

.jpg.2c2c29e54623bd7b752bc2cdab599665.jpg)
Danstream
-
Posts
563 -
Joined
-
Last visited
Content Type
Profiles
Forums
Gallery
Events
Posts posted by Danstream
-
-
-
-
14 hours ago, Old Collingwood said:
I love your G91 in background shot.
Thanks OC, I spent quite a lot of time and work on the very old and inaccurate Italeri kit of the G.91, but I was committed to get a decent replica out of it, being my memories (related to aviation) as a kid associated to this small jet. Furthermore, I started working as a young engineer, more than 37 years ago, in the factory in Turin, in Italy, where these planes were designed and built. At that time, the company was called Aeritalia, not Fiat anymore, and G. Gabrielli, the chief designer of Fiat (the 'G' in the name) had retired, but documents of the plane were still around. If you are interested, once finished, I will post here some photos of my G.91.
Kind regards,
Dan
-
-
Hi all,
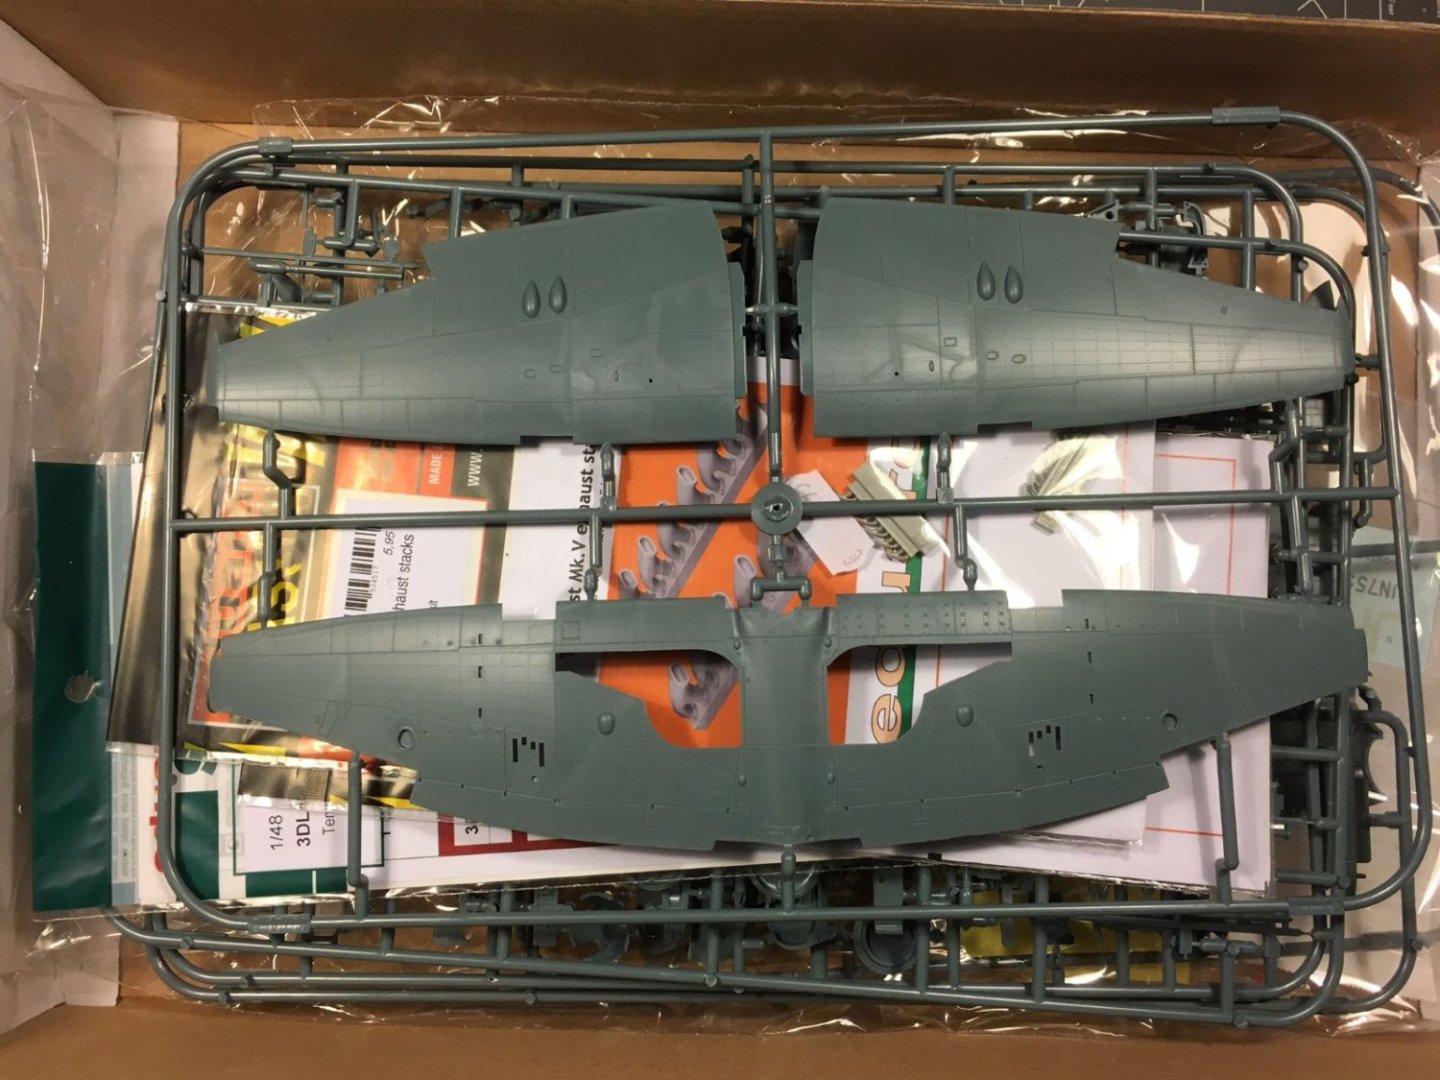
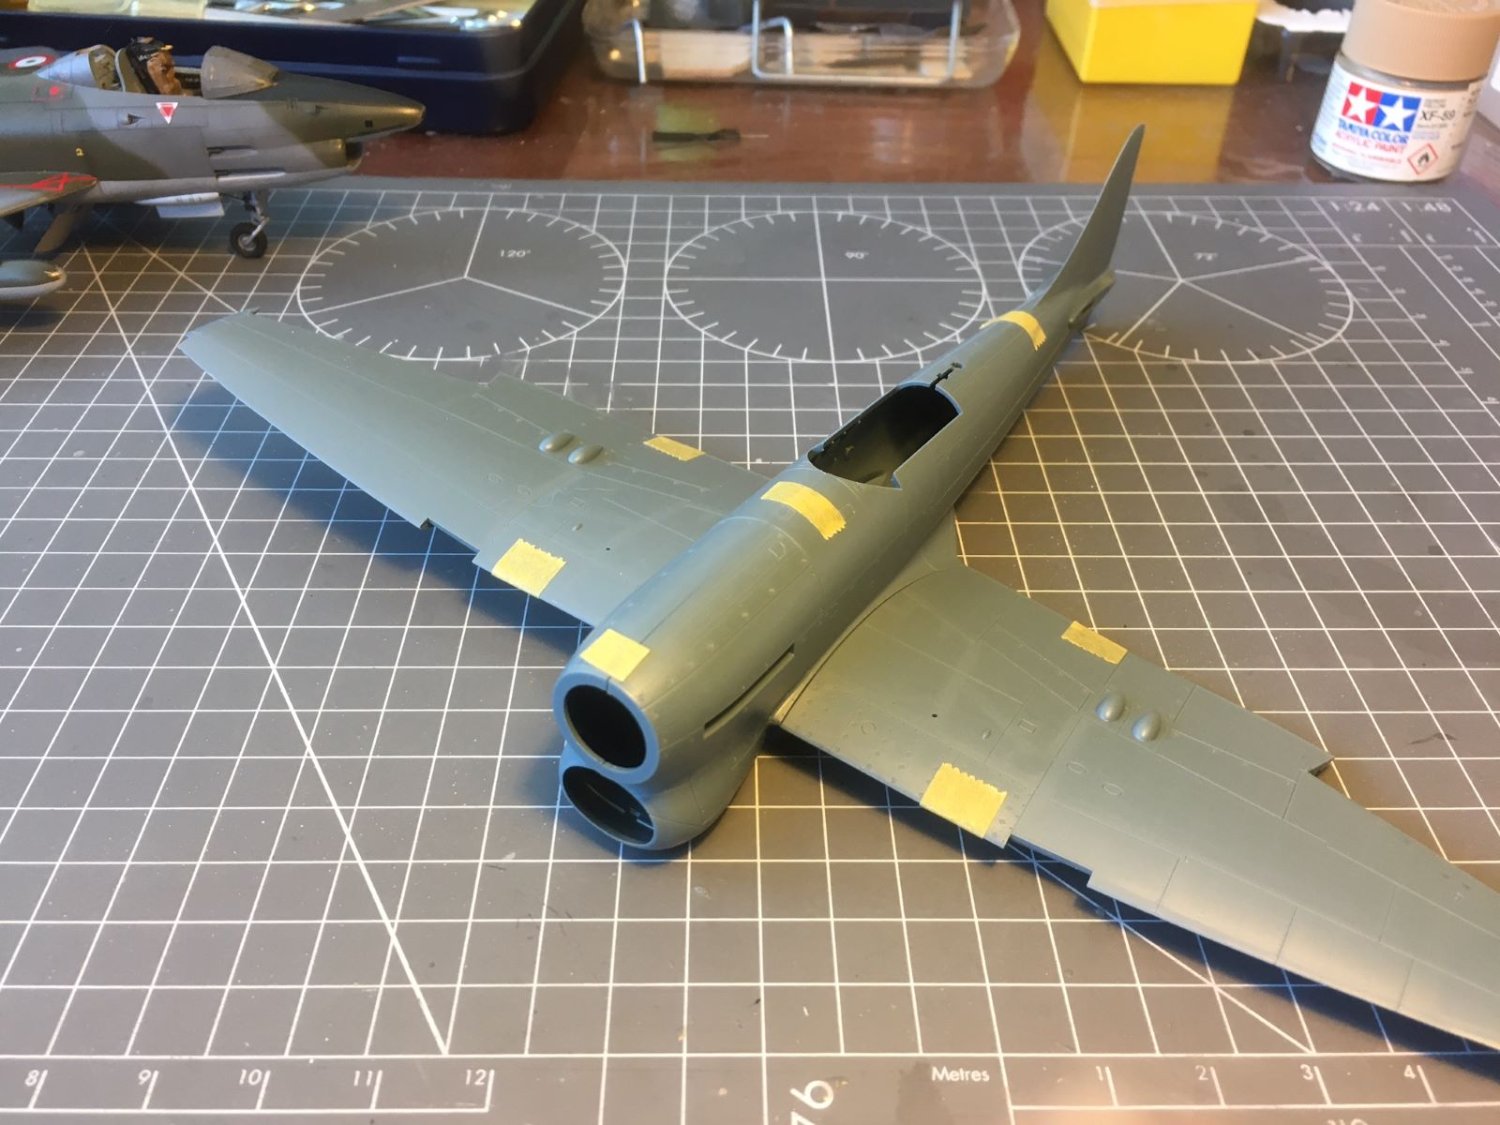
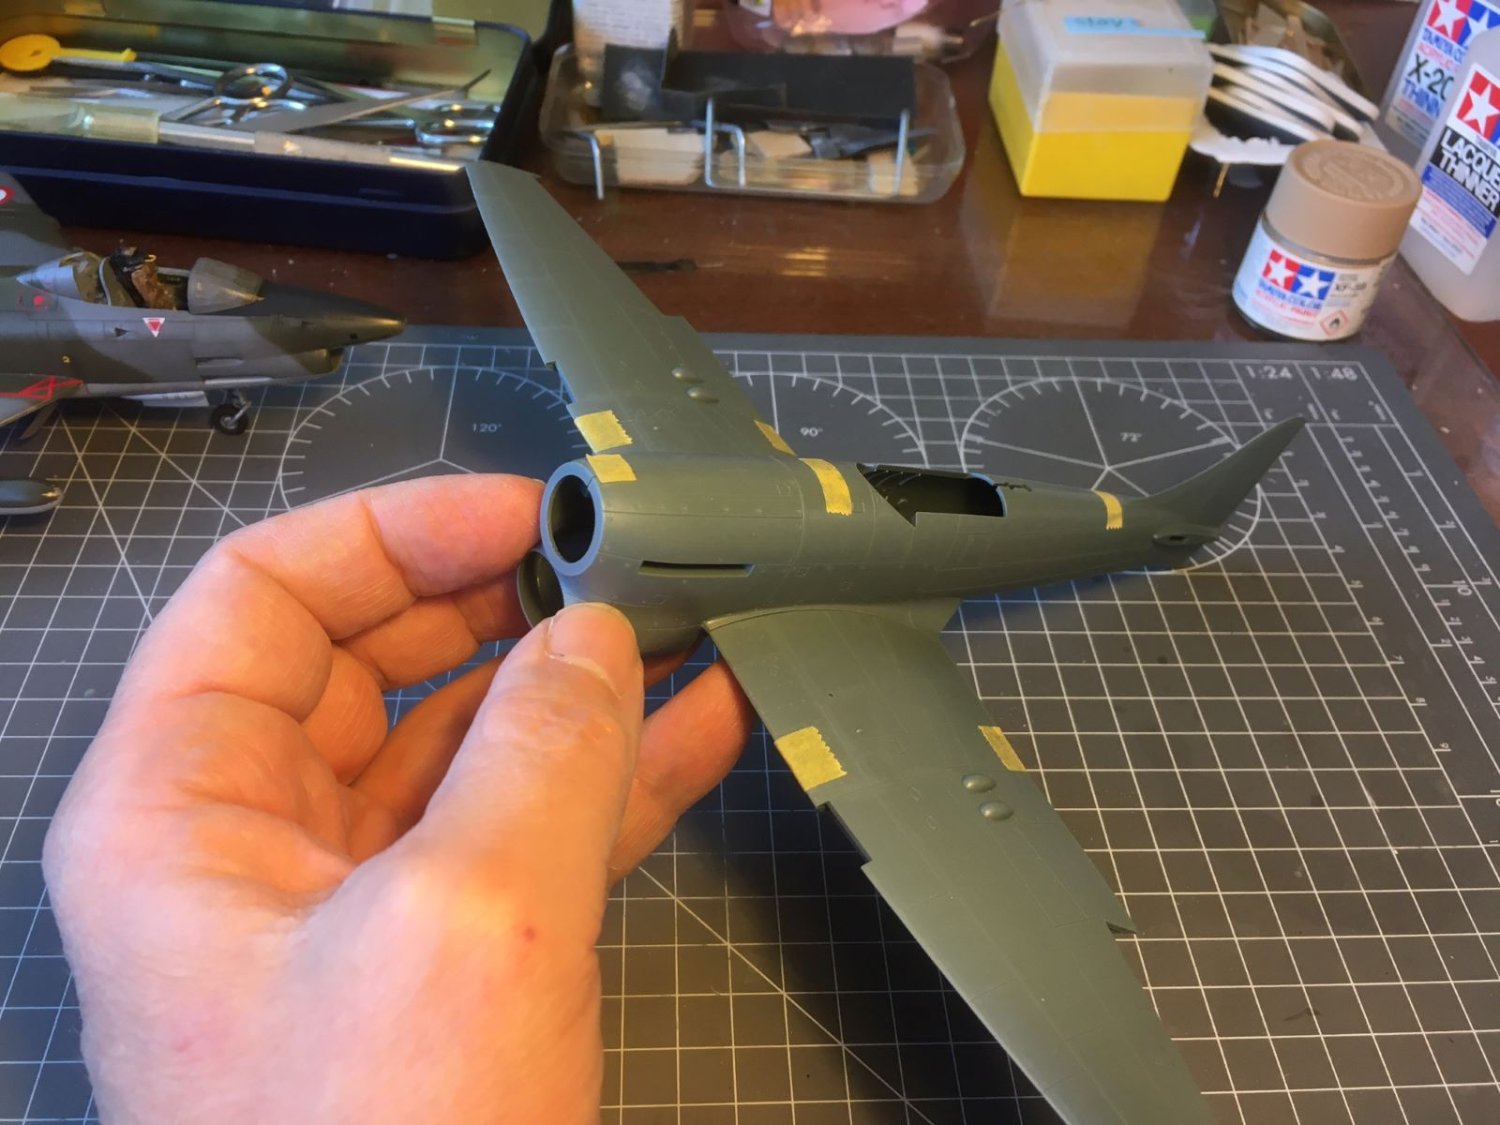
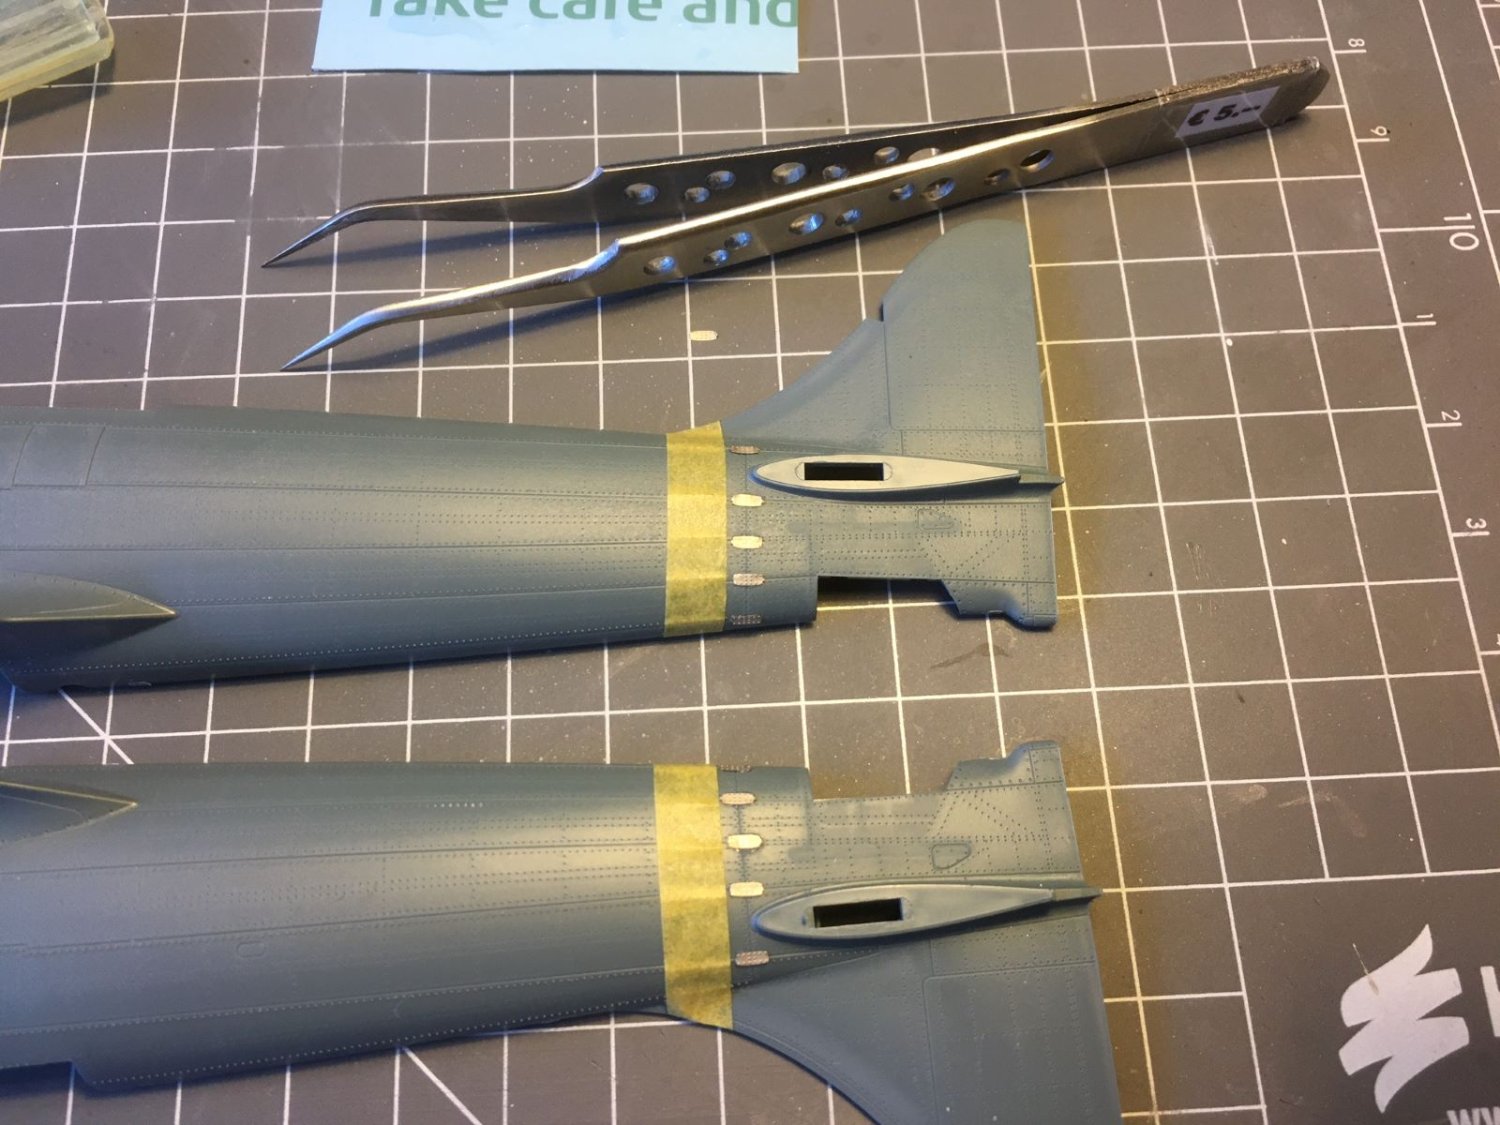
although I am quite enthusiastic about this kit, I had not the time to do much. I am posting few picture just to show that the build had started. This is a preliminary dry fit which showed a very good precision of the main parts:

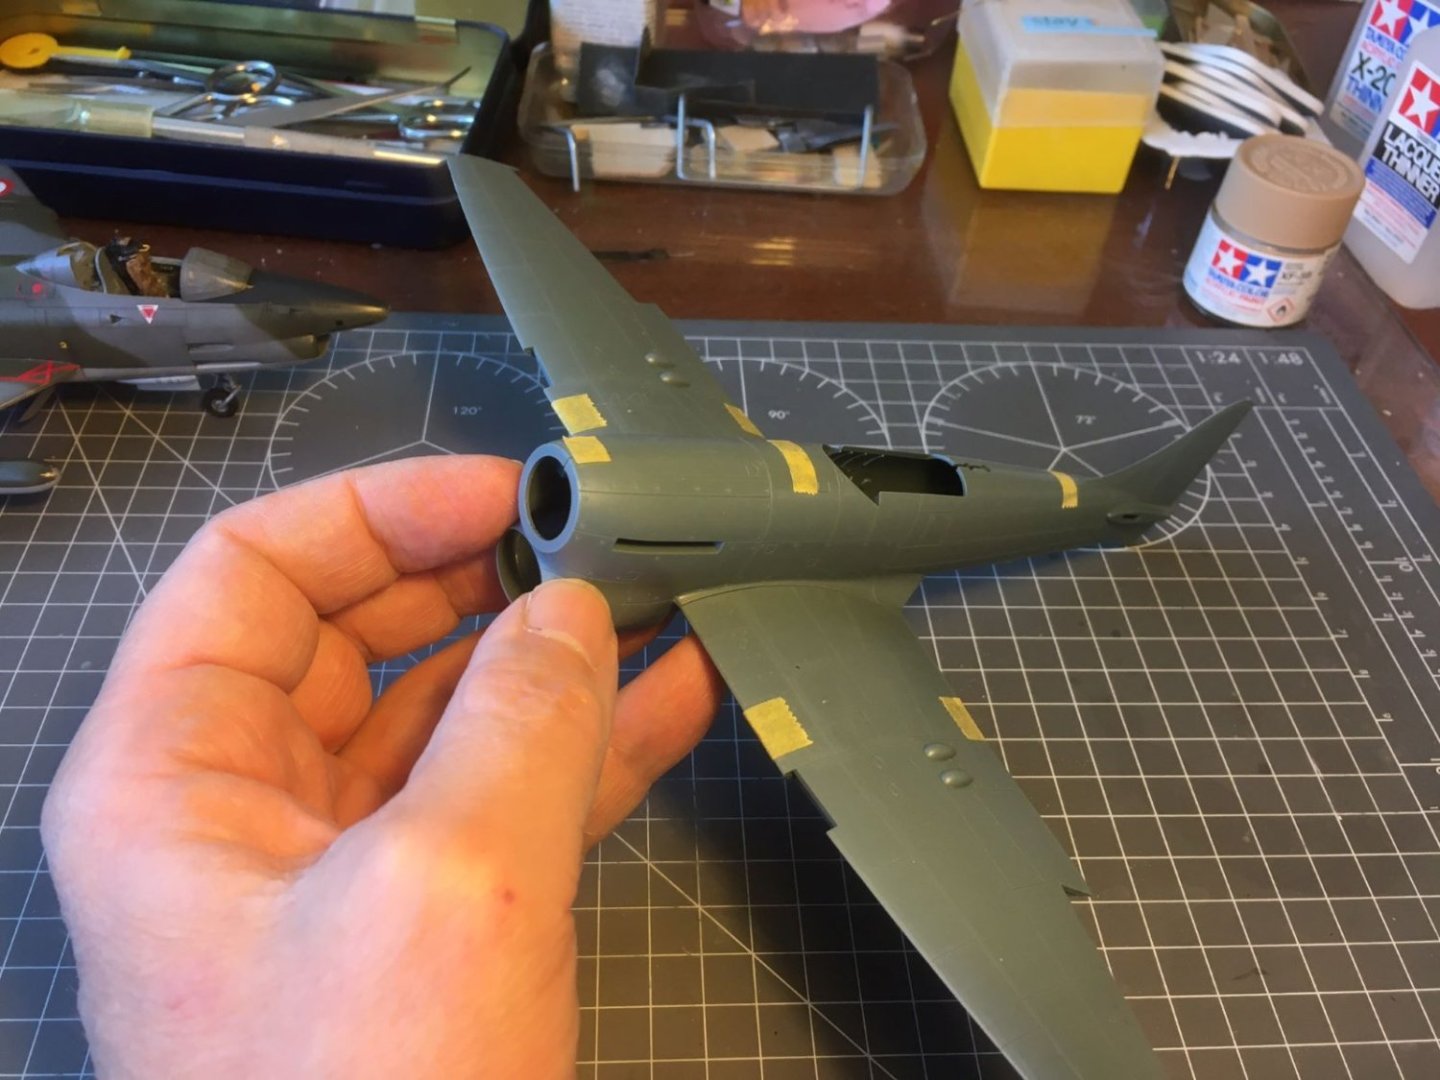
I am working on the cockpit parts, but I also started a subject that the instructions defers to a later stage. It is about gluing a number of fishplates which stiffens the tail assembly of the real aircraft. I thought that it would be easier to do that with the fuselage halves flat on the table. The work is very tedious and I can do only few of them at the time. Eduard provided the fishplates in the photoetched fret (thoughtfully, they provided them in excess of what is strictly needed).

So far, I glued on only half of them (I only glued every second one) and I still need to complete it. I used a thick CA glue which fills in the irregularities of the surfaces and I bought the tweezers showed in the picture that were really useful to position the plates. I degreased the plastic with IPA and activated the back surface of the plates (which is a fancy way to say that I sanded the back of the fret with a very fine grit 🙂).
Not much, but this is all for now,
greetings to all,
Dan
- CDW, Edwardkenway, king derelict and 10 others
-
 13
13
-
Very nice display and great model. With all panels open and the crew around you show a story behind it.
well done,
Dan
- Edwardkenway, Landlubber Mike, Canute and 3 others
-
5
-
 1
1
-
Nice build and good result with the black finish. Stencils look good too, with no silvering.
Congrats,
Dan
PS - Should Langley have succeeded with his machines before the Wright, we would now talk of 'aerodromes' (I like the terms 'aeroplane' or 'airplane' better).
-
-
-
Very nice smooth finish.
Cheers,
Dan
-
Thank you all, for your replies. It will be great to have you following and keeping a good eye on me.
Cheers,
Dan
- Old Collingwood, Egilman, mtaylor and 6 others
-
9
-
20 hours ago, shipman said:
Shame there isn't a separate Sabre engine, one of the few redeeming features of this aeroplane.
Not sure I have got the right sense of your line. Is it a criticism to the real aeroplane? Or a deficiency of the model? In the former case, we can do very little about it and anyway it is arguably difficult to get a good combat plane without a great engine. In the latter case, see the post from @Egilman listing possible options. Anyway, it is not my intention to include the engine. I will be satisfied with rendering the feel of the original, buttoned up airframe. If you are interested, I will be glad to have you following.
Kind regards,
Dan
- Jack-in-the-Blue, Canute, Jack12477 and 6 others
-
9
-
Dear all,
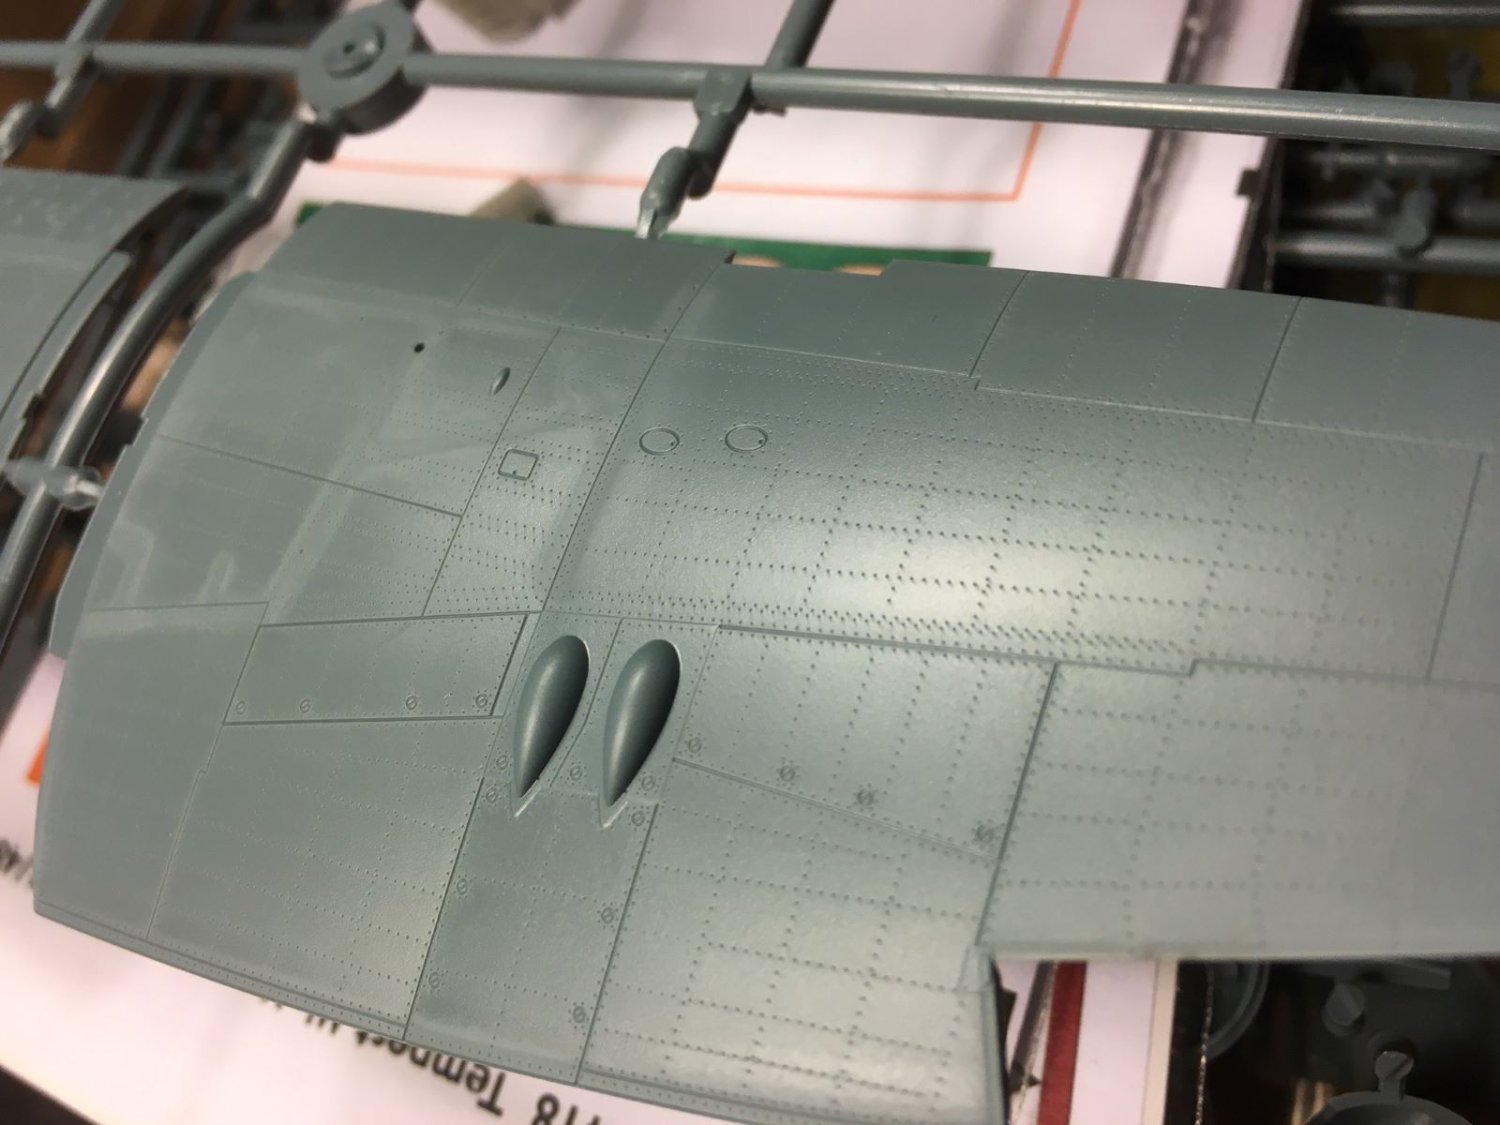
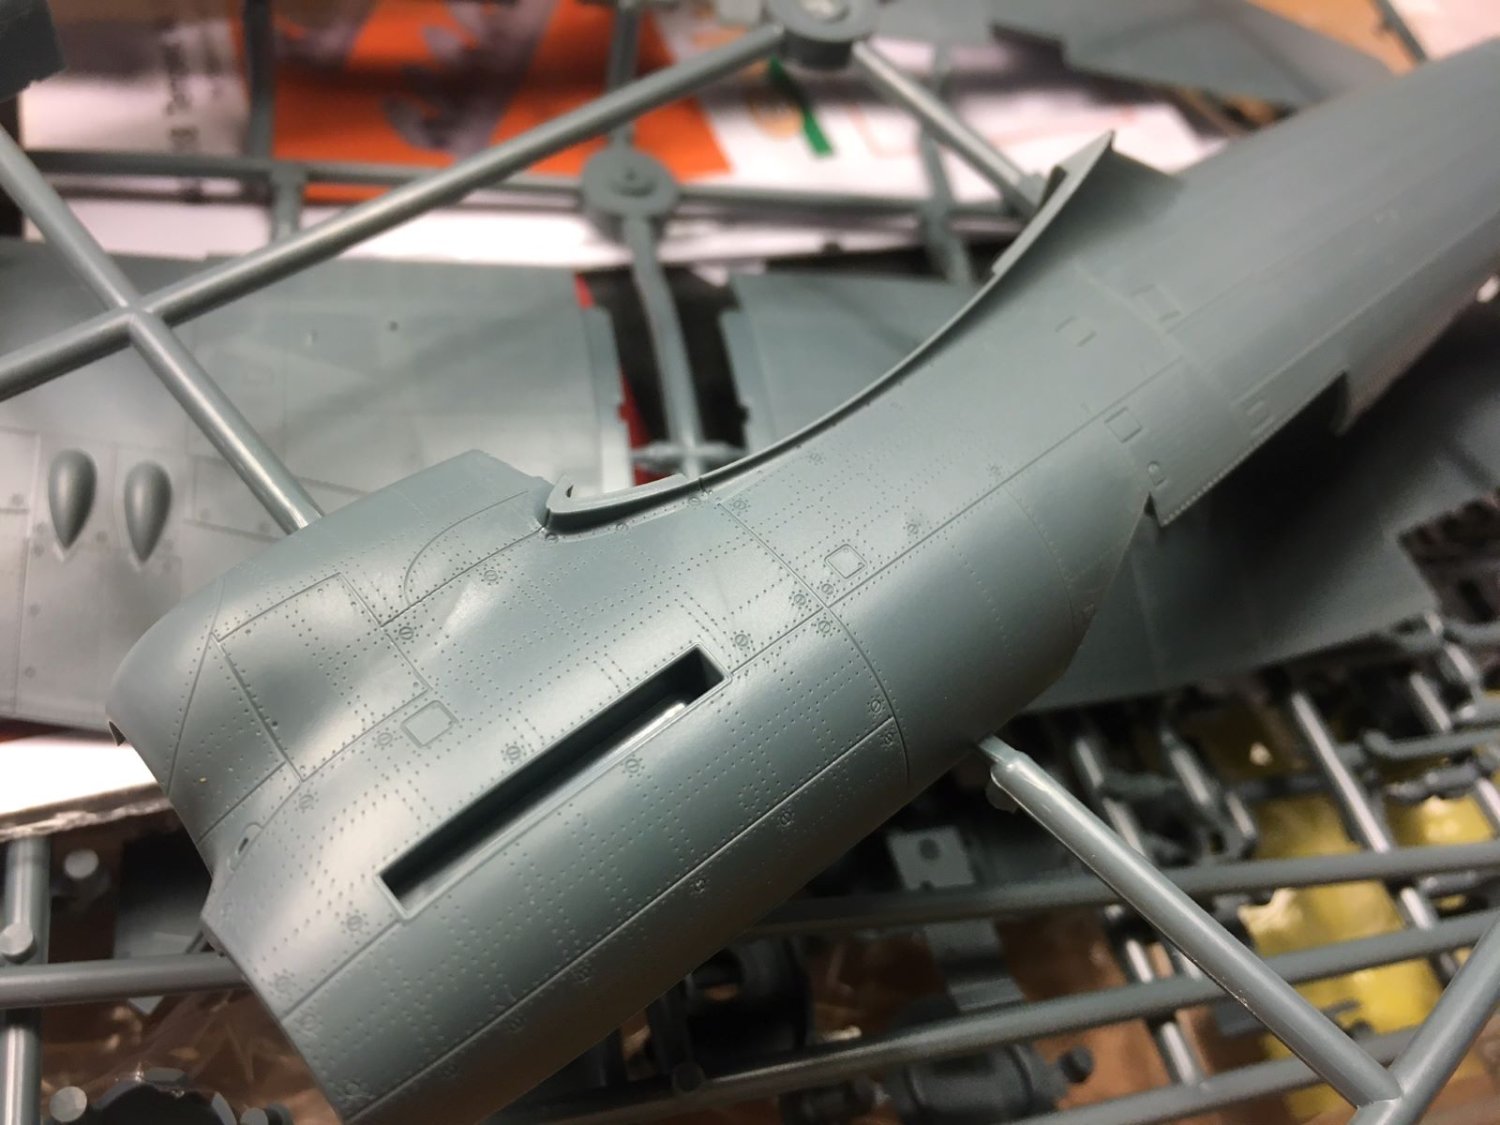
I'd like to share with you my next build of the mighty, pugnacious looking Hawker Tempest Mk. V.

The kit is the awesome Eduard new tool, last generation plastic, in its 'Profipac' edition which I got as a gift to myself for the past Christmas. The great artwork displays one of these Tempest decorated with invasion stripes in full action against a German V1 over the British countryside. I could simply not resist getting it (actually I also got a 'Limited Edition' Tempest Mk II also by Eduard, but it will be the subject of a later build).
The box is packed with high quality parts to which I added few Eduard's aftermarket extras. I find the level of detail of the surfaces fantastic perhaps equaled only by the latest Tamiya models.

I don't know if, once enlarged 48 times, it would look right, but, for me, it will make a fantastic miniature rendition of a real airframe construction.

The Tempest was a predecessor of the Sea Fury, the model of which I have built some time ago.
I can't wait to start it although, as usual for me, I am afraid it will not be a quick one. I hope it might be of interest to some of you,
best regards,
Dan
-
It is amazing, it looks so real. Mind get a reset when you post one of those pictures of yours with your gigantic spectacles.
Continuing watching,
Dan
- Keith Black, Edwardkenway, Egilman and 5 others
-
7
-
1
-
Thanks for your comment. Good luck with your Spitfire, I hope you will post your build here. The Spitfire is always a beautiful subject and the Eduard offering is awesome.
Cheers,
Dan
-
-
Great start. Quality of details is astonishing already in your first post.
Cheers,
Dan
- Edwardkenway, Jack12477, Keith Black and 6 others
-
8
-
1
-
Very nice and realistic model. It really conveys the mood of such constructions.
Cheers,
Dan
-
-
I have followed your build and enjoyed it a lot. You got a very nice model with a distinctive weathering finish.
Congrats,
Dan
- mtaylor, Jack12477, Edwardkenway and 4 others
-
7
-
-
Lovely models, I like so much the Opel bus design.
Kind regards,
Dan
- Jack12477, king derelict, Edwardkenway and 5 others
-
7
-
1
-
Lovely done. Carefully assembled and very precisely painted. Indeed, you got a great looking model out of this old kit.
Cheers,
Dan
- king derelict, Javlin, Edwardkenway and 6 others
-
8
-
1
-
Fantastic details. Waiting for the final,
cheers,
Dan
- Old Collingwood, Egilman, Edwardkenway and 4 others
-
6
-
1


Hawker Typhoon Mk 1b by Realworkingsailor - FINISHED - Airfix - 1/72
in Non-ship/categorised builds
Posted
Good start Andy.
Dan