

.jpg.2c2c29e54623bd7b752bc2cdab599665.jpg)
Danstream
-
Posts
551 -
Joined
-
Last visited
Content Type
Profiles
Forums
Gallery
Events
Posts posted by Danstream
-
-
Hi there,
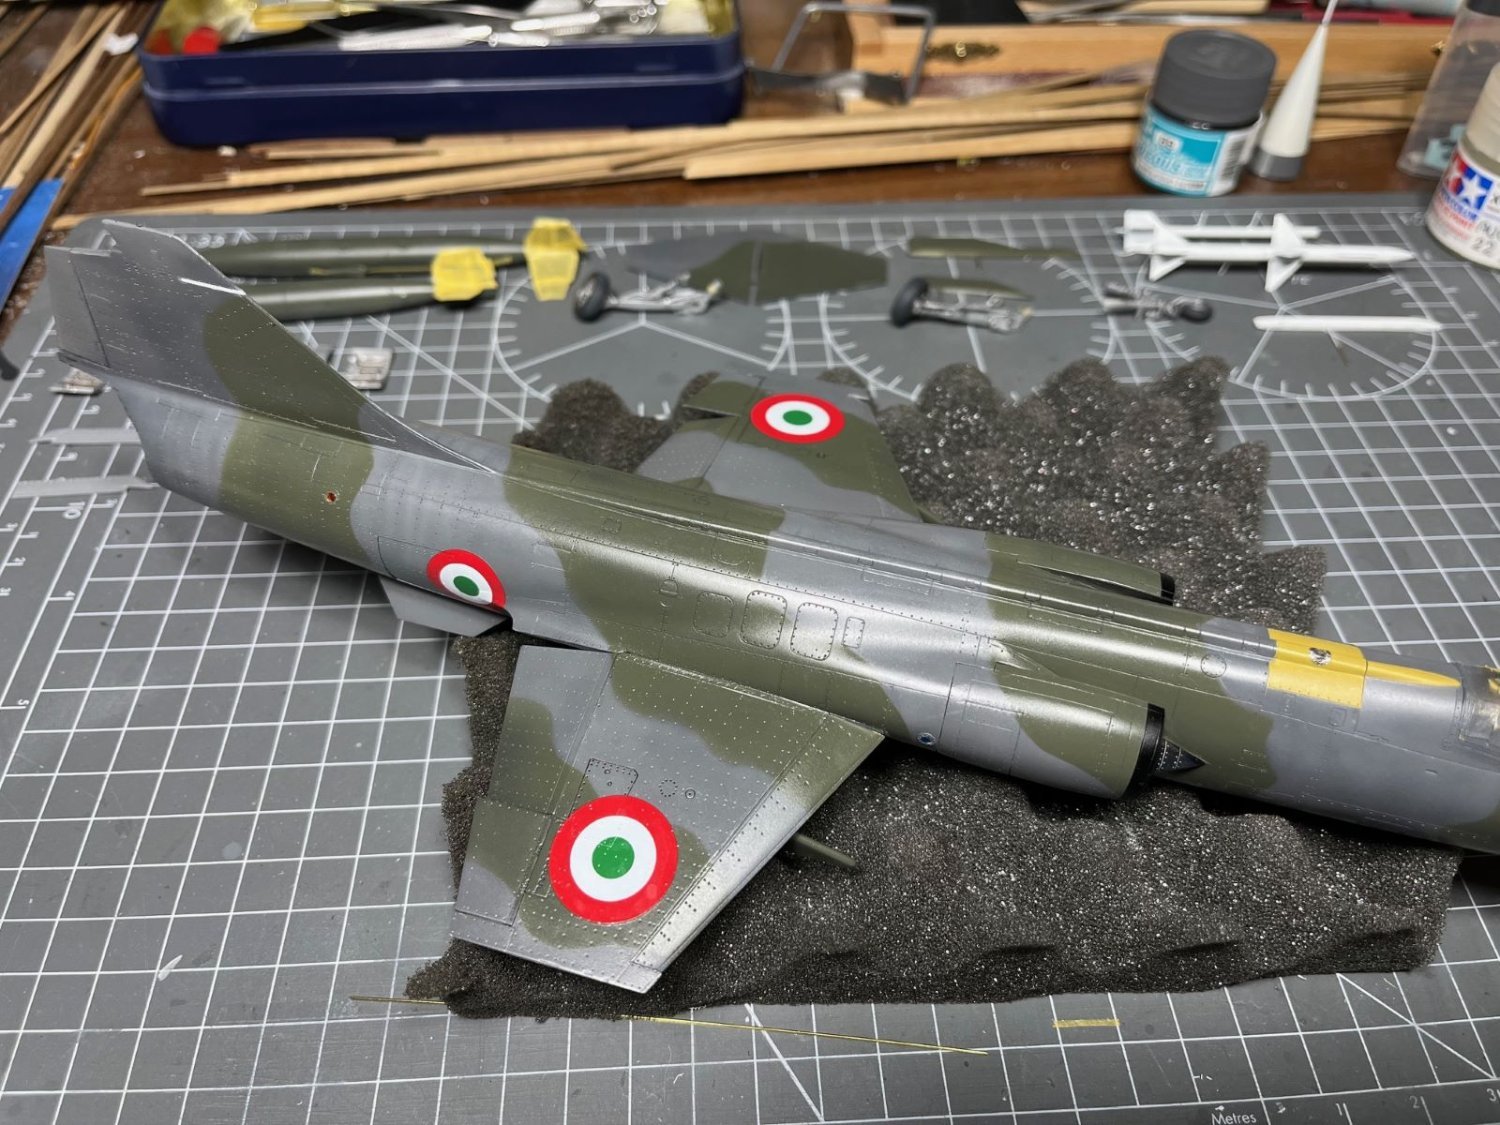
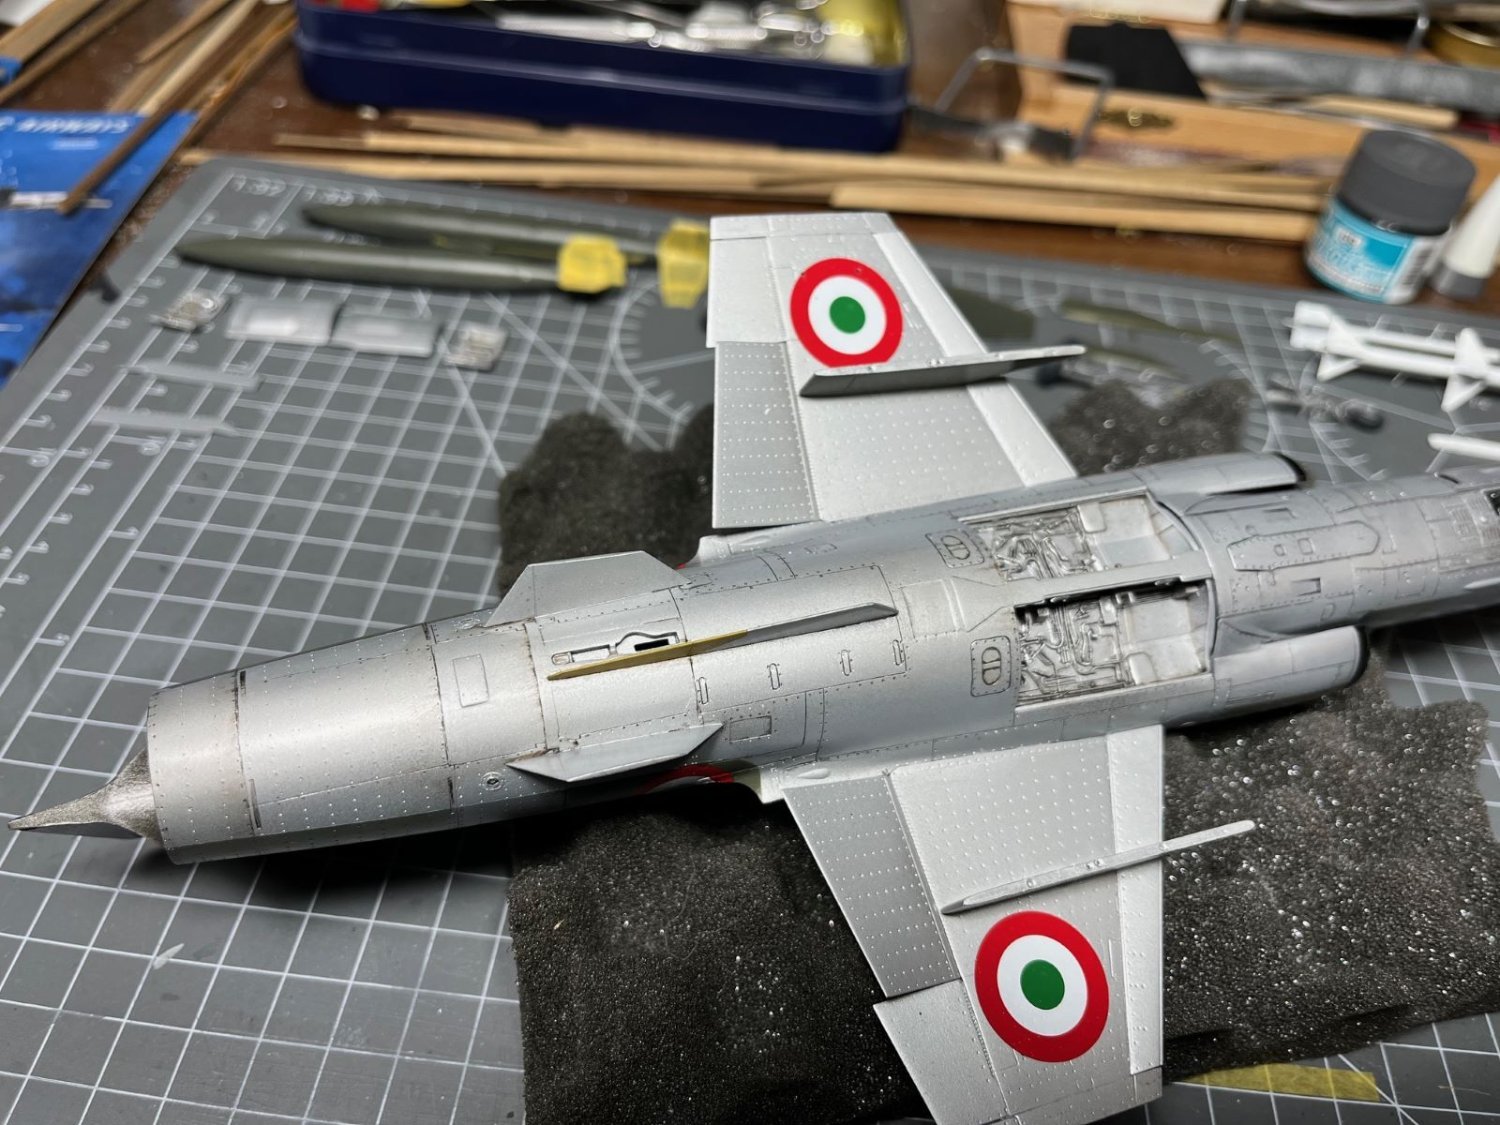
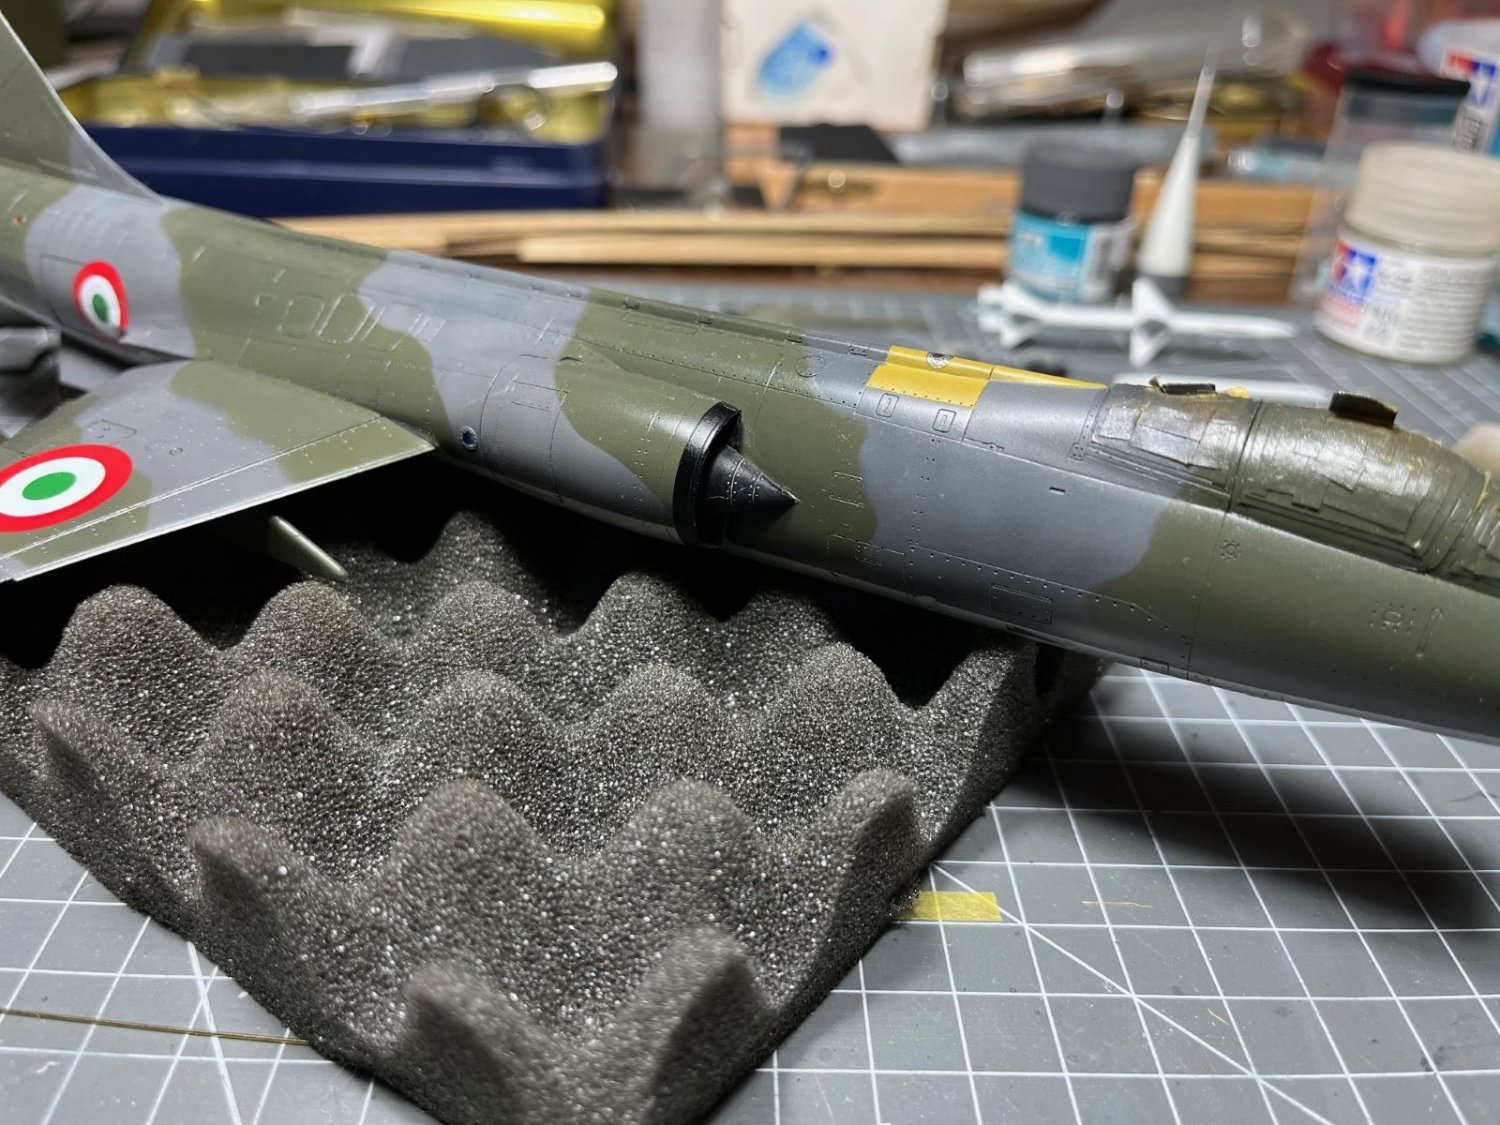
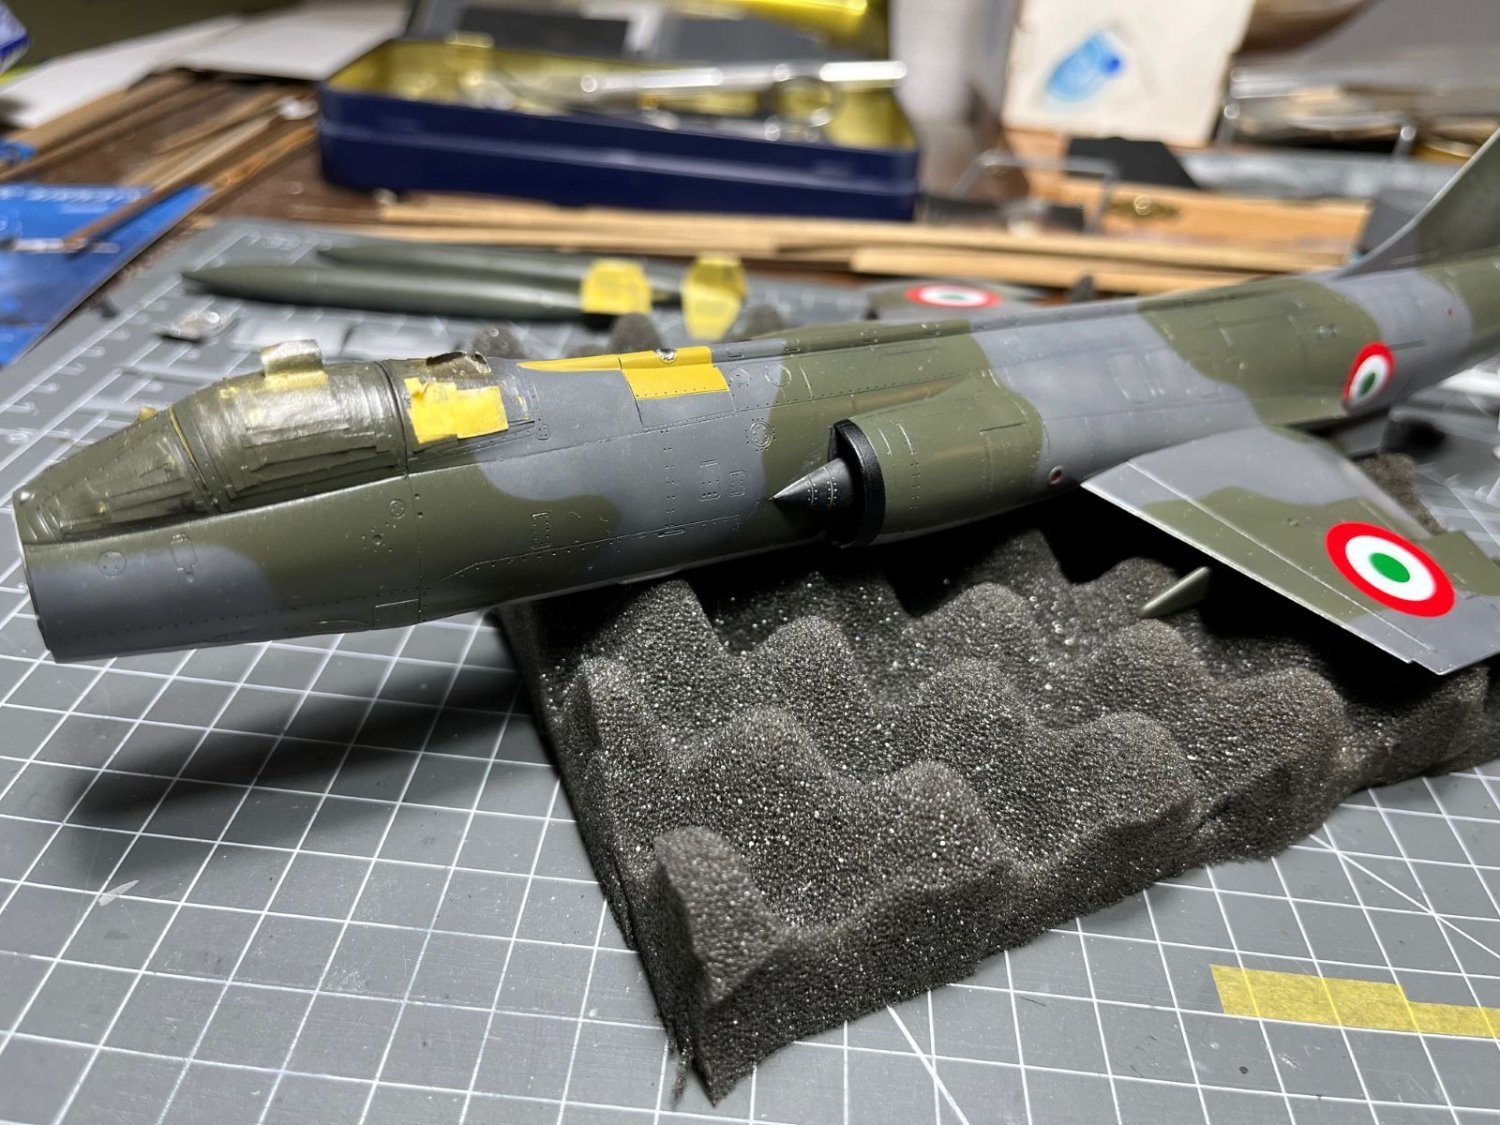
I am slowly progressing with this build, but not at the pace that I expected, though. Actually, I retired from work two weeks ago, but it seems that my hobby time has not increased, being a lot of time required in administrative and domestic affairs. At any rate, here I am. I started decorating the F-104 with the Italian roundels, but I have not yet committed which squadron badge will be sported by it.

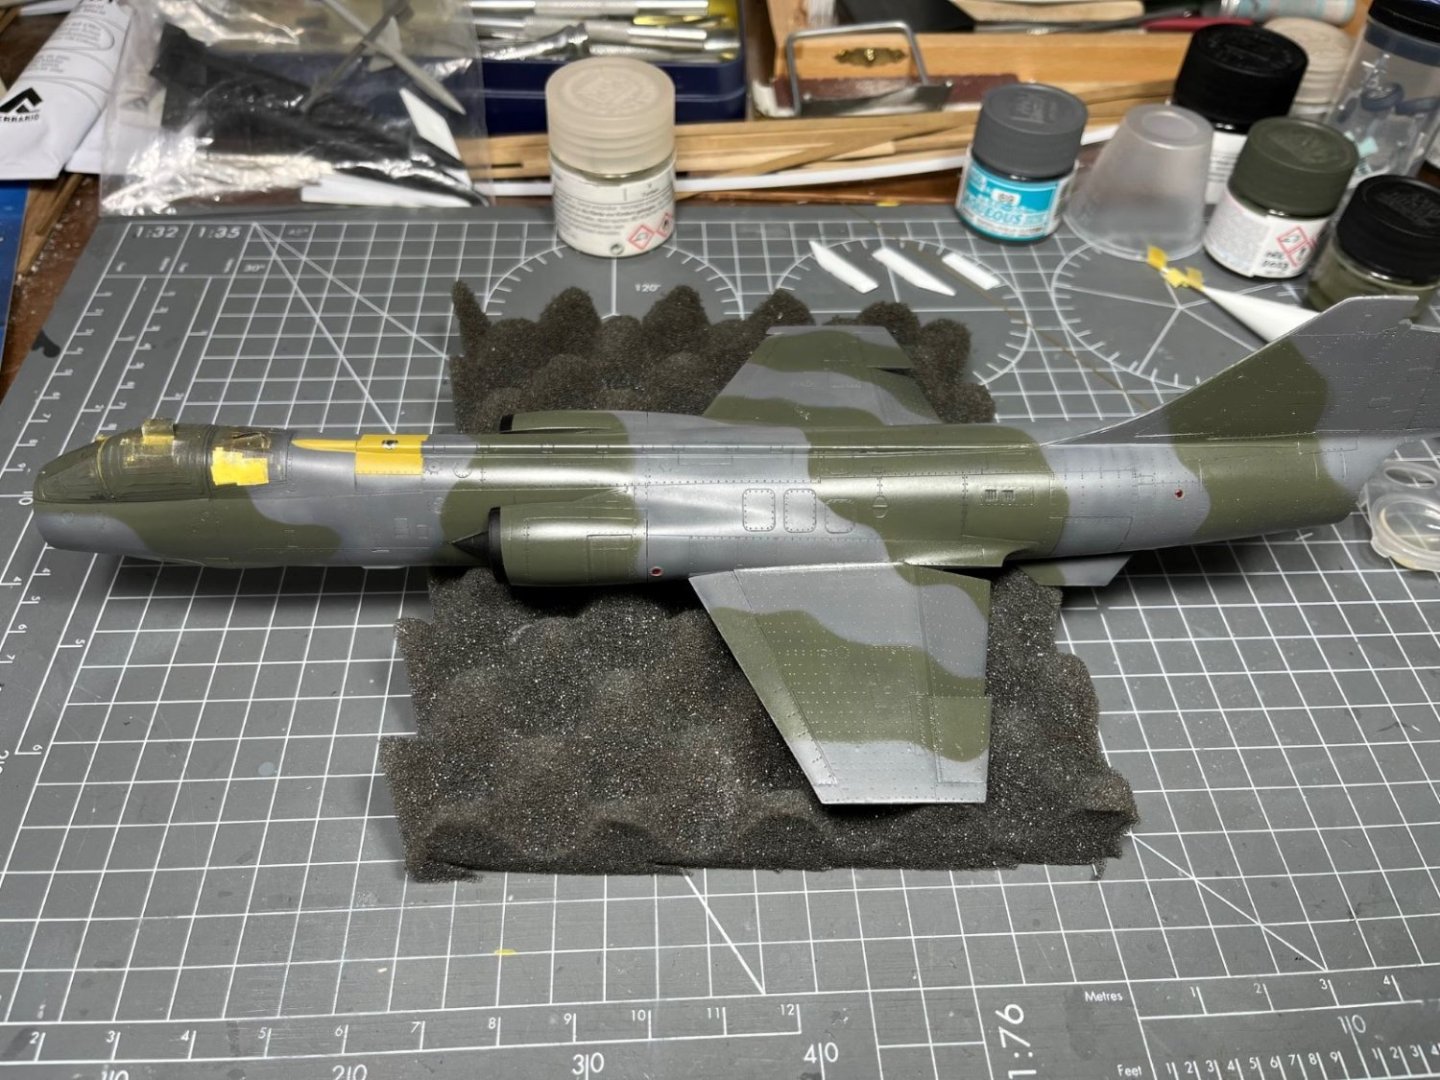
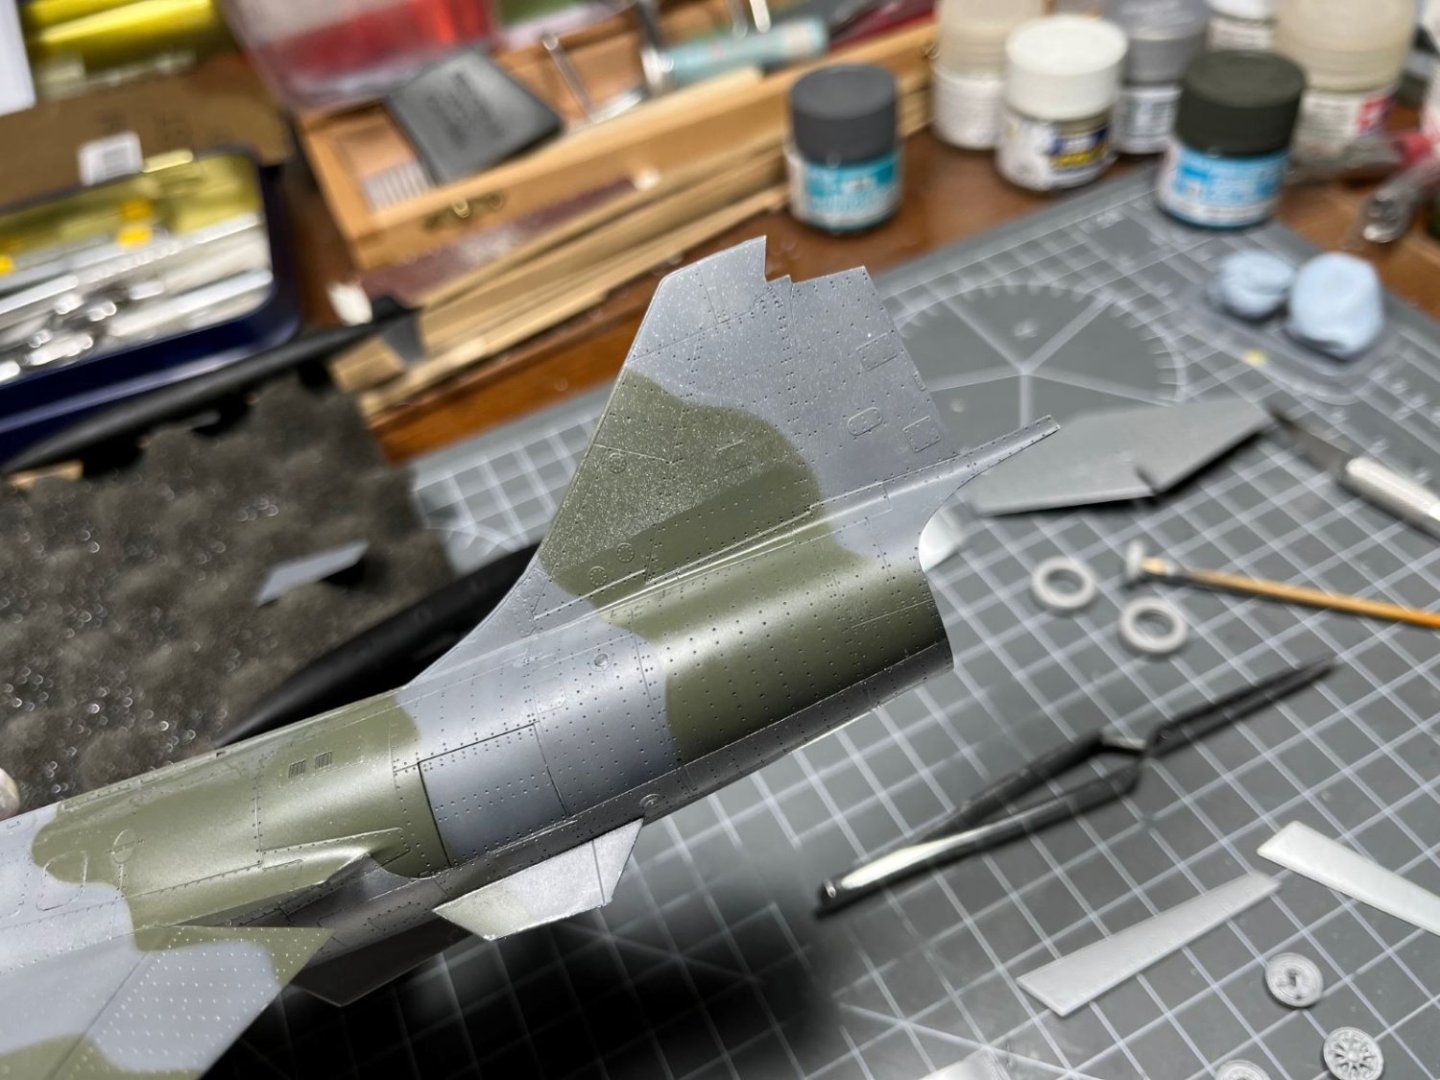
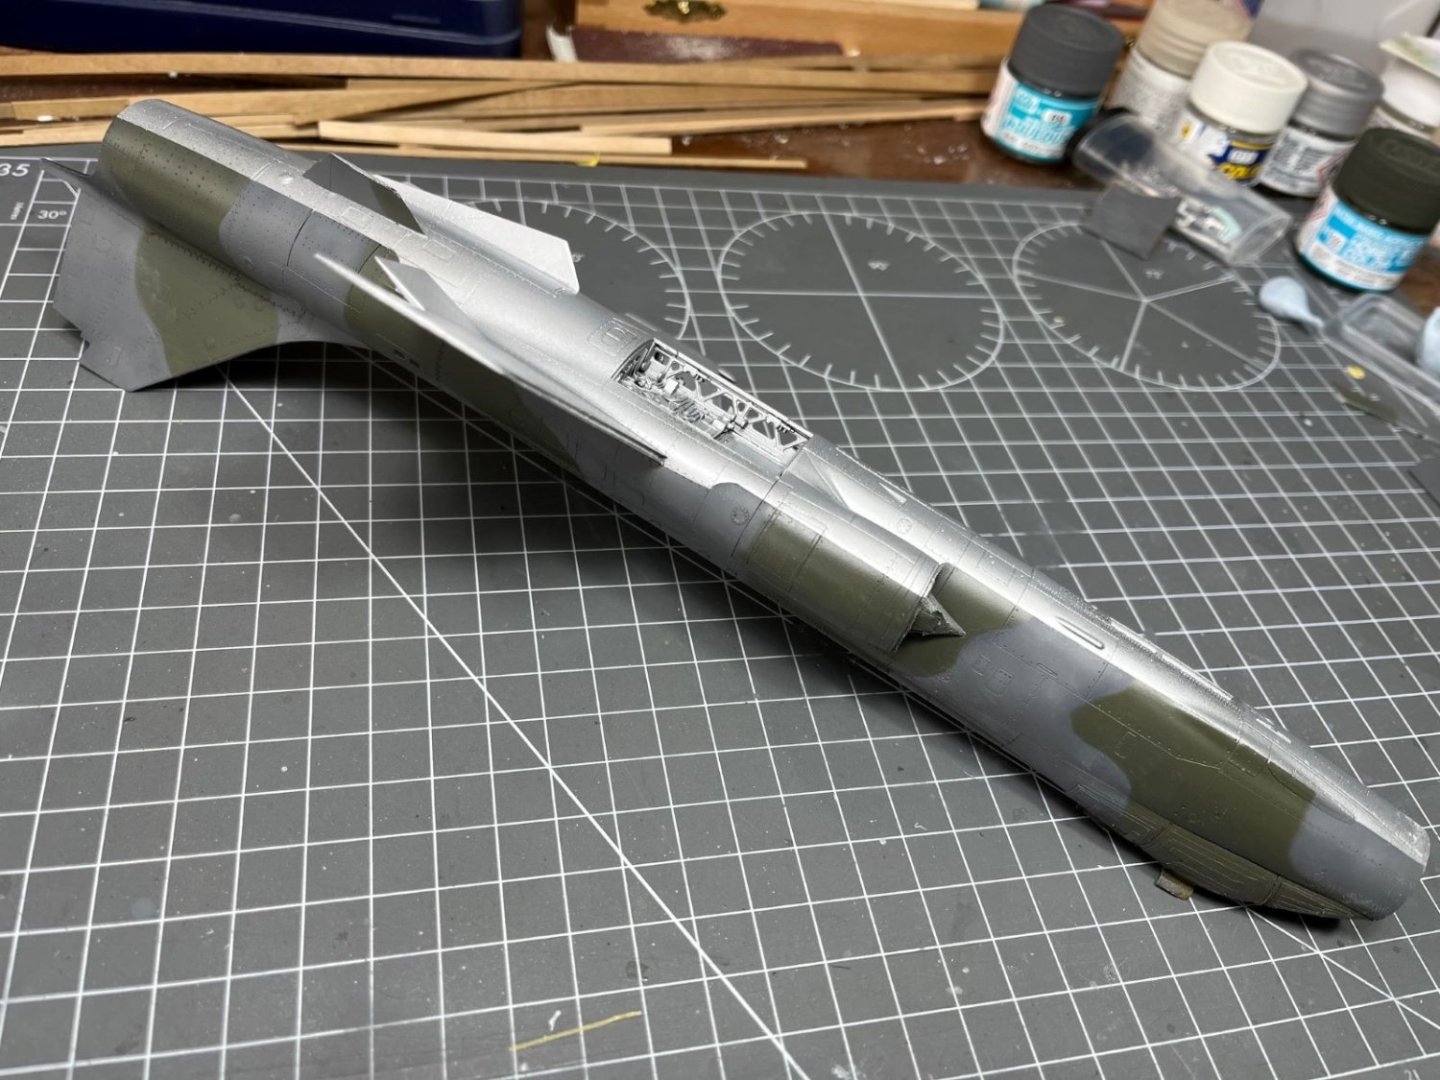
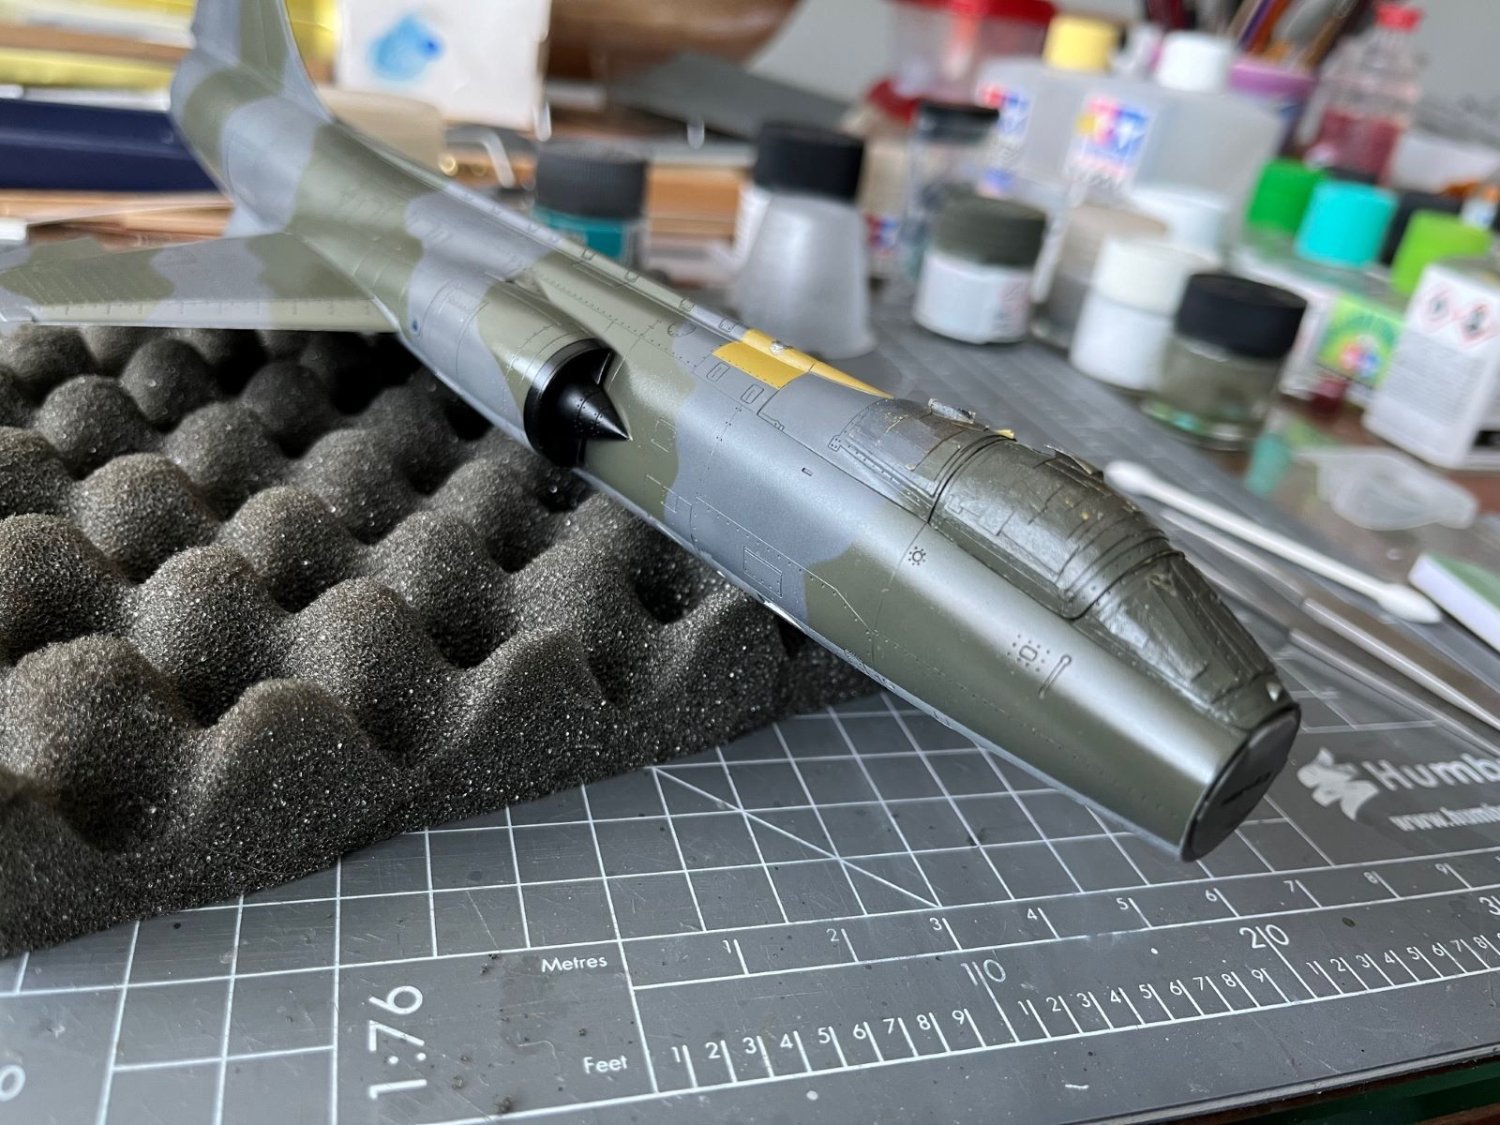
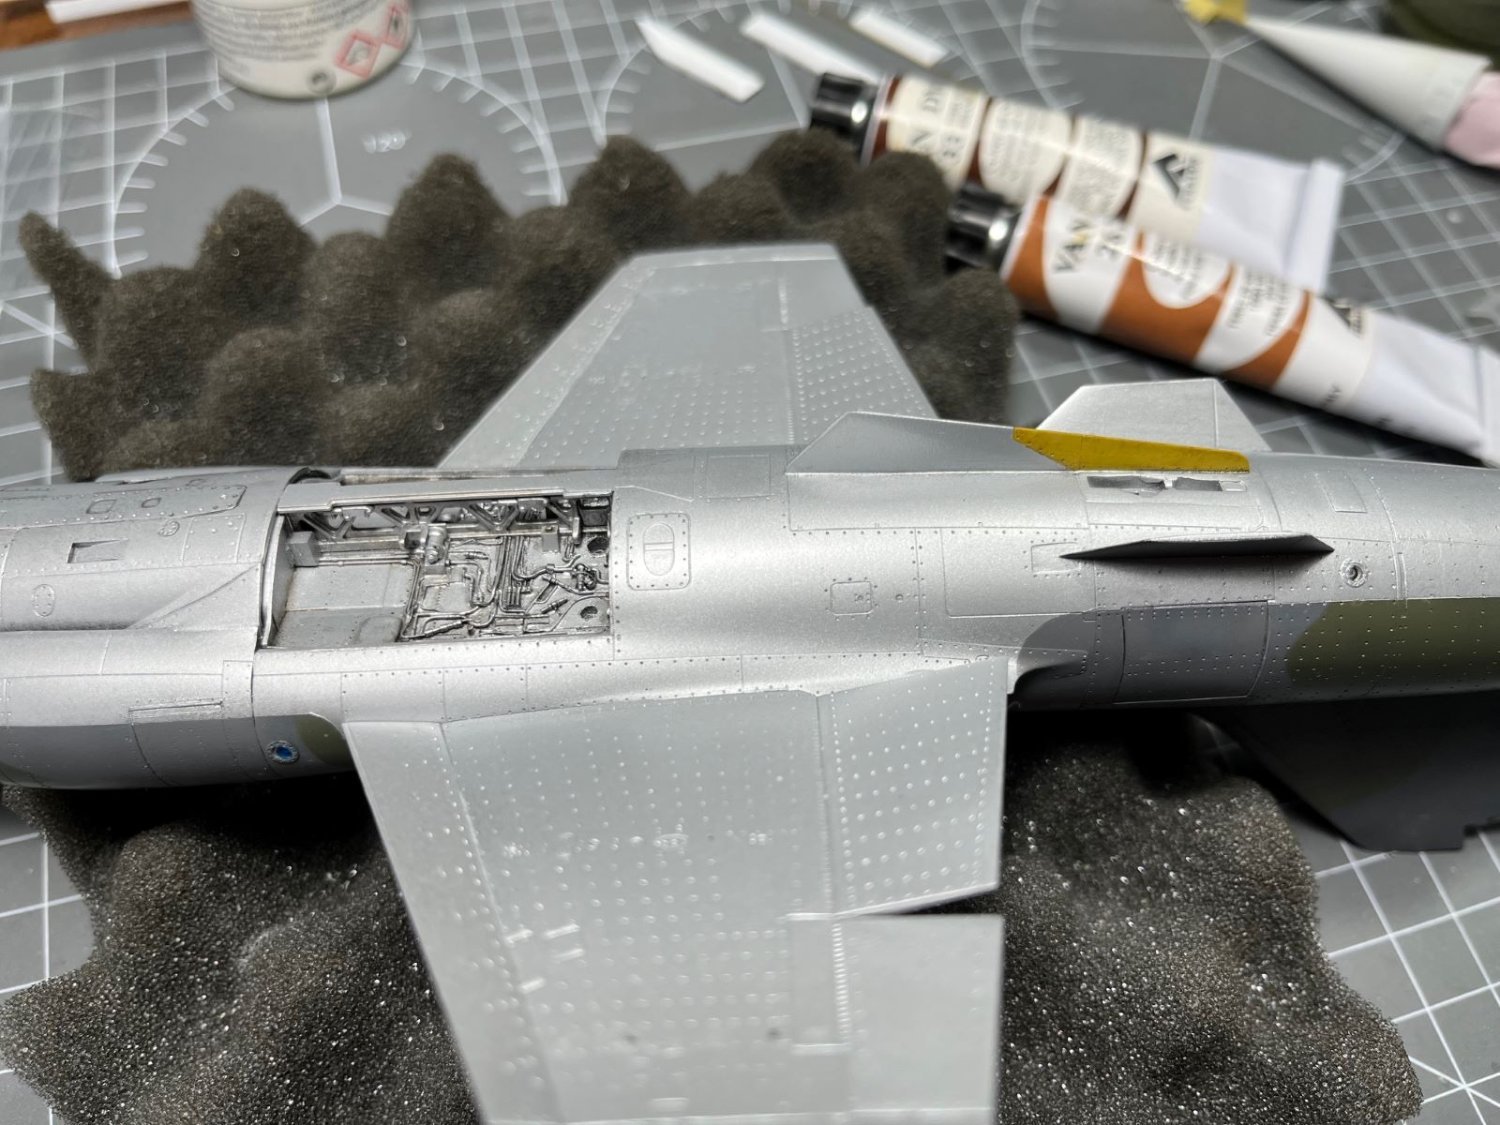
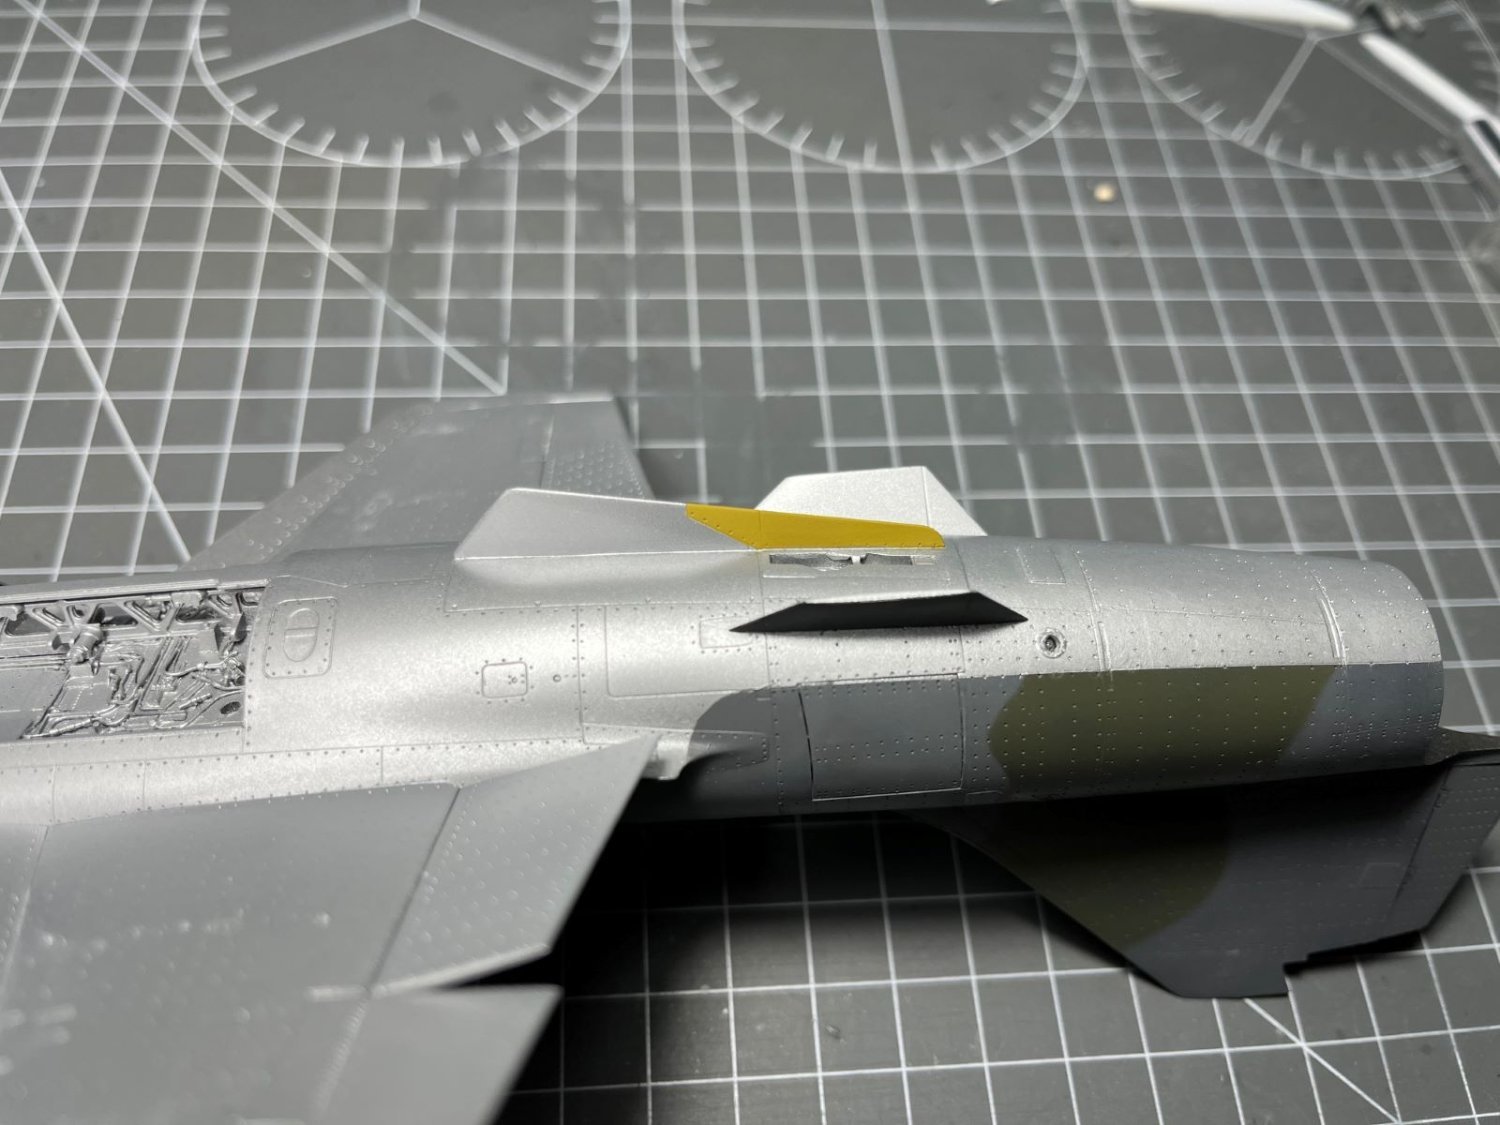
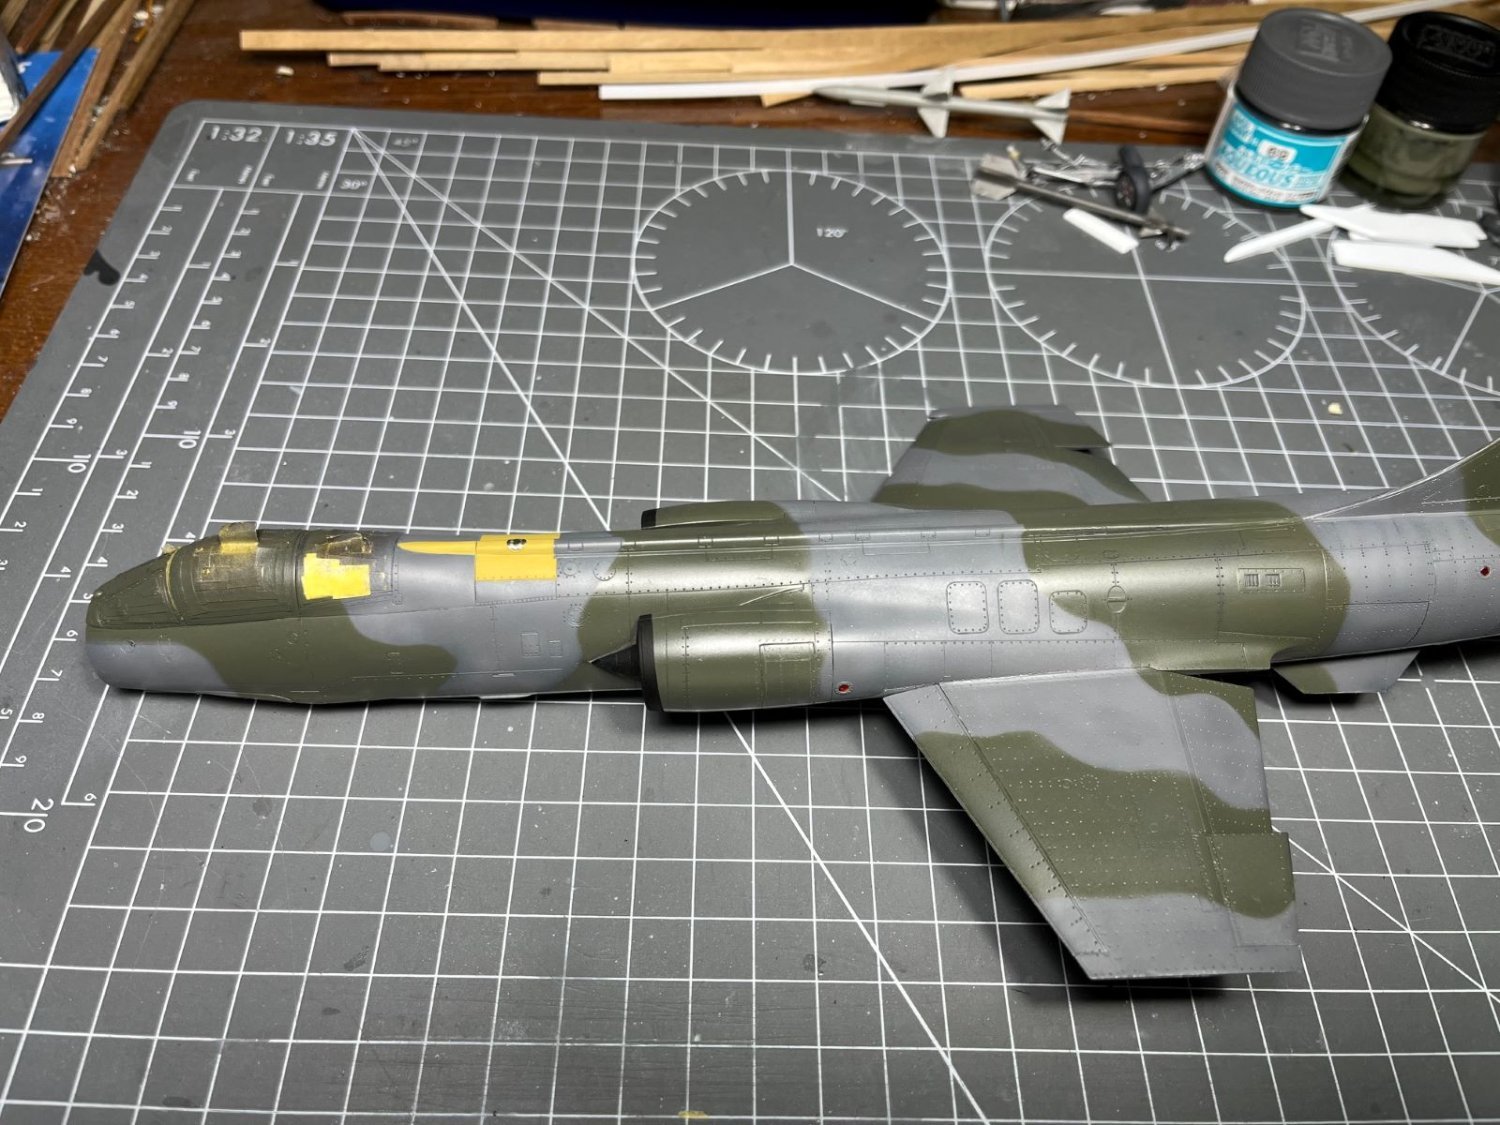
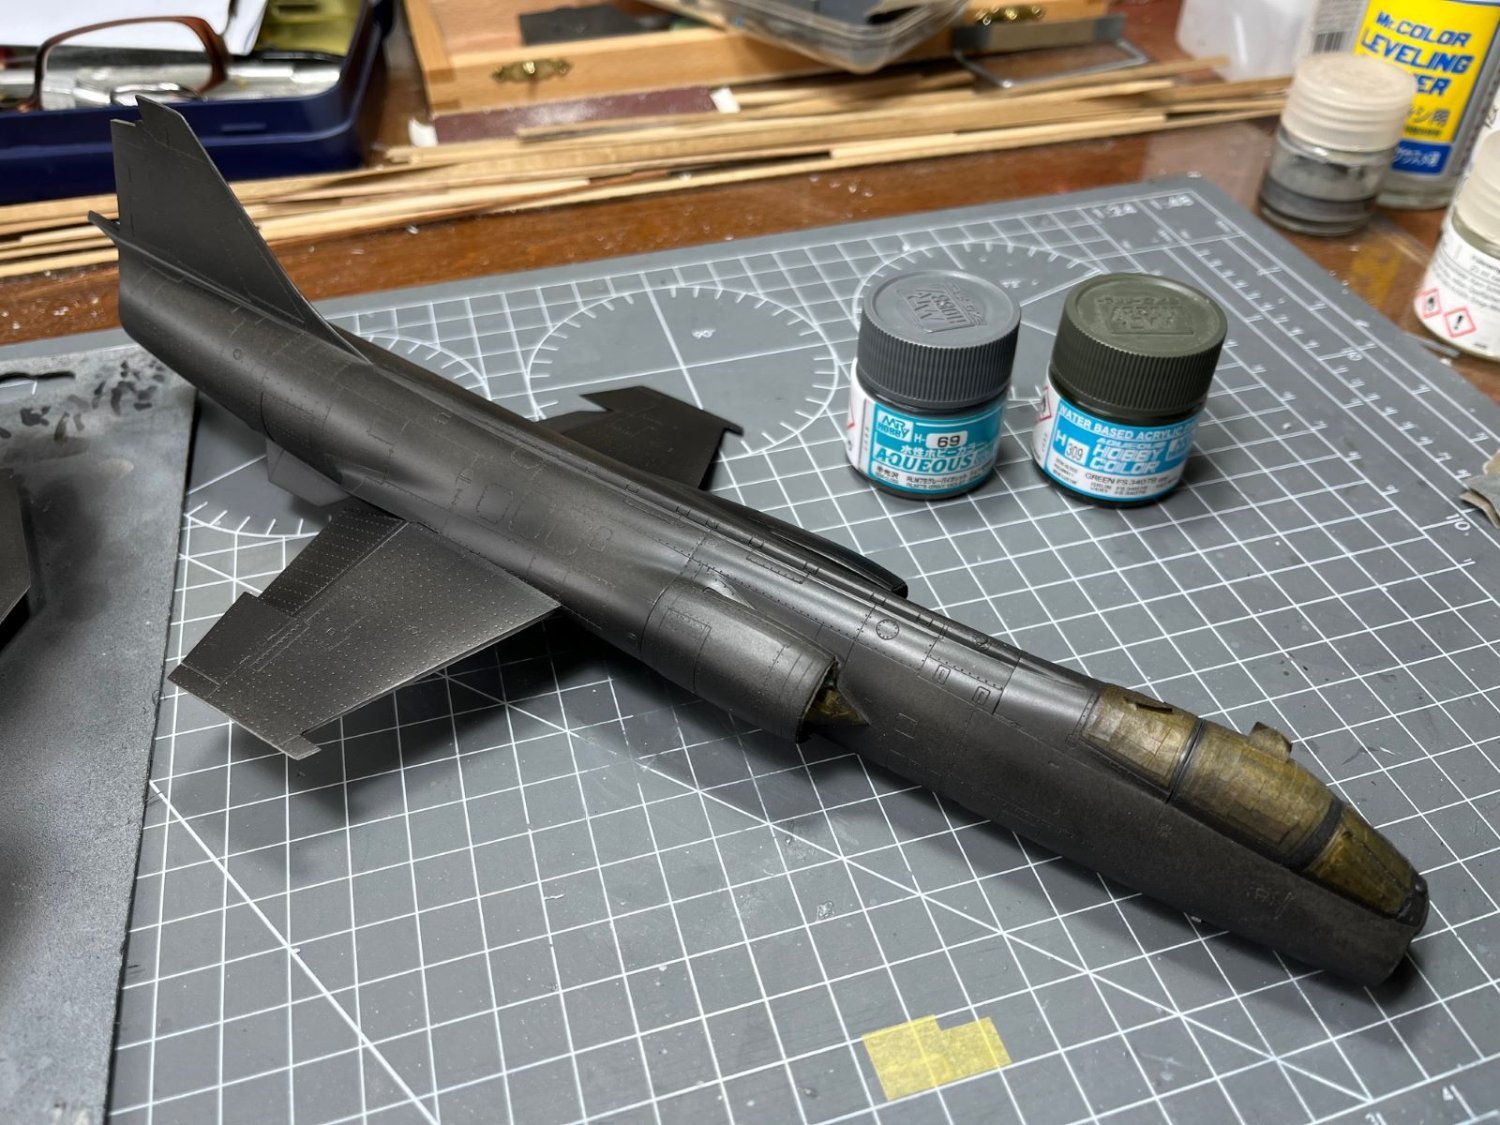
On the underside, I started to brush dirt trails in the area of the tail with oil colors:
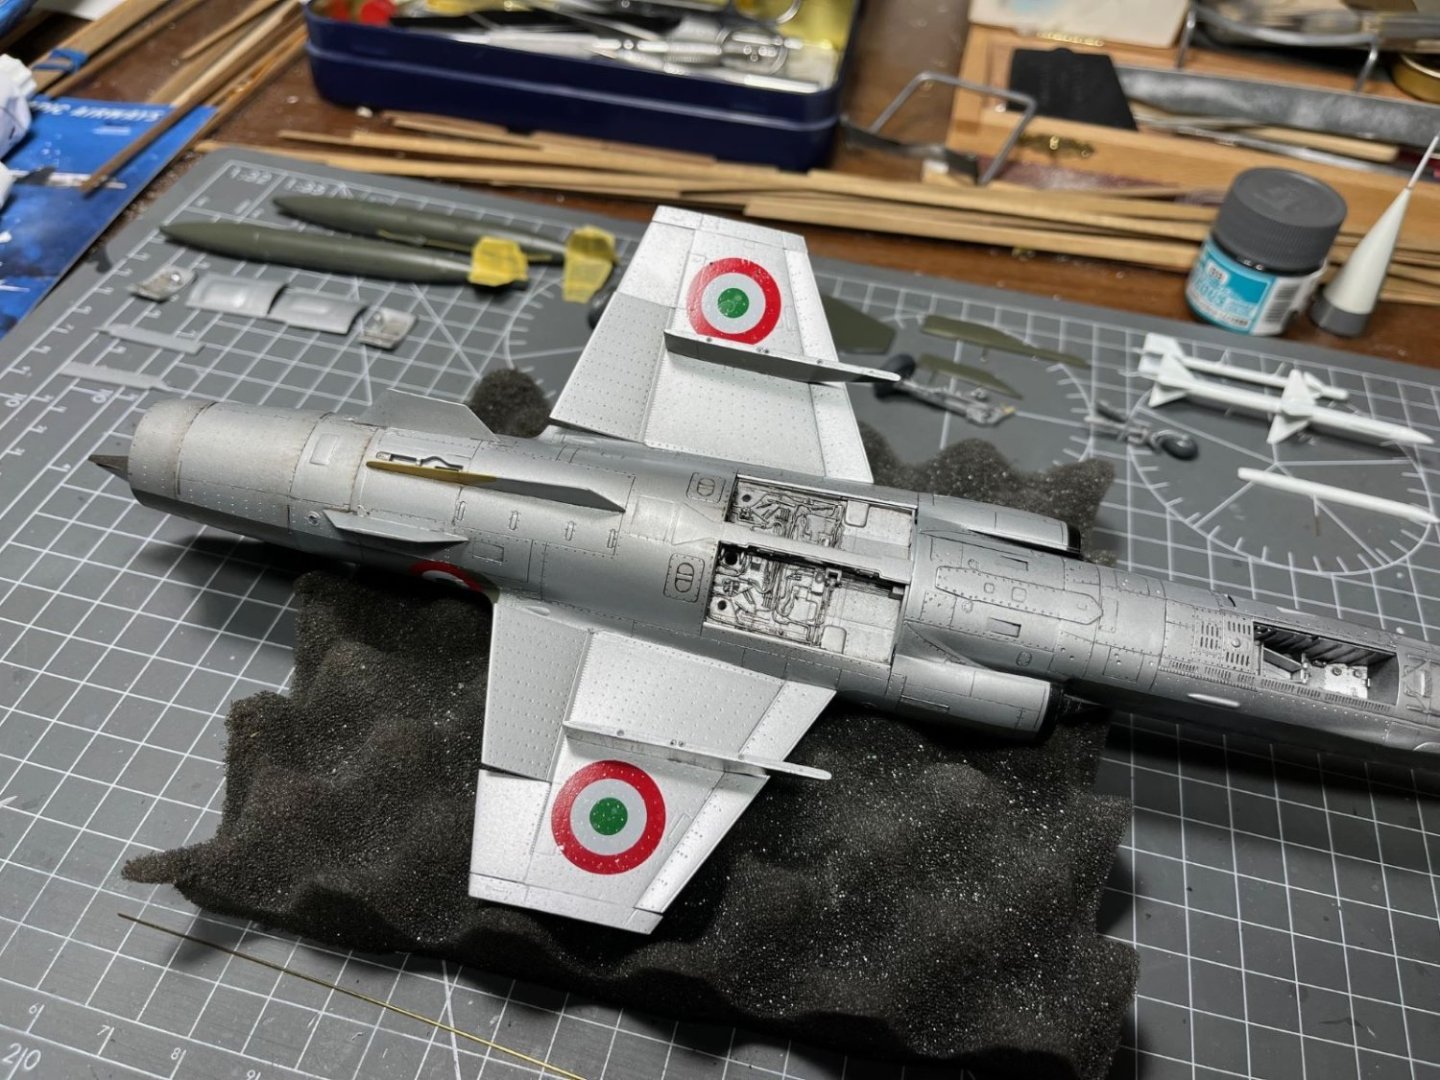

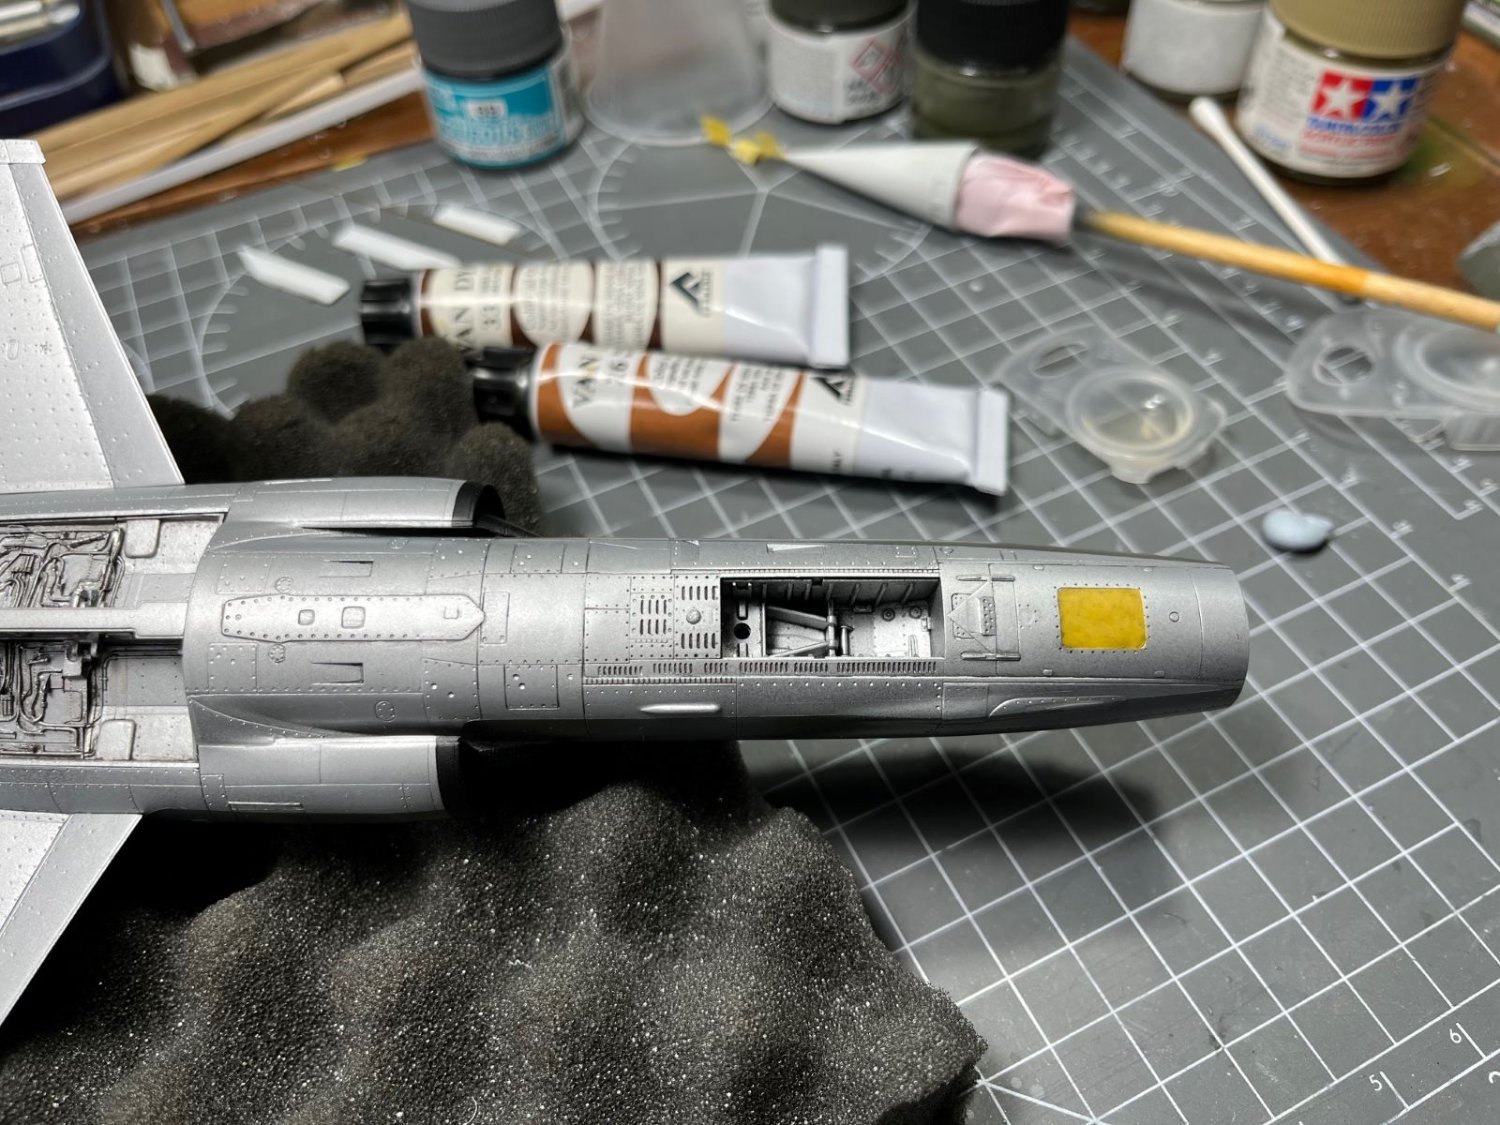
I also used oil colors on the cones of the air intakes to highlight details

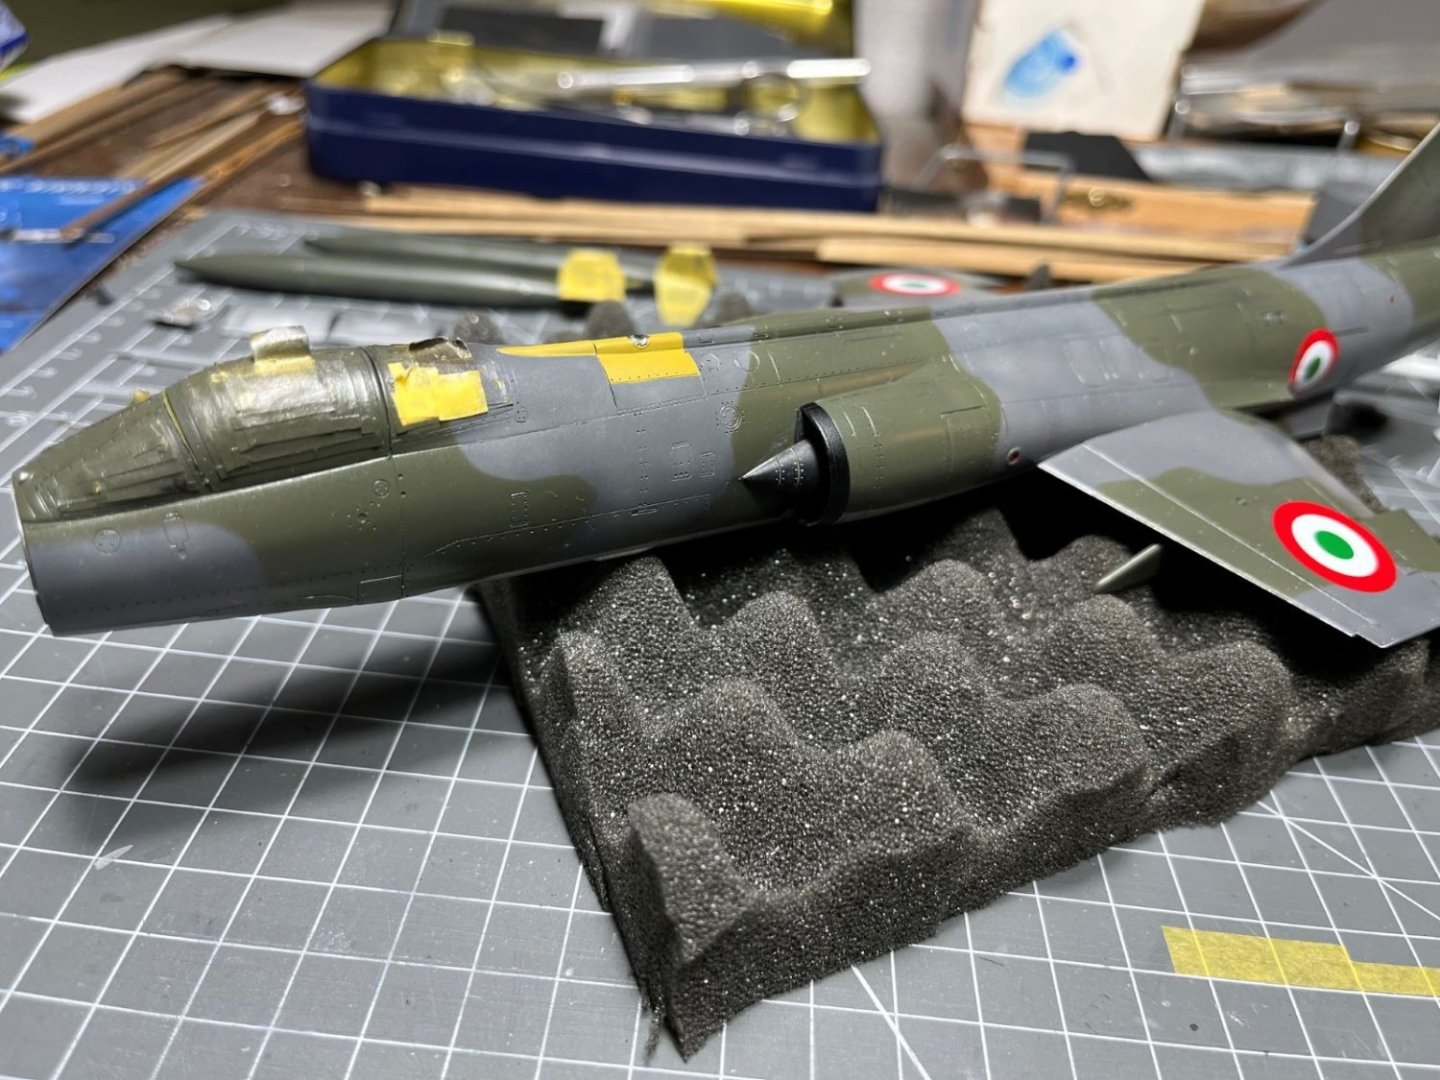
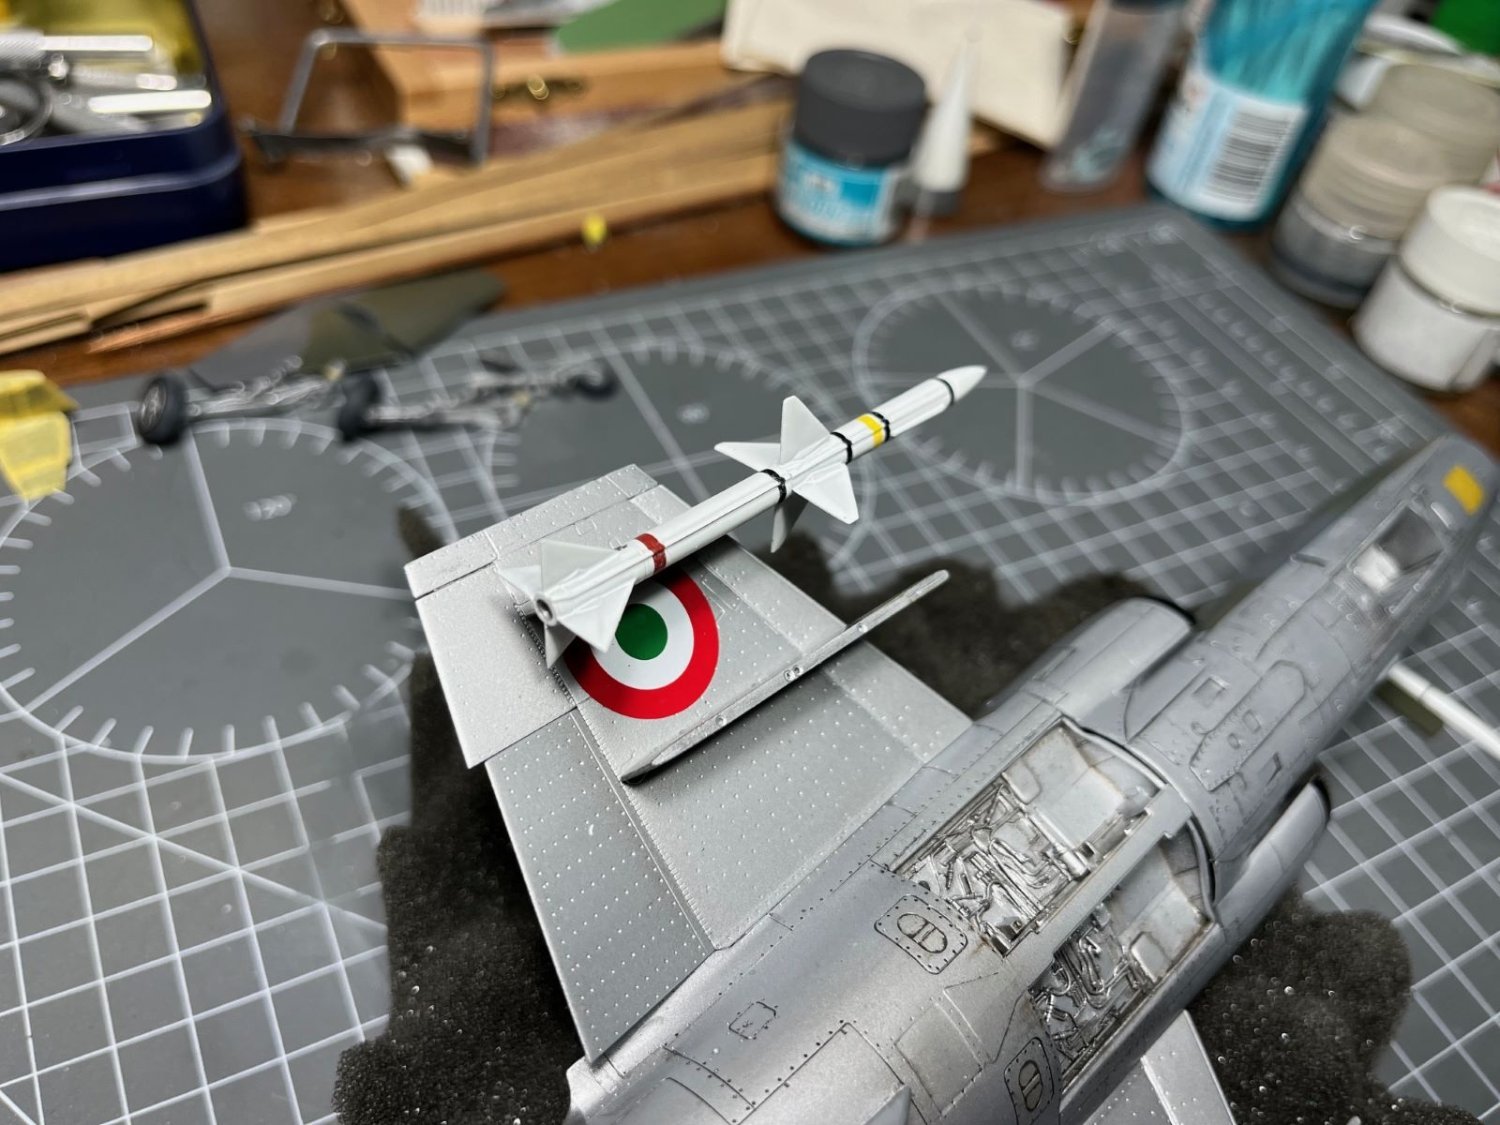
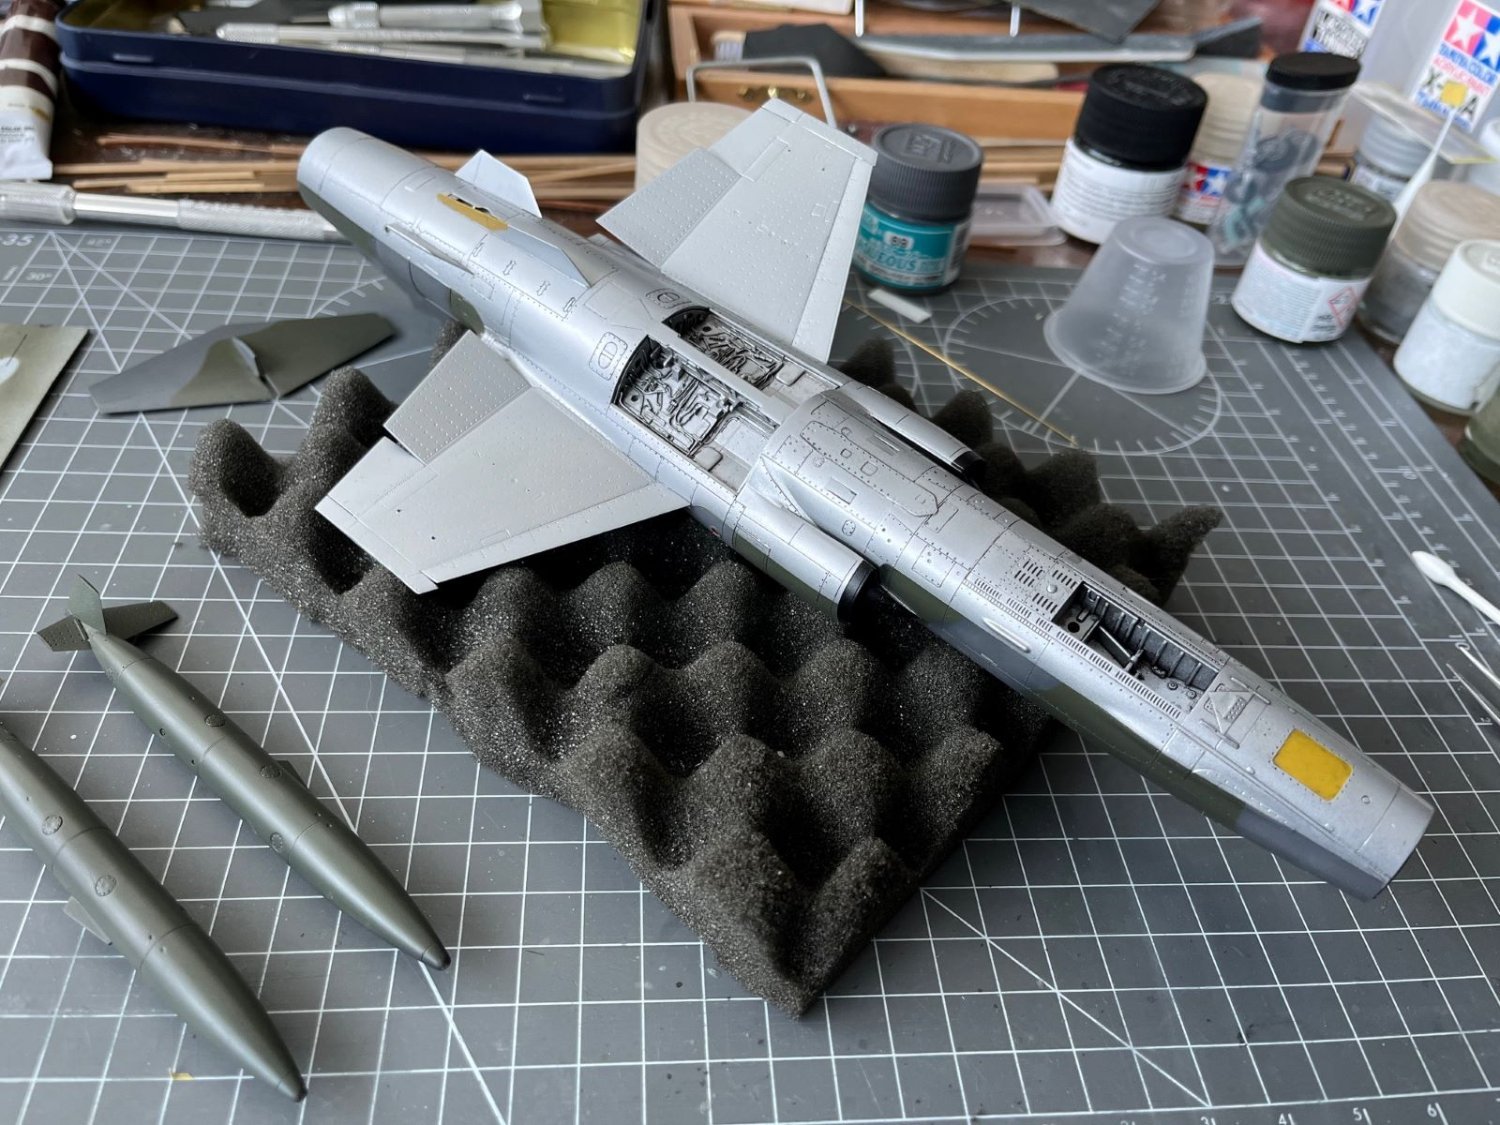
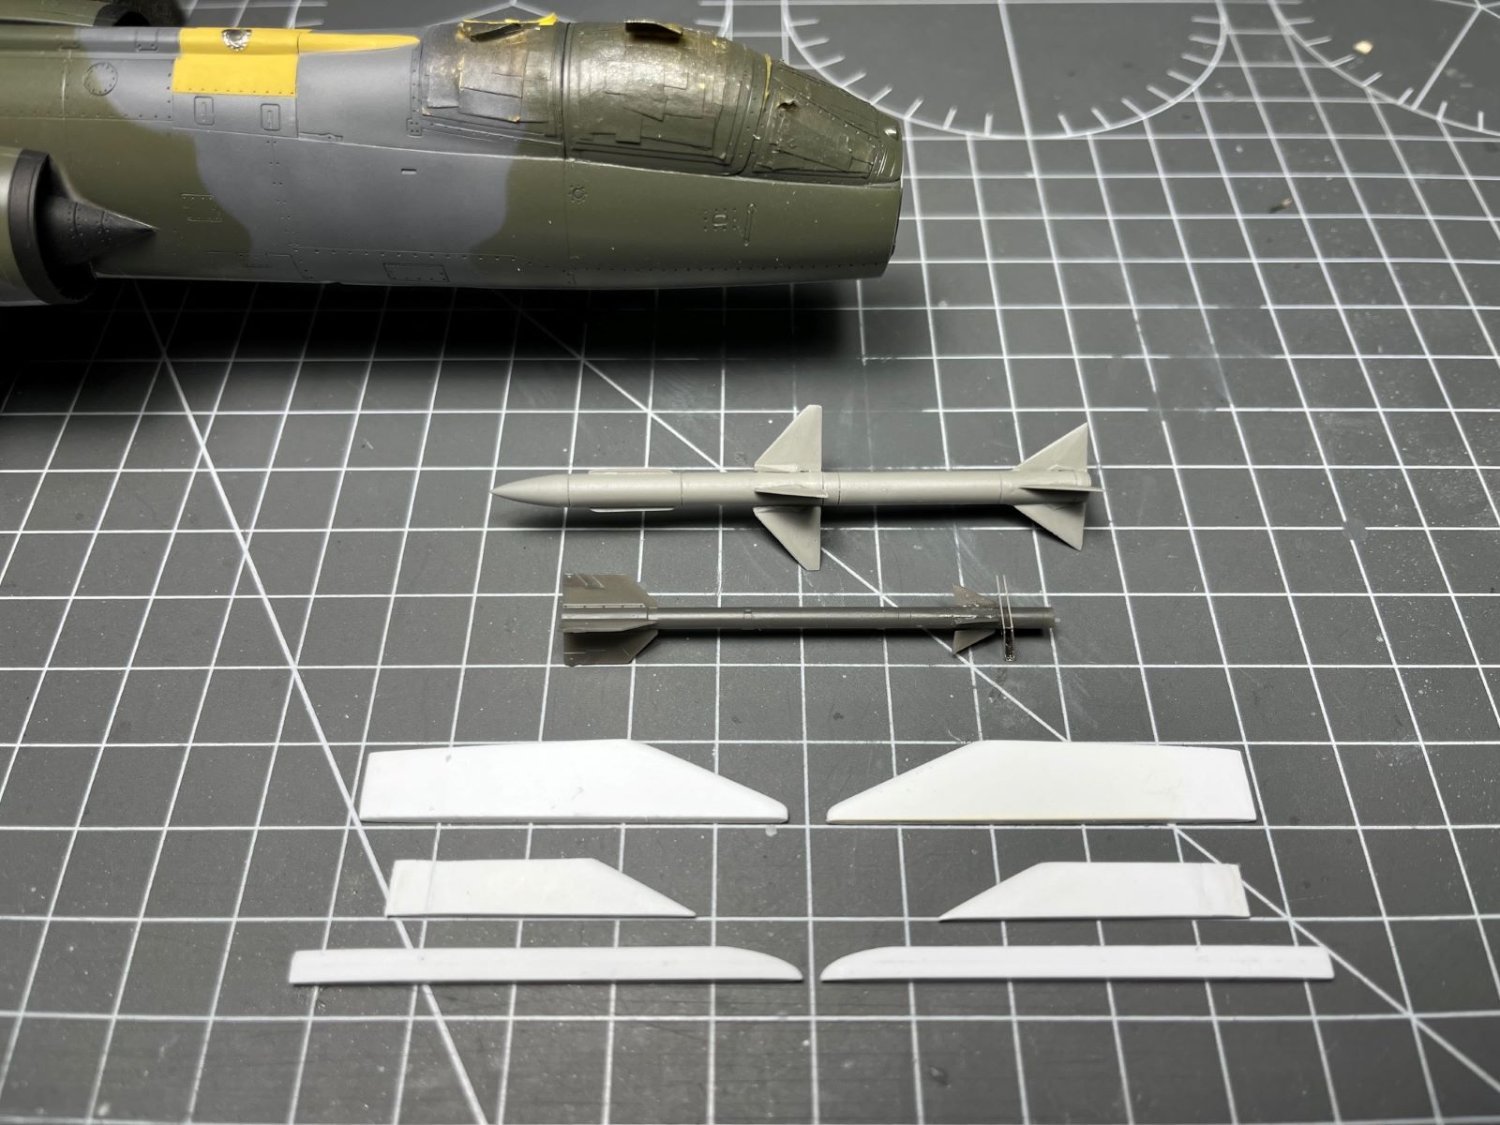
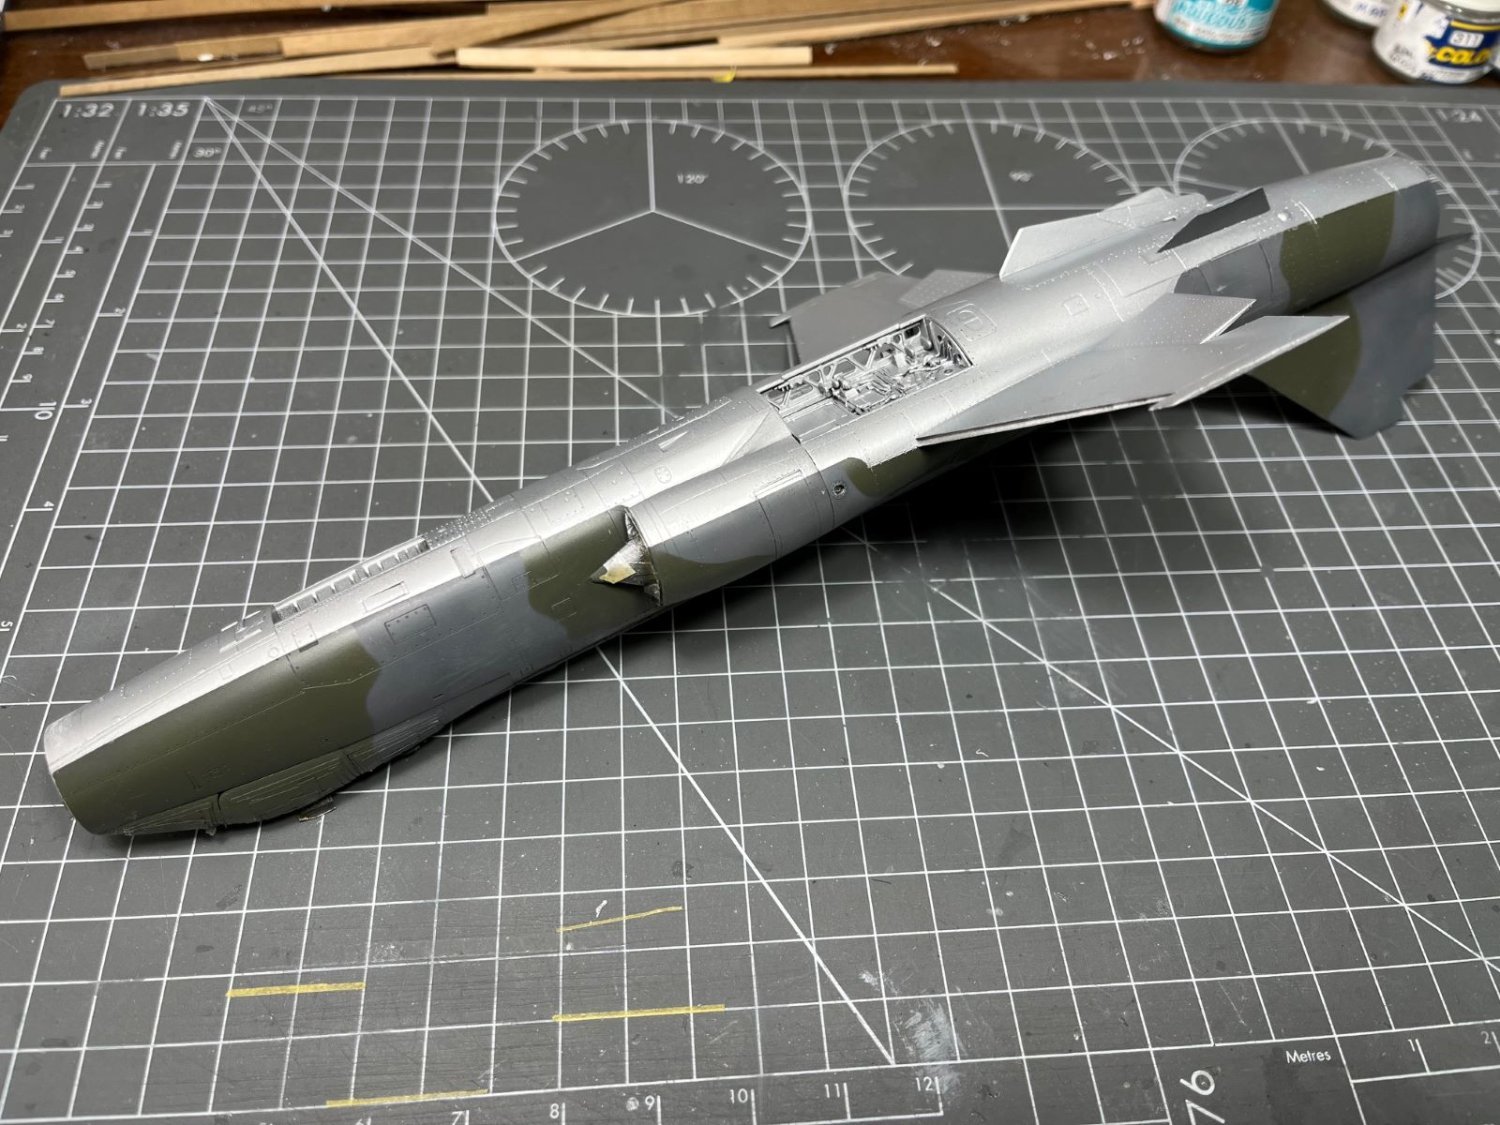
I worked to finish the scratch built pylons and the resin missiles. This is a dry fit of the Sparrow:
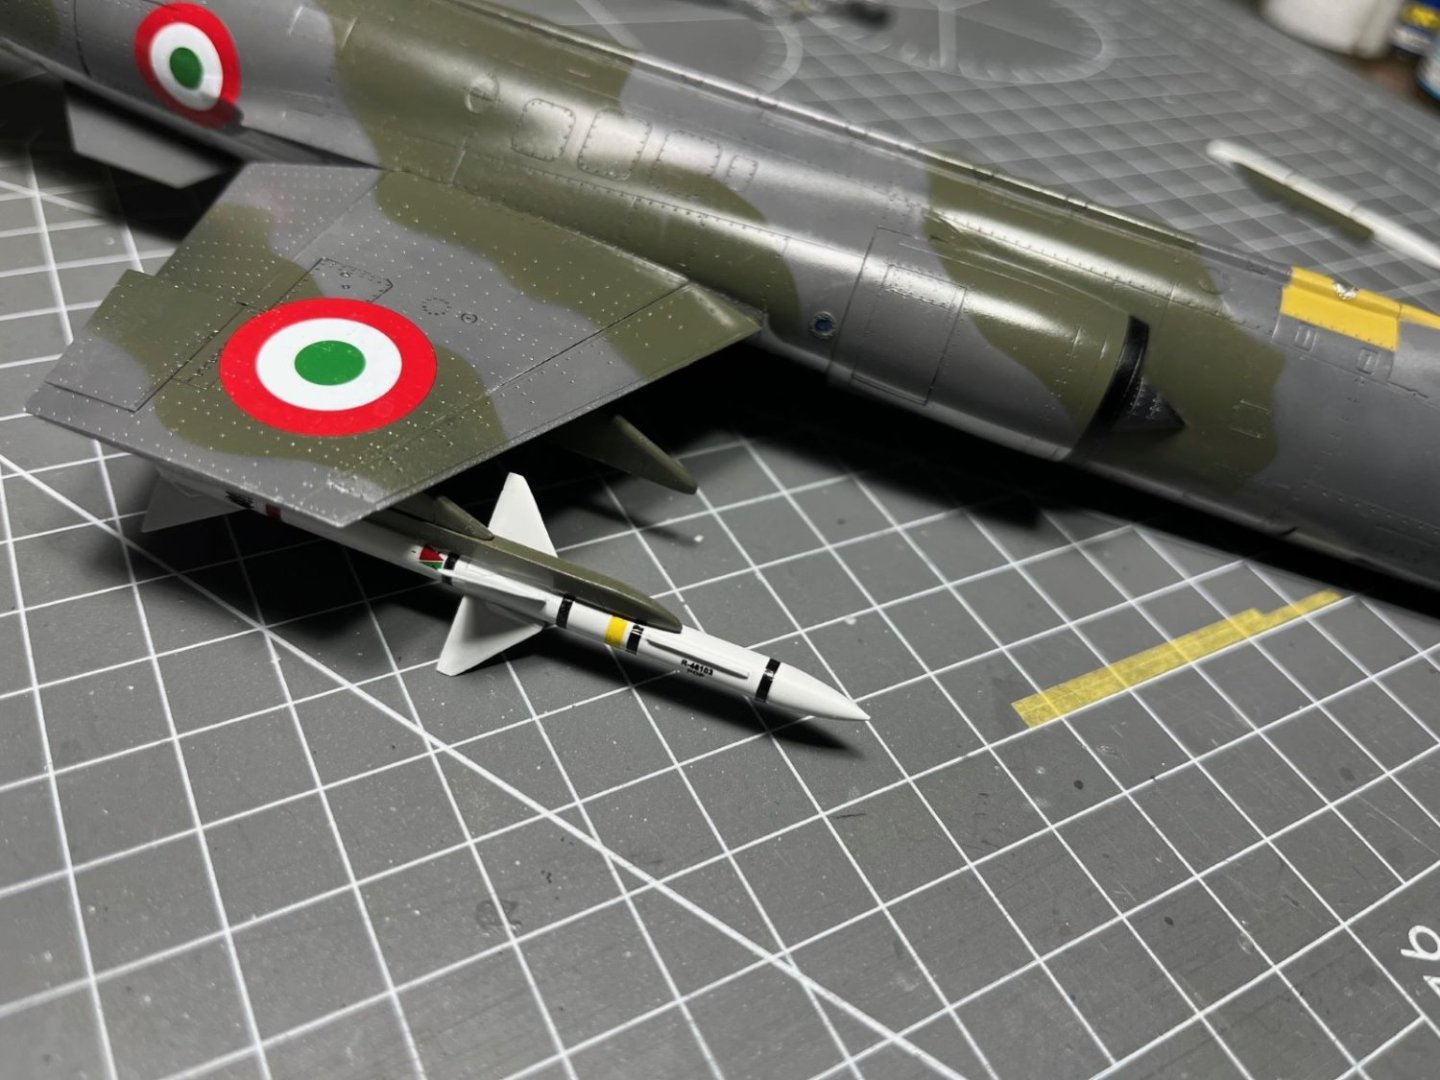
Comparing with pictures of the plane, I realized that the missile sits a bit too forward and I need to shift it back.

These resin missiles are another level of detailing when compared with the rough ones that I used on my F-15 few builds ago. I hope @Canute , who is a guru on the matter, is watching and will approve what I am doing.
I am now working on the Sidewinder and soon I will show also that.
That is it for now,
best regards,
Dan
-
-
Nice choice with the Hurricane.
Dan
-
Great modelling, the spoked wheel looks like the real thing.
Following your build with interest,
Dan
- Egilman, Old Collingwood, Tim Moore and 2 others
-
 5
5
-
-
3 hours ago, CDW said:
I have not watched the movie Ferrari. Will look for it and watch.
My only 'negative' point of the making of the movie is that modern American actors are too big for these cars designed for Italian people of the '50s. They barely fit in there 😉.
Dan
-
17 hours ago, CDW said:
The Highway Patrol pulled me over and wrote me a citation for not having my license plates displayed. I corrected that.
I repeat myself, in these last two pictures of this post, I admire the way light is reflected by the flanks of the car. Smooth and regular reflections that look very realistic.
Cheers,
Dan
PS _ By the way, just watched the movie "Ferrari", I liked it a lot, the reconstruction of Italy in 1957 is just amazing, let alone all the beautiful cars portraited in the movie.
-
Very cool plane, I love airplanes from this era. Following along.
12 hours ago, Egilman said:Today in engineering terms they are all seaplanes like you say, very few flying boats left in the world....
One of the very few built in modern time (well, it is already 30 years ago):
https://en.wikipedia.org/wiki/Dornier_Seastar
Cheers,
Dan
-
Very cool model. Is the second last picture above showing some translucency of the side covers? The whole real plane looks quite flimsy although elegant in its way. I knew of this type, but never stopped to observe it in detail.
Following along, cheers,
Dan
- Canute, Egilman, thibaultron and 4 others
-
7
-
-
-
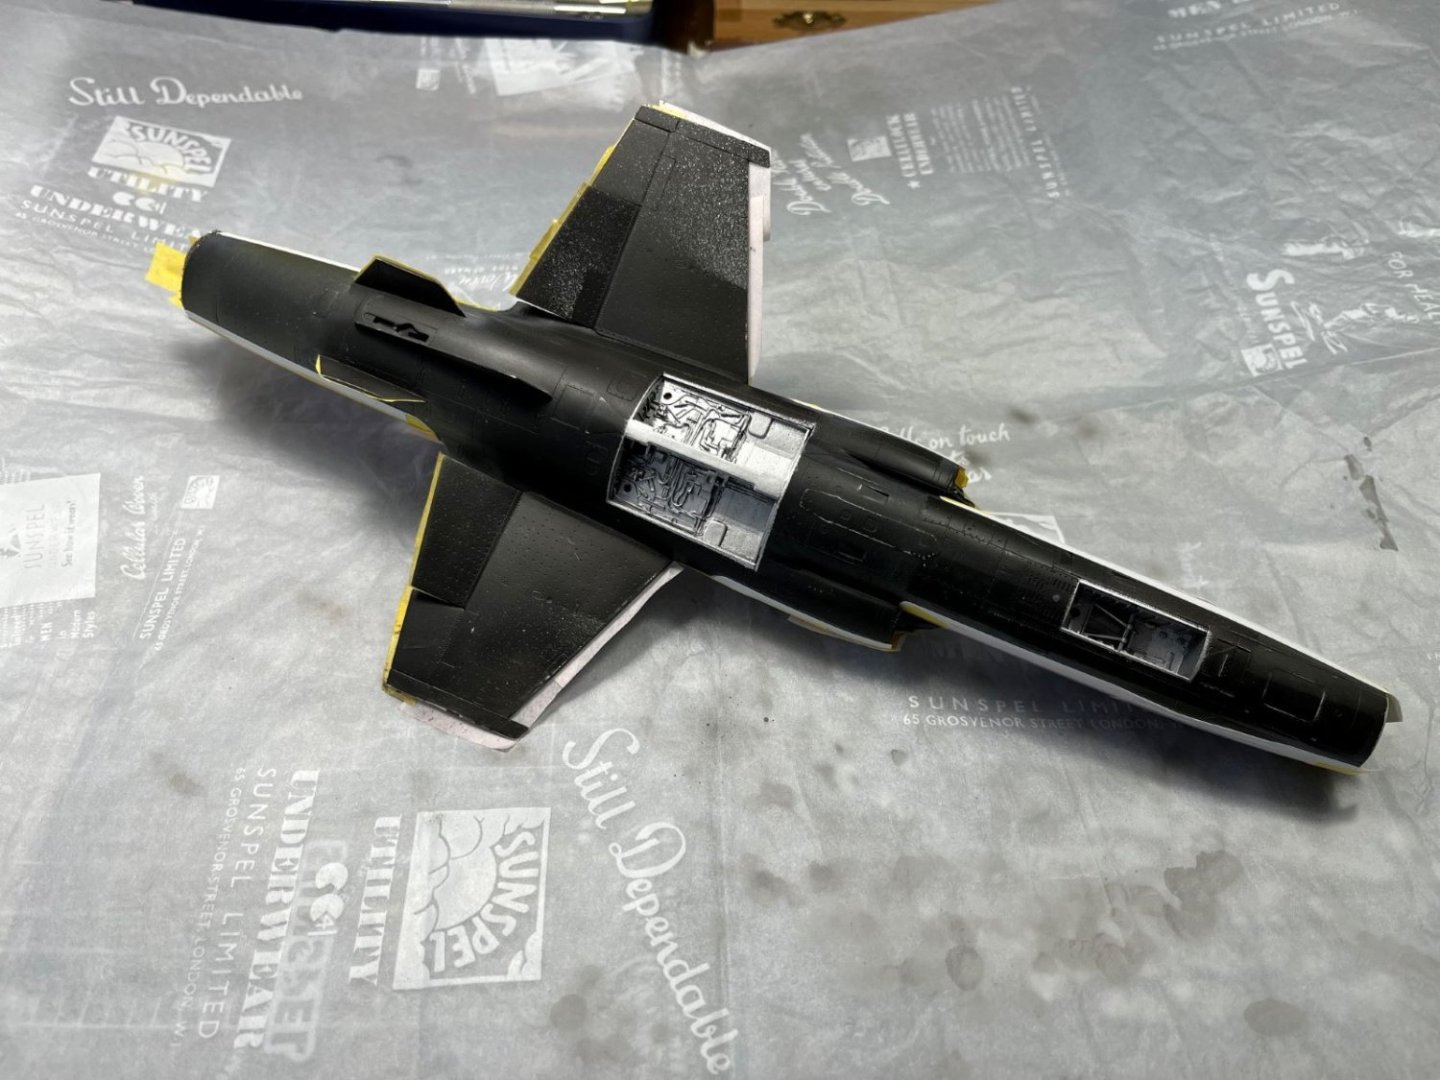
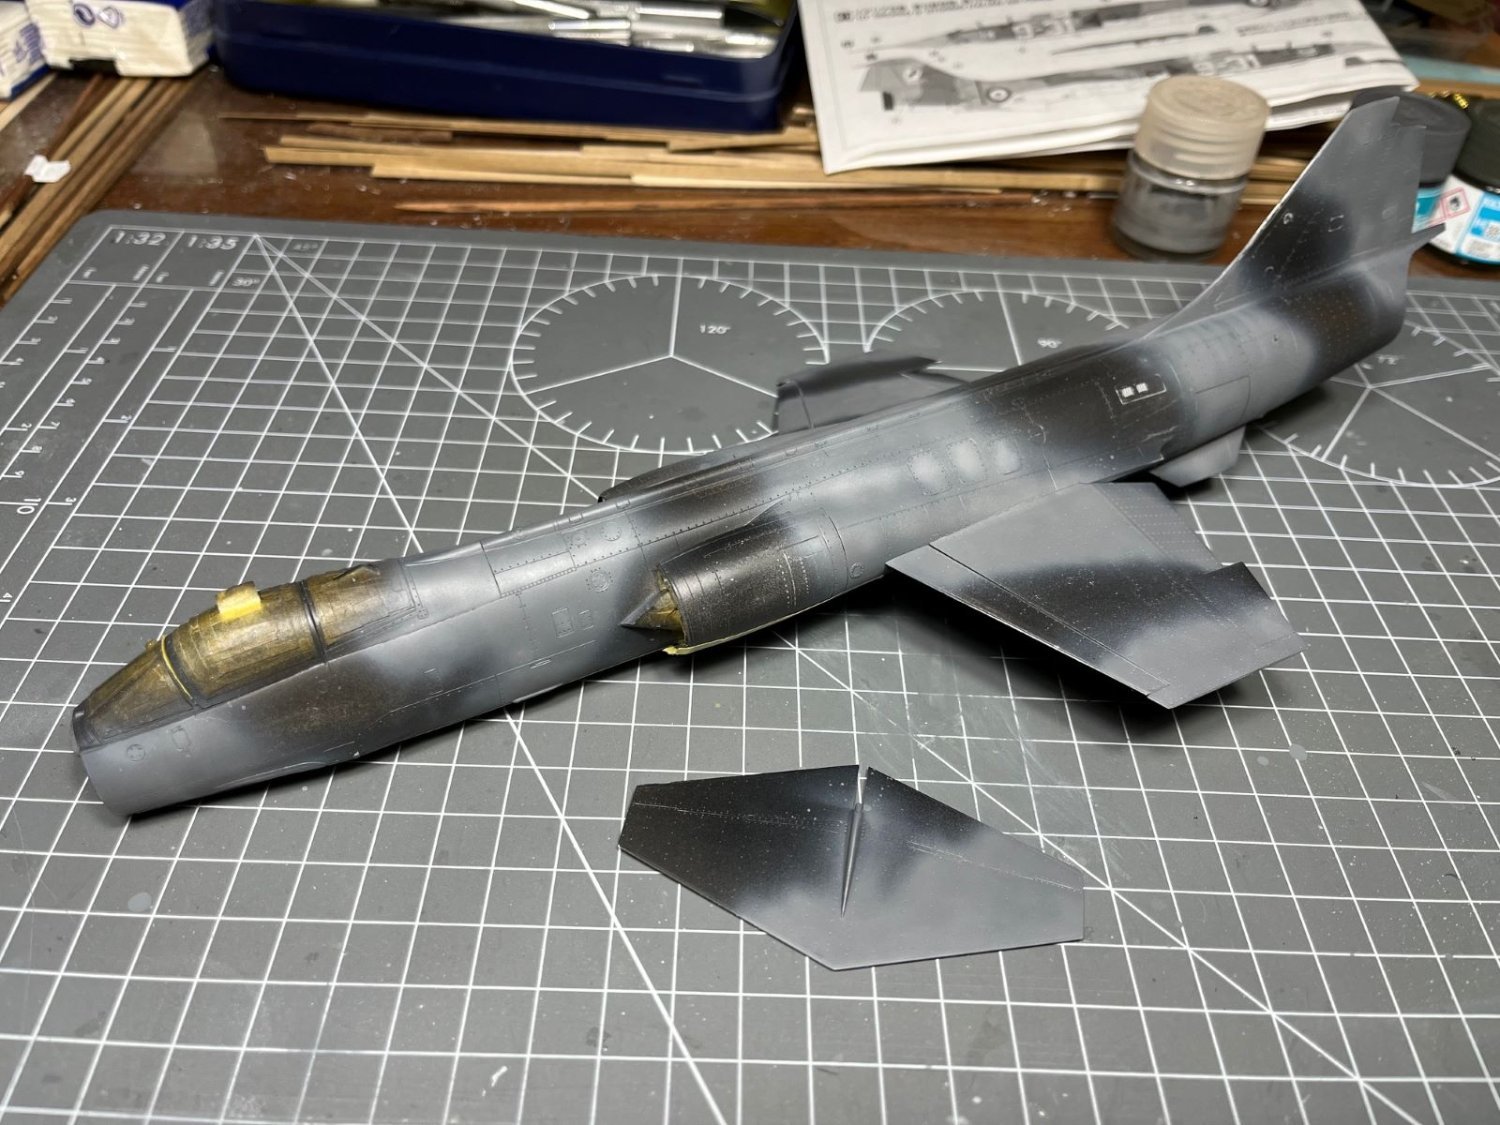
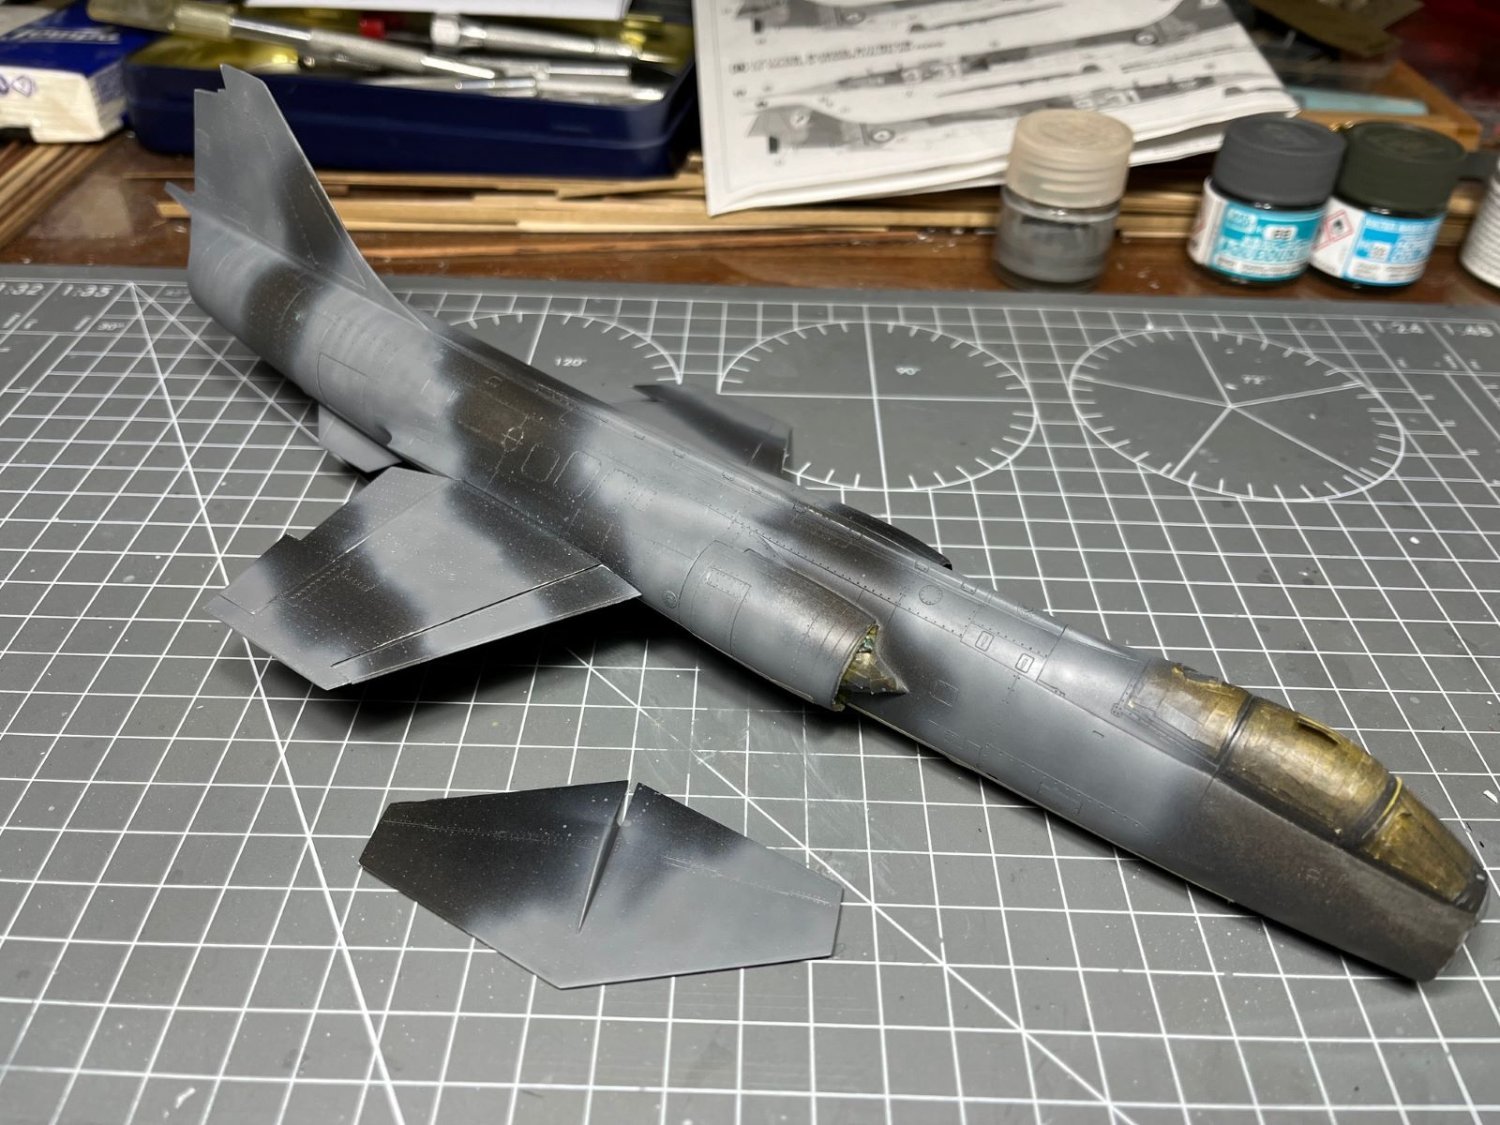
Hi all, I completed the paneling of the underside of the fuselage with a black oil color which admittedly might be a bit too stark.

Then, I decided to go for a second coat of Tamiya gloss X-22 finally obtaining the good smooth finish that I wanted.
Thanks to the wet sanding and two very thinned gloss coats, I obtained the good level of smoothness that I wanted and that is shown in the details below.


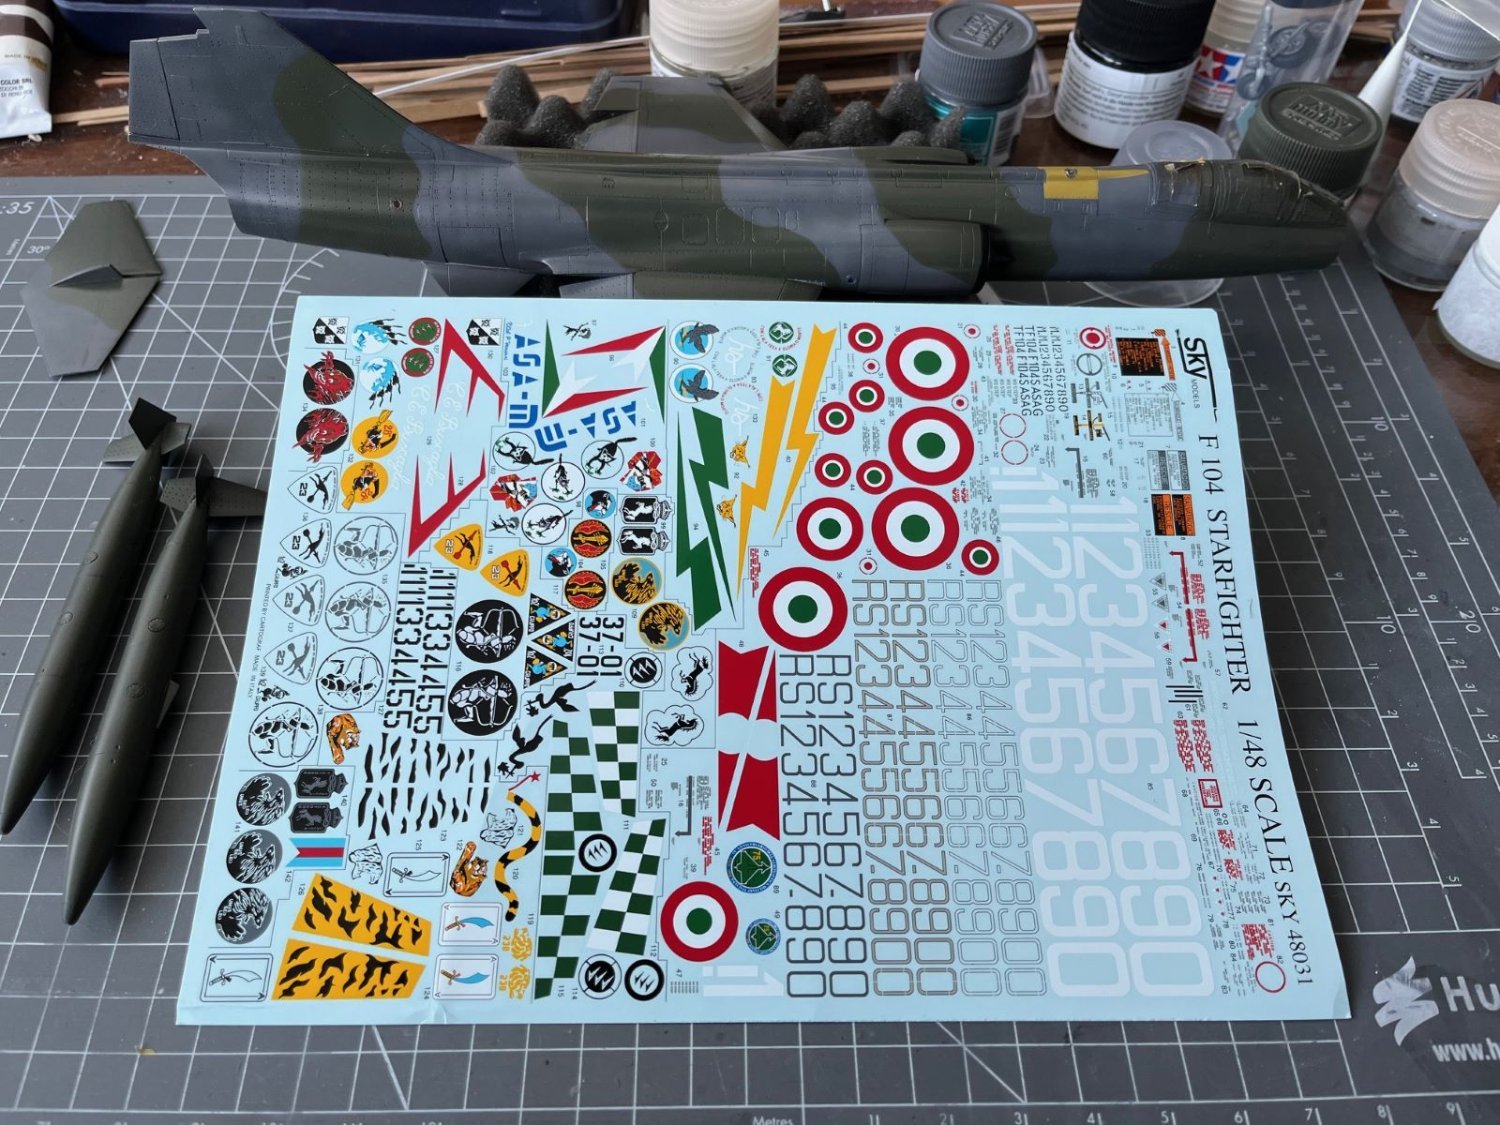
Now, I am really ready for decaling (actually, I have still to finish the inside of the jet opening). As said in earlier posts, the original Hasegawa decals don't look that good with whites that appear creamy and I didn't like them. Fortunately, I bought from an Italian shop on the web a nice decal sheet from SkyModels dedicated to this specific aircraft with a large choice of markings.

The quality of the print looks excellent (made by Cartograph) and there are plenty of different possibilities to chose from.
That is all for now, I will take my time to select the group or squadron which looks coolest to me.
Best regards,
Dan
- Landlubber Mike, Dave_E, Canute and 10 others
-
13
-
Hi all, just a small update to show that work is on going. I finished the first gloss coat on the overall airframe. Small pieces have still to be completed:
Unfortunately, divots on the wings are still evident, but I will have to live with that. The rest is looking fine. In principle, I could start decaling, but I have not chosen the group squadron yet. Meanwhile, I started to work with oil colors on the wheel bay.

On the front part, I used the oil colors for the panels and to discolor the glass fiber dielectric panel:

Going on with the other surface details, but I believe I need another gloss layer before the decals.
Best regards,
Dan
- hof00, Old Collingwood, mtaylor and 9 others
-
12
-
Hi all,
at the end of the last instalment, I said that I was ready to spray the gloss coat on the airframe. Well, actually I changed my mind and chose to color the remaining bits that need to be finished with a different color.
The resin panels on the lower part of the fuselage:
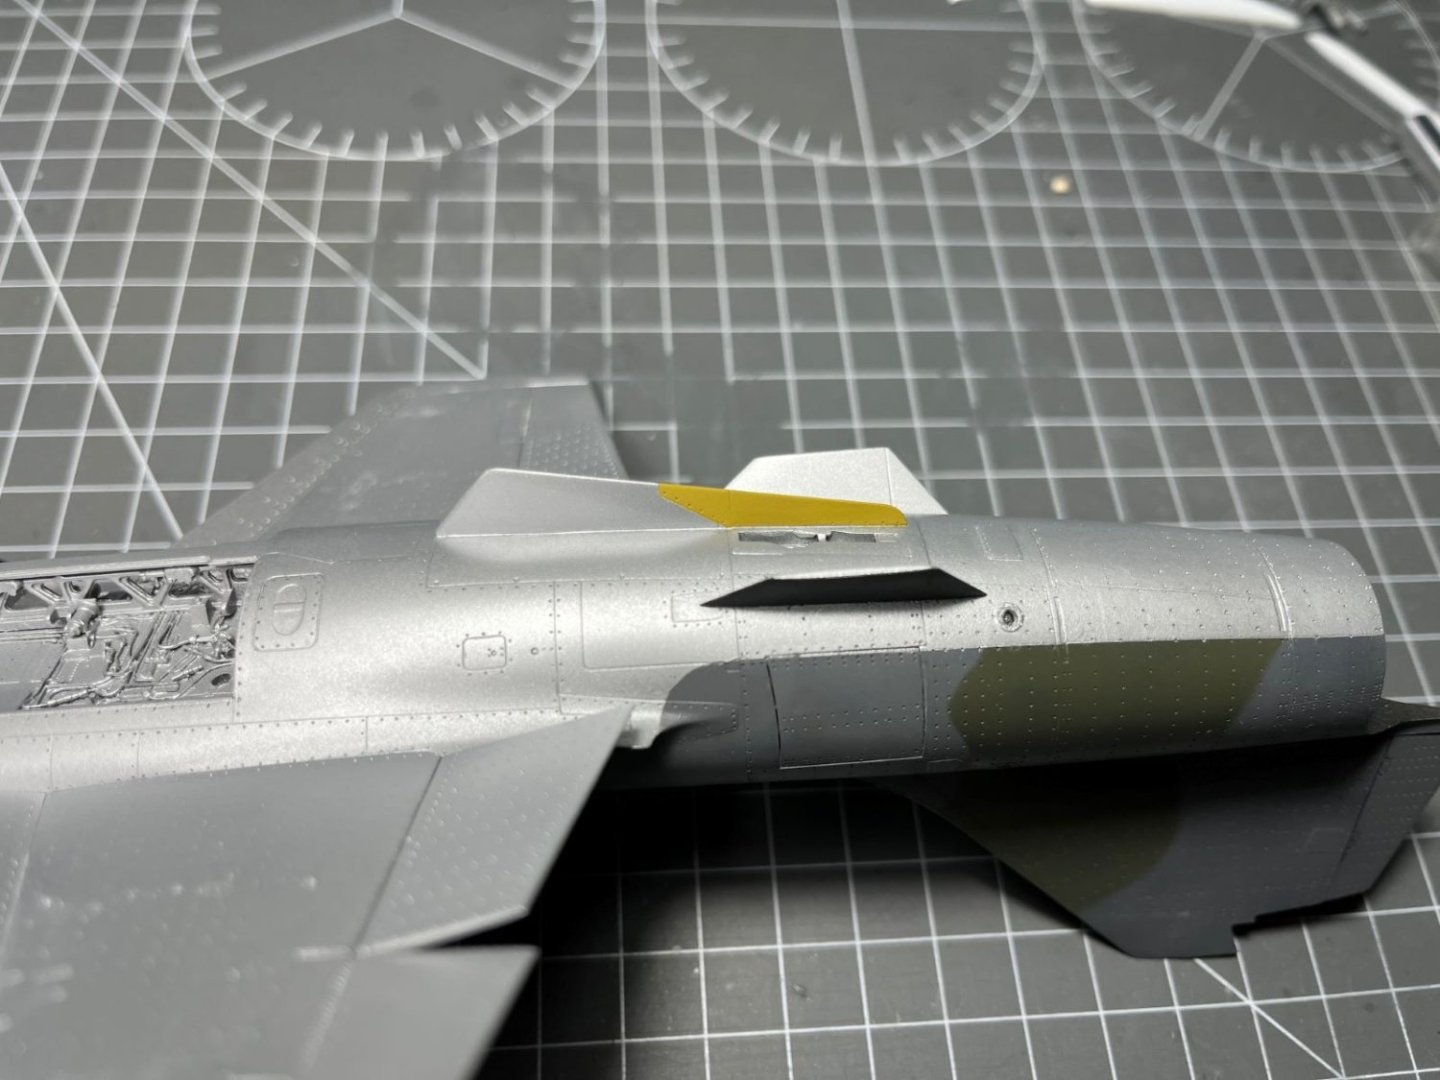
The resin panel on the spine and the black edge of the air intakes:

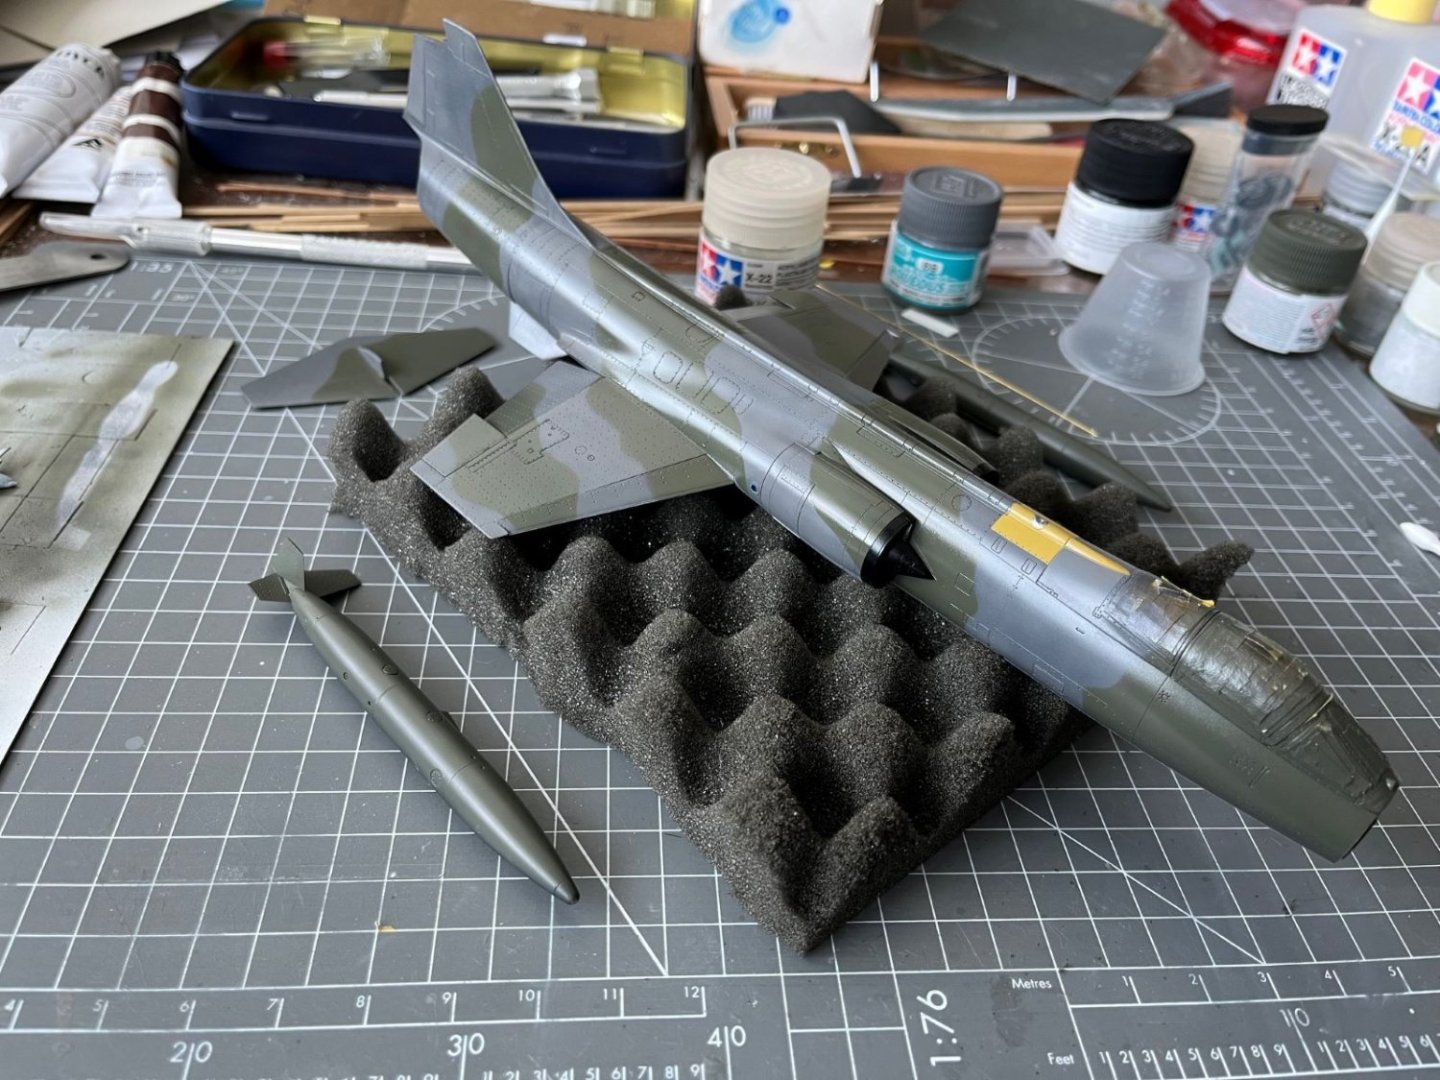
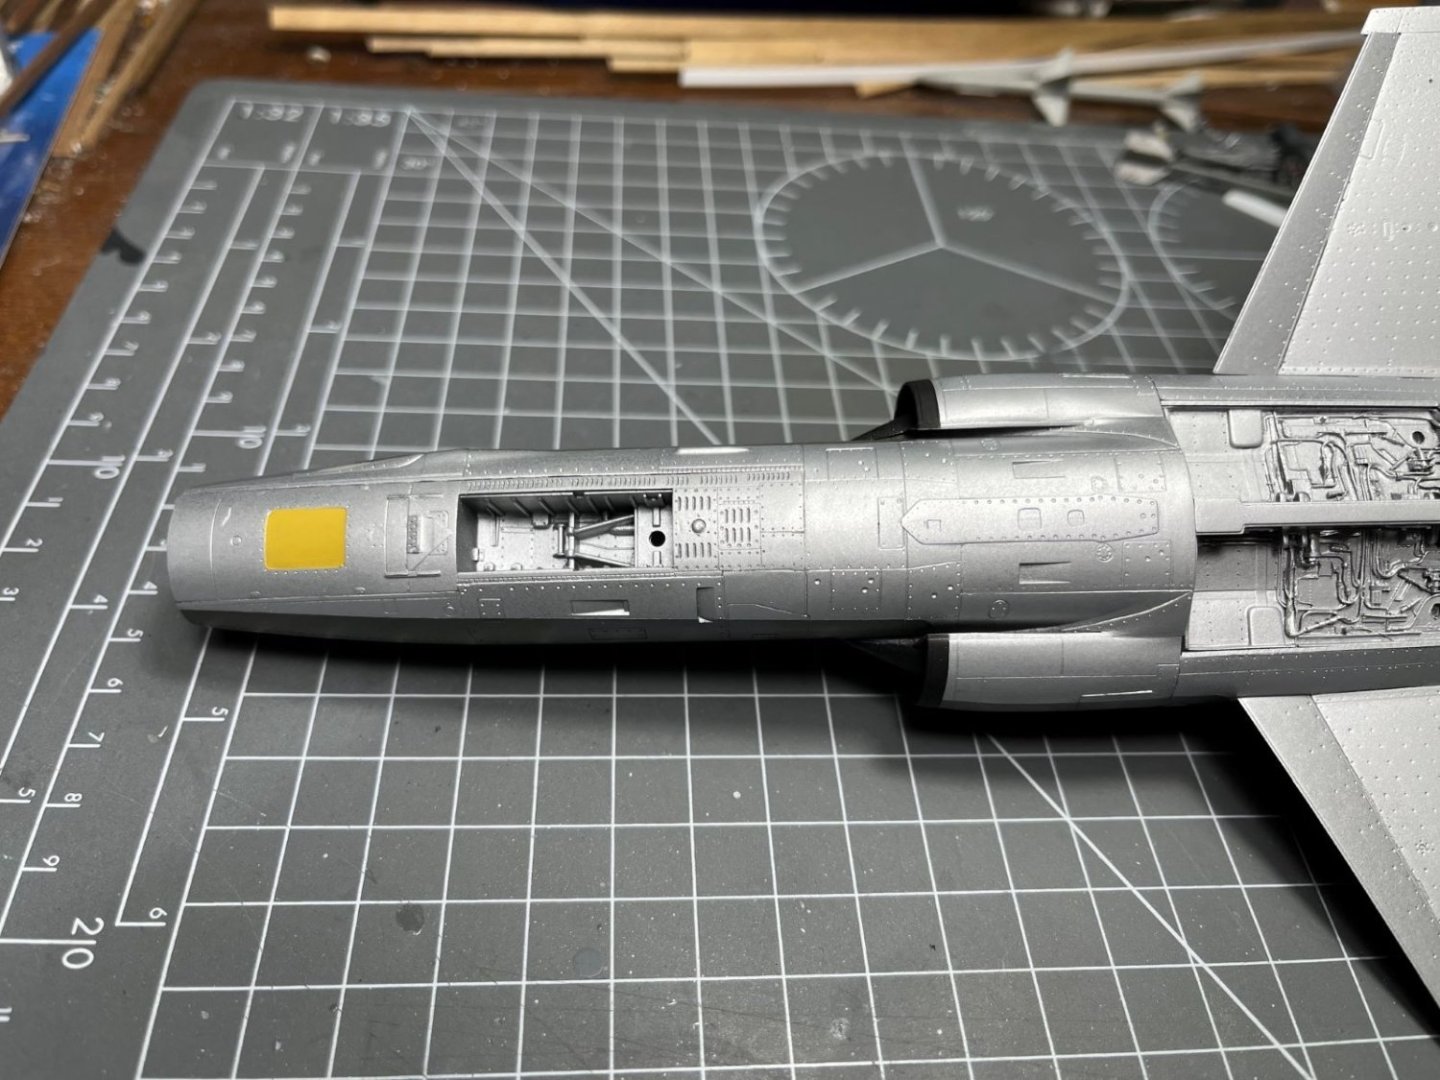
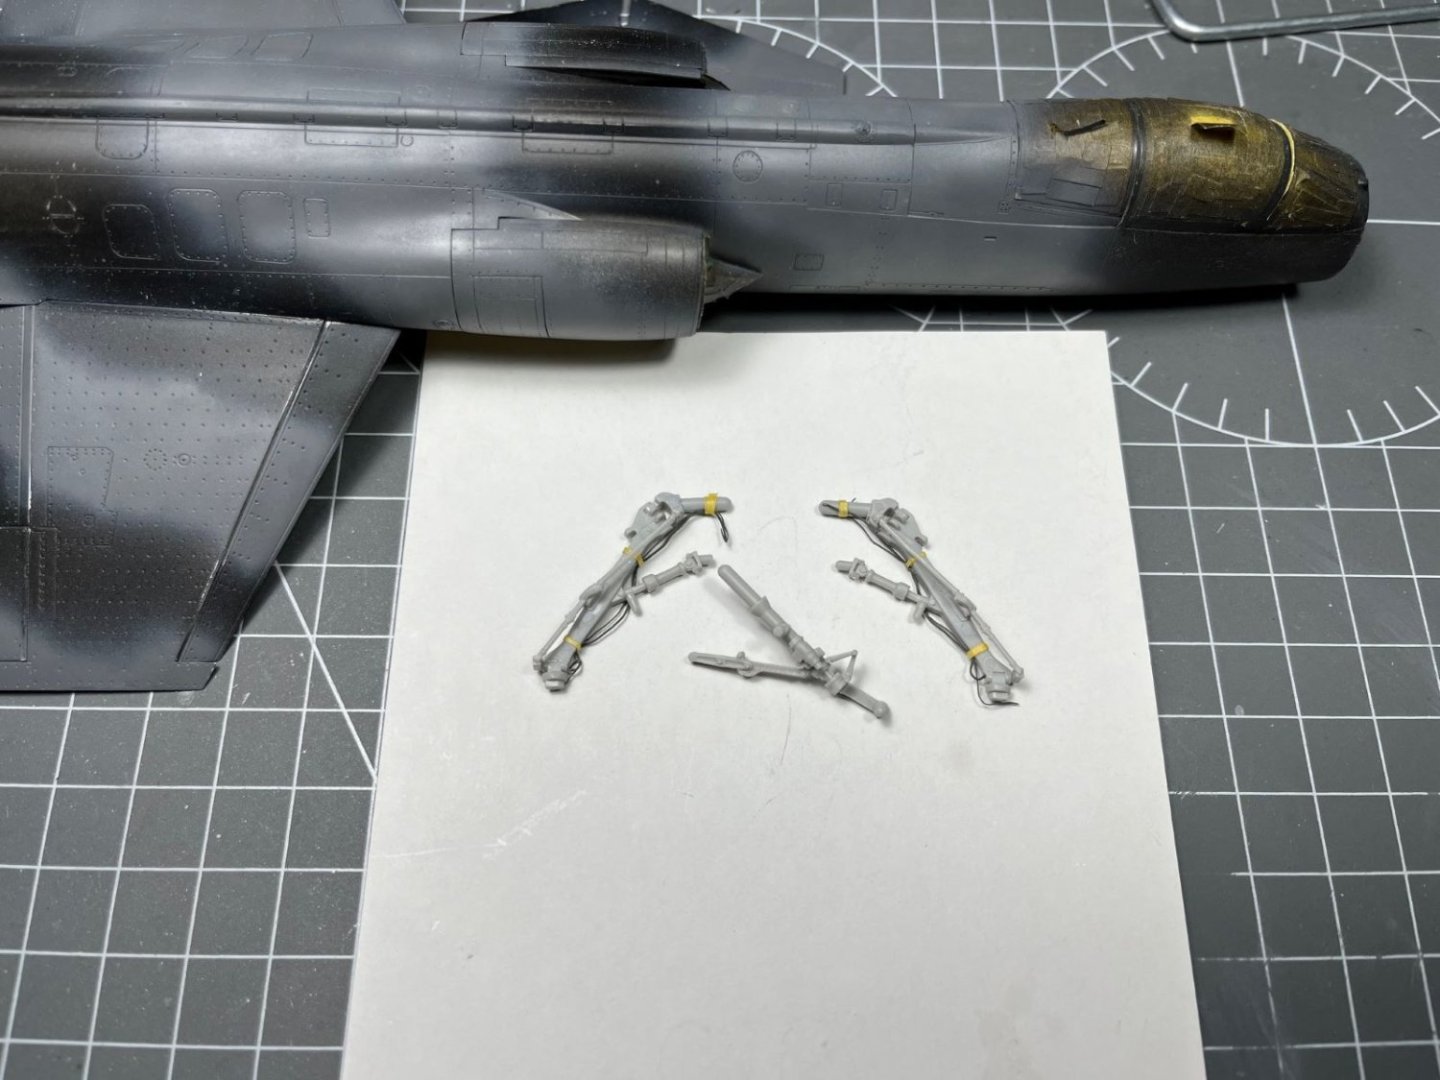
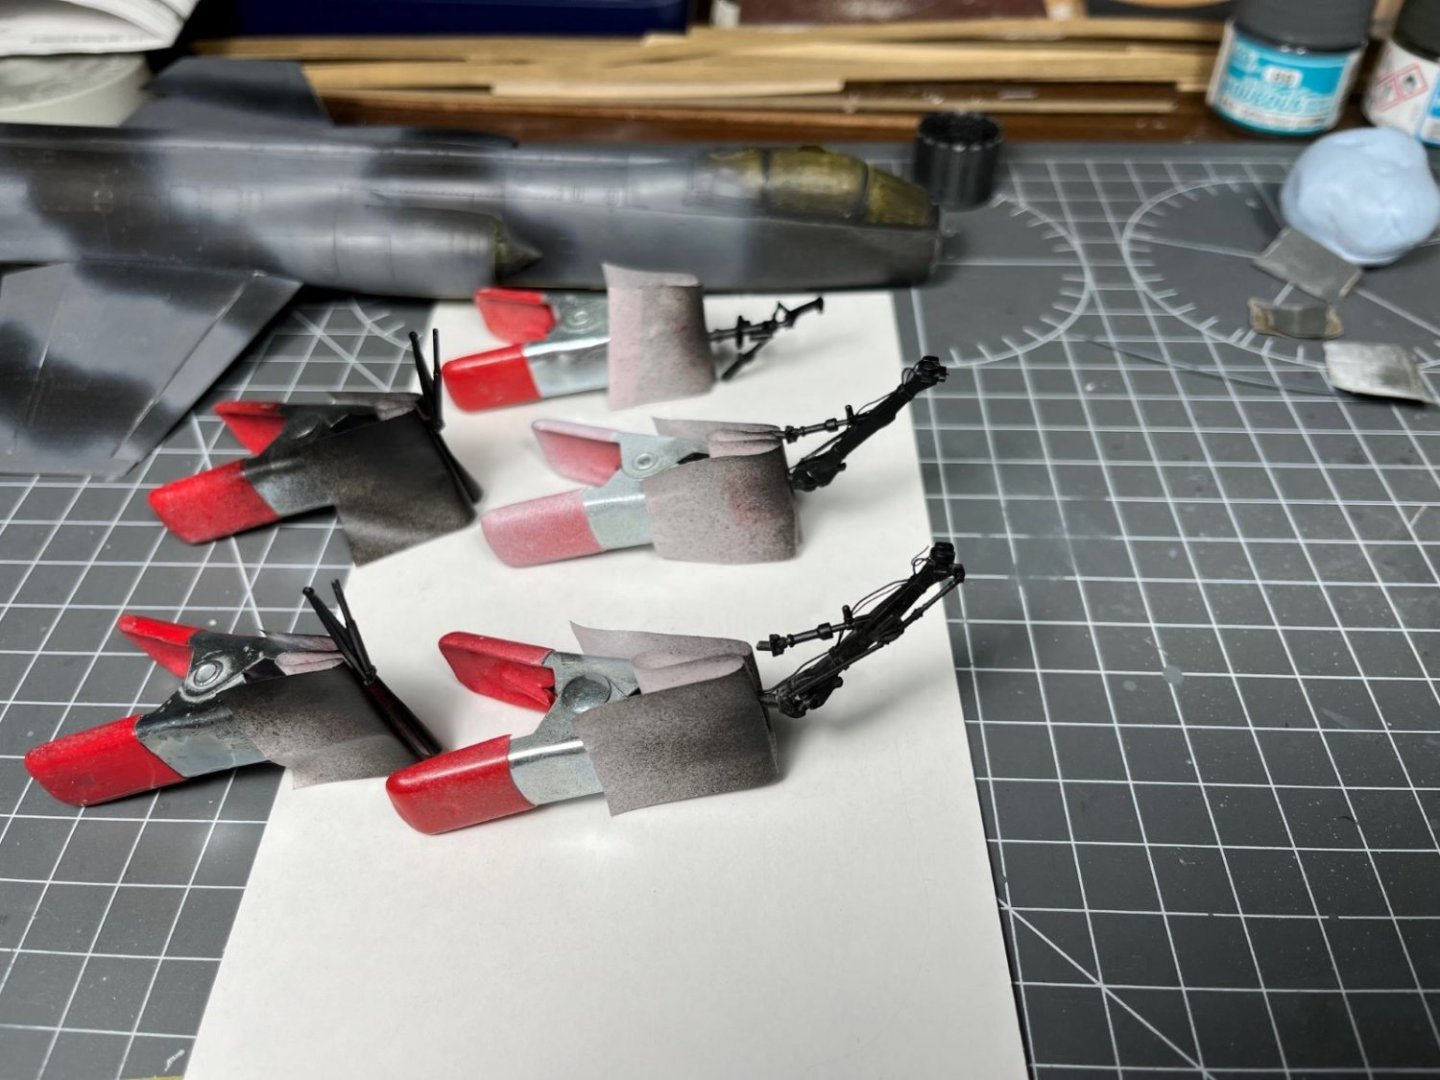
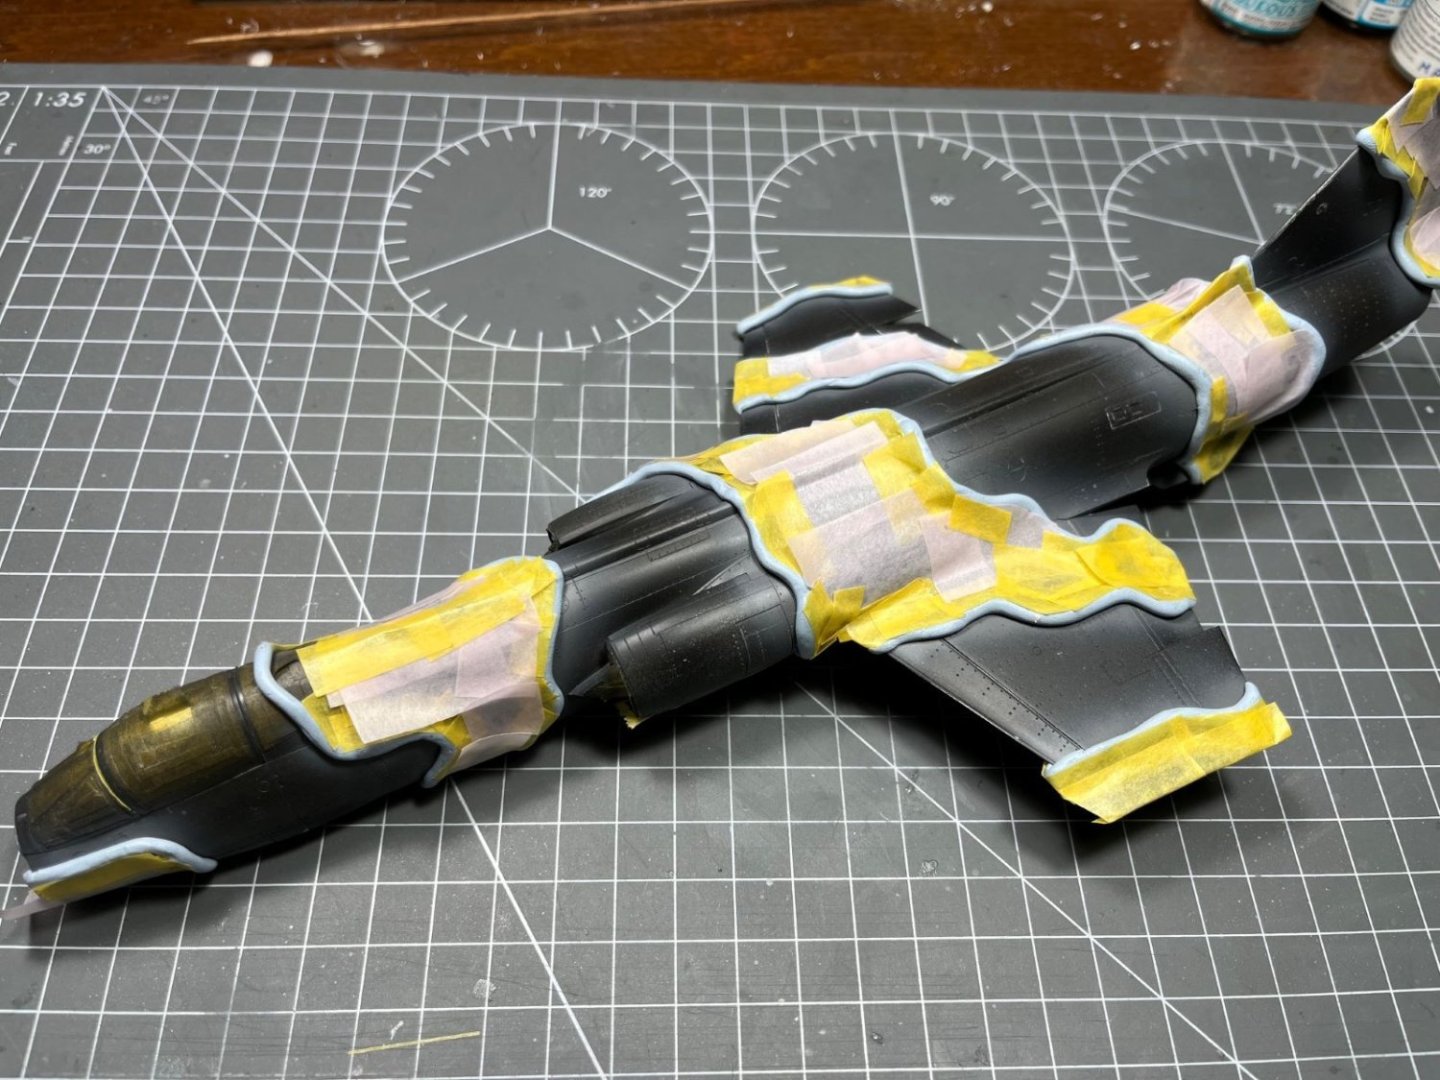
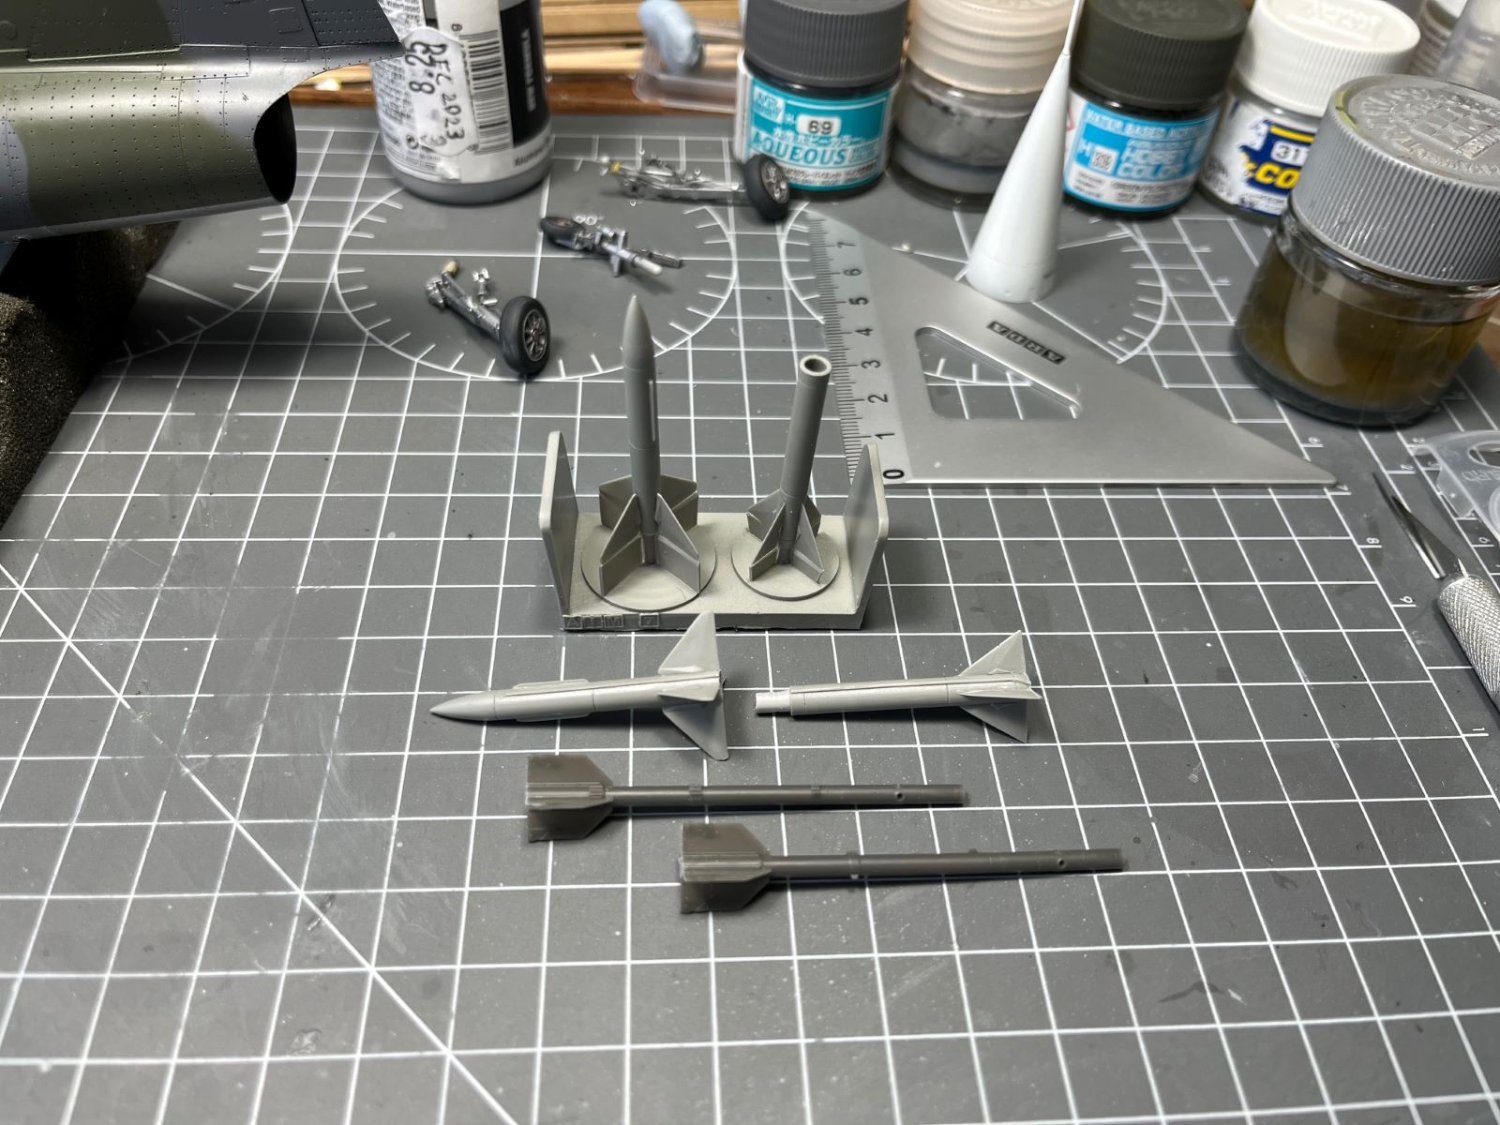
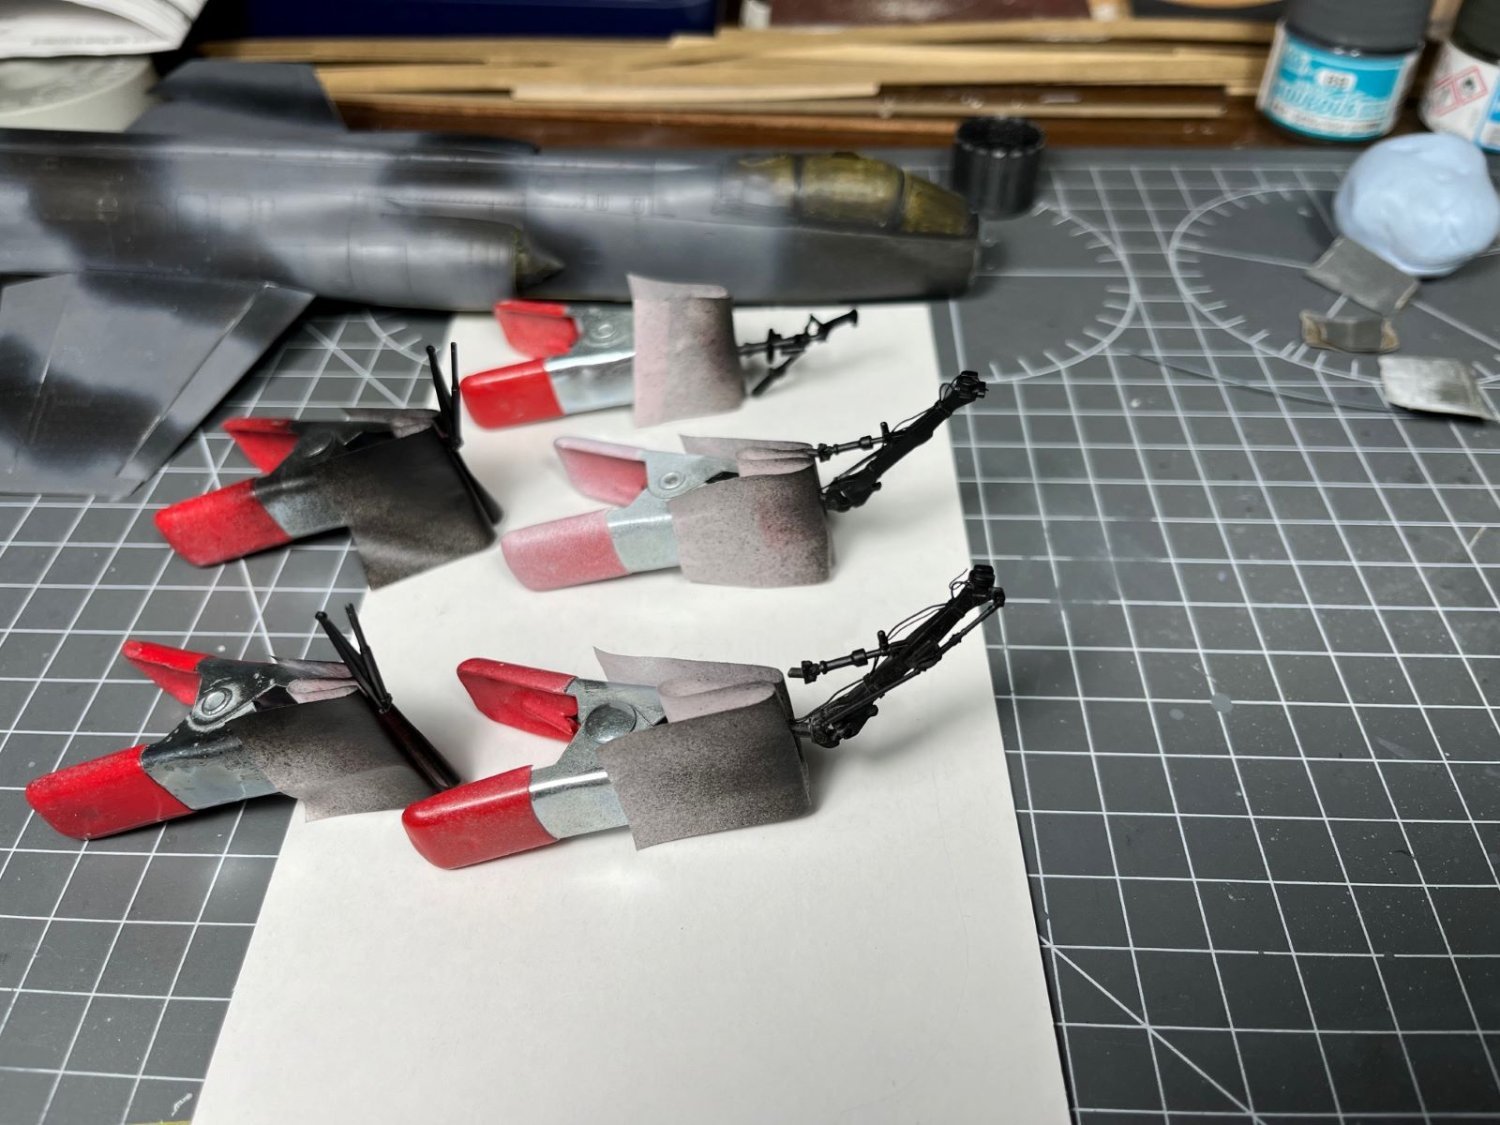
I also removed the masking material from the air intakes. Switching to the underwing loads, I sourced the Sparrow (Aires) and the Sidewinder (Eduard) resin missiles.

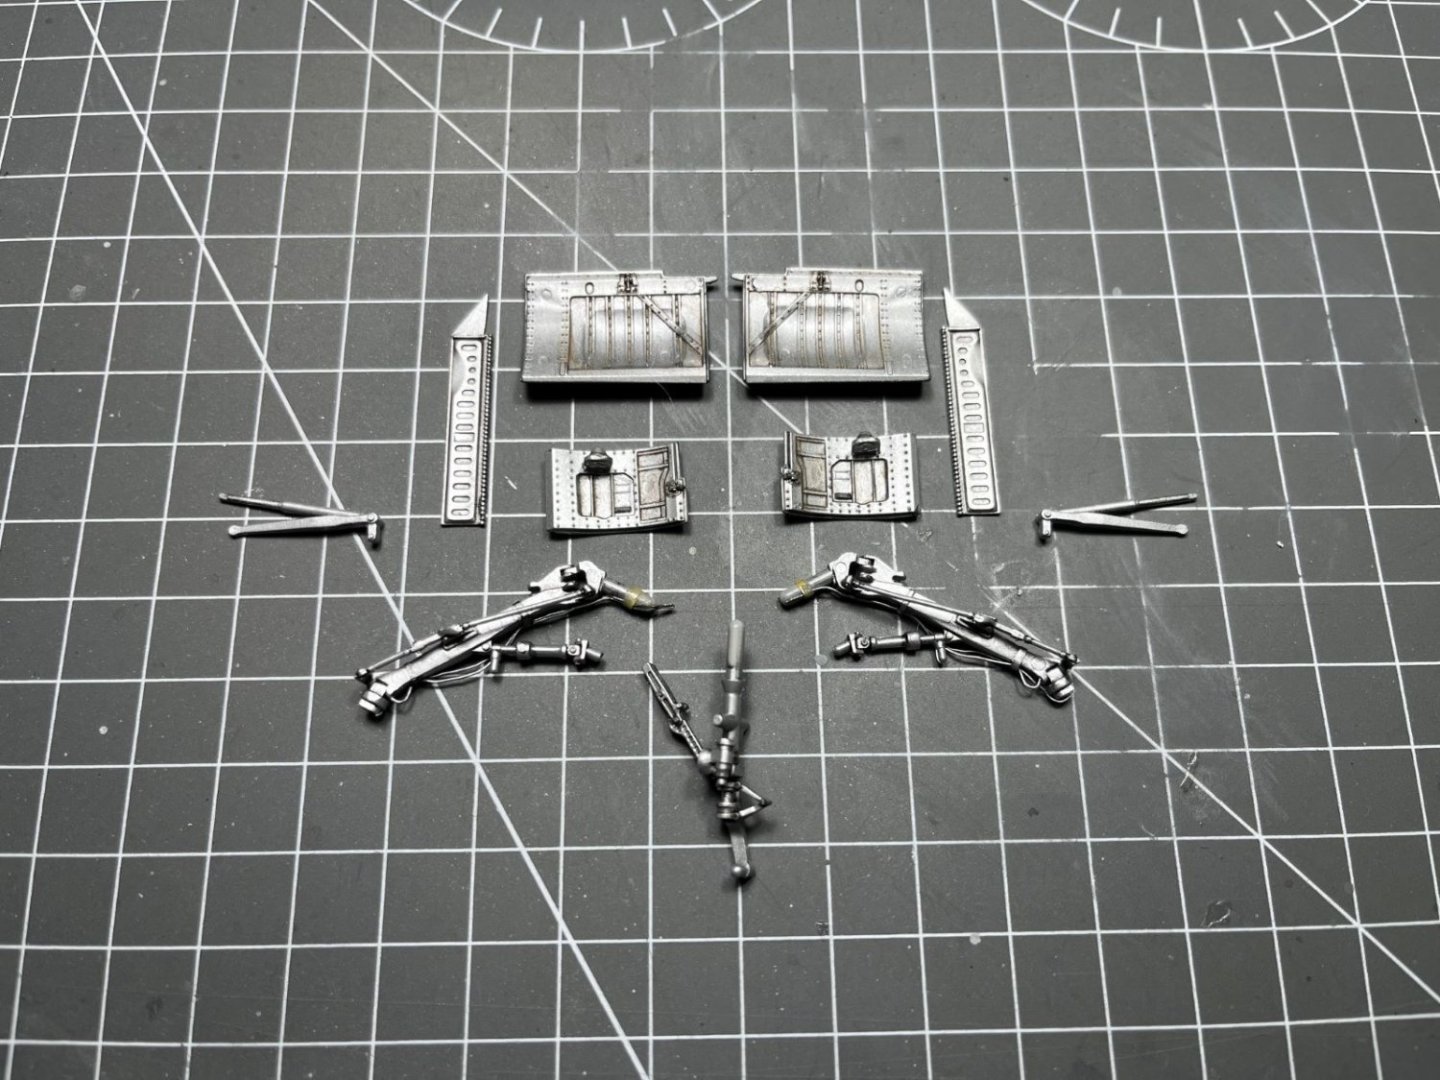
Unusually, the Sparrows came split in two halves, so I added a central pin to reinforce the junction. Both types are immensely better than the crude reproductions that came with my previous F-15 model. In addition, I started scratch building the underwing pylons and the launch rails from styrene plates and stocks. I will just add some rivet lines to make them more interesting.

Now, I am really ready for the gloss coat.
Best regards,
Dan
- Old Collingwood, Dave_E, AJohnson and 8 others
-
11
-
-
Hi,
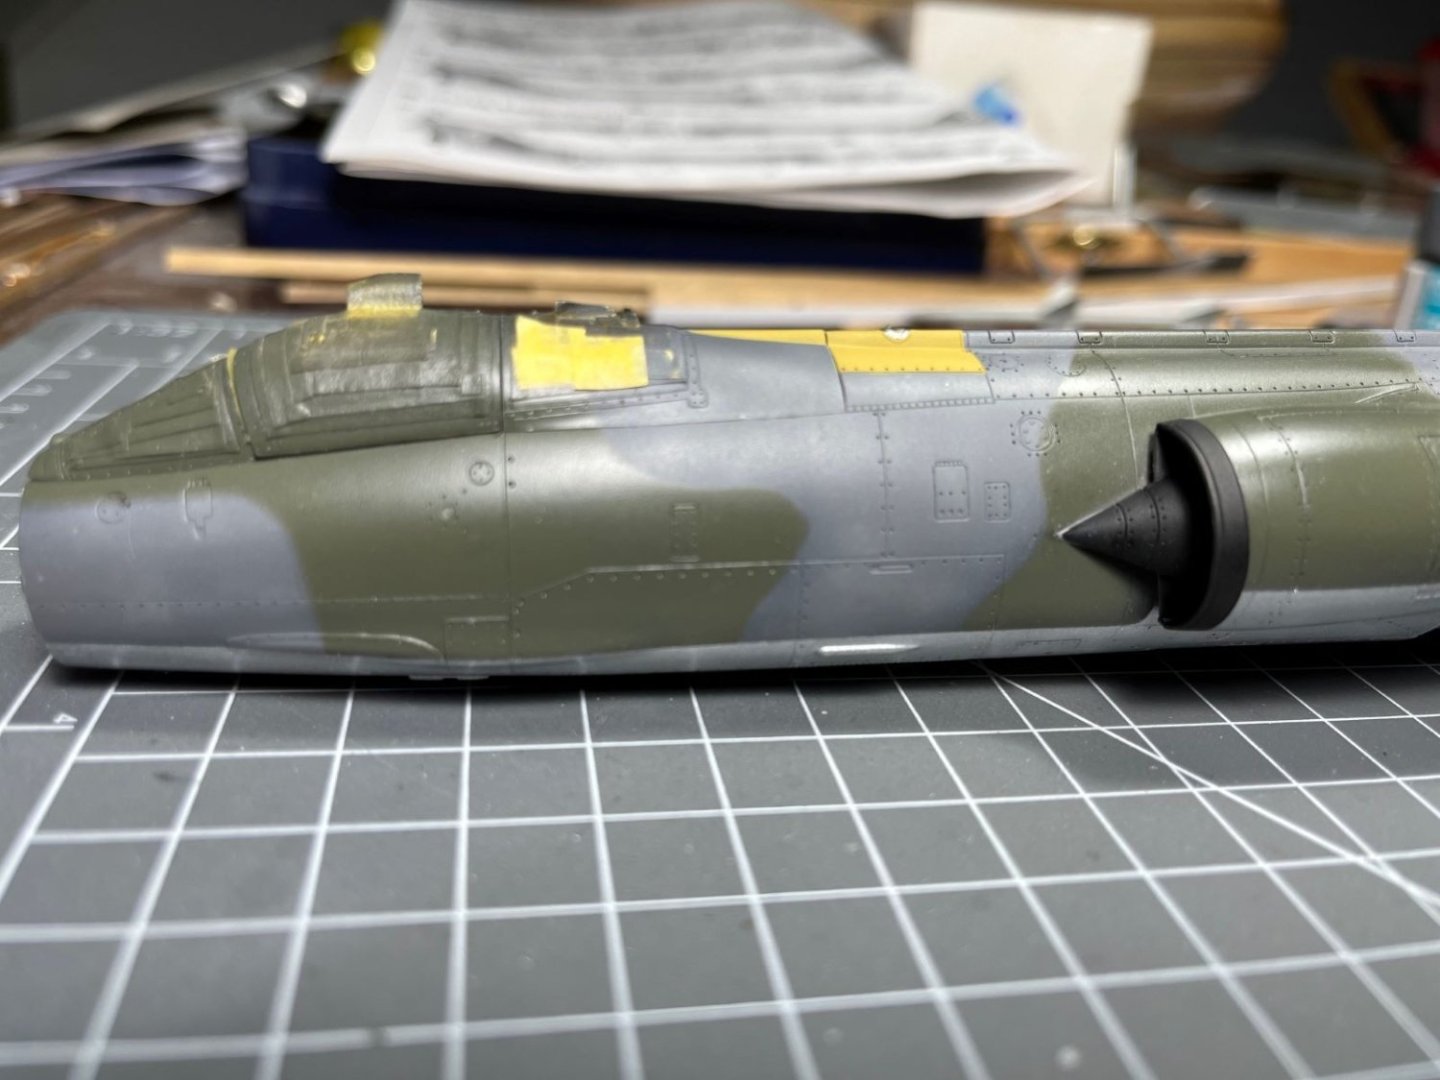
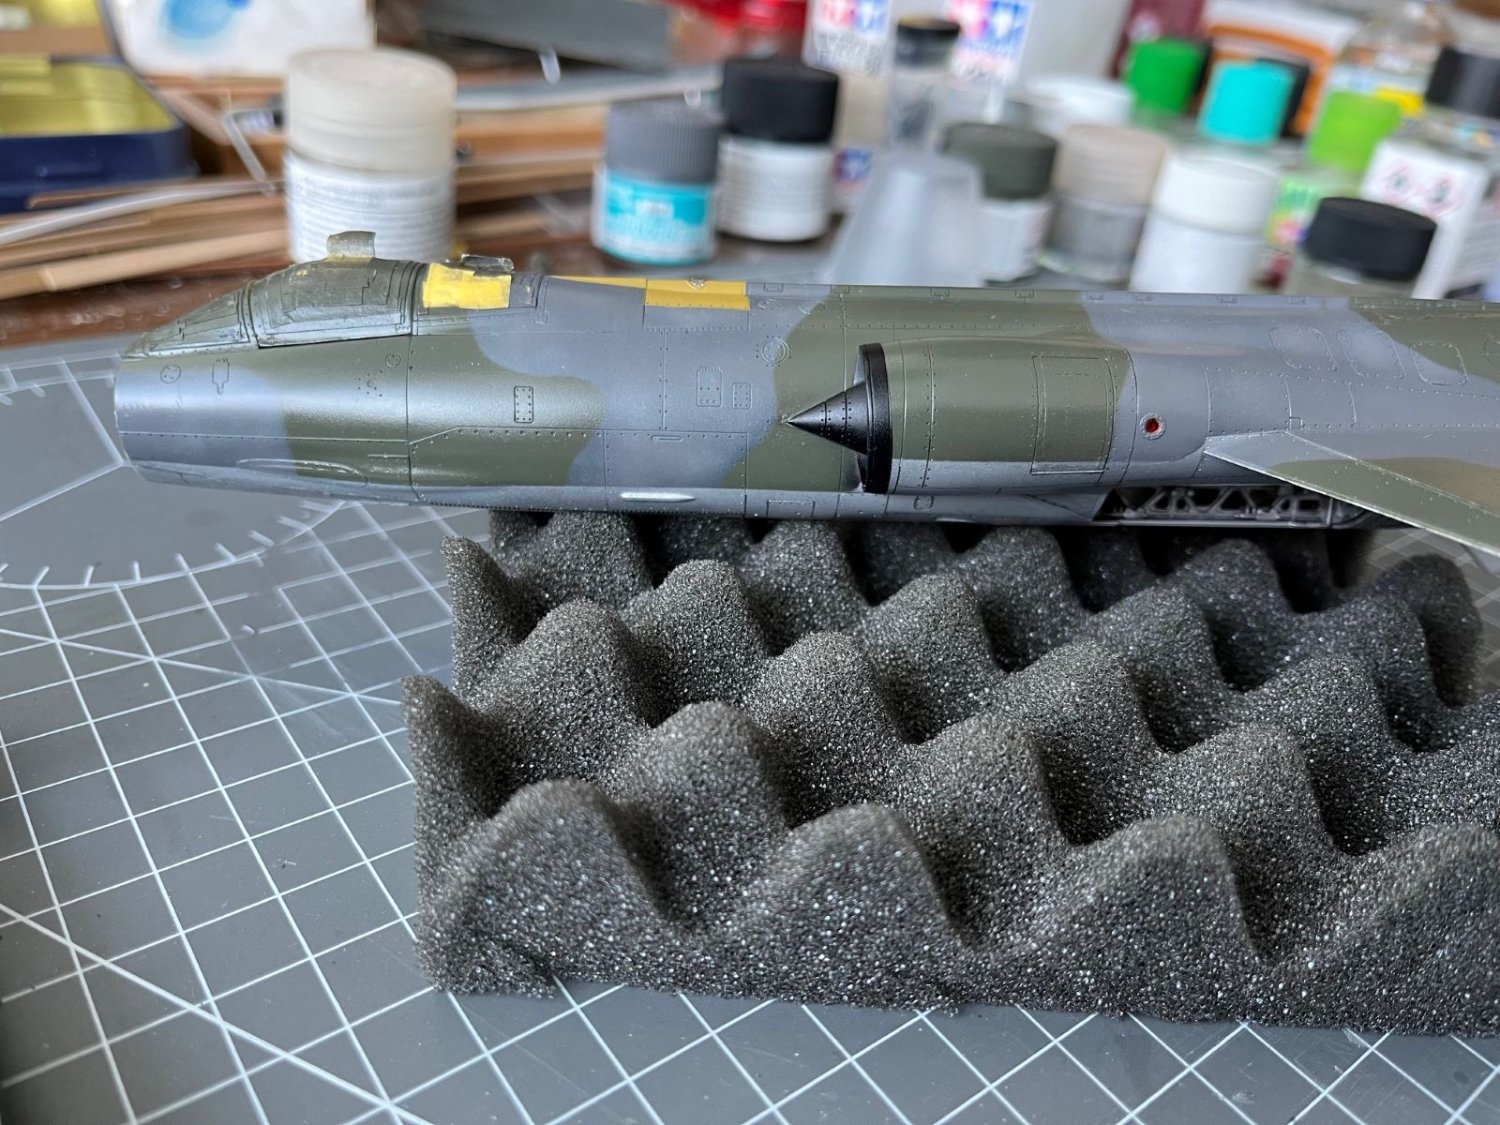
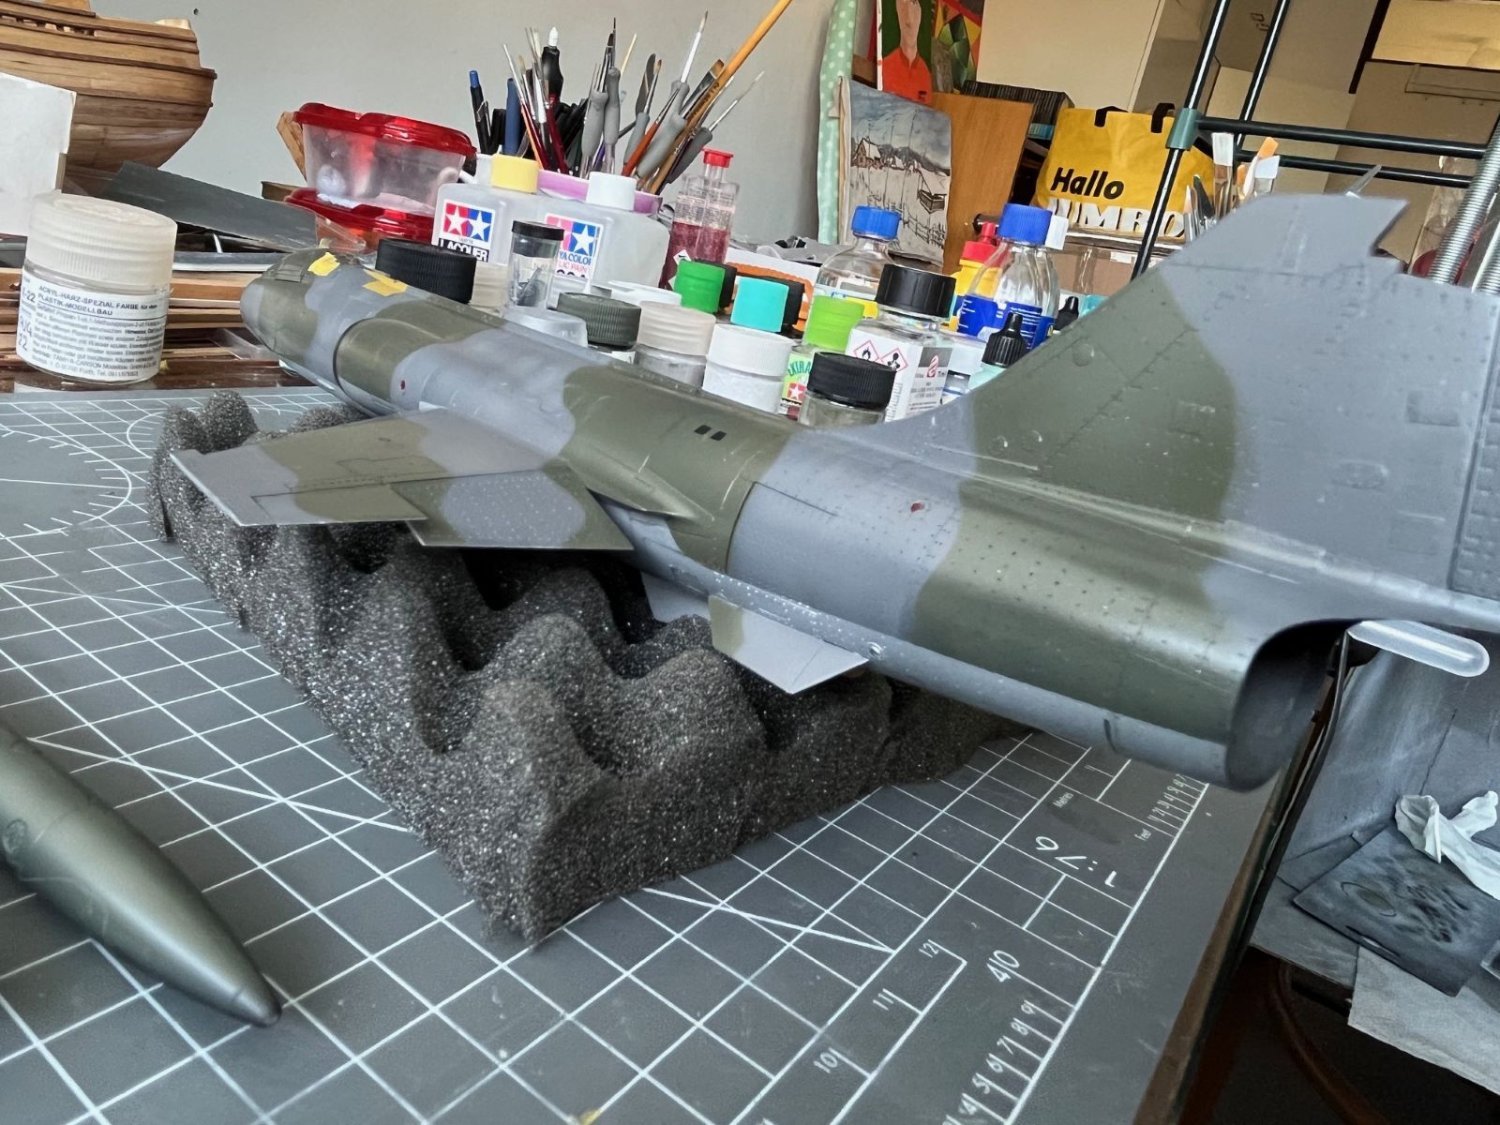
working on touching up blemishes on the livery, I had one of my seniority moments, when re-spraying the aluminium paint, I made the masking few centimeter shy of what was needed and I got this:
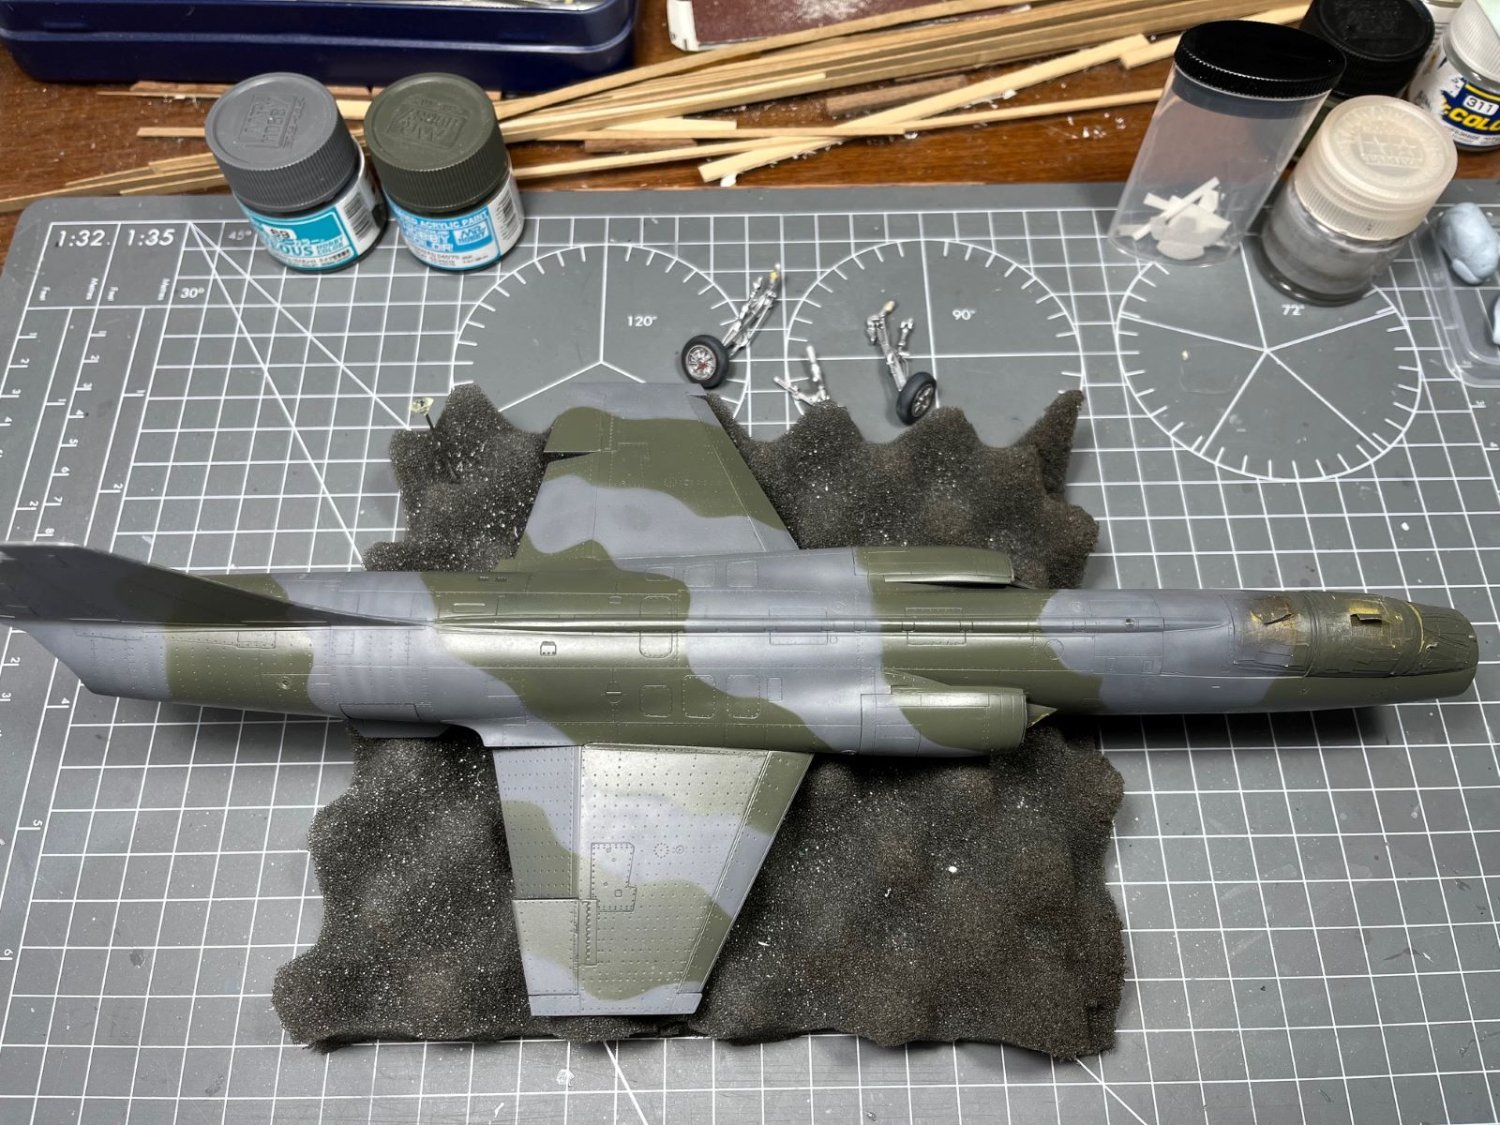
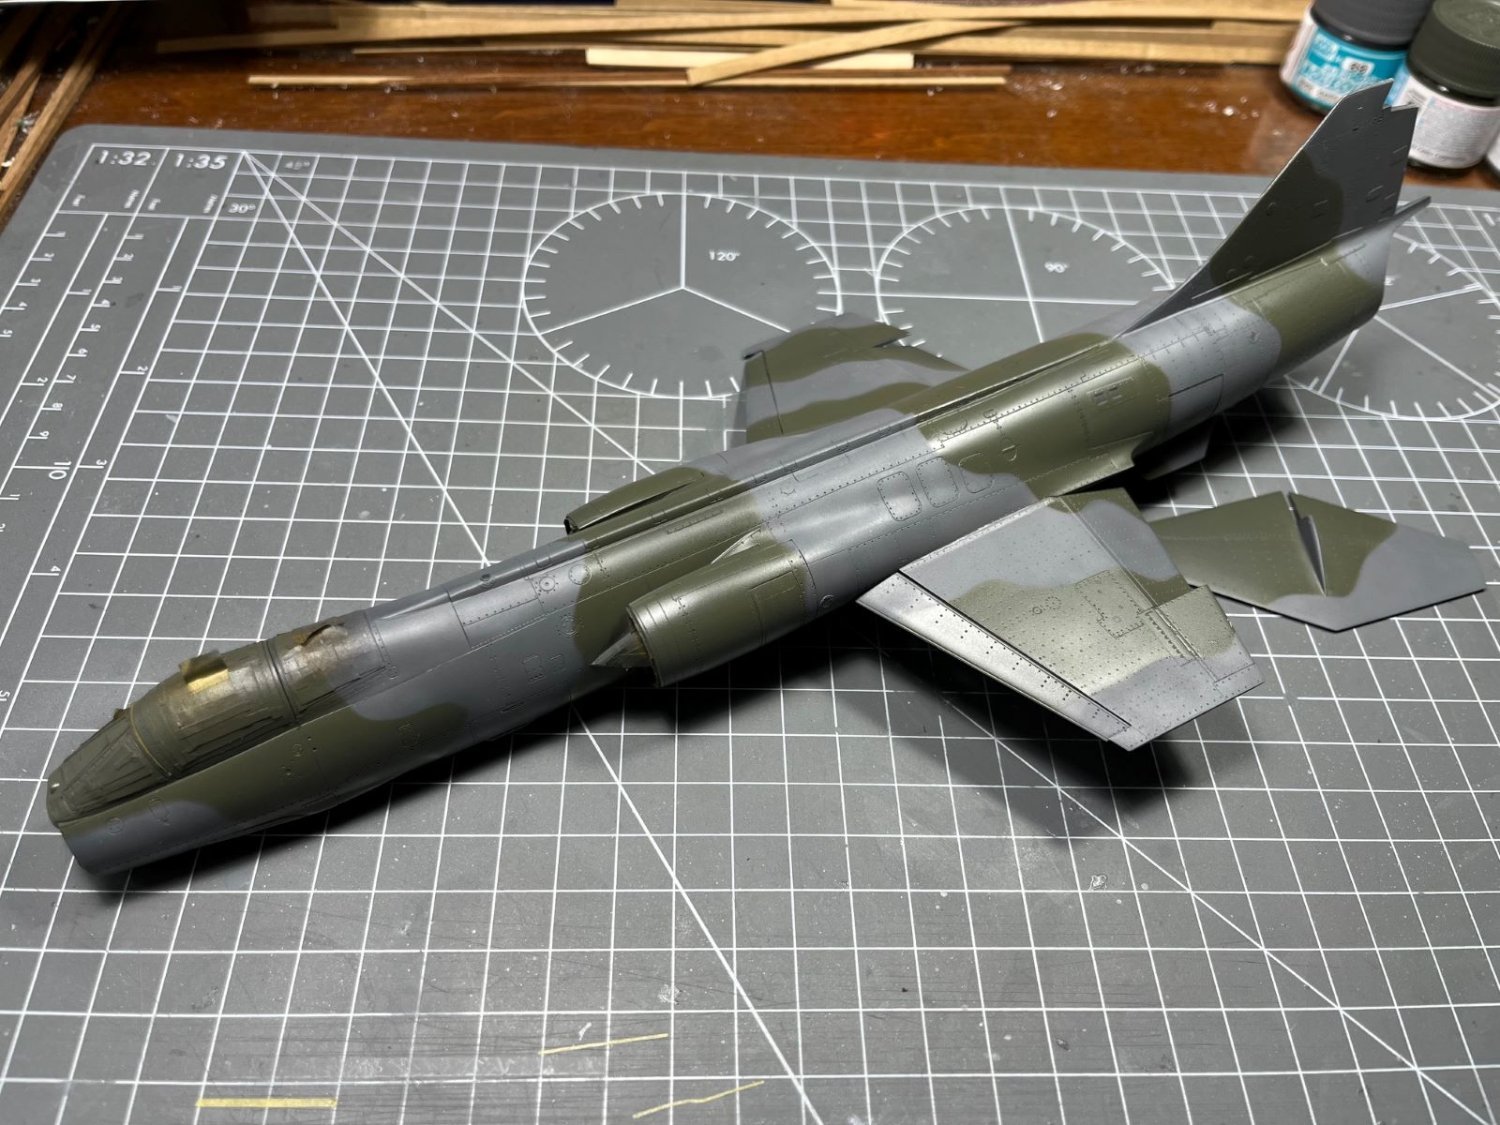
I hate when this happens, just a couple of tape stripes more could have avoided that. So, back to the camo colors to repair the damage. This is eventually the end result, with most of the blemishes addressed and the rudder and the leading edge slats finally glued on.

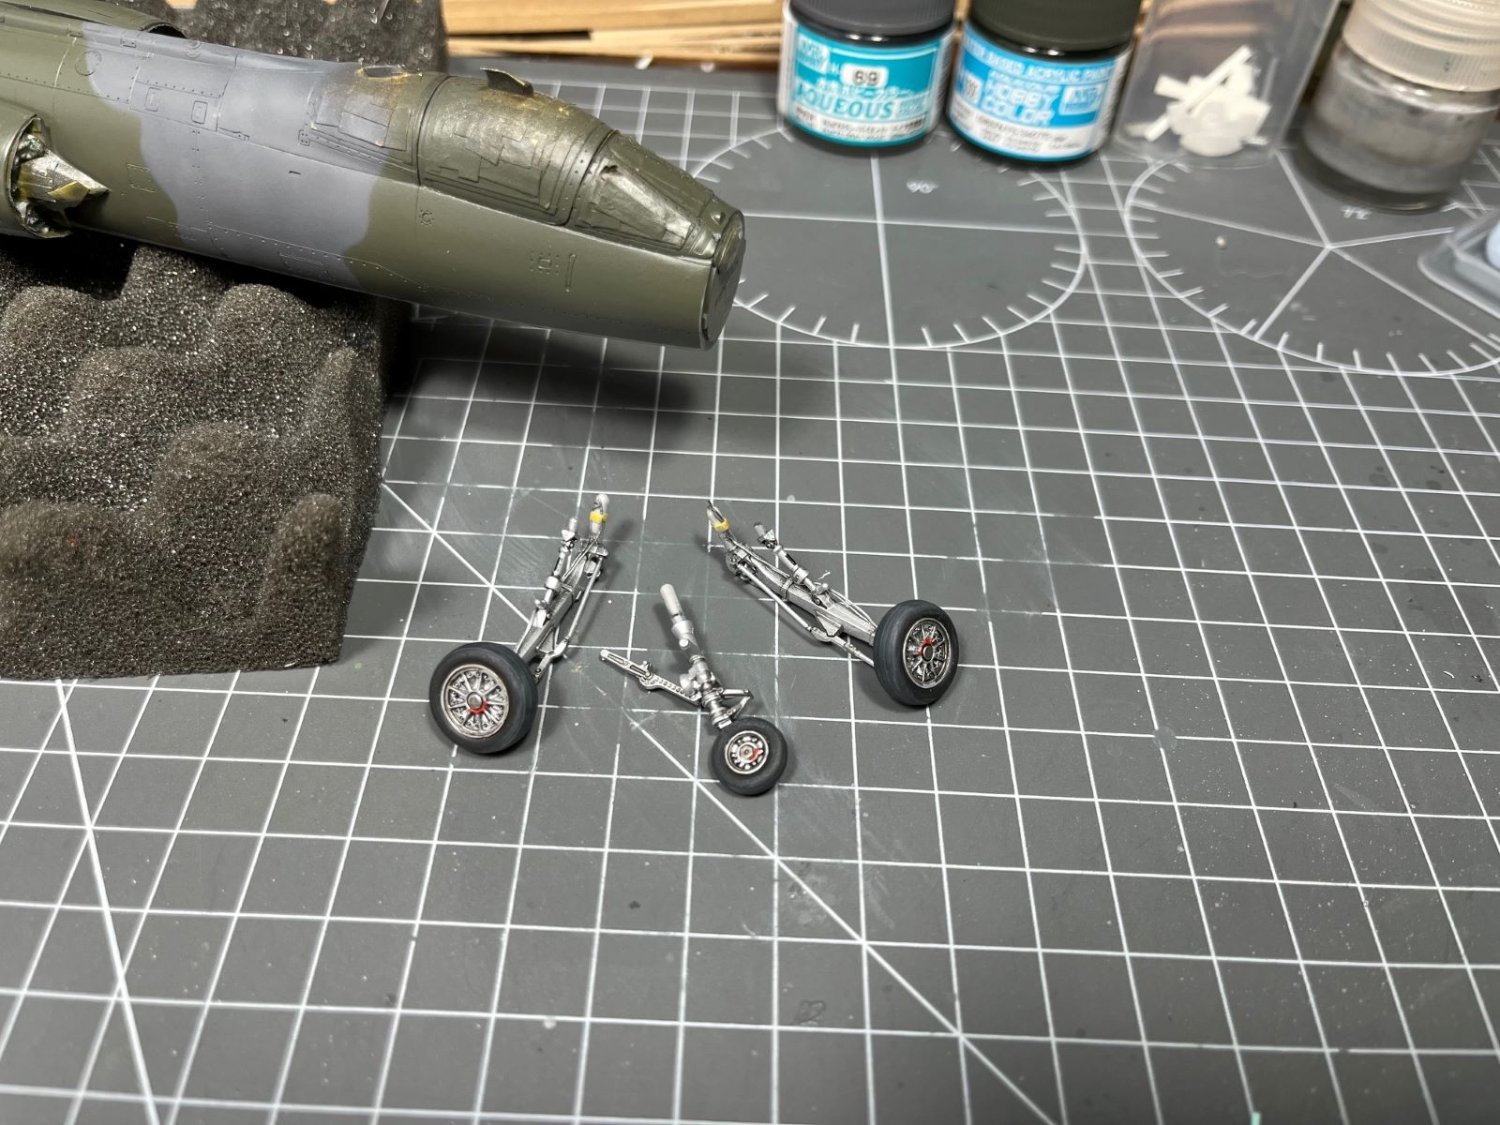
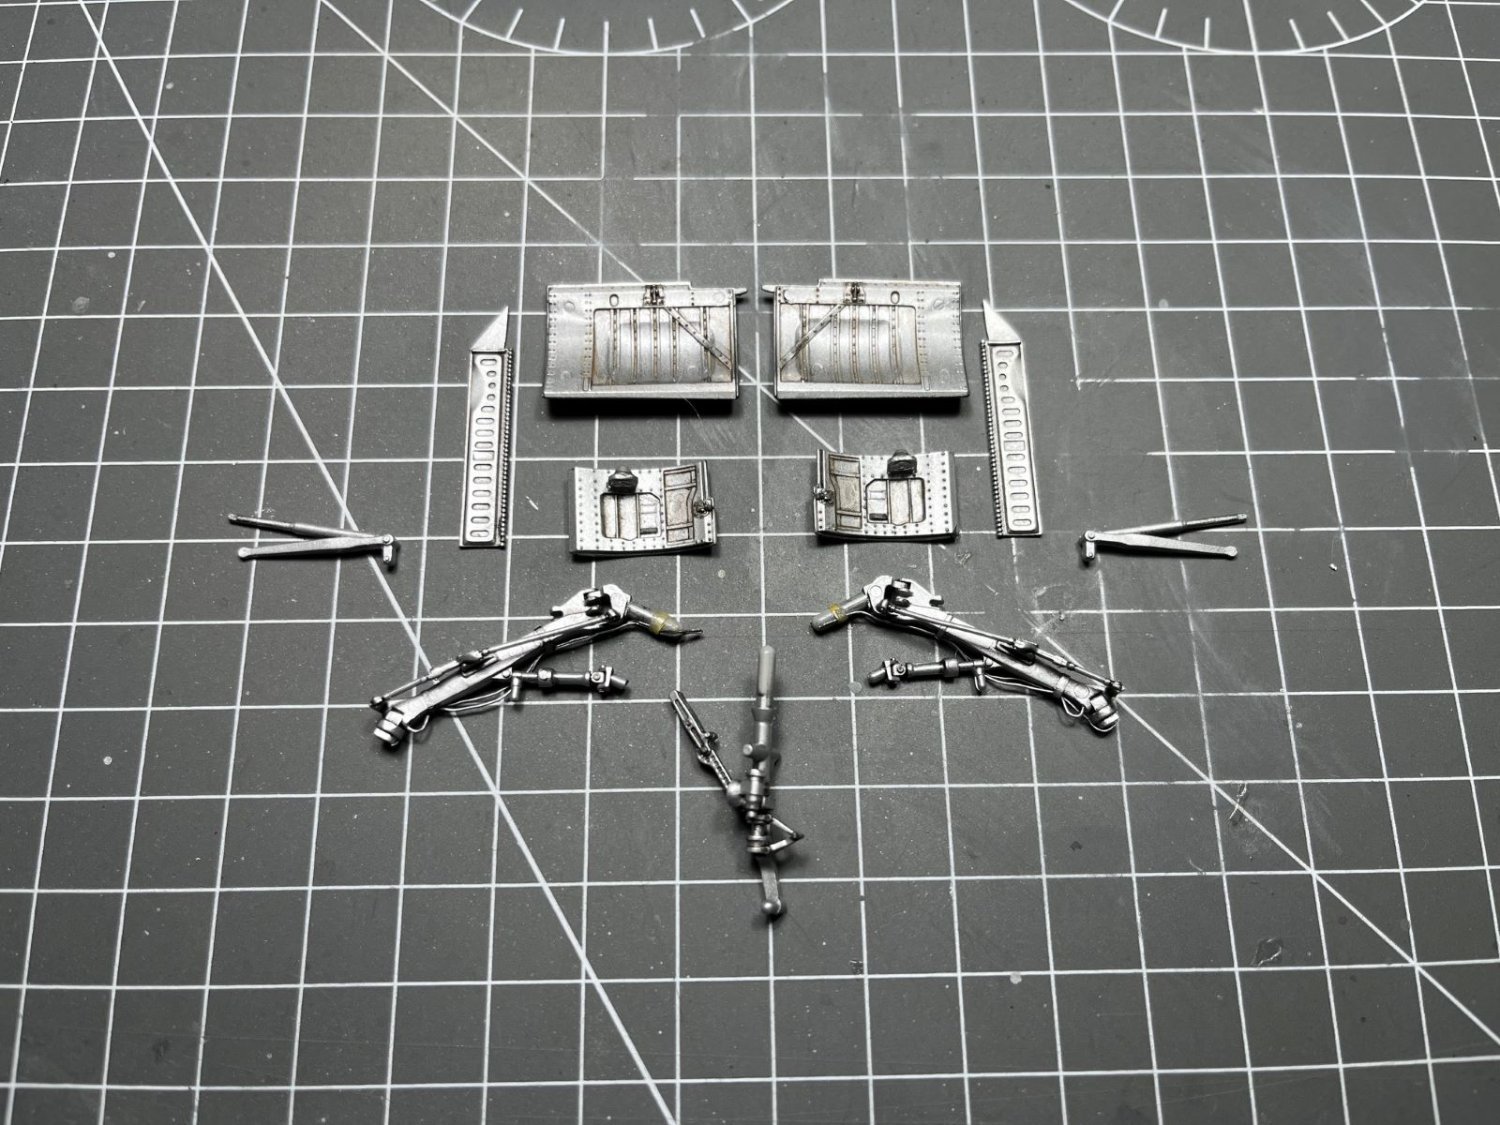
In between, I also managed to finish the landing gears adding the finished wheels:
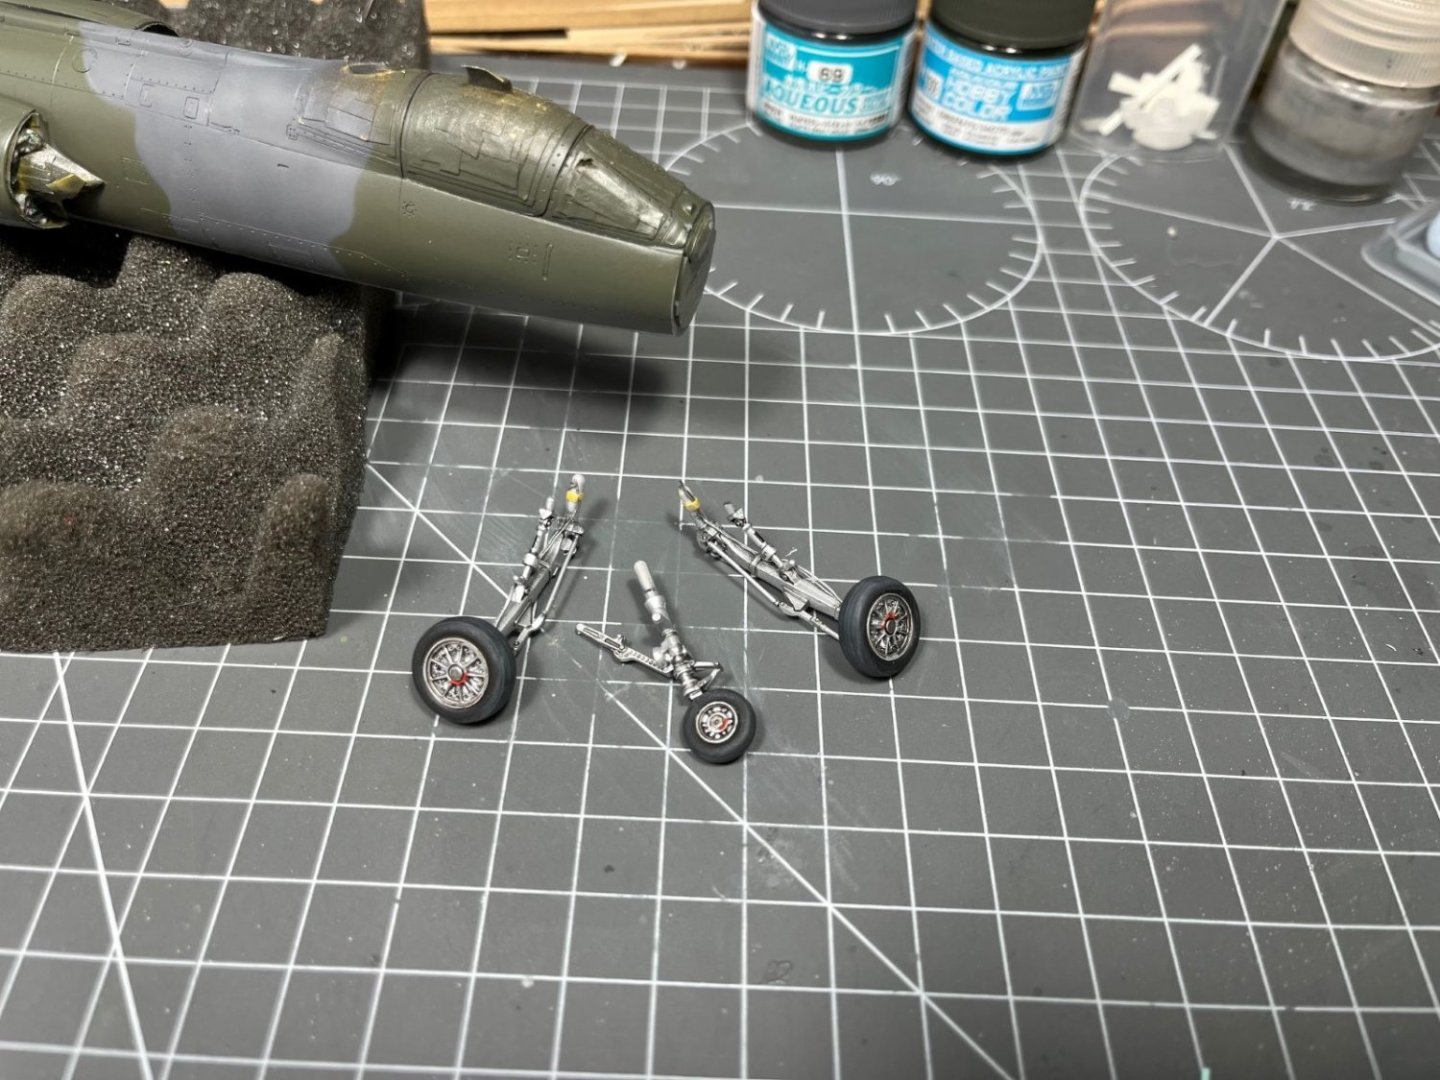
A nice addition was the pitot probe that is a brass aftermarket from Master:
.thumb.jpg.7471bd57c9cdf57f8b4960c18521ce09.jpg)
I love these brass addition from this company in Poland, they are really sharp and accurate and can greatly enhance the usually sloppy bits like, pitot tubes, gun barrels, etc. Here the nose cone is just dry tested. I wonder how many times I will knock it off before the end.
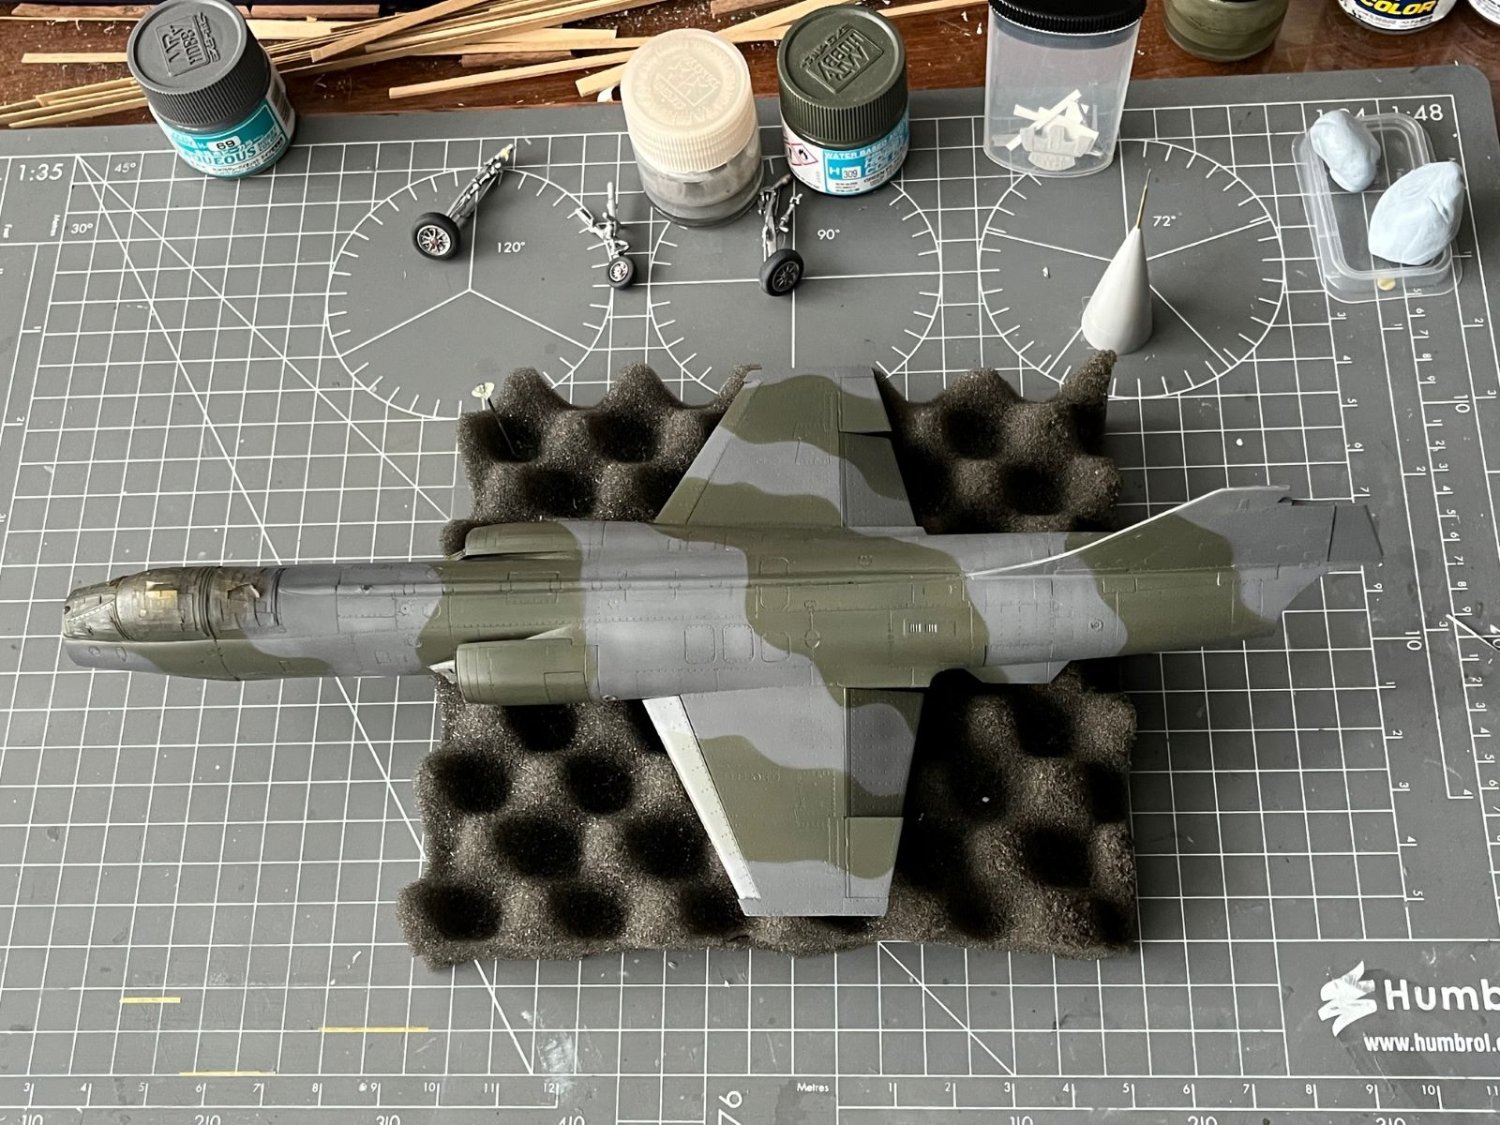
Finally, another picture of the overall airframe this time taken with natural light to better appreciate the real hue of the camouflage colors:
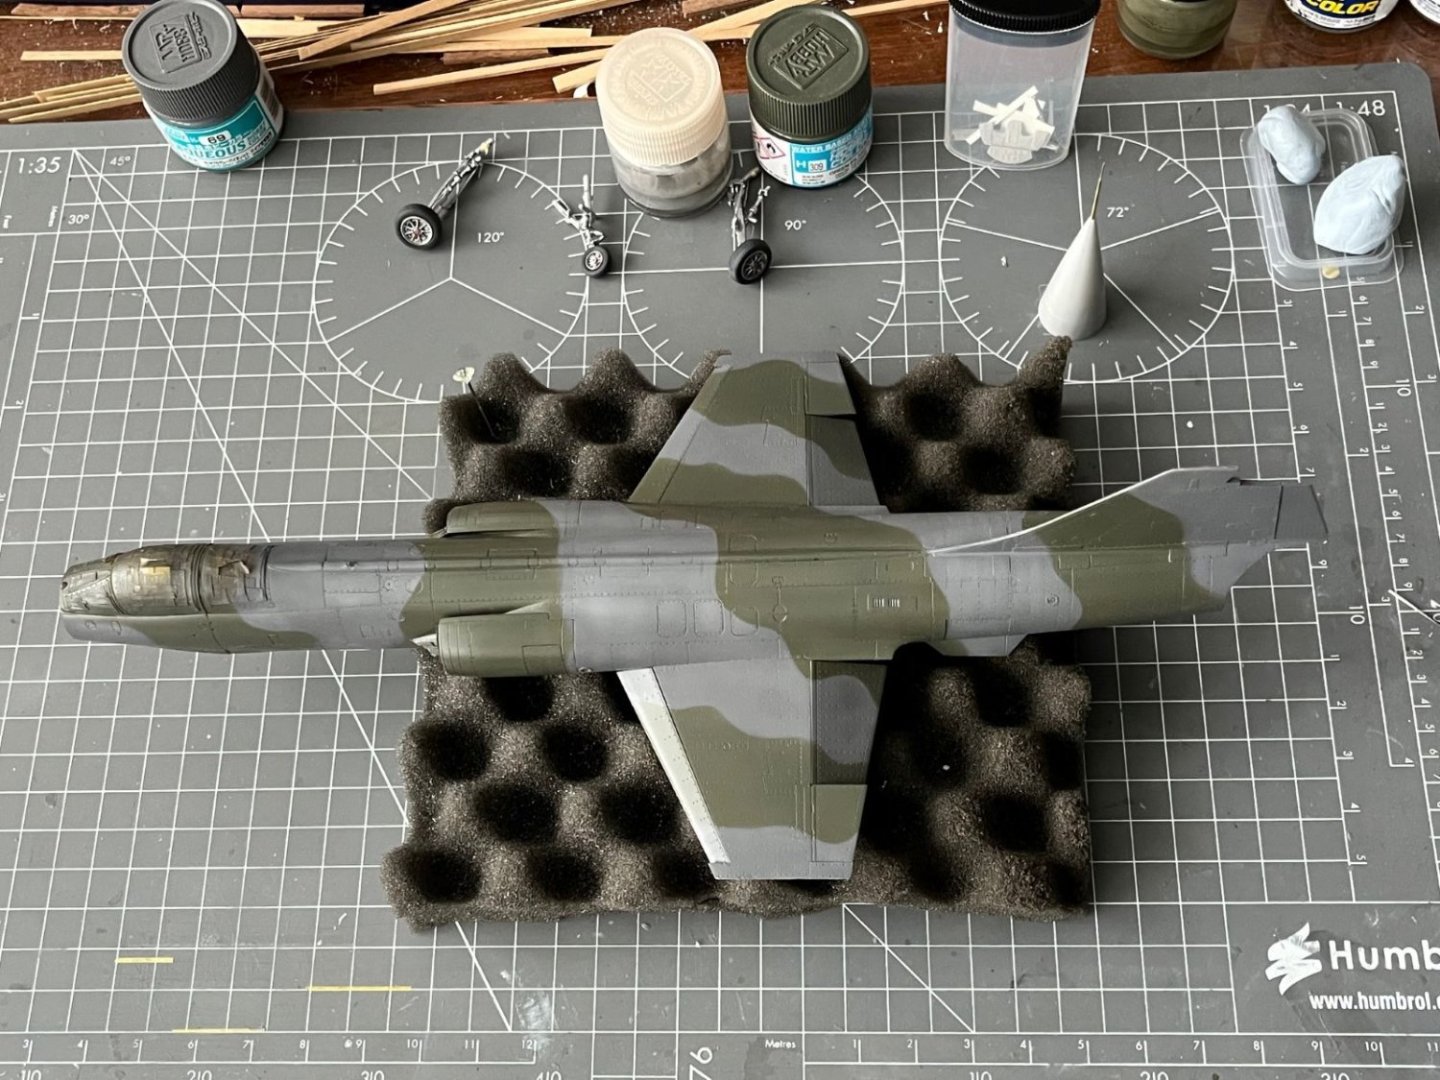
Now everything is ready for the gloss coat which I will spray after the paint touch-ups are well cured. Meanwhile, I have to start thinking of the external loads, having Hasegawa provided only the tip tanks in the kit.
Cheers,
Dan
- Egilman, Landlubber Mike, GrandpaPhil and 9 others
-
11
-
 1
1
-
11 hours ago, CDW said:
The Ferrari 288 GTO yellow body was set aside for paint drying/curing time. Yesterday I wet sanded it with 4000 grit. As I kept looking at it, it just seemed to me the yellow was not the correct shade for Ferrari.
Indeed, I refrained to comment earlier, but the earlier yellow was too 'cold', now it is much better. To many, red is the color for a Ferrari, but, personally, I think the nothing can beat a yellow Ferrari.
Coming back to the color, I read that the best substrate for yellow is actually pink. I am surprised and I never tried it, just mentioning as a curiosity.
Very nice work on your Ferrari, curious to see more.
Dan
- Old Collingwood, Egilman, CDW and 2 others
-
5
-
Hi,
I went on with the main airframe, I wanted to apply the remaining aluminium paint on the underside. The Italian painting scheme of the '70s had the underside painted with a matt aluminium which I am replicating with Metallic color 'white Aluminium' by Vallejo. The finish of this paint isn't matt, but it doesn't matter because it will be adjusted to the correct finish.
Here is the model ready to be sprayed:

Here the result:

The demarcations with the camouflage are quite ok, with only few oversprays to be addressed:

The overall look resembles quite well the scheme seen in period pictures (and it also matches my memories).
Now, while the paint cures, I will continue with the small parts.
Best regards,
Dan
-
Hi Mike,
thanks for your comments.
About you question about wet sanding, in preparing the model, I went through progressively finer sanding, smoothing and rescribing or rebuilding details in specific areas. Even after priming these areas, I found blemishes to be addressed and locally sanded down to 1000 grit, sometimes wet. After the final coat of priming (1), when no blemishes were found anymore (or almost), I went through the complete model with a wet 2000 with the paper well soaked in water and with a very light touch. This eliminates any possible granularity of the paint and left the surface as smooth as silk. This was a good start for the camo colors. Possibly, I will sand the entire airframe after the clear coat with even finer grits (3000 or 4000, always wet) and even after the sealing of the decals. At the end, my aim is to have a silk smooth finish that even with a matt coating will possibly reflect light as an 'egg shell' imitating as far as possible the light reflections seen in pictures. This is an approach that works well for me and every time I try new procedures, but be aware that is easy to remove too much color and spoil the work done until then (2).
Happy modeling,
Dan
(1) Note that if you insist with priming you might obliterate surface details. In this build, I intentionally tried to obliterate details (as much as practical) on wings and tail surface.
(2) For this, I have procured sanding pads with grits from 3000 to 12000, although I never used the finest range which I believe are good for glossy finish of car models.
-
Hi all,
a small update of my build, while working on the camouflage, I started to work also on the preparation of the landing gear pieces. I cleaned all the parts, filling extractor marks and furnishing them with some wiring simplifying what seen in the pictures of the real thing.
Then a black primer followed:
Finally, I sprayed them with a metallic white alumimium along with their L.G. bay doors. At the end, I picked up some details with Tamiya black and brown panel accent liners.
I will complete them with little placards that I will obtain from pieces of black decals. Landing gears are one of my favorite subject and generally, with little attention they can be improved quite a bit.
That is all for now,
Best regards,
Dan
- Canute, yvesvidal, GrandpaPhil and 9 others
-
12
-
-
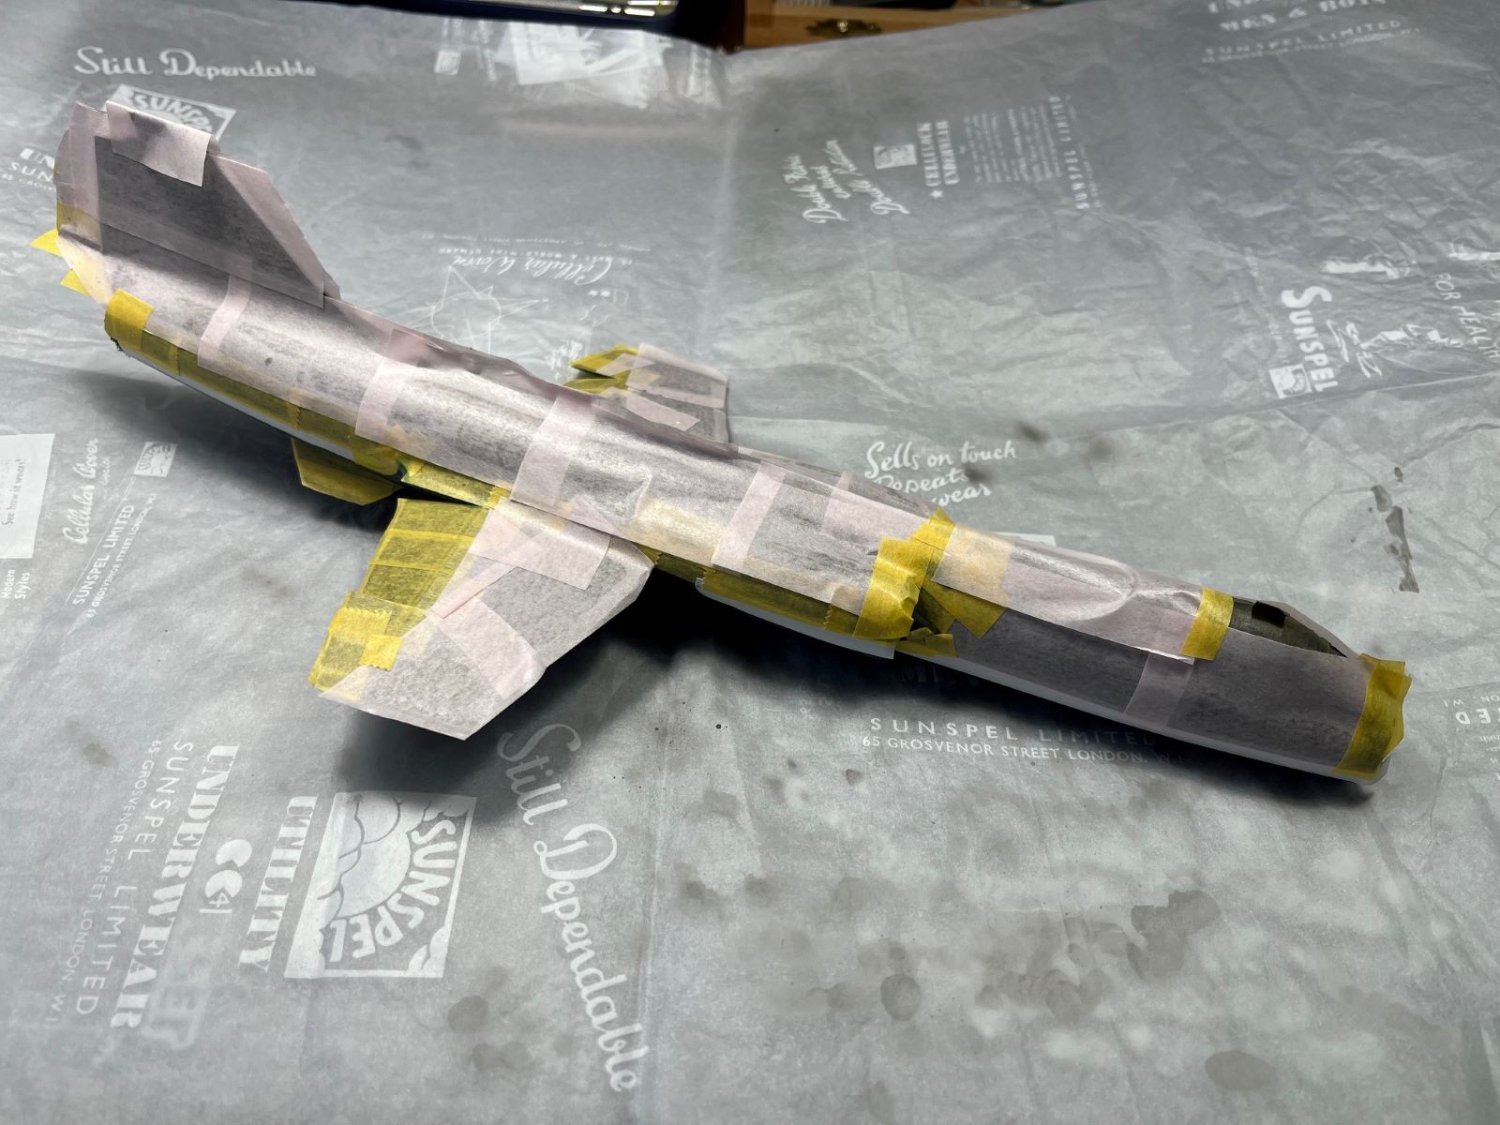
Hi,
I went on with the camouflage and prepared the masking for the dark green. Instead of preparing paper masks, I eventually decided to go with rolls of blu-tack.
For the green, I used the Gunze H-309 which is supposed to be a good match for the Italian Verde Scuro 26 (FS34086), although it turned out a tad too light in my view.

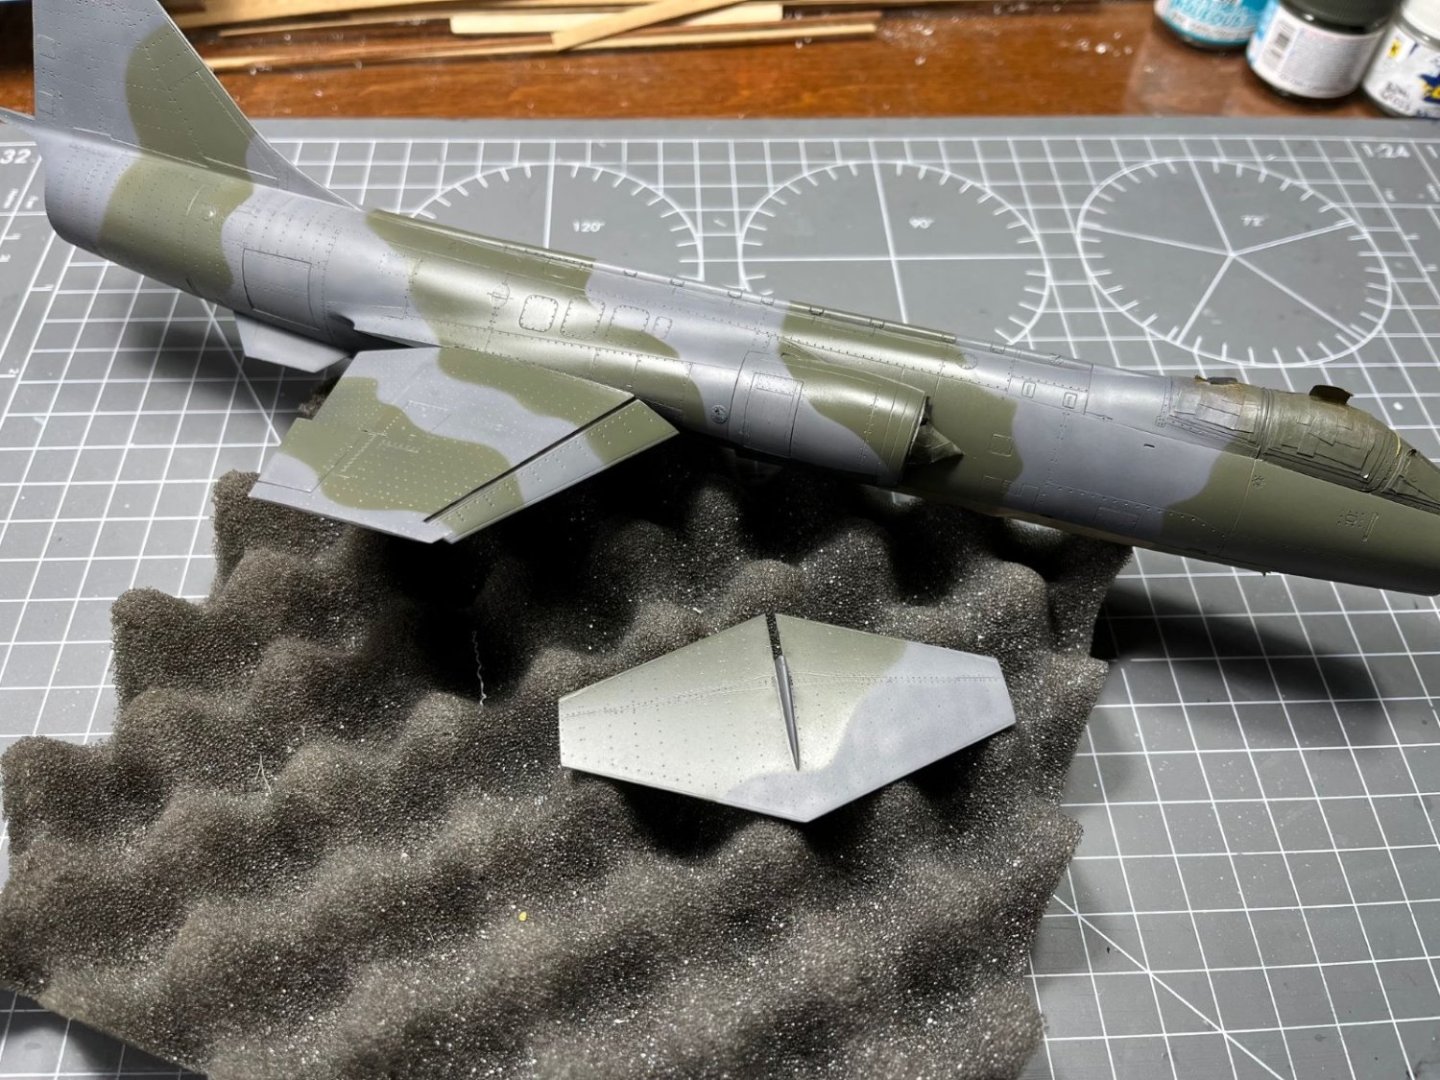
The blu-tack rolls were supposed to deliver a slightly feathered edges, but, instead, this effect is almost unnoticeable. At any rate, the paints went on very smoothly and I think the result is quite acceptable and resemble very much a NATO finish of the '70s. Only few touch ups here and there will be necessary. Next step will be the aluminium paint on the bottom to conclude the main paint job of the airframe.
Best regards,
Dan
-
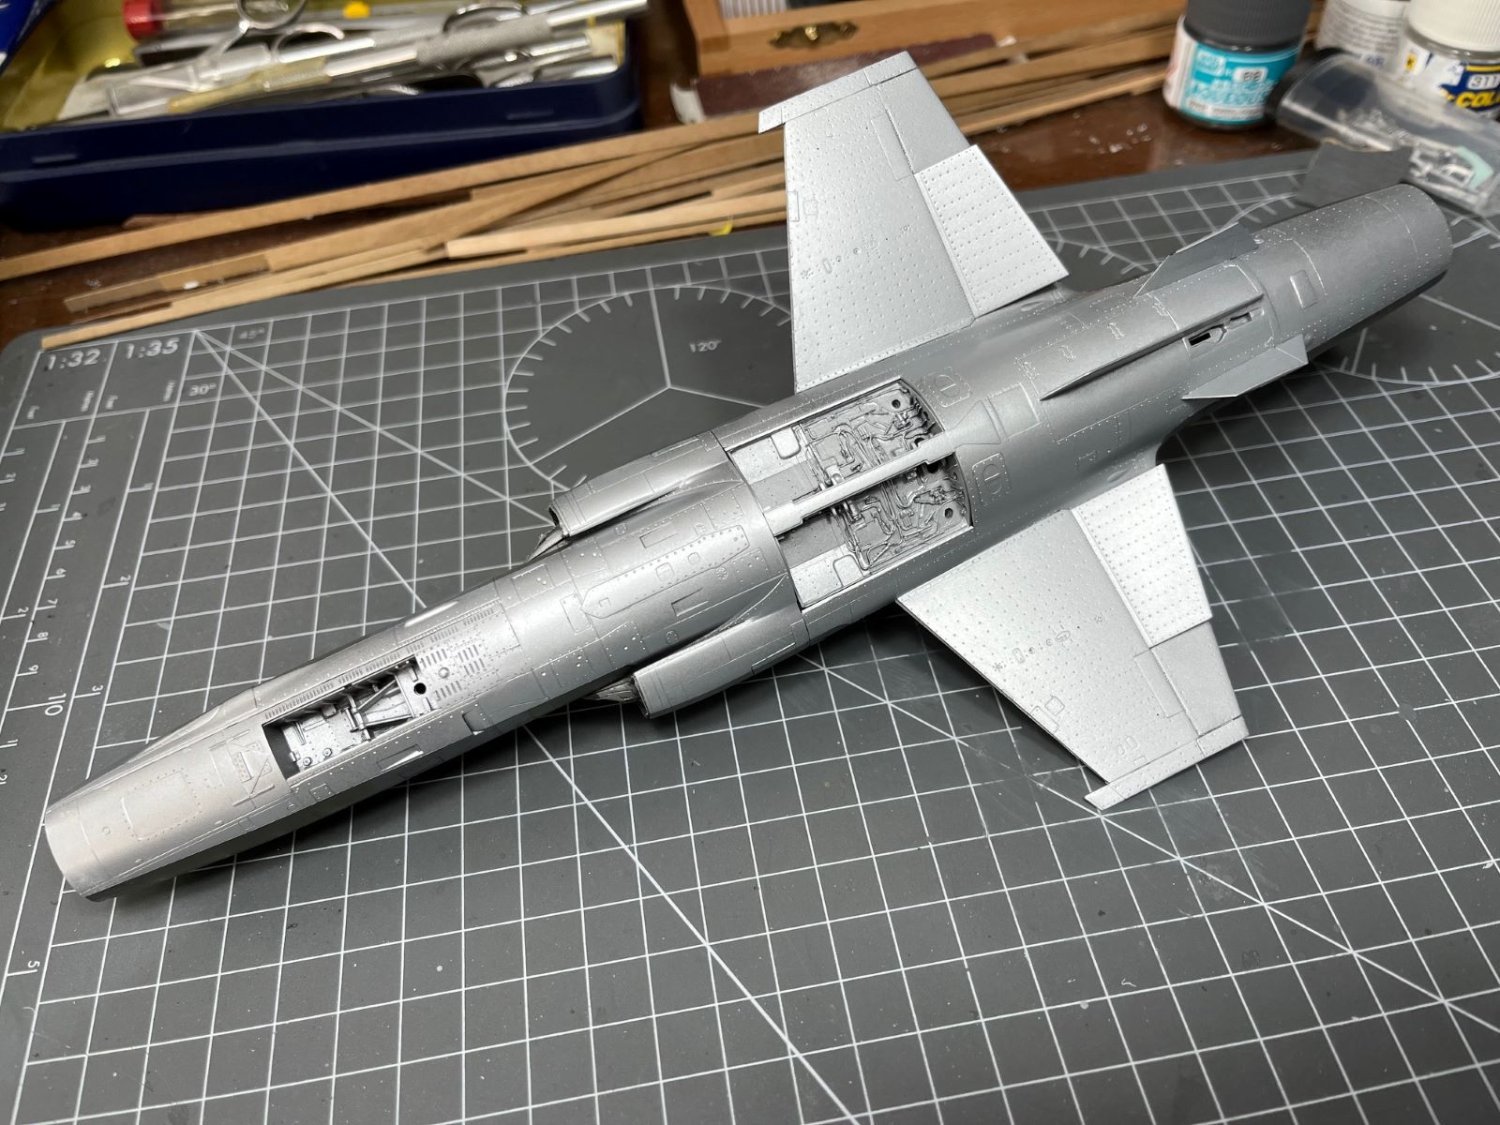
Hi, I completed the black coat and after having corrected the little defects, I got a black Starfighter:

After an overall wet sanding with 2000 grit, I started with spraying the camo colors. The first color, in the Italian denomination Grigio Mare Scuro 27 – FS36152 (dark sea grey) corresponds well with Gunze H-69. The original grey paint underwent to quite a noticeable discoloration on the real aircraft (differently from the green), hence I started with adding a little white to the paint and sprayed it in random patterns to get a non-uniform coverage.
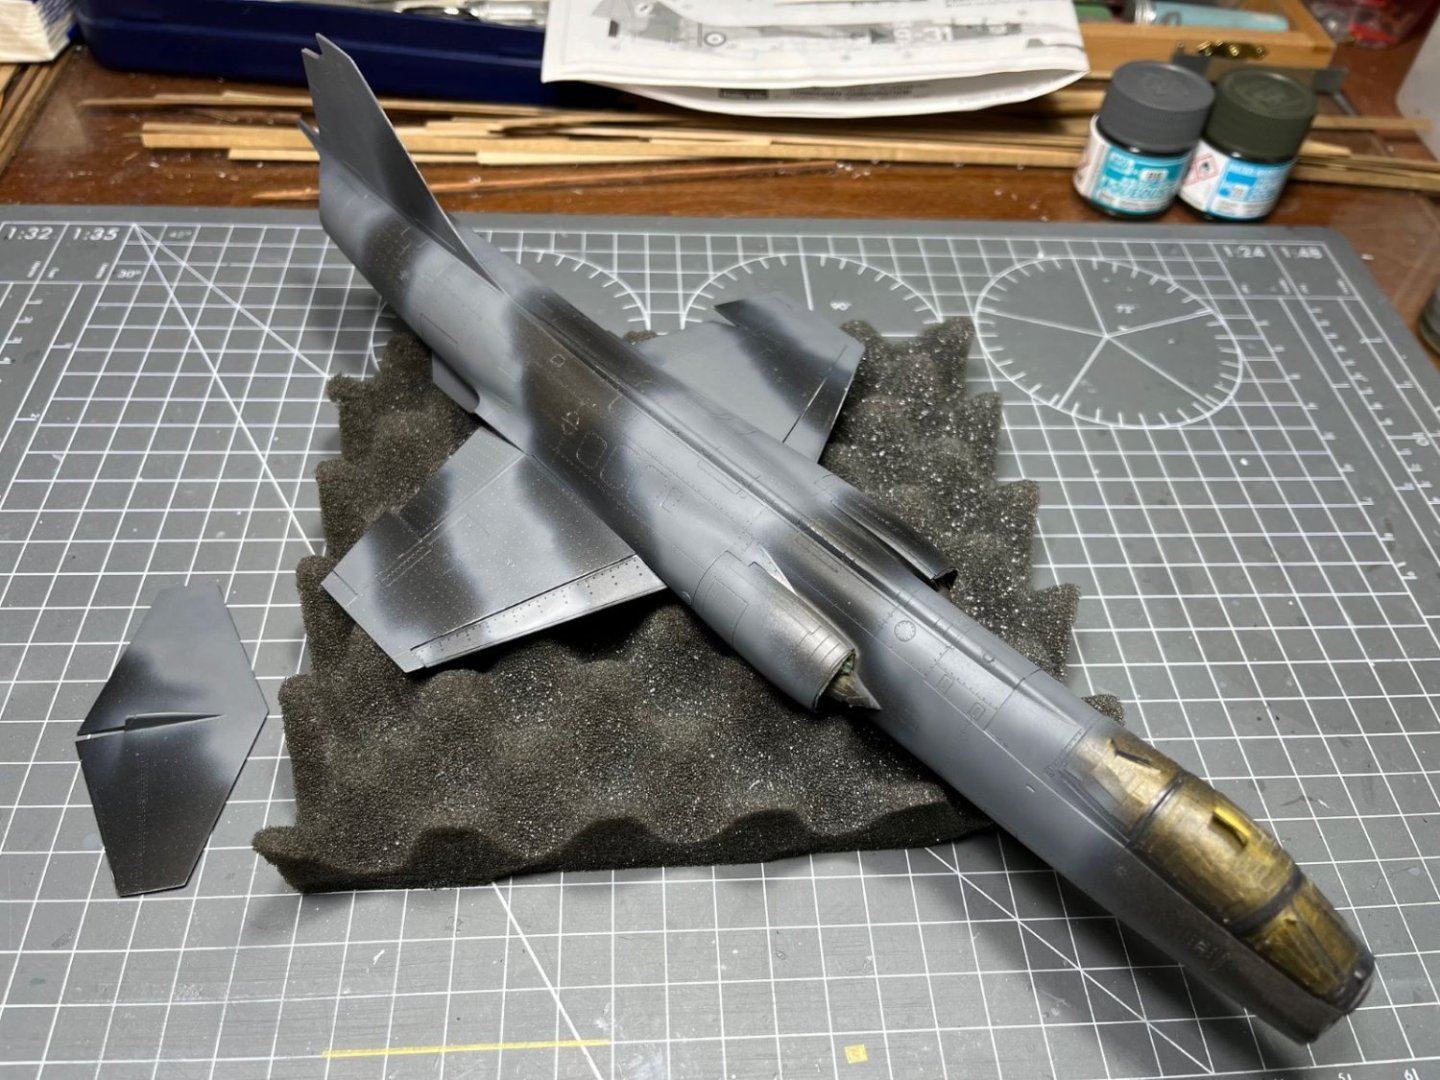
To represent the patchy appearance showed by pictures of the aircraft, I added mottles of paint with more white added in it.


Now, I need to prepare paper masks before spraying the green.
Best regards,
Dan
-
Very nice result, the quintessence of early aviation. I smile at the opening in the center of the upper wing, where the lift loading was the highest.
Best regards,
Dan
- Ryland Craze, Dave_E, Jack12477 and 11 others
-
14


.jpg.3baa2202dc0c0dd3b425f84d6be92d28.jpg)


Lockheed-Aeritalia F-104S by Danstream - FINISHED - Hasegawa - 1:48
in Non-ship/categorised builds
Posted
Hi guys, thank you very much for your kind messages for my retirement 🙏. I have still to get used to my new status and I am spending a lot of time in front of the PC, responding mails, doing administration and paying bills. I see from your messages that all that is to be expected. I need also to do some works in the house which remained a bit behind all these years. I will be missing my work, the business trips in most of the significant places in Europe, the launch campaign in French Guiana and the last recent one at Cape Canaveral, however, I will not be missing the Monday morning project report meetings.
Back to modelling, thanks for commenting positively my work. I am still working on the ordnance pylons, every second day I find new pictures that show different arrangements. Most probably, configurations changed along the years and I have to draw a line and stop modifying. My intention is also to resume naval modelling which languished for long time.
Indeed, the sheet is very packed and I already spoiled one of the items. I am now much more careful and I am using a sharp knife instead of the scissors.
Best regards,
Dan