


GGibson
-
Posts
530 -
Joined
-
Last visited
Content Type
Profiles
Forums
Gallery
Events
Posts posted by GGibson
-
-
Excellent work on the turnbuckles, John! My $0.02 would be either aluminum or a brass-like gold. For my bowsprit turnbuckles, I purchased some "pre-made" ones that turned out... ok. But, now that I have a mill machine, I believe I could make some even better like yours here. And all of the tubing that I have is brass. Hmmm... I think there are some more turnbuckles higher in the rigging, isn't there?
- John Ruy and Glen McGuire
-
 1
1
-
 1
1
-
6 hours ago, JSGerson said:
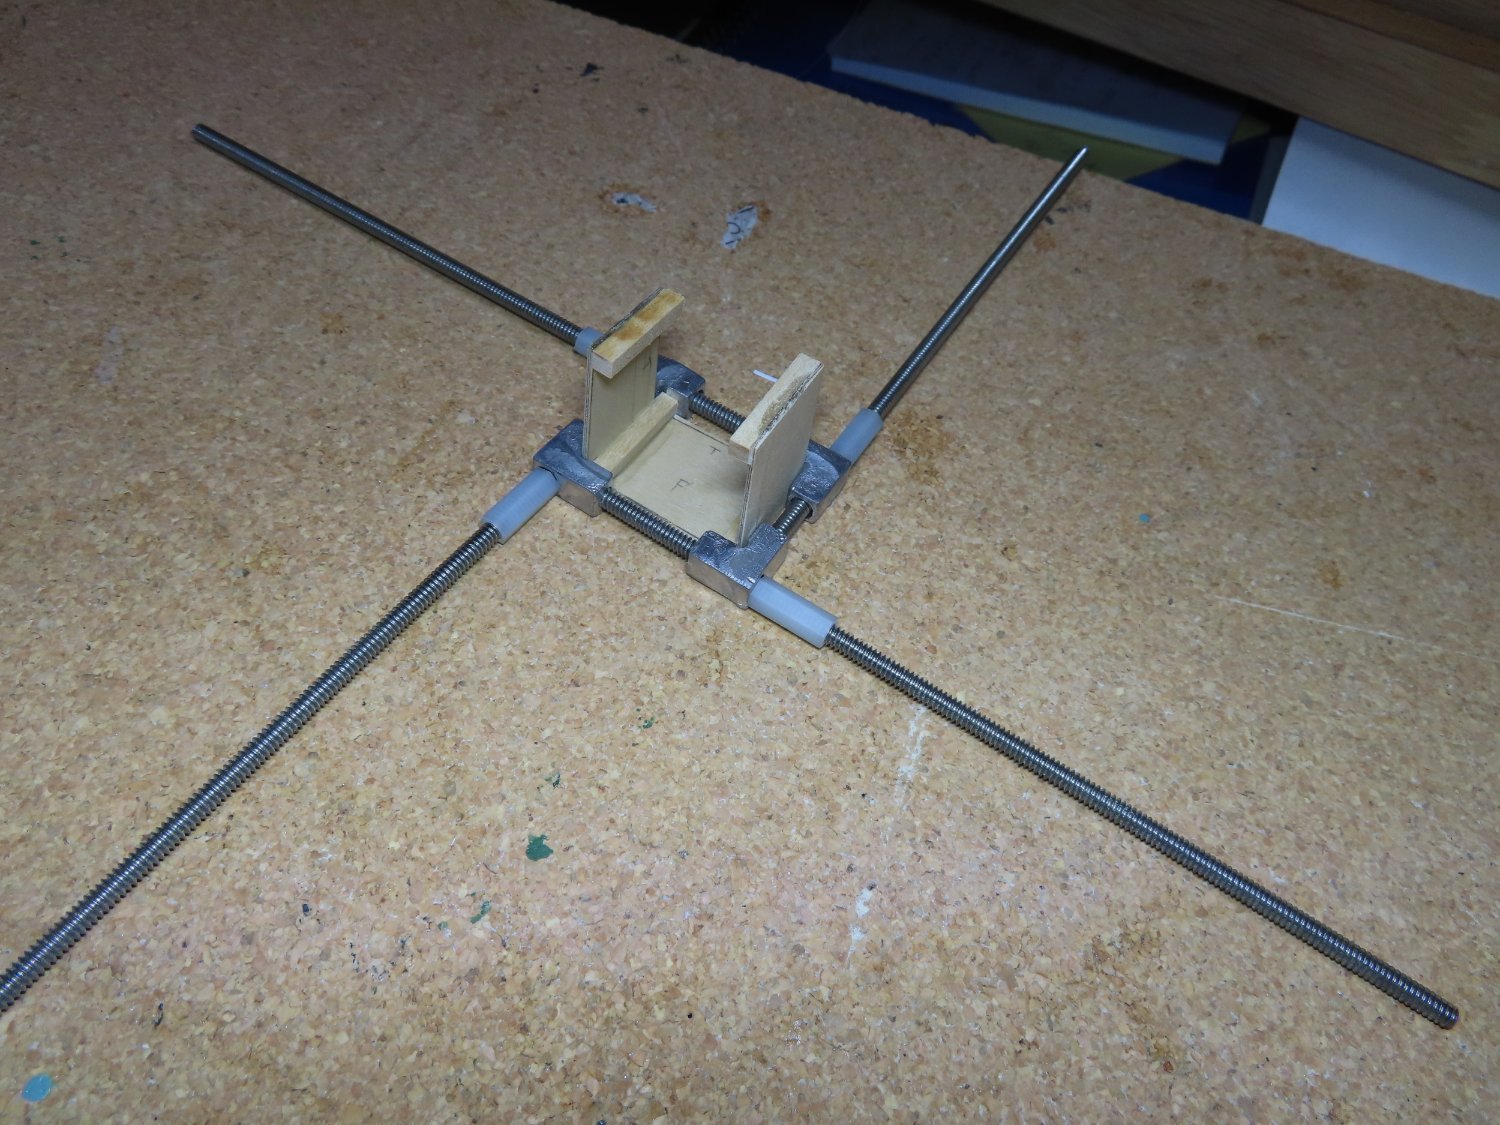
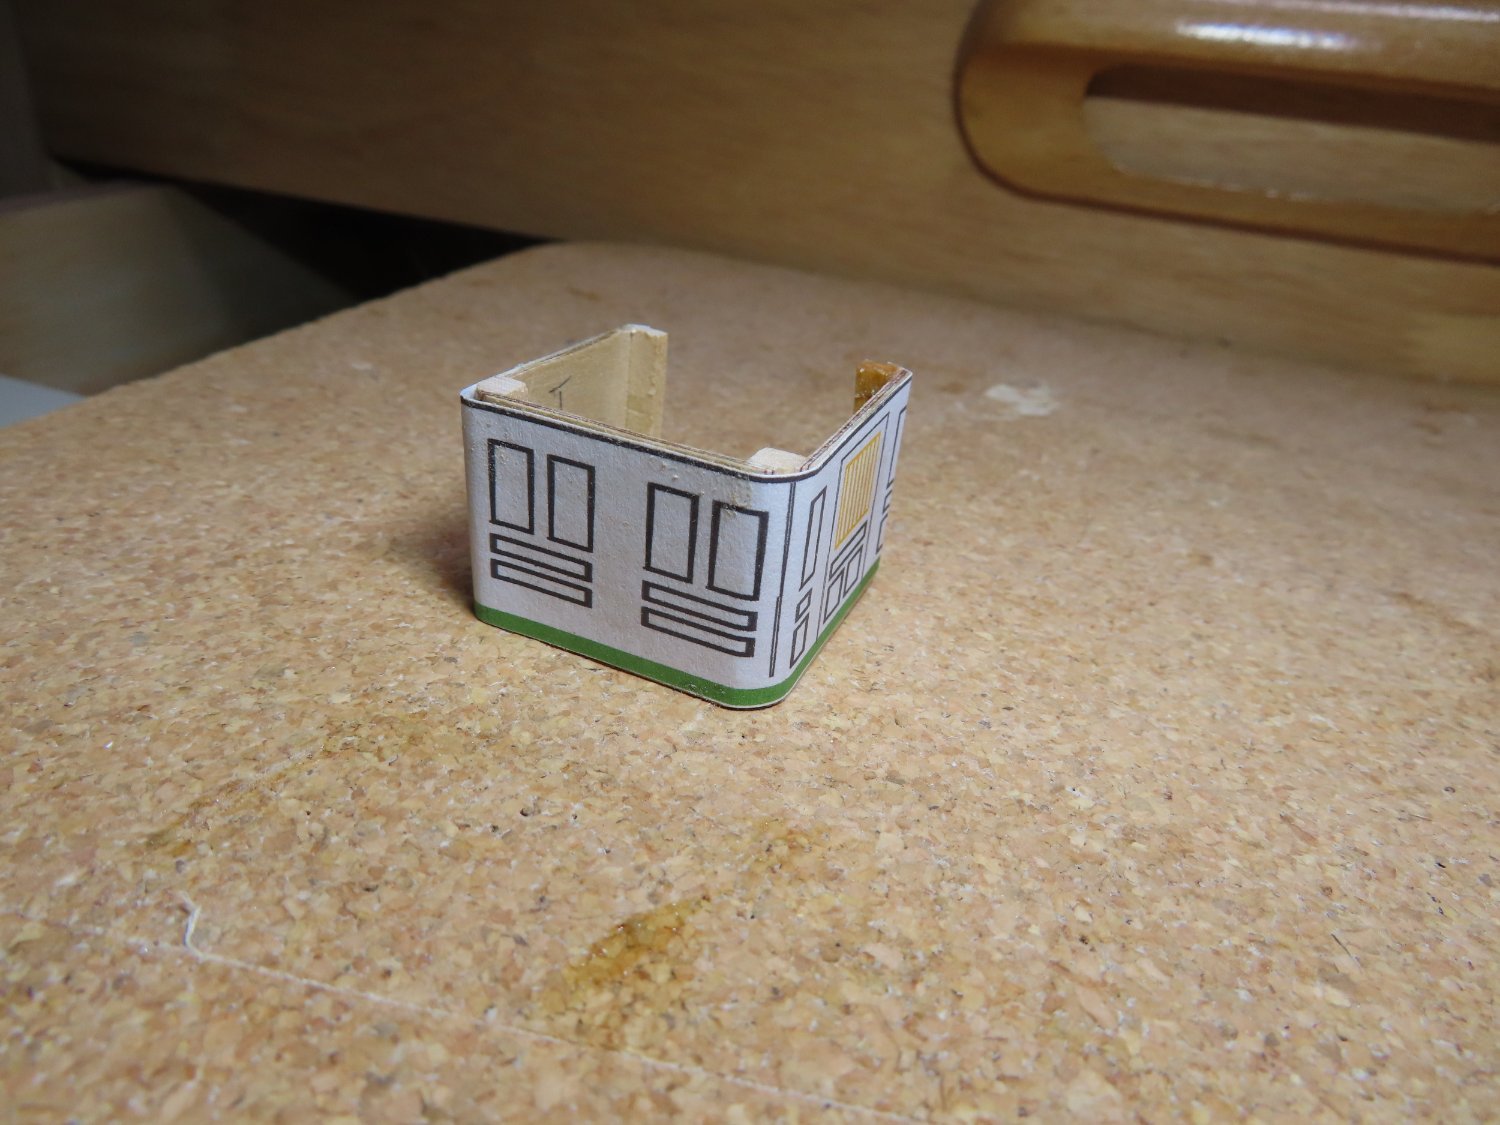
Construction of the Commodore’s pantry was made from three identical pieces of 1/32” plywood based on the US Navy plans and four vertical glueing surfaces. Using a four-way clamp, the three pantry walls were glued together. Next the two corners were filed to rounded them off. The partition was then dry fitted on the gun deck again for the image below.
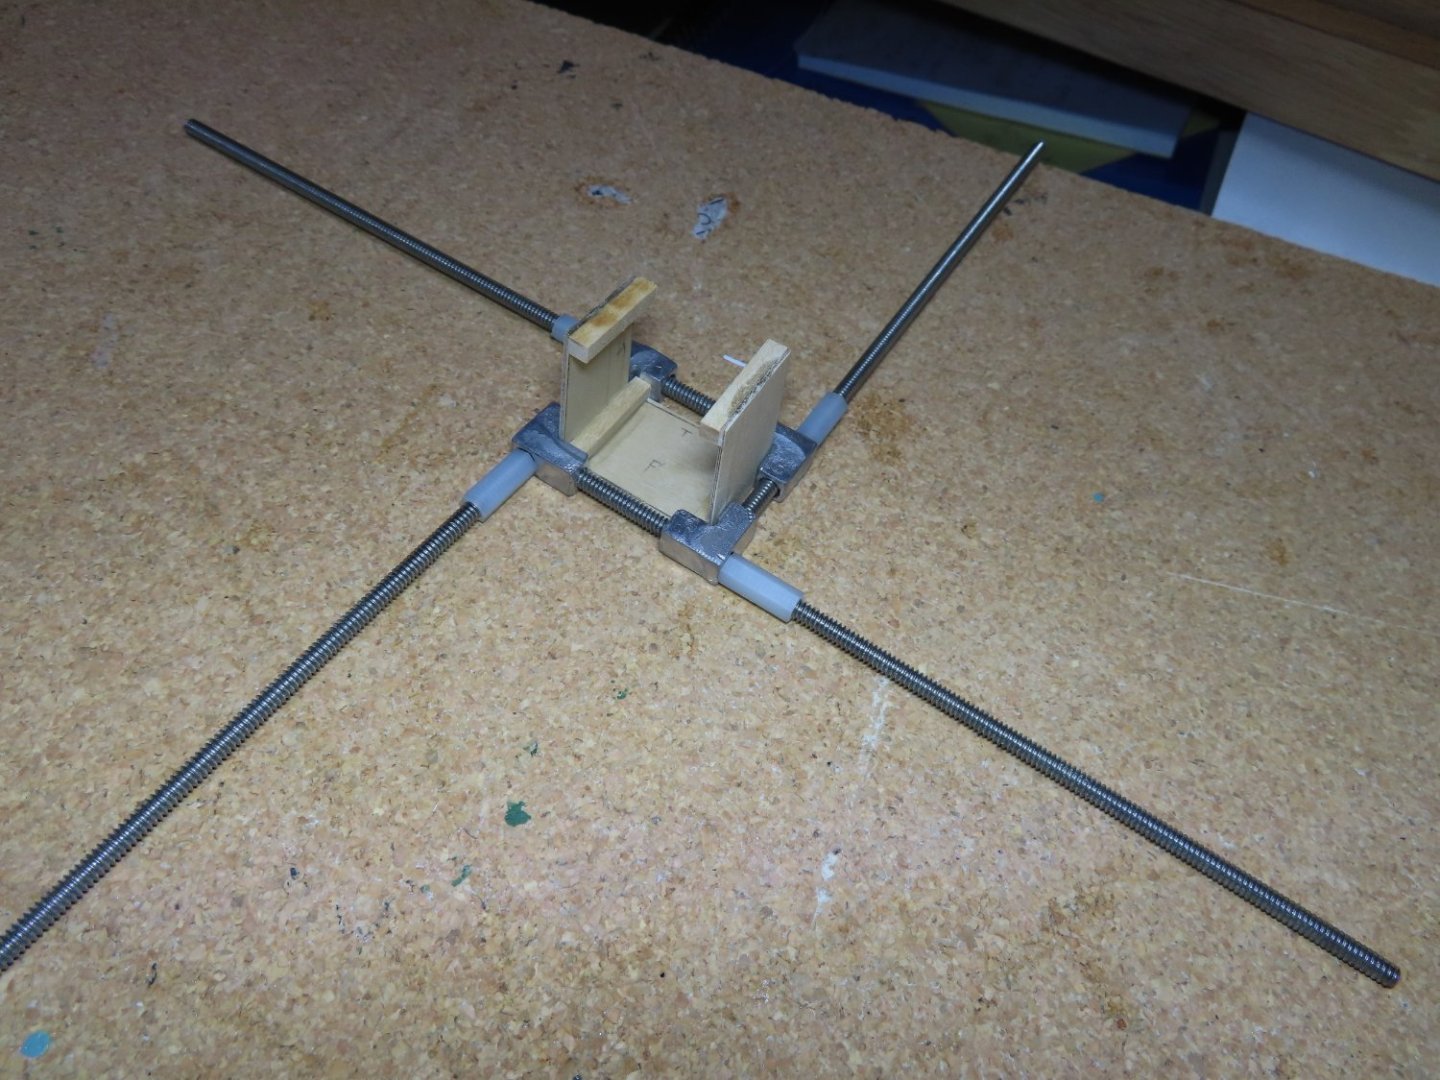


Great work, Jon, as usual! I am always looking for new and interesting hobby tools. Where did you find the four-corner brace/brackets in the 1st photo of this post?
And... for what it's worth, I have admiration for what both you and Mustafa (and Peter aka Der Alte Rentner, as well) are doing with your Constitutions! I took advantage of Model Shipways recent sale and have added the Constitution to my shipyard. Couldn't pass up a great deal on an iconic ship. Besides the fact that I have some great modelers who have paved the way in front of me! Carry on, sir!
-
2 hours ago, vossy said:
You might also like to check out this newer version from Pavel Nikitin
https://shipsofpavelnikitin.com/details?code=CSM01
I will definitely be getting this one day.
Let us know which one you get, Tony! Will be watching.
And yes, vossy, I added the Pavel Nikitin version to my shipyard for.... someday! <shrug> 👍😁
- mtaylor, vossy and Knocklouder
-
3
-
30 minutes ago, Knocklouder said:
...so I will follow along if you don't mined.

Bob M.
Absolutely fine, Bob! Always appreciate additional encouragement and criticism! I have no less than 10 Bluenose build logs that I refer to, as well, for insight and inspiration, including @John Ruy, @Fubarelf, and @JohnU, who all have active, awesome build logs, in addition to several finished Bluenose build logs from @genericDave and @Ed Ku20. I encourage you to find all of their build logs, as well!
Speaking of following build logs, though, did you have a build log for your Amati Santa Maria? I was intrigued by Pavel Nikitin's Santa Maria, so I have added that to my shipyard shelf, and may do that one next... if I ever finish this Bluenose! Speaking of which... BACK TO WORK! 👍🤣
-
19 minutes ago, Knocklouder said:
That looks interesting, Bob! I'm saving that one. I have this one saved for reference and have used it several times...
-
Thanks, John! Appreciate your peeking in and commenting. Yeah, a few things I wish I'd done better, but as many have said countless times, only us as the ship builder will notice. For the friends, family, etc who will look at, they will be amazed... 😄 <shrug>
Just finished the peak halliard bands on both lower masts and... I think I'm getting better at this soldering thing... 🤣🤣 The cranes and the mast caps pose additional challenges...
-
2 hours ago, Knocklouder said:
...could you tell me the name of the color that you painted the lower hull I know its red but what which manufacturer that sort of thing ?
Hi Bob! No doubt John's Bluenose has been turning out great from the get-go, which is why I've been following his progress (and stealing ideas!) for a long time. Yours looks equally as magnificent! Congrats!
For alternative options to the hull color, on my Bluenose hull, I used Liquitex Basics Acrylic Alizarin Crimson Hue Permanent (brushed on with multiple coats) and sealed with Minwax Polycrylic Crystal Clear Topcoat. I was really pleased with the outcome.
- John Ruy and Glen McGuire
-
2
-
-
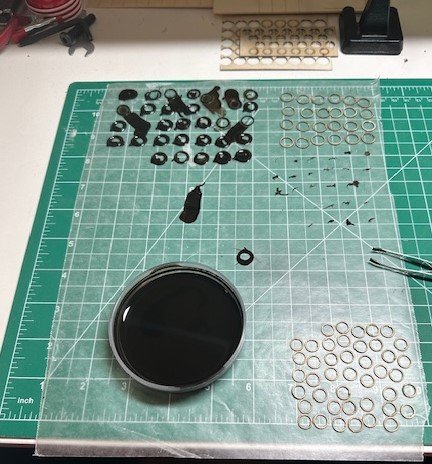
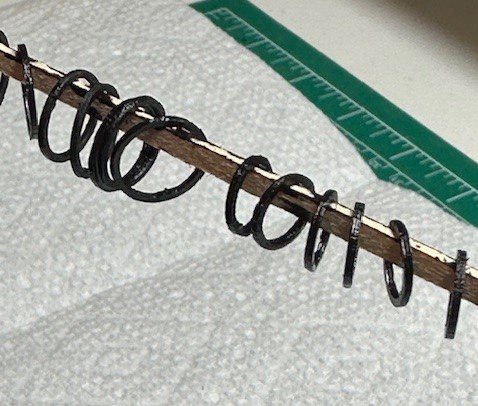
Another small update on my Bluenose progress... this time working mostly on the upper portions of the lower masts, specifically the trestle tree area. Before attaching anything to the top of the lower masts, though, as Bill reminded me in the post above, I needed to place the necessary mast hoops around the lower masts. Whether I decide to do full sails, furled sails, or no sails at all, I think I will still want the mast hoops attached to rigging in some form, so... let's get that done first. The mast hoops were provided in the kit but needed to be carefully cut out from the laser sheets. Once I had them all cut out and cleaned up a bit with sandpaper, I wanted to stain them. I used the same red mahogany stain that I used on the deck buildings. I dipped them in a stain bath and then hung them to dry. They came out much darker than I expected, but I still think the contrast between the cherry stained masts and the hoops look good, so we'll go with that. Once they were completely dried and ok to stack on one another, I placed the larger ones on their respective masts, saving the smaller ones for the upper masts when the time comes.
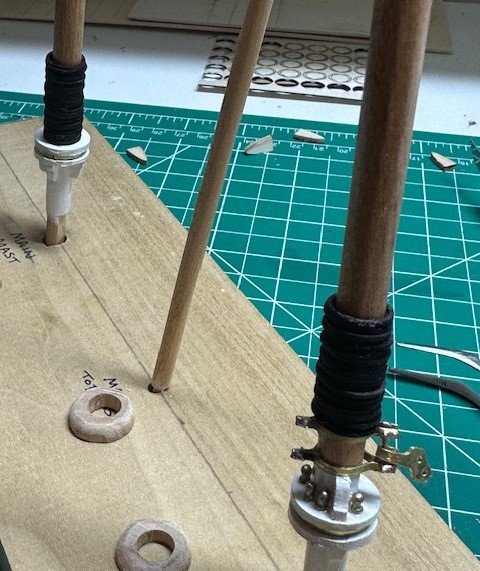
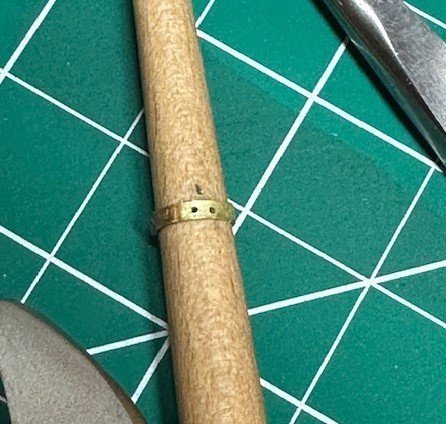
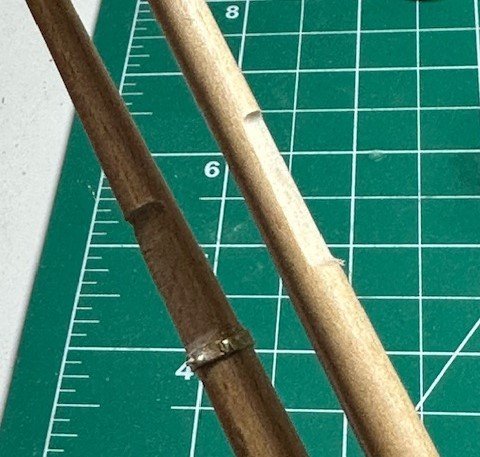
Now to the trestle tree assemblies. I first worked on the main mast band for the futtock shrouds, using a 1/16" x 1/64" brass strip. I wrapped it around for size and then soldered. (I'm getting a little better at soldering!) I then fit it onto the mast and drilled two holes in port and starboard sides for placement of U-shaped wires on both sides for the shrouds to ultimately tie to.
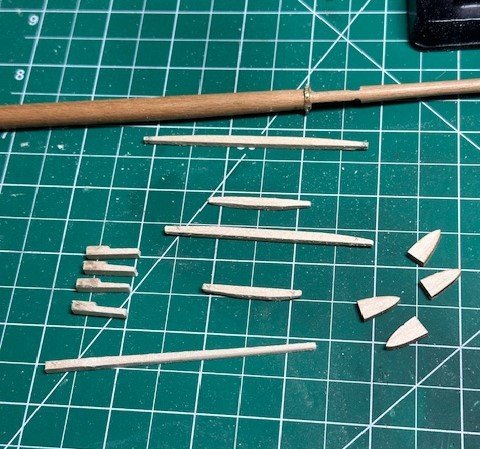
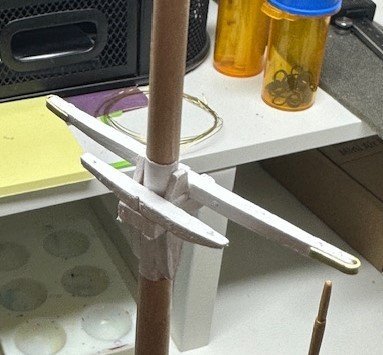
Using my recently-acquired Proxxon mill, I shaved/flattened some spots on both sides of each mast for the cheeks and made up all of the needed parts for the trestle tree configuration. The spreaders were made from 3/32" square strips. I put pencil marks on the appropriate sides of each strip to help identify which ends were not to be tapered for sanding, which helped keep things straight in my mind. The trestle trees were made from 1/8" square strips. I lined them up together and used some parallel pliers to grip them as a guide for where they needed to be filed down, and that seemed to work well. For the bolsters, I sanded a long piece of 3/32" square stock down to 1/16" and rounded one corner. I then cut them down to size to fit between the spreaders. The slabs were cut from scrap sheets.
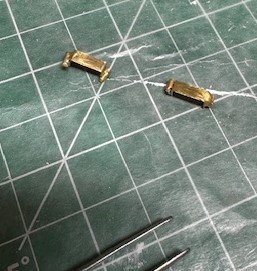
I glued the cheeks and trestle trees in place on both masts, masked above and below the areas and painted white. I decided to paint the spreaders off the mast and added the end clips (using the 1/16" wide brass strips) before gluing the spreaders to the trestle trees. After the spreader trees were secure, I added the bolsters and slabs and painted the entire assembly sections white.
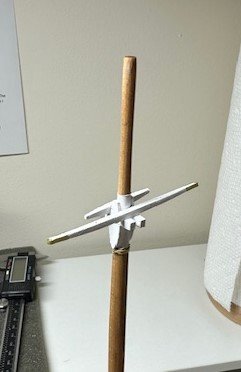
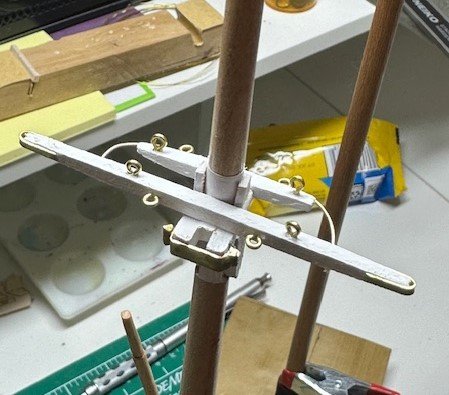
For the iron gates, I had a 1" x 6" x 0.3mm thick brass sheet and cut a 1/8" wide strip and trimmed two of them to fit securely around the two trestle trees. 1/16" brass rods were then soldered onto the strip ends and cut to size to simulate the pins on each end. (Another chance to get better at soldering!)
Spreader rods were made using 0.020" brass rods and were attached to both masts' spreaders using CA glue. The quarter lift bands were placed under the main mast trestle trees using the 1/16" brass strips. Four eyebolts were attached to the top of both foremast spreaders, four eyebolts were attached on the sides of the foremast spreaders for the fairleads, and two eyebolts were attached to the sides of the shorter mainmast spreader for fairleads. (I hope I got everything where needed!)
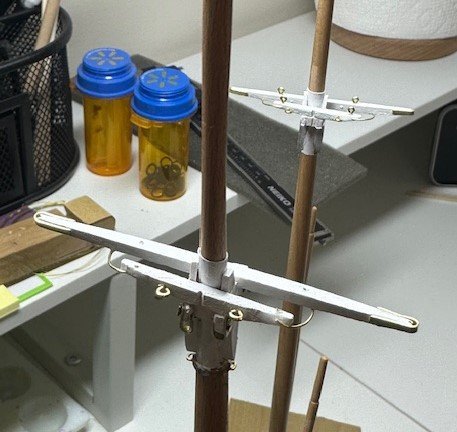
All in all, I think the trestle tree assemblies came out well, considering. Now it's on to more mast work... and more soldering! Yippee!
Appreciate the follows, likes and comments. I continue to learn from many others!
- Knocklouder, mtbediz, bhermann and 3 others
-
6
-
Very impressive dory work, Richard! 👍
- Retired guy and FriedClams
-
1
-
1
-
On 3/8/2024 at 8:29 PM, JohnU said:
...he indicated they cost upwards of $5k and were custom made for each person.
I'll keep on squinting... <shrug> 🤣🤣
-
I purchased this caliper/divider a couple of years ago on Amazon and I love using it when needed. The bow spring and fulcrum screw are strong enough to hold their position well when using for measuring or scribing.
-
22 minutes ago, SUBaron said:
And Legos!!! Doesn’t everyone have them?
Yep! In fact, I keep going into the grandkids' stash kept in the storage room for when they aren't here dragging them out, and I stealing some more! <shrug> 🤣
Looking very good so far, Andre!
-
Awesome shipyard, Richard!! 👍🏆
- FriedClams and Retired guy
-
1
-
1
-
Great job, Doug! They all look awesome! Looking forward to starting my Santa Maria version soon. Will no doubt be looking back at some of the things here on your build log. Thanks! What's next for you?!?
-
-
-
Nice work on those barrels, John! Nice lathe work. If I stay in this hobby too much longer, I may have to add a lathe to my shipyard arsenal!
-
Ooooooohh!! A new tool for the shipyard! Seems to me like the Rockler one with the digital readout would be better than the Lee Valley ones, as you would have to measure and adjust the setting on the Lee Valley's Veritas gauge using a separate scale/device, whereas the Rockler has the gauge built-in like a digital caliper, correct?
-
27 minutes ago, SUBaron said:
I was thinking about getting some micro-calipers, or possibly the proportional divider (Micromark - #14129) for planking. Any suggestions on a must have instrument/tool for that future effort?
Hi Andre... Great build so far, love following your progress. I have a really nice digital micro-caliper that I use all the time. I'm sure most of them are very similar, but mine can switch from millimeters to decimal inches to fractional inches with the press of a button. The proportional divider you linked to MicroMark looks interesting, as well, though! No such thing as "too many tools" in the shipyard!! <shrug> 🤣
- SUBaron and Scottish Guy
-
2
-
Yep, I see them now! Wow, that cherry wood looks sharp! Nice work! 🏆
-
7 minutes ago, Jim in KC said:
Thanks Gregg. I guess there's no easier way to taper the planks. What I have been doing is to shave off the plank to where it's close and then sand from there. I have messed up a few plank by getting the taper uneven, with a bump or dip. If I try to fix it I usually taper too much, and if I just install it, the next plank won't fit all that well. I appreciate your advise.
Yep, there is a fine line (no pun intended) in getting the tapering just right. When sanding the entire taper distance, I think I would use an 80 or 100 grit sandpaper to get it down as best I could, then finish with 150 or 220 grit. And, sort of like you were describing what you are doing in your Swift post, I would have measurements for each plank at each bulkhead point, so that, for instance, at Bulkhead A, a certain plank needed to be 3.48mm wide, at Bulkhead B 3.75mm, Bulkhead C 4.05mm, etc. Sounds like you've got it down, though! I'd just be too afraid that I would snap the plank if I had it in a vise. At least in my hand, I can control the wavering a bit better. <shrug> 🤣
-
Hi Jim! Your pictures in this last post are not showing like others in your previous posts. Did you insert them differently into this last update? I'm not "techy" but perhaps someone else can offer some advice if you can't resolve.
-
3 hours ago, Jim in KC said:
Thanks Gregg for responding to my log. Your Bluenose looks beautiful. I really like the look of your hull planking. I'm currently planking my Swift and I've been tapering the planks like you, but not as well. I've been using a 31/2 "miniplane. I fix the plank in my vise with with soft jaw pads but getting the plank positioned just right is difficult. As I've progressed, I have had to bend planks crosswise more. How did you taper your planks?
I plan on not painting much if any - I want to show off the beauty of the wood. I am using cherry planks I bought instead of the thin walnut strips that came with the kit. But I am clearly going to need to do a lot of sanding and at least some filling. I saw that you used a Tamiya putty filler. Does that take stain? I know nothing of fillers - I've been thinking of using a Minwax wood filler. Any suggestions?
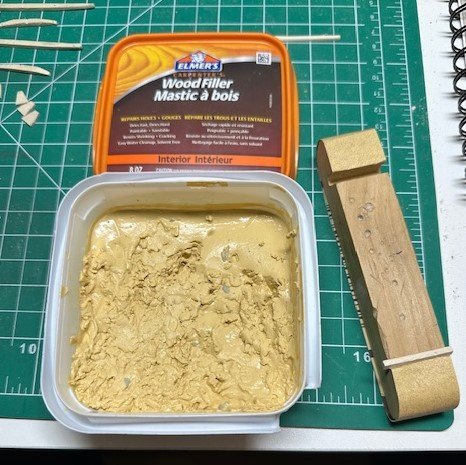
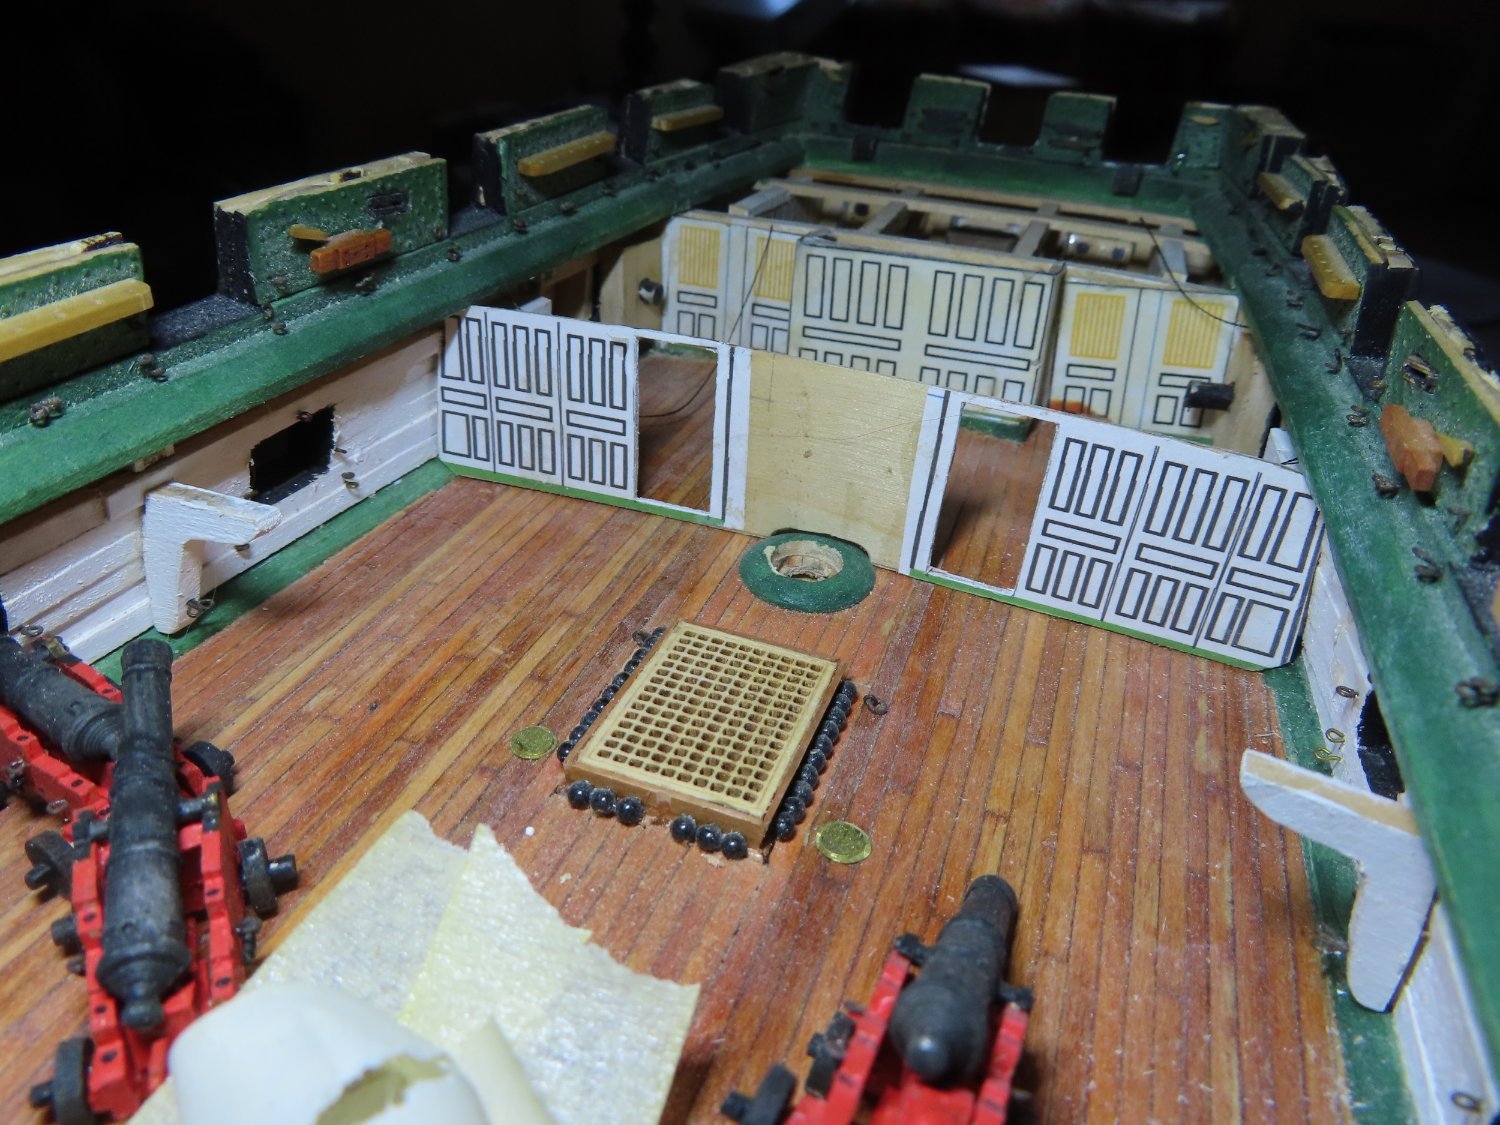
Hi Jim! Appreciate your comments! Yeah, on all four of the ships I have now worked on, the planking part (whether it's hull or deck) has been my least favorite and where I seem to most struggle. Regarding the tapering of planks, I do it the old-fashioned, manual way! If there is a better way to do it, I'm all ears. But, I have simply held the plank strips in my hand and, using a small wooden palm sander with appropriate grit sandpaper attached, (pictured below), sanded to whatever width needed.
When I was doing the hull planking, it sometimes required getting the wood hot (either with hot water or with a hot iron) to bend the way it was needed, but the deck planking only required tapering, as I recall, no bending.
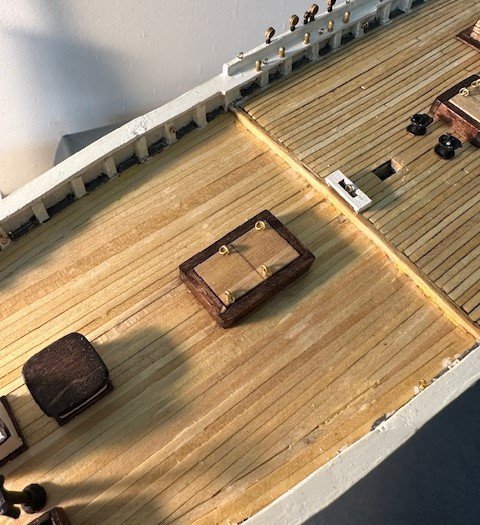
Regarding the putty, when I was doing the deck planking and it required a bit of putty in spots, I was then using the Elmer's Carpenter's Wood Filler (also pictured below). Fortunately, I didn't use a lot of it, as it did not take the pre-stain and cherry stain all that well, as you can see from the port-to-starboard spots on either side of the hatch, as shown in the 2nd picture. Since this is where the two dory kids with the stacked dories will be eventually placed, most of those imperfections should be hidden.
Hope that gives you some answers! Looking forward to seeing more of your work on the Swift Virginia Pilot Boat!


1921 Bluenose by John Ruy - Model Shipways Kit No. MS2130 - 1/64 scale - Canadian Fishing Schooner
in - Kit build logs for subjects built from 1901 - Present Day
Posted
Just did another quick scan of Sheet 6 - Rigging Details, and I was probably thinking of the numerous shackles, not turnbuckles.
Continued great work, John! 👍