


FlyingFish
-
Posts
470 -
Joined
-
Last visited
Content Type
Profiles
Forums
Gallery
Events
Posts posted by FlyingFish
-
-
-
-
Great work Keith - the drill press is interesting - how did you make the ratchet on the stem?
- KeithAug, Keith Black and mtaylor
-
 3
3
-
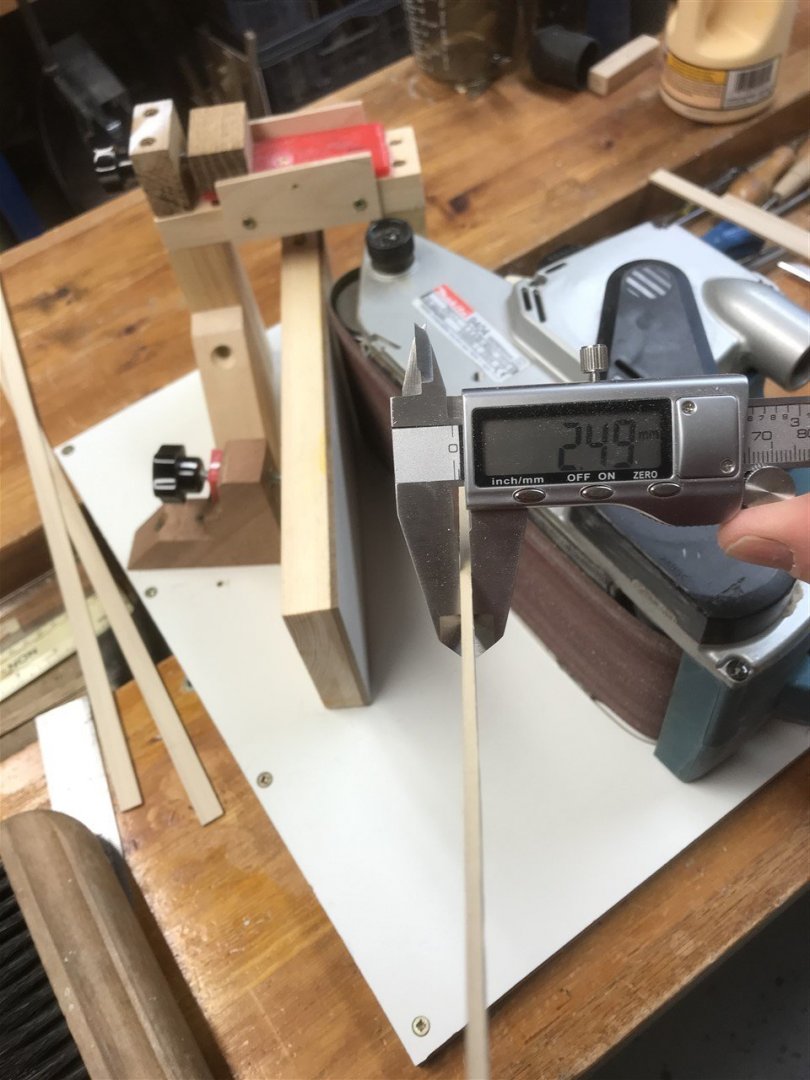
Made a quick jig for thicknessing strip planking, (credits to the Open Wood Shop You Tube channel). Wasn't expecting it to be so accurate. Shooting for 2.5mm; very chuffed at the repeatability.
- GrandpaPhil and neilm
-
2
-
-
Thinking forward to planking the hull. Firstly, I've had a good look through the resources on this forum; really excellent tutorials etc - thanks to all of you for passing on this useful information - the depth of knowledge is tremendous. I've had tried to follow some of what I've read, but treat me as ignorant and you won't be disappointed!
Any tips or suggestions gratefully received, need my hand held here. My mind is full of drops strakes and stealers, edge setting and hood ends. Just love the language.
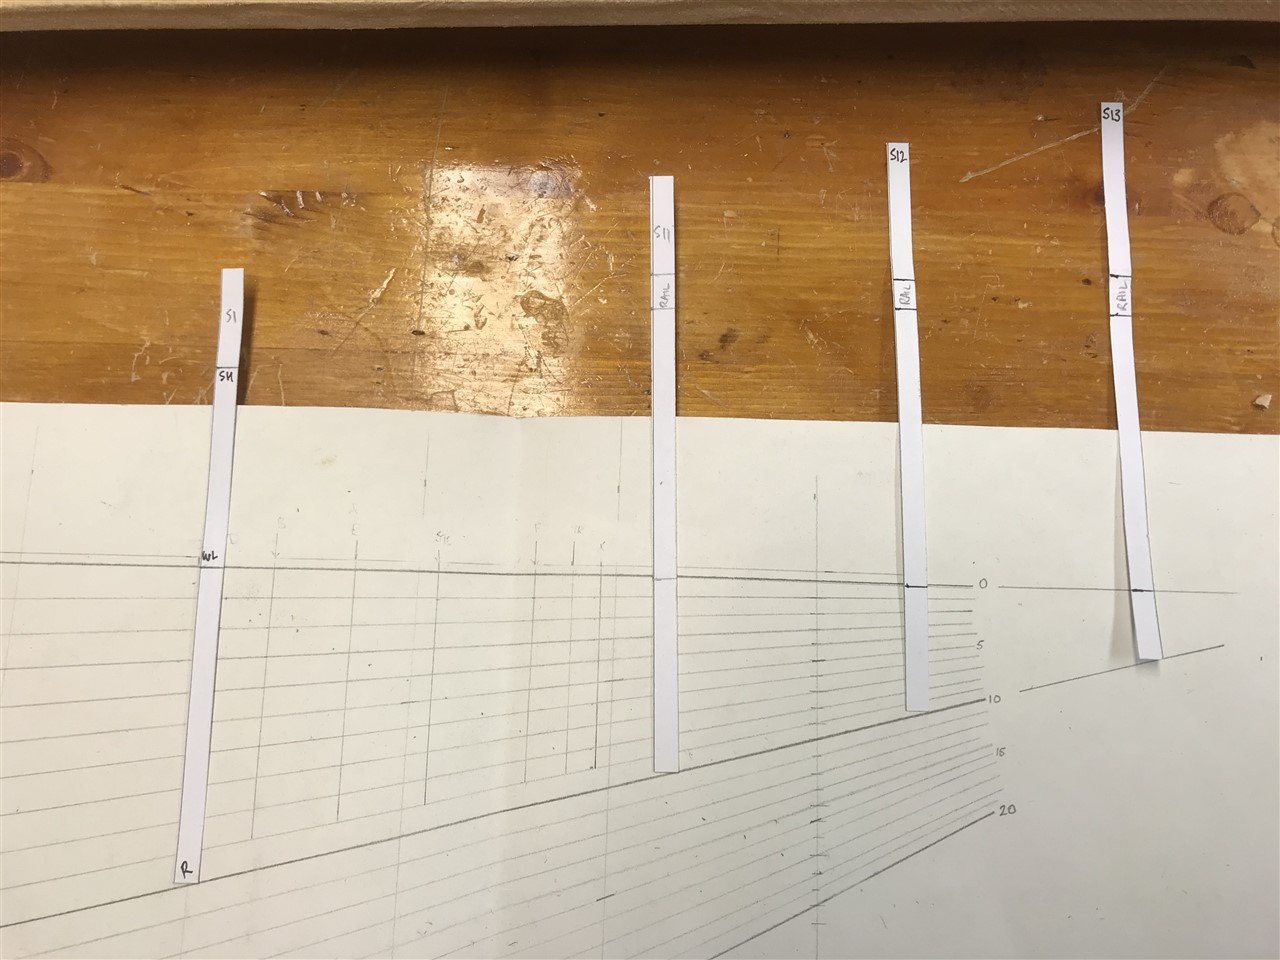
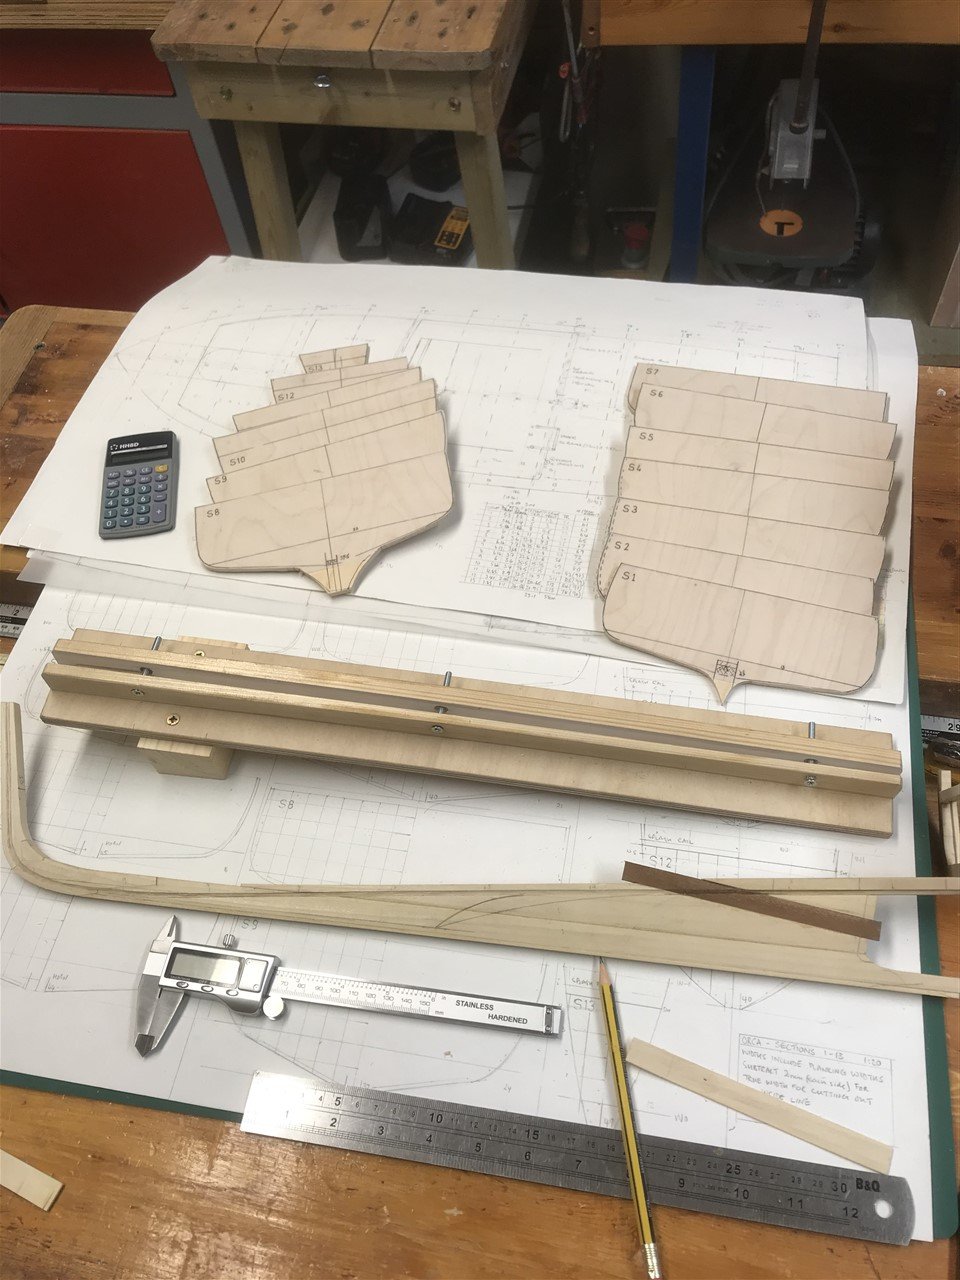
'Lining out' - I've no idea if this is the right way to do this, but I started by marking card strips at each station at the rabbet, DWL and sheer, then lining them up at the waterline to look at the proportions I got, S1 being at the stern.

My first thought was that the strakes below the WL would have to narrow too much coming forward until by S11 or 12 they would be too narrow.
Strakes above the WL would widen going forward. So it seems to me therefore that the lower strakes might sweep up towards the stem to take up some of this space.
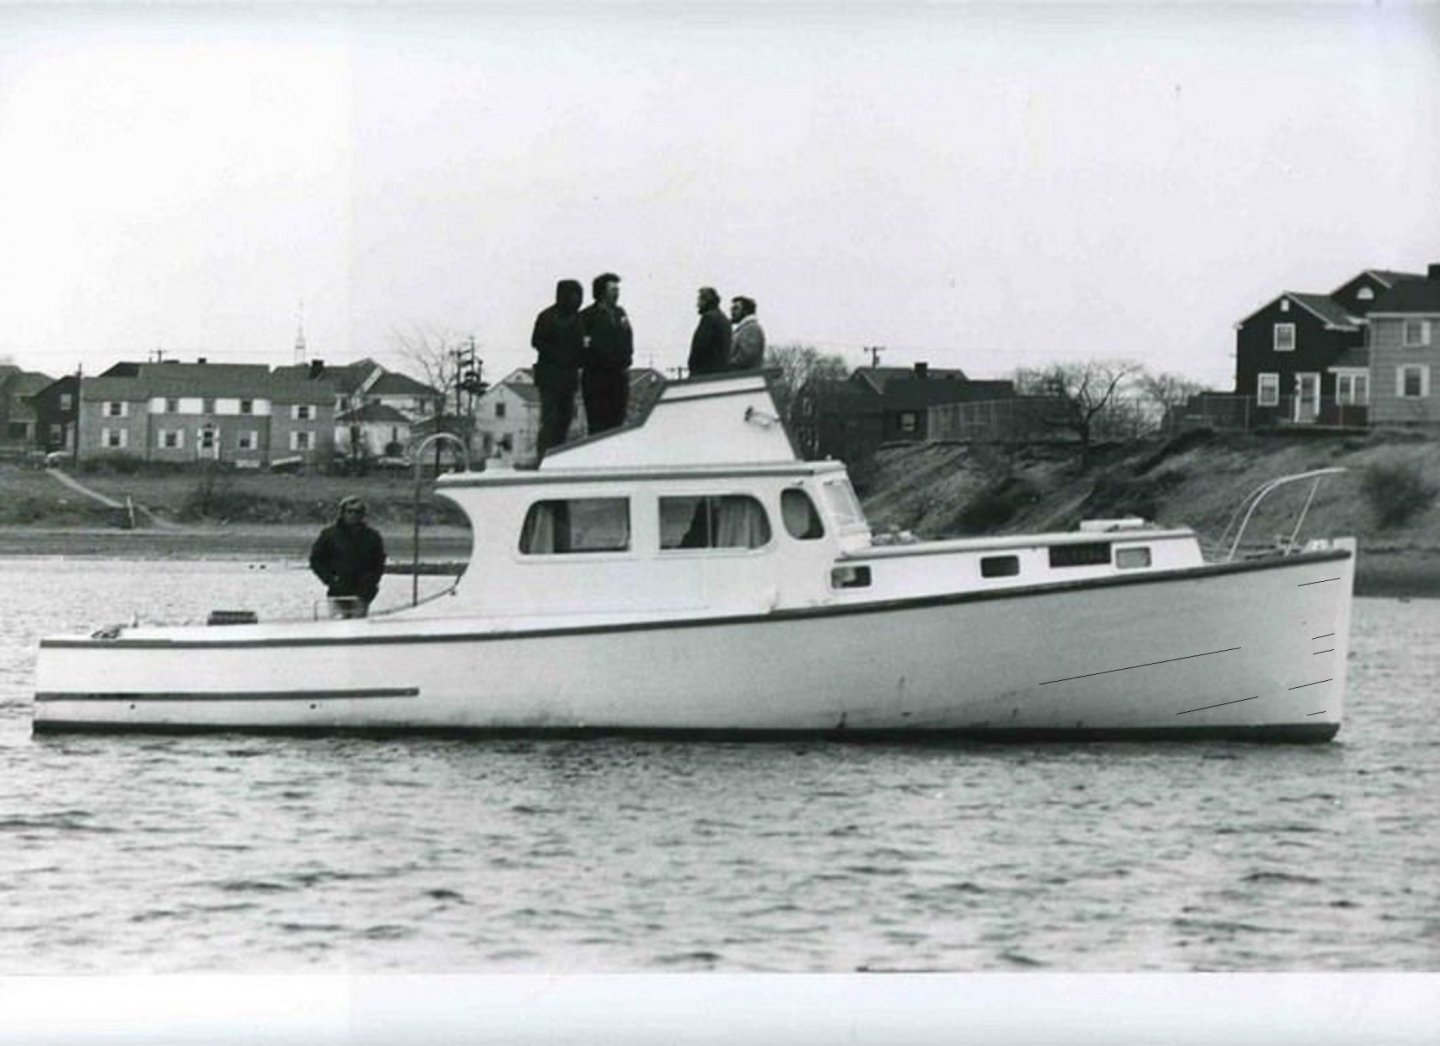
Looking at warlock's bow, the planking shows through the paint, and I've highlighted what lines I can see, which seem to bear this idea out.
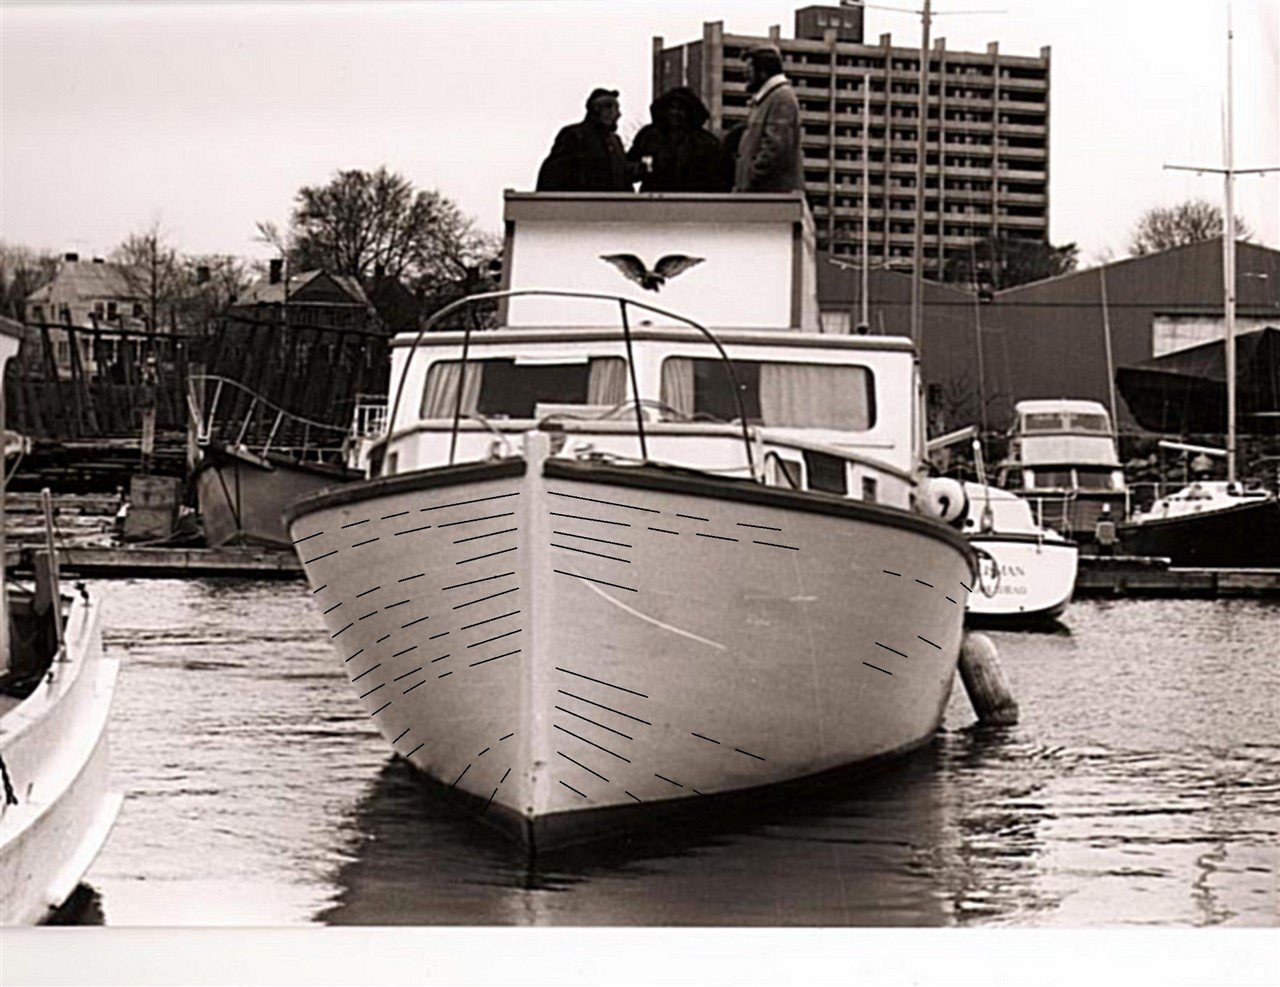
So reading Antscherl's tutorial, I guess my next step is to get some thread and mark out on the frames how the planks might sweep up from the WL amidships in groups to the stem and transom. Have I got that bit right so far?
- neilm, GrandpaPhil, KeithAug and 1 other
-
4
-
Thanks for the thumbs up!
Still steamin' and bendin'.....


Got some work to do to the bow section; it will be mightily fiddly once I get to the sharp end!
All this will come off again once all the ribs are steamed into their shape, so that the frames can get their final fairing sanding, and then planking lines worked out. Oh and I need more mini clamps - lots more!
- neilm, Duanelaker, mtaylor and 3 others
-
6
-
On to the ribbands....
First need to cut some new stock - plenty of semi-green field maple left, and really like the way this works with hand tools.
Ribbands are 3.5mm square and 650mm long.
Rather than attempt to replicate the number that would be used in life, I have opted to place ribbands where they will hold the shape of the ribs when they are steamed in. I intend to bend the ribs to shape in advance, so if I get this right they will hold in place once fitted.

Using soft copper wire to hold them in place to keep the clutter of clamps down.
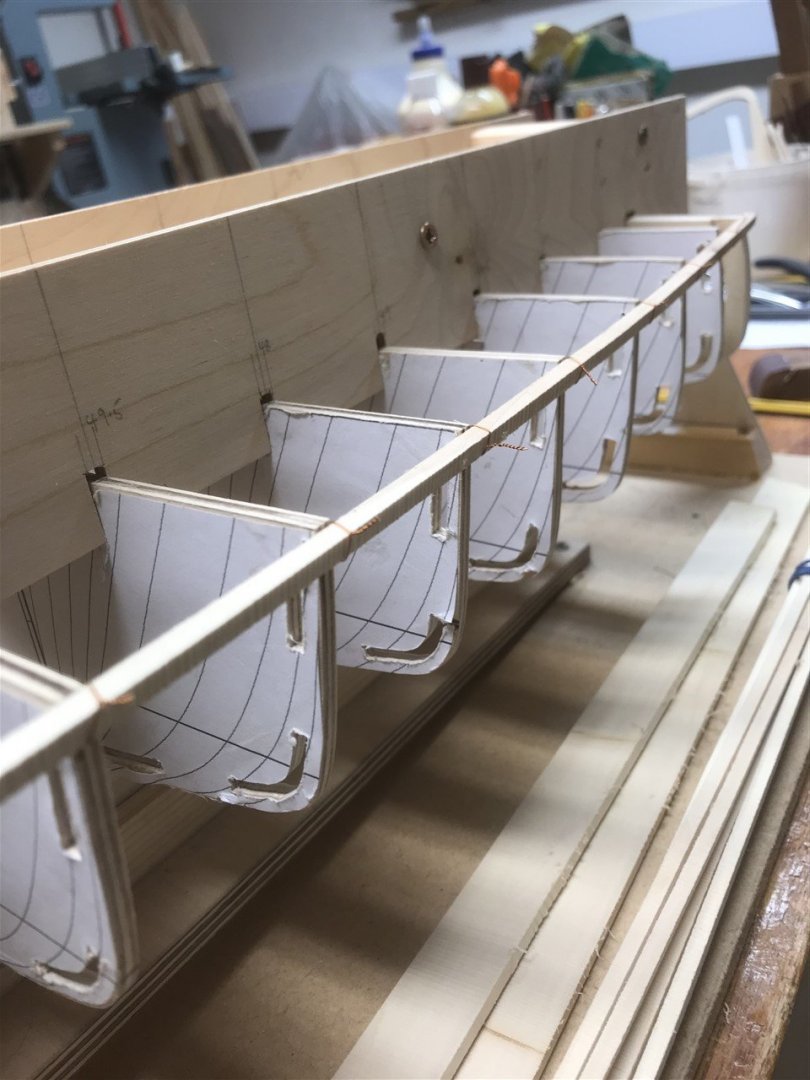
Now on to a batch bend of the ribs.... nearly had a disaster here - used the best stainless steel casserole dish to heat the ribs - almost got caught by the head woman returning it to the kitchen cupboard. Phew.

Hope these turn out alright... we shall see.
-
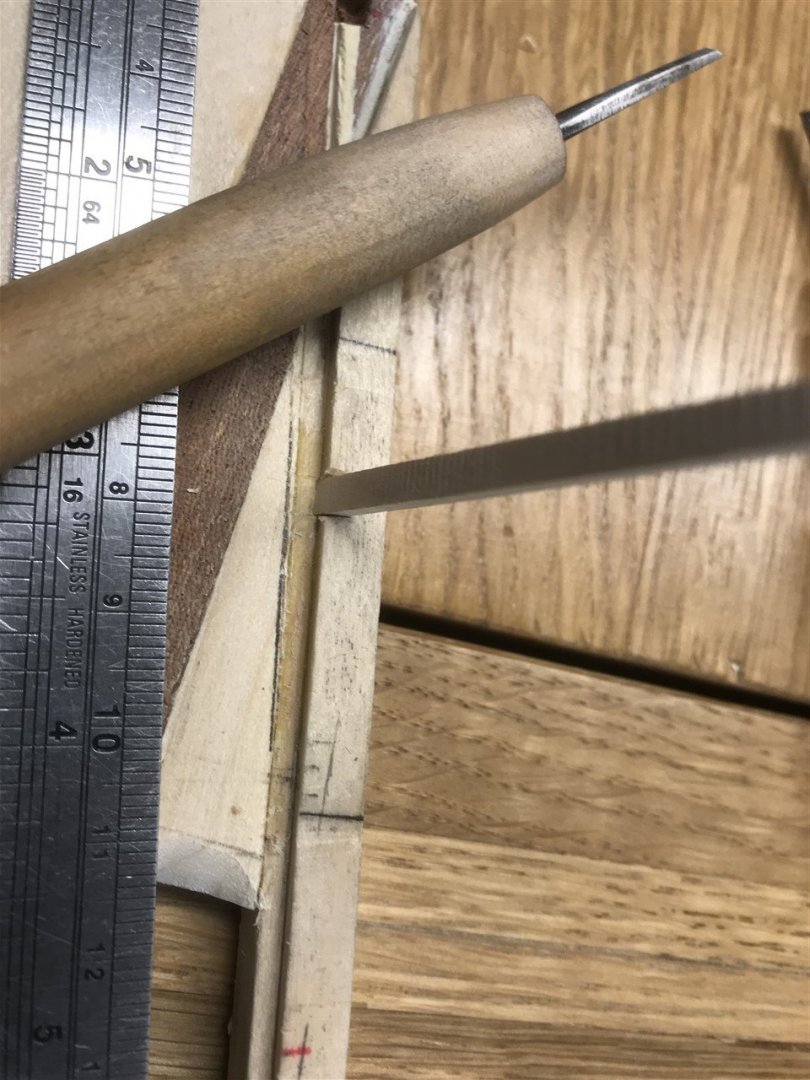
A little progress…
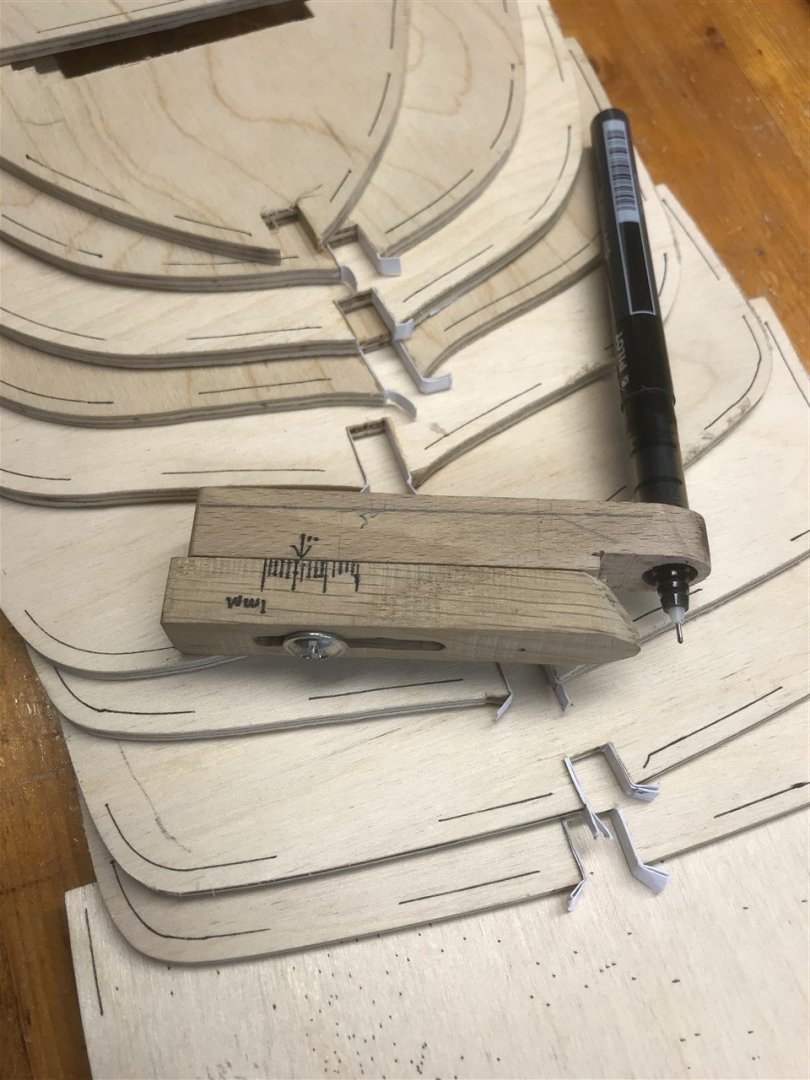
Cutting the rib pockets out using my little home made chisels.
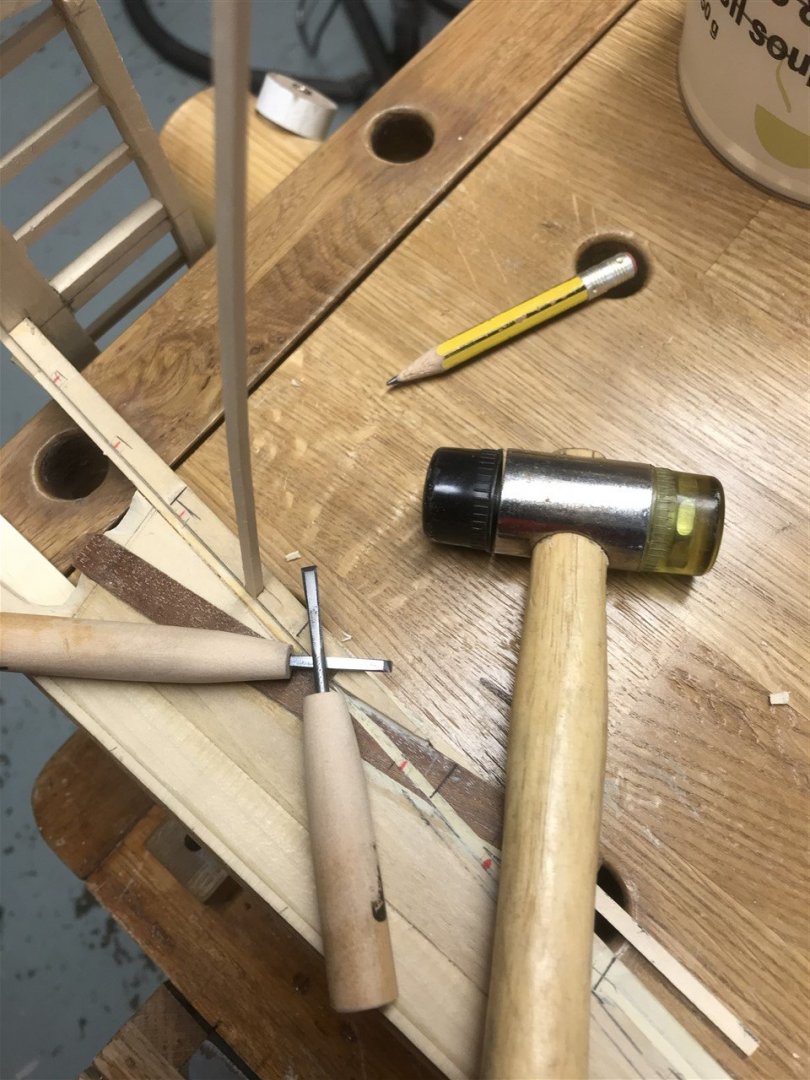
The rabbet has been moved to allow for the altered planking line amidships.
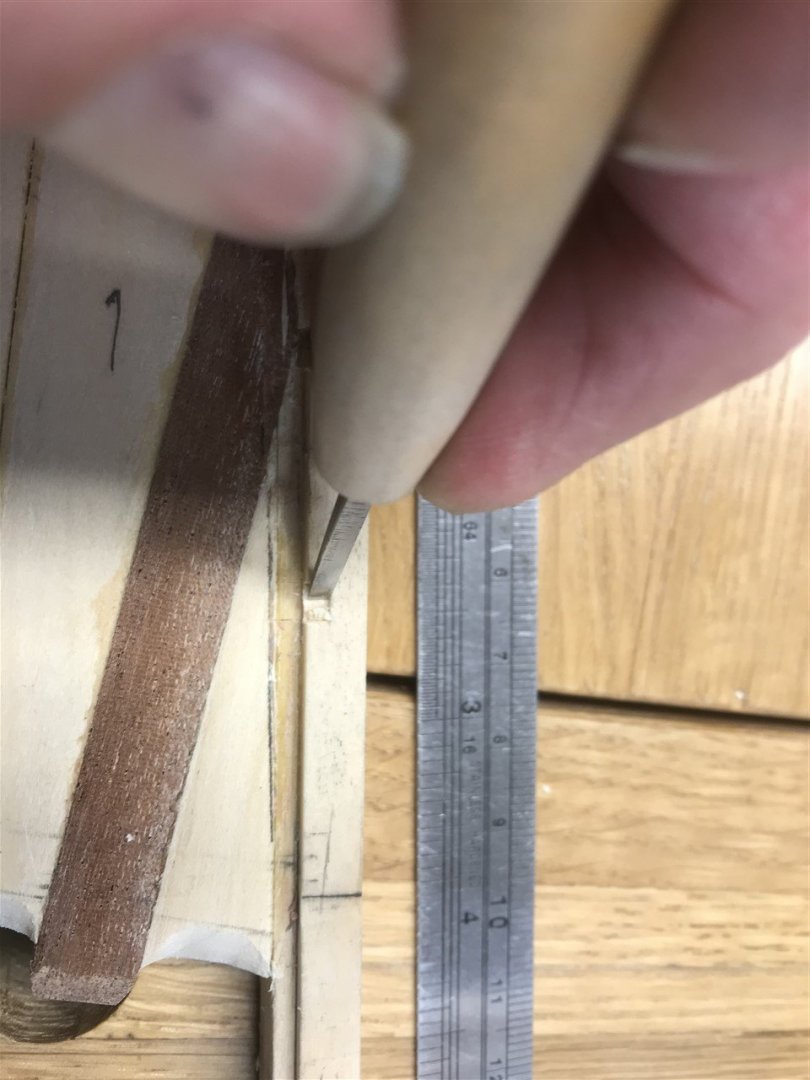
I’m learning to be more accurate with each one… might even have a half decent pocket by the time I get to No. 26!
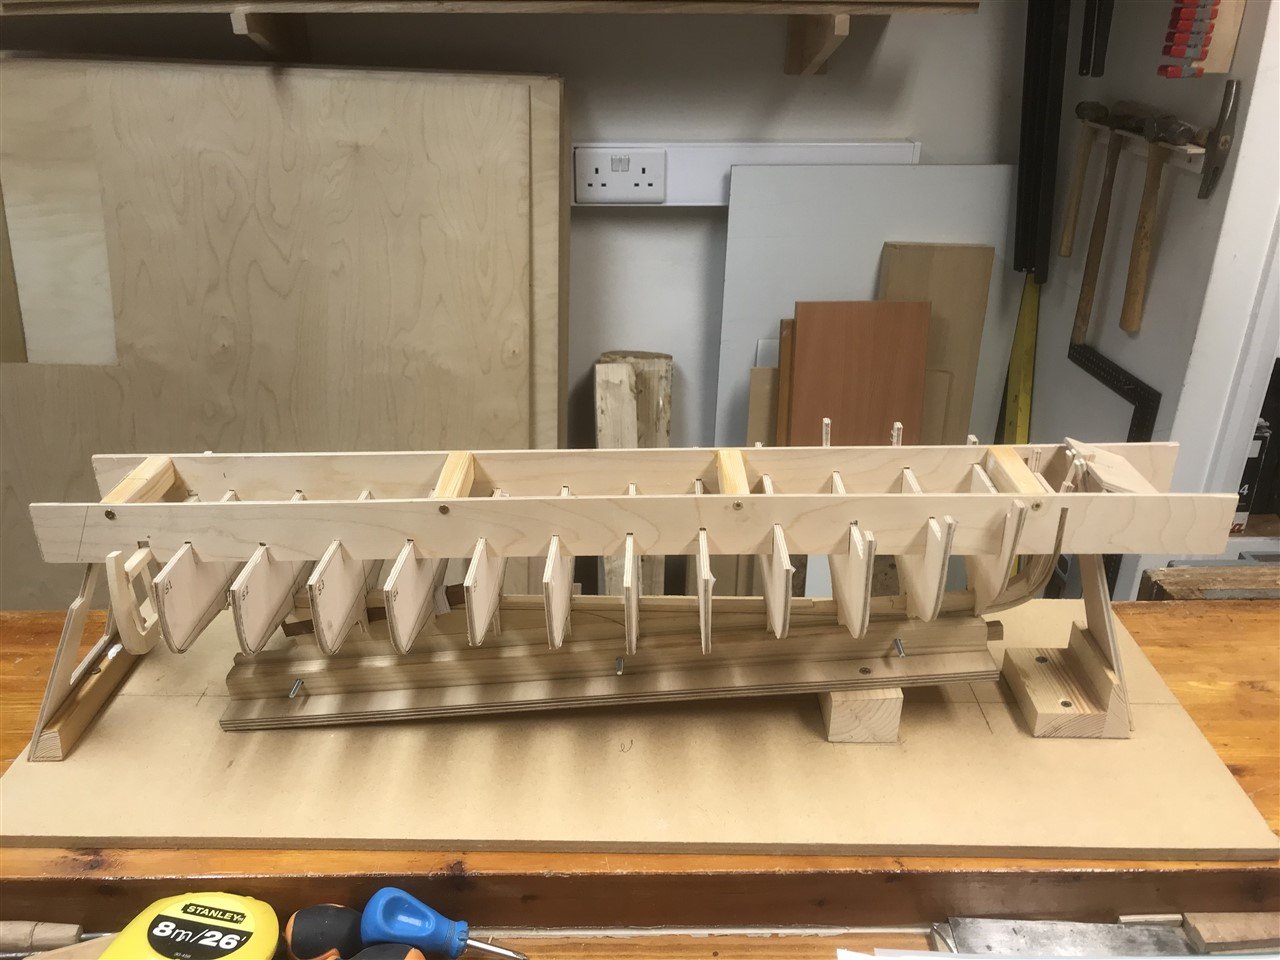
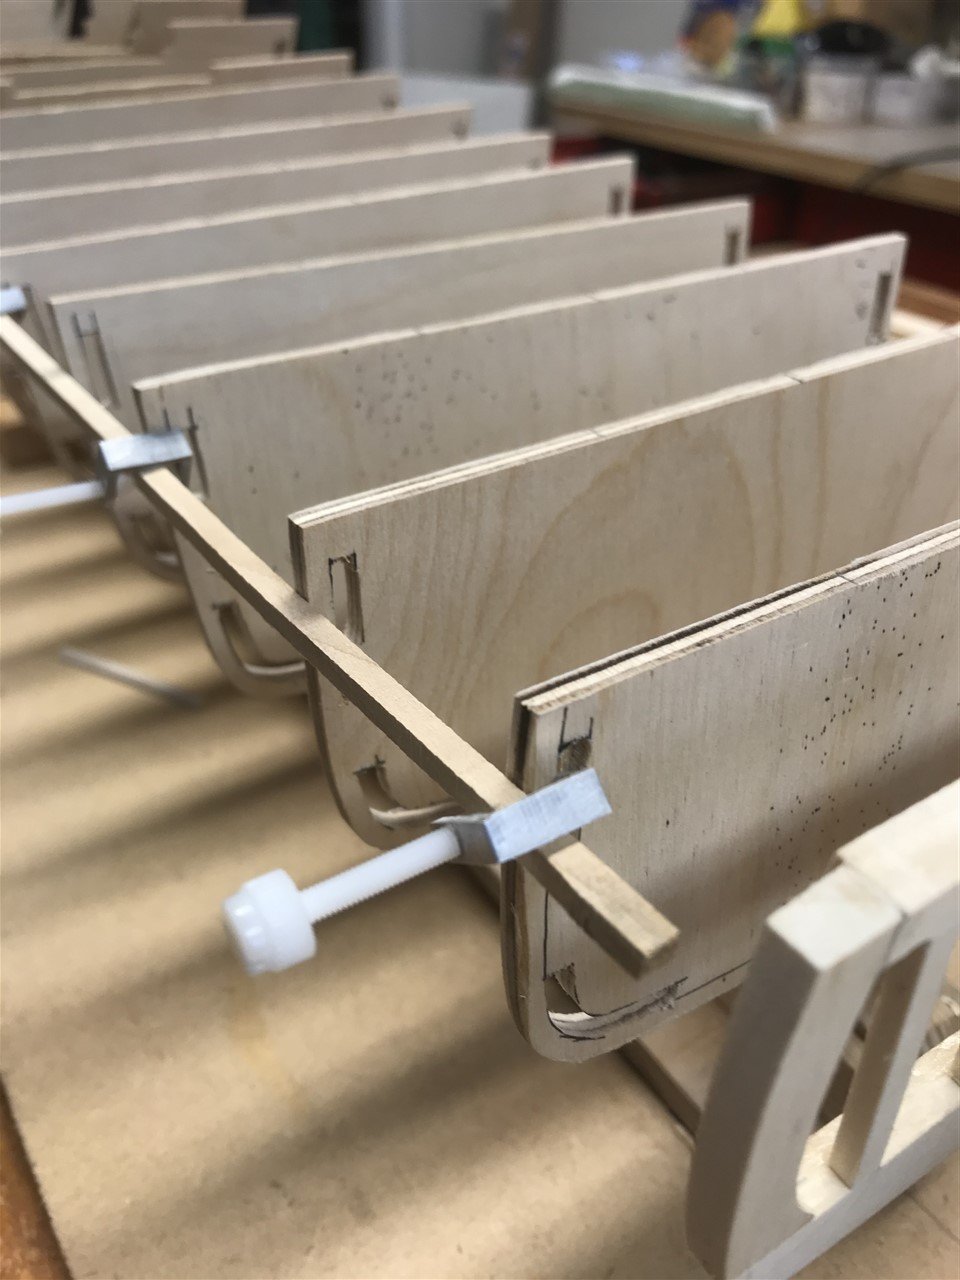
Then on to prepare the frames so that I can fix the ribbands to them without gluing, and have some clamping points for planking later…
I use a simple little edge marker for this..
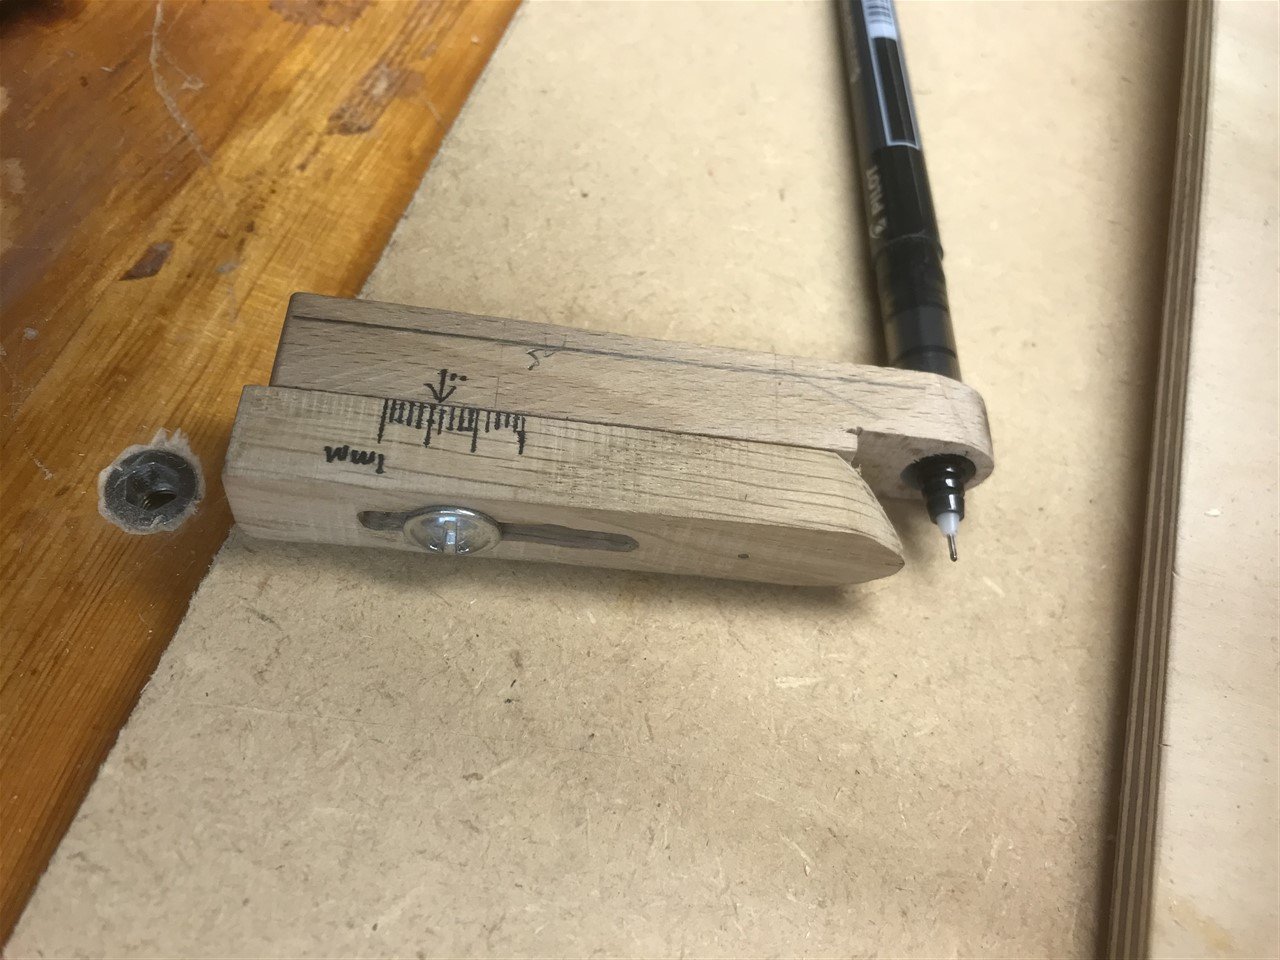
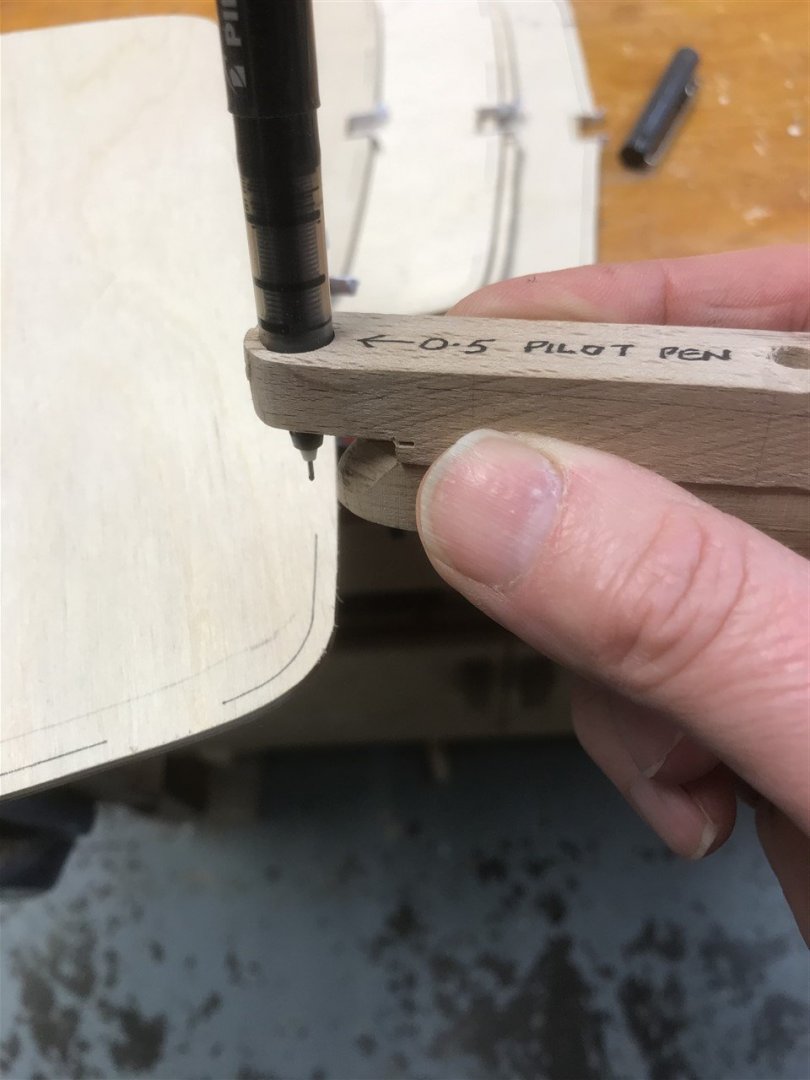
A bit crude, but it seems to work. When making this I wished I had a lathe and mill so that I could make one in brass, but making do with what I have available.
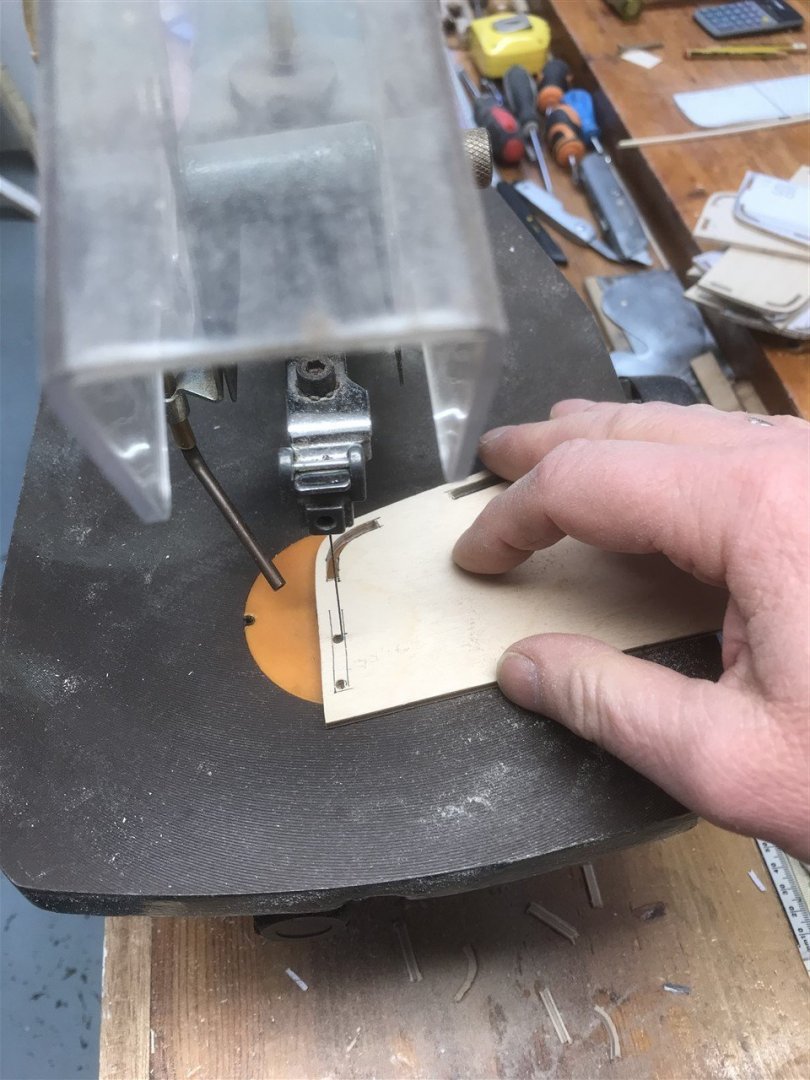
Then a happy hour or two on a 16” Draper scroll saw, listening to jazz helps with repetitive tasks.
The idea is to use my little 19mm clamps like so…
- mtaylor, KeithAug and GrandpaPhil
-
3
-
-
-
Tremendous work Michael; the accuracy of your work is very inspiring!
- Keith Black and mtaylor
-
2
-
Hey Bitao7697 - this is just wonderful!
I'm just amazed by your great accuracy and ability - what engineering - thank you for inspiring me! Just spent a day on my workshop and I cannot bring myself to photograph my very poor efforts now!
It's great to see your skills in so many disciplines - you are a master craftsman no doubt.
Looking forward very much to following your build.
- Keith Black, michael mott and mtaylor
-
3
-
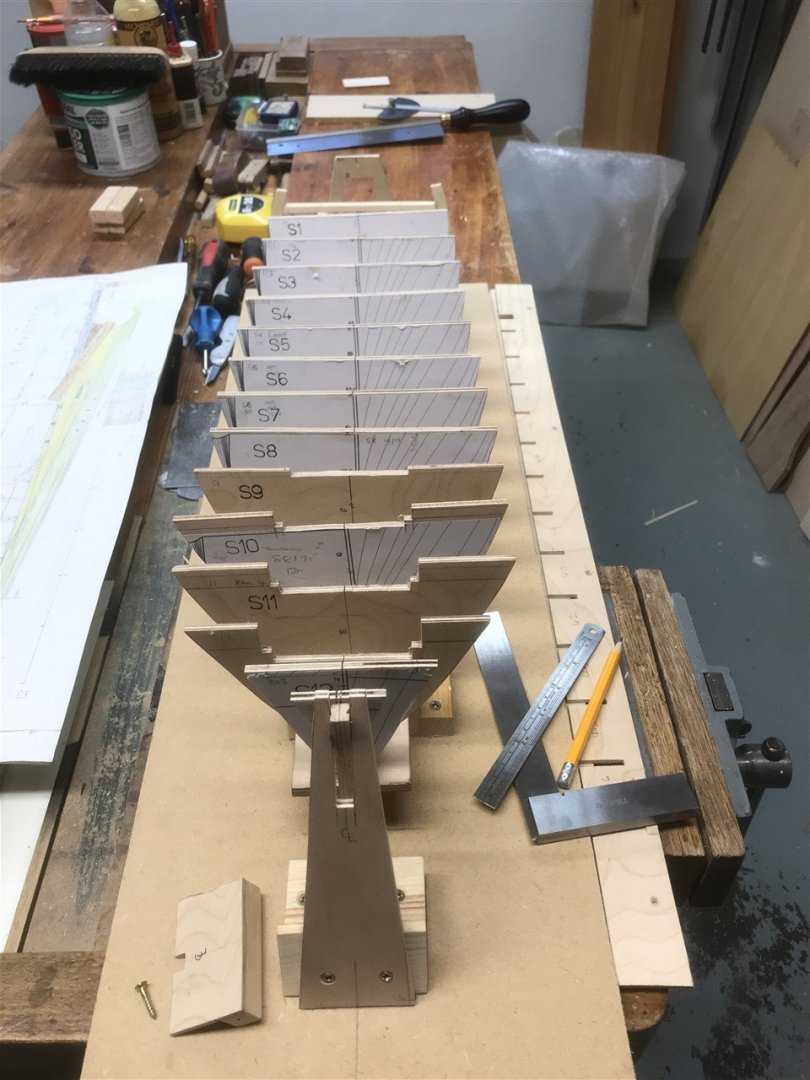
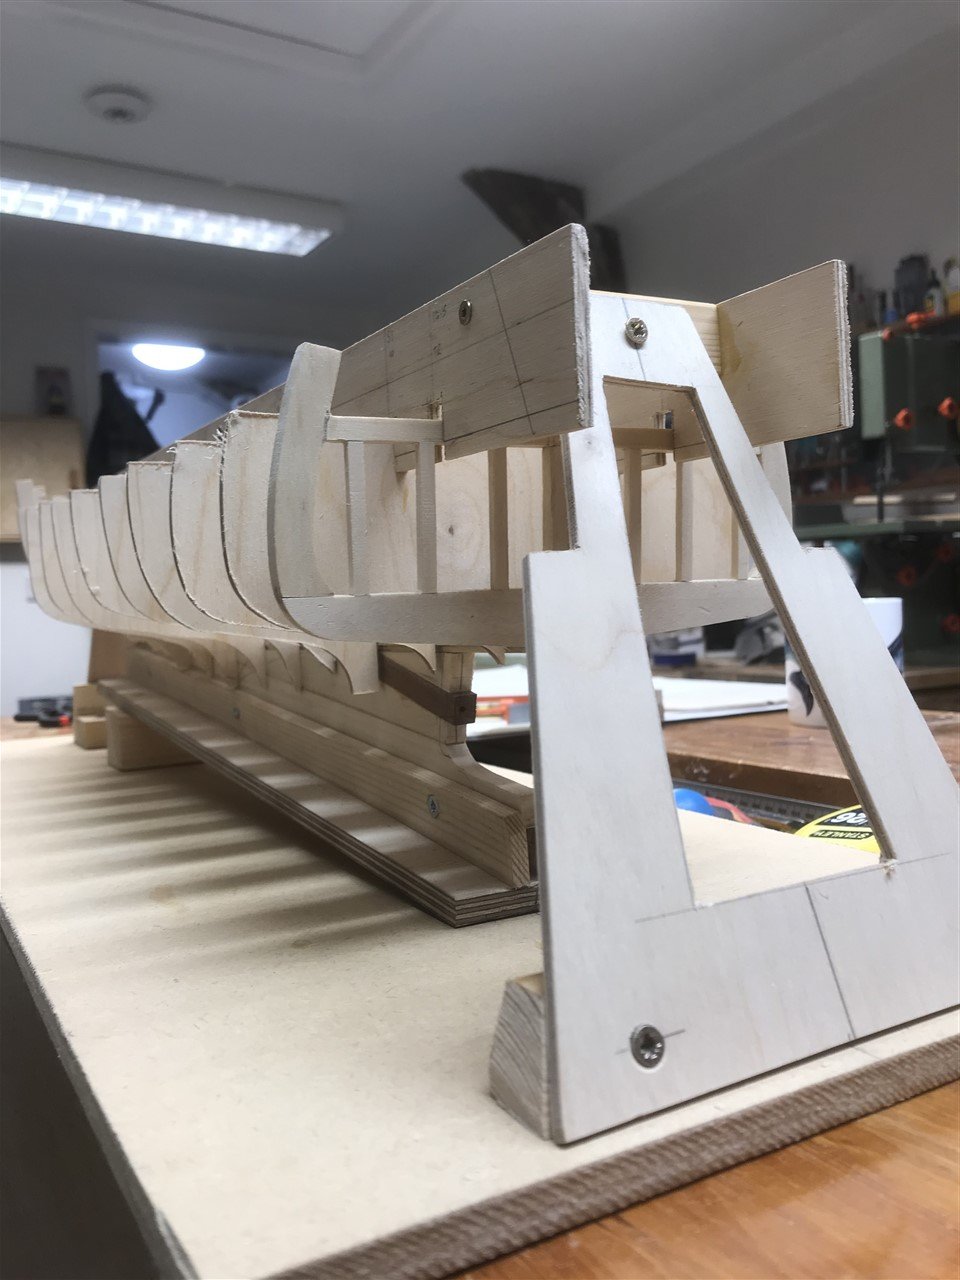
Have the frames true to within 1mm at the sheer, rabbet and at each waterline. Some adjustment needs and a couple rebuilt. Getting a sense of the shape of the hull now. May remake the jig to simplify it and allow more room to add the floors ribs and ribbands. Next step is to fair the edges of the frames. It's only at this stage that I feel I have a set of plans that are accurate to the original.
-
-
Thanks Michael, as a bit of a newcomer to all this, so will I!
-
Made a start on a building jig. . Not sure how this will work, but will adapt as I go along. Looks a bit of a mess at this stage.
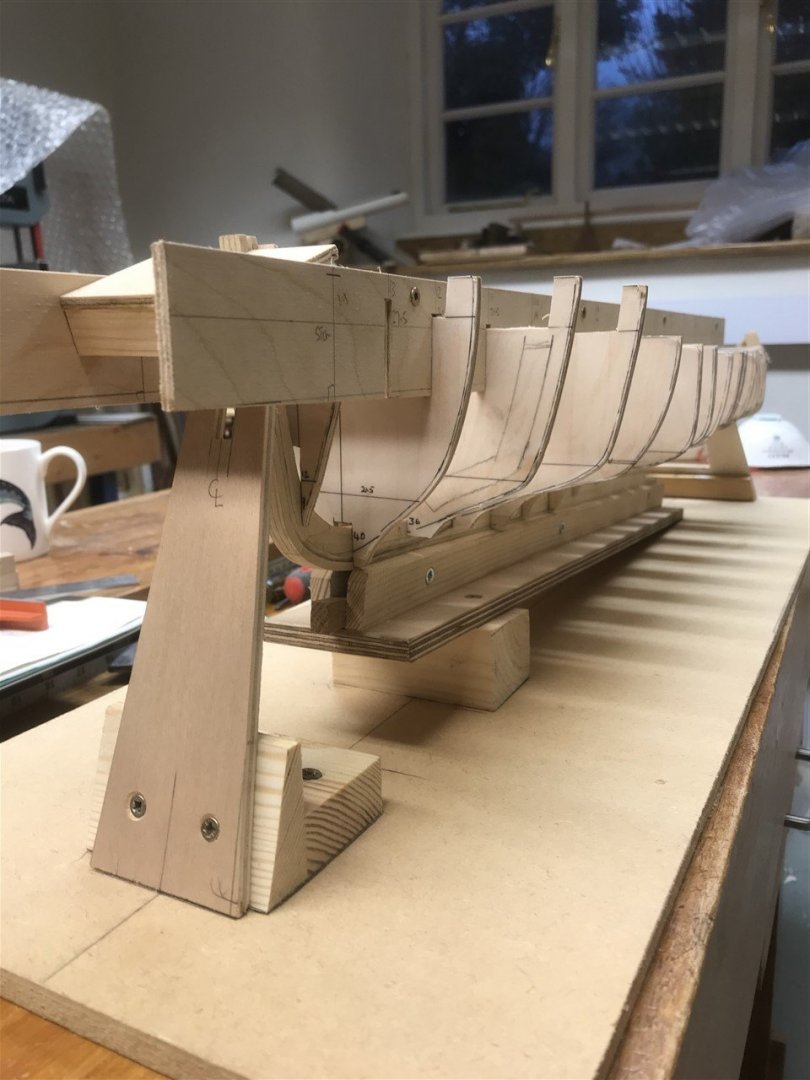

The deadrise area of the frames is not yet cut to shape - a great deal of work to do on fairing the frames!
The design will allow me to whip out a frame fairly easily when needed, and trying to allow space to get my hands in and around the work.
- neilm, GrandpaPhil, KeithAug and 1 other
-
4
-
-
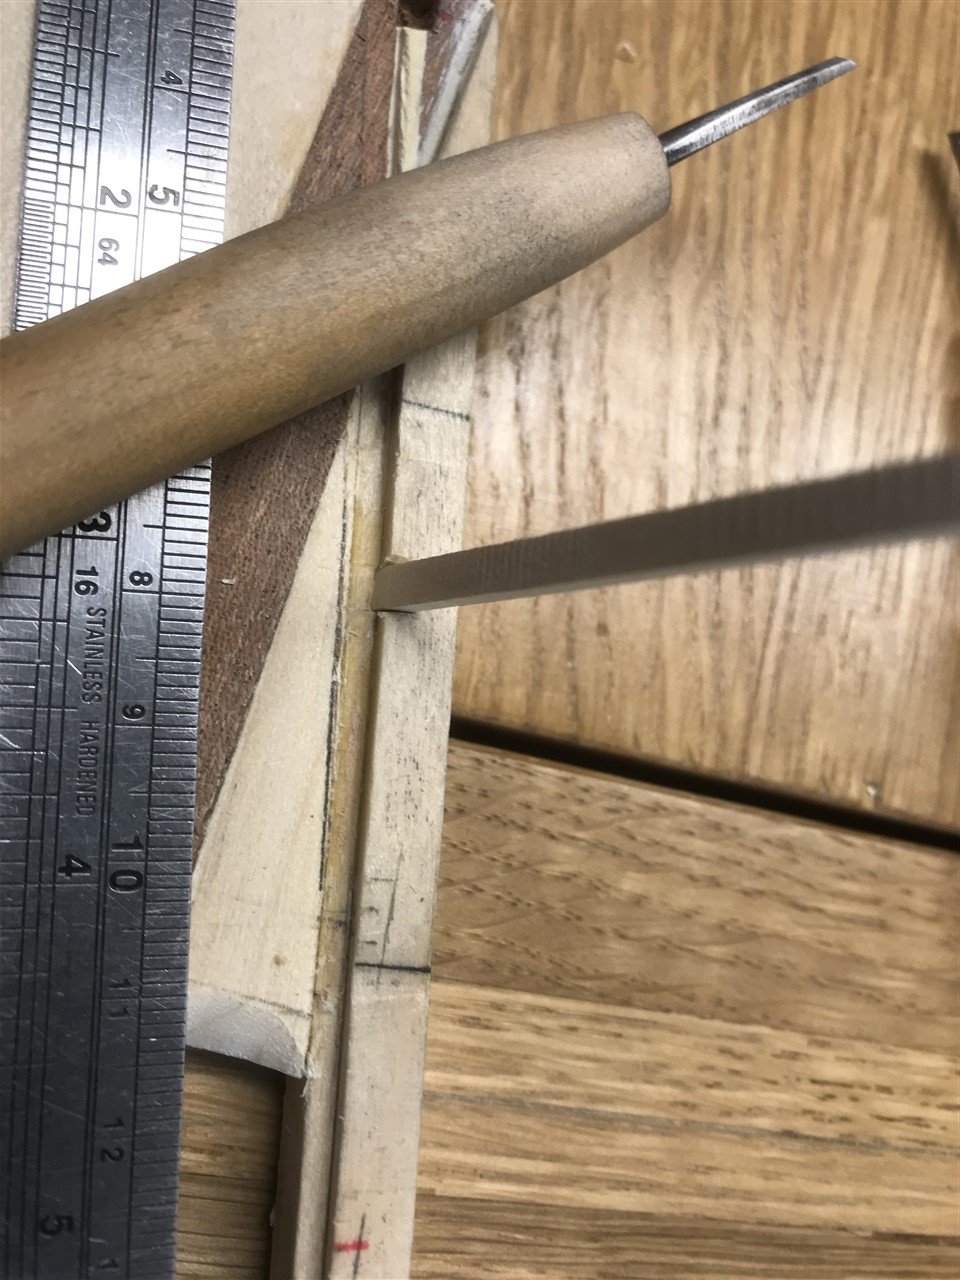
Need some tiny chisels to cut out the rib pockets. Found some 2 1/2" masonry nails and fashioned a mini set; 3.5mm 2.5mm and 2mm. Will make
handles from an old drum stick.

Need to cook a pizza so I can harden the steel again.
- mtaylor, GrandpaPhil and neilm
-
3
-
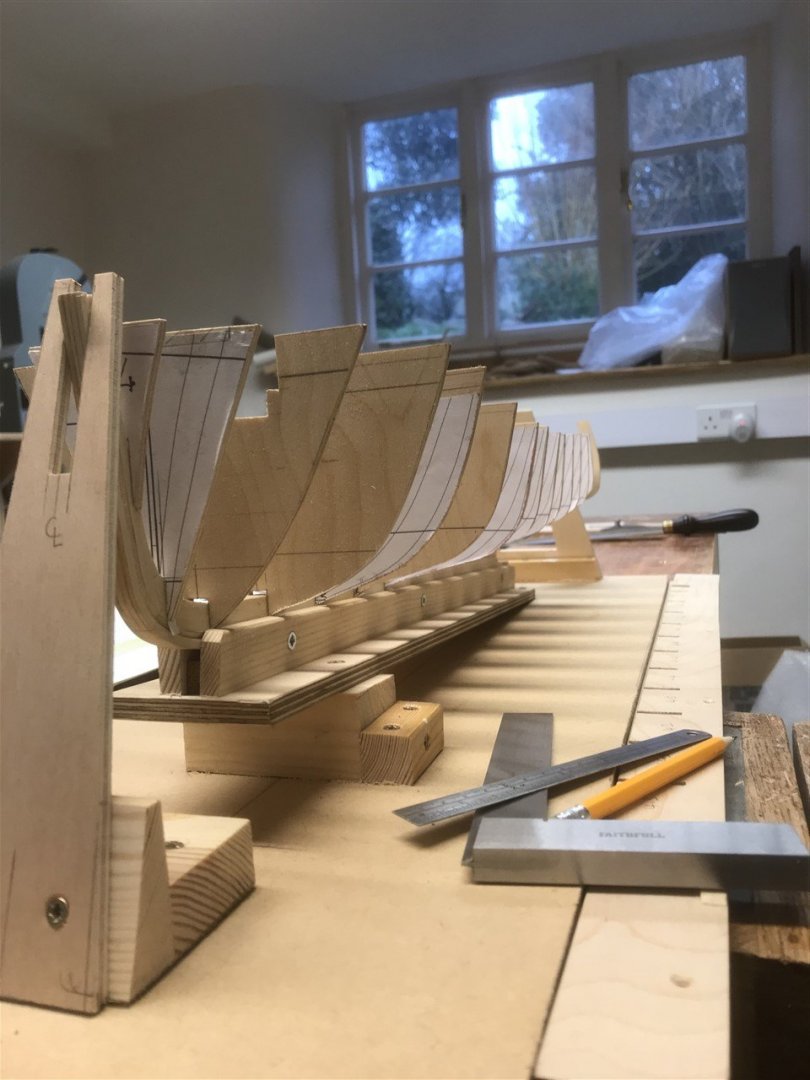
Getting on towards the framing now.

Rough cut outs with deadrise to be faired after fitting.
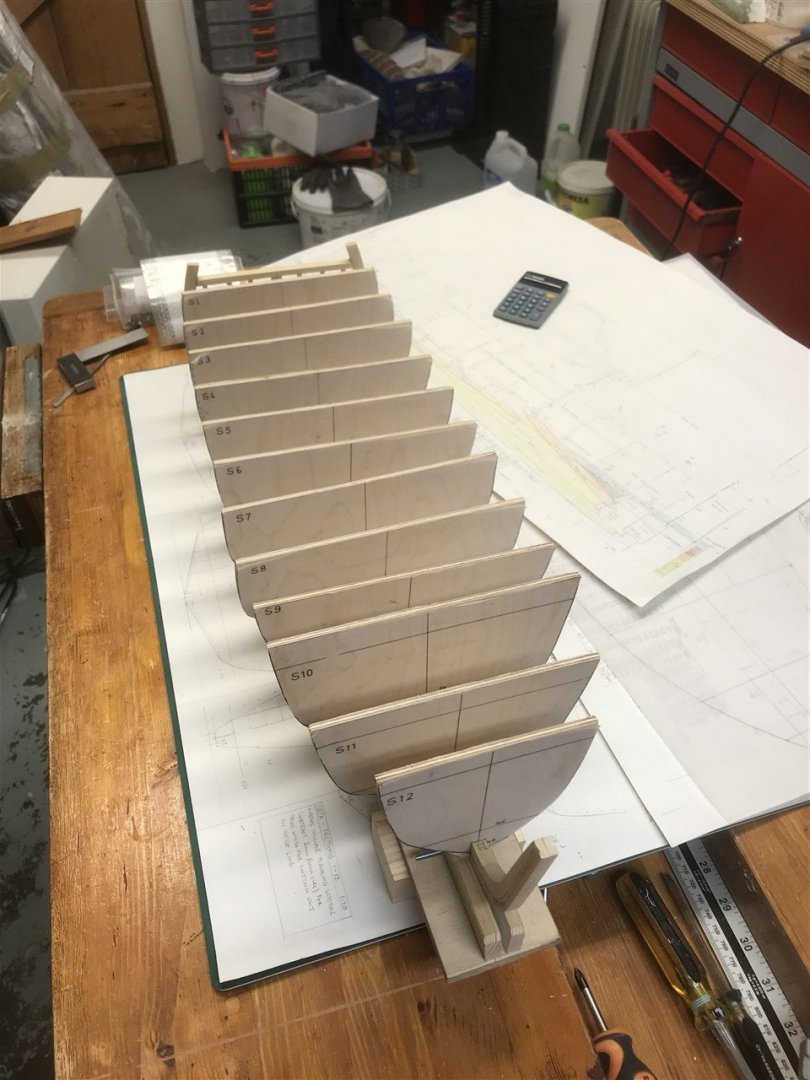
Couldn't resist seeing what a loose fit looked like. Need to make a simple framing rig to square them up yet.
Next steps will be to finalise the rabbet line at the deadrise amidships, then cut rib pockets before fitting and fairing the frames properly.
- mtaylor and GrandpaPhil
-
2
-
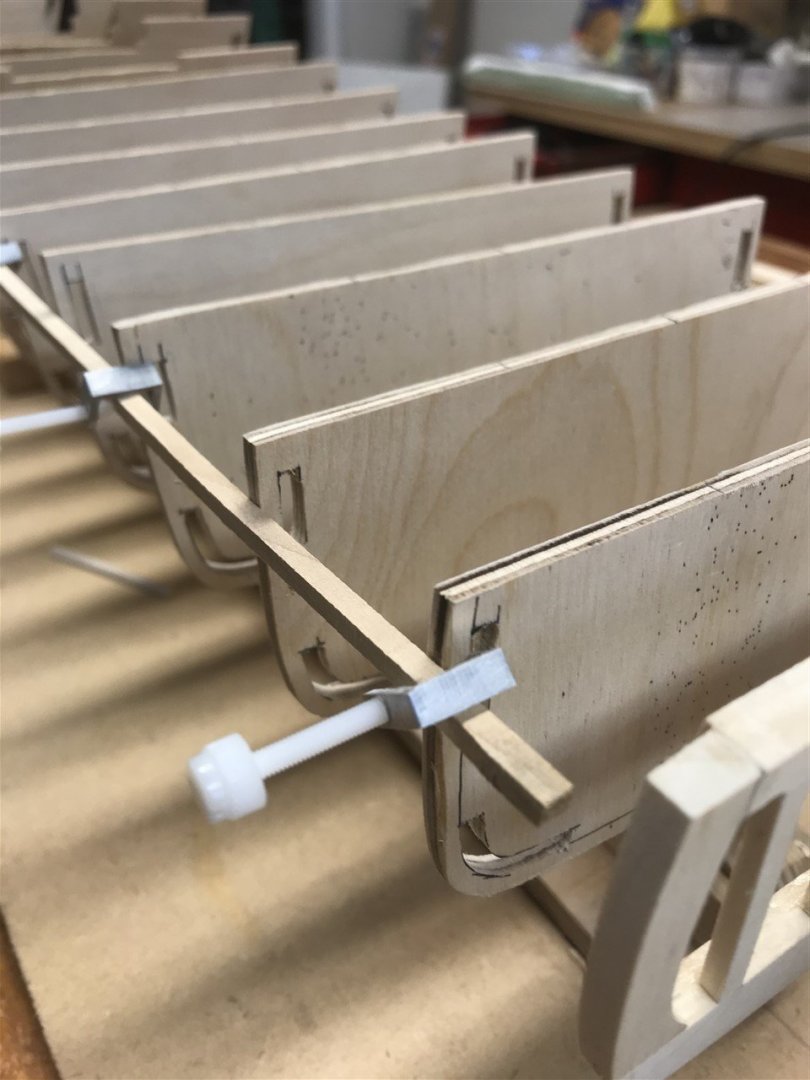
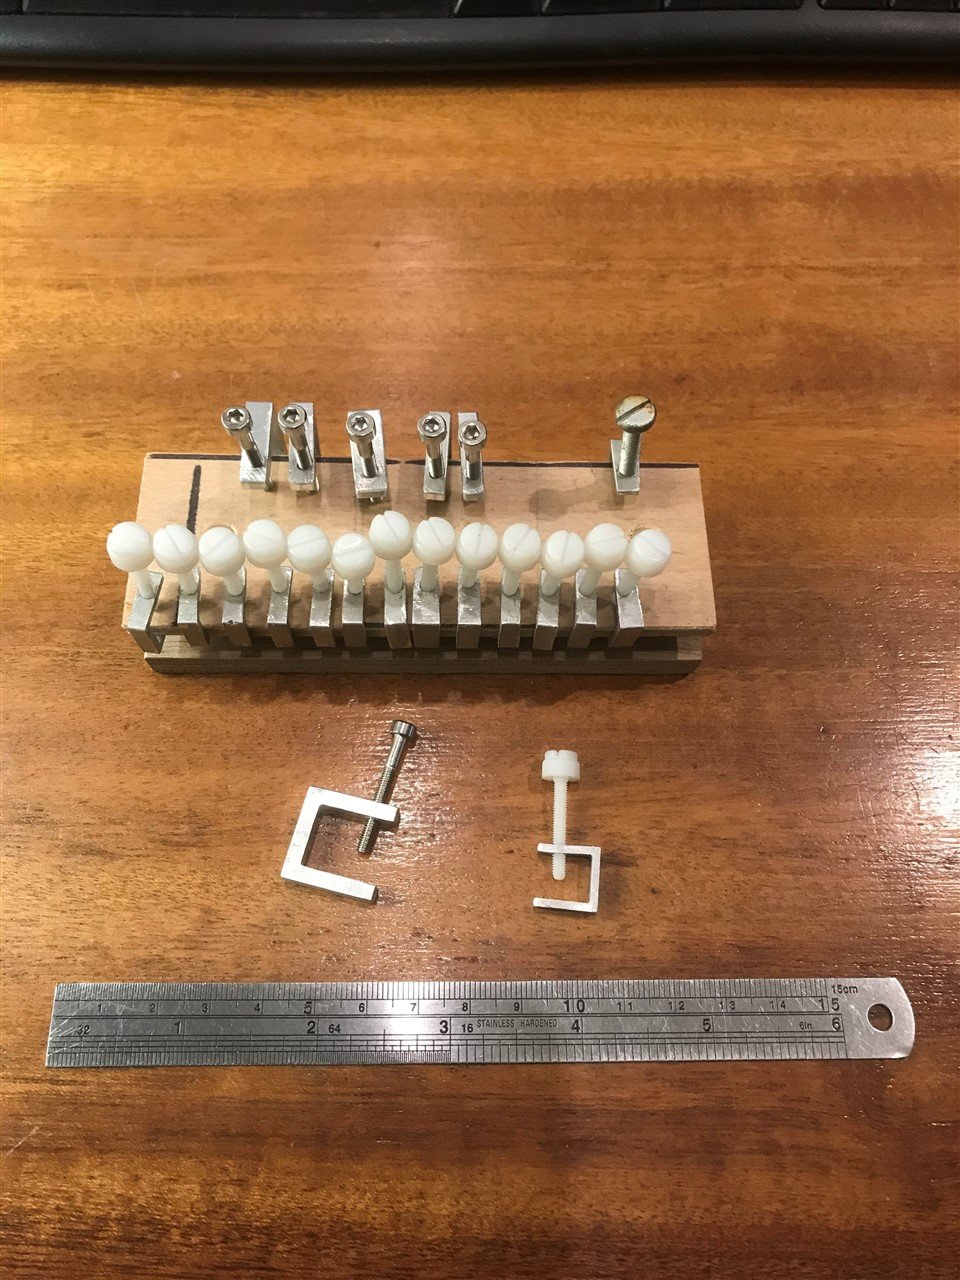
Most metal suppliers will sell the channel, for example: https://www.metals4u.co.uk/materials/aluminium/aluminium-channel/100719-p which yu cut and tap to size, these are 3mm.
and the thumb screws https://www.accu.co.uk/en/plastic-thumb-screws/427329-SFTR-M3-30-N
-
Aluminium 12 mm & 19mm channel and thumb screw head bolts. Cheap 'n cheerful.

- thibaultron, grsjax, Canute and 5 others
-
8
-
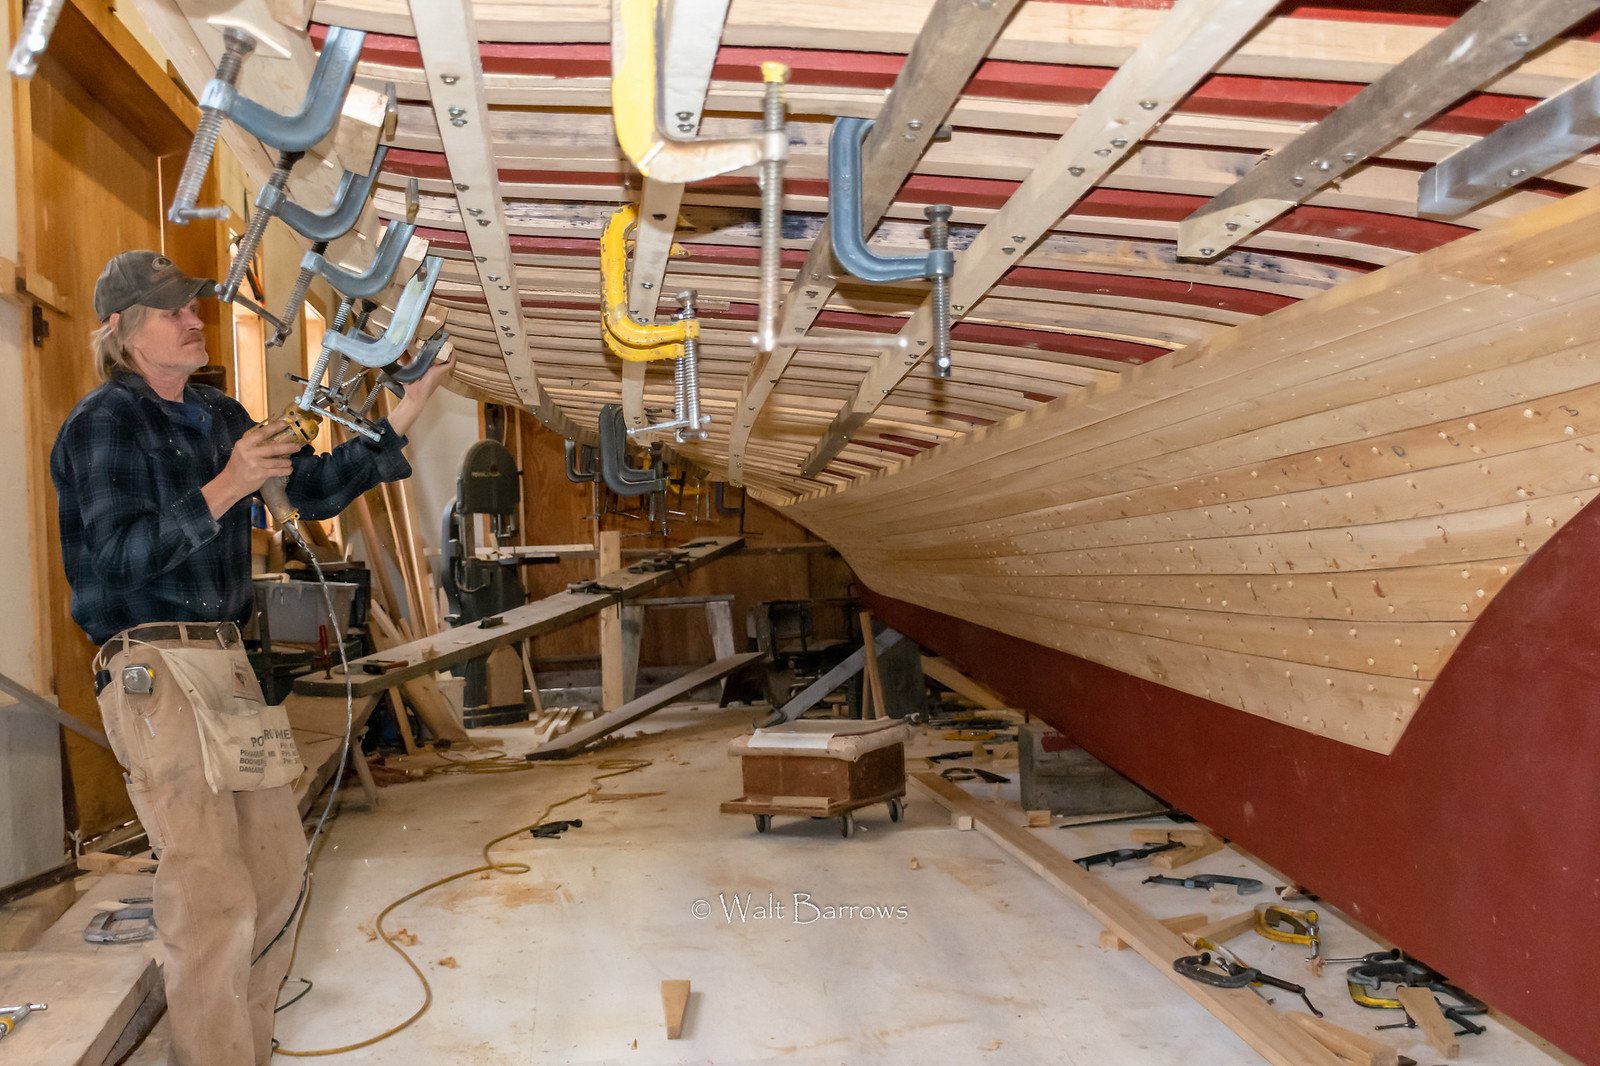
So back to the plans, and here is where I'd like your advice friends.
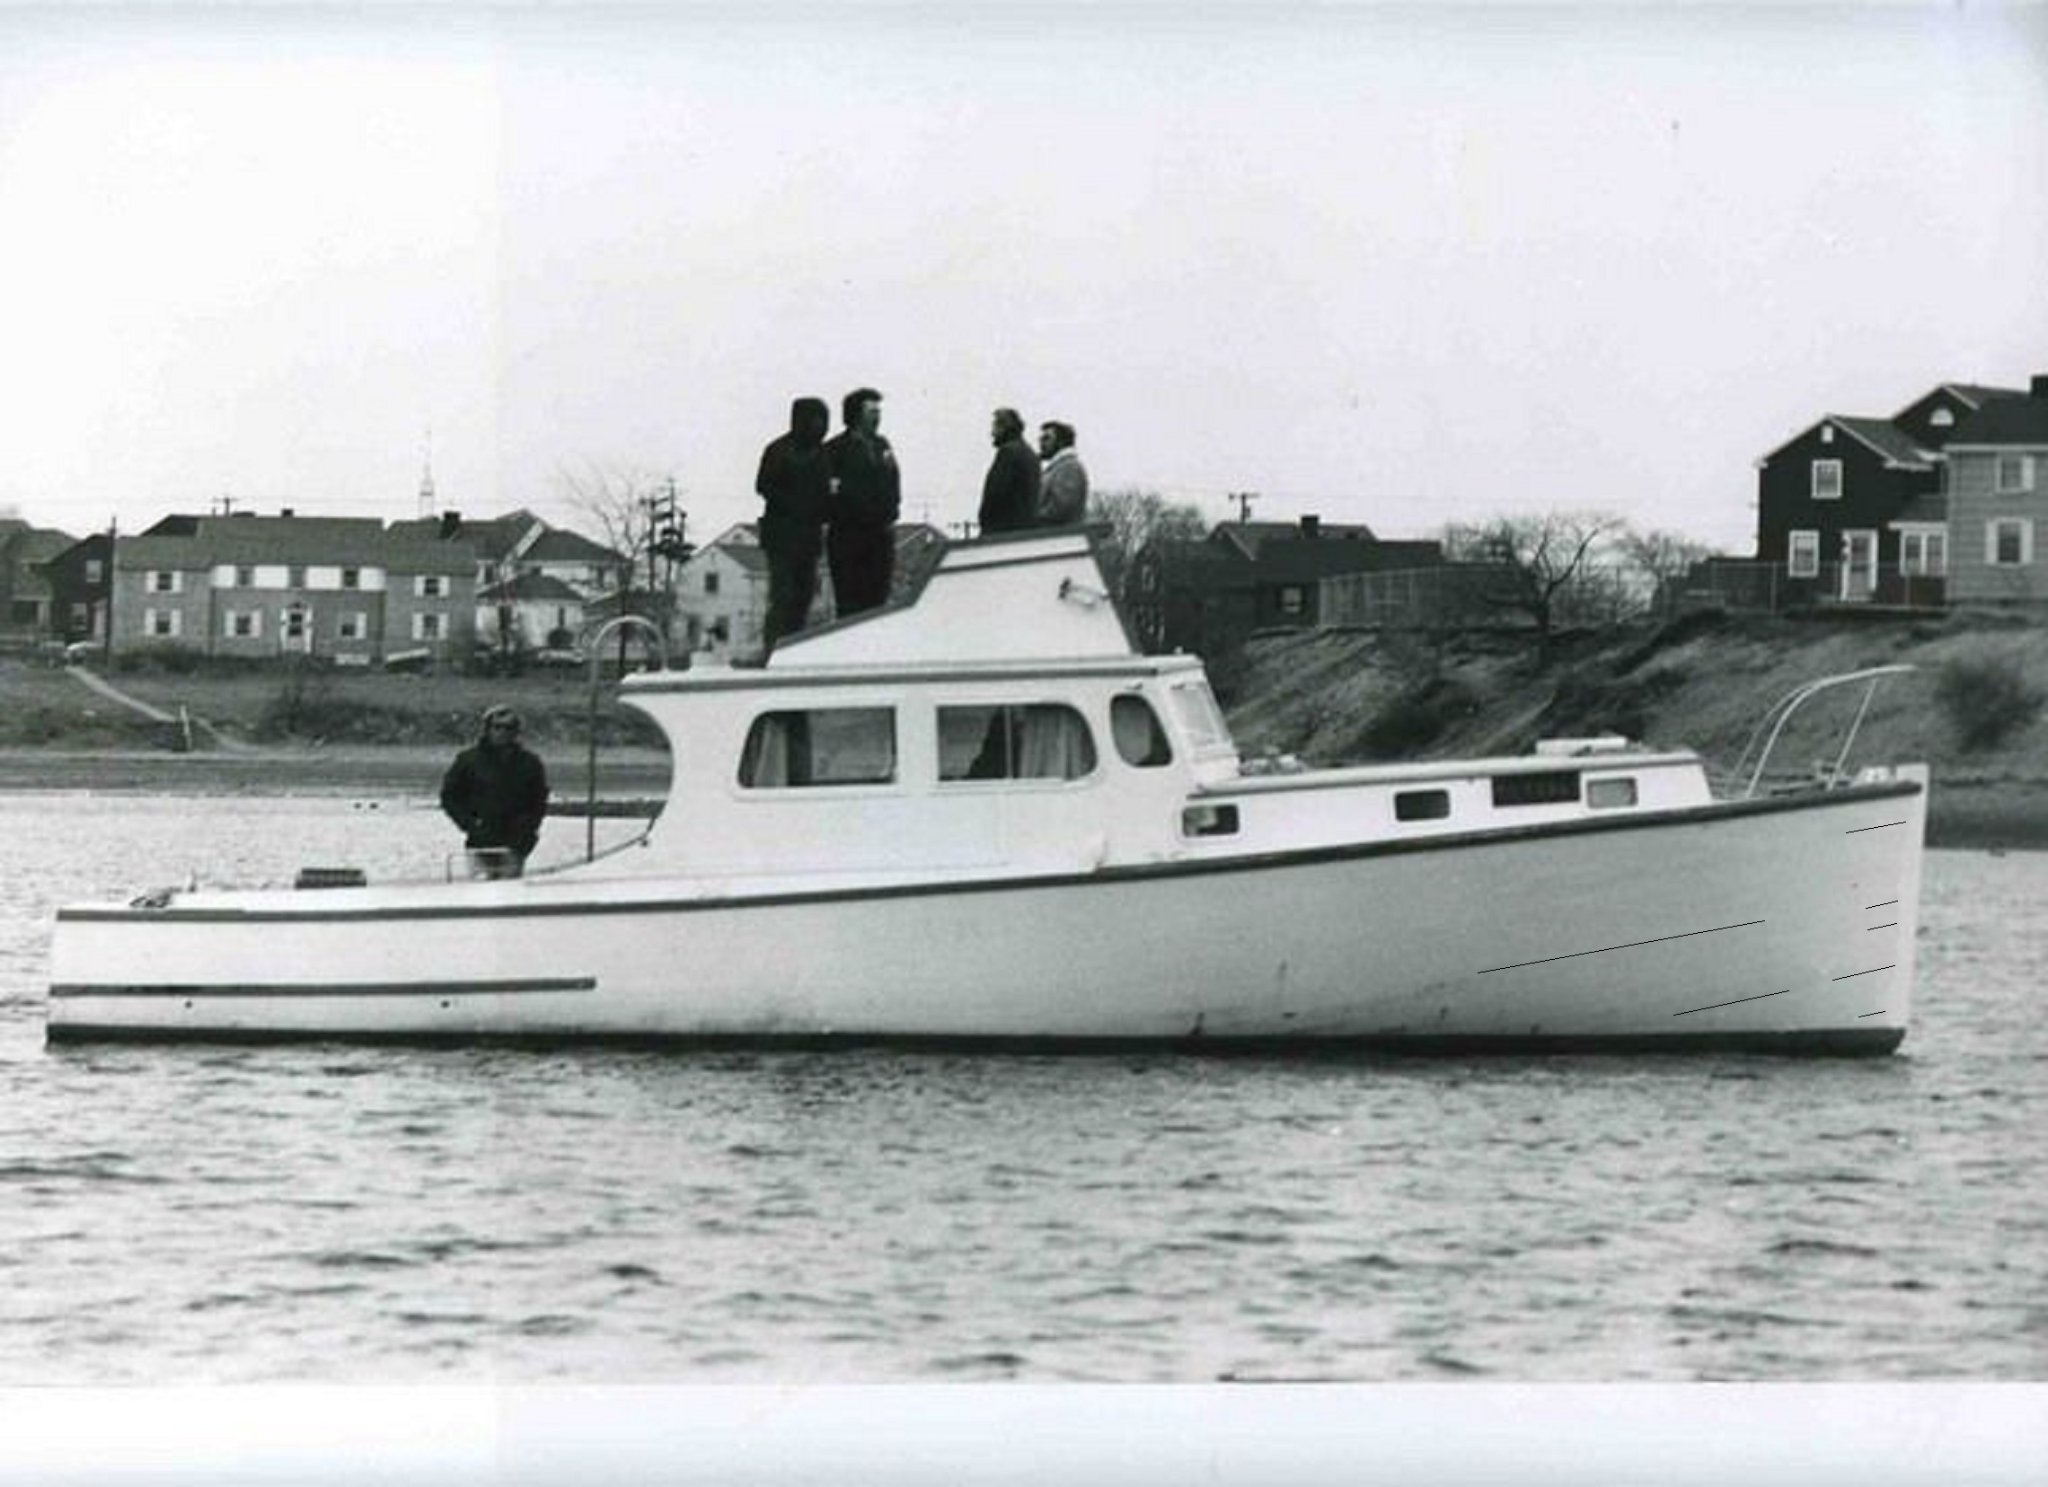
I had planned to cut the rabbet and rib pockets next, and if you look at the plans in post #12 you'll see that I was to cut the rabbet straight from aft to stern - skeg built I think it is called. However, the more I research Orca, I think she was planked built down to 2/3rd of the way aft then skeg built to the transom.
Here's a half model (not mine) to illustrate what I mean:
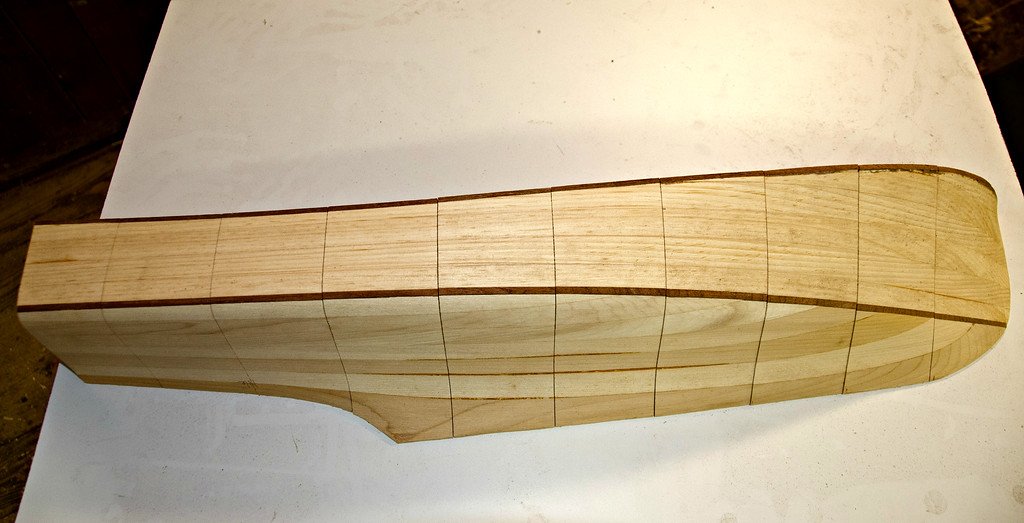
So I need a different rabbet line to achieve this, more like this one:
...and looking forward...

If we have a look again at the great photo that jlt13th send me (see post #5) I think there is evidence that this is how Orca's hull was planked. If so I have some adjustments to make.
Be interested in the thoughts of any of you more familiar with this type of boat.
[Credits to Walt Burrows Photography from whose wonderful website this images of John's Bay Boat Co. came.]
- michael mott, neilm, GrandpaPhil and 1 other
-
4
-
Well it's been some time since the last post. Domestic tasks (ripping out and installing a bathroom and adding insulation to my loft space) plus numbingly cold temperatures in the workshop have delayed the work, but also I have had to rethink the plans a little - more of that later.
Firstly a day or two exploring steam bending ribs for Orca.
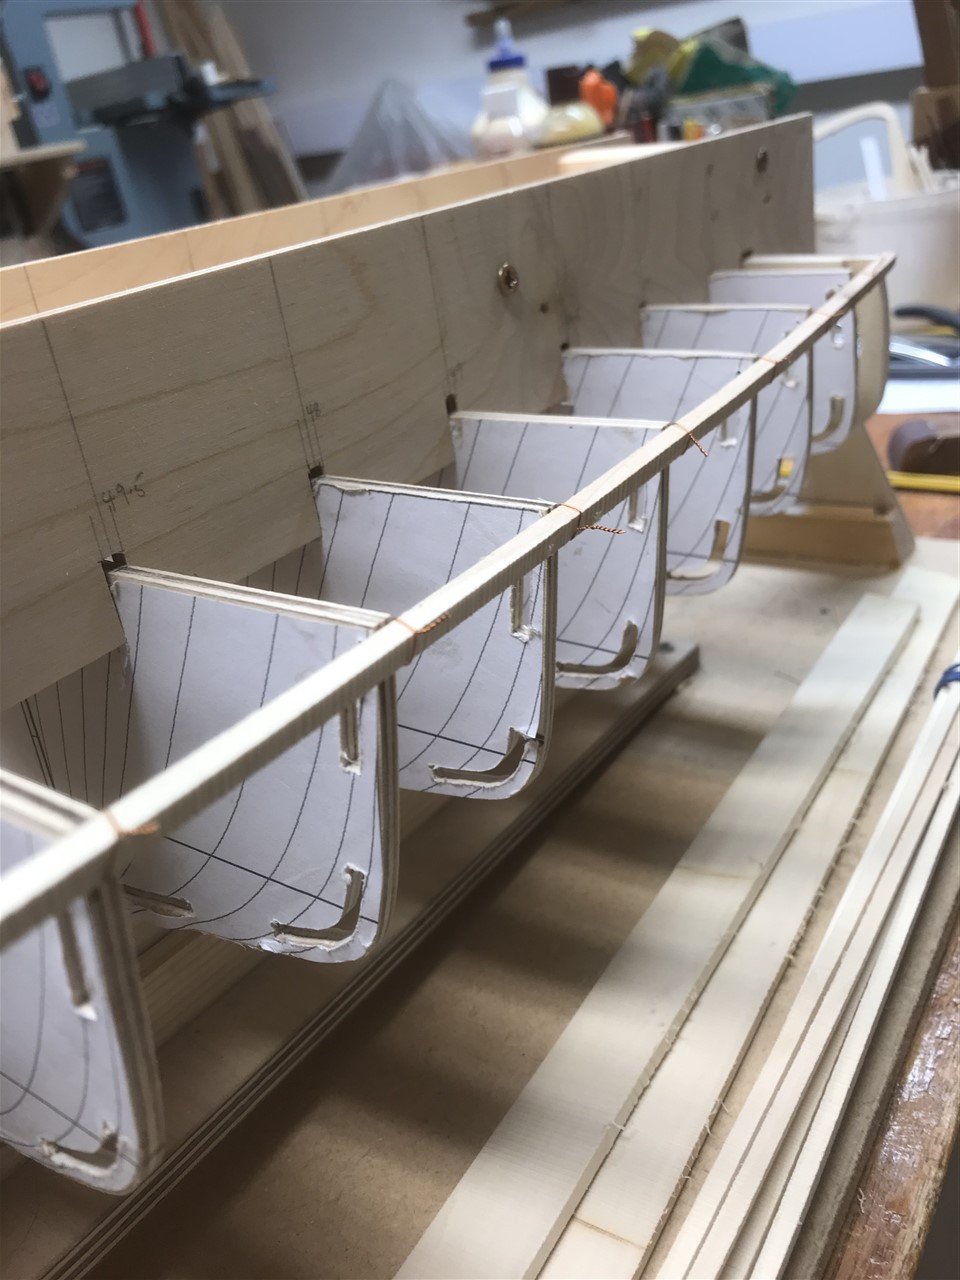
The method I aim replicate is to put up temporary frames and ribbands, as shown in the drawing.
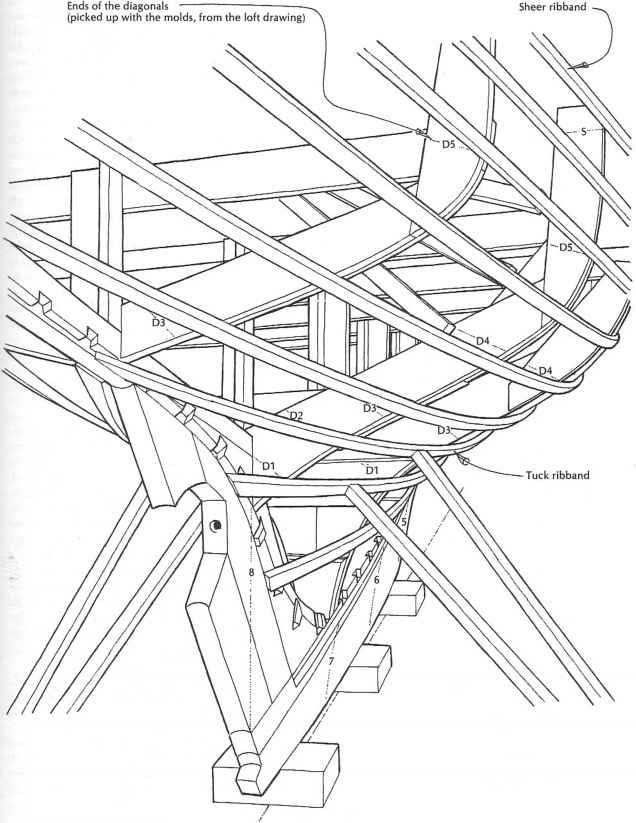
The ribs are steamed and jammed into the pocket sockets on the keel or hook and then ‘walked up’ (literally) into place and clamped.
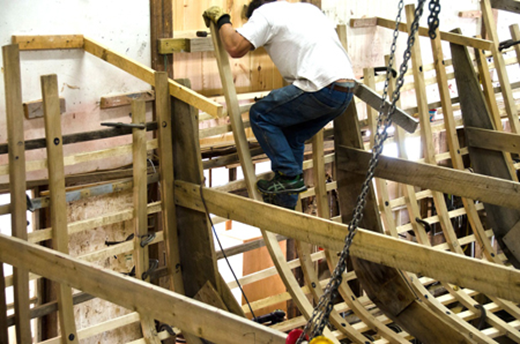
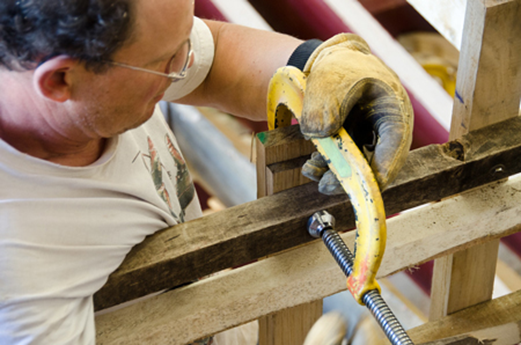
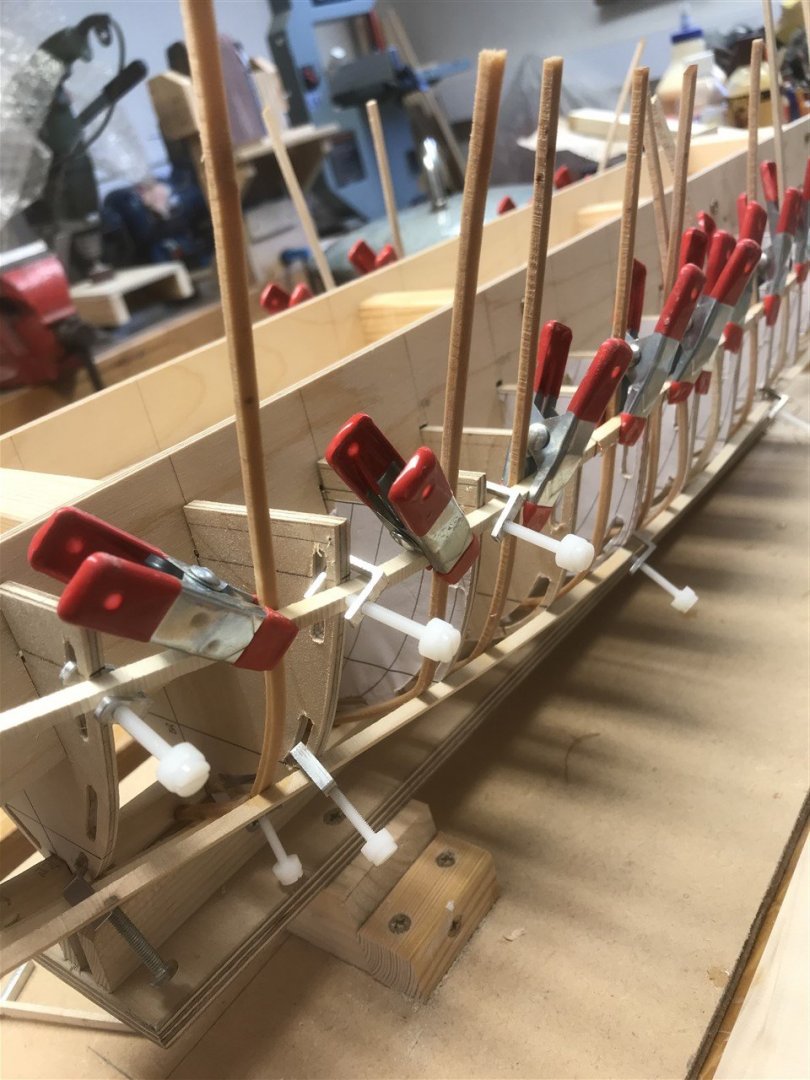
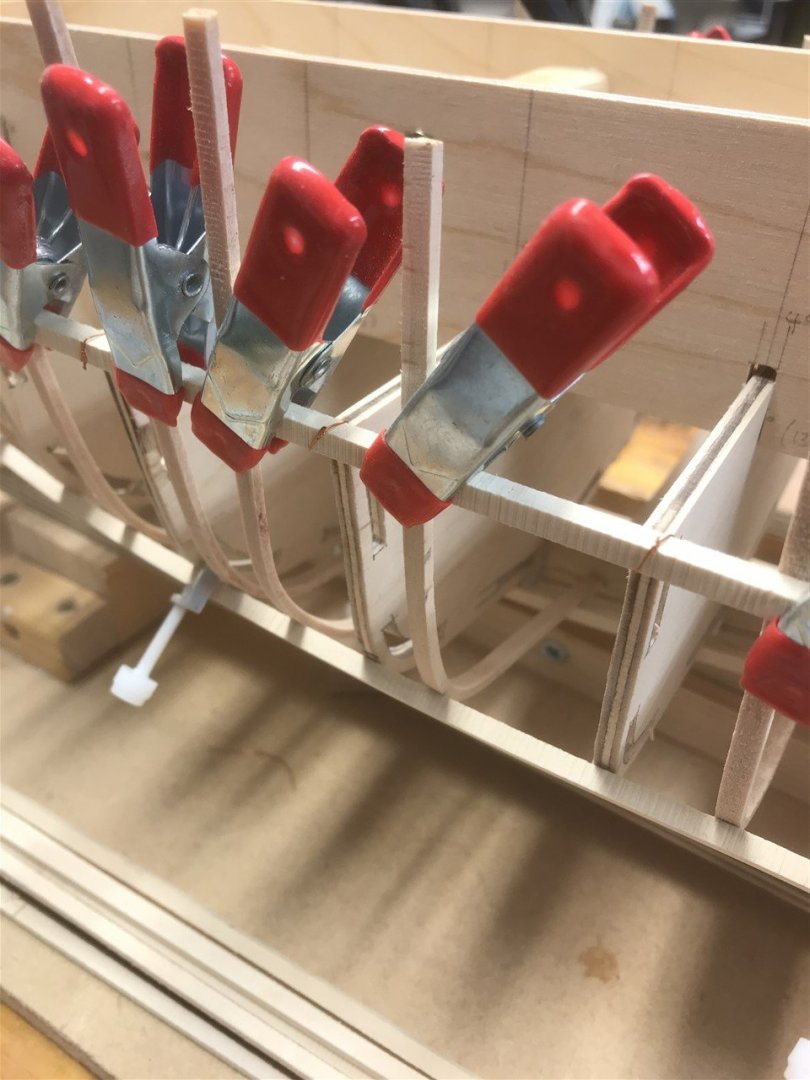
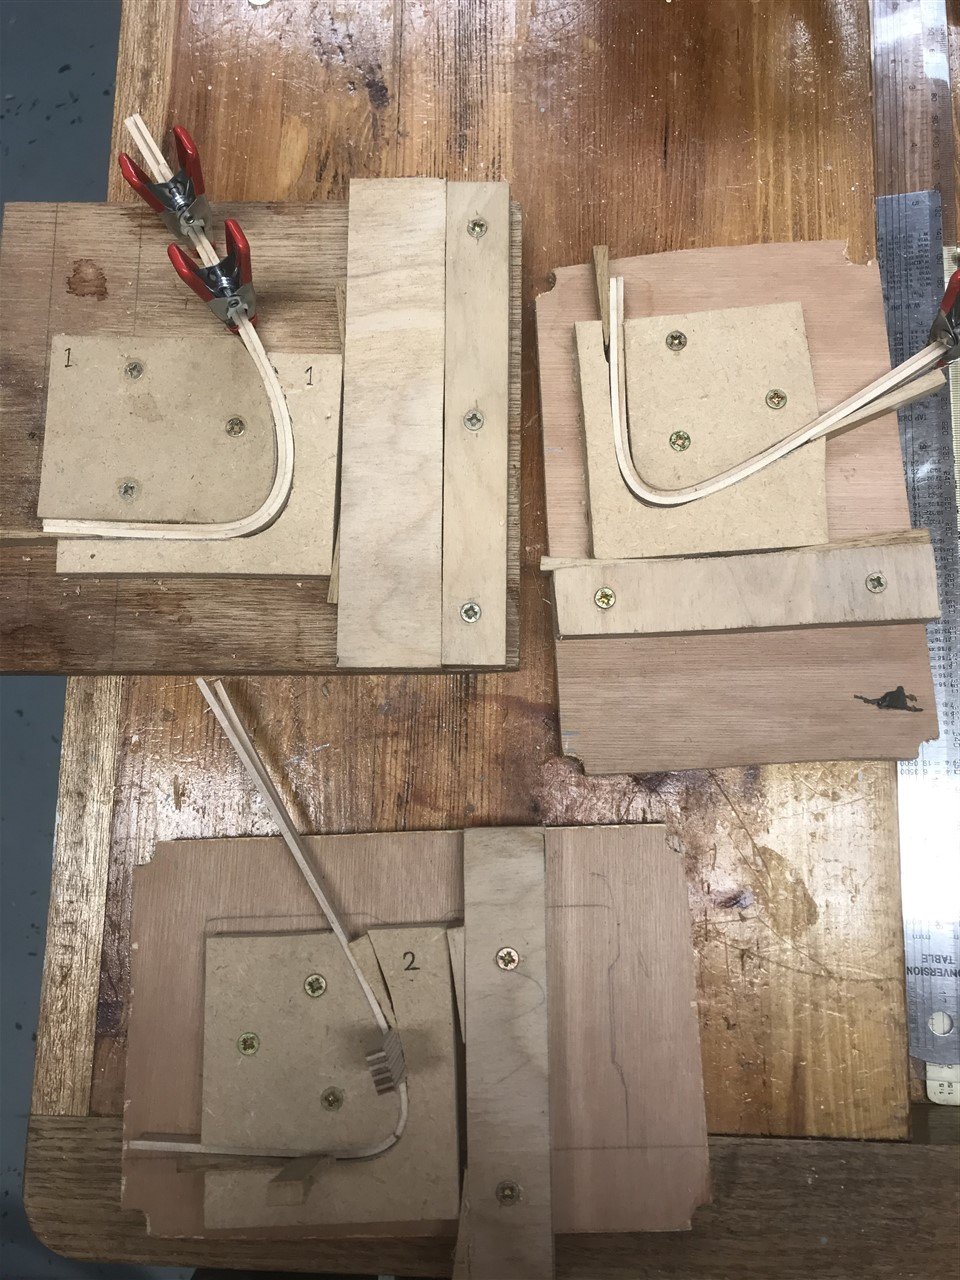
For tight curves, the ribs are split for the top half to reduce stress. The difference in radius of the two halves shows in this picture of the rib being clamped at the sheer. A short video of this can be found here;
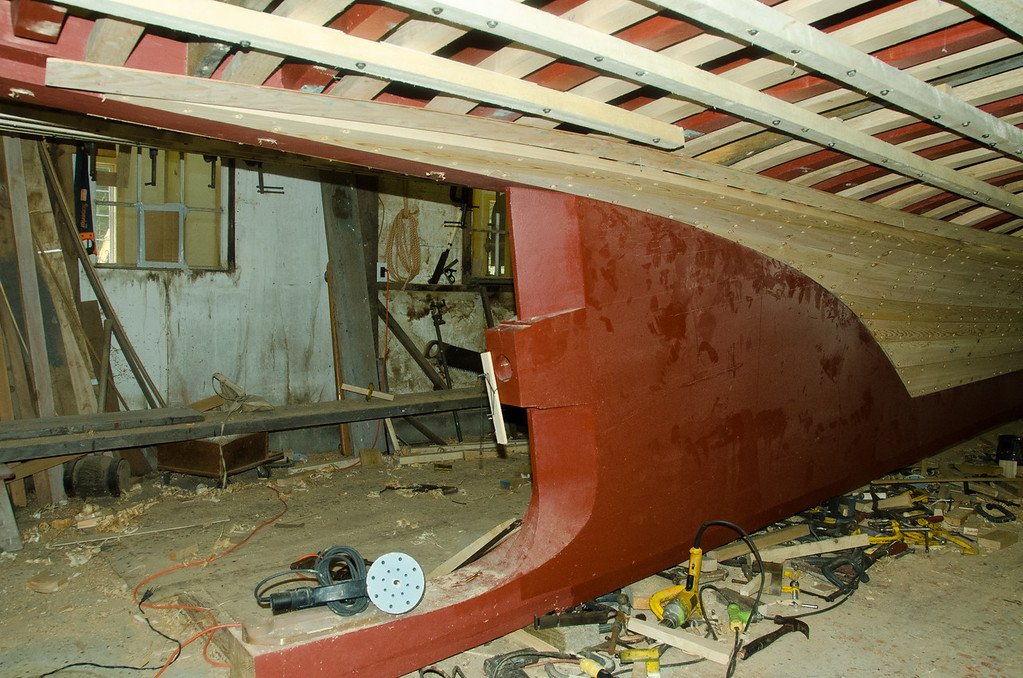
The ribs for this boat, the ‘Never Better’ are 1 ½” x 2 ½” white oak and seem quite small when you look at the size of the boat, but the 1 ½ “thick carvel white cedar planking outside makes a sturdy hull.
I suppose I could plank over temporary frames, then add the ribs, as one might do with a lapstrake dingy, but wanted to try the ‘proper’ way.
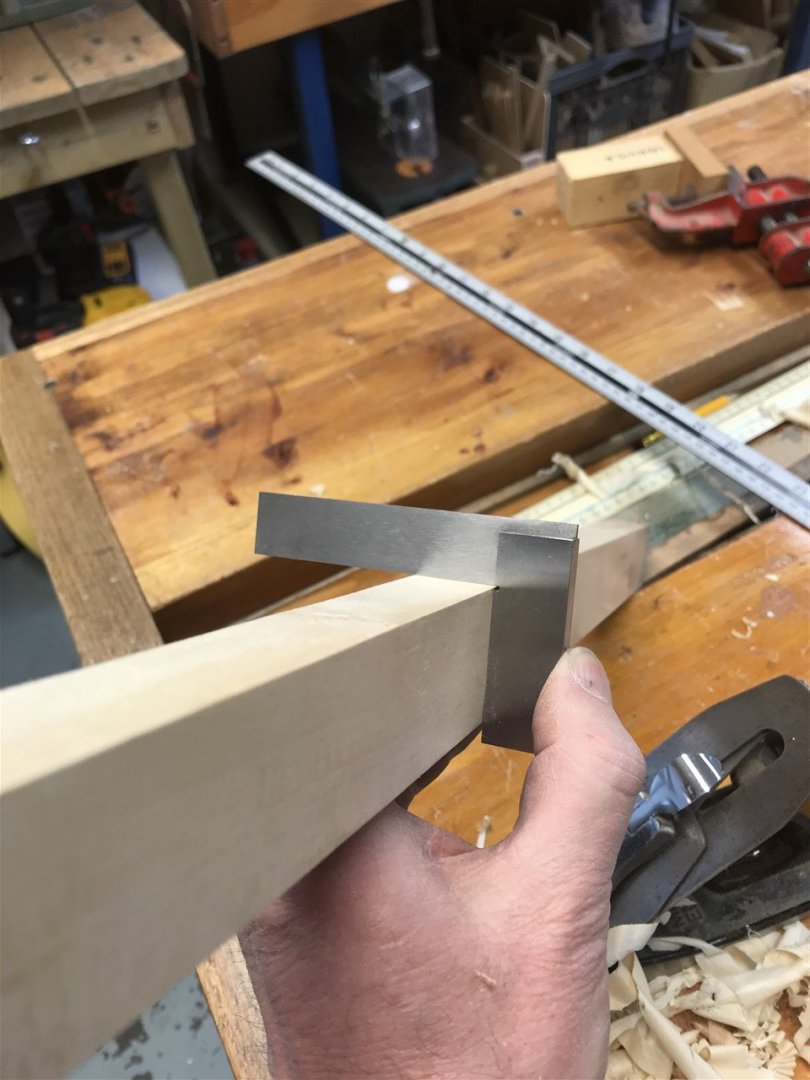
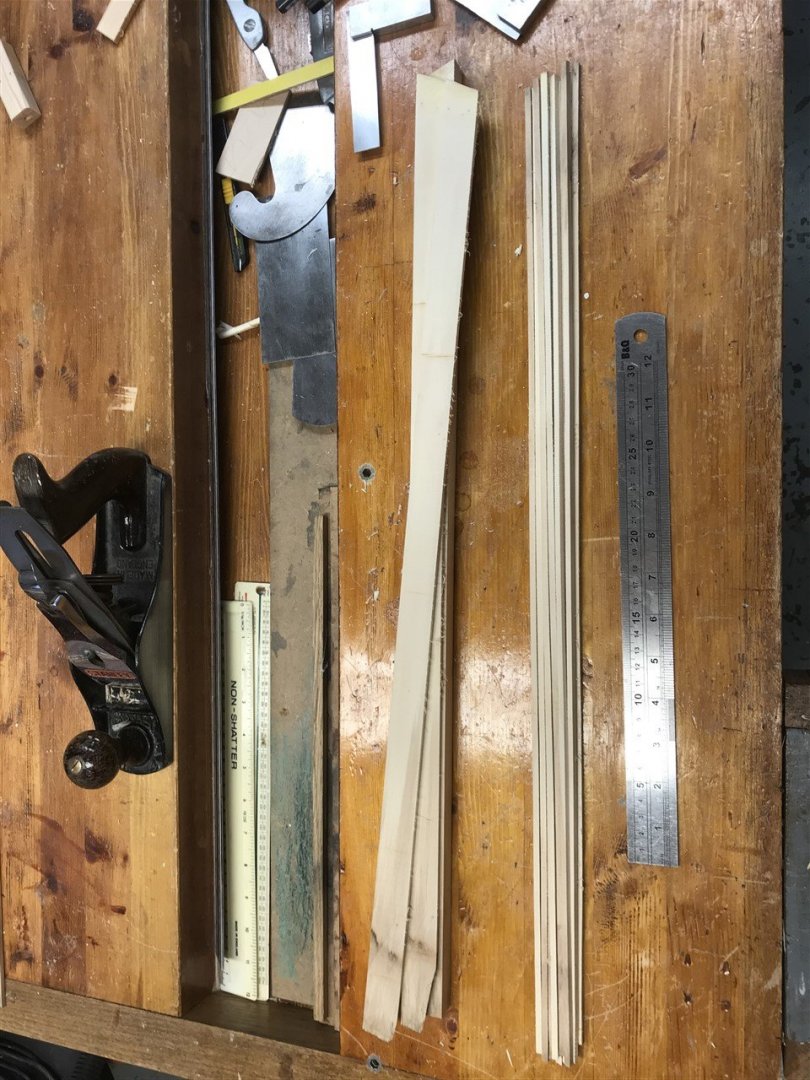
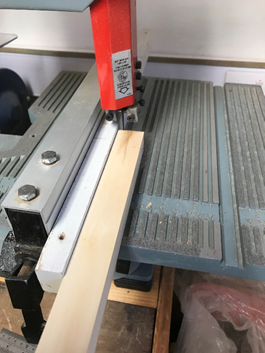
For the test I tried 3mm x 5mm first then 2mm x 3.5mm ribs in part-seasoned field maple (sycamore), seasoned white oak; seasoned tulip (I think this is American poplar) and green Ash all available from my timber stock (well my firewood pile in fact). I tried to get the most straight grained sections, which was made easier by splitting some of the billets before dimensioning. This 40 year old Dewalt 100 16” bandsaw can prepare stock with a freshly sharpened 6 tpi blade with remarkable accuracy.

I have a little Delta bandsaw with a sharp 24tpi blade and a ‘floating fence’ as I call it rips hardwood into fine strips when needed. I hand plane the stock after each cut so that at least one side of the plank is smooth, but the other only needs a light 240 grit sanding after that. I keep reading about the wonderful little US table saws lots of you own, but hell’s bells - the shipping and tax puts them out of reach for me.
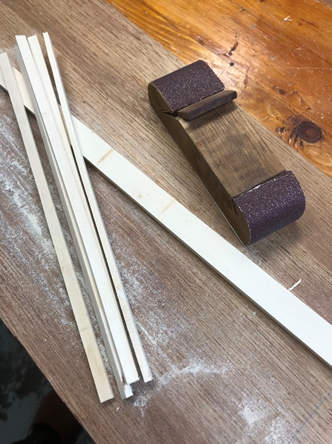
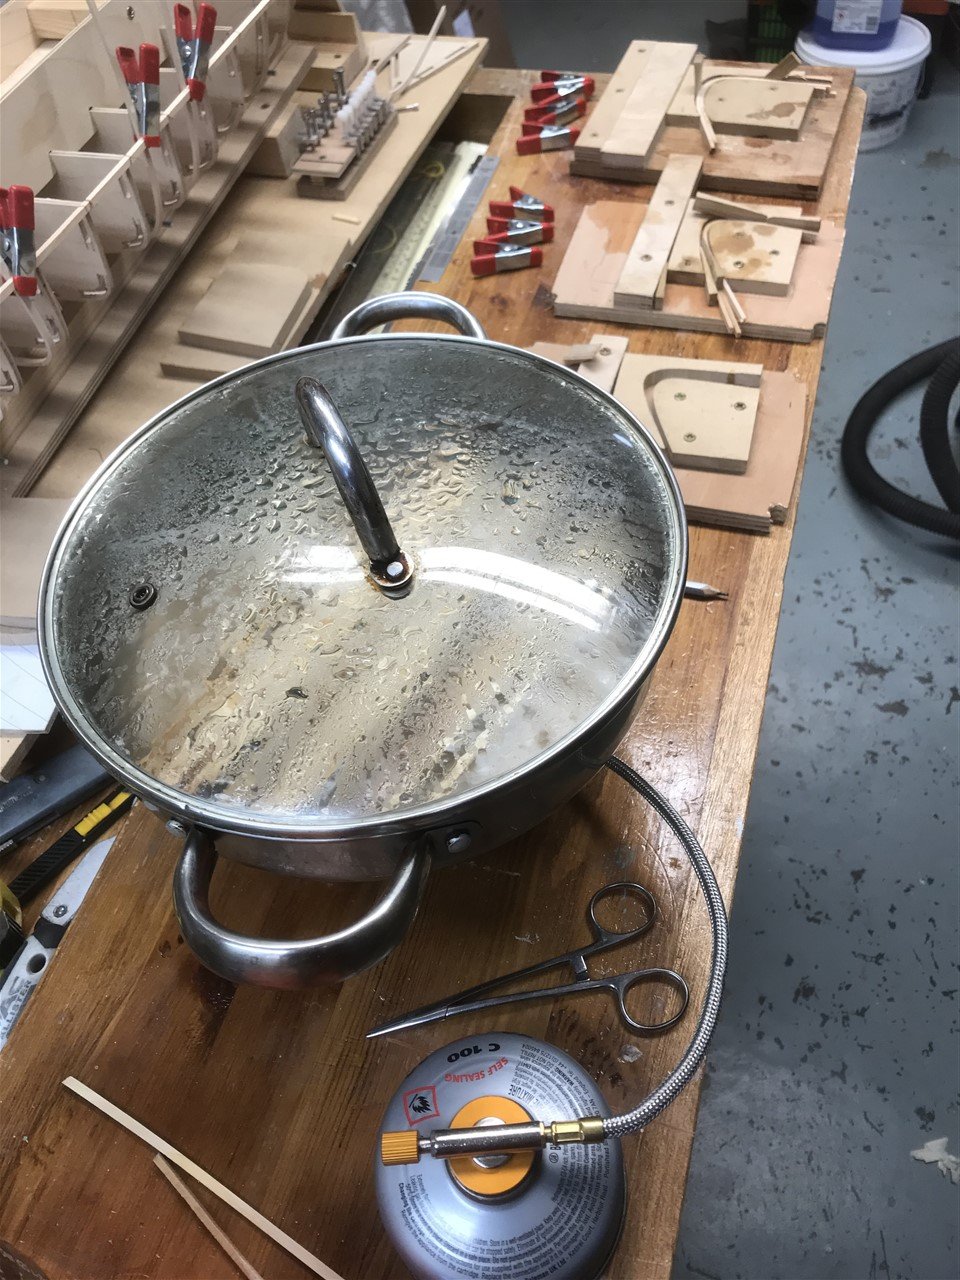
I cut the strips to size in width and depth but overlong and let them boil in water for a few minutes. Her indoors was not too pleased that I used a frying pan for this, but I think I got away with it.
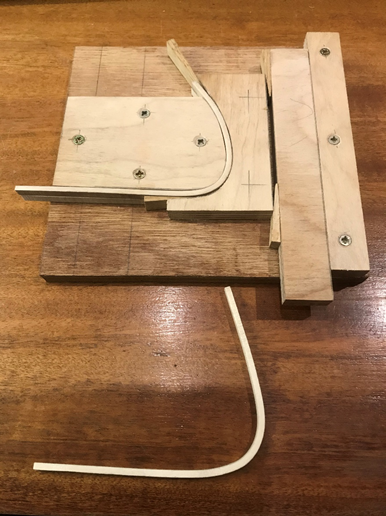
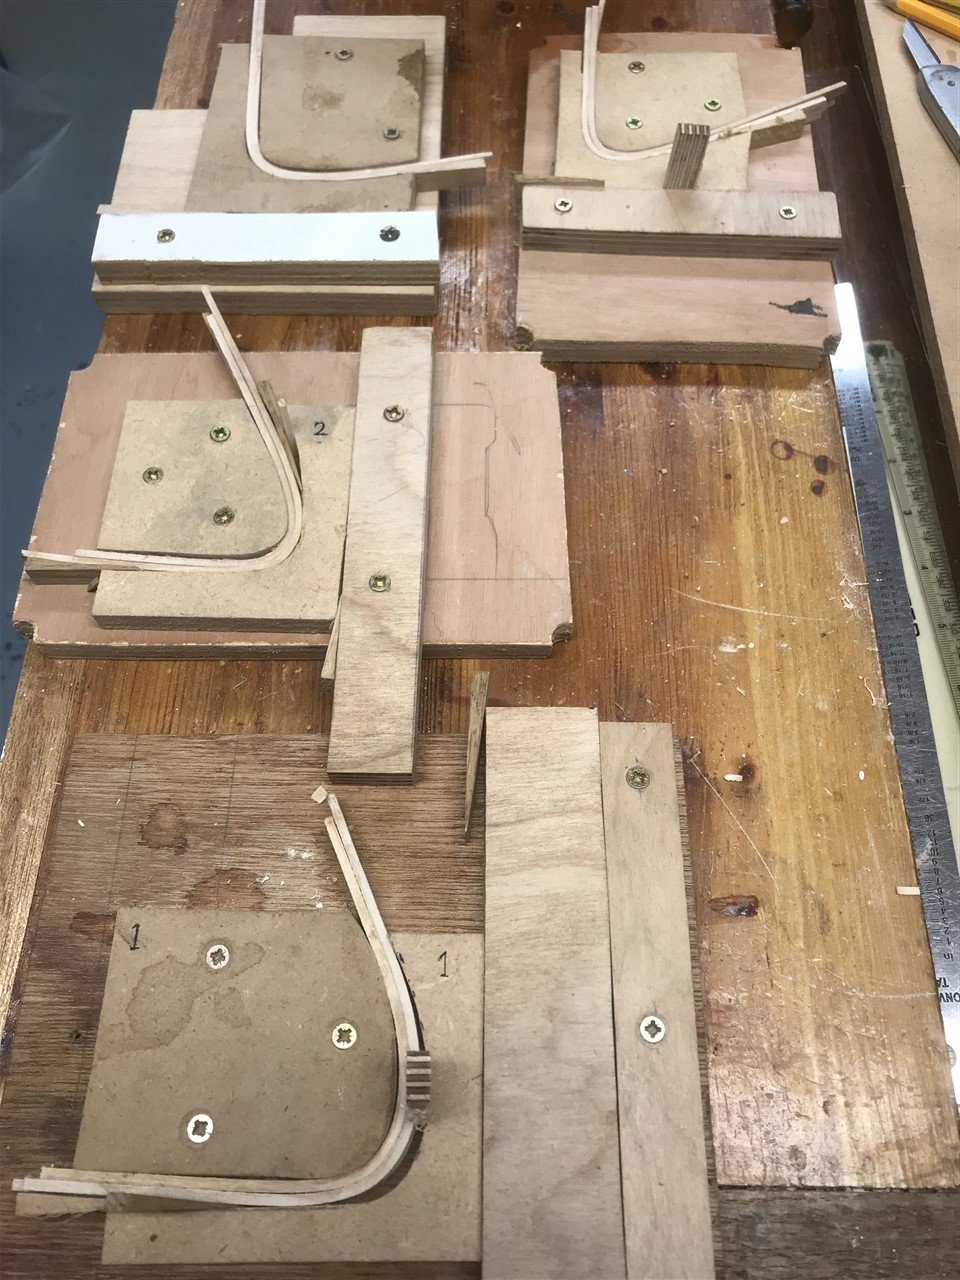
I made a very simple test jig deep enough for 2 ribs at a time with a slightly tighter radius to allow for spring back. I prepared enough ribs to allow for some breakages and fiddled with the best method for bending them into place to relieve the stress, using a shaped former, as shown.
Of the four woods I tried the maple won hands down. The oak and the ash are too coarse grained for this small size, but I was very pleased with the maple, which not only bent well, but when dried was strong. The tulip as a close runner up.
Whether the ribs can be ‘finger-walked’ into place on the model without a former is yet to be seen! The ribbands are removed sequentially as carvel planking progresses from the keel up, and the frames removed after that.
One concern I had for such small strips was how to hold them in place on the ribbands, as drilling and pinning would weaken them too much. I’m working on some custom mini clamps to hold them in place. The carvel planking which will be edge set and glued and pinned to the ribs will eventually create a very strong hull, I hope.
- michael mott, GrandpaPhil, mtaylor and 1 other
-
4


YOUNG AMERICA 1853 by Bitao - FINISHED - 1:72
in - Build logs for subjects built 1851 - 1900
Posted
Quite extraordinary - those joints are so tight and crisp!