


FlyingFish
-
Posts
464 -
Joined
-
Last visited
Content Type
Profiles
Forums
Gallery
Events
Posts posted by FlyingFish
-
-
If you go on like this I'm going to have to buy a lathe and mill.... I just painted mine on! 🤣
- FriedClams, mtaylor, KeithAug and 4 others
-
 7
7
-
Very nice build - love the shape of this boat!
-
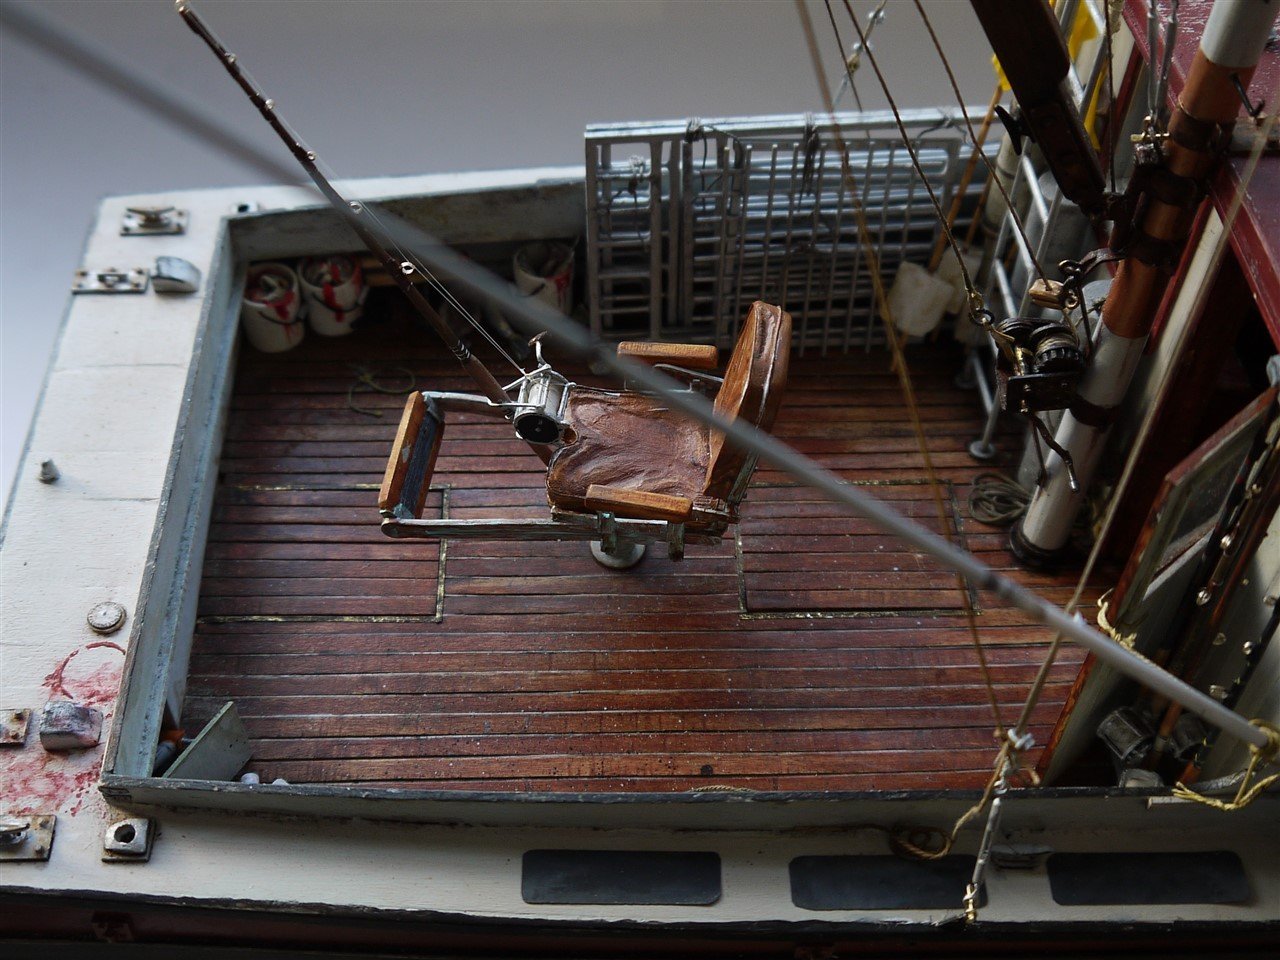
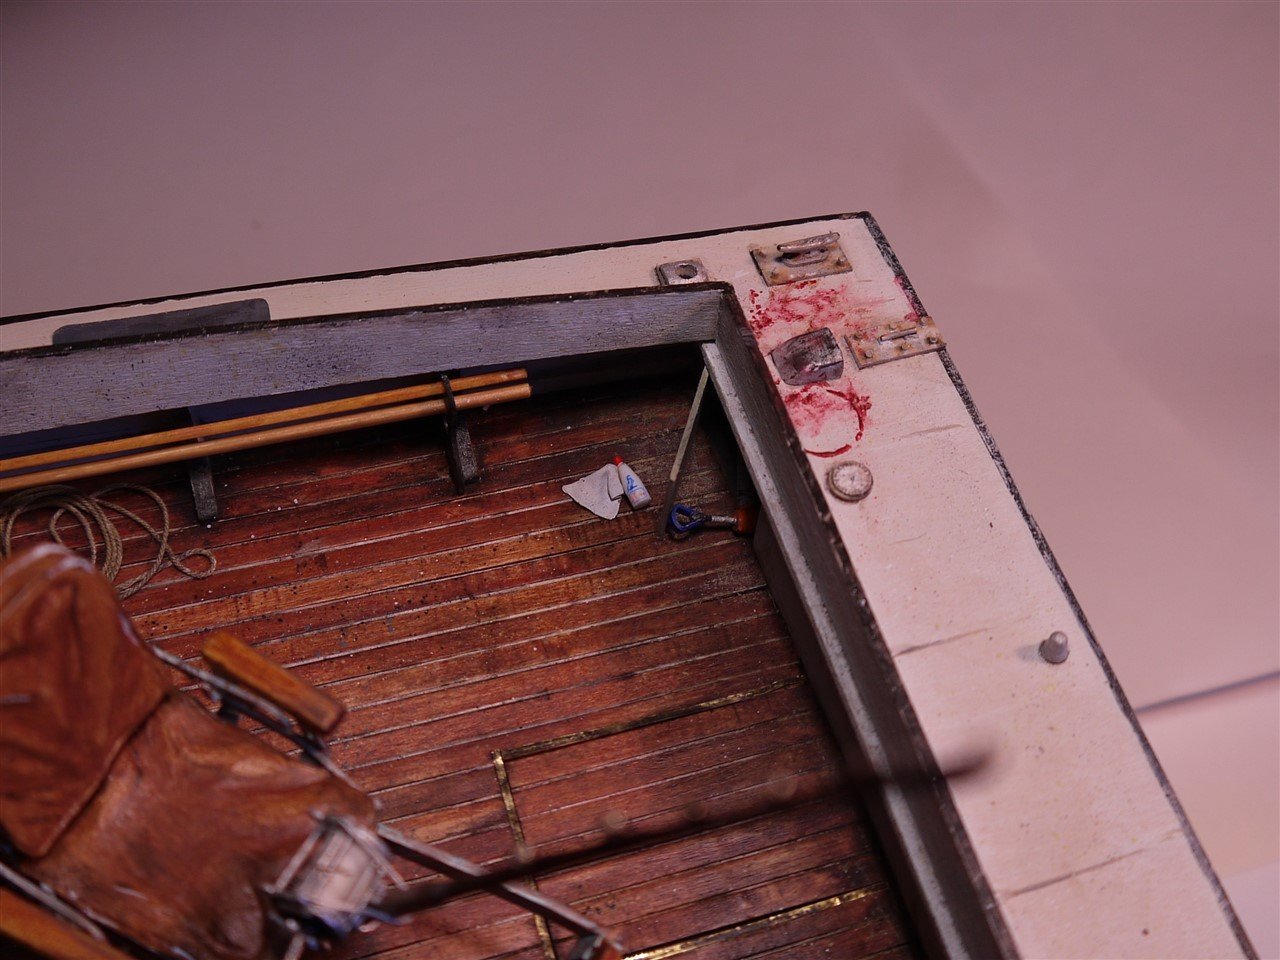
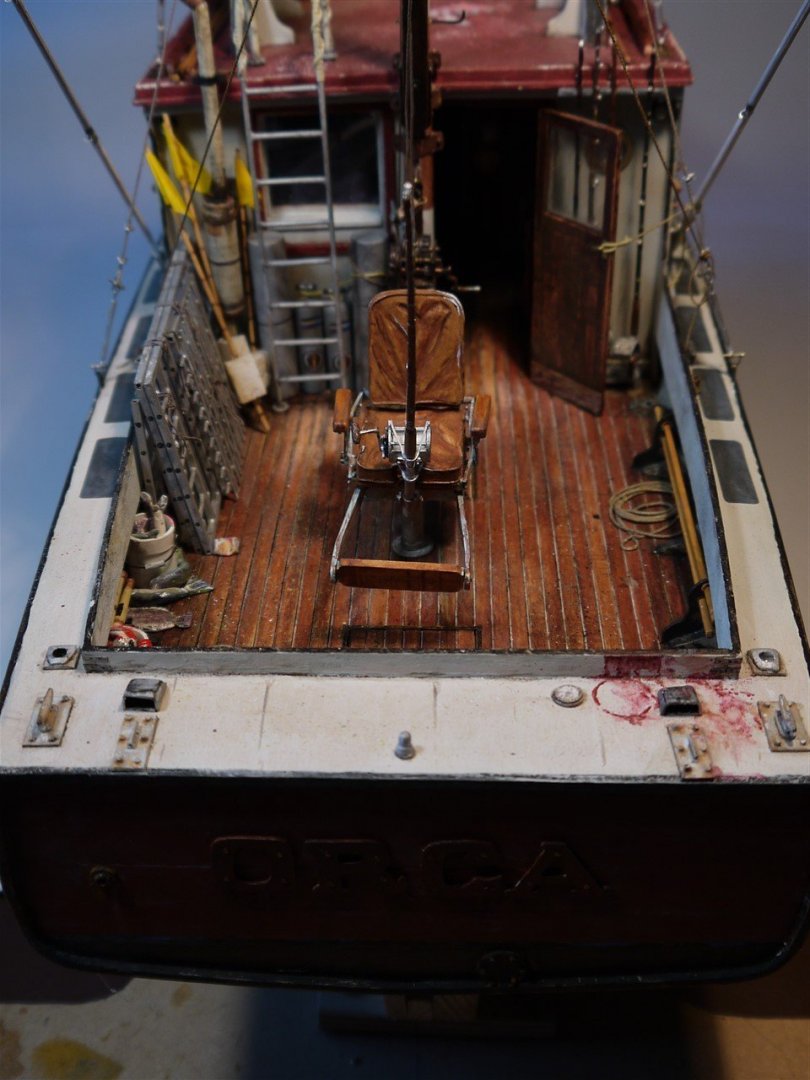
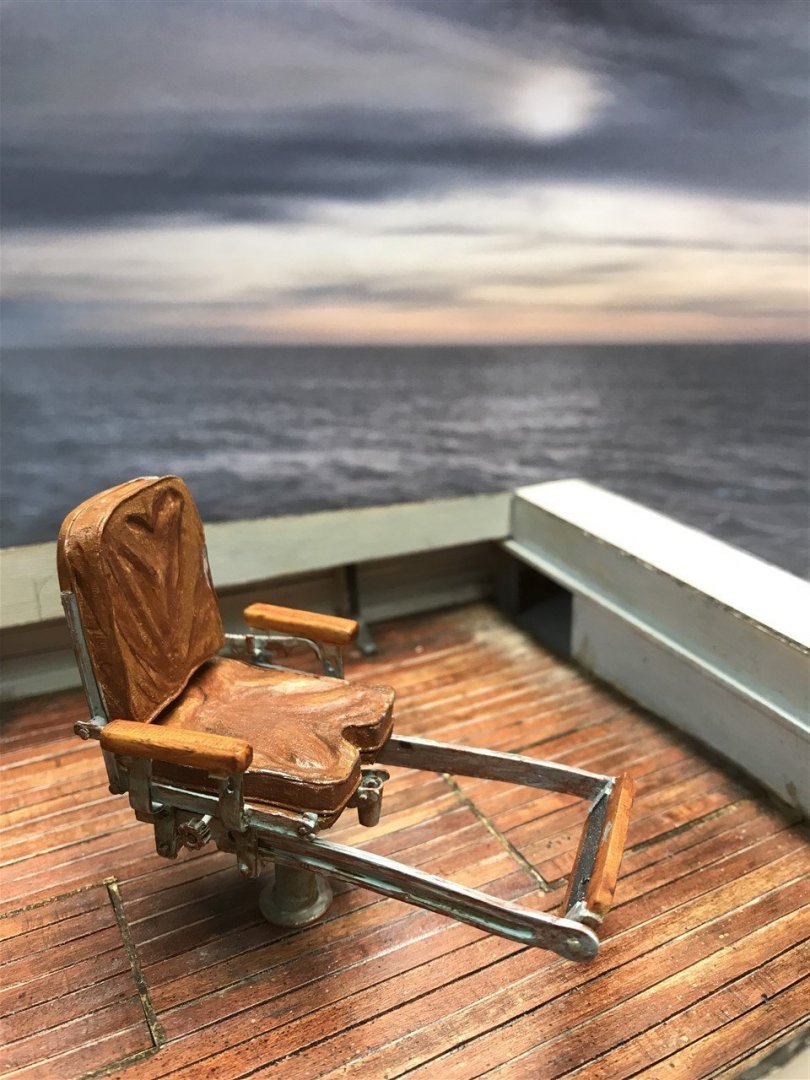
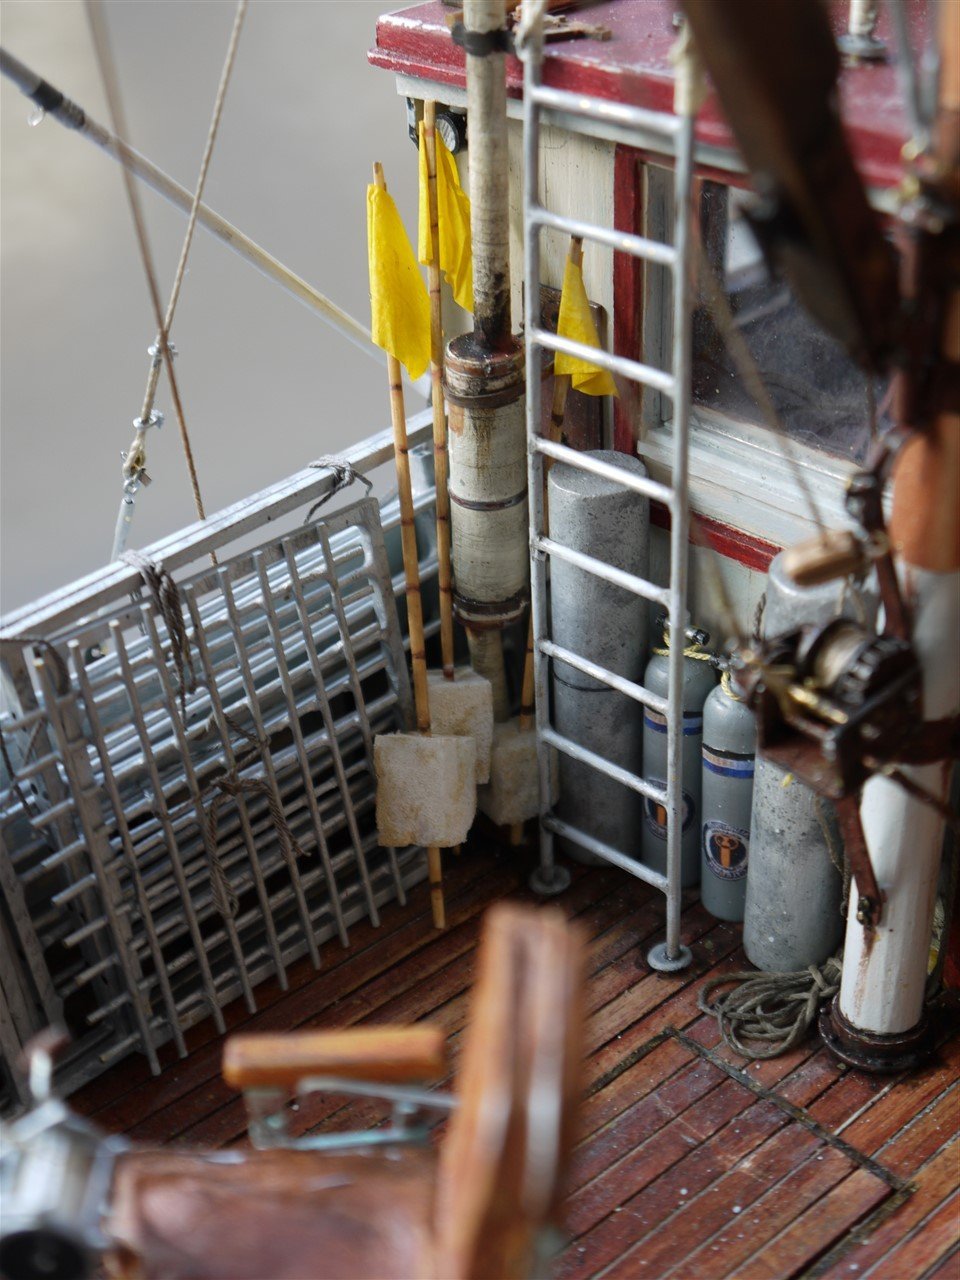
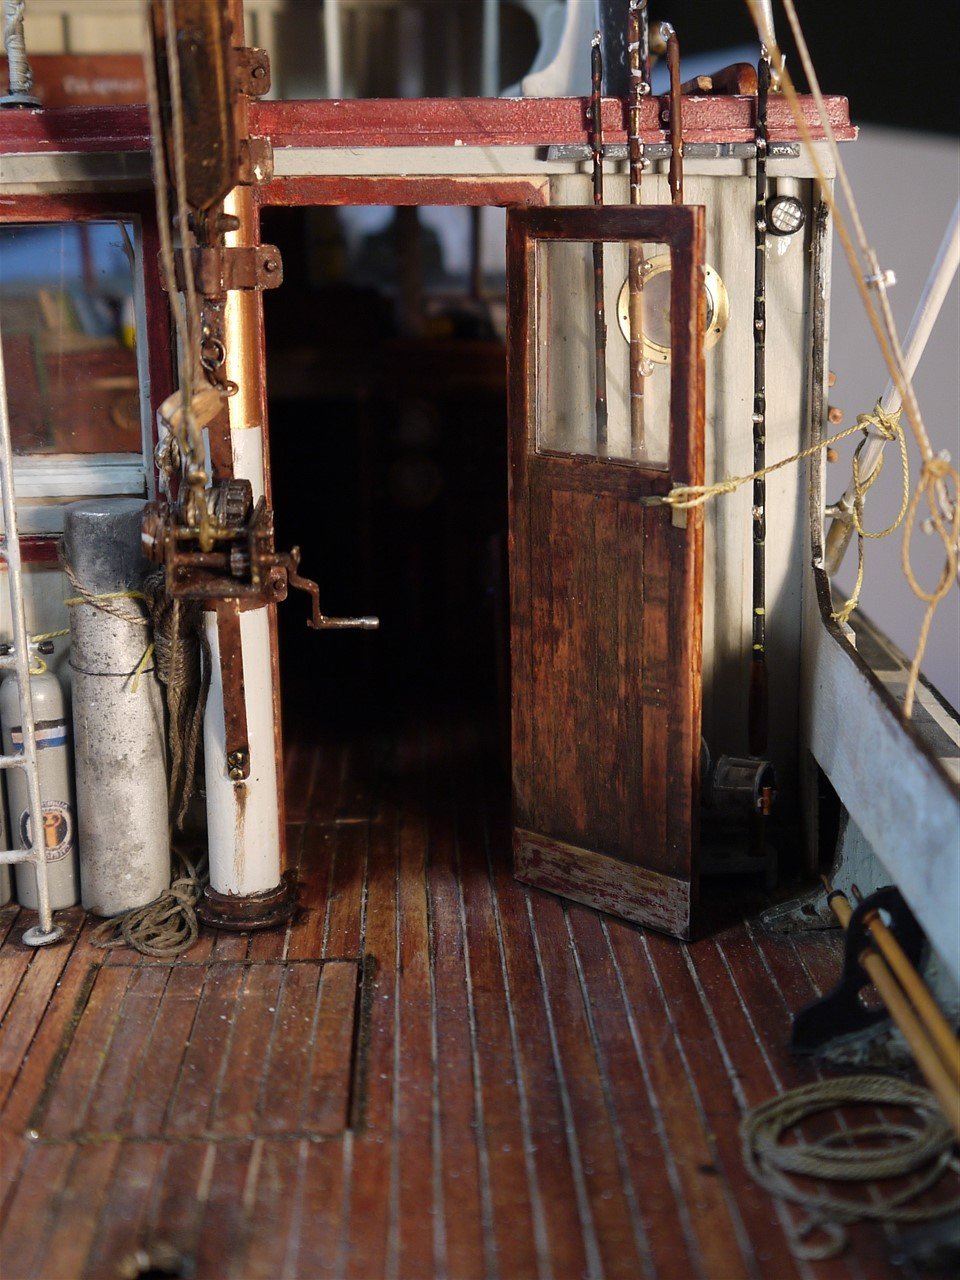
Aft Deck
‘Yeah, that's real fine expensive gear you brought out here, Mr. Hooper. 'Course I don't know what that bastard shark's gonna do with it, might eat it I suppose. Seen one eat a rockin' chair one time’.
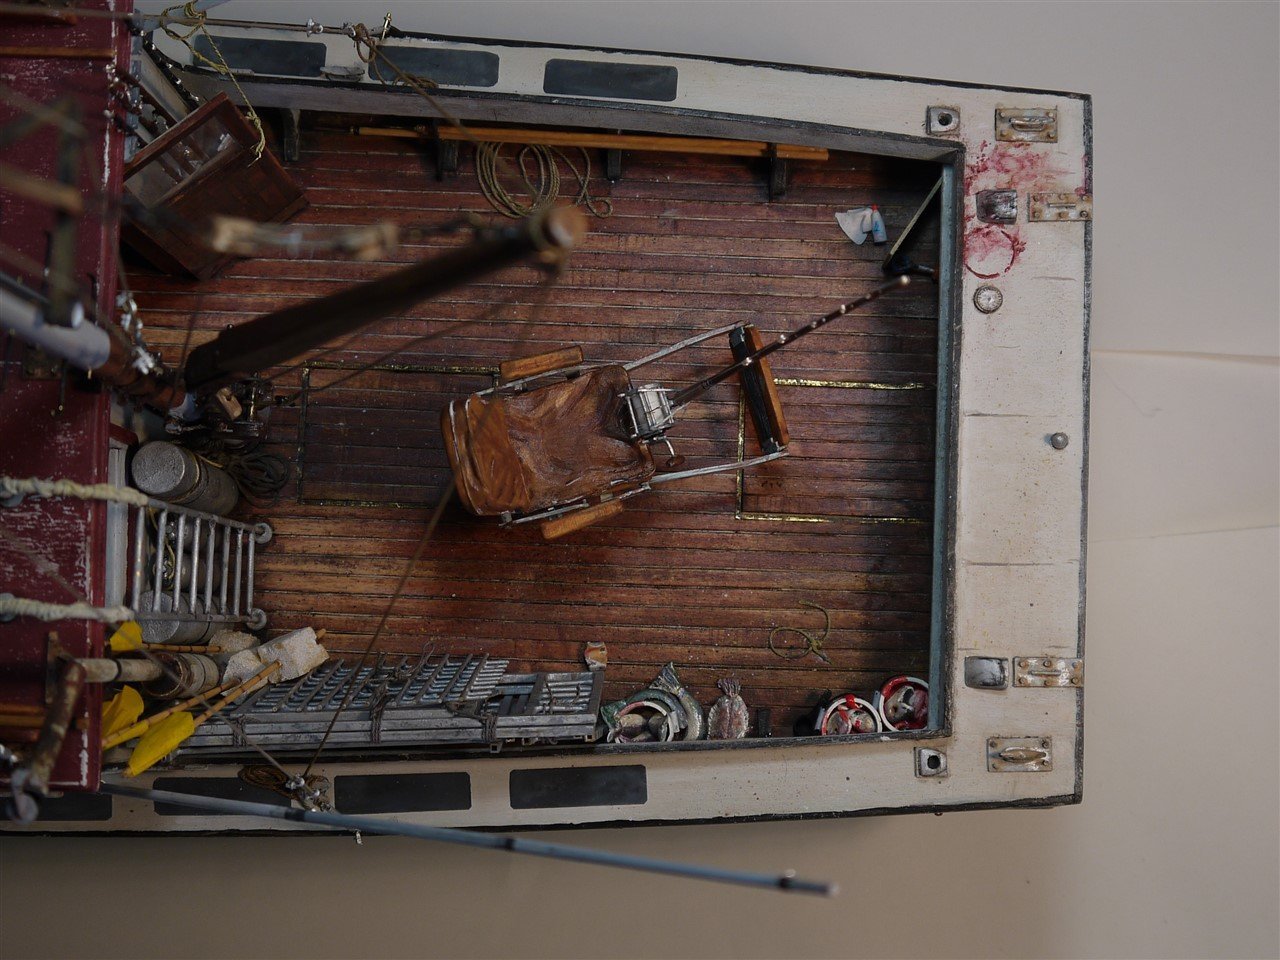
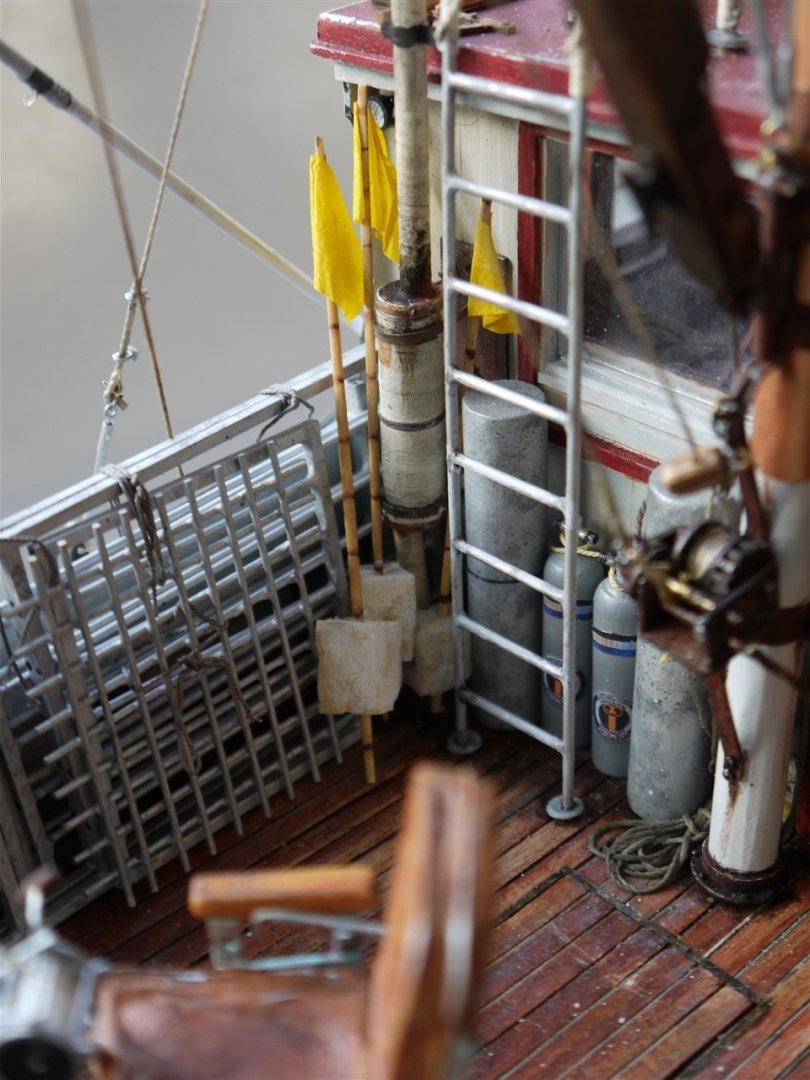
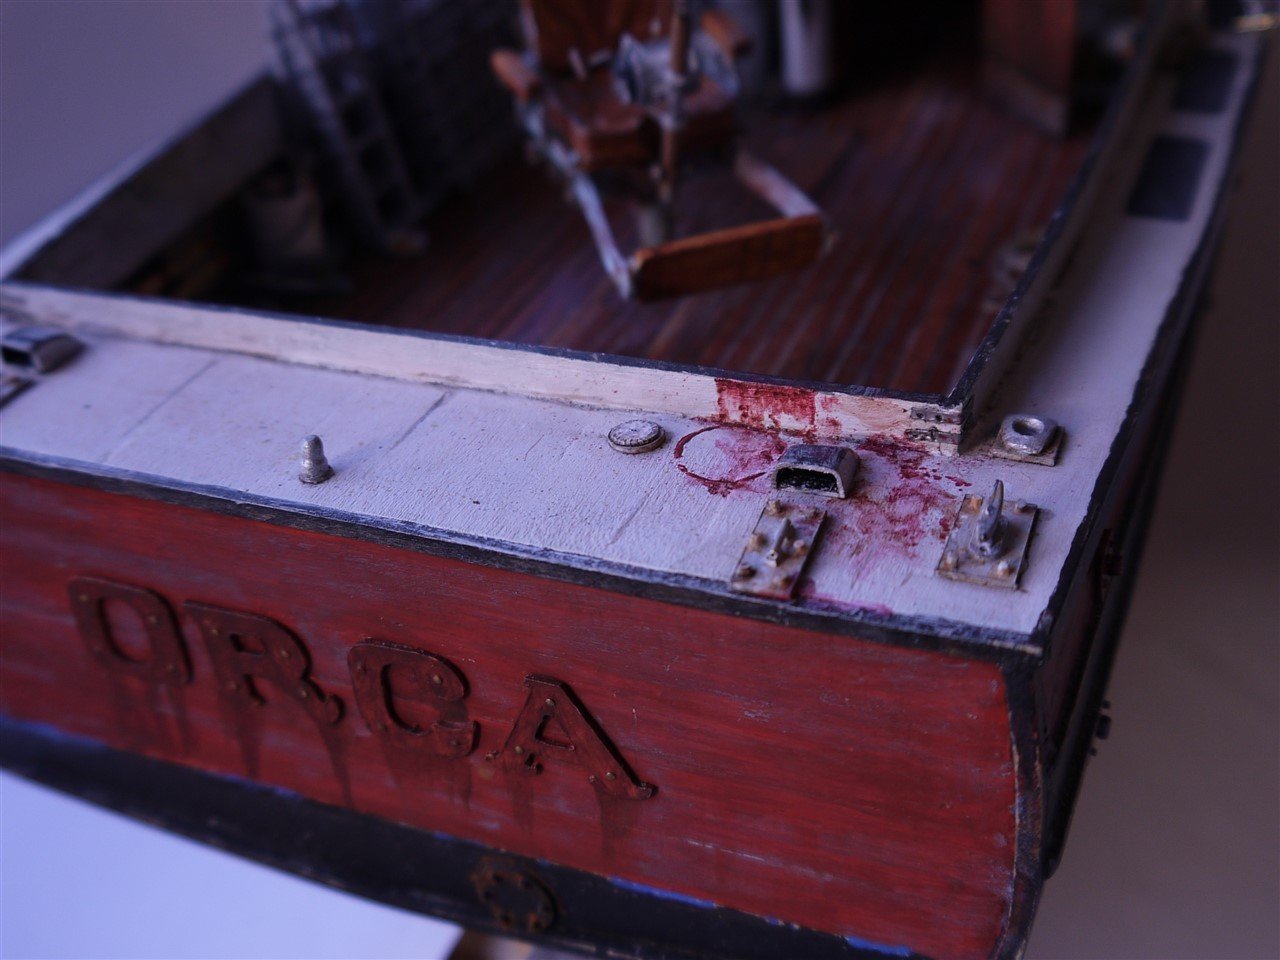

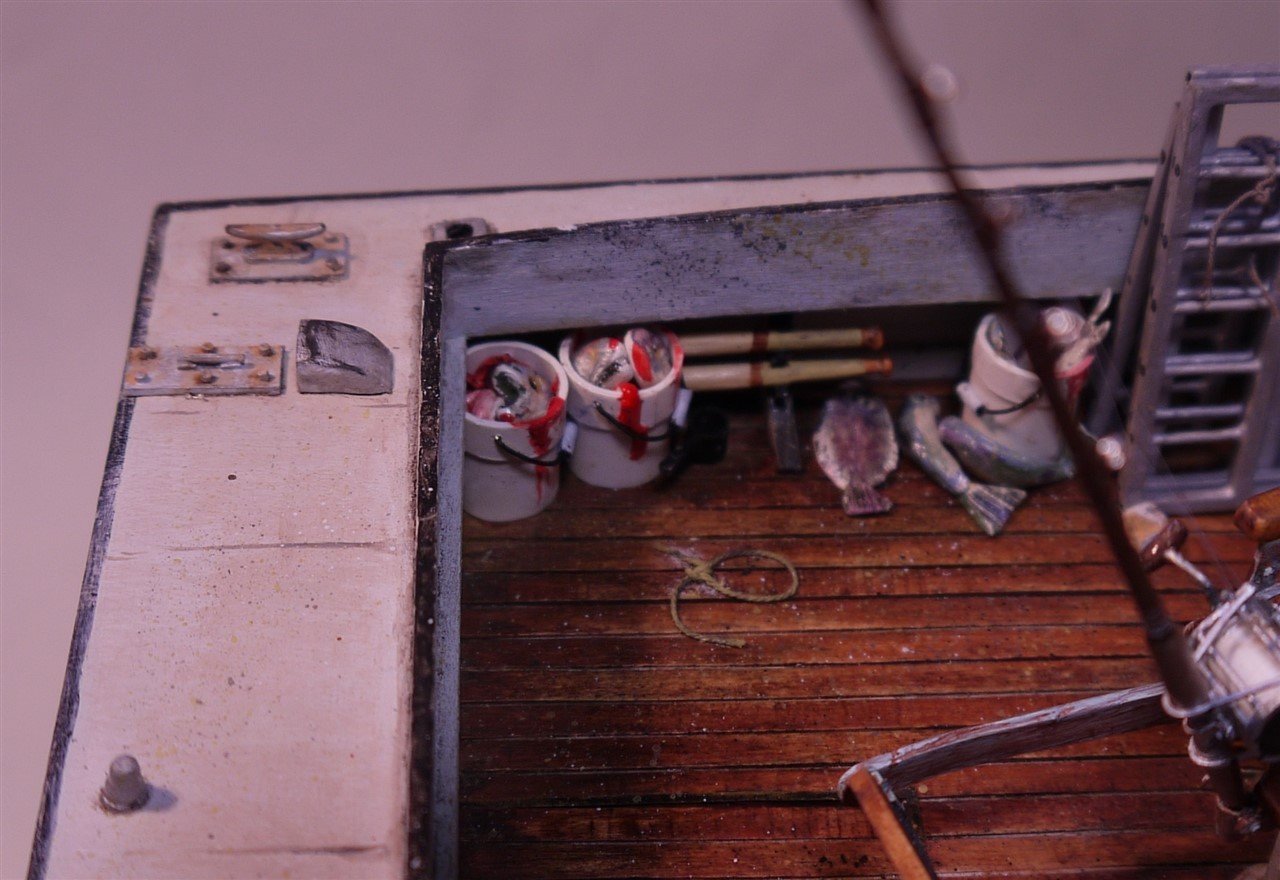
Some details...
'Why don't you come down here and chum some of this stuff?'

'Little rabbit goes round the tree, in the hole, out of the hole, round the tree again... '

"Hey, Hooper! Maybe You're A Big Yahoo In The Lab, But Out Here You're Just Supercargo!"

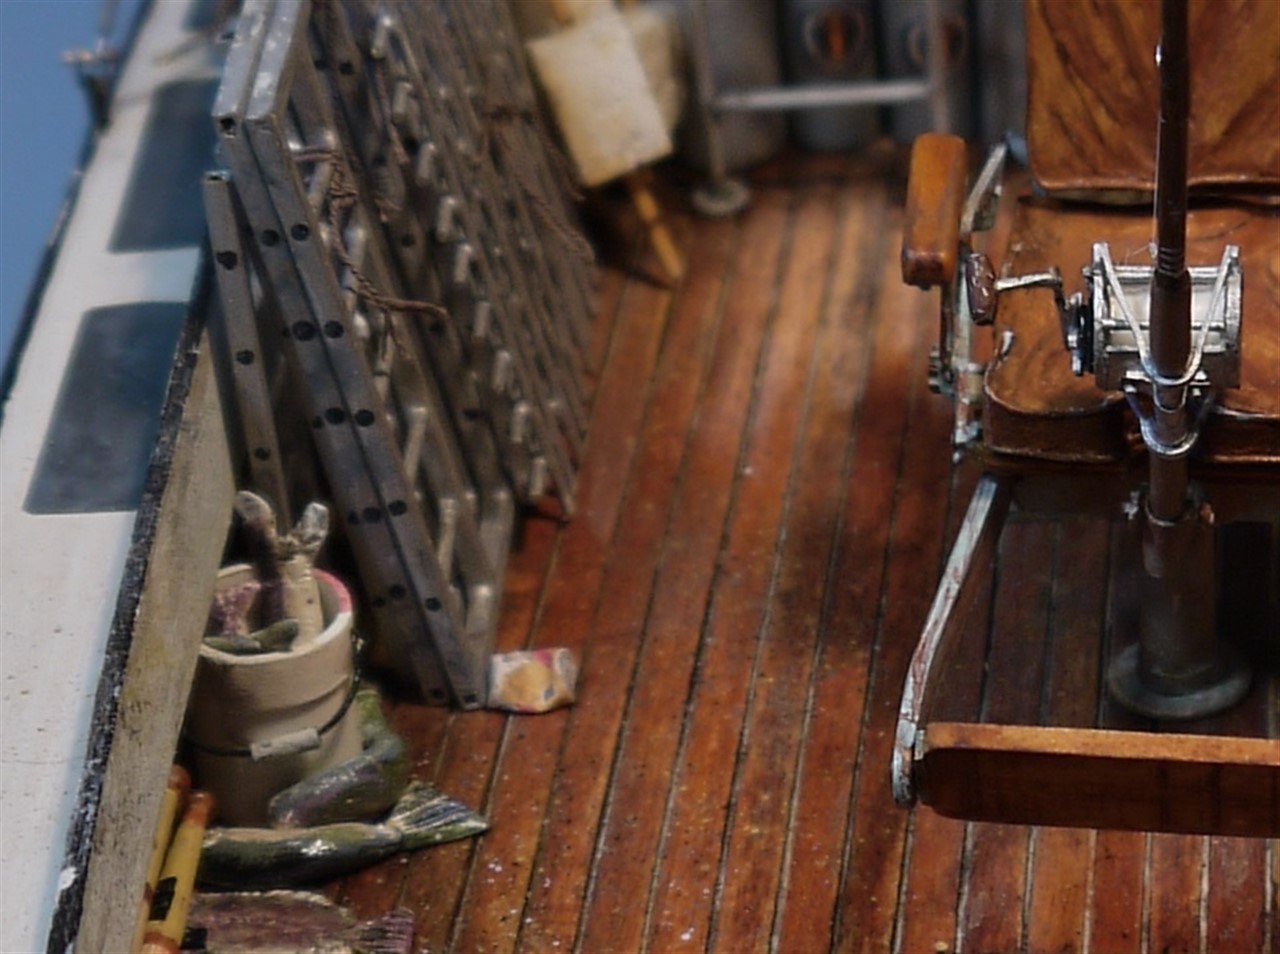
'Come on Chief, this isn't no boy scouts picnic! I see you got your rubbers! Ha Ha!'
- oneslim, BLACK VIKING, FriedClams and 6 others
-
8
-
 1
1
-
On 11/26/2021 at 8:56 PM, KeithAug said:
Fabulous job
Thanks Keith,
On 11/28/2021 at 5:19 PM, FriedClams said:Great execution of details
Thanks Gary!
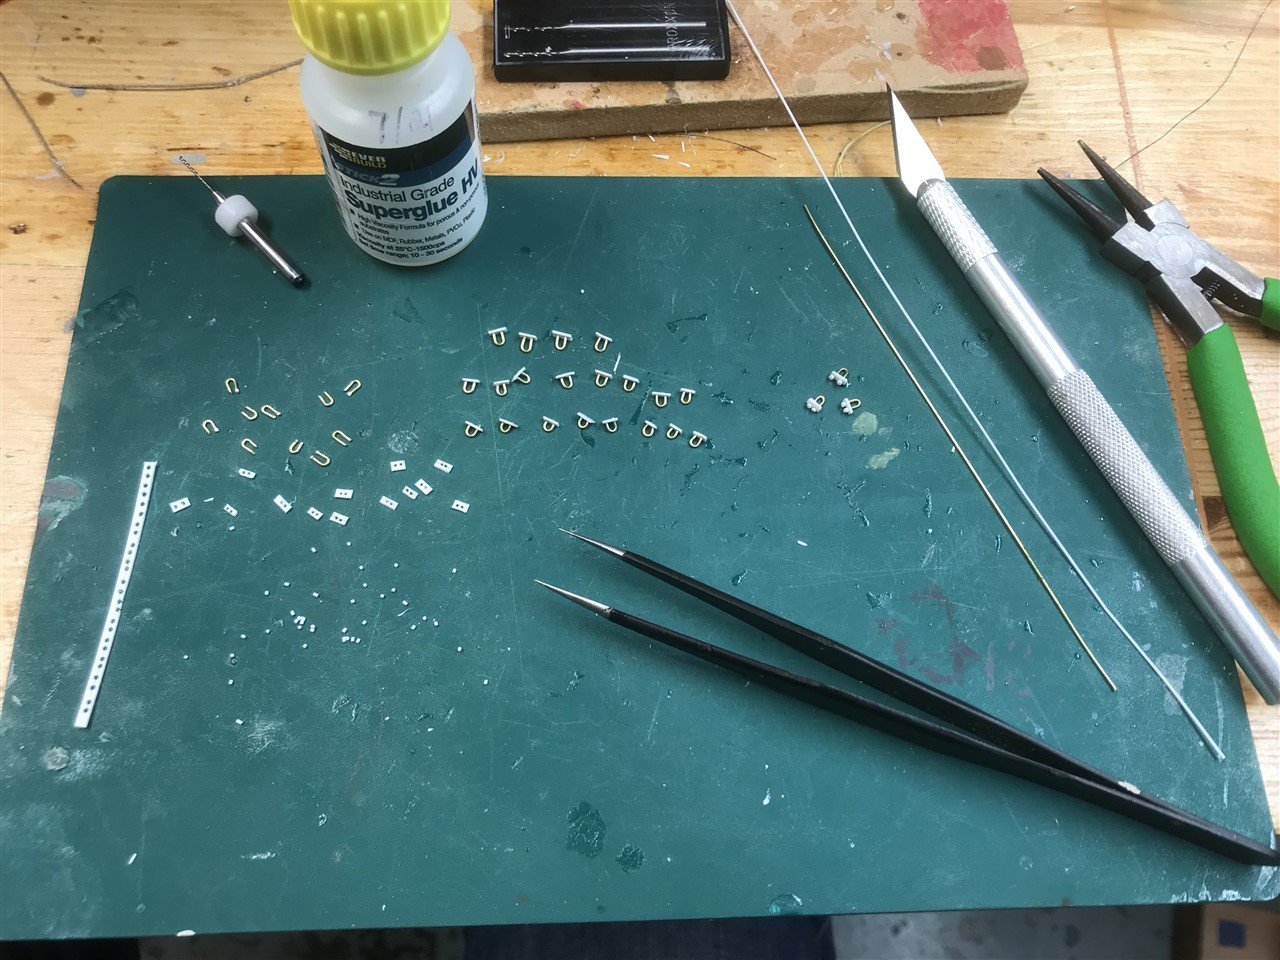
Well I'm nearly ready to post some pics of the completed sections as I do them... just finishing bulk production of rigging fixtures, and working through a long list of snags. Shouldn't be long now.
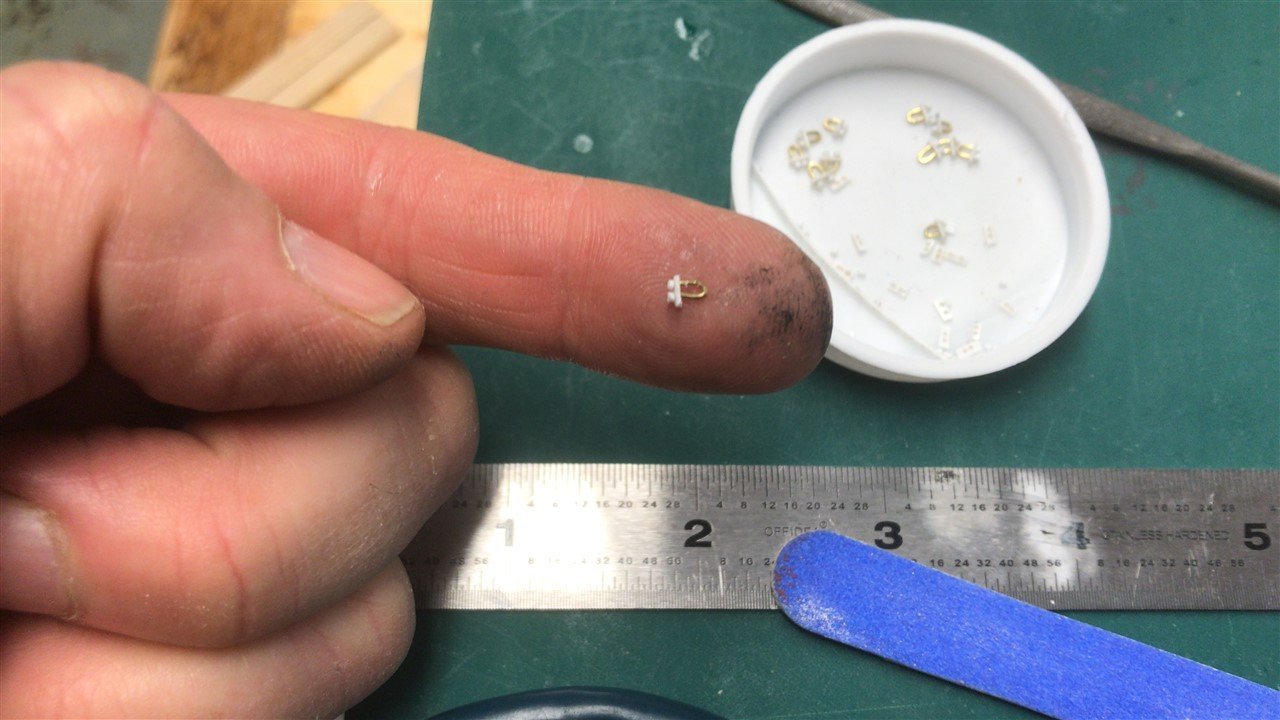
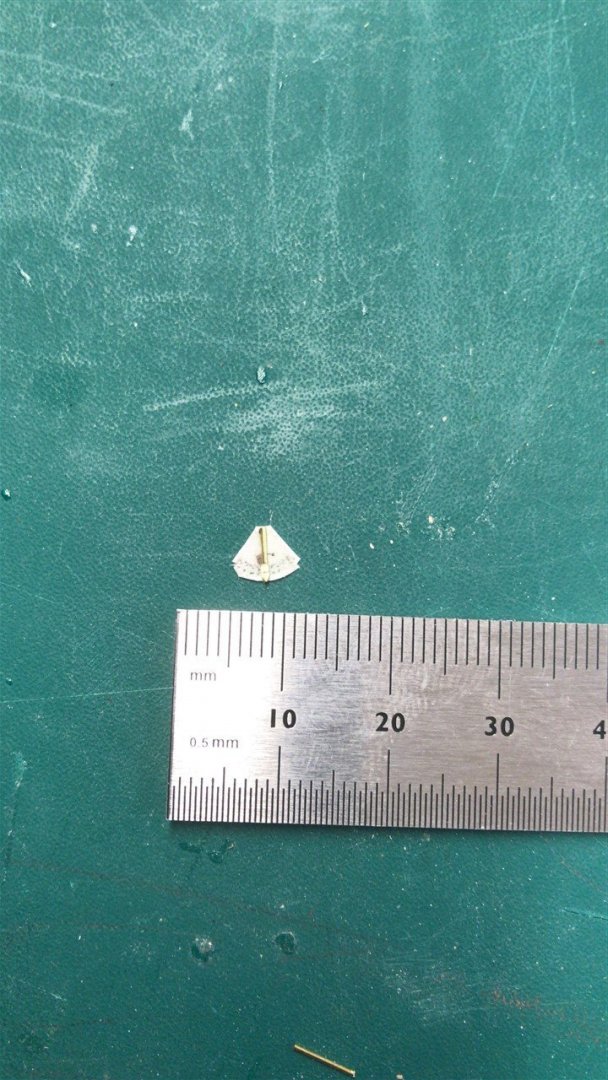
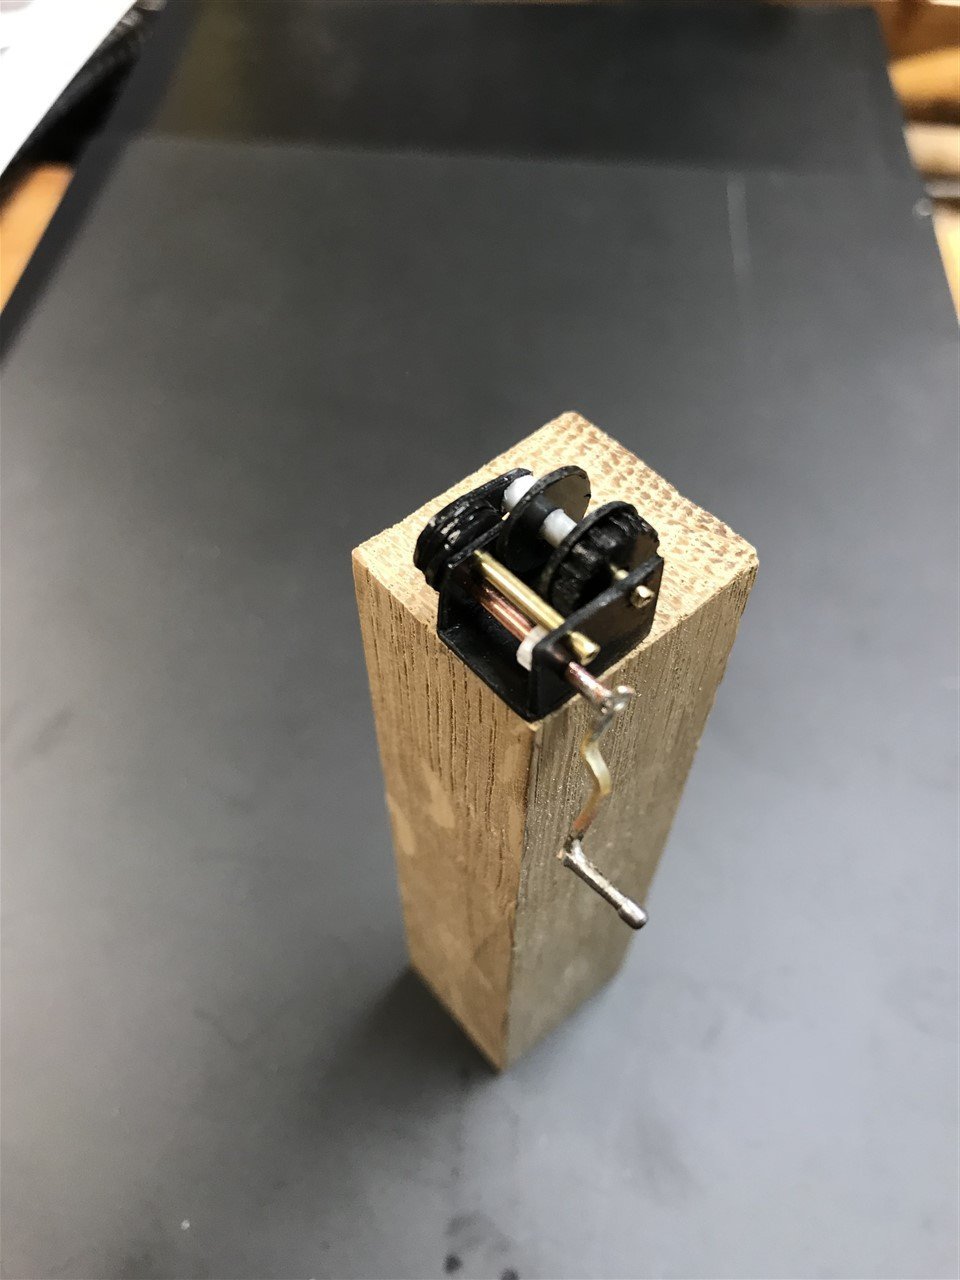
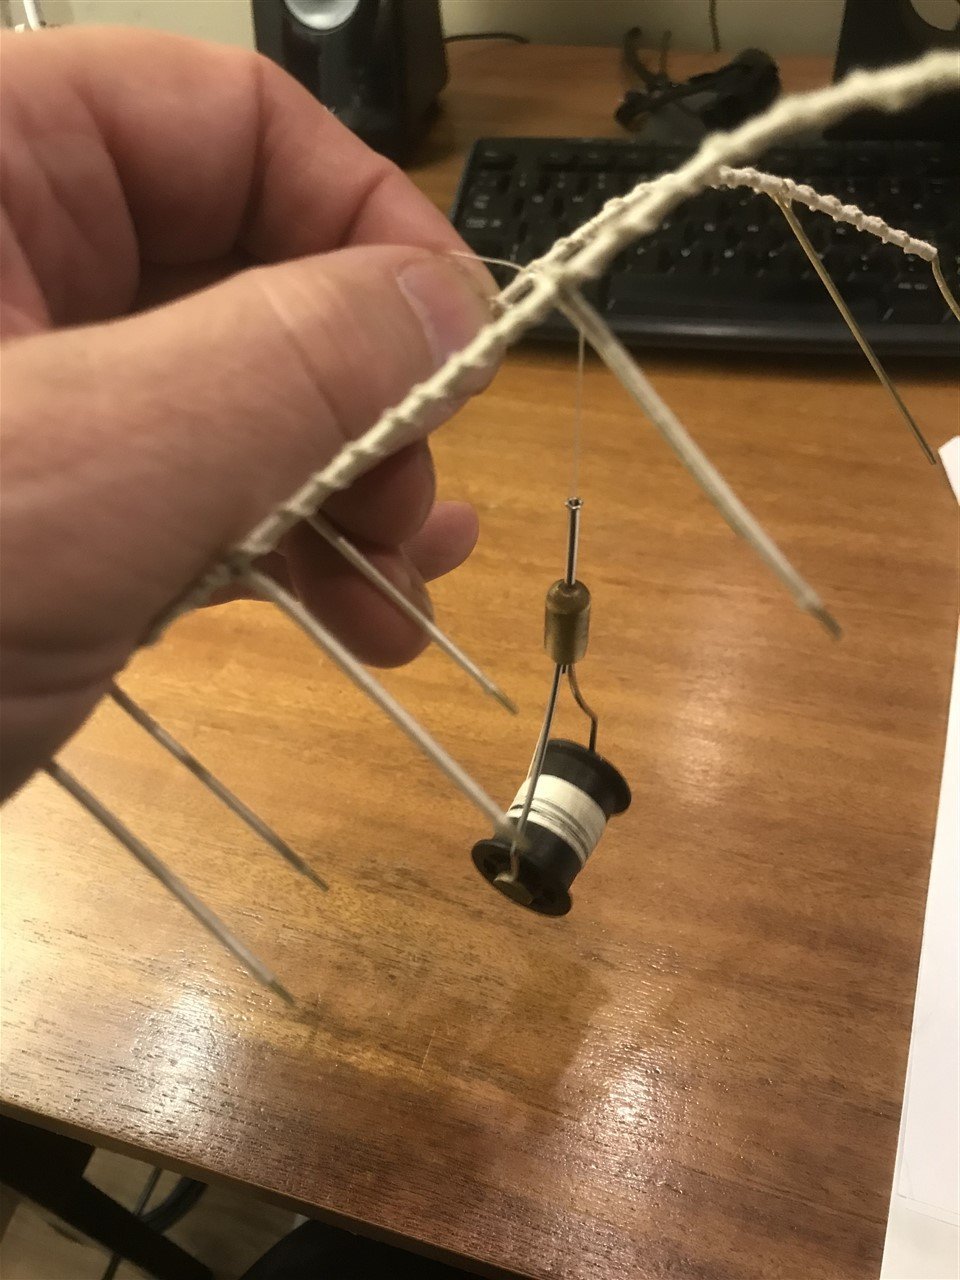
As I was painting the turnbuckles (btw thanks to Tom Lauria for his excellent tutorial on making these), I thought the gig we fly tyers use might be of interest. We use these when varnishing the heads of trout flies.
Just search for 'spring loaded fly -tying clips' on e-bay or similar if you want to make one. They are very handy.
Back to the U bolt and D bolt production lines...

- GrandpaPhil, FriedClams, mtaylor and 1 other
-
4
-
This looks like a great subject for a build - don't be put off buy your recent inexperience, it looks like you know what you are doing; I'm on my second build since I was a kid - it's a great antidote to life's stresses. go for it!
-
Thanks for all the thumbs up friends, and your patience. It's been very busy in the props department... and just about everything made now, and beginning to put it all together. These last few items are very time consuming, a bit like building a house, the last bit takes the longest.
I'll be posting the finished areas one by one over the next few days, but here's a hint of some of the work in progress....
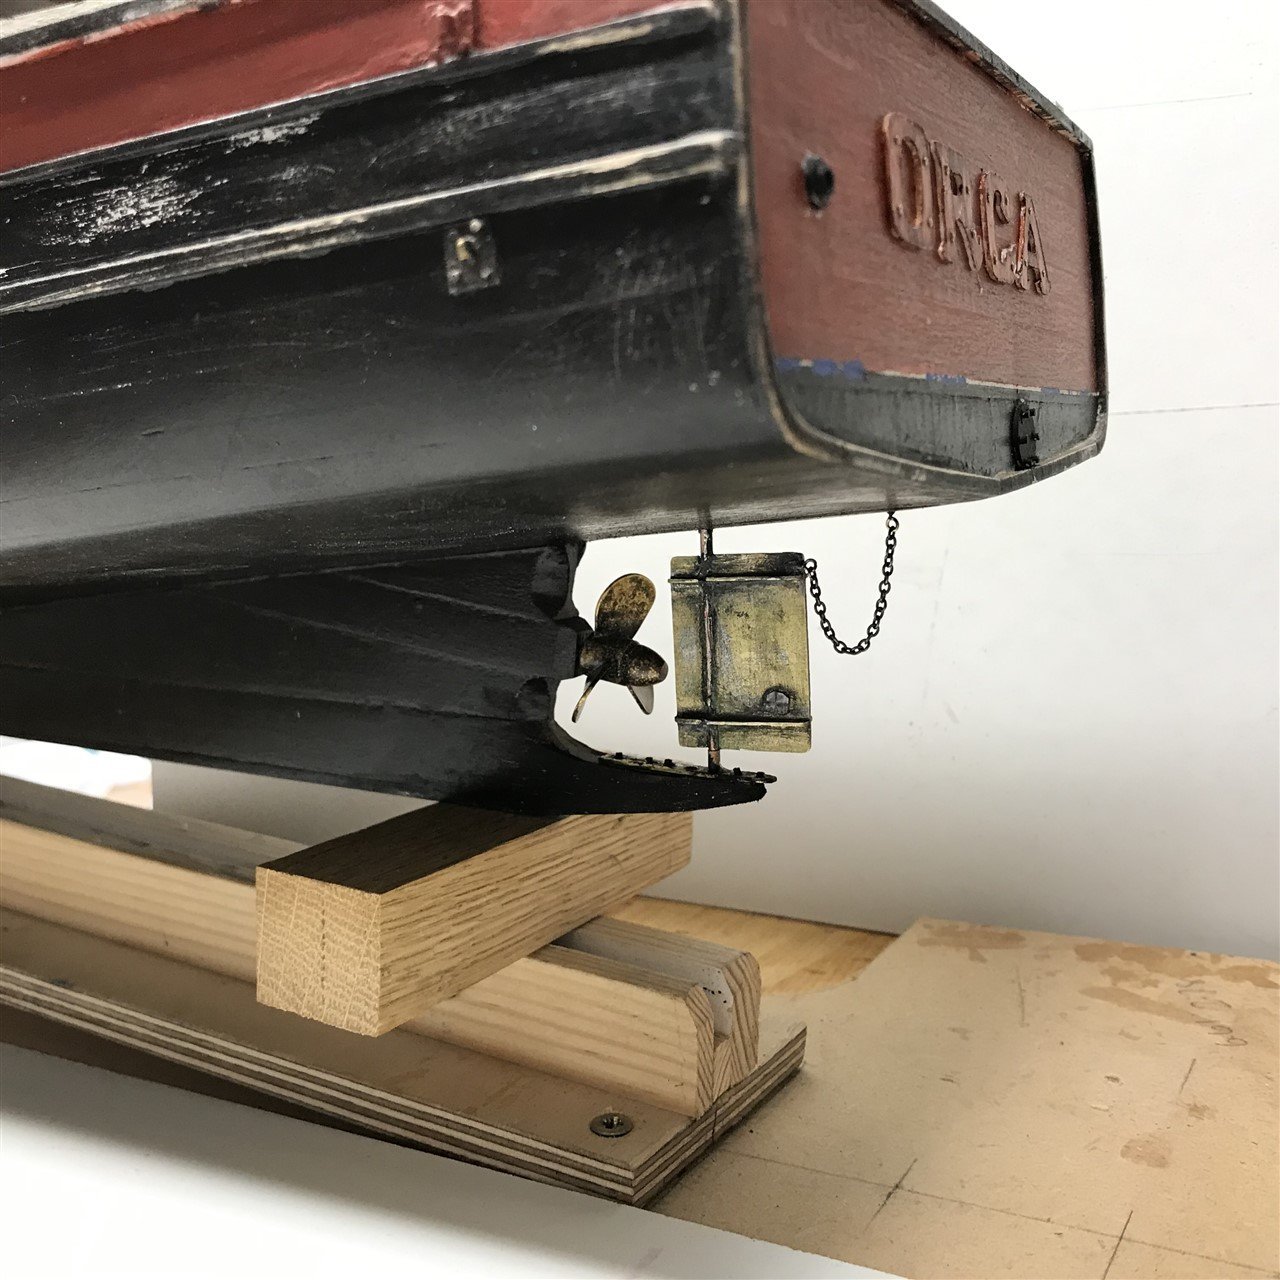
Prop and rudder..

Shark cage...

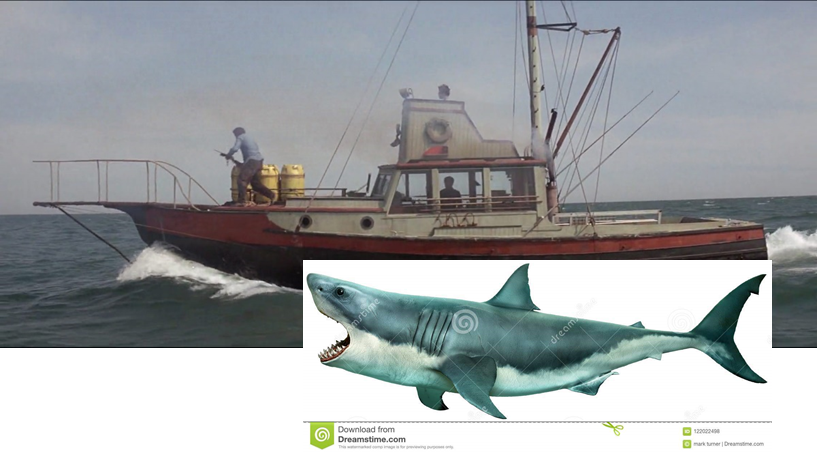
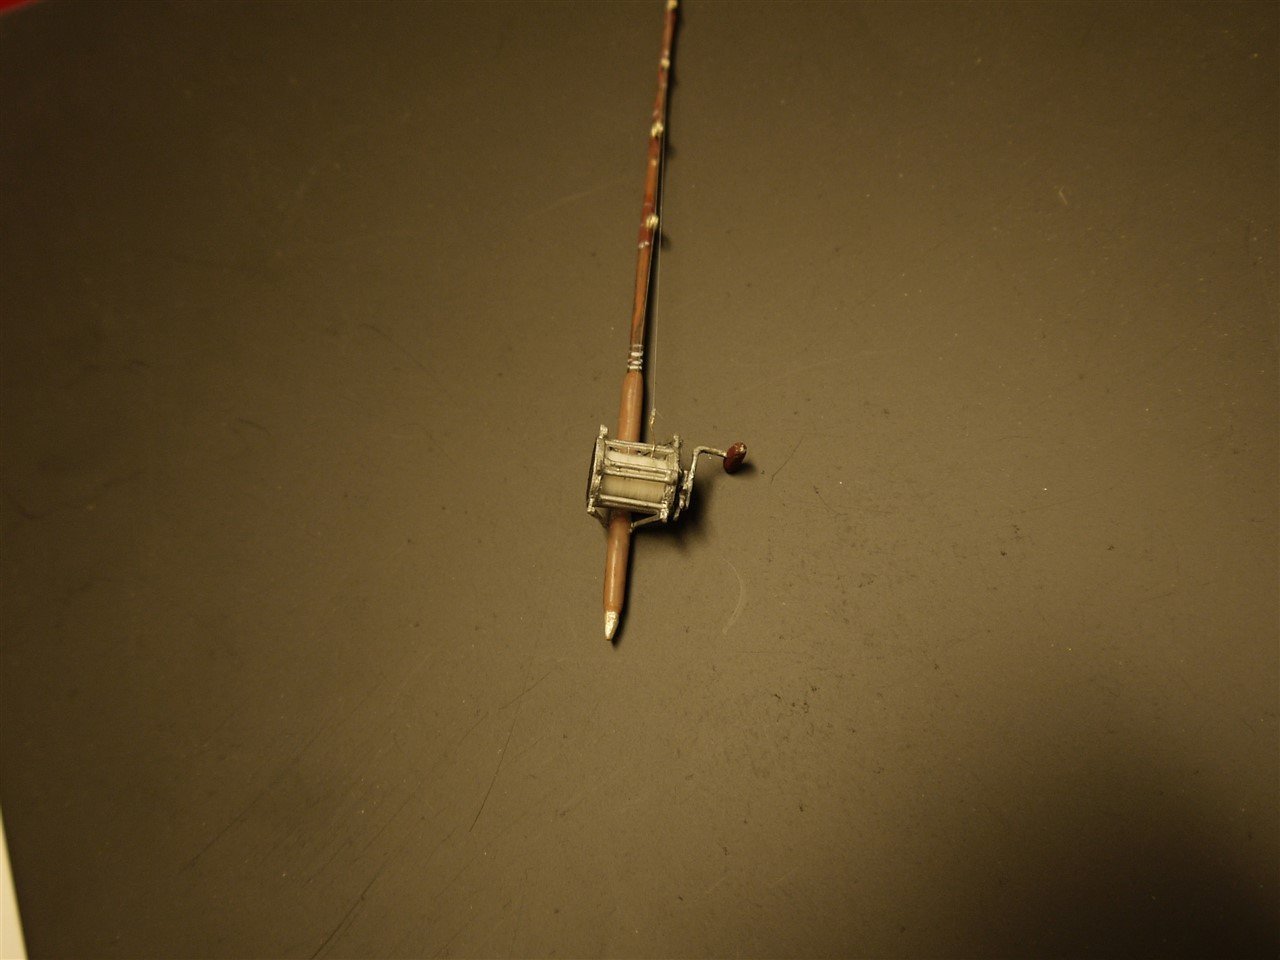
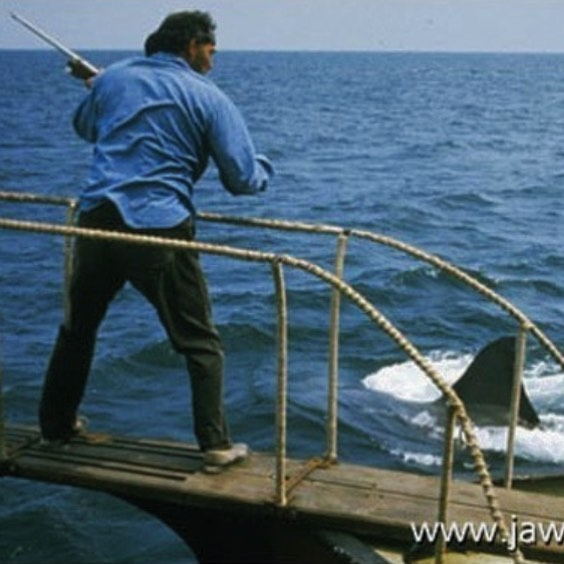
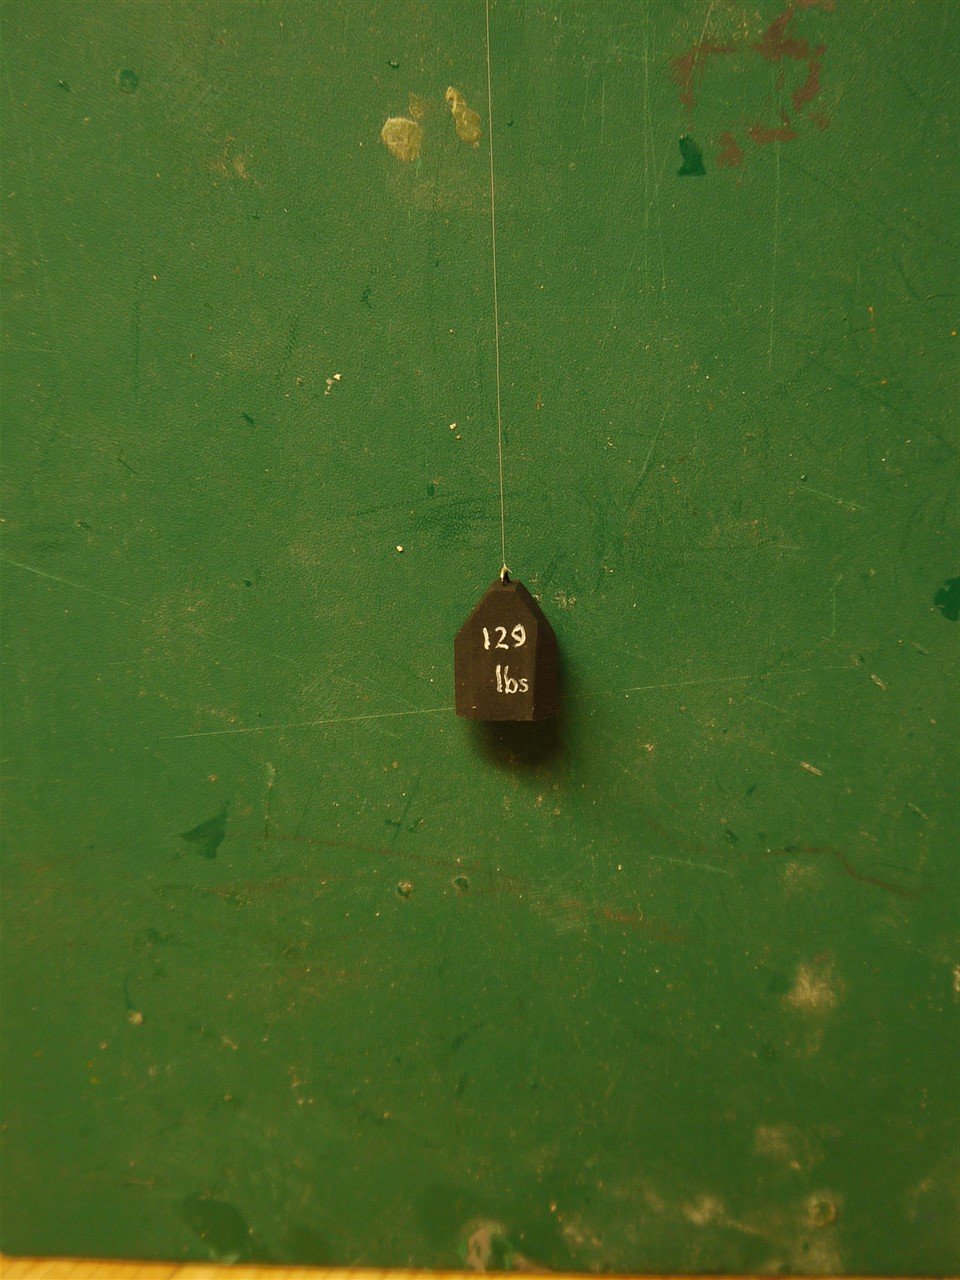
Fighting chair installed with the big Fenwick 670 130lb shark rod, and the huge Penn Senator 16-0 reel. Must have weighed a ton. There is one on e-bay now, starting price £740 ($1000). These reels hold 1000 yards of 130 lb line. The rods, when they come up for sale, go for even more. The Jaws shark was 25 ft, 3 tons or 6000lbs in weight. It would have wrecked even this heavyweight tackle in seconds. This picture shows the shark in scale to the boat.
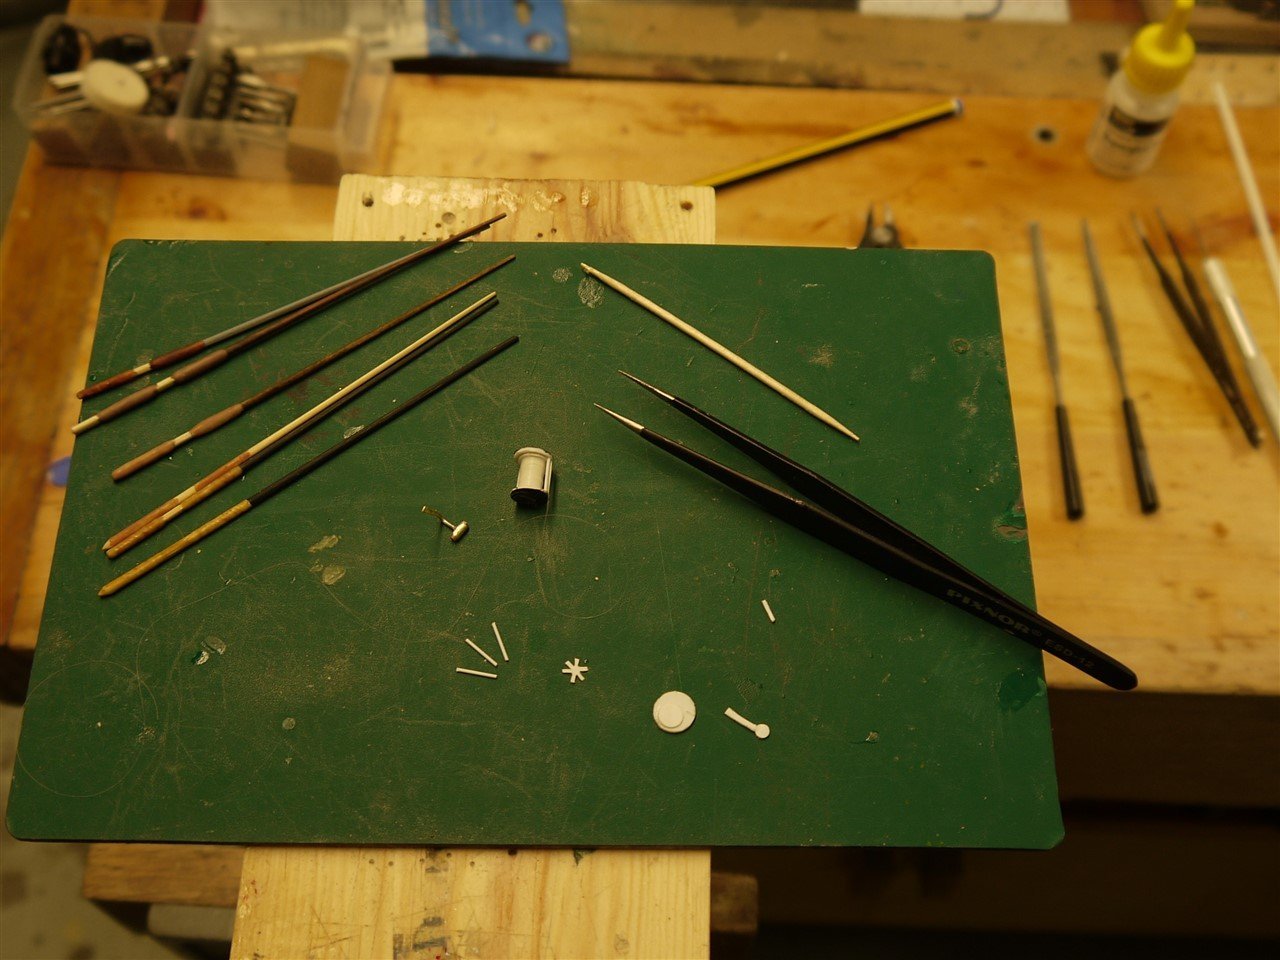
The Penn reel spool was loaded with 30 denier spider thread (said to be the thinnest fly-tying thread made). It is roughly equivalent in diameter to the 130 lb main line on the big Penn reel. I got 50 yards spooled up which at 1:20 is 1000 yards; spot on! That fish would have snapped this like cotton.
Quick check that it will take the strain...
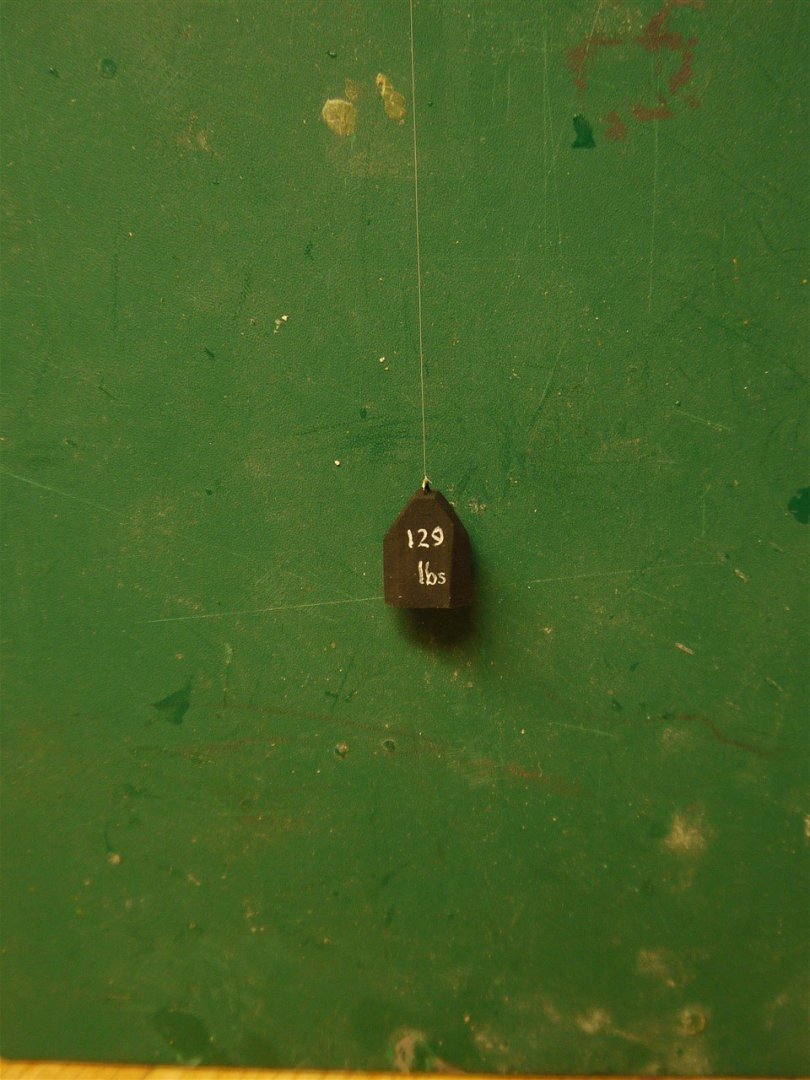
Yep, that should do it...
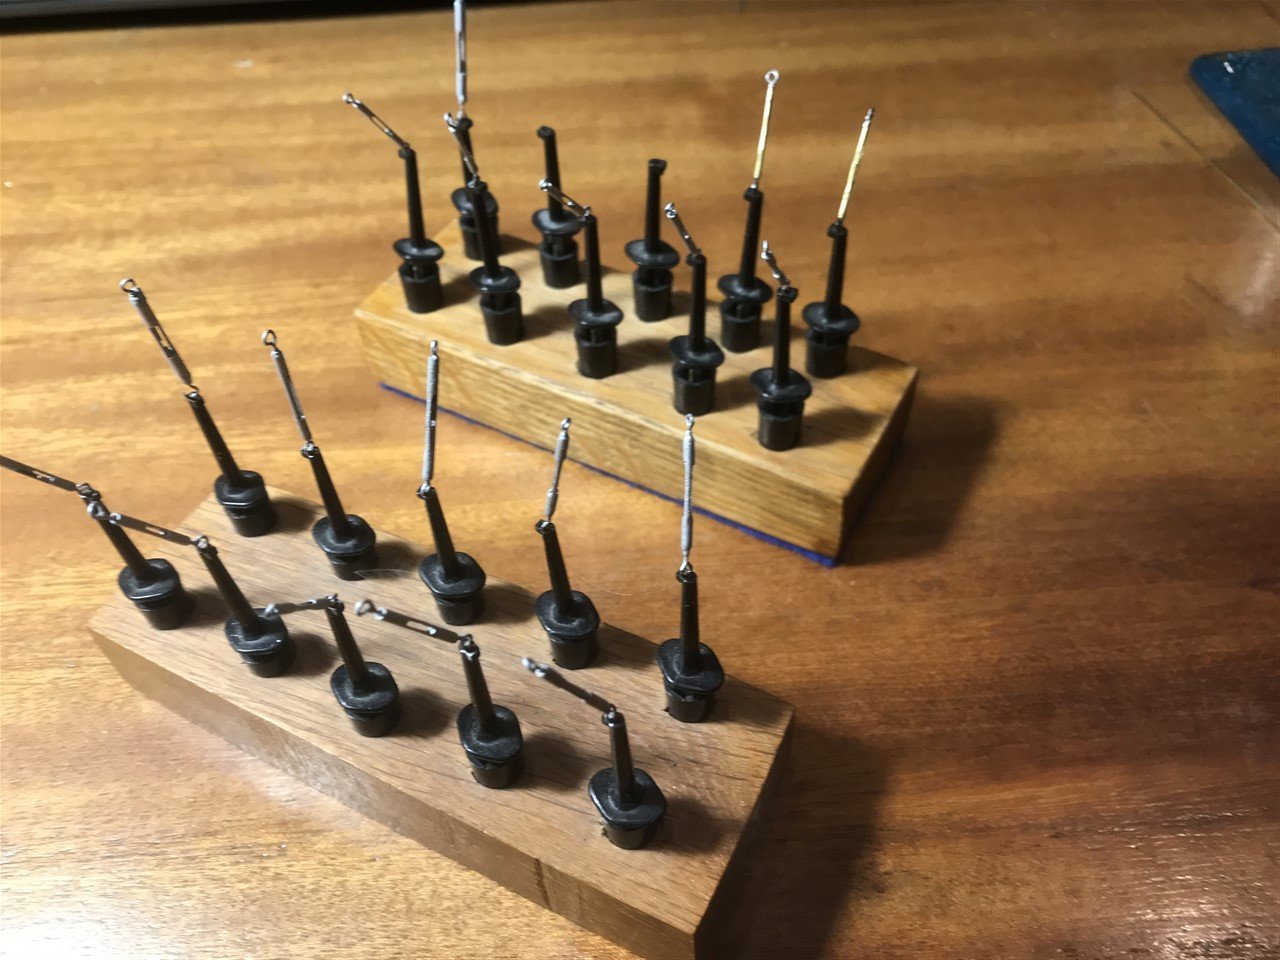
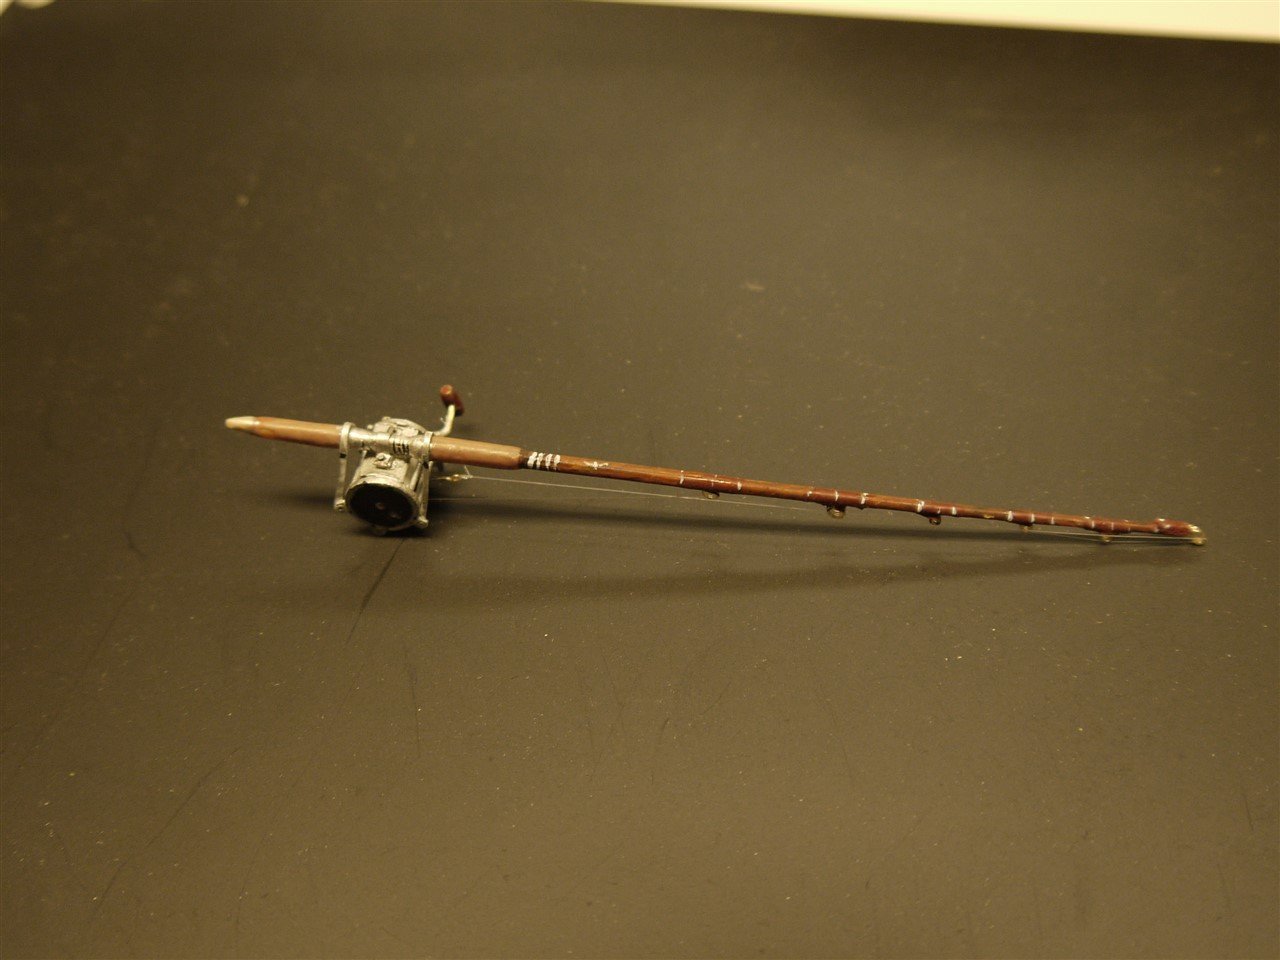
Finished rod.

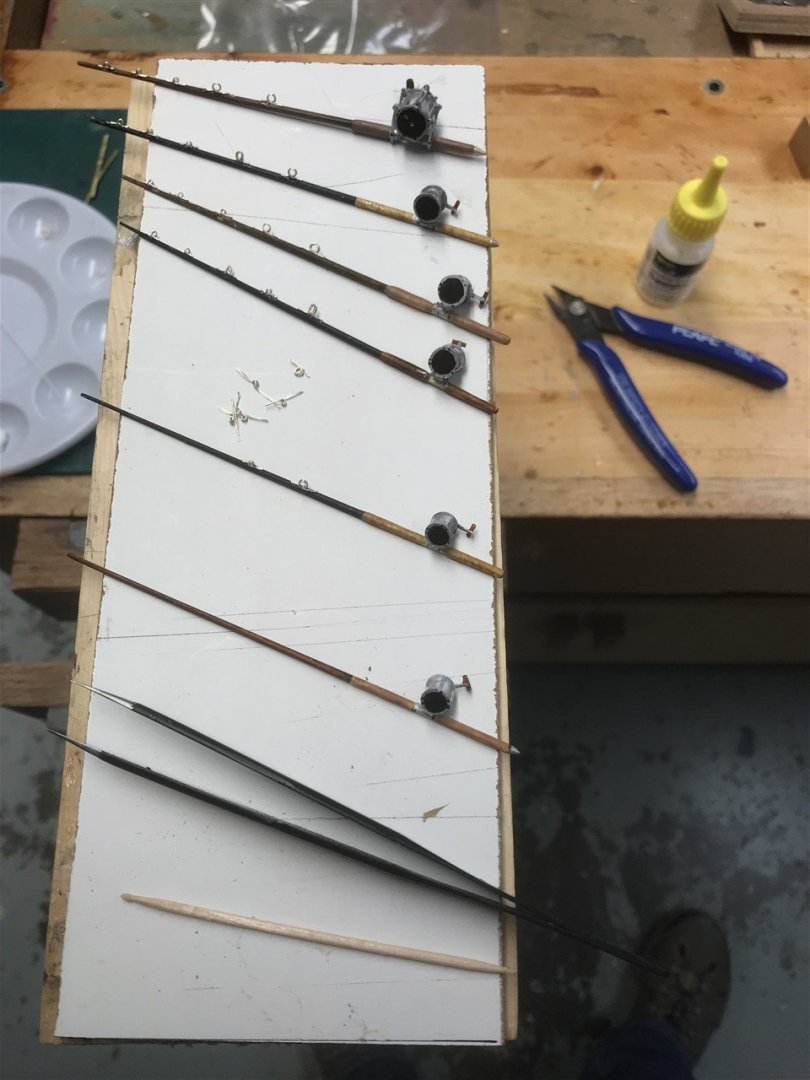
..and a few more getting their roller rings for the rack behind the door...
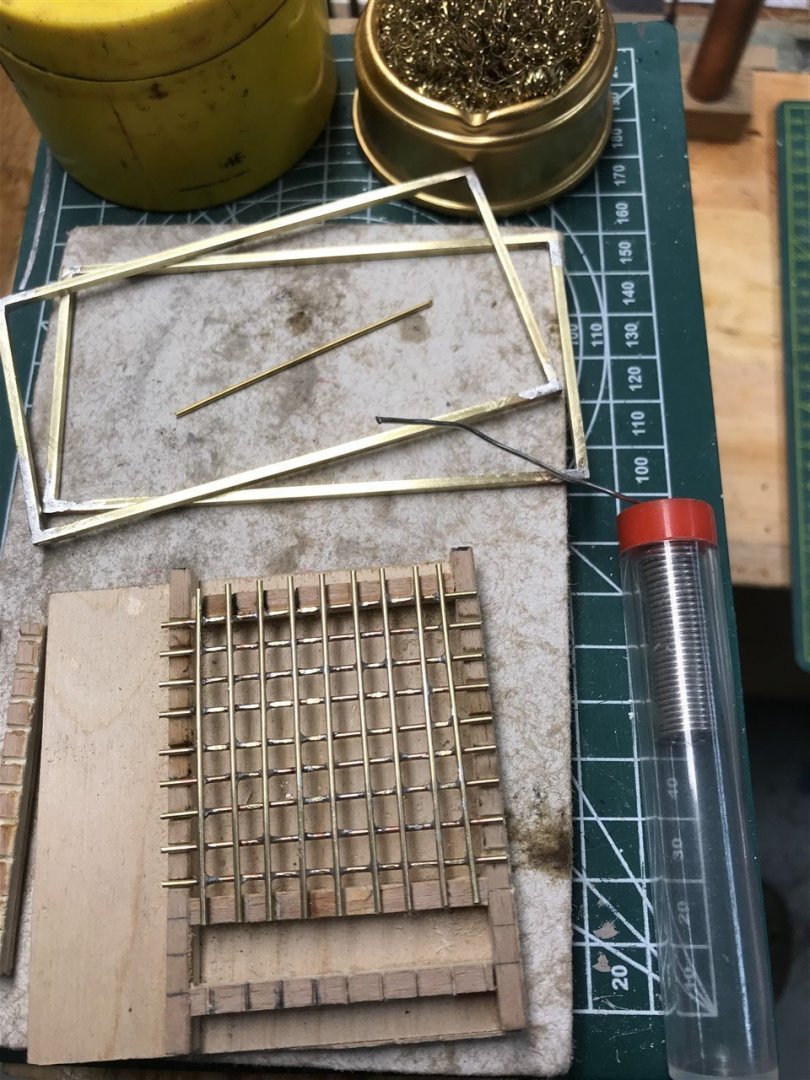
Shackles for the rigging. My eyes are still not recovered from this session!
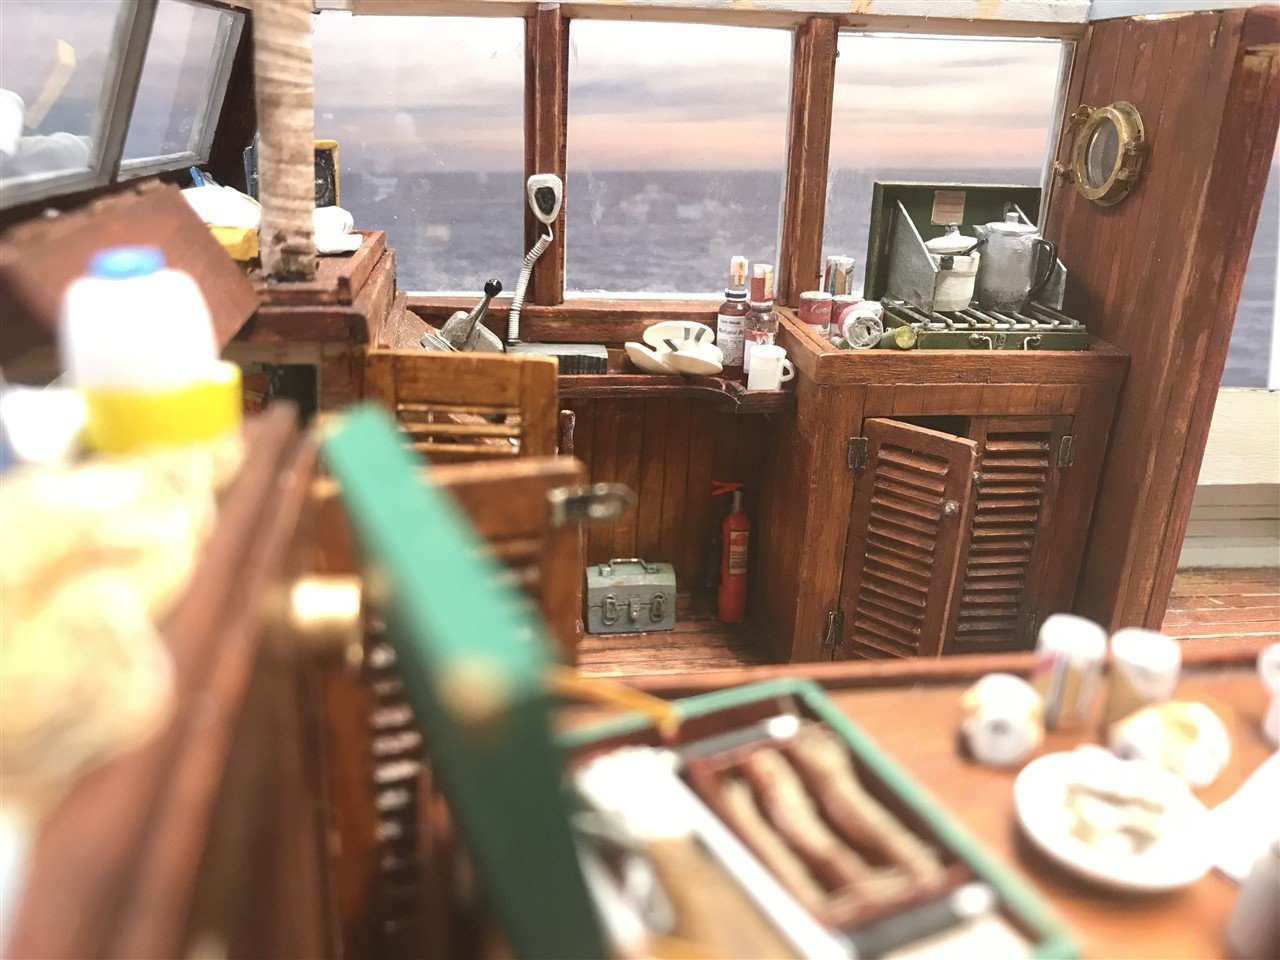
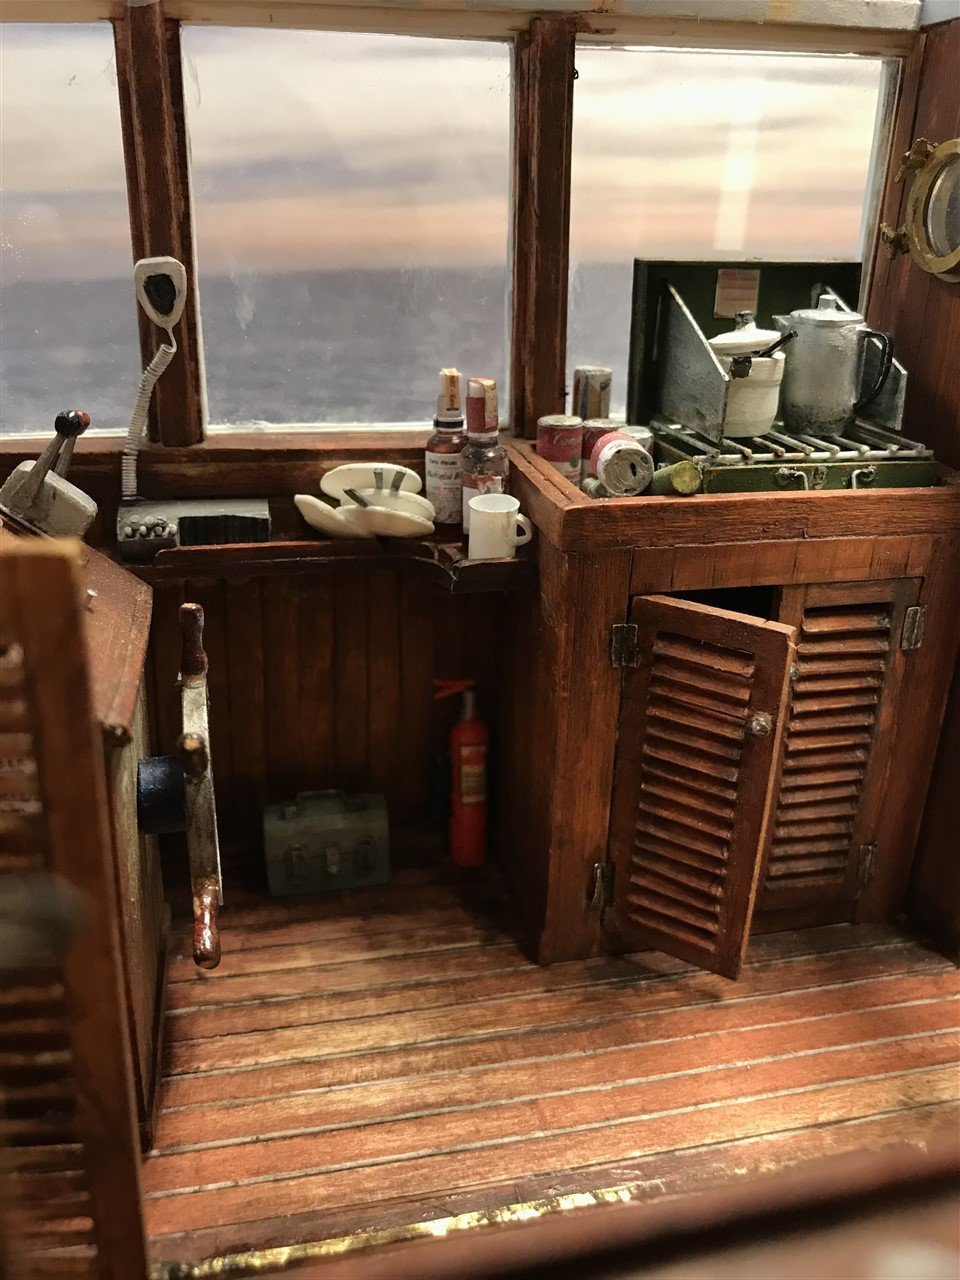
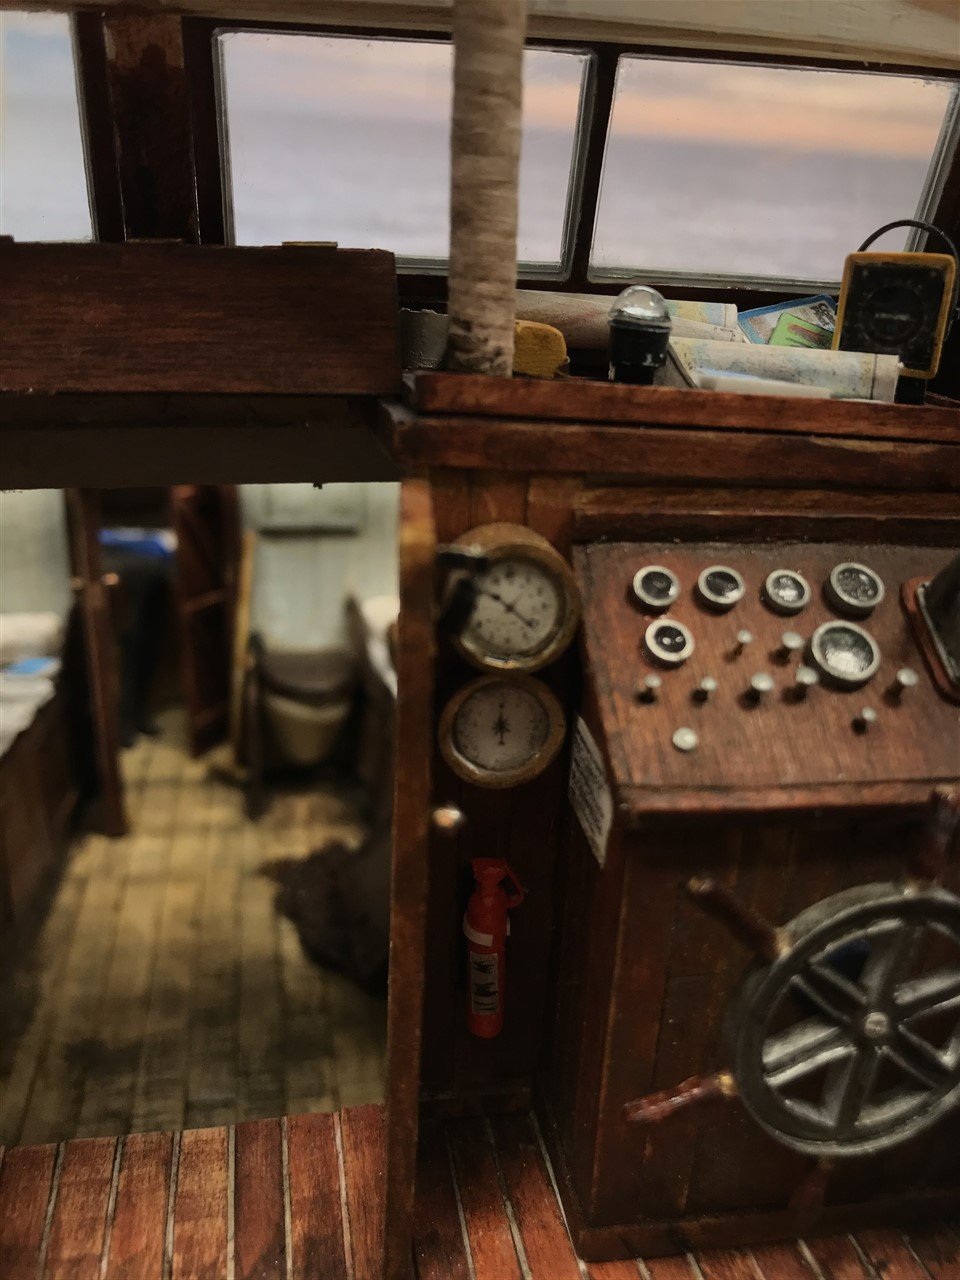
Also lots of tiny details for completeness, like the inclinometer in the cabin...
More to follow soon.
- FriedClams, GrandpaPhil, Ian_Grant and 3 others
-
4
-
1
-
 1
1
-
These are a pleasure to look at - great work!
- mtaylor, KeithAug, Keith Black and 1 other
-
4
-
So after a wonderful few weeks hosting family visits which made us feel as if some sense of normality might be returning, I have a little time to get back to Orca.
Thanks to the suggestion from DCN, and my new Spanish friend on ‘Shapeways’ I have some very nice resin printed 1:20 barrels.
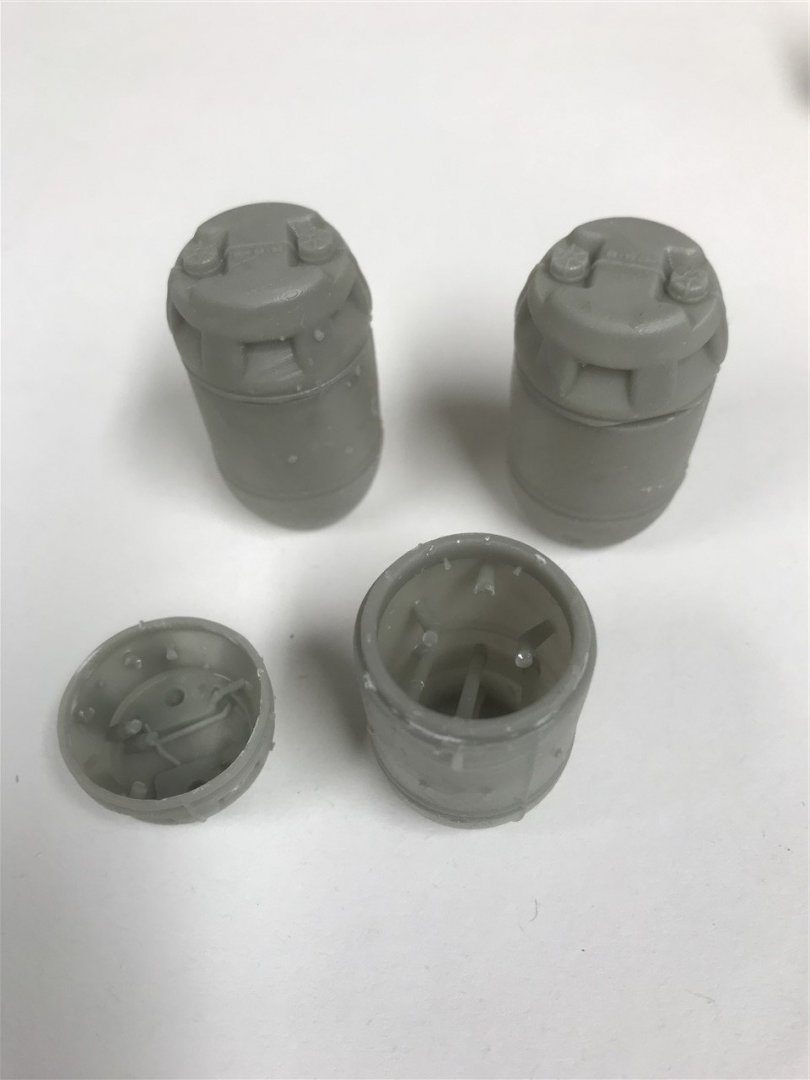
The maker, Holden 8702 was super helpful and took the time and interest to get the size right when the first set were a little too large. I can recommend him to anyone else, just google shark barrels on Shapeways and you’ll find him. I am bugging him to print the characters of Quint Brody and Hooper, but these would be a big project so maybe have to wait for that.
The detail on these is amazing, down to the correct lettering on the top and bottom, and mold lines etc. Great job Holden 8702!
I primed the barrels with a couple of coats of black acrylic and then sealed with a matt clear coat before spraying with Plasticote yellow. This was then distressed back to match the originals.
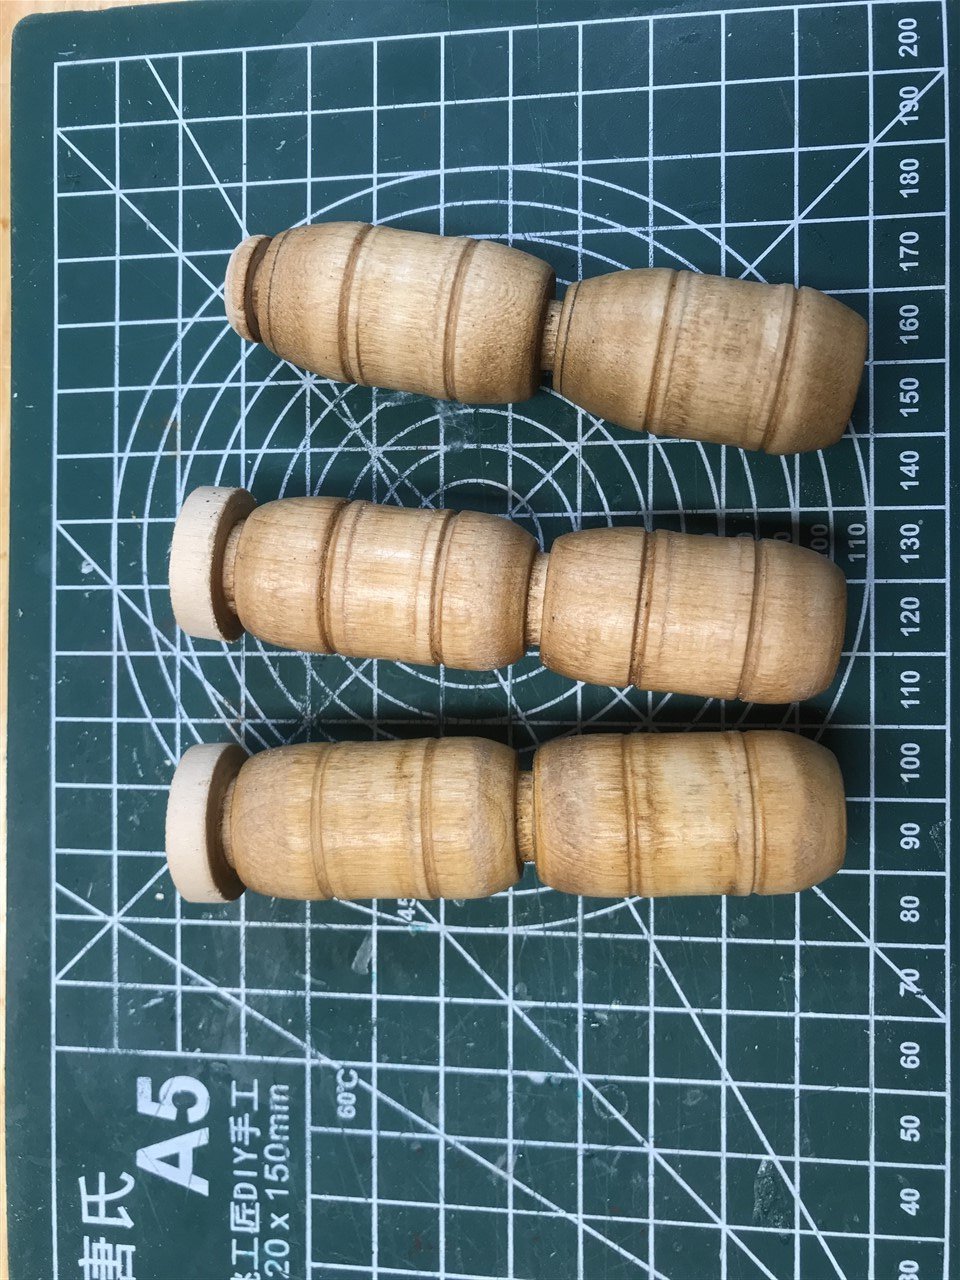
So here’s the thing – I really wanted to make these myself, but didn’t have the confidence. So I got the resin printed ones, and they fantastic – clearly the work the went into their manufacture is of a very high standard, with all the details of the original as I’ve said. But I went ahead and made a set in wood anyway, carved in the details and painted them up.
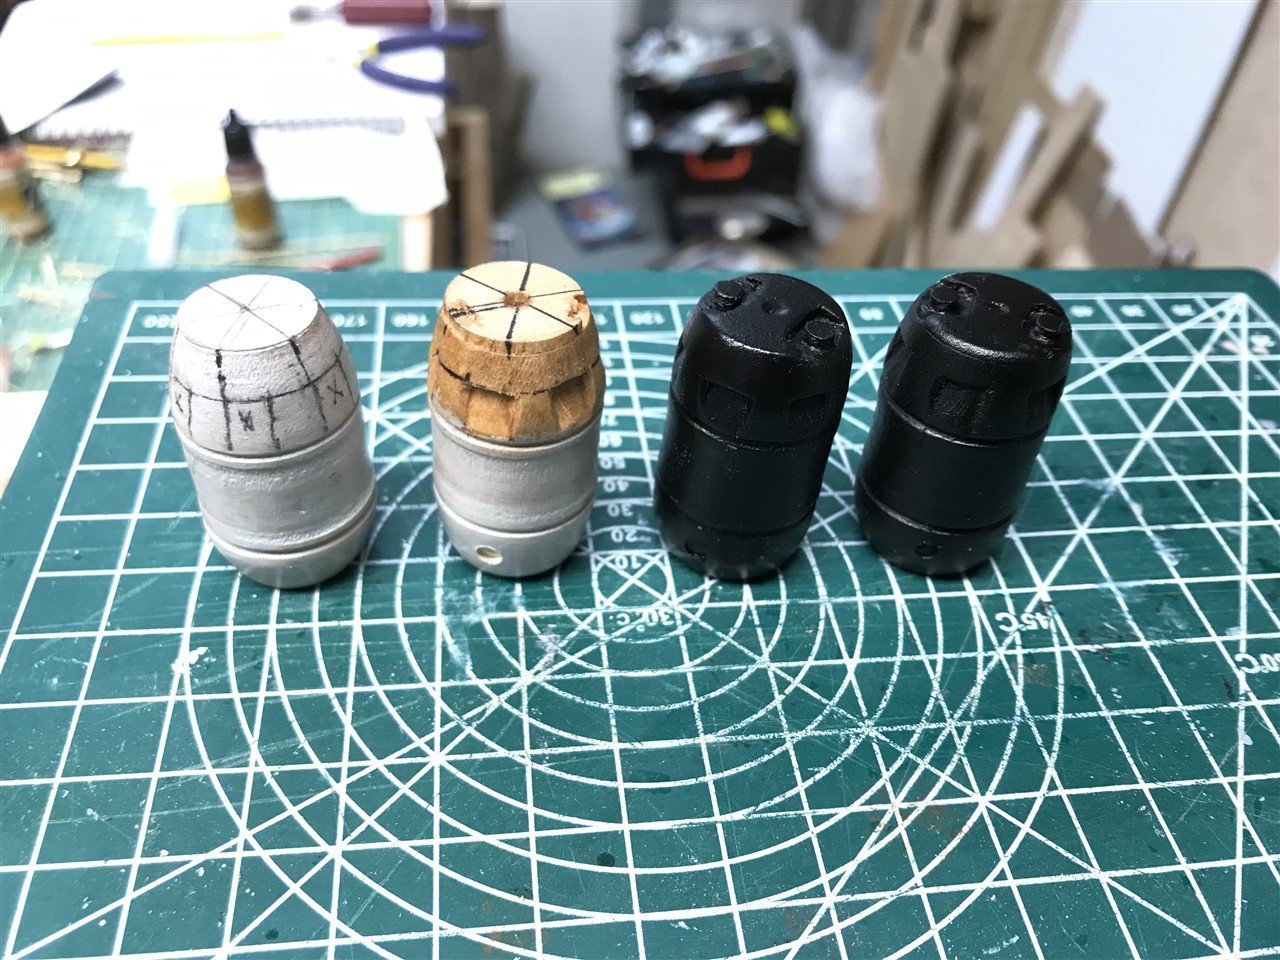
The barrels had a steel hoop attached with loops to provide a strong attachment for the ropes; they needed to take a battering without coming lose. Copied this with styrene and attached suitable home made hemp colored rope. Pleased with the result. So this next image shows the resin printed ones and a couple of the wooden ones mixed in. Can you tell the difference?
Now moving on to the final few props on the flying bridge and aft deck. More to follow in a few days.
-
-
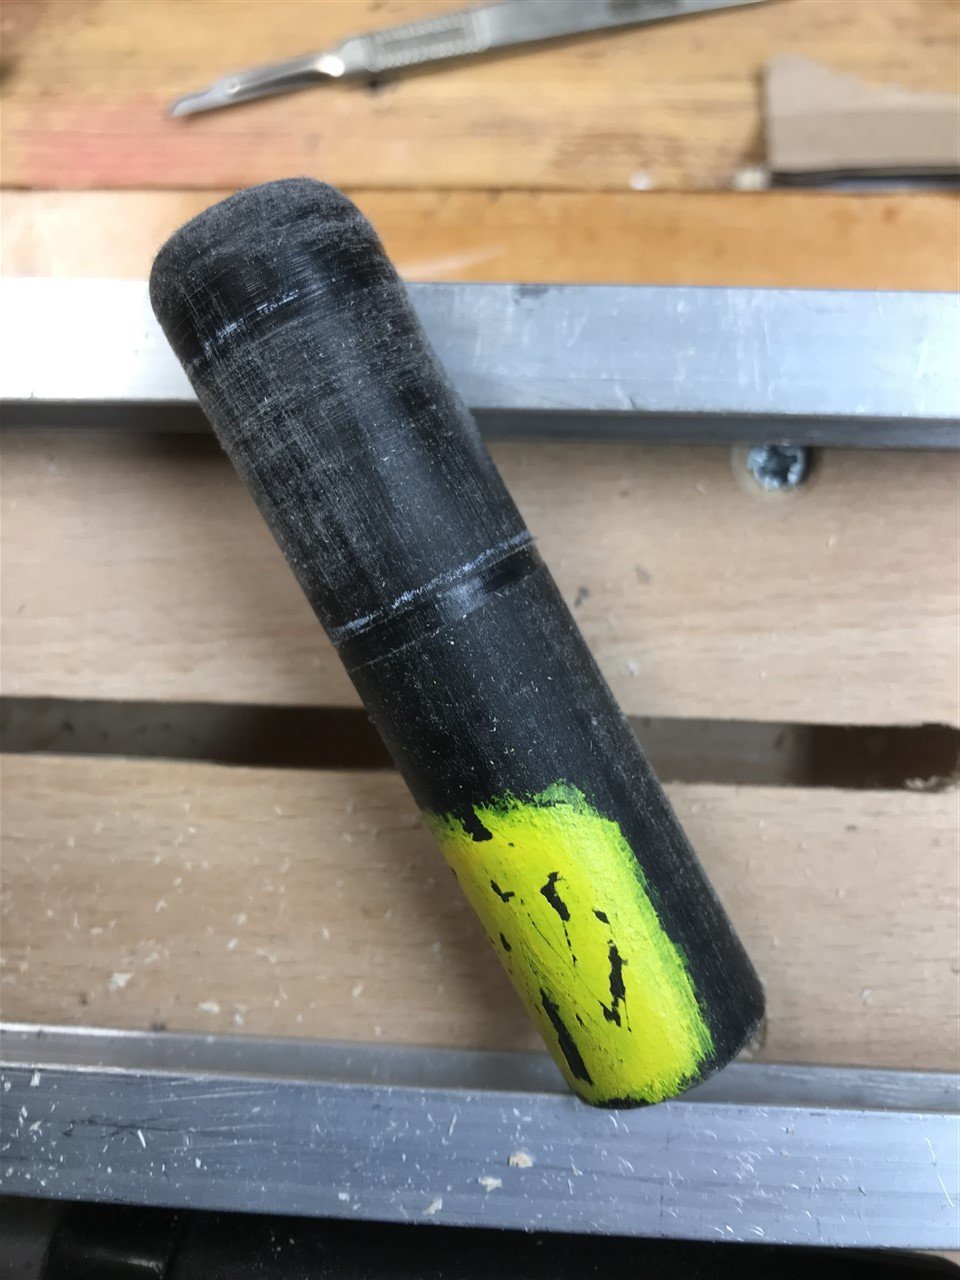
Progress on the barrels-
Whilst I wait for some resin printed barrels to arrive, I thought I'd have a go myself anyway.
UHDPE was no good - if I had a CNC machine or metal lathe it might have worked, but this is slippery difficult material.

So ditched that and found some 25mm beech dowel, and did a little turning on the DIY lathe.
Decided to see how these will look compared to the 3d printed ones, then make a decision.
Anyway, there will be a pause now until the next post as after 2 years of this blasted pandemic our children who live abroad are coming home to visit for a couple of weeks! The shipyard is therefore closing for a bit so that I can put first things first!

- GrandpaPhil, FriedClams, lmagna and 2 others
-
4
-
 1
1
-
Winch fitting for mast...


-
Enjoying the build - that's a very fine shaped hull.
-
Thanks for the likes and views.
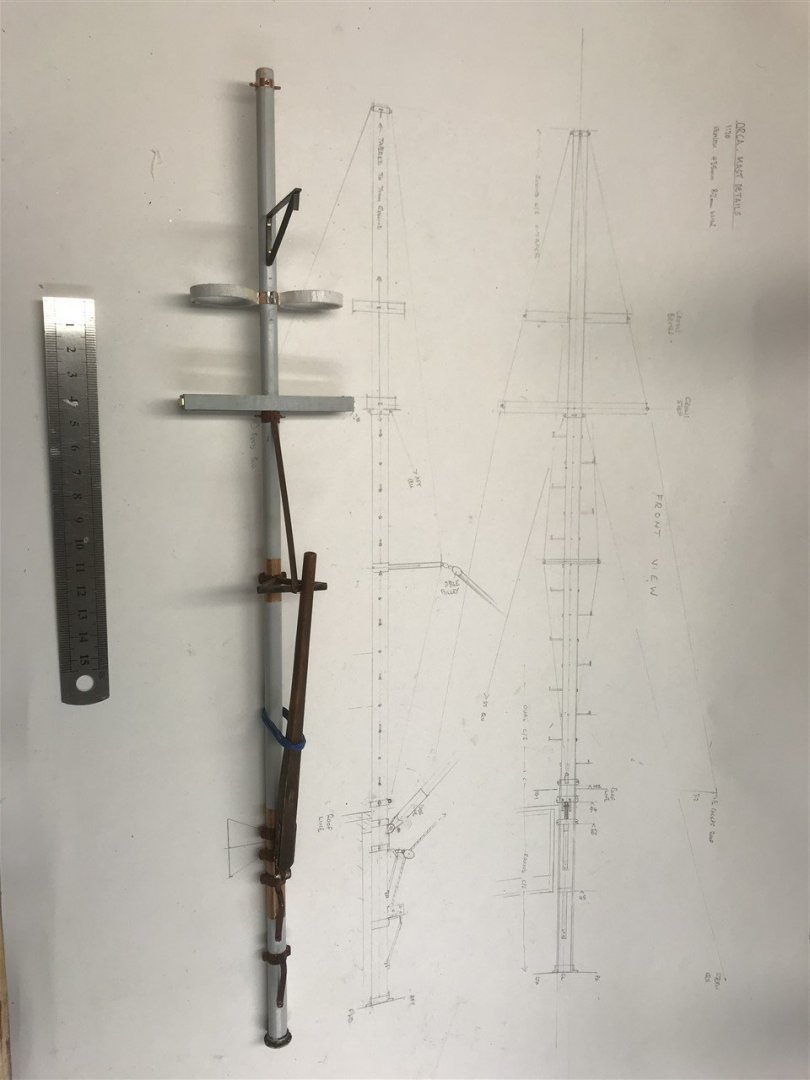
Mast build.
A design ramble for those looking to build Orca; otherwise skip down to the build photos!
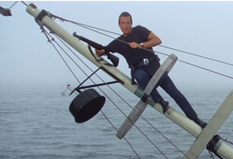
The mast can be confusing for two reason; Orca I and II had different masts; the latter even being offset from the centreline. Working from movie stills mean you need to be very careful which boat you are looking at if you want fidelity to the original vessel.
There are some clues…
Orca I (doorknob)
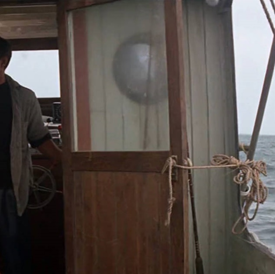
Orca II
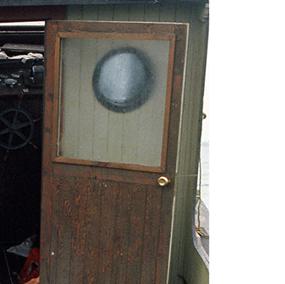
Orca I (brackets on mast)
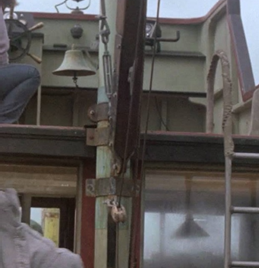
Orca II
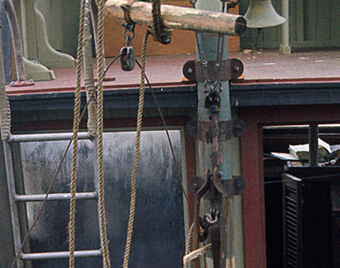
Orca I (lights on lookout step)
Orca II
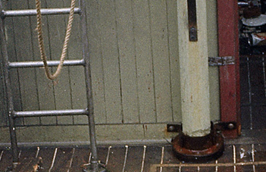
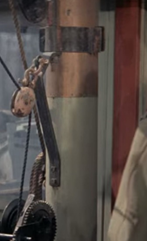
Orca I (Mast base and ‘skirting’ to wall)

Orca II
…and there are many, many more.
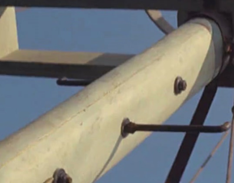
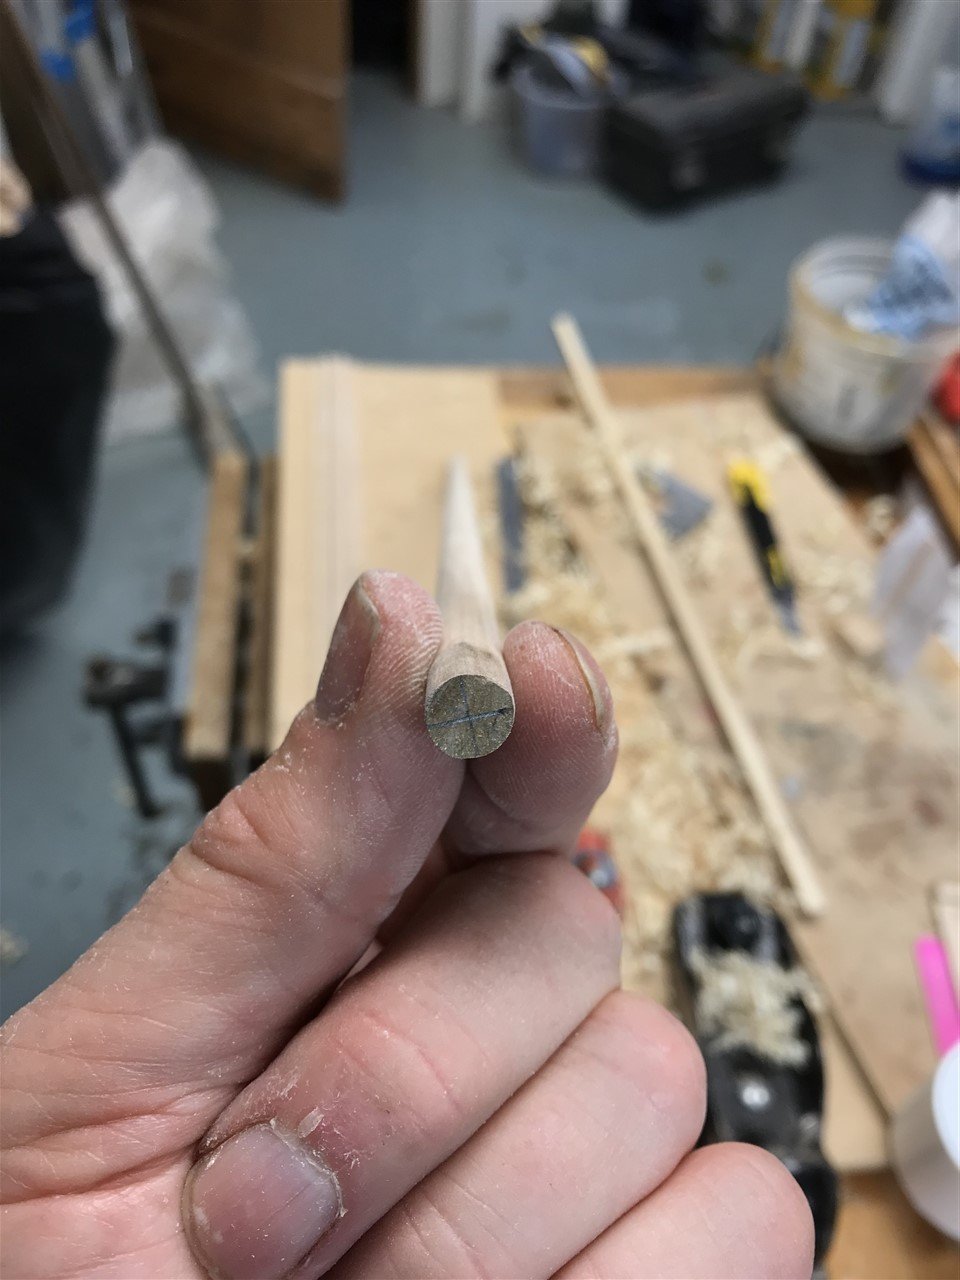
Orca I has a mast base that appears round…. But in the middle it is flattened at the sides. It tapers a little and gets rounder at the top.
Does this all matter? Well there are many Jaws/Orca aficionados who will be eager and able to point out mistakes and variances from the original, so better do my due diligence.
Back to the build...
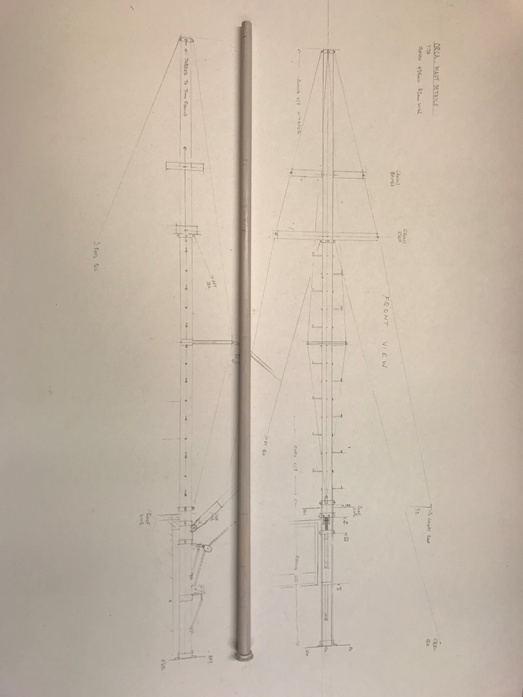
Wanted to scratch build the mast, not rely on dowel or metal rod, so started with a square section of home grown Poplar, then planed to octagonal, the 16 and 32 sides.
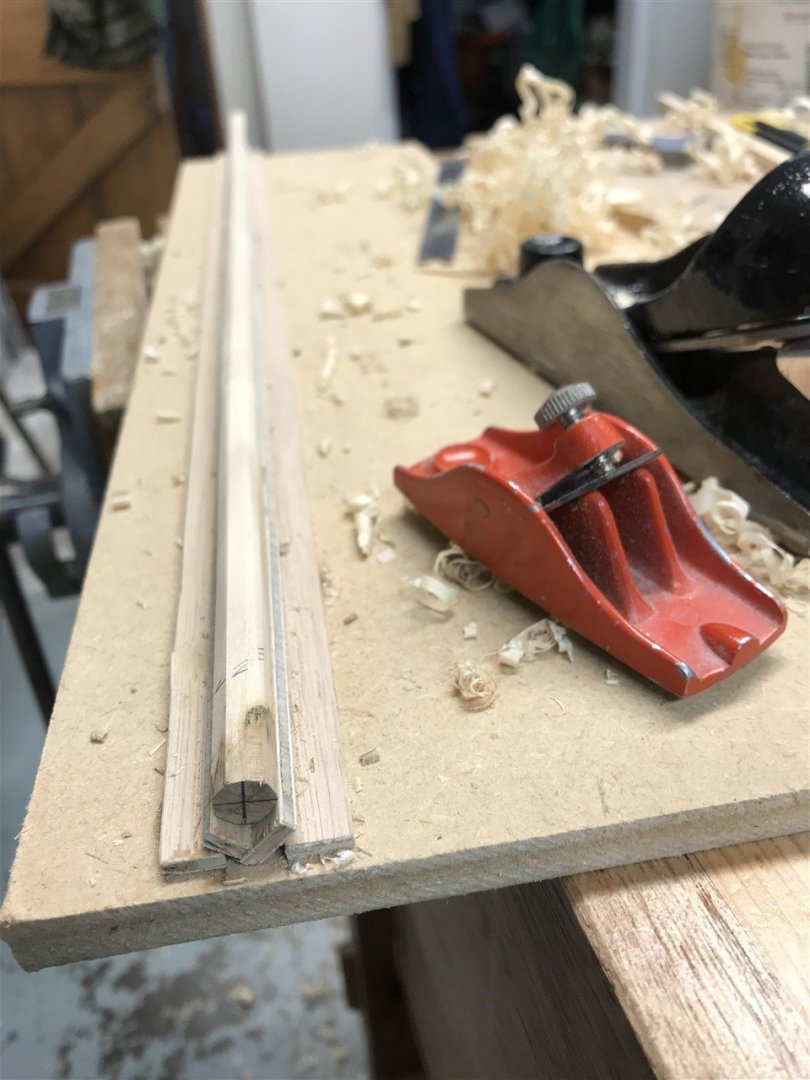
Yellow ball, corner pocket...

Then flattened the centre section to size and tapered and rounded the top according to my measurements. Primed and mast base fitted.
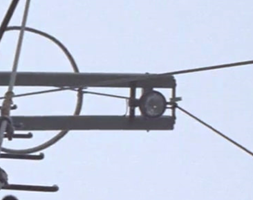
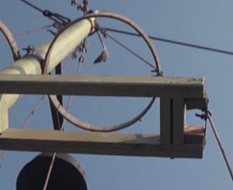
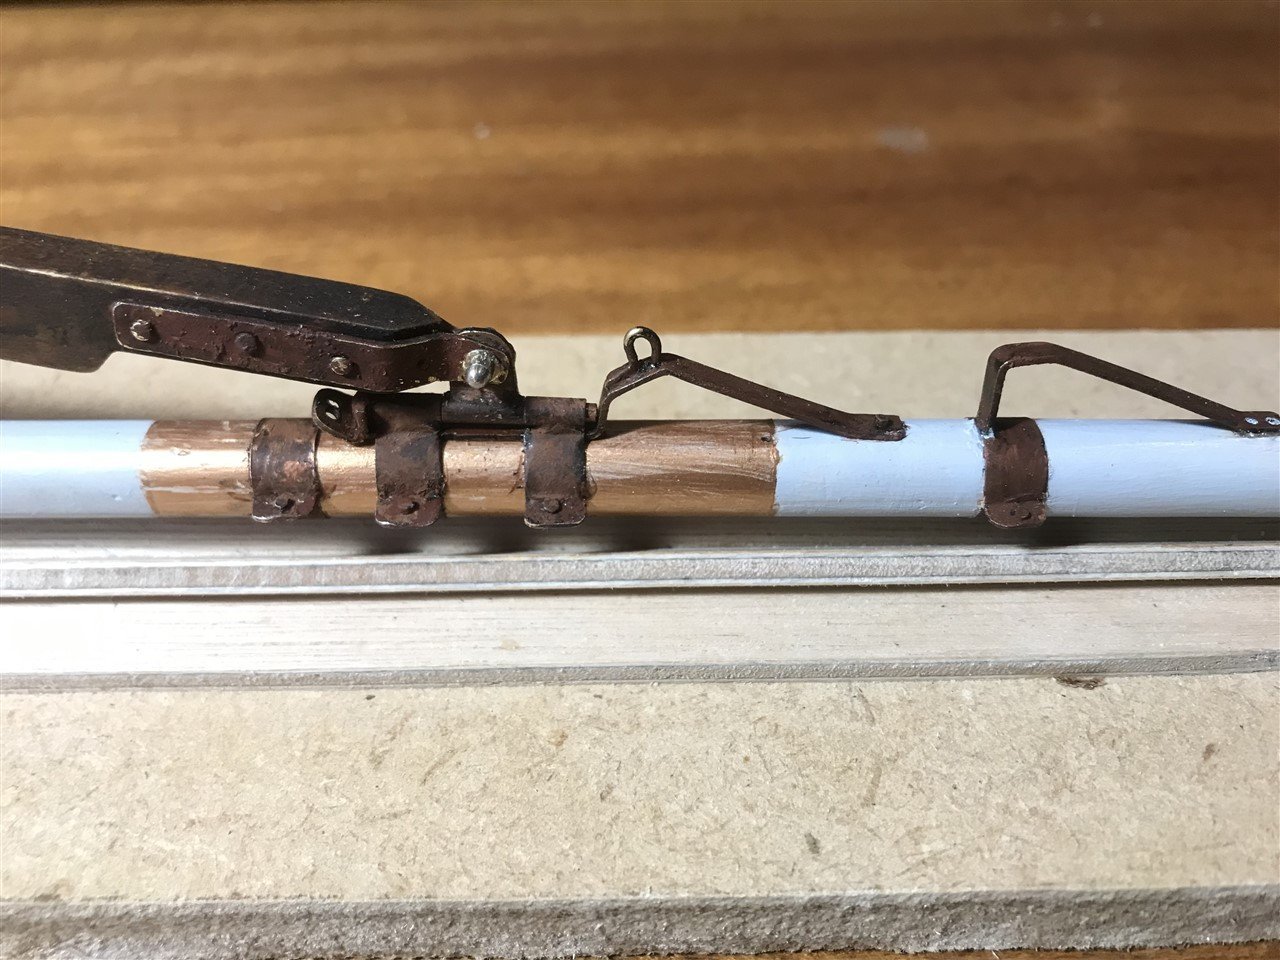
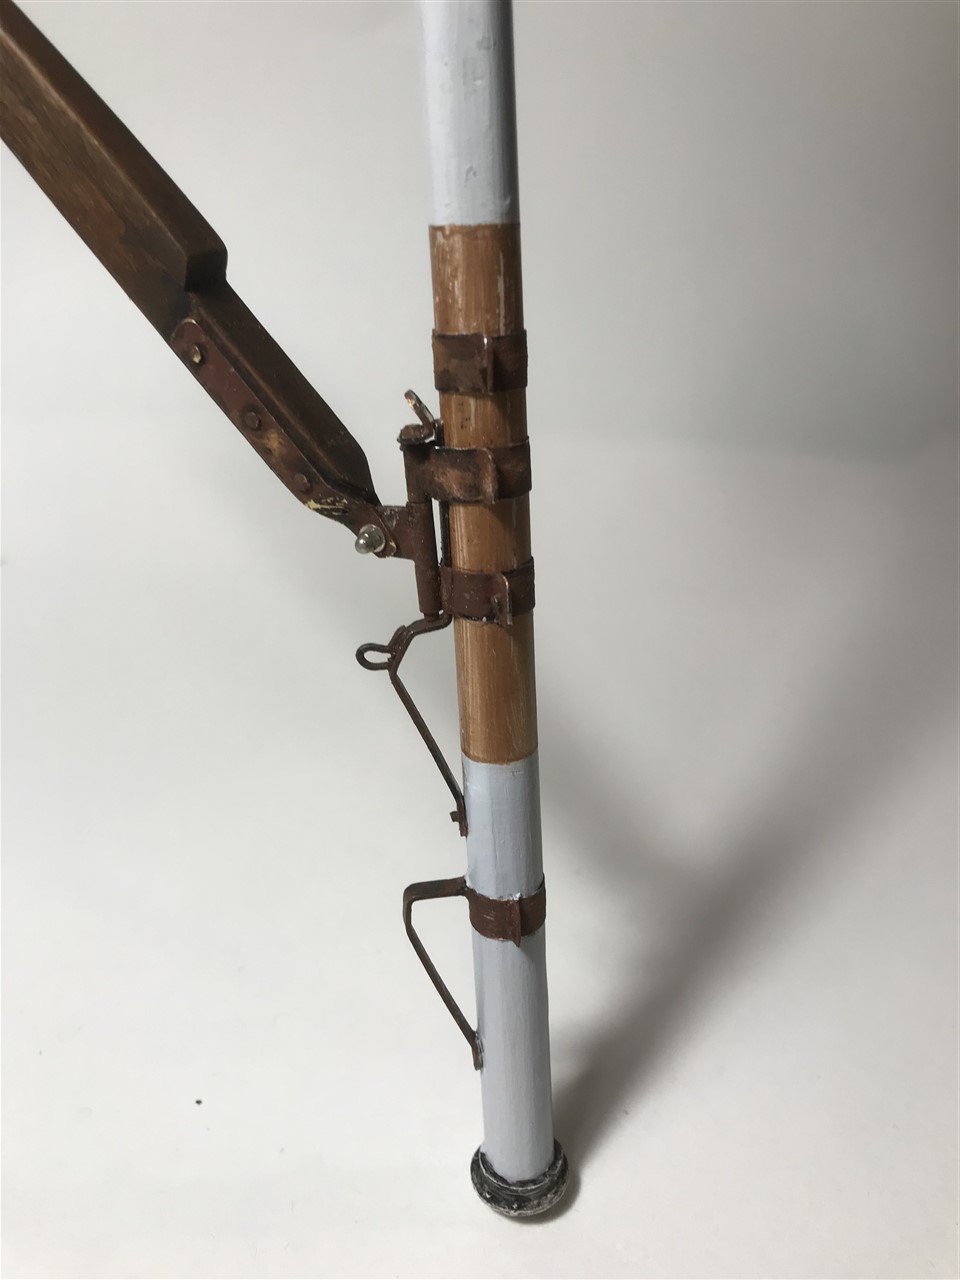
Working up from the base - the derrick pivot, mast rings and winch attachment come first.
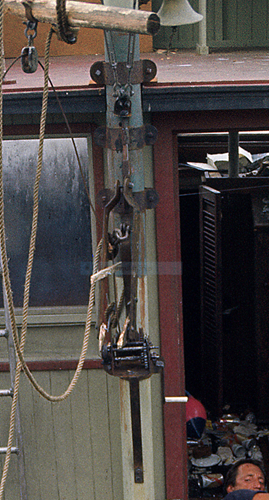
Mast hoops, winch mount; mast derrick gooseneck and eyes for the shrouds from the diamond spreader all soldered in brass for rigidity.

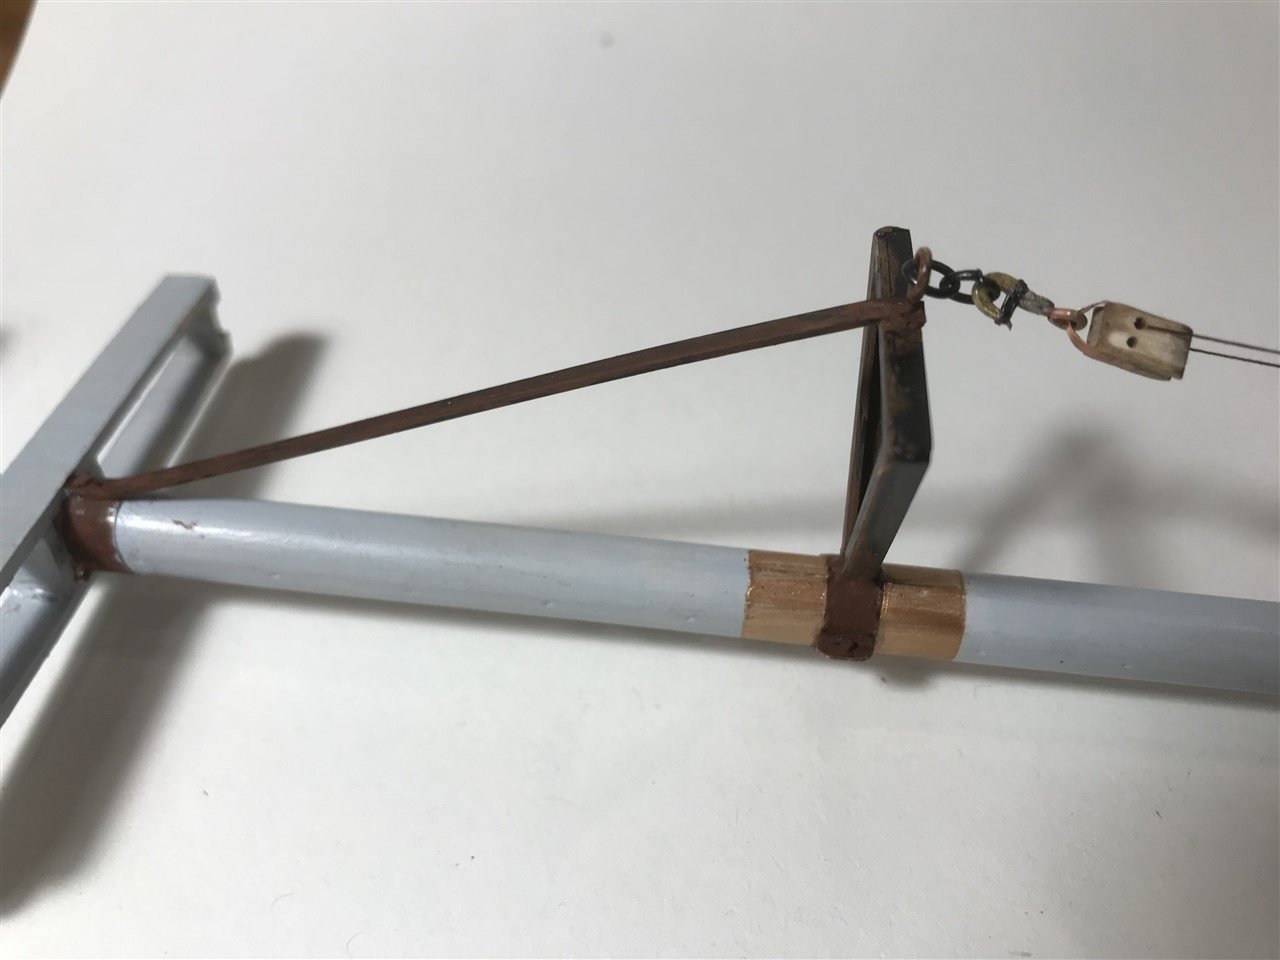
Span block mount and diamond spreader made in styrene, block fitted with loose front hook crafted from soldered soft copper rod and ultra fine black wire.
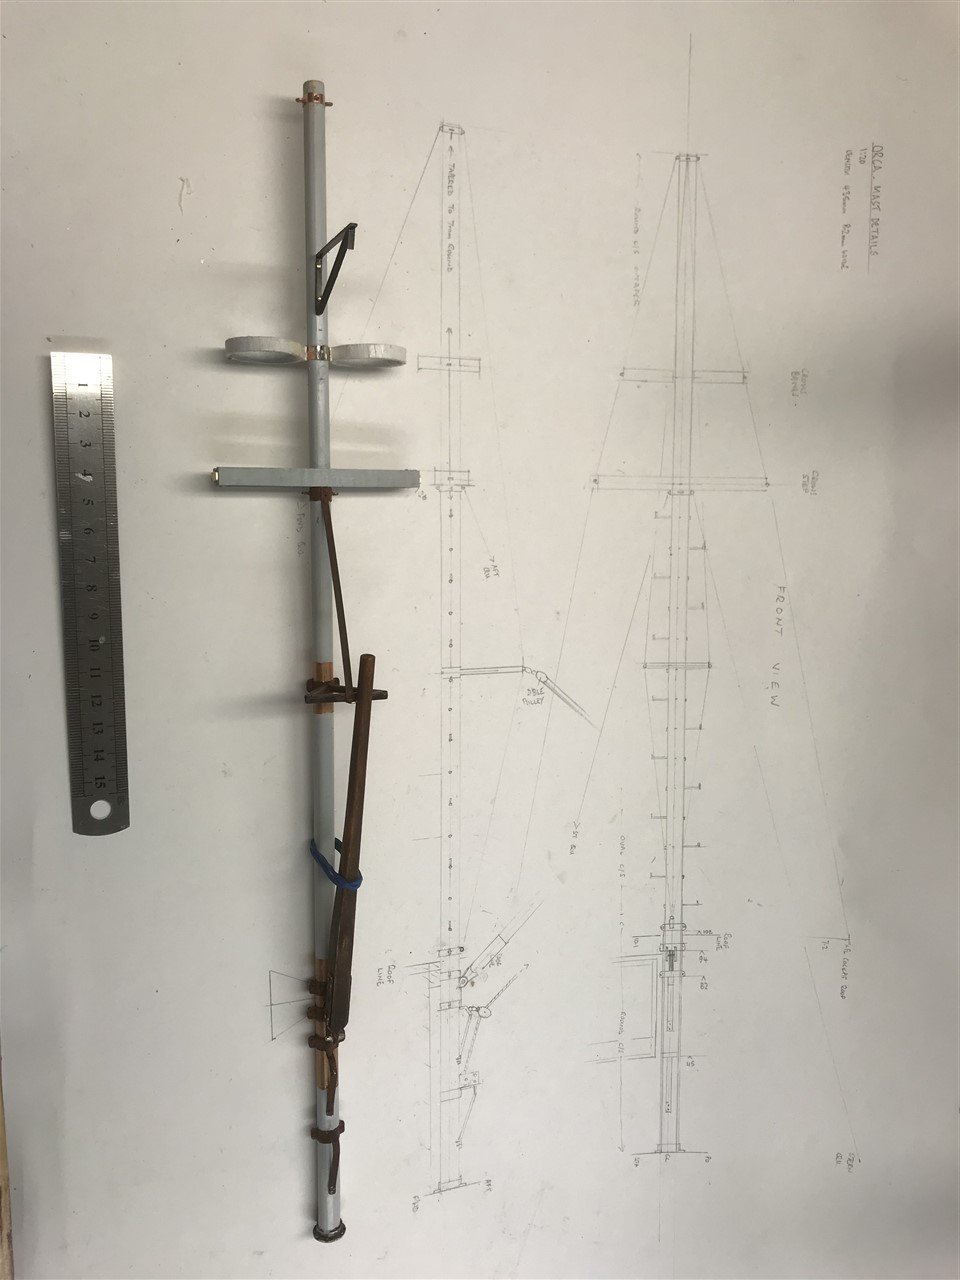
Lookout platform, lamp bracket and top mastband with four eyes for rigging :
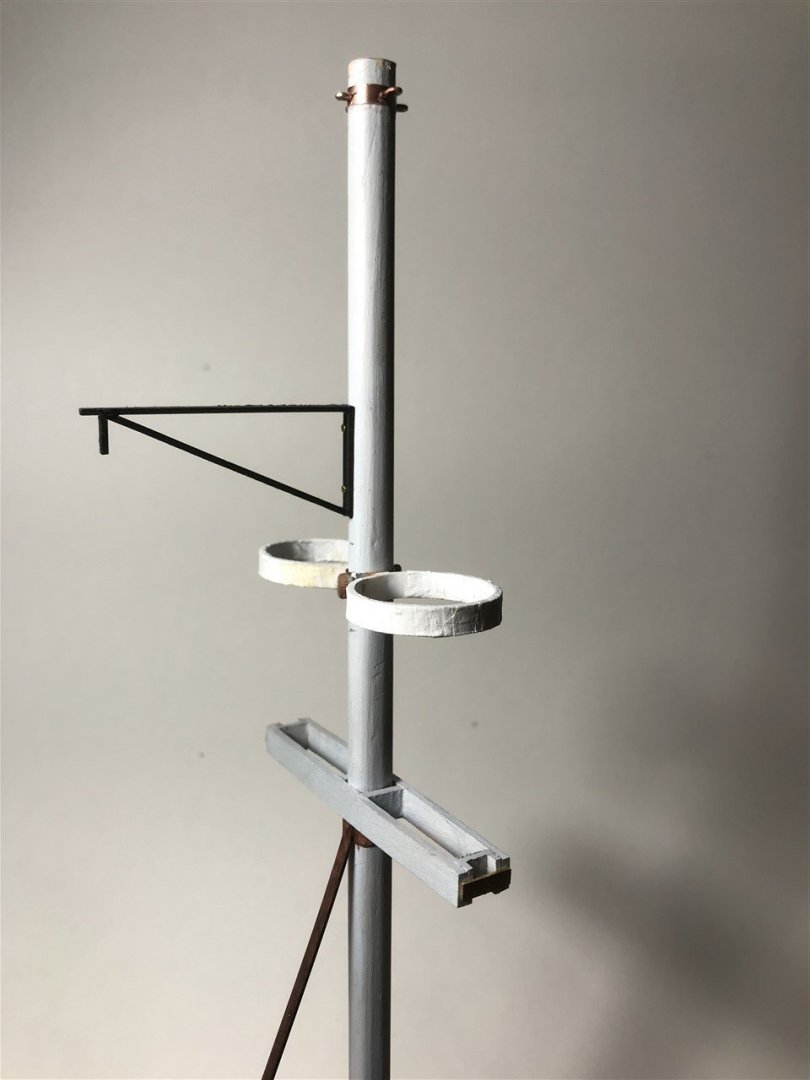
The whole thing so far, ready for detailing and finishing.
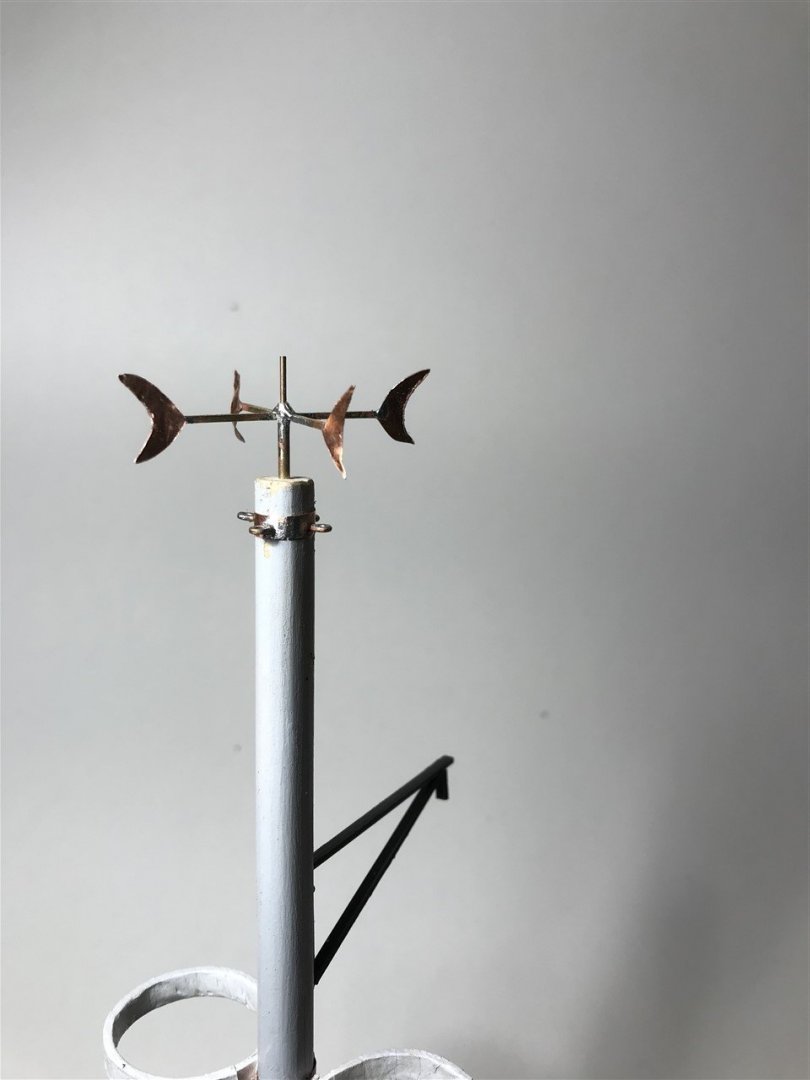
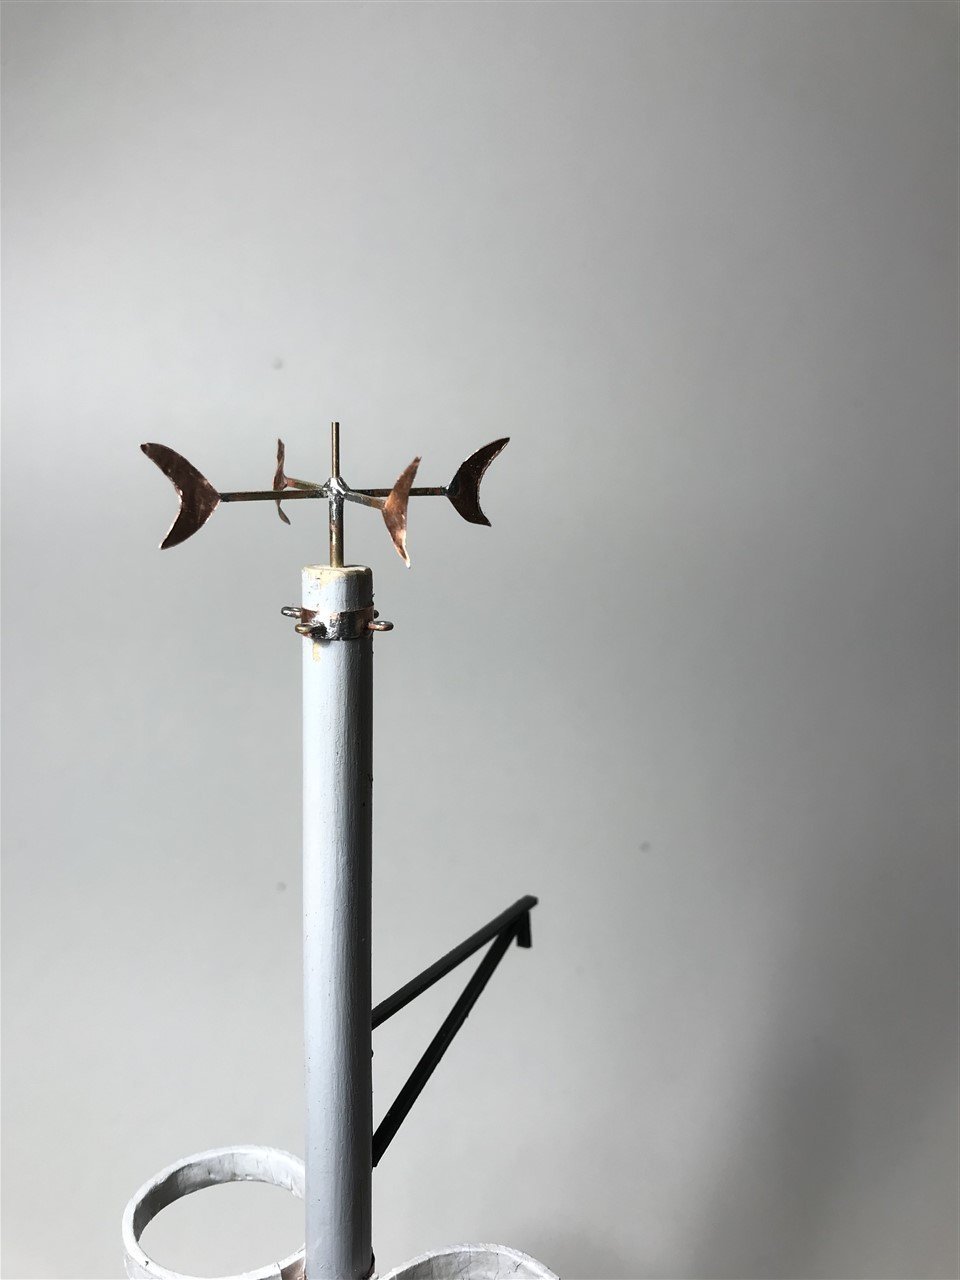
Last job today was the shark-tail wind vane (maybe?) atop the mast. I’ll add the flag later.
- KeithAug, Sea Hoss, FriedClams and 3 others
-
6
-
Good to see the progress Keith. Always impressive, and the brass-work so neat; very inspiring!
- FriedClams, mtaylor, Keith Black and 2 others
-
5
-
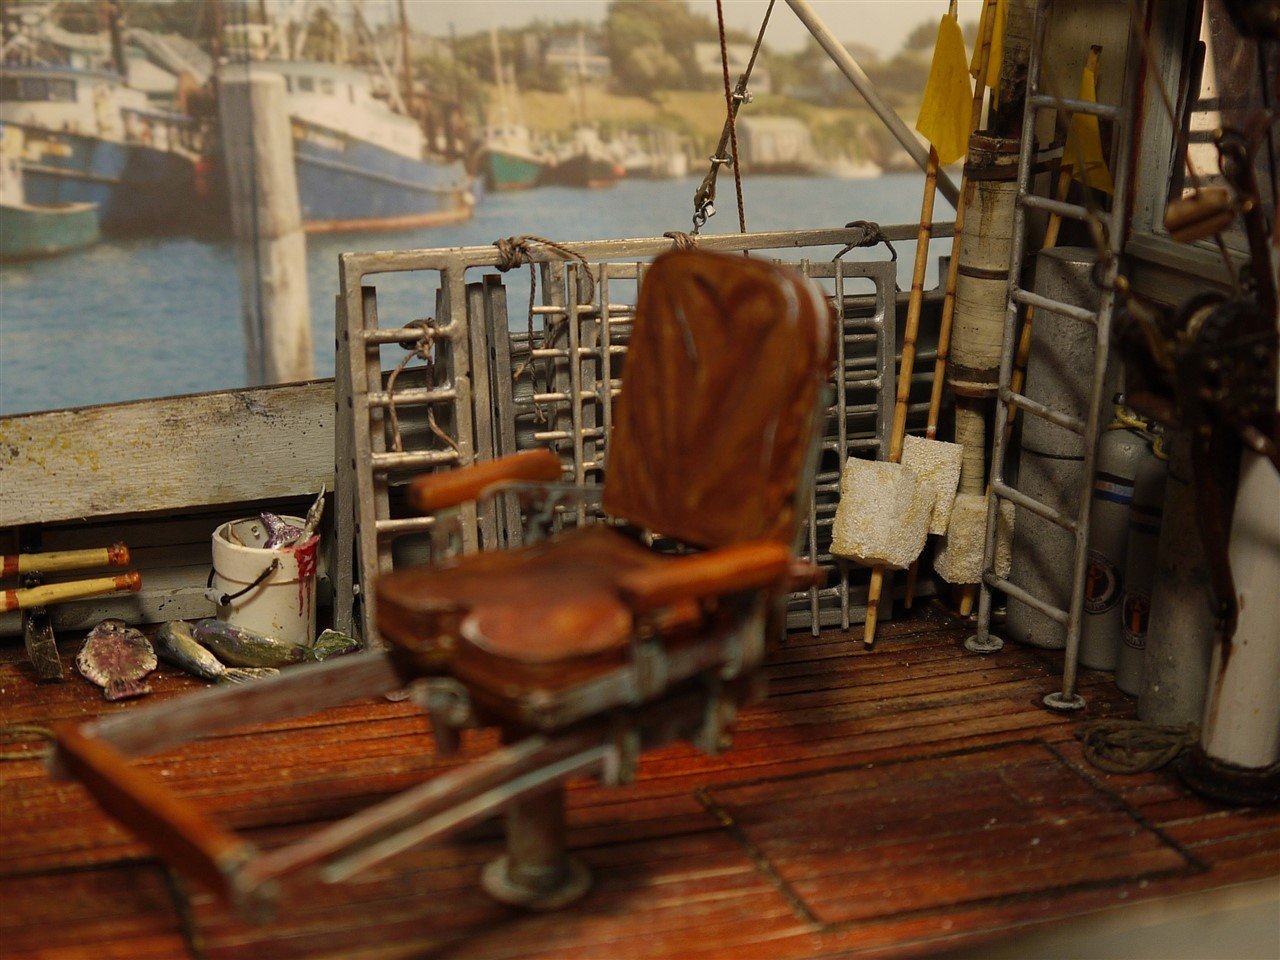
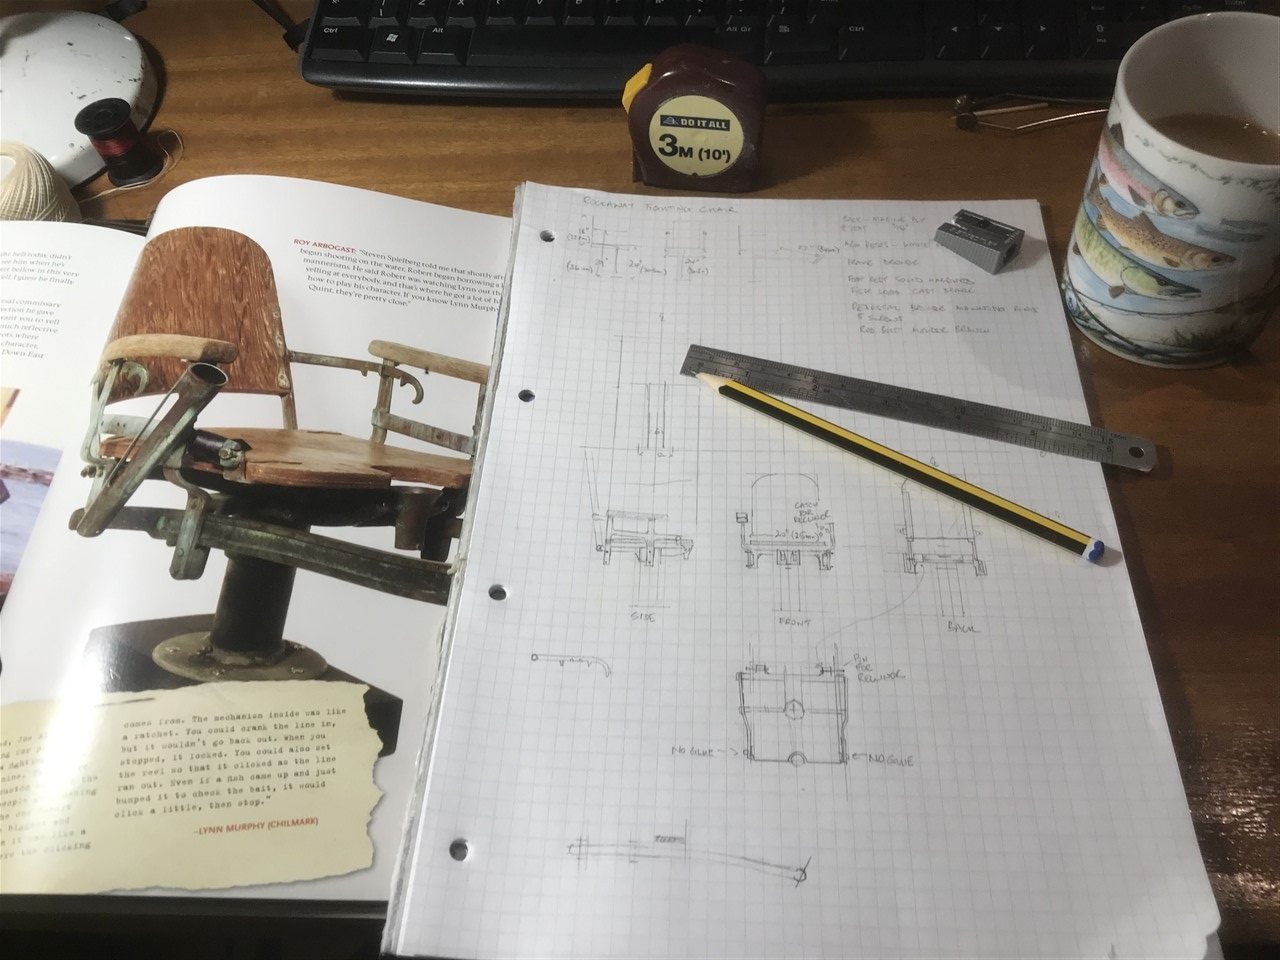
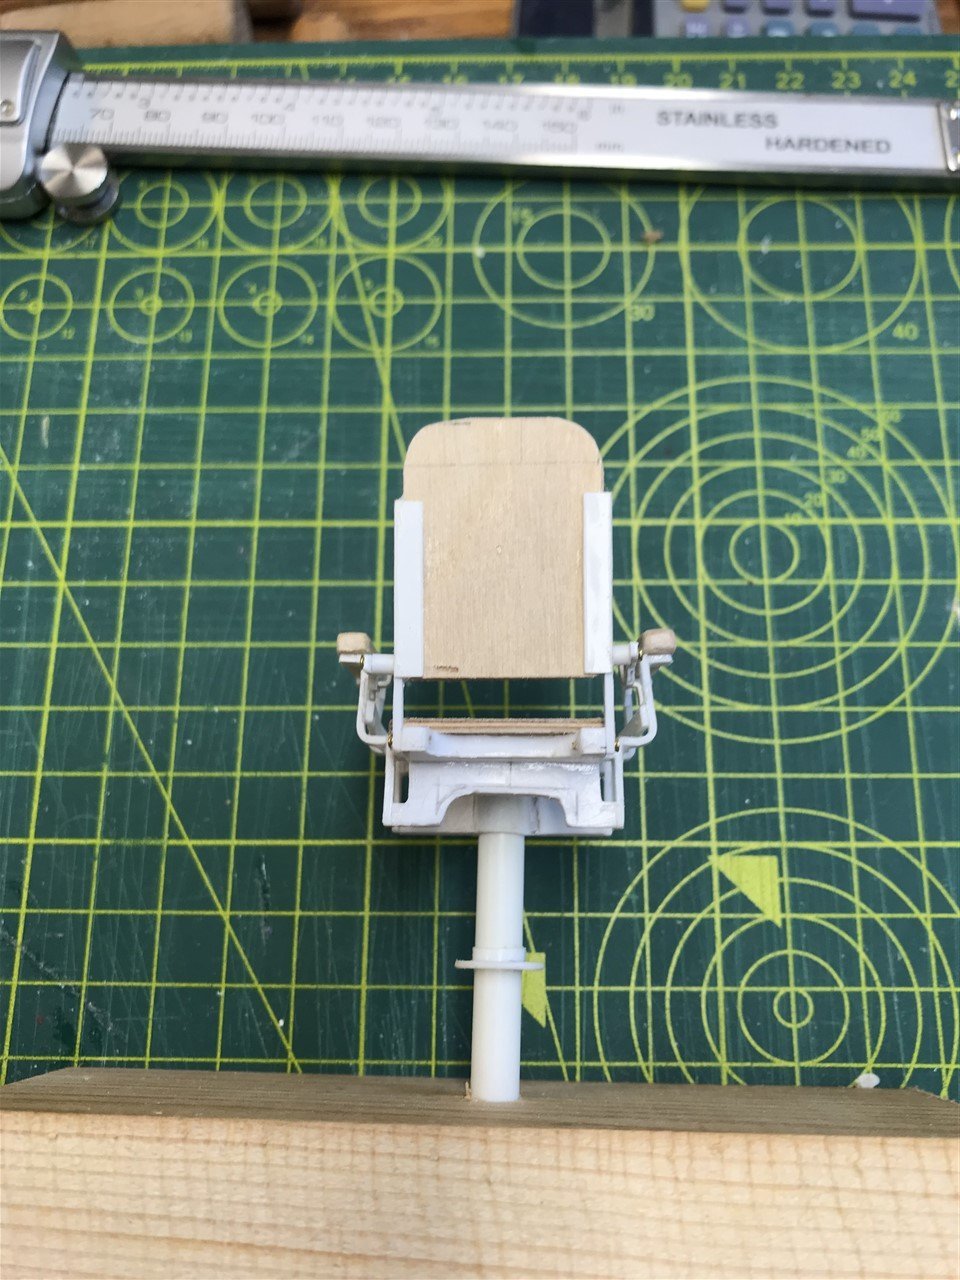
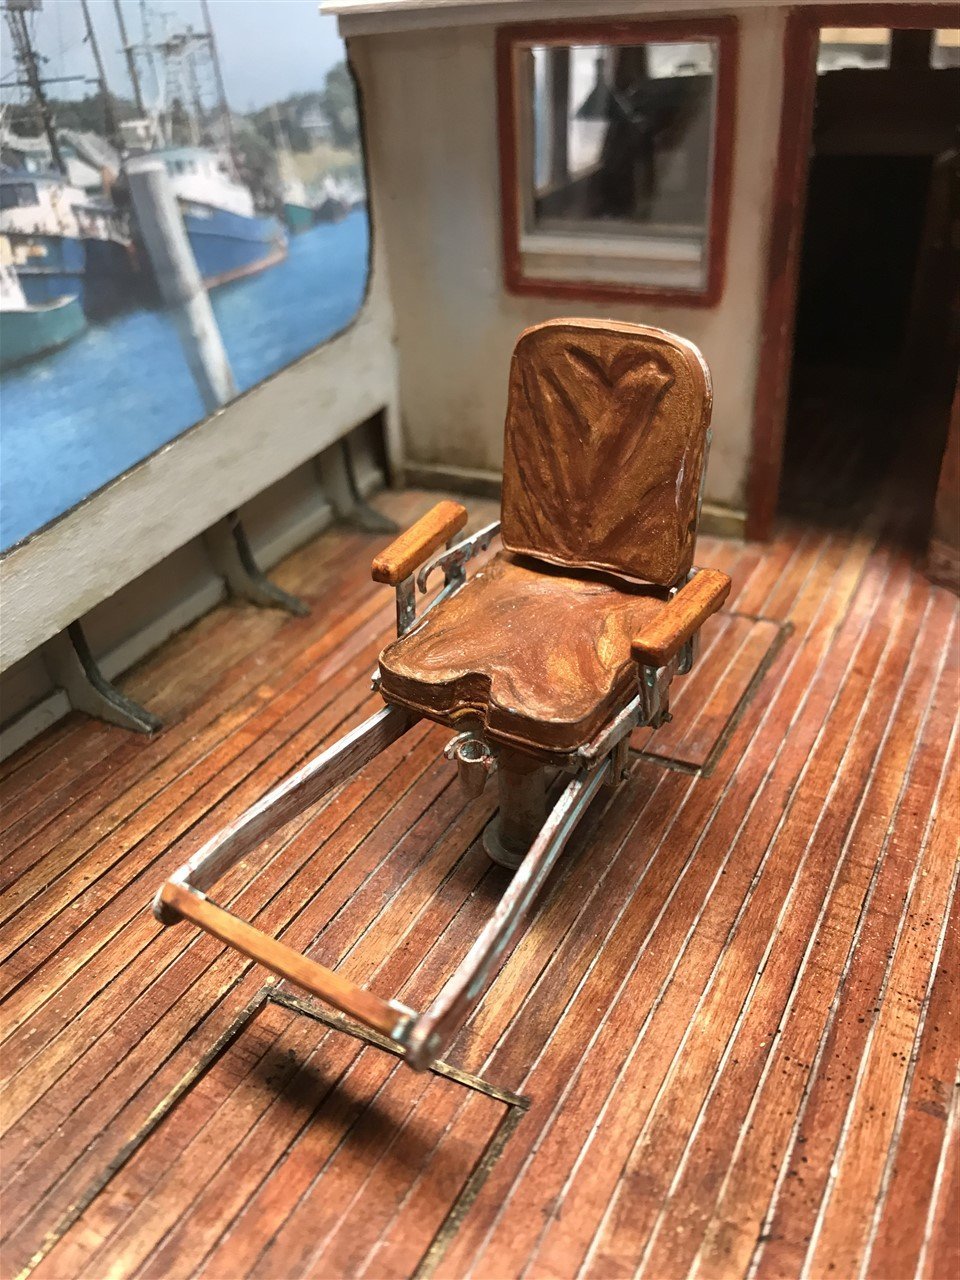
Rock-Away fighting chair.
Whilst scratching my head about the barrel build, thought I'd have a bash at the chair. It's a tricky little job; at 1:20 it's about 2 1/2" (65mm) high.
Pity Quint didn't sit on a box like other anglers...


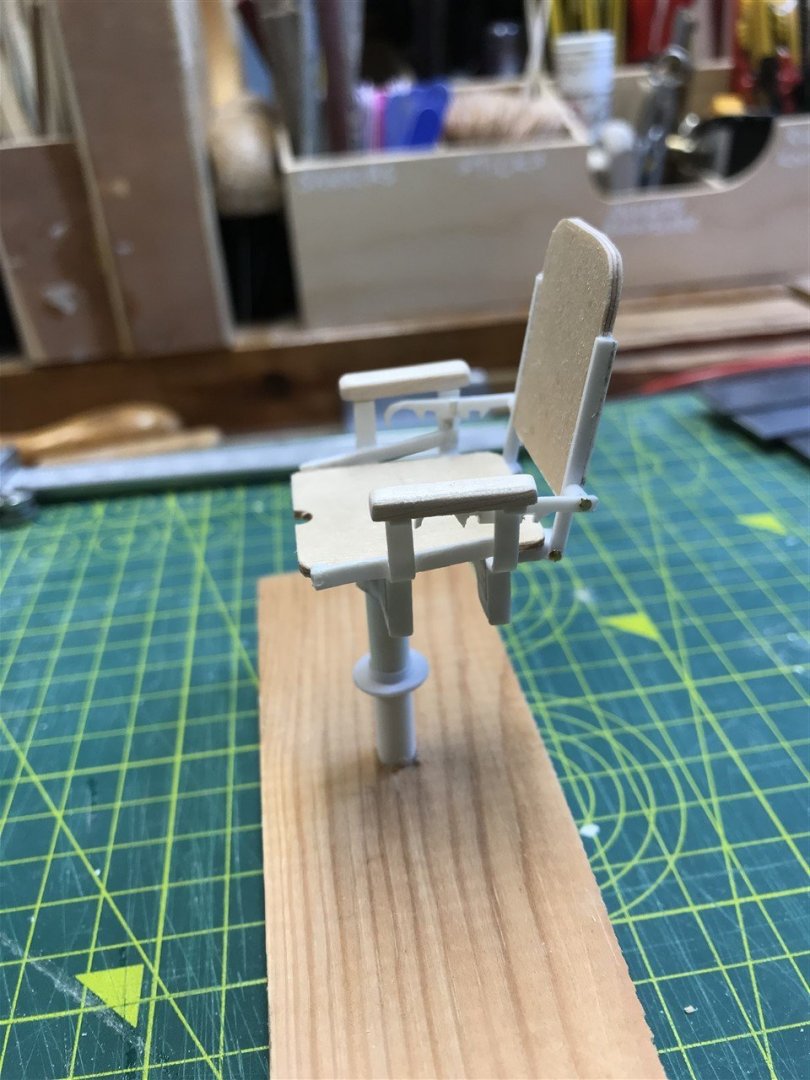
Getting there...
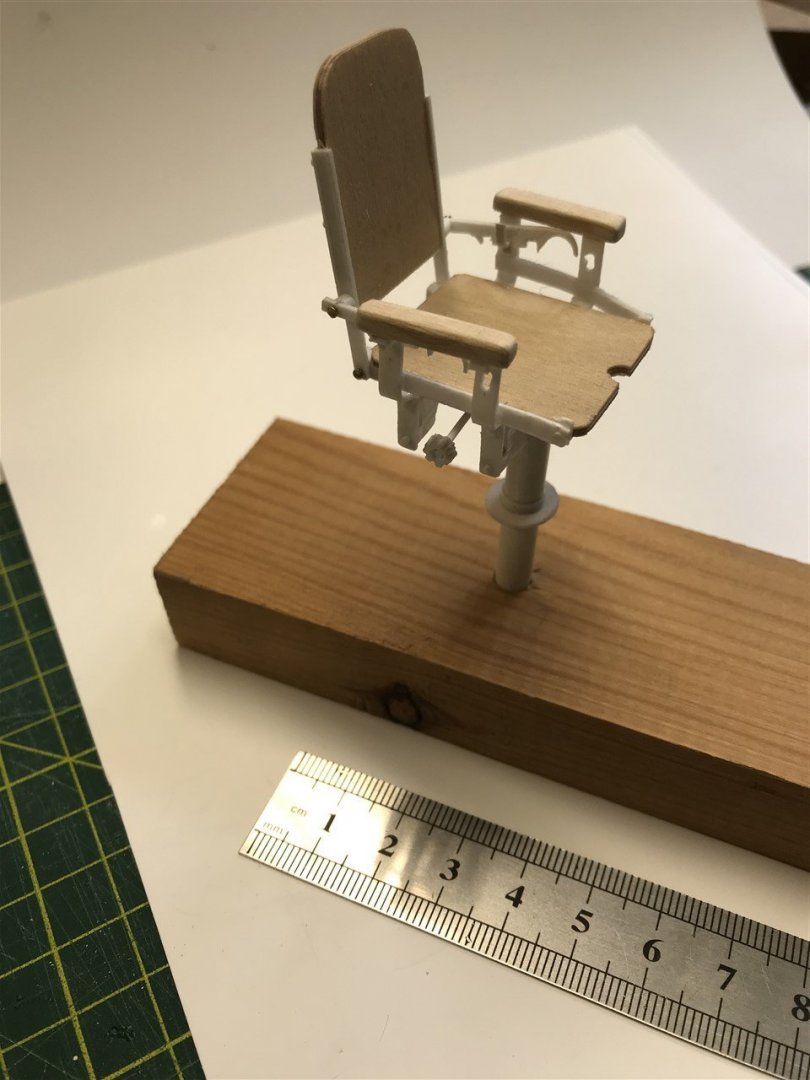

Still have some tapered machined rod holders either side to do.. but that will do for now.
-
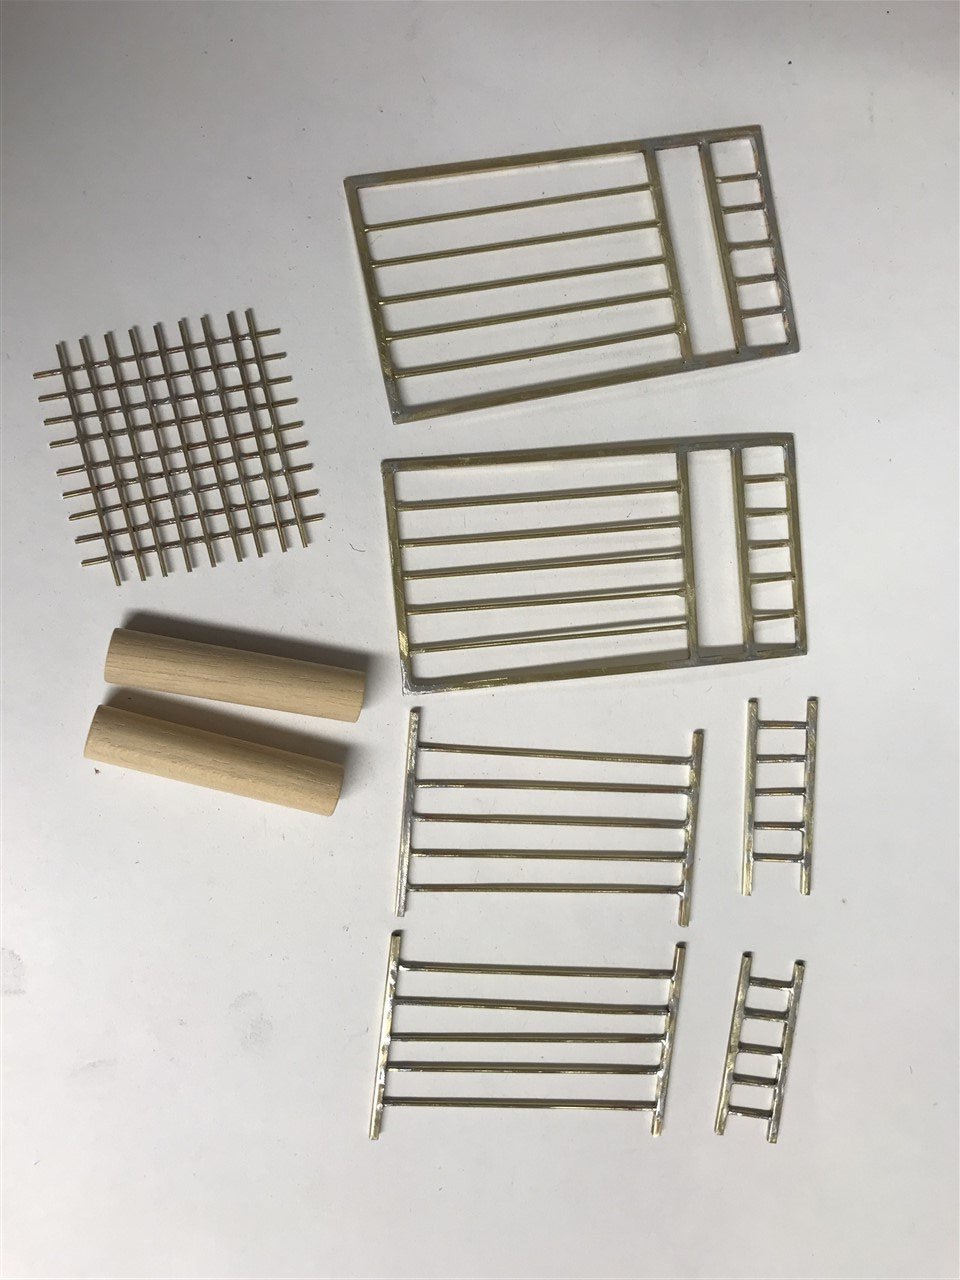
Coxcoaming the pulpit rails and Upper cockpit ladder.
Well as if this boat wasn’t fiddly enough!
Quint obviously whiled away the hours waiting for a bite by decorating handrails with coxcoaming. This did have a practical purpose of adding grip to wet rails, but I wish he’d used gaffer tape (in character) rather than 3 strand rope wrapping (like a yachtsman).
Well, you want a bit of grip in this situation, I guess.
If like me you hadn’t heard of coxcoaming it means any sort of binding on a rail to dress it up. It can be a simple single French hitch, as below, or perhaps a three bight spiral which is a bit fancier.
Orca’s appears to be St Mary’s coxcoam which has three bights hitching over themselves down the rail.
Google it if you want to see it done, and practice on a bit of dowel first, before dropping down to the correct scale. Here’s a useful link if you want to have a go yourself. http://www.frayedknotarts.com/tutorials/coxcombing/smary.html
So I made the rope from 3 strands 60 gauge French twine on the rope walking machine, waxed it to give it a bit of colour using black wax (saved from the Christmas Vintage Cheddar Cheese) and set to with a glass of wine at hand. Felt like those wonderful old Scottish or Norwegian Crofters knitting away, or the knit for victory movement in the war.
Spielberg paid a local expert to add coxcoaming to Orca; here’s a fancy bit from the top of the ladder:
So using a fly tying bobbin from my main hobby..

Now that’s the look of concentration!
- GrandpaPhil, pjofc4, FriedClams and 2 others
-
4
-
1
-
-
So work has stalled - I have known for a while that one component would be problematic, and I'm still not sure how to resolve it.
.jpg.740ea245608a6a1357be8e8d3eea9844.jpg)
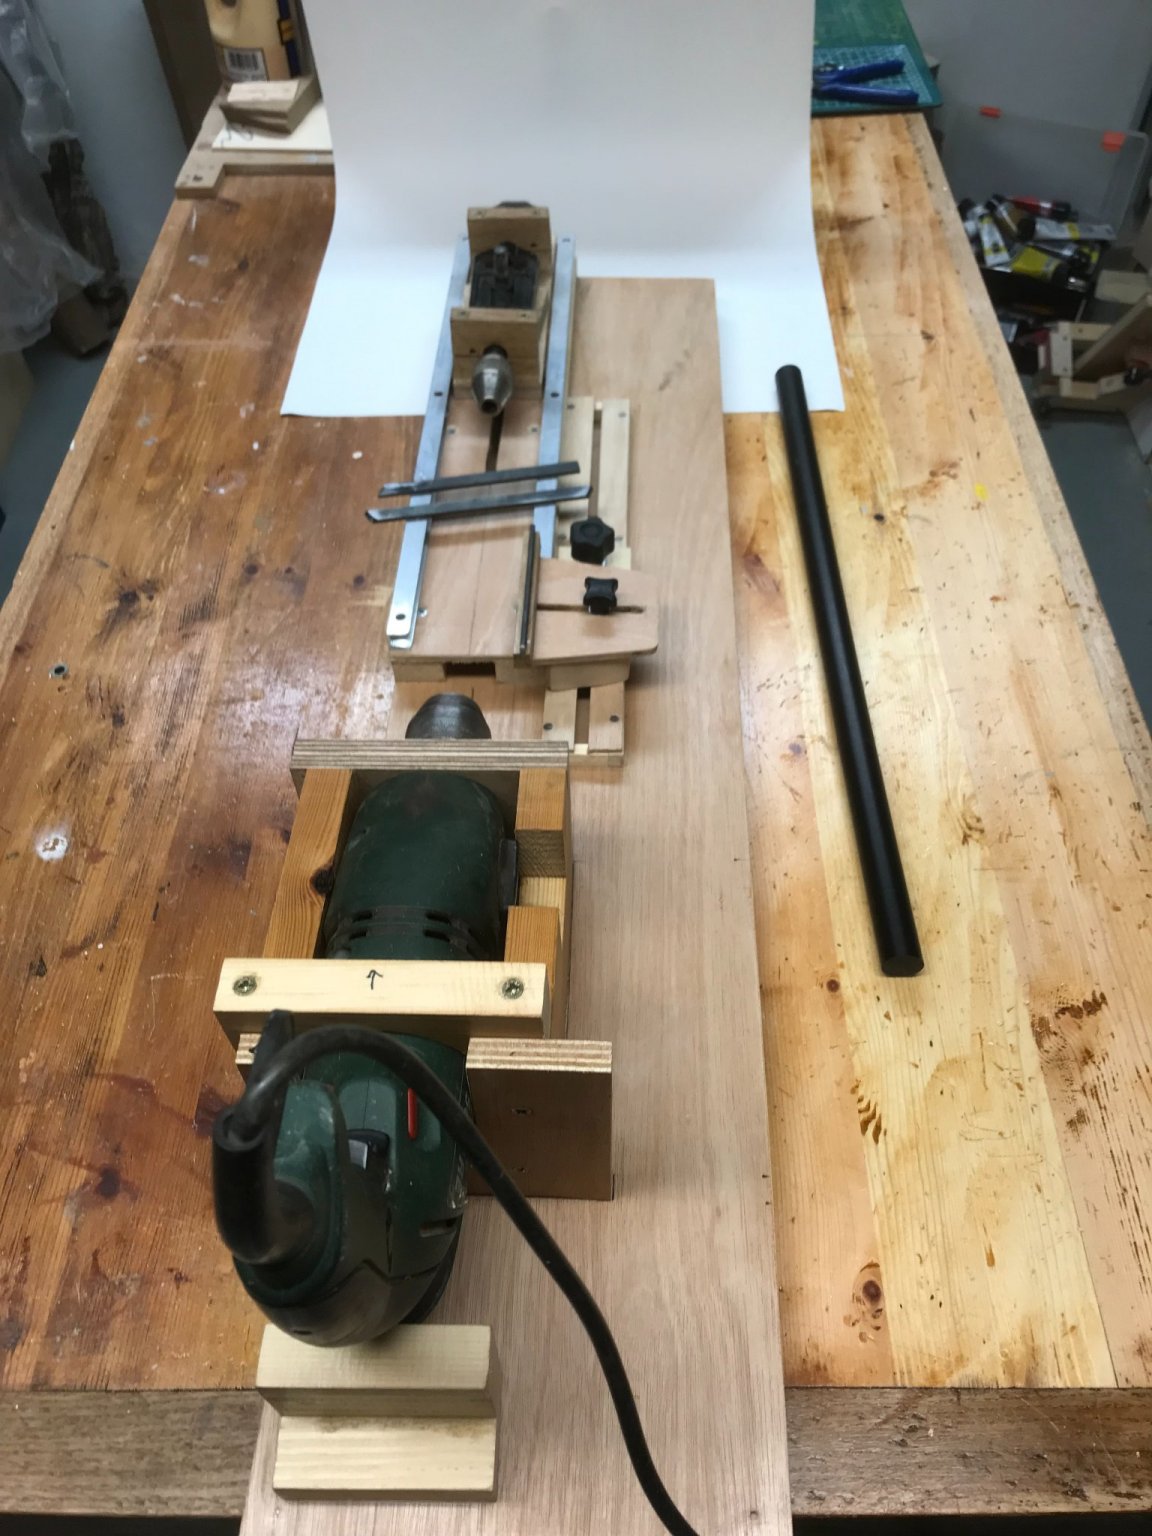
Yep it's those pesky barrels. As this is a scratch build I want to fabricate these from... well, scratch.
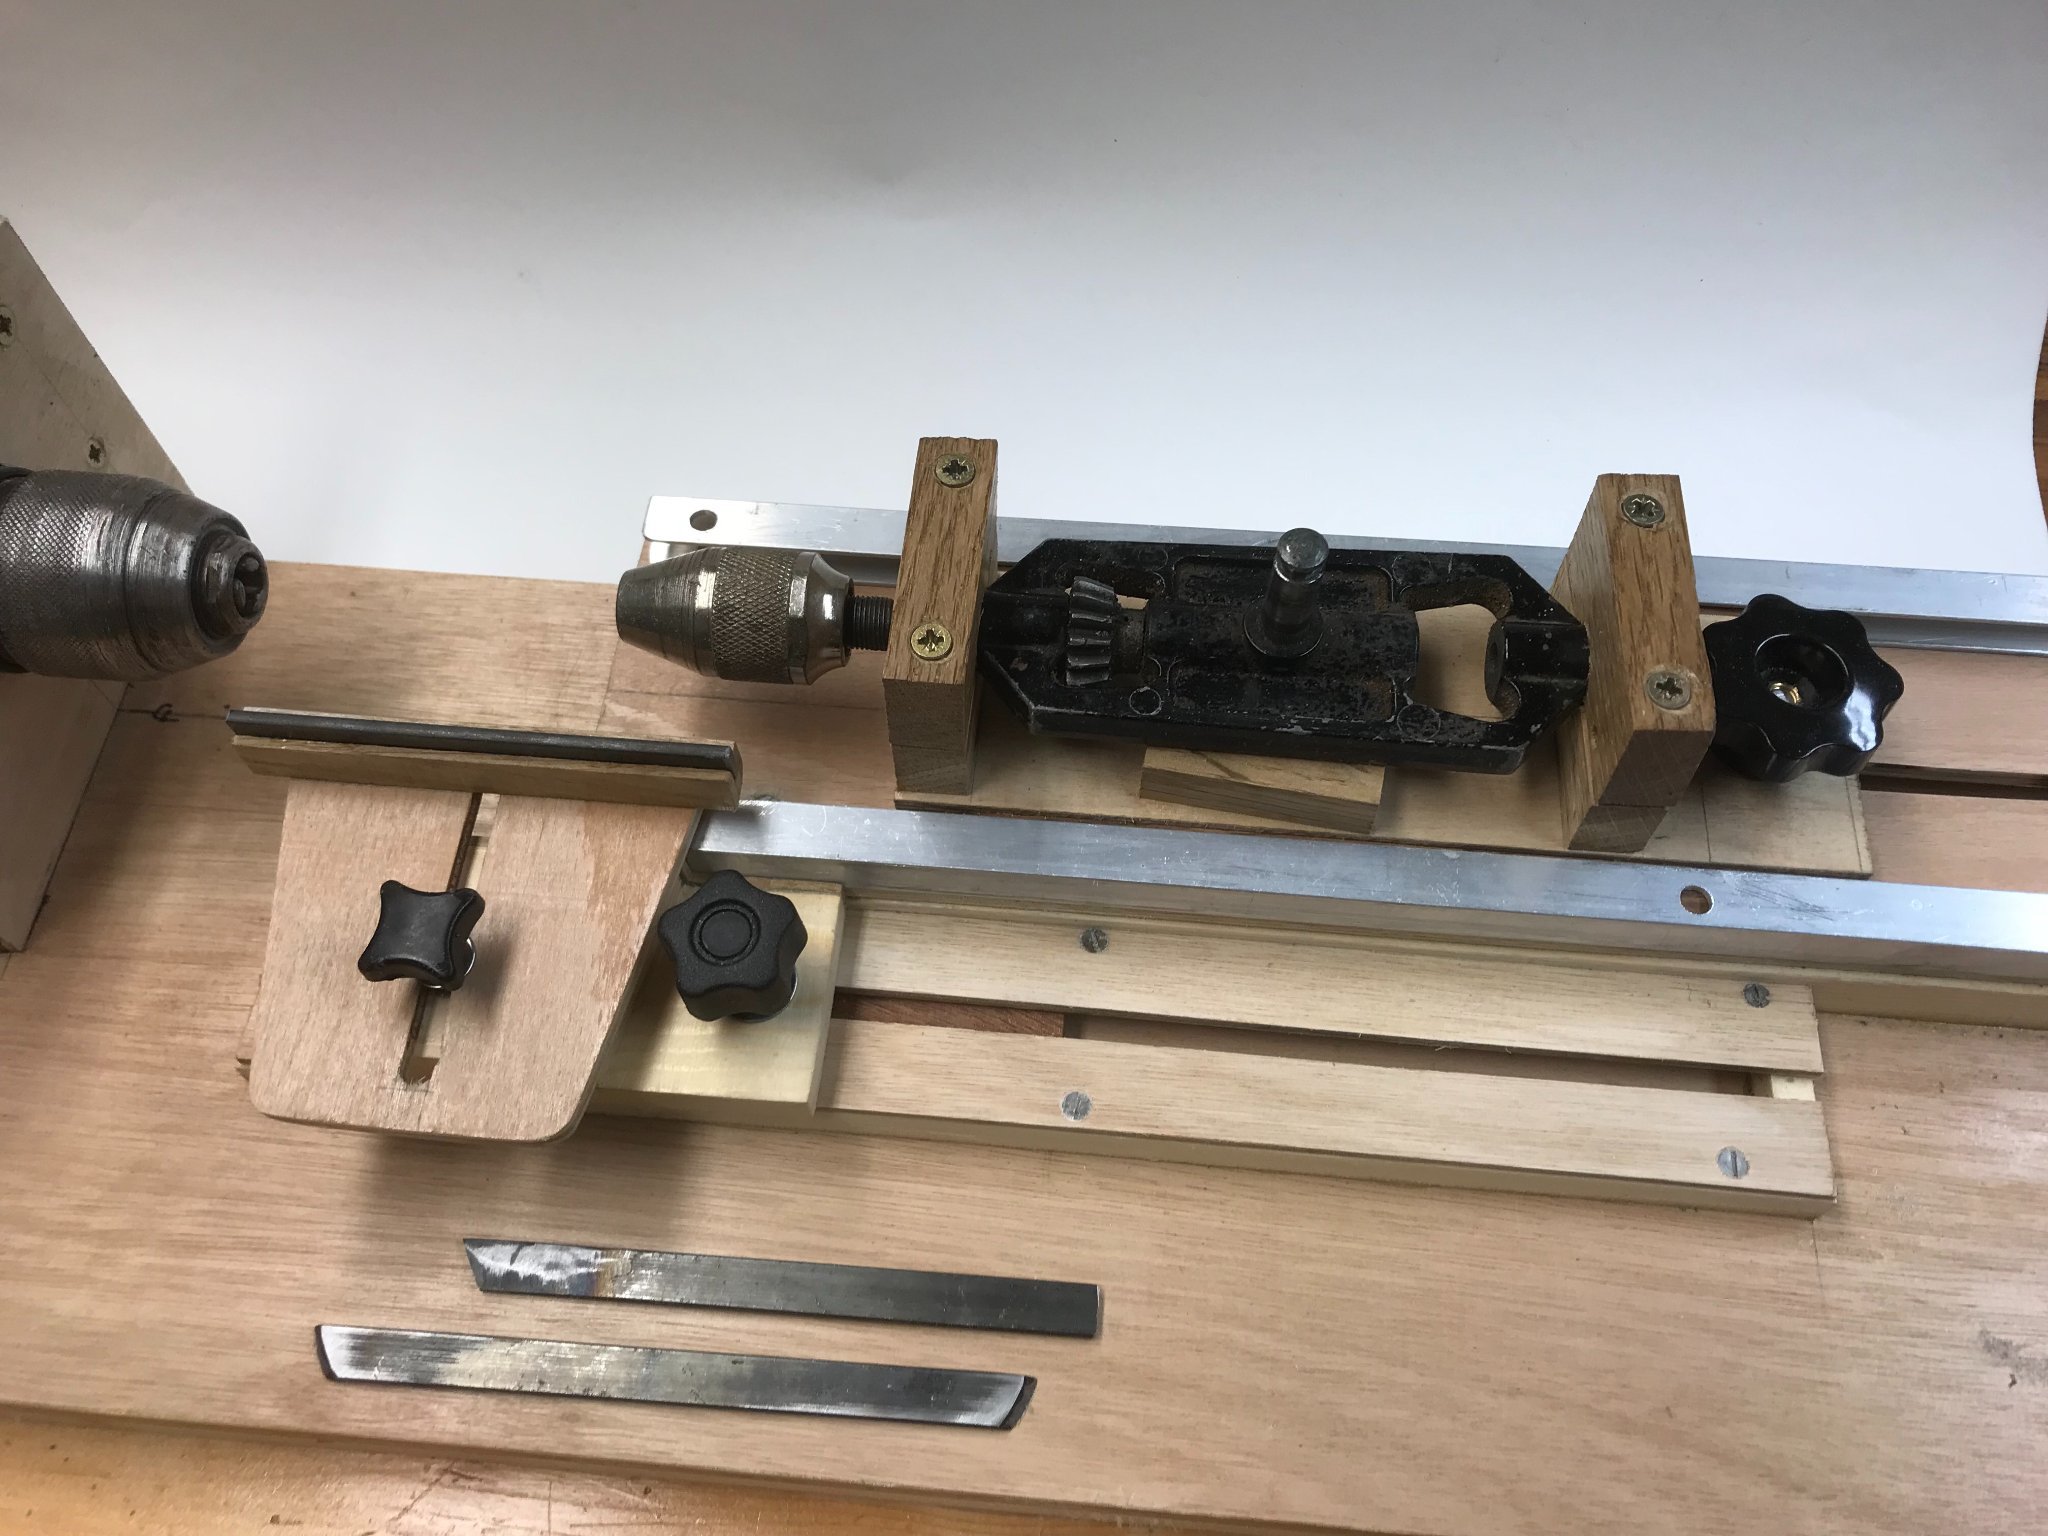
I don't have a 3D printer, nor know anyone with one, and I don't have a lathe.
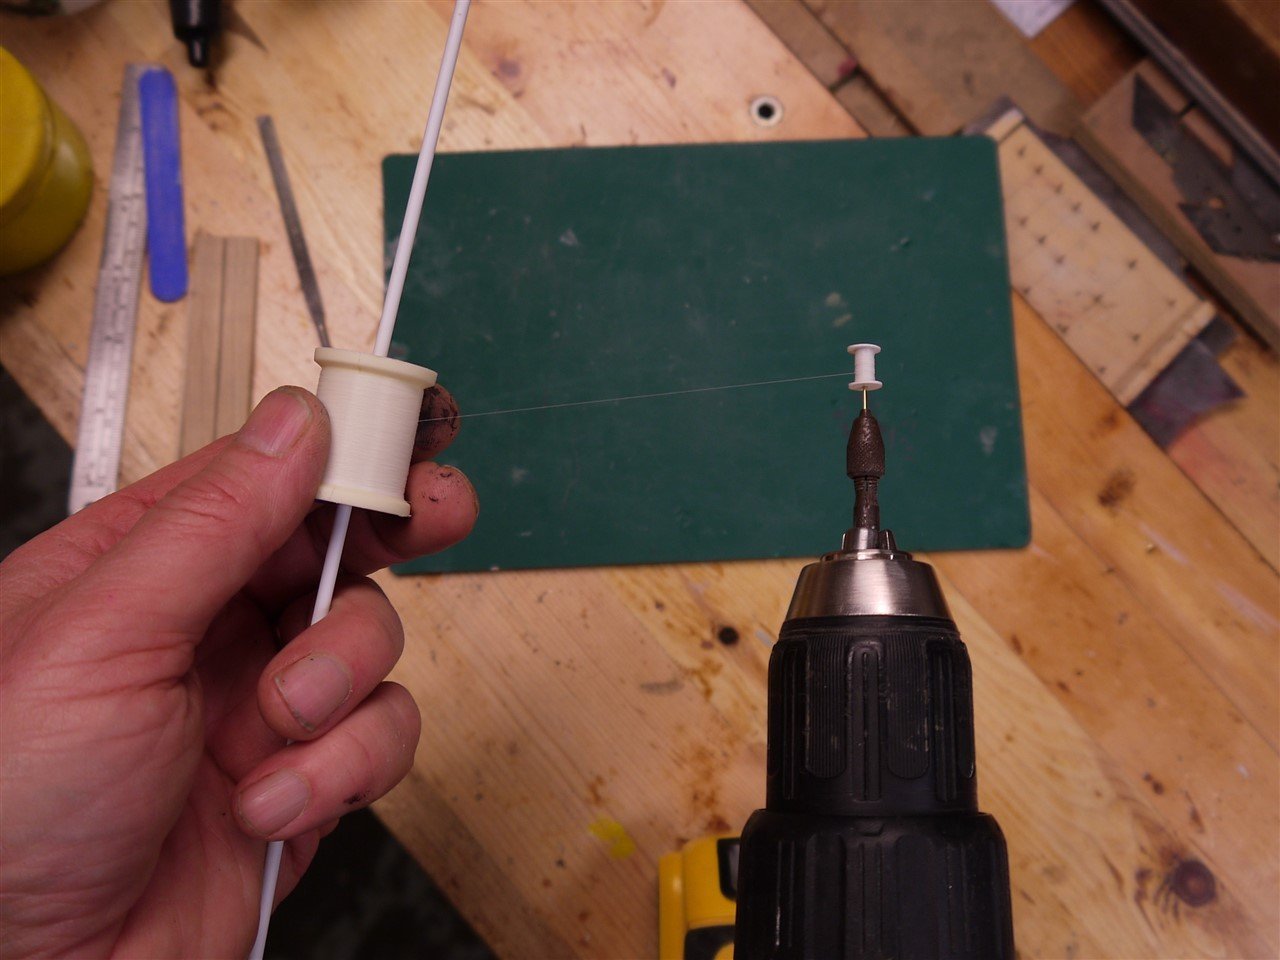
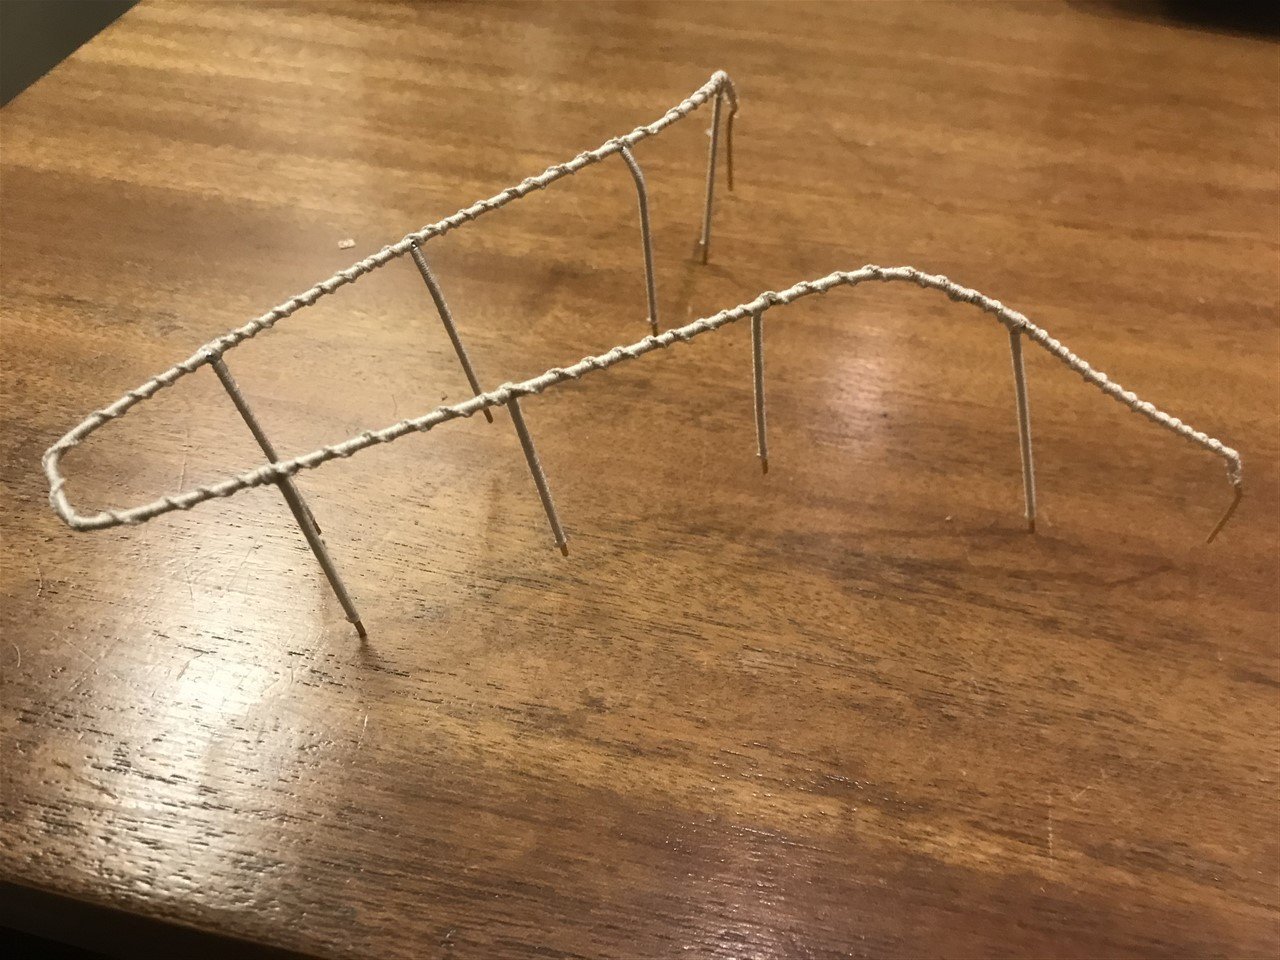
They are a very complex shape. My first idea was to get some plastic rod and make a simple lathe...
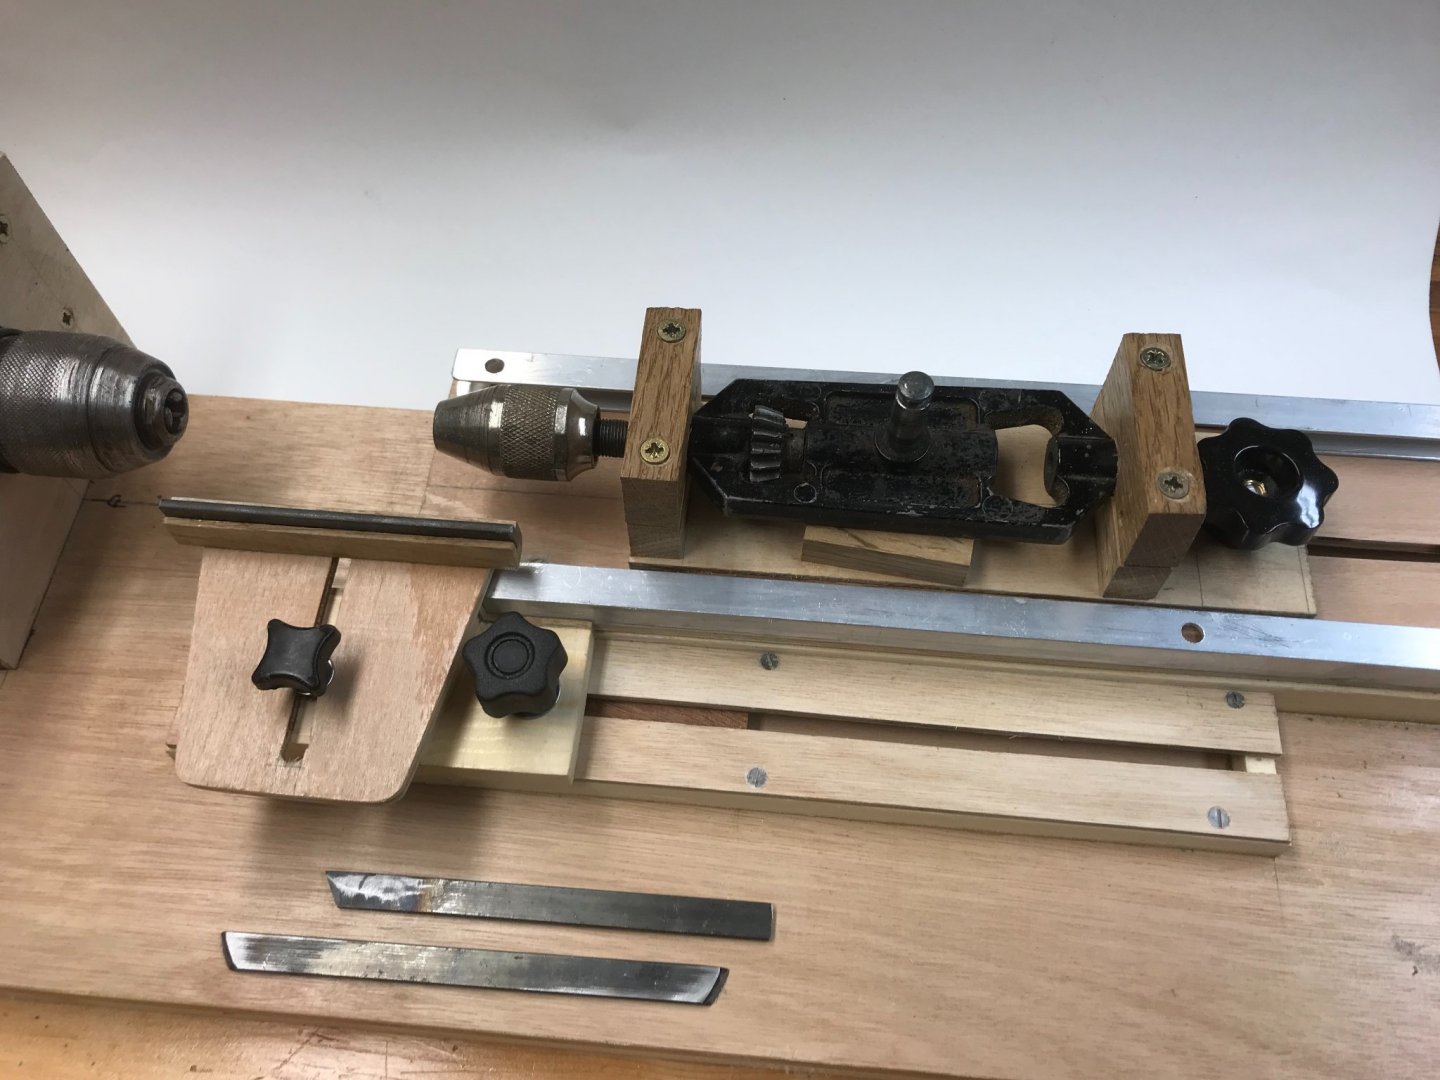
So did that (my Pa's old Stanley hand drill serves as a tail stock)...

...and an ancient drill with variable speed to drive it. Made some tool bits to go with it.
I know that turning the basic shape is straightforward, but milling the rest a bit of a nightmare (I don't own a mill).
However, undeterred, I bought some UHMWPE black rod and then discovered it can't take a paint finish at all. Tried everything so far, special primers; abrading the surface; etc. The originals were made from black PE and of course we want the yellow paint to be pretty beat up, but so far it just falls off!
Wondering whether to use some hardwood dowel (I have some 20mm birch dowell), or try some other plastic...
All ideas welcomed from this deep well of expertise.... 🙂
- mtaylor, FriedClams and GrandpaPhil
-
3
-
-
-
On 8/27/2021 at 10:06 PM, DCN said:
Small magnets on the corners
That's a great idea DCN, I'll look at that.
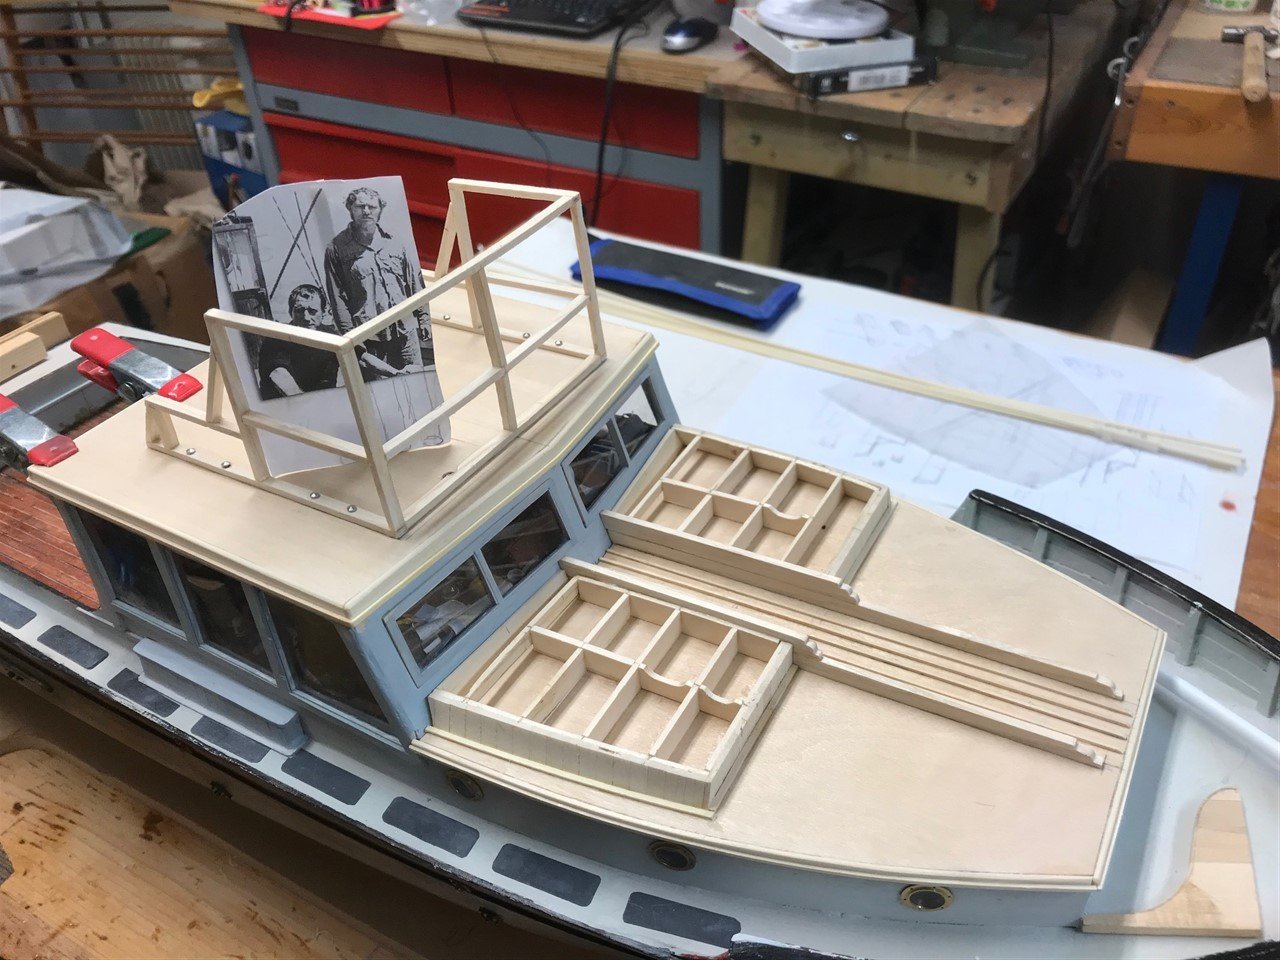
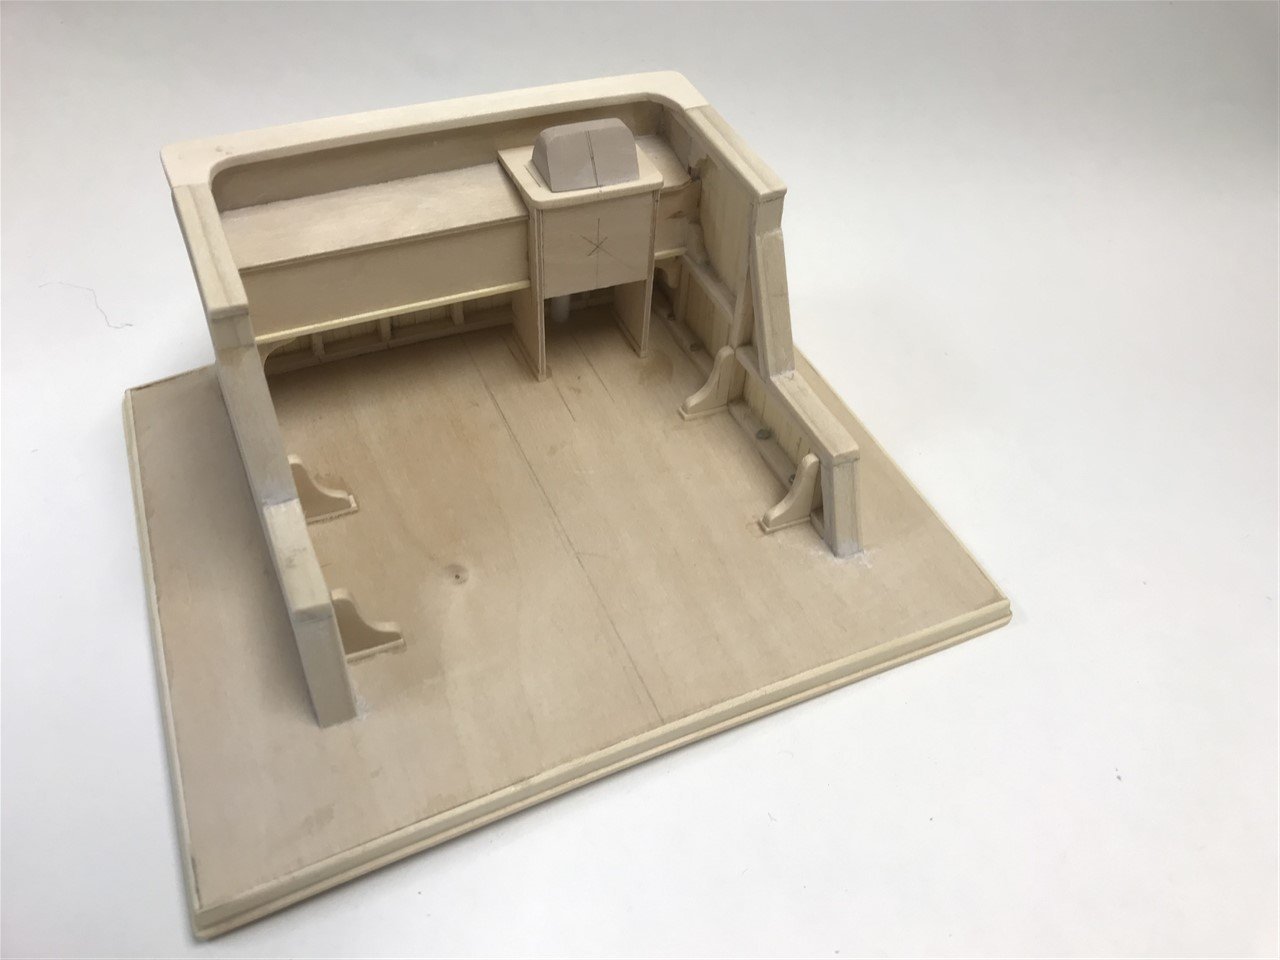
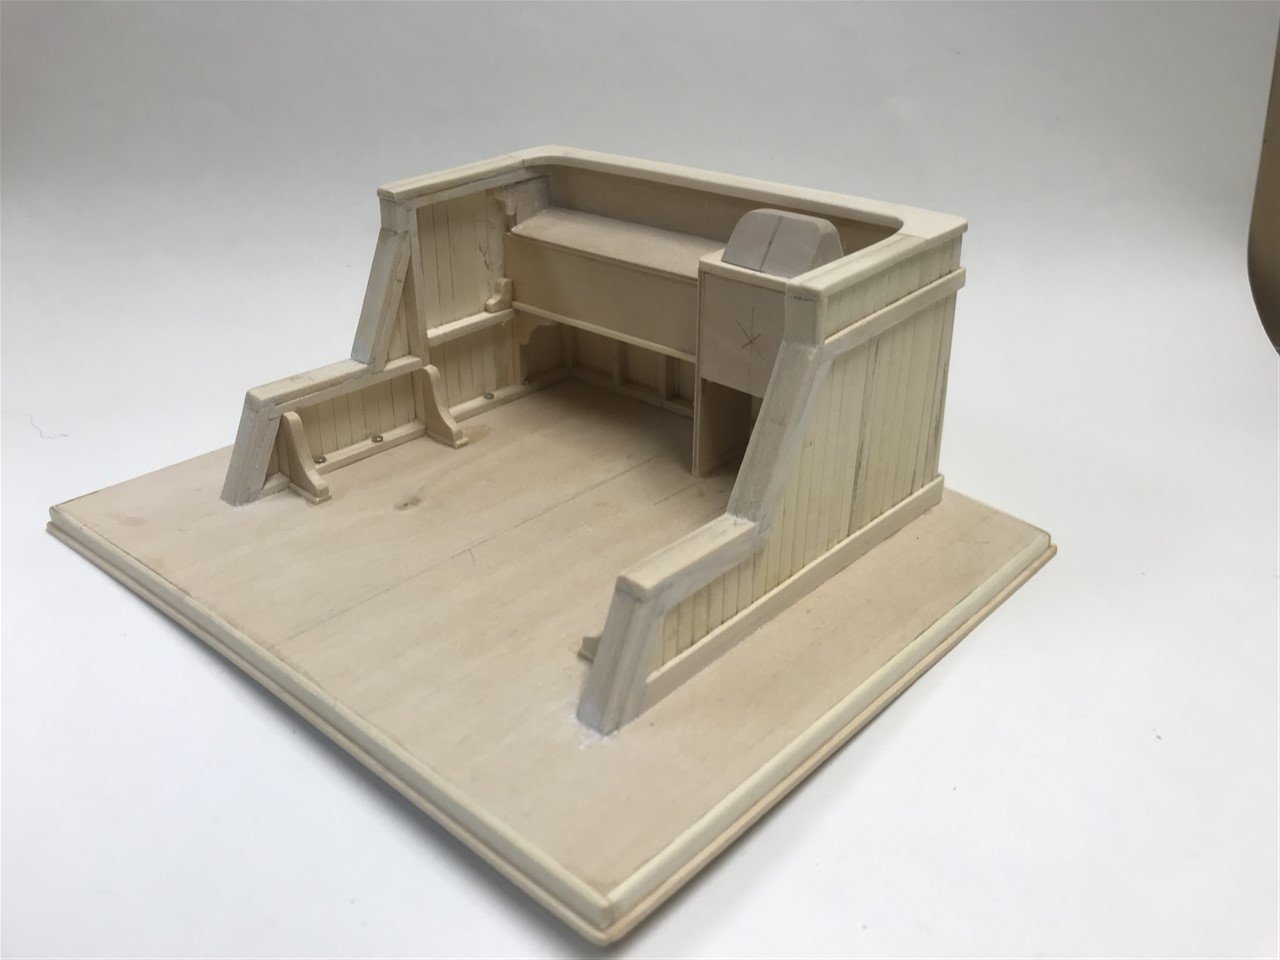
Framing of top decks coming on. I wonder what they would have stored in those lockers...?
- ccoyle, FriedClams, DCN and 2 others
-
5
-
Interesting build! I'm intrigued by the shape of the bow - surely this shape creates enormous water resistance? Or maybe that's an advantage if you want to slow down quickly...
Getting something like this from China must be quite a 'drag'?
- thibaultron, mtaylor and JKC27
-
2
-
1
-
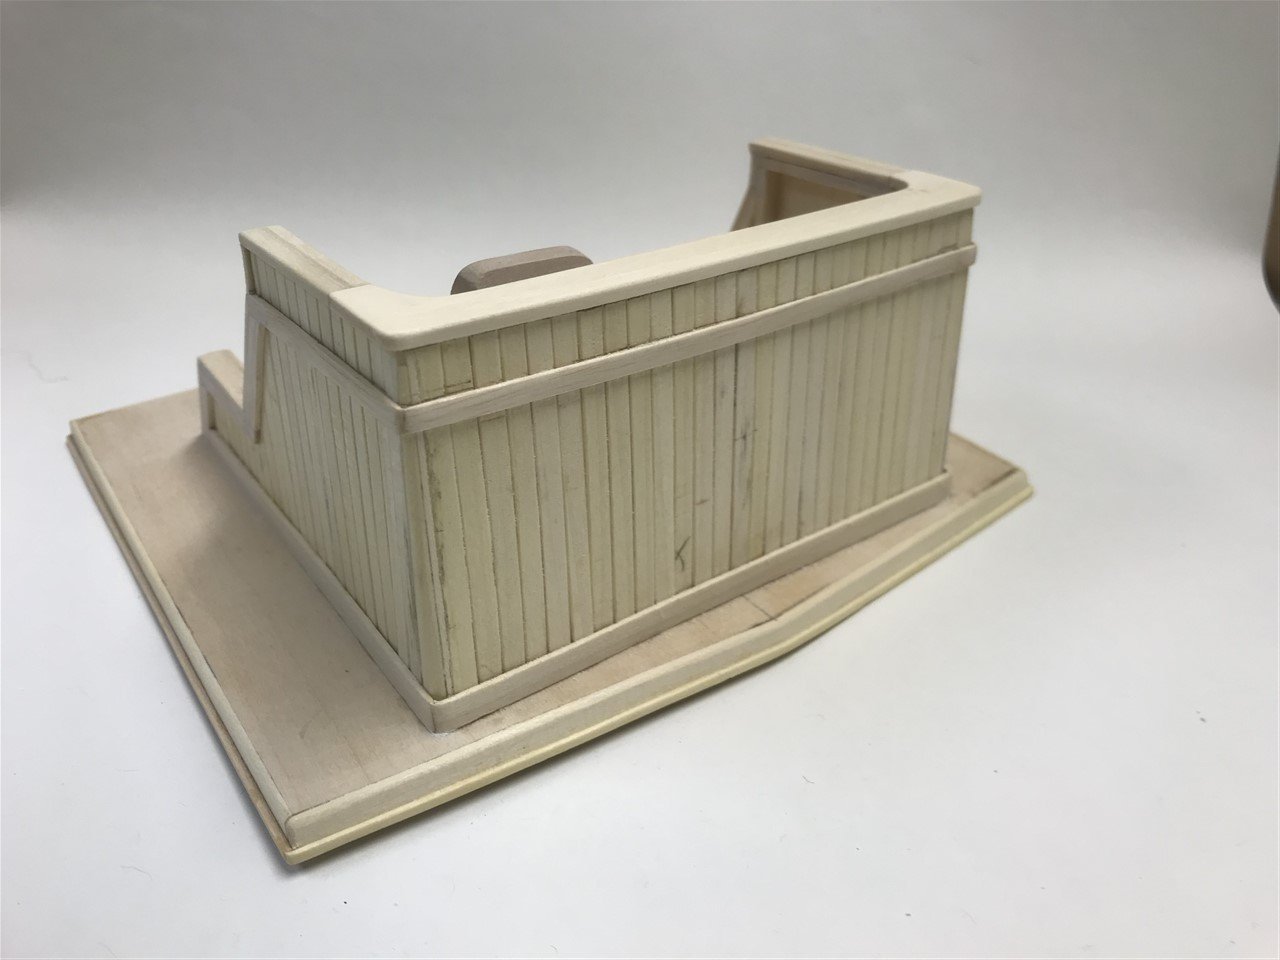
So after all that fiddly stuff, time to cover it all up.
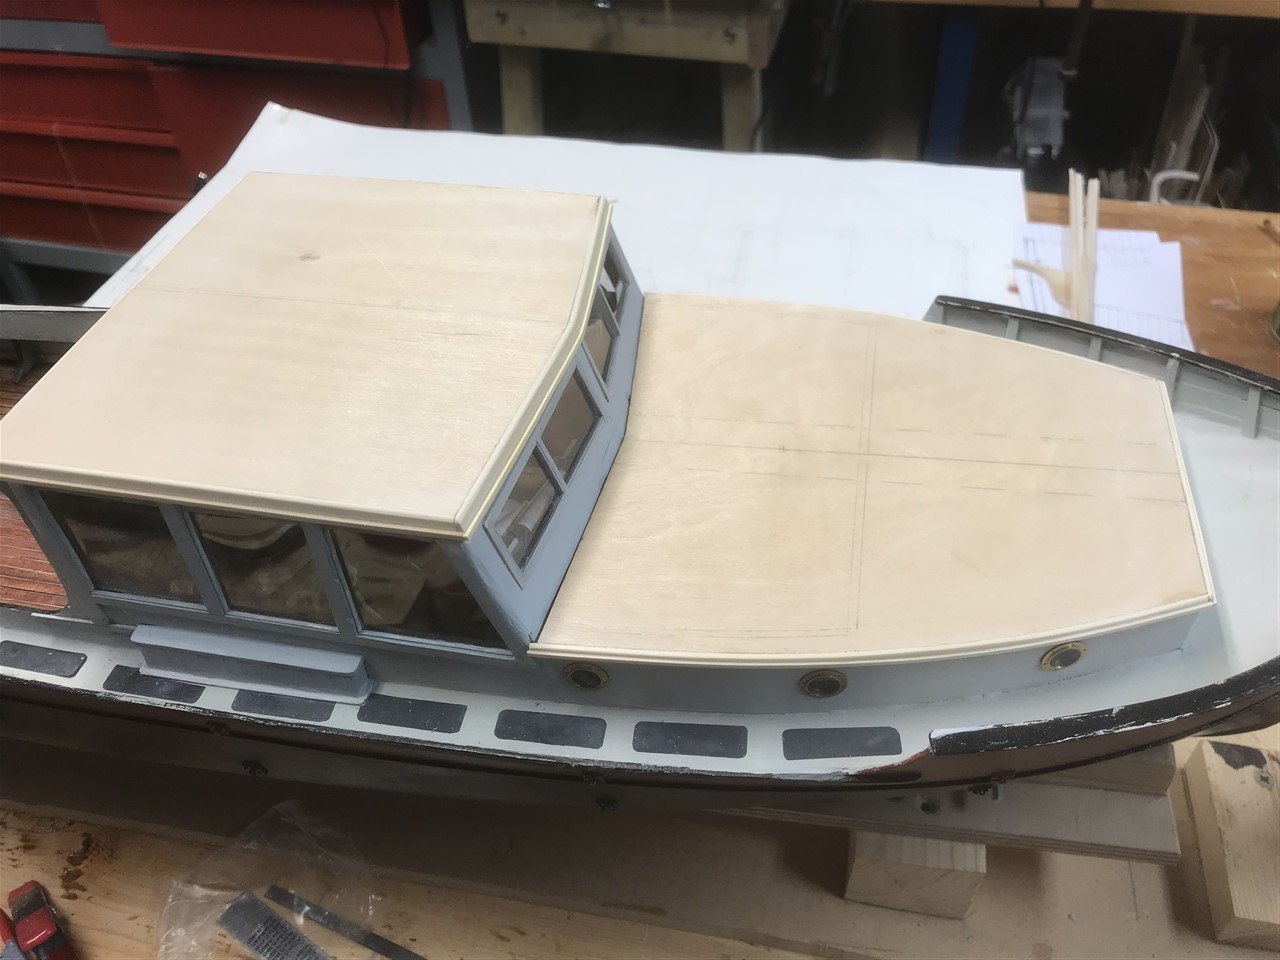
The admiral (head shark hunter) thinks I should find a way to open the deck to show the interior, what do you think?
- oneslim, BLACK VIKING and GrandpaPhil
-
3
-


Orca by FlyingFish – FINISHED - Scale 1:20 - from the movie Jaws.
in - Build logs for subjects built 1901 - Present Day
Posted · Edited by FlyingFish
Thanks to all for likes and comments!
The detachable transom had crossed my mind.... maybe in a future adaptation!
Flying Bridge
Lets go up onto the flying bridge...
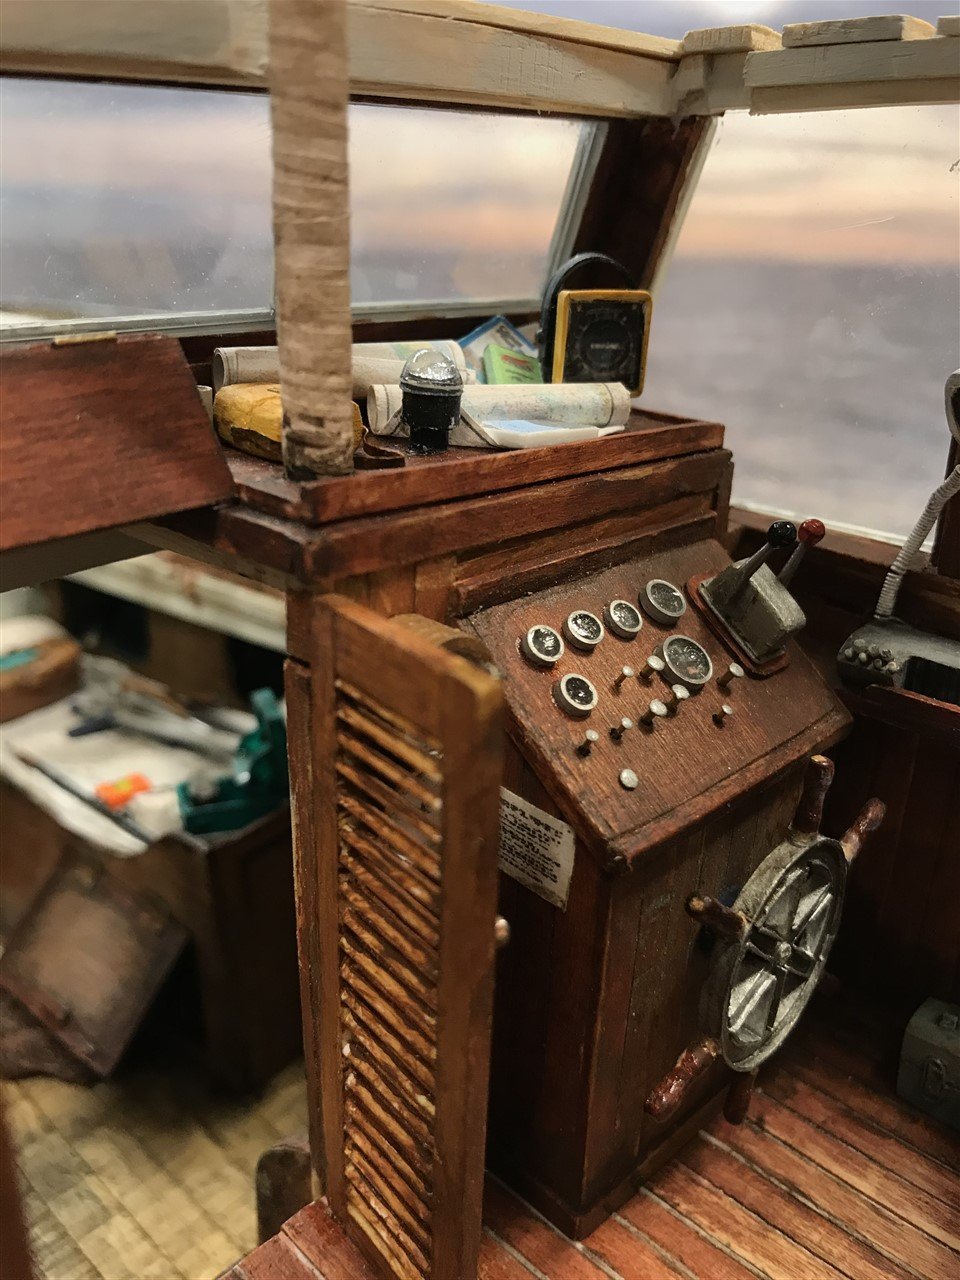
Flying bridge controls now complete, including searchlight.
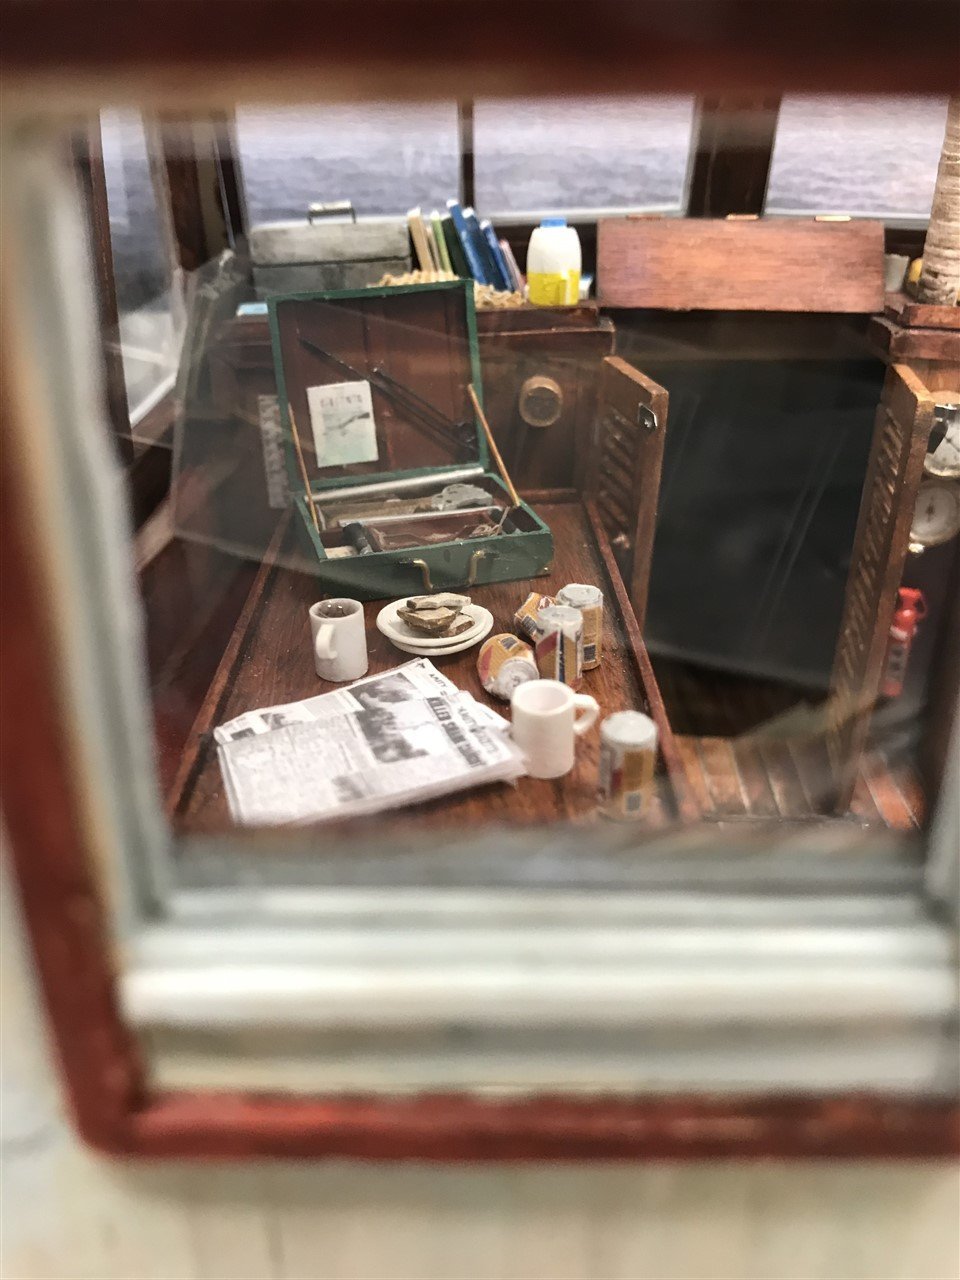
Shark hunting takes patience, and Hooper's game remains unfinished on the deck.
Took some liberties with the wooden box that appears under the flying deck console. Figure it might have been Quint’s old Navy trunk, so decorated accordingly. USS CA-35 is the identifier for the Indianapolis.
Flying Bridge also finished with navigation lights foghorn and lifebuoys; shark jaws, grab rails, cowl vents, harpoons and flying gaffs.
(‘Stop playing with yourself Hooper!’)