ERS Rich
-
Posts
605 -
Joined
-
Last visited
Content Type
Profiles
Forums
Gallery
Events
Everything posted by ERS Rich
-
 Amongst all this scuttlebutt.....only 1 picture of a recently built model....expressing an idea is not the same as successful execution.....
 -
Hello JS, Using the guide from Mr Hunt as well. It’s fielders choice here, went with the dividers because have a pair purchased years ago, have not had a problem with tightness. As you say. marked the plank width at each bulkhead. Prefer removing the material with an upside down hand plane in a vise, it’s like a mini joiner. Found the difficulty with this is it’s easy for the cut to become a bevel along the tapered edge rather then a right angle. I use a sanding block to square the edge to a right angle. Mr. Hunt’s method is good. I have the whole set, and have built the Armed Virginia sloop and Pride of Baltimore with them. I’m deviating from the guide by doing all the hull planking before the deck. Plan is paint for the hull and bulkheads. Deck will be pine stain. I don’t like the brown/black stain for the deck. I’m going to prime with a light coat of rattle can shellac for an initial seal, take care of imperfections, a light rub down with steel wool, then airbrush, with an Iwata RG-3L HVLP mini gun, a coat or two of artist acrylic gesso. Artists use gesso to prime canvas. Since I have a Caldercraft Snake kit with copper plates....will paint the copper, again with the minigun, Tamiya acrylic. The advantage of the mini gun is it lays down a high volume of paint - a wet coat yielding a smooth finish. See Paul Budzik on Youtube. Thanks for getting in touch!
-
Looks first rate to me, nice work, Bradley
-
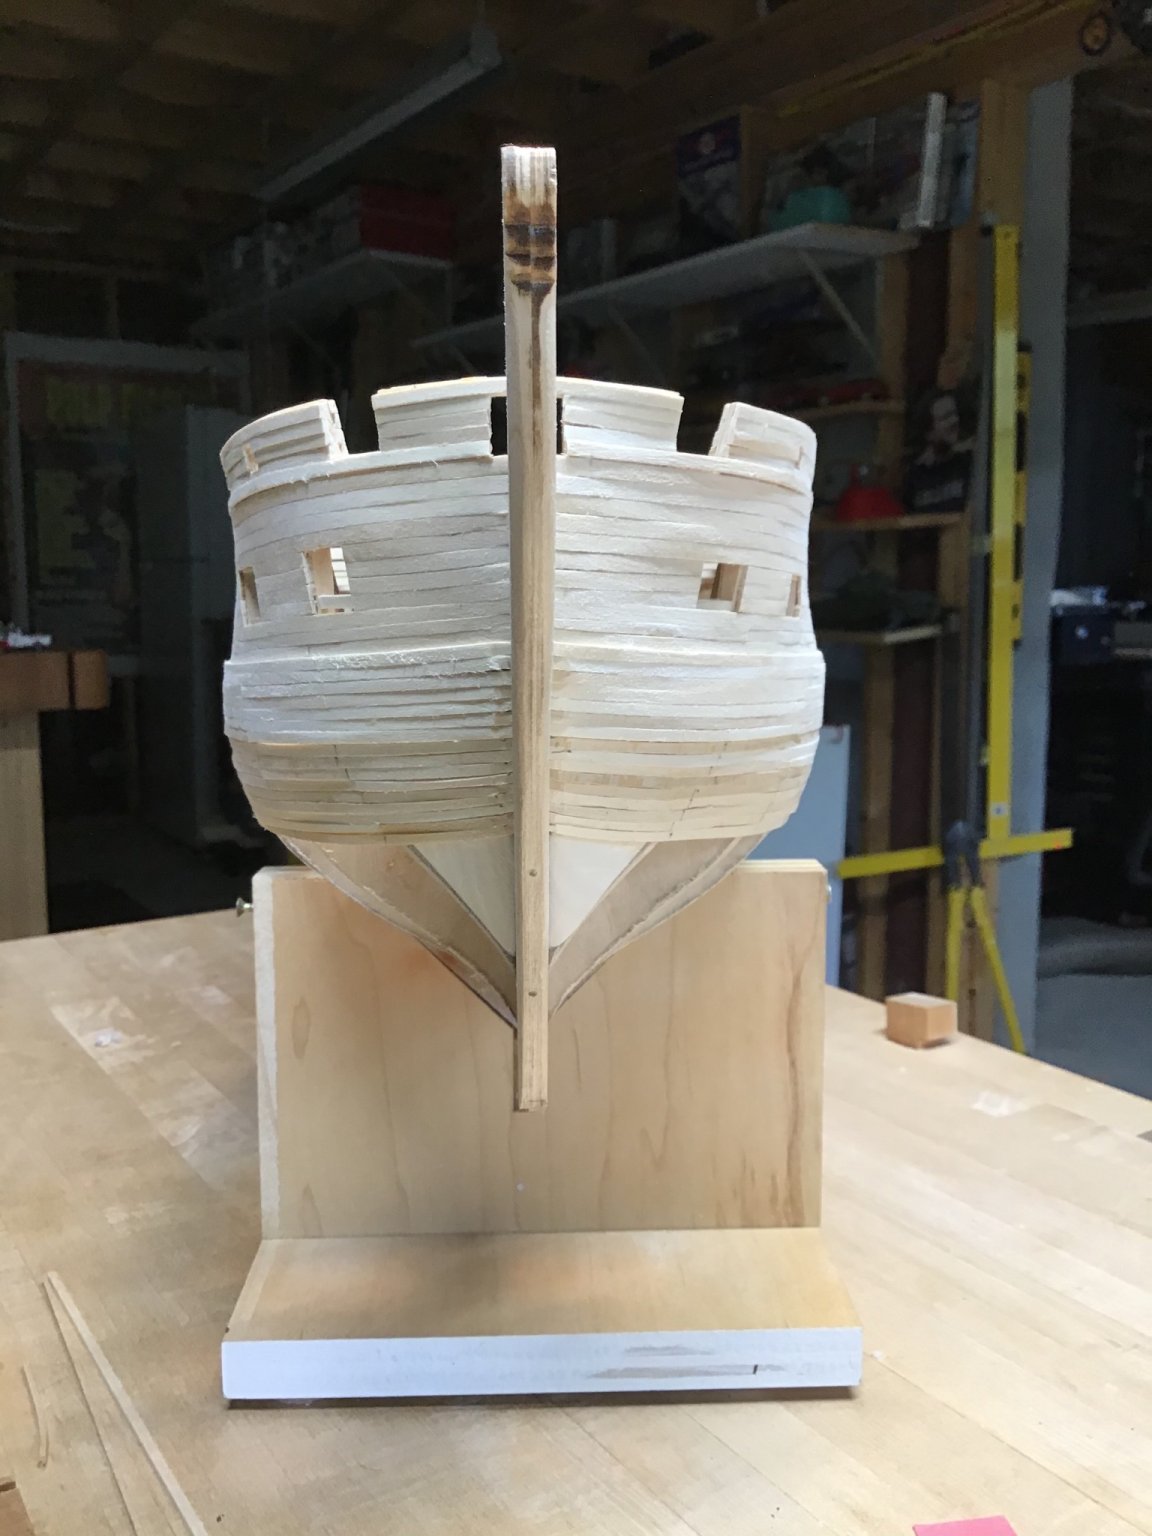
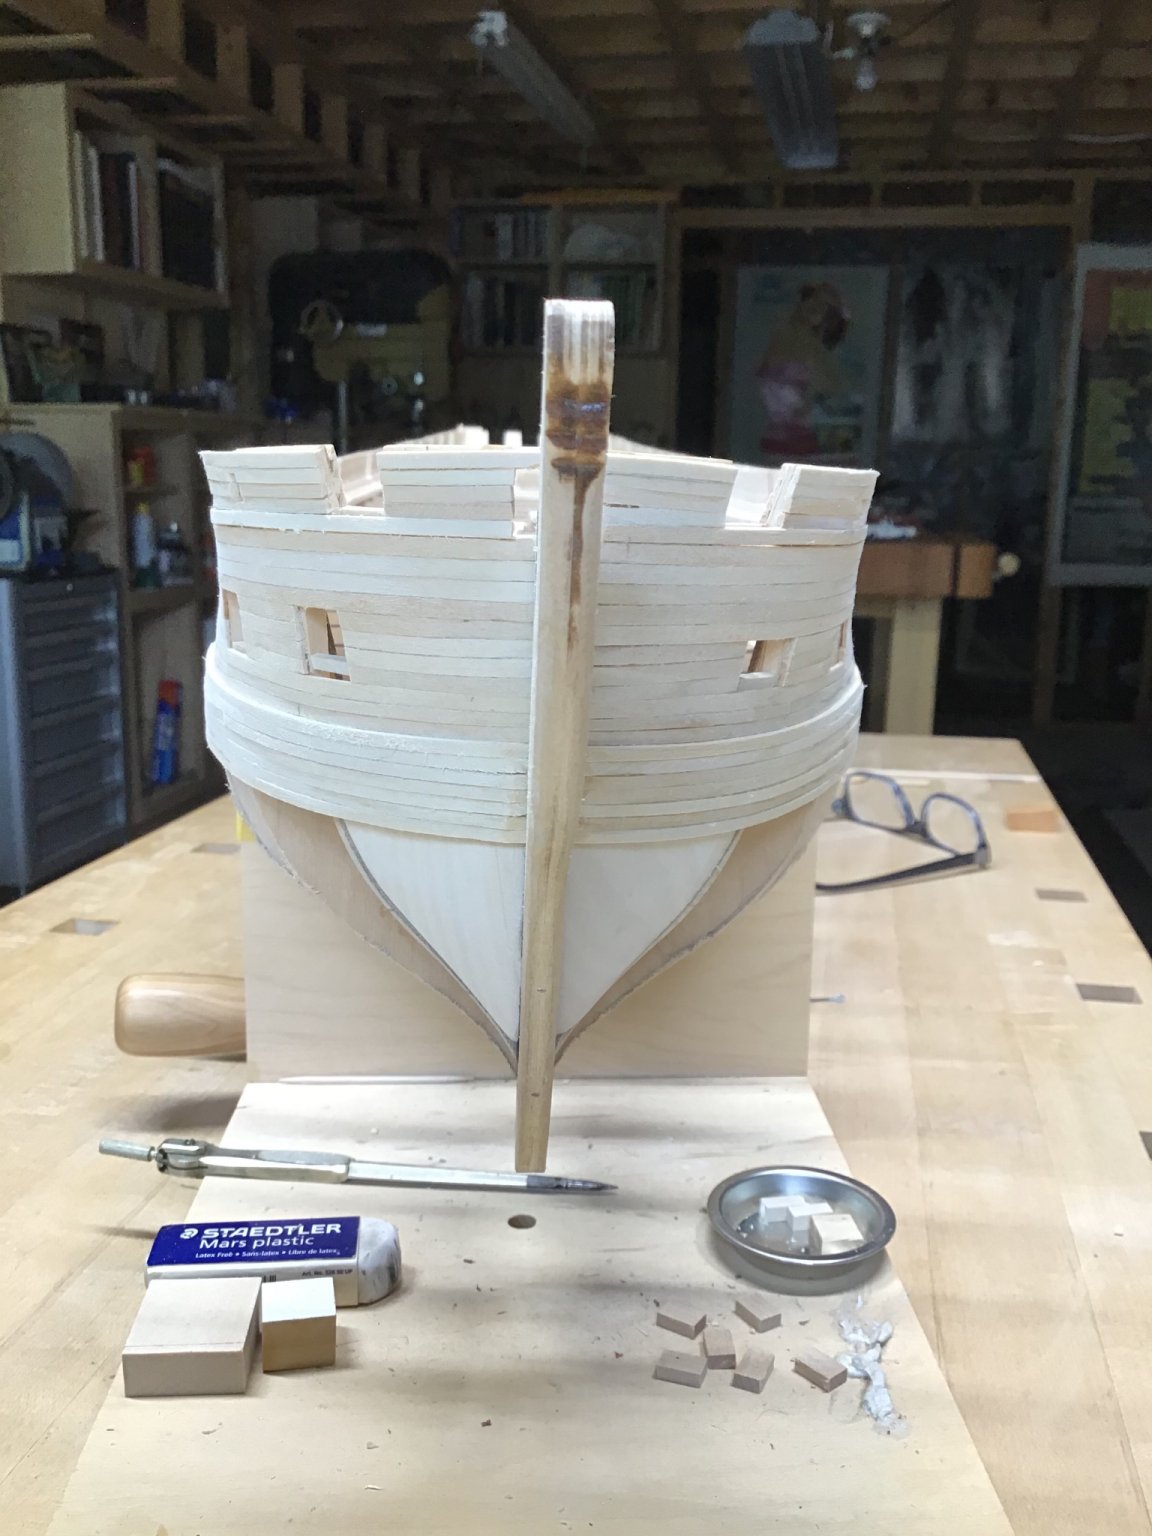
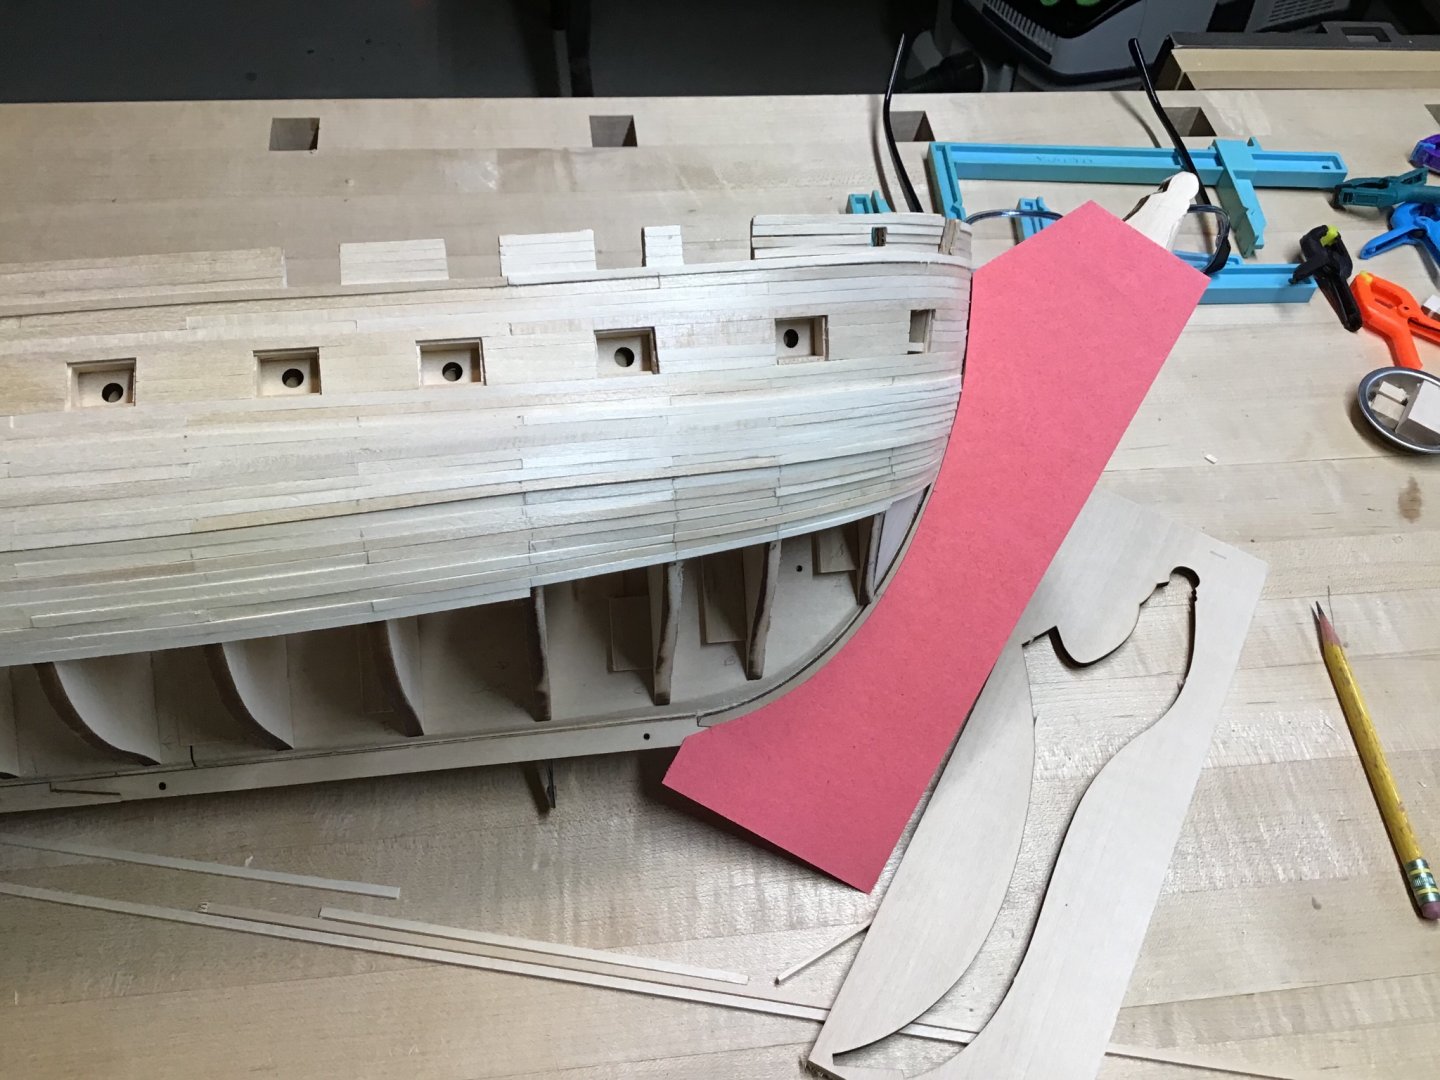
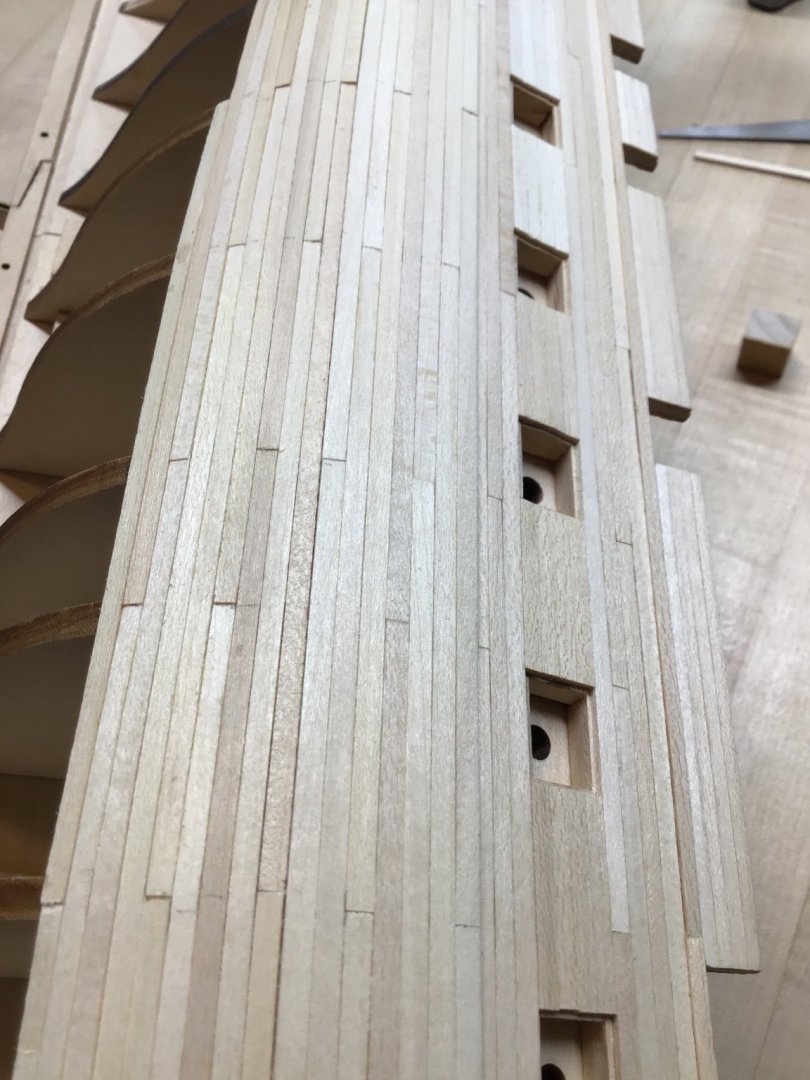
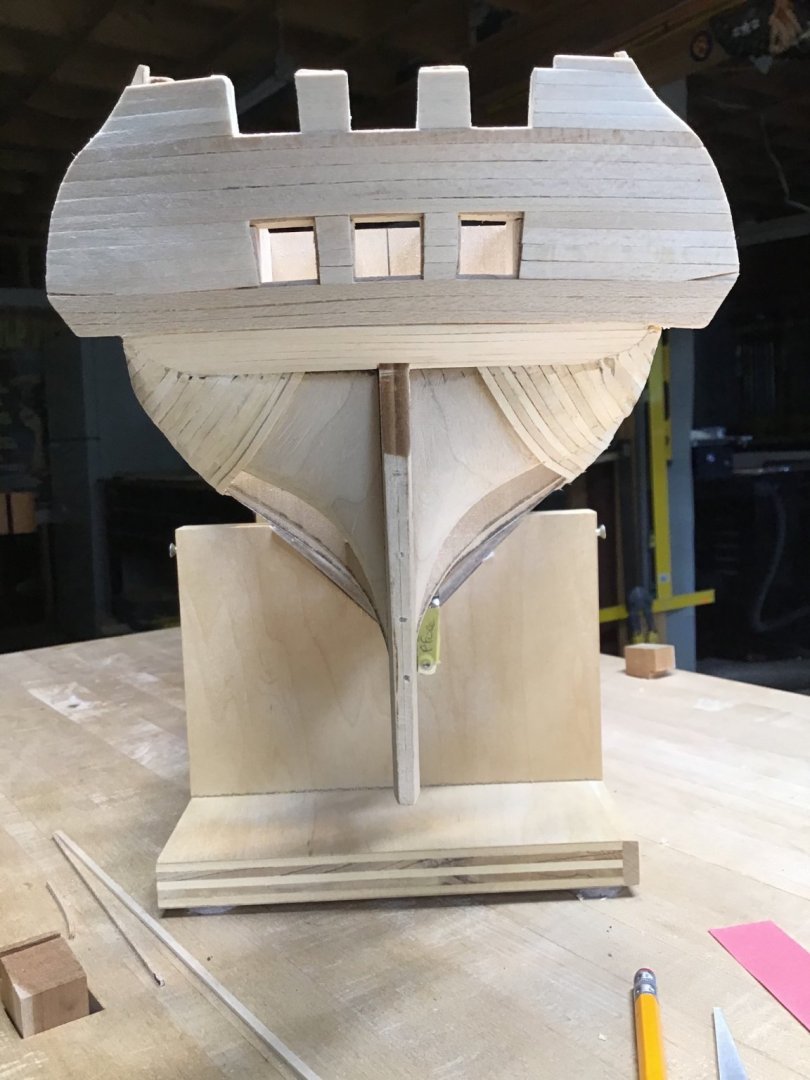
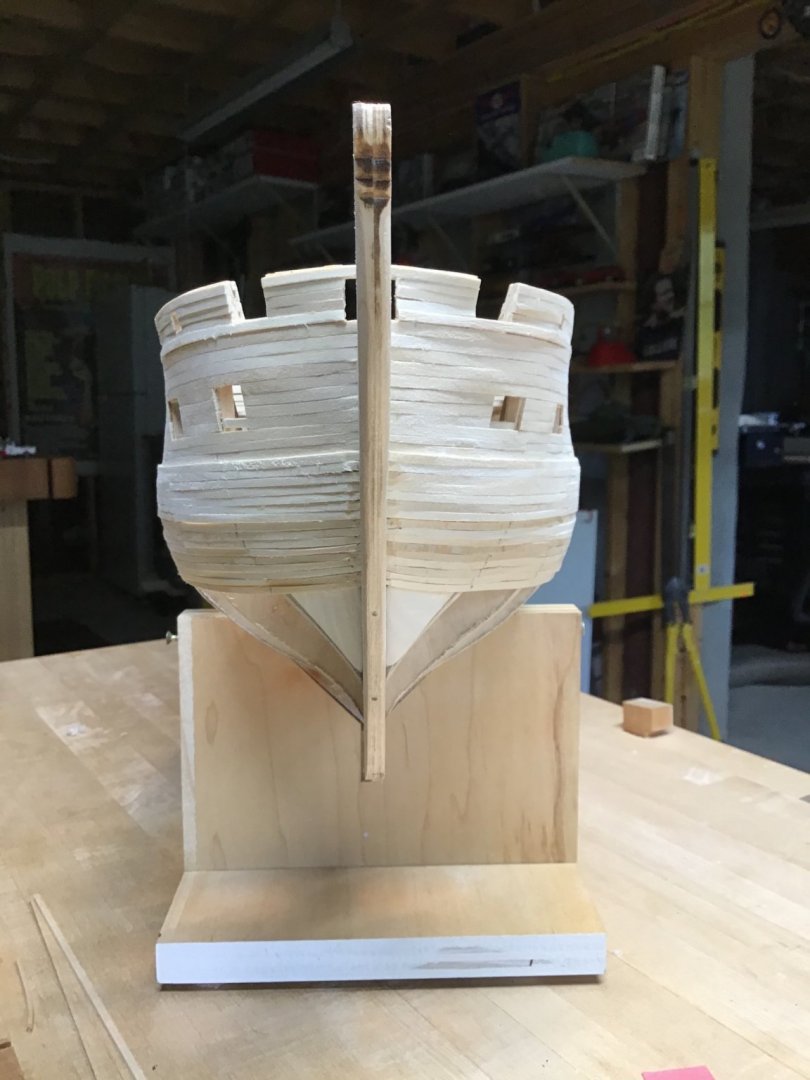
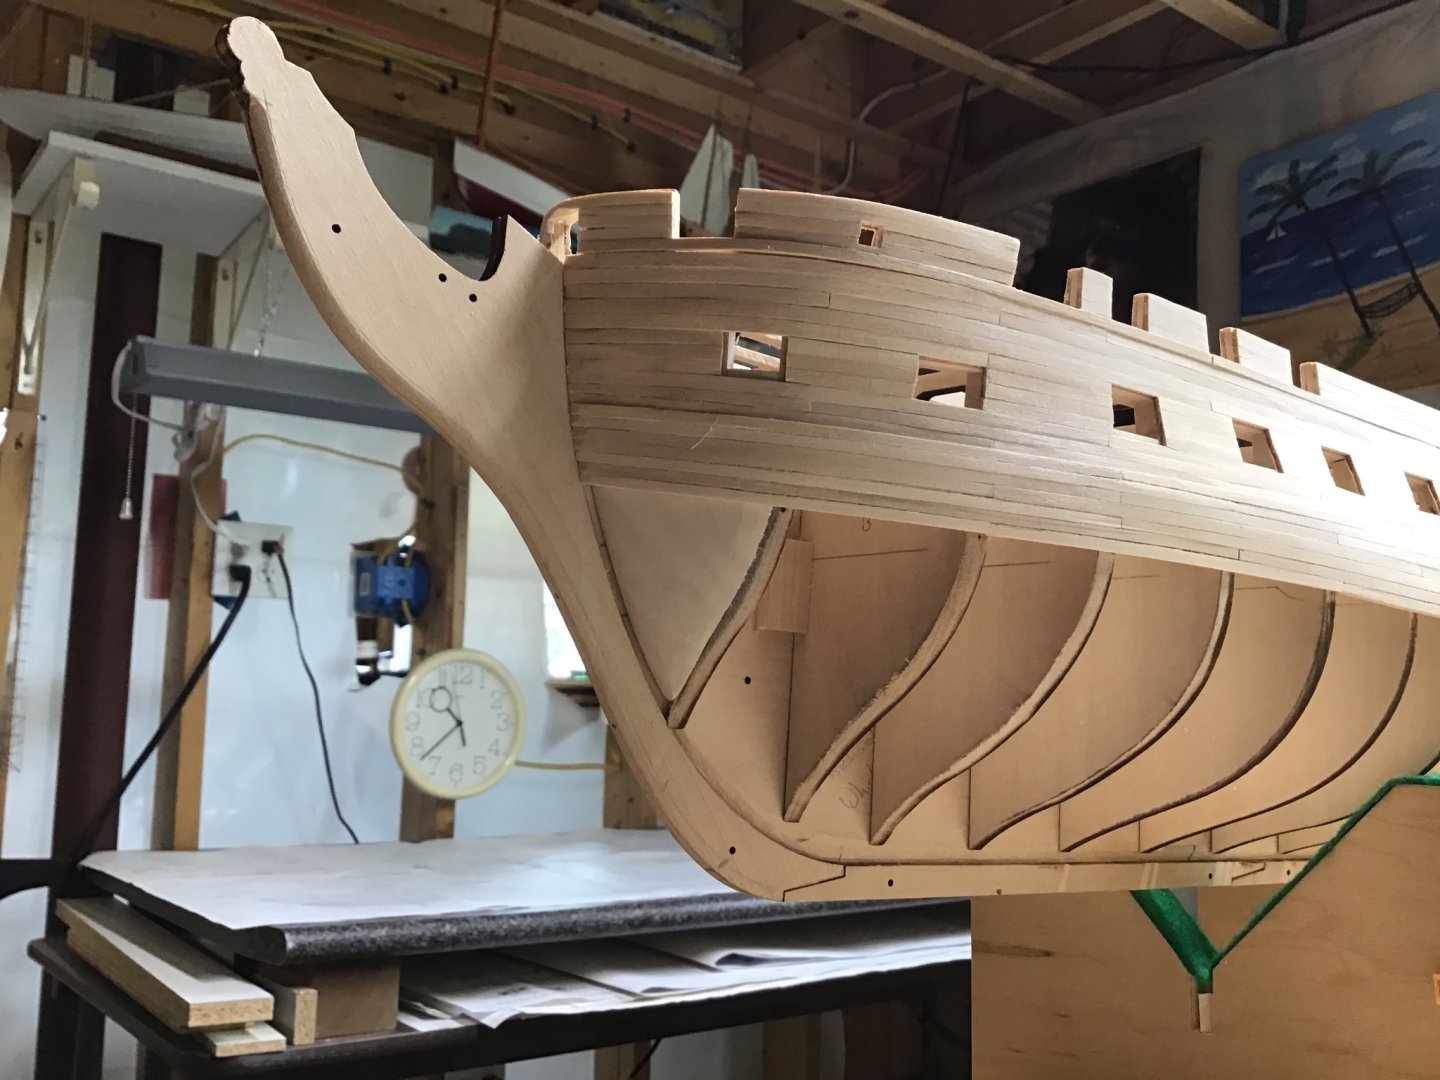
Belt A Installation - Starboard Side Belt A consists of about 90 planks, 45 per side. As before for the Wales, used the plan to mark the belt widths on the bulkheads. The max plank width is 1/8”, the kit given stock is slightly over sized so needed to rip it down to 1/8”. As with the Wales full width planks are used from bulkheads E through M. A construction paper pattern was made of the stem curve, from the billet holding the stem piece. The pattern was used to mark the belt width on the stem. Again the proportional dividers were used to mark the planks for tapering. The wood template for the bow curve (made earlier) was used to bend the bow and stem planks after a soak. An electric steam kettle was used as a source of steam to bend the slight curves in the planks coming off amidships. A smooth run amidships is easy. Looking for “sameness” from port to starboard sides at the bow and stern. Pretty close at the bow, a little off at the stern. For me I need to pay attention to tapered plank width, have a tendency to leave them over wide. Onward to Belt B, interesting as will be covering the remainder of the counter, and rounding the corner to the Sternpost.

-
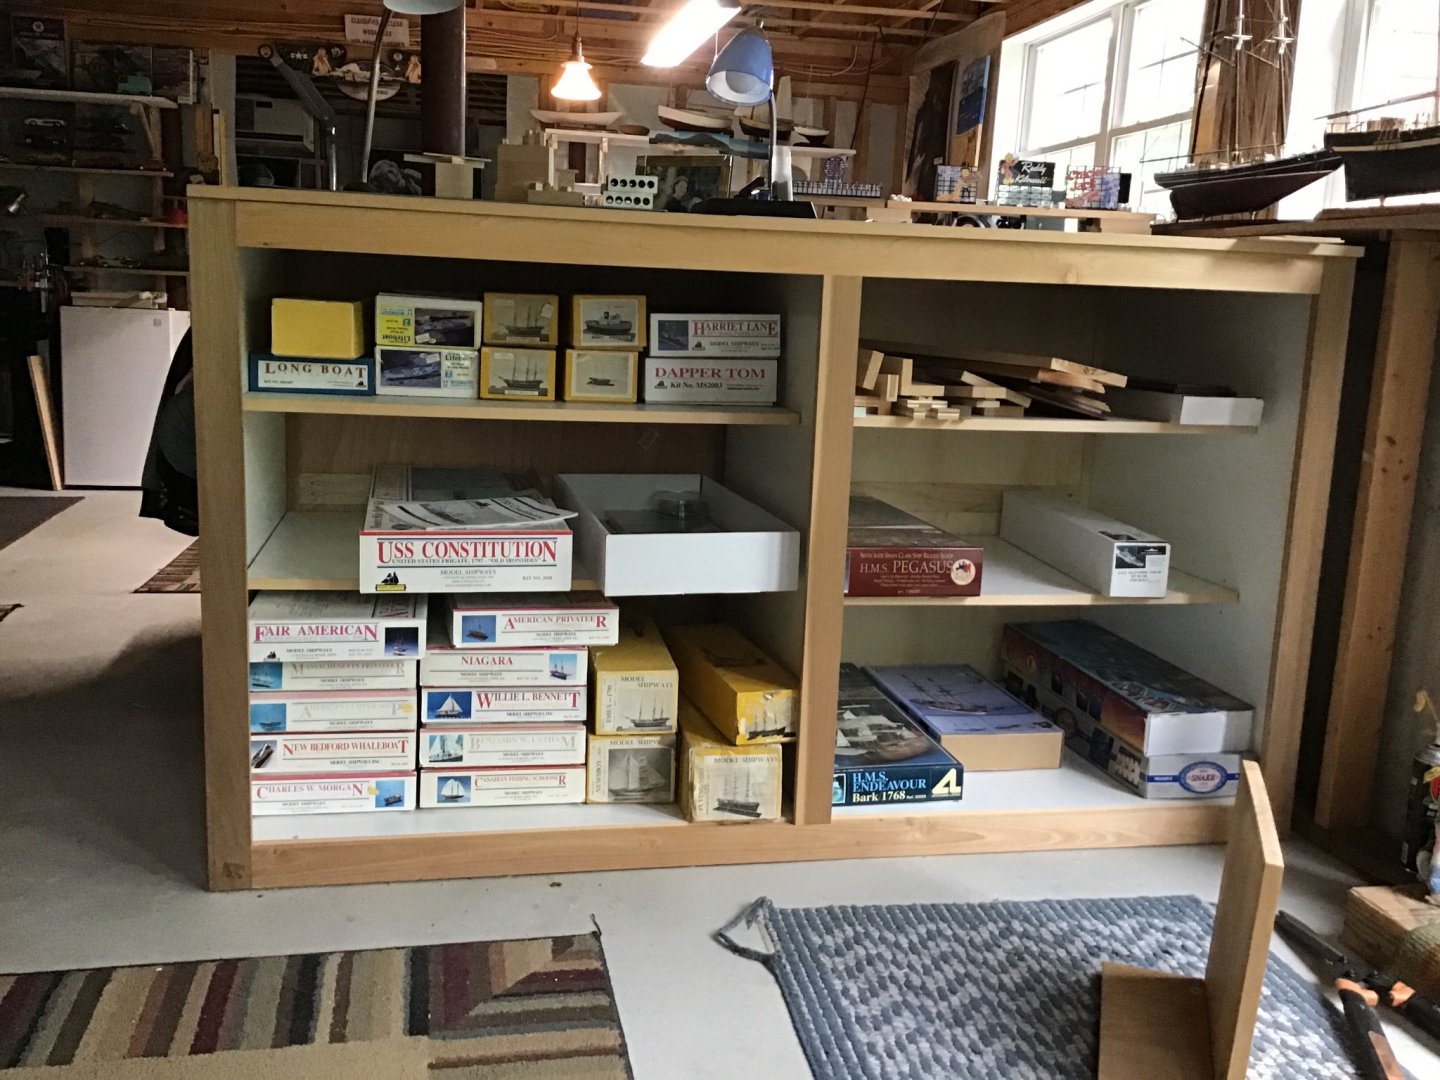
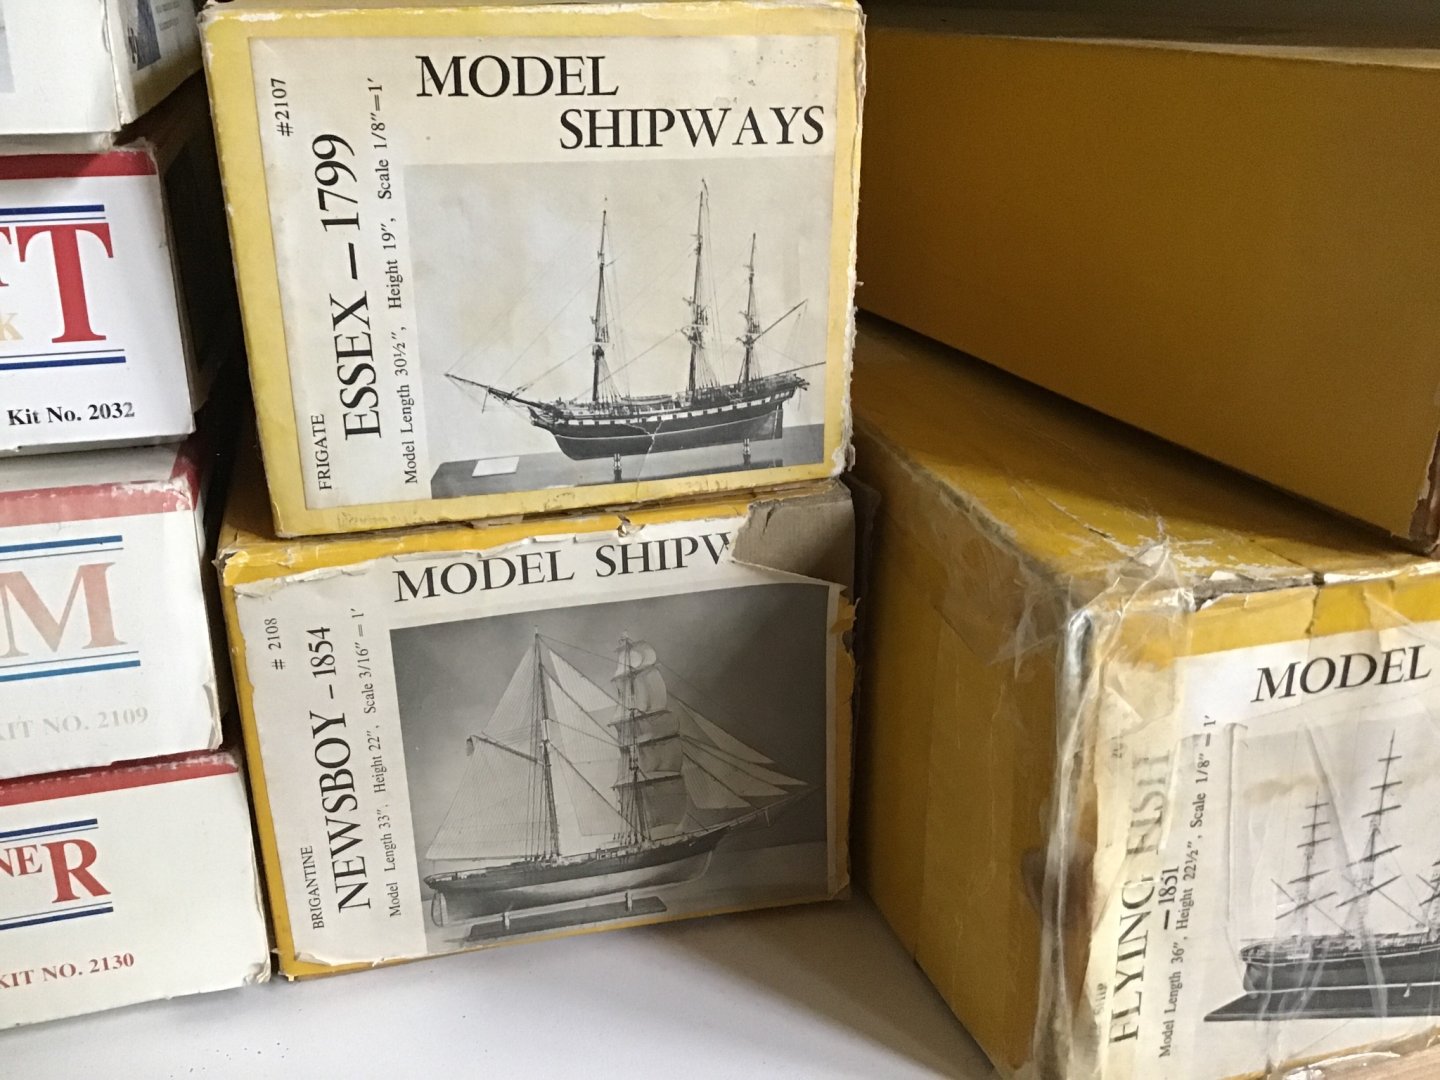
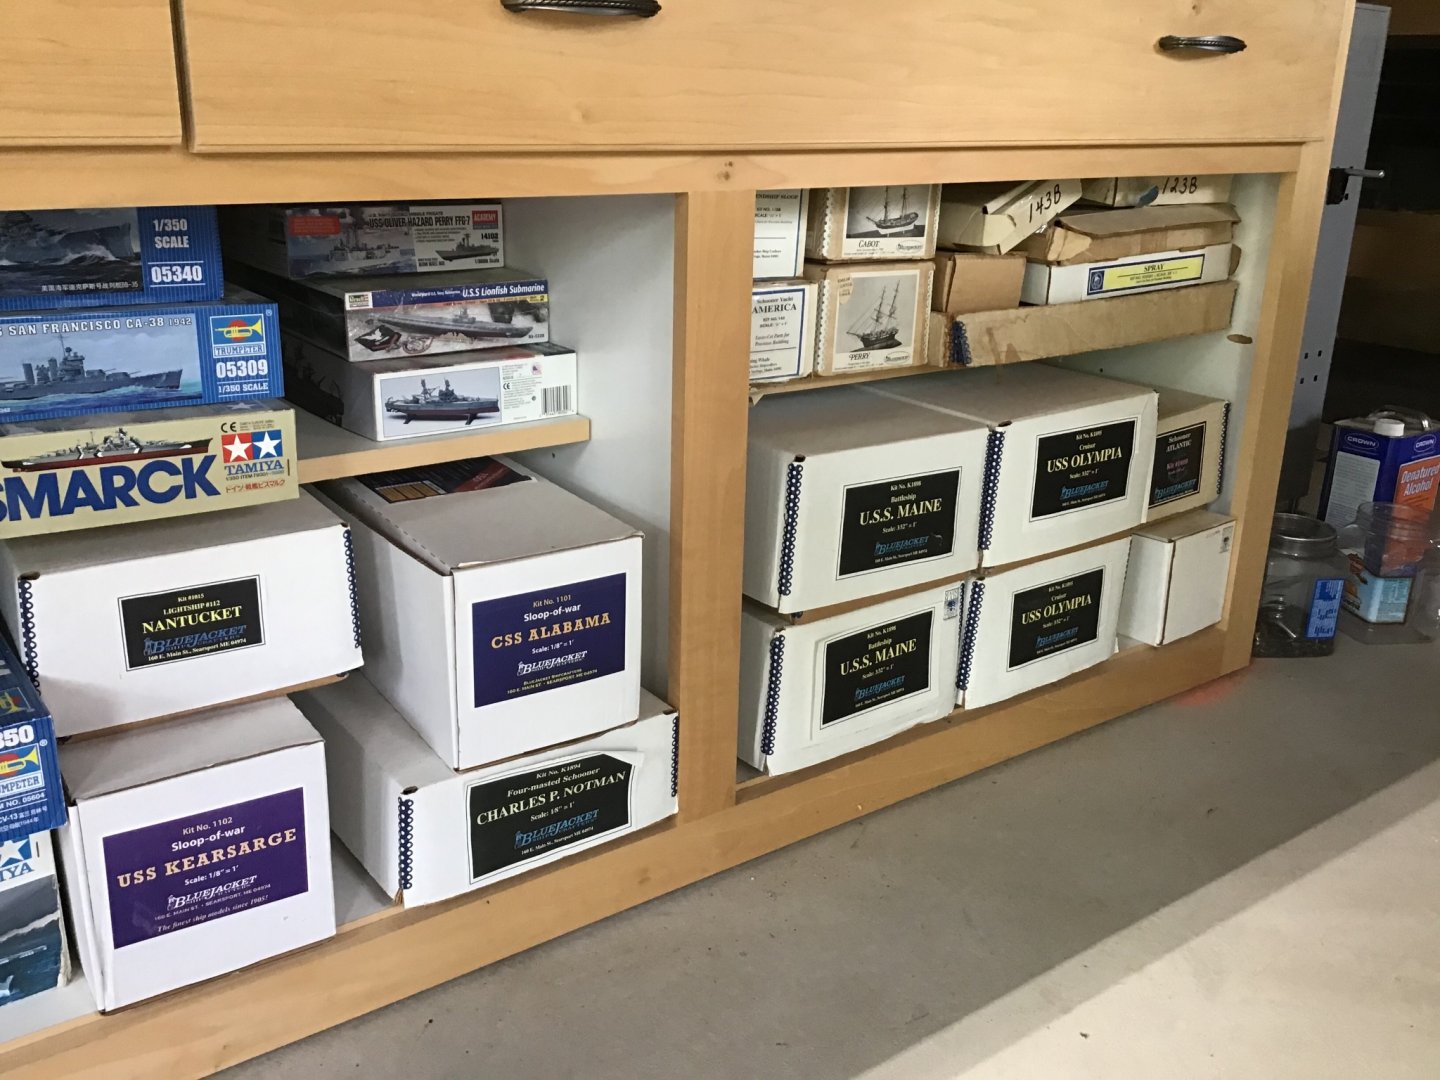
Hello GuntherMT! Yes, quite a few kits to build.....collected for quite a few years while in corporate.... Here’s the other half...... Constitution may be the last plank on frame, at least for awhile. It’s a colossus of planking. Completed Belt A this week, port and starboard together are about 90 planks, this week it took from Tuesday to Friday to complete the Port side. Thinking, ok I know how to plank, so going forward go with solid hull, which allows more time for topside work. Bluejacket Maine and Olympia are on my mind.....though they appear to be a colossus of photo etch..... Also have a vintage Newsboy kit....interesting as it is schooner rigged with a square rigged foremast. Stay tuned and thanks for checking in....
-
Thanks KLB.....going forward, after many projects, may no longer build plank on frame and stick to solid hulls....planking is just too time consuming and takes away from fitting out the deck, masting, and rigging. Scratch building? To each his own. Not sure if I’ll be a scratch builder. In my imagination I’m operating a ship yard that constructs ships. Shipyards take components made by others and assemble ships. That’s why I like kits. For me taking a single piece of wood, say for the stem, cutting it up into little components, then glueing it back together, is a head scratcher. Why not make the stem out of a single piece of wood and scribe and color lines for the components? Would an observer be able to tell the difference? I have a cabinetmaker/furniture makers bias, why spend time on something that either isn’t visible or can be done a faster way. It’s all good, everyone is different, as it should be. Cheers
-
Found you project and decided to follow along..... What a unique look....looking forward to your posts....thanks.
-
Hello, like this ship and decided to follow along....thanks....
-
Finished up the wales and did some smoothing.... Started smoothing with sandpaper....it’s seductive....however the long flat file does the best job and it’s faster.... Gearing up to plank the rest of the hull...... In the back of my mind is stopping and pausing Constitution on 5/31.....would rather build 2 at the same time...start Amati Vanguard, get it to the same stage as Constitution and complete both in parallel. Planking simply takes too much time. Or stop sailing ship construction and move on to one of the Great White Fleet battleship kits I have from Bluejacket. We’ll see.....


-
Just found this and decided to follow along....feel free to send a message if you have a question...
-
Just a couple of shots of a stern plank, with the twist and bend.....
-
Congrats Bro! A pleasing rendition of aGrand Banks Dory. Certainly your next project will be even better after incorporating your experience! Cheers
- 85 replies
-
- 4
-

-

-
- Lowell Grand Banks Dory
- First Build
- (and 2 more)
-
blazing a path for others to follow....thanks
-
You got through it. Like the Tung Oil. Looking at the work, may I suggest taking a look at using a wood file to clean up the board ends, rather than sand paper. Gives tighter control and crisper edges than sandpaper. Next one will be even better. Cheers!
-
Welcome aboard! Cheers!
-
Welcome aboard! Looking forward to seeing more of your work.
-
Welcome! Being from Norristown, now living in Massachusetts, please value your ability to get a good cheesesteak hoagie and Italian pizza. Philly has the best anywhere and I really miss it. My advice is to build something with one mast square rigged, then two....checkout Model Expo Armed Virginia Sloop....if you can swing it get the practicum from Robert E Hunt for the Armed Virginia Sloop, does a good job of leading the student through the rigging. Please feel free to contact me if you need a hand.
-
A nice looking model. Most significant is you got through it to completion! The next one will be even better. All the best and if you need a hand, please let me know.
-
Take a look at Neolube....it’s alcohol based so dries almost instantly....it’s very thin, graphite colloidals in alcohol, and inexpensive. Available from Micromark. Brushes on, no need for soaking, less mess. Just checked price, maybe not inexpensive but competitive with Casey gun blueing products. Non hazardous waste, is a big benefit for me....
-
Hello, if I may offer a suggestion that works for me.... Apply carpenters glue along the plank edge of the previously installed plank with a toothpick. At the bulkhead a dot of CA. Install new plank by butting it up against the previous plank from left to right. Pressing down on each bulkhead in succession from left to right. CA dries fast, holding the board. Carpenters glue squeezout fills seams, and open time allows adjustments of the edges. More on my USS Constitution build page... Thanks
-
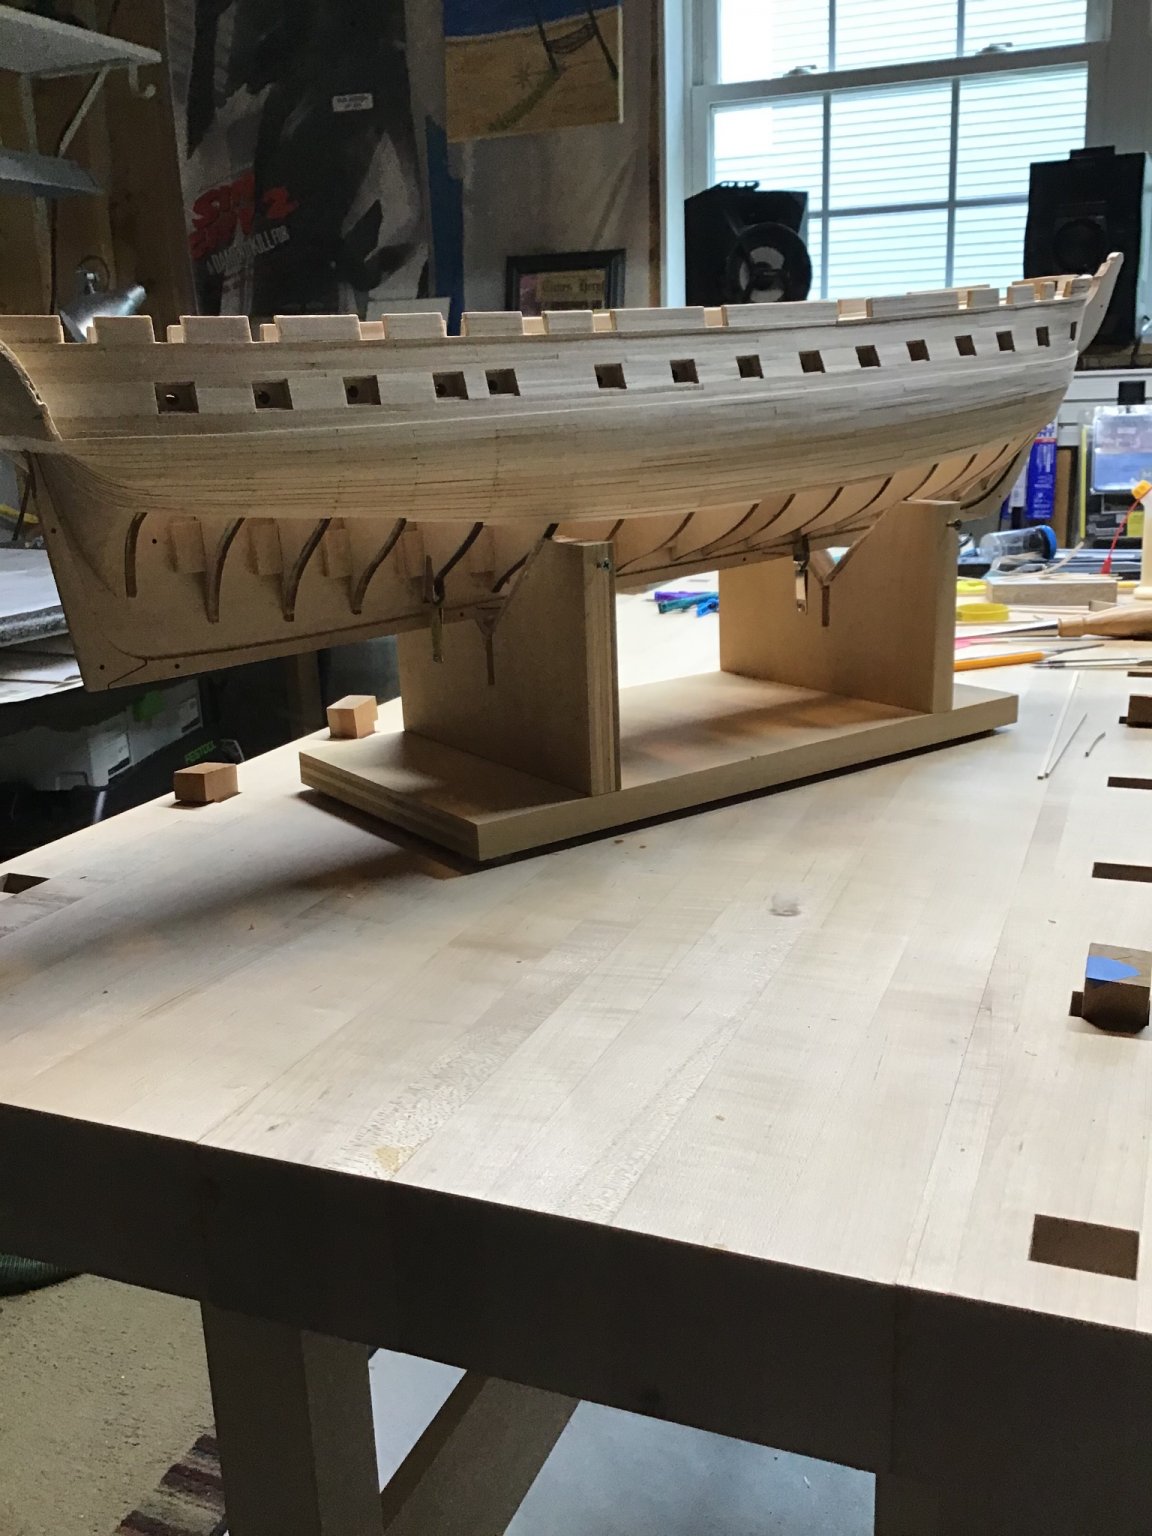
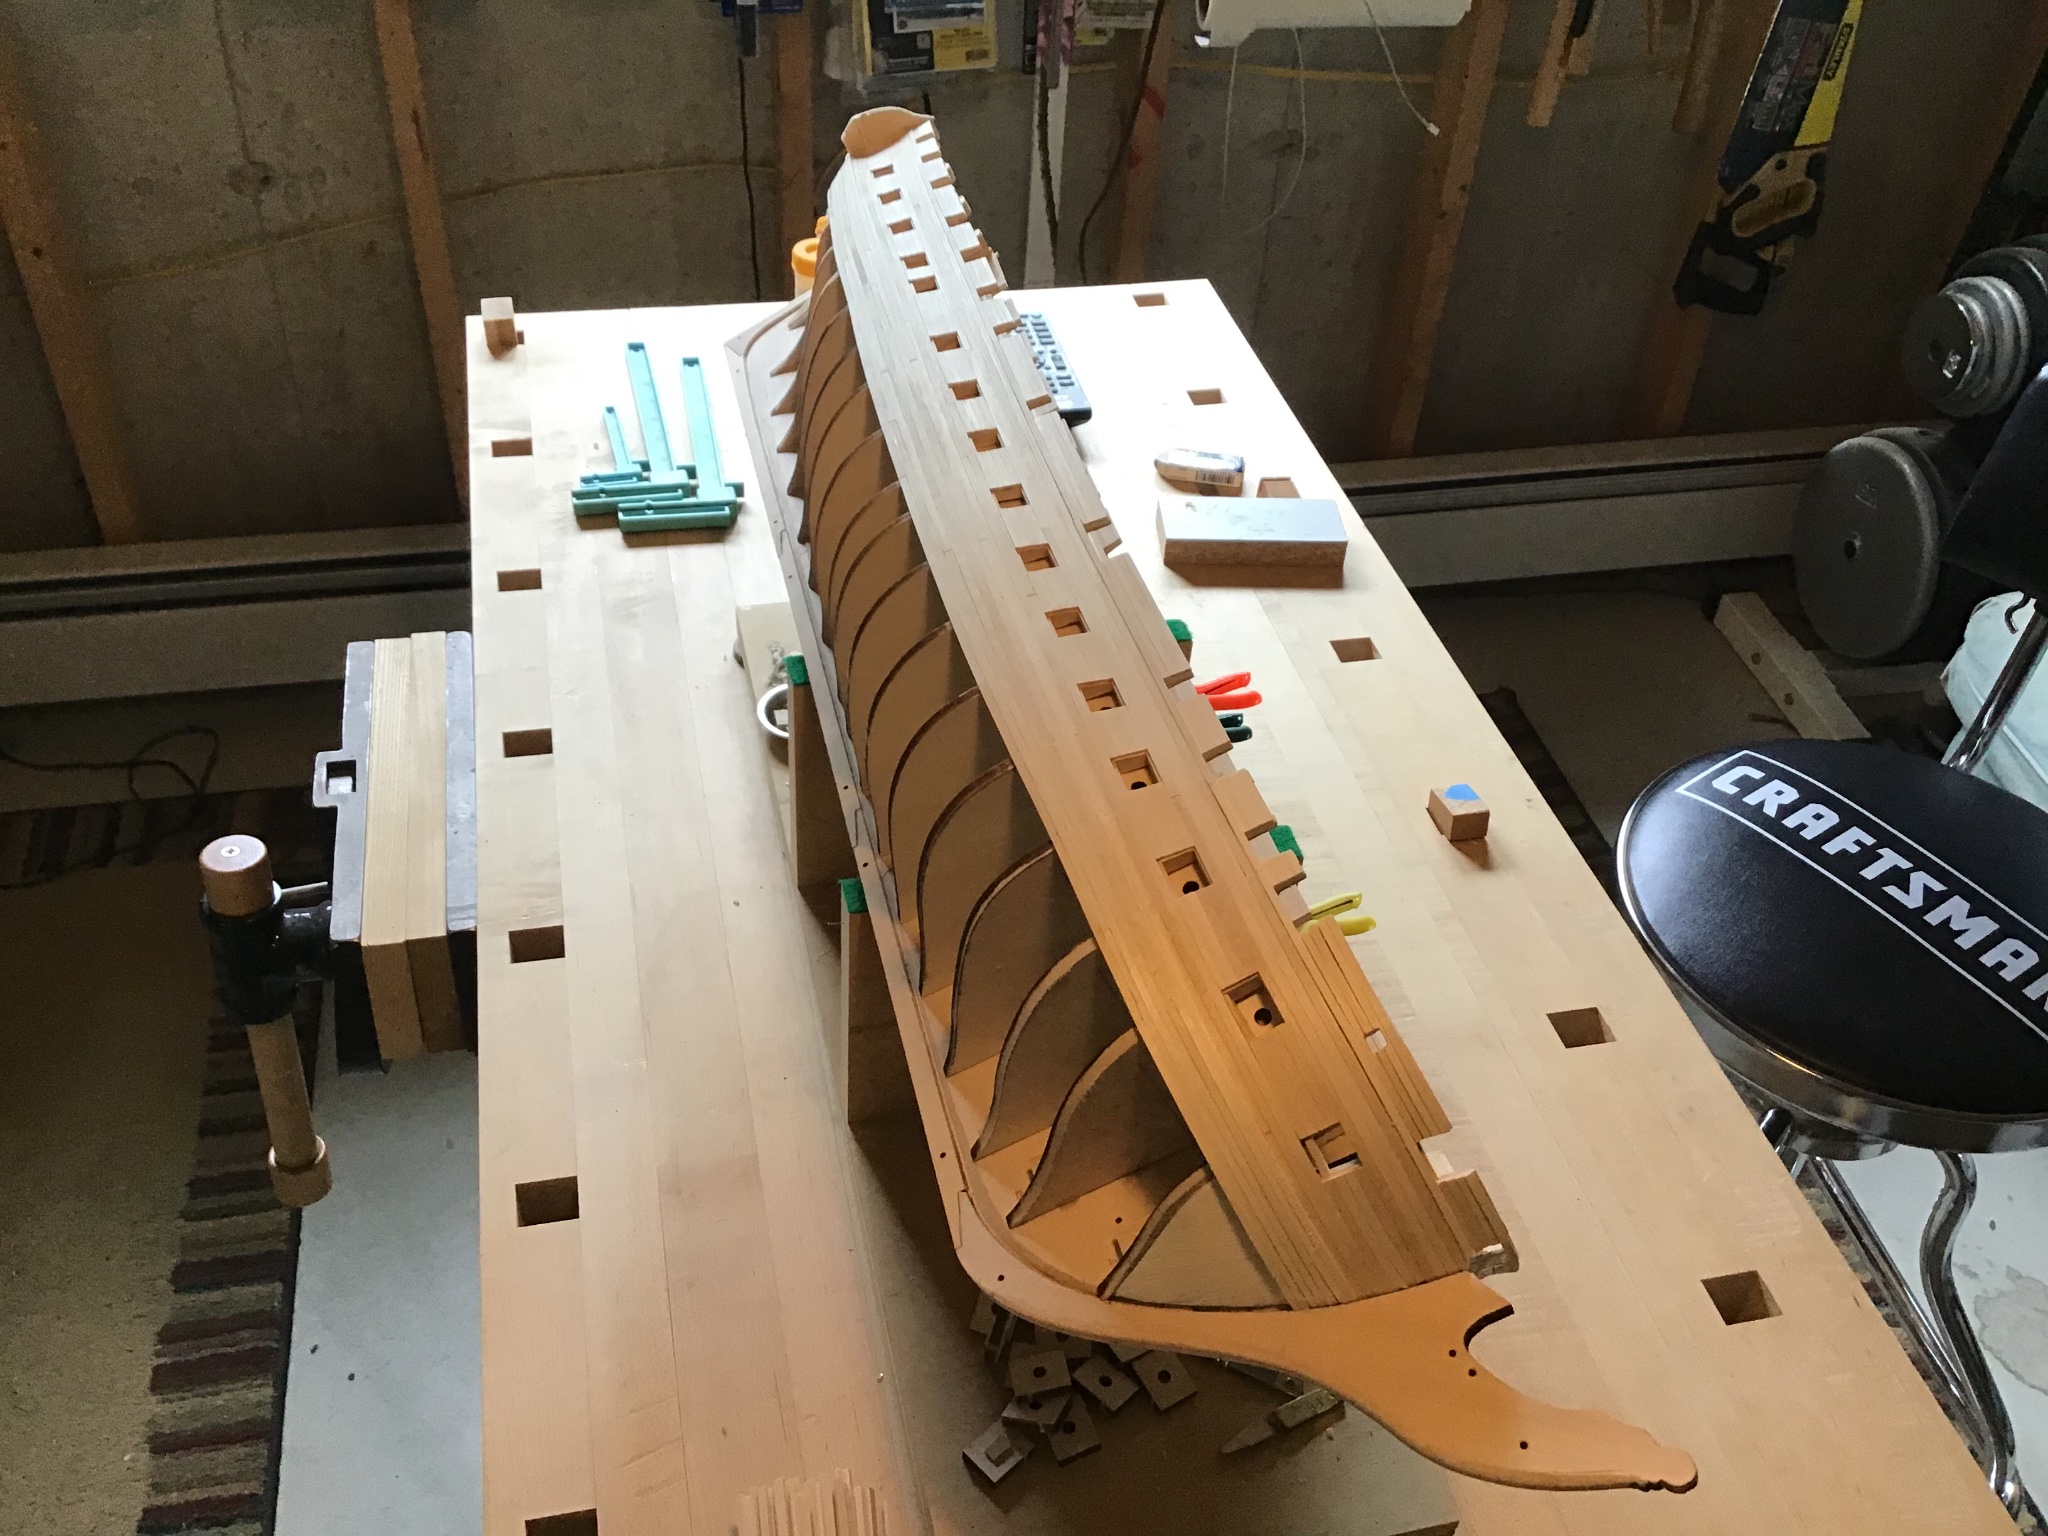
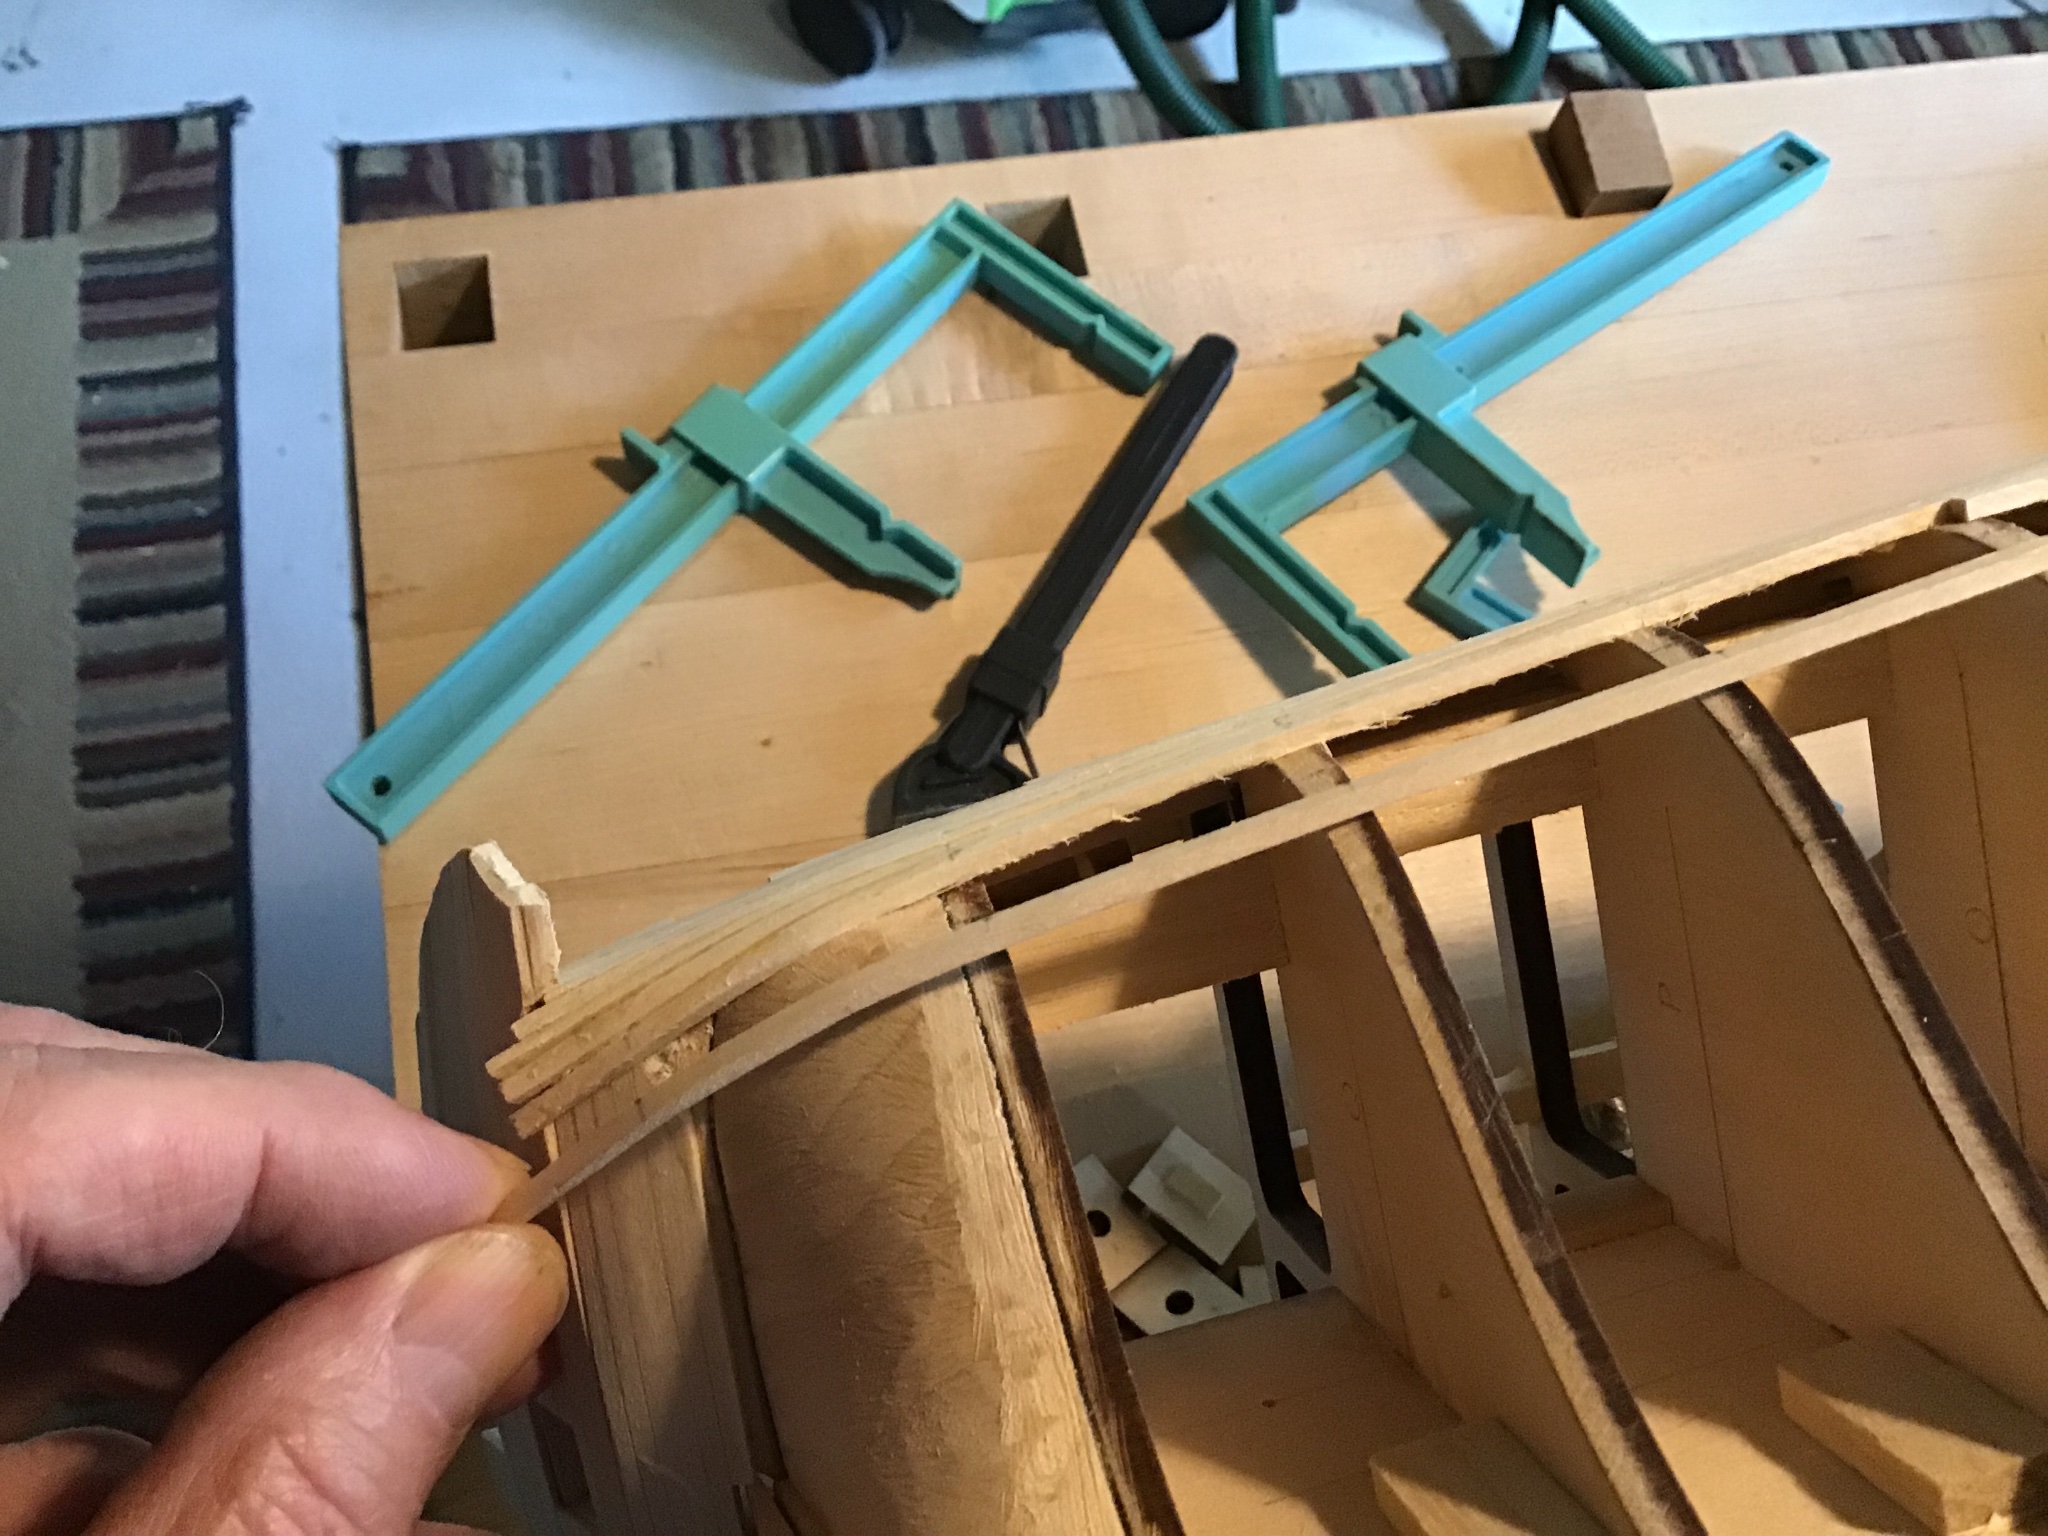
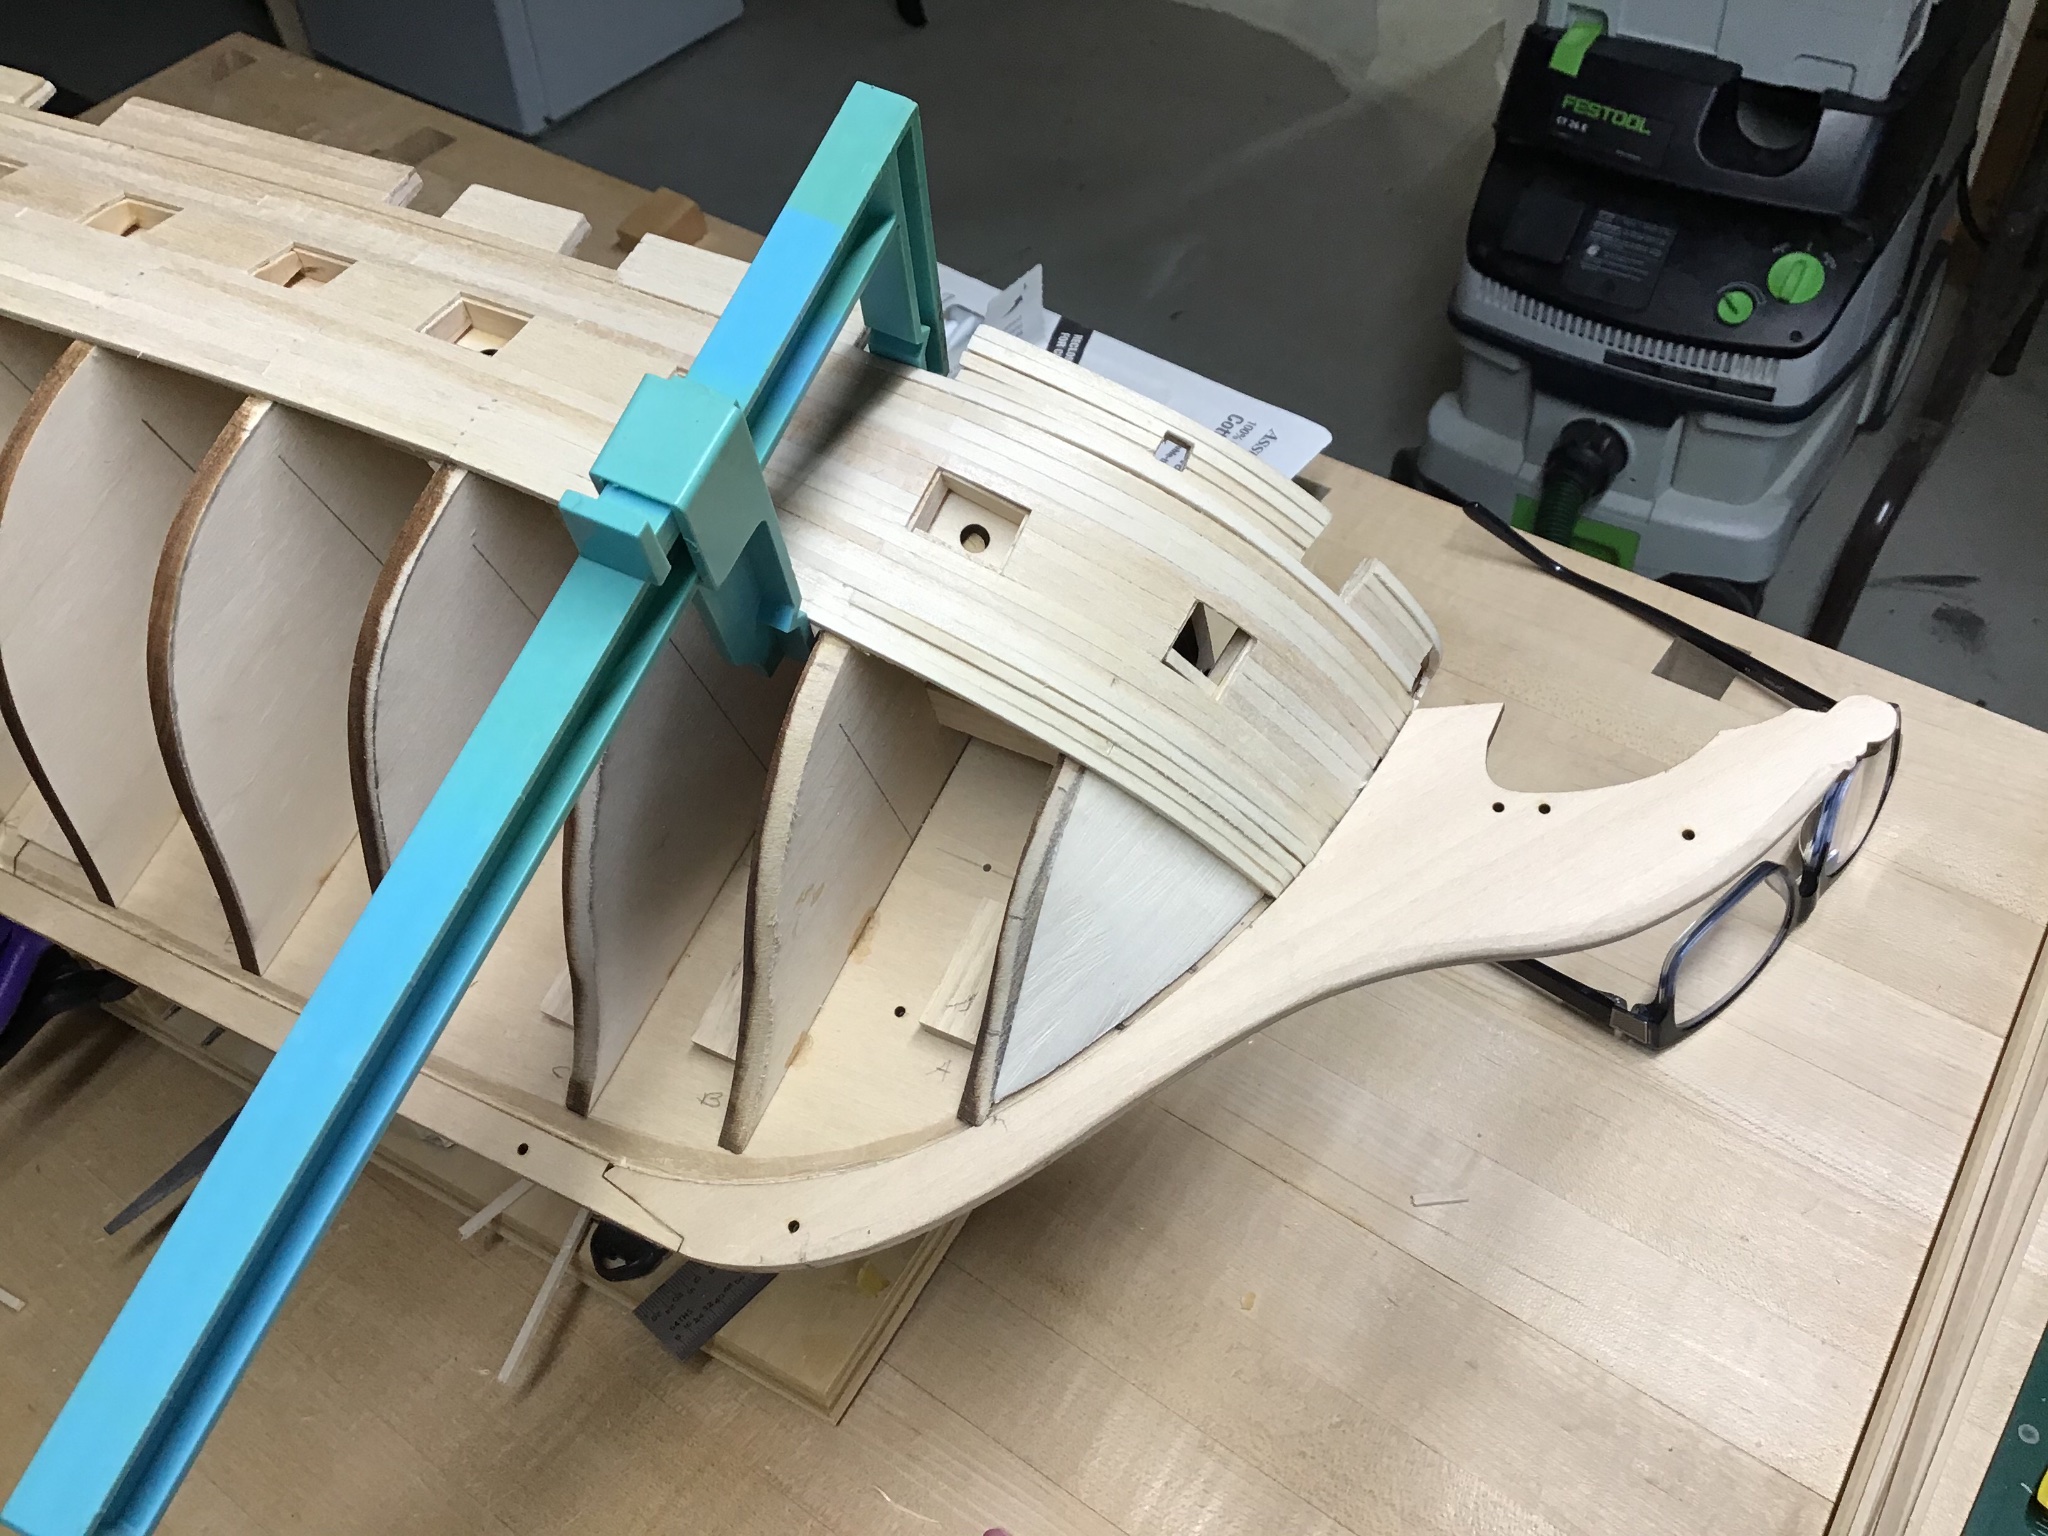
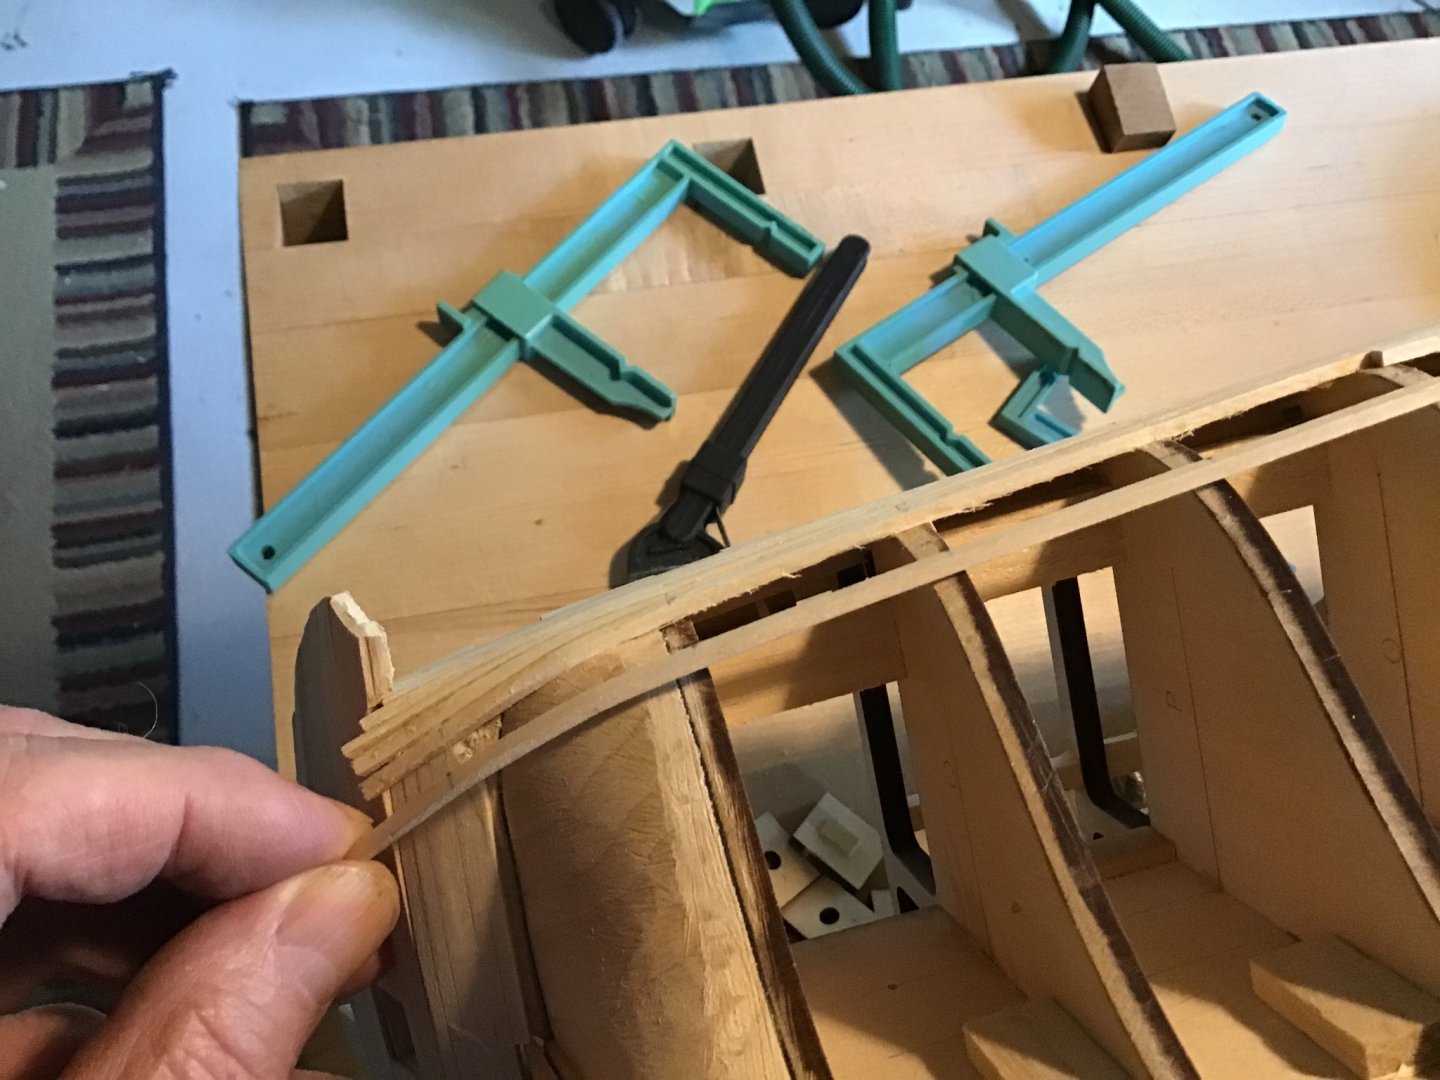
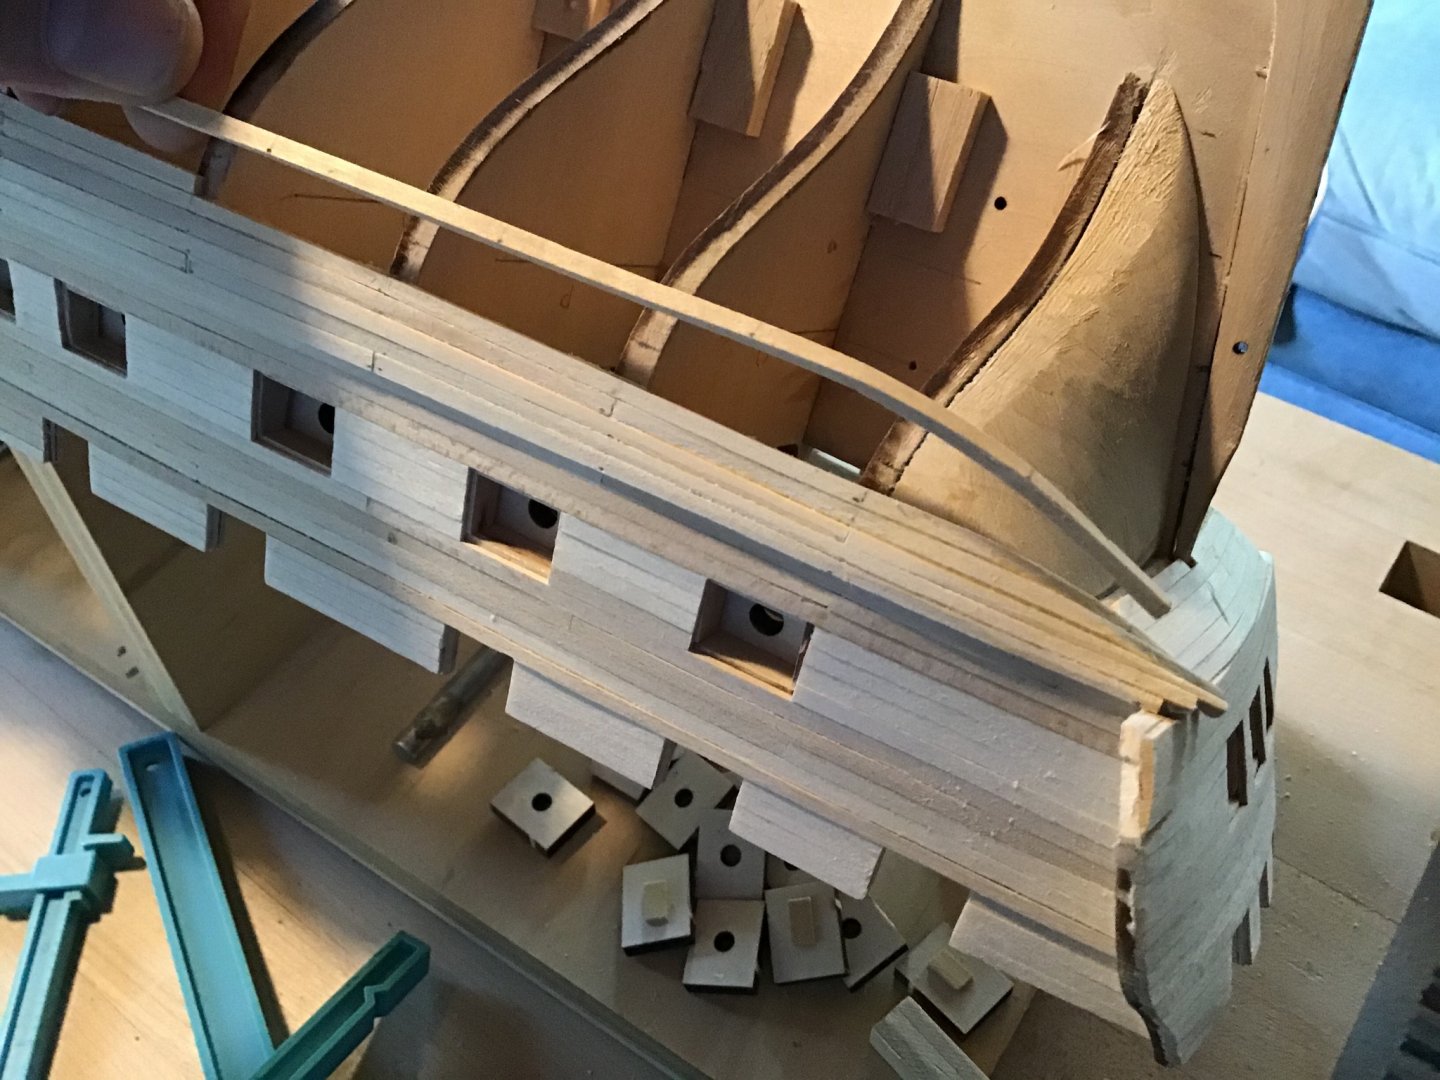
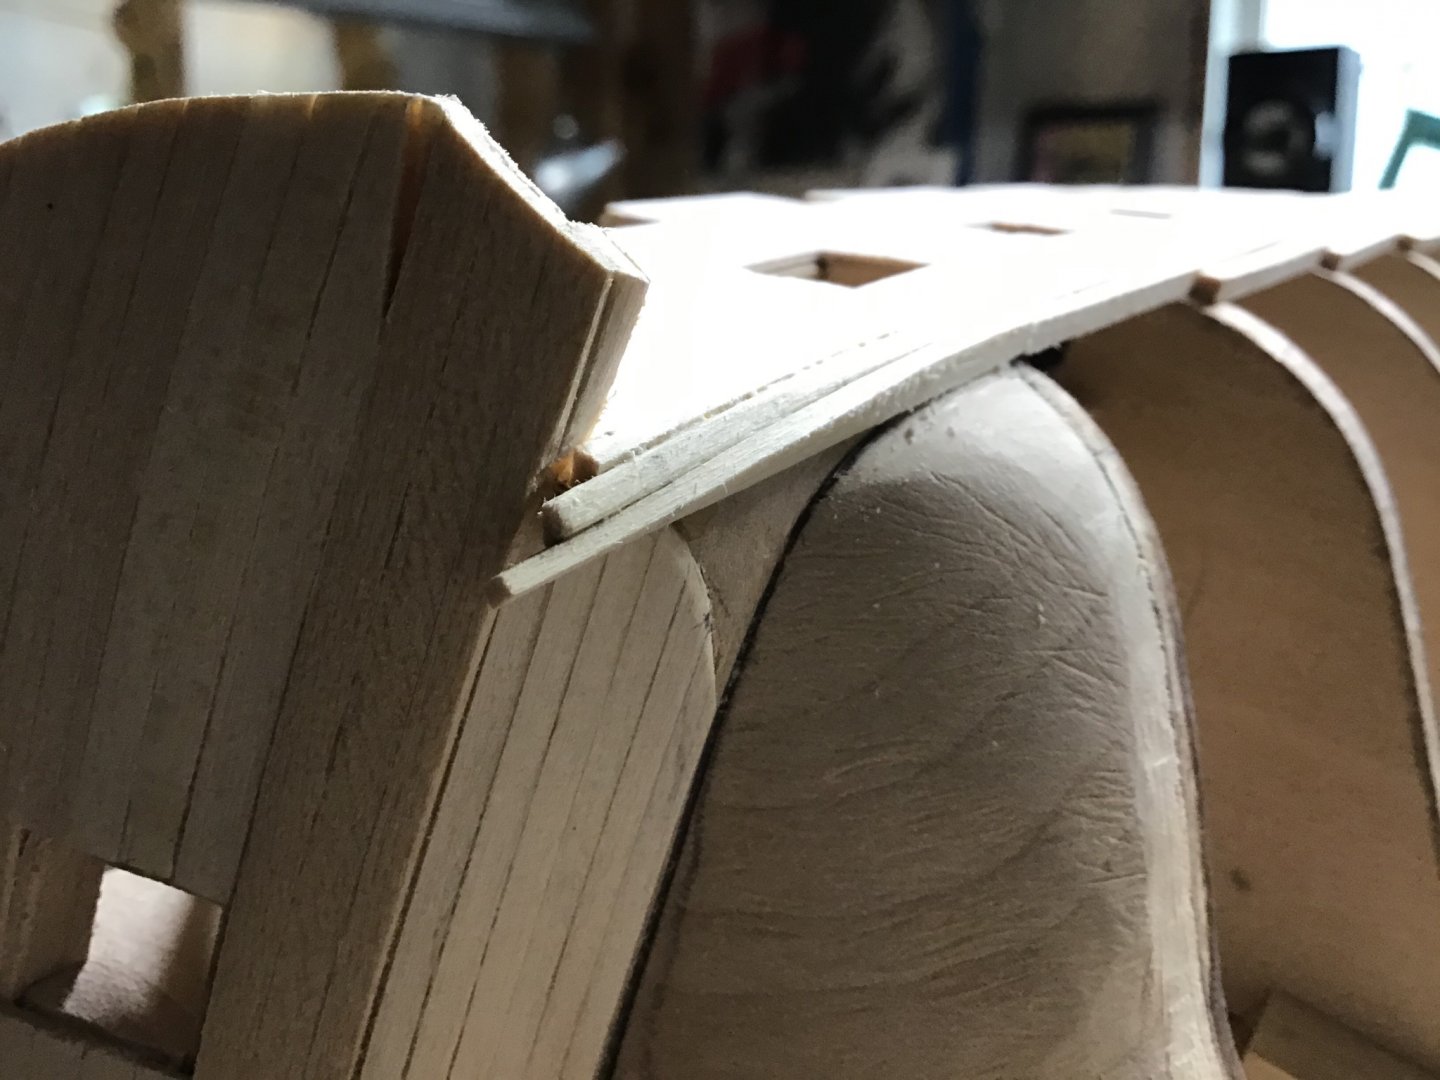
Planking Starboard Wale The wale consists of about 35 planks per side. Pretty straightforward, the action is at the stern where the board twists about 90 degrees and bends around the stern blocks to reach the counter. 4 steps to process a stern plank: cut to length, taper, soak in water 10 minutes or so, twist end 90 degrees, bend to fit shape of stern block. Picture 1 shows clamp used to close gap between bulkheads. Picture 2 shows working from amidships, aft, I like starting amidships, where planks are full 1/8” width. Picture 3 shows stern planking. Looks intimidating, however, understand that the long thin wood fibers don’t mind twisting after a soak, and after twisting the plank will easily bend around the counter. Should mention the plank edge faces do need to be worked by easing the inside corners with a file, and removing material along the stern edges changing the rectangular cross section to a trapezoid. Last picture shows progress after some smoothing. Finally seams are tight because of generous carpenters glue on the plank edges during assembly. No squeeze out means not enough glue. Using a carpenters glue that is sandable and paintable. Also good as wood filler to fill any seam gaps.


-
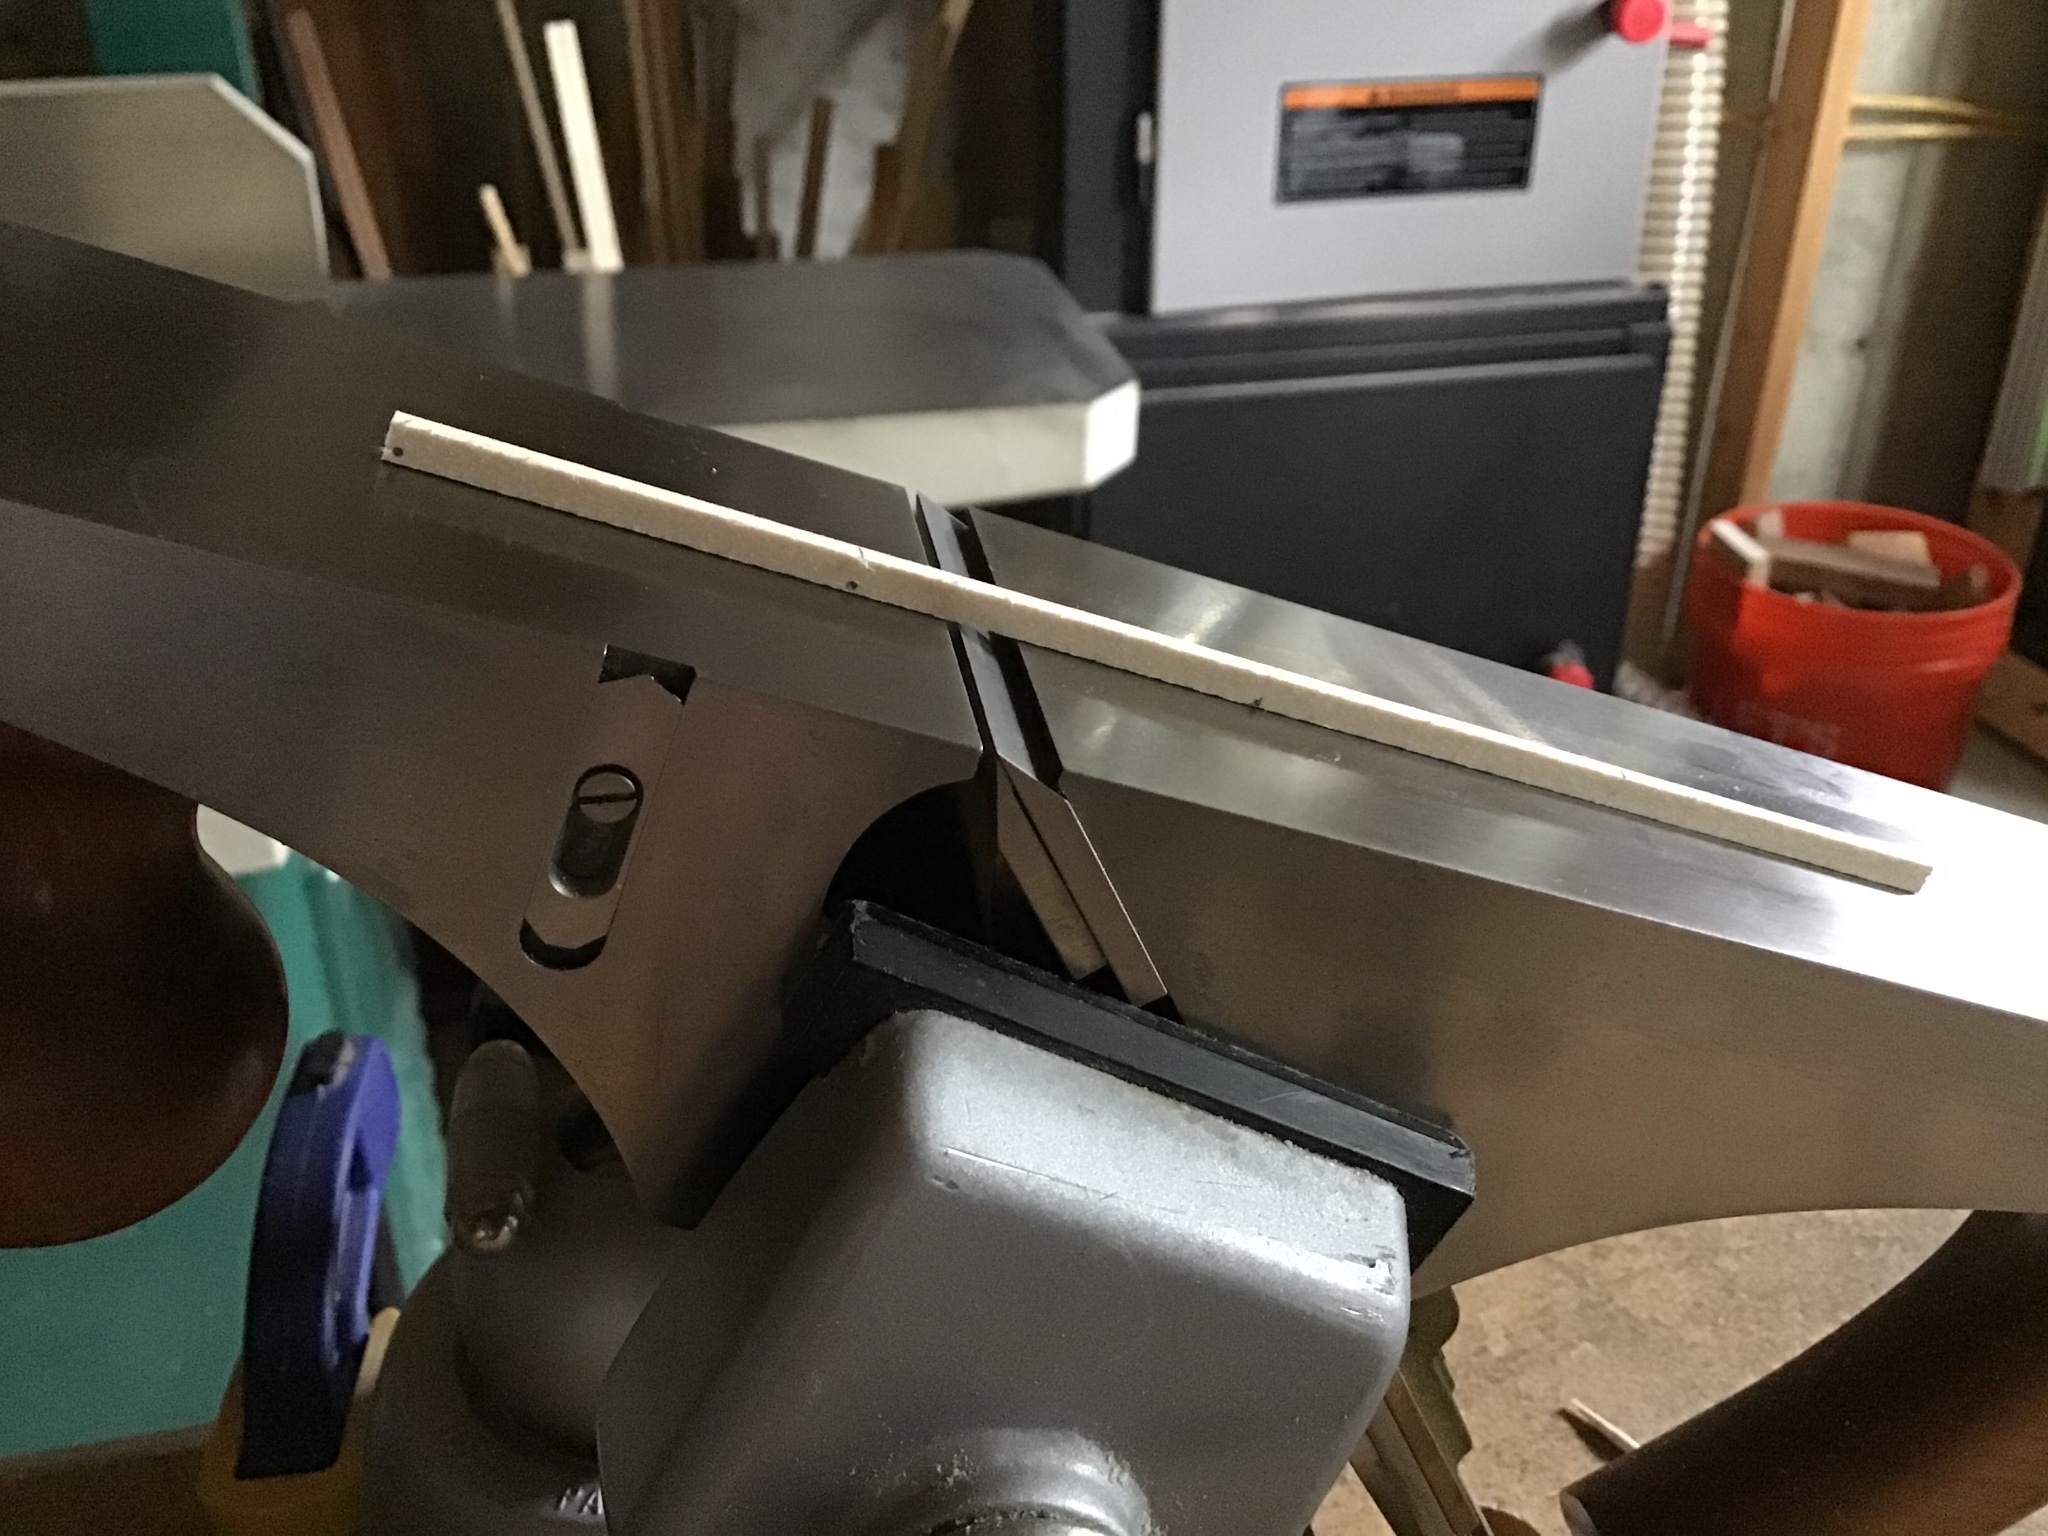
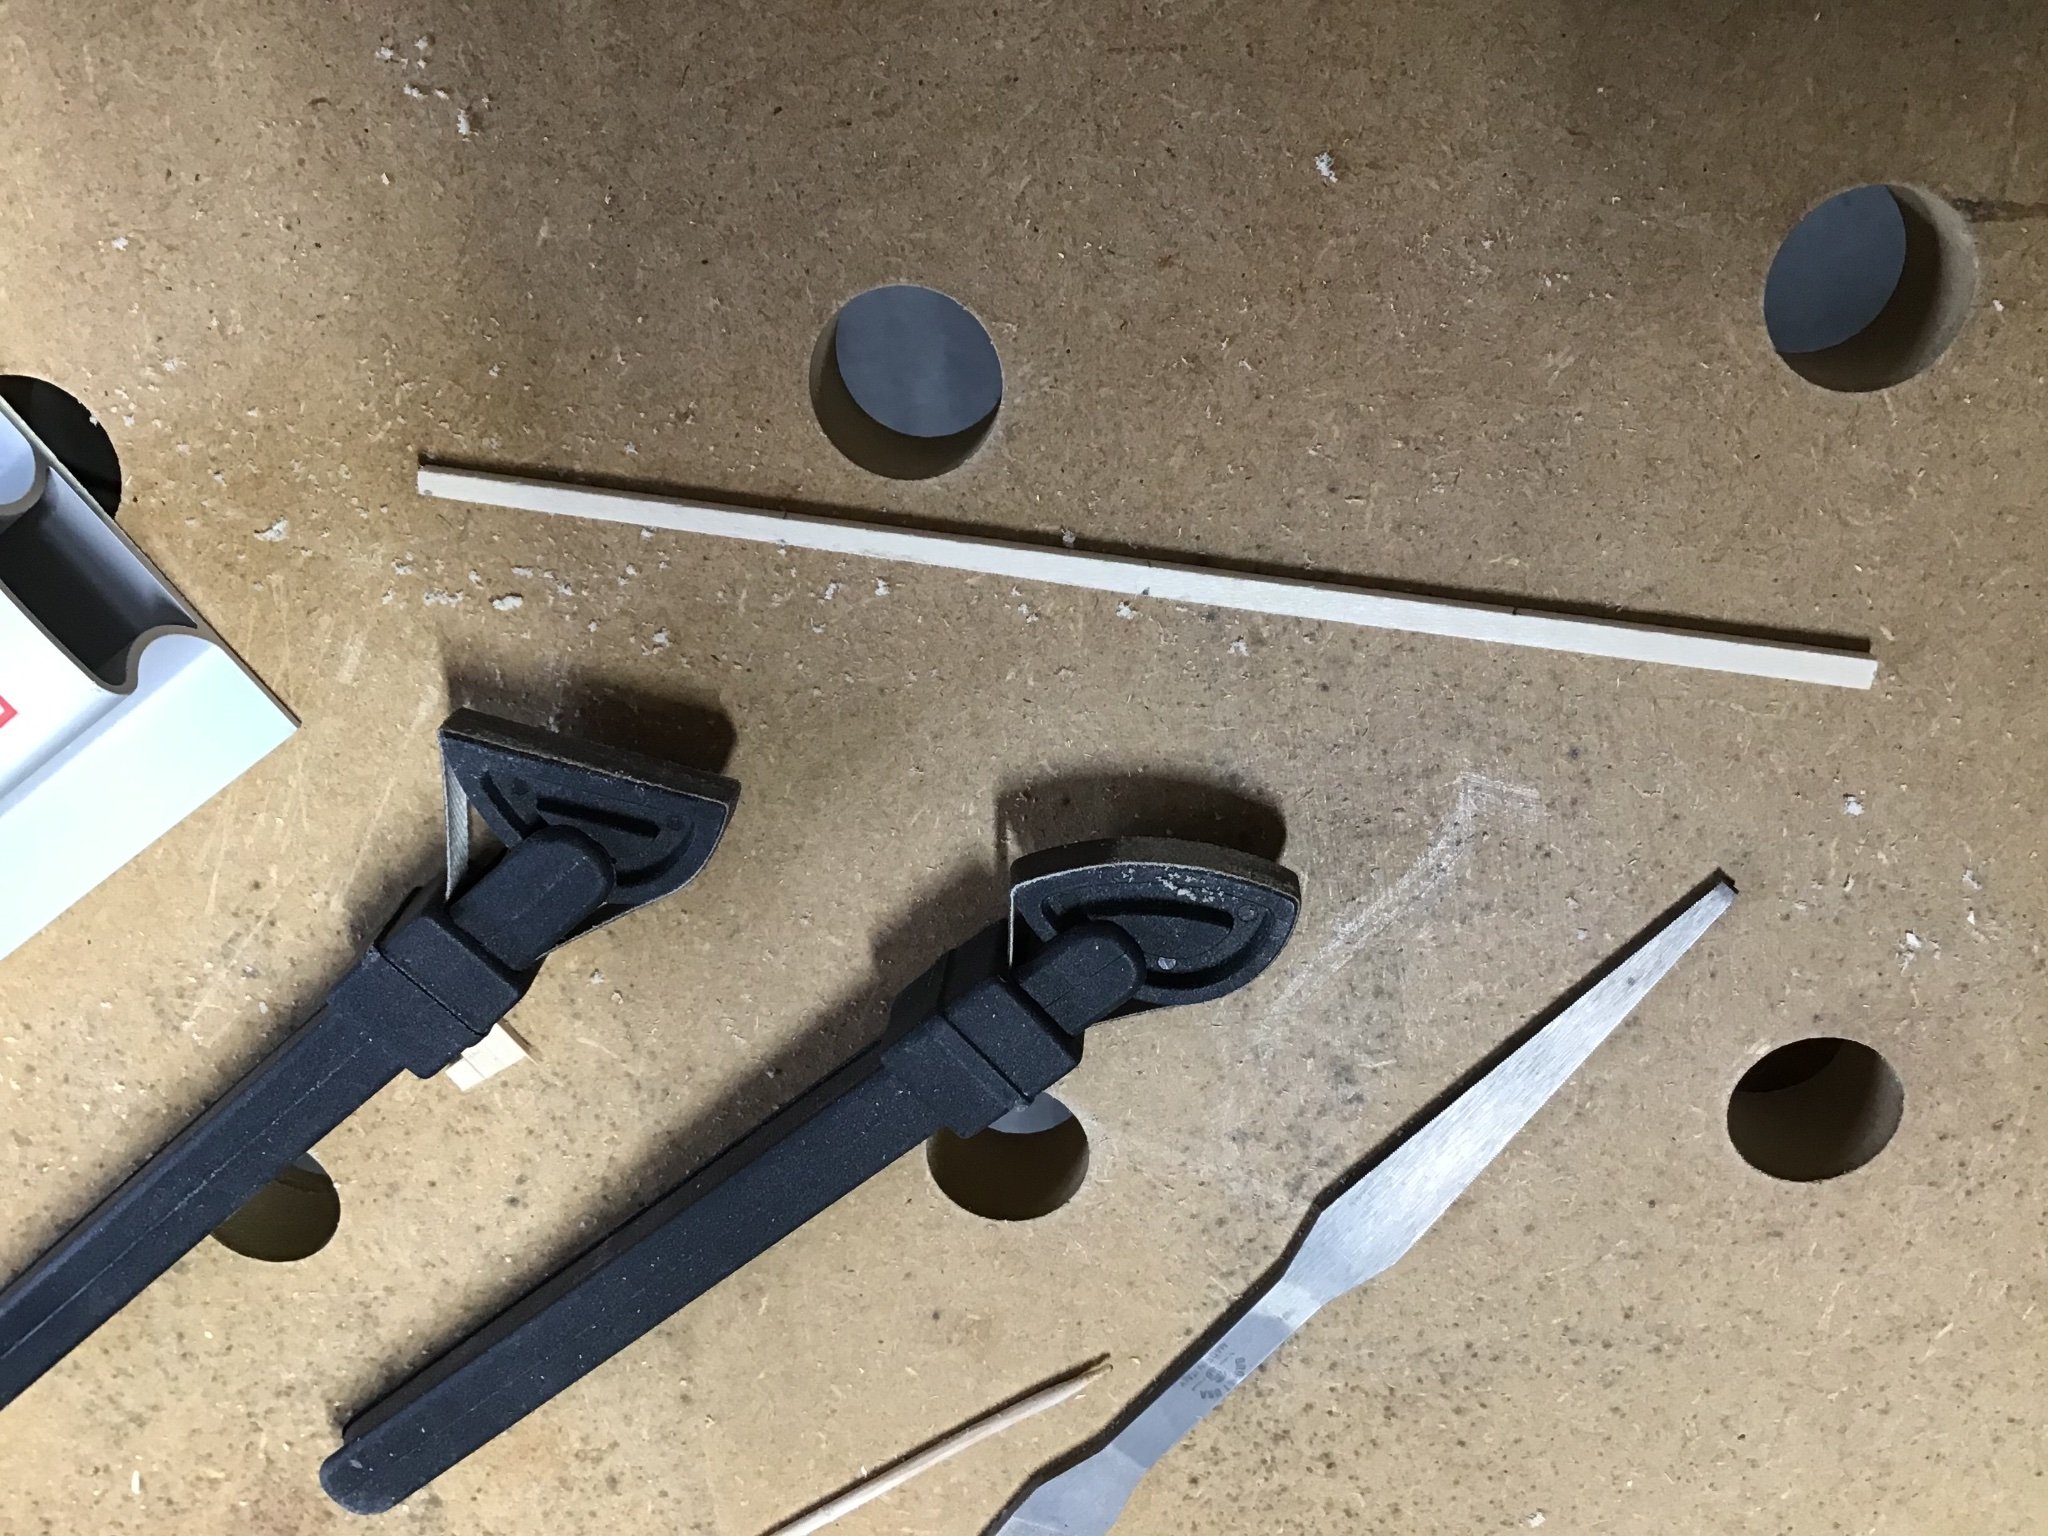
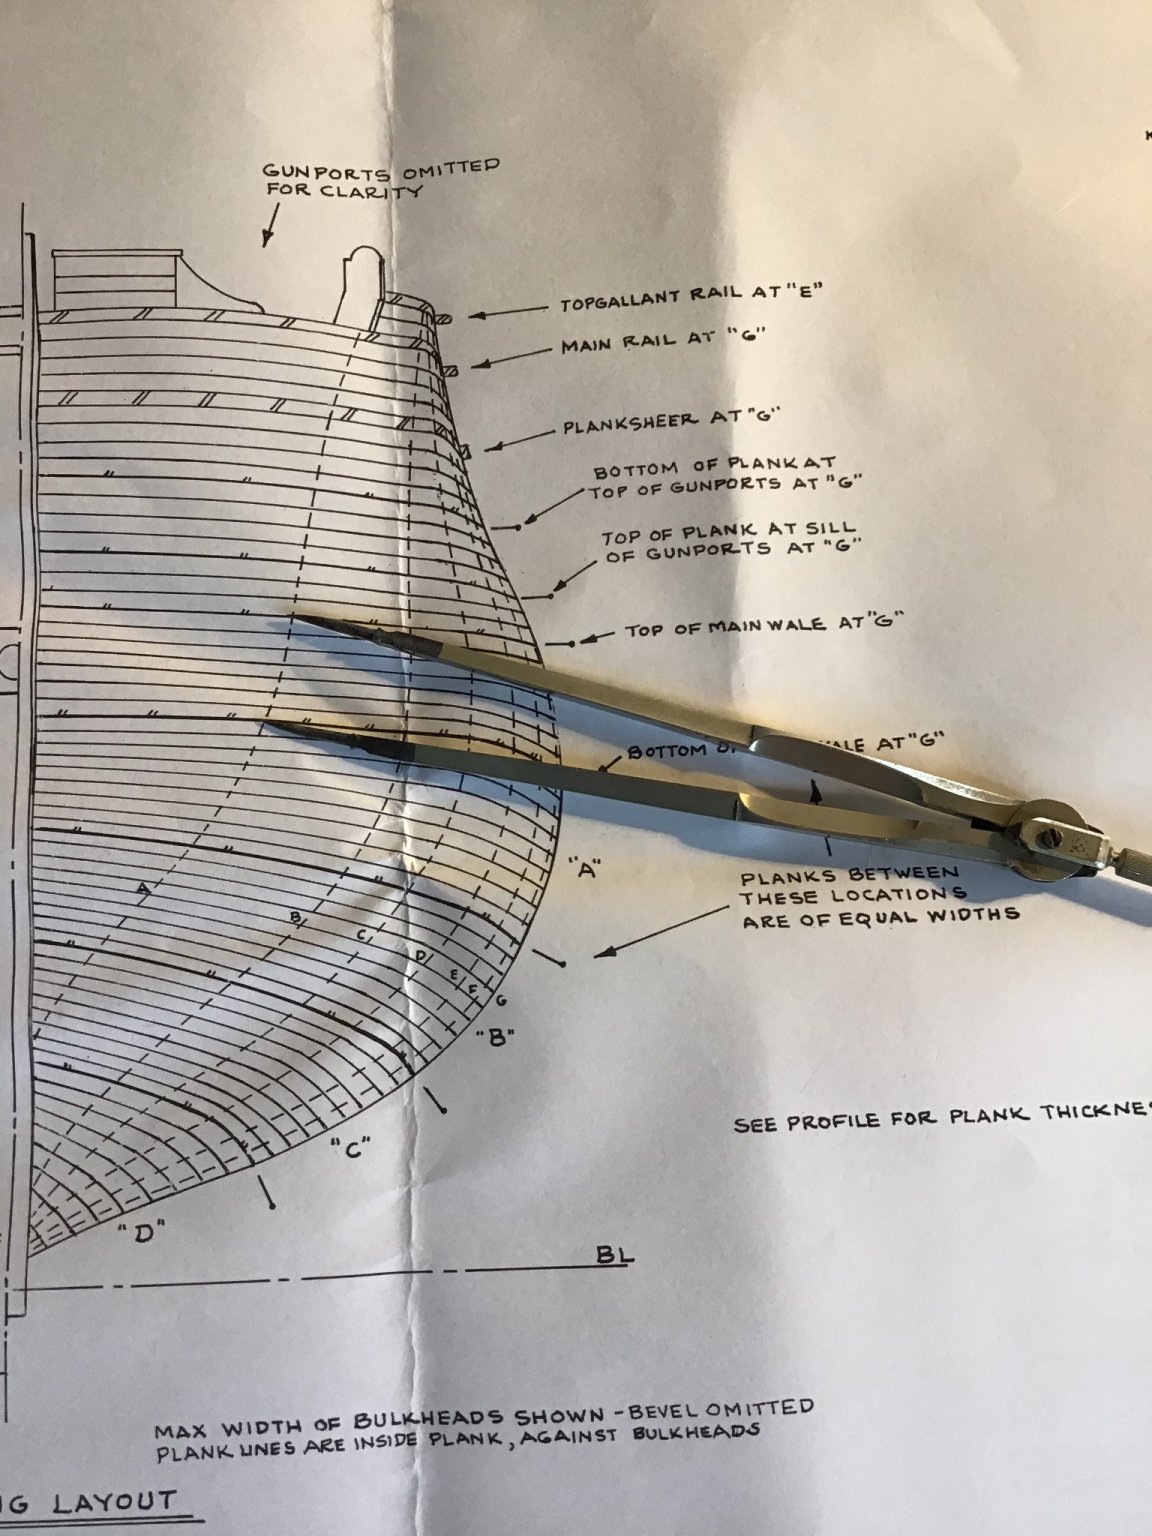
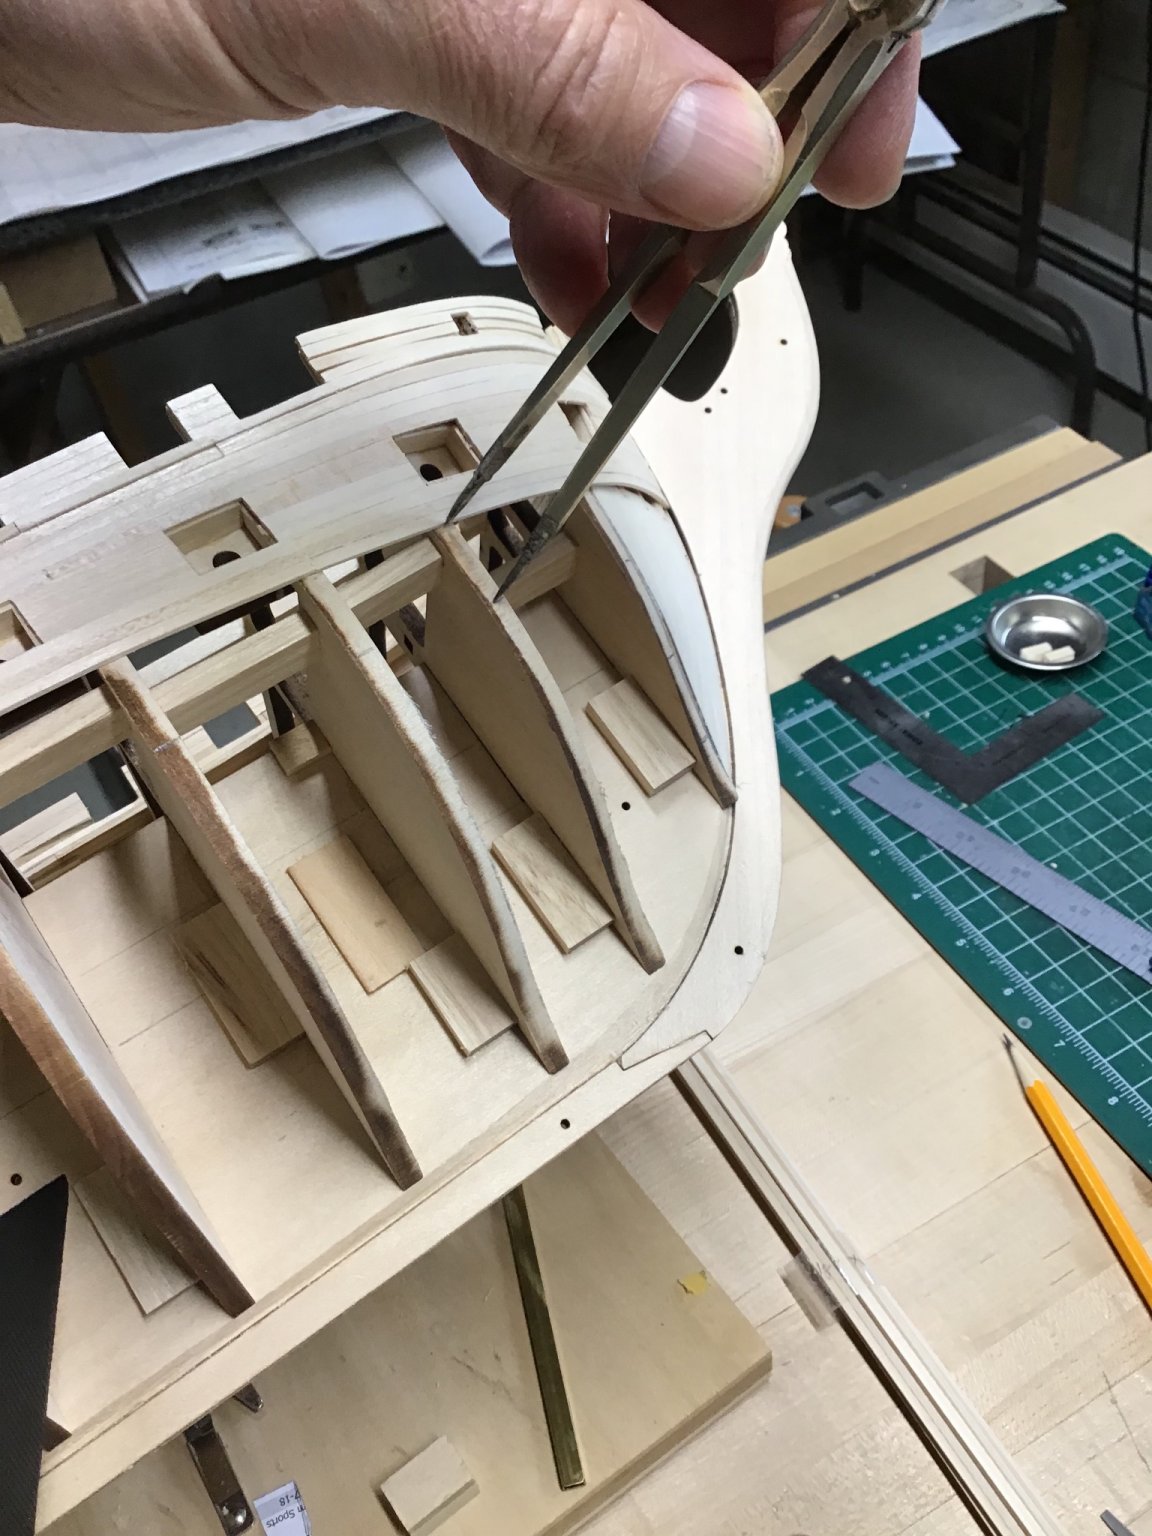
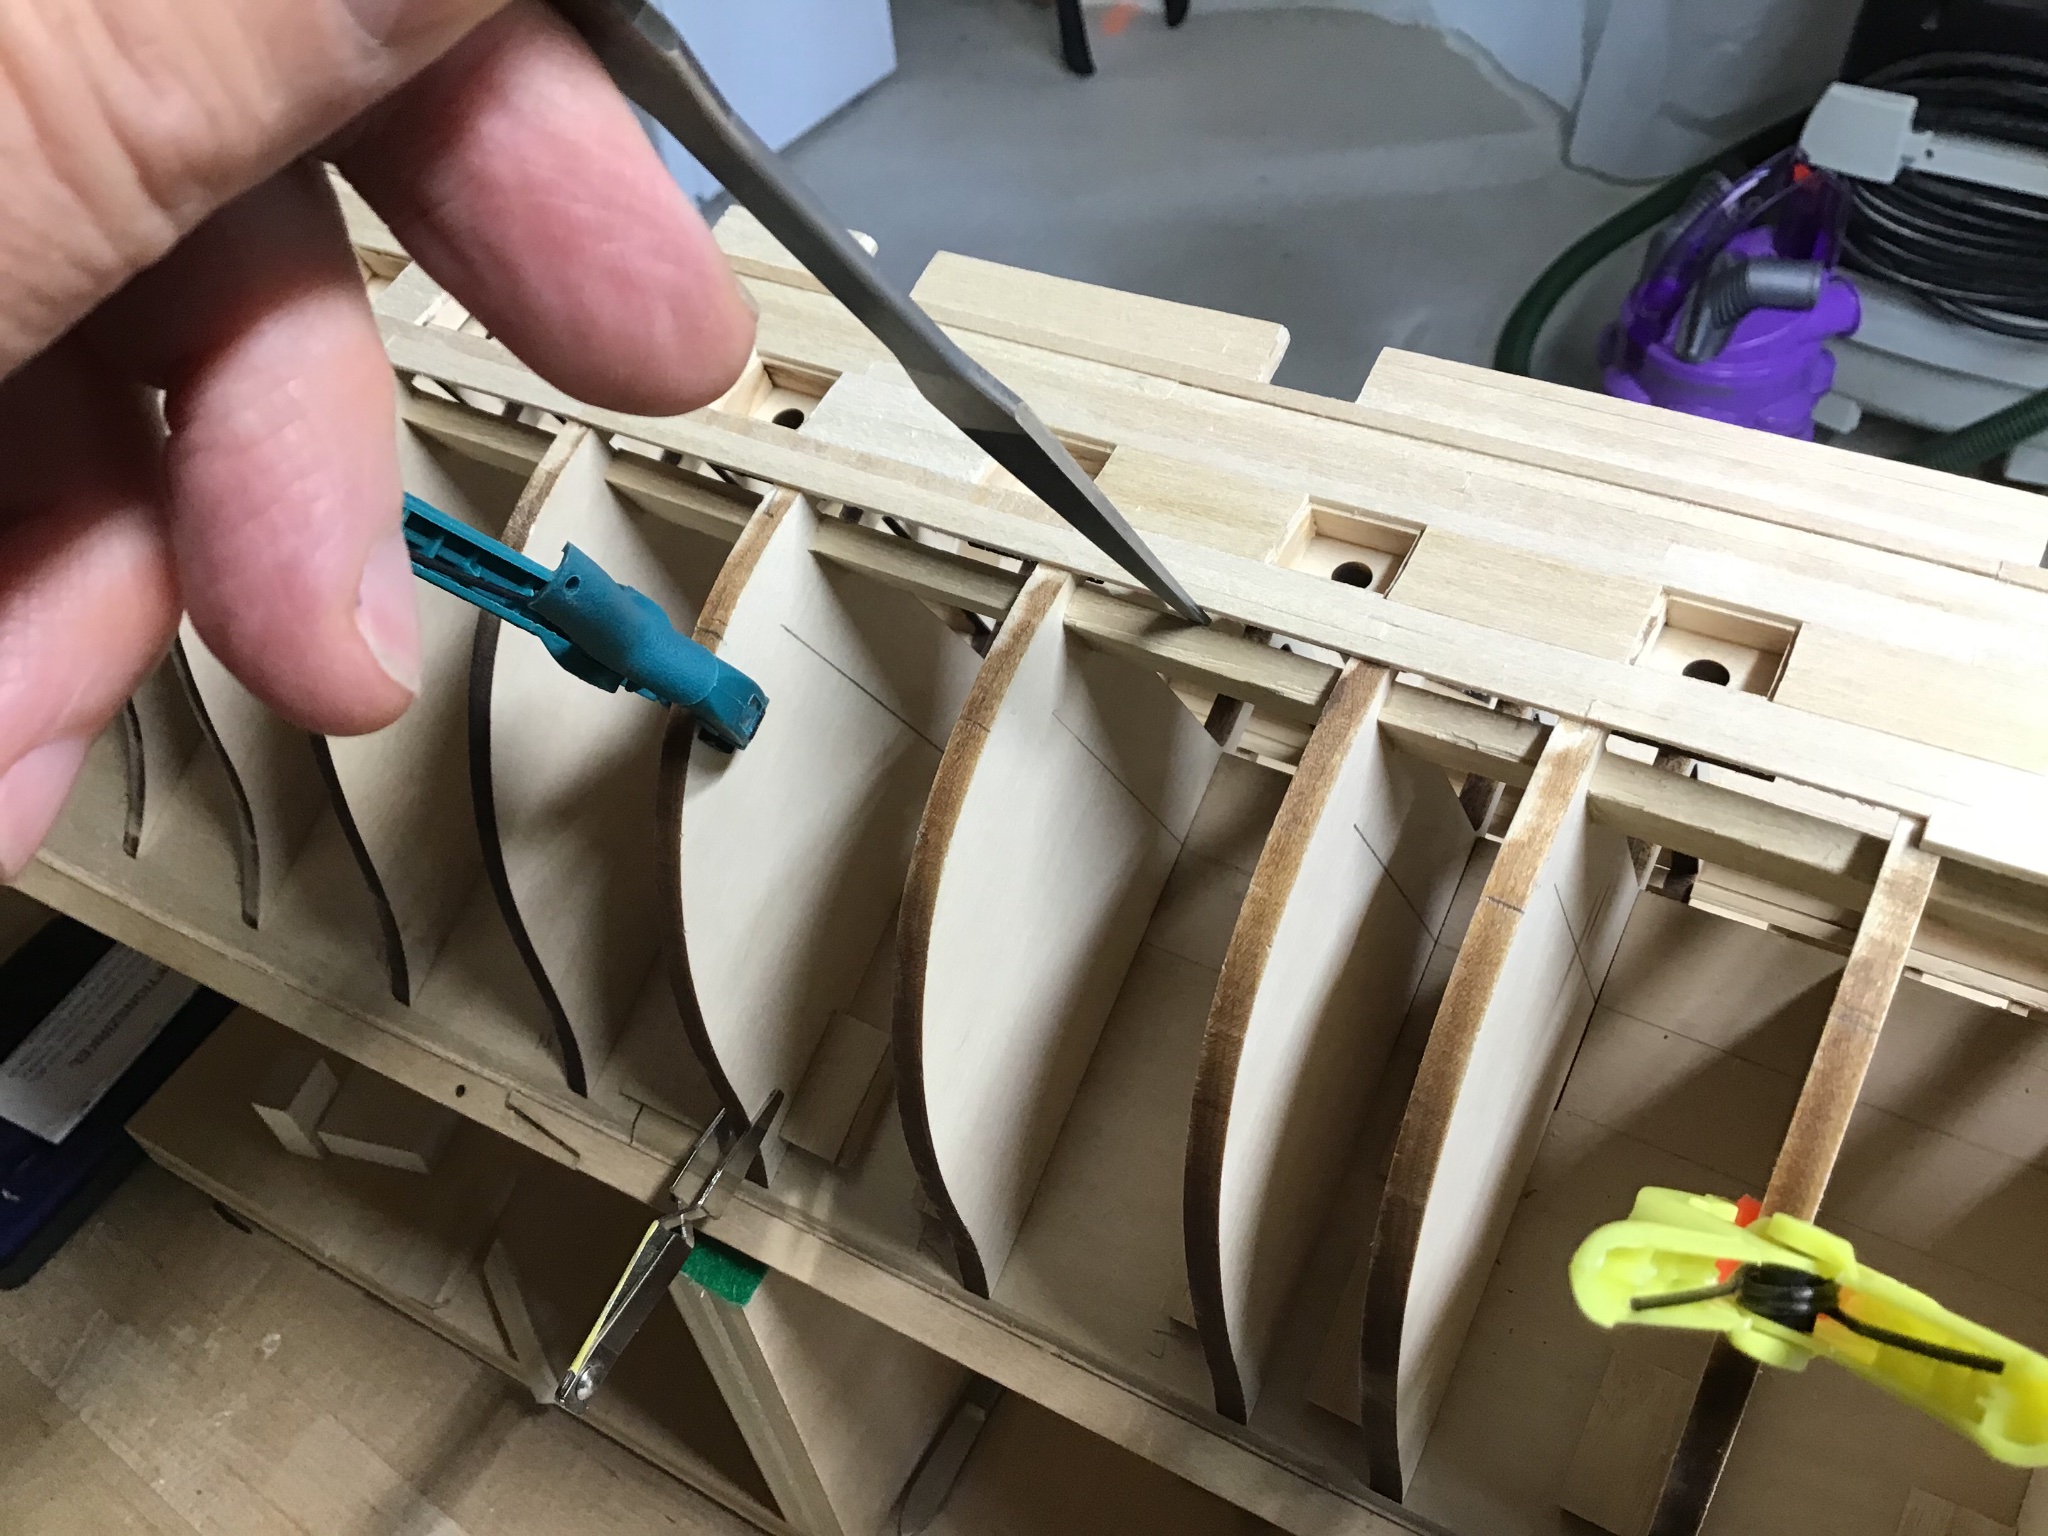
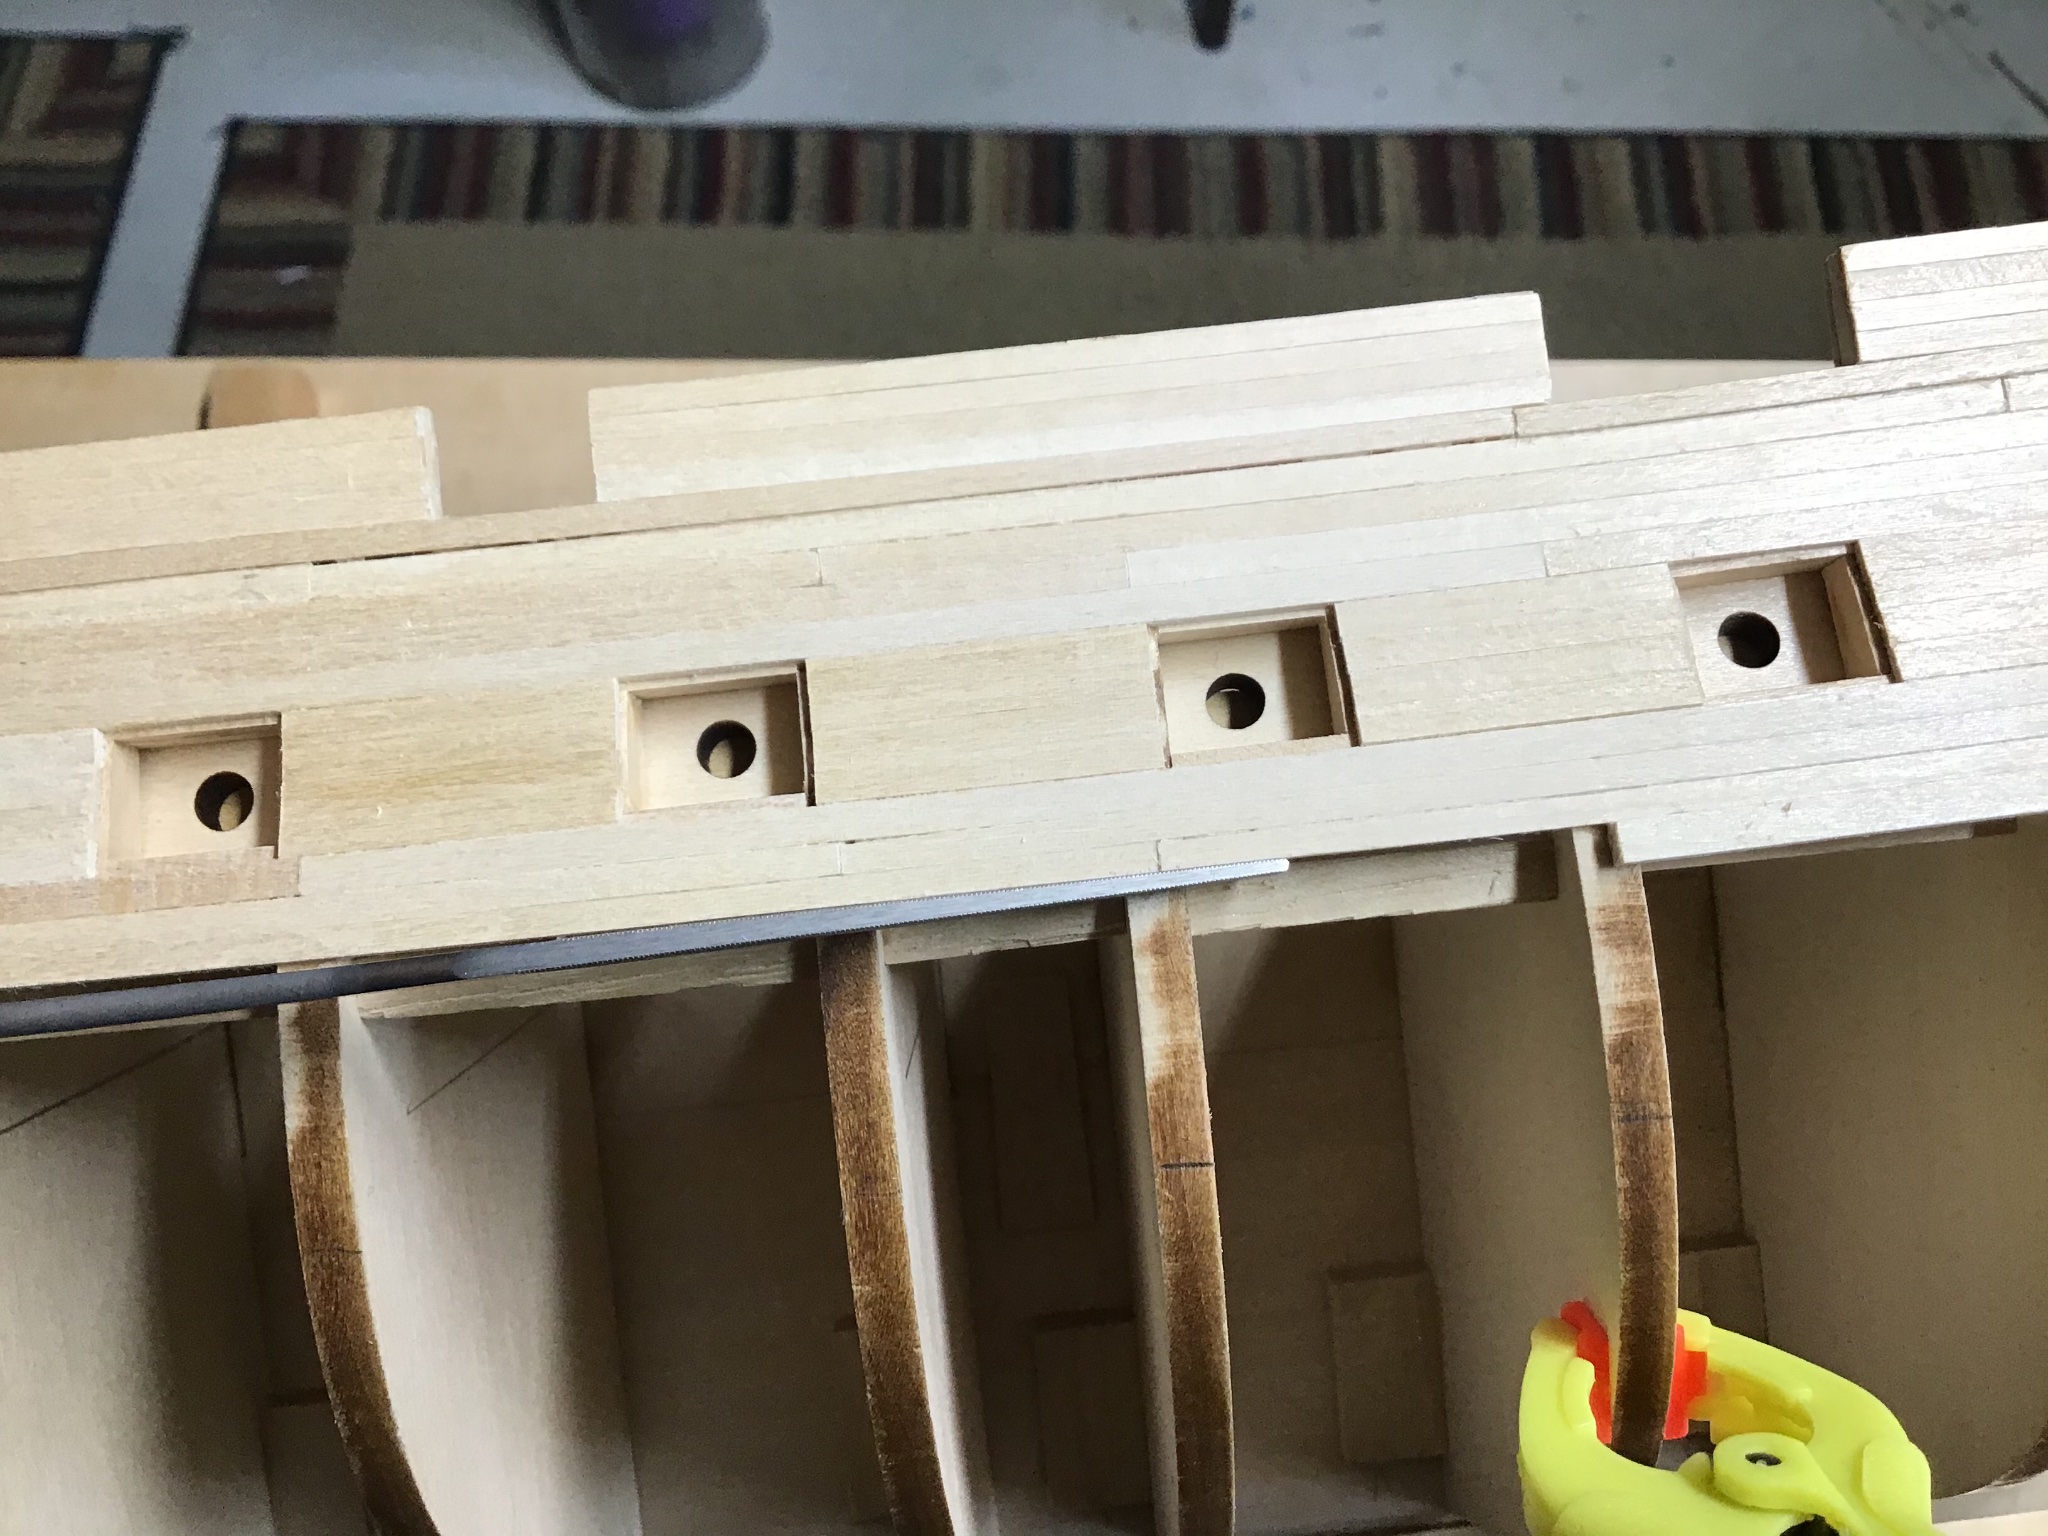
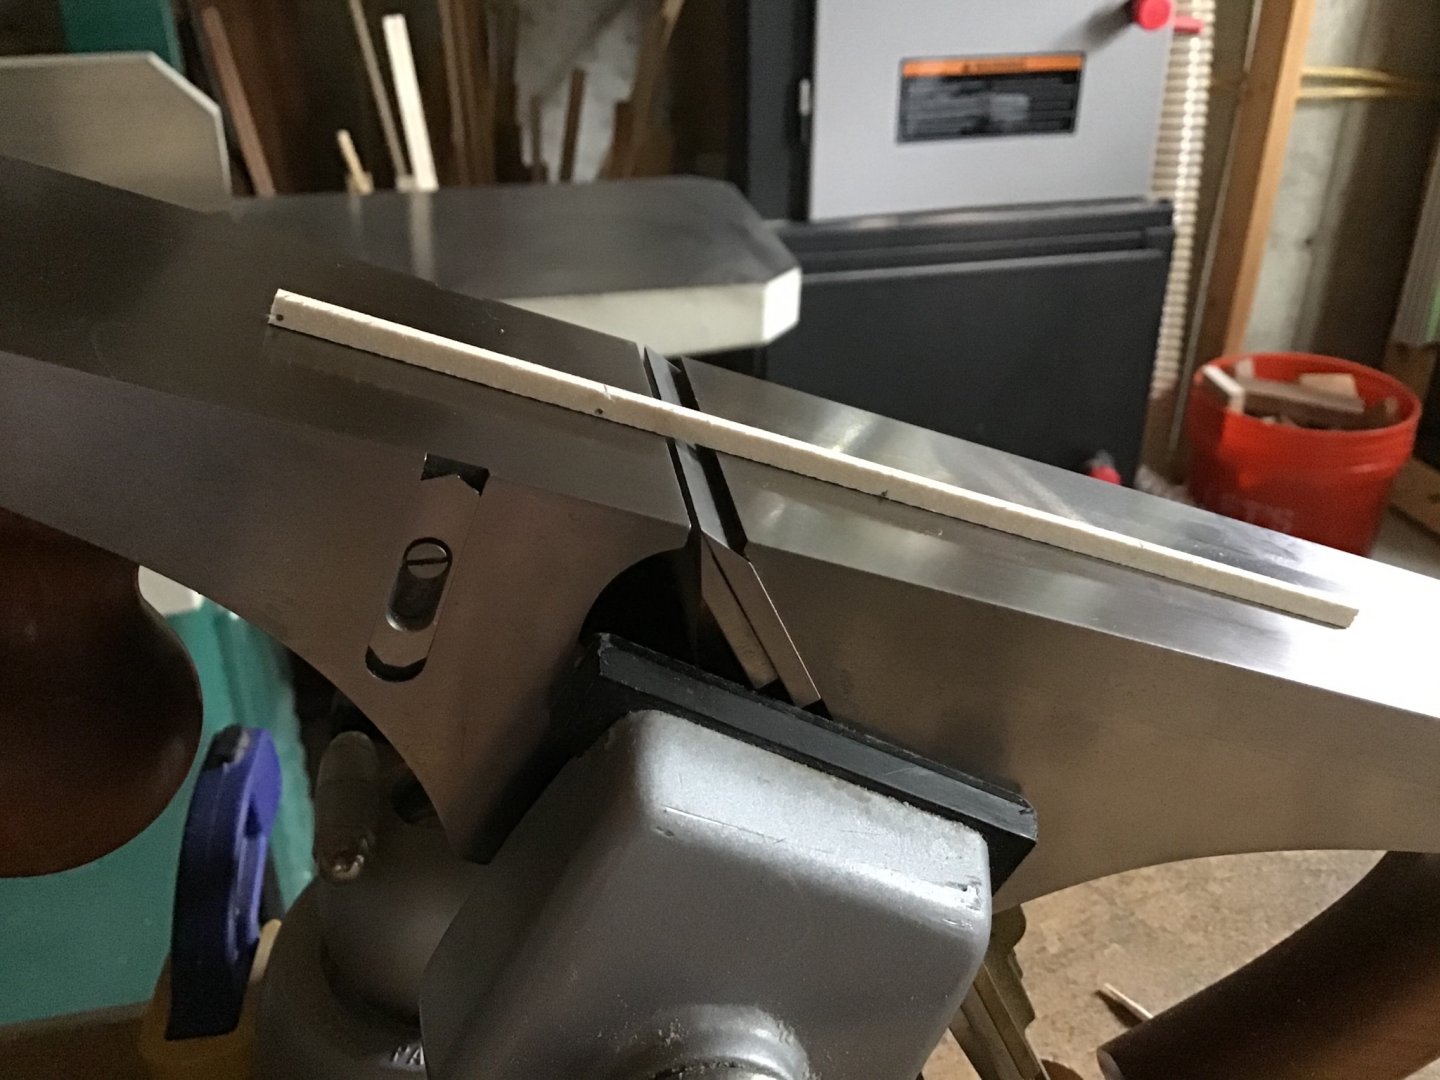
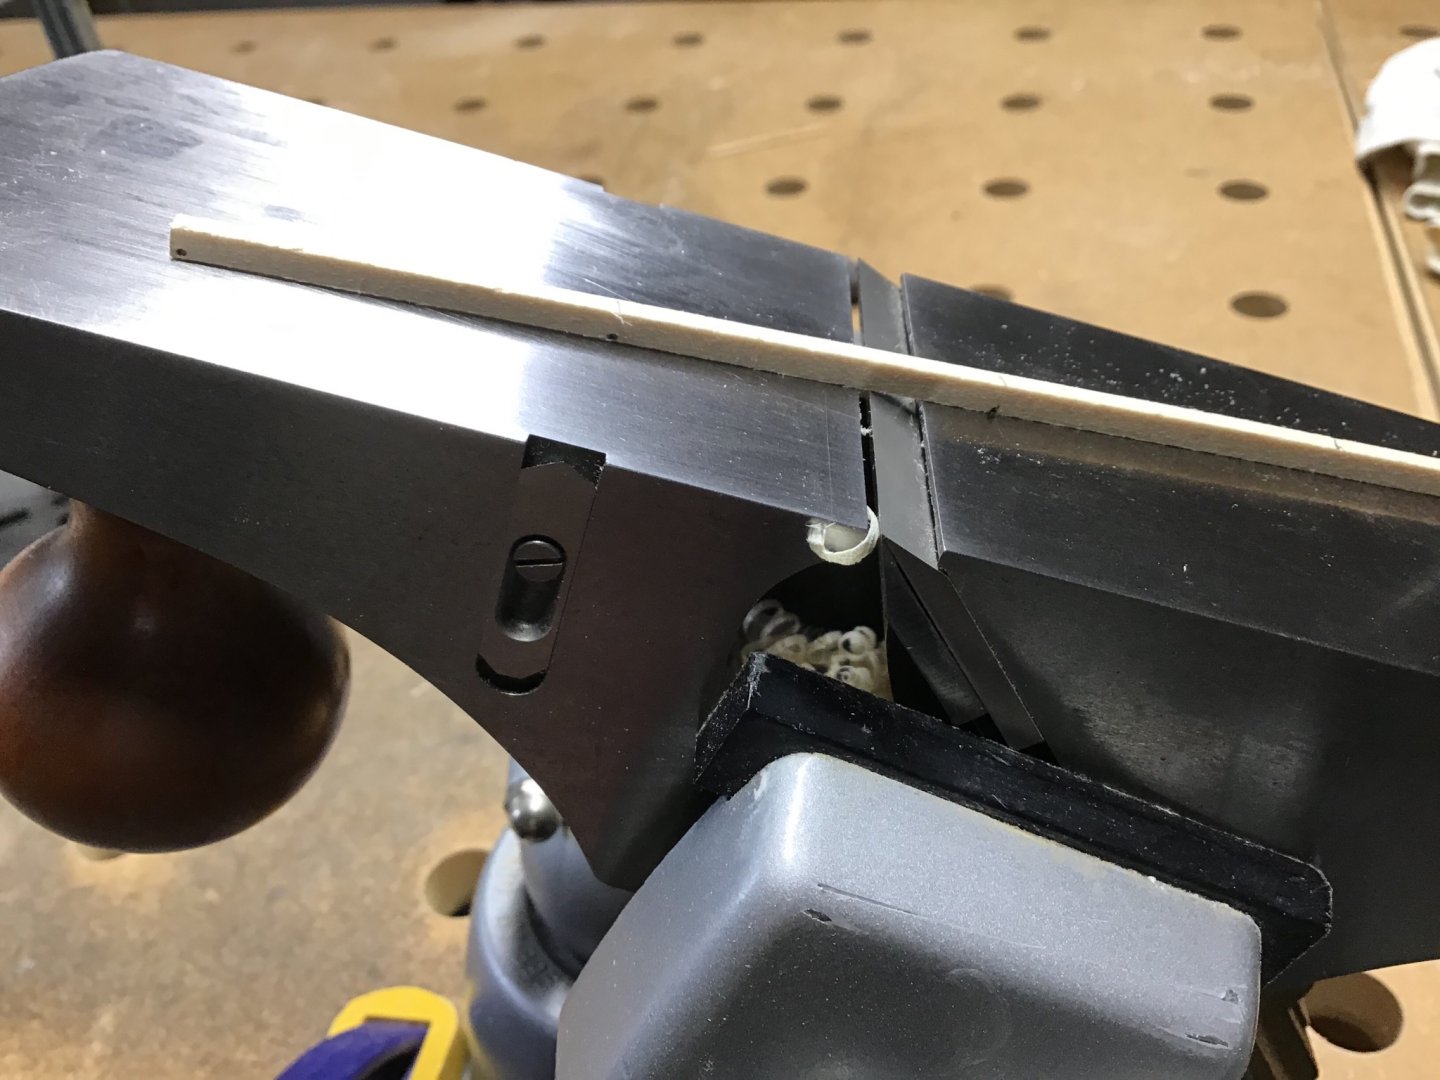
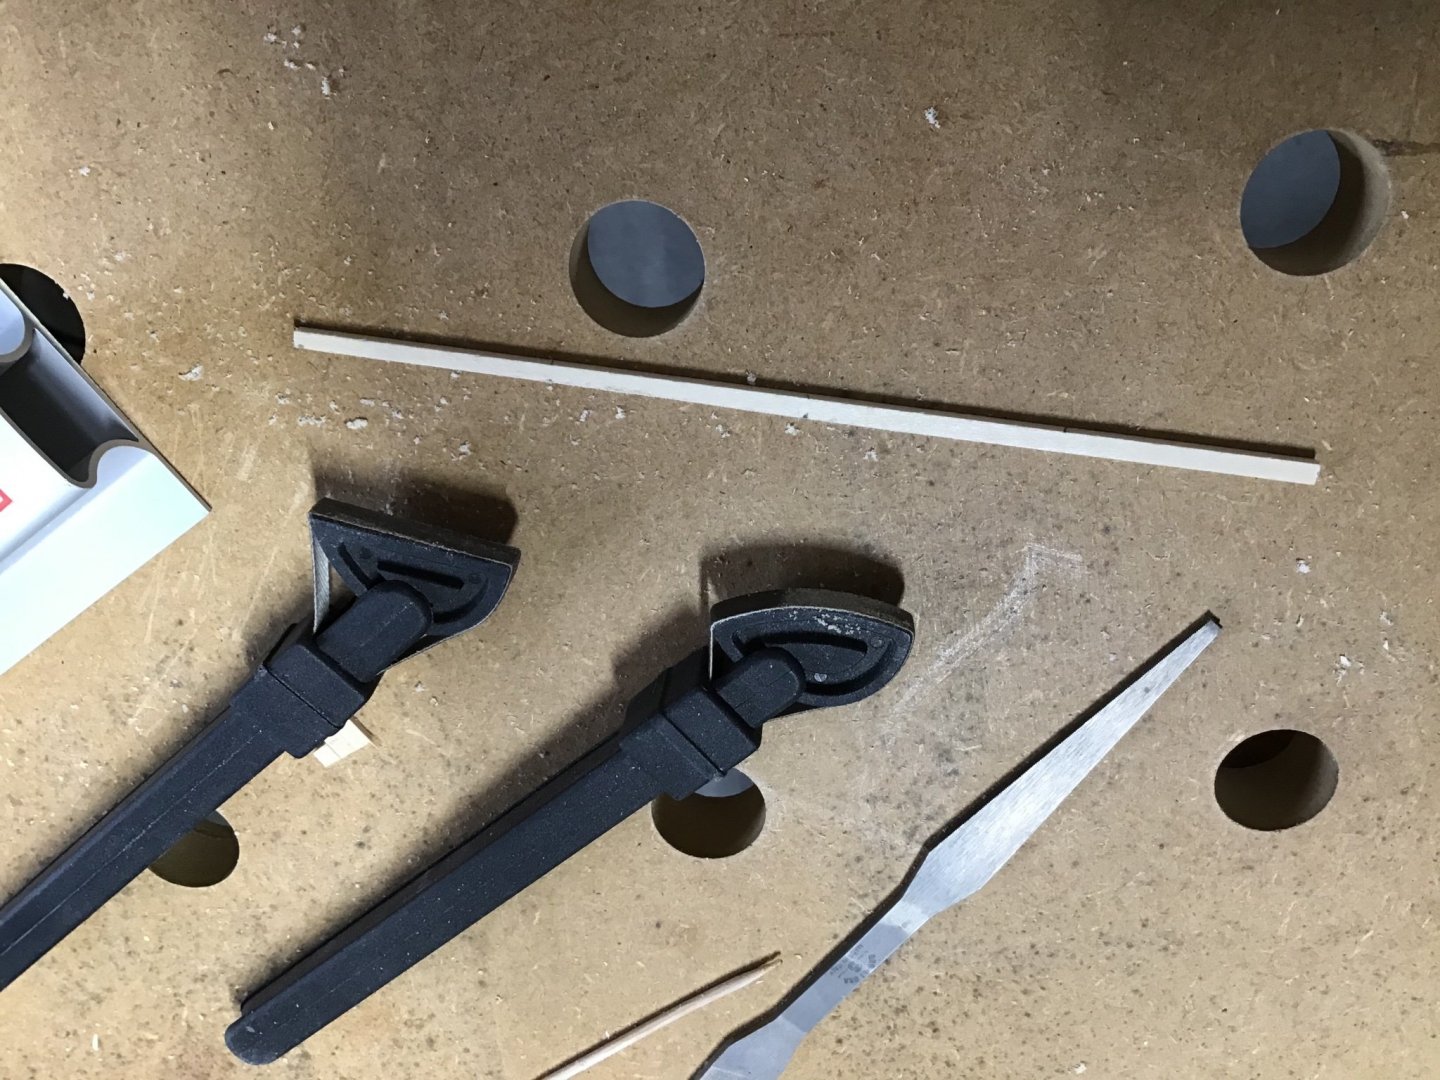
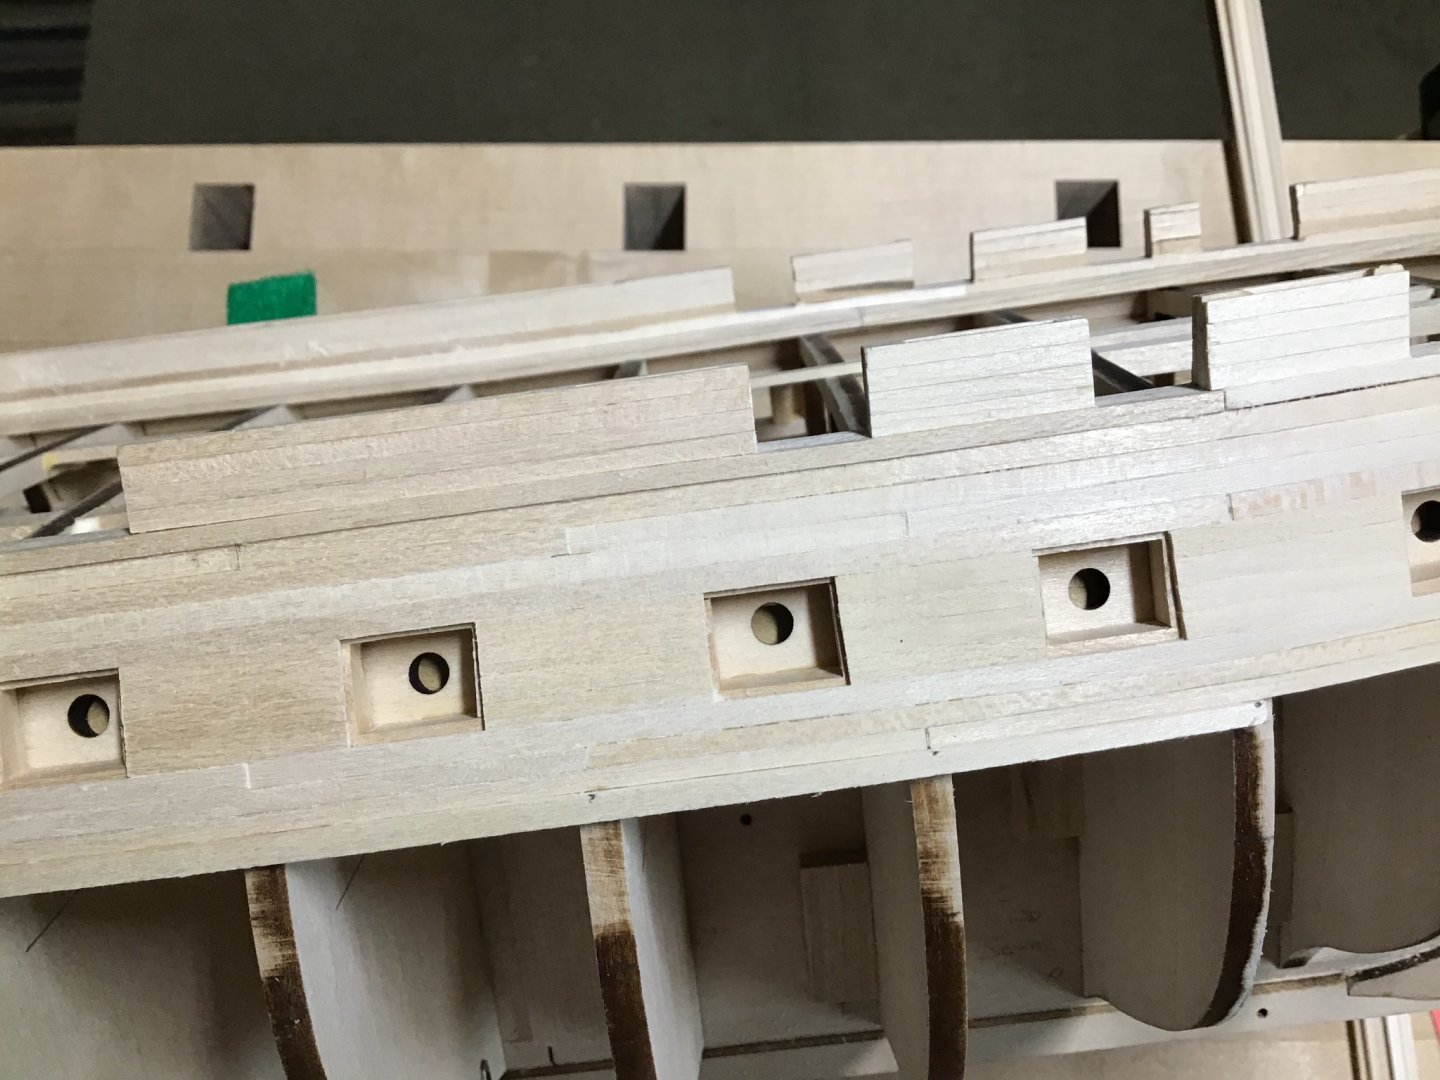
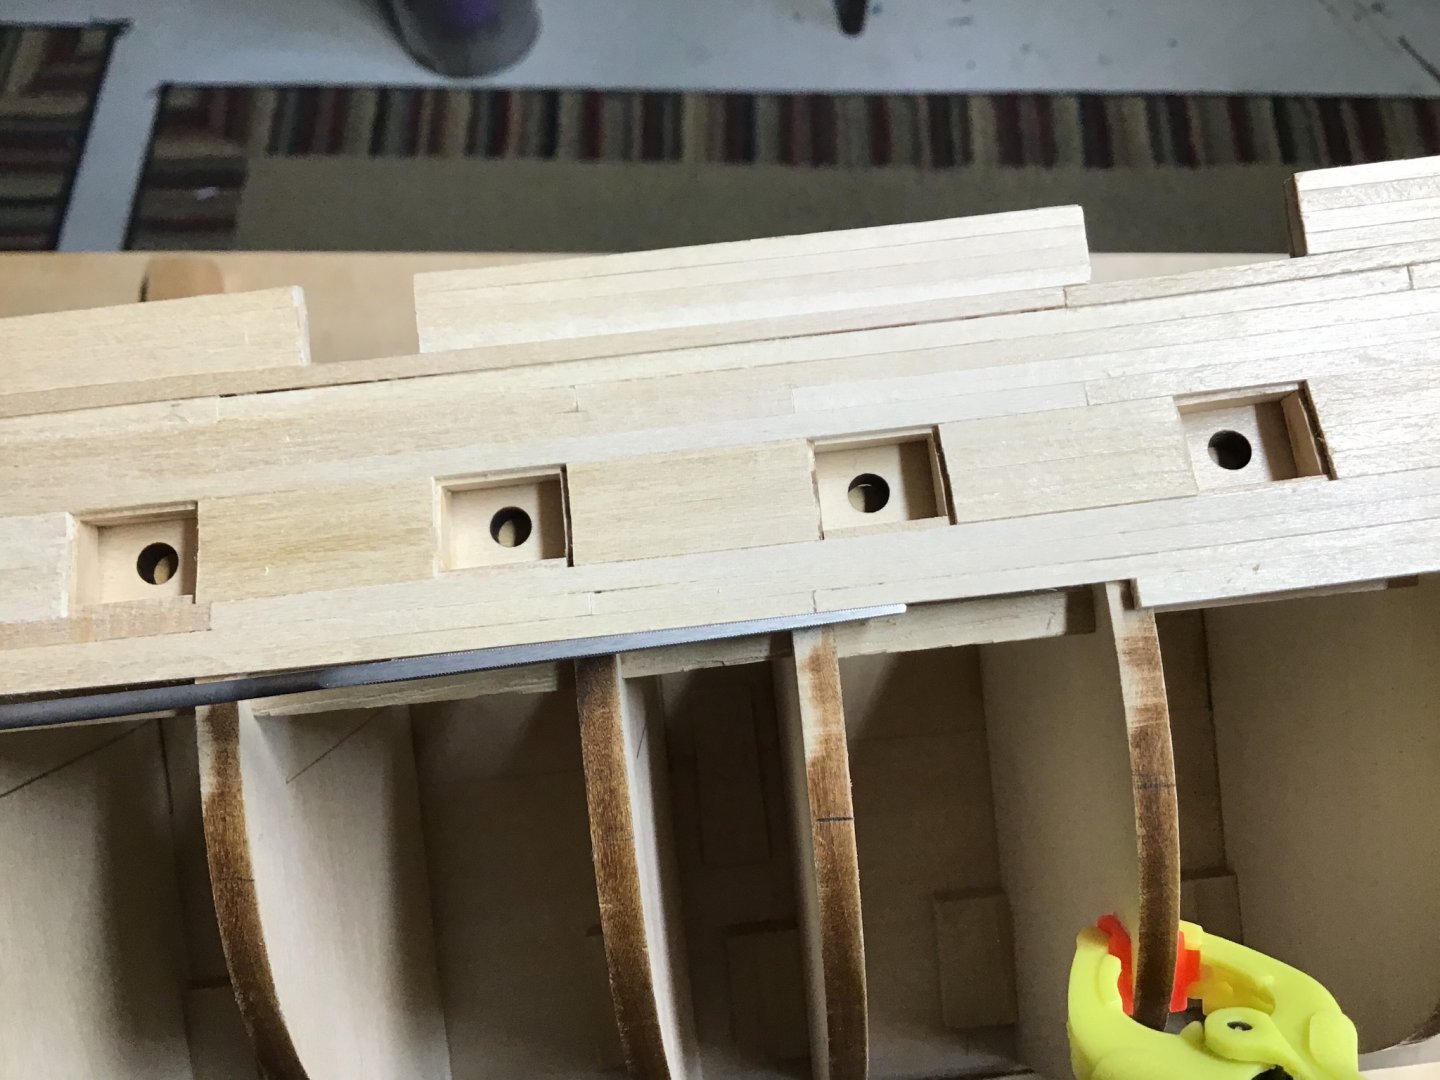
Tapering a Plank This plank runs from bulkheads H to D and is tapered in width from F @1/8” to D @ 3/32”. The first picture shows a plank, marked with dots, indicating required width, at bulkheads F, E, and D locations, using the proportional dividers (search this site for purpose and use info), on the hand plane bed, setup with a vice. Wale consist of 7 strakes so dividers set to 7. Use the plane to remove the waste material under the dots. Small shavings can easily be removed. Hold the plank in a way that maintains a right angle to the bed. Picture 2 shows the result. Picture 3 shows the tools used to cleanup and smooth taper. Test fit the plank on the model. Picture 4 shows the plank installed. Note, next plank from bulkhead D to the bow, is not tapered. Will rip stock to 3/32” wide. Completed this plank in less than 10 minutes.
-
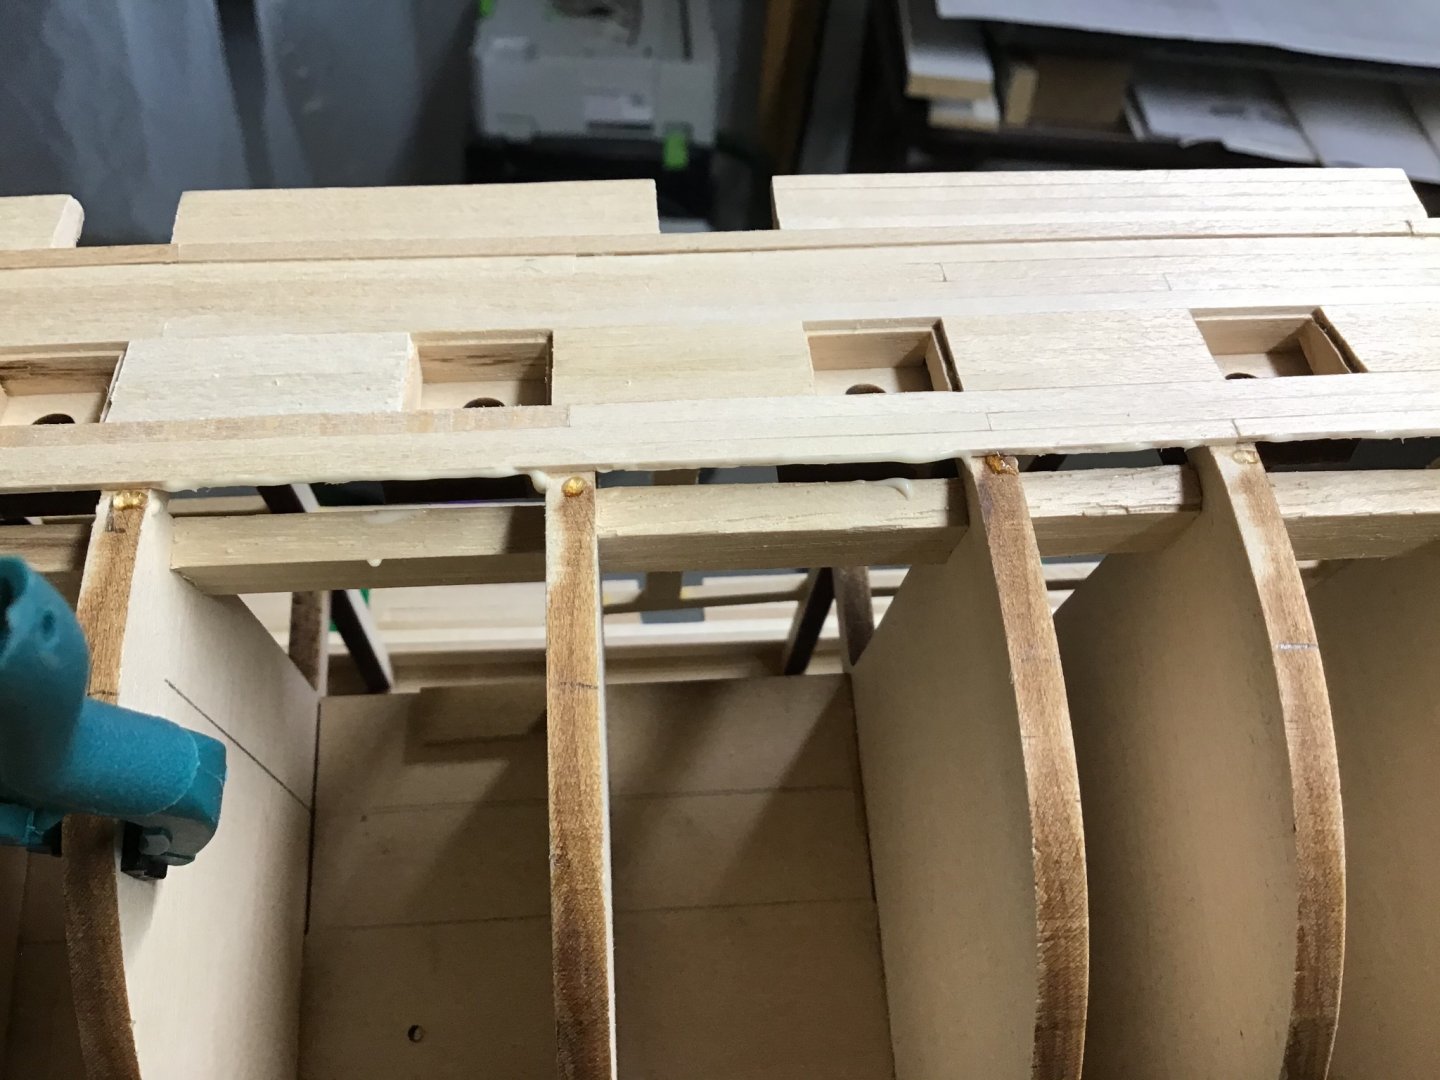
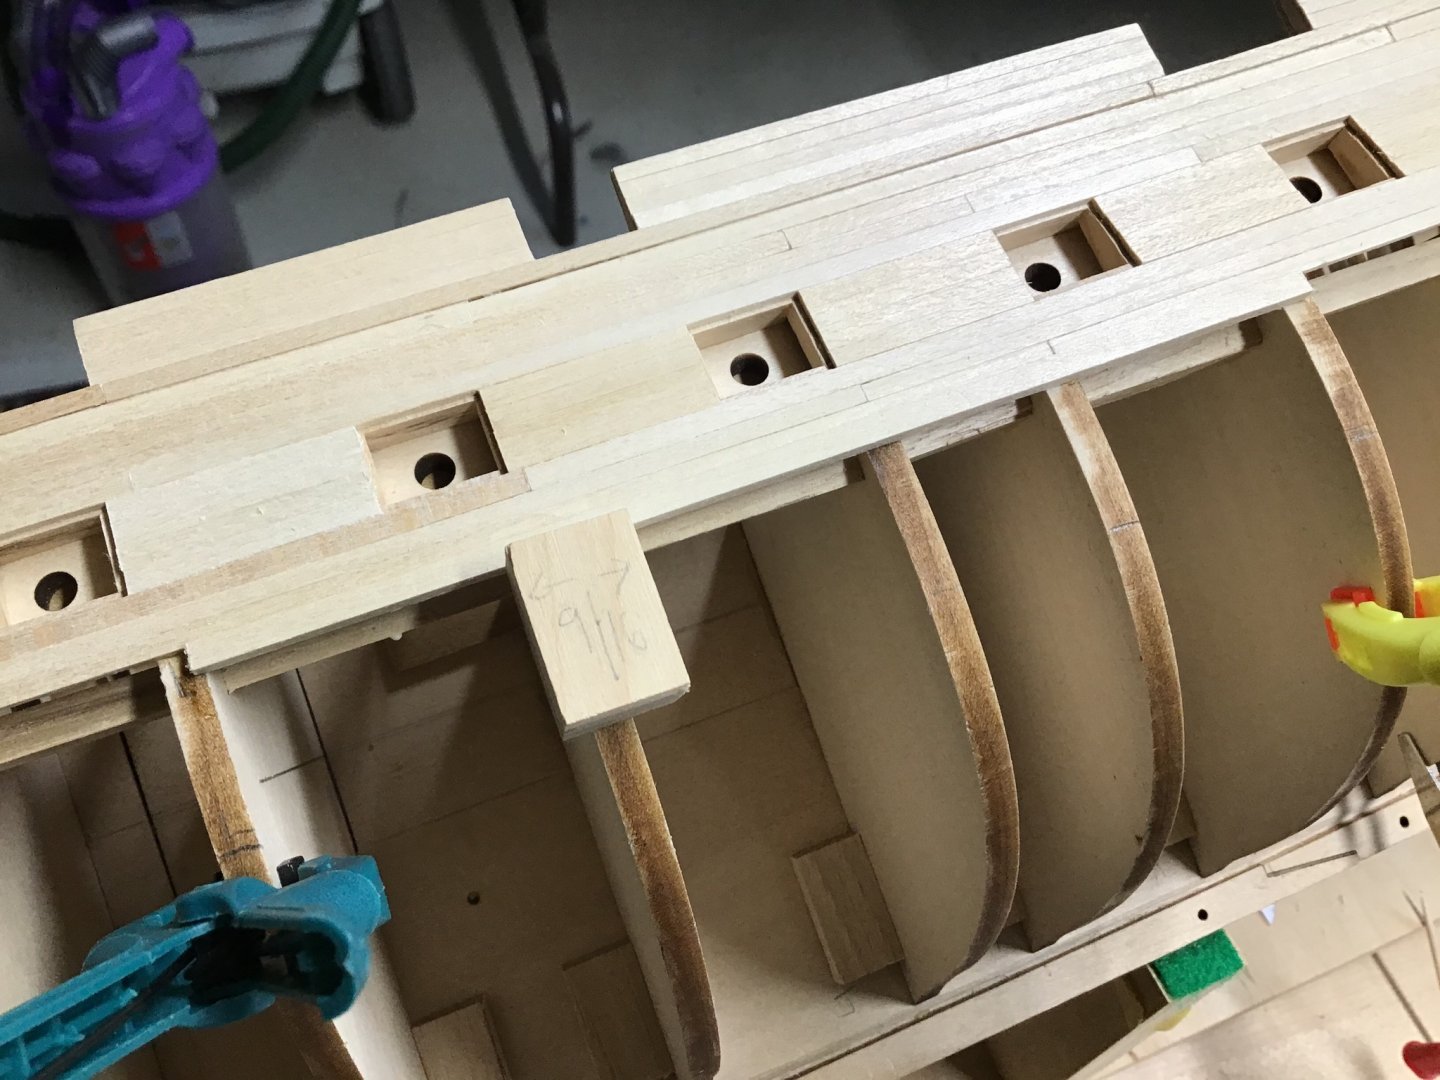
Planking the Wales - Planking Without Clamps or Pins First off mark the bulkheads with the width of the wale at that bulkhead with the plans and the dividers. Pictures 1 and 2. Compare the widths at the bulkheads and look for equivalence. In this case the width is the same from bulkheads A-D, and G-L. This means plank widths are the same amidships between bulkheads G-L - 1/8” and 3/32” from bulkhead D forward. Tapering occurs between bulkhead D and G, and from bulkhead L to the stern. Will use proportional dividers to mark the widths on planks and a hand plane held in a vise upside down to taper. Next use the pattern file to ease the back edge of the previous plank and the lower edge of butt joints. Pictures 3 and 4. Apply carpenters glue with a toothpick to the lower edge of the previous plank and a dot of fast glue to the bulkheads. Picture 5. Install plank, apply pressure up along the plank to close any gaps, and down on the bulkhead. Fast glue grabs and holds the plank while carpenters glue is slowly drying. Look for squeeze out of the carpenters glue and the fast glue. Cleanup with a toothpick. Note there shouldn’t be any gaps, and little force should be needed, if so spend more time prepping the plank for good fit. Or preping the previous strake lower edge. If needed, use the fast glue squeeze out on the bottom of the plank, on the bulkheads, to close any gaps, by pressing a block into it with upward pressure. Later the block will easily pop off with a little side to side wiggle. Picture 6.


-
When building anything, there is the plan....then the modification of that plan with “as built”.... How can anyone know with absolute 100% certainty what a wooden ship from over a hundred years ago looked like at one point in time? A modern plan of a period ship is just an approximation of the real thing based on impressions, compromise, research good or bad, taste, and bias. The state or configuration of a ship is never static. Skippers changed the rig, the location of cannon, ballast, paint color, just about anything to suit themselves. The captain of the ship is god. To sum it all up, you are the skipper, it’s your ship, feel free to do it as you like. Have fun with it....
-
Thanks Sea Hoss. Much to learn with this one.......a real challenge.