DocBlake
-
Posts
1,811 -
Joined
-
Last visited
Content Type
Profiles
Forums
Gallery
Events
Everything posted by DocBlake
-
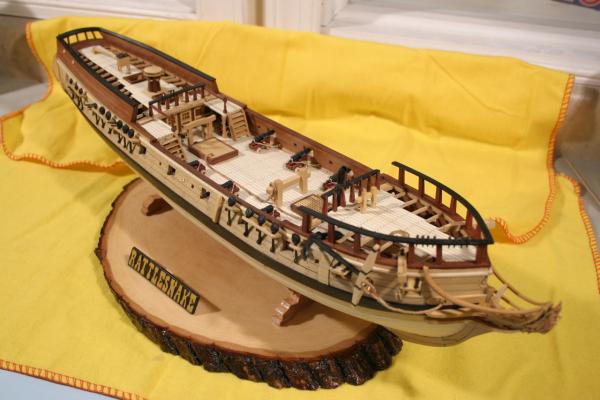
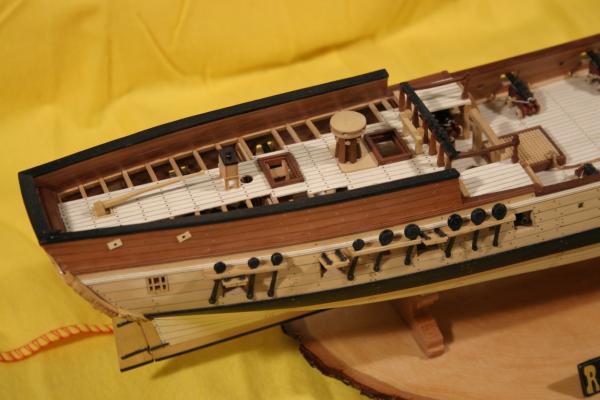
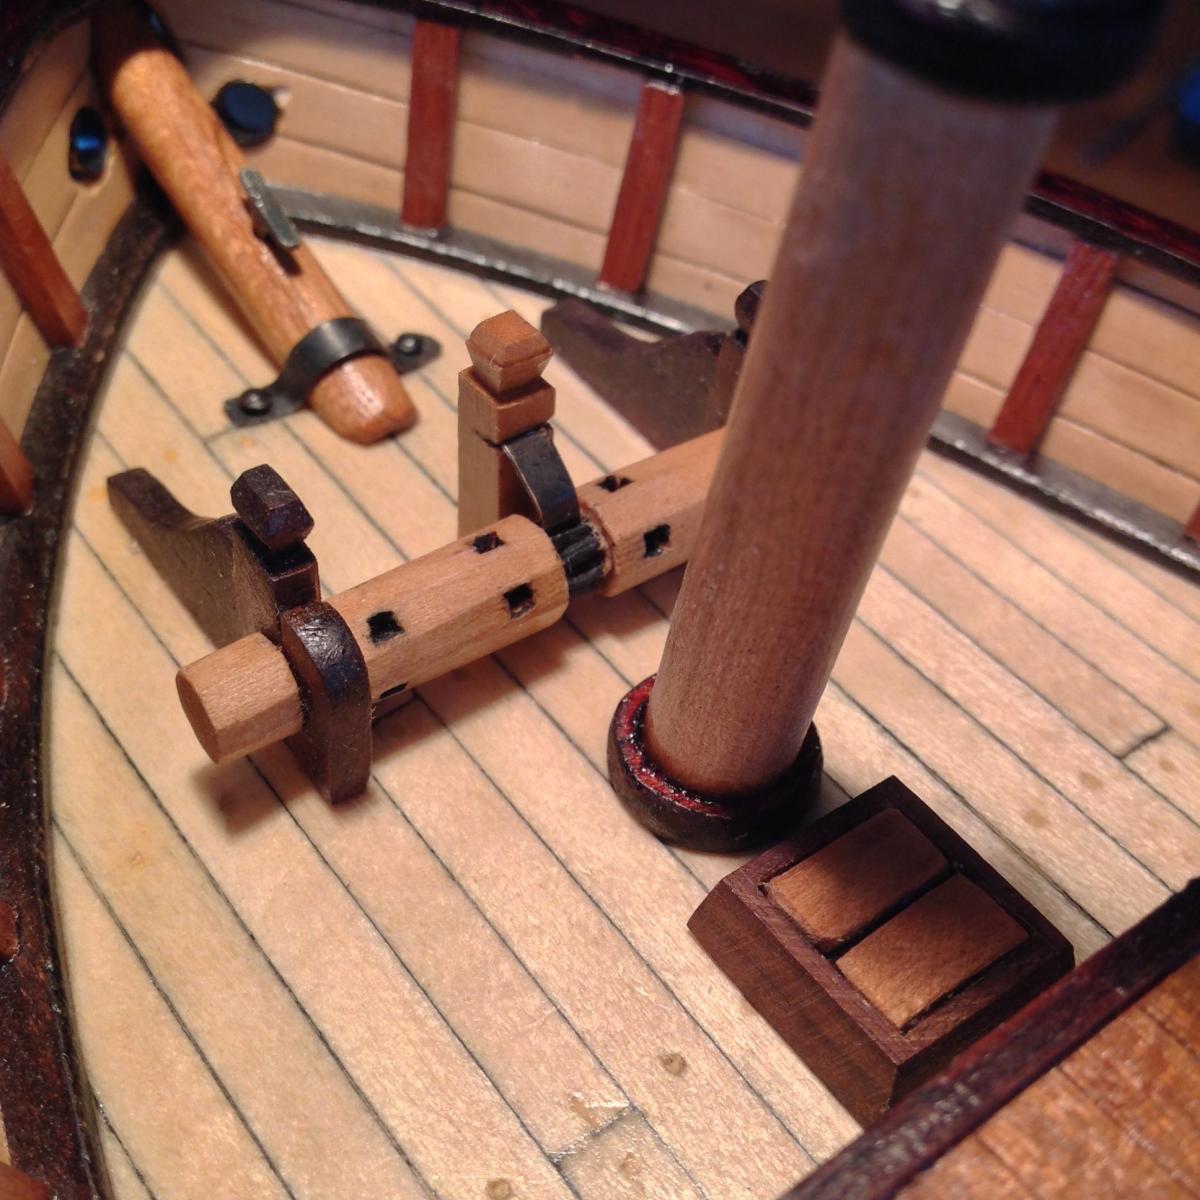
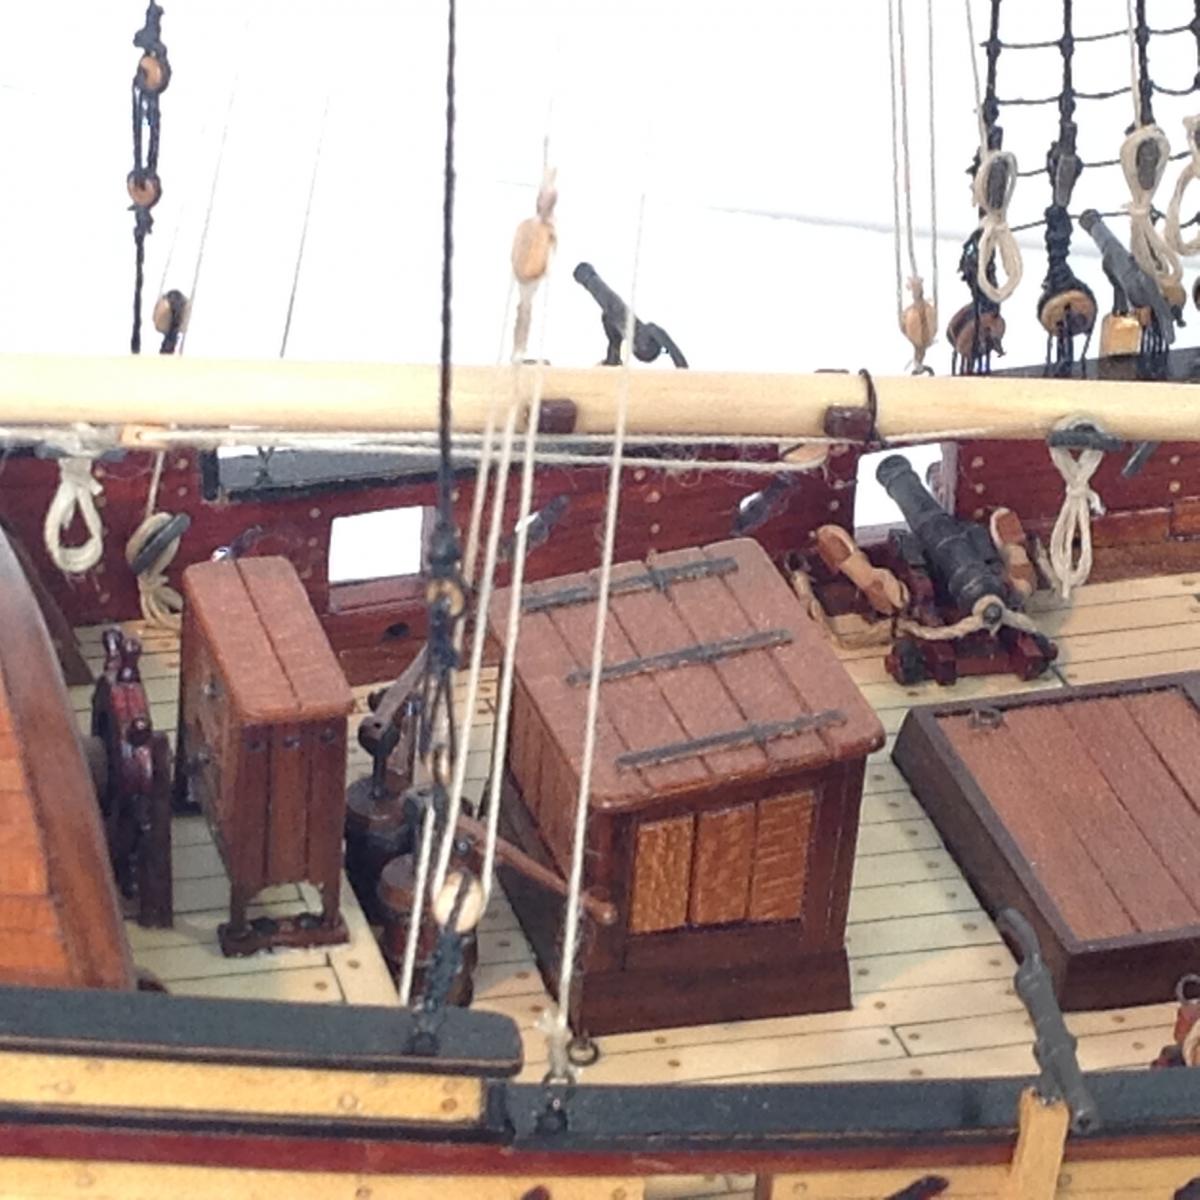
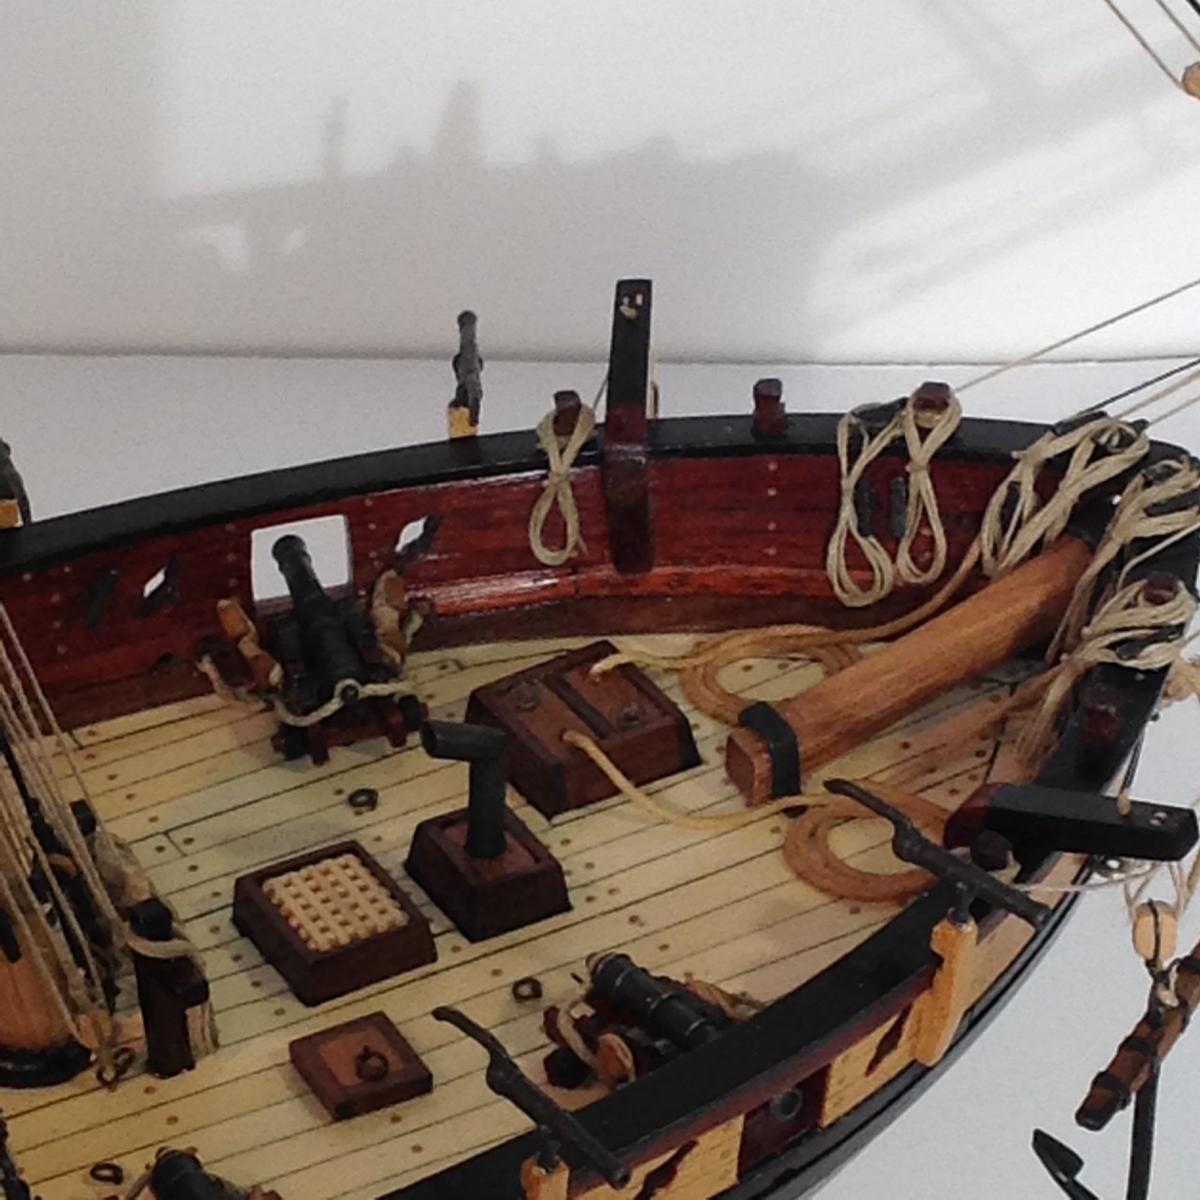
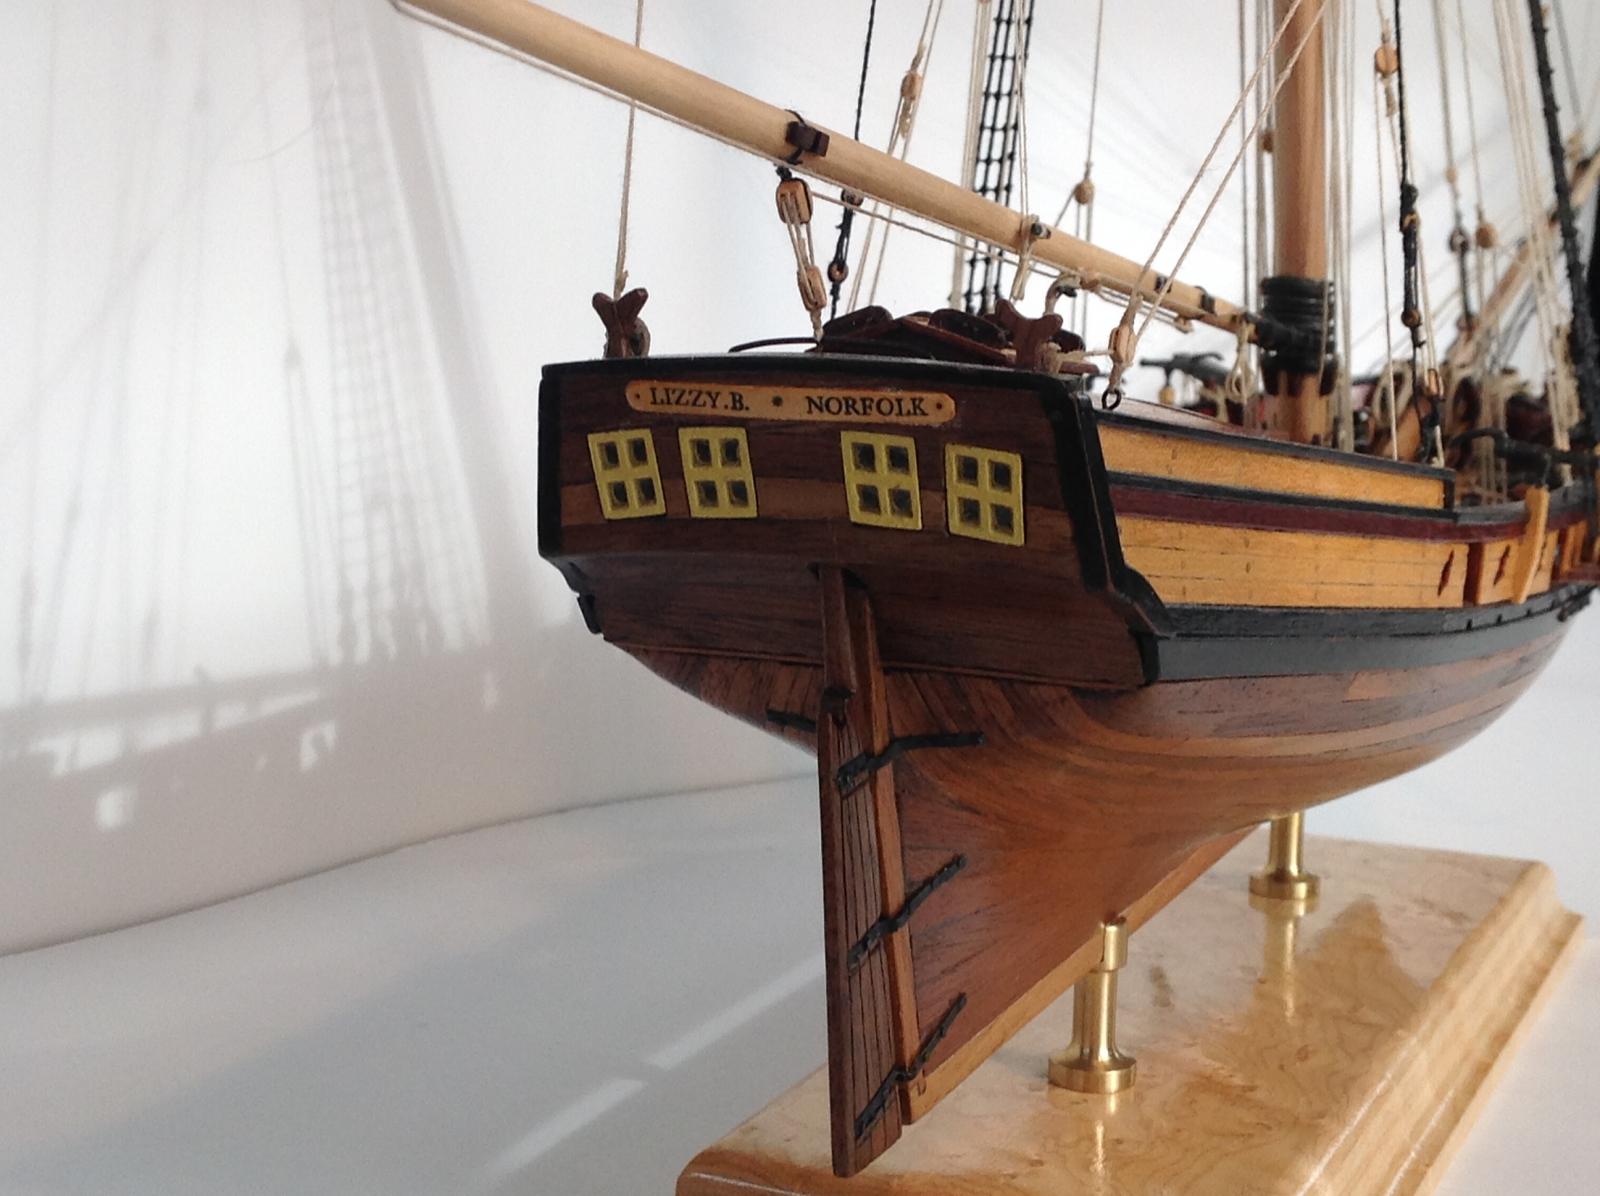
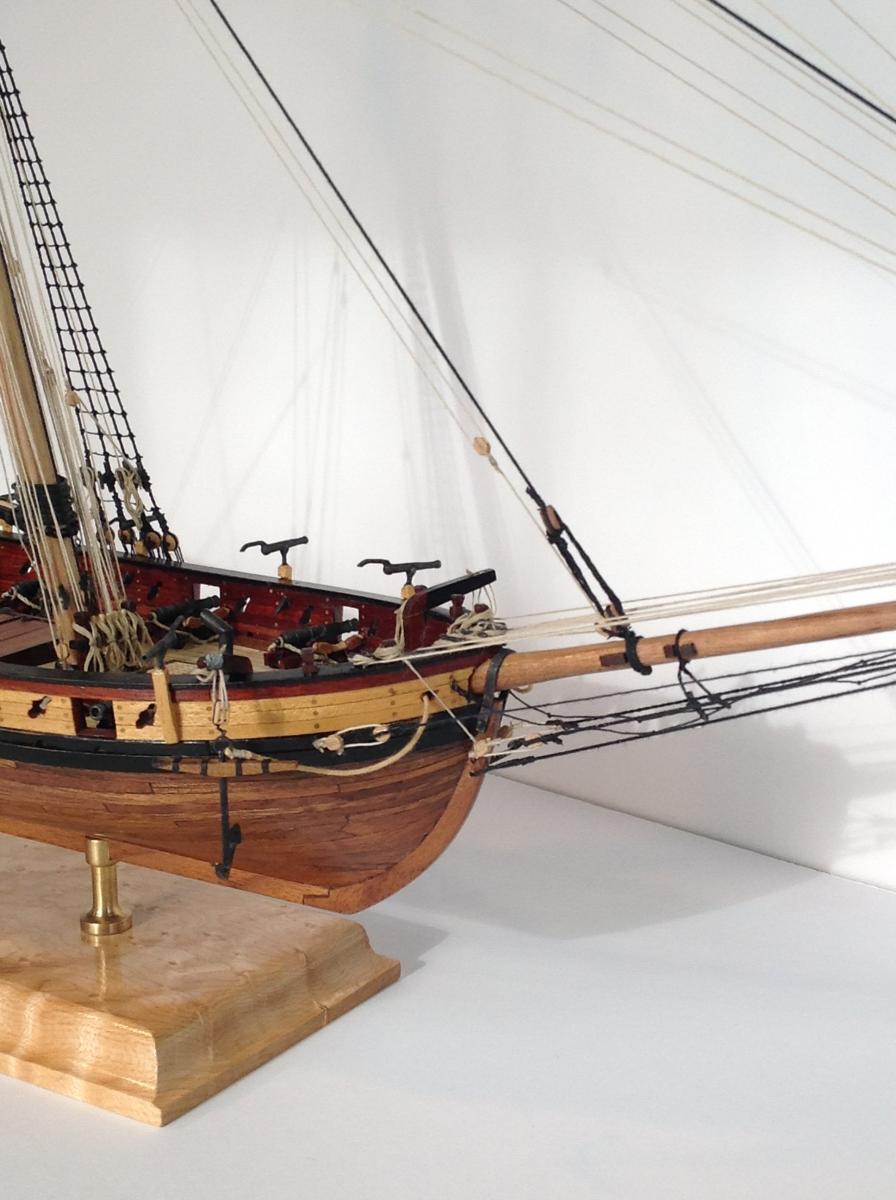
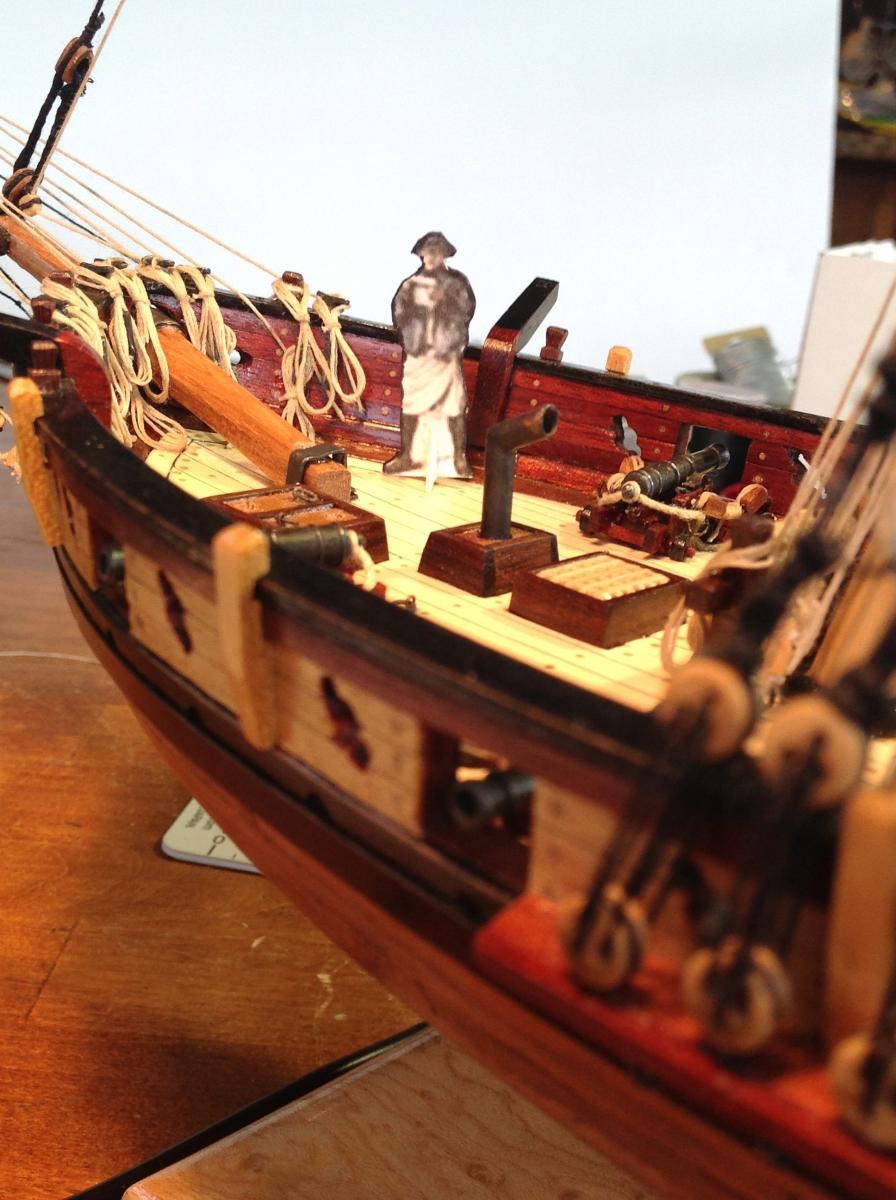
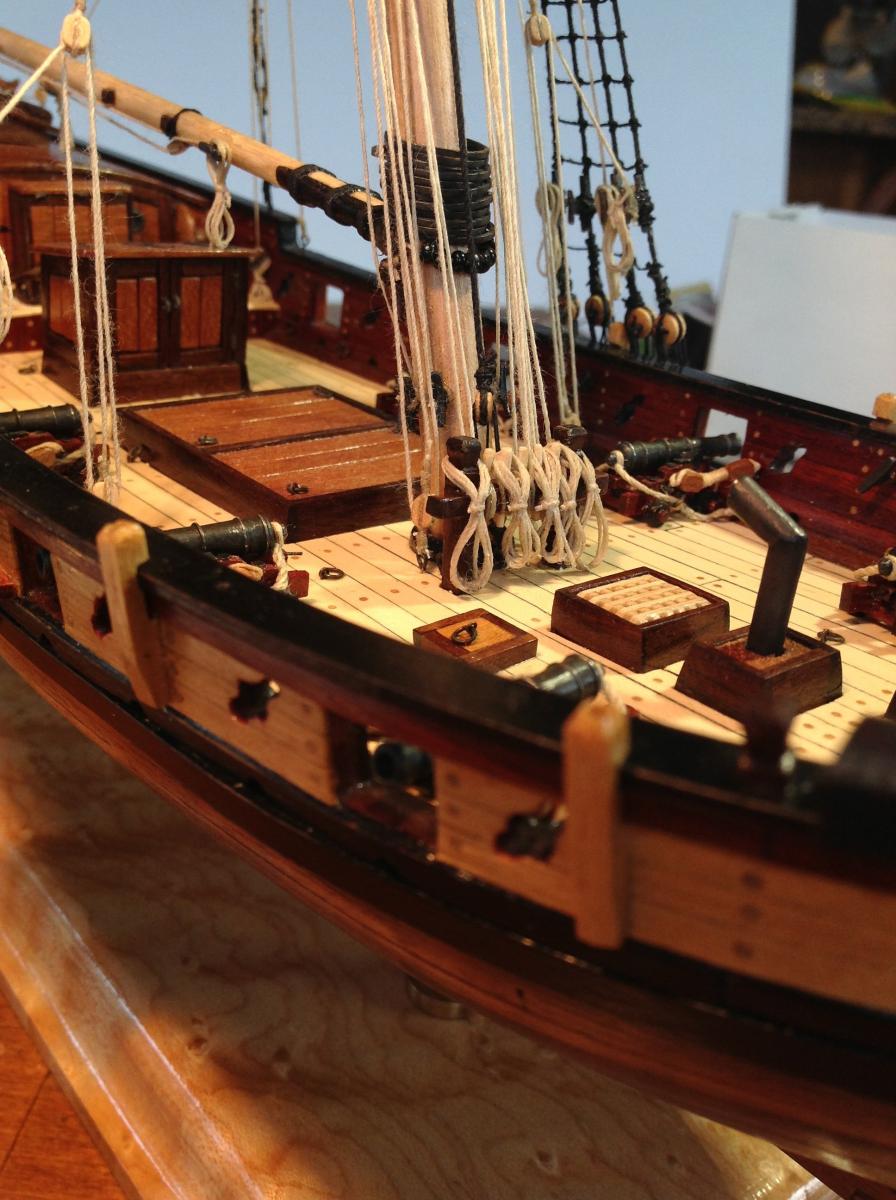
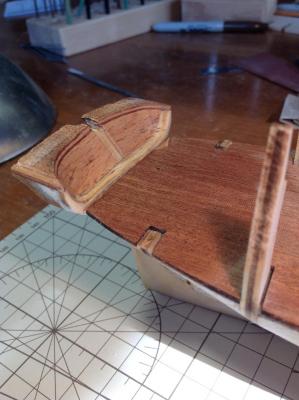
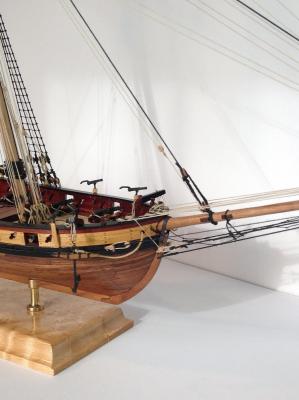
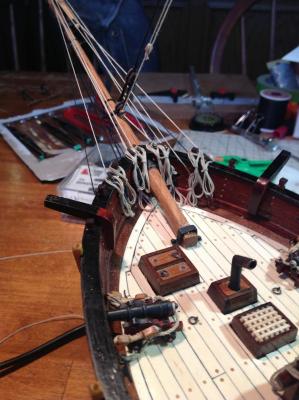
 I redid much of the bow portion of the kit. I eliminated the bit, whose only function was to support (inaccurately) the bowsprit. I fastened the sprit to the deck and held it with an iron fitting...much more accurate. I also scratch-built a windlass to weigh the anchors, and a hatch to lead the anchor line below decks. Notice the boxwood timber supporting the pawl that engages the center gear on the windlass cylinder. Almost ready to rig. BTW, the hawse pipes are actually fairly symmetrical. The photo introduces an optical illusion! Dave
- 11 replies
-
- 2
-

-
- swift
- artesania latina
- (and 1 more)
-
Thanks, jbshan! Presents a problem. I'll have to plane the plywood profile former down to 1/8" and then shim each bulkhead so they fit the new center keel thickness. Dave
-
Please post more! I have the bulkheads, profile former and wood package from the Lumberyard also. I was looking over the practicum, and according to Dr. Feldman, the profile former (central keel) is supposed to be 1/8" thick, and the boxwood stem, keel and stern post 3/16" thick. The difference allows for a 1/32" "rabbet" on each side that doesn't have to be cut. My center keel is 3/16", not 1/8". Did you have the same problem, and if so, how did you solve it? Dave
-
I favor 3,4 or 5 ,but I'd like to see them finished, also. Dave
- 456 replies
-
- 1
-
-
- finished
- bomb ketch
- (and 2 more)
-
Nice work, so far. I like your commitment to being historically accurate with the fittings such as the pumps. One thing that is alarming is the bottle and glass full of "Jack Daniels" on the box-cover art! Does this mean that the "Jack" is a required tool for this build? Dave I
- 113 replies
-
- 2
-
-
- constitution
- mamoli
- (and 1 more)
-
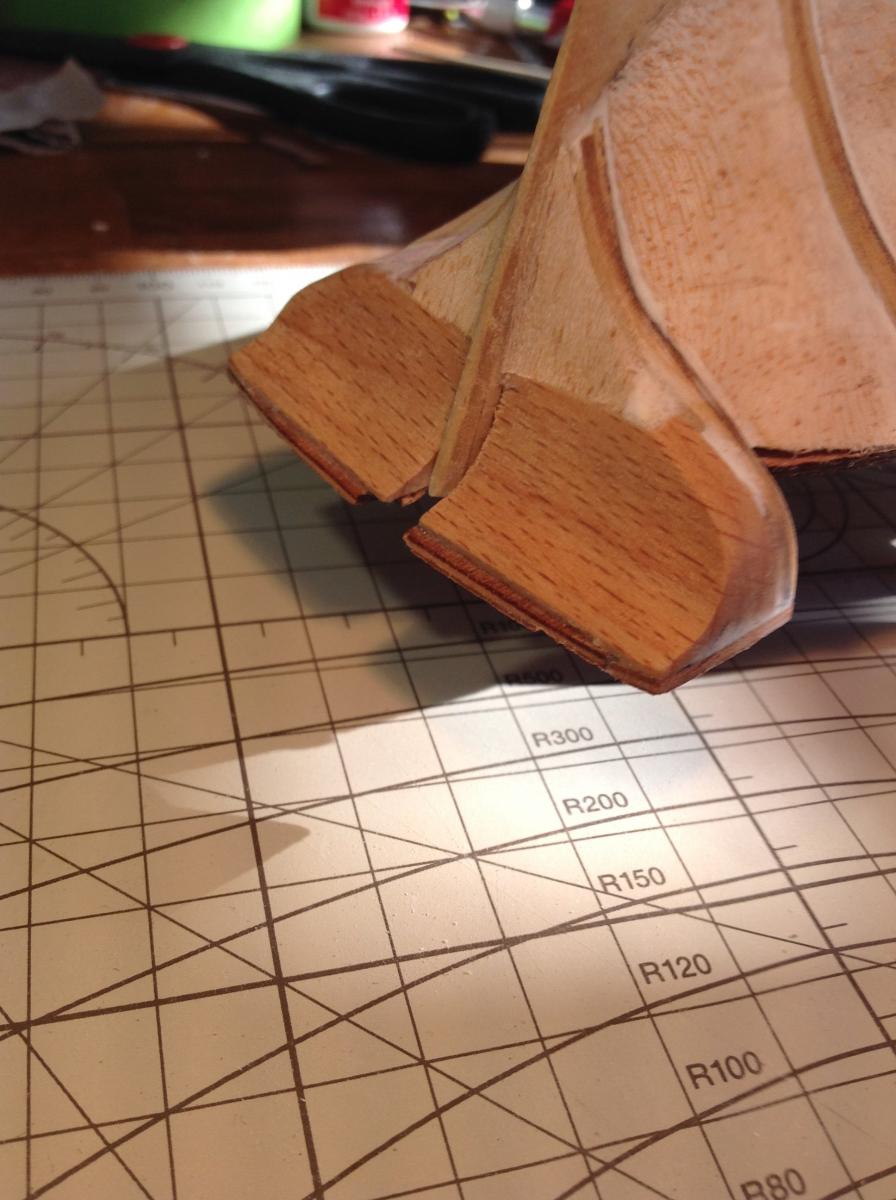
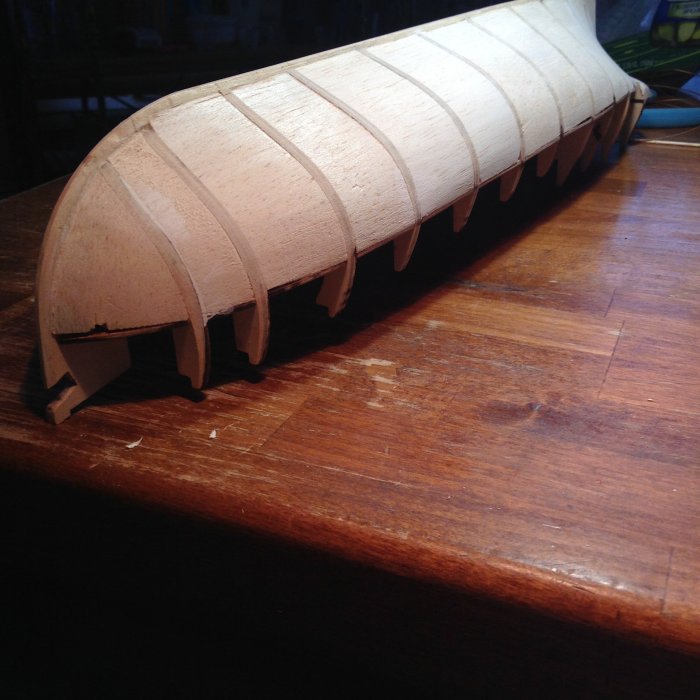
Progress so far: The bulkheads and filler have been glued in place and the hull faired. Any voids filled with wood filler. I performed the major surgery on Bulkhead 12, removing it. the counter has been formed, and the inside of the transom hollowed out. Next is to place the external transom plywood. Pictures show the counter ans the hollowed out transom wood. Jonathan: Did you do anything to the hollowed out area. I'd like to panel it, or fit an upholstered bench across the span, as might have been done in the real vessel. Dave


-
Does anyone know of masking and rigging plans for the "Oliver Cromwell"? The Hahn plans at the Lumberyard don't include them. Dave
-
I own an oscillating spindle sander and it works well, even at these scales. Originally purchased for furniture making. Buy the cheapest you can find. The extra cost of a top of the line unit is not justified by improved performance. Dave
-
Hi Brian, and thanks. The line is Amati line. The junk in the AVS kit is worthless. I used Syren line for my battle station, and ultimately that's what I'll use going forward. Expensive, but looks great. Unless I buy a Byrnes rope walk....... Dave
- 31 replies
-
- 1
-
-
- armed virginia sloop
- model shipways
- (and 1 more)
-
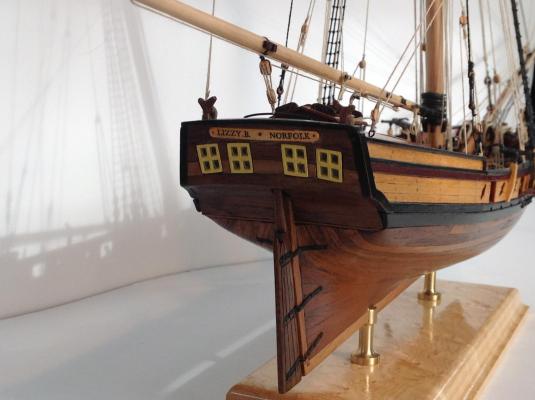
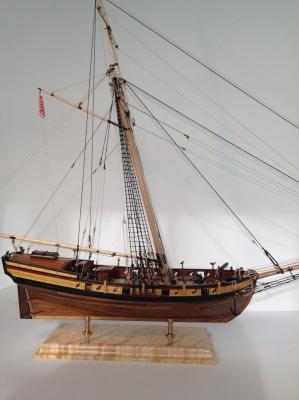
I'm finally finished with my AVS! Dave


- 31 replies
-
- 14
-
-
- armed virginia sloop
- model shipways
- (and 1 more)
-
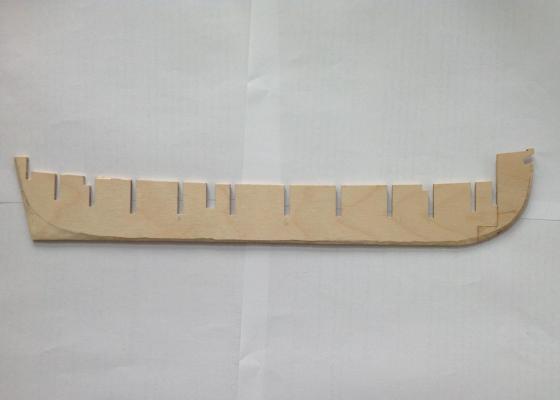
I lofted the bearding line and the rabbet, cut off the stem, the keel and the stern post. I then cut the rabbbet. Next is gluing up the bulkheads. Every one is loose and will have to be shimmed, and most fall too far into the slot on the center keel and have to be shimmed there also. The only good news is that the center keel and bulkheads are all plywood, and are uinlikely to break. Fairing may be an issue, though. Dave
-
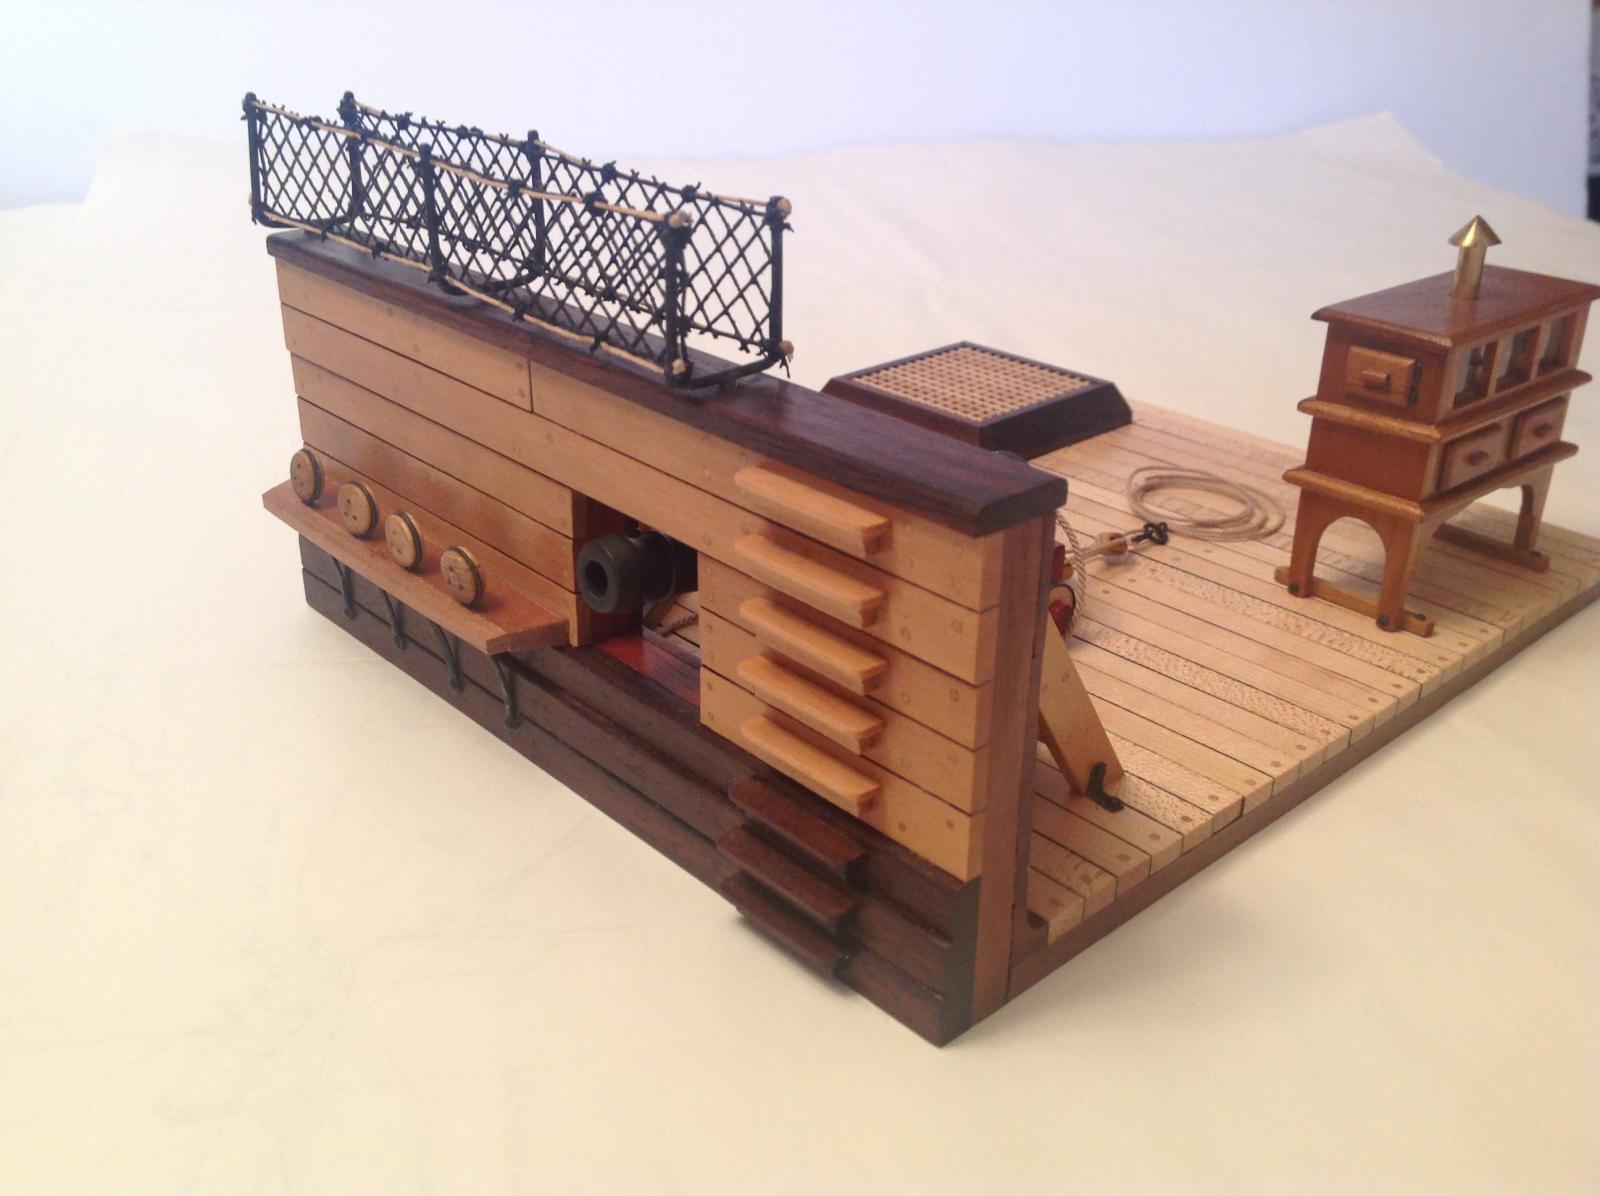
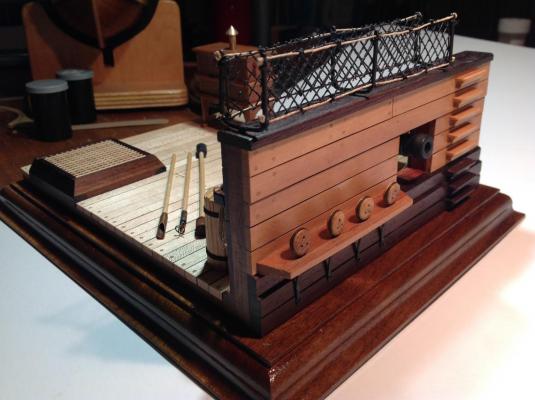
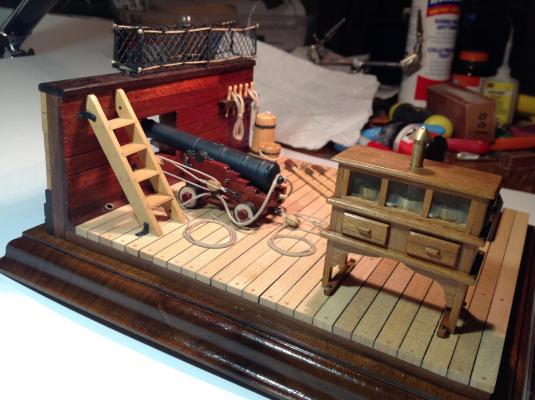
Finally done! Next up is a small case to protect the battle station


-
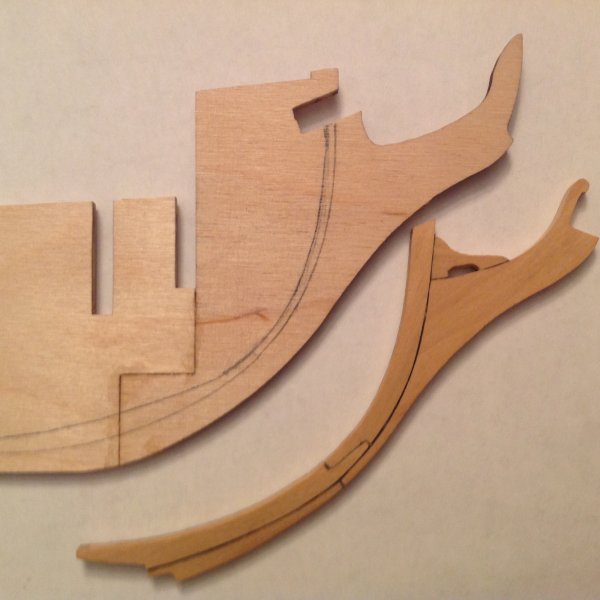
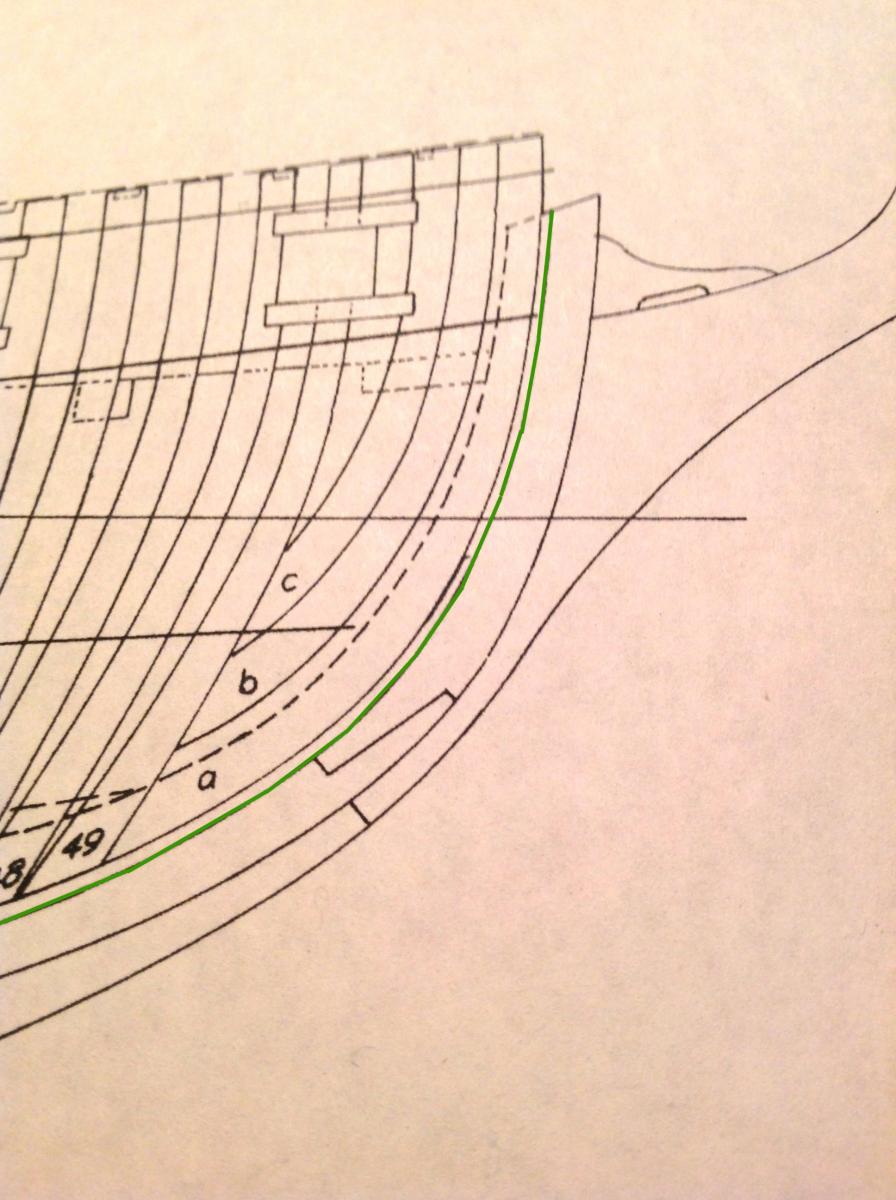
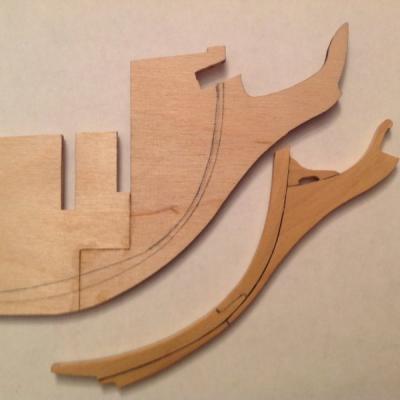
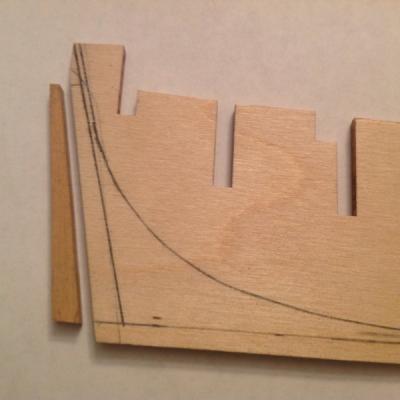
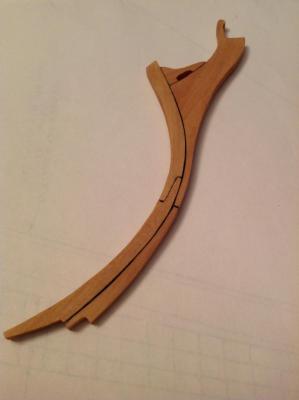
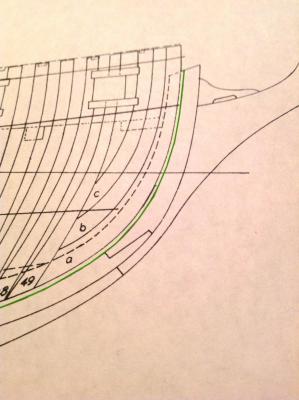
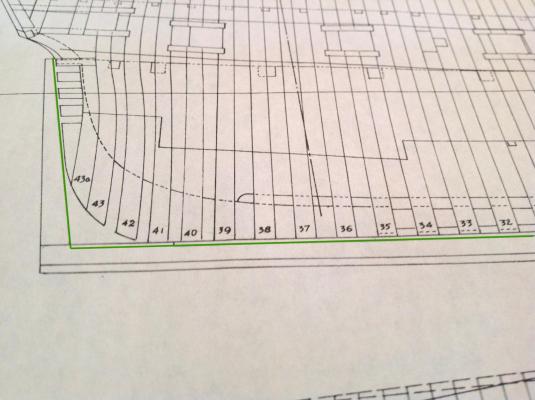
I've been studying the practicum and the Hahn plans, and I finally couldn't stand it any more. I had to cut some wood! So I built the new stem and cut out the stern post. The center keel contains the stem, true keel and stern post. When glued up, these will be removed by cutting along the rabbet line. The two photos show the rabbet line. The practicum calls for transferring the bearding line from th Hahn plans to the center keel. Where is the bearding line on the Hahn plans? I'm stumped! Dave
-
I use my Apple I-pad (and an older model at that!). This shot is straight from the I-pad. No enhancements, macro lenses etc. Dave
-
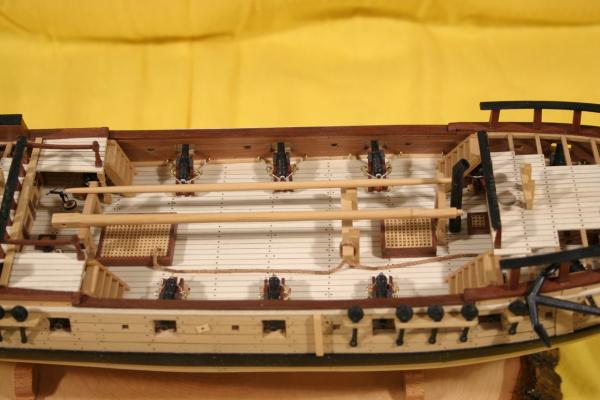
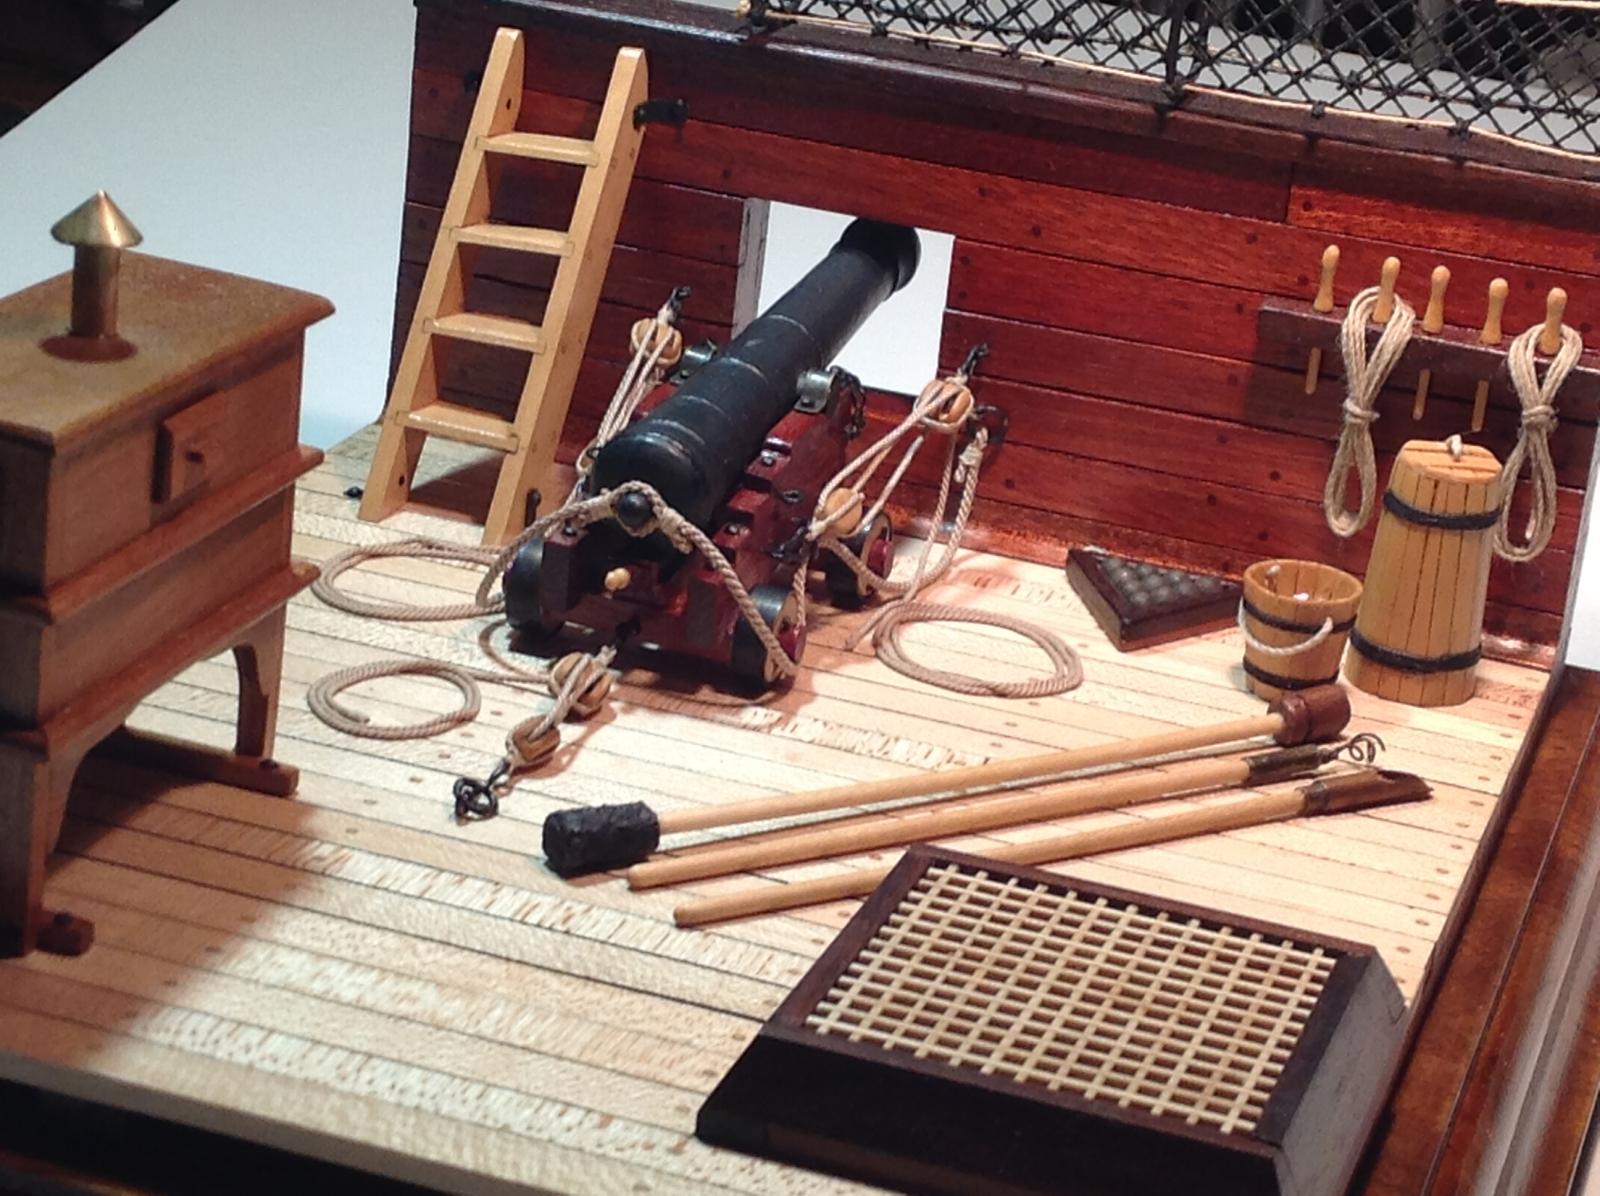
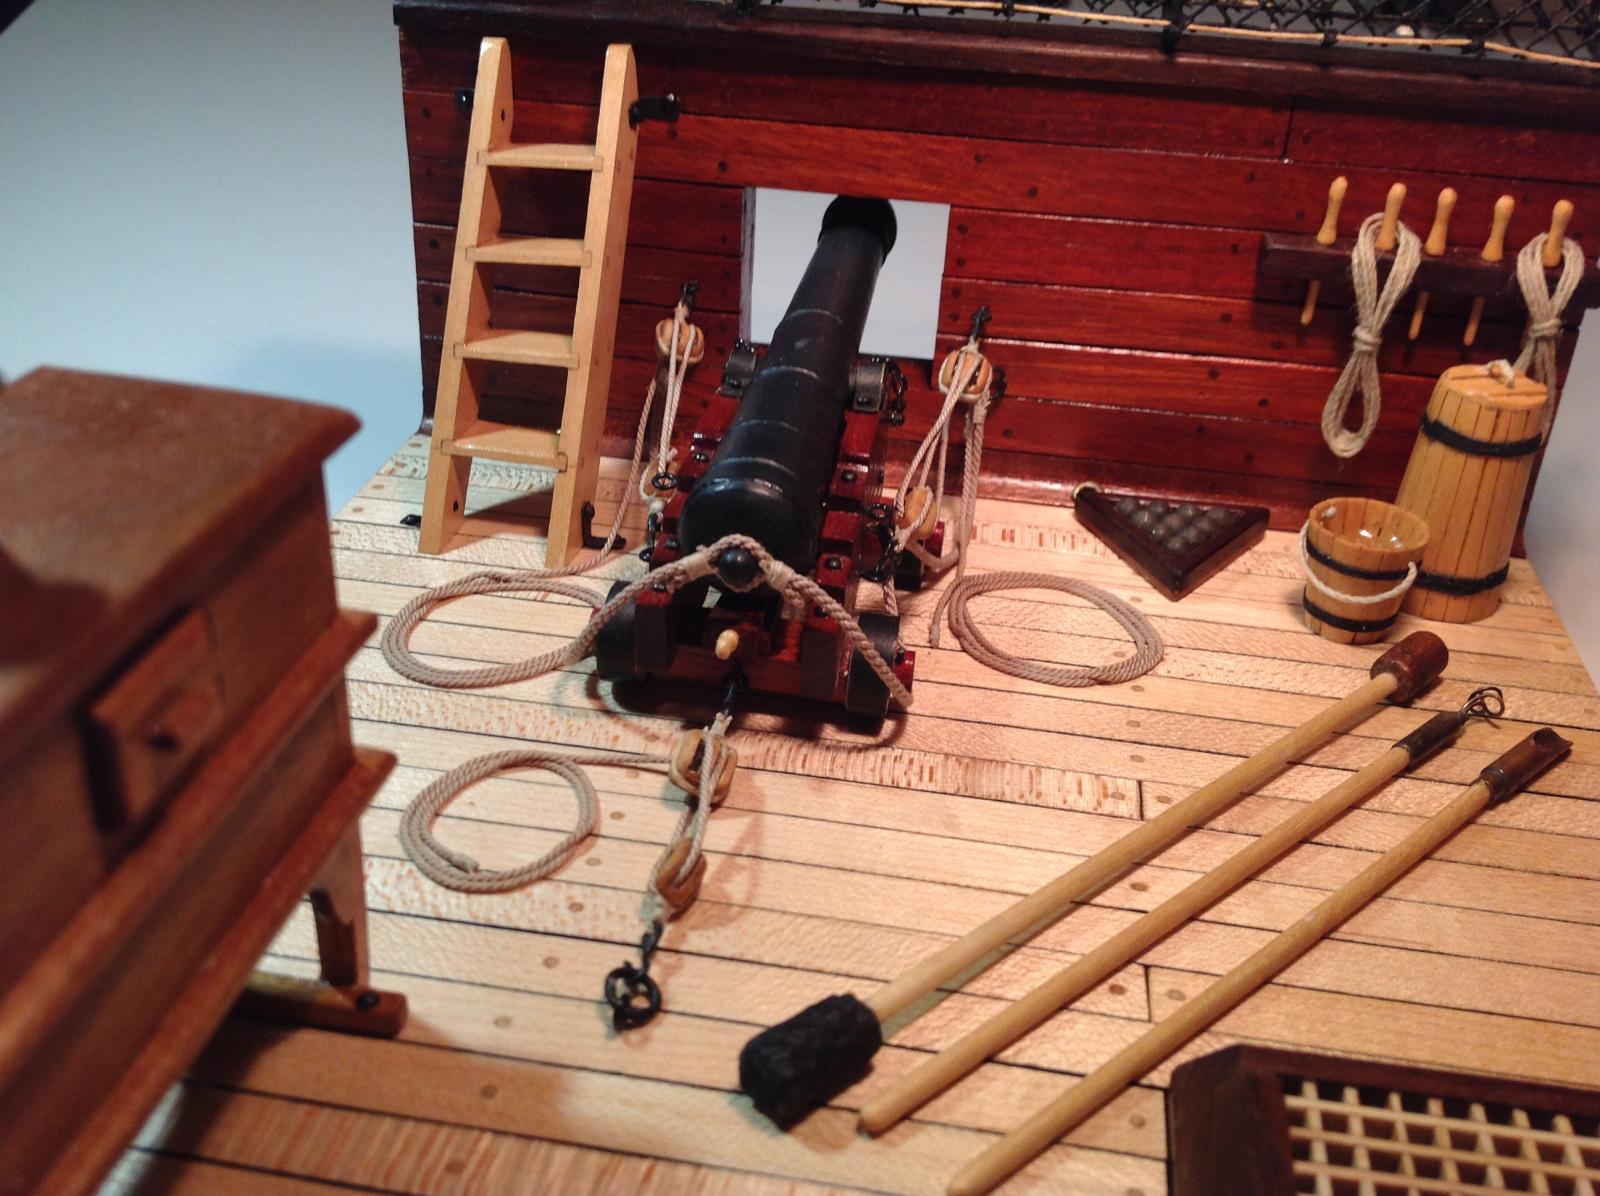
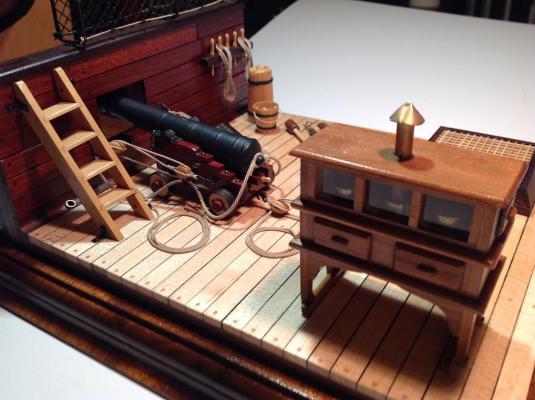
Great job on the gun deck section.
-
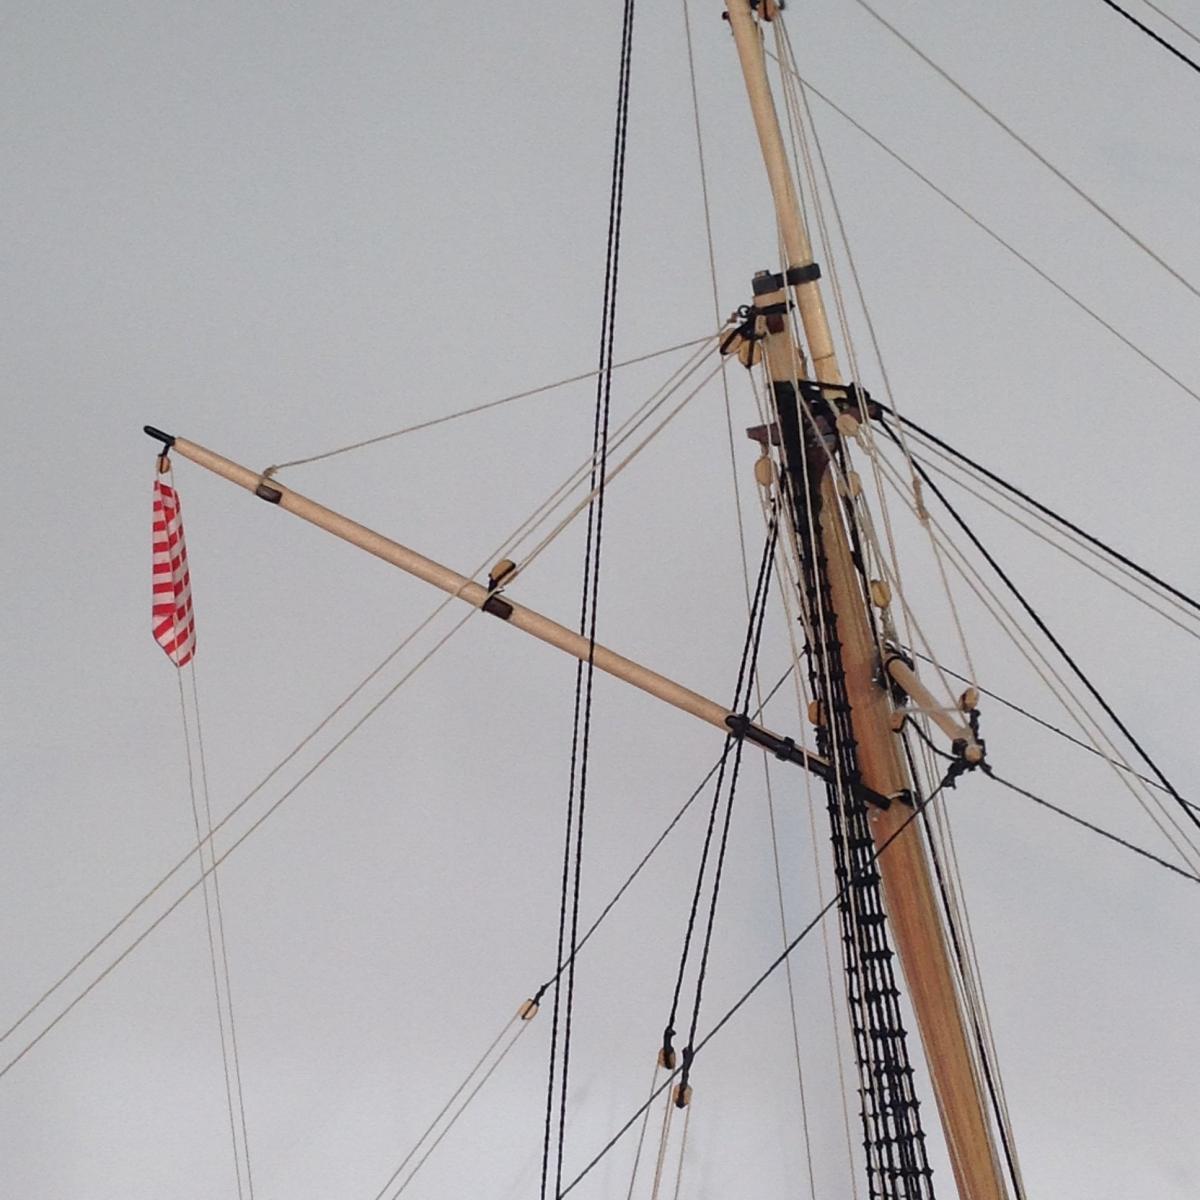
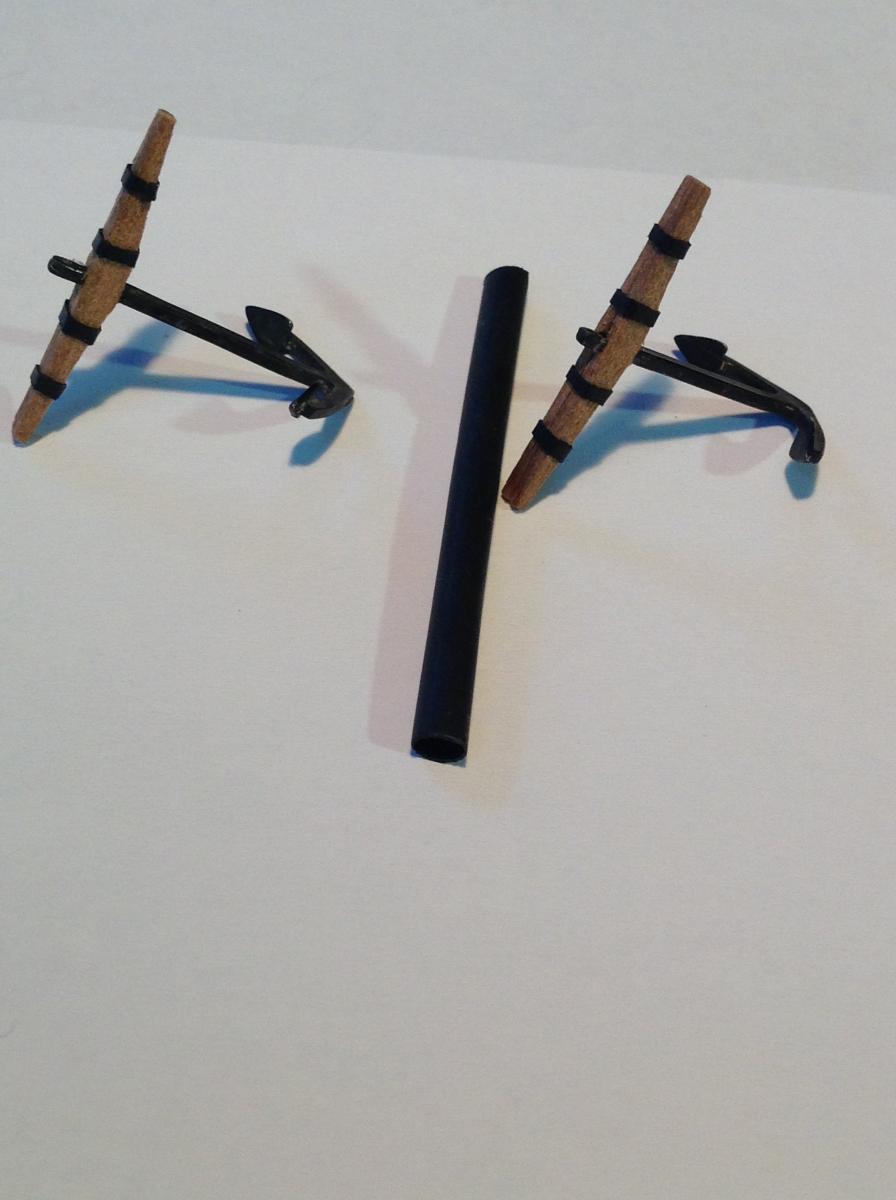
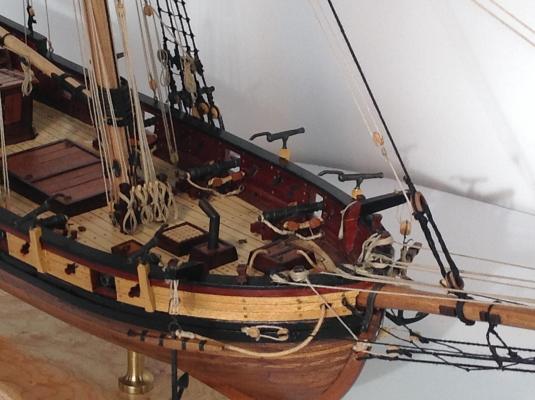
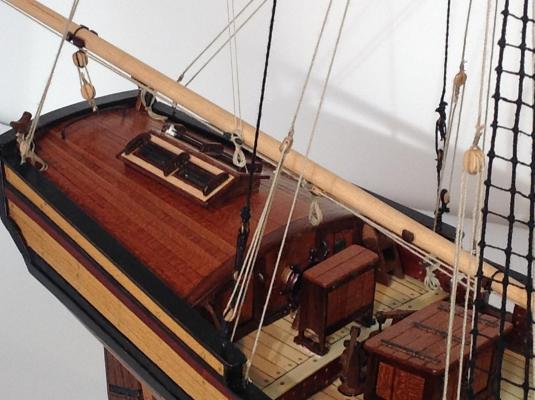
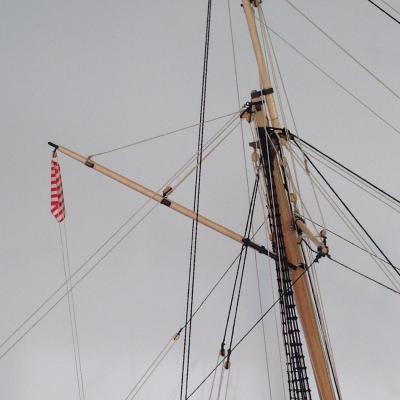
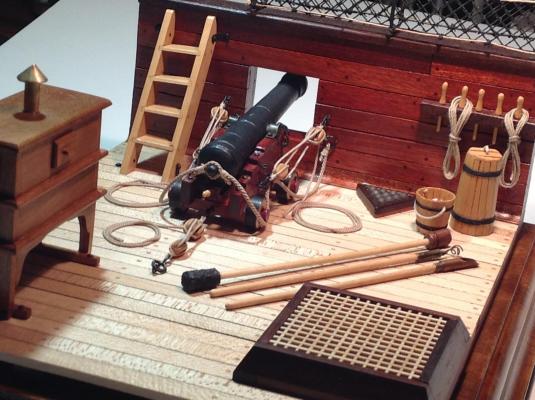
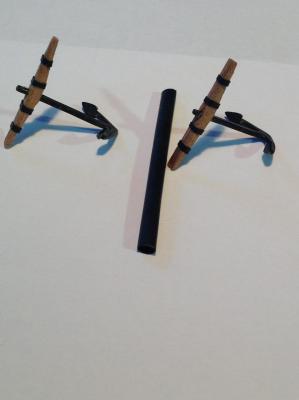
Almost finished. Only the anchors left to rig. I was concerned that my rope coils at the bow were too long, but if I made them shorter, I couldn't get them to bend and lay naturally. They "stuck out" almost straight from the rail. I added a shot of a 5'6" sailor standing nearby. i don't think the scale is terrible. Any thoughts? I think the riding bit rope coils look OK. I read about a technique using shrink wrap tubing on models for straps, bands etc. I tried it on my anchors and it worked great. Just cut to the right width, slide the resulting rings onto the anchor stock in their proper positions and head in a 300 degree oven for about 3 minutes, The tubing comes in various sizes and is cheap. Another great use would be the iron reinforcement rings on the mast. I'll post finished shots when the anchors are rigged. Dave BTW: Anyone have a good technique for getting rid of the "fuzzies", especially on the tan rigging? Dilute white glue?


- 31 replies
-
- 4
-
-
- armed virginia sloop
- model shipways
- (and 1 more)
-
Beautiful work on the frames. You've set a high bar! Dave
- 456 replies
-
- 1
-
-
- finished
- bomb ketch
- (and 2 more)
-
Nice job on the planking. If there are errors, only you will see them! That's the curse that comes with building anything. Dave
-
I've been wondering. Why doesn't "Swift" have rattled shrouds? It would seem that there would be the same need to go above while underway as there would be for a ship of the line: To repair or replace broken or worn out parts, lines, sails etc. Why no ratlines?
- 11 replies
-
- 1
-
-
- swift
- artesania latina
- (and 1 more)
-
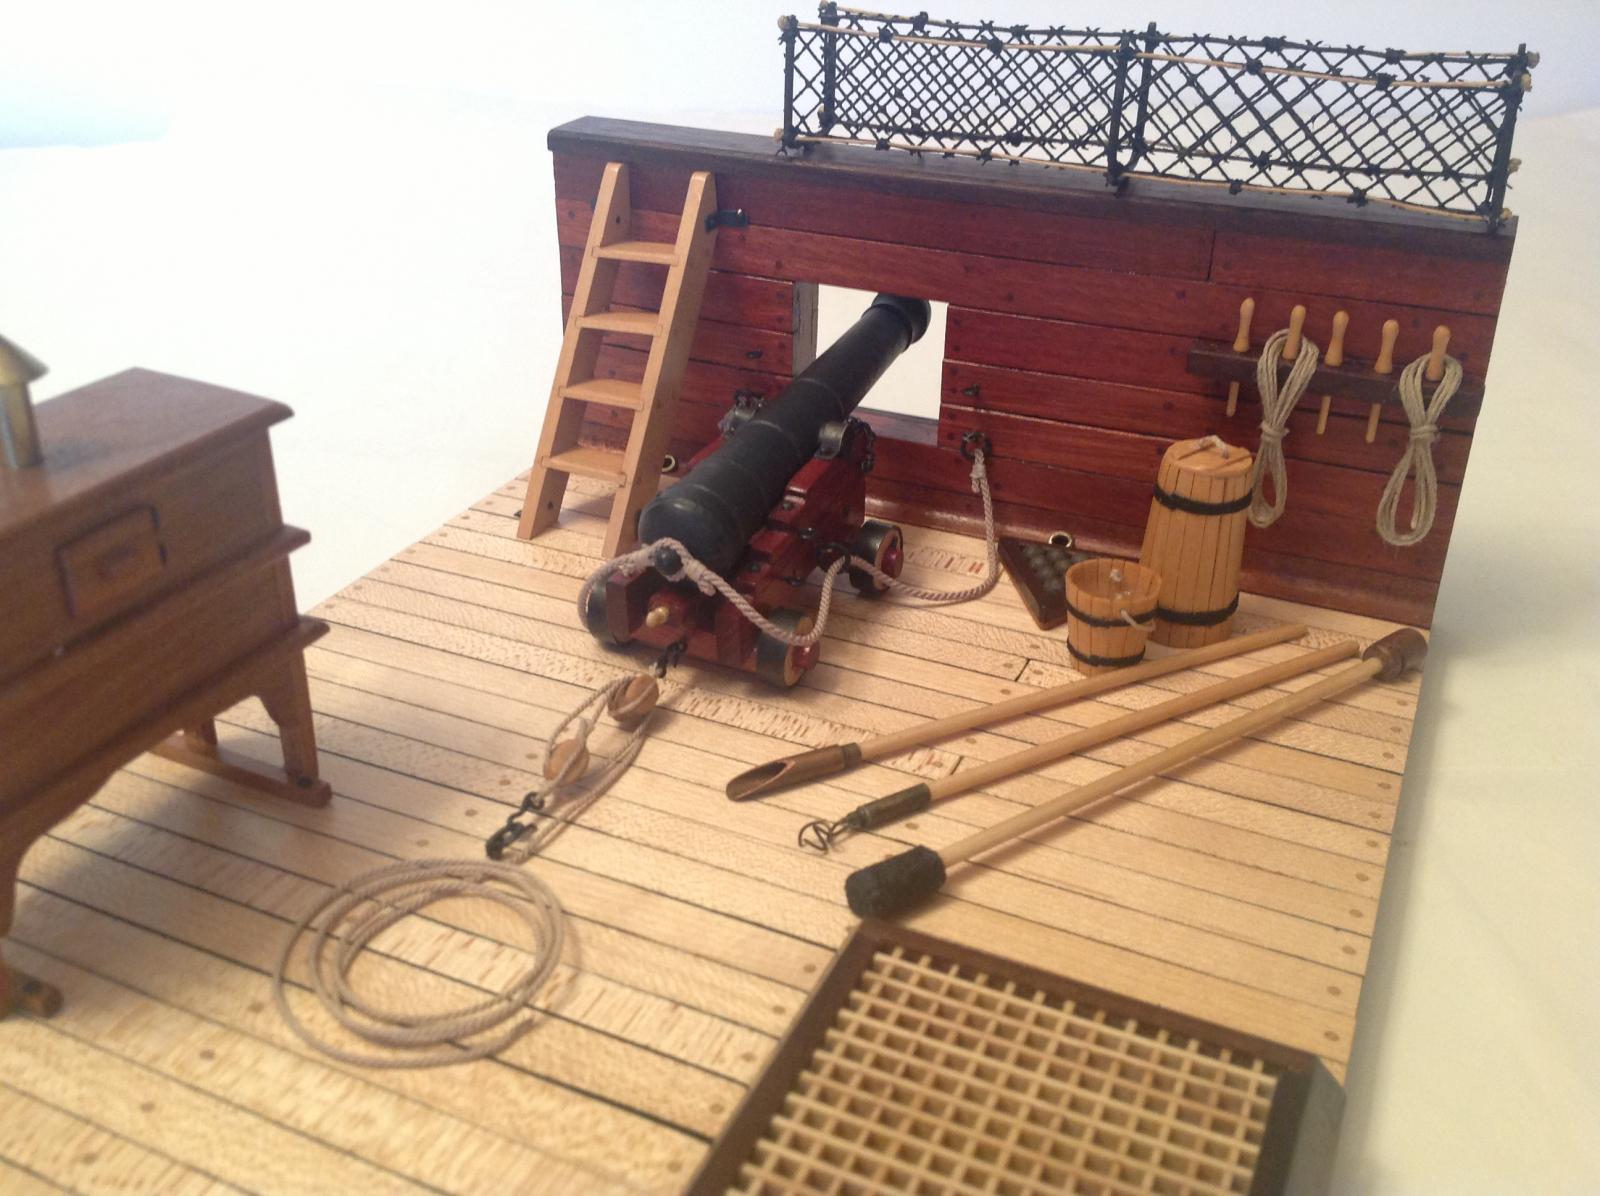
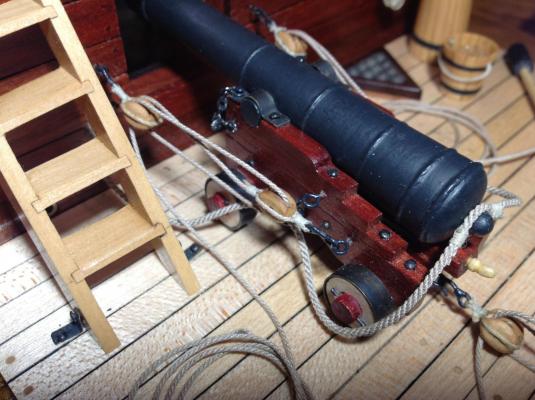
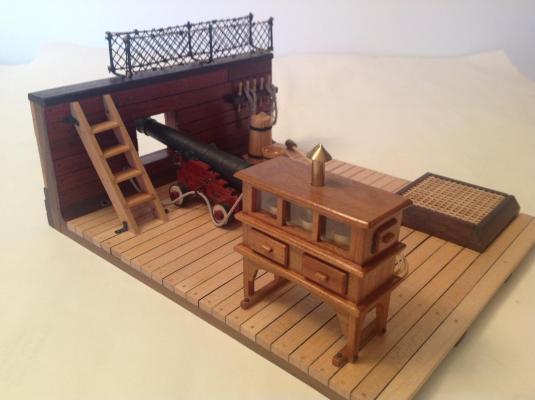
All that's left is to install the train tackle. Then fasten the loose pieces down, and mout the station to a display board. Dave


-
Very nice work. I'm itching to start, but I think I'm going to do a kit-bashed "Rattlesnake" before going over to the dark side. Dave
- 255 replies
-
- 1
-
-
- granado
- bomb ketch
- (and 2 more)
-
Jon: I bought the kit and the wood package about 1-1/2 years ago. I purchased all of Bob Hunt's practica for a flat fee and fell in love with the Rattler. I'm just finishing the Armed Virginia Sloop using a Hunt practicum also. As for Hobby Mill, Jeff is now retiring, and not accepting new orders. He used to supply lumber for Bob's kits, but Bob has been out of the kit business for a few years now, although he has started producing a POF Armed Virgia Sloop at 3/8" = 1" scale. It looks like a winner. http://www.lauckstreetshipyard.com/avskit.htm Going forward I plan to mill my own lumber with my Byrnes saw and a home-made thickness sander. Dave
-
Jon: I've been following your log and your superb job on the Rattlesnake is one of the reasons I want to go ahead with the project. I will use the practicum, but your build log will be close at hand. Thanks! Dave
-
I used yellow heart, bloodwood, rosewood, cherry, holly, African blackwood and some maple on my AVS. All relatively tight grained with minimal pores. If you get some nice rosewood, you'll never use walnut again on a model! Check my thread in the kit log forum:http://modelshipworld.com/index.php/topic/6998-armed-virginia-sloop-by-docblake/ Dave
-
I used Bob's practicum on my AVS and it was very helpful. Obviously it's designed for someone who's not had a ton of experience (me)! The Practicum for the Rattlesnake is manditory for the kitbashed version I'm planning.You can buy all the various Practica as a package for $200. This will allow you to use them for multiple vessels, including a scratch built "Hannah". Here's a link: http://www.lauckstreetshipyard.com/ Here are some shots of the model under construction from the Practicum: Dave