MORE HANDBOOKS ARE ON THEIR WAY! We will let you know when they get here.
×


Glen McGuire
-
Posts
1,913 -
Joined
-
Last visited
Content Type
Profiles
Forums
Gallery
Events
Everything posted by Glen McGuire
-
 I wholeheartedly agree with what everyone said above. Exceptional craftsmanship in every detail. So well done. Congratulations on a fine build!
- 201 replies
-
- 5
-

-

-
- Oyster Sharpie
- first scratch build
- (and 1 more)
-
Larry and I are on board with you and Captain Rodney. Let's...

-
I like the curves and the stairstep on the base. Very elegant.
- 70 replies
-
- 3
-
-
- Scheldt River
- Dredger
- (and 2 more)
-
Thank you to everyone for the kinds words and likes and everything else. As I've said before, I consider these projects a team effort and y'all are the best team anyone could ever imagine.
- 185 replies
-
- 8
-
-
-
- Flying Dutchman
- Black pearl
- (and 2 more)
-
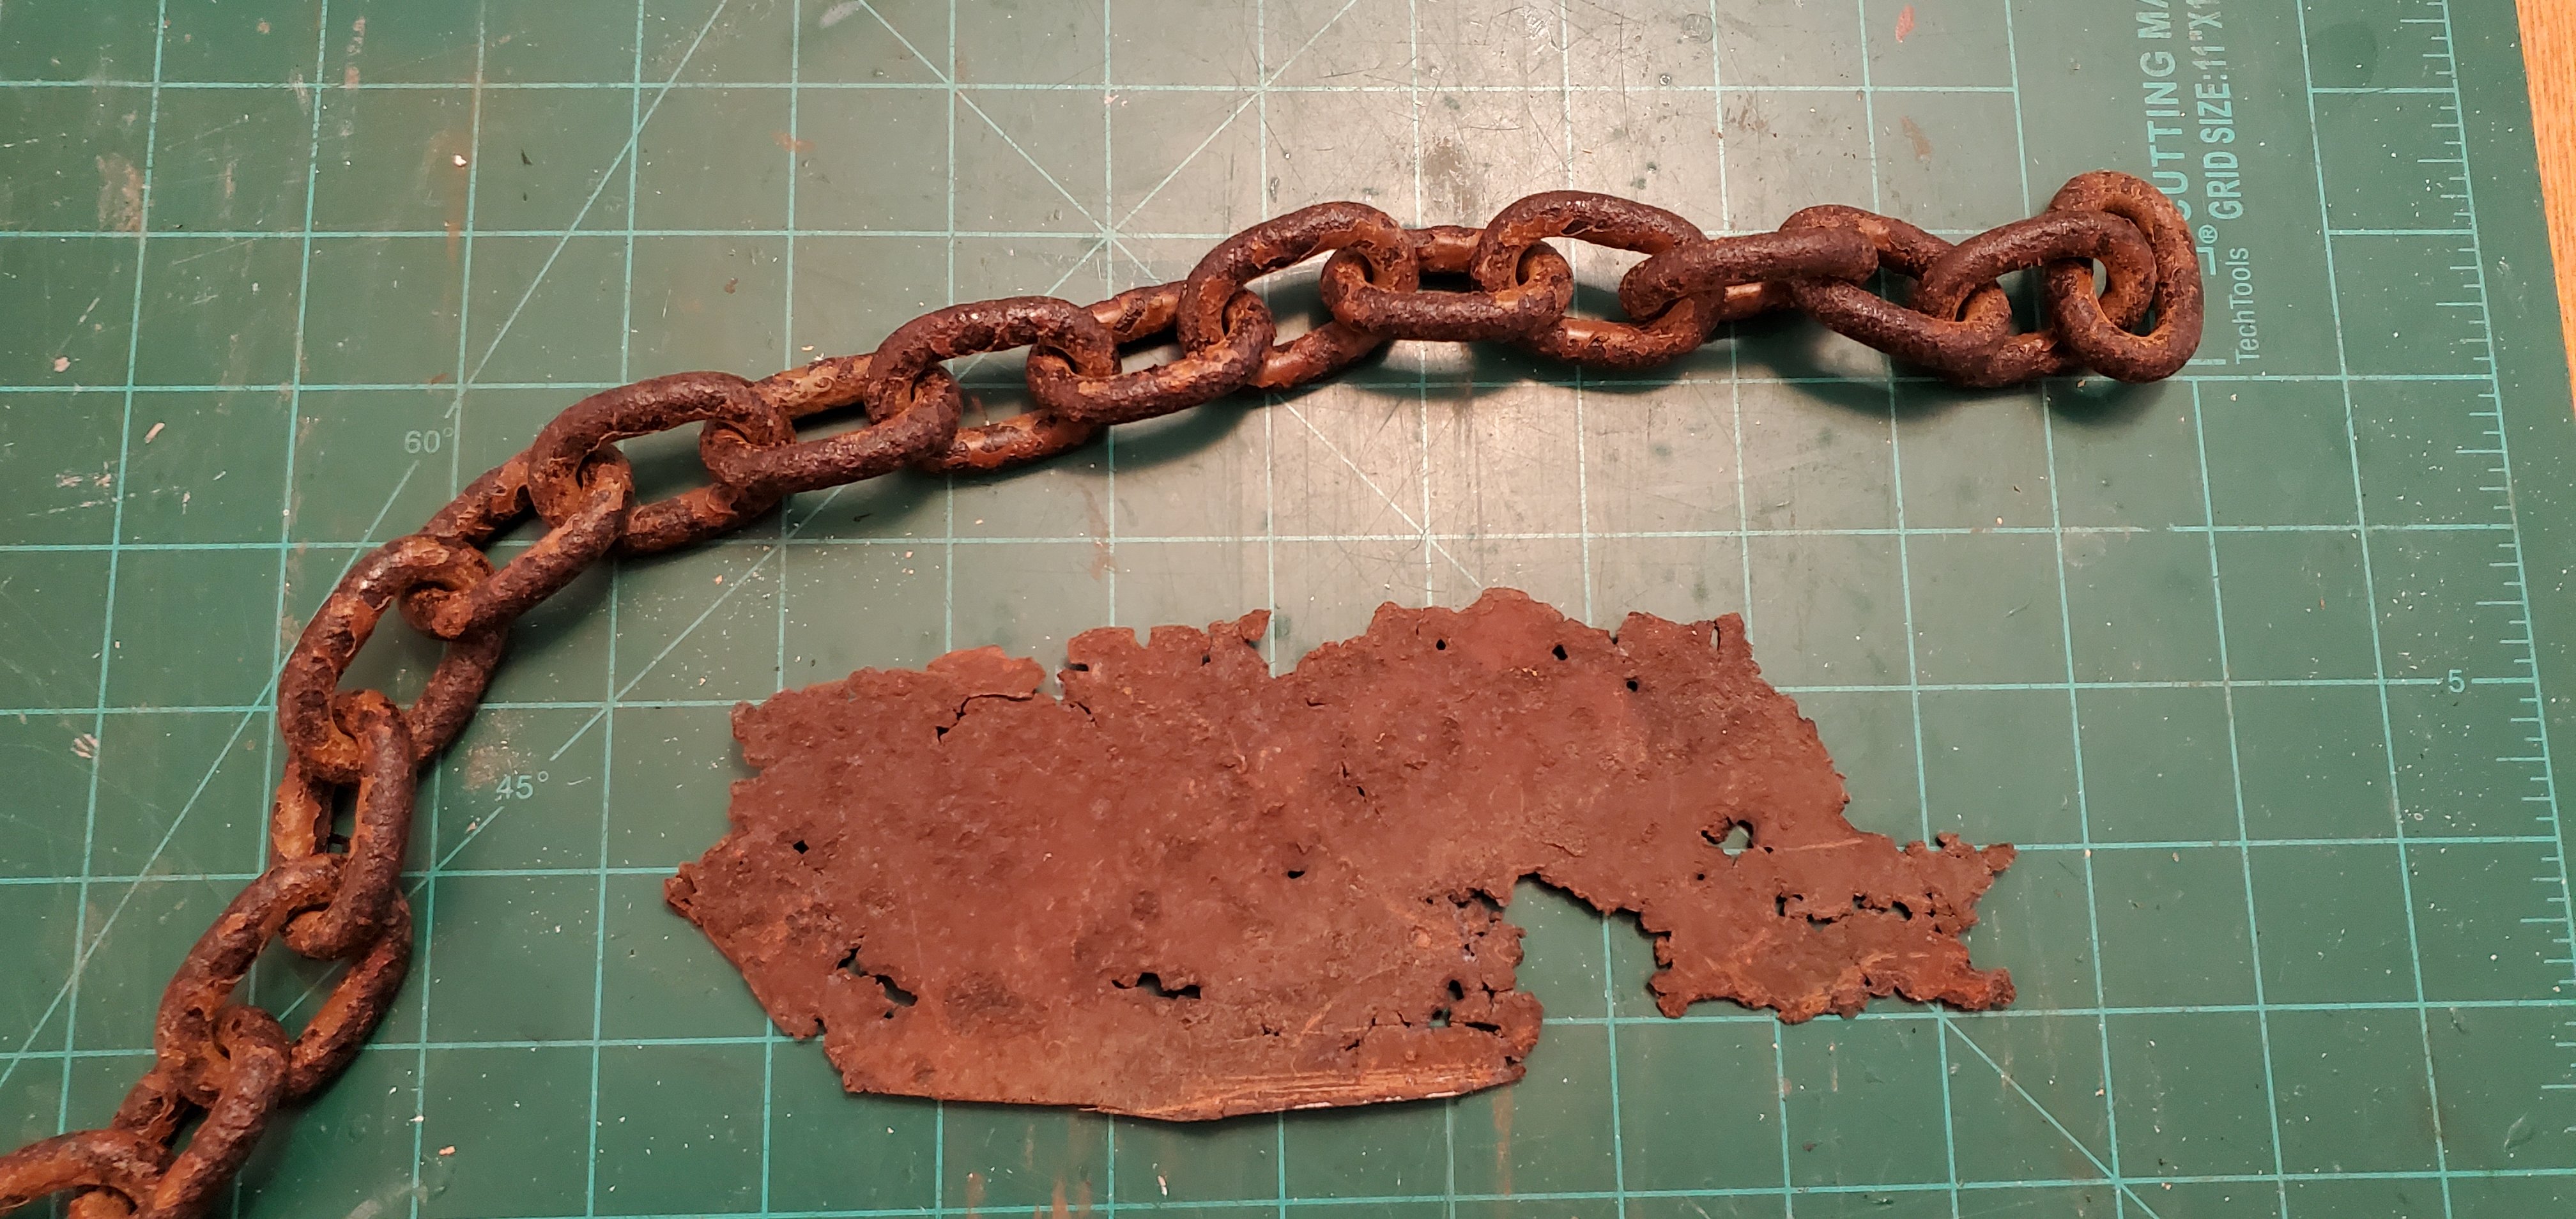
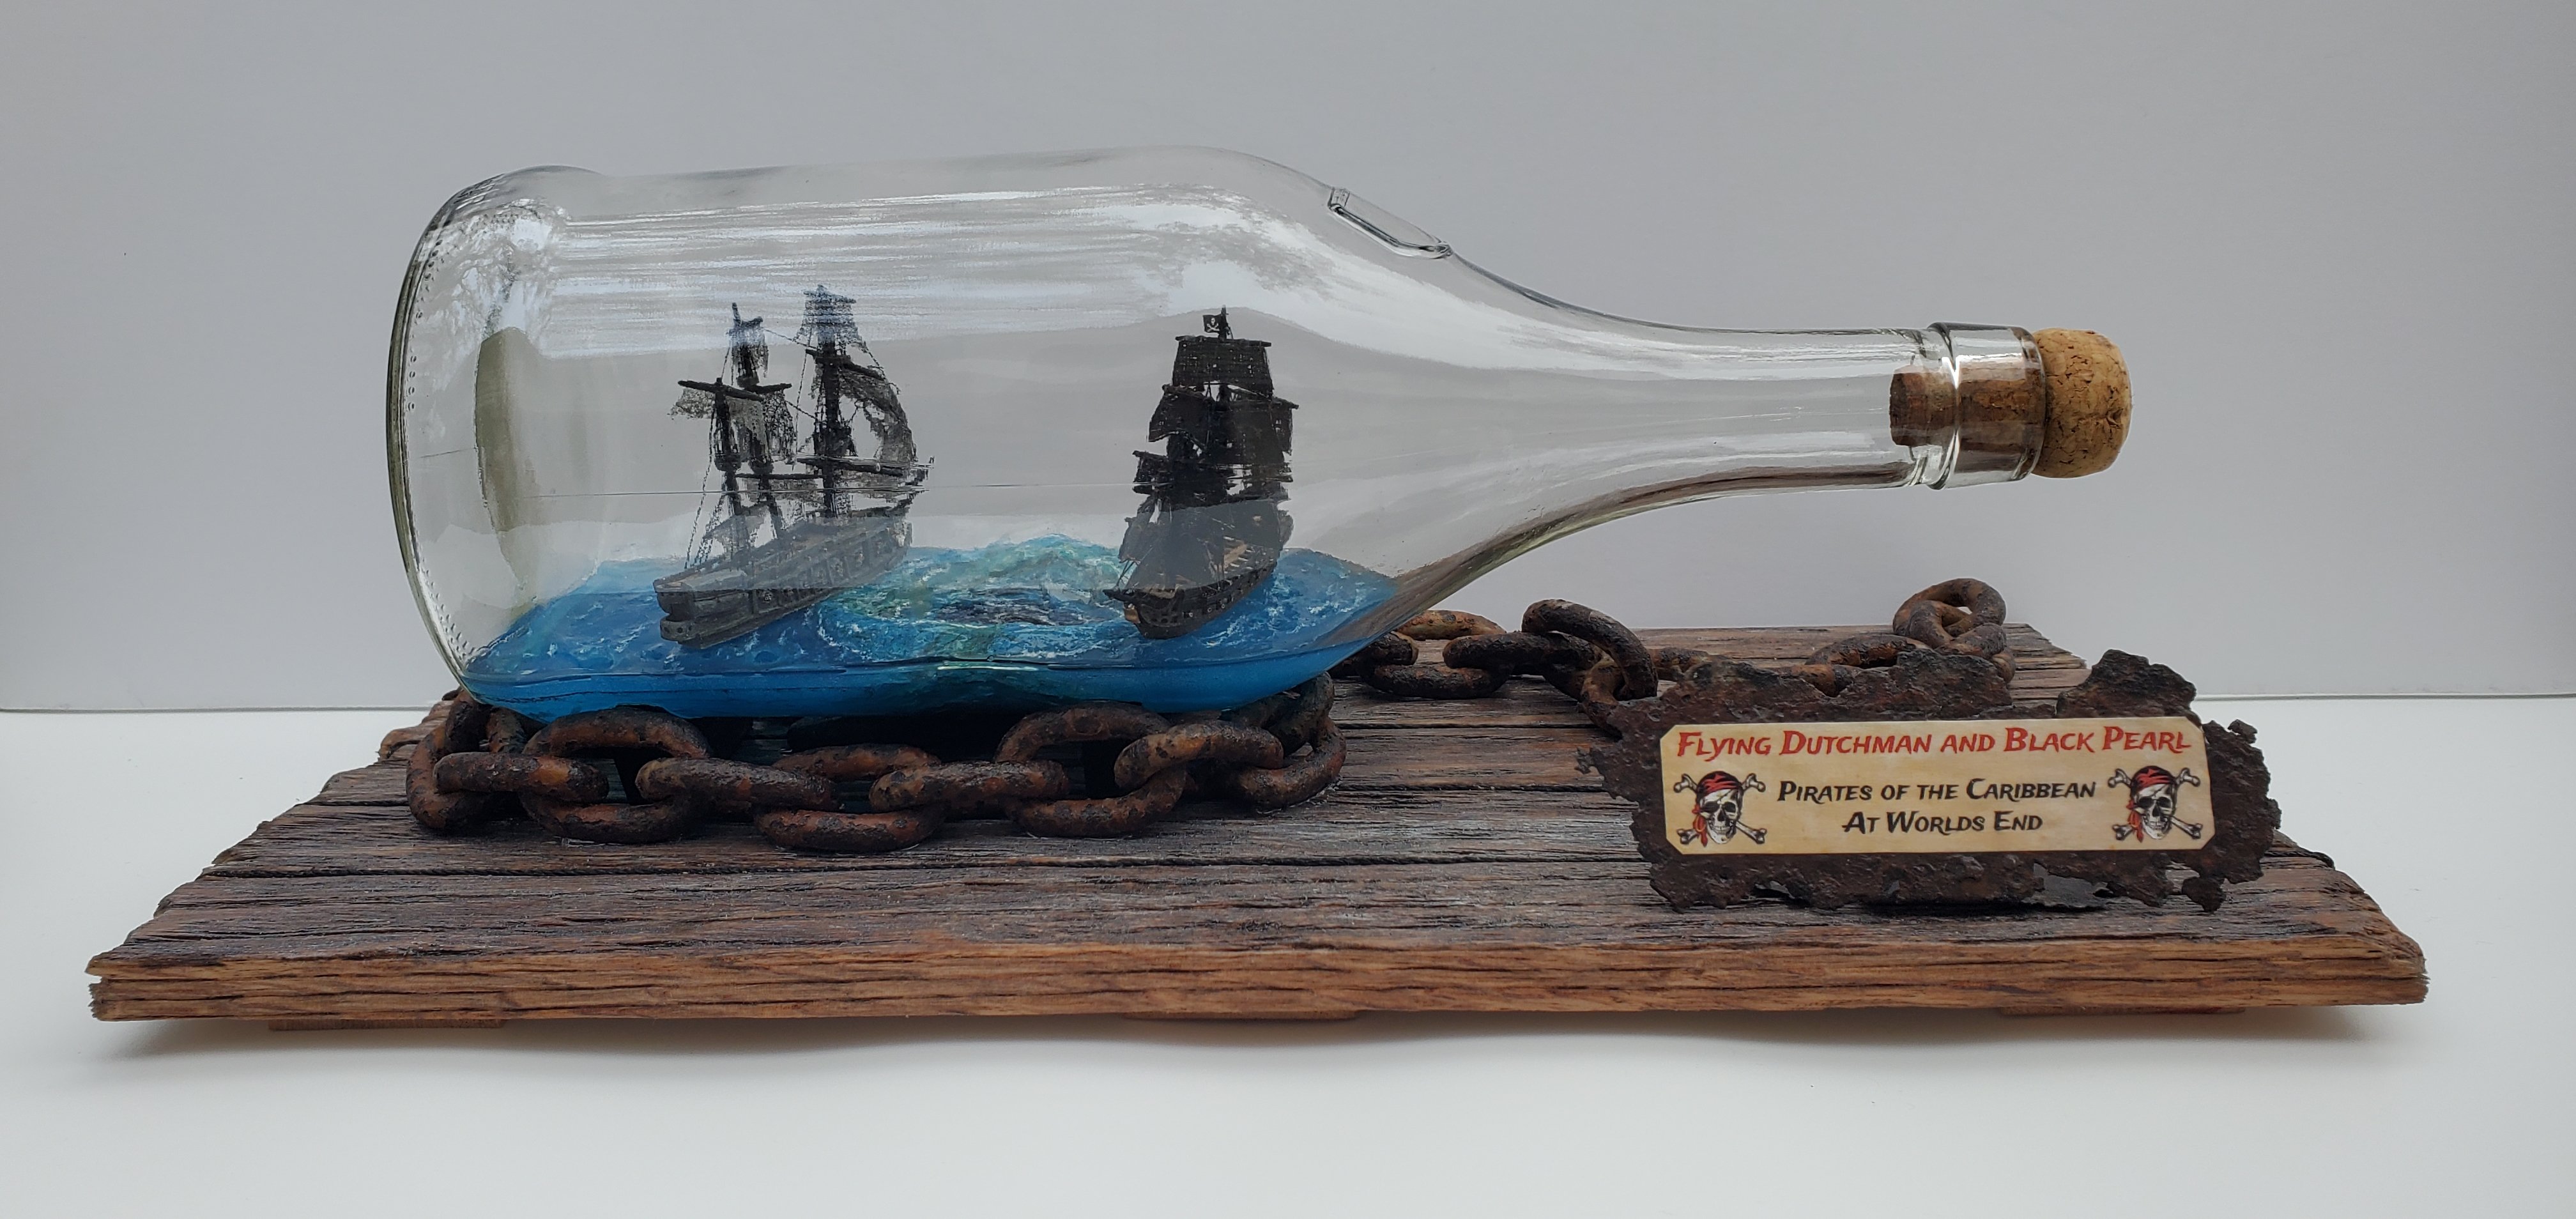
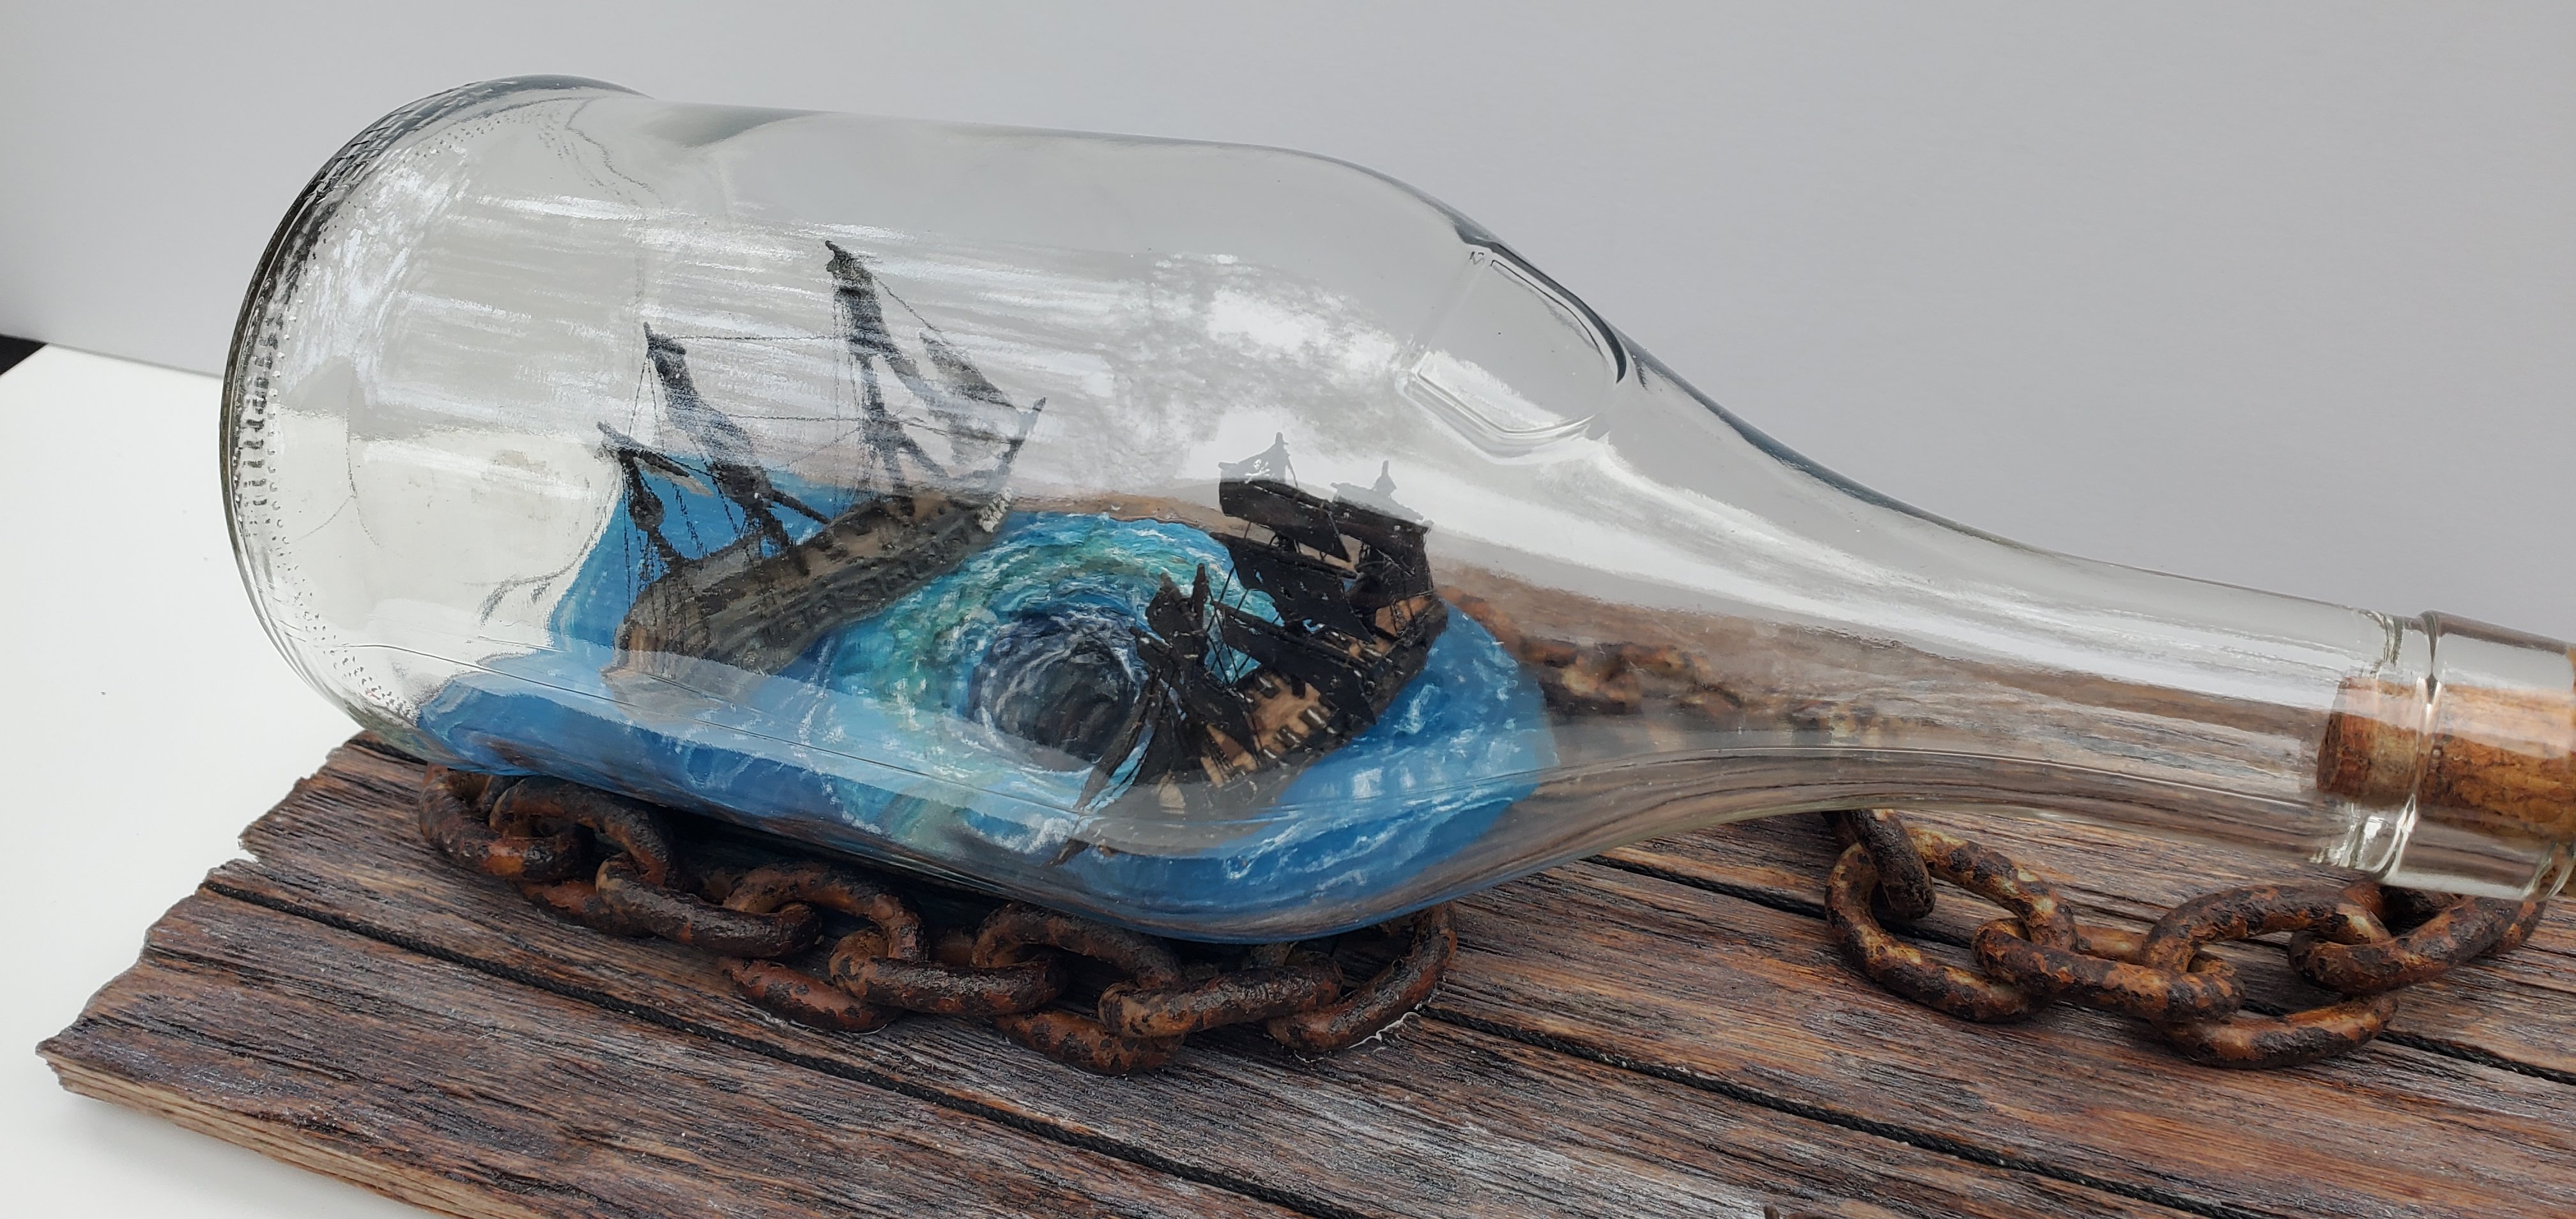
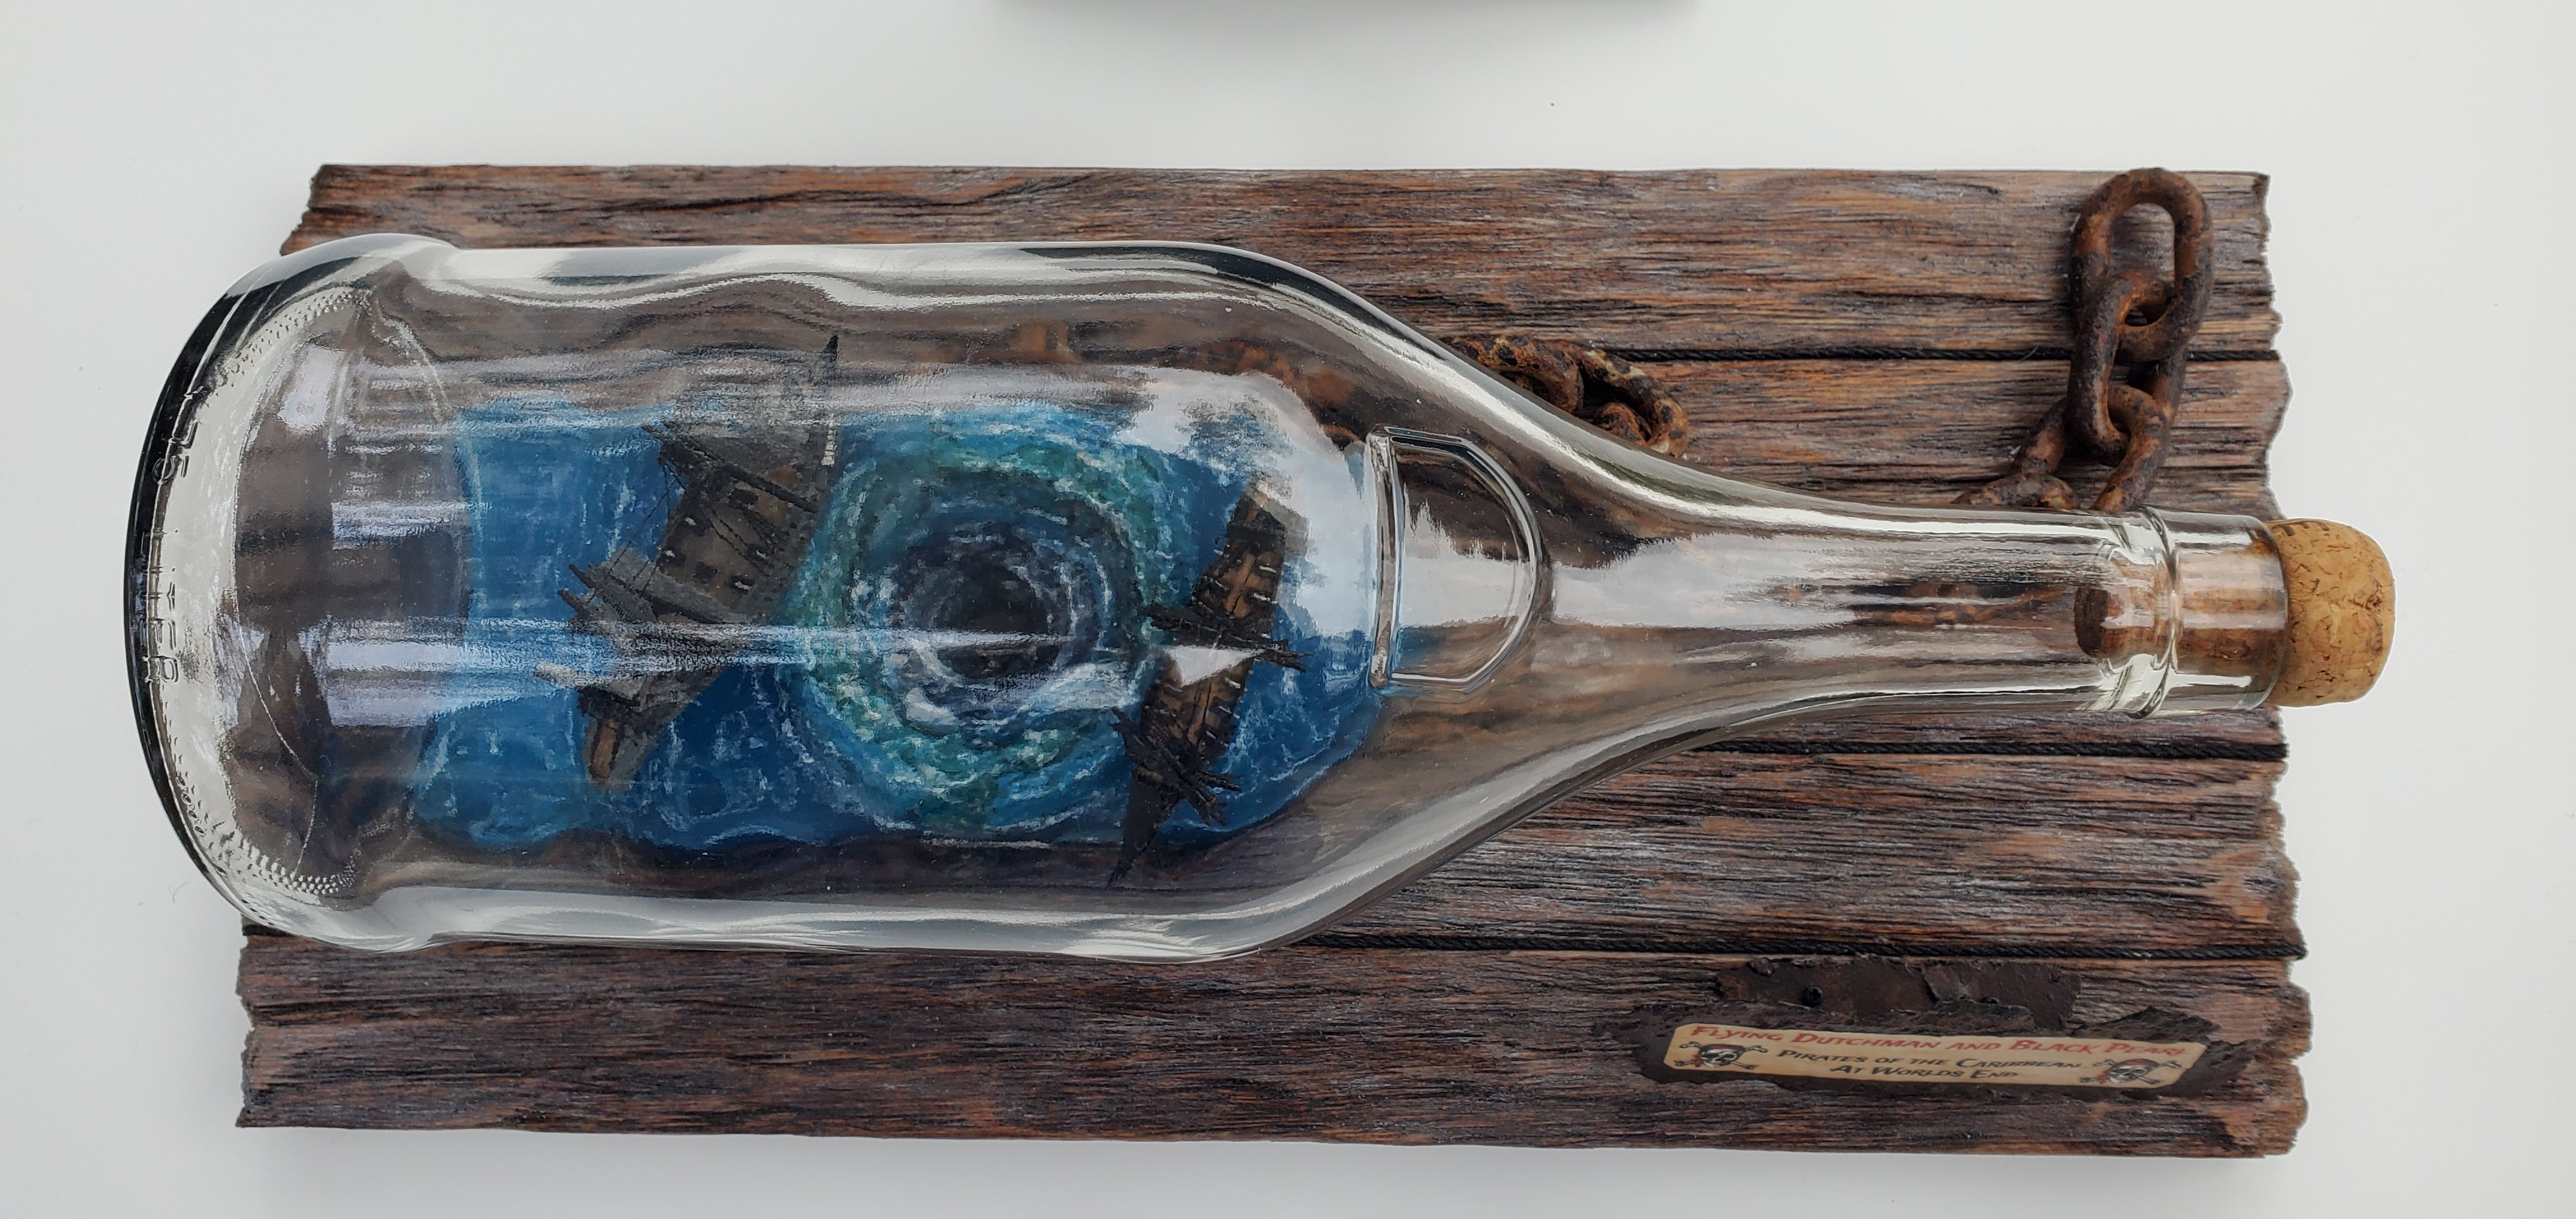
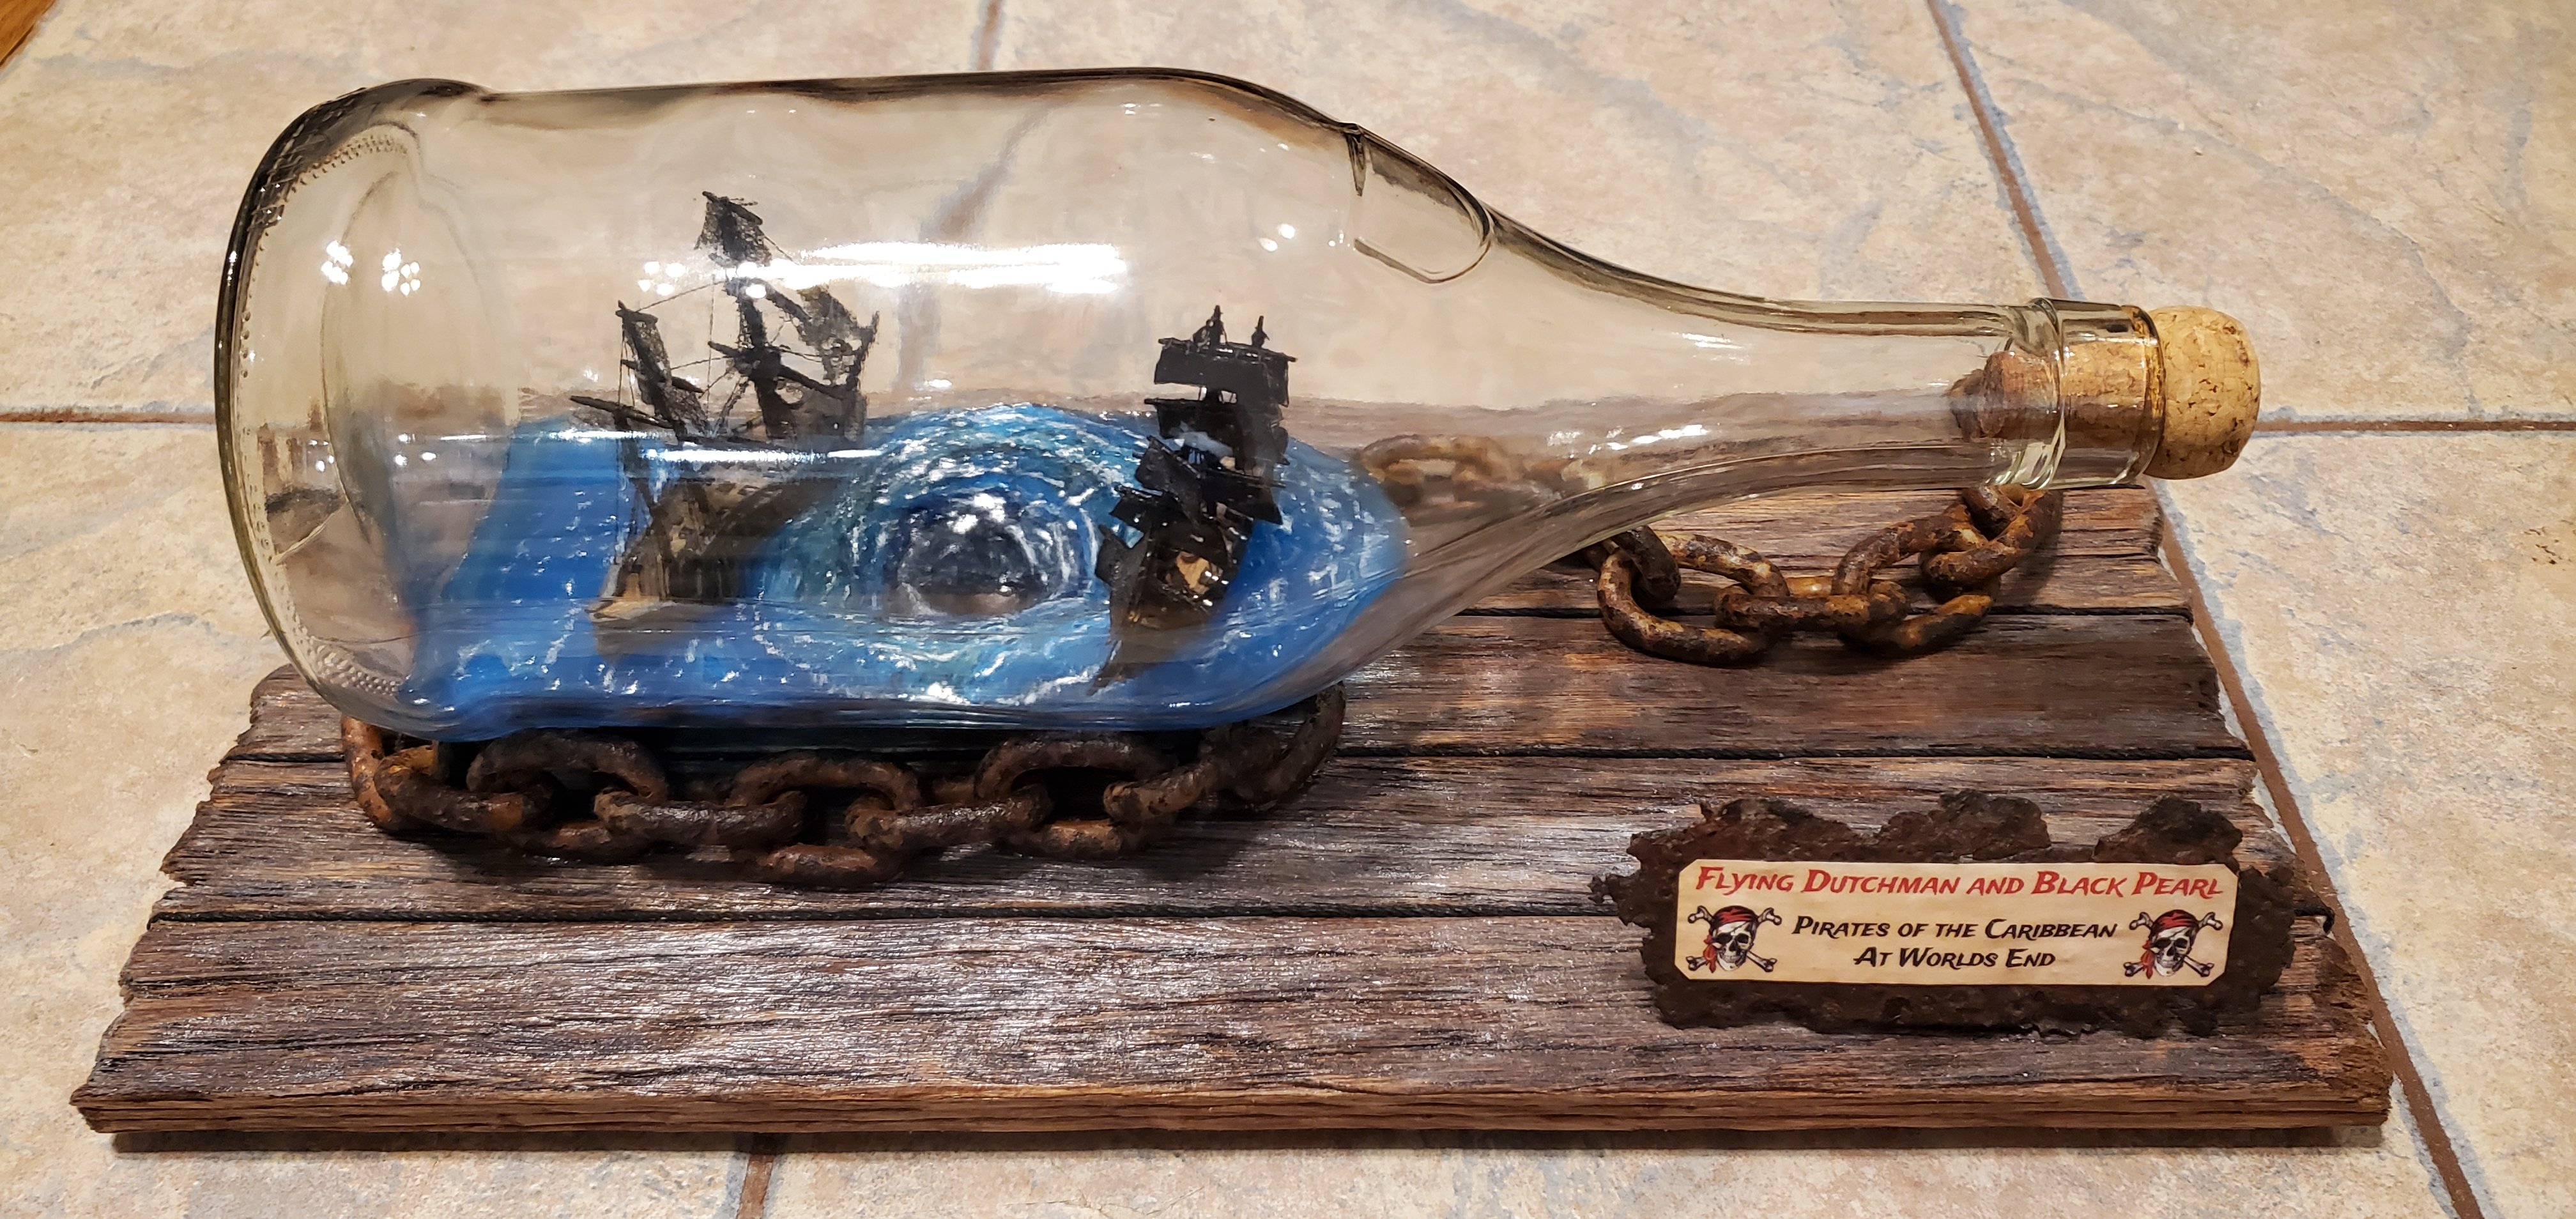
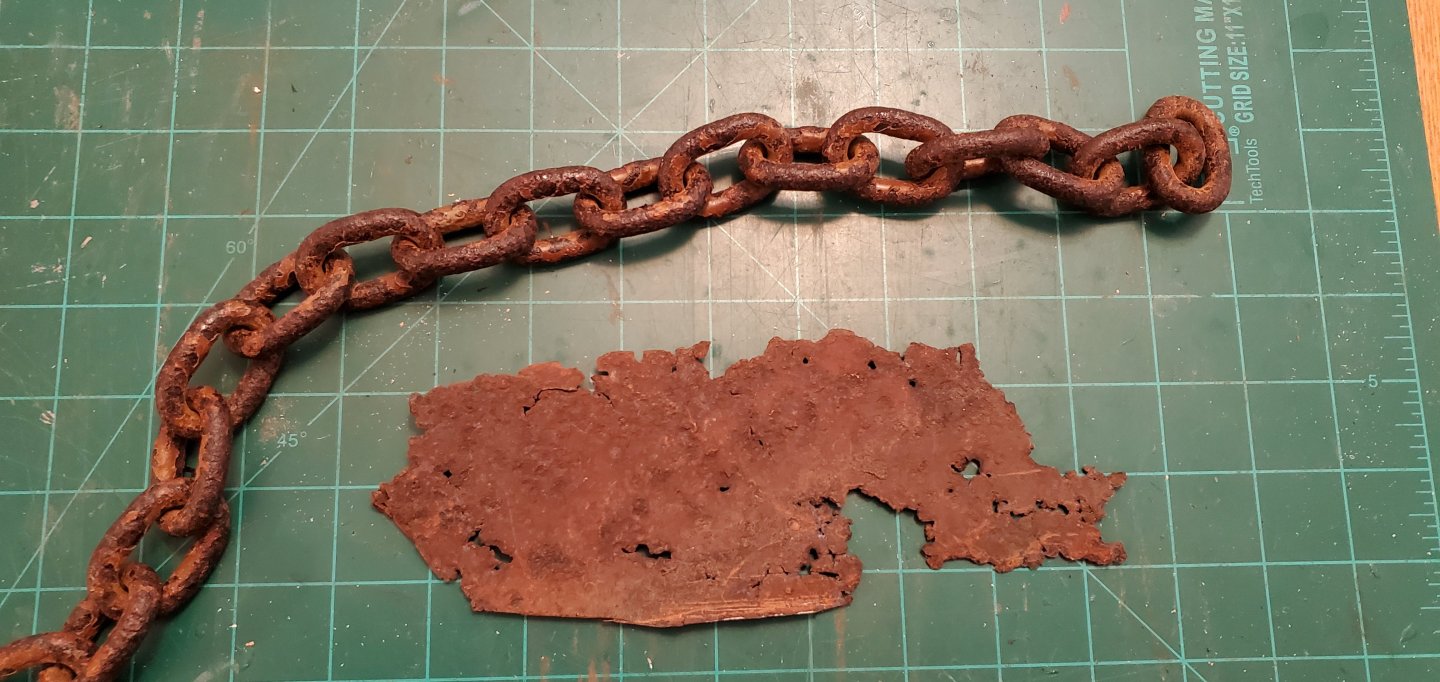
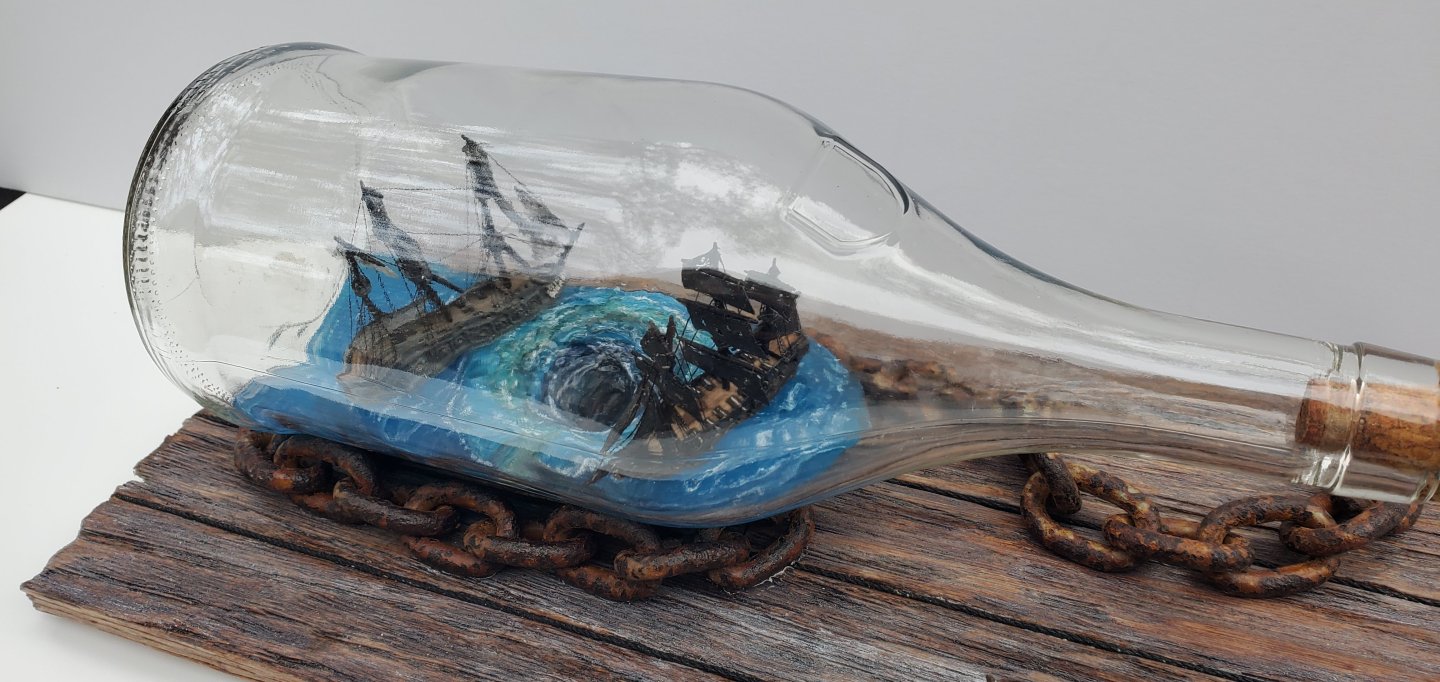
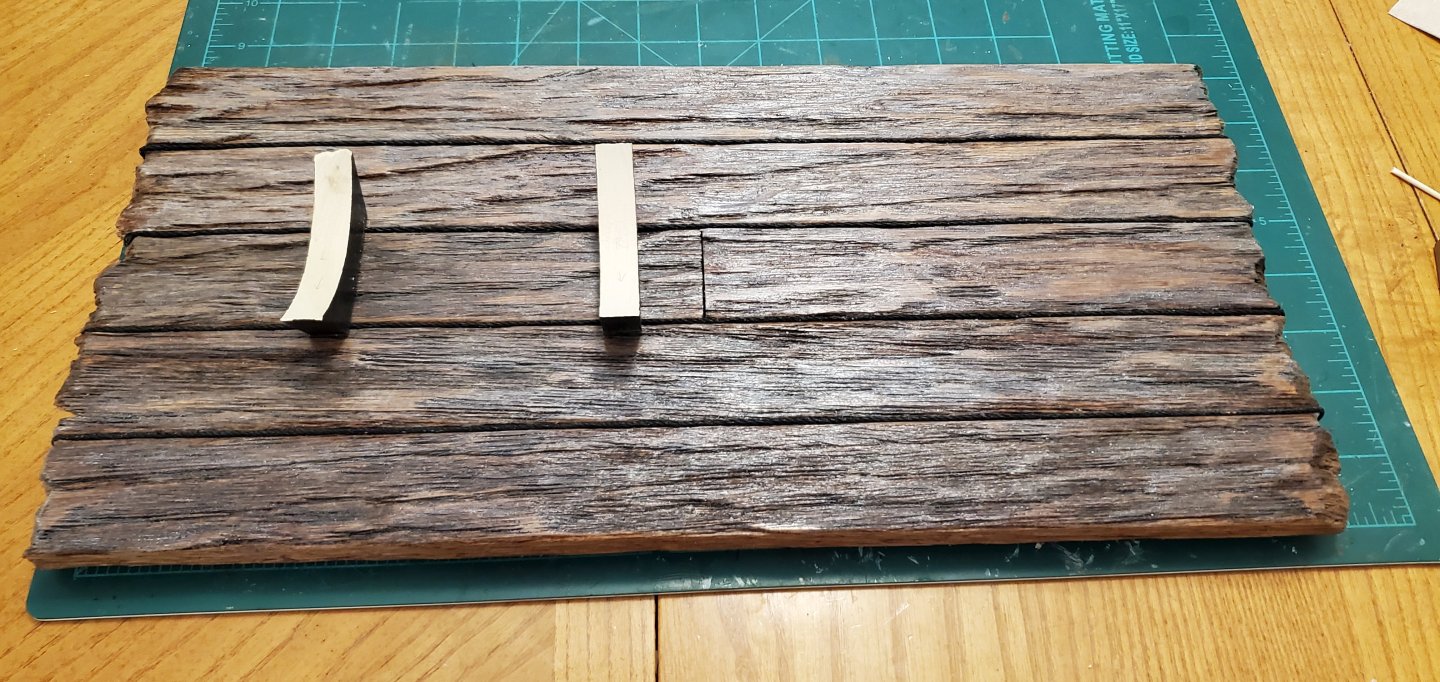
I was fumbling around for a couple of days trying to figure out how to finish this thing up. I liked the weathered deck planks, but I wanted more than just the bottle sitting on a cradle on top of the planks. The Final Jeopardy music kept playing and nothing was coming to mind. The next day, I was walking through an old shed out at my ranch and noticed a discarded, rusty chain and some scraps of a rusted gutter lying in the corner. Hmmmmm. I wasn't exactly sure what I could do with them, if anything, but they were interesting enough to take home and ponder further. I got them home, started playing around, and finally stumbled upon a way to use them to enhance the presentation. After sealing the chain with spray poly, I coiled it around the bottle's cradles to where it hid the cradles and made it look like the bottle was resting on the chain. OK. I liked that. Now, the only thing left was the nameplate. I was sizing up various small pieces of wood to glue a nameplate to when another light bulb went off. Why not use a piece of the thin, rusted gutter to glue the nameplate to? So I found a piece that had rough edges and was about the size I needed. I bent the bottom edge of it backwards so it could act as a base. Then I printed out my paper nameplate and Mod Podged it to the rusty piece of gutter. Before I post the final pictures, I want to extend a sincere THANK YOU to everyone that took part in this project. I would have never made it to the finish line without your comments, critiques, suggestions, encouragement, and humor. What an amazing group of people we have here at MSW and I’m fortunate to be a part of the community. Whether you popped in and out or suffered through every post of this build log, I owe you a debt of gratitude: @BANYAN, @Keith Black, @Knocklouder, @Ian_Grant, @Javelin, @Canute, @GrandpaPhil, @FriedClams, @gjdale, @Paul Le Wol,@mtaylor, @Bryan Woods, @tmj, @Landlubber Mike, @BLACK VIKING, @JacquesCousteau, @Old Collingwood, @Dan Poirier, @Kauz, @CiscoH, @herask, @ccoyle, @John Fox III, @Baker, @Snug Harbor Johnny, @PvG Aussie, @Desertanimal, @Thukydides, @gsdpic, @firdajan, @vossiewulf, @DanielD, @Pfälzer, @Ainars. Oh, and special thanks to Plumber Paul, PFC Gnomer Pile, and Goober for their support (even though Mr. Goob had his doubts about me). One more. Extra special thanks to my friend Eric. He is an extraordinary artist/carver/creative genius, etc and is the one that came up with the idea of building the whirlpool in layers outside the bottle and then inserting them piece by piece. That was the key to pulling this whole thing off. Here's how all that came out.


- 185 replies
-
- 31
-

-
-
-
- Flying Dutchman
- Black pearl
- (and 2 more)
-
I was looking at the doghouse roof and thinking wow, you did a really nice job of showing random wear from foot traffic on the planks. And then you go and cover it up with the rubber! Sigh. Nevertheless, the roof looks great and the texturing you did on it is out of sight. Well done, Gary!
-
That dog house (and the pup) is awesome, Bryan!!
- 55 replies
-
- 3
-
-
-
- Le Martegaou
- billing boats
- (and 1 more)
-
That little pump is soooo well done (as well as everything else)!!
- 732 replies
-
- 5
-
-
-
- Lula
- sternwheeler
- (and 1 more)
-
Agree, Keith. I still like that piece of wood so don't be surprised if it shows in some future project. We just never know what might come in handy, do we, Paul! Thanks, Grant. I learned from a pro!
- 185 replies
-
- 7
-
-
- Flying Dutchman
- Black pearl
- (and 2 more)
-
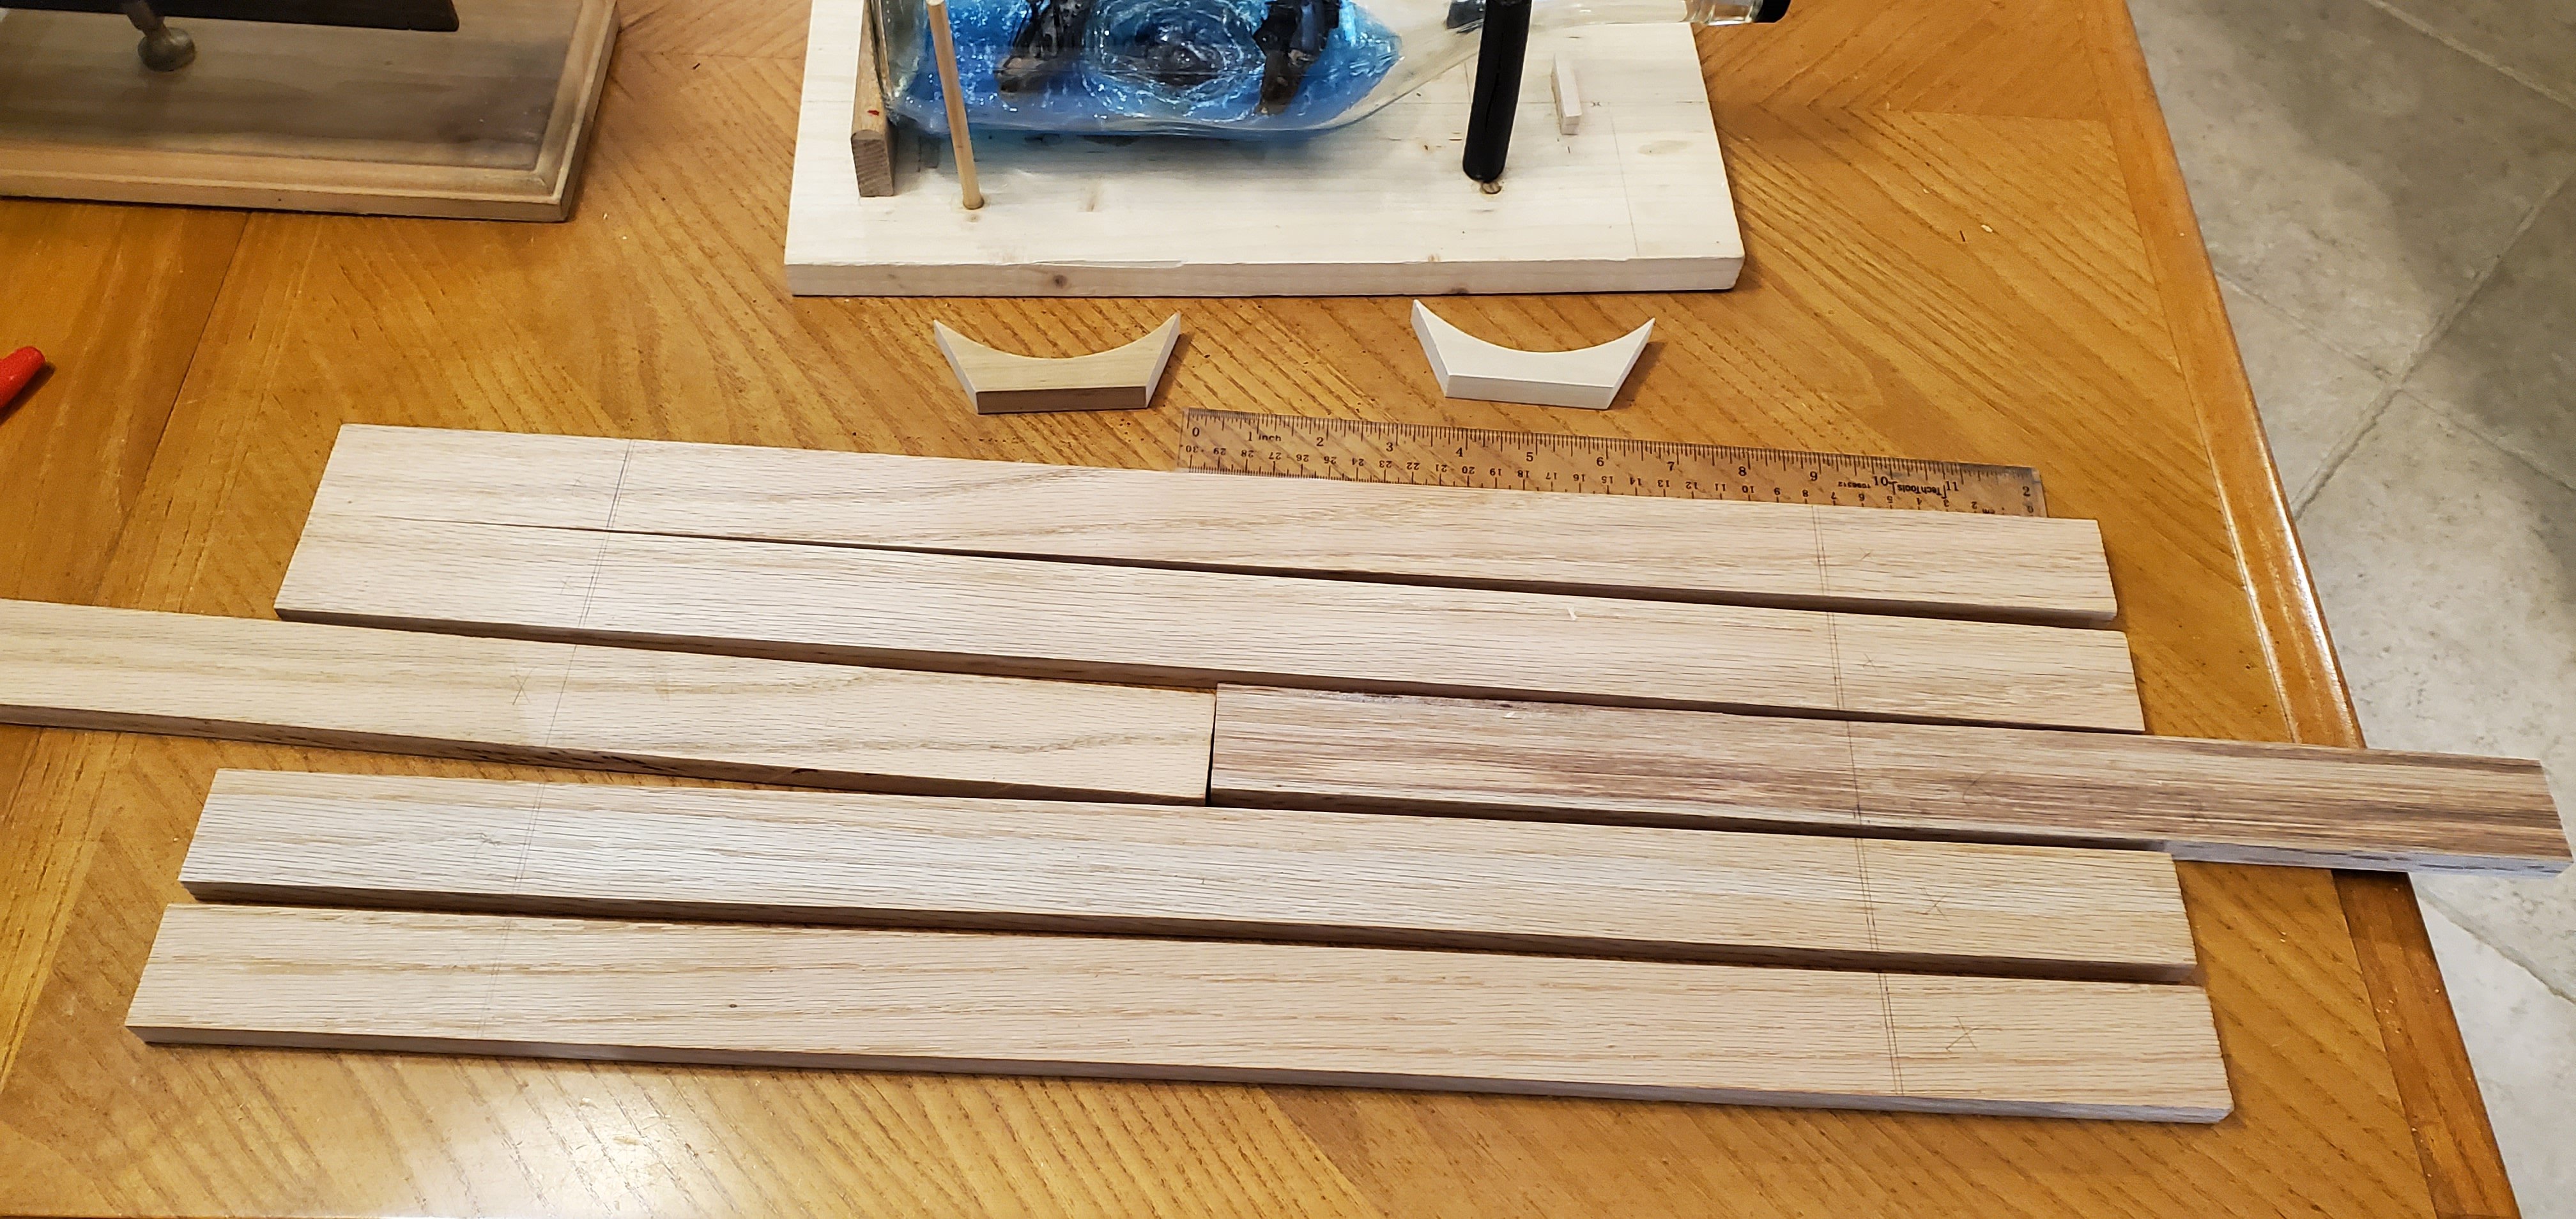
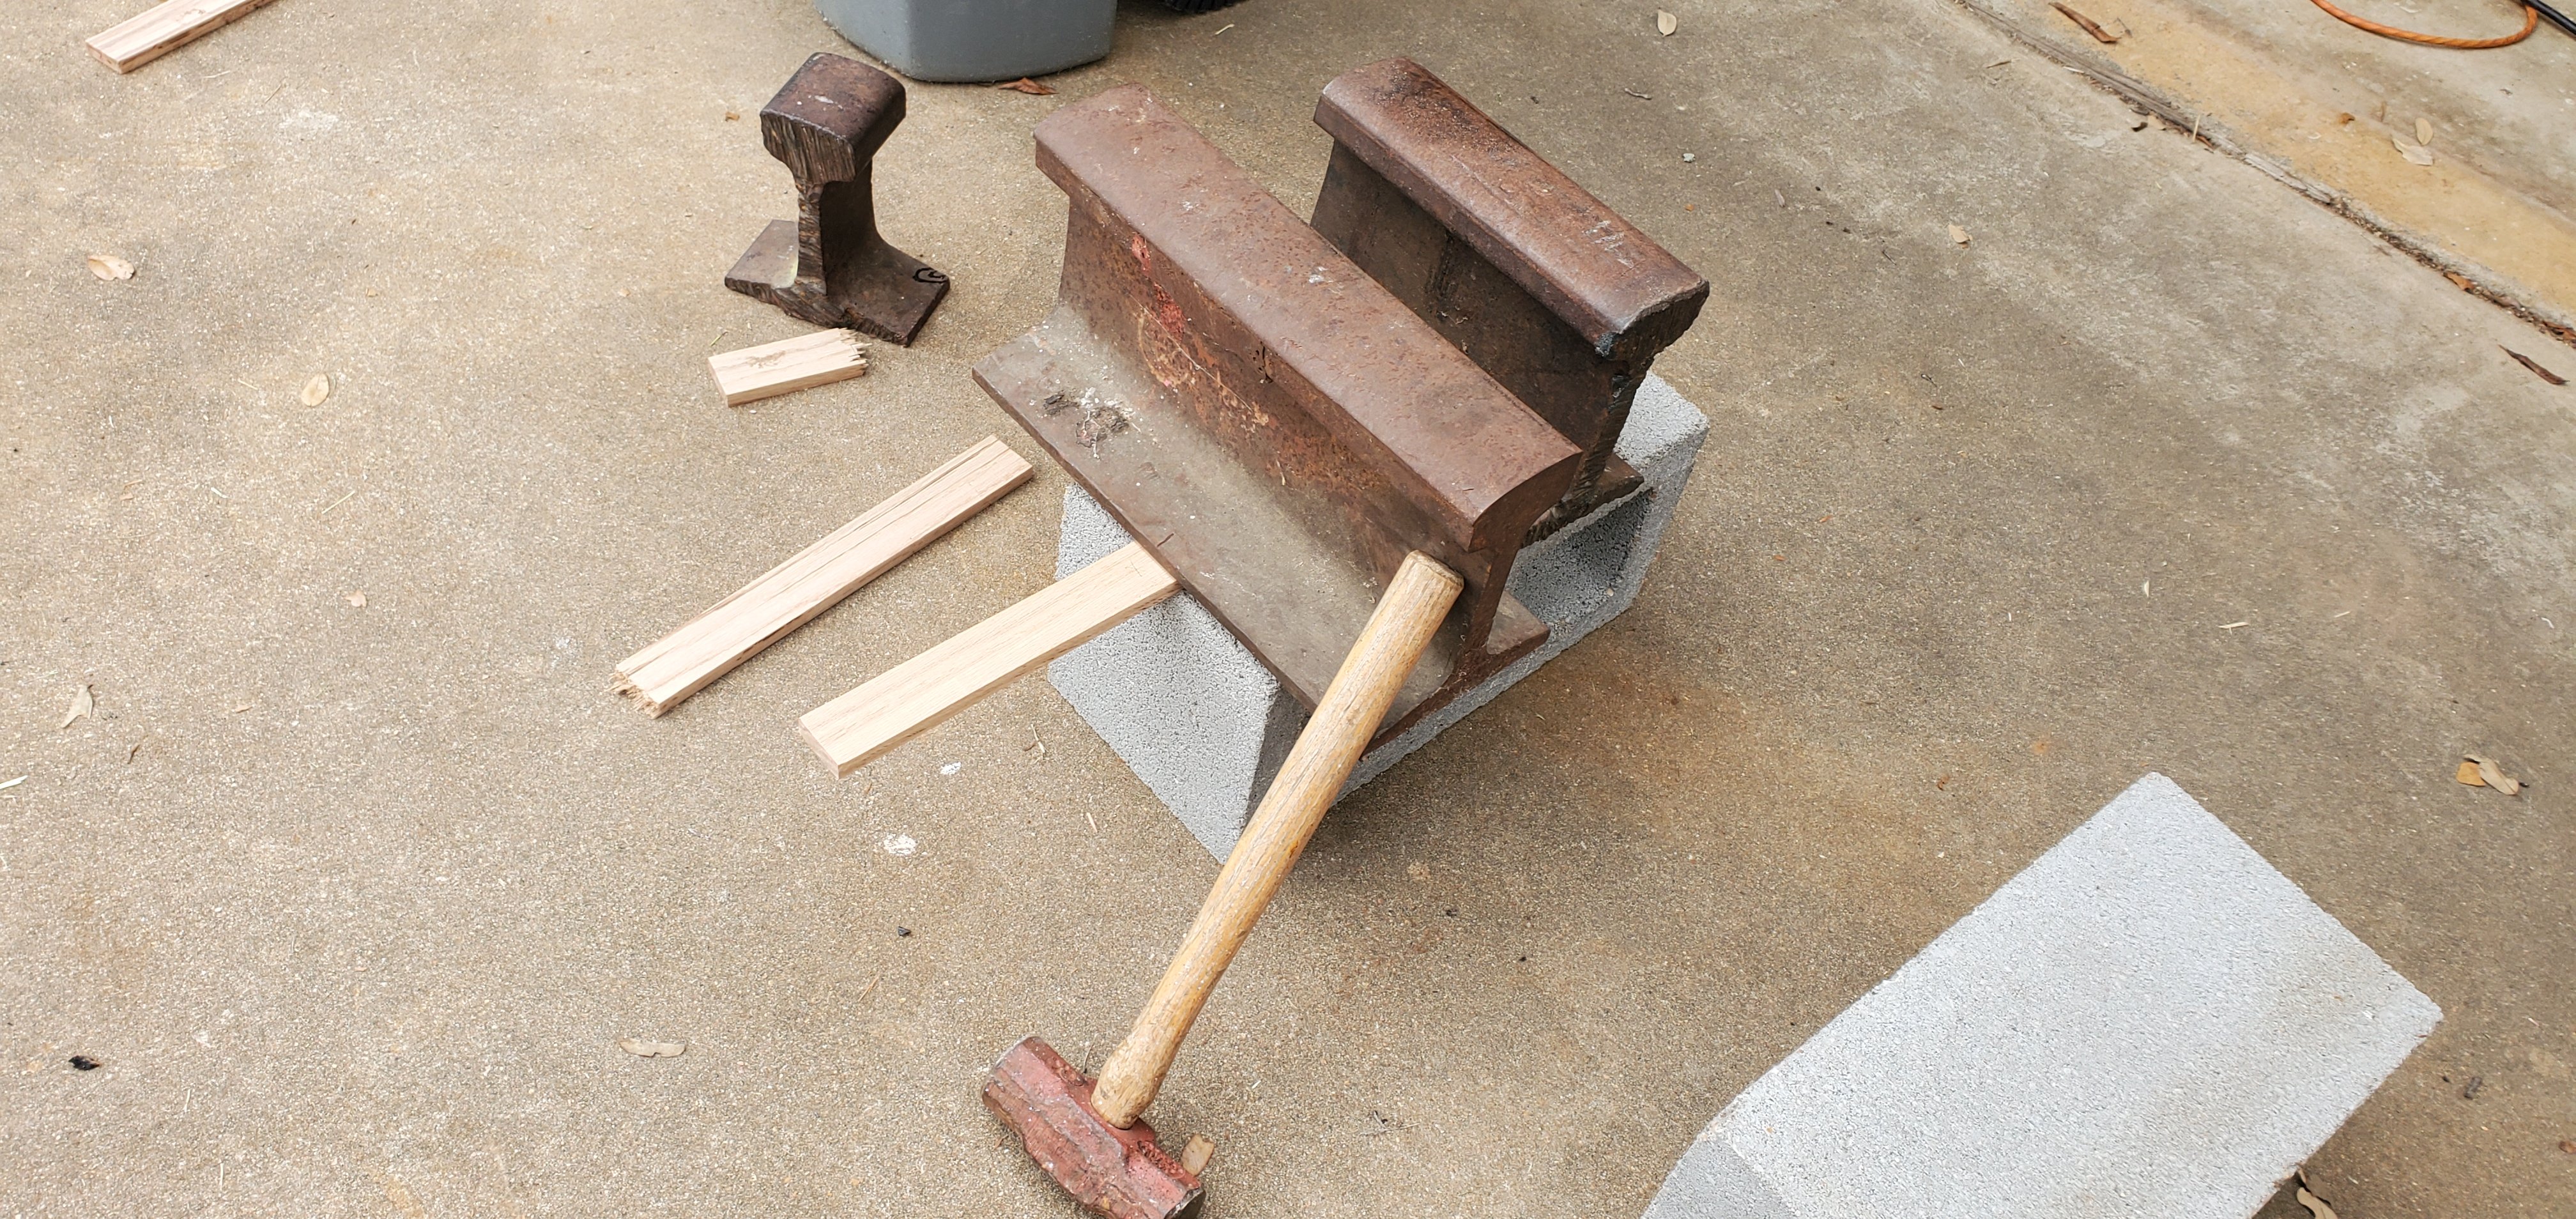
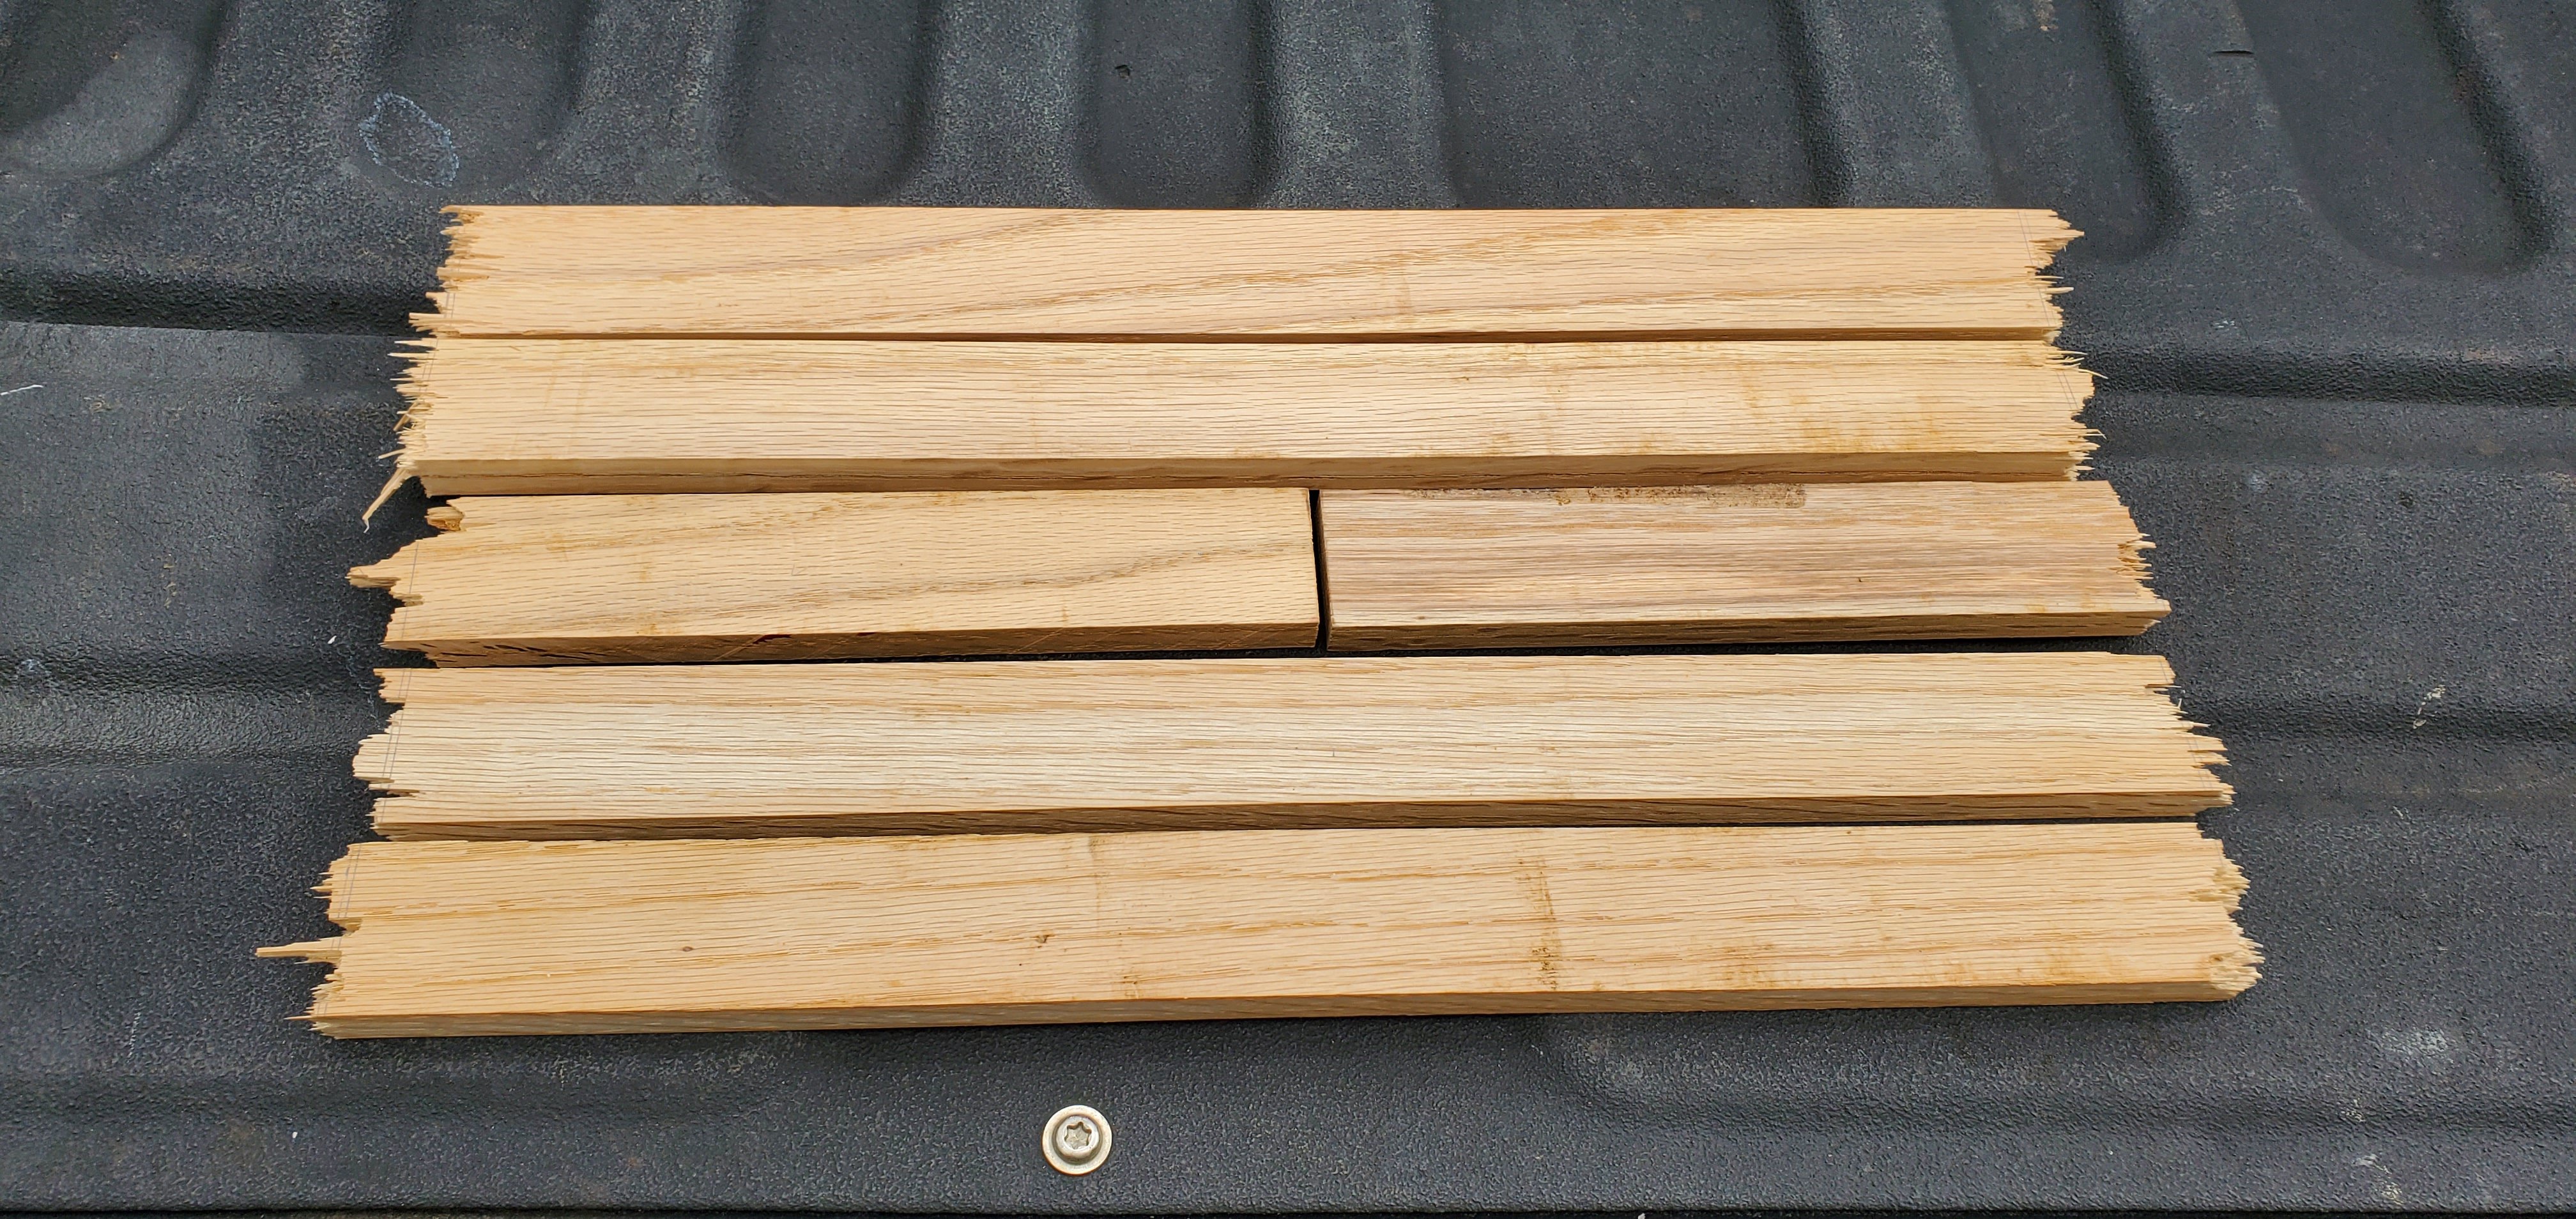
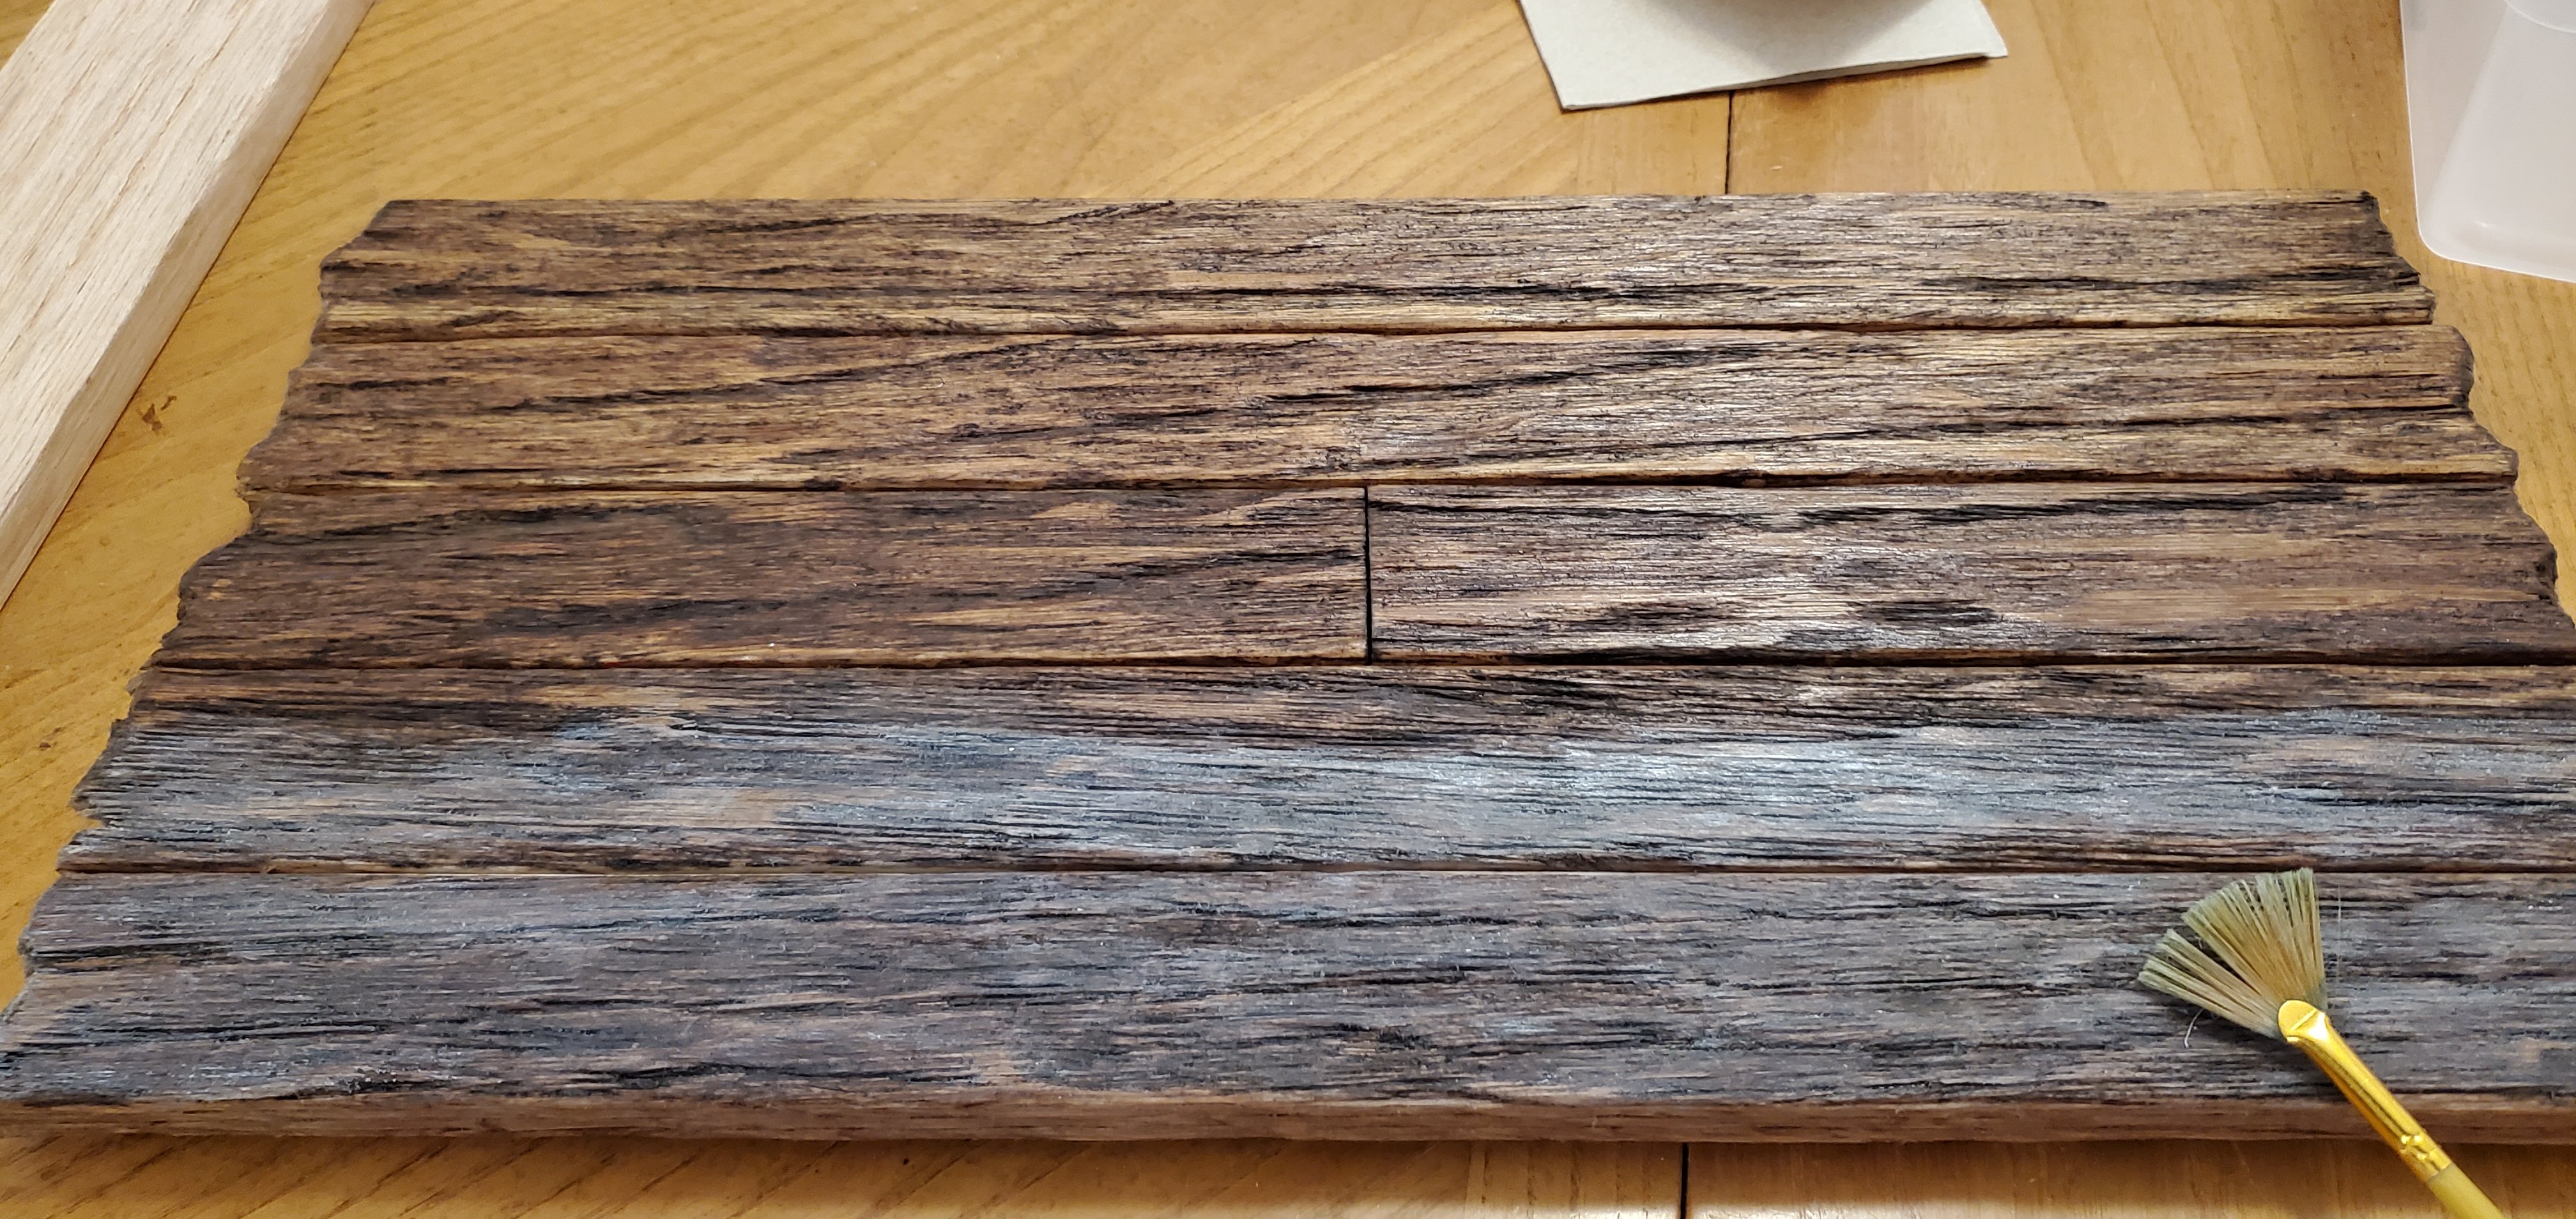
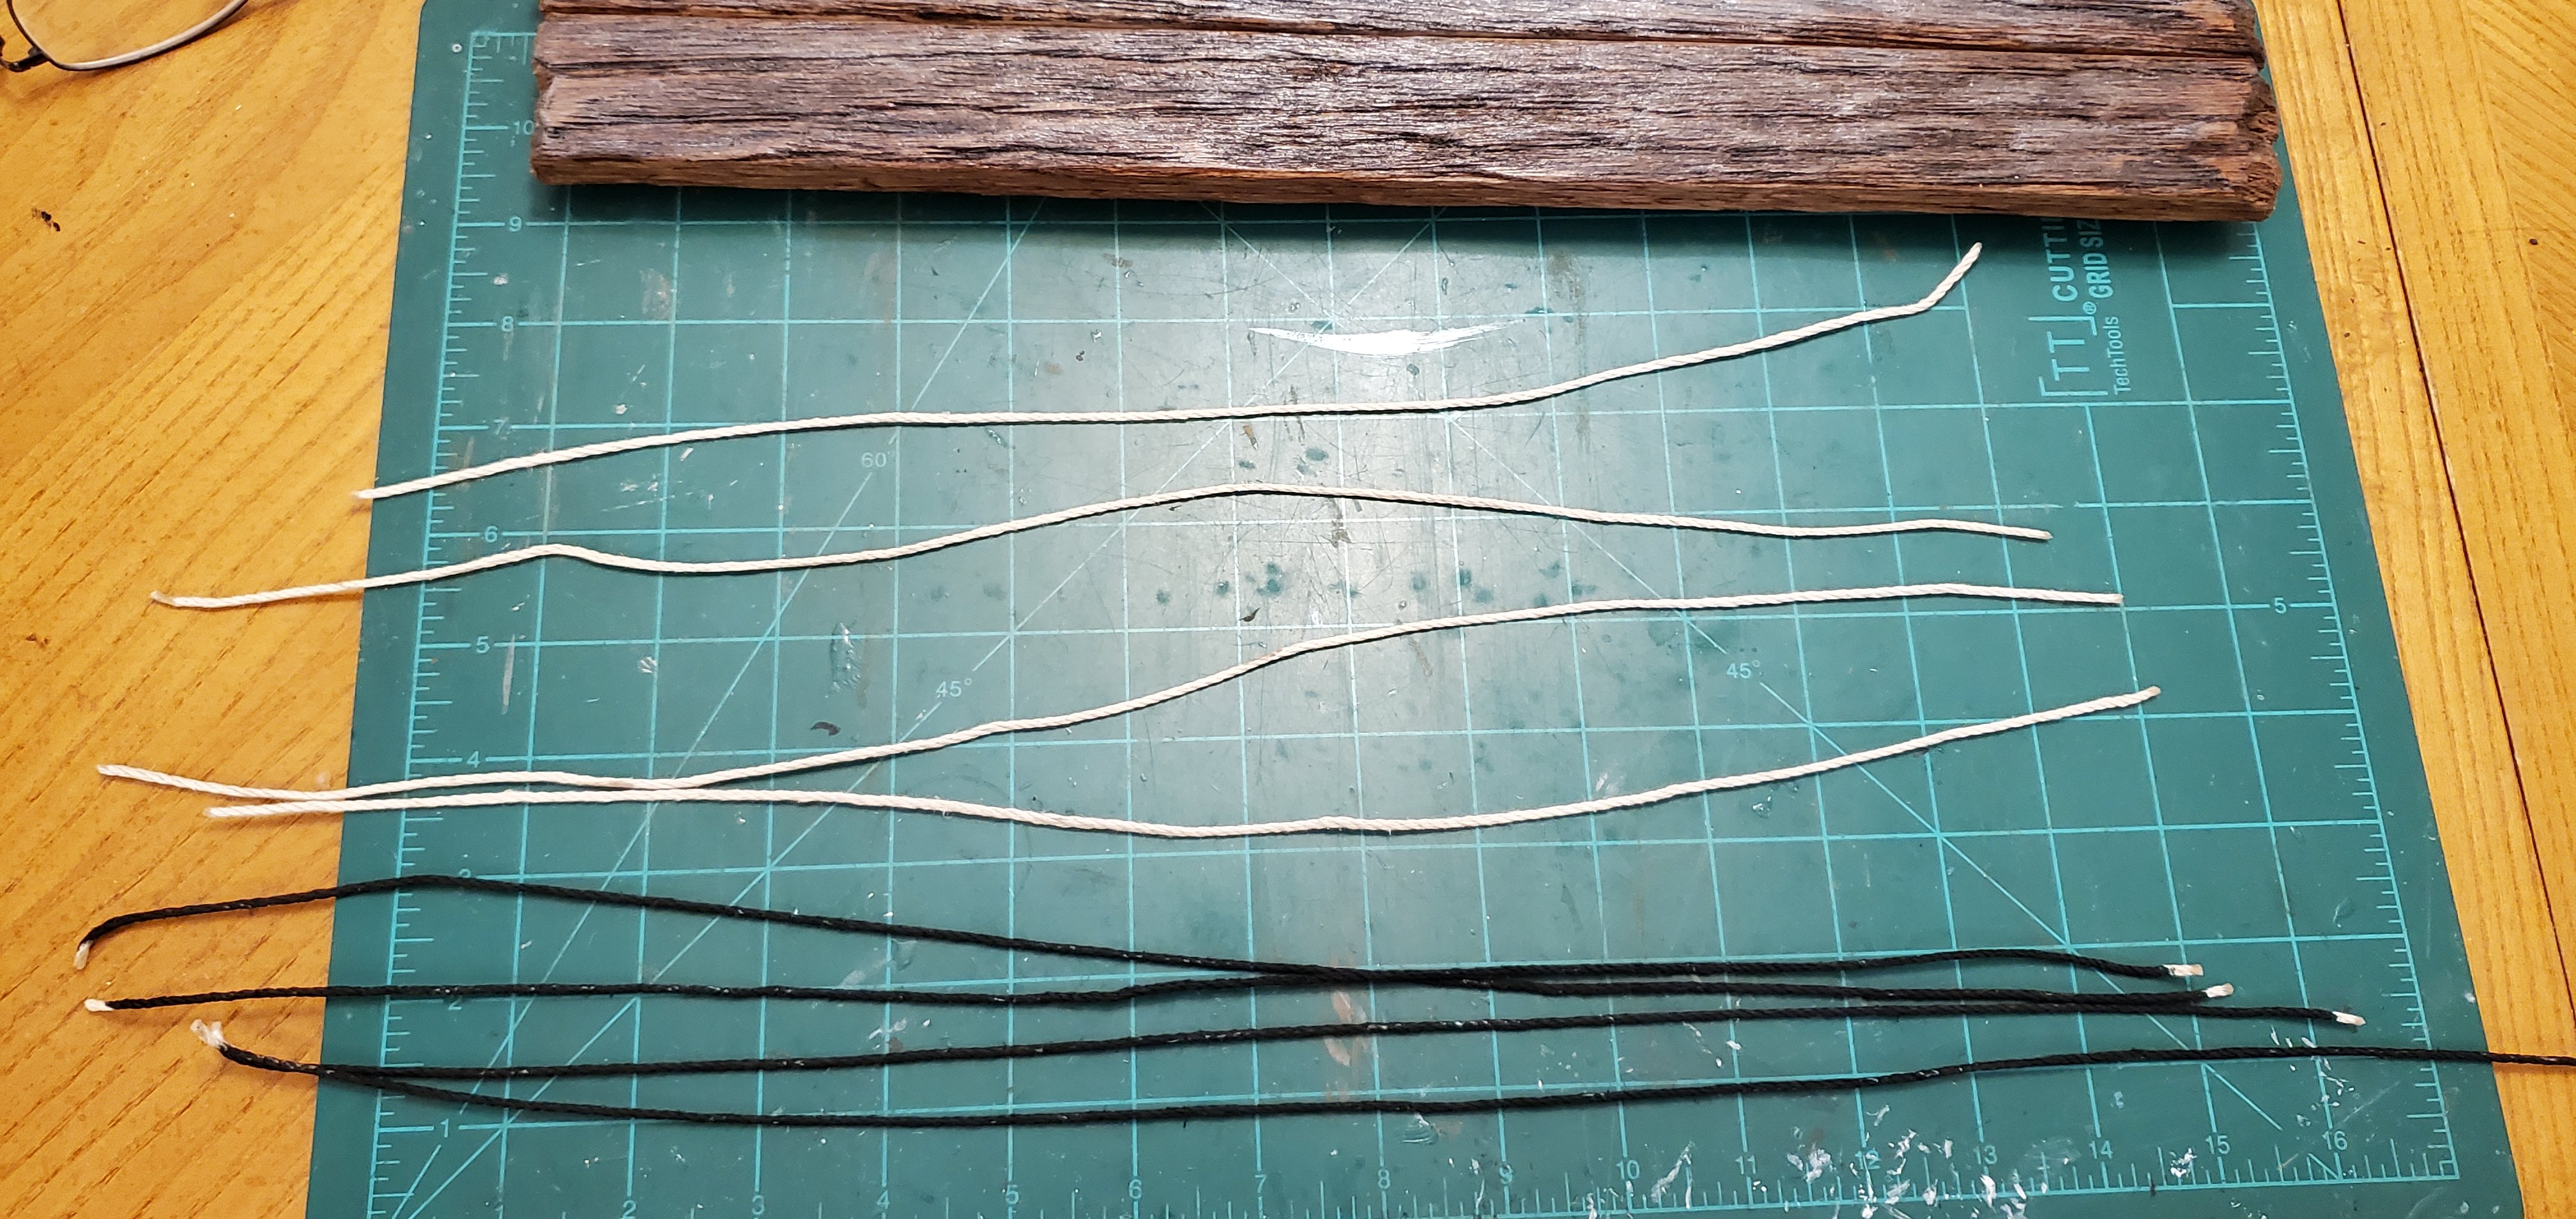
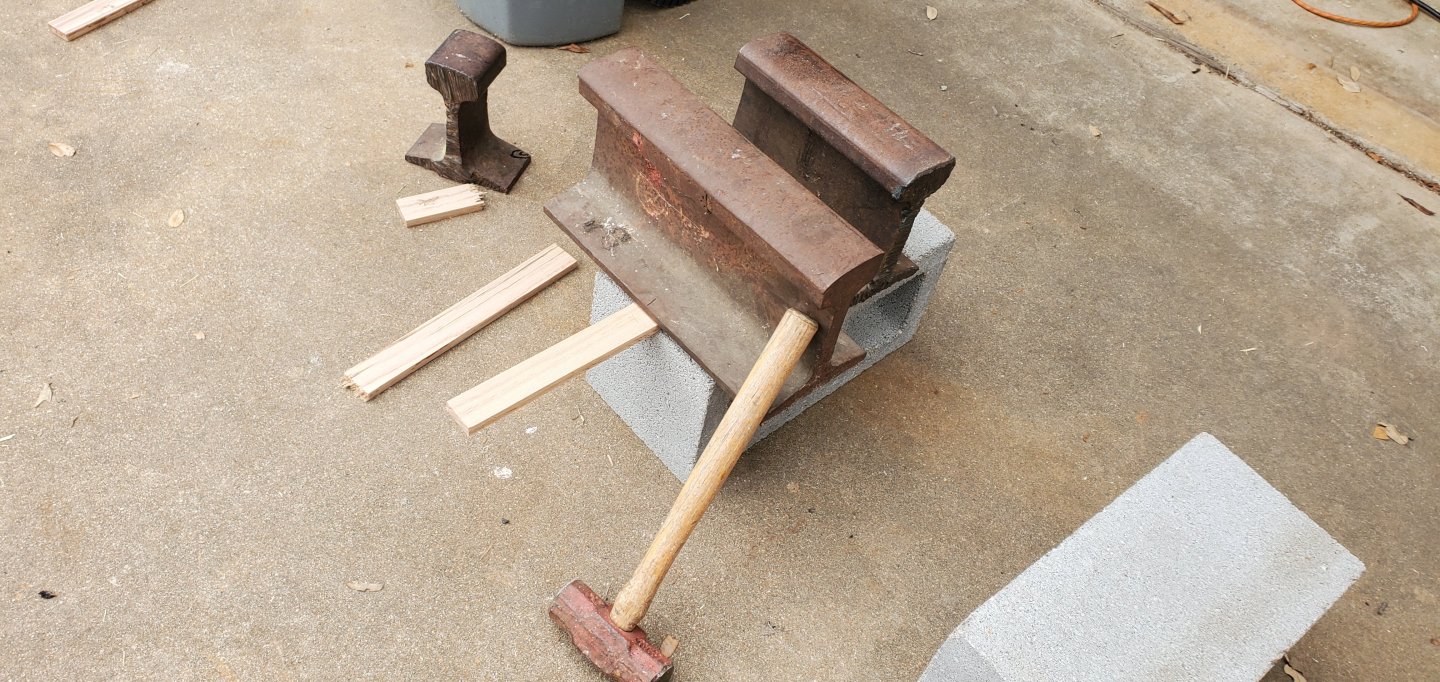
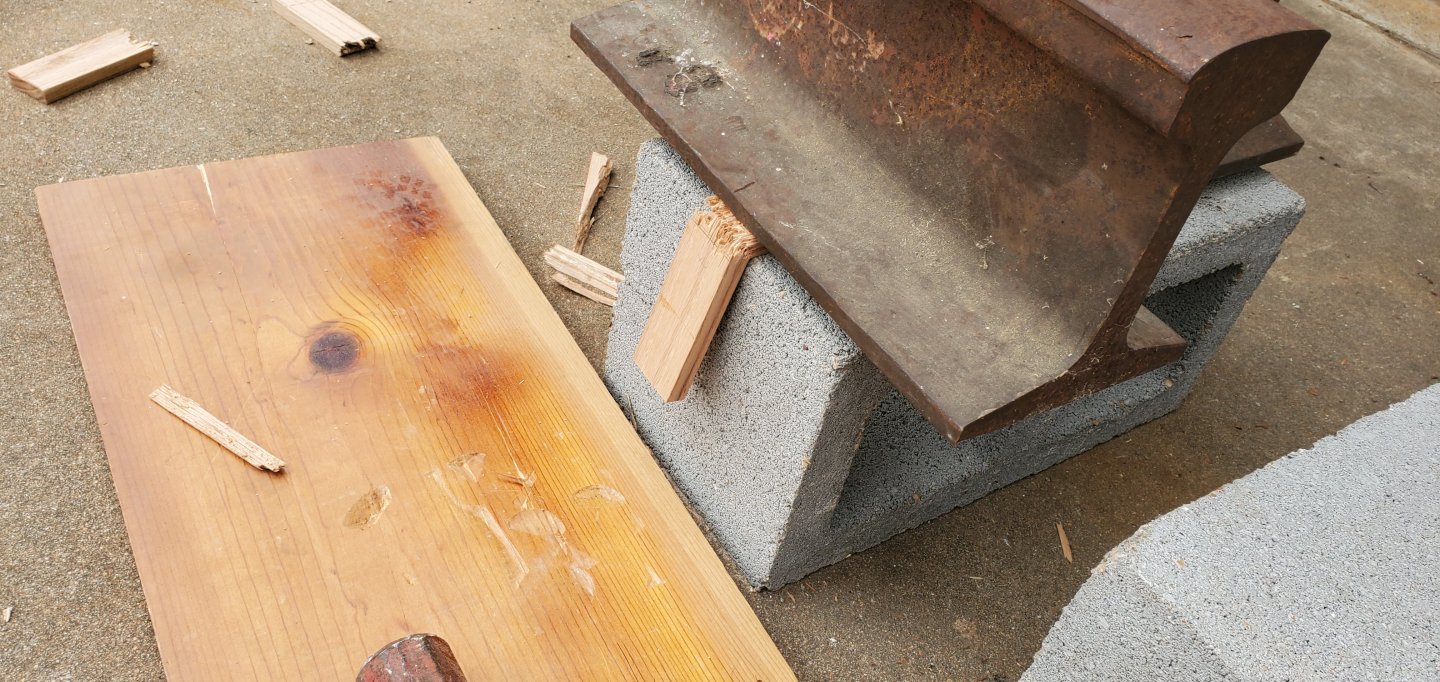
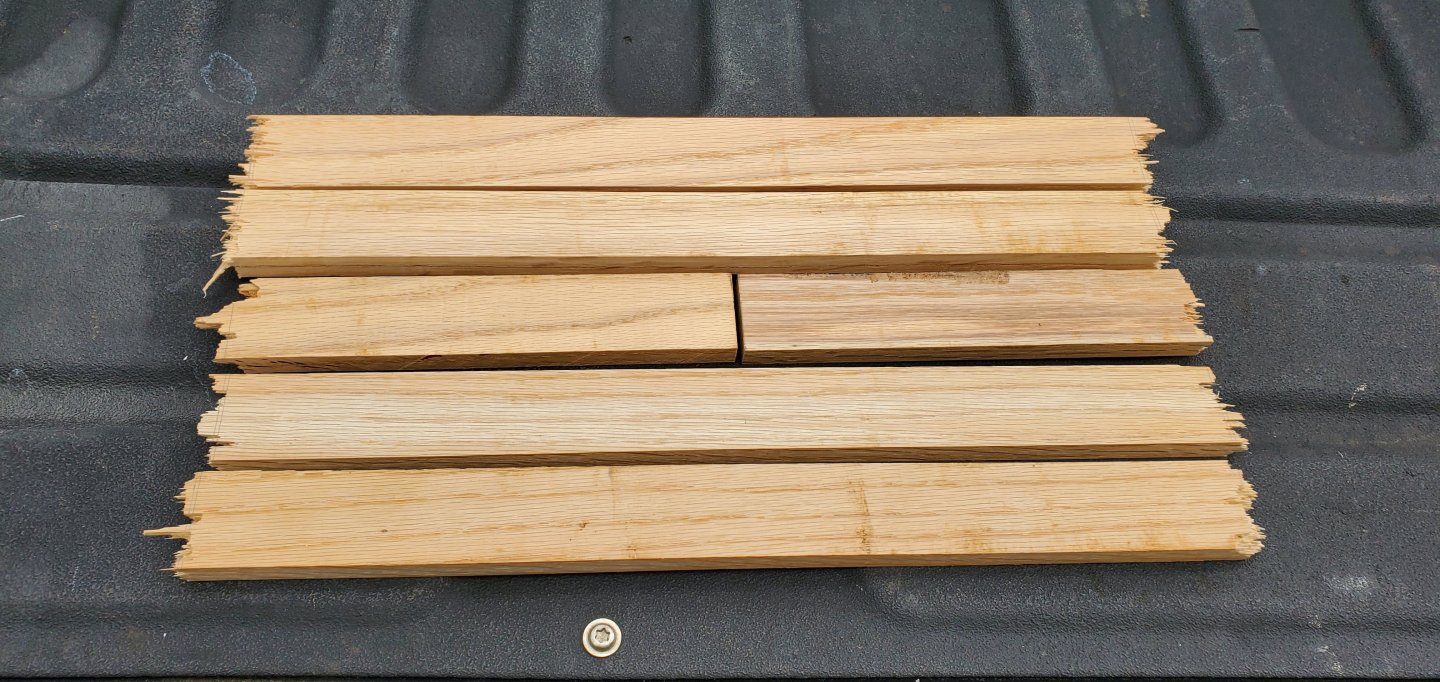
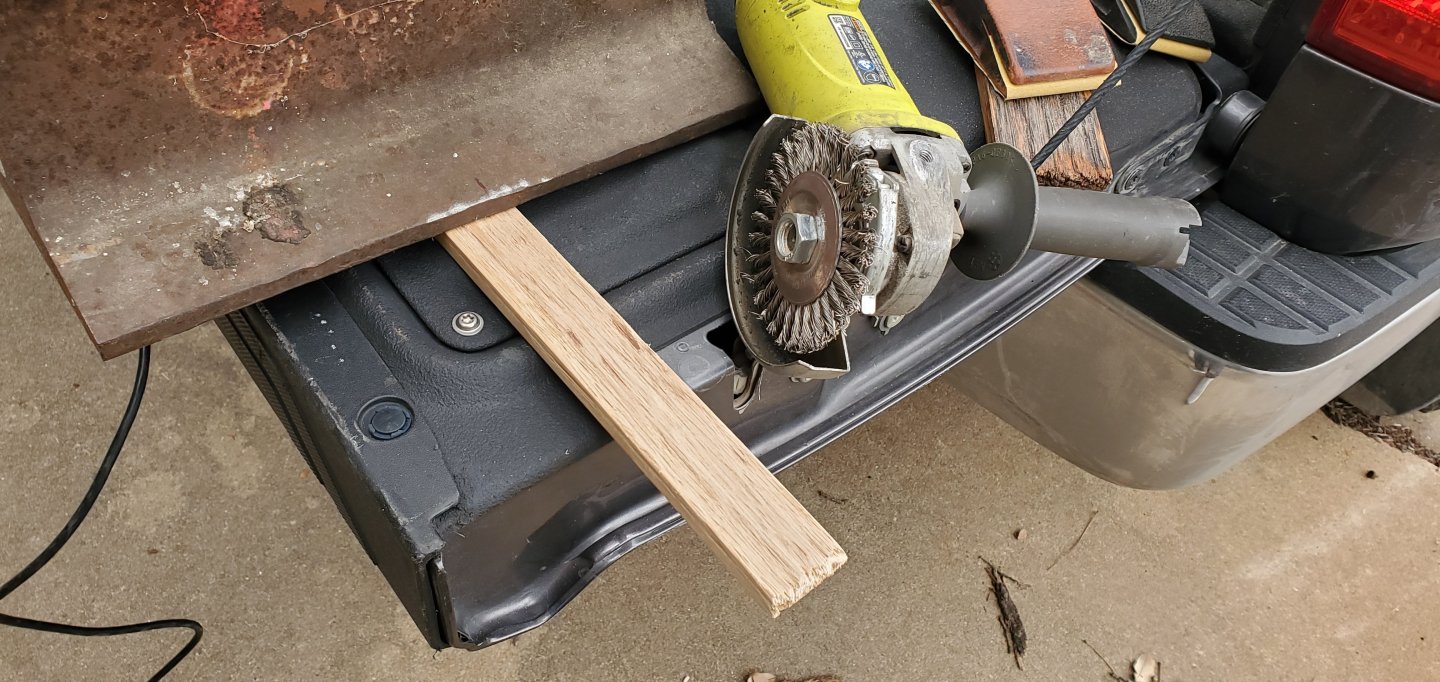
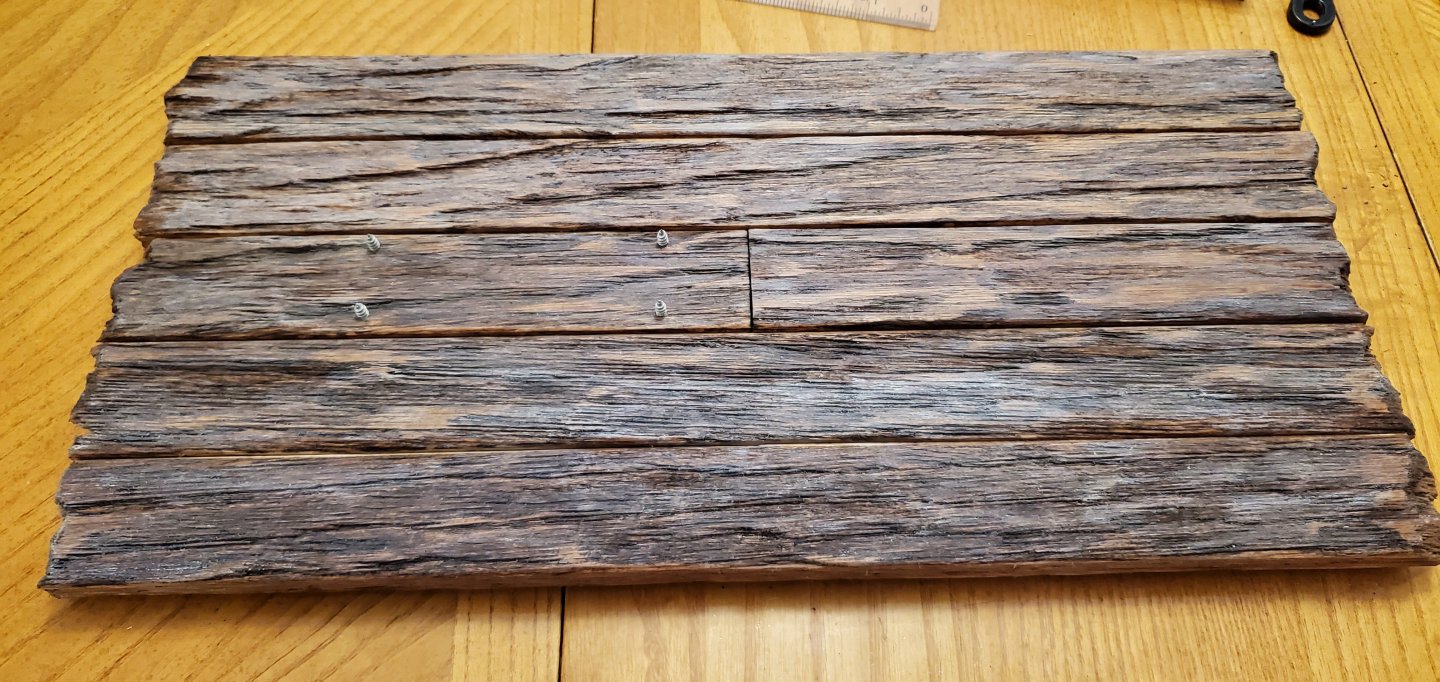
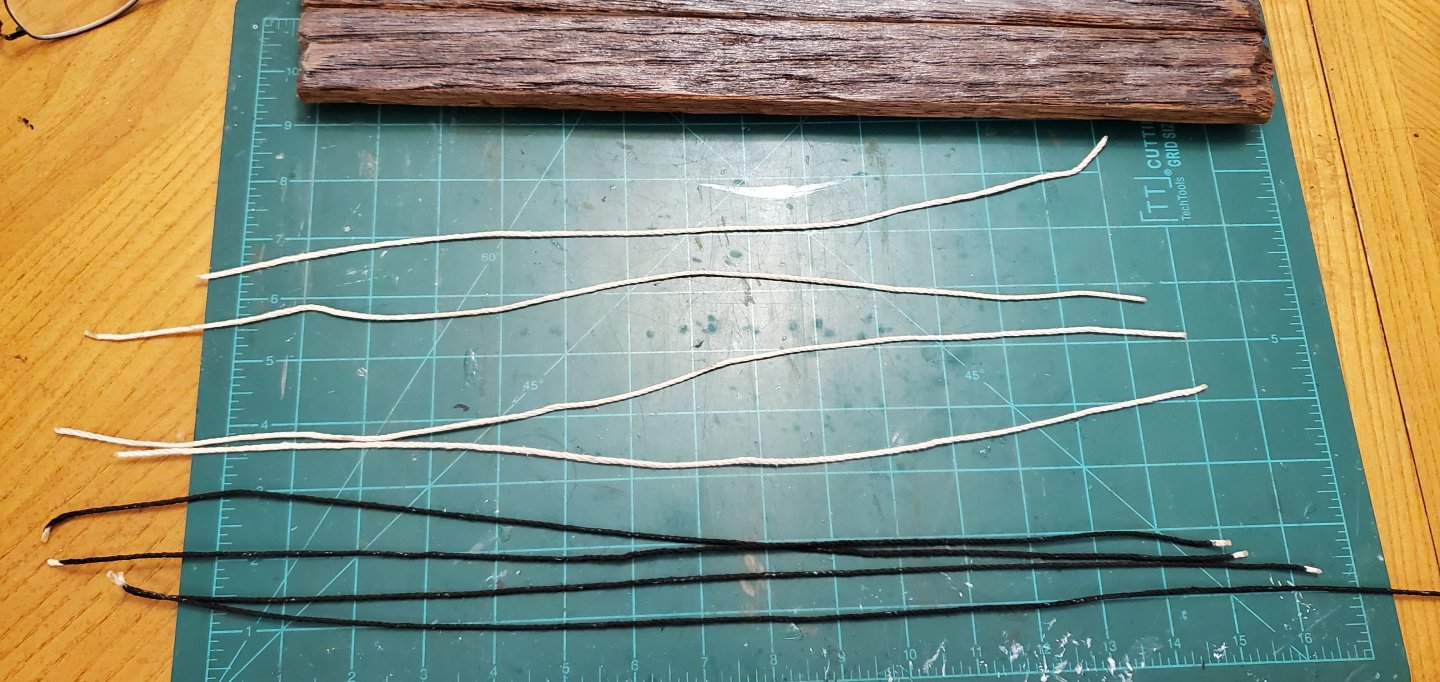
I finally emerged from my ratline stupor on the Constitution and got to work on the base for this project. However, I decided to change directions on the base. Originally, I was going to set the bottle in the middle of that swirled piece of wood shown in an early post. But looking at it now, I think the piece of wood is too large. It swallows up the bottle and overwhelms the ships. So I decided on a base that’s smaller in stature and ties more directly to the pirate/ghost ship theme. So now the idea is to make a base that looks like a section of an old, weathered, pirate/ghost ship deck and have the bottle rest atop it. I started with finished oak strips that are ½” tall by 2” wide and 24” long. I only had 4 in hand that were long enough so I pieced 2 shorter ones together for the middle plank (the seam between the ends will be hidden under the bottle). Next, instead of clean ends on each plank, I decided to make rough, broken edges to add to the old, weathered look. Here, I found another use for my heavy pieces of railroad track. I used 2 pieces of track to securely hold the oak plank down on a cinder block. Then I took a hand sledge hammer and gave the extruding end a hard WHACK. It broke off pretty rough but I figured I could clean it up a bit and soften the sharp splinters. Here's all the planks whacked down to their proper length which is about 16”. Now for the ageing and weathering. I’ve learned 2 things about ageing and weathering wood. The first was from @gjdale and his Foss Landing diorama when he taught me that ageing and weathering is not just about the color, it’s also about the texture. To give my planks the proper texture, I used an angle grinder with a stiff-wire scraping attachment and cut deep, random grooves into the surface. I also used it on the splintered board ends to soften them. Here’s all the raw planks after the angle grinder treatment. The second thing I’ve learned about ageing/weathering wood has to do with the color. There’s a lot of old barn wood at my ranch that’s been out in the elements for decades. Studying the old barn wood, there are layers of colors that provide its aged look. So that’s what I tried to do with these planks. I had it in my mind that an old pirate/ghost would be on the dark side, with shades of brown, and gray showing through. So I started with a layer of English Chestnut stain. Then I hit the deeper grooves with a much darker Early American stain. When that base coloring dried, I made several mixes of Tamiyo white and Tamiyo gray and thinned each pool with a bunch of acrylic thinner to make several fairly transparent washes. Finally, I took a fan brush and very lightly applied the different washes across the surface of the planks. In the pic below, the first 2 planks have the wash applied and you can see how the wash really adds to the layering of colors compared to the planks above them. The last pic shows all the planks with stain and wash. The picture makes it look a little more shiny that it really looks with your eyeballs. Here's all the planks with the washes applied. The final task for the base was to add oakum between the planks. For oakum, I used strands of hemp which I colored black before pushing them into the grooves. And here's the completed base with cradles for the bottle added. Not quite home yet, but the finish line is right around the corner!


- 185 replies
-
- 19
-
-
-
- Flying Dutchman
- Black pearl
- (and 2 more)
-
Beautiful craftsmanship. Every line is so clean and tight. Well done, Paul.
- 201 replies
-
- 4
-
-
- Oyster Sharpie
- first scratch build
- (and 1 more)
-
Nice recovery. She looks great!! And I'm sure the first mate's laughter was the supportive and encouraging type of laughter!
- 207 replies
-
- 5
-

-
- vanguard models
- Duchess of Kingston
- (and 1 more)
-
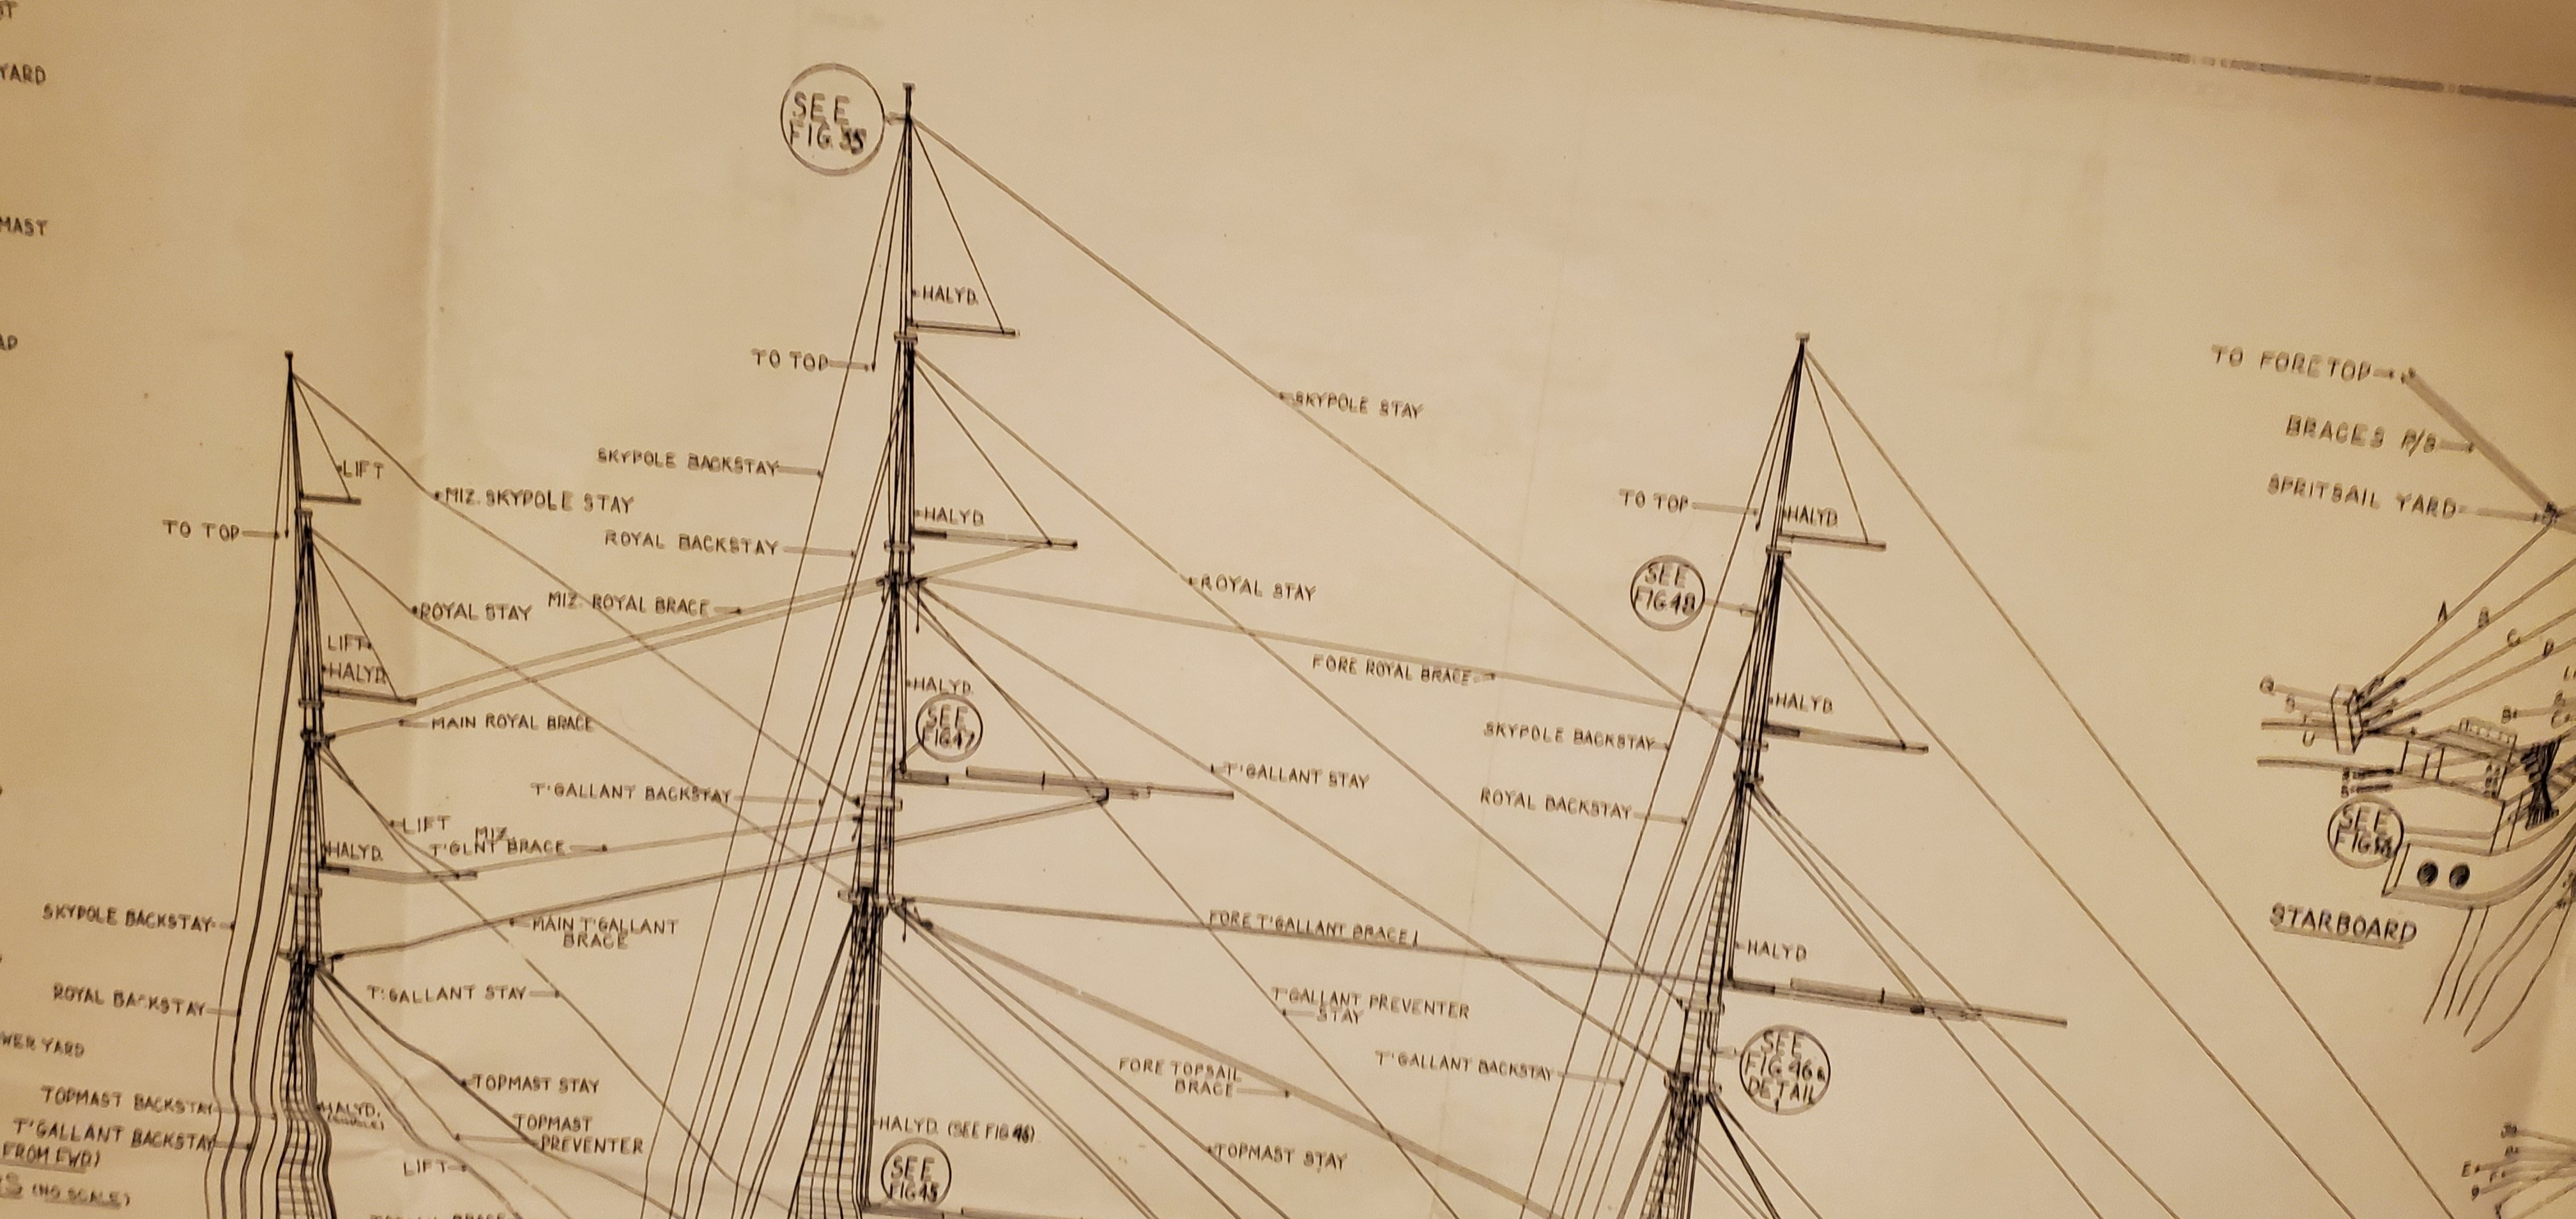
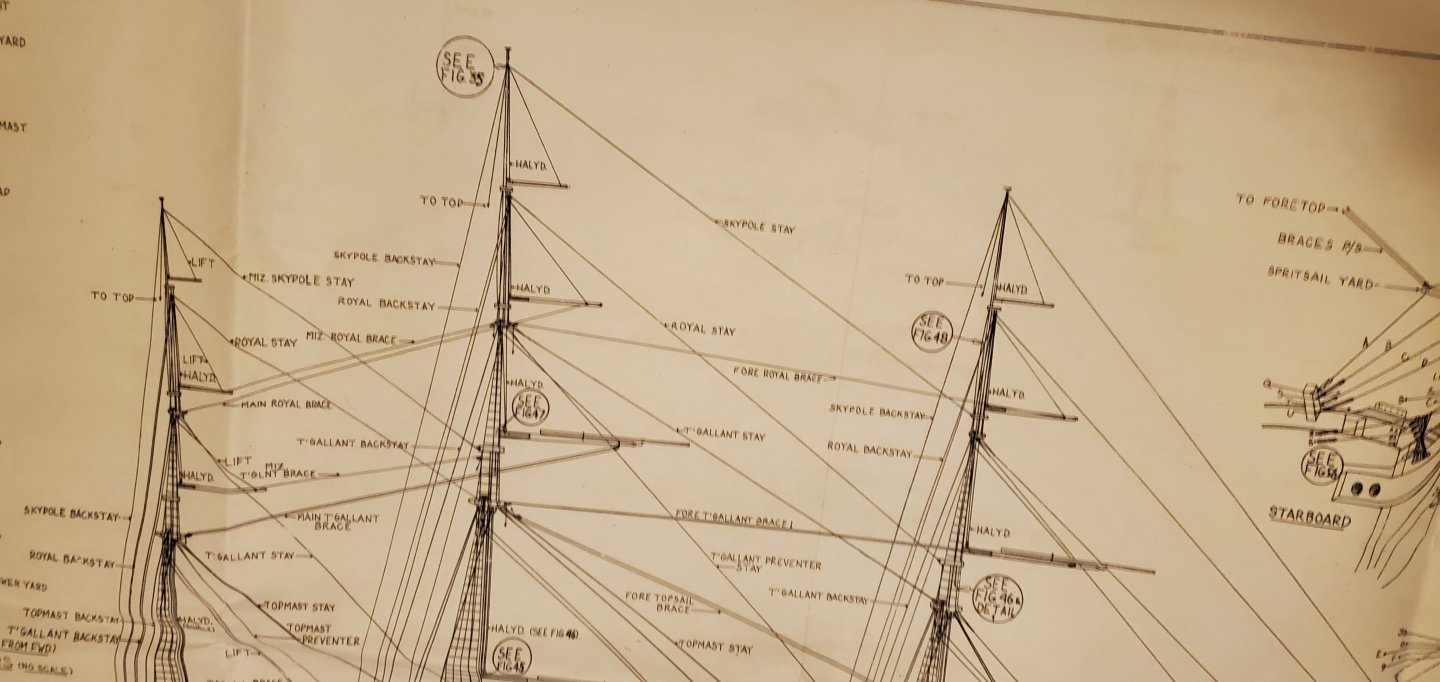
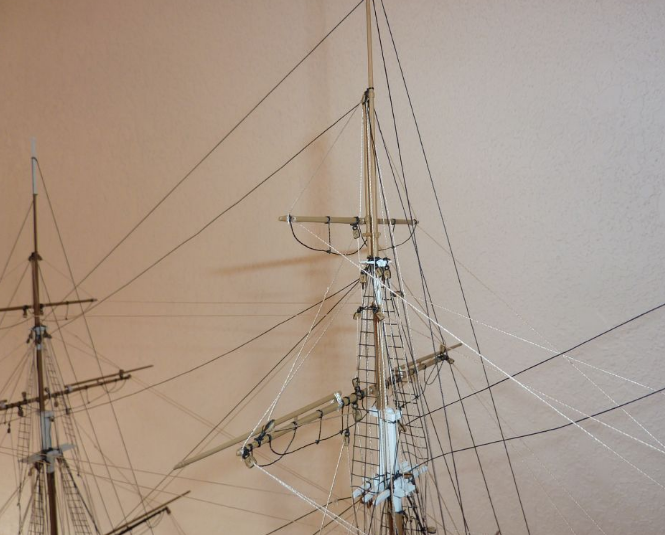
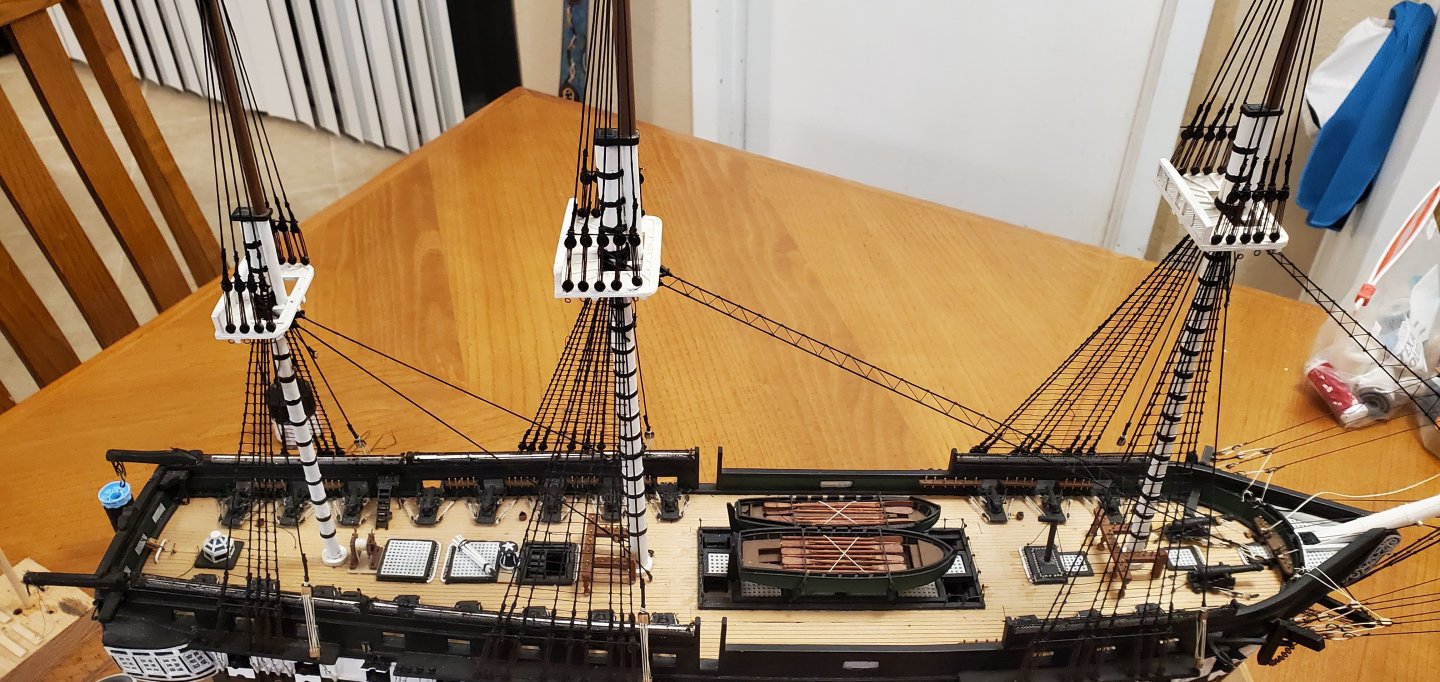
I find that interesting too, Ian. Some of the build logs I've been using for reference do not have ratlines on the topgallant shrouds. However, the BlueJacket rigging plan clearly shows ratlines on the topgallant shrouds. I've also gone thru a bunch of Constitution pics in the MSW Gallery and most of those also have the 3rd level of ratlines, like this one from @AndyMech. So as much as I'd like to have all the ratlines in my rear view mirror, I've still got a few to do. You make another interesting point about the topgallant shrouds being too narrow for use as a ladder. The plans also show a "Jacob's Ladder" that runs from the cross trees of the topmast to the cross trees of the topgallant mast and is perpendicular to the longitudinal line of the ship rather than parallel like the ratlines. So not only do I get to do more ratlines, I also get to build a few ladders!
- 301 replies
-
- 9
-
-
- Constitution
- Bluejacket Shipcrafters
- (and 1 more)
-
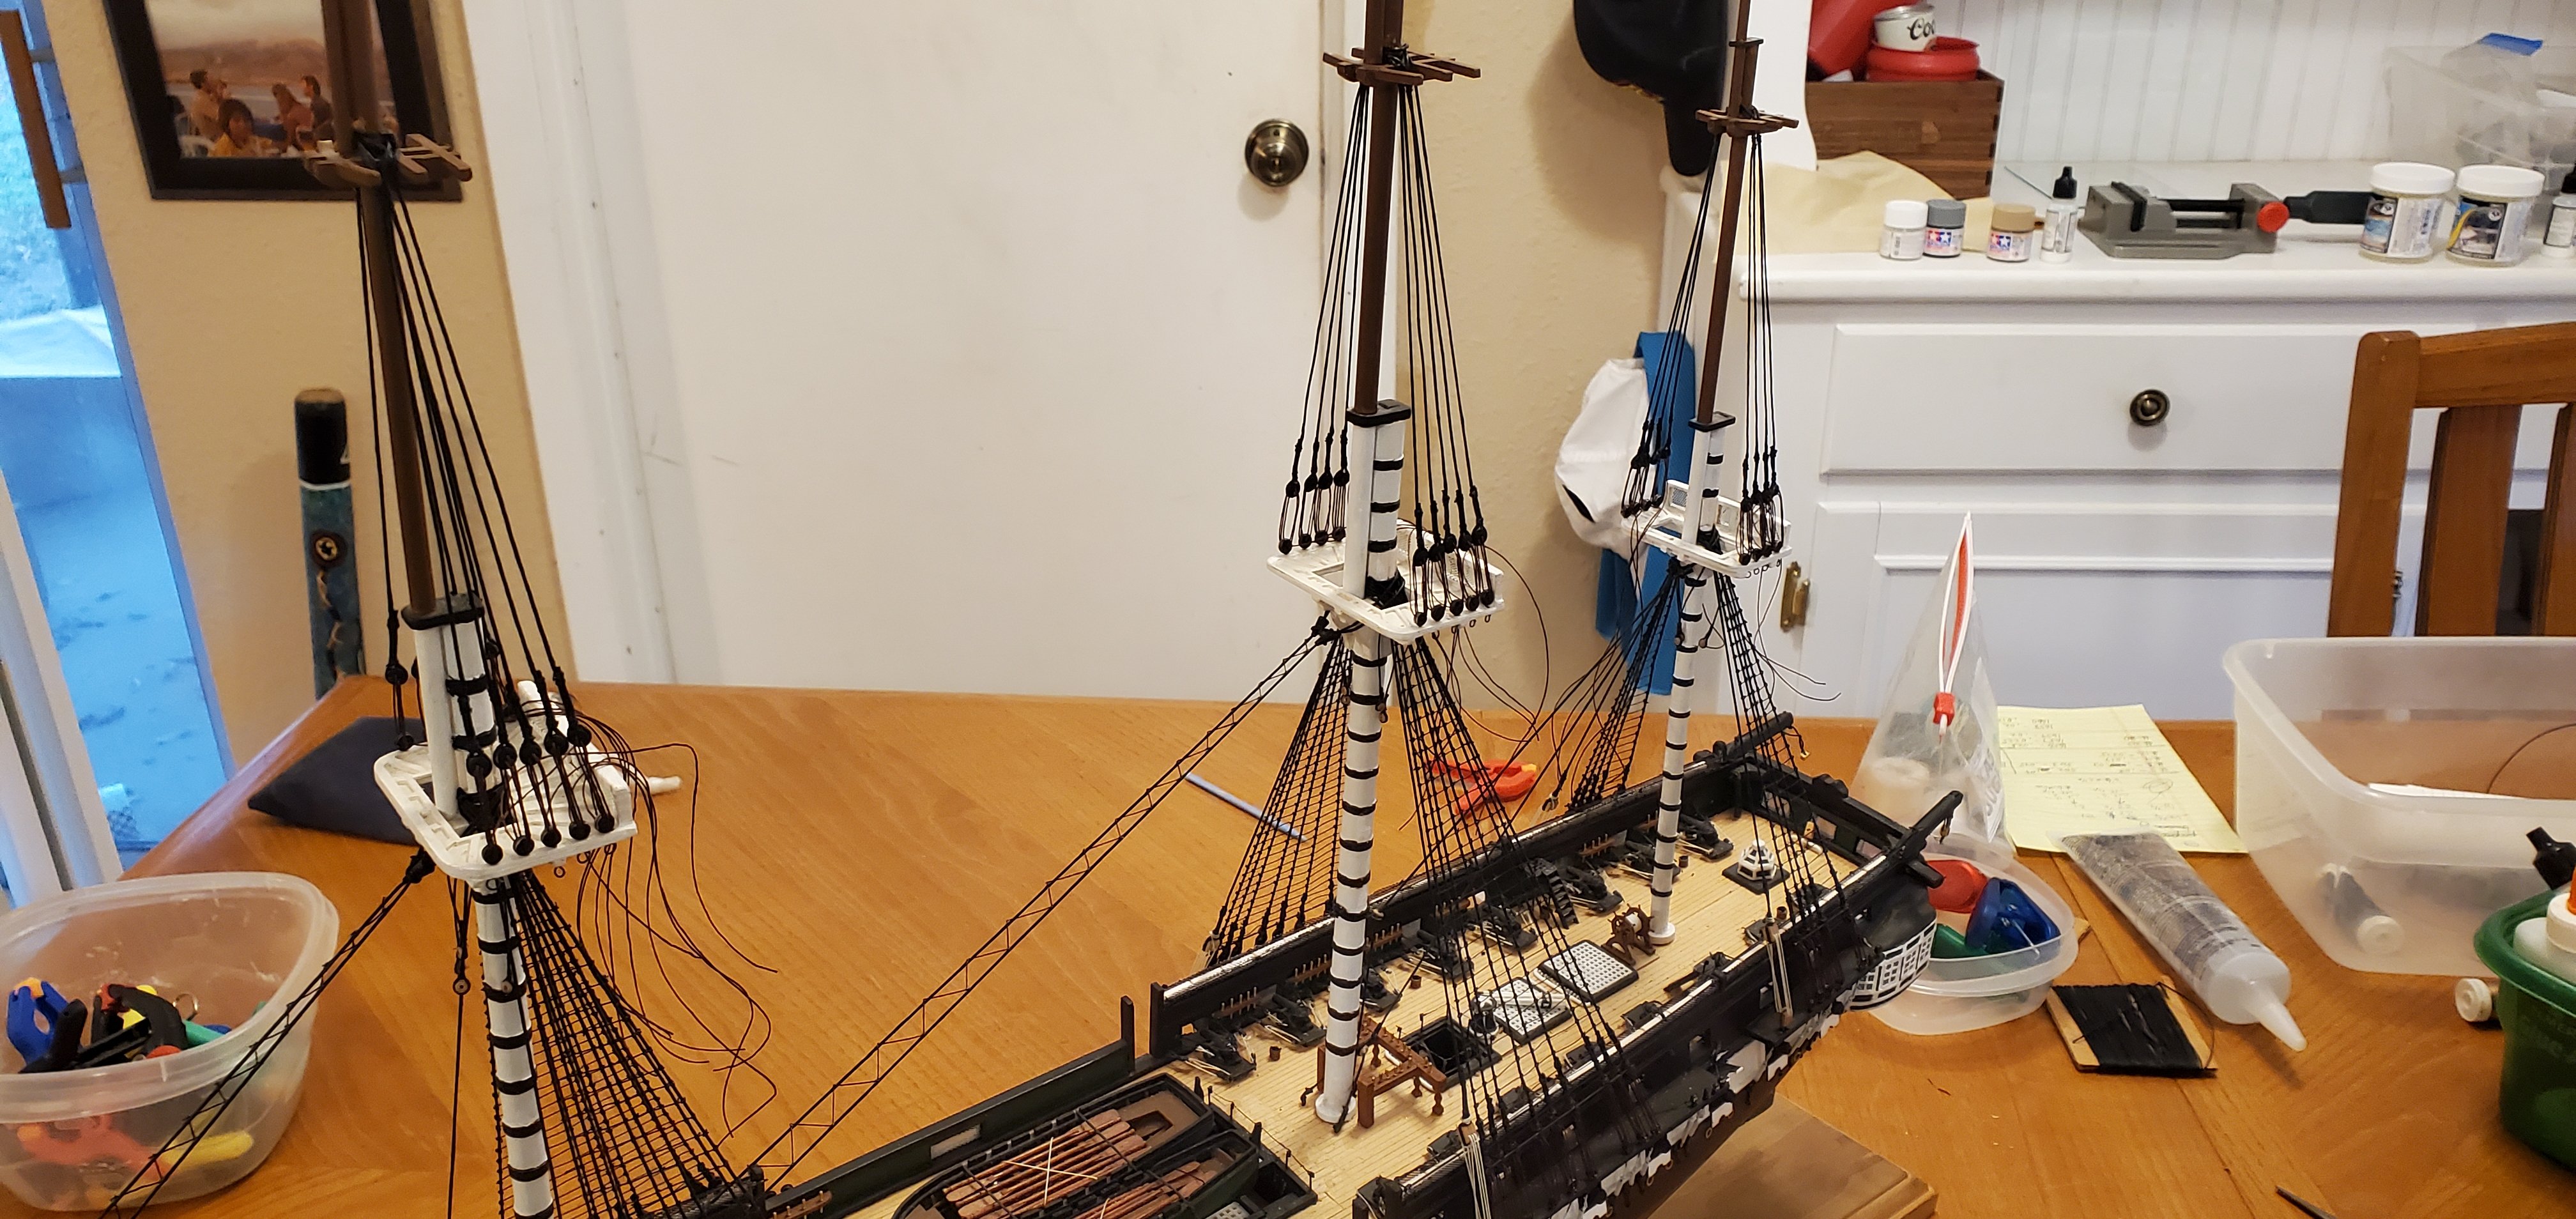
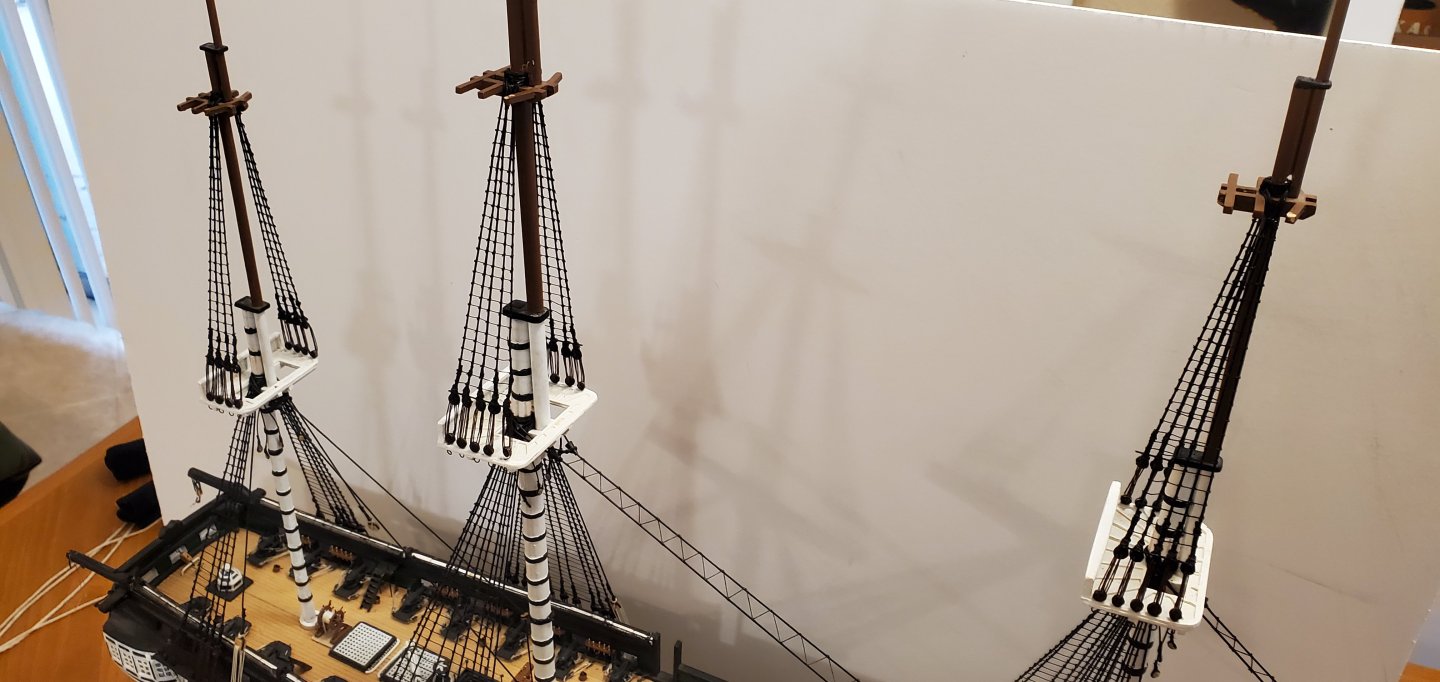
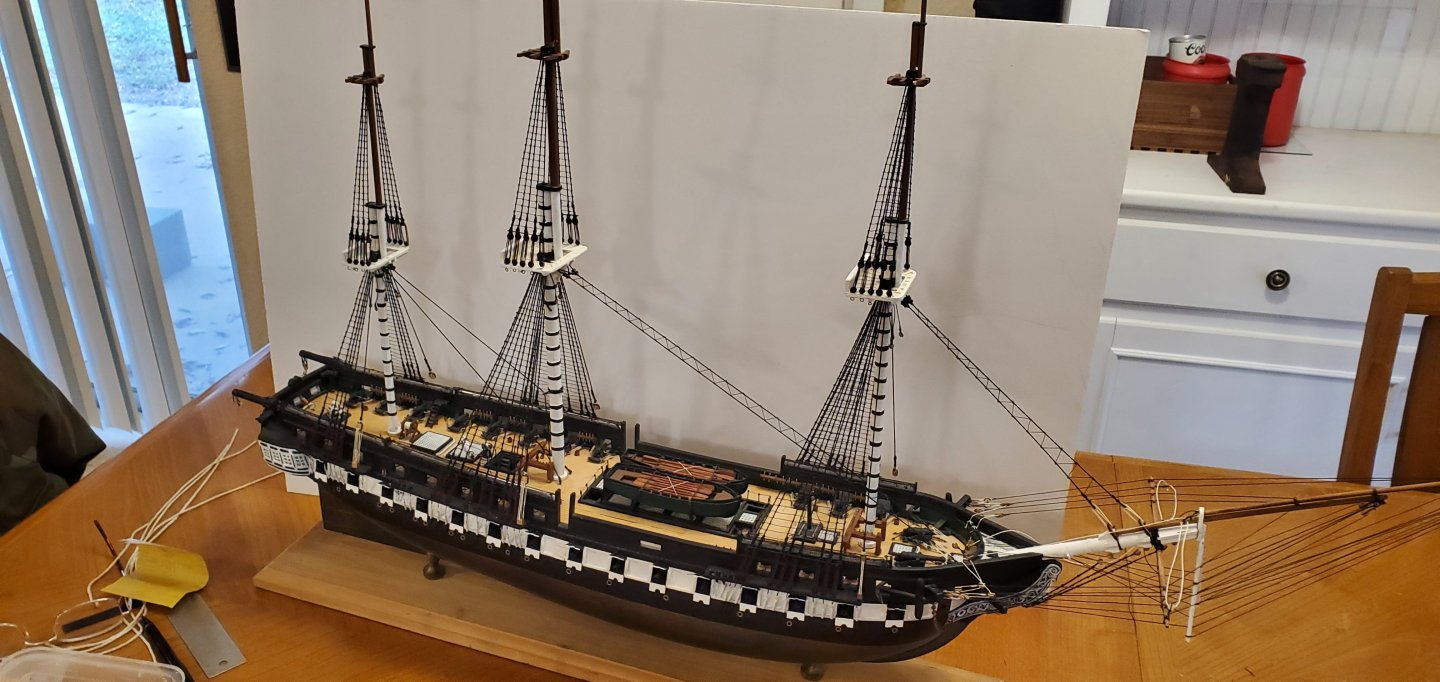
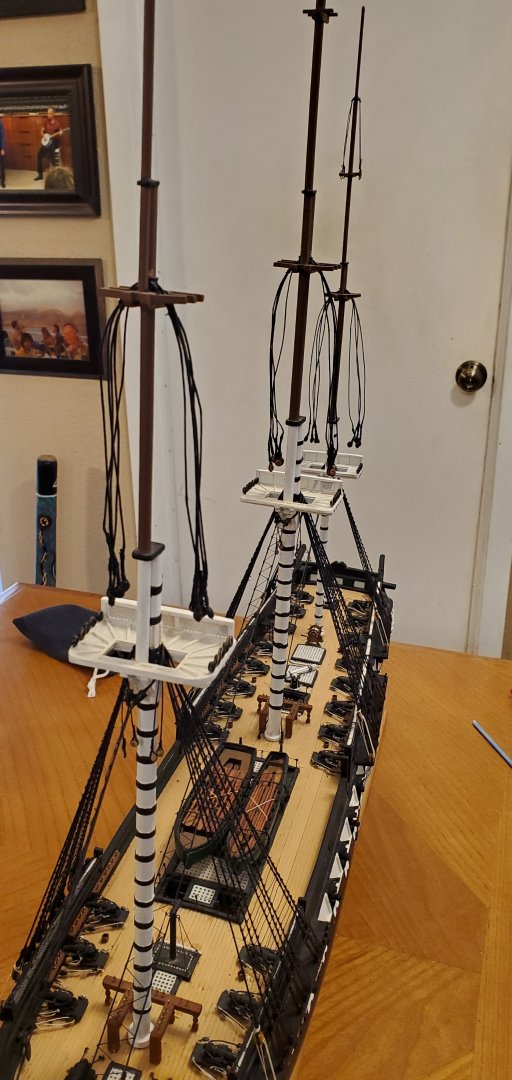
Second level of ratlines complete! Only the top gallant shrouds/ratlines left to go. But they are only 3 strands each and short by comparison. So they should only take hours instead of days! I can see light at the end of ratline tunnel!! 🐀🐀🐀 Time to hop back over to the Flying Dutchman/Black Pearl to put the finishing touches on that project.
- 301 replies
-
- 11
-
-
-
- Constitution
- Bluejacket Shipcrafters
- (and 1 more)
-
As Jerry Lee Lewis used to sing, "Whole lotta shakin goin on..." Regardless, you're rigging looks great. Bob!
- 207 replies
-
- 5
-
-
-
- vanguard models
- Duchess of Kingston
- (and 1 more)
-
LOL!!! BTW, nice detailed work on that dredge pipe. Very convincing. And I like the cloud too.
- 70 replies
-
- 3
-
-
-
- Scheldt River
- Dredger
- (and 2 more)
-
That makes me think back to when I first started my longhorn herd several years ago. I learned something fascinating about cows. They can walk, eat, and poop all at the same time. I guess they haven't designed a dredger yet that can multi-task like that! 😃
- 70 replies
-
- 6
-
-
- Scheldt River
- Dredger
- (and 2 more)
-
If I understand correctly, the cotton wool behind the drag head would be kind of a dredging wake as the ship inches forward? If so, I like that idea and think that would add a visual of some motion to an otherwise static display. Speaking of motion (as if you weren't facing enough challenges already with this project), I'm really hoping you have a plan to show the sediment spraying from the bow like the picture below. 😃

- 70 replies
-
- 2
-
-
- Scheldt River
- Dredger
- (and 2 more)
-
Thank you, Mr. Salty! I wish I could take credit for the entirety of this build, but most of the fine work was done by the original builder. I just did a bit of repair work and am now grinding my way through the rigging. Regardless, I definitely appreciate your complimentary words and you following along.
- 301 replies
-
- 4
-
-
- Constitution
- Bluejacket Shipcrafters
- (and 1 more)
-
Thank you for the kind words, Mr. Frost. Very much appreciated.
- 301 replies
-
- 5
-
-
- Constitution
- Bluejacket Shipcrafters
- (and 1 more)
-
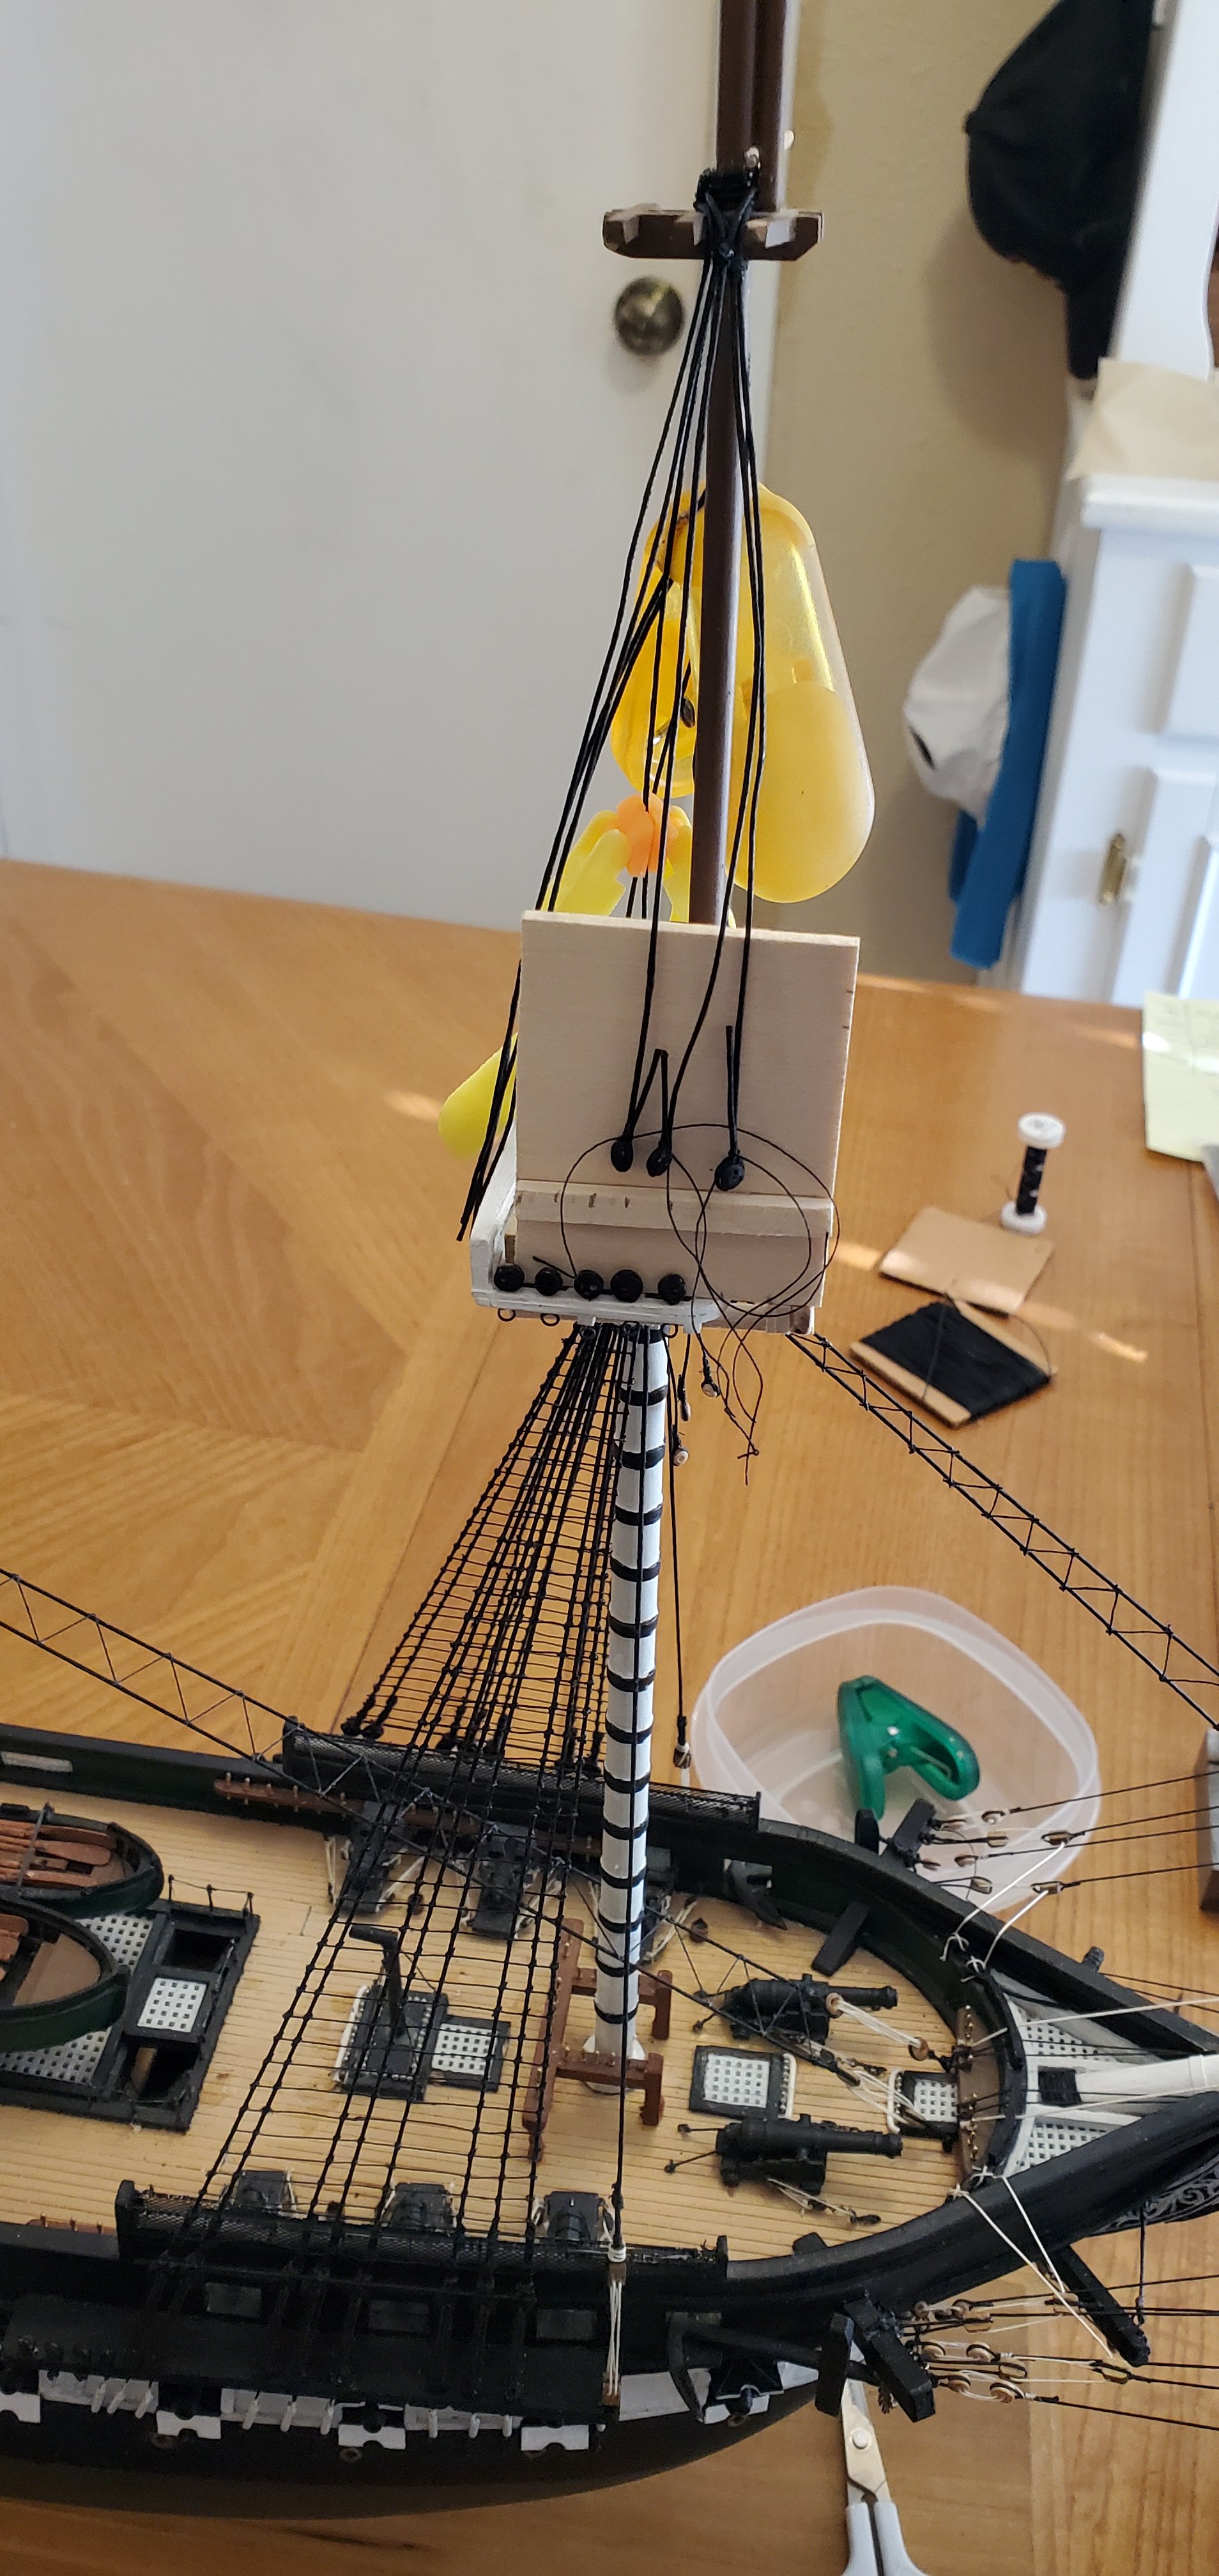
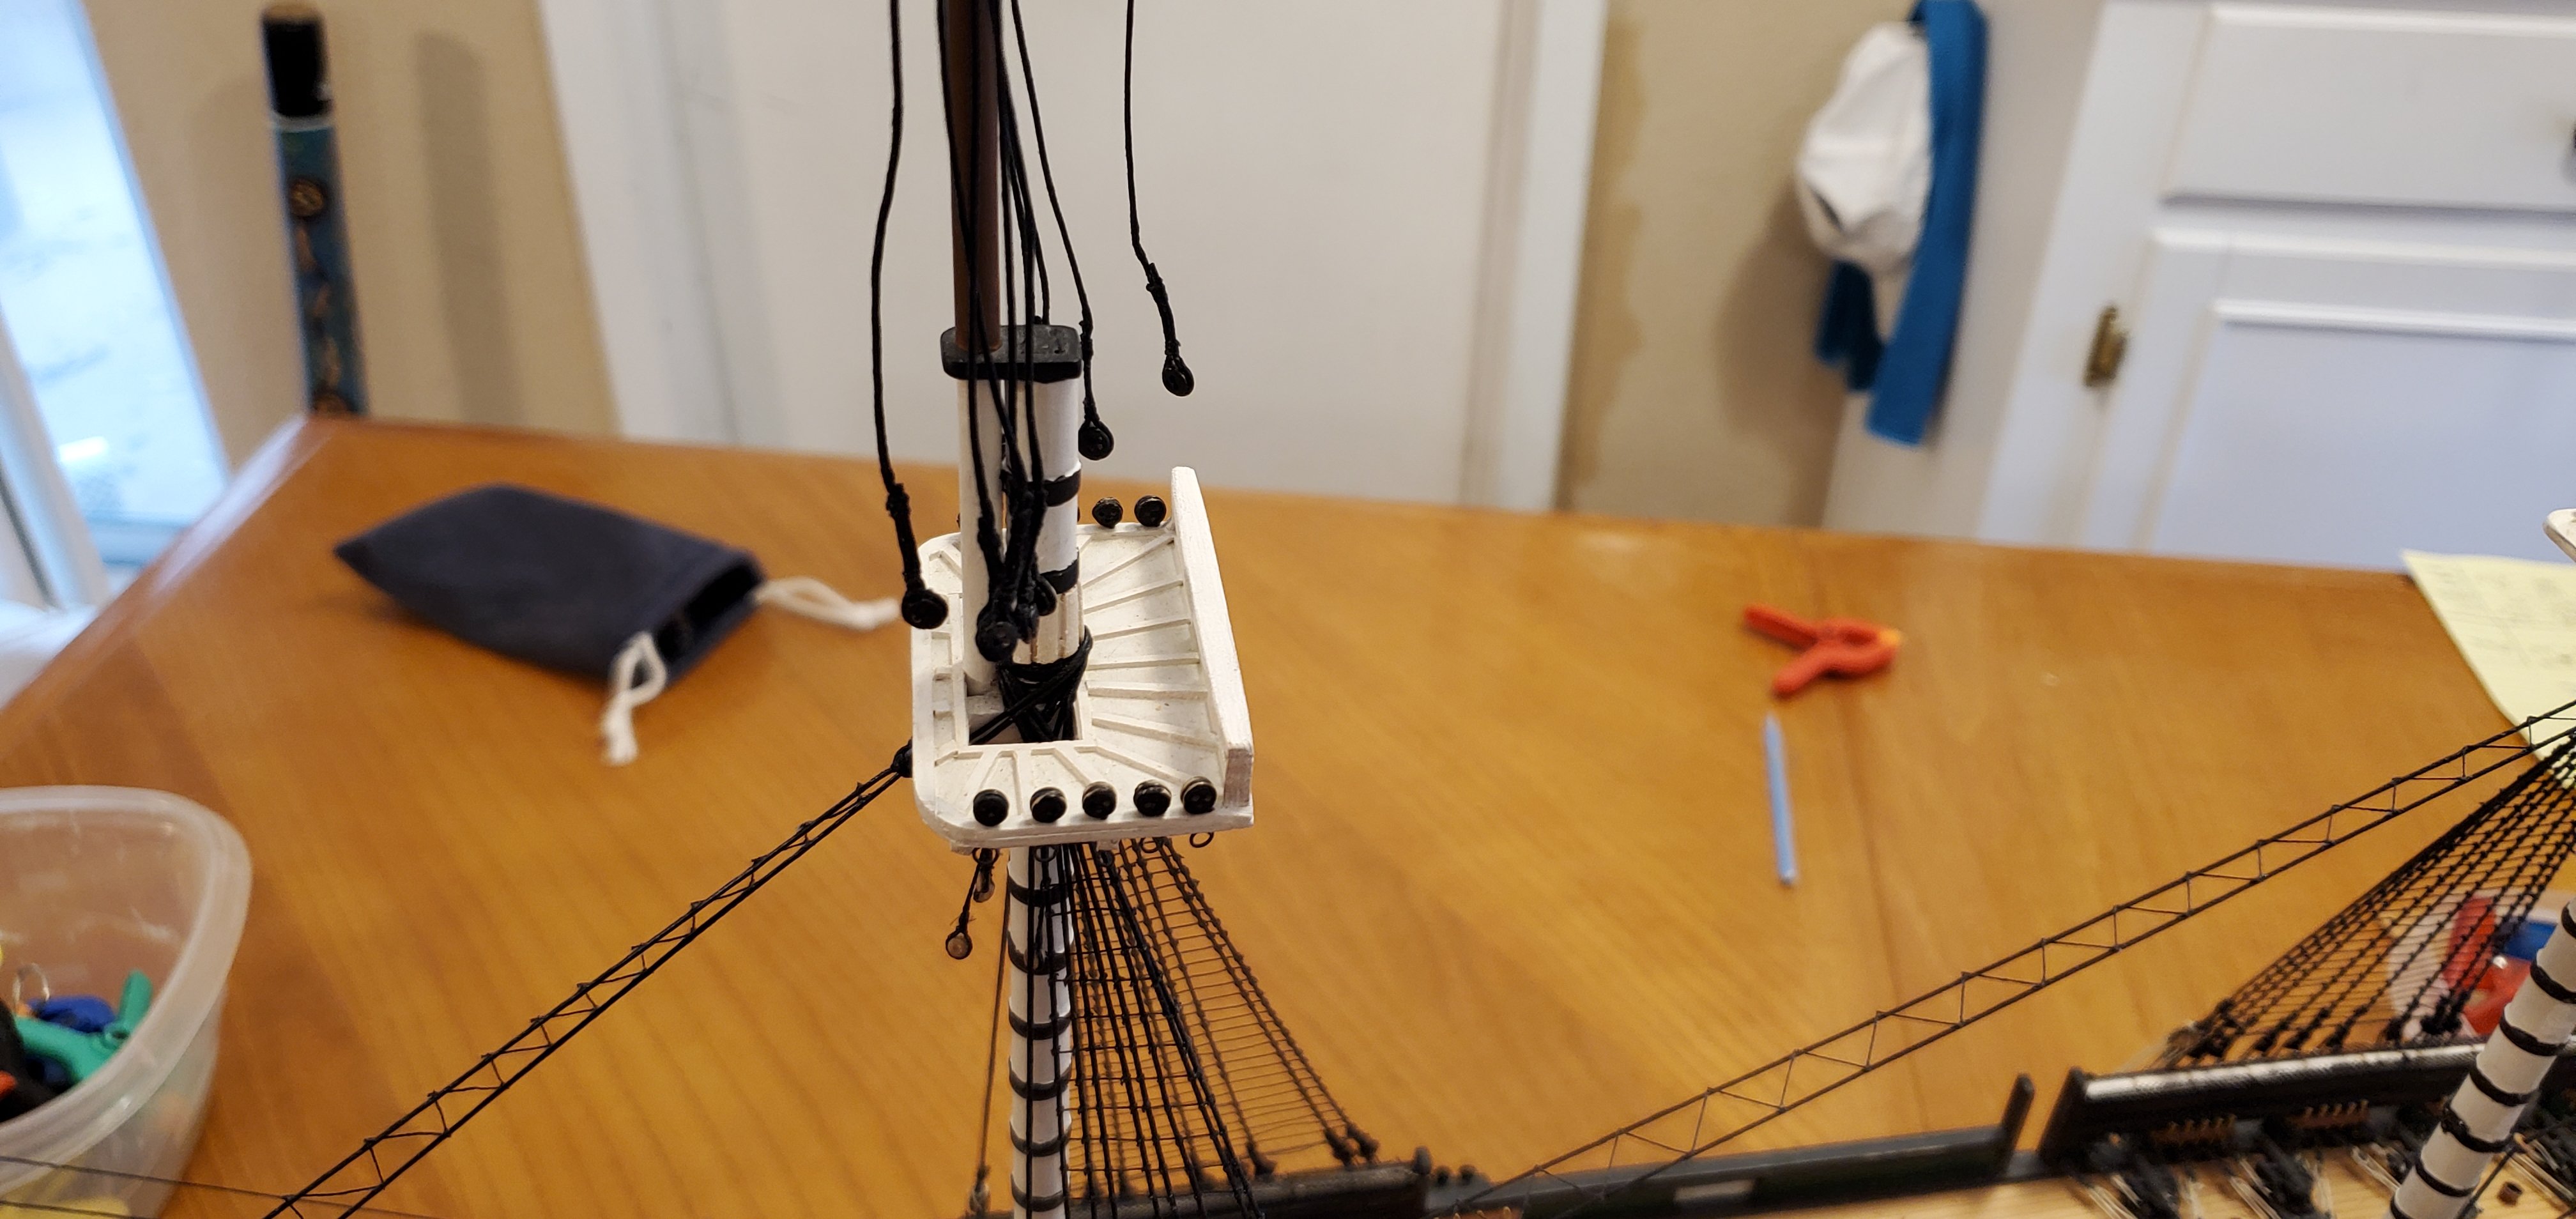
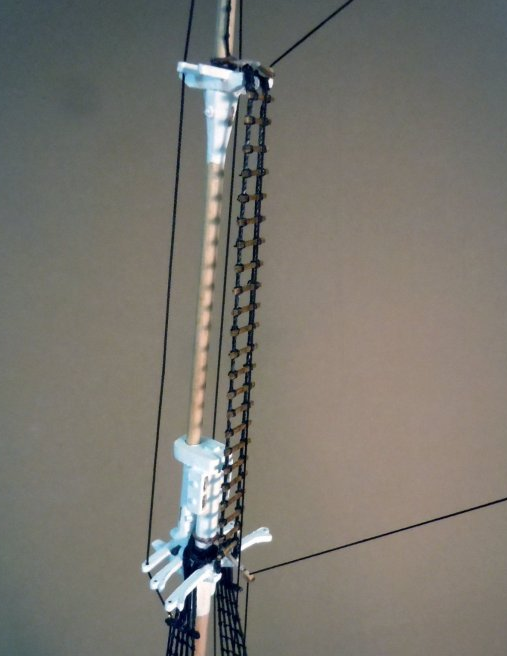
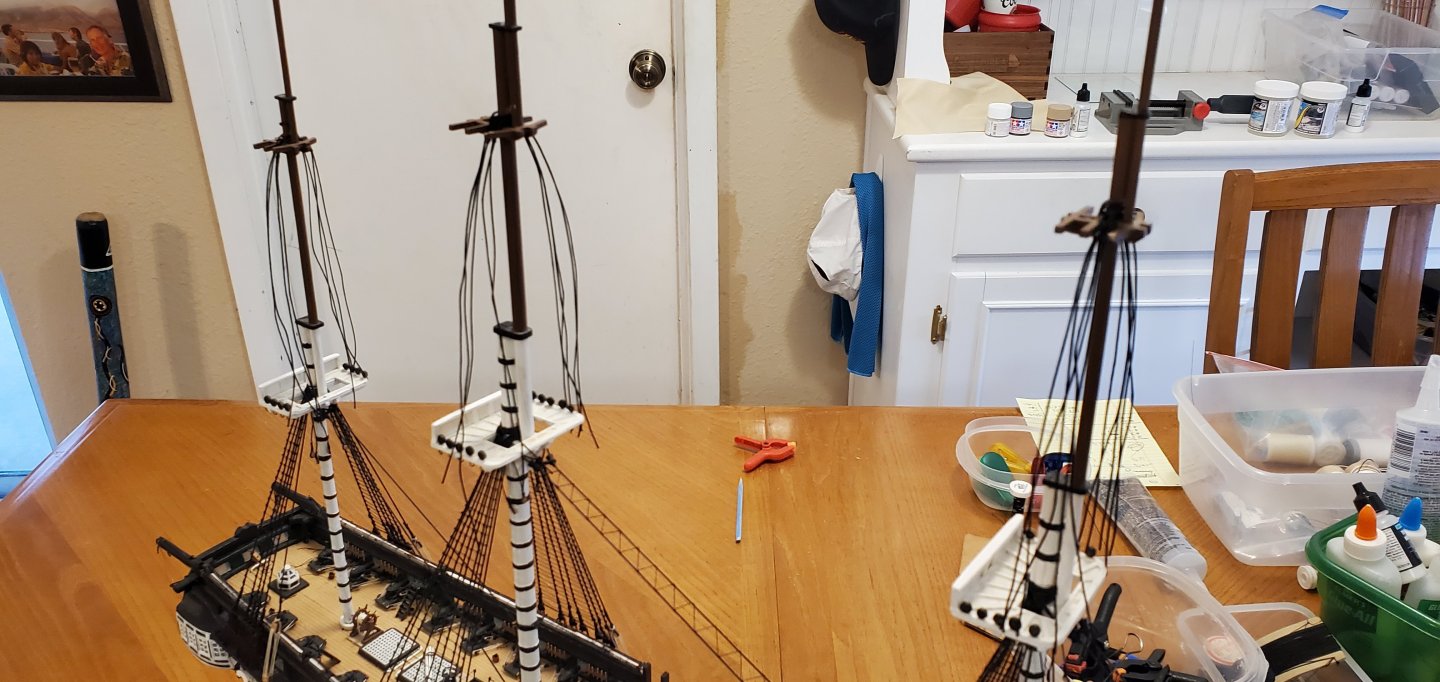
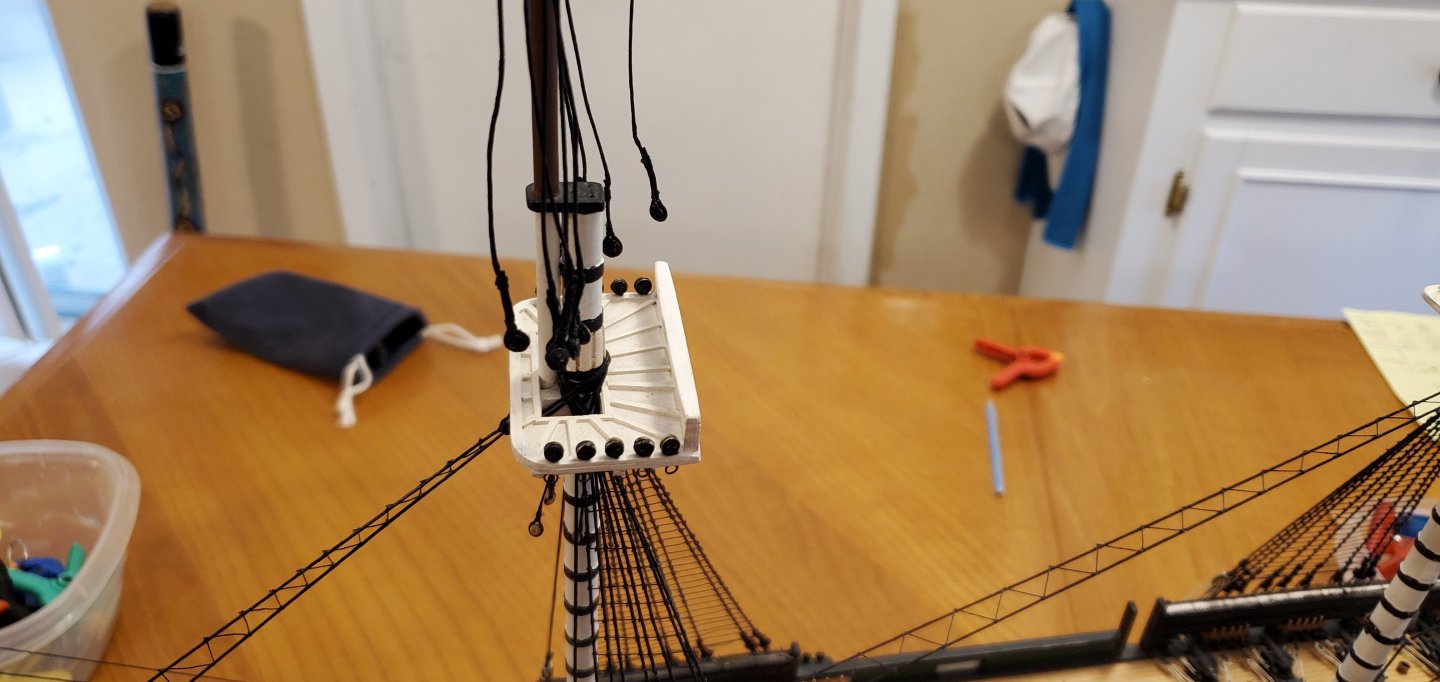
Here are my steps for the upper shrouds. First, the spaghetti strings tied off in pairs to the cross trees. Next, looping the ends of the shrouds around the upper deadeyes using my alignment jig and then seizing the loops. Here's the upper deadeyes on the fore topmast with double seizing followed by a shot of all the upper deadeyes ready for threading to the lower deadeyes. Deadeyes in the process of being threaded together. And finally, upper shrouds complete with deadeyes rigged and sheer poles added. That can only mean one thing...it's time for the next round of ratlines!!! WOOHOO!!!!!!!!!!!!!!!!! 🤐


- 301 replies
-
- 15
-
-
- Constitution
- Bluejacket Shipcrafters
- (and 1 more)