MORE HANDBOOKS ARE ON THEIR WAY! We will let you know when they get here.
×


Glen McGuire
-
Posts
1,917 -
Joined
-
Last visited
Content Type
Profiles
Forums
Gallery
Events
Everything posted by Glen McGuire
-
 Beautiful work on those doll houses!!
 -
Whoa! That piping work makes rigging jobs look easy. Amazing!!
-
First, welcome aboard Brian! My answer to the above question is: I thought ship modeling was a solitary activity until I found Model Ship World. Now, when I've got a build log going here, I feel like I've got a bunch of people from all over the world helping me work on my models. There are so many amazing craftsmen out here that offer tip and suggestions, answer questions, and provide encouragement that I never feel like I'm working alone.
-
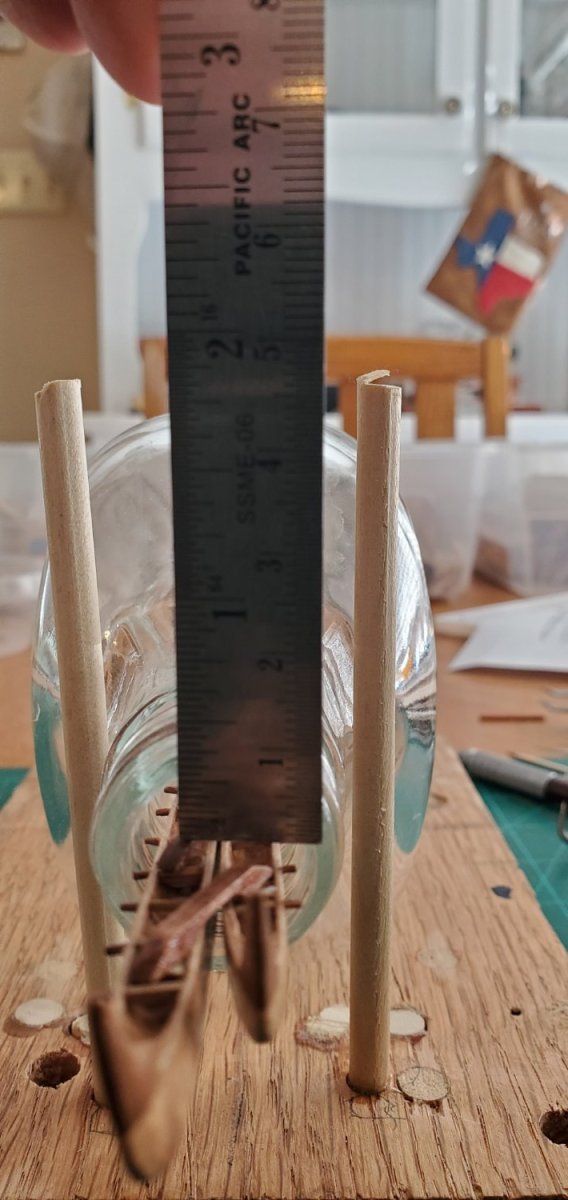
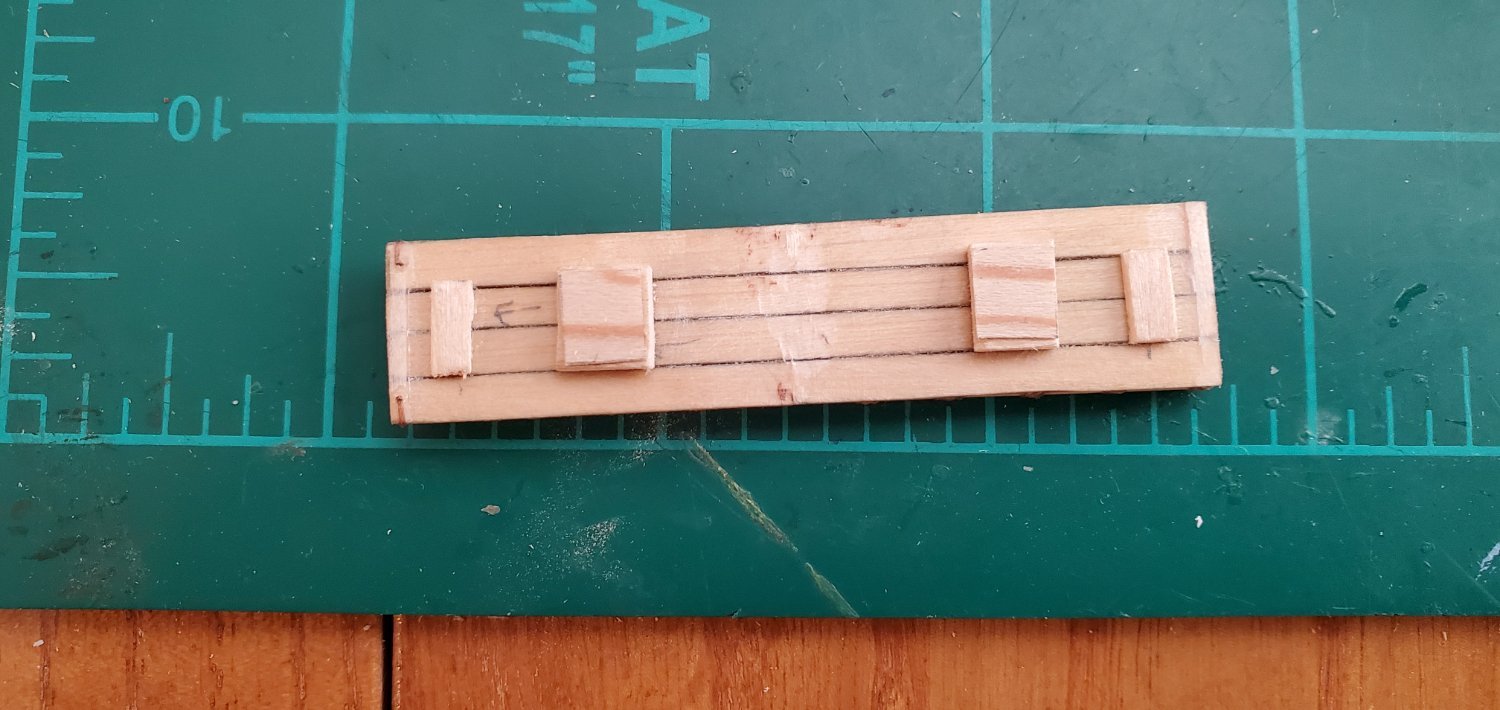
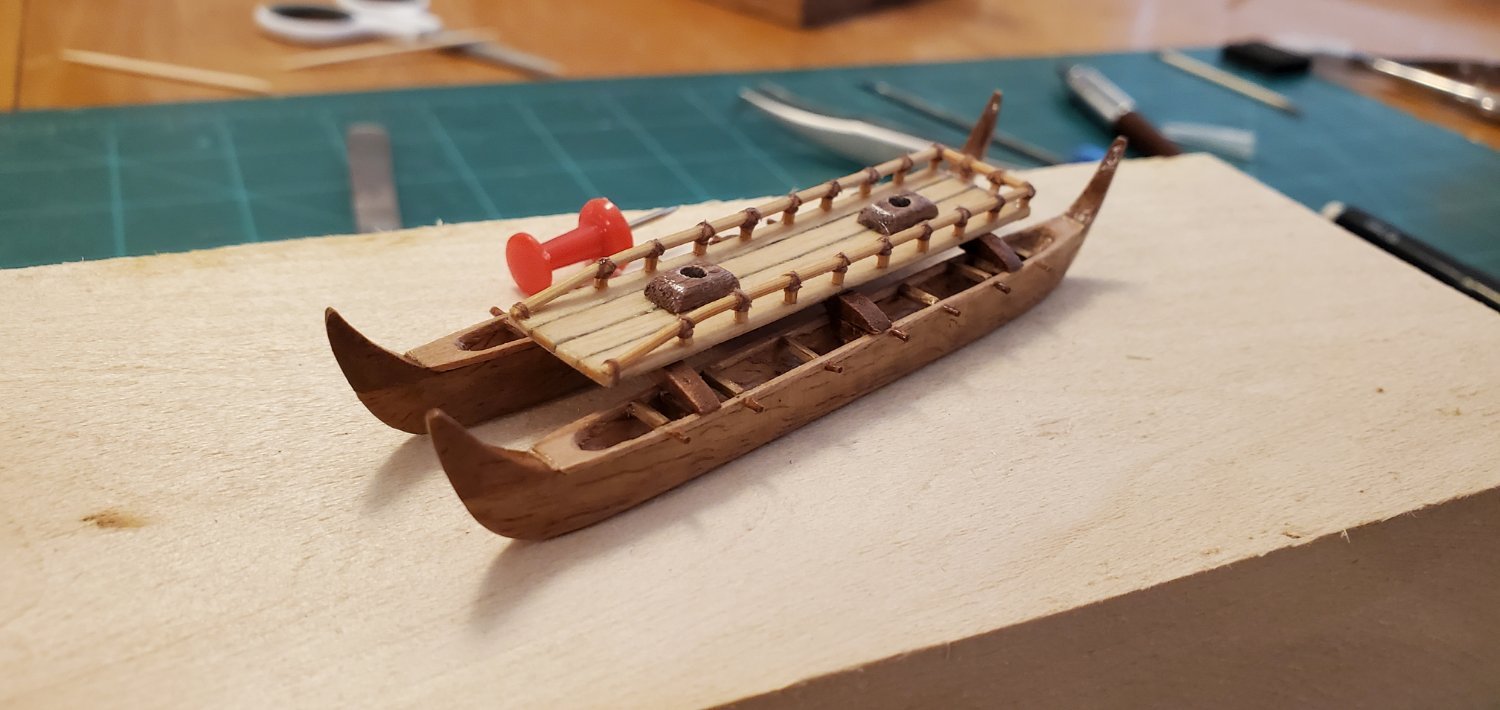
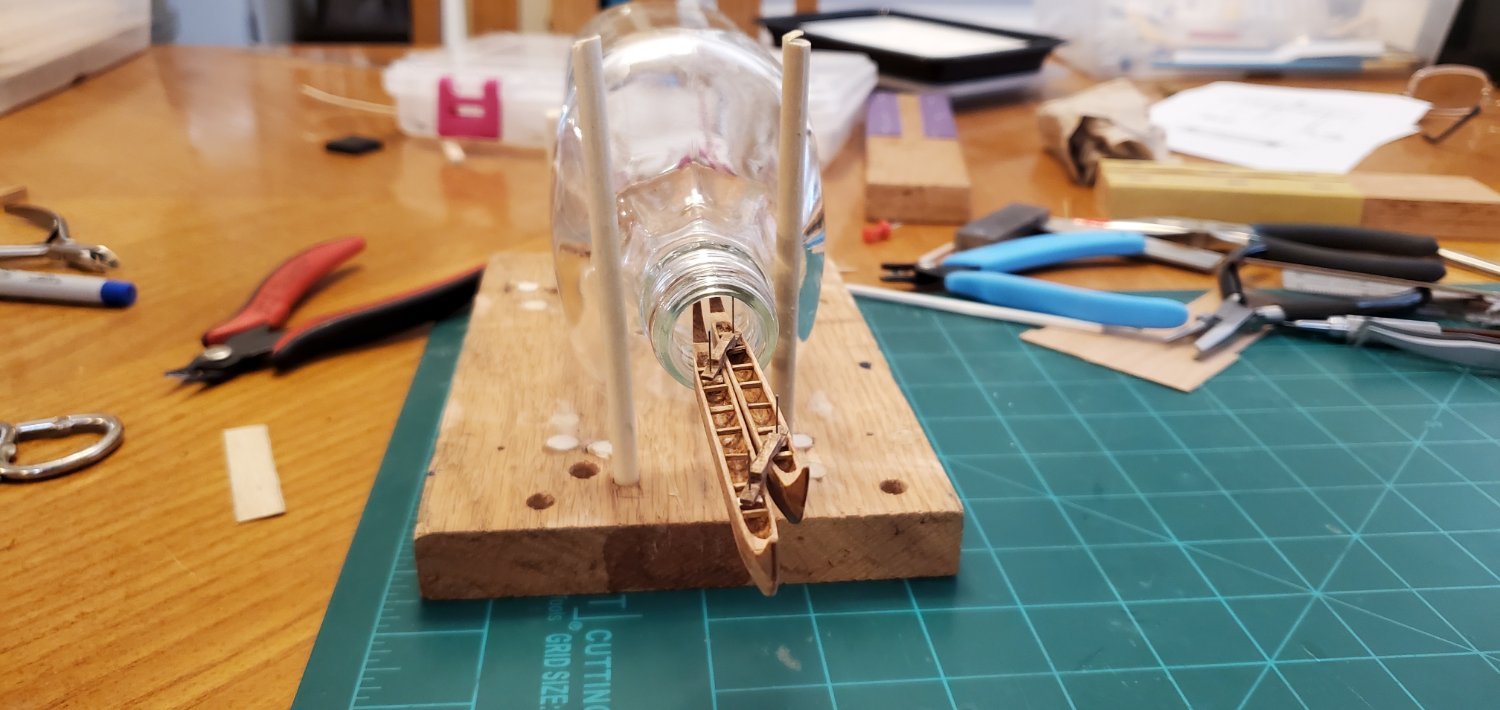
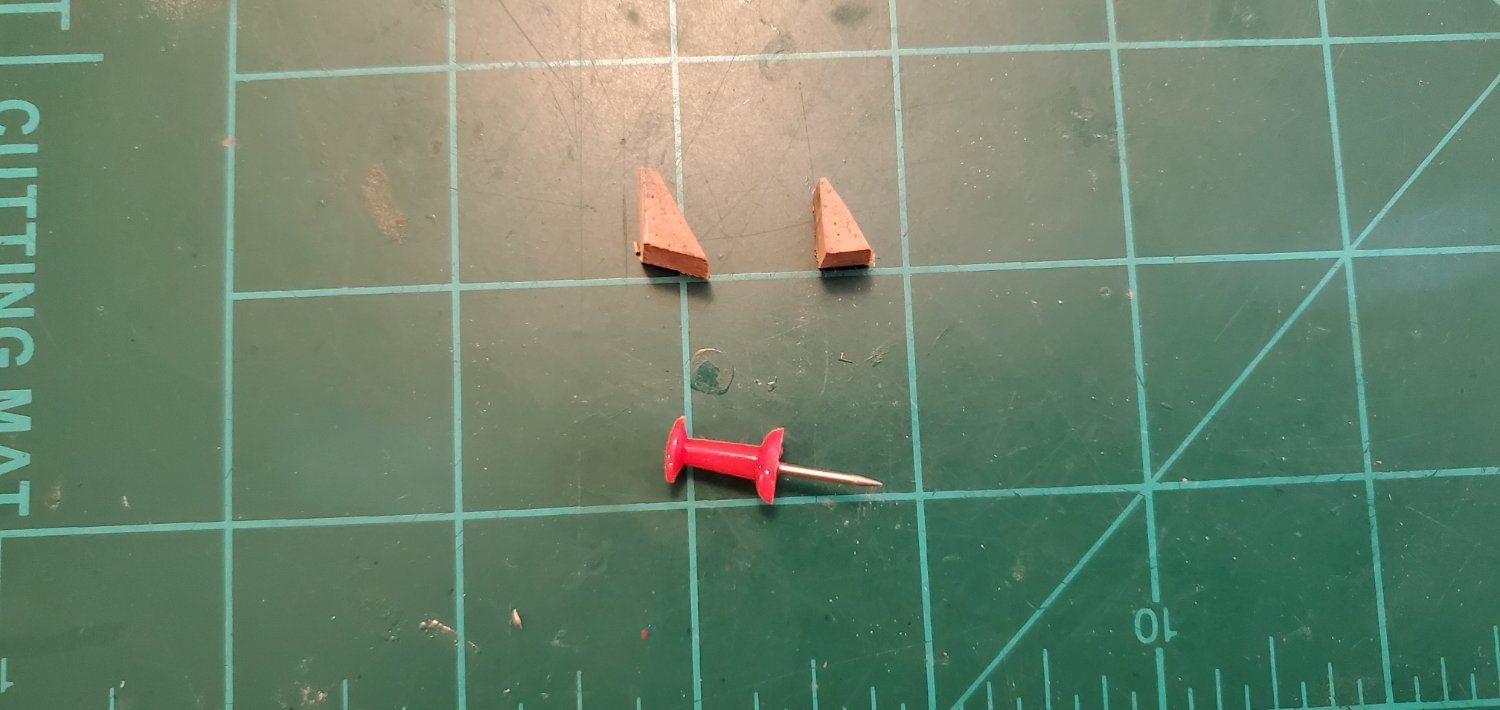
Thank you for the explanation, Ian. You helped the dim lightbulb flicker on. When I used to fly many years ago, I had to calculate the crosswind component for takeoffs and landings to ensure it fell within the limits of the aircraft. The term we had for "degrees off wind" was the "crosswind angle". We used it along with the wind velocity and runway heading to calculate the crosswind component. Your second paragraph makes perfect sense now when I relate it to course headings for planes. 💡💡💡 Yes to your 2nd question, Javelin. When I add the masts, the platform will be too tall to pass thru the neck. In the 1st pic below, you can see that I've got 7mm from the top of the Kūanueneu to the top of the bottle opening. I will need at least 13mm with the masts installed and hinged down. So I will definitely have to install the platform inside the bottle. I agree, that will be a challenge. My plan is to put the hull structure inside the bottle, align the hulls, and glue it down. I don't think that will be too difficult. Once secure, I'll drop the platform assembly on top. To help with dropping the platform straight like you say, I've added a couple of alignment pieces to the bottom of the platform. The 2nd pic below shows the bottom of the platform. The 2 larger squares of wood on the inside are mast "stops" and line up with the mast steps on top of the platform (they will help anchor the masts in place). The 2 smaller rectangles of wood are alignment stops that snug against the outside edge of the fore and aft Kūanueneu's when I drop the platform in place. I think these serve the same purpose as the stopping pins you suggest.


- 174 replies
-
- 10
-

-
- Waa Kaulua
- bottle
- (and 1 more)
-
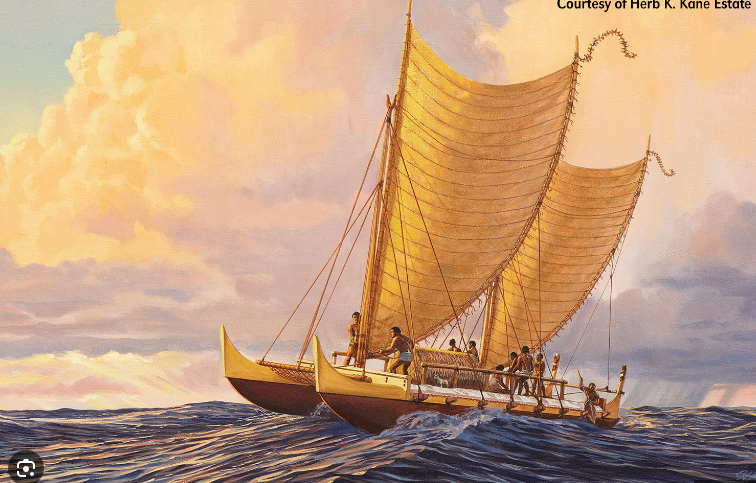
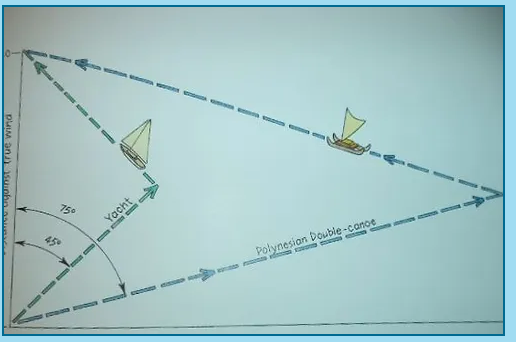
Thank you, Harvey. I looked at other paintings by the same artist - Herb” Kawainui Kāne (https://www.herbkanehawaii.com/) - he has done a few others where the canoes look like they are moving at a fairly pronounced angle into the wind or at least a quartering cross wind. Another site (https://www.hemakeewaa.org/hawaiiansail) has some detail on the sails and how they work in relation to the wind along with the diagram below - "The Hawaiian sail is very effective in sailing across the wind or down wind. It can sail windward at an angle of about 75 degrees off the wind. The round hull of the Hawaiian canoe however allows for significant lee drift. Early explores describe Hawaiians frequently paddling their canoes while under sail, especially when trying to sail to windward. Paddling while under sail allowed the canoe to travel higher to windward and reduced the lee drift significantly. Paddling while under sail makes the paddling much easier. It also can increase the canoe's windward ability making between 45 to 40 degrees off the wind." I would need someone that actually knows how to sail to explain all that to me in landlubber's terms (degrees off wind, significant lee drift, etc???).
- 174 replies
-
- 5
-
-
- Waa Kaulua
- bottle
- (and 1 more)
-
From @Keith Black on my Aurora log - "As close as I can figure......According to Mr Google, Antarctic penguins are 24 to 30 inches in height. A foot at 1:500 scale is .024 inches, correct? That would make 30 inches = to .060 inches." I wave the white flag on that one!! Regardless of penguins or no penguins, your water effects turned out really nice! Well done, Javelin!
-
Clear coat fumes and a double tot and that boat will be going both directions at the same time!! Could be a bit of a quartering cross wind coming in from about 10 o'clock? Hard to tell. Regardless of what the artist did with the wind, I believe the native is sitting on the stern. The only difference it makes is that I have the railing curving downward towards the bow and there is a slight difference in the heights of the kupe's (the bow and stern ends that sweep upward). Otherwise, the whole thing is symetrical. Mine too!!
- 174 replies
-
- 4
-
-
- Waa Kaulua
- bottle
- (and 1 more)
-
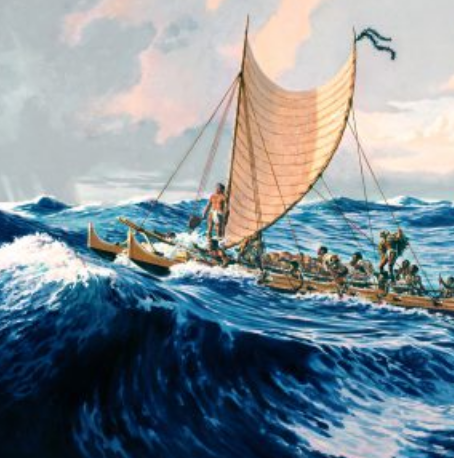
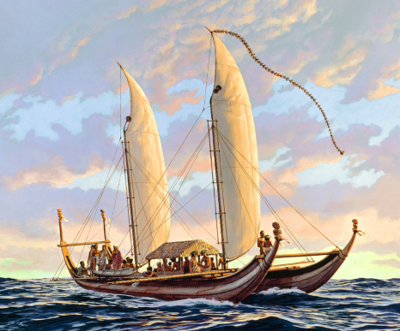
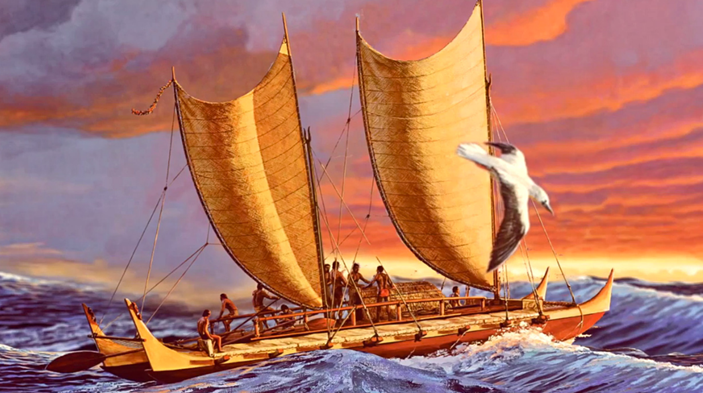
Yes to your 2nd question. Definitely going to do some kind of thatched structure. Some illustrations show a doghouse like you call it, but others show more of a small pavilion-like thing. So I am TBD on exactly what I'm going to do, but I will do something. Probably add it separately inside the bottle like I did for the archer's tower on my quinquereme. As for your first question, it brings up something I've been uncertain about. And that is which end is the bow and which end is the stern. Here's the full pic below. I see the native sitting at the stern holding a long oar he is using to steer the boat. I think he would be looking forward as the boat rides up the backside of the waves. The waves look like they are moving left to right and the sea gull's wings look like he is gliding downwind. However, the curvature of the sails and the little stringy thing hanging from the top of the left sail make it look like the wind is coming from right to left, which would put the seated native at the bow. How about the way the rigging is tied? Seems like it is tied downward to the left which would mean the wind is moving from left to right, wouldn't it?

- 174 replies
-
- 5
-
-
- Waa Kaulua
- bottle
- (and 1 more)
-
I really like your color variation from wave tip to trough! Well done, Bryan! I've recently discovered Woodland Scenics products for water simulation. Their Water Ripples in particular makes a nice surface layer.
- 134 replies
-
- 1
-

-
- sea of galilee boat
- SE Miller
- (and 1 more)
-
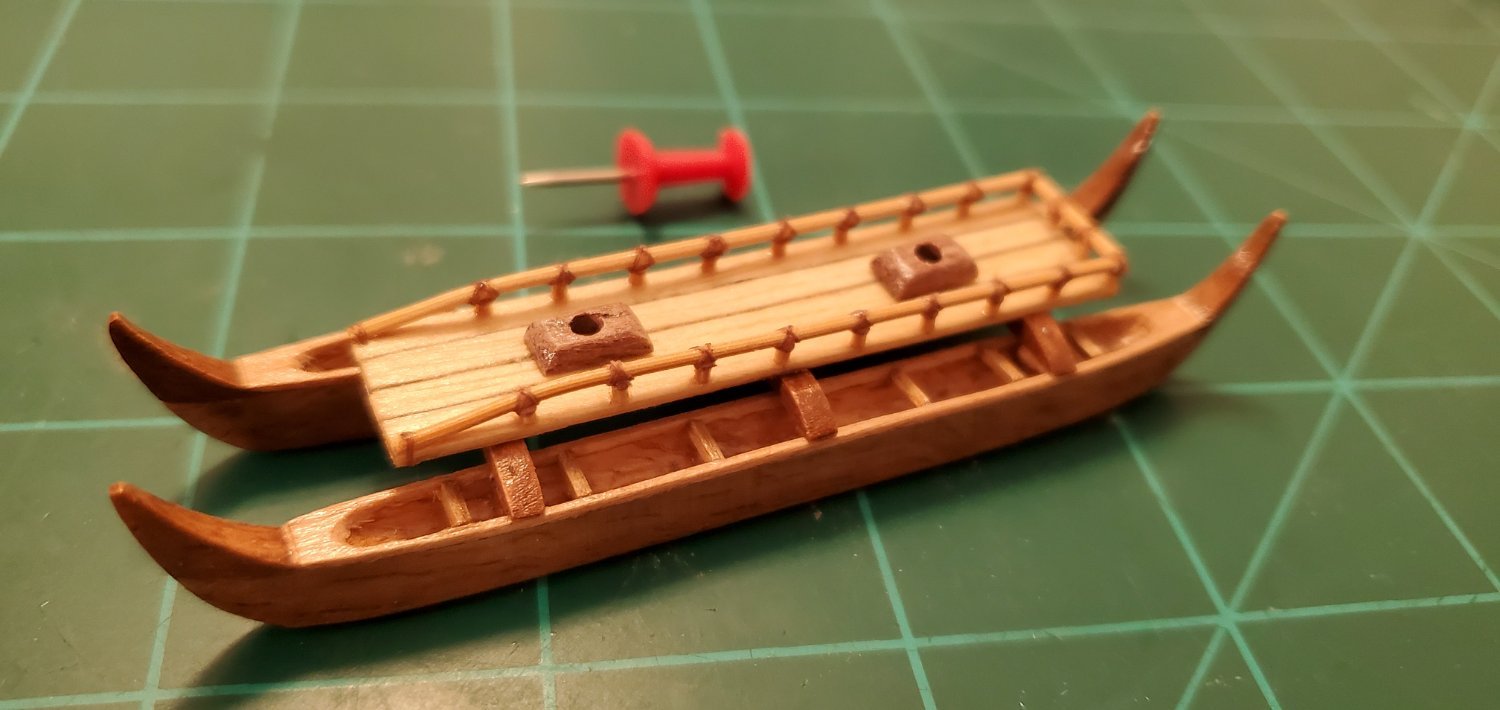
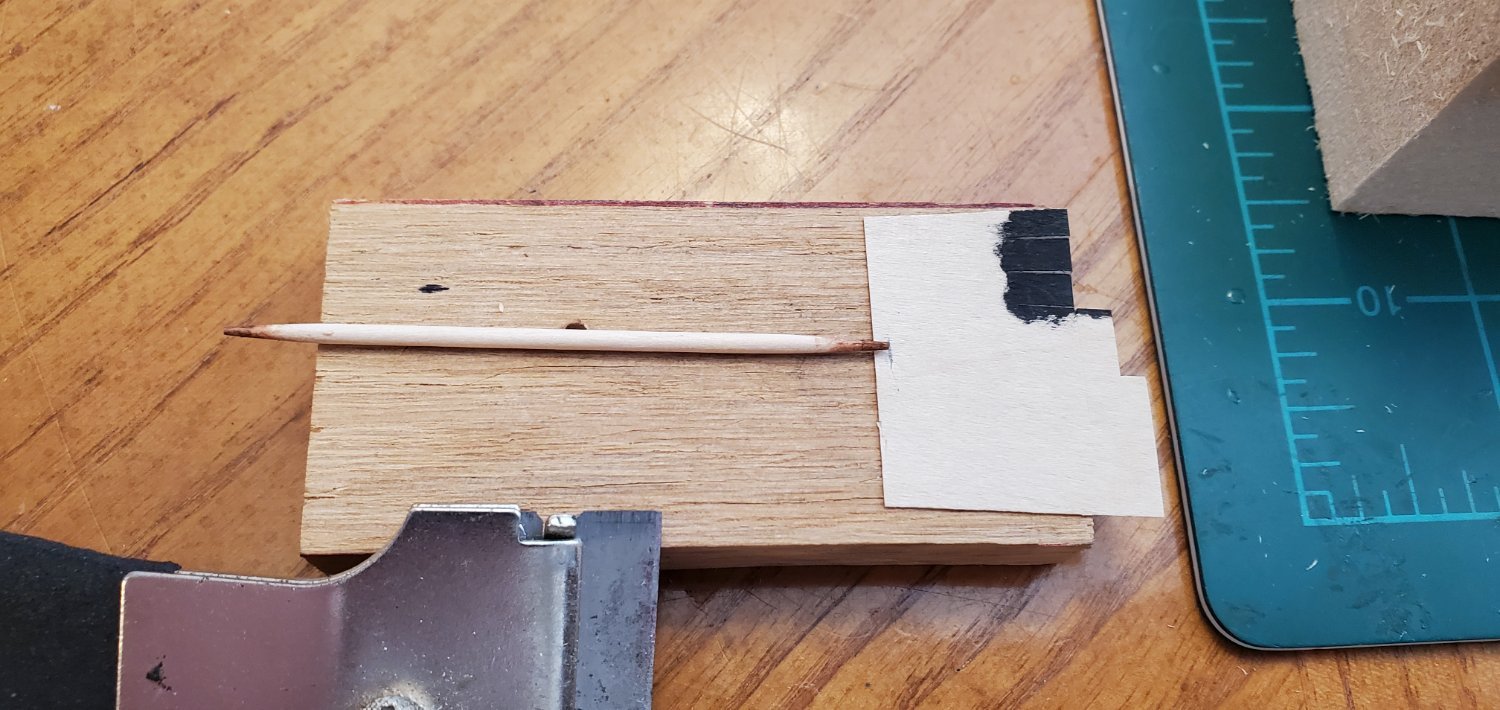
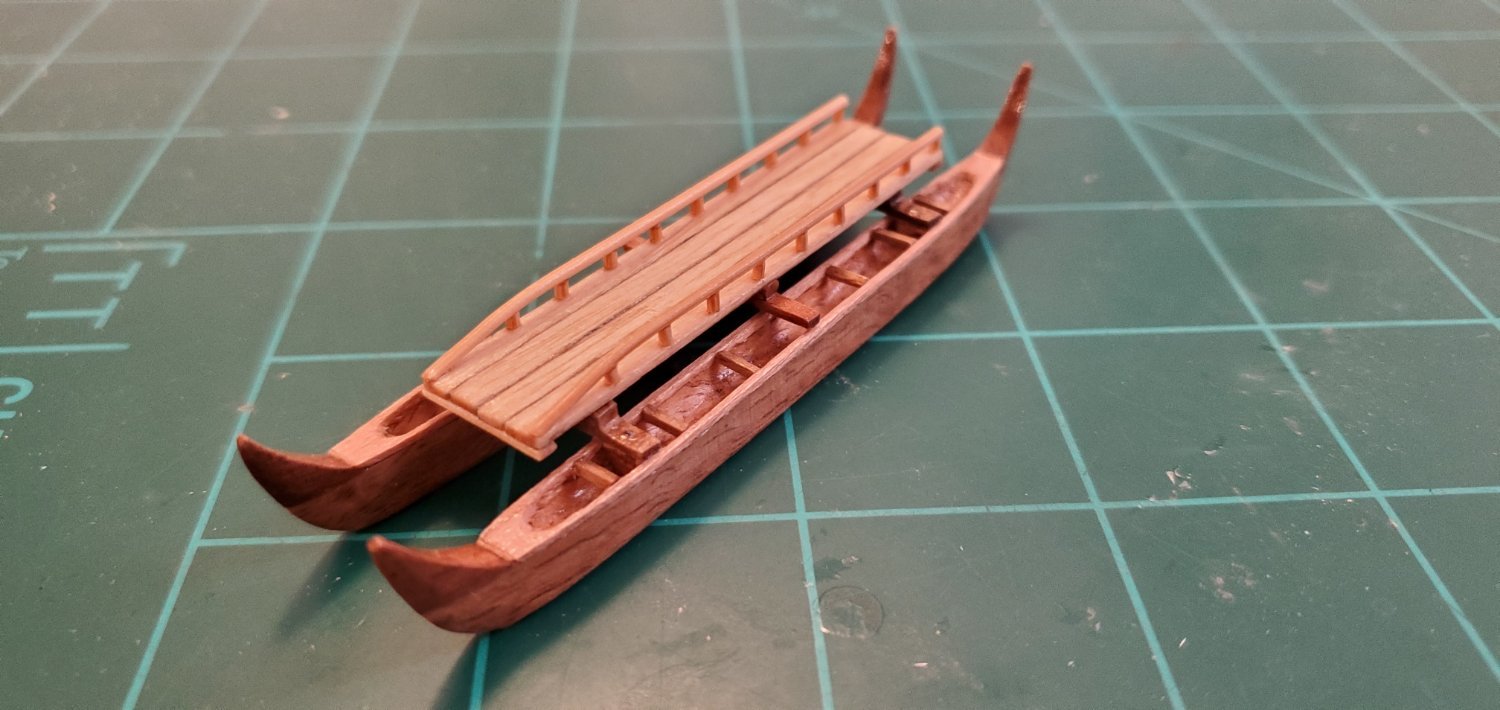
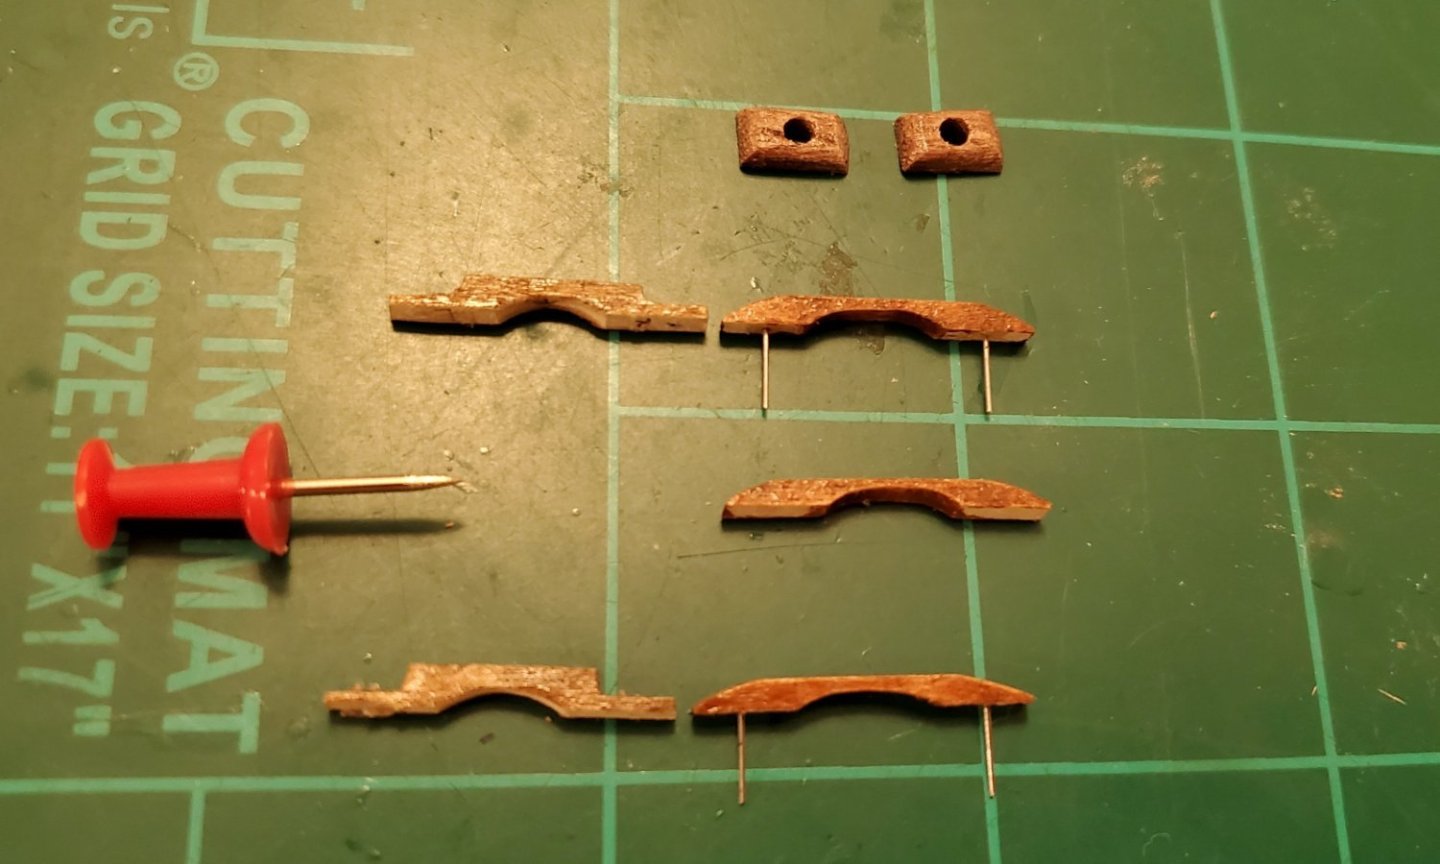
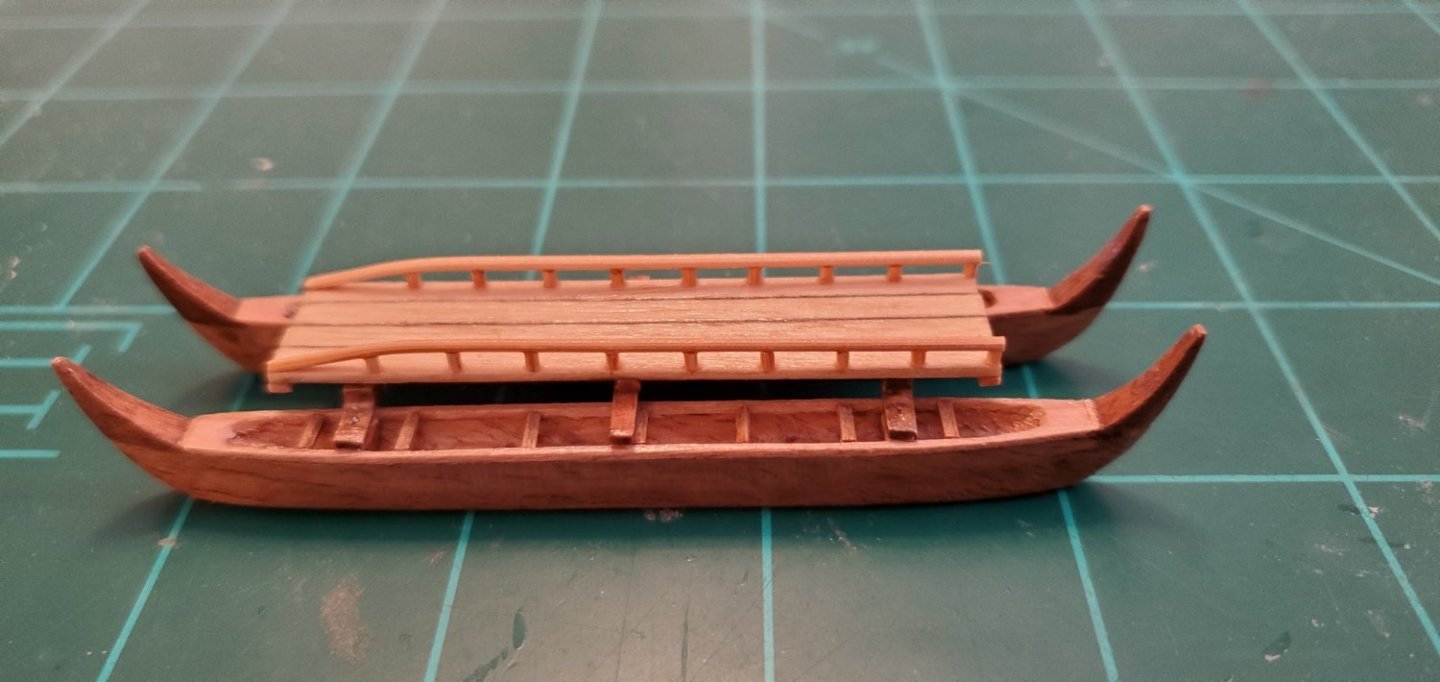
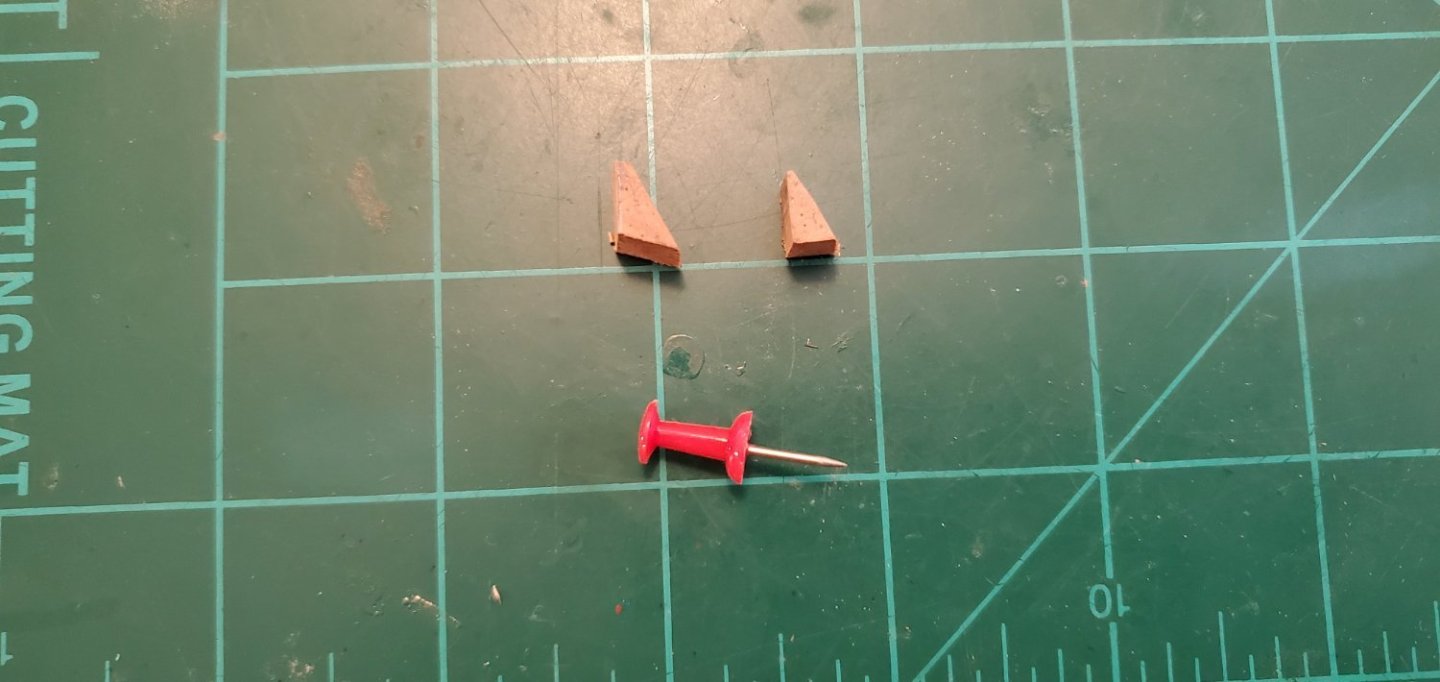
Who am I to argue with Pat. A double tot of Bundy it is!! After my double tot (or was it a triple tot?), I made the mistake of scrutinizing my work and I did not like a couple of things. First, the pola (deck) looked like it was sitting too high above the ka'ele's (hulls). I know it's supposed to ride high enough to give plenty of clearance between it and the water, but it's a bit tall compared to the illustrations I've been using as a guide. Second, I did not like the way I had squared off the Kūanuenue's (connecting ribs). I thought they would look better with a smooth curve going from the edge of the pola to the ka'ele. So time to backtrack just a little. In the pic below, the "before" Kūanuenue's are on the left and the "after" on the right. We're only talking about 1mm of height shaved off, but I think it makes a difference and gives a better overall look to the boat (compare the 2nd pic below to the pic above Pat's post directly above). I also went ahead and made a pair of mast steps. Those are made out of macadamia nut wood. Next, I started thinking about the masts and sails, which also made me think about the rigging. These boats did not have a lot of rigging, but the question I had looking at mine was where would the rigging be tied off (running rigging in particular)? So I went back to my main illustration and found a small detail I had missed. There are wooden protrusions which appear to be extensions of the wae's (the spreaders that look like seats). The running rigging is attached to these. The next question was how to make and add these without messing anything else up. The solution was toothpicks. After staining, I cut slightly less than 1mm of the tip and then CA glued them on. I think they ended up resembling an extension of the wae's poking thru the mo'o (gunwale). This seemed like such a simple little boat when I started!! 😵😵😵


- 174 replies
-
- 13
-

-
-
- Waa Kaulua
- bottle
- (and 1 more)
-
Glad to have you on board for another ride into the great unknown, Grant! A small update here (although not small in time spent, which was 3-4 hours of eye-crossing work). I added a back rail and then lashing to all the places where the tiny stanchions contact the rail. Almost made me want to go tie some ratlines. Almost, but not quite! 😃 The lashing is 136D 6/0W fly tying thread.
- 174 replies
-
- 15
-
-
-
- Waa Kaulua
- bottle
- (and 1 more)
-
@Keith Black tried to get me to do that at 1/500 on my Aurora build, but I could not pull it off! 1/2000?? Whoa!
-
Me too, Keith! I could not figure out how to make the hulls and deck fit into the bottle as 1 assembly. So, the plan is to take the hinged hull structure by itself and insert into the bottle. Then straighten it up and glue it down. After the glue is dry, I'll add the deck/mast/sail assembly as a single piece and glue it onto the ribs connecting the 2 hulls. The masts will be secured to the deck before insertion, hinged down flat towards the stern, then raised after all the glue is dry. That's the plan, anyway. But we know how well my plans end up sometimes! 😵
- 174 replies
-
- 7
-
-
- Waa Kaulua
- bottle
- (and 1 more)
-
HMCSS Victoria 1855 by BANYAN - 1:72
Glen McGuire replied to BANYAN's topic in - Build logs for subjects built 1851 - 1900
The land down under ain't the only place that enjoys a warm Christmas. From the George Strait song Christmas Time in Texas: "When it's Christmas time in Texas, It's a very special time for me In Texas we'll be swingin' around the Christmas tree, Dancin' to a Christmas melody When it's Christmas time in Texas, It might look just like a summer day There may not be snow in San Antonio, But it's a Texas Christmas to me"- 993 replies
-
- 5
-

-
-
- gun dispatch vessel
- victoria
- (and 2 more)
-
I let the rails dry overnight in their makeshift mold. For the stanchions, I used a straight razor and cut off pieces of bamboo that were a bit less than 1mm in length. Then I CA glued them into place.


- 174 replies
-
- 14
-
-
-
- Waa Kaulua
- bottle
- (and 1 more)
-
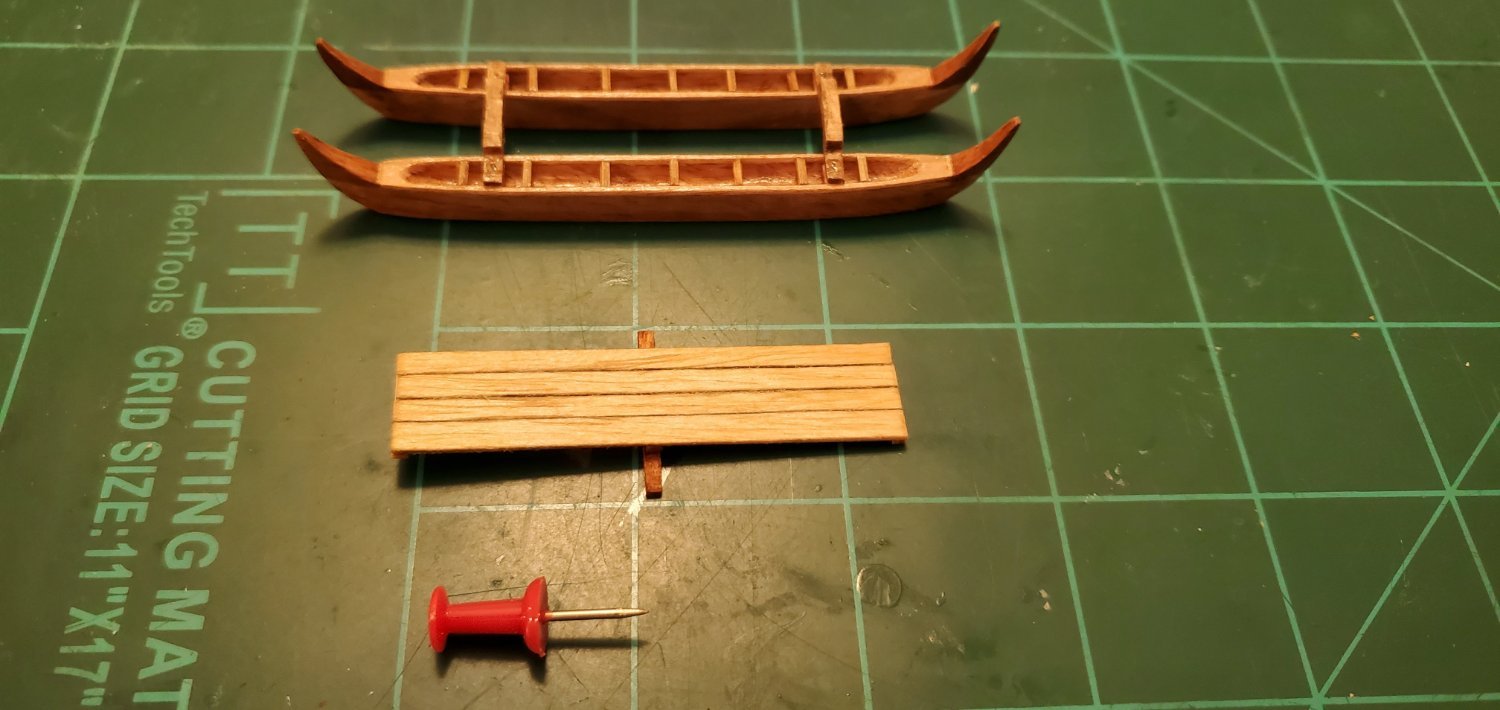
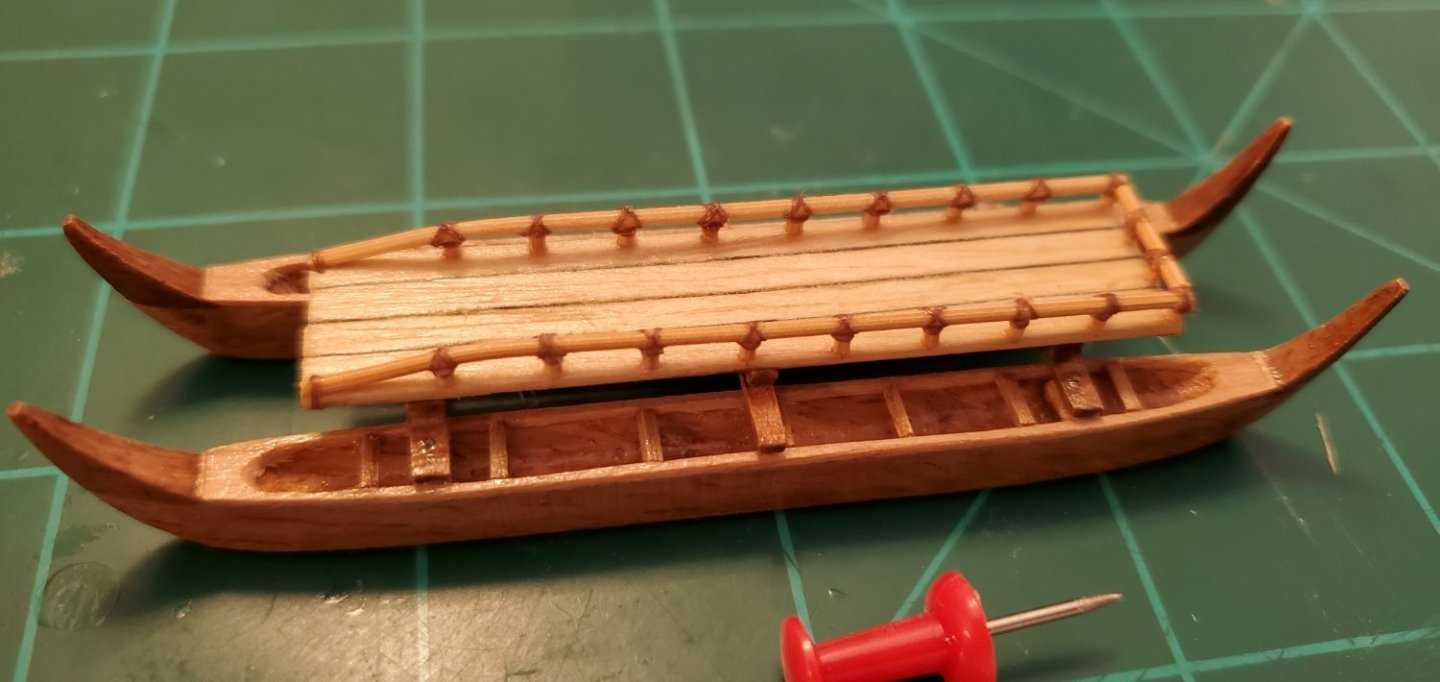
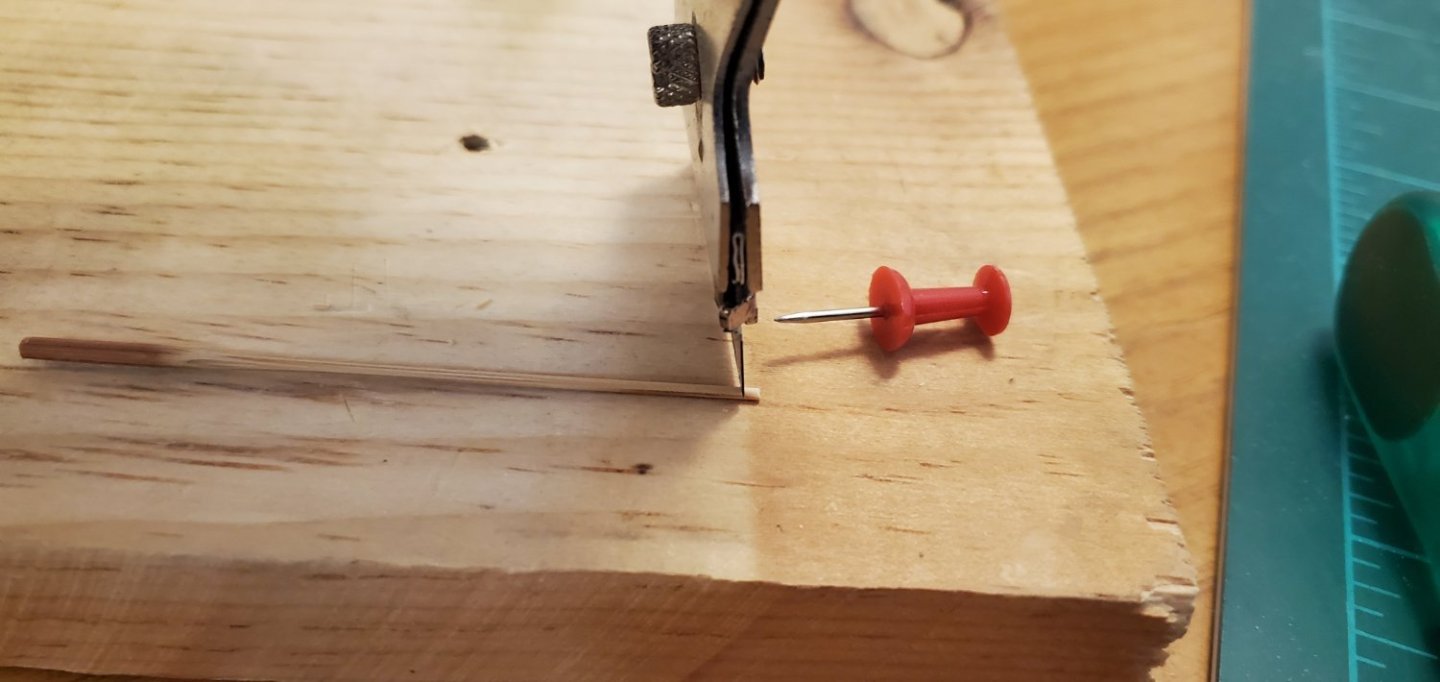
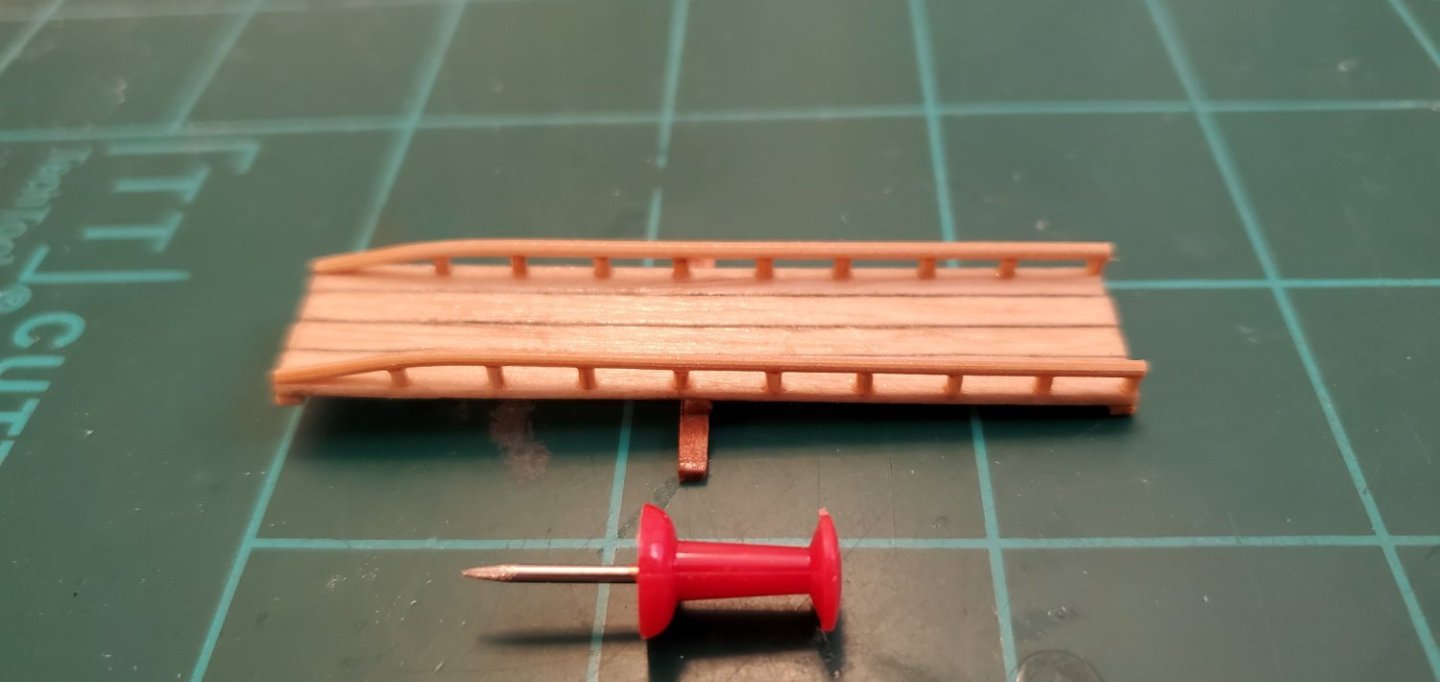
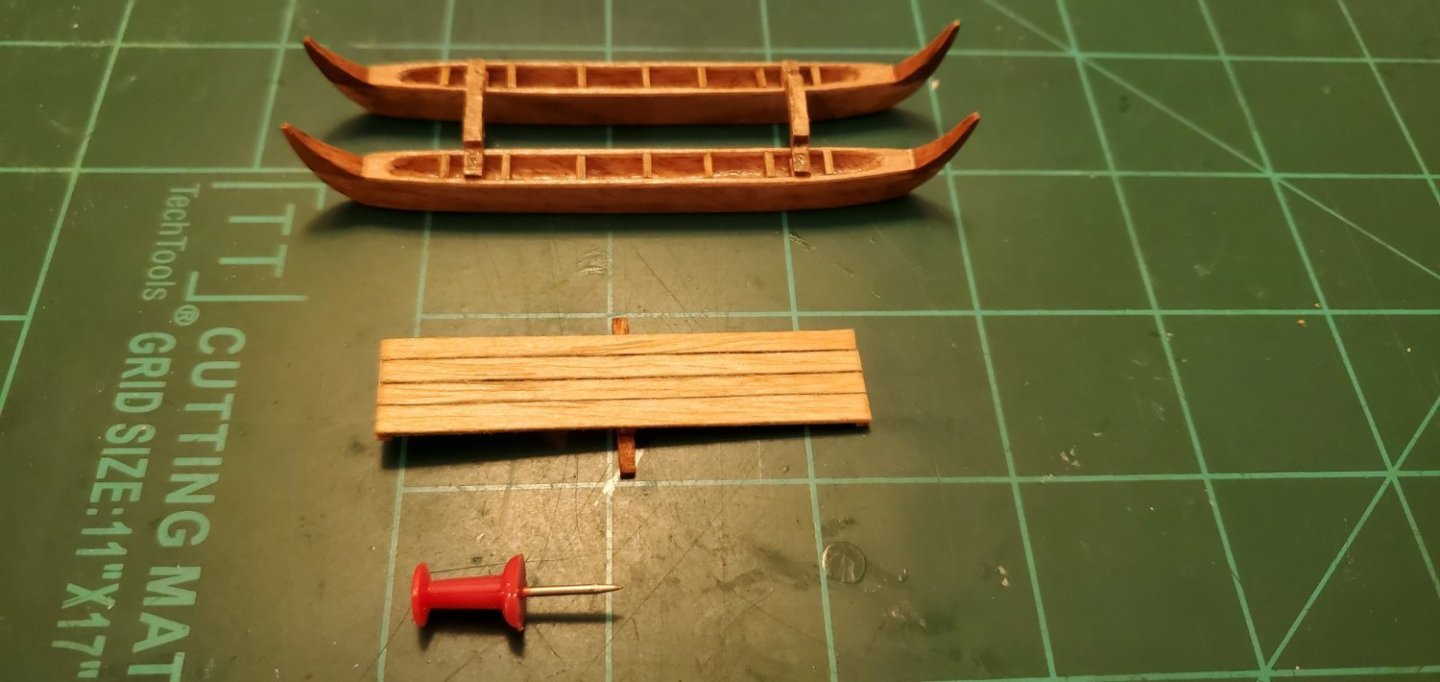
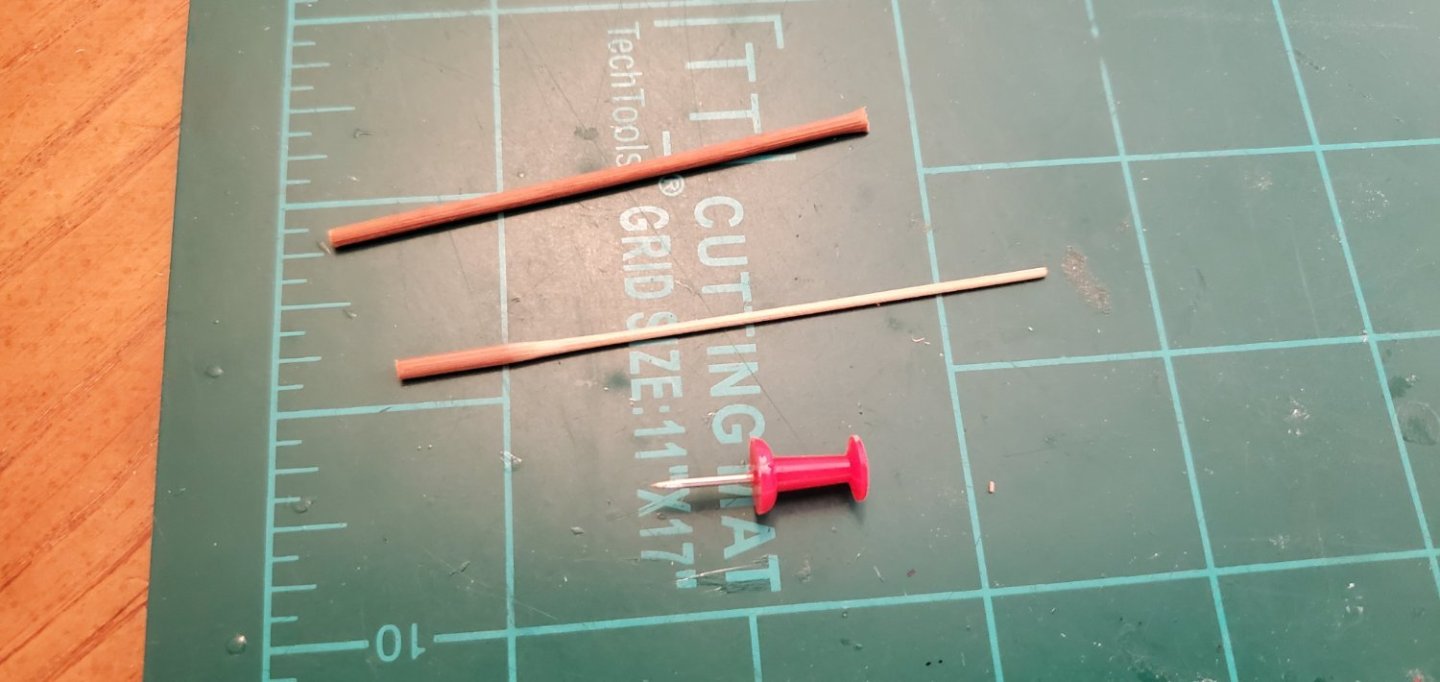
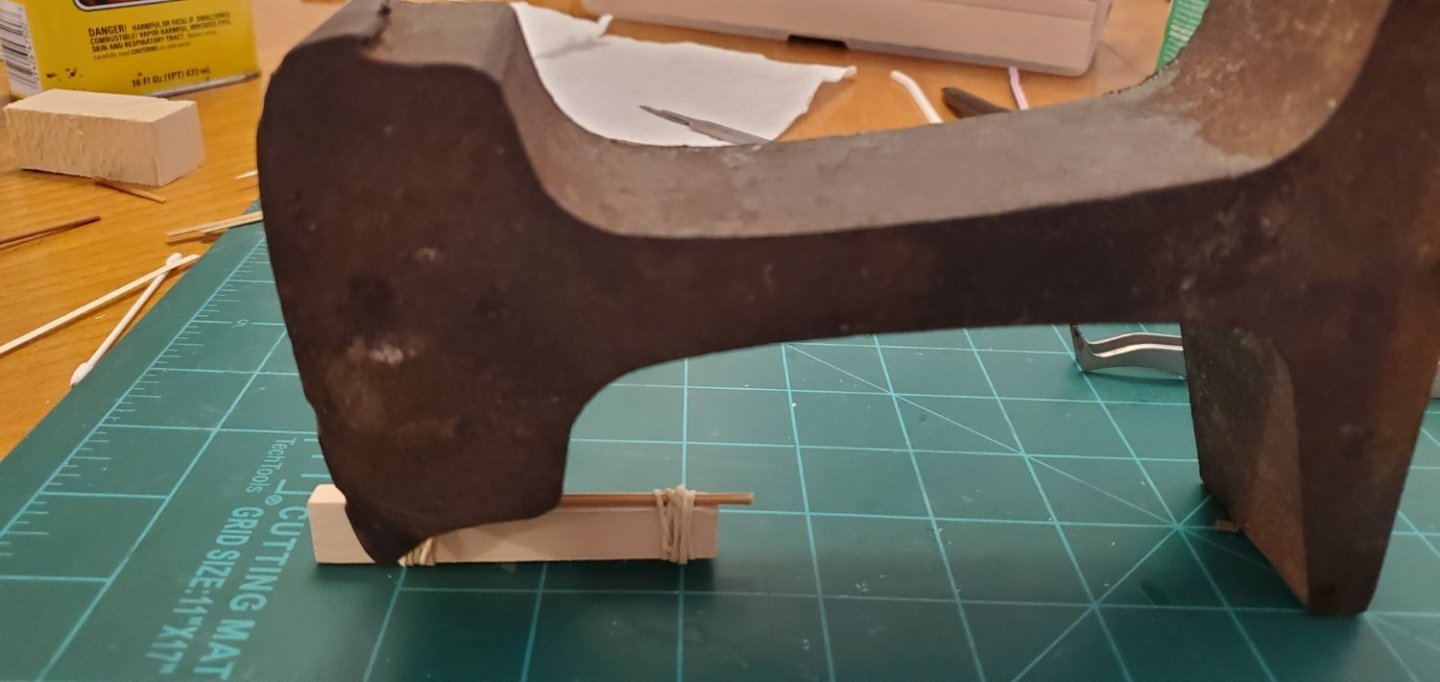
Work begins on the "pola" (deck). The pola sits on raised Kūanueneu's (the ribs that connect the two hulls together). This gives the pola plenty of clearance above the waves while riding thru rough seas. For my pola, I cut planks (3.5mm x 6cm) out of queensland maple, glued them side by side, and affixed a 3rd Kūanueneu. That one will not hinge like the other two. Queensland maple is another native Hawaiian wood, but is not actually a true maple. It gets its name because it resembles curly maple. The 2nd pic below shows the pola dry fitted between the ka'ele's. Next step is putting on a rail. In some illustrations of the wa'a kaulua, the rail curls down to the pola at the front of the boat like the one below. I liked that look and decided to try and replicate it. . For my rails, I decided to use bamboo. I doubt if the original rails were made from bamboo, but it's easy to work with at the thin diameter I need and it's also native to Hawaii. The first step was to put my thin bamboo rods on the drill lather and make them even thinner - down to slightly less than 1mm in diameter. Next, I dropped them in a pot of boiling water for about 20 minutes. In the meantime, I cut a small piece of scrap wood into the curvature I needed. After I pulled the 2 pieces of railing out of the boiling water, I strapped them to the curved piece with rubber bands and pressed with one of my scrap pieces of railroad track.

- 174 replies
-
- 7
-
-
- Waa Kaulua
- bottle
- (and 1 more)
-
Your rudder looks great! I told my longhorns about it and they got very excited. Then I realized they thought you added an udder to your ship. They don't hear too well.
- 175 replies
-
- 6
-
-
-
- Victory Models
- Pegasus
- (and 2 more)
-
Thanks, Pat. Glad you are feeling better. Hopefully complete recovery soon!
- 174 replies
-
- 4
-
-
- Waa Kaulua
- bottle
- (and 1 more)
-
No way am I waiting till the end of the build, mai tai's are my favorite drink!!
- 174 replies
-
- 5
-
-
-
- Waa Kaulua
- bottle
- (and 1 more)
-
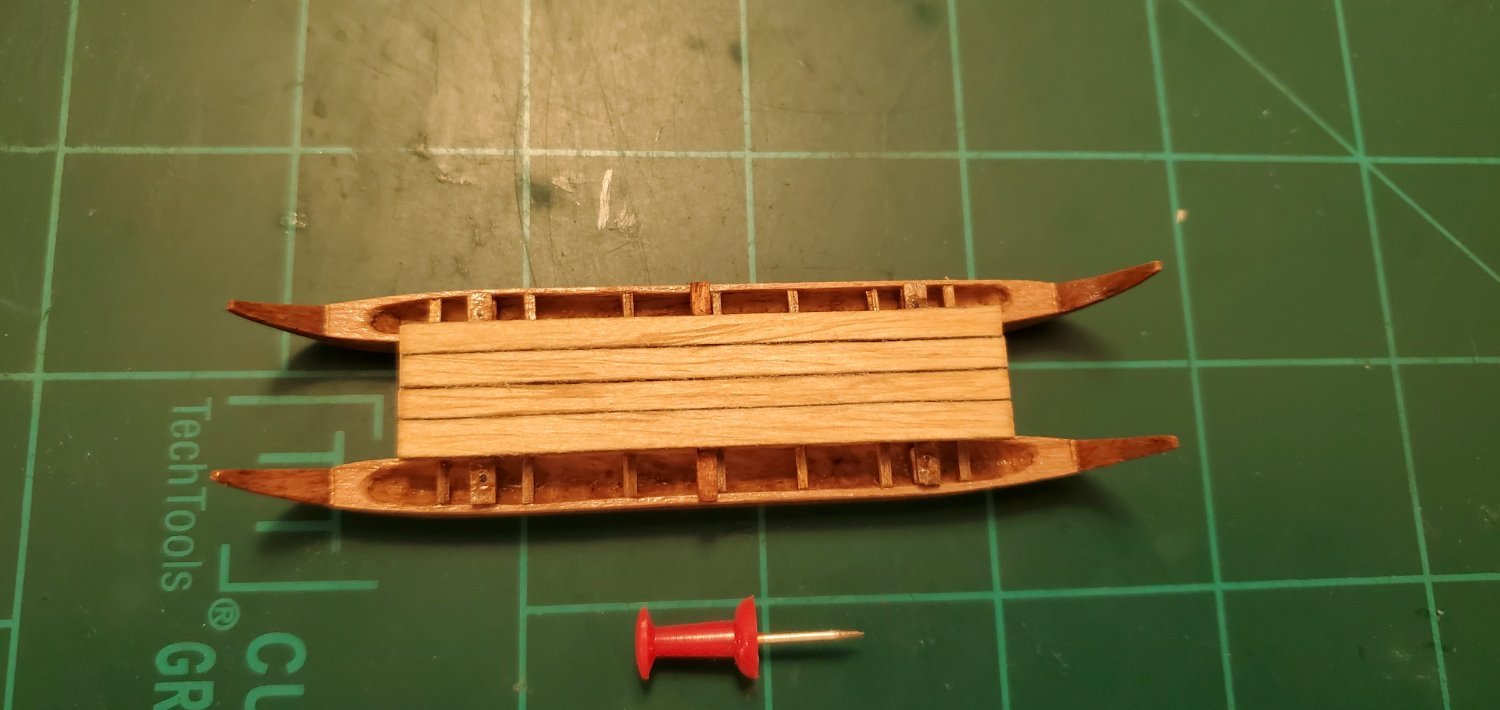
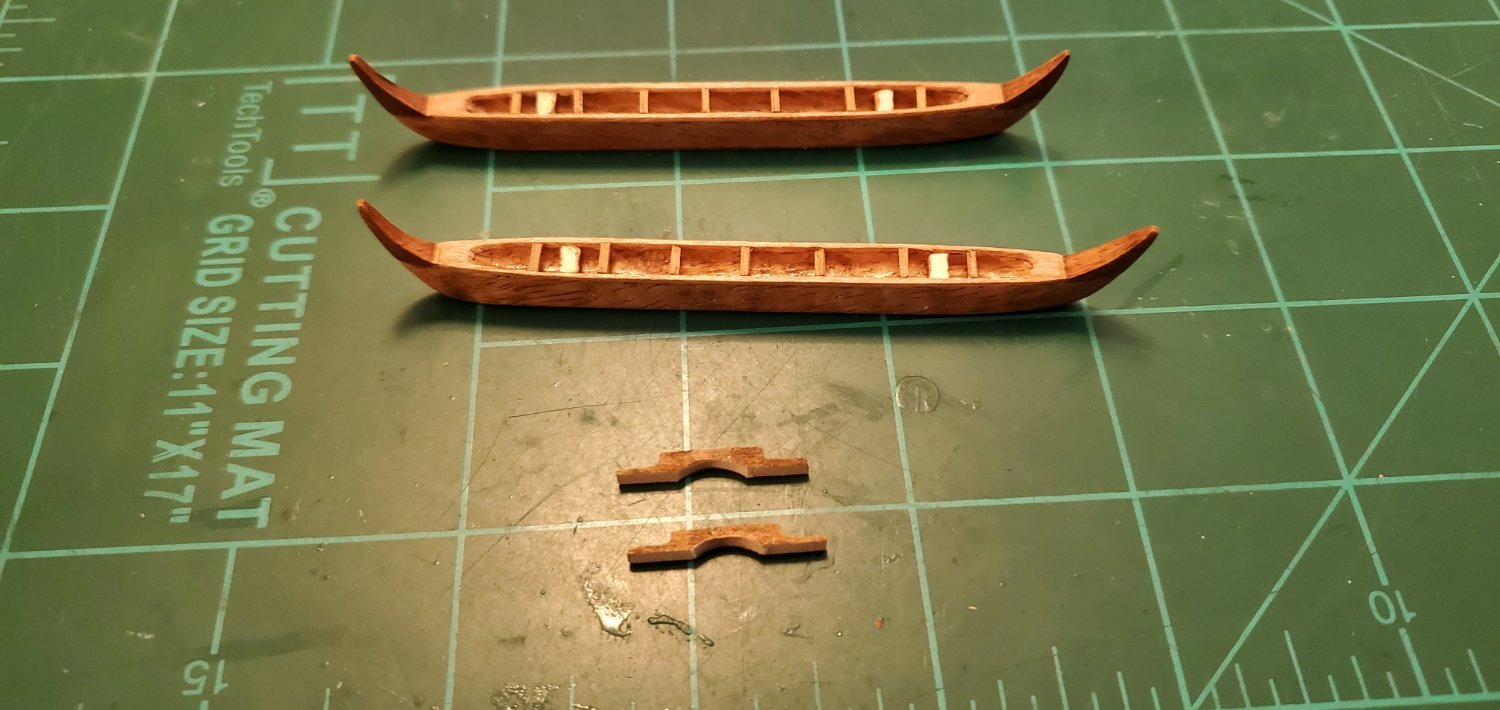
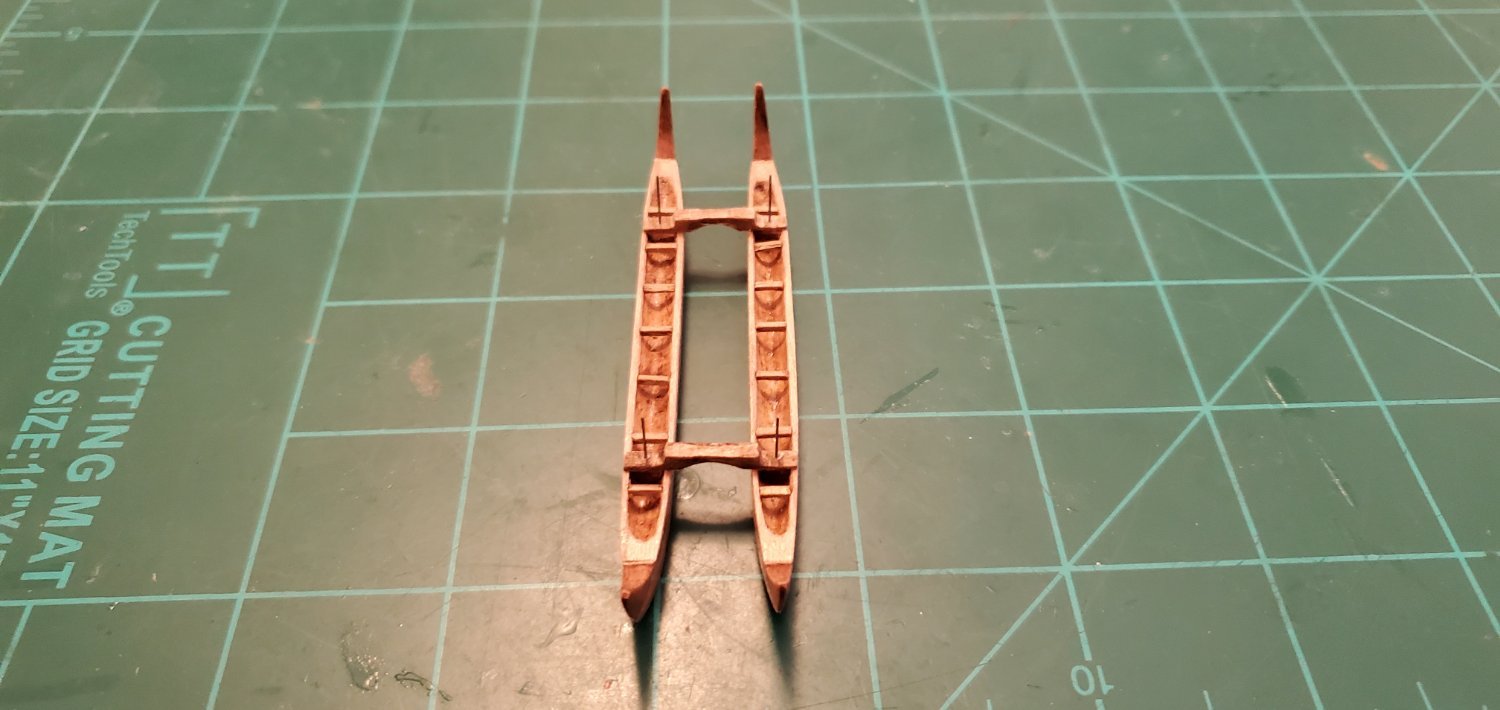
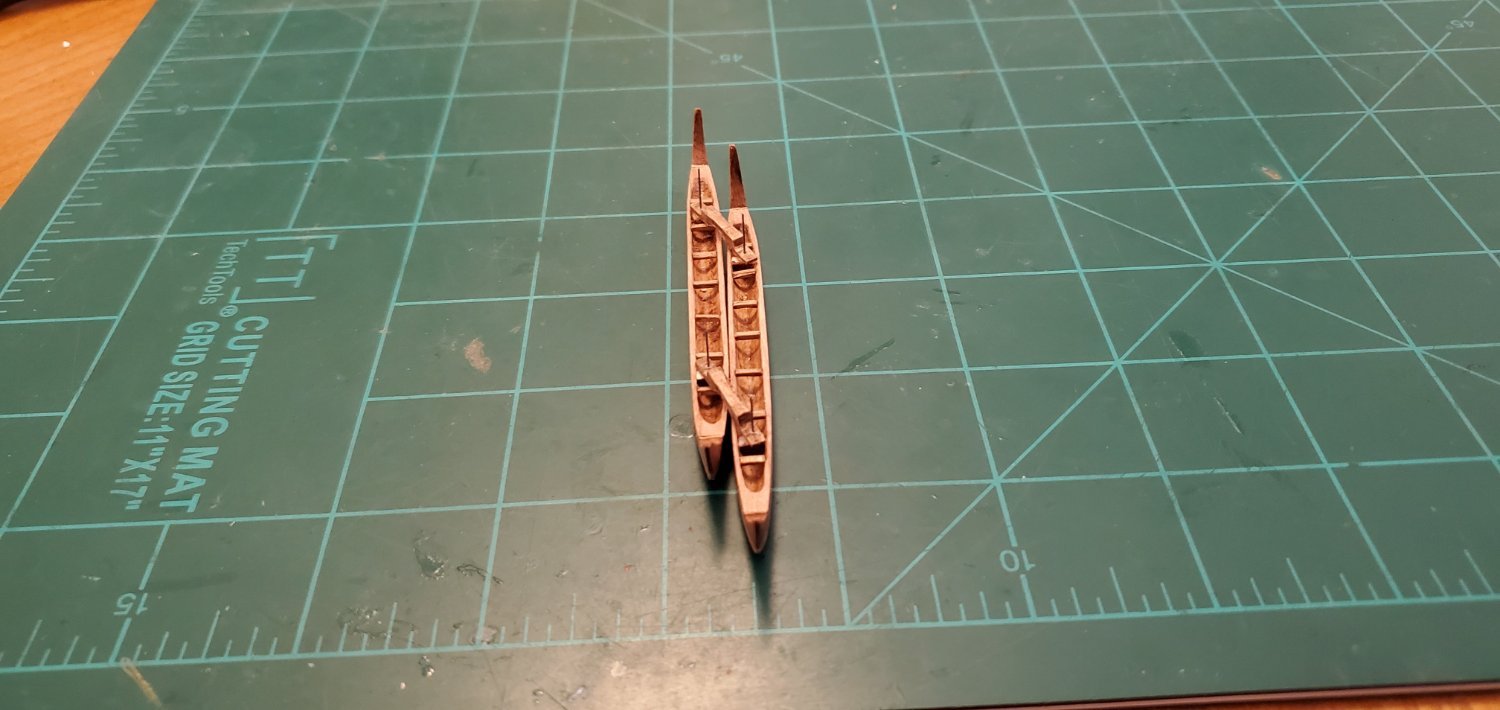
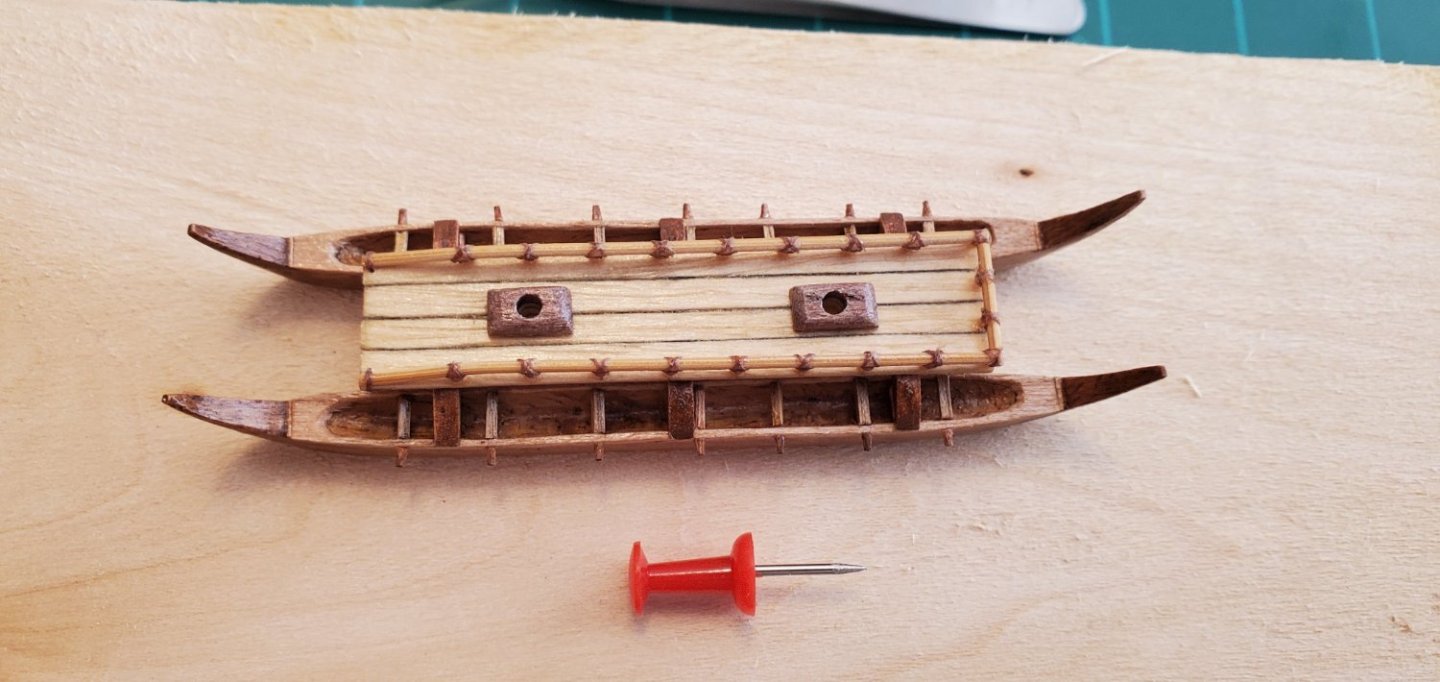
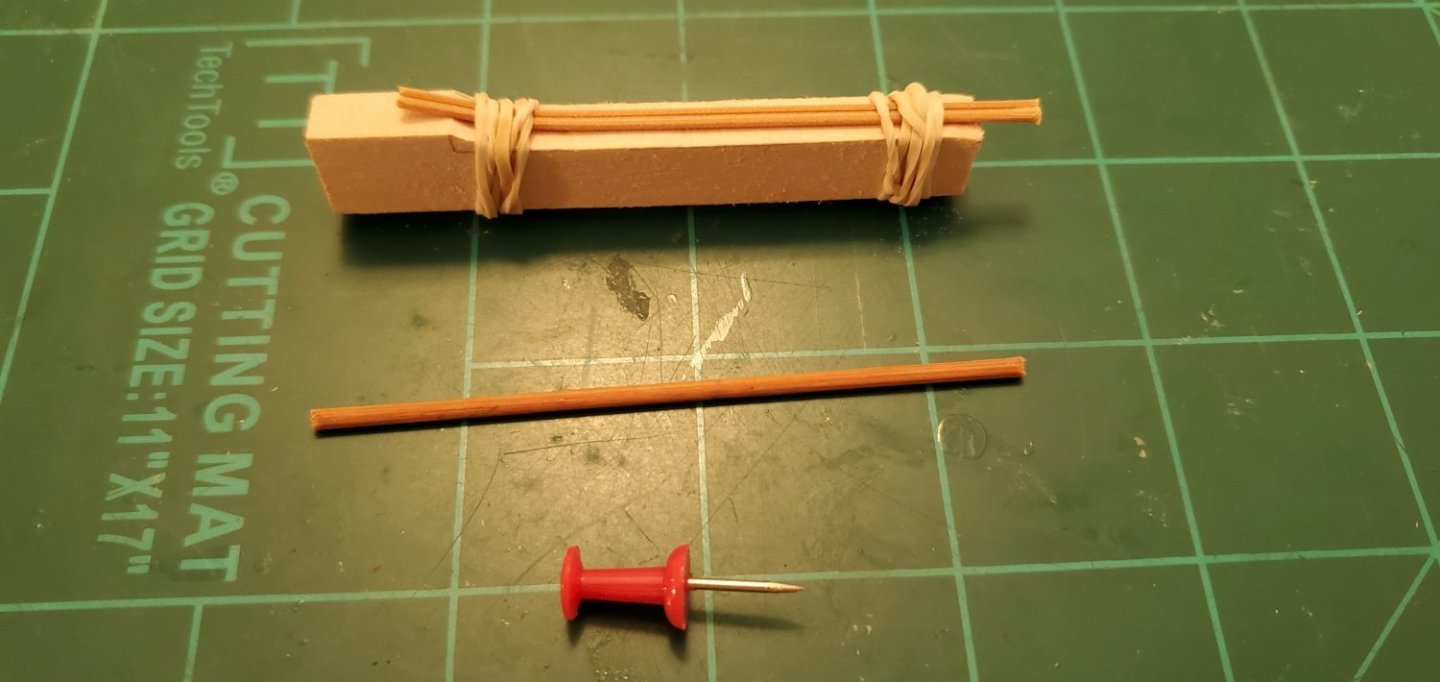
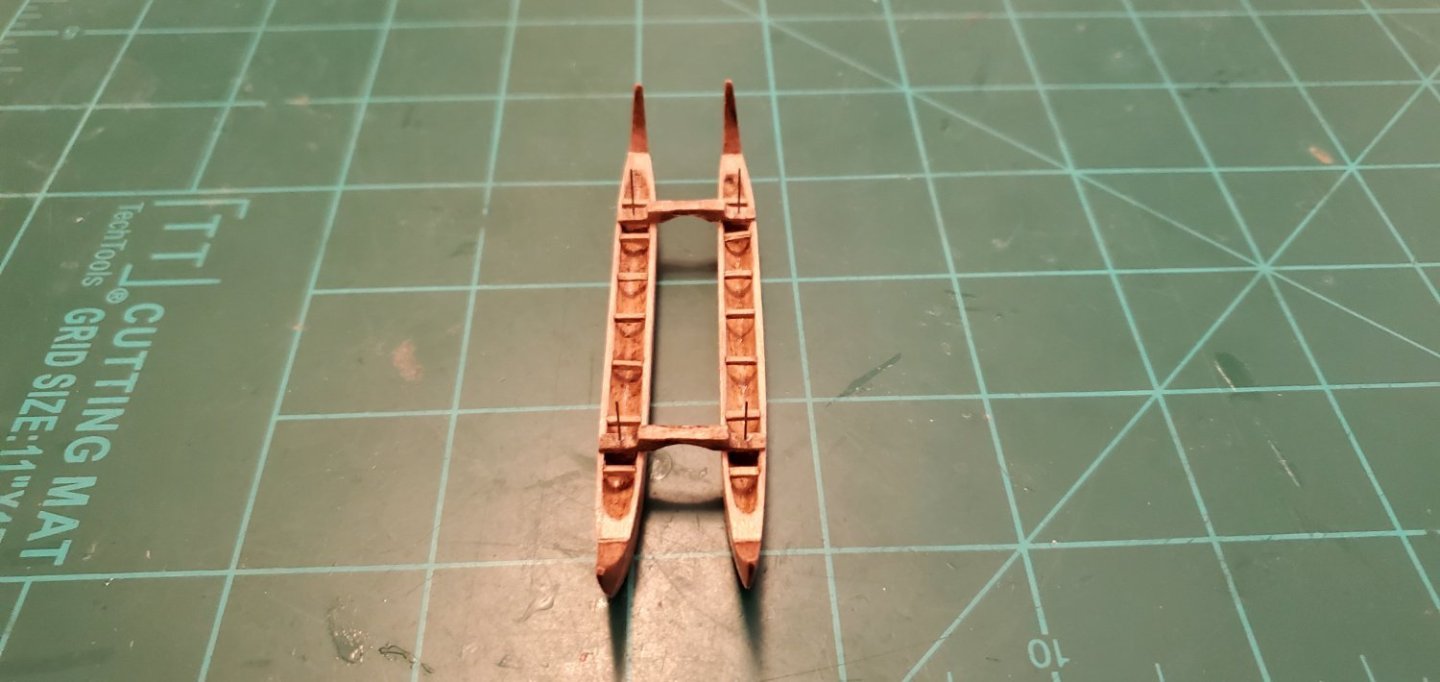
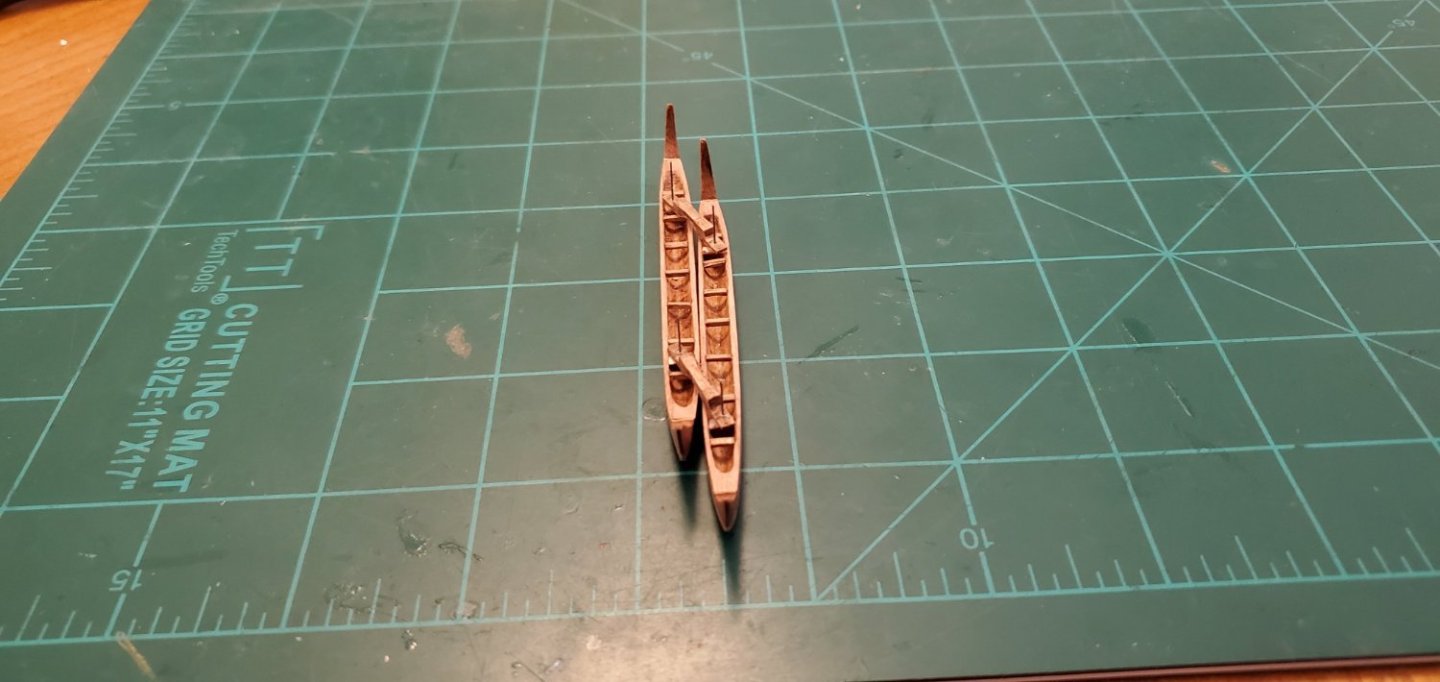
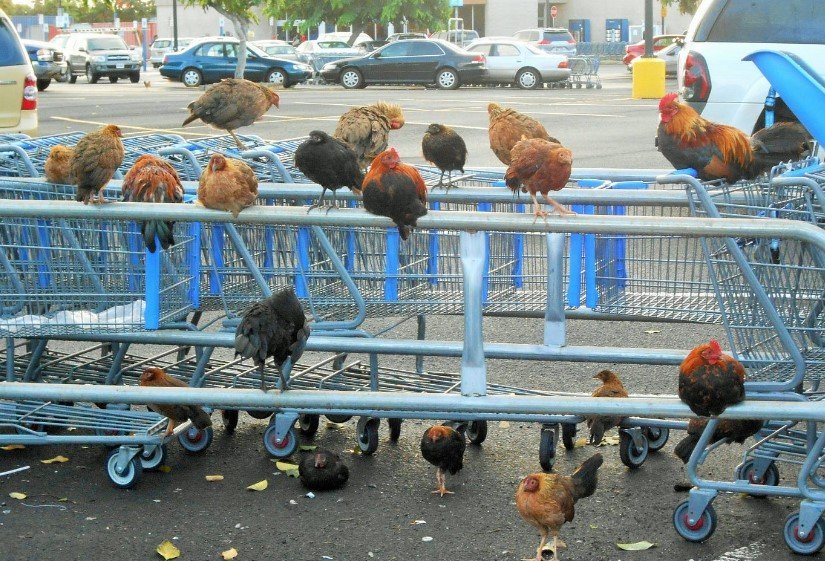
From what I've read, domestic chickens were introduced to the islands by the sugarcane plantations in the 1700s. When the plantations died away in the late 1800s/early 1900s the chickens were simply let loose and became feral. There have been numerous efforts to control the chickens, but people feeding them exacerbates the problem. OK, enough about chickens for now cuz it's making me hungry. On to the next step of construction, which is the "wae's" or spreaders. Wae's are pieces of wood that are fitted into the ka'ele between the mo'o's at spaced intervals. At first, I thought they were seats for paddlers but they actually are a structural component that adds strength to the sides of the ka'ele and spreads out the stress of waves hitting the sides in rough seas. The next step in the construction process is the "kūanueneu's" which are arched blocks of wood that connect both ka'ele's. In addition to connecting the ka'ele's, the kūanueneu's support the "pola" which is the deck/platform that sits between the ka'ele's and houses the masts and sometimes a small structure. Up to this point I had not really thought much about how I was going to fit everything into the bottle. But now it was time to figure that out before I got too far down the construction path and built myself into a corner I couldn't get out of. I quickly found out that, based on the length of my ka'ele's, a proportional width would be too wide for my bottle opening. Once again, my up front planning and design is a big fail. My first thought was to just try and assemble all the pieces inside the bottle. But this particular bottle has a pretty small opening (3/4"), so I didn't like the idea of trying to line everything up perfectly parallel and then try and drop a bunch of small pieces into place. The solution I finally came up with was to connect the kūanueneu's to the ka'ele's with pieces of thin music wire. The wire would act as a spindle, running thru the kūanueneu and thru a small block glued to the bottom of the Ka'ele. That would allow me to slide one ka'ele forward, bringing it adjacent to the other ka'ele while still connected. Then, once inside the bottle, it would be easy to slide them back apart and maintain perfect symmetry. Pictures probably explain it better: I will clip the wire down to size so it does not protrude above the kūanueneu as it does in the last few pics. I will also add the pola (deck) inside the bottle. That should not be too difficult.


- 174 replies
-
- 15
-
-
-
- Waa Kaulua
- bottle
- (and 1 more)
-
I have no words...🤣 I apologize, Boccherini! I just could not help myself when I read about the mo'o. On the other hand, instead of livestock and penguin references, I thought about bringing up Hawaii's feral chicken problem. It was just starting to be a nuisance in Maui last time I was there about 10 years ago and has apparently gotten much worse: https://www.courthousenews.com/foul-fowl-hawaii-locals-overwhelmed-by-wild-chickens/
- 174 replies
-
- 5
-
-
-
- Waa Kaulua
- bottle
- (and 1 more)
-
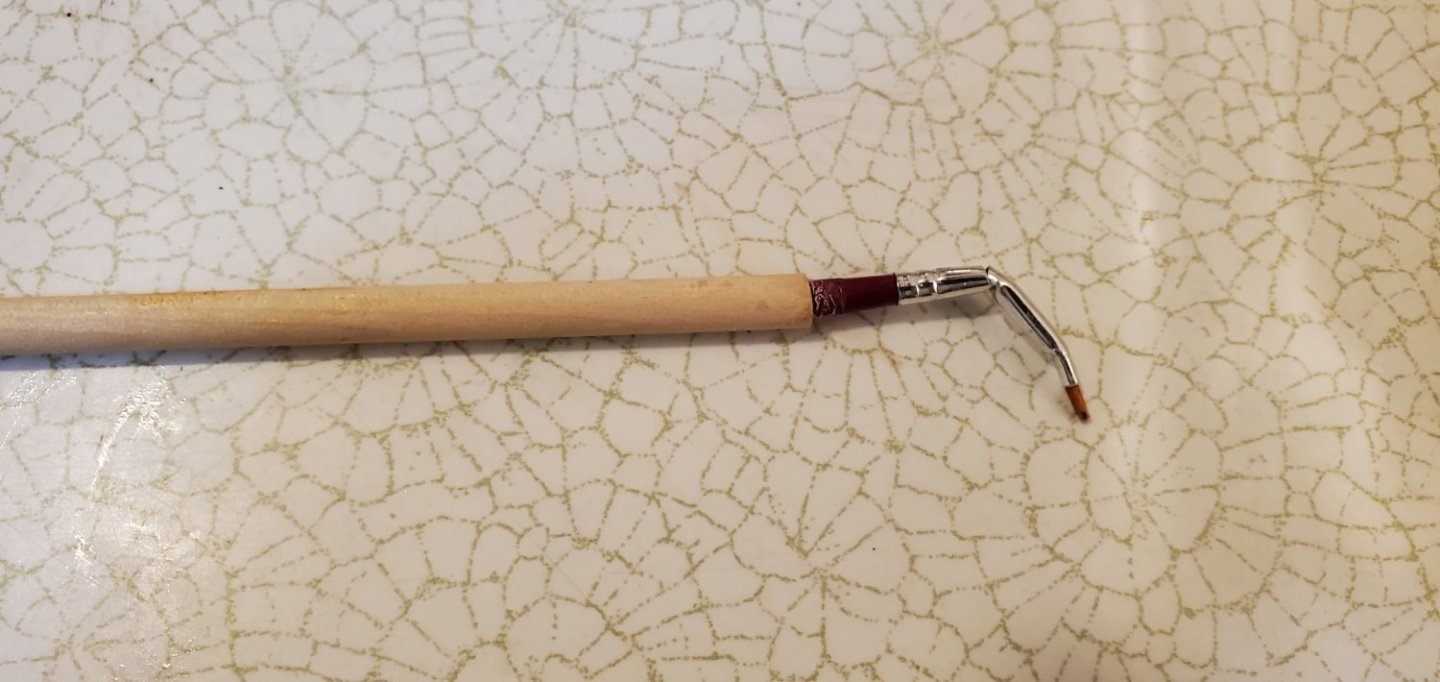
Hey Druxey, you are not gonna like what I do! For my ship-in-bottle work, I am often trying to get a dab of paint or glue into a hard to reach place. What I do is take a fine-tipped brush with a long metal ferrule, and then bend the ferrule to the angle I need to reach the nook or cranny. I will also use a cuticle trimmer and nip the bristles down to a few strands if necessary, depending on how tight the spot is. In the example below, I cut off the end of the brush and glued it into a dowel rod so I could reach way inside a bottle. Obviously that step would probably not be necessary for what Mr. Brinkman has in mind.
-
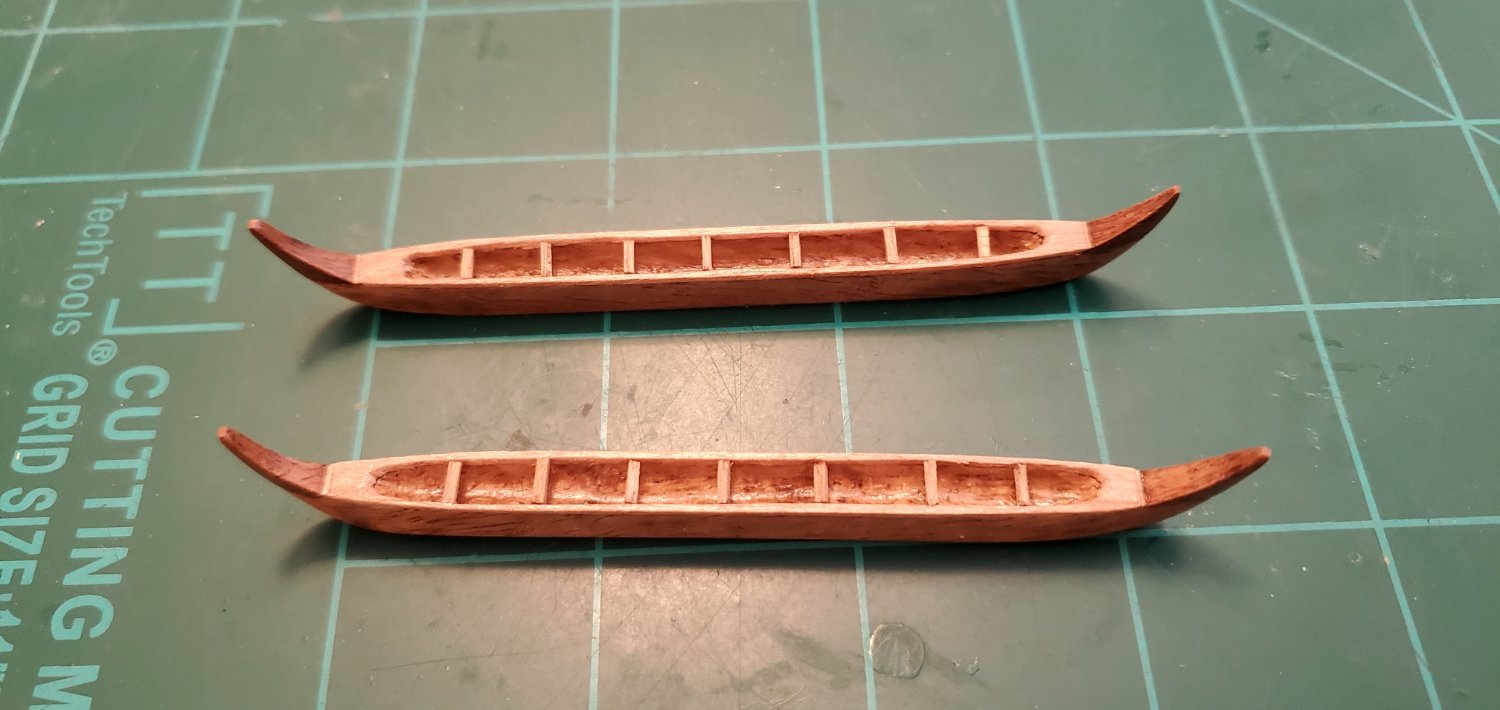
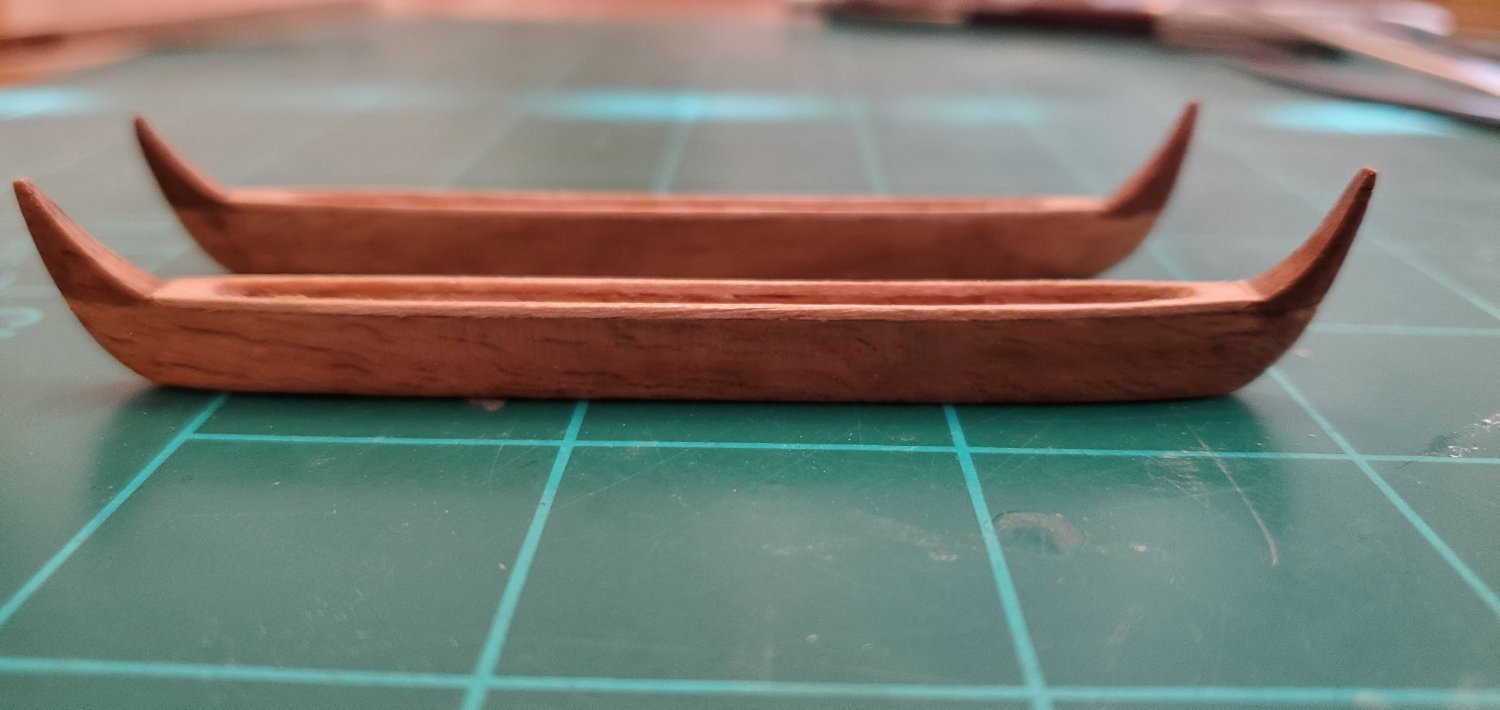
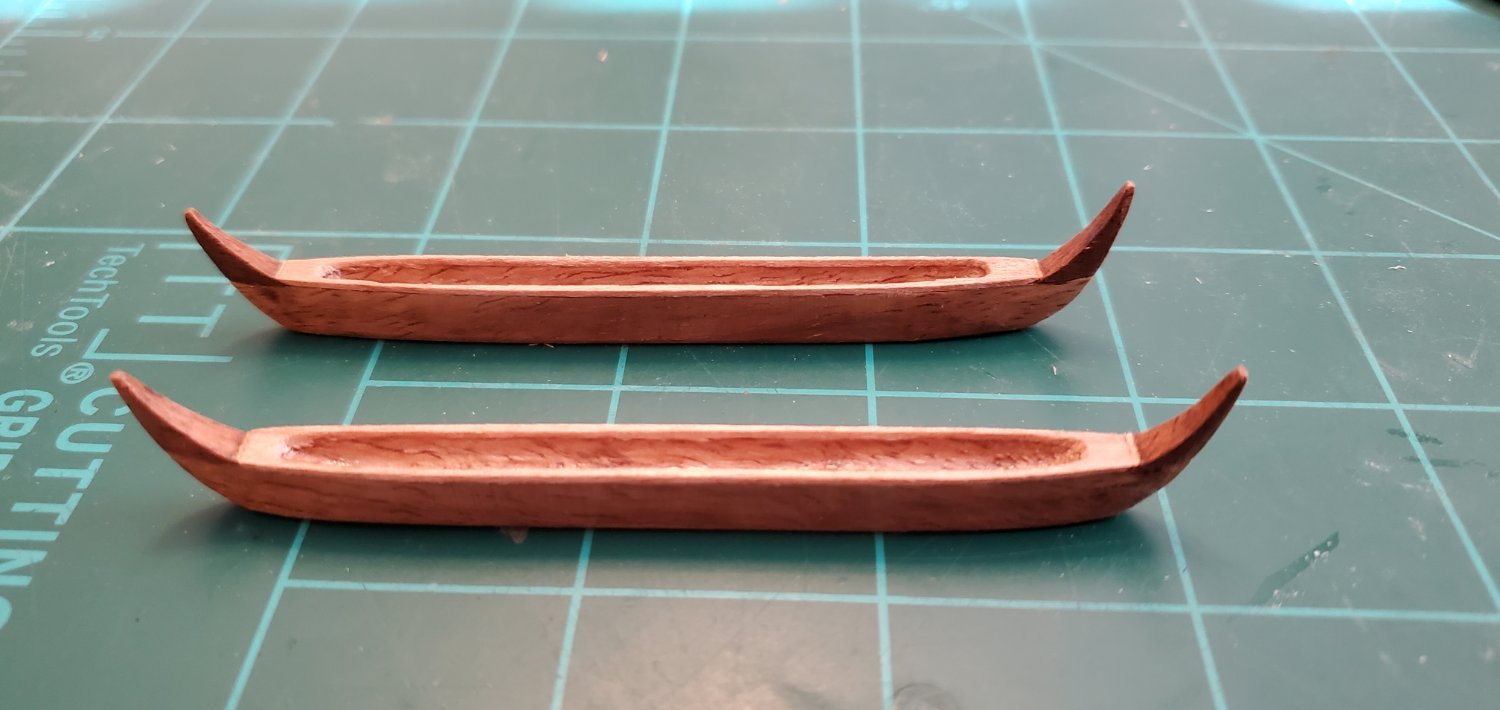
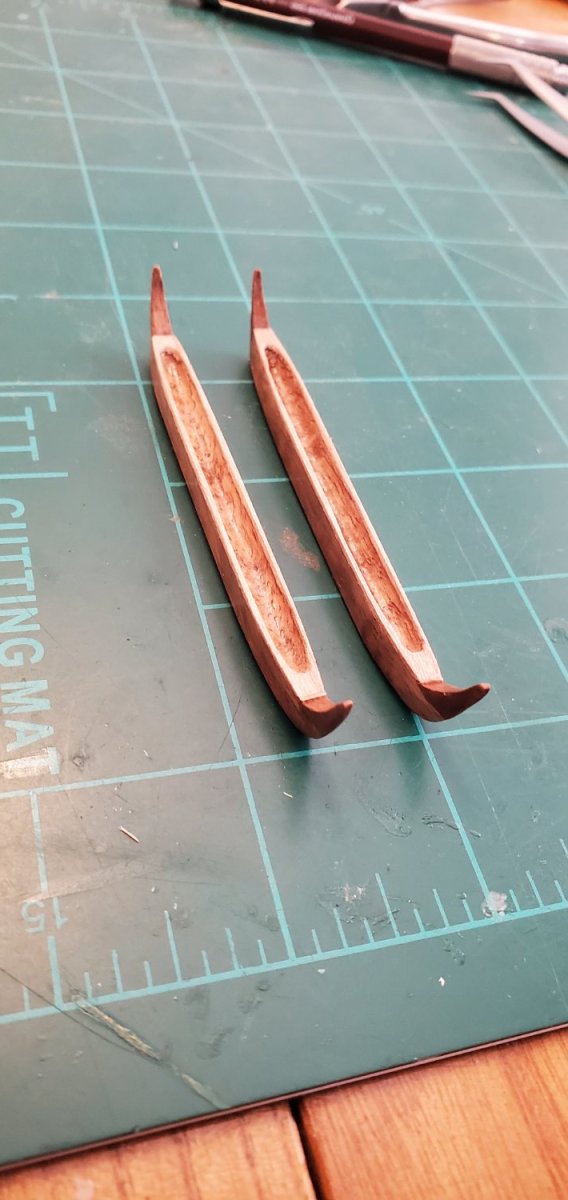
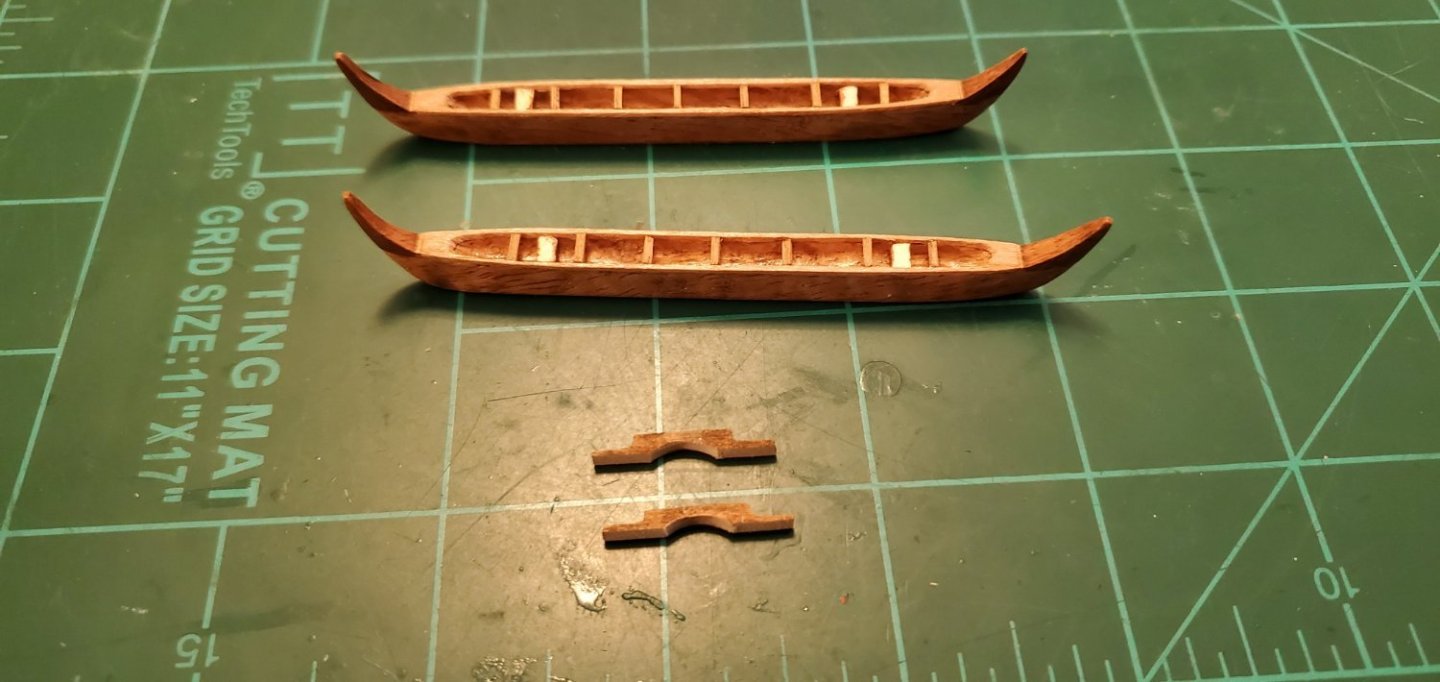
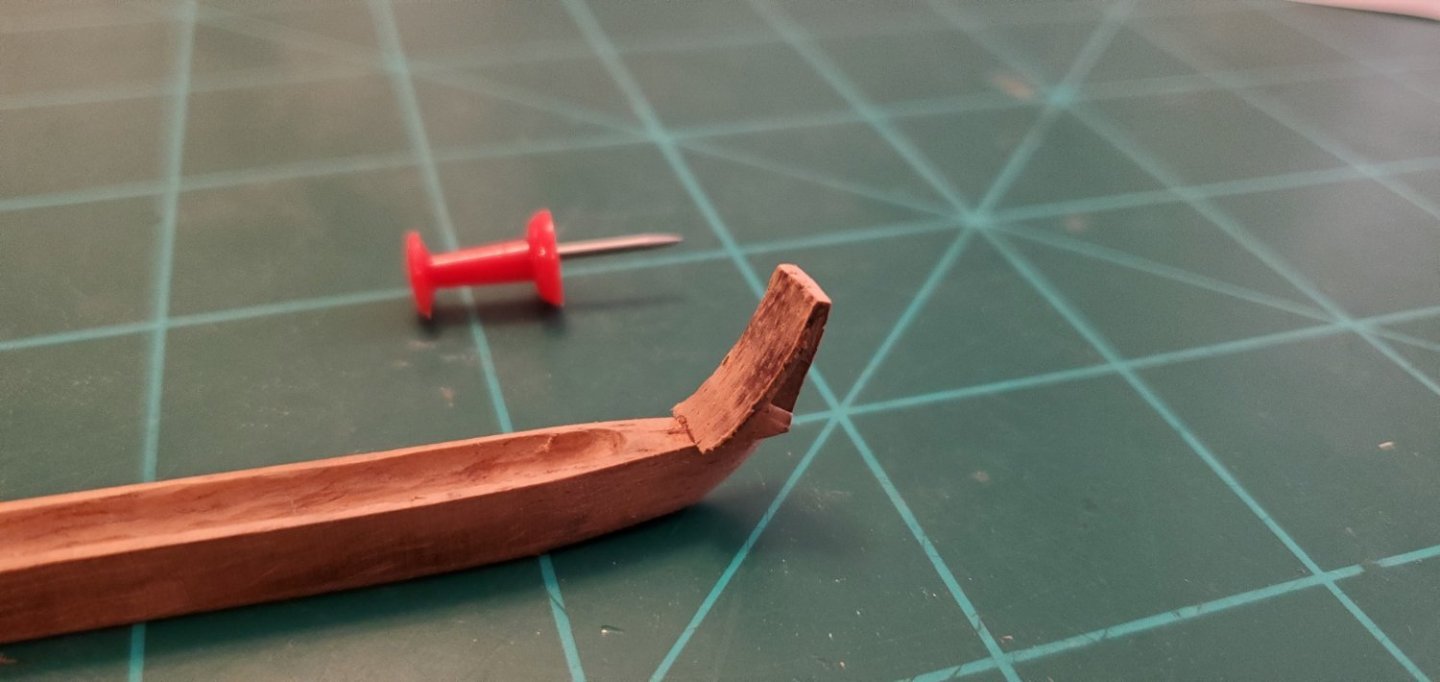
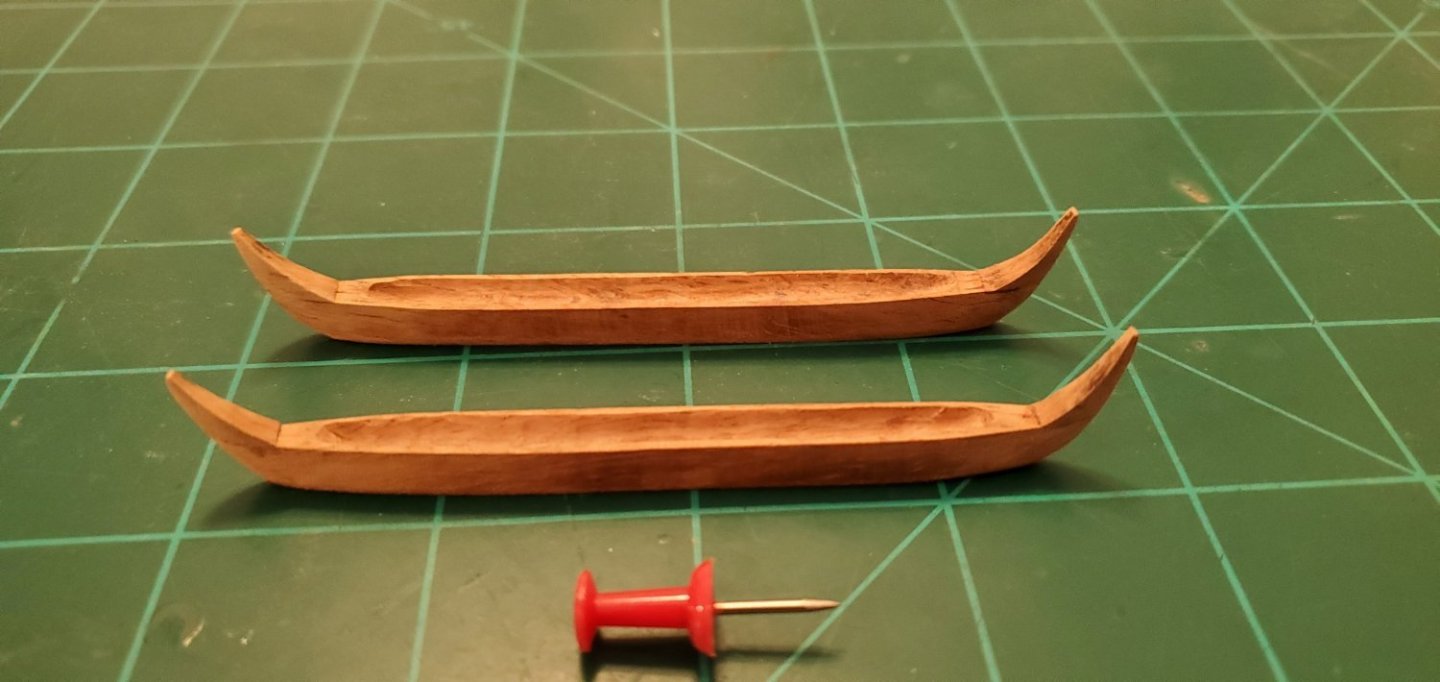
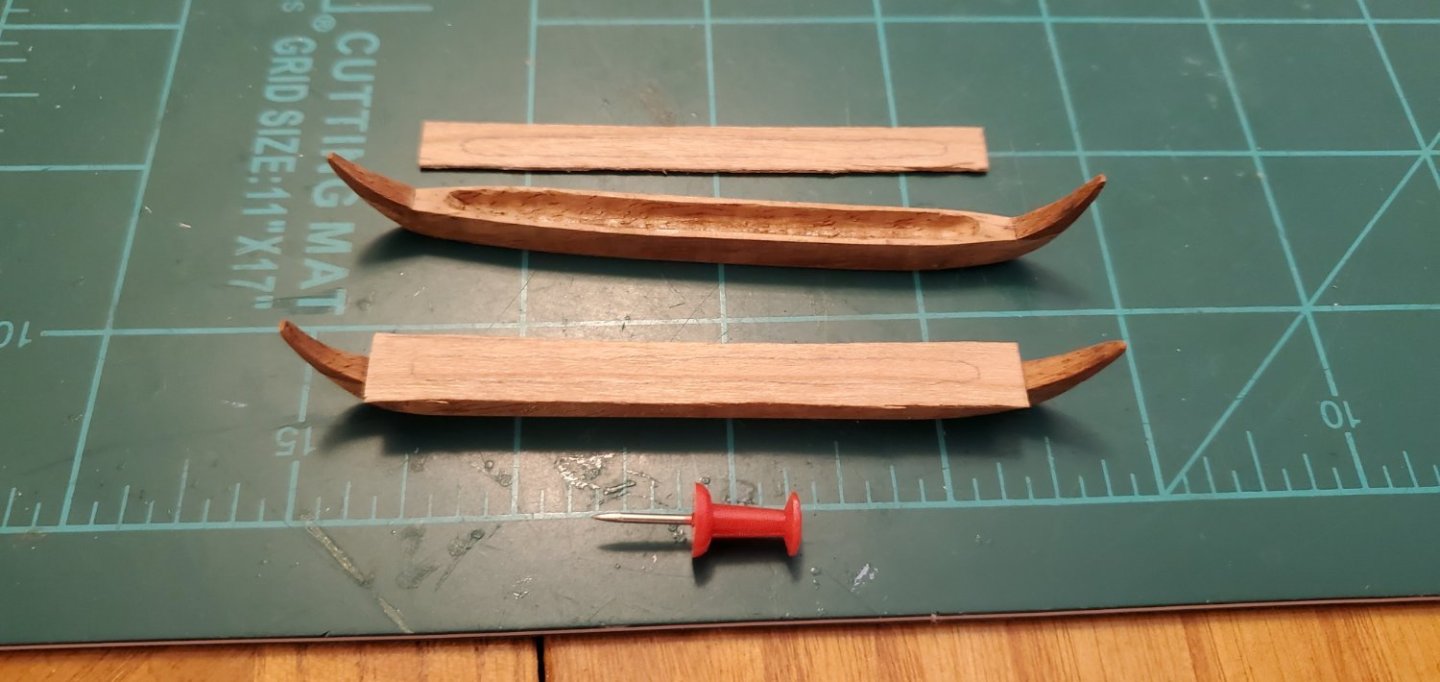
My guide for construction of the Wa’a Kaulua is the website: https://www.hemakeewaa.org. "He Make'e Wa'a" translates to "having great affection for the Hawaiian Canoe." It gives a nice description and purpose of the main components. As mentioned in a previous post, the next step is making the kupe, which was a separately carved piece added to the bow and stern. The upsweep of the kupe is called the manu. The purpose of the kupe was to keep excessive water from splashing into the ka’ele. The purpose of the manu was to slice through waves and help the ka’ele to rise up and over large swells. I started with small blocks of koa, glued them onto the bow and stern, and then sanded them to a final shape. I don’t know if the kupe was supposed to be made out of koa or a different type of wood, but I decided to use koa. Another piece that was separately constructed and attached to the ka’ele was the gunwale. I was going to skip on the gunwale because it's such a small effect and may not even be visible once the wa'a kaulua is in the bottle. However, when I saw the Hawaiian name of the gunwale, I knew I had to include them. The Hawaiian name for the gunwale is "mo’o" (of course my longhorns love the name too!). The mo’o helped protect the edges of the ka'ele from damage. It was made of wood denser and sturdier than the koa. I made mine out of a thin piece of maple veneer. Here’s where I did not think things thru very well for my construction process. It would have been much easier had I thought of the mo’o before carving, shaping, and hollowing out the ka’ele’s. I could have glued it to the koa blank for each Ka’ele and then shaped and hollowed out as a single piece. But since I didn’t figure that out first, I had to glue it to the ka’ele between the kupe’s and then shape/hollow it out. For the finish, I brushed a coat of gloss varnish on the ka’ele, and the mo’o. Even though the kupe was made out of koa like the ka’ele, I wanted the kupe to stand out visually so I gave it a coat of slightly darker stain before hitting it with the varnish. Overall, I am pretty happy with how things have turned out so far. There are some rough edges, but I think that’s maybe even a better look for a boat that was hand carved from a whole tree. The biggest challenge for me was to make 2 boats that were as identical as possible. They are not perfect, but I believe both came out fairly uniform.


- 174 replies
-
- 11
-
-
-
- Waa Kaulua
- bottle
- (and 1 more)
-
Superb work on some very small components!