Gregory
-
Posts
3,152 -
Joined
-
Last visited
Content Type
Profiles
Forums
Gallery
Events
Everything posted by Gregory
-
 I offer this from 1684. From the post by @palmerit
 -
Wood Plank Benders - Rounding
Gregory replied to MintGum's topic in Modeling tools and Workshop Equipment
Why 100w? I have this 60w iron and it will burn wood. $26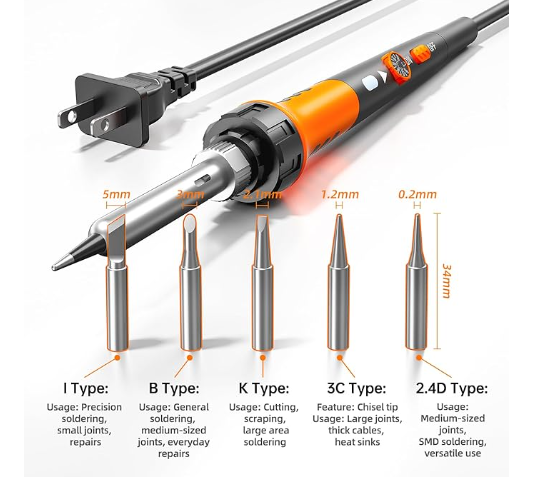
-
Just to be a little warned, unless it has been corrected in other printings, in the book it says " .166 % ", which will not yield good numbers at all. As I said, I think the calculator at HIS Model which uses the .166 (1/6) of main mast diameter at the deck, will yield good numbers.
-
Wood Plank Benders - Edge Bending
Gregory replied to MintGum's topic in Modeling tools and Workshop Equipment
While I like the idea of the one in the video, without applying heat in some way, the drying/curing time would be considerable, and I don't see a good bend being permanent without springing back to some extent. I still look forward to experimenting with the idea put forward in the video while allowing for heat to be utilized. -
Wood Plank Benders - Edge Bending
Gregory replied to MintGum's topic in Modeling tools and Workshop Equipment
I really do not think there is a commercial version out there. The jig in the video you provided looks really good. I'm going to explore that one. This shot from one of Chuck's videos is about as simple and as good as it gets. I wonder If I could put three clamps and some scraps of wood in a box, call it an "Edge Bender" and sell it for $30 ? 😁
-
Great info from @palmerit Not much to add, but it looks like the calculator at HiSModel is based on figures from the Mondfeld book Historic Ship Models which I would consider reliable for model building. I would not worry about getting a perfect scale match for all the ropes and blocks you find on a ship. Just a few different sizes to get a balanced look that is not out of scale by a large amount. Many kits have blocks that are too big in the higher rigging, where the rope and the blocks should be smaller. Another good source of scale rope is MSW Sponsor Ropes of Scale. It appears they have 17 different sizes of rope. I doubt you would find more than six or so sizes that would fall within the range of your 1:85 model. Look at the models here, and the images of contemporary models, and try to get a look for your model that looks balanced and proportional.
-
Cant find this simple chainplate
Gregory replied to Johnny Mike's topic in Masting, rigging and sails
What size deadeye? Found these at ModelExpo https://www.modelexpo-online.com/products/corel-l093-wire-chainplate-for-5mm-deadeyes-26mm-long-pk-of-10-pcs?_pos=1&_psq=chainplate&_ss=e&_v=1.0 -
AI Is so wonderful...
-
One of the quickest ways I identify these scam sites ( too good to be true is one ), put something in your cart and try to check out with PayPal. It won't work the way PayPal should. Actually, it won't work at all.
-
here is what I get when I Google AL.. https://artesanialatina.net/ Depending on what pay method you used, that site is probably harvesting personal information. If you used a credit card, I would lock it, and report the transaction. Also contact Artisania Latina . They have a presence here. @Artesania Latina
-
Is that mill ( the Unimat ) available for sale anywhere? I couldn't seem to find it.
-
Innocraftsman appears to be a storefront for the various Chinese hobby tools that can be found at any number of outlets.. Their pricing seems to be a bit aggressive compared to some other outlets like Amazon. For instance, this little press from Innocraftsman for $249 can be found on Amazon for about $80. This little mill on Amazon looks like it might be a good alternative to the one in your OP..


-
My First and Ugliest Ropewalk
Gregory replied to vvvjames's topic in Rope Making/Ropewalks's Discussions about Rope Making
It's the result that counts, and that looks as good as any rope I have seen! -
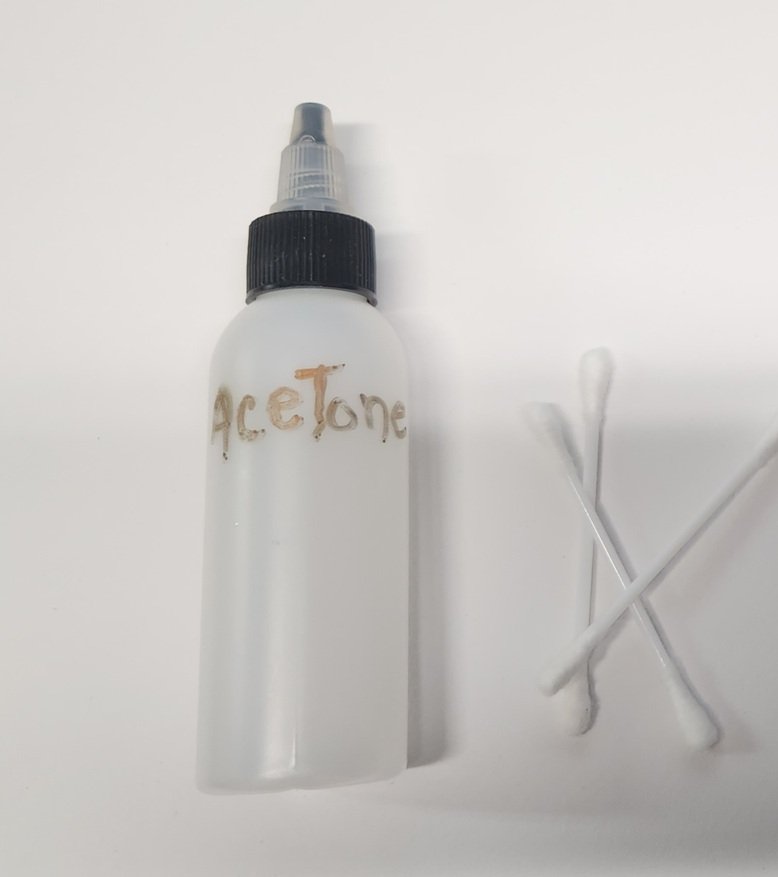
I use this little 2oz bottle and Q-Tips. I put it on the Q-Tip and not the work piece.. Any open container would evaporate quickly.
-
Can you elaborate on this ? Are you referring to stropping blocks and etc..?
-
Hms Mamoli swift brig. rigging question
Gregory replied to lunarlander's topic in Masting, rigging and sails
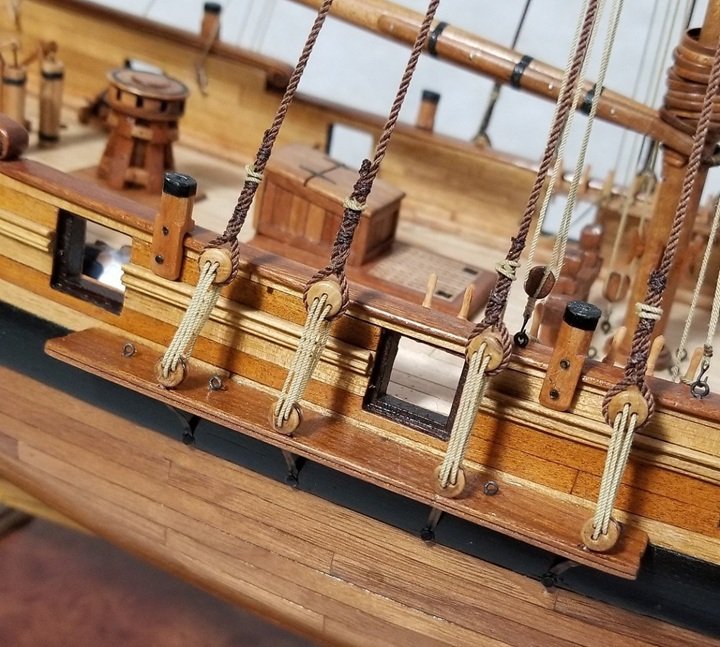
17 Appears to be an eyebolt for one end of a bobstay. 18 Appears to be a block through which the bobstay is reeved then tied to an eyebolt at 16. Doesn't look like actual practice. 204 Refers to a belay point that they have the forestay going to, and that would certainly be wrong. It wouldn't be set up with a block tackle like that. The forestay could be set up like this, with hearts. The bobstays might be set up like the one in the lower, right part of this image. There is another deadeye out of sight, and they would be set up similar to a shroud. To overcome the shortcomings lot of kit rigging plans, you need a good reference like The Masting and Rigging of English Ships of War, 1625-1860 .. One of the Petersson books, Rigging Period Ship Models and Rigging Period Fore and Aft Craft would be a lot of help; the former in particular.. They don't include this particular type of rig, but the basic set-up of various lines would still apply.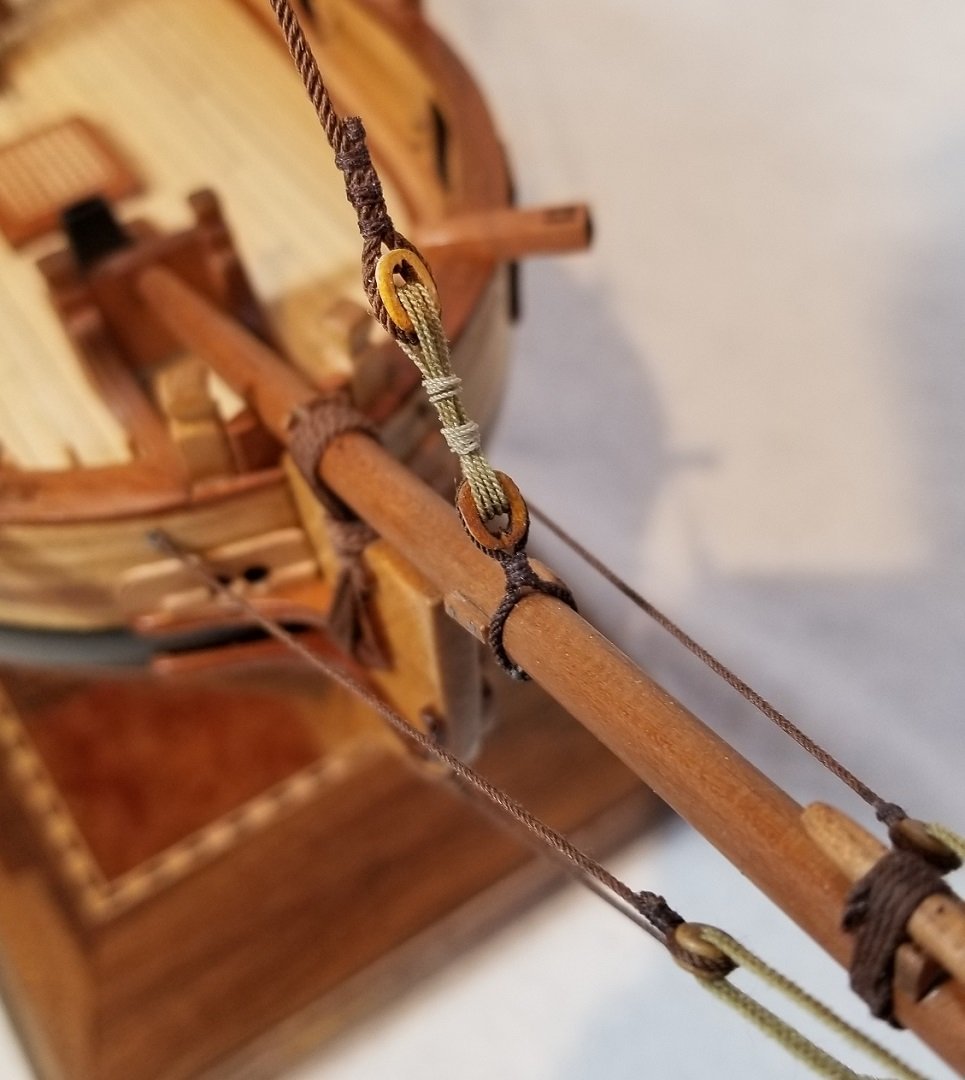
-
Where are you located? Send me PM if you want to keep it private.
-
Basswood Strips
Gregory replied to DGraley's topic in Building, Framing, Planking and plating a ships hull and deck
ModelExpo has a pretty good selection of basswood strips. I see my local Ace has them. Amazon has Midwest basswood also. -
Bullseyes & Lanyard - some help please.
Gregory replied to Capt. Kelso's topic in Masting, rigging and sails
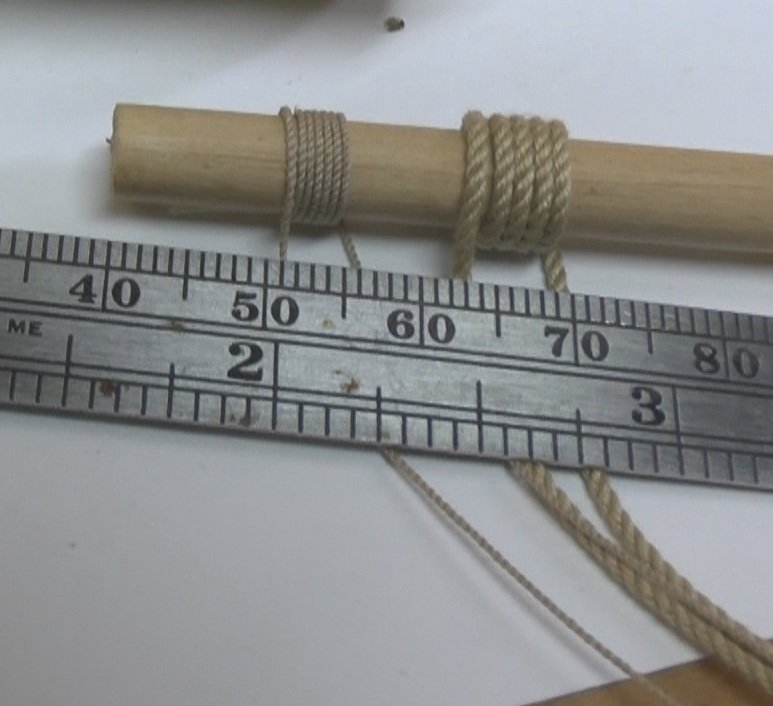
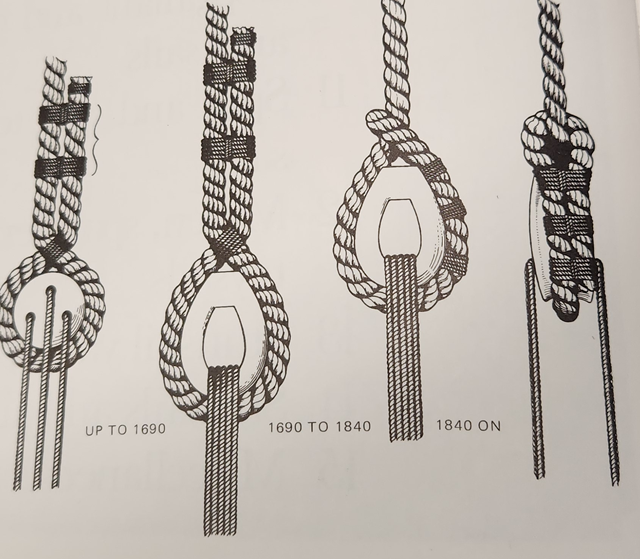
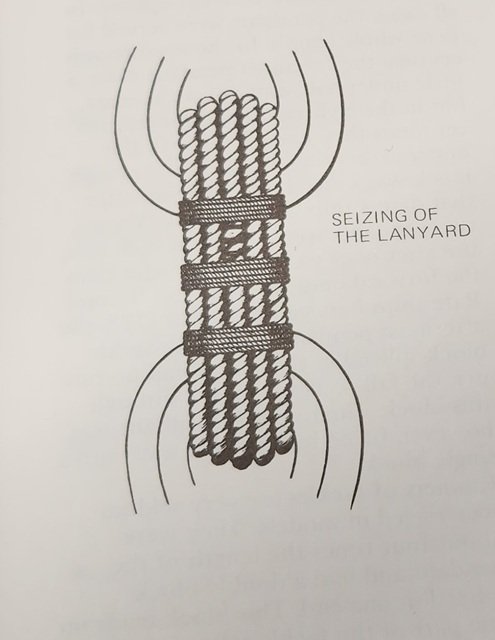
Here is how it looks on my Resolution. These are 'hearts' but the bulls eyes would be rigged similar as far as the lanyards go. The last two pics are from Lees. Again, showing hearts. I can't seem to find specific examples of rigged bulls eyes. Hopefully others will chime in. The number of loops would be determined by the size of the line. I would think maybe 2 or 3 max on a bulls eye.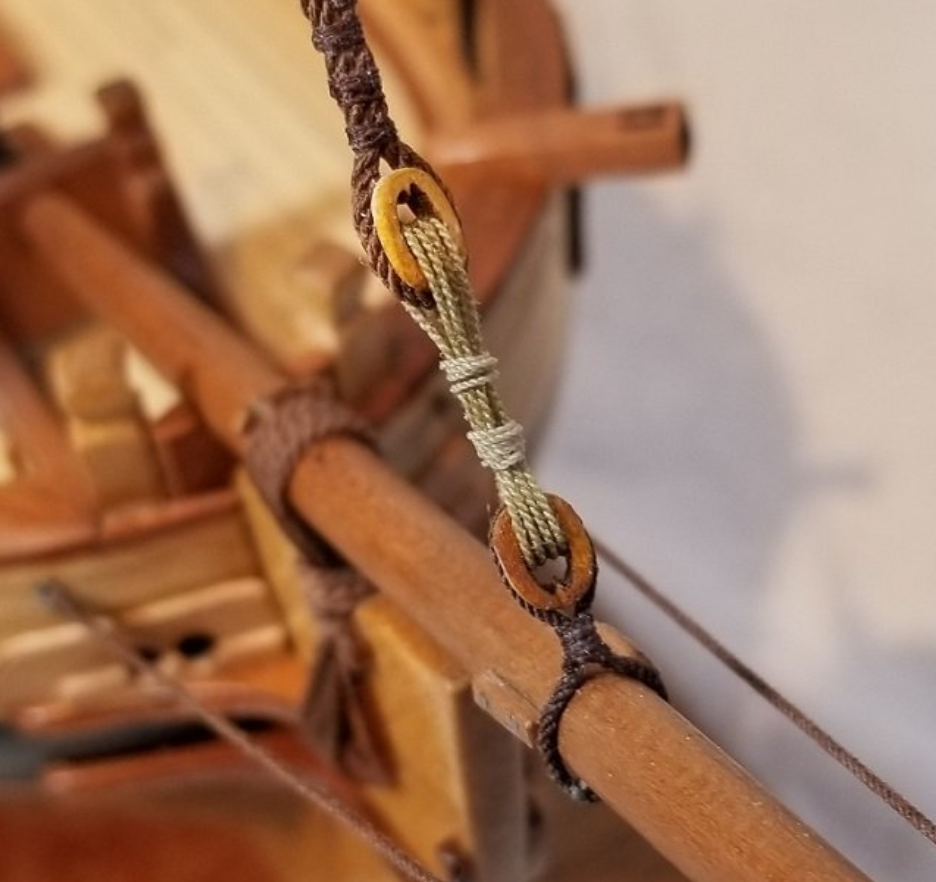
-
With practice, CA can be very effective. If you have looked at Chucks planking videos , He uses CA almost exclusively. I recommend a good medium formula such as 2P-10 Professional . Don't use the thin stuff. It spreads too thin and will soak into bass wood too fast. You will also find, when you get the blanks bent correctly as shown in the planking videos, they lay almost flat and only require some finger pressure for 30 seconds or so for a good bond. I rarely use regular PVA glue anymore except when I need lots of adjust time . One of my favorite build logs for this kit is 18th Century Longboat by BobF. A lot of detail about how Bob built the kit. Your first plank looks really good.
-
, Assuming the 'tailstock" is what I call my 'traveler', There is also a swivel that I described above. This allows the rope to twist and lay up in it's effort to overcome the tension of the twisted strands. I'll try to provide a video of it spinning later .

-
I appreciate the interest. I'll try to make a more comprehensive video that I can post at YouTube. Might take a few days. ( or weeks ) I'll put together a new gearbox to show more about how it's made.
-
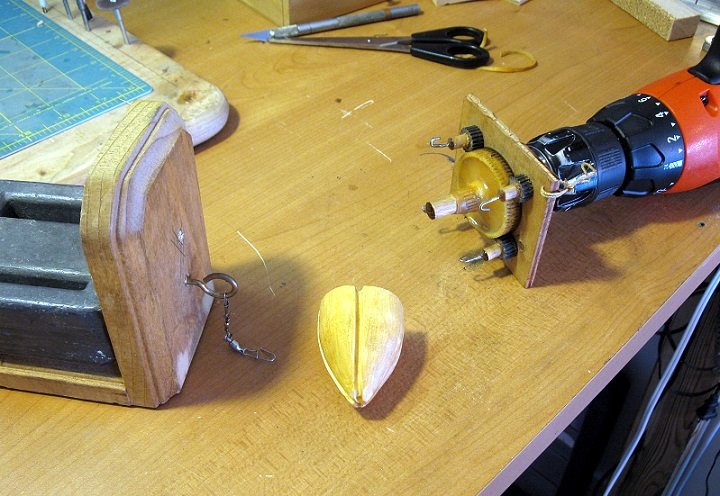
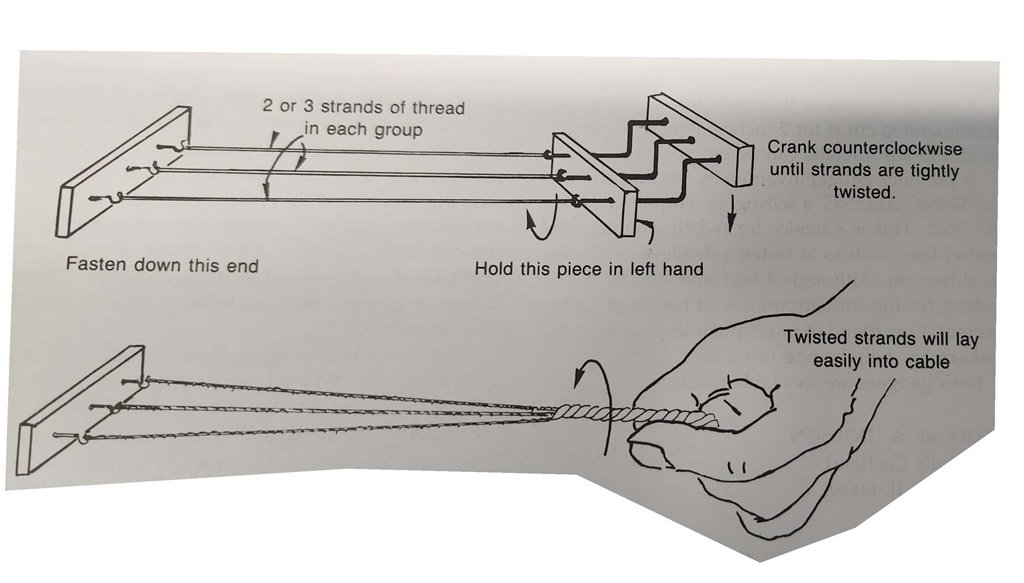
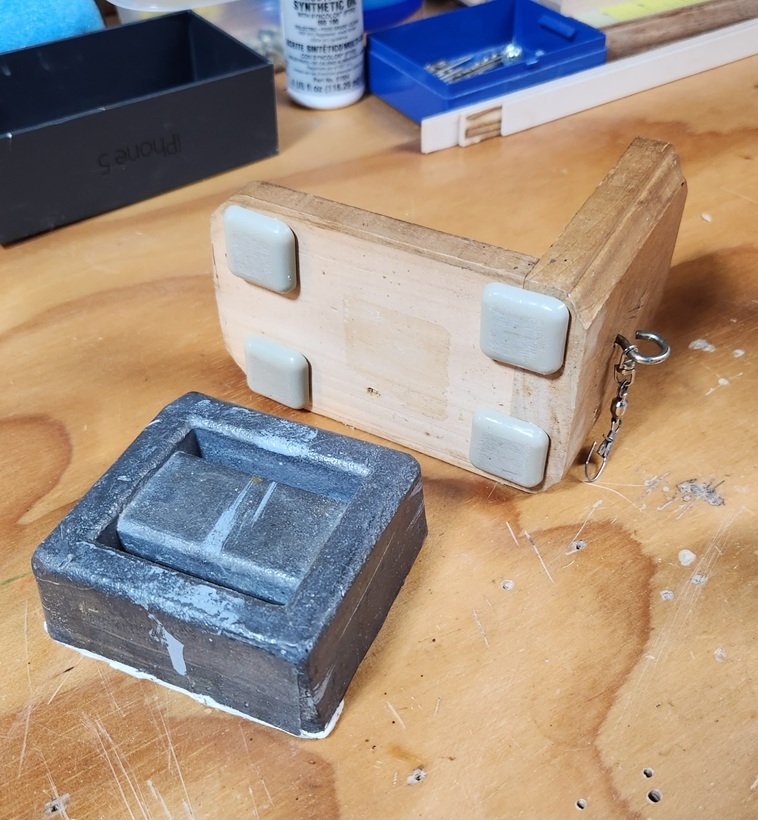
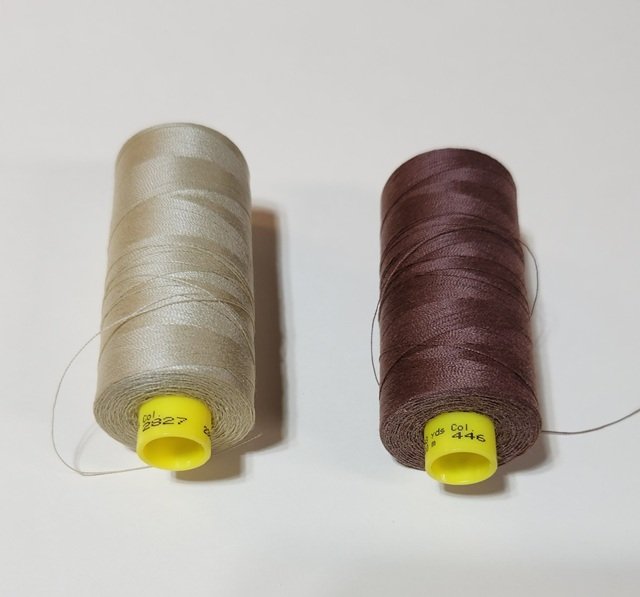
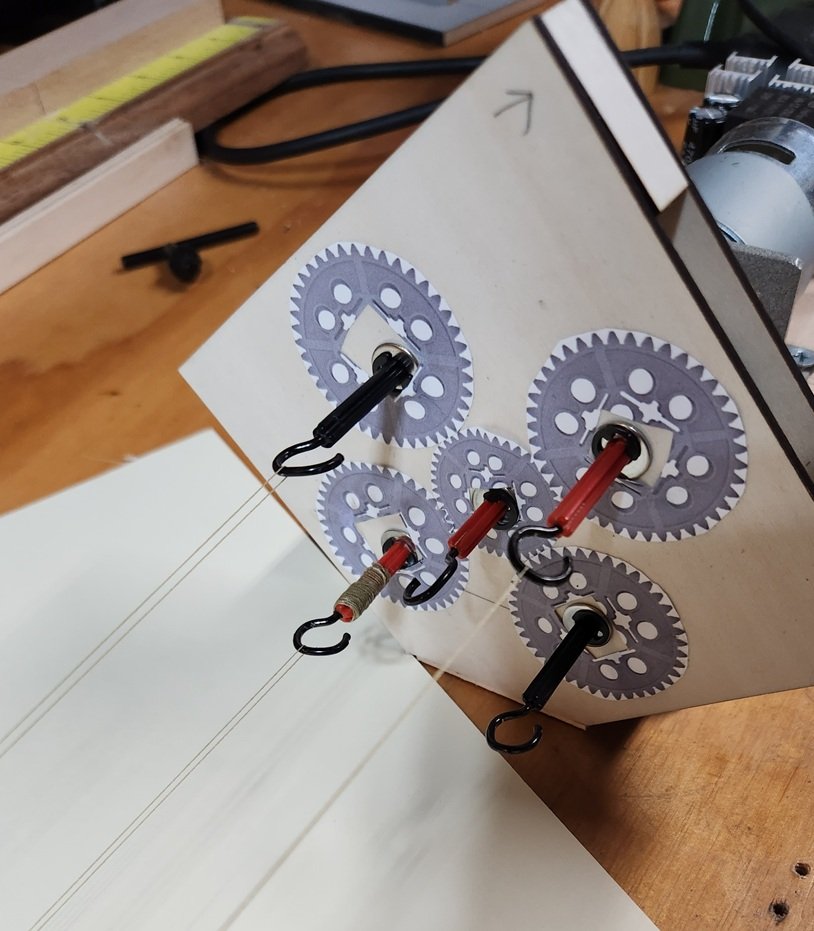
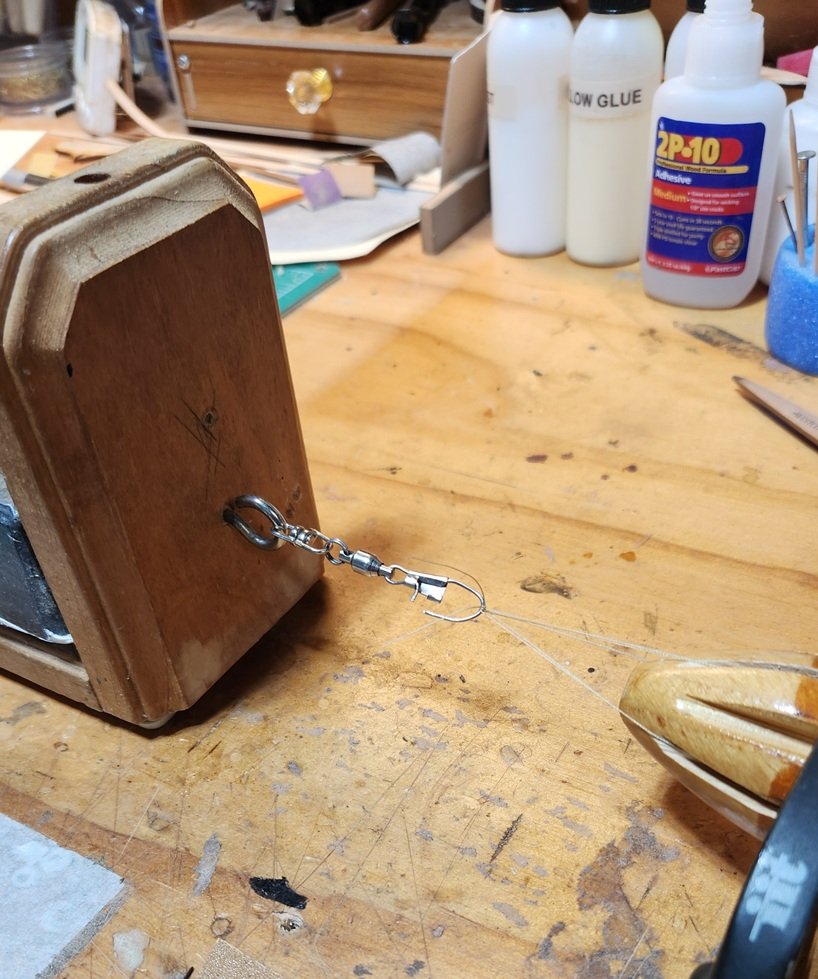
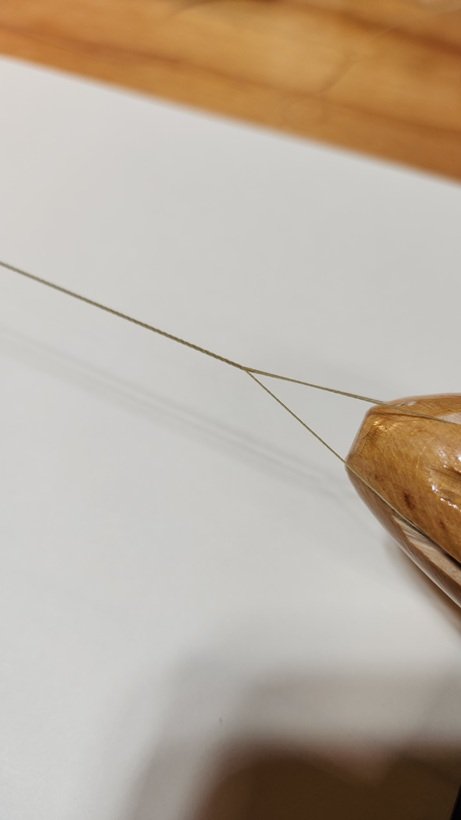
Per my discussion with @Ronald-V over in Chuck's Syren Store topic, I will try to give a description of my rope maker and it's output. First, here is my original rope maker. I realized the shortcoming of kit provided line when I built my first wood ship kit in 1994. I found the basics of rope making in Ships of Scale Magazine, along with a few books that were my only source of information back then. Just for fun, here is one of the the rope making ideas from a book - Ship Modeling From Stem to Stern by Milton Roth. One of my go-to's back then, but I have since found it had a lot of not so sound information, mixed in with the useful stuff. Here is some of the " Not so sound " information from Roth. While the principle is OK up to a point, unless you were making rope out of rubber bands, this design would fail. The upright on the right, which would be the ' looper ' on a working ropemaker, needs to be moveable, not fixed as shown here. As the strands are wound, and the rope begins to set up, it contracts, and becomes somewhat shorter than the original strands. I wonder how many people built this, and experienced the snapping of the strands. Here is the latest version of my Rope Maker. ( Rope walk ) I believe this is what is called the Frolic style, but I didn't know that when I made it. I put images of the gears on the outside, because they are sandwiched inside the framework I made of plywood. I will explain the named components, then show a little more detail about how it works. 1. The Whorls. The strands of thread are attached here. The whorls spin ( wind ) the strands to put a reverse tension on them. Then, when that tension is released, the strands will twist together and lay up into rope. This is the basis for full size rope making. I believe the Rope Rocket has 3 whorls and of course makes great rope. I added a 4th, which I rarely use, but it gives some flexibility with recipes. 2. The Traveler. The traveler for my rope maker is essentially a sled, to which is attached the looper. 3. The Looper. The strands are all attached together on the looper. It will spin freely when the rope begins to lay up. I'm using a little Fishing Swivel Snap Ball Bearing. 4. The Topper. The topper keeps the strands separated while tension is put on the strands. Once the rope starts to lay up, it will slide toward the whorls, with the rope coming after it. Here is the driver for the whorls. It is a DC motor with a 20V power supply. There is a variable speed, reversable regulator. A good electric drill could be used, as with my original set-up, but I use this motor for other purposes. My gearbox is made from Lego Technic gears. Those hooks (re-purposed eye screws ) have to be welded solid. If they move in the shaft you won't have even tension on the strands, which is essential for rope making. I'm reluctant to provide detailed construction instructions or parts list, because I think other builders can come up with a more refined machine. My goal is to show what can be done with simple parts, while achieving some very good rope. The traveler is on Teflon pads so that it slides easily. The diver's weight is necessary to keep it from sliding too easily. All to keep tension during the making. I use two colors of Gutermann polyester thread of various maras. For light colored rope I use 2827 and for dark 446. Here are the various sizes ( Maras ) I have for making different size rope. I use Chuck's rope size chart to help with my rope making. I think there is also a recipe chart somewhere, but I have been making my own by hit and miss, because I may not use the same thread Chuck does. To start making rope I tie my thread to the looper and run it to the whorls, looping back and forth. For this example I am using three doubled strands of Mara 100. This is the looper end. The topper holding the strands apart prior to laying up. Untitled.mp4 Here is a little video to show the set-up before the making process. The strands are about 31 inches before the rope is made. The clamp keeps the topper from flipping over or falling out. When you first start spinning the threads, you are spinning the opposite of the way the yarns in the thread are laid up. I have found this to be clockwise for the thread I am using. This makes the threads sag a little, so you have to adjust the tension a little at this point by moving the traveler away from the whorls. Again, this is something you have to experiment with early on as you learn to make rope with this type of rope maker. A shot of the rope starting to lay up. This is at the whorls after the topper has been removed. I cut the rope from the whorls, holding it to keep from unraveling, and wrap it round the center drive shaft eye. I realize I could have provided more pics of the various stages. I'll try to respond to any special requests for more info. Spinning the rope in the direction of the lay while keeping the looper from turning, 'hardens' the rope. This is with the other end of the rope attached to the center eye, as mentioned above. The traveler will move toward the whorls at this point. How much to spin it is trial and error until you get a feel for it. If you spin too much, the rope will start to gnarl up. Here is the finished rope. Maybe a little over .5mm. The final length was about 21 inches, so about 2/3 the length of the strands I started with. I don't know how this compares to the Rope Rocket, but I know Chuck makes 30 foot lengths of rope. For me that would mean starting with 45 foot strands.😄 I put this presentation together rather quickly, so I apologize if it is not that helpful. Please let me know if you feel I can add some detail or other information that would be helpful.


-
Ronald, I make rope in 36-48 inch lengths. Any one line on a 1:48 is never longer than that. I don't have the Rope Rocket, but use a home made gadget that uses the principles of full size ropemaking. This is my first machine I made when I built my first model in 1994. I have refined it a bit, but don't have any current photos. Here is some of my rope. If you are interested in how it works, I can post some info over in the Rope Making section.