
DONATION DRIVE - SUPPORT MSW - DO YOUR PART TO KEEP THIS GREAT FORUM GOING!
×

Gregory
-
Posts
3,160 -
Joined
-
Last visited
Content Type
Profiles
Forums
Gallery
Events
Everything posted by Gregory
-
 The head rails are so far above what has ever been part of a kit.. While I may not build the Winchelsea, it is like master ship modeling school to follow along and anticipate using your ideas in my future builds.
- 1,784 replies
-
- 1
-

-
- winchelsea
- Syren Ship Model Company
- (and 1 more)
-
No need to apologize.. There are more builds that never get finished compared to those that are.. Too bad we all cannot get paid to do this, and be able to pay someone else to do the chores that take us away from ship building.
-
If I may, I seem to remember Chuck discussing this way back when. Not sure if it is Bulkhead 21, but here is the mention.
-
Those are called " wooldings " ... Don't ask me why.😁
-
The original posts seems to be talking about using it off the spool for rigging line. I would be curious to see examples in various sizes that have the appearance of rope.. The crochet thread I have seen wouldn't work for me..
-
I would say a drawback, is that it doesn't have a rope-like appearance.
-
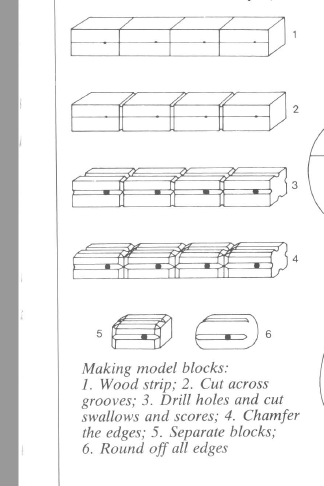
Anything above 6mm would be a really good exercise in making one's own blocks.. If you have a small table saw, this method from Mondfeld would be a breeze..
-
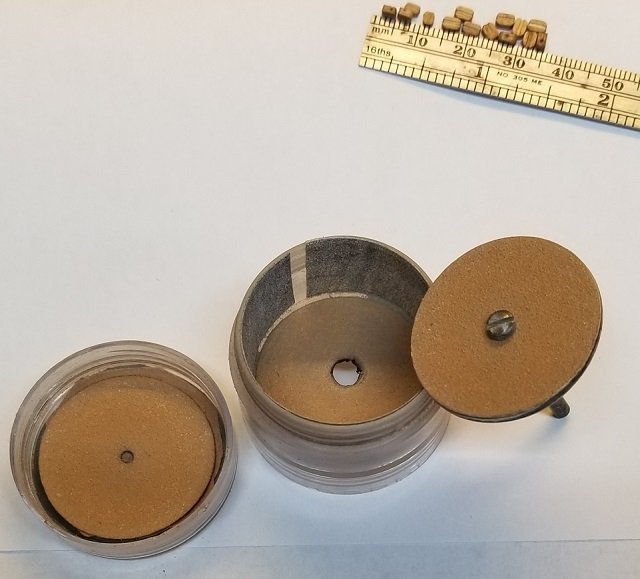
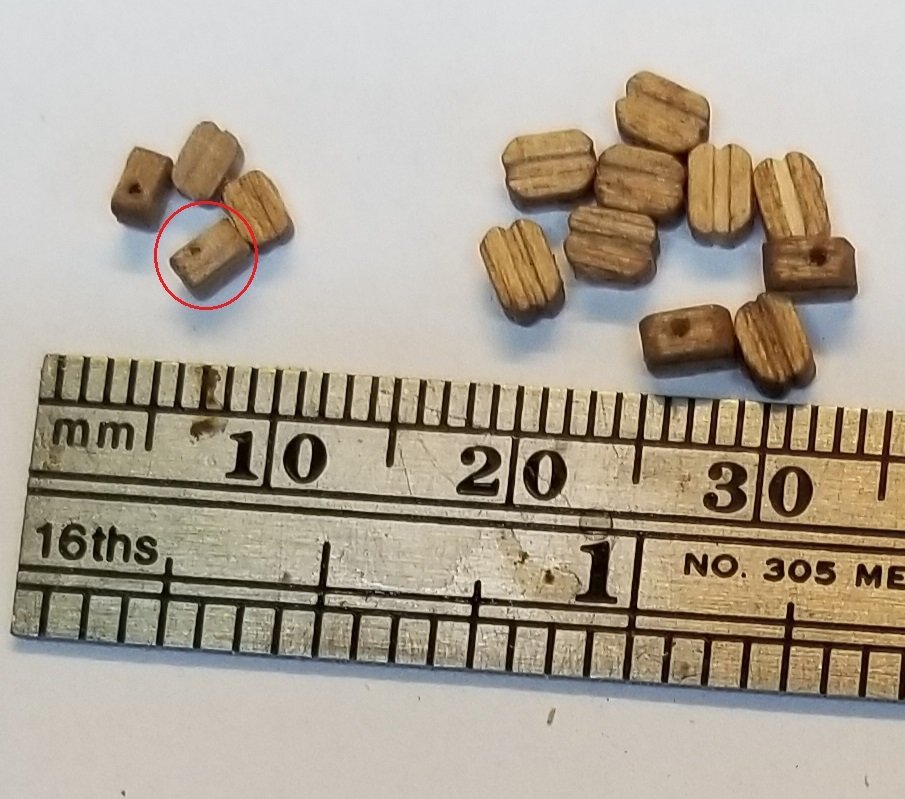
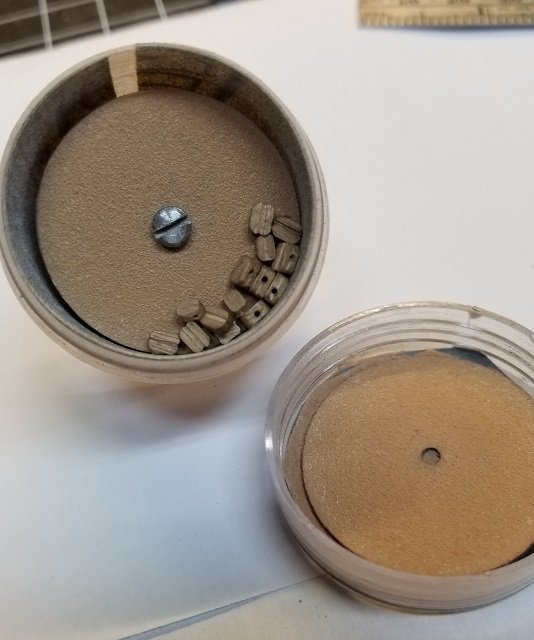
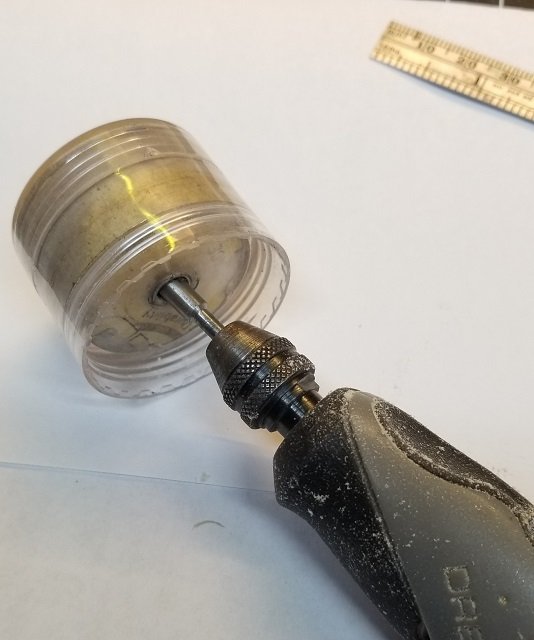
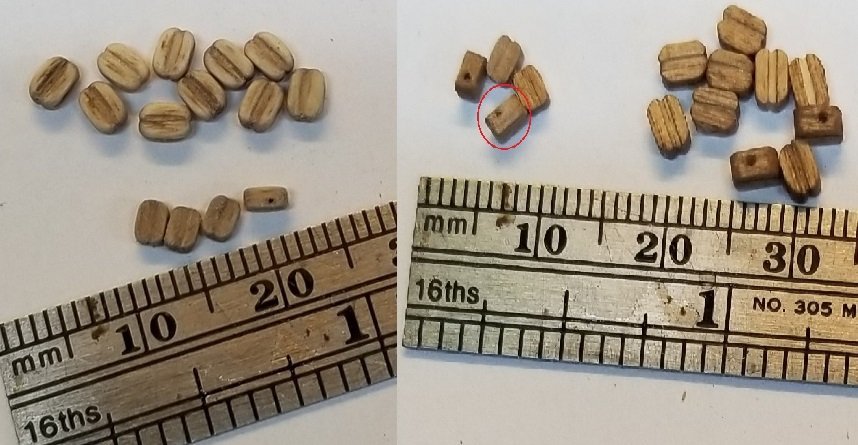
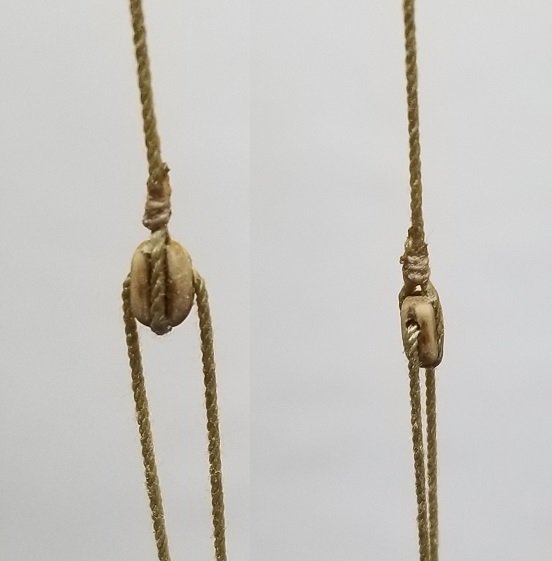
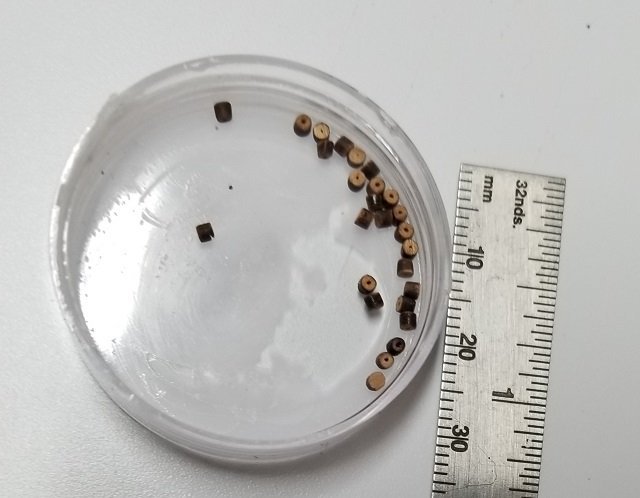
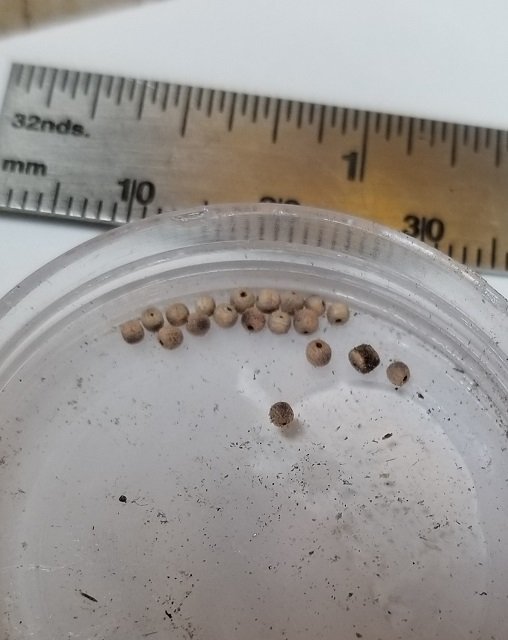
Here's my .02 on a block tumbler/buster. I made this little guy out of a little parts keeper with a screw on lid. Lined with 400 grit sandpaper. The disc moves freely up and down to make the parts bounce around and up and down. Here are the blocks that came with my Model Shipways 18th Century Longboat. 3 and 4 mm.. Note the red circle. Block is not useable. Blocks inside my tumbler. Cap on. I hold the container and run the mini Dremel at about 1-2K for a couple of minutes. Here is the result on the left. Some improvement, but nothing to compare with the good aftermarket blocks. Here is one of the 4mm stropped up. Back away ten feet and they are not bad at all.. Another problem with the kit blocks are the defects. Even if the sheave hole is in the right place, the groove needs to be deeper and at least as wide as the hole to look right. A lot of kits don't have enough to begin with, and the defective ones will have to be replaced. Before I go here is another use I found for my little tumbler. I cut out these wood beads with my laser. Here they are after tumbling. ( Ignore the one that didn't round up like it should have. It got trapped in the tumbler somewhere ) I was experimenting with making some parral beads.
-
Cost might be one reason. A lot/some of kit supplied blocks can be made 100% better by rounding off the sharp edges. Some of them are hopeless when the sheave hole/s is not positioned in a a way for them to look remotely realistic. Have you seen any of the " block buster " tools. They can do quick work of rounding of the edges. I can show you some examples later. I think it is great for you to see this as a way to improve your build. I have seen some great workmanship really overshadowed by the poor quality blocks provided with a kit. Before you buy a set for a particular kit, don't rule out putting together your own set by purchasing from Syren. I have bought some of the blocks from Crafty Sailor with a slight cost advantage but the Syren blocks are better quality.
-
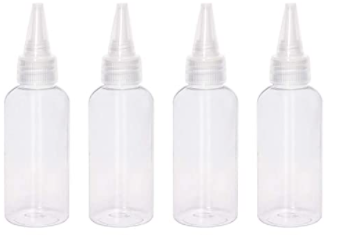
Different strokes for different folks. I have occasion to use very small amounts, and will put a few drops in the target area and spread it with a brush. If I need more, the tops of the bottles screw off and I can pour what I need in a small dish or whatever.
-
I have squeeze bottles with airtight caps and it stores just fine.. Bottles
-
I've stored it in a small air tight container with no problems. The thing about shellac, is that it doesn't cure like varnish and other stuff. The solvent, usually alcohol can evaporate and cause it to thicken or harden, but adding alcohol will bring it back to it's original consistency.
-
The margin planks were an extra challenge for me, but I think no more of a design problem than many other parts of your kit. Any small alignment problems can be covered with a waterway.. My waterway is a bit overscale but shows the technique. I see how retaining tabs would be a problem in a production environment, but I can think of a possible way to mitigate that..
-
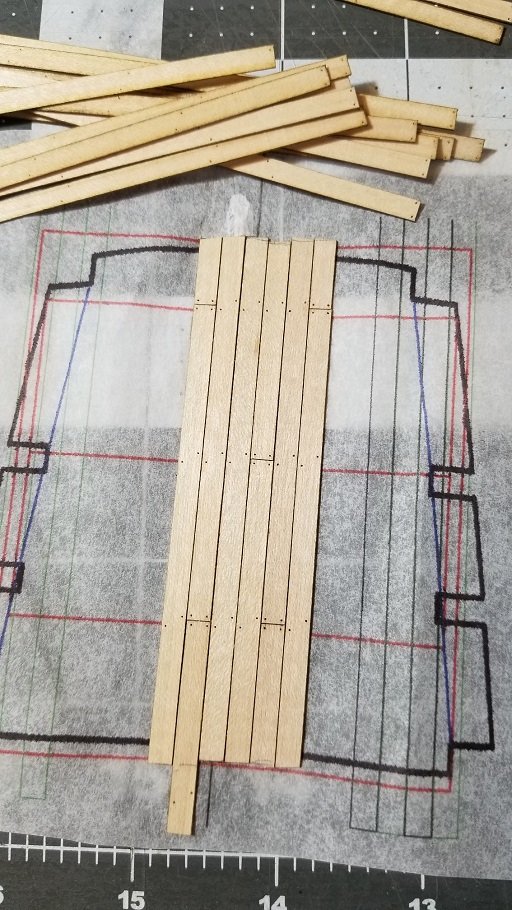
Chris, have you considered offering laser cut planks ? The laser char provides the treenail and caulking look. This was maple veneer. Probably about .8 mm..
-
Those strips are 'battens' and appeared to have been common on the larger yards. Here is what Mondfeld shows.

-
Don't forget worming and parceling of the stays! 😁
- 476 replies
-
- 4
-

-

-
-
- sphinx
- vanguard models
- (and 1 more)
-
I bought it on a whim many years ago to go with a Santa Maria kit many years ago.. The kit is still on the shelf among others.. You are probably aware there are no definitive plans for those ships, only conjecture based on known practices and artwork from the time. I will be happy to share excerpts from the book that comply with fair use.. Like a lot of AOTS books, I see some crazy prices for this one, but I see one on Abe Books for $50.. If you decide you really want the book I'm willing to part with mine, for no more than the cover price + postage..
-
Kind of late to the show, but what do you mean by " doesn't work " ? I have used highly diluted white glue on poly rope. It penetrates down to the fiber level ( does not penetrate the fibers, of course ) and provides a binder that holds the shape of coils as well as securing knots. I use about 50% water for knots, and 75-80% for coils.
-
Mondfeld shows these images for 15th & 16th century capstans. As Allan says the major components would have been of wood with some metal fittings such as bolts. That framework looks strange and would have really hindered operation IMO.. But not having any further information I can't say for sure it is inaccurate. Do you have the AOTS ( Anatomy Of The Ship ) for the Columbus ships? I have it, and will check later for what the author had to say about a capstan..
-
This is really a great build for a first kit.. You will have a much better feel for when to do what on your next.. Most importantly, do what works for you and don't get bogged down, worrying if you are doing it "right "..
- 362 replies
-
- 3
-
-
- Amati
- Lady Nelson
- (and 2 more)
-
There are some nice images here that may be of help: Admiralty Models
- 82 replies
-
- 1
-
-
- Fly
- Victory Models
- (and 2 more)
-
I mentioned above about the NRG article concerning the Hahn model. My recent research uncovered this page: Hahn's Rattlesnake Which has all the pictures of the figurehead carving steps.. I think that site has some relationship to the Hahn estate, so the private use of the images should be on the up-and-up..
-
Matching Deck Colors
Gregory replied to hof00's topic in Painting, finishing and weathering products and techniques
Vanguard models has a nice tutorial in their ship's boat instructions for making PE look like wood. Go to page 4 in this one. https://vanguardmodels.co.uk/wp-content/uploads/2022/02/admirals-barge.pdf -
300' Full size? WIKI has her at 177, but I guess that could be not including the bowsprit. Would the bowsprit be another 125' ?
-
The 26' boat from Vanguard might be a good option. Crafty Sailor ( that I linked to) is a great source for hooks, eyebolts and other fittings. Reasonable prices and fast reasonably priced shipping.