

Gregory
-
Posts
3,175 -
Joined
-
Last visited
Content Type
Profiles
Forums
Gallery
Events
Everything posted by Gregory
-
 The margin planks were an extra challenge for me, but I think no more of a design problem than many other parts of your kit. Any small alignment problems can be covered with a waterway.. My waterway is a bit overscale but shows the technique. I see how retaining tabs would be a problem in a production environment, but I can think of a possible way to mitigate that..
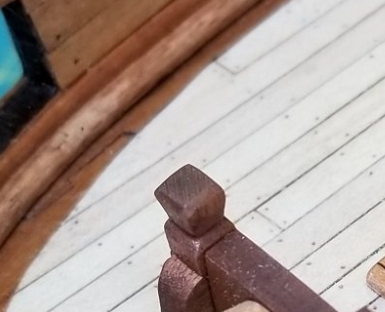
-
Chris, have you considered offering laser cut planks ? The laser char provides the treenail and caulking look. This was maple veneer. Probably about .8 mm..
-
Those strips are 'battens' and appeared to have been common on the larger yards. Here is what Mondfeld shows.

-
Don't forget worming and parceling of the stays! 😁
- 476 replies
-
- 4
-

-

-

-
- sphinx
- vanguard models
- (and 1 more)
-
I bought it on a whim many years ago to go with a Santa Maria kit many years ago.. The kit is still on the shelf among others.. You are probably aware there are no definitive plans for those ships, only conjecture based on known practices and artwork from the time. I will be happy to share excerpts from the book that comply with fair use.. Like a lot of AOTS books, I see some crazy prices for this one, but I see one on Abe Books for $50.. If you decide you really want the book I'm willing to part with mine, for no more than the cover price + postage..
-
Kind of late to the show, but what do you mean by " doesn't work " ? I have used highly diluted white glue on poly rope. It penetrates down to the fiber level ( does not penetrate the fibers, of course ) and provides a binder that holds the shape of coils as well as securing knots. I use about 50% water for knots, and 75-80% for coils.
-
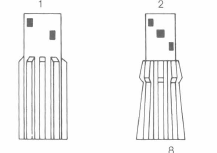
Mondfeld shows these images for 15th & 16th century capstans. As Allan says the major components would have been of wood with some metal fittings such as bolts. That framework looks strange and would have really hindered operation IMO.. But not having any further information I can't say for sure it is inaccurate. Do you have the AOTS ( Anatomy Of The Ship ) for the Columbus ships? I have it, and will check later for what the author had to say about a capstan..
-
This is really a great build for a first kit.. You will have a much better feel for when to do what on your next.. Most importantly, do what works for you and don't get bogged down, worrying if you are doing it "right "..
- 362 replies
-
- 3
-
-
- Amati
- Lady Nelson
- (and 2 more)
-
There are some nice images here that may be of help: Admiralty Models
- 82 replies
-
- 1
-
-
- Fly
- Victory Models
- (and 2 more)
-
I mentioned above about the NRG article concerning the Hahn model. My recent research uncovered this page: Hahn's Rattlesnake Which has all the pictures of the figurehead carving steps.. I think that site has some relationship to the Hahn estate, so the private use of the images should be on the up-and-up..
-
Matching Deck Colors
Gregory replied to hof00's topic in Painting, finishing and weathering products and techniques
Vanguard models has a nice tutorial in their ship's boat instructions for making PE look like wood. Go to page 4 in this one. https://vanguardmodels.co.uk/wp-content/uploads/2022/02/admirals-barge.pdf -
300' Full size? WIKI has her at 177, but I guess that could be not including the bowsprit. Would the bowsprit be another 125' ?
-
The 26' boat from Vanguard might be a good option. Crafty Sailor ( that I linked to) is a great source for hooks, eyebolts and other fittings. Reasonable prices and fast reasonably priced shipping.
-
I think what you want is Issue 39.. Index to journals and articles are found here.. https://thenrg.org/journal/issue-index
-
FWIW There is an issue of the Nautical Research Journal with a very comprehensive article by Hahn about his model of Rattlesnake. What you may find particularly interesting are a series of pictures of his carving of the figure head, which is a pretty good rendition of the NMM drawings. I'm sorry I don't know the issue number, but someone at the NRG should be able to help you find it if interested.
-
18th and early 19th Century cutter models
Gregory replied to tkay11's topic in Nautical/Naval History
Perhaps scuppers, when appropriate, were one of those things taken for granted and not always shown on models and plans. Chuck says they are on the plans for Cheerful, but I can't identify them on the plans I have seen.- 42 replies
-
- 3
-
-
- Cutter
- 18th Century
- (and 4 more)
-
I think either one is just called a bulkhead, and identified by location, i.e. " quarter deck bulkhead ".. Someone more knowledgeable may come along and elaborate..
-
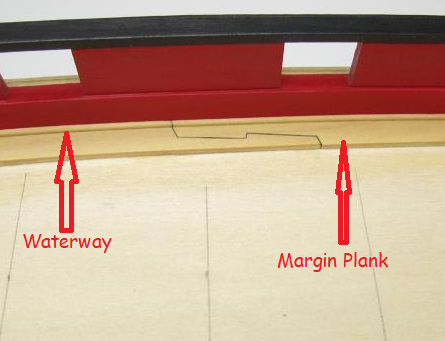
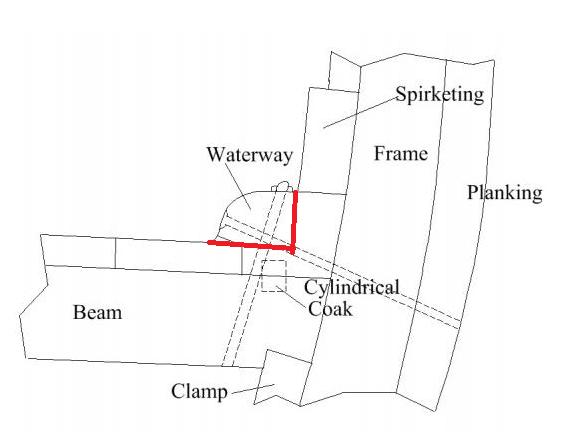
Confusing terminology.. Do the instructions call what you are referring to as the waterway. It looks like what you are working on is the margin planking. The waterway is actually a feature that covers the gap between the margin planking and the bulwarks.. Here is an image from Chuck's Cheerful.. On a model it would be similar to the quarter-round molding used between a wall and the floor.. Here is a diagram provided by Allan in another topic. On a model, the waterway is typically formed with a strip that I have defined with the red lines.
-
Couldn't have said it better.. There are all kinds of tricks for faking the rigging. Particularly making your coils separate off the boat.. The oversize pin rack holes should be easy to hide.
- 362 replies
-
- 2
-
-
- Amati
- Lady Nelson
- (and 2 more)
-
No, it translates to: " We are having shipping delays because we are moving. You may cancel your order if you don't want to wait. "
-
Gluing deck, will this work?
Gregory replied to ubjs's topic in Building, Framing, Planking and plating a ships hull and deck
I use Elmer's white glue. I put a few drops along the plank and spread it with this plastic knife which creates little ridges of glue. I keep a wet cloth handy to clean up goofs..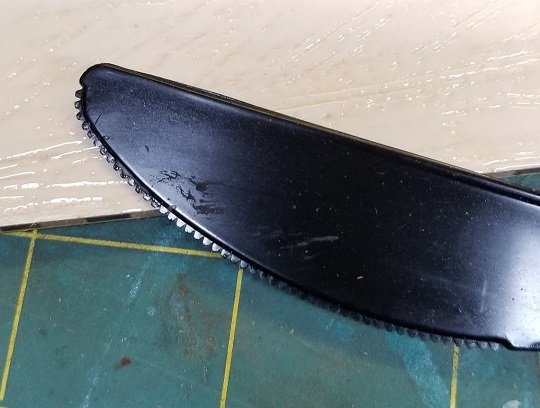
-
Gluing deck, will this work?
Gregory replied to ubjs's topic in Building, Framing, Planking and plating a ships hull and deck
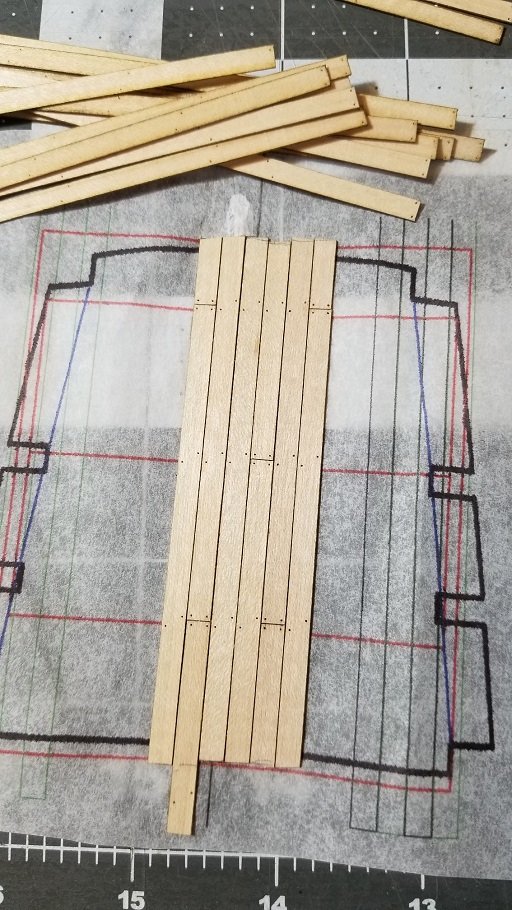
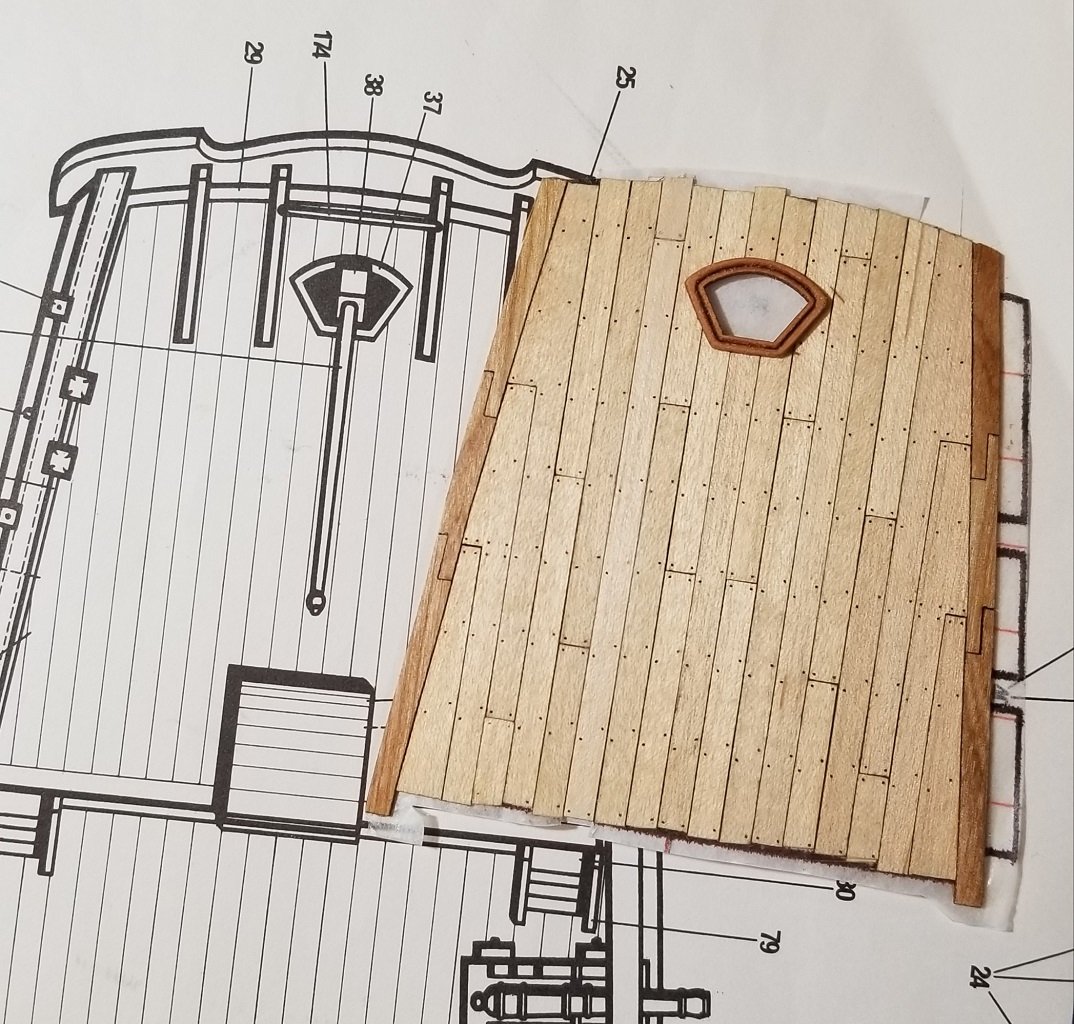
I think you would spend as much time taping as you would gluing, so I don't see how you would save any time. I glue my planks to paper off the model, before gluing the completed assembly onto the model. It take a little more time but easier to adjust and correct mistakes.
-
I may have mentioned earlier that Cornwall Model Boats is a great source for Italian kit makers. Even with shipping they are usually substantially less than US vendors like ModelExpo.
-
From the NMM article: The captions on those NMM items sometimes are not accurate. The plans I posted would be in contradiction to that model. Perhaps the description in the plans I posted are not accurate.. The model would not need gallows for a ship's boat, since it has davits. Are those belaying pins in the " gallows" ? Interesting to consider how they would be worked, or are they something else? Another rabbit hole..
-
Regards your ships wheel, have you seen the one at Syren? Wheel for 1:64 Your guns would look fine with no tackle.. At this scale, it often looks oversized and draws attention away from finer points of the model. Breaching ropes can be a nice touch if done neatly, but just as well left off in my humble opinion..