

Gregory
-
Posts
3,169 -
Joined
-
Last visited
Content Type
Profiles
Forums
Gallery
Events
Everything posted by Gregory
-
 Common card stock is also about .01 I find it behaves a lot like wood.. How would you mill your boxwood thinner than .01?
 -
That depends on your skill level with regard to scratch building. There is a lot of information here: The 32 Gun Frigate Winchelsea (1764) You can look at the illustrations and ask yourself " Can I make that ? " The store is closed right now so the prices are not available. If you are planning on milling your own wood strips you will need a good small table saw such as the Byrnes Saw.. An alternative will be to buy the timbering set from Modeler's Sawmill As well as this forum with all the build logs. Member Build logs for the HMS Winchelsea
- 1,784 replies
-
- 2
-

-
- winchelsea
- Syren Ship Model Company
- (and 1 more)
-
The laser cuts are very accurate. They are a perfect clone of the file/drawing used to make the cut. There is a clue in there somewhere.😁
-
I had some trouble in that area also with my laser cut bulkheads that I made symmetrical before cutting. I will be doing some filling to smooth things out. Unfortunately you won't have that luxury with single planking. You may have to build up or shave off the the bulkheads to make things fair.
-
Thanks for all the comments. I think more glass will make for a nice design. I will be kicking the details around shortly.
-
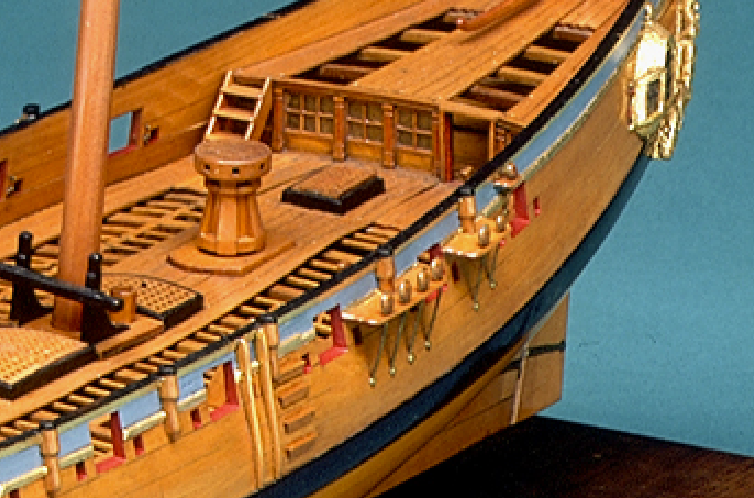
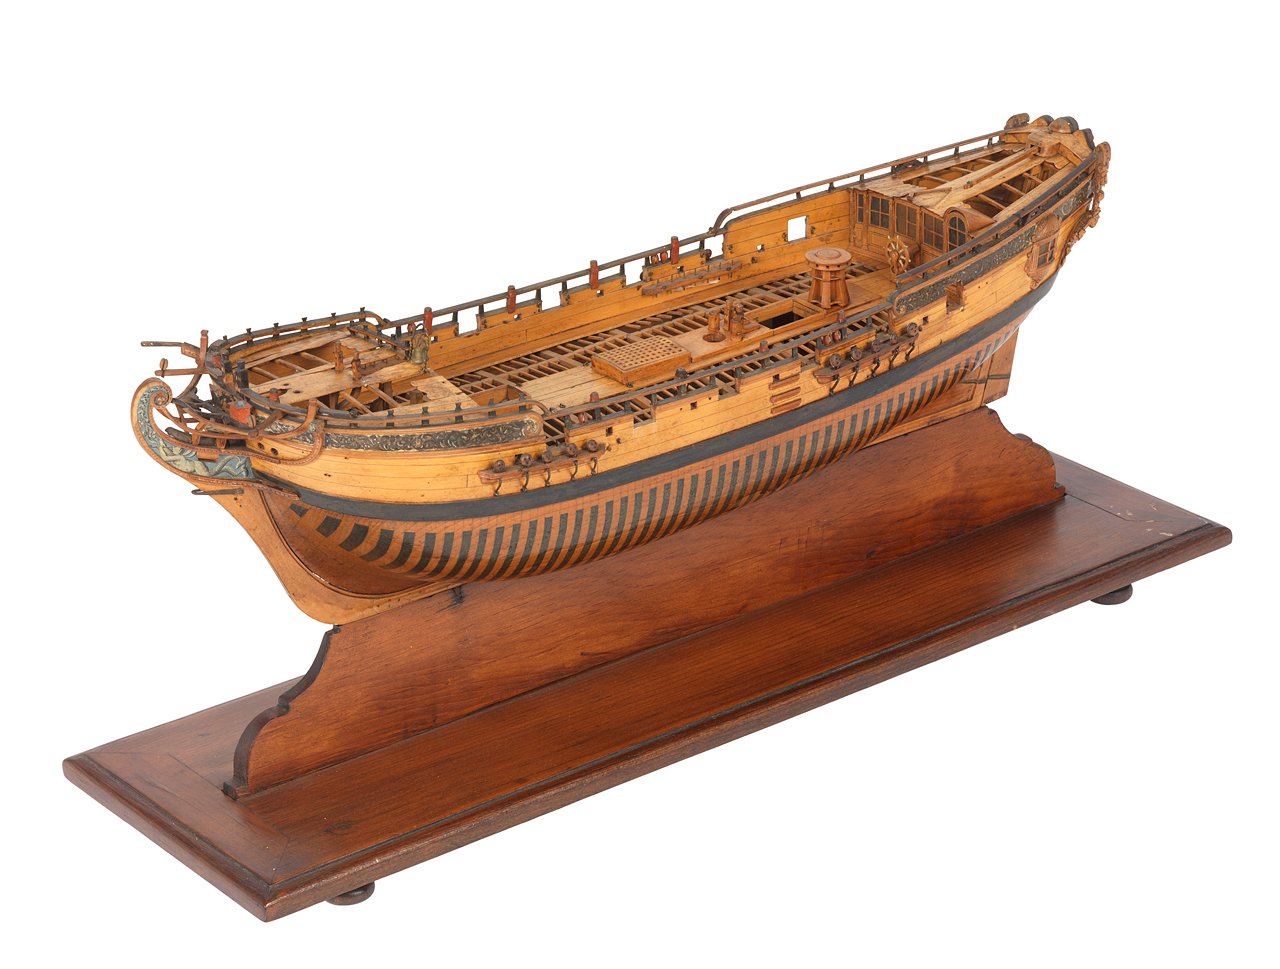
I appreciate your thoughts and safety concerns, but my goal is to build a decorative piece, and I have seen many examples of contemporary models with glass(?) or simulated panes such as this : Or maybe like Winchelsea. One more..
-
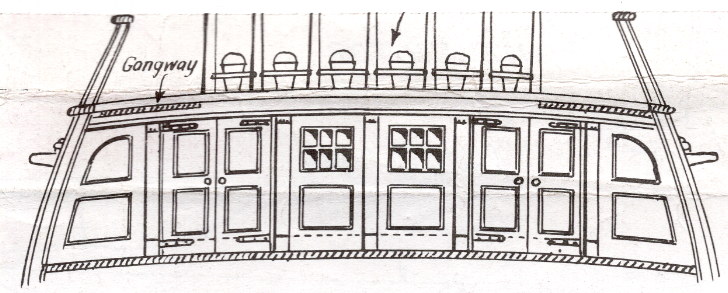
The builders of this ship did not seem to be pinching pennies, what with all the ornate carvings. I'm leaning toward Mark's idea of panes all across the doors and center section. I think I saw at least one contemporary model that had that effect.
-
MS/Campbell/Hahn calls it the "Poop Bulkhead".. I was just going with that so the other Rattlesnake builders would know what I am referring to. I have seen the quarterdeck referred to as the ' Poop ' deck whether there were any obvious poop facilities available or not.
-
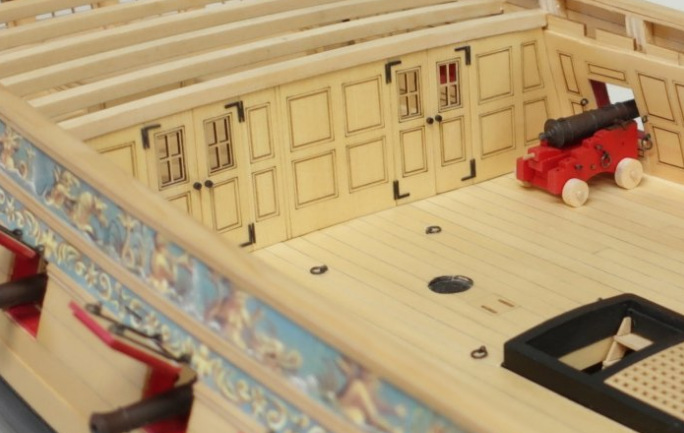
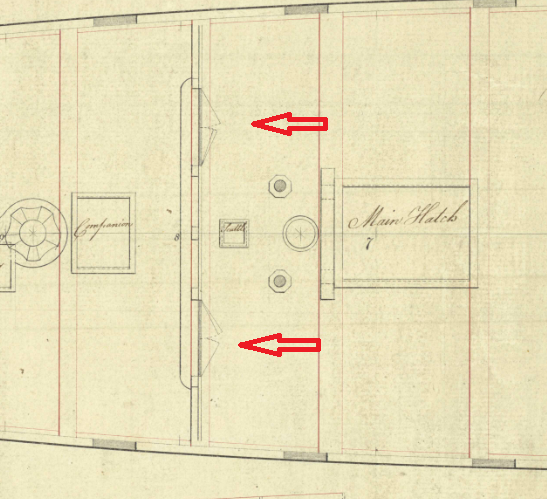
As I continue with my build of Rattlesnake, I have some thoughts about the Poop/Quarterdeck bulkhead. The NMM plans show that there are two sets of doors. Campbell drew the bulkhead like this: This what we see in the MS, Hahn and the Mamoli plans, which indicates everyone followed Campbell. My thinking is that the windows in the center/fixed panel don't seem logical. I would think any windows would be in the doors so one could see who is coming or going on either side of the bulkhead before opening the door. I guess one could glance out the window in the middle before proceeding to the door, but windows in the doors make more sense to me. Anyone have any further thoughts on this?
-
Interesting, but I don't think it would have the strength of a built-up mast.
-
Sorry Ben, I thought you started with the Rope Rocket. Word is, you make great rope..
-
Great work on the transom, but my eyes are still drawn to the flow of the planking into the counter. Just awesome..
- 840 replies
-
- 4
-
-
- winchelsea
- Syren Ship Model Company
- (and 1 more)
-
This may be of some help. It shows Chuck's anchor fabrication for Cheerful.
-
Steam Gratings
Gregory replied to barkeater's topic in Discussion for a Ship's Deck Furniture, Guns, boats and other Fittings
Allan, It looks like that model builder didn't follow good practice with the joints on those coamings.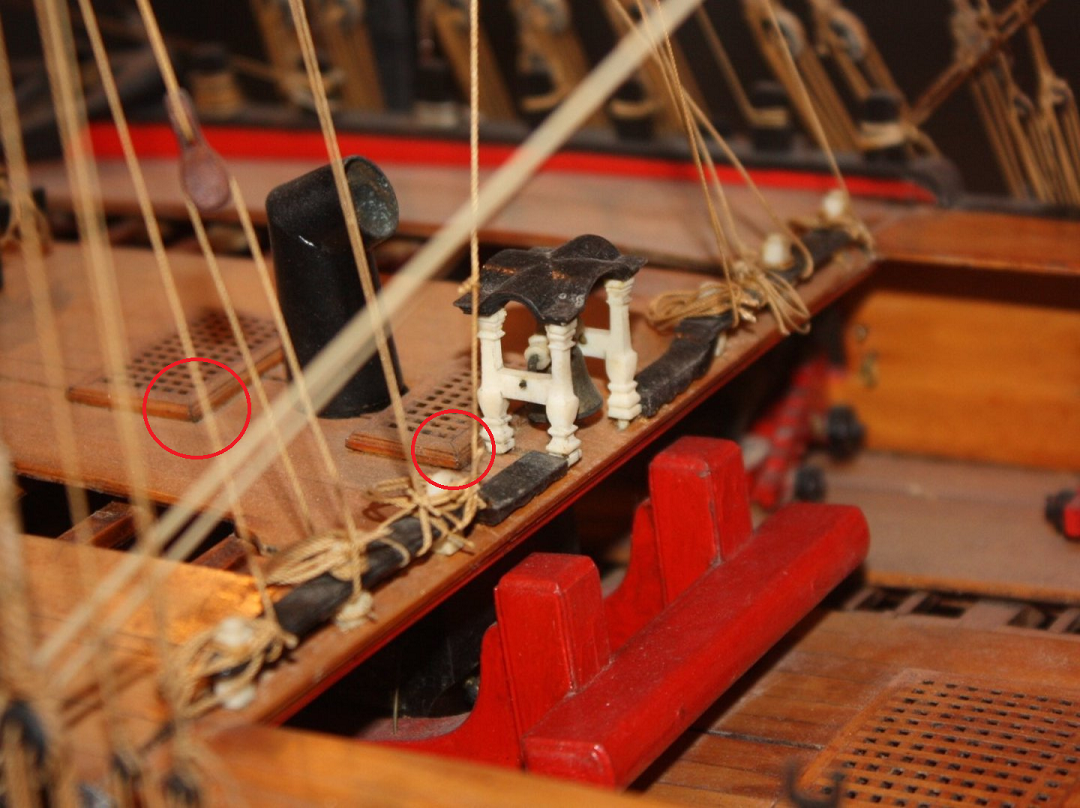
-
I'm sure most of you have some type of handy conversion chart. but this one popped up in my browsing at Amazon and I find the format one of the easier ones I have seen. Fraction-Decimal Conversion Chart Now, if I can just figure out why the Amazon recommended room for use is " Bedroom " . It also says: Reusability - Single Use I guess after you look at it once, it self destructs. So, not a good value. 😁

-
- 3
-
-
I really like the cradle!😁 ( Seriously, it's a good idea that didn't occur to me before...}
-
Good to hear an update. For a first build, making the most of the kit provided parts and finishing the model is an accomplishment a great many kit builders never achieve. Many, if not most kits are sadly lacking in accurate details and realistic scale.. Keep doing what you are doing and you will have a fine model, and will have gained the experience to make your next model even better.
- 89 replies
-
- 1
-

-
- Enterprise
- first build
- (and 2 more)
-
The only thing you might watch for is the bearding area, and not carry the first planking beyond the bearding line, as it might be difficult if not impossible to get the second planking flush with the stern post and keel in that area.
-
It's hard to beat Syren, but the selection can be limited. I really like the hooks, eyebolts, cleats and blocks from another of our sponsors, CraftySailor. Their service has been fast and shipping rates very reasonable. They have a nice 1:64 binnacle and a capstan as well. They also have the Vanguard 1:64 ship's boats..
-
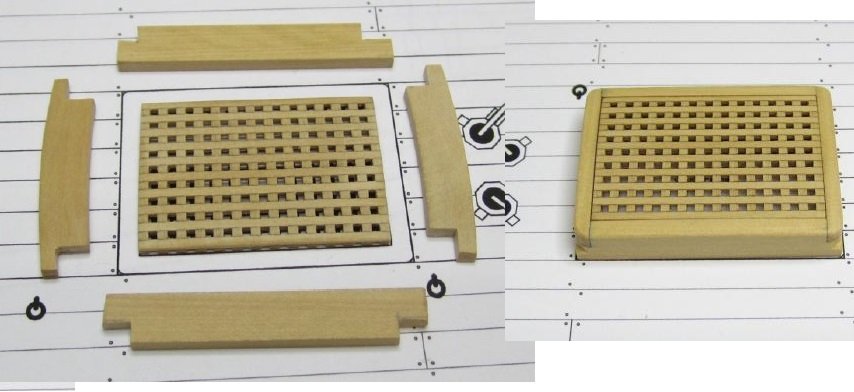
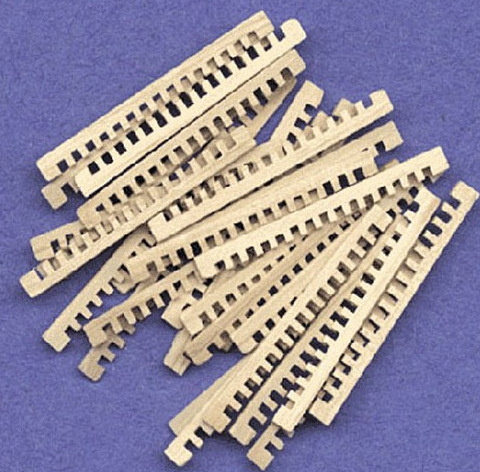
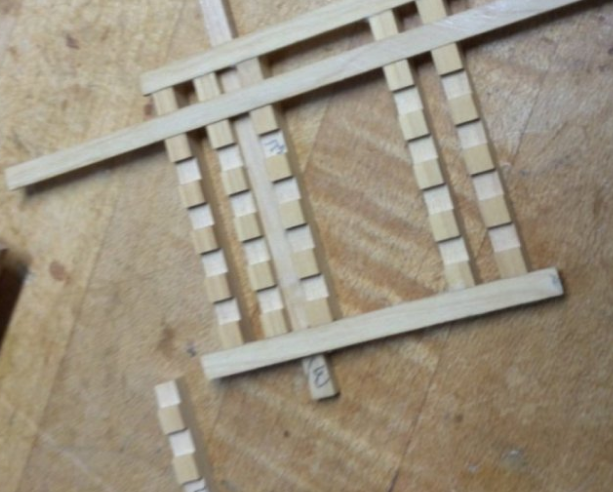
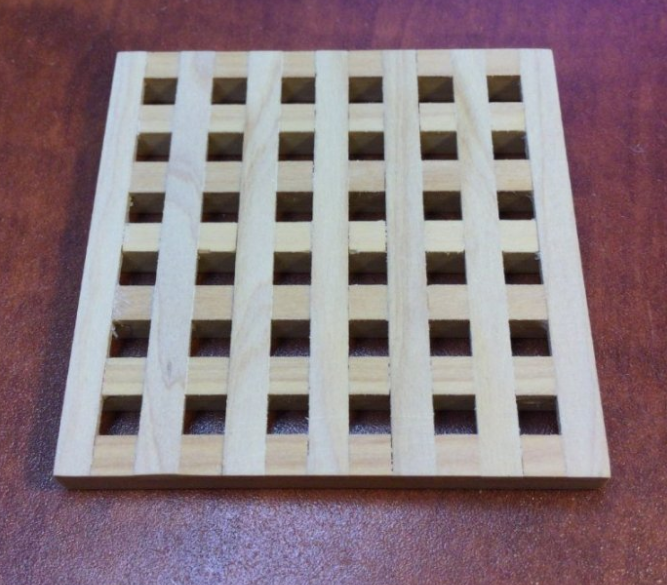
Here are some pictures from Cheerful to show how relatively simple making frames ( coamings ) can be. The thickness of the wood would depend on your scale. As for the gratings, John Fox ' method with cardstock might be your best option. Those gratings can be a real challenge without a small table saw. However a hobby saw with the correct kerf, could be an option with an appropriate jig to keep everything square. You need to end up with parts that look like this: There might be several ways to make these. This method by DocBlake is one way While the pieces above an be interleaved, you can use such pieces for every other layer, and lay battens across them. Doc Blake's example is large scale which would be easier than smaller scales..
-
Getting rid of CA is not unlike getting rid of paint. It depends on how far it has penetrated the wood. It essentially becomes a layer (thin or otherwise ) of plastic . The thickness will vary depending on the initial application. I go after it with a q-tip and acetone, which dissolves it. Sanding will make it like an application of varnish you are trying to get rid of. In the end, it is not that difficult to hide compared to any other unwanted contamination. The trick is to practice using it, and getting a feel for how much it takes, and avoiding getting it where you don't want it. It's hard to argue with the results when used successfully.. Waiting a few minutes to cure beats waiting overnight.. Winchelsea by G Barlow..
-
What's a good kit for learning rigging?
Gregory replied to Mark m's topic in Masting, rigging and sails
Not at all.. This was probably a good place to start.. -
What's a good kit for learning rigging?
Gregory replied to Mark m's topic in Masting, rigging and sails
Your best resources for that would probably be The Anatomy of The Ship book. The Ships of Christopher Columbus Historic Ship Models might be some help.. Finding downloadable references for the period in question might be a challenge...