

Gregory
-
Posts
3,175 -
Joined
-
Last visited
Content Type
Profiles
Forums
Gallery
Events
Everything posted by Gregory
-
 I would experiment with some scrap to see what looks best. Black, or maybe dark blue. Flat, rather than gloss.
 -
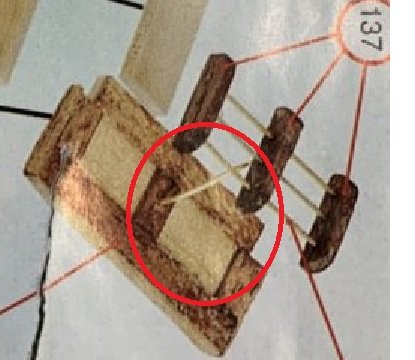
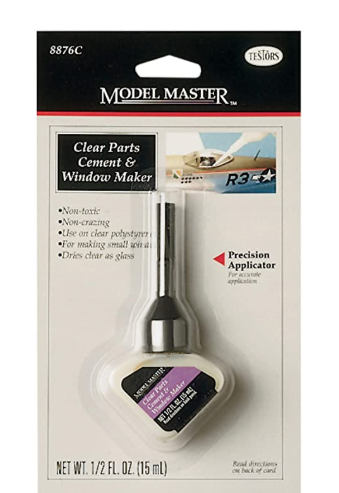
For a simple approach I would try to build it pretty much like the instructions show. Then, in the areas I circled, you could fill it in with something like this: It will look just like glass..
-
Is there an easy wooden tall ship out there to build?
Gregory replied to thegrindre's topic in Wood ship model kits
Any wood ship model kit is going to be complex.. But the way to keep it as simple as possible, is to reduce the armament, and reduce the rigging.. Just to get a feel for the wood kit building process, you might start with something like one of these kits from Model Expo: LOWELL GRAND BANKS DORY WITH TOOLS 1:24 SCALE It's currently bundled with a nice little tool set. Only $49 MODEL SHIPWAYS MS1457 18TH CENTURY LONGBOAT You would get a feel for how fast the building process is, then come back for ideas about a bigger, more complex project. There should be a build log or two for the kits mentioned, and you can see how others did. -
You're off to a great start.. How much experience do you have with wood ship models?
- 29 replies
-
- 2
-

-
- constructo
- prince
- (and 1 more)
-
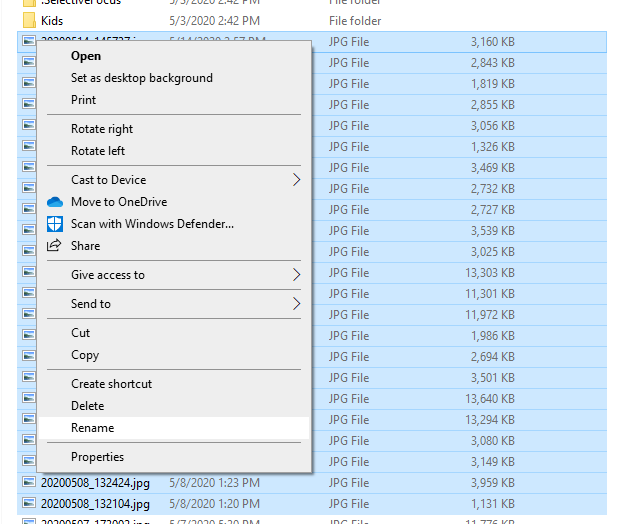
Just another little nit pick: It would be nice if modelers would consider renaming their pics before uploading them. Seeing a lot of " 20200504_152930.jpg " & etc. is distracting. In Windows, you can rename a batch of pictures by highlighting all of them, right-click to rename- and give them something short and sweet like " Schooner ", And they will all be named " Schooner(1) , Schooner(2) etc.. Just a thought..

-
I've noticed this happening when the original photo in my camera was rotated before editing.. I have found that opening the photo in an editor, changing some minor detail, then saving it as a new image, corrects the problem.
-
As promised.. Card stock and Mod Podge. One little project at a time..
-
Ooops! I just realized I didn't add the hinges, and a door knob/latch handle.. I'll be back...
-
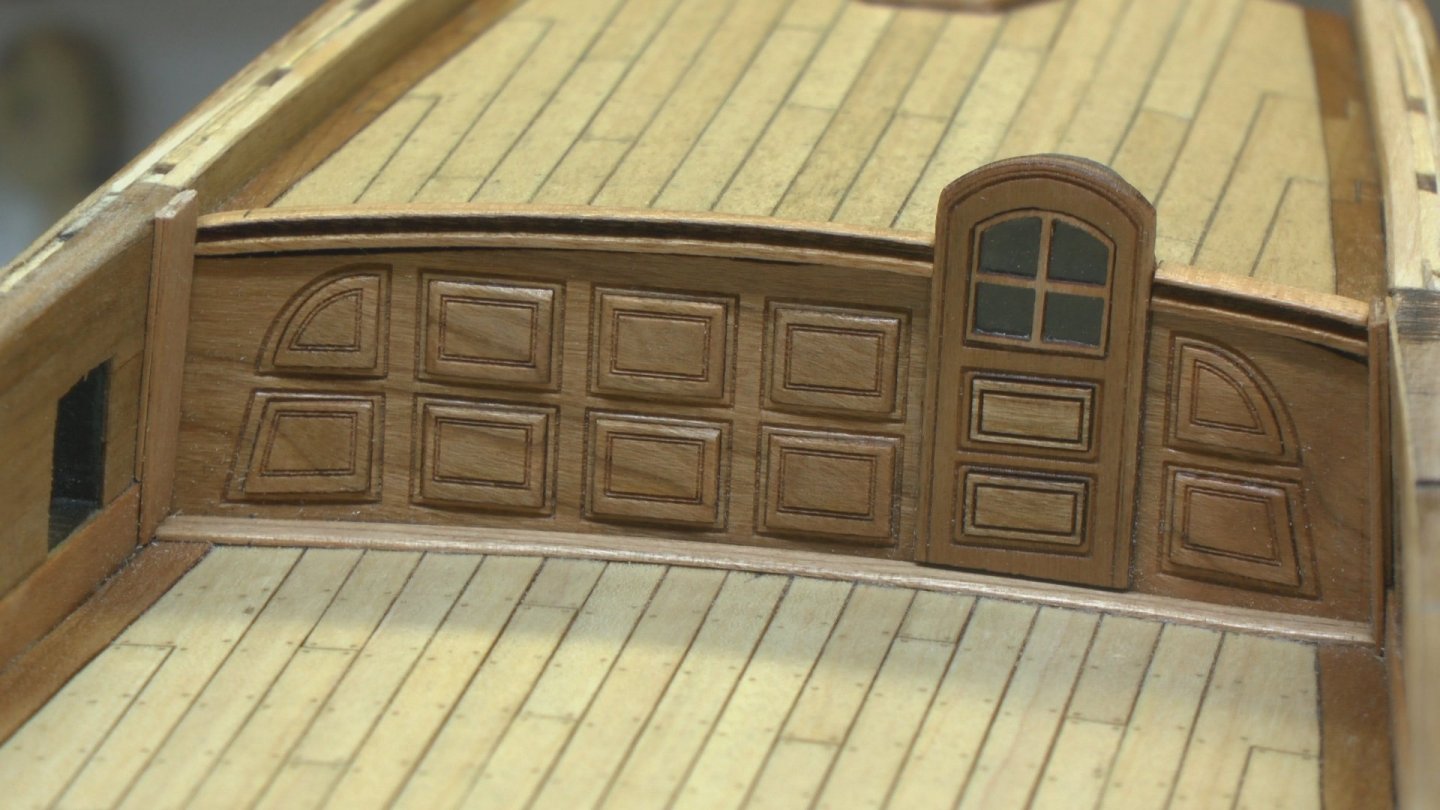
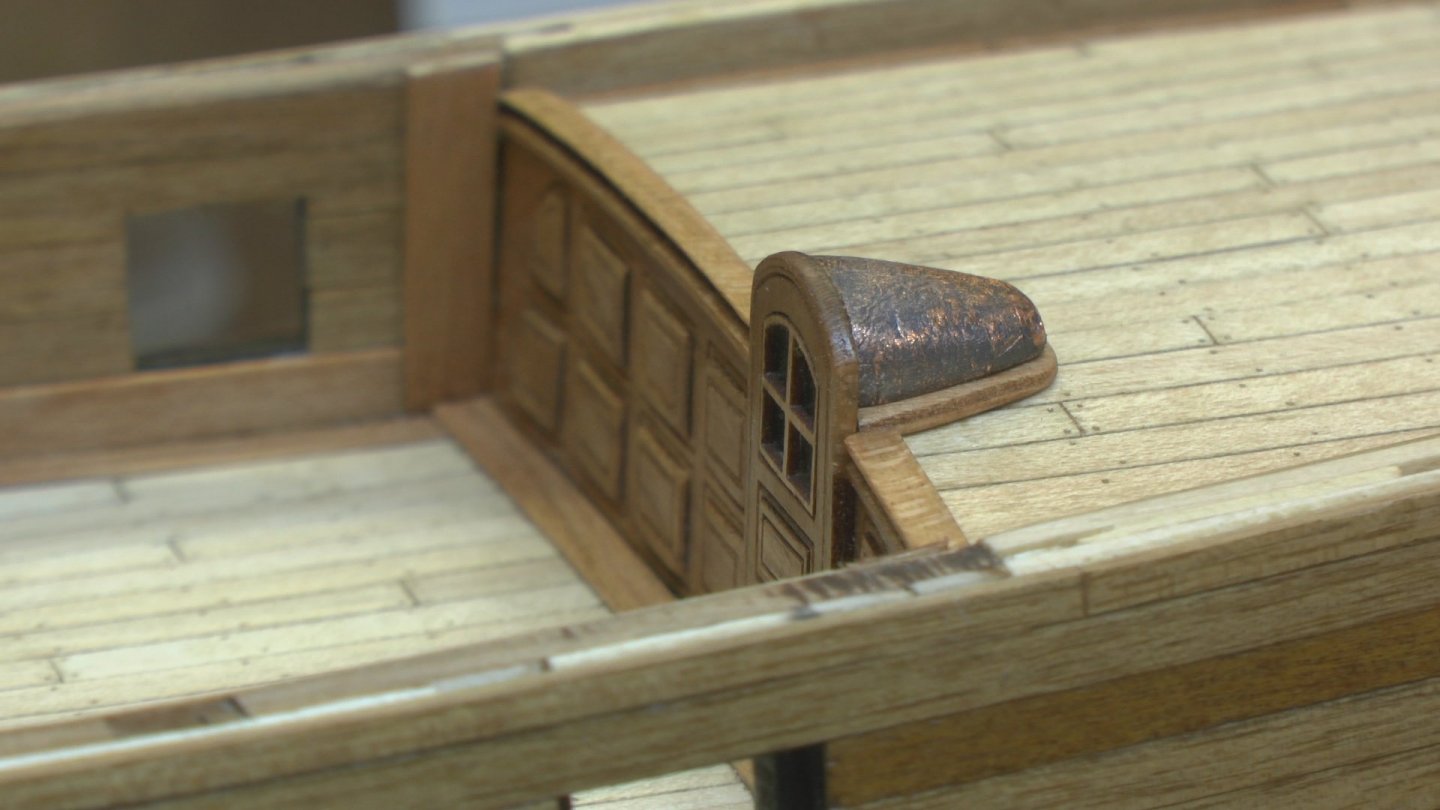
Finished up my quarterdeck bulkhead project. The scrap pile grew considerably while refining this.. The cupola, also inspired by Greg Herbert and David Antscherl's Speedwell, was more challenging for me than I expected. Still trying to avoid paint, I settled on a wood mold that I covered with copper leaf.. The patina was created by enclosing the part in a sandwich bag with a chopped boiled egg.. Go figure... What to do next.. Capping rail? Tiller ? Cannon? I have already fiddled a bit with all of those.. Now to get it done...
-
Without some kind of computer controlled tool; laser, CNC, your only option is by hand, or you could print a decal. Make a pattern on a piece of tracing paper, then use a fine pointtool to etch it onto the work piece.
-
As smooth as you can get it. Any irregularities will show through to the 2nd planking, and you won't have as much thickness to work with..
-
I think if you buy the kit, you have to sign an agreement to do the treenails just like that.. 😀
-
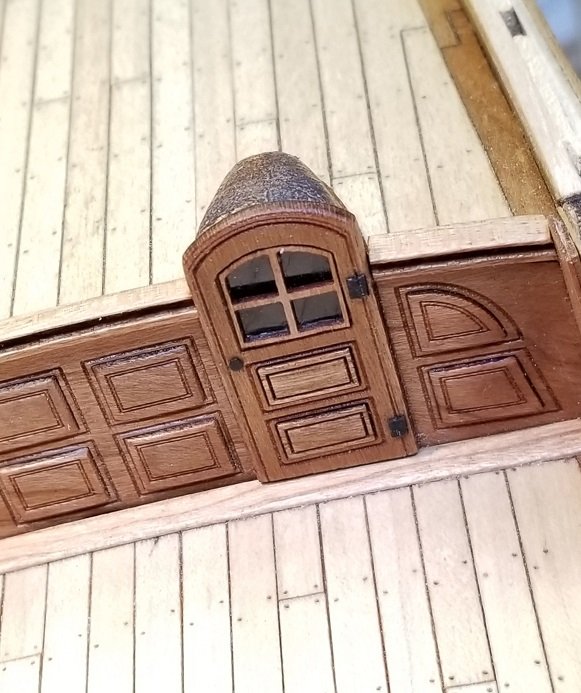
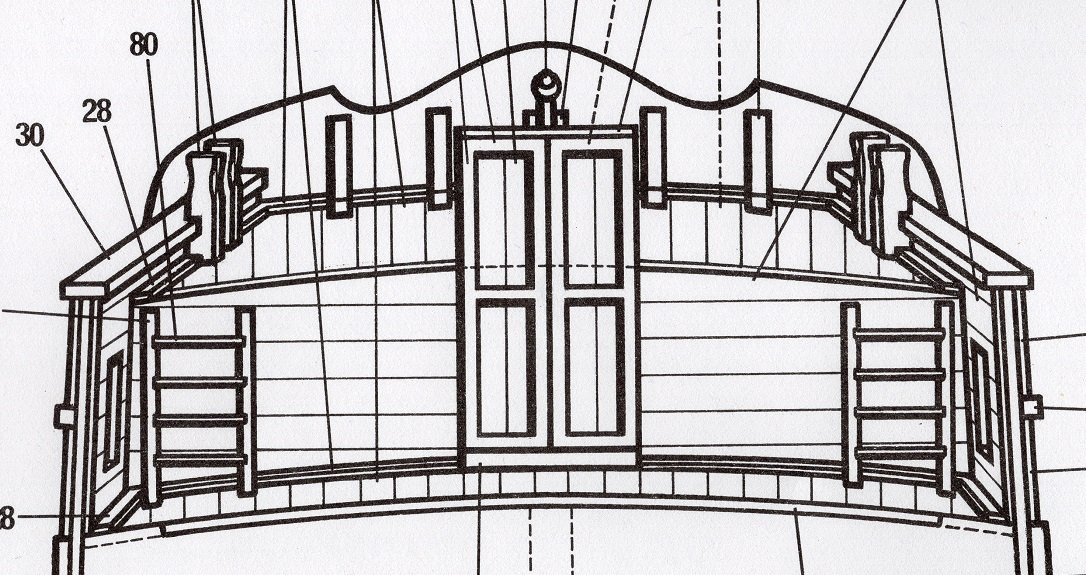
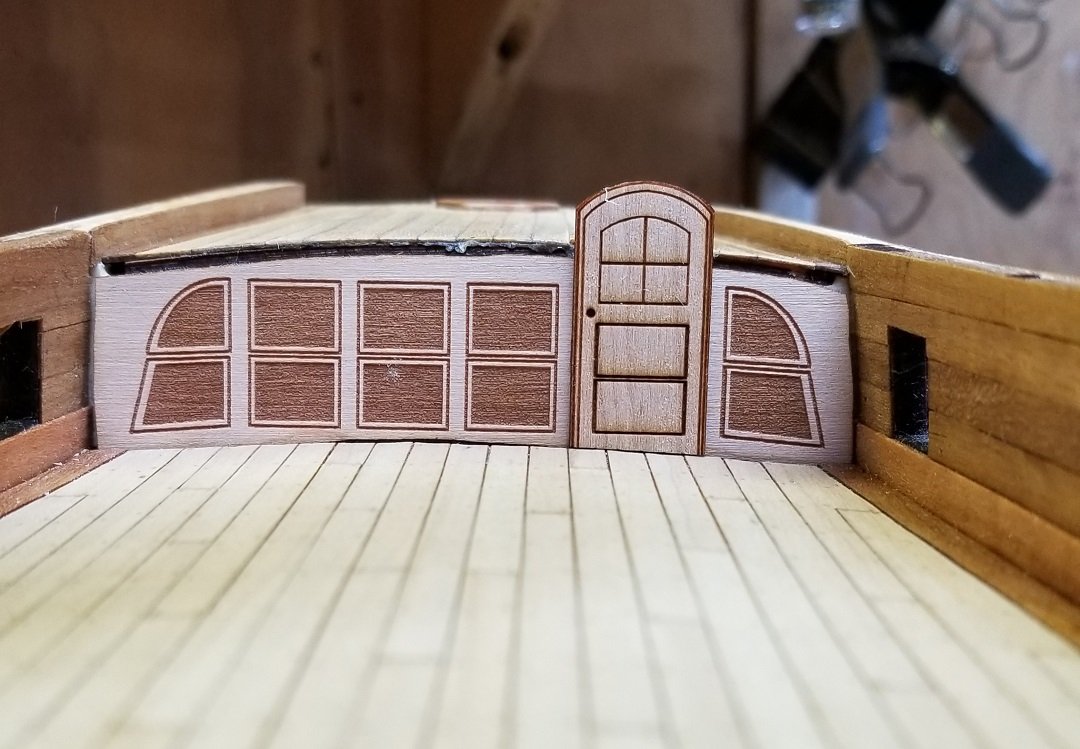
One of the detail projects.. The kit plans show an unlikely door to the great cabin. Scaled from over 7 feet, it seems there was some misunderstanding about the average height back then, or even now. Here is my prototype for the bulkhead and door. I borrowed some dimension ideas from Greg Herbert and David Antscherl's Speedwell , where I calculated the door height to be about 4'7". Stooping a bit as you step down, would seem to be the order of the day. I plan on refining this a bit more and will present the final design later.
-
Thanks.. I will have to check out the " Blue Stuff " ...
-
Finished the main deck planking off the boat. Installed in place. Lot of detail to be done. Here is a little jig I made for placing the eyebolts for the gun tackle.
.jpg.d4295e1ab1b18f537e3435a34ce1151e.jpg)
.jpg.54bd85dbe9945a405707180fc596a2dd.jpg)
.jpg.c3e74fbaf77f77d9324b889fa8910239.jpg)
-
Drill an undersized hole first, then use a reamer or pin vise with increasingly large bits until you get the desired size, using the belaying pin as a guide.
-
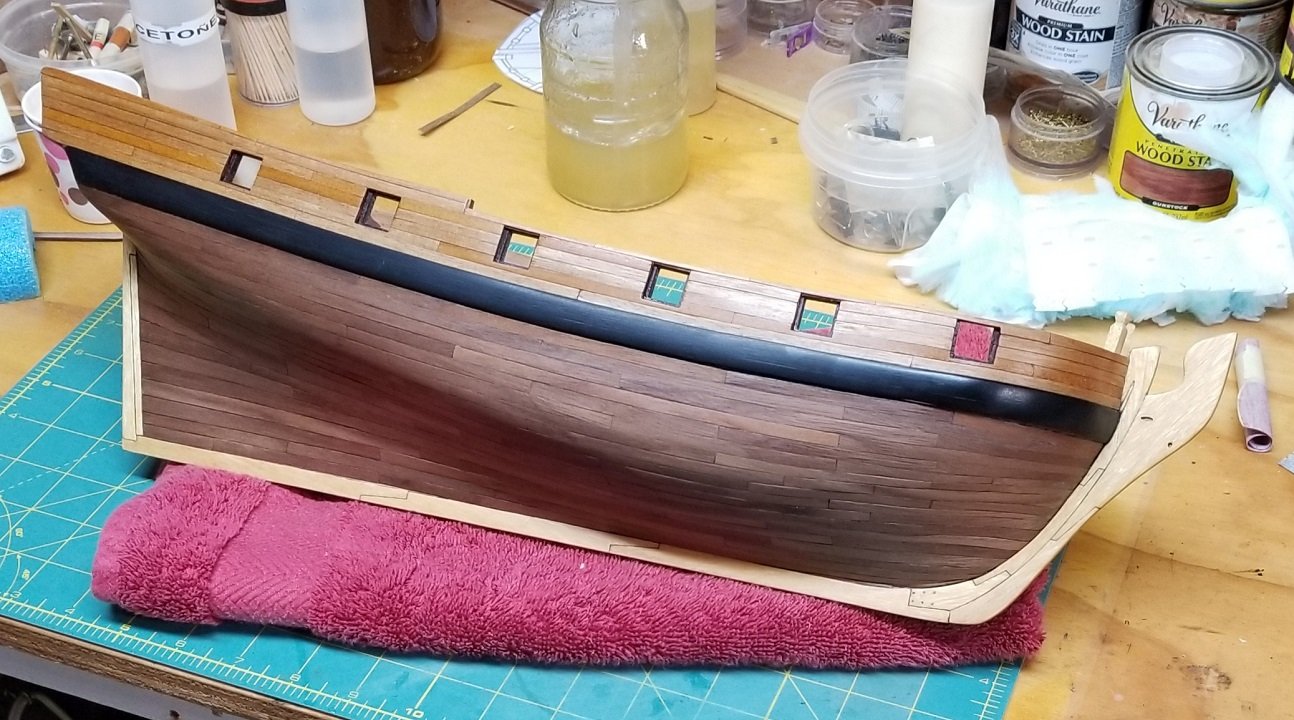
Starboard all done. She stem and keel are showing lighter than they appear in person. Perhaps future updates will show there is less contrast that this picture shows.
-
How much material are you talking about? It depends on the kit, and the extent of the sharing. Excerpts and even small snips of the plans are OK for instructional purposes. A lot of Model Expo kit instructions are available on line at their web site.
-
I agree with David. A very nice build so far..
-
The upper image looks like slats were used, rather than rods. They ( slats ) might be a little easier to model.
-
It would really help to see what you are working on.
-
Have you considered having some wood strips that are not visible from the outside, holding the pins on the underside of the frames? If what I say is not clear, maybe i can come up with an illustration.. A picture of what you are working on might help provide more info.
-
I think you will find most of the CNC work in the scratch build topics. I think the biggest challenge for kit builders, for me anyway, regarding CNC, is getting the design of the part from the kit plans to a cutting file to drive the machine. This has been true for me with my laser cutter. I have spent more hours than I want, learning to use the software to get the kind of precision and results I want. I have one of those little CNC machines that I haven't got out of the box yet. Instead I went ahead and focused on my laser work, and it has kept me busy enough, that I haven't been in the mood to tackle a new learning project. While most members here are always happy to help, they also want to spend their time building, and not teaching CNC or laser cutting techniques. They may not get past the point where they talk about their $2,000 machine and software that is $100 monthly subscription. A great example of the high end of CNC work is from a member here, HJX, is doing the CNC work for the Winchelsea kit, group project. Your best resources may be another online group that is focused on CNC work. Just because they may not be building model ships, the technique would be the same. Welcome to MSW!
-
Thanks..
-
Great advice wefalck and YT! I realize now, I should have mentioned the template.. Getting a consistent shape would make it necessary.


