

Gregory
-
Posts
3,176 -
Joined
-
Last visited
Content Type
Profiles
Forums
Gallery
Events
Everything posted by Gregory
-
Son of a gun!
-
 If you haven't already discovered them, there are some excellent articles on the NRG home page.. Ship Modeling Database of articles
 -
I'm no expert, but I think the cardboard between planks looks a bit wide considering the scale..
-
Hull planking questions.
Gregory replied to Nate7911's topic in Building, Framing, Planking and plating a ships hull and deck
It would be hard to speculate if it would be a good idea for you. Proper planking requires some bending in at least two diminutions, and the thinner planks, depending on the wood type, may be less forgiving. You would really do well to check out the planking articles here: Database of Articles and Downloads -
If a mast is broken out at sea, what do you do?
Gregory replied to Devin Camary's topic in Masting, rigging and sails
There was some discussion about this recently.. Jaager's comments are correct.. -
Hull planking questions.
Gregory replied to Nate7911's topic in Building, Framing, Planking and plating a ships hull and deck
The older Mamoli kits all had the stem and keel as part of the plywood backbone, and the instructions call for the veneer covering. This is also the case with many other kits that do not provide separate stem and keel parts.. My Corel Resolution is a good example. -
It's just a government mandate, and they have to pull something out of their.... hat..
-
Hull planking questions.
Gregory replied to Nate7911's topic in Building, Framing, Planking and plating a ships hull and deck
Very few, double plank kits have a rabbet, which is a kind of groove, where the ends of the planks would sit flush with the stem or stern post. If there is no rabbet, you have to bevel the inside edge and fit it flush with the stem, keel and stern. There are countless good examples here, but I think YT did a particularly good job on his Mamoli Victory.. -
When just getting started, I think a big difference is the quality of the instructions.. The Medway longboat or the Model Shipways 18th Century Armed Longboat 1:24 Scale are great options in this regard.. You also might want to consider the MODEL SHIPWAYS 18TH CENTURY LONGBOAT.. Great price and a decent tool package. Also great instructions by Chuck..
-
Hanging and taping lines in loops until used
Gregory replied to jgilchrist800's topic in Masting, rigging and sails
I just remembered I borrowed a few of these from the Admiral for light clamping. They are small. light and still have a pretty good bite.. Multipurpose Sewing Clips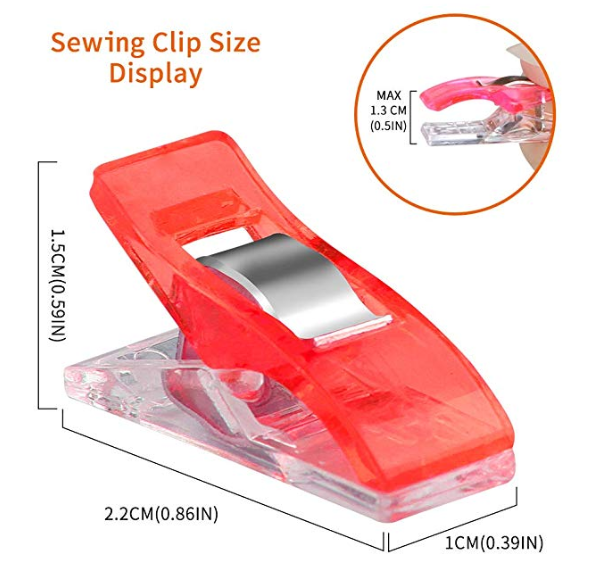
-
I think that is an excellent idea. I don't think a precise color match would be as important as the over-all appearance.
-
Here is a way to explore an alternate deck without damaging the kit provided one. You can transfer a template to tissue paper. Then you glue your planks to the tissue paper, allowing for the waterway . If it is satisfactory when finished, you can glue the whole thing to the existing deck. I have done this with success on some small projects, and it should work at this level also.
-
Hanging and taping lines in loops until used
Gregory replied to jgilchrist800's topic in Masting, rigging and sails
The smallest I can find are about 1 inch.. Miniature Clothes pins Might be the smallest available.. -
I think you might find this section from the ModelExpo Syren helpful.. https://modelexpo-online.com/assets/images/documents/MS2260-Syren-Instructions-Chapter-17.pdf The look of the tops would be very similar.
-
I can't argue with what works for you, but did you ever try using an iron without the tabs? Yes it buckles, but with the iron you can just flatten the buckles out..
-
Suggest to the wife that you want to hone your skills a bit before running the risk of damaging the wonderful kit she bought you.. There may be many suggestions, but my favorite for a first kit is the 1:48 Longboat from ModelExpo. It comes with a nice set of tools. It has really great instructions that will help with most wood kits going forward. Sign up for emails at ModelExpo and watch for nice discounts.
-
18th and early 19th Century cutter models
Gregory replied to tkay11's topic in Nautical/Naval History
I agree Frankie. This has become my go-to place for rigging details ( Not necessarily the run of the rigging ) and deck fittings for cutters.- 42 replies
-
- 2
-

-
- Cutter
- 18th Century
- (and 4 more)
-
There is something wrong here.. Your tools and work area are much too neat and clean..😄 Seriously, that is a very nice start. I look forward to watching your progress... I particularly like your work board with the drawers underneath.. I am going to shamelessly steal that idea..
-
Yellow Ochre Paint
Gregory replied to Daliab's topic in Painting, finishing and weathering products and techniques
Your links would indicate it ( on the left ) is the final color at this point. I don't think it is a color I would be comfortable with if I was building the model. I think most observers would question it, as a lot of them seem to be doing now. I think Druxey's comments above, carry a lot of weight. -
Yellow Ochre Paint
Gregory replied to Daliab's topic in Painting, finishing and weathering products and techniques
Are you sure the picture on the left is the final color, and not some sort of primer? -
For what it is worth, MicroMark makes an adjustable fence like the one shown for the Dremel saw.. Accuriser The Microlux 4" saw was probably the best before Byrnes came along.


