

Gregory
-
Posts
3,176 -
Joined
-
Last visited
Content Type
Profiles
Forums
Gallery
Events
Everything posted by Gregory
-
Have you looked at these? Style Line (STY0701) 6 Piece Soft Sanders Set
-
The Mamoli kit would be a great option for some bashing.. I would want it to be the new Dusek version.. A bank or lawyers office in Mobile might be willing to pay a nice chunk of change for a well finished model.. At the least you might get a nice tax deduction for donating to a local library.. I noticed Bluejacket wanted $10,800 for a completed model..
-
Don't be so apologetic. At that price point I would agree about the cannon and deadeyes. I would expect premium parts all around.
-
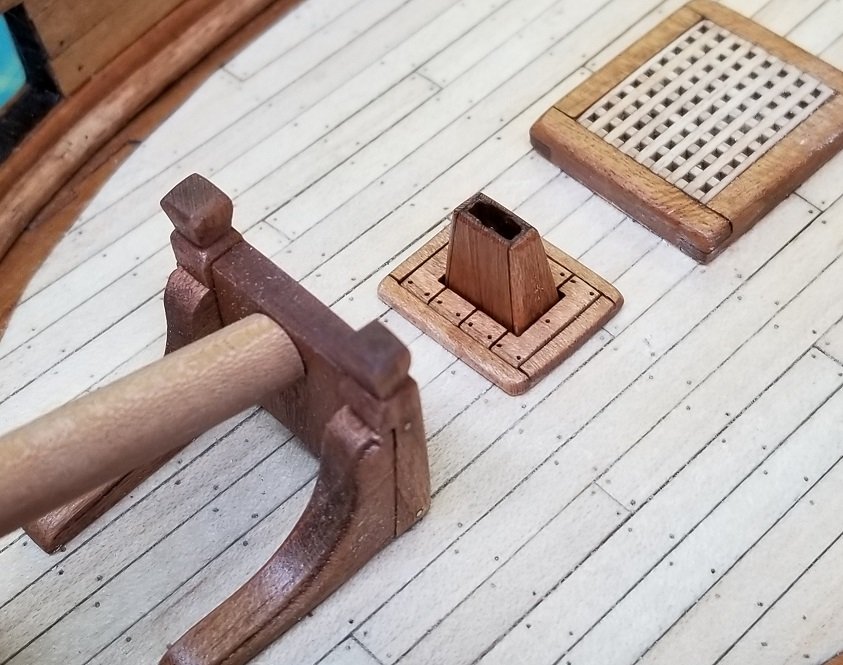
 Another fiddly bit completed.. My little stove stack.. I hope Chuck doesn't mind I used the design from Cheerful.. I haven't decided whether to paint it black or not...
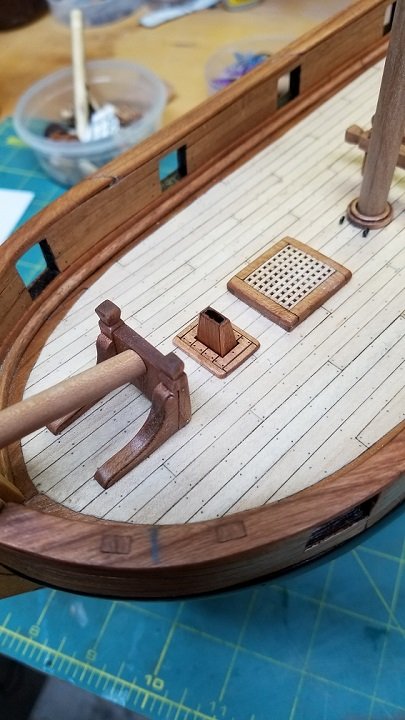
-
Thanks for looking in. Your AVS is a favorite of mine.. When it comes to ornamentation, the laser certainly doesn't compare to the hand carving and CNC work we see from some of of our members. However, I think it is a nice alternative to most of the kit ornamentation, and let's one add little touches that make a difference.
-
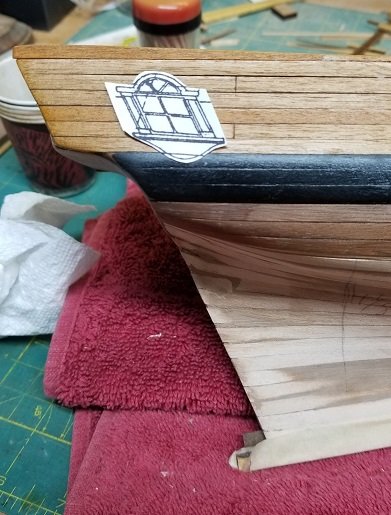
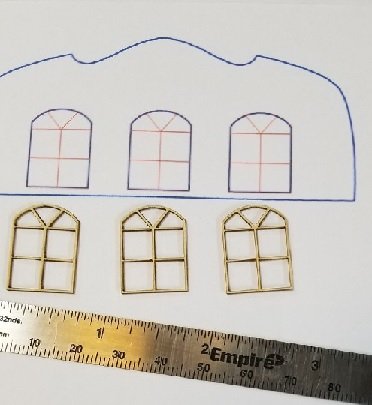
Not a lot of obvious progress, I'm sure many here know that designing and fabricating your own parts can eat up the clock.. I used to think to myself, when I bought those cool mini kits from Chuck, " If I only had my own laser ", without realizing what it takes to turn an idea into a part you can be happy with. For a little perspective, here is part of the window frame in my quarter badge.. Here is a little bit of my adventures in laser land.. In making the window frames for my transom, this is an example of some of the considerations one has to go through. I'm sure there are a lot of CAD gurus out there who can draw things precisely, send them to the laser and end up with perfect parts. However, I'm stuck with 2D drawing apps that I am still learning how to use. Then, you have to factor in things like laser power, speed, focus and the kind of wood you are using Anyway, the picture above shows I'm getting pretty close . The transom facade is 1/16 cherry, and my intention was to create a 1/32 recess on which the 1/32 frame would rest. I miscalculated in cutting out the opening, and you can also see the frame is not symmetrical. Rather than re cut the transom, I made an insert for the frame to rest on.. Ooops. I forgot to correct the asymmetry with the sides of my frame.. Back to my computer and checking where I went wrong.. Ka ching! Oh no! My camera tells me I need to square up the inside of the lower corners of those frames.. Never mind that they will never be visible from a foot away..
.jpg.6e15e99648f3e05ee81f3645efbfcaf7.jpg)
.jpg.6978548b9ed746c62bb1a8b84ec40c63.jpg)
.jpg.31a977b919cc1123f5a56659aefc75b7.jpg)
.jpg.d1b019ce3866ffa7d176a786e900fcca.jpg)
.thumb.jpg.b08eec8bdb71bec35355d2a7a379e20b.jpg)
-
Thanks for looking in.. Your critique is always welcome.. Since this boat has a a cutter rig, I'm relying on my Cheerful plans to help with the details. They are a valuable resource because I know those plans were well researched.
-
This boat is on my to-do list.. I have the plans.. You have raised the bar considerably.. A beautiful model! I have bookmarked this log and will be referring to it frequently..
- 231 replies
-
- 1
-

-
- model shipways
- armed virginia sloop
- (and 1 more)
-
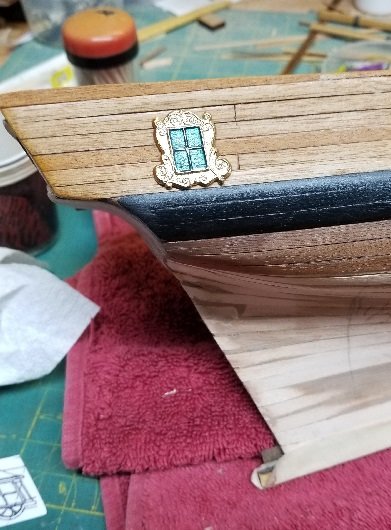
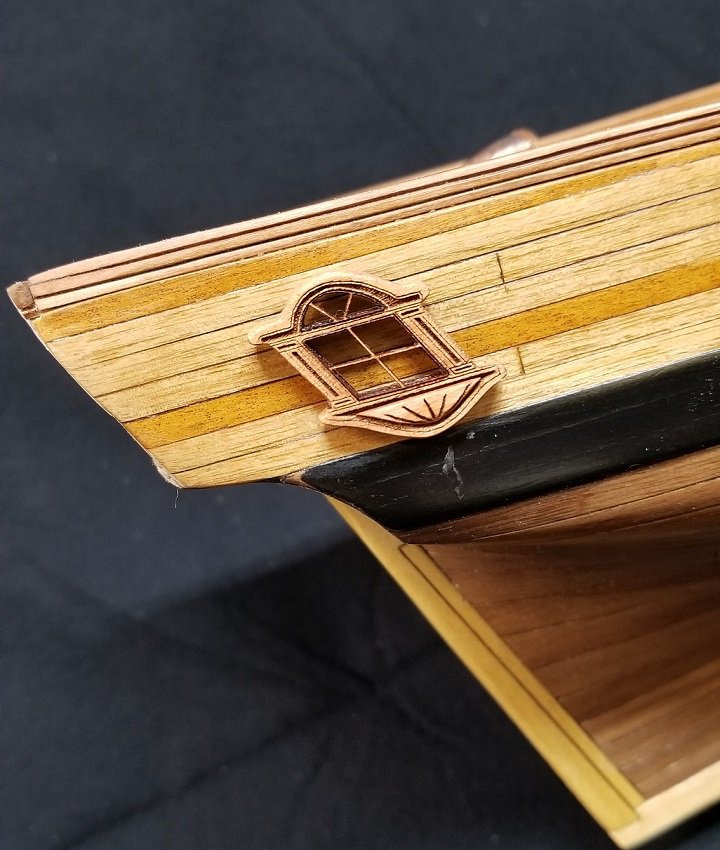
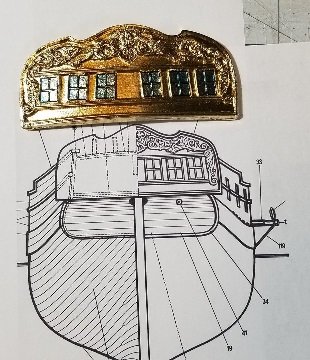
I also talked about using the Chapelle drawings to fabricate a quarter badge vs the kit version. Here's my effort so far. Just temporarily stuck in place for the picture.. Will add some glazing and do a little more refining.
-
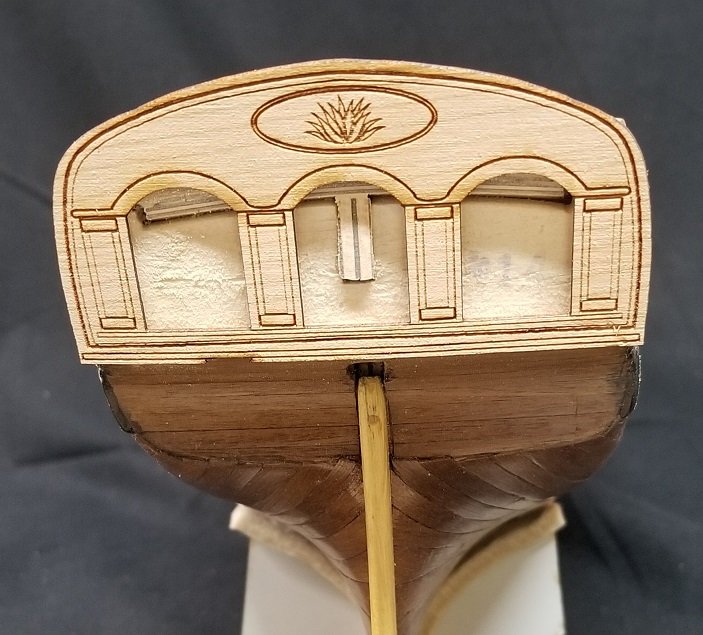
Another quick update. I've been working on the transom.. I mentioned earlier I wouldn't be using the kit transom, and was working on my own version, with reference to the Chapelle drawings. This is my rough prototype. Laser etched on some bass wood. I'm working on embellishing it with some relief work as well as adding frames.
-
Here is a post I made a while back about ratlines. Notice how fine the rope and knots are on those actual ratlines are. On an otherwise nice looking model, clove hitches at a scale size of tennis balls can be very distracting. I can't seem to find the post from Jersey City Frankie about gluing ratlines, but it is an option to consider. let me know if you would like more info about how to do this.. My favorite example of tied ratlines is from JesseLee's Syren
-
Getting some of the deck fittings done. Recalling the kit plans called for a windless which I replaced with a capstan. I have a couple more grates in place along with the companion. The plans also show some bitts with a pin rail behind the mast. I just placed some riding bitts there, the cutter rigging doesn't need those belaying points. In place of the windless I added some bowsprit bitts.. That's all for now.
.thumb.jpg.8cfdceba41ce17cb447170d44b48b0d5.jpg)

.jpg.ddcf95e2b1ac50f27f0065bd6373042b.jpg)
.jpg.b17f5b7c27a707e48e08325f71036b05.jpg)
-
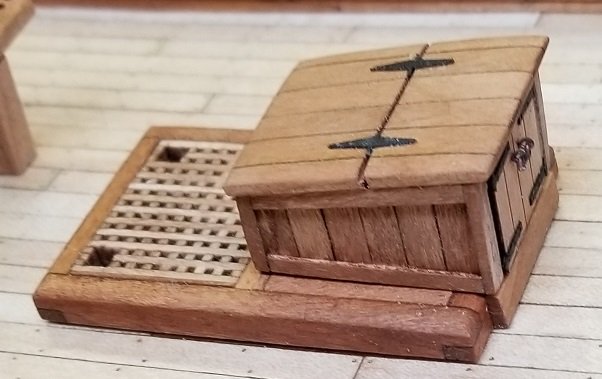
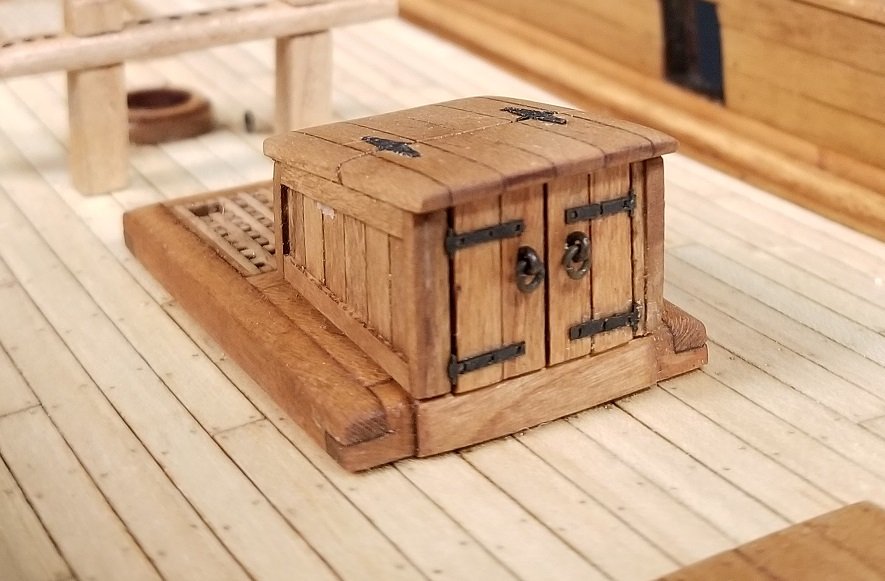
I have been working on some of the deck furniture. The kit plans did not provide for a companion out on the deck, and I believe there should be one. I like this design which is a bit unusual and found on one of the contemporary models from our gallery.. English Naval Cutter 1763 National Maritime Museum UK Here is my version. I grabbed ideas from here and there including the companion from Chuck's Cheerful..

-
We would need to know more about the source of the image.. Good rigging plans would include the lines from the yards and where they are belayed .. If the kit doesn't include a good rigging plan, there are a lot of resources for standard rigging..
-
What a treasure.. I have the soft copy of Architectura Navalis, but it doesn't come close to what you have..
-
That's an interesting grain on the counter planking.. Looks similar to curly maple.. I like wood!
-
Nice work! I love cutters and Chapman references.. What is the source for your plans?
-
Nice to see a new Cheerful build.. I have this in my stash, but I'm trying to hone my skills some more before jumping on it..
- 54 replies
-
- 1
-
-
- cheerful
- Syren Ship Model Company
- (and 1 more)
-
Now I know I'm challenged.. I like the molding-like embellishment on the upper structure.. What do you make of the eyebolts on top? What purpose ? Thanks for that image.. It didn't come up in my search..
-
Thanks. I think it's great that you can point out these shortcomings. It's how we improve our skill and effort. I know I could have gone a lot further to match the actual NMM plans, but basically I was being lazy, and wanted to use one thickness of wood. To give them credit. Master Korabel did use two thicknesses, but not to the extent that is shown in the plans. I think I have been challenged though, and I may have to re-visit this later.
-
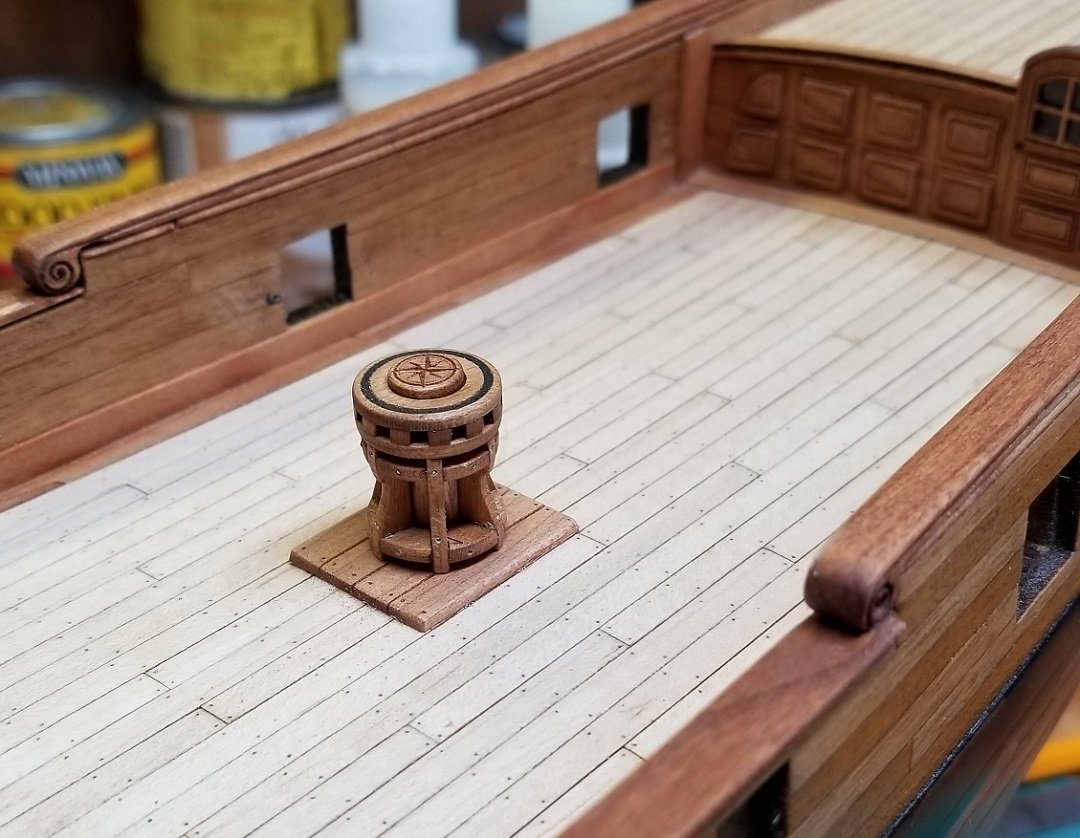
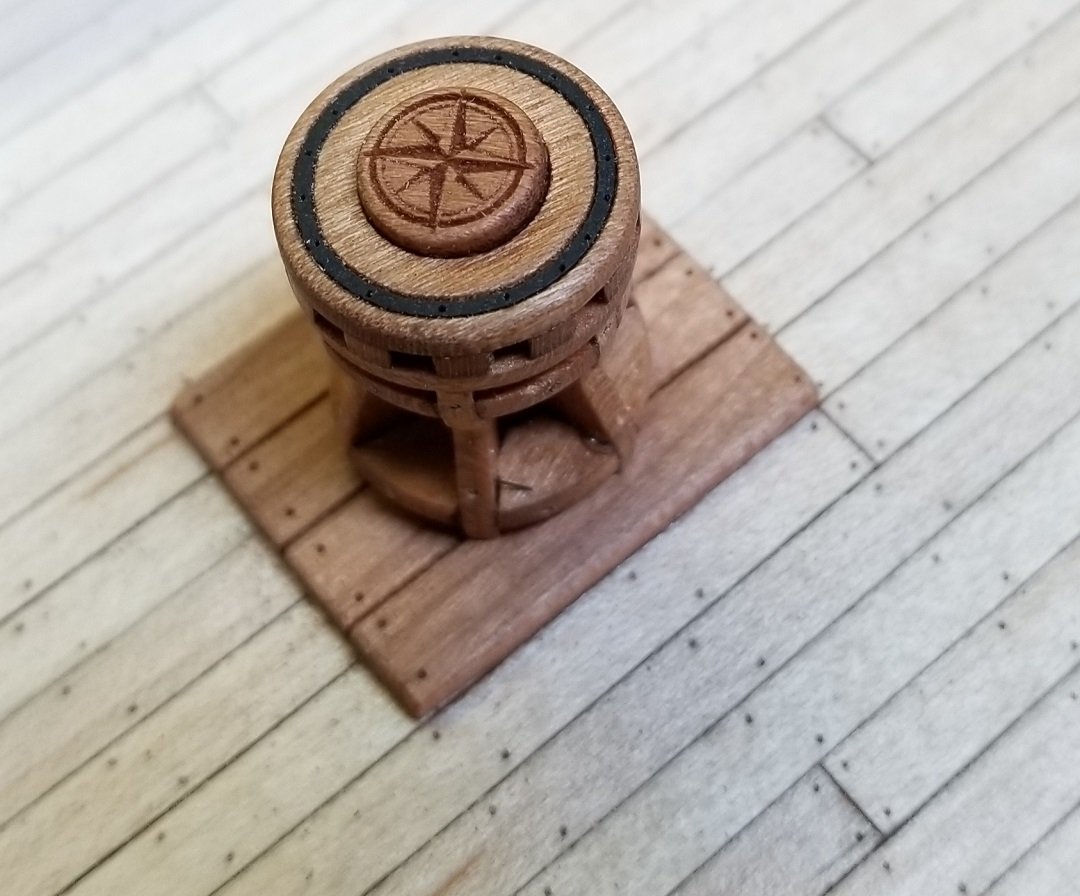
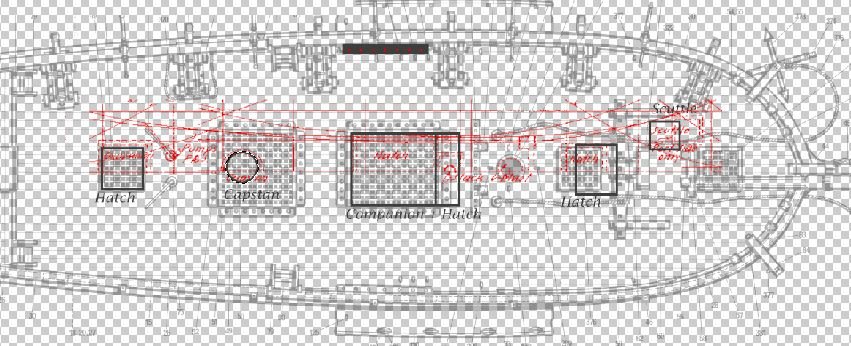
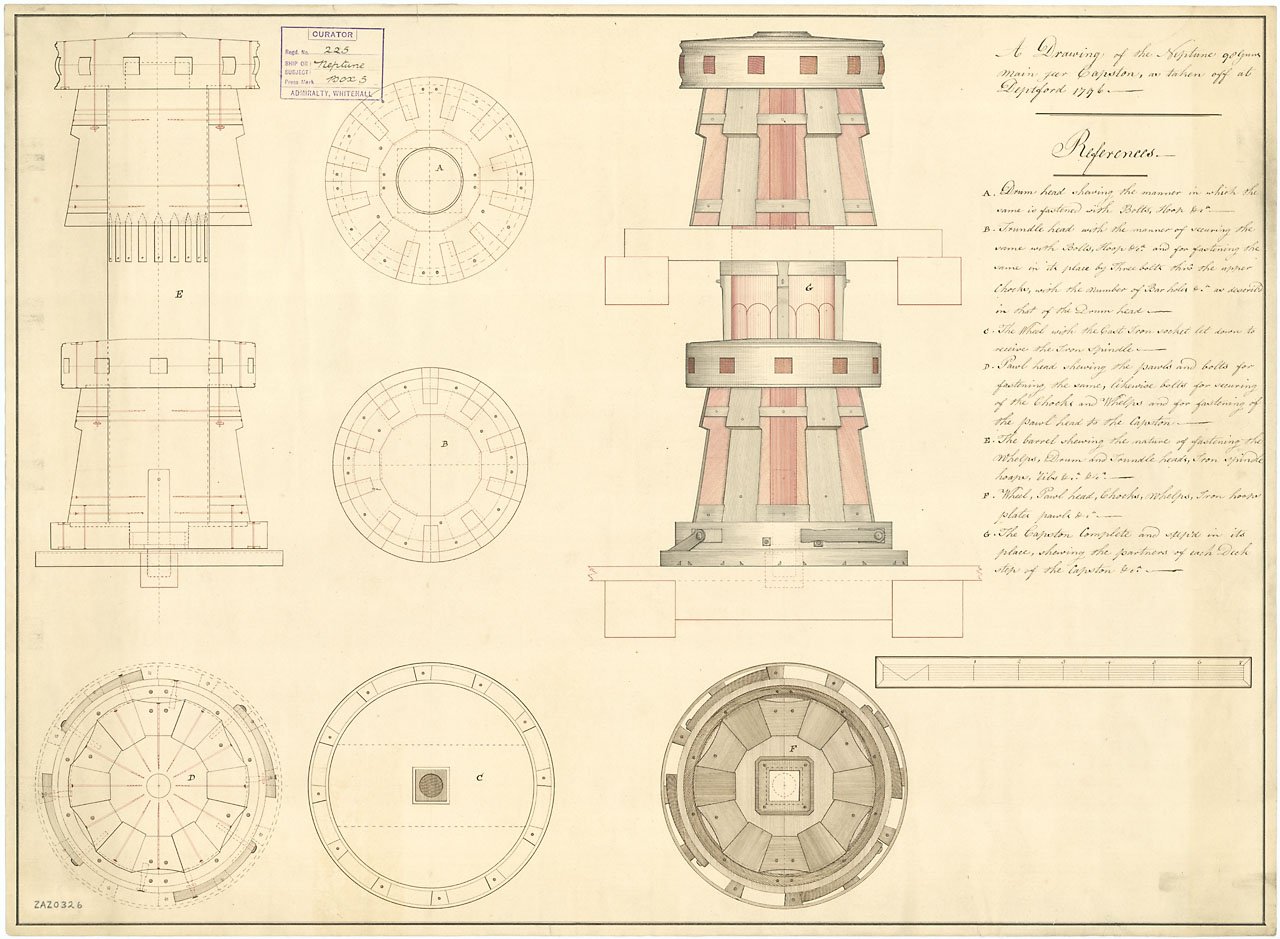
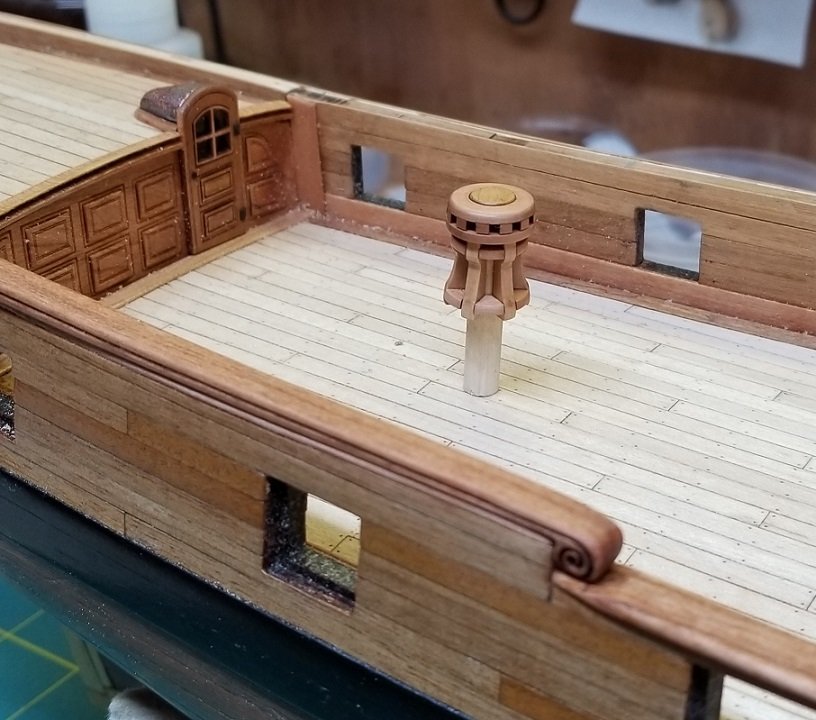
A small update that involved more hours of work ( fun ) than you might imagine. I built a capstan. There are many capstans available out there from the various ship modeling sources, with different levels of detail. There are also some great articles regarding capstans in the NRG data base, Ship Model Furniture, Deck Fittings and other Details I also acquired a set of the Winchelsea plans, after discussing the dimensions of Chuck's capstan for the Winnie project. The basic design was around for over 100 years, and there are some nice drawings at the NMM, which pretty much match what I discovered in my research. This one from Neptune' (1797).. I recently reviewed the mini-kit from Master Korabel of their 1:72 capstan. It has the level of detail I am looking for, but at 1:72 it is too small for the scale of my ship at 1:50. I scanned the parts of the Master Korabel kit and resized them to better fit my model.. ( No, I will not be offering these for sale.. 😄 ) For what it's worth, just scanning, re-sizing then cutting, doesn't result in parts that go together well. The interlocking tabs and slots, have to account for the thickness of the stock used. Also, the kerf of my laser is not as fine as the high end machines, and I had to do a lot of tweaking to get an acceptable fit. Realistic or not, I couldn't resist adding a little bling.. I hope I didn't go too far overboard.. I mentioned up-thread that the deck layout in the plans did not appeal to me, so the capstan is a replacement for a windlass shown on the plans. The Chapelle drawings, based on the NMM plans of Ferret,will be my basis for a deck arrangement. I won't try to match it feature for feature, but it gives me what I feel is a little more appealing than the kit plans.
-
Securing upper yard halyards to yard
Gregory replied to Richvee's topic in Masting, rigging and sails
A link helps.. -
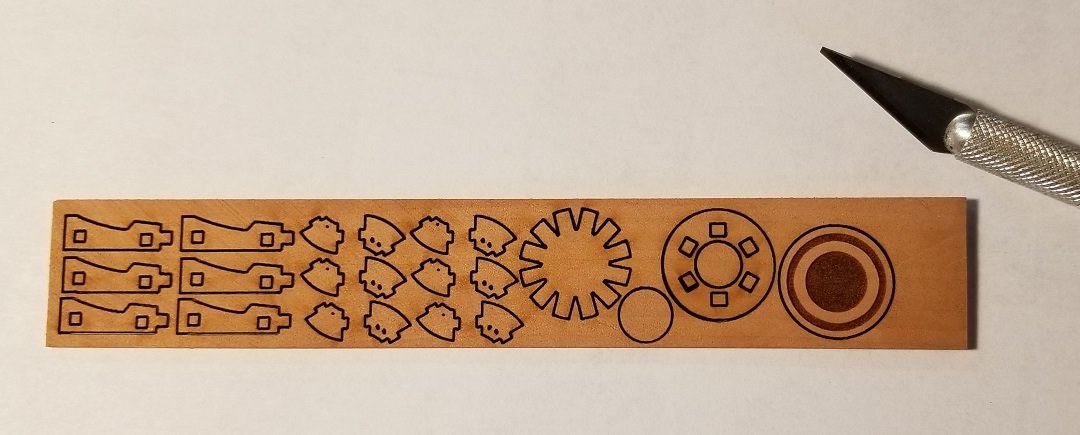
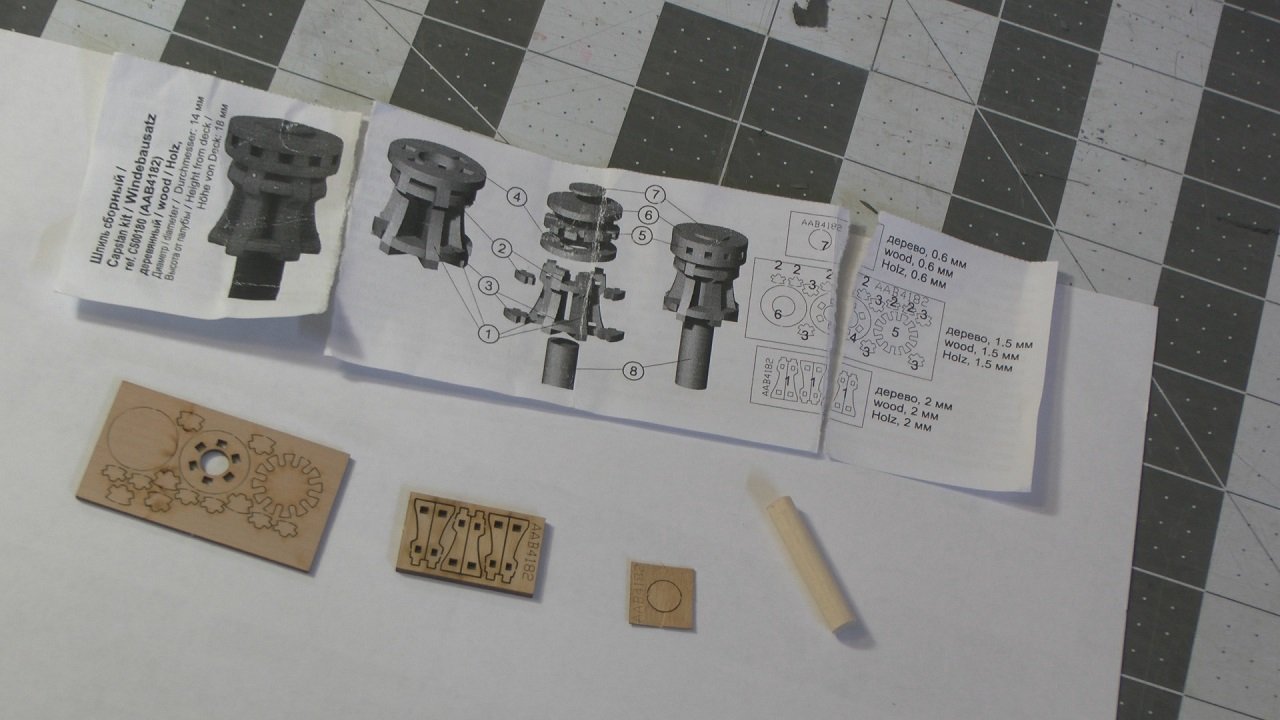
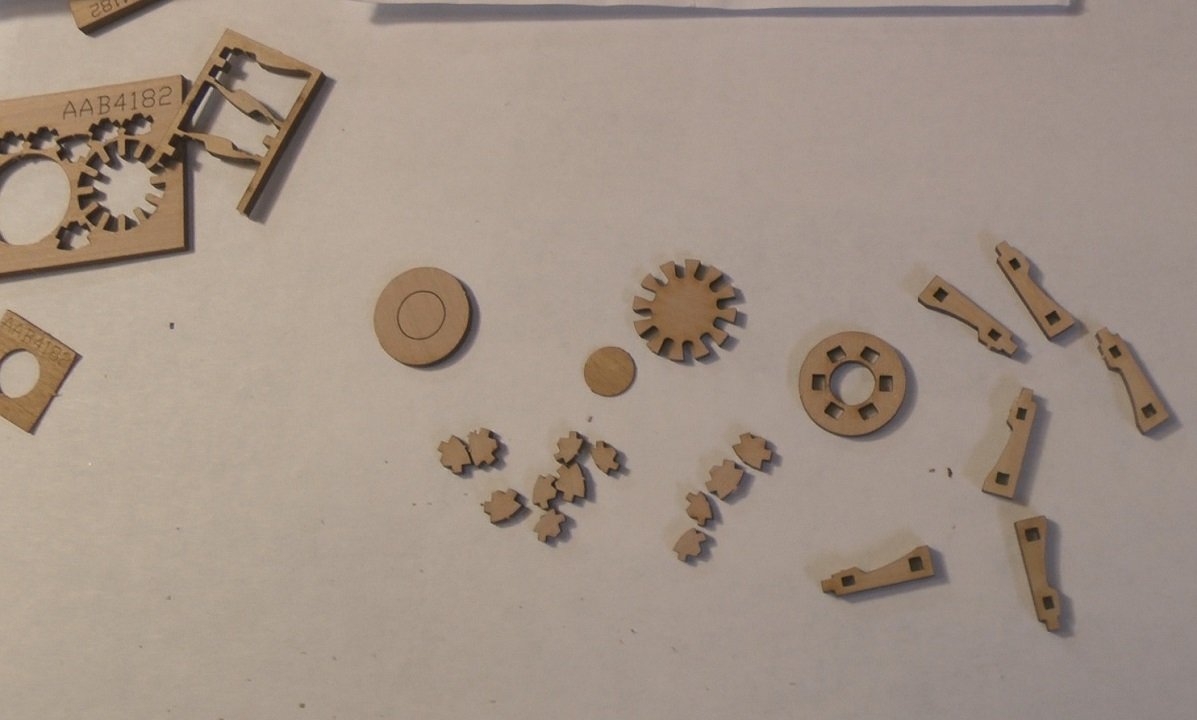
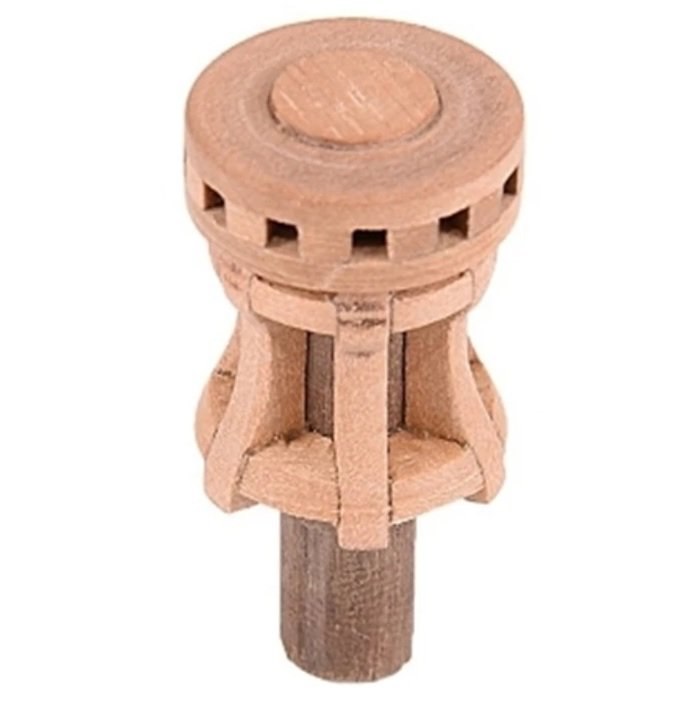
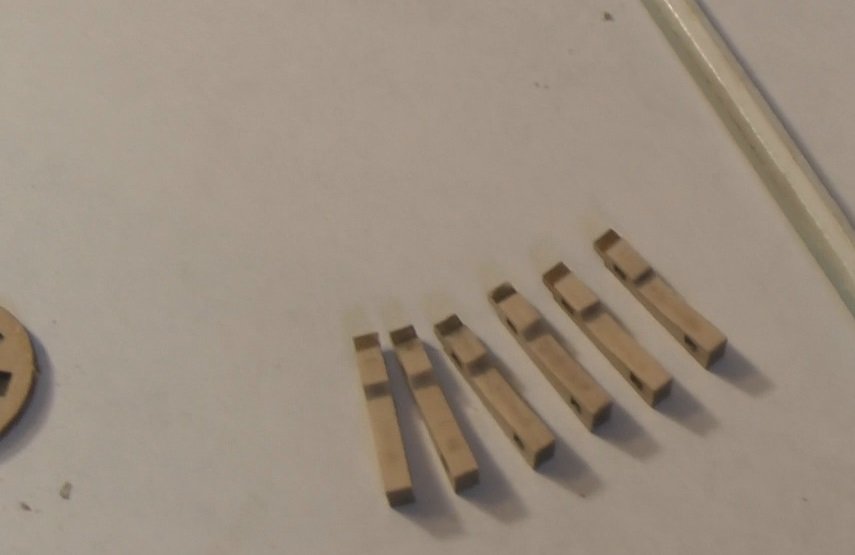
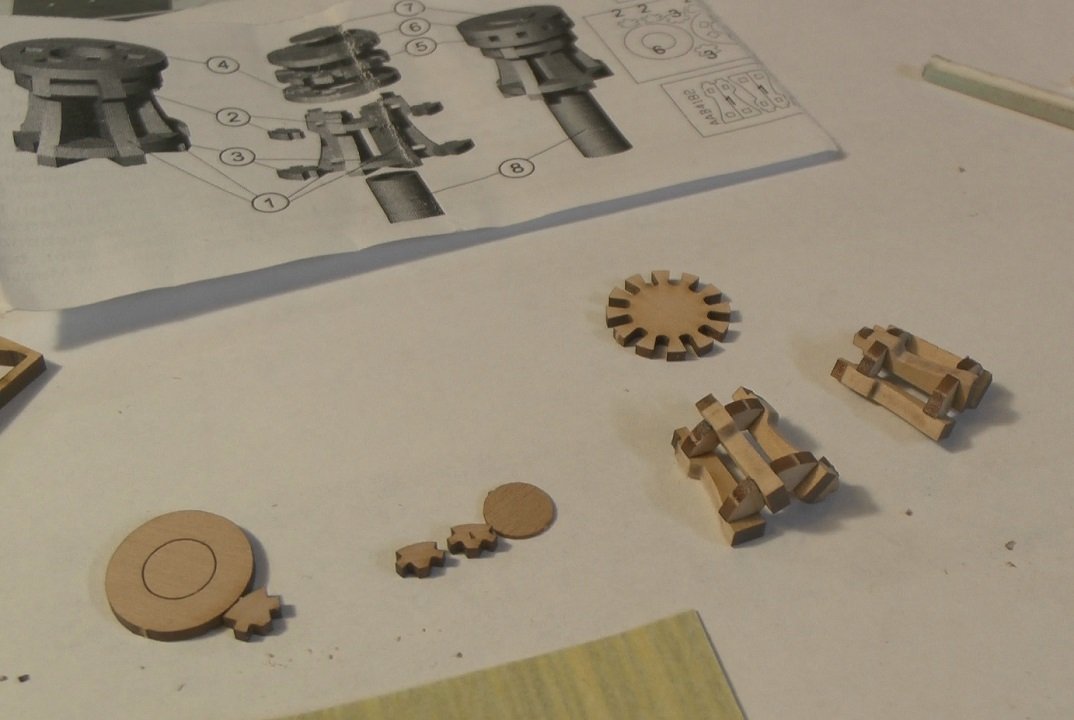
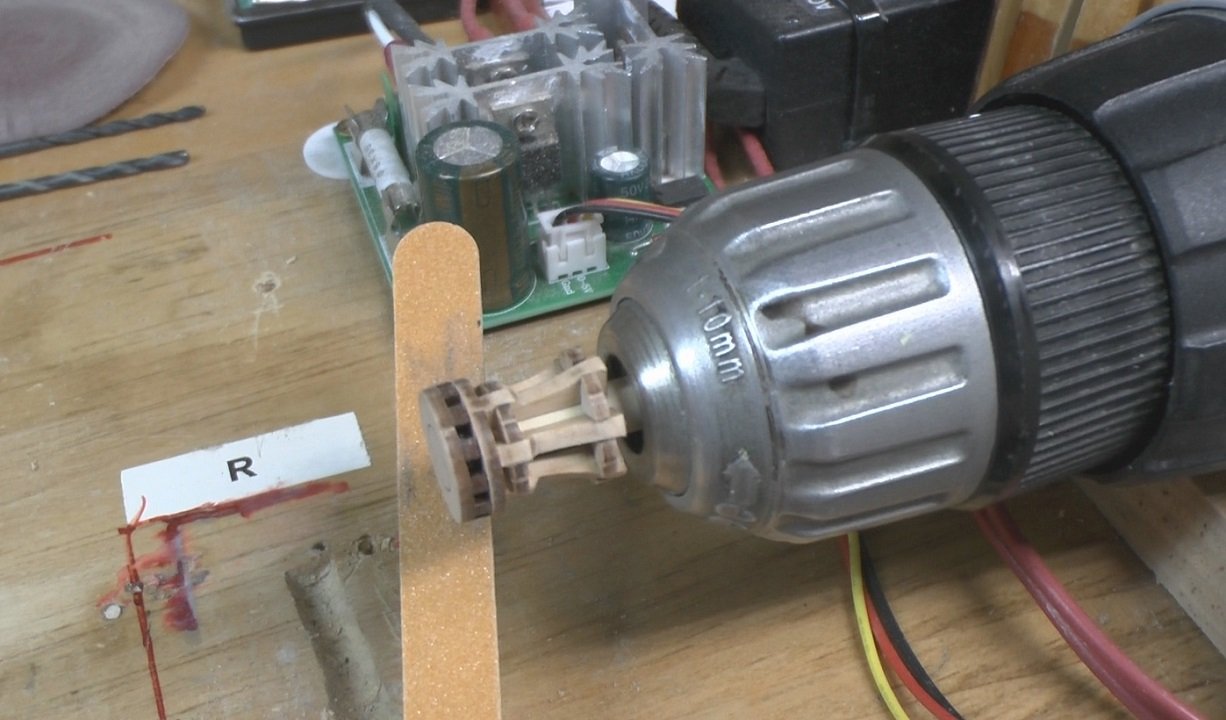
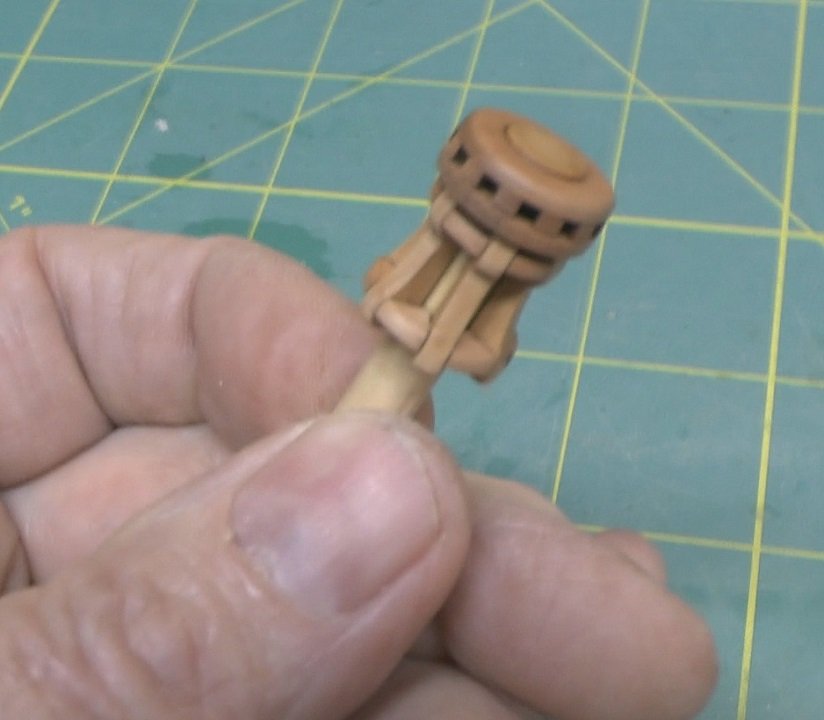
This is the 1:72 capstan kit from Master Korabel It measures 18mm x 14mm actual size. I picked it up from one of our sponsors, Crafty Sailor, and I feel it is a great value at $4.99 US. Looking at the web site illustration, you might have your doubts about using this. But we all know, kits are what you make of them.. Stay tuned.. As you might imagine, the contents are pretty sparse, but it is all you need. I tore the plans taking them out of the little plastic bag everything came in. I forgot to include in the picture, a small length of brass wire, that is intended for making rivets on the completed part. The quality of the wood is very good. I believe it is pear. The parts came out of the sheets very easily, with no risk of damage. The holding tabs were very small and easy to cut and release the parts. I thought I should remove some of the visible char before assembly, but I later realized it was really not necessary .. I spent ( wasted ) about 20 minutes on the parts seen above.. I assembled the main body in two halves, using very small amounts of white glue. The fit of the parts is incredibly tight. I don't really think glue is even necessary at this point. With all the parts together, I mounted it on my unimat for some finishing. This is where I realized all the visible char could be removed by spinning it like this. It didn't take much work to have a nice looking piece. As I mentioned earlier, there was some brass wire included to add the look of rivets, but not knowing when I am going to use this, I decided not to add the rivets at this time. I completed this in less than an hour, and I'm sure any of our members could do as well if not less. I'm going to be needing a capstan for my Resolution, but this is a bit too small. I hope Master Korabel issues some other sizes in the future.. It is listed at 1:72, but I put it on the 1:64 plans I have for Rattlesnake, and it looked pretty good. I highly recommend this kit.
- 1 reply
-
- 11
-
-
Mistake in my kit??
Gregory replied to TreeSqueak's topic in Building, Framing, Planking and plating a ships hull and deck
The shape of the part looks identical on the plans. It looks like they added an extra part to fill up space on the cut sheet.. -
That shot with the supervisor also presents an interesting perspective. It looks like the model is at least 1:10 scale..
- 642 replies
-
- 2
-
-
- winchelsea
- Syren Ship Model Company
- (and 1 more)
.jpg.2bacdc2183ff46f311927fd1c4b7c0cb.jpg)
.jpg.e7f7618e38ba8853cf58ebfa2a92b779.jpg)