

Gregory
-
Posts
3,176 -
Joined
-
Last visited
Content Type
Profiles
Forums
Gallery
Events
Everything posted by Gregory
-
 I don't know if this helps, or even if it is correct, so other jump in/on if I am giving bad advice.. To determine my plank lengths at bow and stern, I start with full length at whatever scale ( 20 ft or so ) plank amidships following my butt pattern working toward the keel. Then I determine the bow and stern lengths as the runs play out. If the distance is short by a scale foot or so, I just use a longer plank, or a little shorter as the case may be..
 -
The measurement made by Thunder of the Caldercraft plans doesn't help?
-
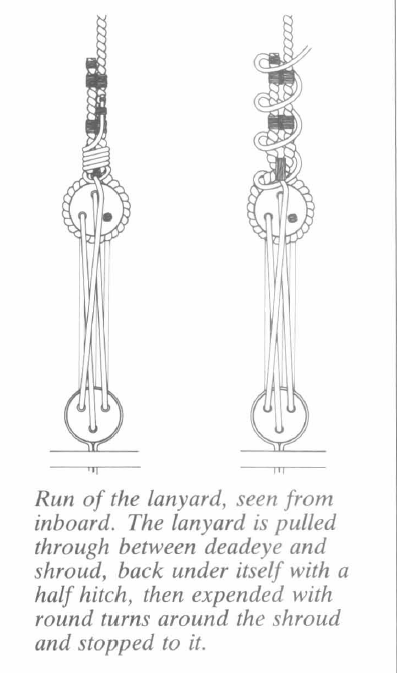
Make sure you note, the example is looking from inboard.. This stuff can get complicated..
- 436 replies
-
- 2
-

-
- vanguard models
- alert
- (and 1 more)
-
Looks really good so far. From Mondfeld. This seems to be pretty typical of examples I have seen..
- 436 replies
-
- 4
-
-
- vanguard models
- alert
- (and 1 more)
-
P.S. Does the spanker boom extend over the stern? Caldercraft would have probably included this in the overall length of the model..
-
The lack of any finishing or beveling of the wood, makes me wonder if it was something contrived by a previous owner, i.e., someone replaced a missing deadeye with a piece of wood.
-
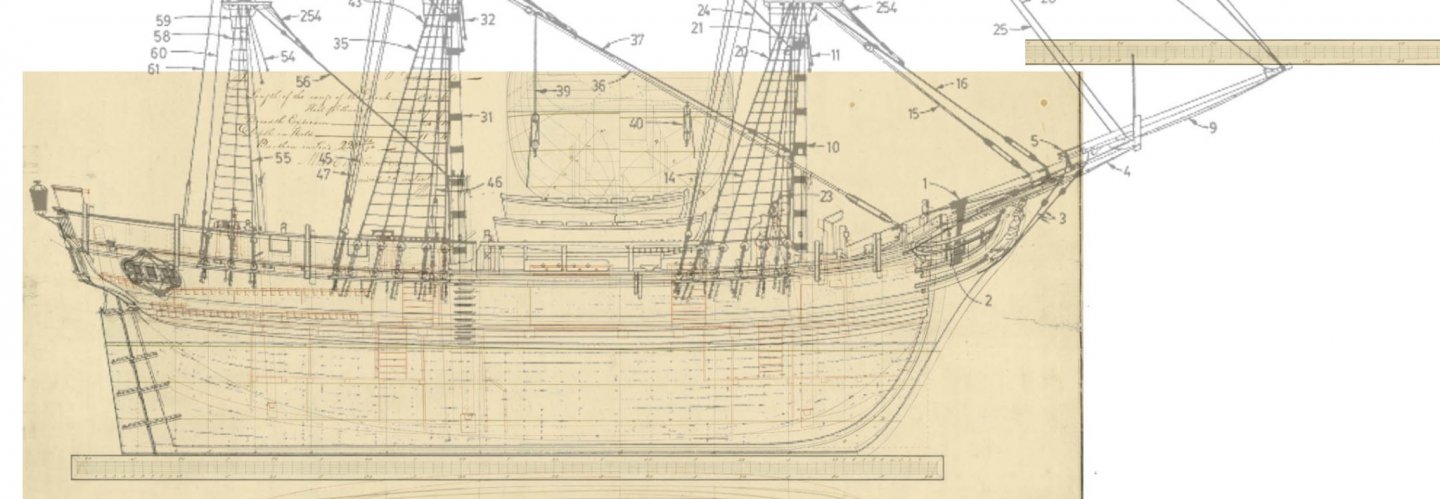
Yes, that ' replica ' is way off.. I overlaid the AOTS drawing on the NMM drawing and couldn't get a match by almost a foot; the NMM being slightly longer. It may be the shortcoming of my software, or an error in the book. However, note that the bowsprit with it's steeve, only adds about 27' to the overall length. Caldercraft probably measures from the back of the lantern to the tip of the bowsprit.
-
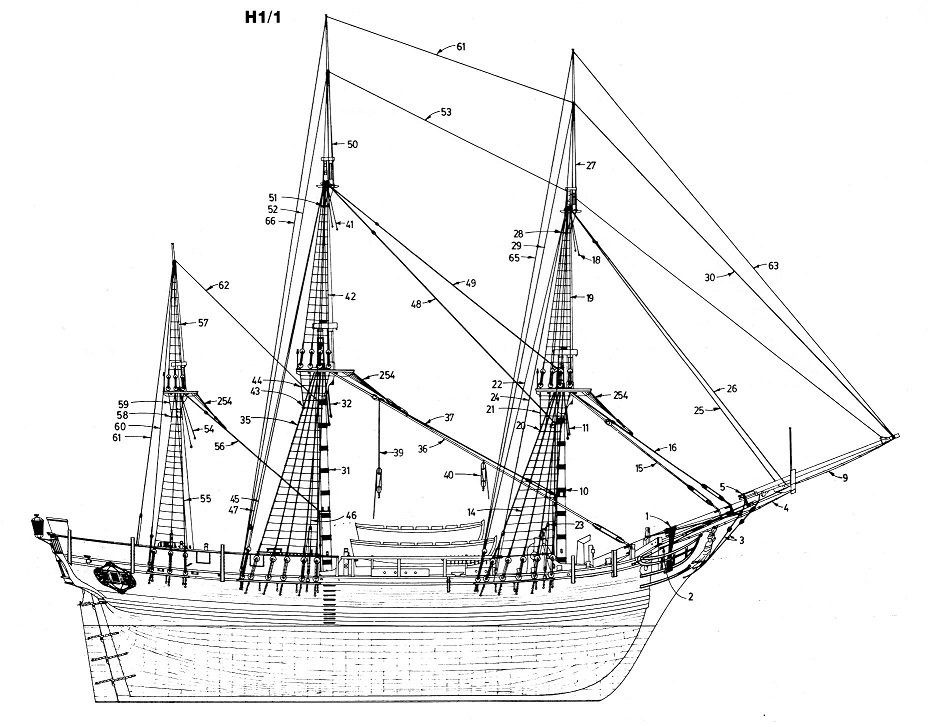
A drawing from " The Anatomy of the Ship " shows the bowsprit to be 35 ft. It looks like forum member/Moderator Matrim , finished that kit. You might ask him how the plans compare to the draught from NMM.
-
I think the seams look good.. Very subtle..
-
No. It is approx 1.5875 x 6.35 mm. The extra thickness would give you more sanding room.. To get mm dimensions you would have to look at an EU source.
-
I think some may go for contrast, while others think in terms of the siezings having been tarred along with the shrouds. You will see a lot of variation on contemporary models as well. It's a matter of preference..
- 436 replies
-
- 3
-
-
- vanguard models
- alert
- (and 1 more)
-
Really looking nice. Chuck is my go to for how things should look, but unlike his planking info, he doesn't go into a lot of detail about how he does rigging. He does provide a lot of good images about how it should look. Something to strive for..
- 436 replies
-
- 9
-
-
- vanguard models
- alert
- (and 1 more)
-
Ships at Trafalgar - what kits are available?
Gregory replied to bruce d's topic in Wood ship model kits
Montanes? -
Chris, I noticed several members have already started or talked about starting Duchess builds. Would it be out of line to ask how many of these have flown off the shelf so far?
-
You might take a look at Chuck's 1:48 windlass kit for Cheerful ( instructions ) Even if you don't use the kit, it may be useful as a design idea.. ( The store is closed right now, but here are the details in the prototype build log..)
-
Need source for Preac blades
Gregory replied to Barry Rudd's topic in Modeling tools and Workshop Equipment
What is MSC? -
Need source for Preac blades
Gregory replied to Barry Rudd's topic in Modeling tools and Workshop Equipment
Last I ordered, Malco does require a minimum $100 . Blades are great.. -
It looks like the angle is set by how the foot of the bowsprit butts up against the bulkhead, and rests on the stem.. Is there a tenon on the end of the bowsprit to be inserted into the bulkhead? Where is the hole to be drilled you refer to?
-
Do you have a snip from the plans? Is the point where the bowsprit is mounted visible on the completed model?
-
The video is episode 18. I posted the link in the post above.. https://www.youtube.com/watch?v=vKFi-mjYzgE&list=PLGC1fmQp8LDsu0EKRM9nen3HqOzD8Y3F2&index=18 For the first planking I would use 1/16 x 1/4 bass like this: MODEL SHIPWAYS BASSWOOD STRIPS 1/16X1/4X24" 12 PACK I will try to find you an example of the grain issue..
-
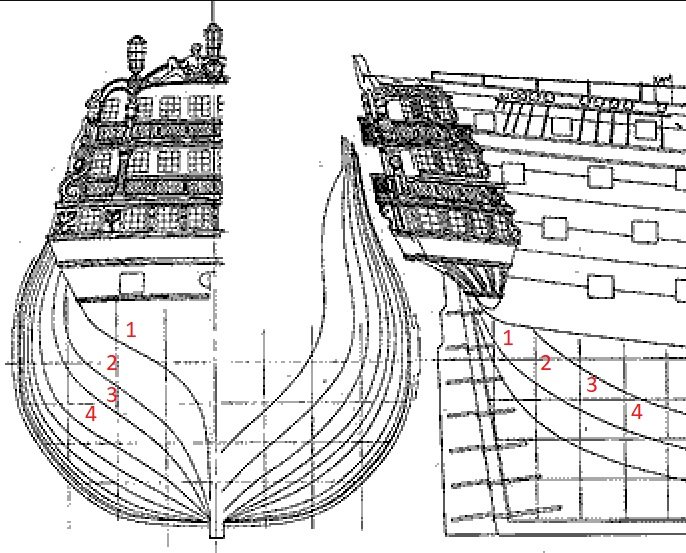
Do your plans include body lines similar to this? It might help to cut out templates and check the shape at the indicated stations. This would make sure the shape of your hull is correct. You should be able to soak your planks and get them to bend to follow the bulkheads/frames. Let them dry in place before gluing. When you bend your planks, watch how the grain tends to rise. It will often want to rise in one direction more than the other. Use the bend that creates less rise.. You said the video does not help, however he is showing how to bend the planks. I do not believe there are any other instructions that show it more clearly.
-
Here is someone building the Modelspace ( Artesania Latina ) Victory on YouTube.. I jumped to episode 18 where he is doing the stern planking. https://www.youtube.com/watch?v=vKFi-mjYzgE&list=PLGC1fmQp8LDsu0EKRM9nen3HqOzD8Y3F2&index=18
-
Here is a log that shows a nice progression for the planking. What kit is Modelspace Victory based on?
-
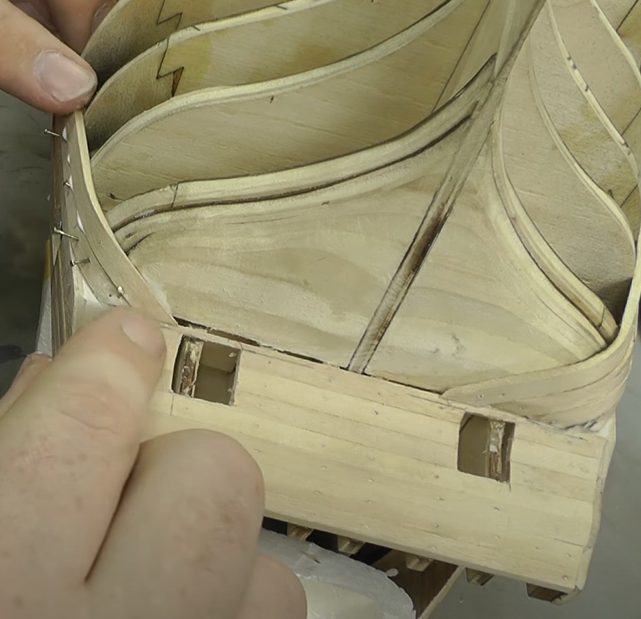
Thunder's image of Victory above, and this image of Mark's Vanguard is typical of what you should be seeing on your model.. Here is another view. The bending is not that extreme as far as a lot of kits go. Is this a first planking you are working on.
-
A lot of kits ( not yours ), have gratings ( the openings ) that are way over-sized to the point that a foot would likely pass through.
