HOLIDAY DONATION DRIVE - SUPPORT MSW - DO YOUR PART TO KEEP THIS GREAT FORUM GOING! (Only 51 donations so far out of 49,000 members - C'mon guys!)
×

Gregory
-
Posts
3,141 -
Joined
-
Last visited
Content Type
Profiles
Forums
Gallery
Events
Everything posted by Gregory
-
Mondfeld, in Historic Ship Models, says ( with regard to Europe ) the pendant was very short in ancient/medieval times and grew longer until the 16/17th centuries when it was 4/10 ( 2/5 ) the length of the yard. In the course of the 18th century it was shortened until around 1800, when it was situated immediately on the yard arm. I would suspect US practices would have closely followed Europe in many respects.
-
 Good point about the iron.. I have a small hobby iron that I use. It works very well when using PVA. The glue sets up within a few seconds as it cools.
-
Being a fan of natural wood, I like to use veneer for variety and contrast. It also facilitates spiling if that is your thing.. Here is a sample of a work in progress. With reference to your comment on flexibility, your sample planks above, appear to have been cut across the grain. That would certainly impart a flexibility that might not be desirable in some situations.
-
With regard to tinting, it seems to me that mixing food coloring in water would be a good idea. I have noticed how hard it is to get food coloring out of clothes, so I think it should weather well..
-
Has anyone mentioned before that some char on the edges of scarf joints, provides some definition that looks good IMO?
- 421 replies
-
- 4
-

-
- medway longboat
- Syren Ship Model Company
- (and 1 more)
-
CA might work as well..
-
In a discussion a while back, it was surmised that the Corel Resolution is based on HMS Ferrett of 1711
- 102 replies
-
- 2
-
-
- speedy
- model shipwright
- (and 1 more)
-
How does that deck template match the plans? It looks like that last notch where 10/12 goes is not big enough. Perhaps gluing #12 to #10 will set up a better fit.
-
I see some on ebay.. https://www.ebay.com/itm/CANNON-WITH-WOOD-CARRIAGE-FOR-SAILING-SHIPS-HISTORICAL-BARREL-HBM2901-AKKURA-/381681726095
-
With CA you can use a razor to cut the end at an angle, creating a point.
-
I'm also curious to know if the lack of a definition of " head feet ", is an impediment to completing the task?
-
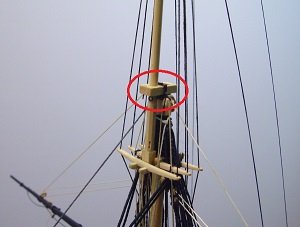
As Frankie mentioned, can you provide any context? 'Head feet' seems to mean something with regard to pumps. Heel would be the end of something. The heel of a mast would be stepped in the keel. A butt is typically where the ends of two planks come together without scarphing or overlap. On a mast it would seem to be the bottom end of some part. Again, context would help. A cap could be any number of things. There are mast caps, such as this: The definition I found for hounds is: The part of the mast near the top platform where the lower shrouds are mounted. The reinforcing timbers at the top of the mainmast where the topmast is mounted
-
Great build Mike! I envy your timely perseverance, and ability to create a great result with essentially what was in the box.
-
You have done very well without me, and much quicker than I ever did.. Sorry I did not reply sooner, but I did not expect you to progress this fast. You have achieved a great balance between paint and natural wood.
-
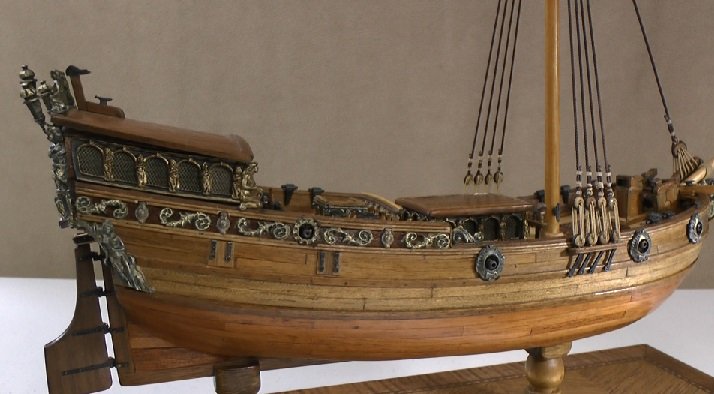
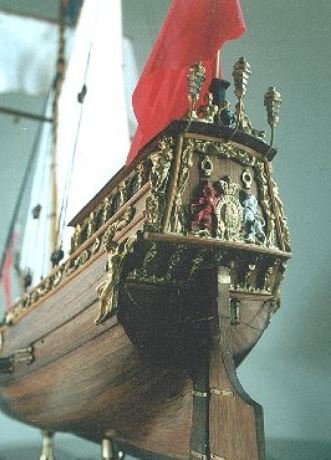
popeye, If you look at the pictures of a museum model back on page three, you can see how it's finished. Mike, I will PM you about the stern decoration and the rudder. The last picture I posted was from the site I linked to earlier. http://modelshipbuilder.la.coocan.jp/yacht-m2.htm
-
popeye, Not sure what you are alluding to, or how familiar you are with the Mary, but the stern/transom gets very busy with trim and ornamentation, as seen here: Correct me if I am missing something with regard to what you are refering to.
-
Really looking nice..
-
Looks like it should finish out very nicely.. The tip from Popeye should go well also..
-
Mike, Here is a Mary Build that I found very inspirational. http://modelshipbuilder.la.coocan.jp/yacht-m2.htm Make sure you click on " Making " just a little ways down from the top of the page..
-
The essential rigging would not be much different ( except for size and quantity ) from the Victory. If you can get something like Historic Ship Models by Wolfram zu Mondfeld, It would give you a good line by line accounting for similar ships; which you could compare to the plans you have and make adjustments as necessary
-
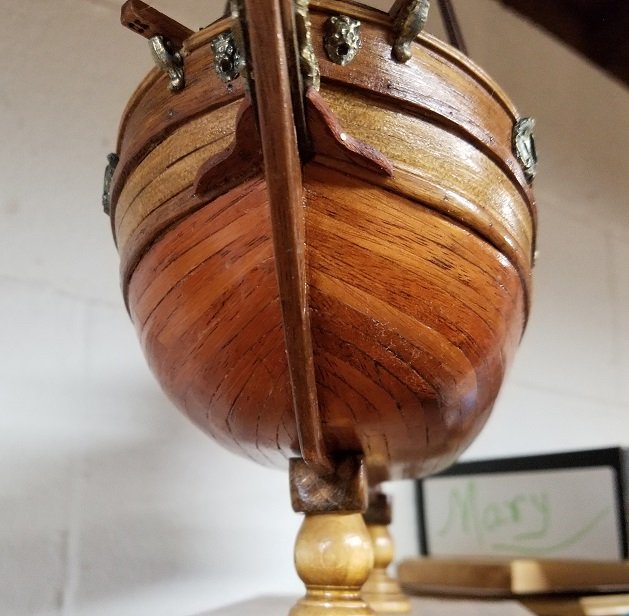
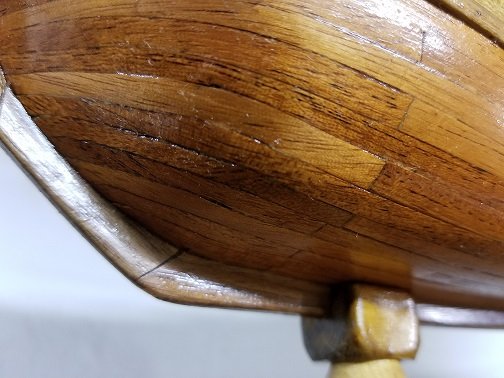
At the risk of hijacking your thread ( please let me know and I will delete ), I am working on a Mary, and in the rigging stage. I didn't document well enough for a log, but I hope to present in the Gallery soon. I was using veneer for the 2nd planking and did some spiling at the bow. I thought I achieved a pretty good effect for my first attempt at this, though it is a little rough in spots. It takes some wide stock to do this. Up to three times the width of the plank, not to mention the waste from practicing.
-
Rigging Question - Virginia Privateer
Gregory replied to David Lester's topic in Masting, rigging and sails
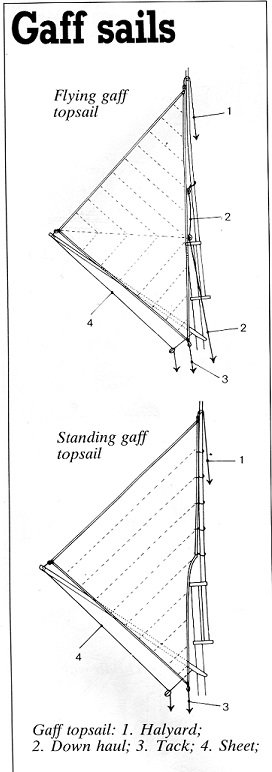
David, I see where I totally missed the boat on that, assuming it was a square sail ... Here is what Mondfeld shows. Your examples look like a flying configuration to me. I don't see going aloft to set those sails..
-
Rigging Question - Virginia Privateer
Gregory replied to David Lester's topic in Masting, rigging and sails
It looks to me like it is in fact a topsail yard, with some kind of attempt at perspective in the drawing. I think you would be hard pressed to find any kind of rigging plan that included a yard/boom as drawn.. Here is a link to what appears to be the same model, which sports a topsail, and a top gallant. Not a lot of detail but, using standard practice should get you by.. http://www.pielcraftsmen.com/ordimages/salemodels.htm P.S. There are reasons to be critical of some of the details in Petersson's Fore & Aft rigging book, however this over-all view of a similar rig, might give a basic idea of a rigging plan.
-
Model Shipway Ratline tool
Gregory replied to fnkershner's topic in Modeling tools and Workshop Equipment
One way to address this, would be to make the shrouds before setting up the deadeyes on the channels. -
Keep in mind, you don't really have to know why/how about every line on a ship. As the number of masts and sails increase, you have the same basic principles repeated over and over. Just pick a mast and a type of sail; main, top, stay, spanker, etc., and the basic principles, with a few exceptions will always apply. This is not to say there won't be variations among countries and periods, but a 'lift' , a 'brace' a 'shroud' or whatever, won't really change that much, because the work to be accomplished will be the same.