

Gregory
-
Posts
3,175 -
Joined
-
Last visited
Content Type
Profiles
Forums
Gallery
Events
Everything posted by Gregory
-
 Well said welfalk.. I have not seen any turns around the windless on any contemporary models. I have seen the hawsers passing under the windless, headed for the cable lockers. I have seen a few kits, where the plans show a couple of turns around the windless. On a model, I think wrapping around the windless might serve an artistic purpose, and provide context for observers outside our ship modeling community.
 -
NY has a code for Piano finishes? 😵
- 1,784 replies
-
- 4
-

-

-
- winchelsea
- Syren Ship Model Company
- (and 1 more)
-
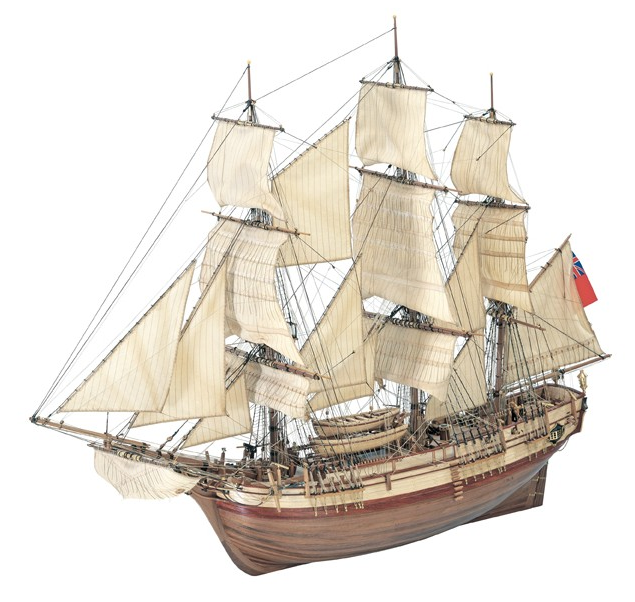
Great start! I'm a Mamoli fan. Were you aware there is a contemporary model in the Royal Museums Greenwich bearing the same name. The Mamoli model appears similar, but not identical..
-
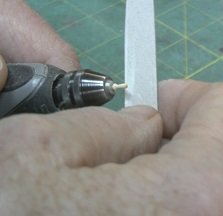
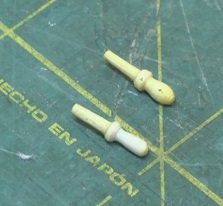
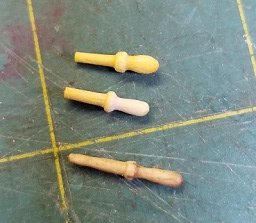
While you have received some great recommendations for other sources, have you considered modifying the one's you have. I have this kit on the shelf and I pulled out the belaying pins. If you have a small rotary tool with an adjustable chuck, it shouldn't be beyond the skill you have demonstrated with this kit.. Started with a fine file, and finished off with an emory board.. This was real quick, and I could have refined the final result a bit.. I would also add a little stain. Here is one I made from a tooth pick using the same method. Might be a bit long for this kit.
-
I really like the base supports.. I'm going to shamelessly rip off that idea...😂
- 51 replies
-
- 1
-
-
- cheerful
- Syren Ship Model Company
- (and 1 more)
-
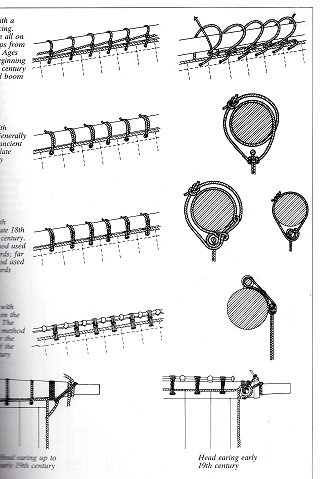
Was I ever wrong.. In Zu Mondfeld's Historic Ship Models, there is a chapter on " Bending Sails to the yards...
-
... Unless it's a DeLorean ! 😁
-
I apologize if I sounded contentious.. Wasn't my intention.. I thought it was a question of to paint, or not to paint; and I prefer not to.. Your Sirius is beautiful, and a standard I could strive for..
-
I guess it depends on whether or not you feel compelled to adhere to that tagline.. Getting paint colors " historically accurate " is not very likely, but if you want to settle for " some shade of red " , then that is up to you.. Personally, my goal in ship modeling, is to end up with an " art " piece, that aunt May, Uncle Jack or myself would be happy with on the mantle. I accomplish that with the natural wood look. There are countless examples of unpainted models in the Gallery that are far better than what I could hope to achieve.. One of my favorites is Longridge's Victory Model..
-
I was surprised that I couldn't find any details in Zu Mondfeld regarding fixing sails to yards...
-
Not an easy task, without a picture or two showing access to the hold... My best guess for a start, is a piece of small gauge wire, that is fairly rigid..
-
Warped frames
Gregory replied to jdbondy's topic in Building, Framing, Planking and plating a ships hull and deck
( Can't resist.. ) Where did you get that boxwood, that you can afford to use where it will never be seen ? -
A lot of teak veneer shows up on Amazon.. Most are somewhat pricey.. This seems reasonable.. Teak 2" x 25' Edging The grain, as others mentioned will be way off for most scales. I would go with a fine grained wood, and some stain to achieve the look you want..
-
I found this listing on ebay.. I see quite a few eyebolts.. Connie Parts PS If I remember correctly, the gun deck calls for a ton of those eyebolts. 99% Of them will not be visible on the finished model.. However it's been a while and I might be confusing the gun deck with the spar deck, where they are quite visible..
-
When you " paste ", look for a little prompt at the bottom of the reply window that says " Paste as plain text... " Click on it and all will be good..

-
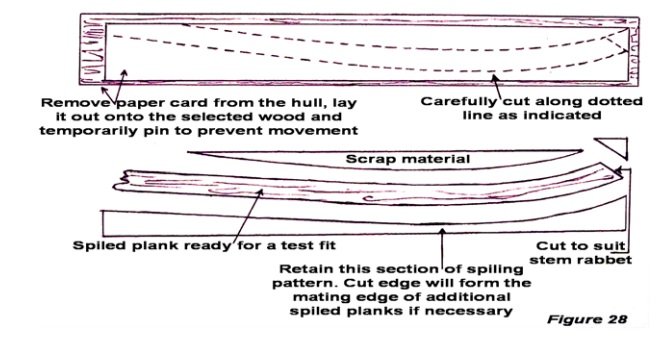
It could be accomplished with a straight plank and bending, but would be more challenging.. What you see is the result of spiling... laid out flat it would look more like this example.. Found in this article, mentioned earlier.. SIMPLE HULL PLANKING TECHNIQUES FOR BEGINNERS You might achieve the same result with some bending techniques involving soaking, clamping and heating..
-
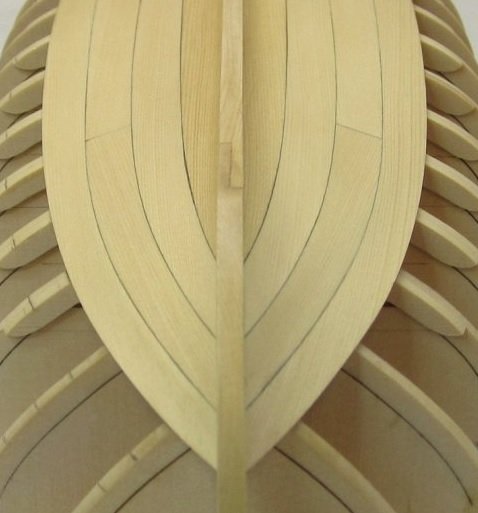
Short of the bow, I belive you are correct that the curve would be toward the stern. My example is not the best.. Chuck's Medway Longboat is a very good example of how it should look.
-
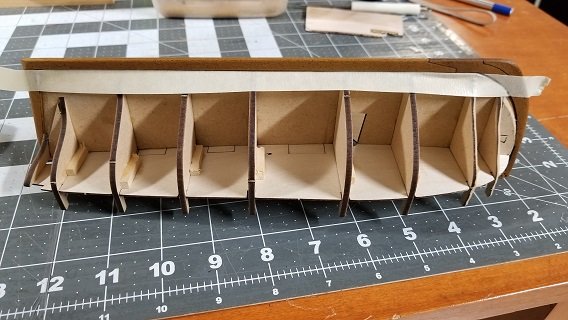
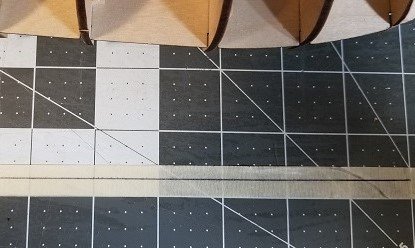
I don't know if this will need further explanation, however when I lay out the garboard ( and other planks as well ) I place a piece of masking tape along the keel, from the stern to the bow. For most of the run, the edge will follow the keel. Where it meets the curve of the bow, I mark it with a pen, then use this as a guide for cutting the plank. Of course, the plank can be tapered and meet the keel further back,. The final shape is up to the builder and the desired result.
-
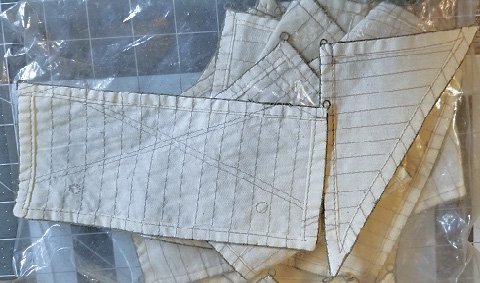
Going through may stash and uncovered a complete set of OEM sails for the Artesania Latina 1:48 Bounty. These are also for the " exposed " kits, and will possibly work for any 1:48 similarly rigged ship. I am willing to donate these to anyone who will pay postage and assure me they will be used on a model. I look forward to seeing them on a completed ship.. P.S. Trivia regarding the old MSW site: Does anyone remember the " Moldy " Bounties?
-
Make note! The spru has several sizes, and there are only ten of the smallest size...
- 714 replies
-
- 2
-
-
- lady nelson
- victory models
- (and 1 more)
-
This showed up in another discussion.. Eyebolt No Collar Might be what you need for making smaller hooks.
- 714 replies
-
- 3
-
-
- lady nelson
- victory models
- (and 1 more)
-
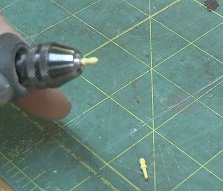
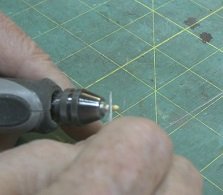
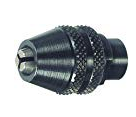
I just eyeball the opening and go from there. The drill bit idea sounds good for getting a little more precision. I burred up the edges of the chuck teeth a little bit with a cut off wheel. It doesn't take much to turn it into a rough cutting tool. I used to do this with various size colletts before I discovered the chuck.
-
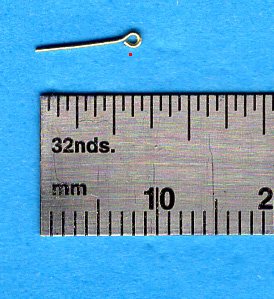
Just curious.. Could you humor us with some context? In the image below, is the smallest eyebolt I have in my collection at about 1mm ID.. The red dot is about .25mm .. It is barely visible when printed and smaller than most of the thread I own. P.S. I certainly admire the effort that requires anything at this scale.. It is way off of my radar..
-
Thanks for sharing.. I was really impressed by by the precision of your parts, and was waiting for you to tell me you have a laser cutter.. Now I'm even more impressed! P.S. Regarding rounding off small square stock. You have made a very nice tool, however, I have found that a Dremel keyless chuck does a pretty good job, and gives you a fairly wide range on a small scale.. It's also good for further reducing round stock.
-
Hey Phil, Nice build you have going here. Just curious how you fabricate your wood parts, such as your gun carriages?