HOLIDAY DONATION DRIVE - SUPPORT MSW - DO YOUR PART TO KEEP THIS GREAT FORUM GOING! (Only 68 donations so far out of 49,000 members - Can we at least get 100? C'mon guys!)
×


AJohnson
-
Posts
2,034 -
Joined
-
Last visited
Content Type
Profiles
Forums
Gallery
Events
Everything posted by AJohnson
-
 Thank you for sharing your insights and learned techniques for working on such small ropes. I am definitely going to try an emulate your work on my Trial when I get time to return to it. One solution I have been trying for fixing rope is “Matte Medium” used for acrylic paintings, it dries clear and has a matt finish. So far it has not left a white or flakey residue. I have got Liquitex branded, a small bottle to experiment with.
- 562 replies
-
- 2
-

-
- vanguard models
- alert
- (and 2 more)
-
P-51D Mustang by CDW - FINISHED - Dragon - 1:32 Scale
AJohnson replied to CDW's topic in Non-ship/categorised builds
That is looking sooo nice Craig! -
Great looking cannon and carriages. I made the same mistake with the quoins on my Trial. I think I got away with it for heights, but it would have been better for spacing them all at the same height in the ports if I’d waited until fitting the cannon to the deck.
-
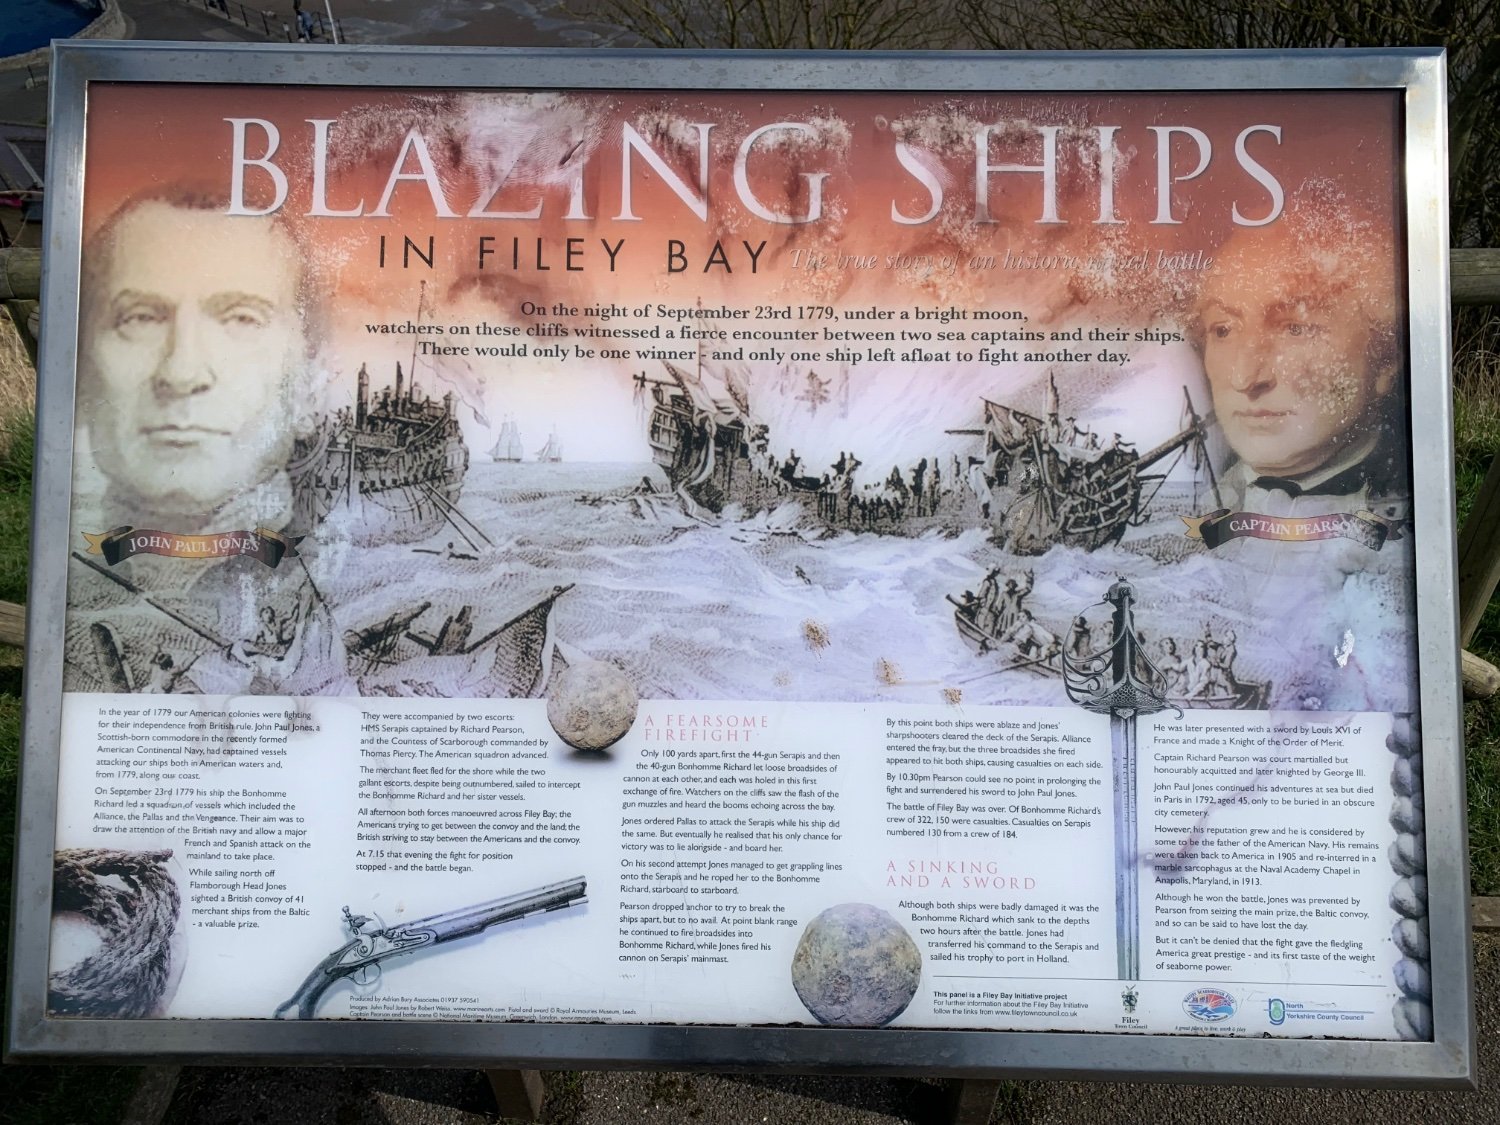
Wreck of Bonhomme Richard found off Yorkshire coast.
AJohnson replied to uss frolick's topic in Nautical/Naval History
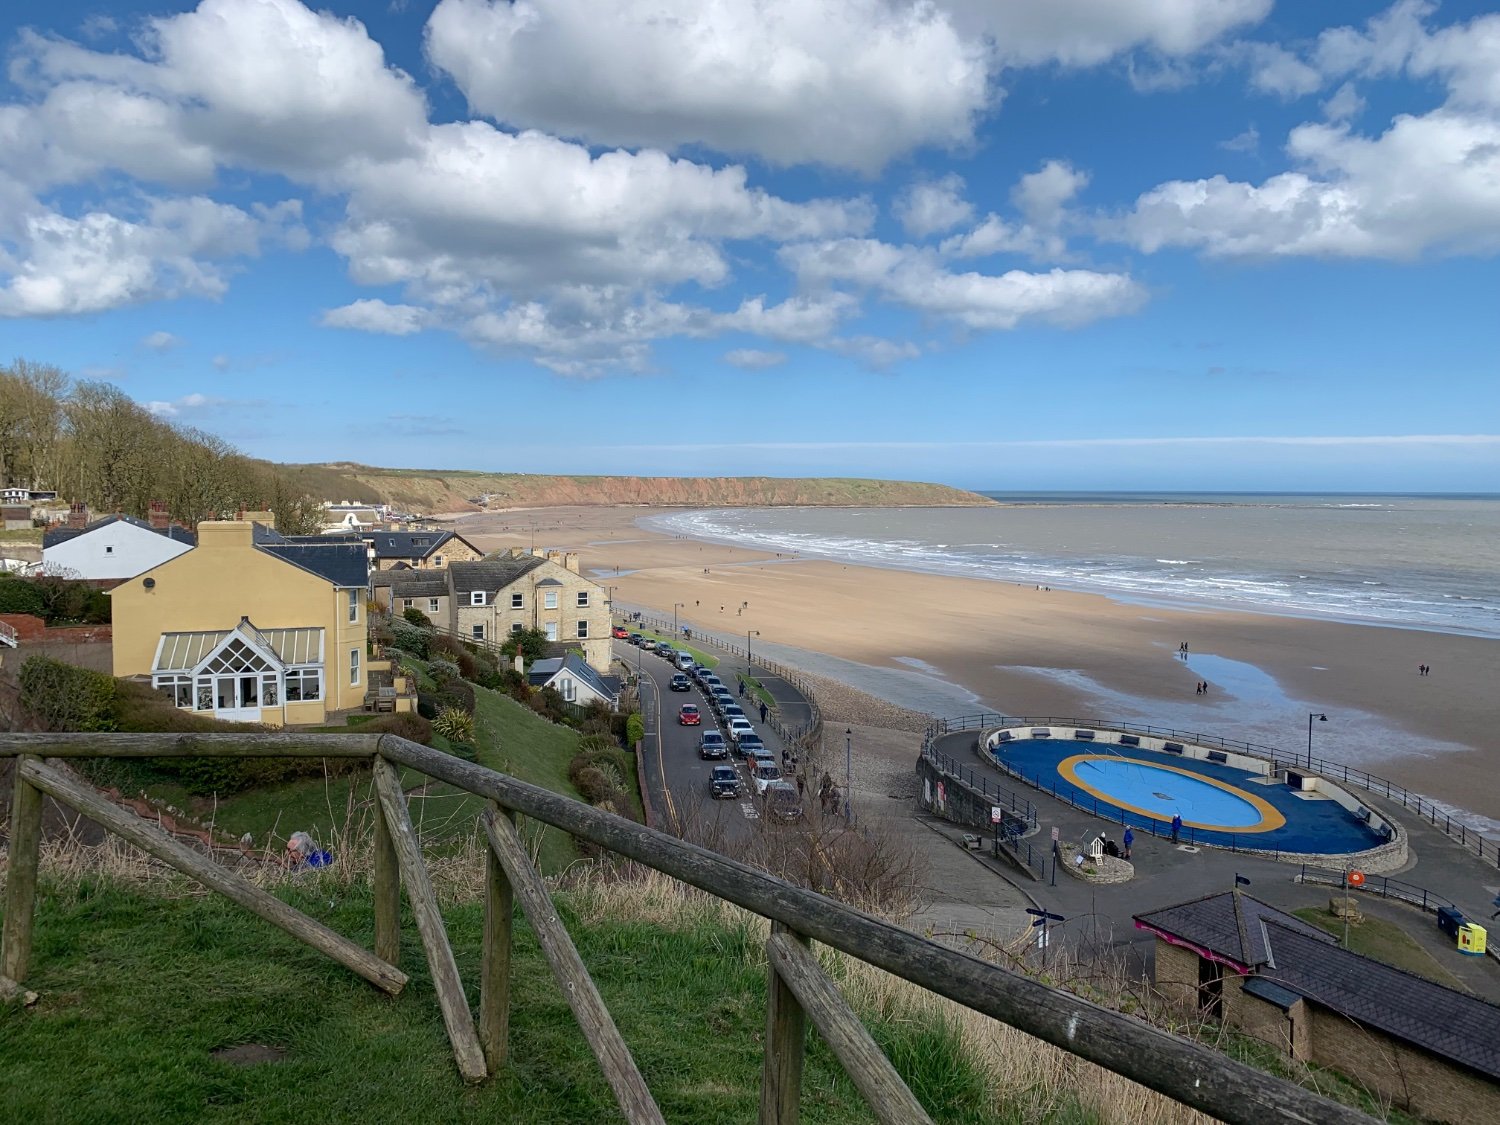
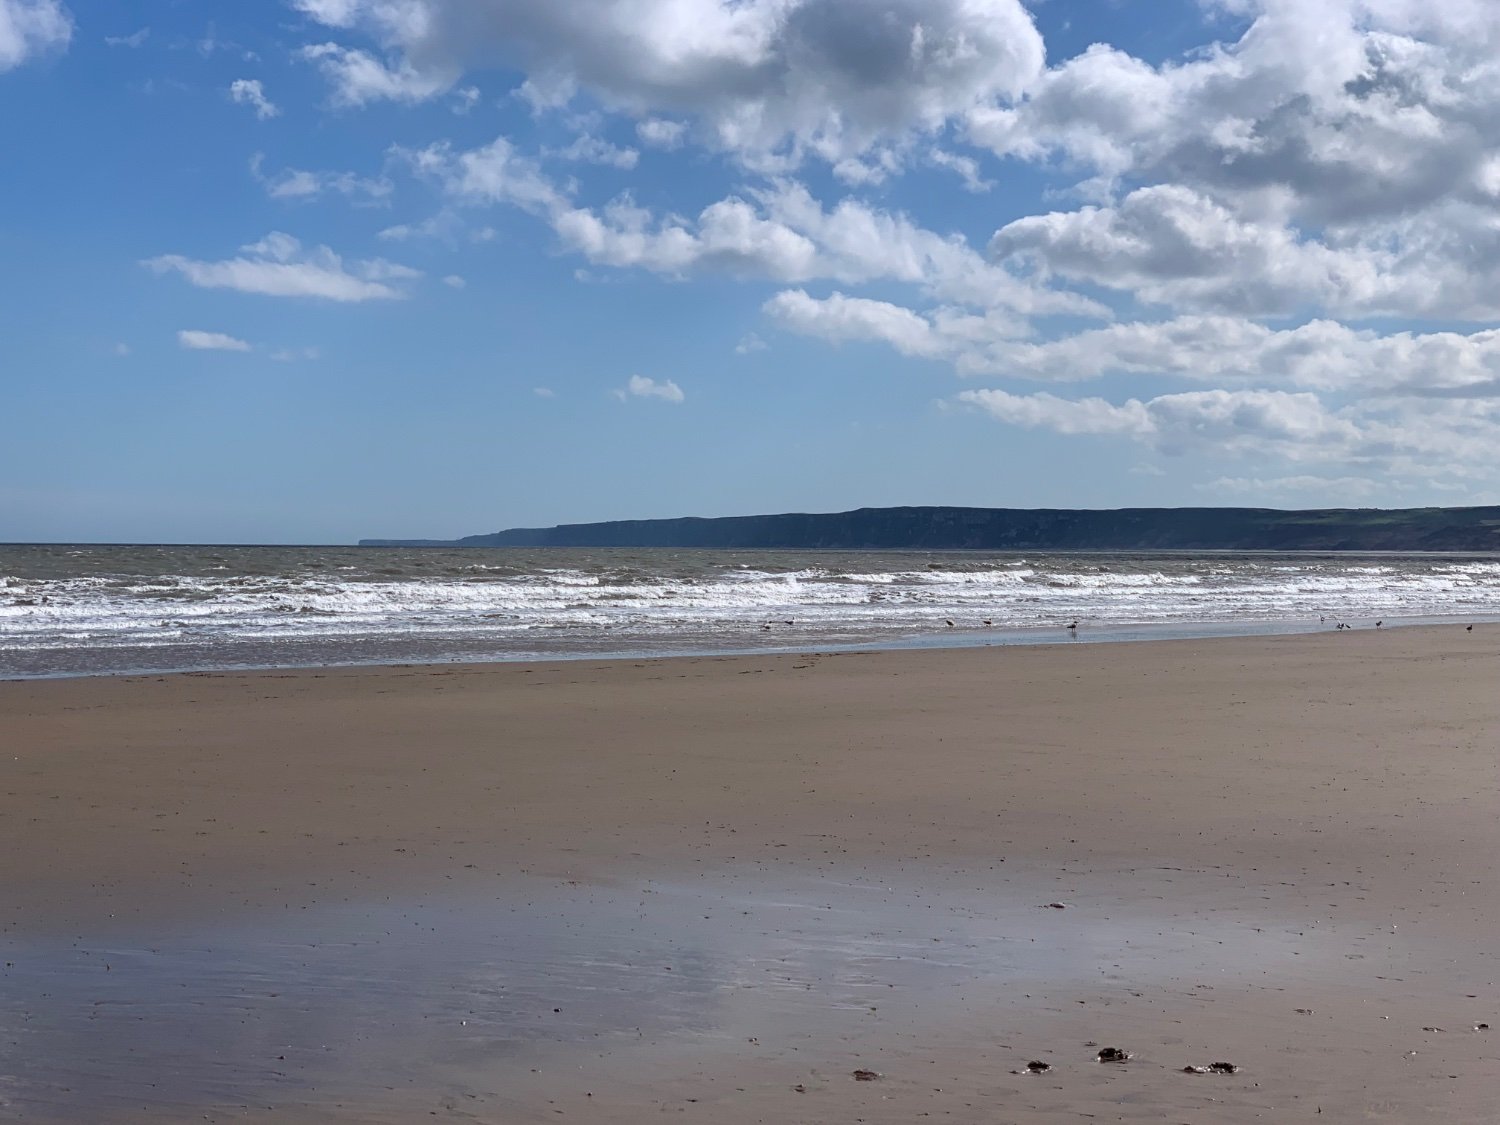
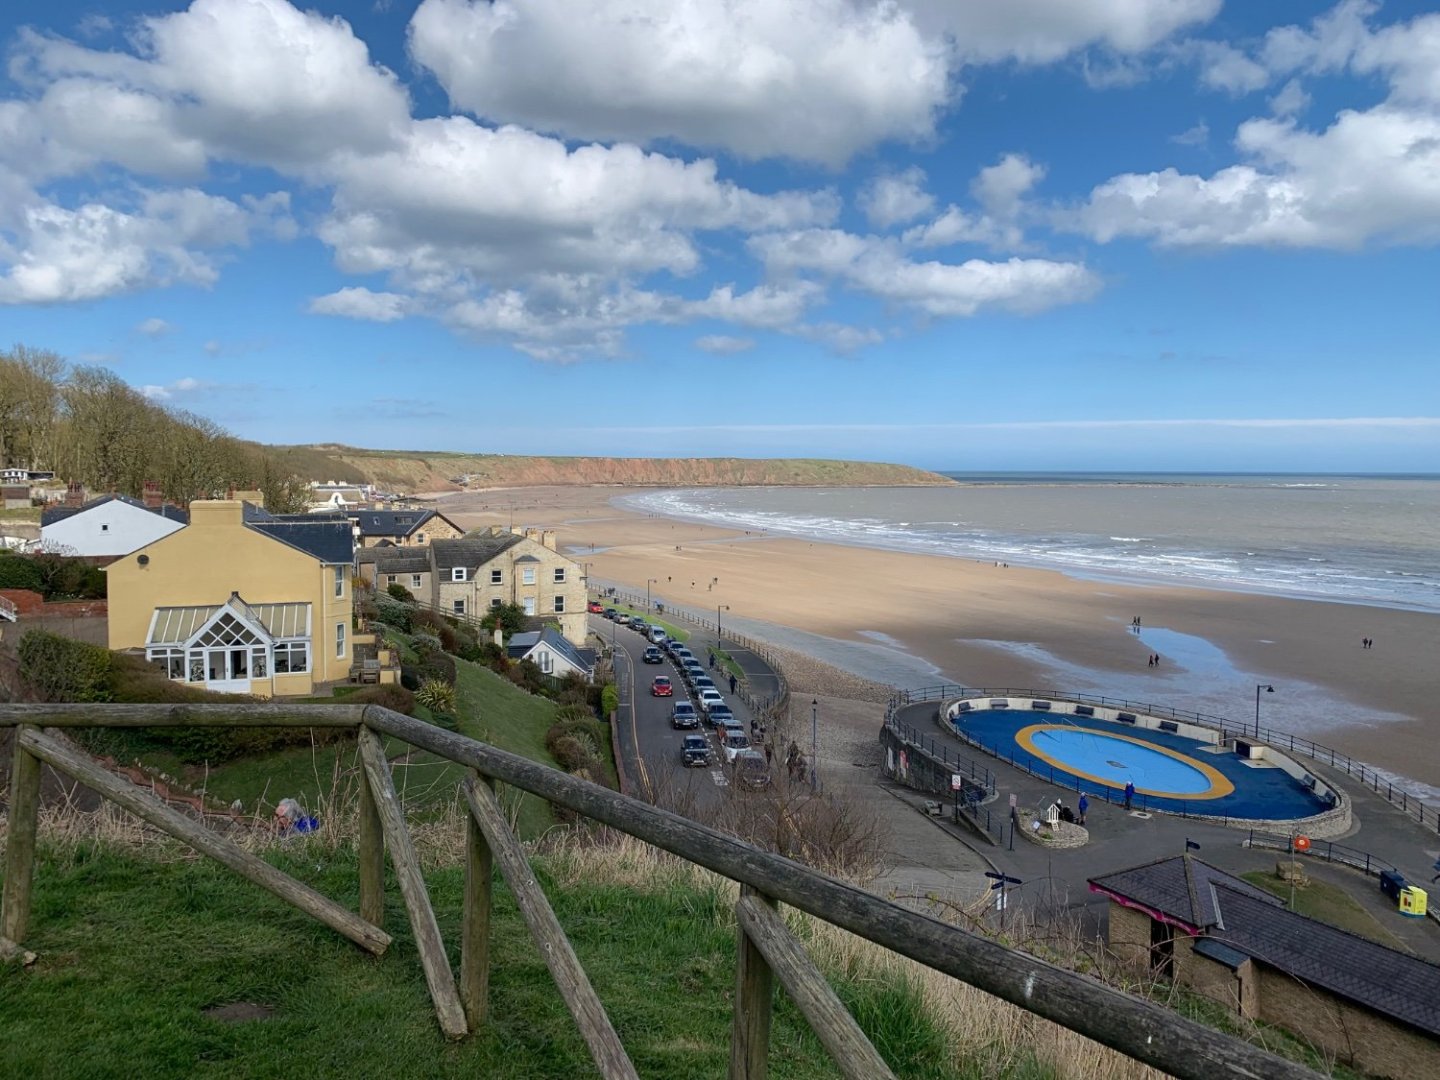
I’m having a few days off work at the moment, we are staying in a little East Coast town called Filey in North Yorkshire. There is a plaque on the cliff top in the town, hope you can read the text, also a couple of pictures of the bay for those interested taken this morning, the last picture are the cliffs of Flamborough Head where the battle took place.

-
That is really good, as others have said this is exceptional at 1/64 scale.
- 562 replies
-
- 2
-

-
-
- vanguard models
- alert
- (and 2 more)
-
That looks great Simon, good luck with the post window fitting renovation/decoration works. See you the other side!
- 125 replies
-
- 1
-

-
- Trial
- Vanguard Models
- (and 1 more)
-
Great progress Dan, I agree on Chris’s interesting subjects. I got Adder as it is so unusual. I have been tempted by Caldercraft’s Convulsion before, but Adder, or Sparkler in my case scratches that particular itch.
- 146 replies
-
- 2
-
-
- Adder
- Vanguard Models
- (and 1 more)
-
Hi Dave, I’m also doing gun carriage rigging on my Trial and found this thread very helpful. I am going to show one half of my build with cannons stowed and one ready for firing with crew.
-
Looking good Dave, that is a lot of work with the improvements you have made to the gun carriages.
-
Hi Simon, yes I did pre-shading of some planks so the white wasn’t uniform. I also did some waterline “grunge” but initially over did it, so put a light coat of white over it to make it more subtle. From a distance it just looks like light shading, only close up do you see it is mucky green to simulate algae.
- 125 replies
-
- 1
-
-
- Trial
- Vanguard Models
- (and 1 more)
-
Hopefully not too much for you to do. Hopefully in a few weeks we will back on with our Trial builds. Solid start you have made.
- 125 replies
-
- 1
-
-
- Trial
- Vanguard Models
- (and 1 more)
-
Wonderful build Dan, think your presentation pictures at the end are really good.
-
P-51D Mustang by CDW - FINISHED - Dragon - 1:32 Scale
AJohnson replied to CDW's topic in Non-ship/categorised builds
Also apologies for setting that particular Hare running! 🐇 A half remembered detail I recalled about Mustang wings. But I did know the folks here on MSW would know the details. Seems modelling with painted and stripped bare metal is fine if you can get the evidence for your particular kite and what happened to it in the field. Love the knowledge out there in MSW! 😁 -
Once again Dan you are blazing the trail for us slow coaches. Looking forward to seeing you build this one, next on my list after Trial.
- 146 replies
-
- 3
-
-
- Adder
- Vanguard Models
- (and 1 more)
-
Hi Simon, good to see another Trial log started. Mine stalled at the moment thanks to the Admiral’s latest DIY project!
- 125 replies
-
- 2
-
-
-
- Trial
- Vanguard Models
- (and 1 more)
-
Welcome to MSW Mimmo!
-
Welcome to MSW Johann!
-
P-51D Mustang by CDW - FINISHED - Dragon - 1:32 Scale
AJohnson replied to CDW's topic in Non-ship/categorised builds
That looks really nice as it is, but know what you mean, some variations will add interest. From reference I have the panels either side of the exhaust stubs often look darker (not just staining either). I’m no Mustang expert but weren’t some Mustangs wings painted, even the NM ones? Not sure where I got that notion from. -
Pulling up a chair. 🍿
-
That’s a really nice looking Spit James!