
HOLIDAY DONATION DRIVE - SUPPORT MSW - DO YOUR PART TO KEEP THIS GREAT FORUM GOING! (Only 68 donations so far out of 49,000 members - Can we at least get 100? C'mon guys!)
×


AJohnson
-
Posts
2,034 -
Joined
-
Last visited
Content Type
Profiles
Forums
Gallery
Events
Everything posted by AJohnson
-
 Really impressive work, congratulations!
 -
Great work B.E. I like the Belfry, how did you patinate the lead?
- 648 replies
-
- 1
-

-
- Indefatigable
- Vanguard Models
- (and 1 more)
-
Your Flirt is looking really good TJM, very clean looking painting.
- 152 replies
-
- 1
-

-
- Flirt
- Vanguard Models
- (and 1 more)
-
That is looking so good Alan!
-
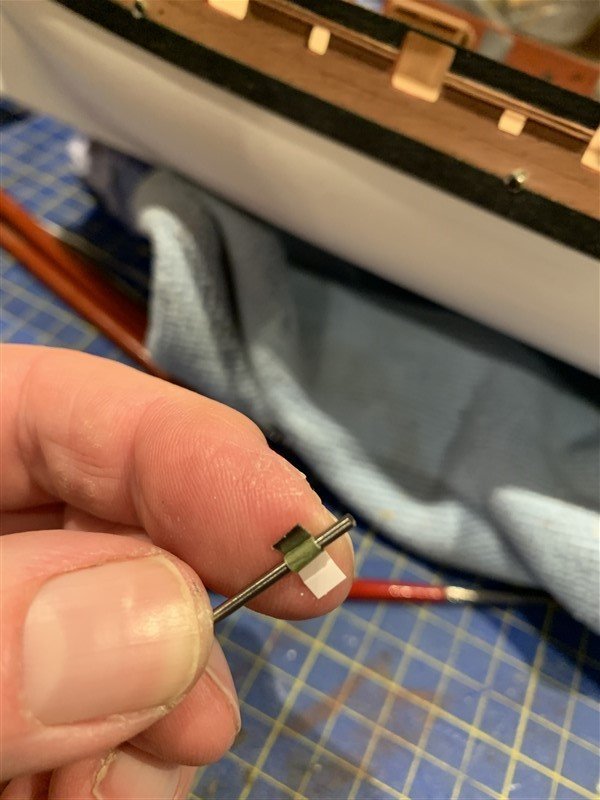
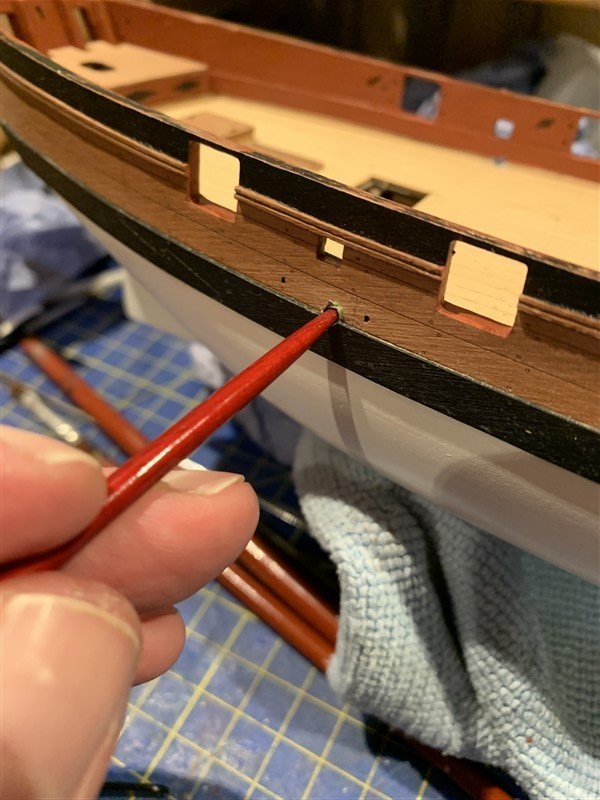
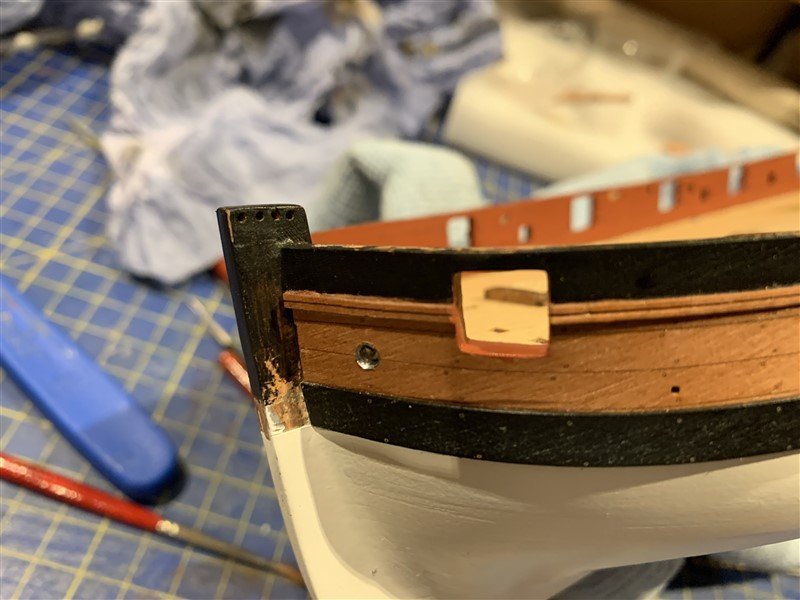
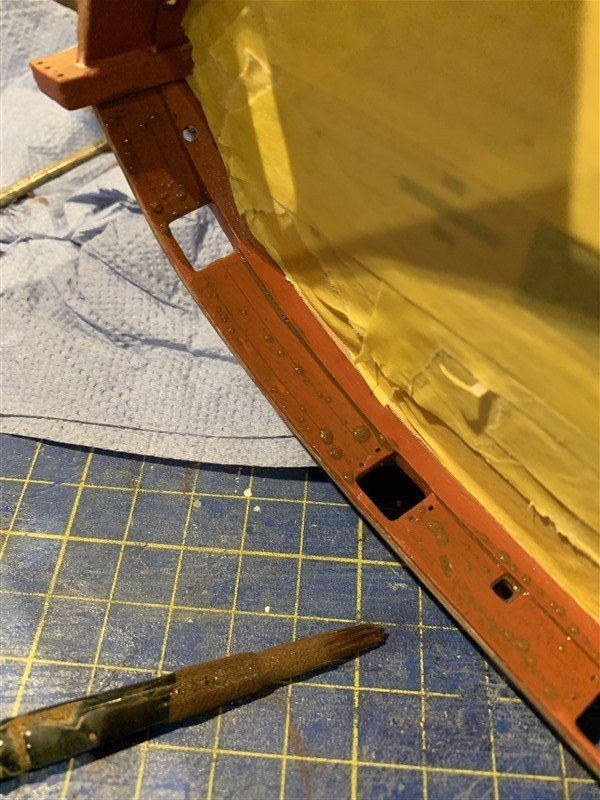
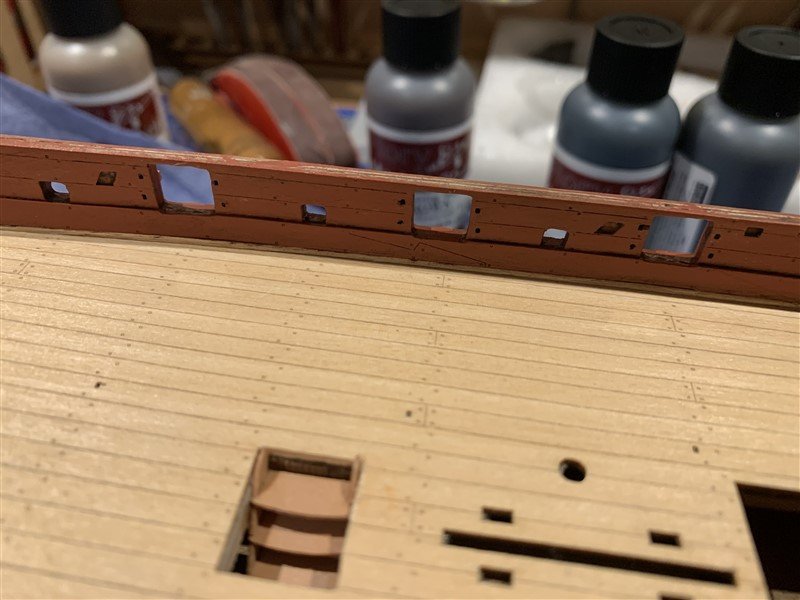
Evening all, A quick update for the addition of scuppers. @dunnock added scuppers to his Trial using metal tube, so I have tried out adhesive lead foil for mine. These scuppers are on the contemporary model at the RMG, so I copied the number and location of that model. Once the scupper holes had gently and slowly been drilled out the adhesive foil was cut into lengths and wrapped around a small drill bit to form a tube; this also usually made the backing tape come free which was an added bonus, these little tubes were then pushed into the openings and worked into the sides and pushing them firmly against the surface of the drilled hole. The most useful tool I found for this was the end of a small paint brush. Excess foil could be trimmed using a scalpel. The adhesive was tacky and did not grab too strongly, so it allowed for adjustment to get the lead where you want it. To seal the edges I will matt varnish these holes, but as you can see from the pictures the hull painting still needs finishing, so I'll do that when the hull is about complete. Thanks for the likes and comments. 😁


- 207 replies
-
- 18
-
-
Looking forward to seeing all this come together Andy, the vehicles look great. 👍
-
Enjoy the sun and cycling Mike, your Alert looks great! 👍
-
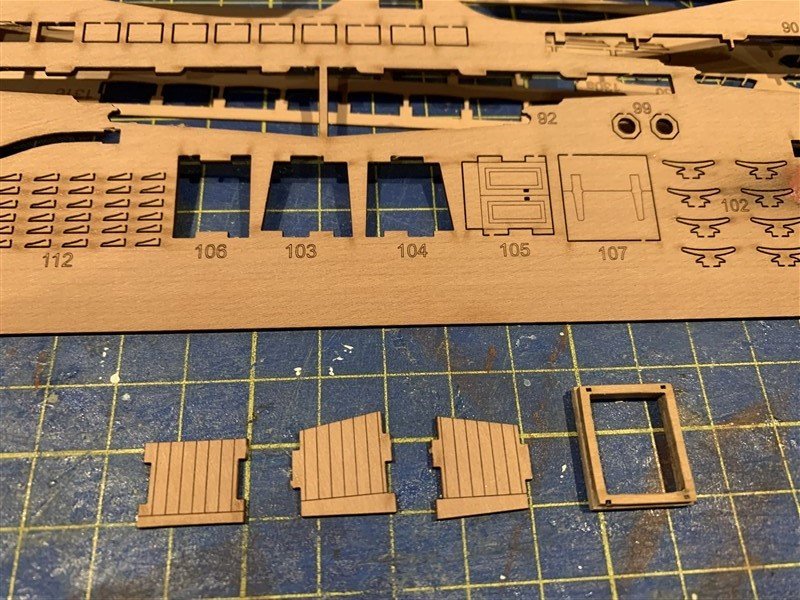
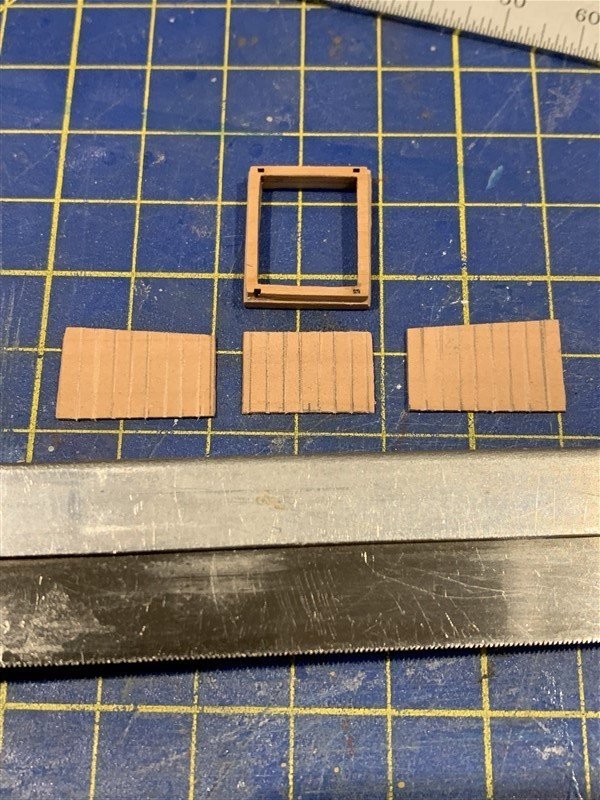
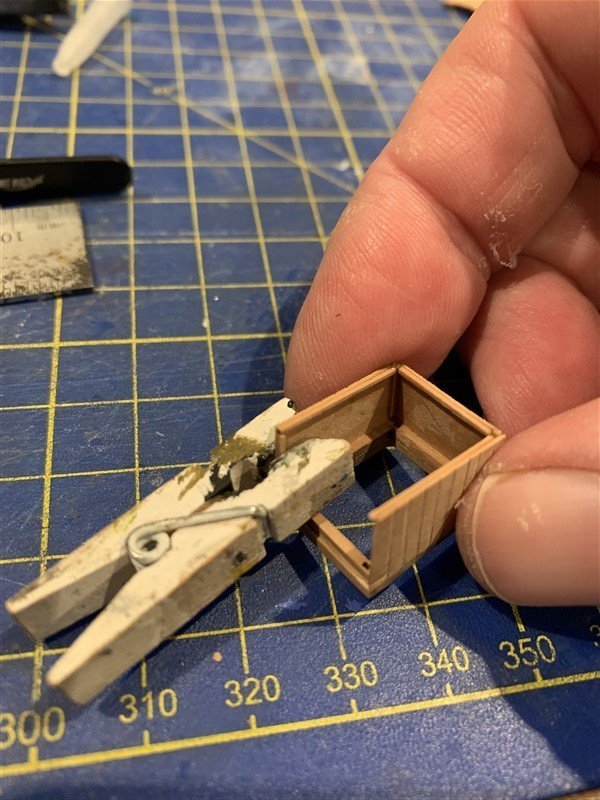
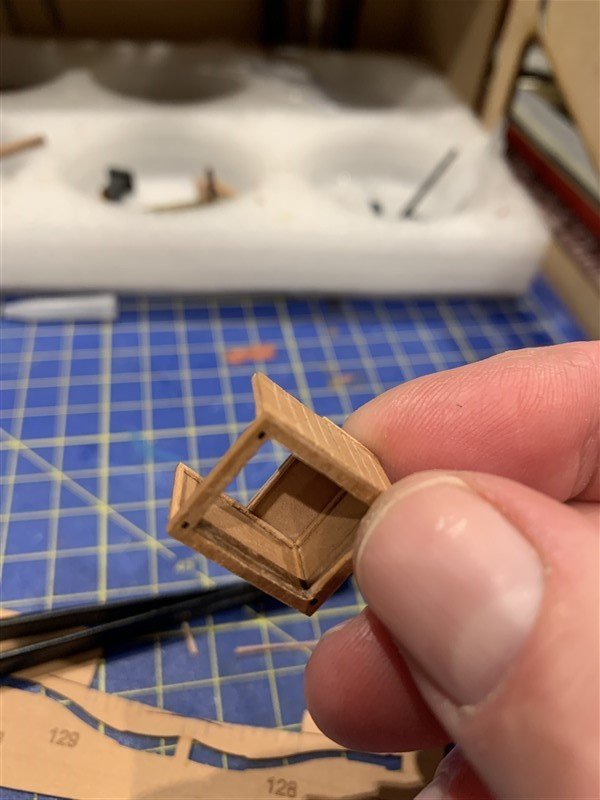
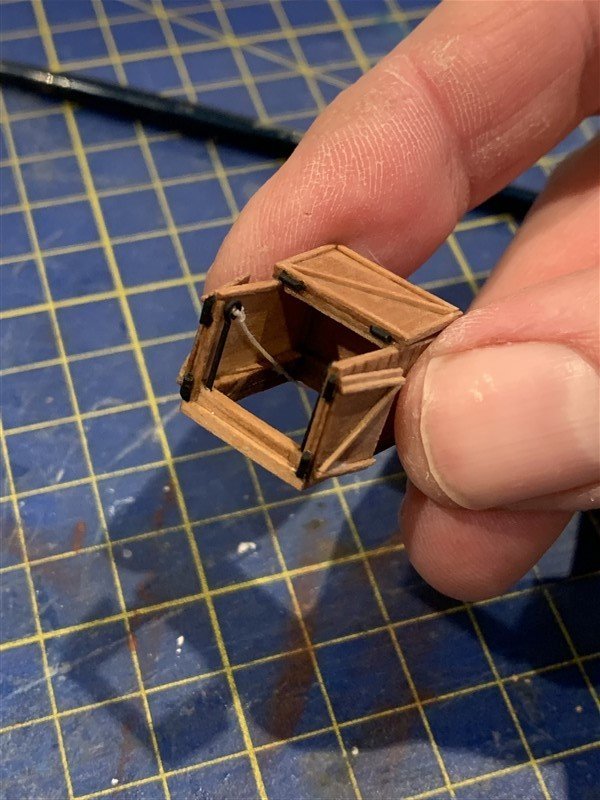
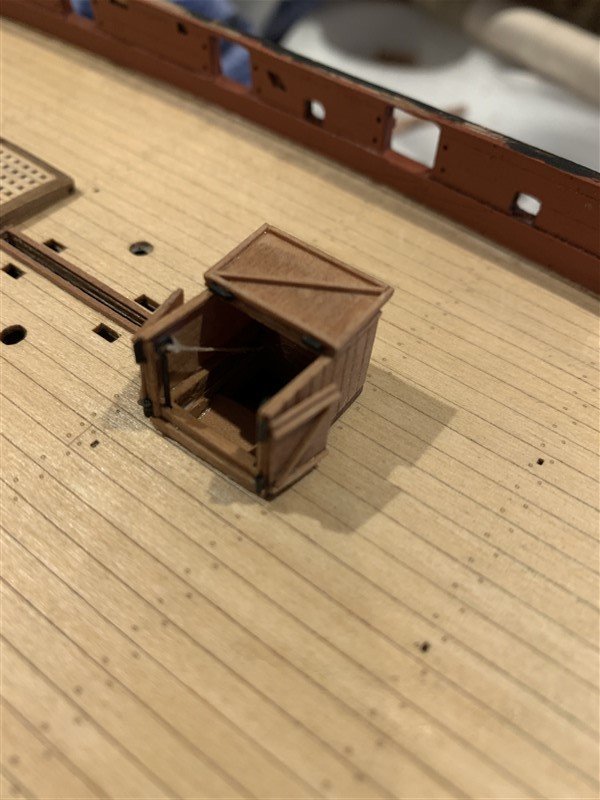
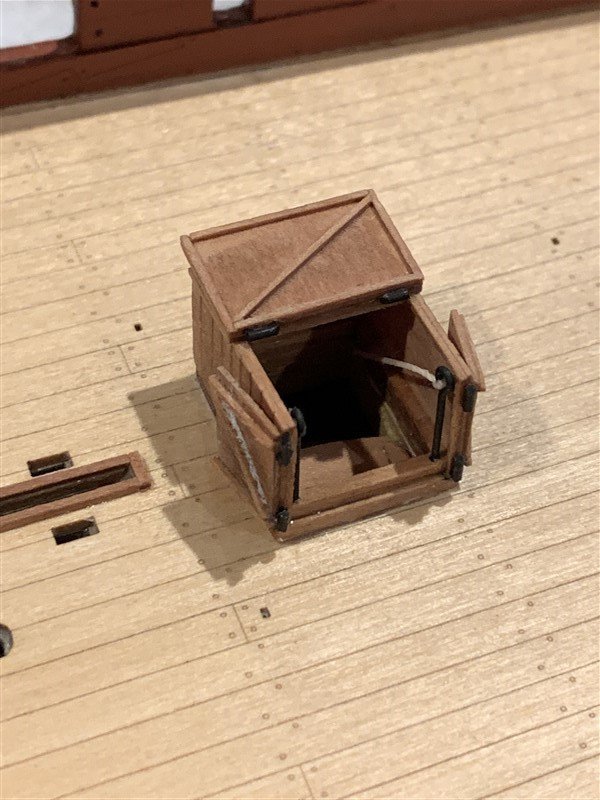
Hello all, hope your weekends are going well so far. Thank you for your kind comments @dunnock @Thukydides @Dave_E @iMustBeCrazy @DaveBaxt @Blue Ensign @GrandpaPhil and the likes everyone! No further forward with my restoration of the stern following my botched repair attempts after dropping it, so focusing my attention to other details whilst I formulate a plan. As I am following NMM drawing ZAZ6418 I am moving the companionway forward and adding a skylight for the Commanding Officer's cabin in the original kit position for the companionway. I've scratch built a new companionway access using the 0.8mm sheet from the kit as my wood and the kit parts 103-107 as my templates, but increasing the lengths of the sides to match the larger hatch. I copied the kits plank markings and cut these into the 0.8mm sheet to add some interest. Also added framing to the companionway doors and top hatch so they also had some extra interest and didn't look like what they are - offcuts! 😁 Hinges are small lengths of wire and used blacked eyelets for ladder access ropes; I'm saving parts PE02 for the bulwark ladderway ropes I will add later. The handles didn't have to be too complex as I used them as attachment points and glued them to the side so the doors had another point of contact and being very "Elf & Safety" conscious for my crew I added hand ropes. 😉 Next up I will try and scratch build a little skylight, thanks for looking in everyone and the continued interest/support.


- 207 replies
-
- 24
-
-

-
Your Indie is looking very impressive Glenn, it will be a very imposing model once finished.
- 587 replies
-
- 2
-
-
-
- Indefatigable
- Vanguard Models
- (and 1 more)
-
Spent an enjoyable break looking through your log. A really great looking boat, well done!
-
Welcome back JB!
-
Welcome to MSW Walter!
-
Welcome to MSW James!
-
At first glance they all look like stones to me Alan, even the dark one. 👍 In isolation yes you can zoom in on “imperfections”, but once embedded in a diorama, then 99% of people will let their eyes move around the scene (the 1% is of course you, I think we all do that to our own work). I think this is going to look spectacular as it comes together. 😃
-
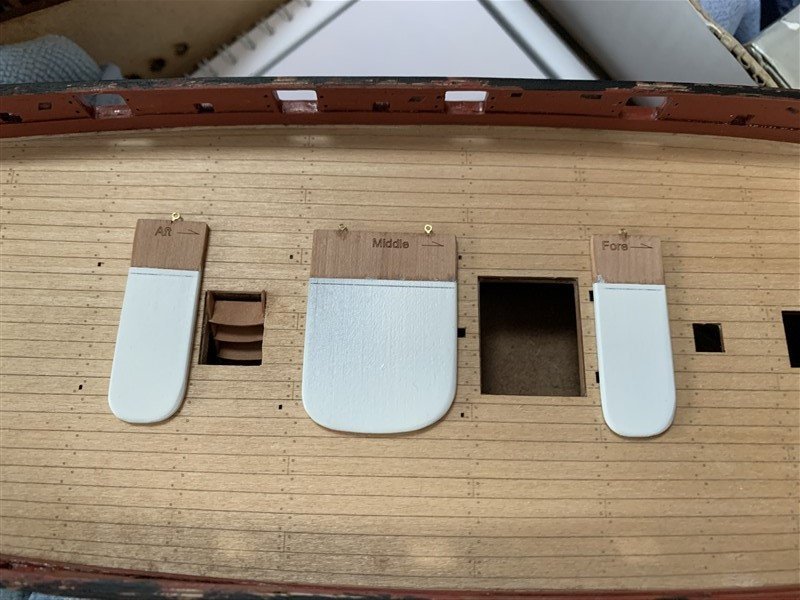
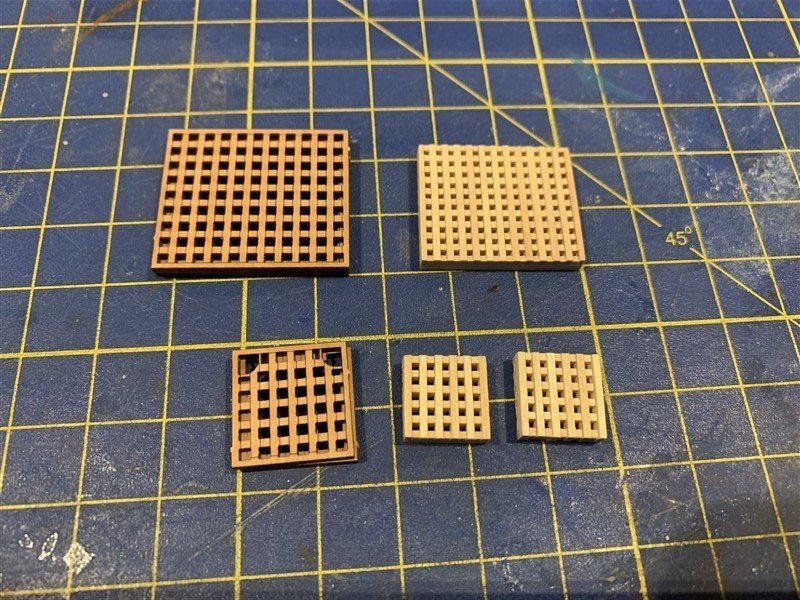
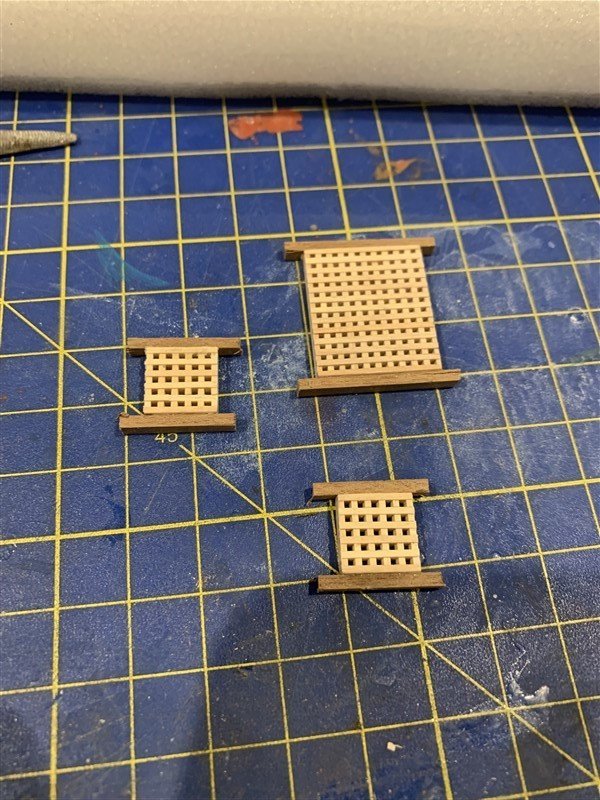
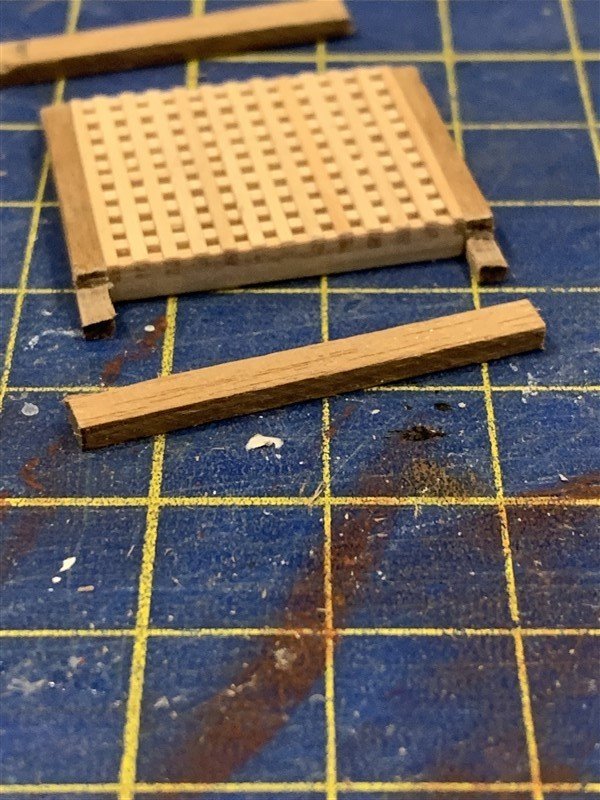
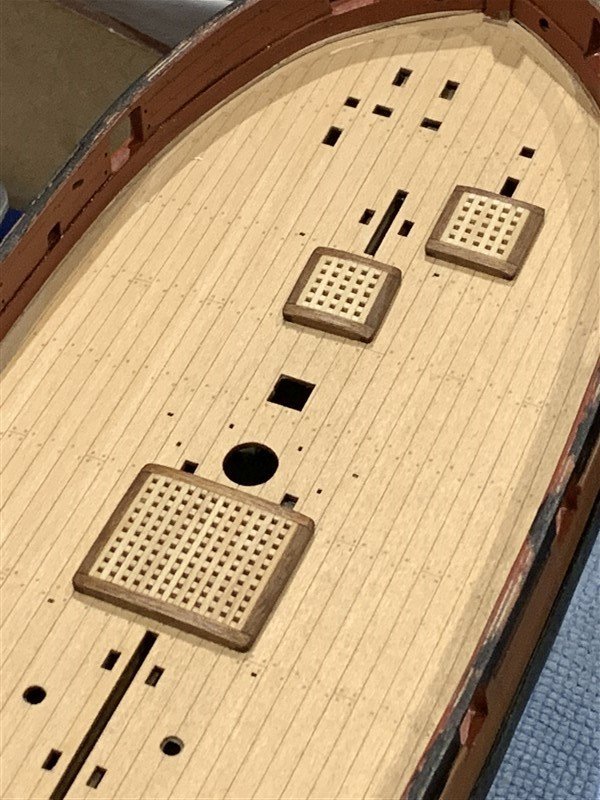
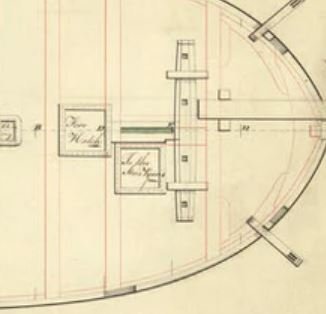
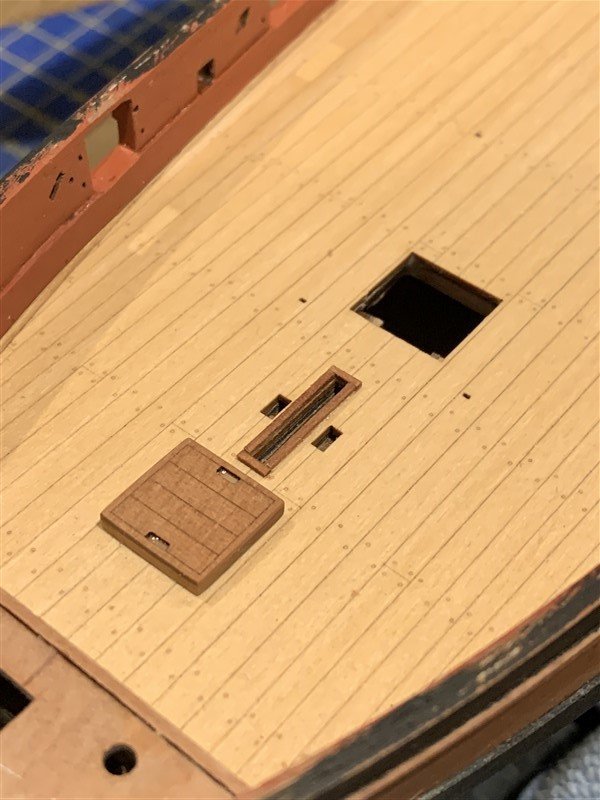
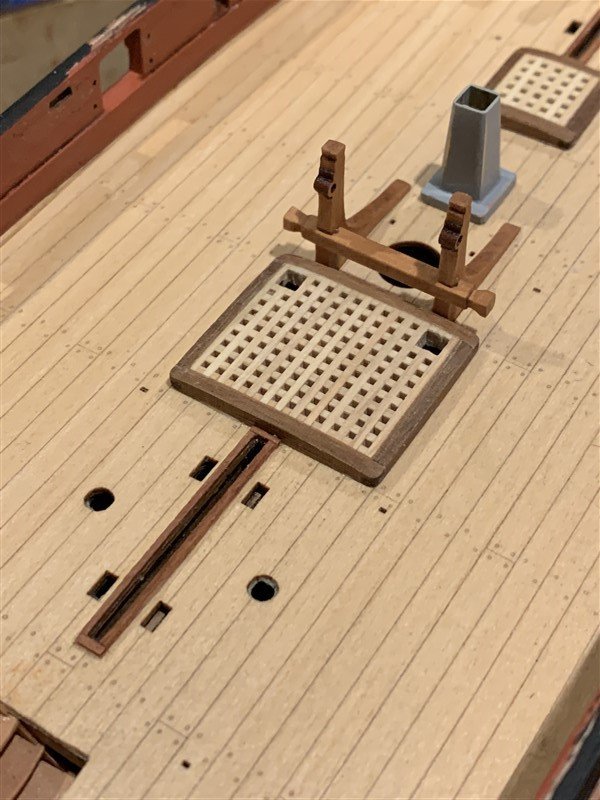
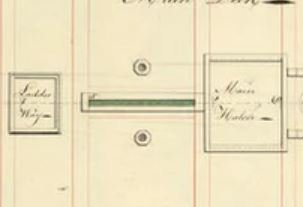
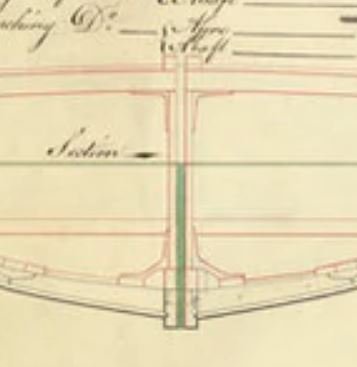
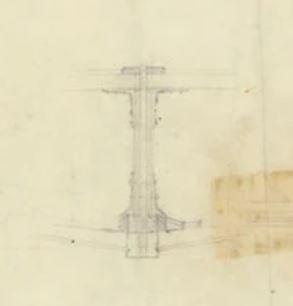
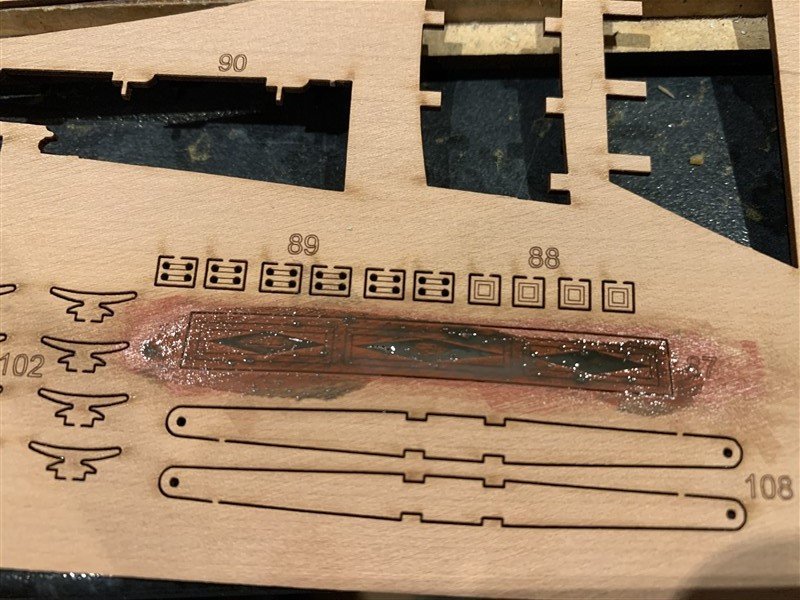
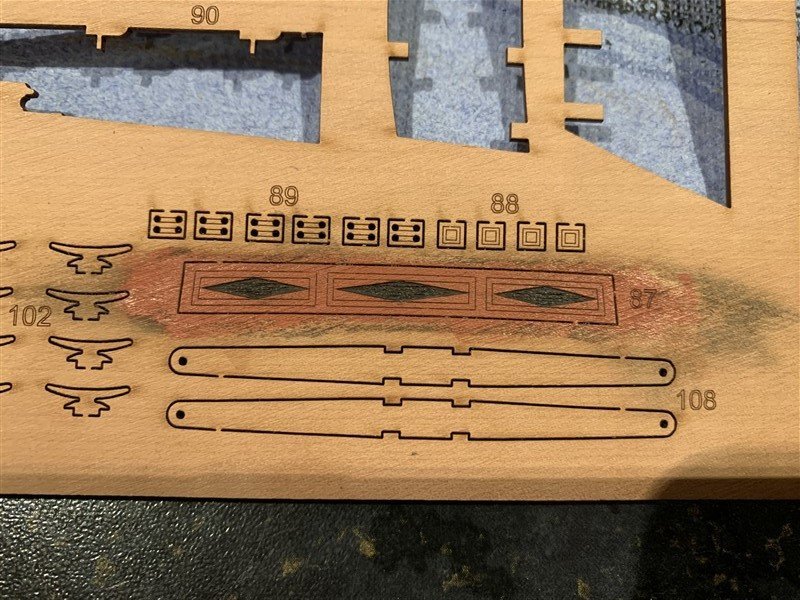
Hello, an update for progress over the last week or so. The following pictures are all of small assemblies and little projects I have been doing whilst wrangling the stern into something I'm happy with; this is still not right, but that will form an update for another day. So on with the bits and bobs I have done. After spending some time looking at the NMM plans (specifically ZAZ6418 & ZAZ6422) I have decided to go ahead and add the additional fore hatch shown in those plans. ZAZ6418 is of the series ZAZ6418-ZAZ6424 plans, but has a date that puts it contemporary with Trial actually having been built; if I'm reading the text properly it says Draft of Cutter "built" 9th September 1790, the other plans are variously described of plans of "proposed vessel with sliding keels" or plans "draught for building by contract" if anything. So on that flimsy basis only, I'm going by this plan... just flagging that up so I can be shot down for my variations! Got the sliding keels ready and also added little deck reinforcement pieces to match those shown on the plans and sections; fashioned from the leftover 0.8mm wood. Gratings, as I was making an additional one I had to go with some from Caldercraft so they all look alike, Chris's look crisper, but to compensate I did try to construct the Head ledges and side combings as best I could to match the details supplied in various posts here on MSW. The other minor detail I have gone for is to have the anchor cables enter via the main hatch. The centreline fore hatch is in front of the galley and the additional one I have added goes to the compartment that leads to the Boatswain's, Gunner's & Carpenter's store rooms. On ZAZ6422 the plan shows what look like at least five transverse bulkheads that have no doors or openings in them to allow crew/stores movement from stem to stern; perhaps a strengthening addition for the sliding keels, or additional compartments as the sliding keels were a bit "leaky" 😱 - don't know pure speculation on my part. The Mainmast and Bowsprit bitts are not fixed permanently yet. Thanks for all the likes and comments, next time I might be brave enough to share what I've done to the stern...🤫 - not all of it planned...


- 207 replies
-
- 24
-
-
Very nicely painted figure. I have bought the same and some sailors, marines and gun crew for my Trial, so thanks for sharing your techniques.
- 562 replies
-
- 2
-
-
- vanguard models
- alert
- (and 2 more)
-
I think the Japanese have a word for this “Bakkushan” , I’ll get my coat whilst looking for more shelf space 😆
-
Another really interesting design Chris, certainly better than the endless usual suspects from other manufacturers. I love those names, like a “evil” version of Snow White’s little friends! 🤣.
-
Excellent progress Simon, I like the ship’s boat, is that a Vanguard one?
-
Looking good David, hope you had a good Christmas break, see you have been busy. Thanks for the tips on the order of doing some of the rigging.
- 152 replies
-
- 1
-
-
- Vanguard Models
- Cutter
- (and 2 more)
-
Brilliant build Rick.
-
That's a very tidy paint job there Dan! More than "acceptable" I'd say.
-
This is really looking good Alan! Cats have no loyalty, give Salmon to my Dogs and they follow you around forever! 🐶
-
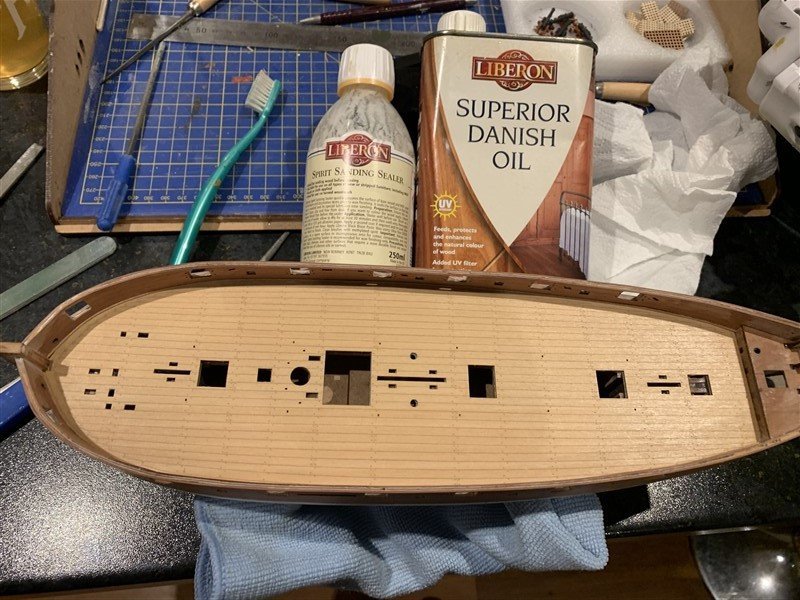
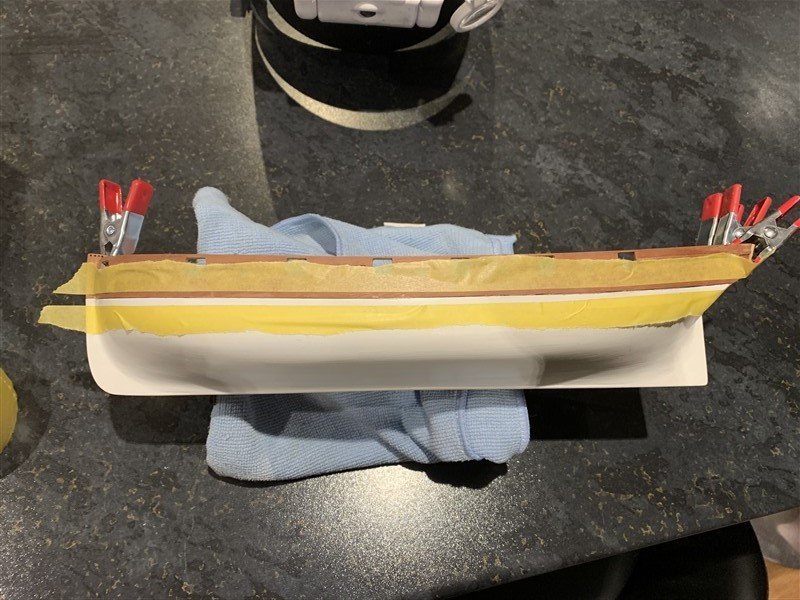
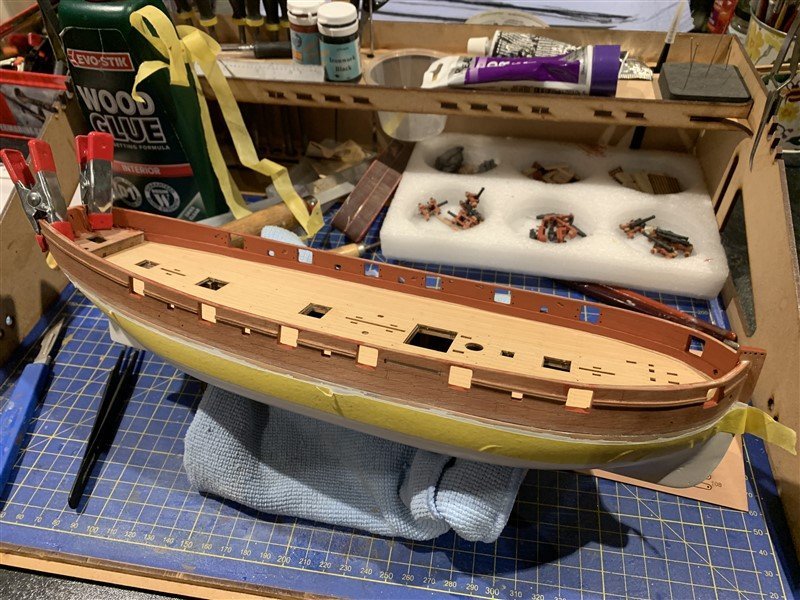
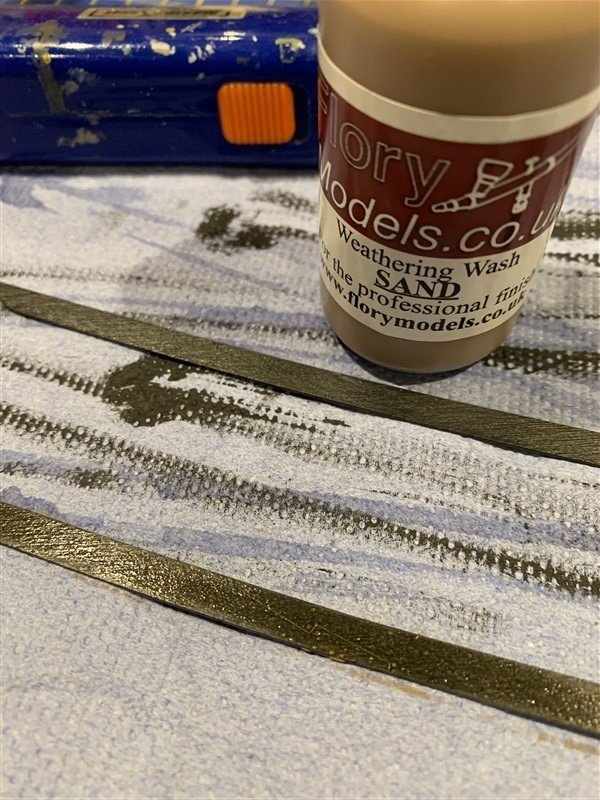
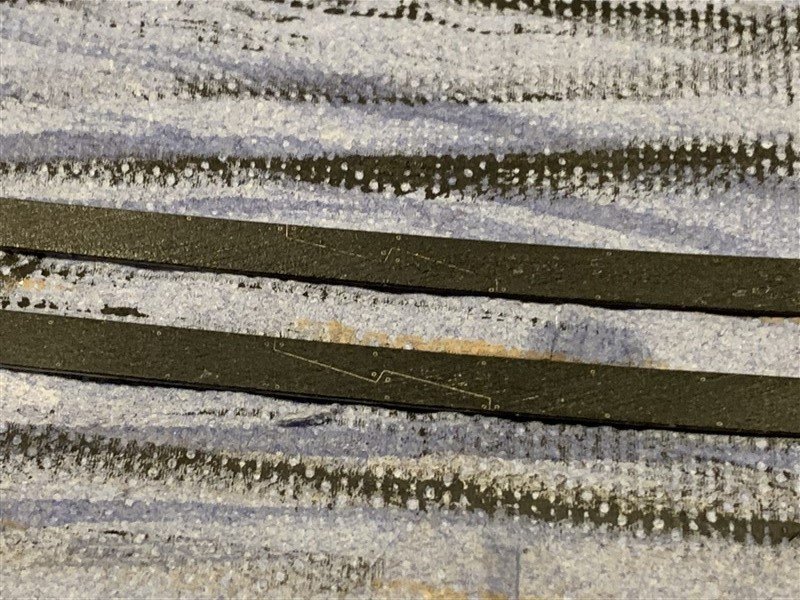
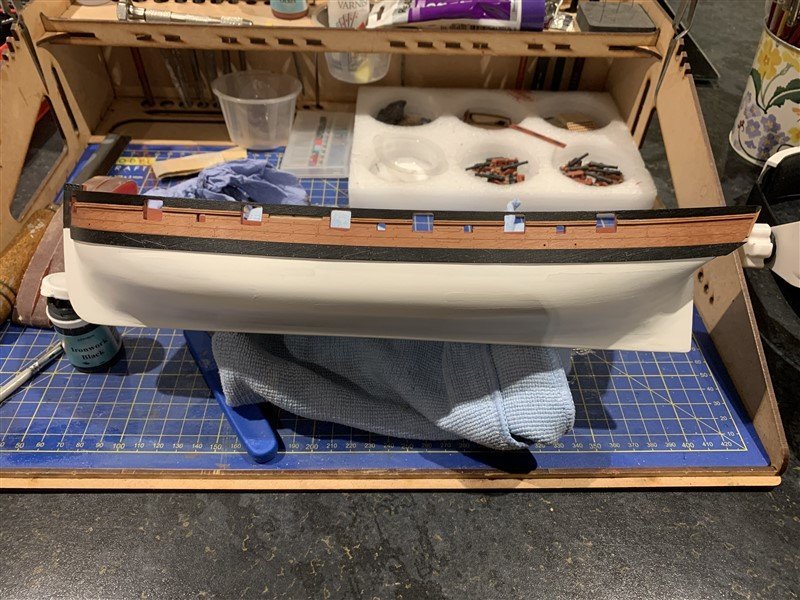
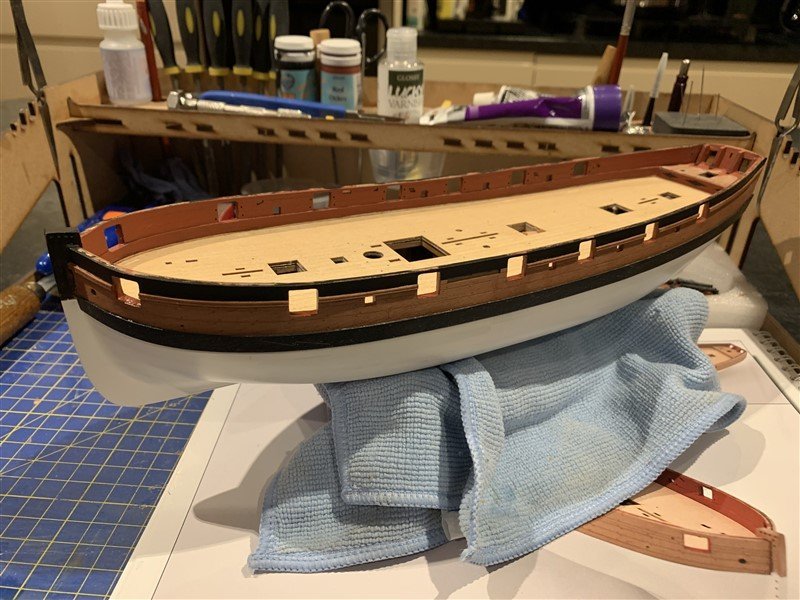
Hello All and belated Happy New Year and best wishes for 2024. The festive period did not allow for much model building, but that is not a complaint as we did enjoy meeting up with family and friends and indulging in too much good food and drink. What I have got done on the Trial has been very enjoyable. Not much building as such, just added the side mouldings and wales, but these have made the model suddenly look very different. Most of my time was spent variously painting, varnishing and washing parts and using Danish oil to seal and bring out the wood of the deck and Bulwarks. After painting, I gloss varnished all the parts of the model I wanted to add washes to and then used dark washes on the inner bulwarks and light washes on the wales, to bring out all Chris's lovely details. I did briefly toy with painting the sides in yellow ochre but in the end was so pleased with how the wood looked after a few coats of Danish oil I am glad I didn't! The addition of the black upper edge to the bulwarks in addition to the black wales looks like two "go faster" stripes! 😁 Hope everyone had a good holiday period and also got some modelling done. Thanks for looking in.


- 207 replies
-
- 27
-
-
That new helm looks really good Keith!
