
HOLIDAY DONATION DRIVE - SUPPORT MSW - DO YOUR PART TO KEEP THIS GREAT FORUM GOING! (Only 72 donations so far out of 49,000 members - Can we at least get 100? C'mon guys!)
×


AJohnson
-
Posts
2,034 -
Joined
-
Last visited
Content Type
Profiles
Forums
Gallery
Events
Everything posted by AJohnson
-
 The inside walls “Bulwarks” are red as you say. The outside is a really nice Pear wood that a Chris provides in the kit, so best left natural, just Danish oil or wipe on poly is good. No stain needed. If you wanted to paint then Pale Yellow Ochre or pale bright yellow would be historical accurate. Main thing is to take time carefully masking everything you what to preserve as bare wood. You are doing great, wish this version of Sherbourne was available when I did it as my first build.
- 177 replies
-
- 2
-

-
- Sherbourne
- vanguard models
- (and 3 more)
-
I think they look great and will be a fine addition for any of your models with cabins, a great pleasure for viewers finding partially “hidden” details when looking over a model. 😁
-
Also just seen this and love the work you have done and the lovely lines of this vessel.
-
Welcome to MSW Olli
-
Welcome to MSW.
-
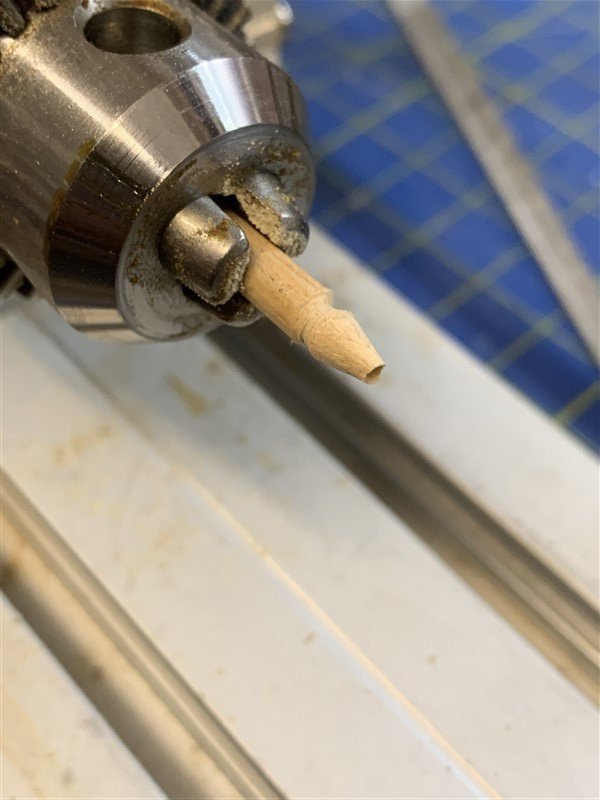
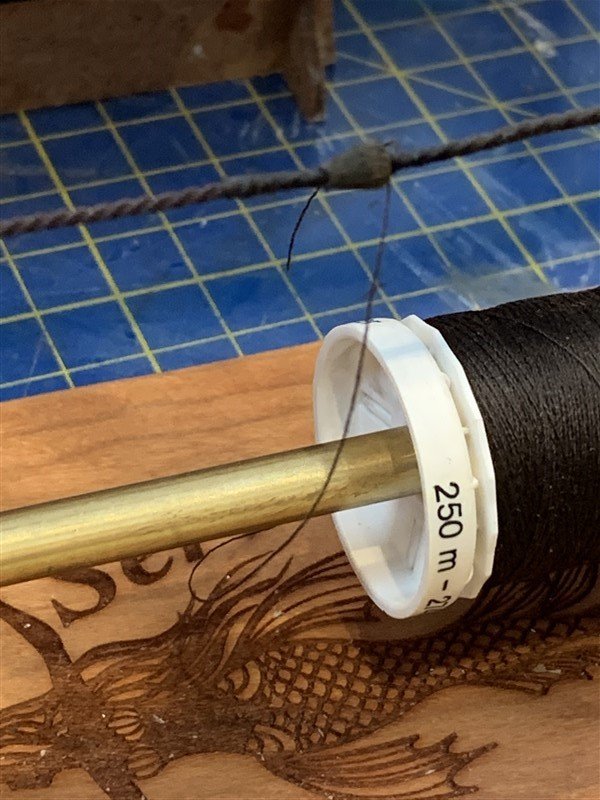
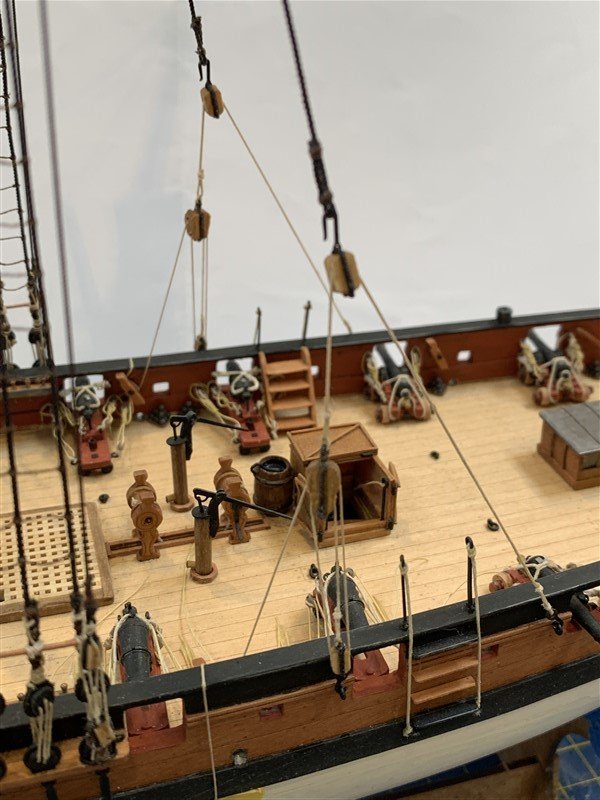
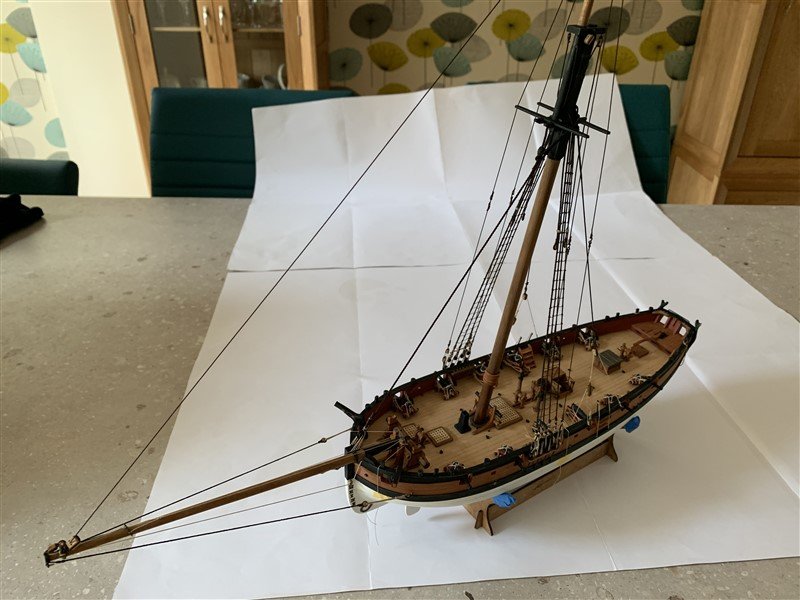
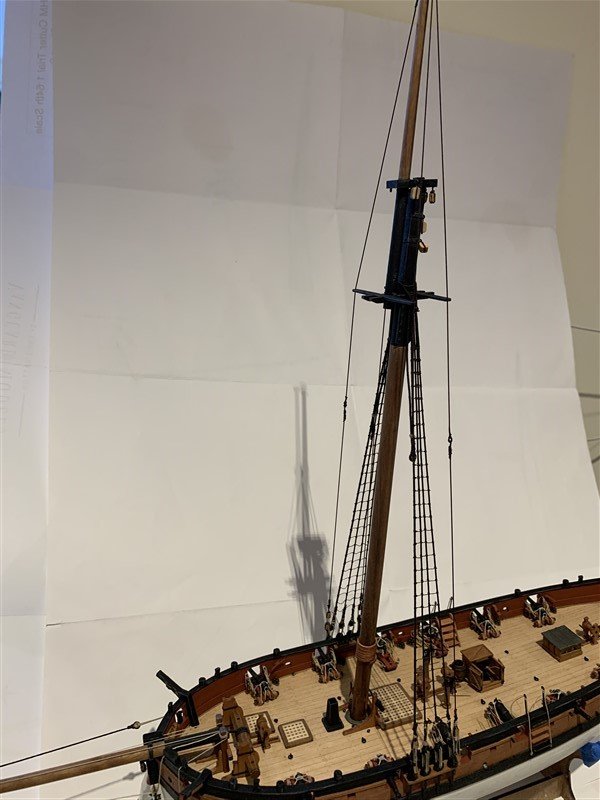
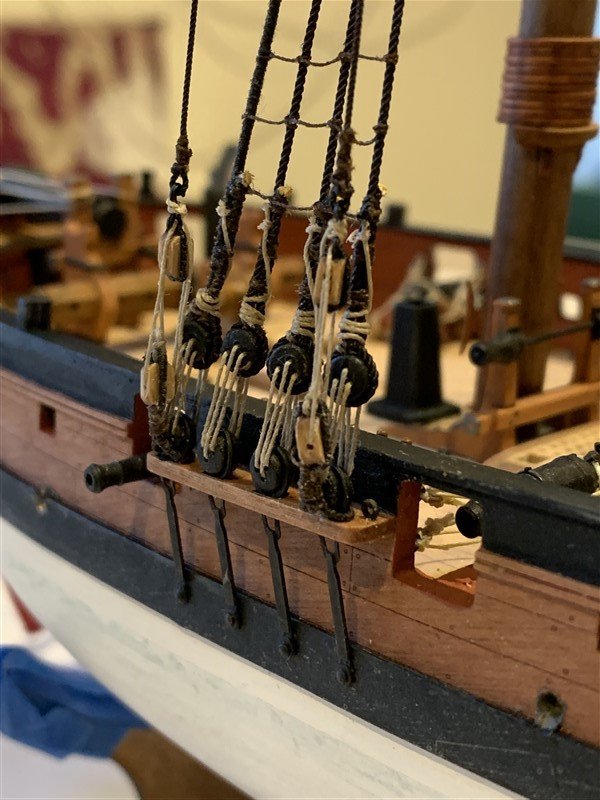
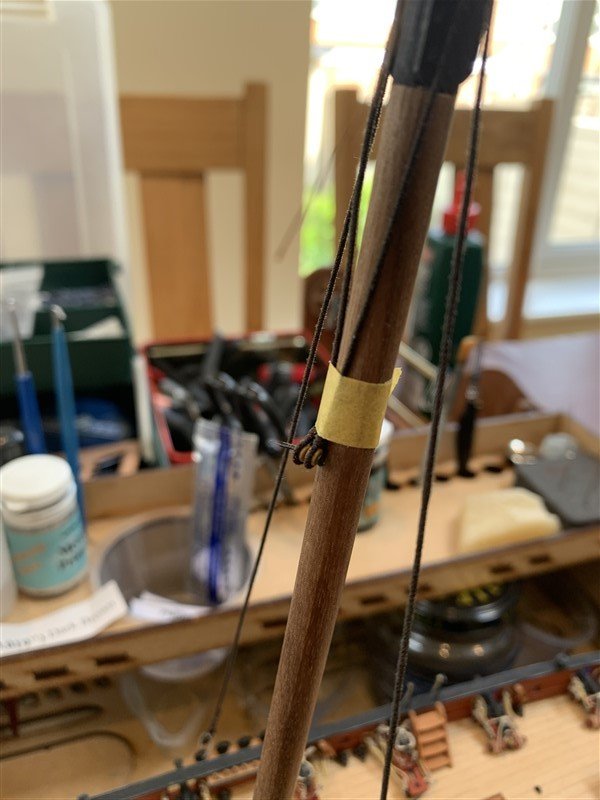
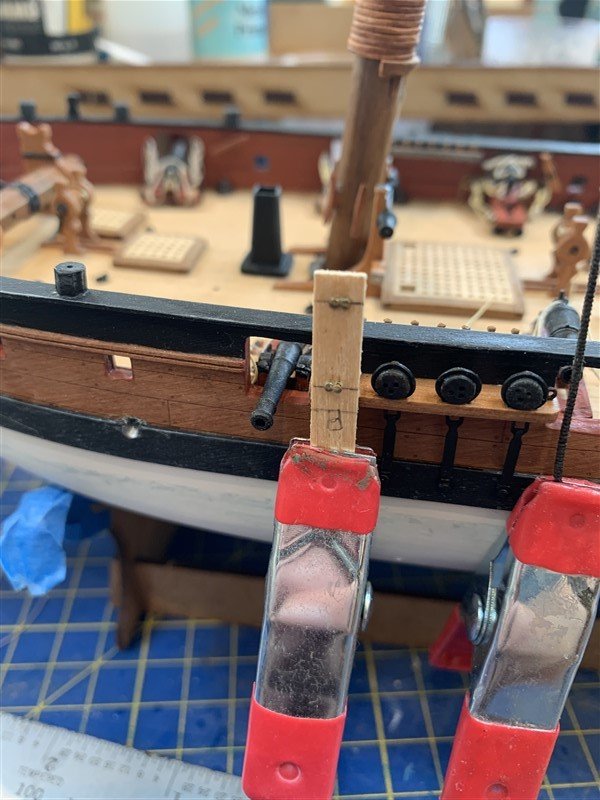
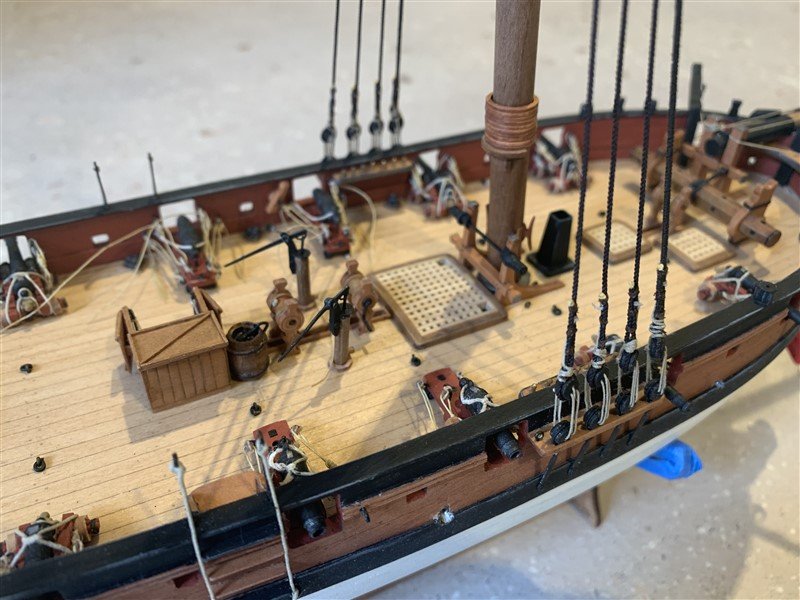
Progress this week has been slow, rigging the stays and redoing about 50% of everything I touched! Added a mouse turned from dowel on the forestay and then painted it dark brown before serving. Otherwise all fairly straight forward following Petterson and the kit instructions. Also would like to add that the ropes I got from Ropes of Scale @BenD are really nice and make my average rigging look much better! One other detail I did add was the addition of Toprope pendants. I know from Lee's they were unrove when not in use from 1800, so thought it would not be too much of a crime to add the pendants as Trial was c.1797. Tied off the thimbles at the same level as the Burton pendants, which added a certain pleasing symmetry. Next stage is to look at loosely adding yards and booms, but acutely aware that from this stage on working space on the model is going to start rapidly shrinking, so careful planning would be good, so I can maintain access and working room for as long as possible... We shall see what I forget to do as time goes on! 😆 Thanks for stopping by and the likes.
- 207 replies
-
- 18
-
-

-
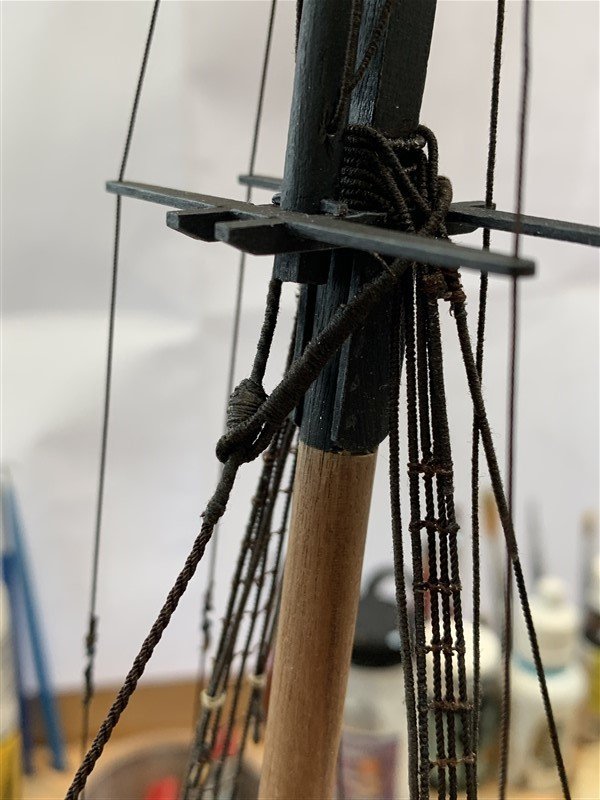
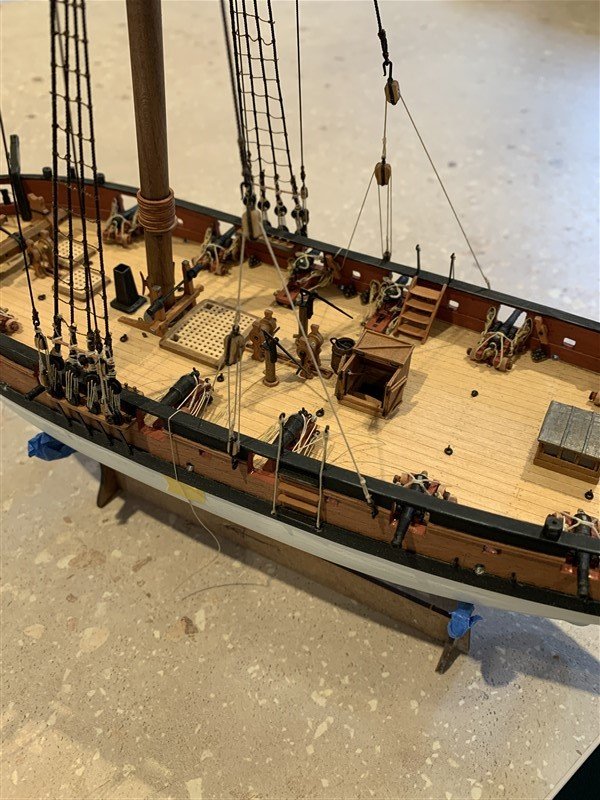
Suddenly coming together, I love Chris’s new style engraved pear bulwarks.
-
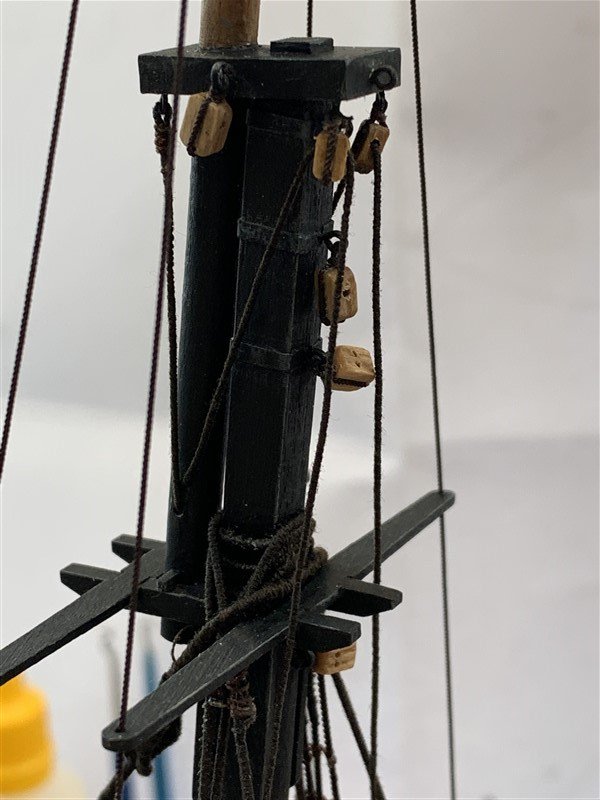
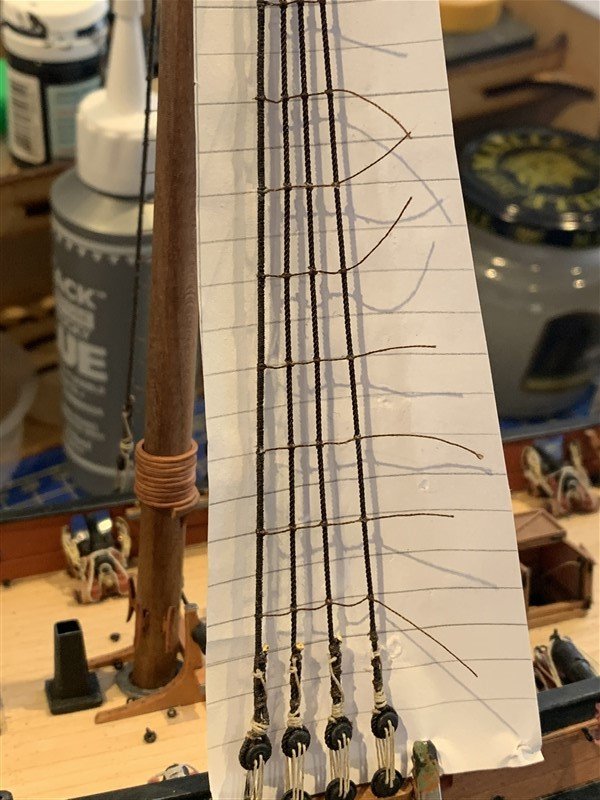
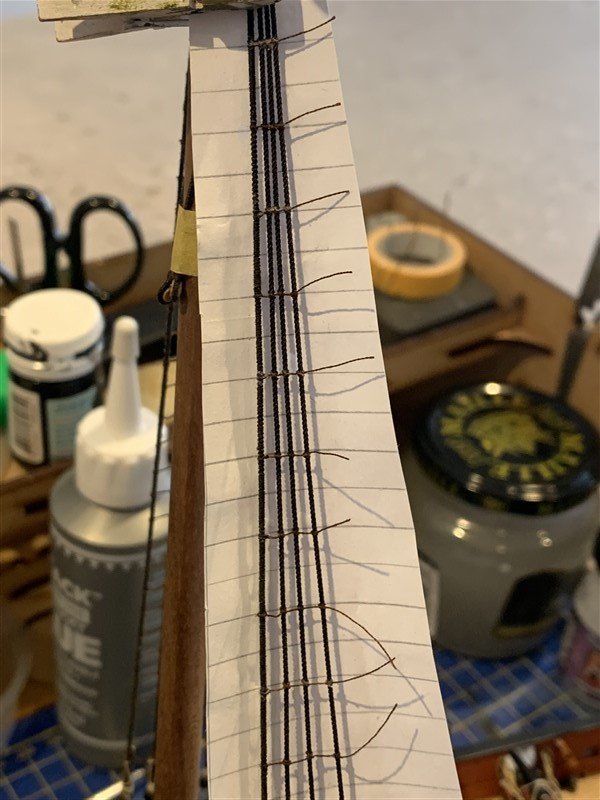
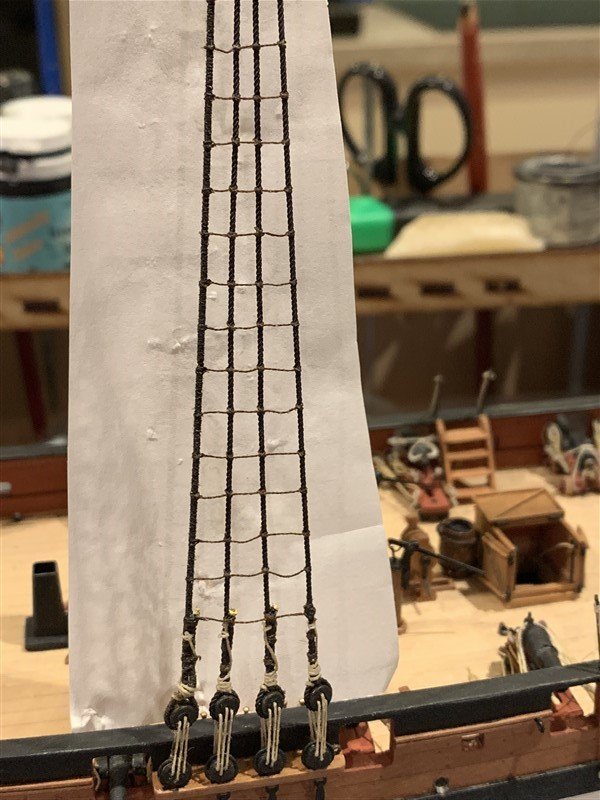
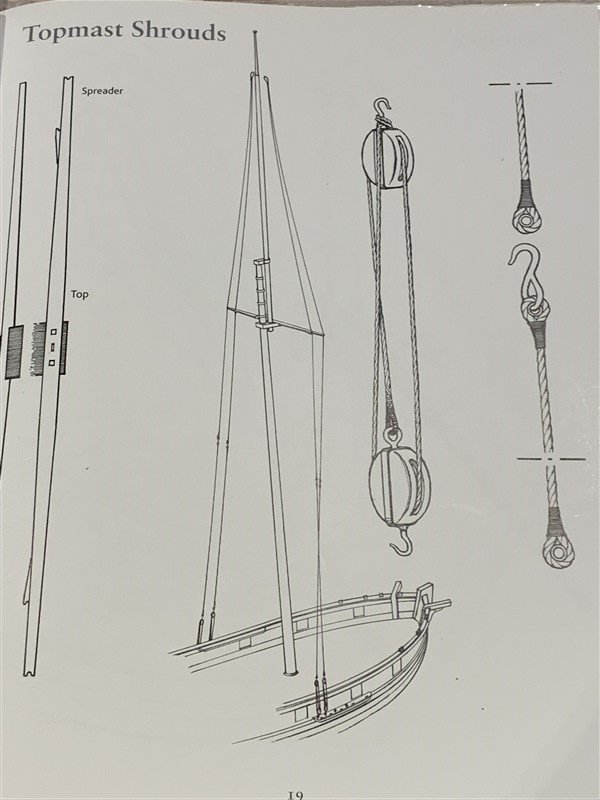
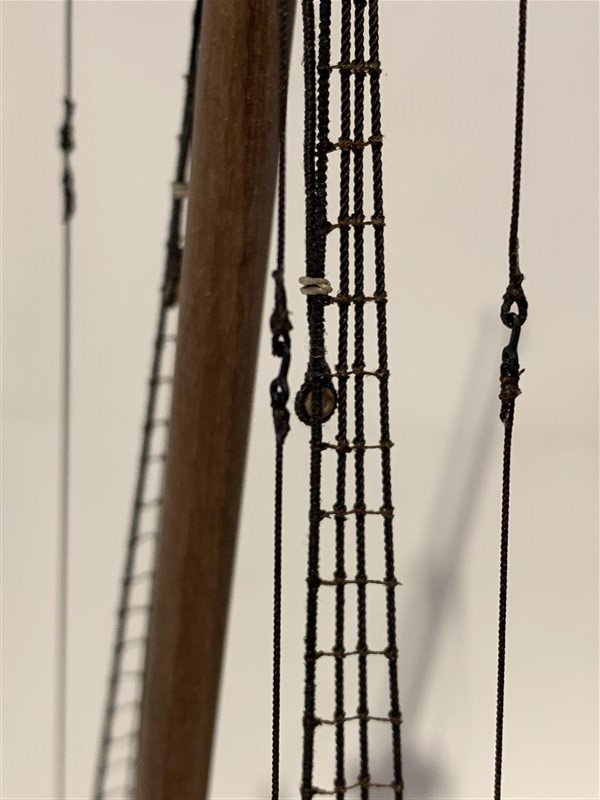
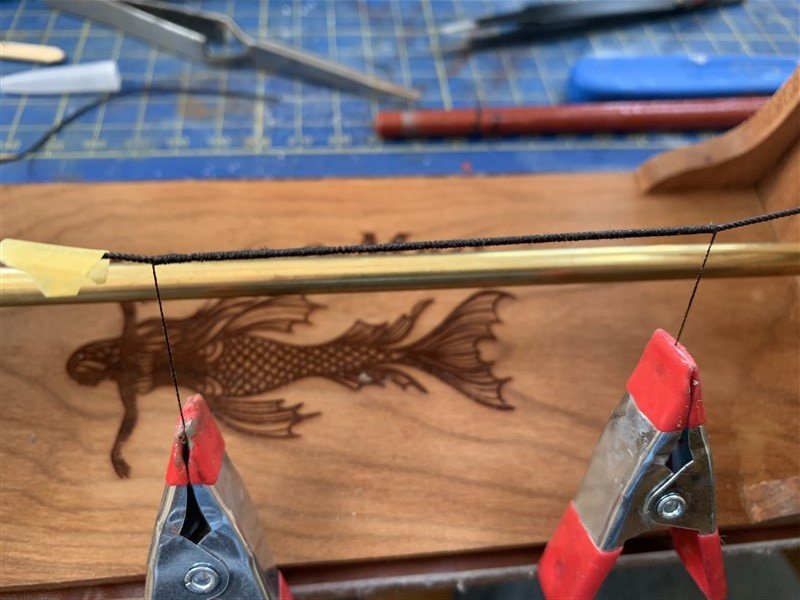
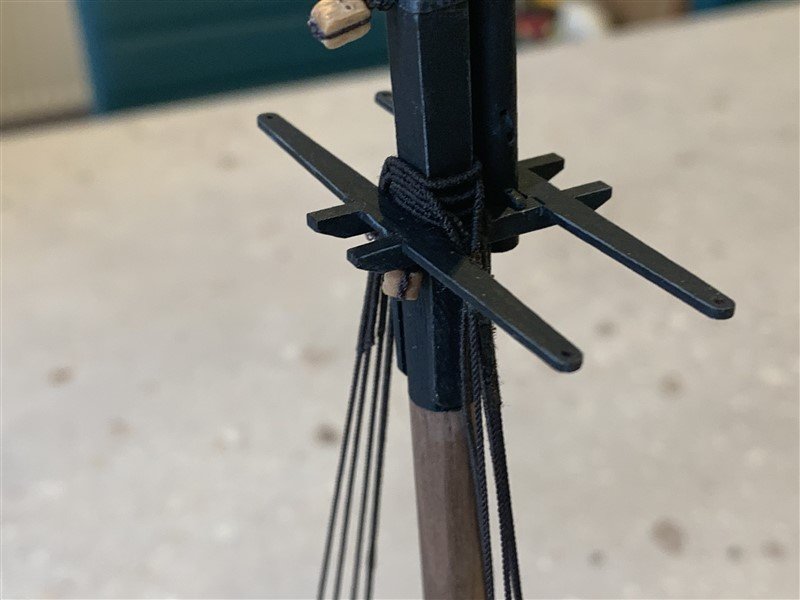
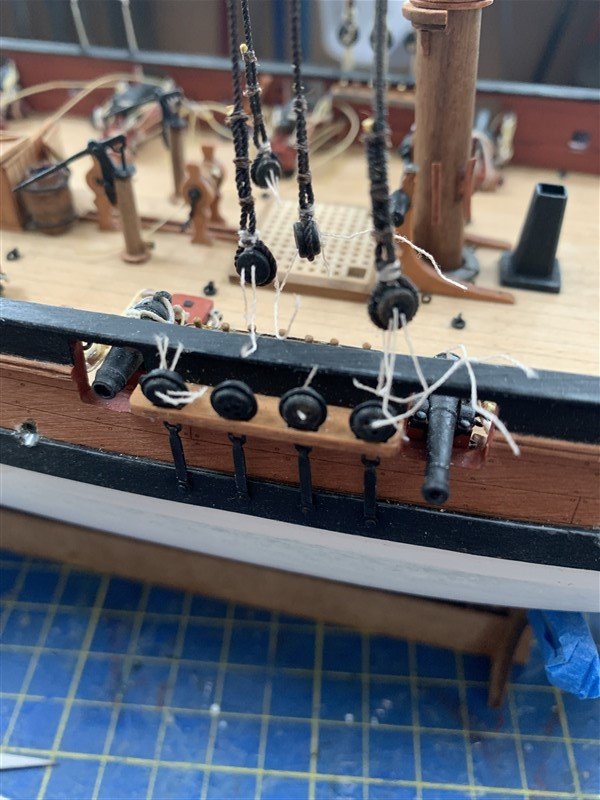
Thank you all for your likes and kind comments from the last update. Not a great deal to show for what seemed like a lot of effort at times, but I have completed the ratlines and the Topmast shrouds. The ratlines actually went okay once I got into the "groove" of doing them and slowed down to take time to tease/allow the thread to curl they way it wanted to whilst doing the clove hitches, so the free end to the next clove hitch stayed flat and didn't want to kink upwards and also taking care to use fine tweezers to help the knot tighten into the correct location to avoid moving it about later and the evitable loosening of the knot that causes. The topmast Shrouds have turned out satisfactorily, I might not go so far as to say I'm "happy" with them, but my rigging skills would not produce noticeable improvements with yet more redo's! 🙄 They are something of a compromise between the details provided by Lennarth Petterson's Cutter in "Rigging period Fore and aft craft" and the contemporary model referenced before. Most noticeable being the tying-off to the Dead eyes (as per. the contemporary model) rather than their own eyelets as shown in Petterson. I have tied off the port side, but have not done the same yet for the starboard side, as some adjustment will be needed for the deflection of the Topmast shrouds caused by having the lower yard braced to that side. I am having the yards braced as though the wind is coming onto the Port quarter, partly for looks, but also to make the model narrower for the designated shelf width! 😆 These Cutters with their large sails have a deceptively large footprint for display purposes! Next up the rigging of stays, whilst preparing for the addition of sails. Hoping for an incremental improvement over the ones I added to my Nisha 🤞:- Thanks for looking in! 😁

- 207 replies
-
- 17
-
-
Yes hope you are alright Glenn! 🤕
-
Another milestone on your Diana build, looks great. Enjoy your holiday Dave. 😎
-
Since when has that stopped us S.A.B.L.E’s (Stock Acquired Beyond Life Expectancy) 🤣 - you know you want to Dr. Per…. 👼
-
Good rescue on the paint job, and I like the details you are adding Jay with reference to Marsh; I also referred to him for my Nisha build, his books are a goldmine of useful information and drawings. Looking forward to seeing your weathering work.
- 63 replies
-
- 3
-
-

-
- Lady Eleanor
- True Vine
- (and 2 more)
-
My wife would agree! about the part in ()’s - (from another Tyke!) 🤣 Looking really smart Keith! 👏
-
Welcome to MSW!
-
Don’t worry we have all been there, well I have anyway! 🤣 Good progress. 👍
- 177 replies
-
- 1
-

-
- Sherbourne
- vanguard models
- (and 3 more)
-
That planking looks super Ronald! As for the gaps you mention, then I can’t see any that are nearly as large as the etched detail deliberately put in the bulwark sides anyway! Good job!
-
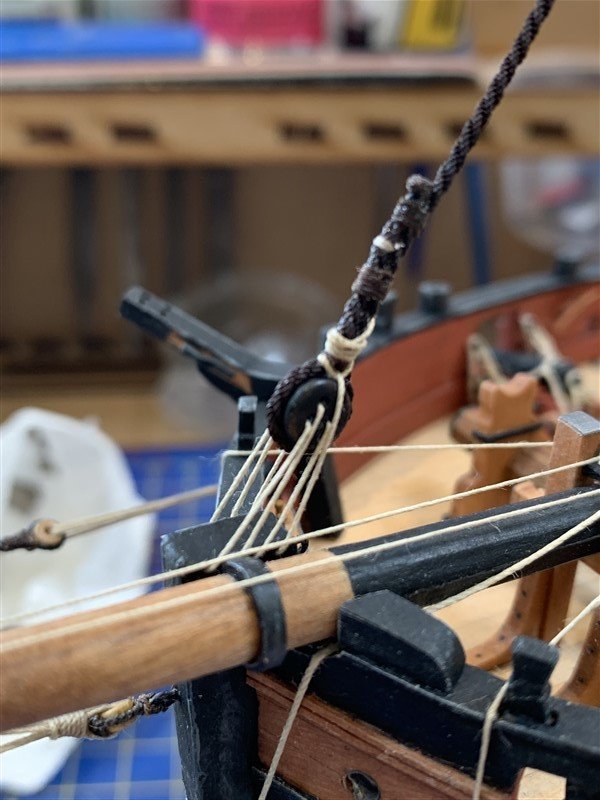
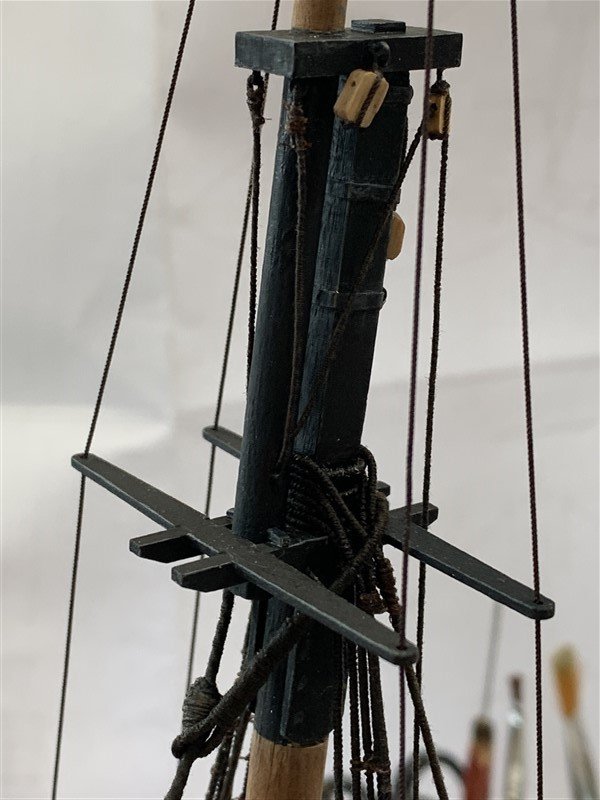
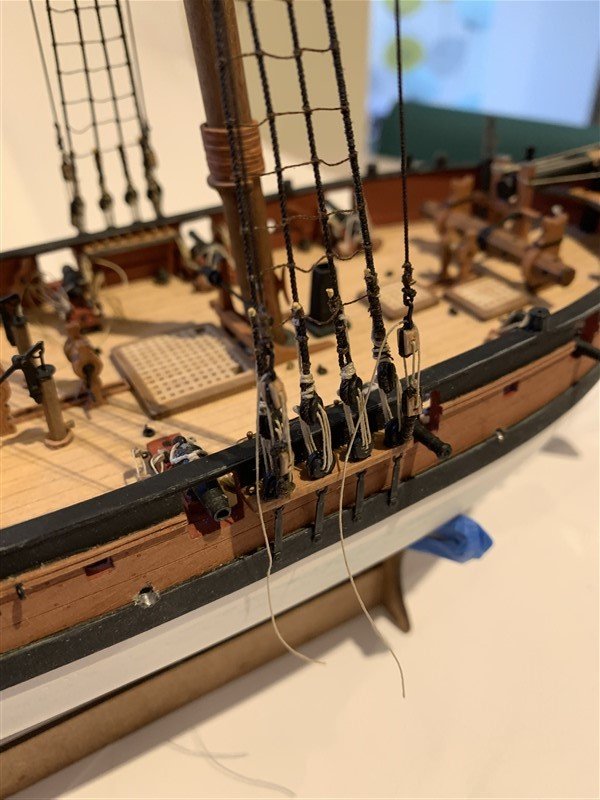
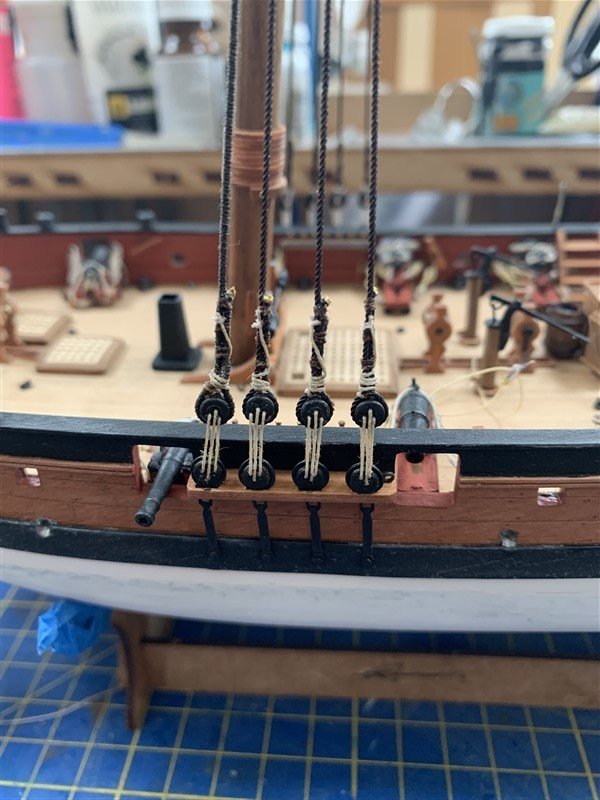
Hello shipmates! Since the last update I've been wrangling shrouds and deadeyes into some resemblance of respectability. This hasn't always gone smoothly and there has been a considerable amount of "redo's" to get them looking as best I could manage, at one stage it looked like the poor old Trial had been in a scrape with a French Privateer like her original namesake - rigging all shot to pieces! 😆 Anyway, glad I redid them, for the few extra hours, would be as nothing to the countless times I would have looked at them later and not been happy if they had been left... The fore shroud was served for the full length and the remained the top portion only, I've also added Burton Pendants as a little detail. I am starting to think about the order in which the rest of the rigging gets completed as I am adding sails. I think the foresail first, once I have the Forestay is added as this won't get in the way too much, then Jib sail, but this will be vulnerable as an extremity. Then yards, or mainsail? 🤔 Another thing that I'm pondering is how the topmast shrouds were adjusted if the lower yard was braced round for the wind? On the RMG model referenced before:- - the foremost topmast shroud is already deflected and rubbing up against the lower yard when the yard is simply perpendicular to the keel, but when braced one way or the other, this must really have deflected the topmast shrouds a lot! These must have been served and regularly replaced due to wear? Lennarth Petterson's Cutter in "Rigging period Fore and aft craft" (based on the model in the London Science Museum, shows tackles for adjusting these shrouds when the yards are braced? Perhaps this is something I could replicate? Plenty to ponder as I start on the Ratlines! 😬 Thanks for looking in and the likes. 😁


- 207 replies
-
- 17
-
-
Glad you had a great river cruise Glenn. Your Adder coming along nicely. I will also be watching how the second planking goes on that bluff bow, as this is my next build.
-
Fantastic details Mike, those little AA guns look very neat! 👏
- 37 replies
-
- 4
-
-
-
- Five Star
- Akitsu Maru
- (and 1 more)