HOLIDAY DONATION DRIVE - SUPPORT MSW - DO YOUR PART TO KEEP THIS GREAT FORUM GOING! (Only 36 donations so far out of 49,000 members - C'mon guys!)
×


AJohnson
-
Posts
2,028 -
Joined
-
Last visited
Content Type
Profiles
Forums
Gallery
Events
Everything posted by AJohnson
-
Hi John, welcome to MSW! 👋
-
 Nice little details 👍 the iron band at the end of the cat head, is that card or thin metal?
- 310 replies
-
- 1
-

-
- Diana
- Caldercraft
- (and 1 more)
-
Hey this colour scheme is getting better and better. 👍👏
-
Hey, I have one of those! I think many of us have a “scrap box” it is amazing the number of times you end up rummaging around in it for something to do a little job. I really struggle to throw things out, my Dad who I inherited the trait from always says “you never know when it might come in!” But he restores old motorbikes not model boats. Good progress so far Dave. 👍
-
Looking very nice Greg, your rate of construction puts me to shame! 😲
- 203 replies
-
- 8
-
-

-
- Roma
- Micromaster
- (and 4 more)
-
Forgot to add, the madness will return at some point, once I have knocked off a few nearly finished projects..... Until next time Card Fans, keep taking the meds! 😆

- 53 replies
-
- 11
-
-
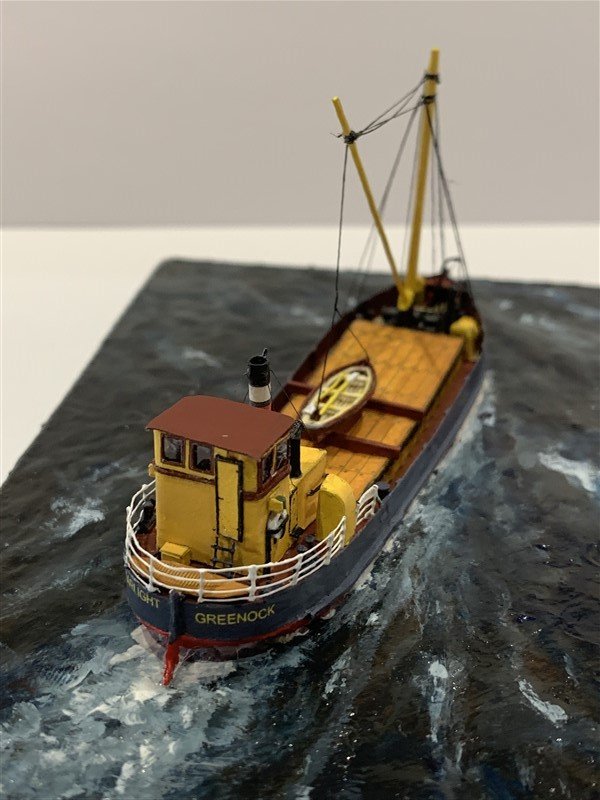
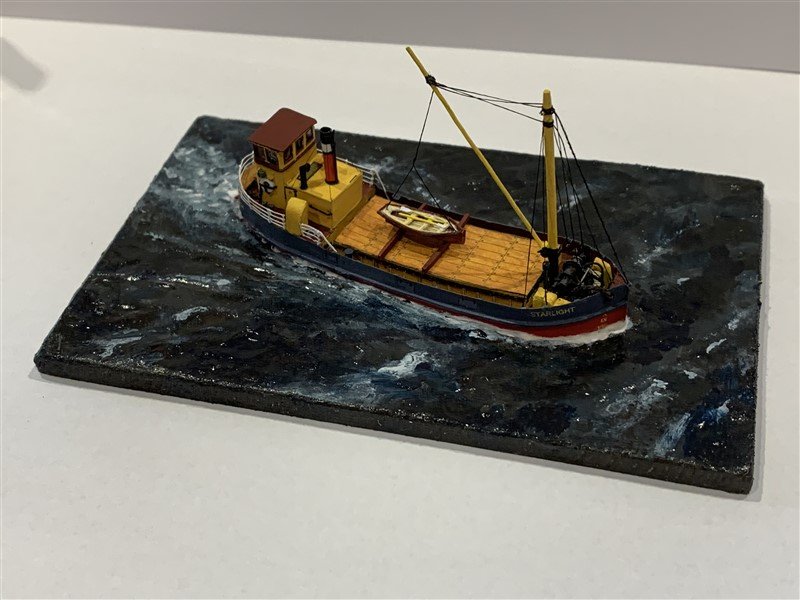
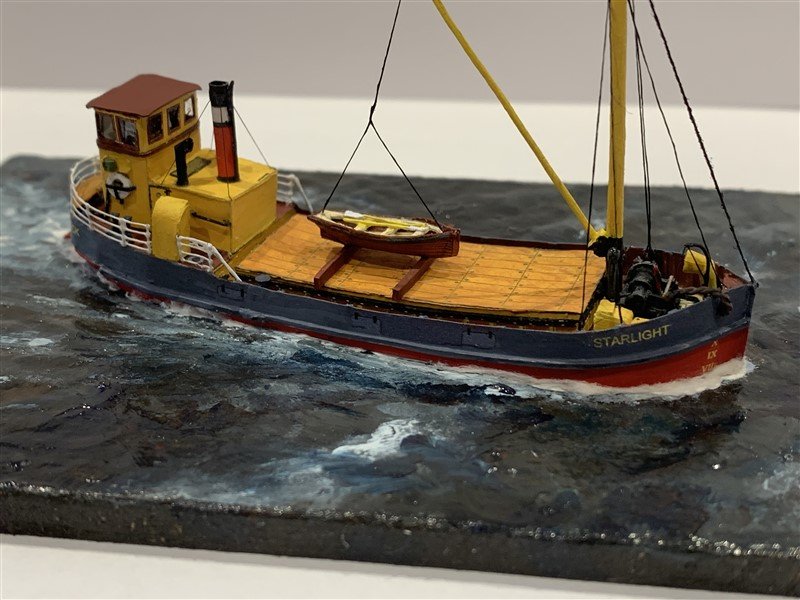
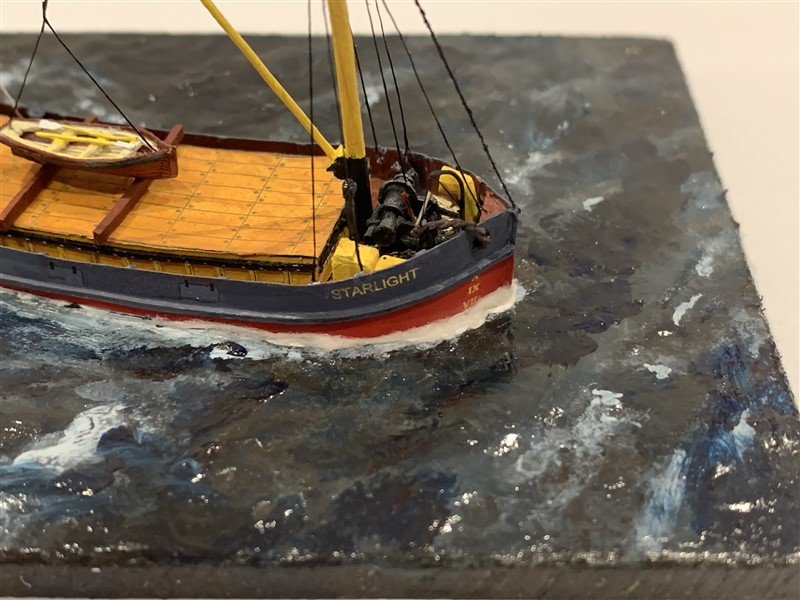
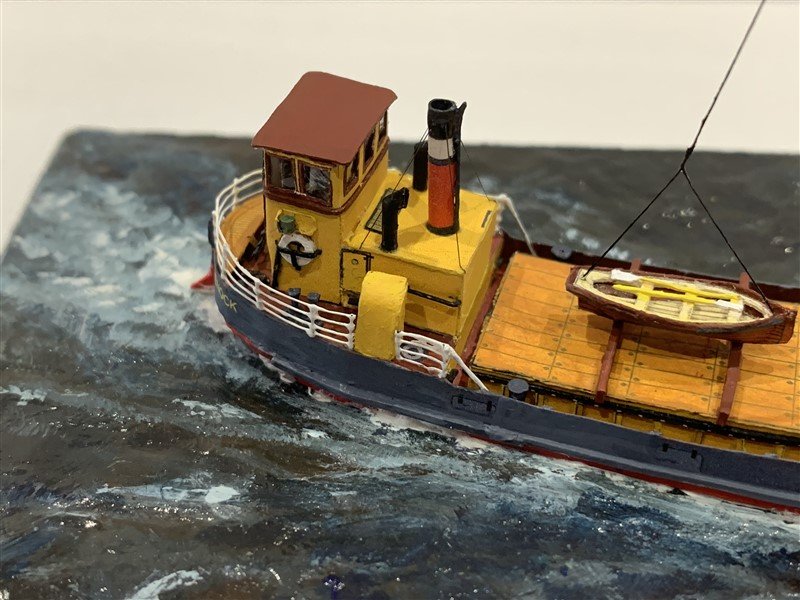
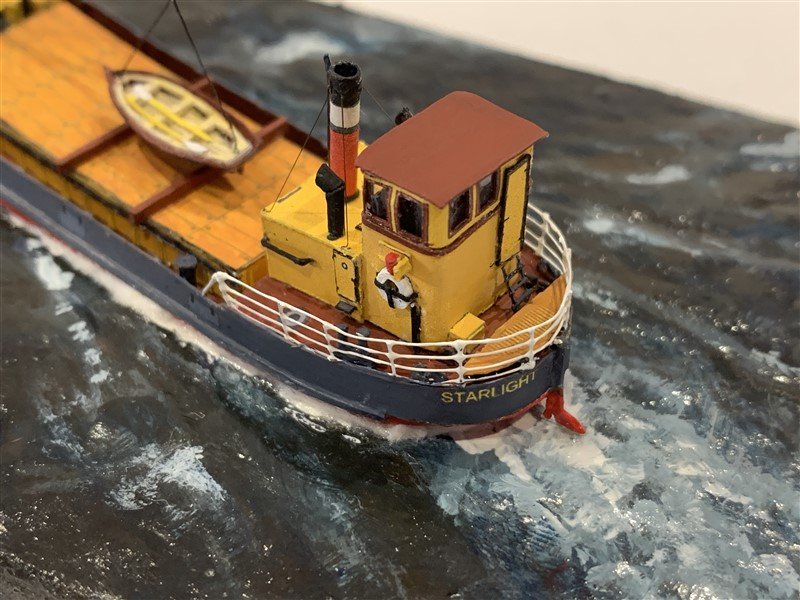
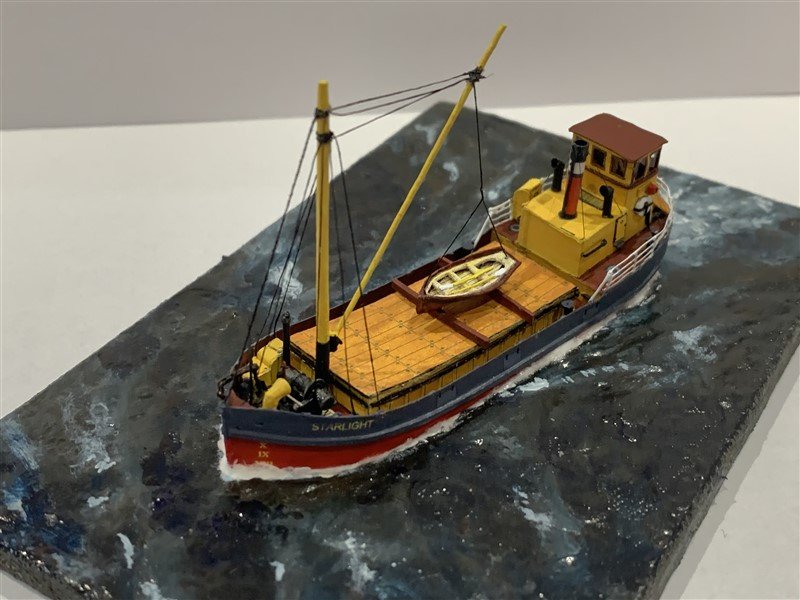
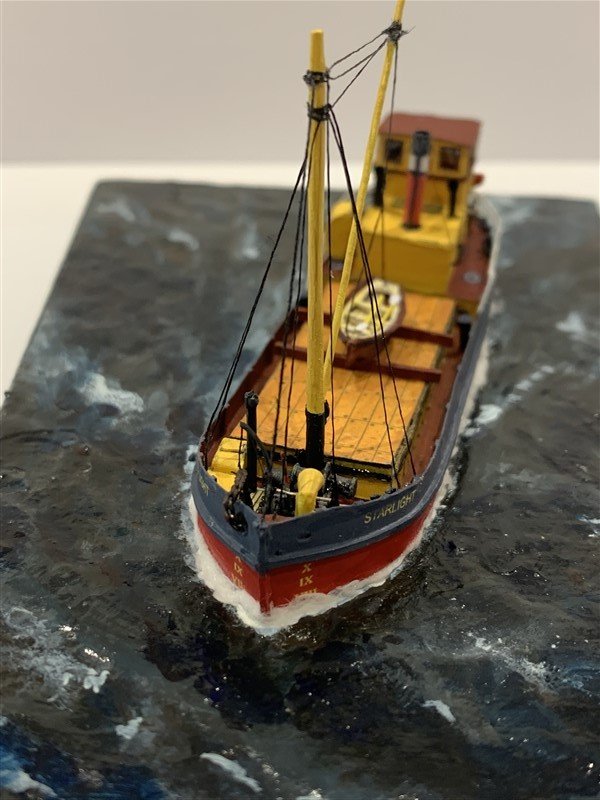
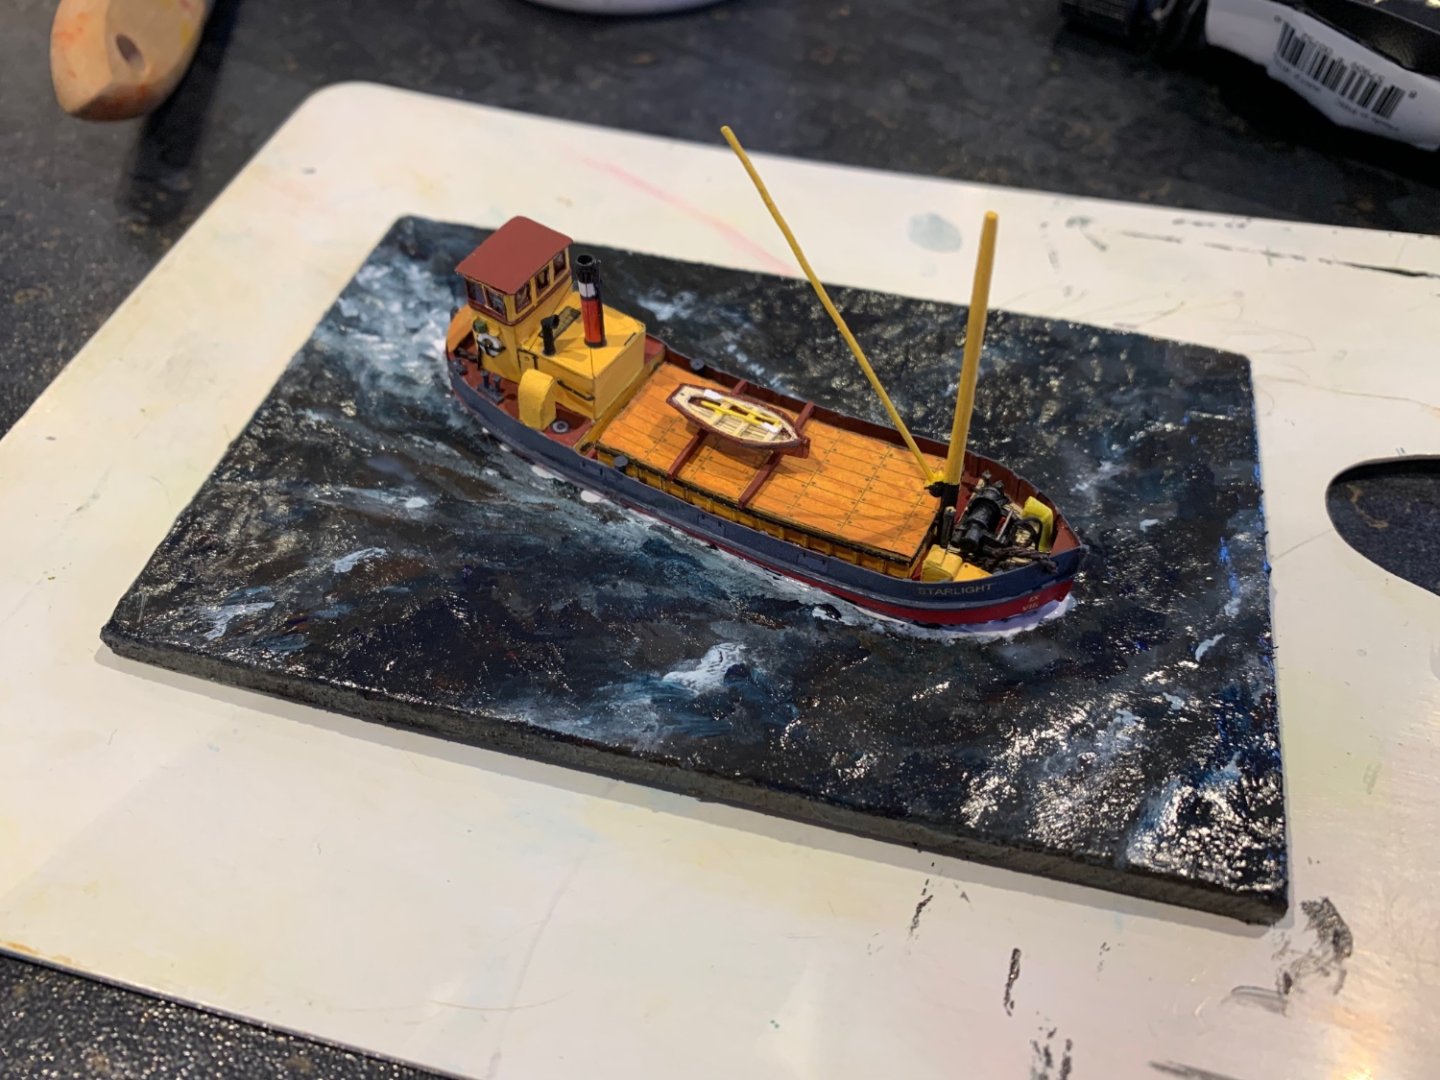
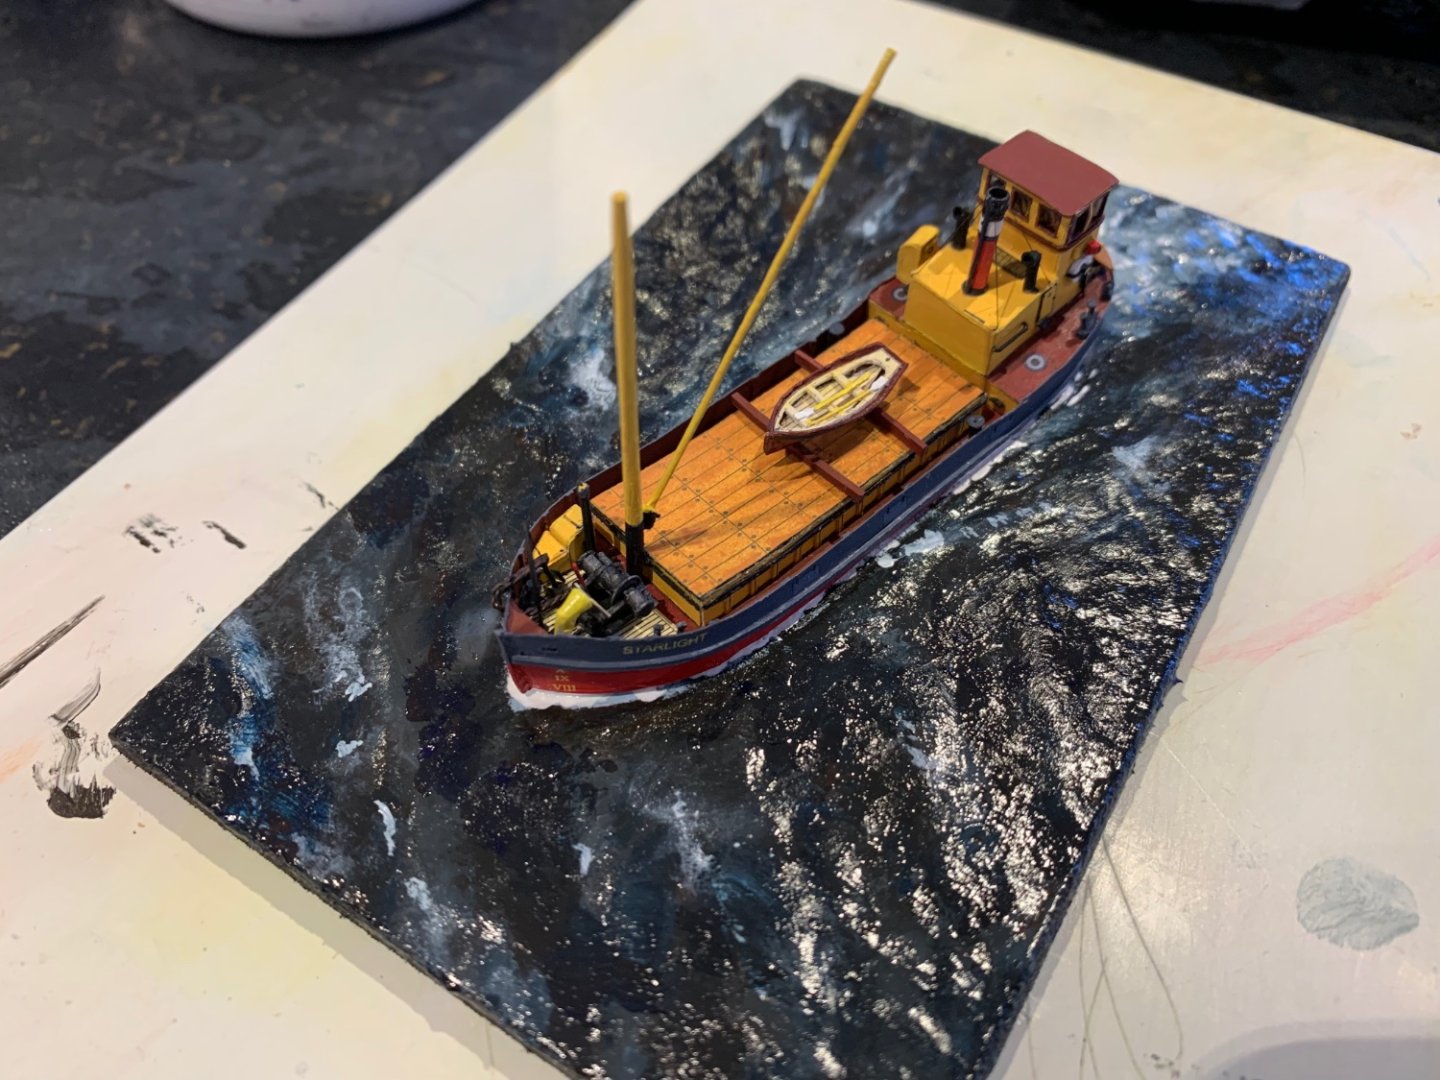
Well thank you all for following along and the kind words and encouragement, these are the last few pictures of the finished model. Final touches were the rigging, handrails, crew ladder and life rings made out of slices of plastic sprue that had a hole drilled in it. Also added a little cotton wool glued along the waterline in places to 'hide' the base of the model. Now, I really must get back to my Vanguard "Nisha" ! after this initial foray into card models 😄
- 53 replies
-
- 20
-
-

-
-
Really nice and tidy work again David, I like the use of the cardboard templates. 👍
- 310 replies
-
- 3
-
-
- Diana
- Caldercraft
- (and 1 more)
-
Very nice scene, what era is this? The lighthouse seems more recent the Brig timeless 👏
-
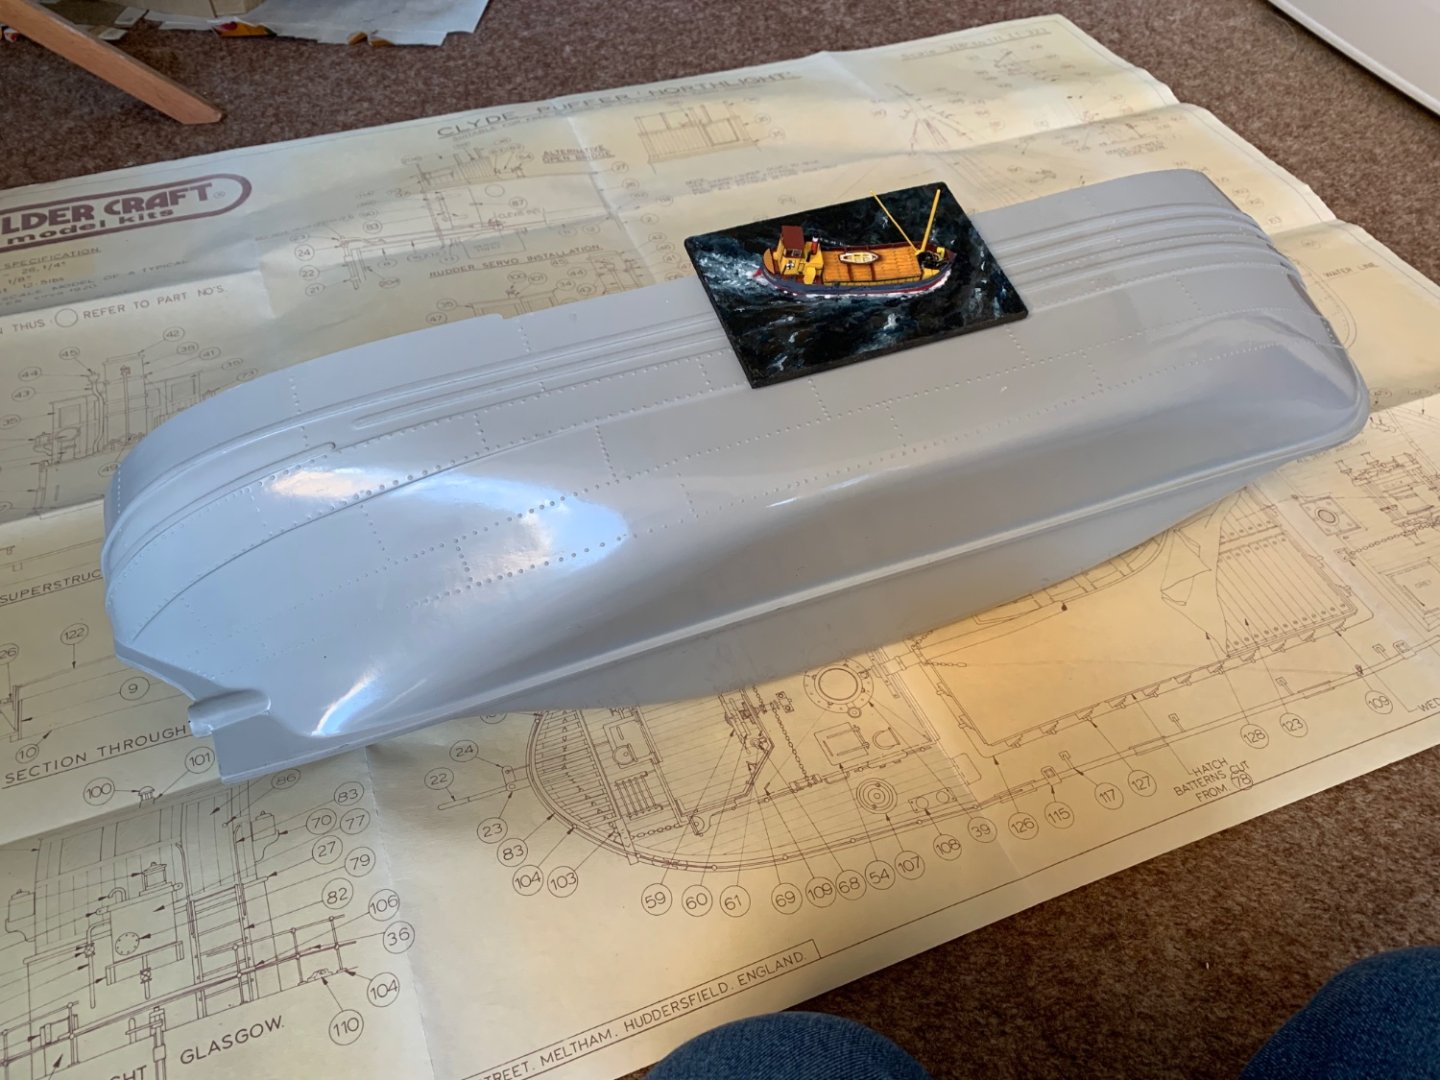
Here you go, after much rummaging in the garage and disturbed dust and spider webs we have this Ol’ girl awaiting her turn on the slipway. I have had this years, - you can tell by the state of the “Dead Sea Scrolls” that pass for plans! 🤣 I this bought from an old chap who said he would not get around to building it (I’m in danger of following that path myself if not careful!) Interesting to compare a 1/32 to 1/250 scale Puffer.
-
Ah that is good news, I have had my old Caldercraft “Northlight” Puffer years and just chickened out of doing it! If we were each other’s “Wingman” we might just build them! 🤣 A dual build if you like. You have given me an idea - hold my beer….
-
Agreed they look the business, she is starting to get her teeth! 👏
- 203 replies
-
- 8
-
-
- Roma
- Micromaster
- (and 4 more)
-
Meticulous work Slog, I really admire the patience and perseverance to do the detail that probably won’t be seen, but WE know you did it! 👏
- 13 replies
-
- 4
-
-
-
- Dom Bumagi
- Admiral Nakhimov
- (and 1 more)
-
Looking very good Sam, I have this kit in my stash, so following your progress with interest. 👍
-
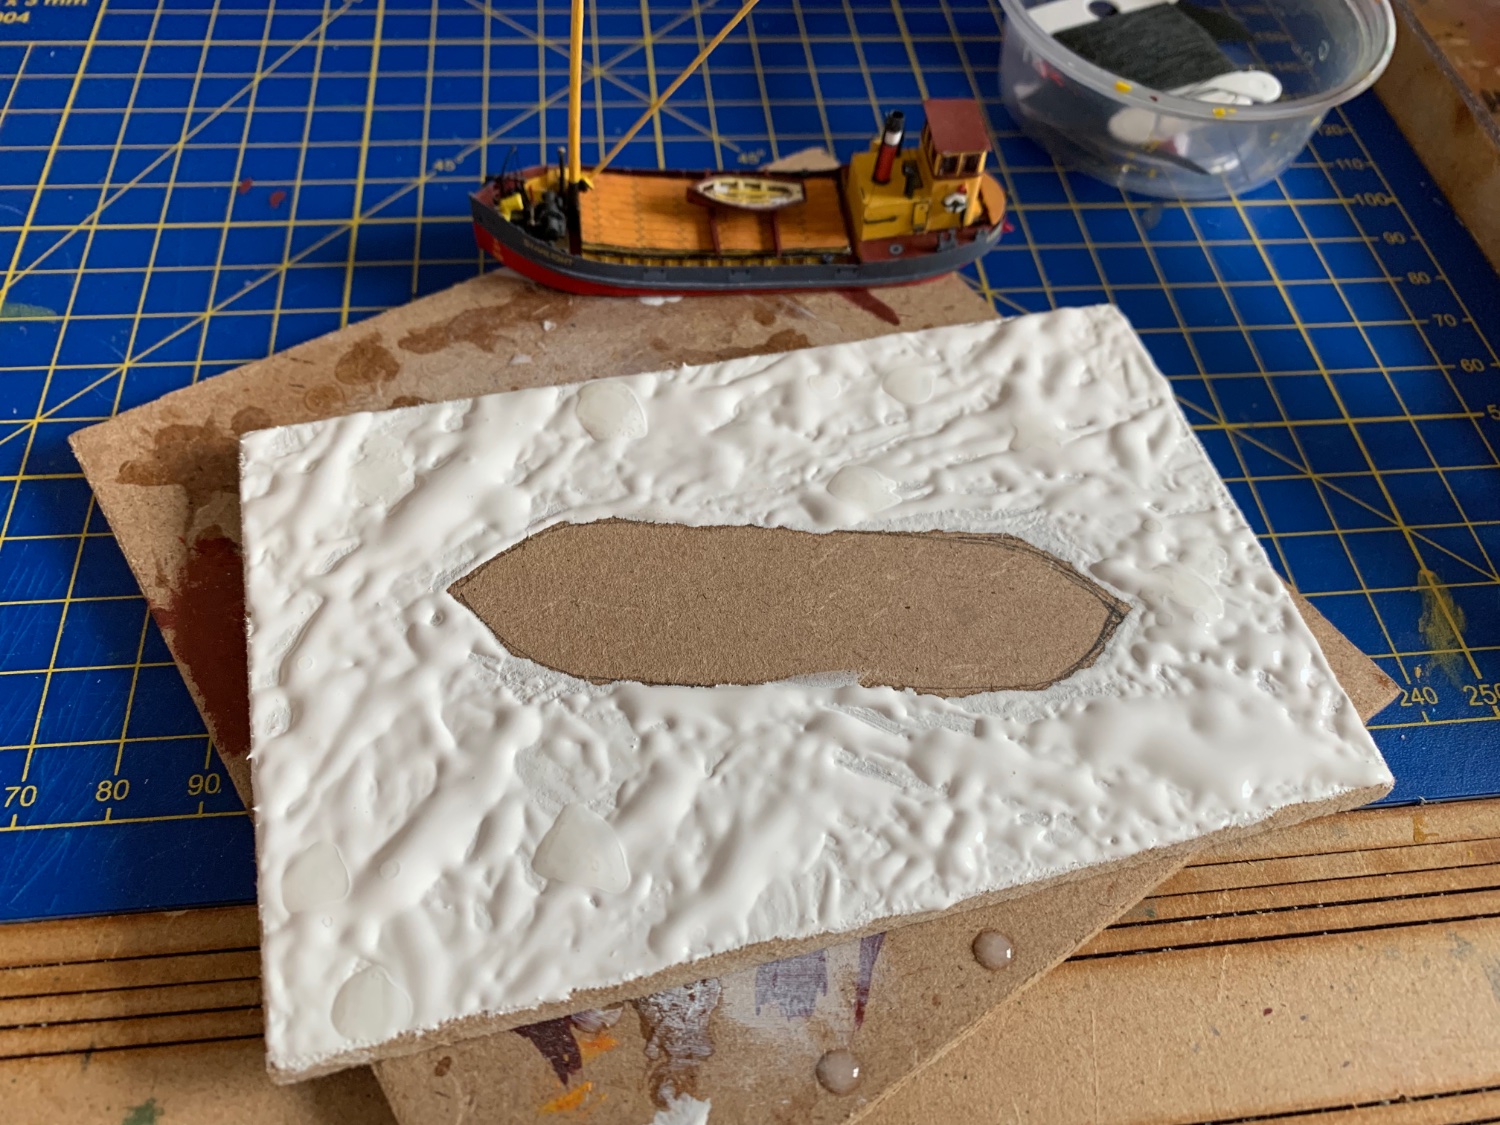
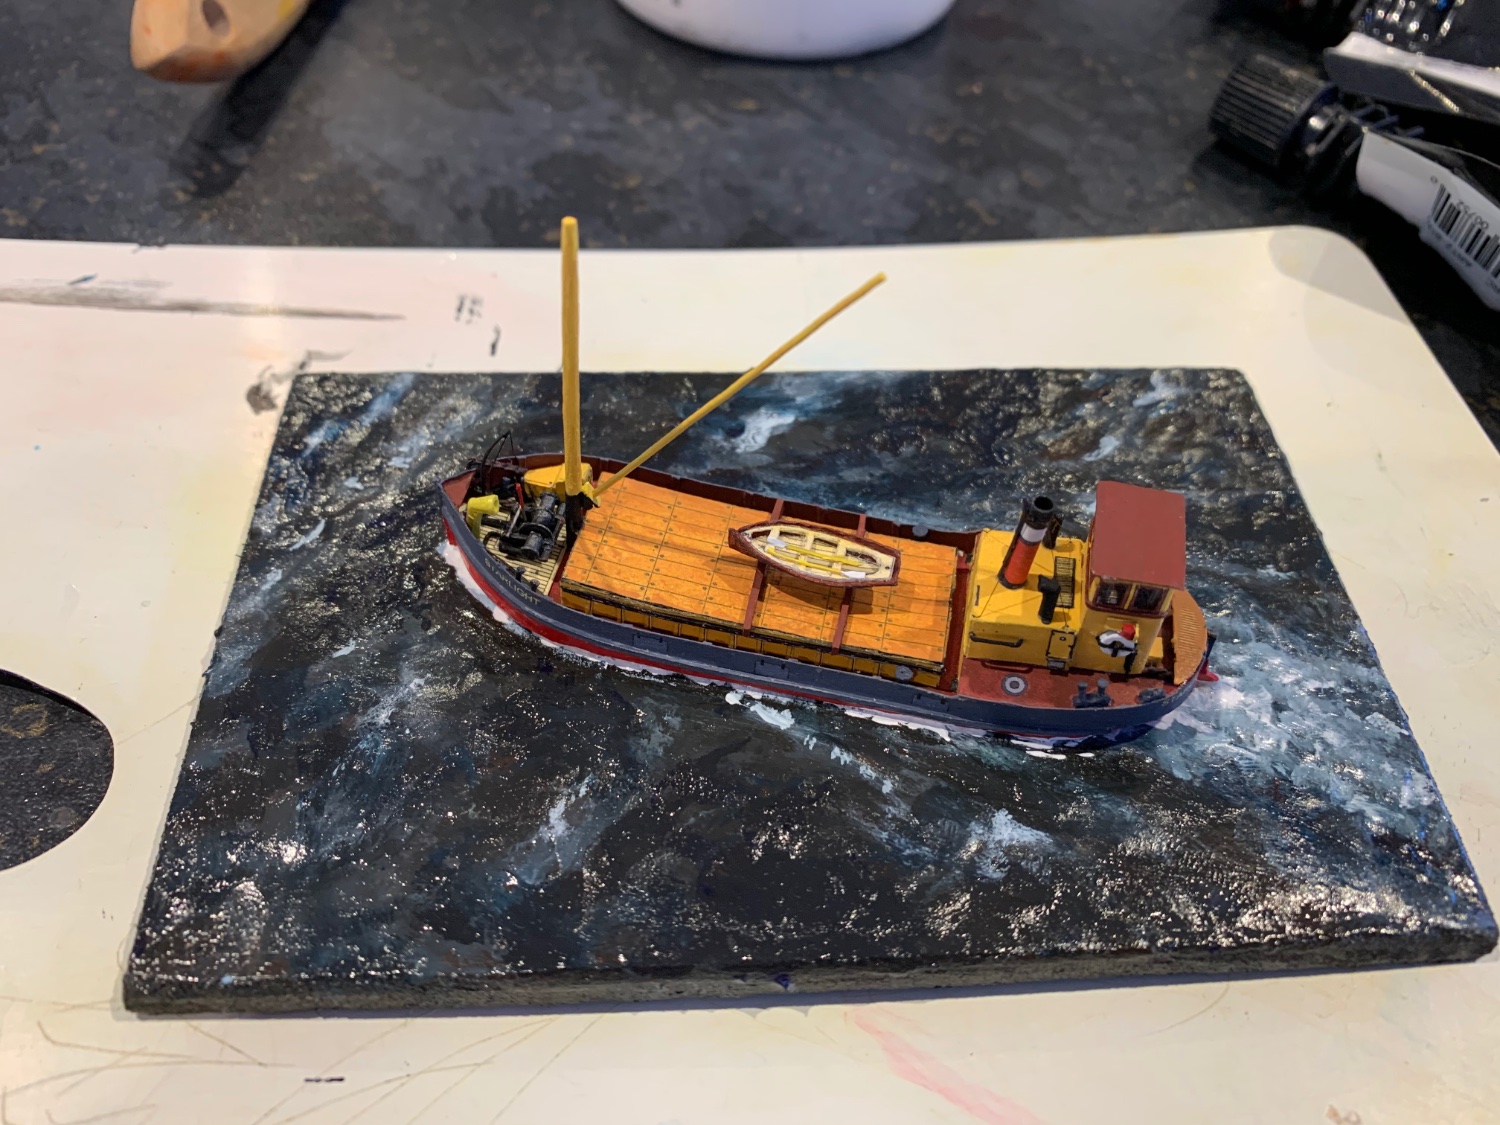
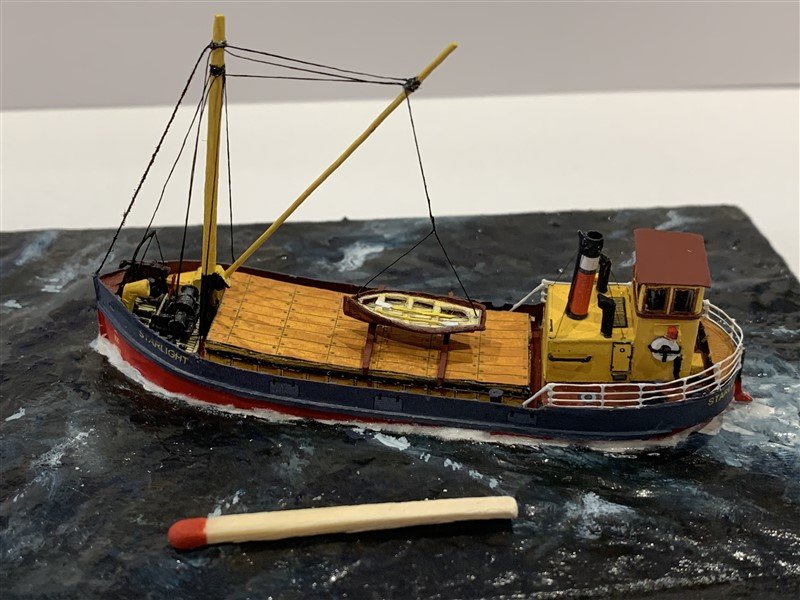
Decided I needed to think about mounting the Puffer before I got onto the delicate rigging phase. Used a small rectangular piece of MDF then made a sea “texture” using Gesso. Painted using a mix of brown, crimson and Phthalo blue, with some light highlights for the wake and a few wave tops. Nothing too over the top. Finished in Acrylic gloss medium and gloss varnish


- 53 replies
-
- 19
-
-
-
Lovely painting skills again OC 👏
-
Brilliant work Chris! 👏 I hope your friend has big shelves in his new house when he moves!
-
The link in the post Gregory posted (#198) is a very good read, the binnacle houses the compass(s) and lamp to read by night.
-
Oh heck guys, this sounds bad! 😥Snake is my next ‘big’ build once I finish a couple of project’s off that are close. Though I am going to ‘kit bash’ it into a different “Cruizer” class ship rigged of 1830s vintage, so probably will end up semi-scratch built anyway.
- 1,144 replies
-
- 2
-
-
- snake
- caldercraft
- (and 1 more)
-
I know that look, get that at home from my pooches! - “Will you stop what you are doing, we need to go sniff some lampposts and bums NOW!”
- 203 replies
-
- 6
-
-

-
- Roma
- Micromaster
- (and 4 more)
-
Very nice detailing and painting effects! 👏
-
Oh, how we suffer for our Art! 😆 That said, I bet you have to be careful separating some of the printed parts from the little "stalks" 🤯
- 203 replies
-
- 6
-
-
- Roma
- Micromaster
- (and 4 more)