


AJohnson
-
Posts
2,067 -
Joined
-
Last visited
Content Type
Profiles
Forums
Gallery
Events
Everything posted by AJohnson
-
 That is very true, I have 1/24 P47 (Razorback) a Hellcat and the 109 on my shelf, the 109 almost looks as though it’s a different scale model in between those two beasts! Outstanding work again Chris! 👏
- 165 replies
-
- 11
-

-
Martin B-26B Marauder by CDW - FINISHED - Airfix - 1:72 Scale
AJohnson replied to CDW's topic in Non-ship/categorised builds
Oh yes and shooting them with air rifles, even launched a few fighters on firework rockets! 🚀 🤣 -
Martin B-26B Marauder by CDW - FINISHED - Airfix - 1:72 Scale
AJohnson replied to CDW's topic in Non-ship/categorised builds
Well back in the 1970/80s I would of said that was pretty dammed close. ! 🤣 Yep, needs a good clamp, and you just to need to channel your inner 1970’s child “couldn’t give a f@“&” attitude and go for it ! -
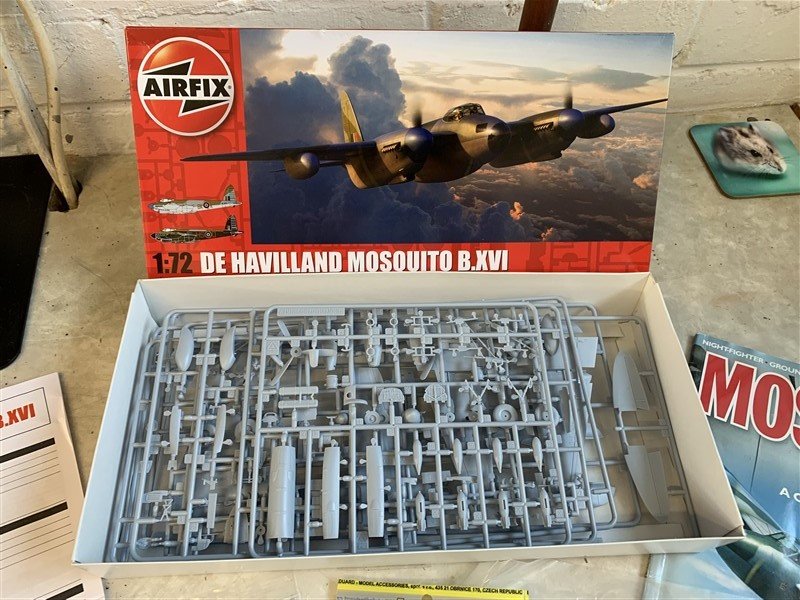
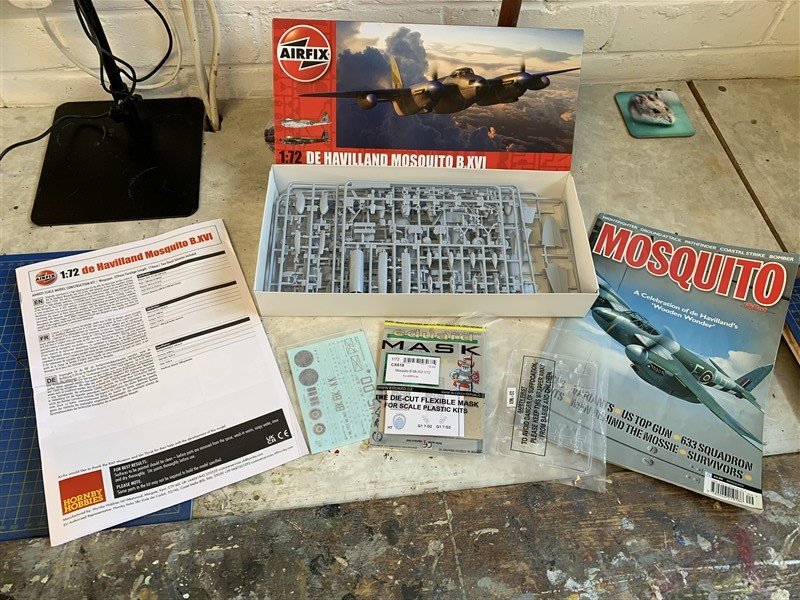
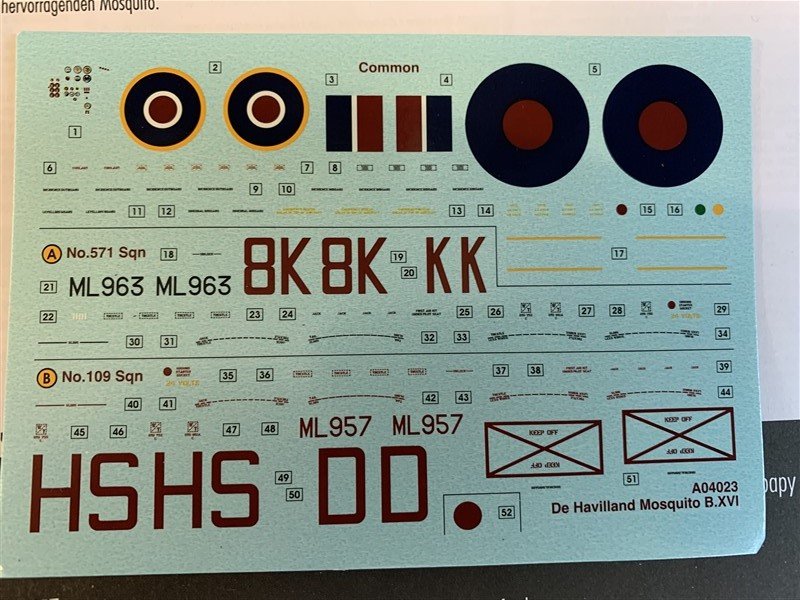
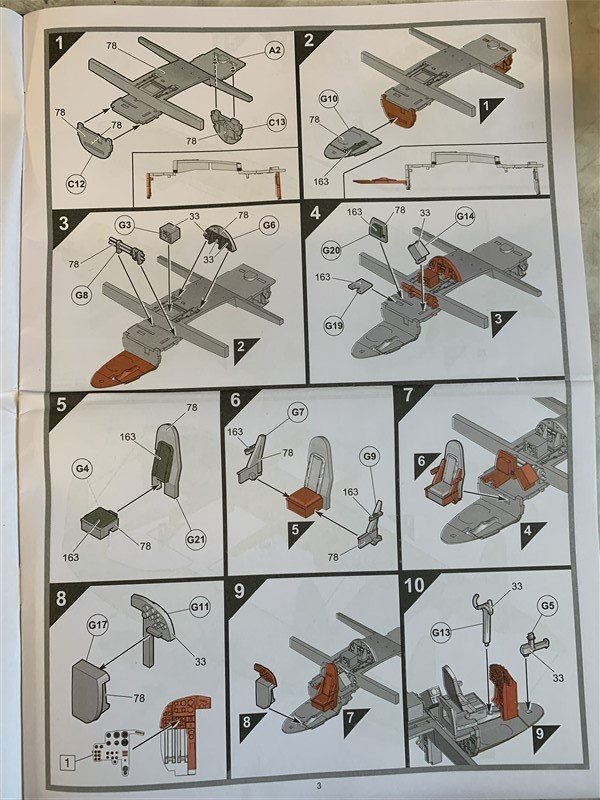
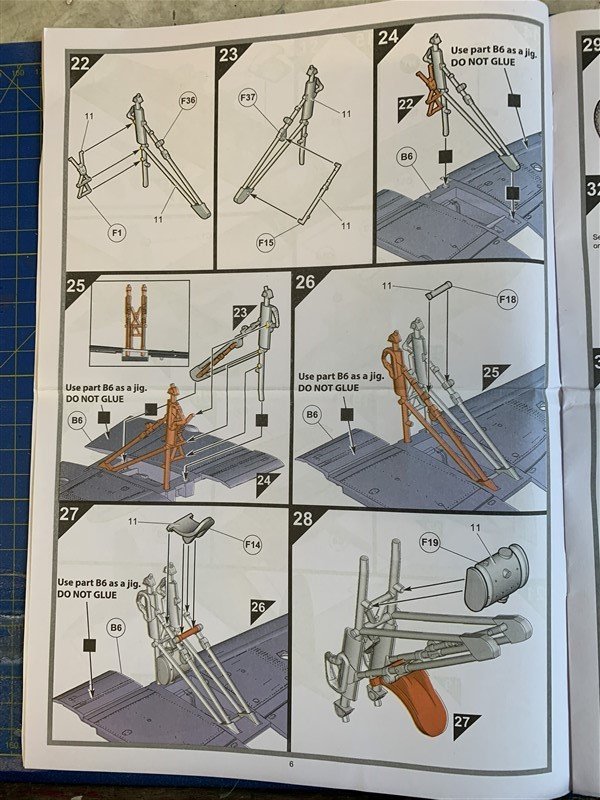
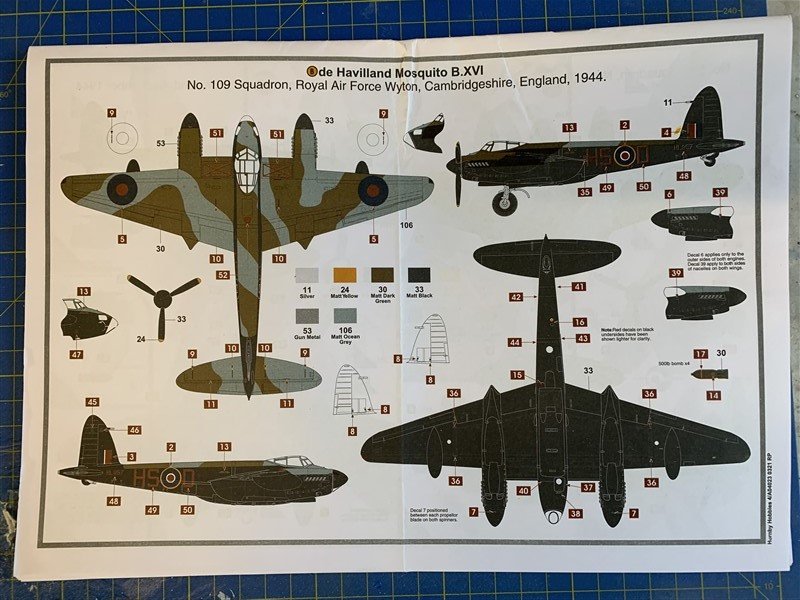
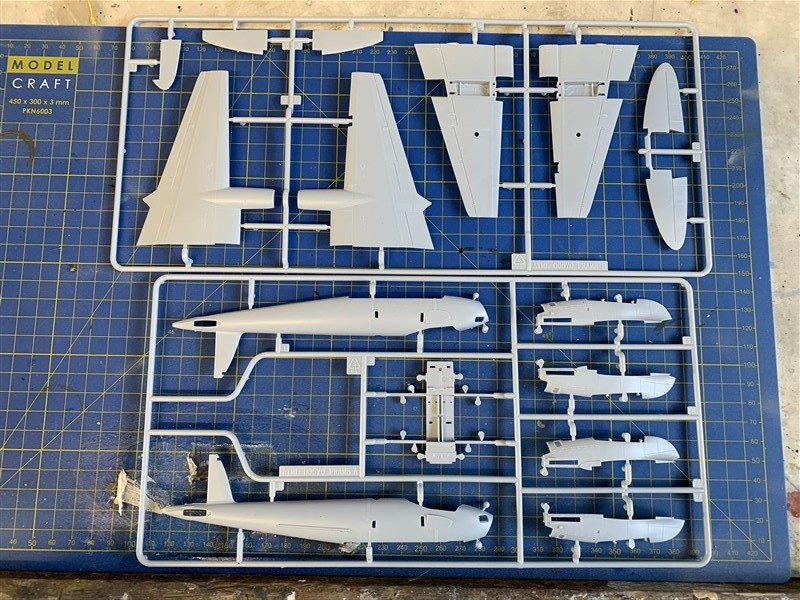
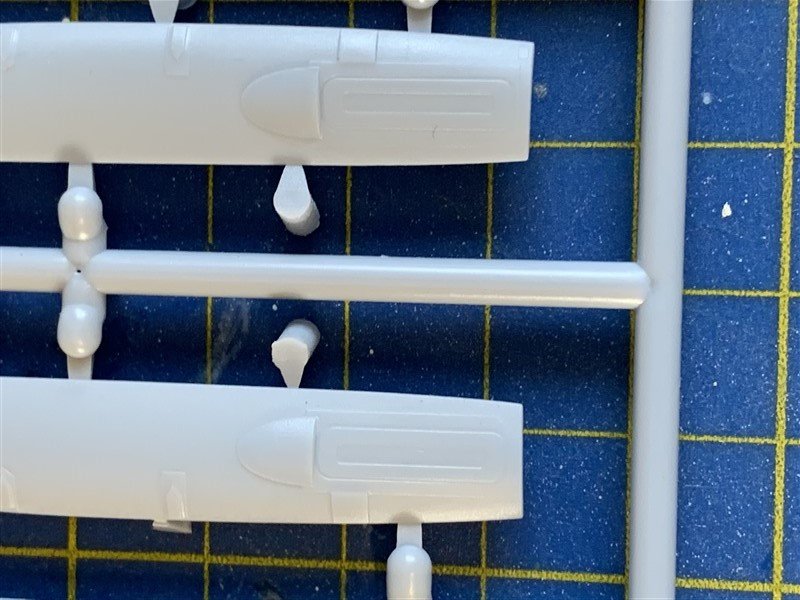
Hi there "Mossie"/"Wooden Wonder" fans, here is a starter post for my build log, following on from my Beaufort, I'm on a bit of a plastic roll atm. This is Airfix's new release 1/72 Mosquito and if the Beaufort is anything to go by then it ought to go together without any major issues. A few pictures of what you get and a few at the end highlighting the already much debated (on other forums) "mould issues" with the kit. Tackling these straight off, the problem has occurred in that for their kit, Airfix used the TT.35 at RAF Cosford for the basis of the kit and very faithfully LIDAR scanned it (as is the way with kit design these days) and faithfully reproduced every detail. The word "every" being the key one here... The TT.35 was the Target Tug version of the B.XVI and had a few differences in the bomb bay doors and rear fairing to accommodate the targets they towed. The other thing the scanning crew captured was the modern undercarriage support struts, which for some reason the kit designers overlooked and reproduced in the kit! (see last two pictures) Now from reading the furore on other forums you would have thought that a comet was about to crash into the Earth or something! 😲 But hopefully; although perplexing that a major kit manufacture might make these kind of "School boy" errors, you will all agree it is not the end of the World and nothing a bit of sanding/filling won't fix. There off my soap box now... I think I'm set on doing the 109 Squadron version in the Night camo.
- 50 replies
-
- 12
-
-
Martin B-26B Marauder by CDW - FINISHED - Airfix - 1:72 Scale
AJohnson replied to CDW's topic in Non-ship/categorised builds
Very close, one of my Catalogues has the prices written beside each model. For the series fours like the B-26 they were 85p in the mid 1970s. -
Until you pointed that out I was oblivious. I’m going to dirty up the deck on my “Nisha” a bit when I get back to it (soon!). These were hard working boats so doubt the decks were scrubbed and clean like holystoned warships decks.
-
Martin B-26B Marauder by CDW - FINISHED - Airfix - 1:72 Scale
AJohnson replied to CDW's topic in Non-ship/categorised builds
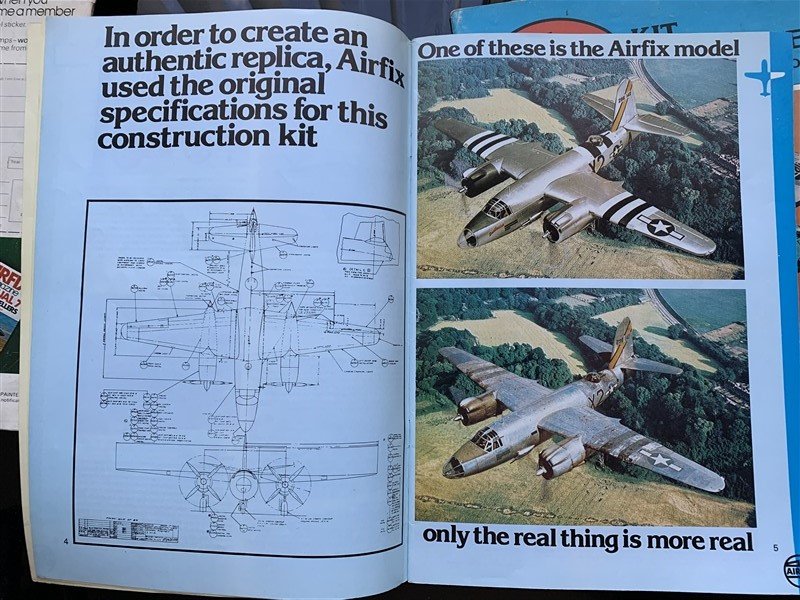
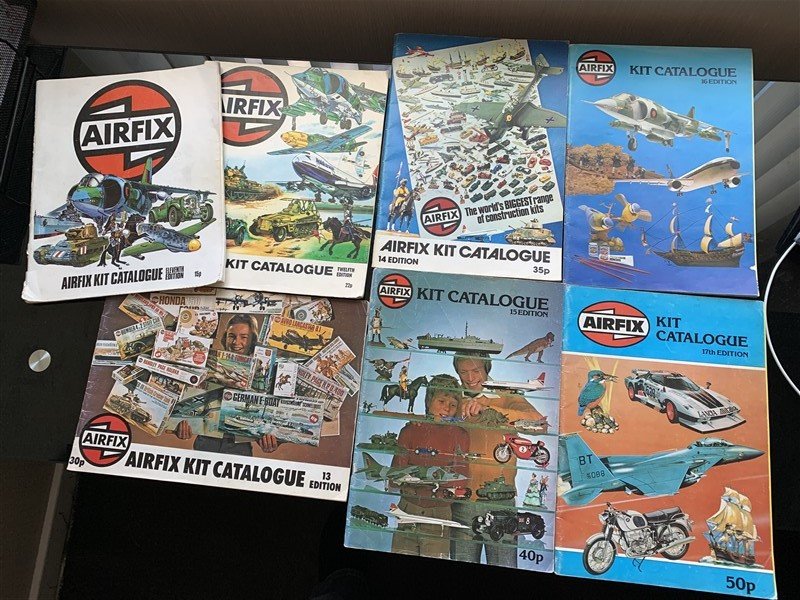
Hope you don't mind, I have dug out some old Airfix Catalogues (all from my main model making years as kid) and looked up some of the original blurb on your B-26 kit. Released in 1973 - gosh, that mould will be 50 soon! It was heralded as being a kit with "new levels of detail"; in their 16th Edition catalogue (1979) they were inviting readers to spot the kit from the real thing! 😆 - Now there's bravado for you! Sorry for butting in, lets see how my Rose tinted glasses 👓 fair up against your 2022 build of her, pulling up a chair... 🍿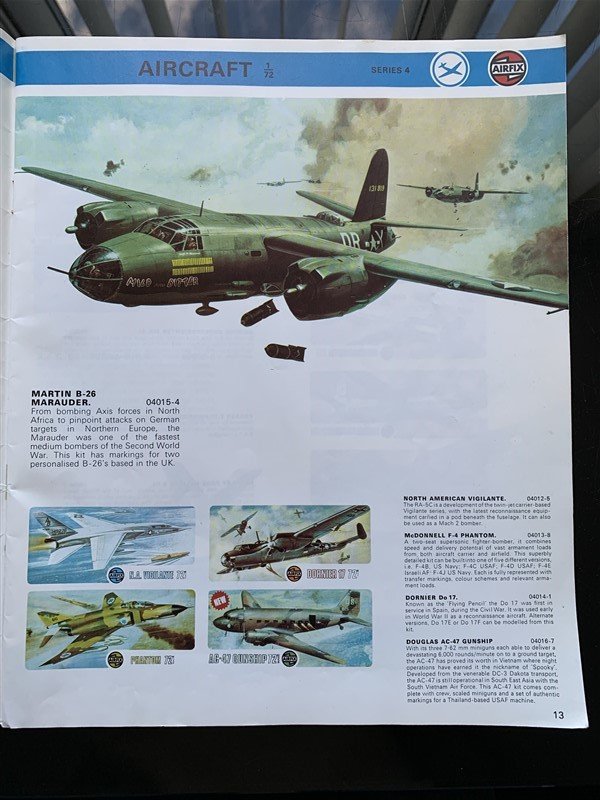
- 97 replies
-
- 13
-
-

-
Martin B-26B Marauder by CDW - FINISHED - Airfix - 1:72 Scale
AJohnson replied to CDW's topic in Non-ship/categorised builds
I’m in, that’s a recent re-boxing of the old 1970s mould. Airfix’s new moulds are good but they still have the cheek to re-box the old stuff and call them Classic Vintage, or something like that! 🤣 From memory the B-26 was quite detailed for its time; with internal bomb bay details. But not sure how the “fit” will be. Plus it has “raised” surface details and may be covered in rivets big enough to grace an ironclad battleship! Looking forward to seeing how my memory matches to the reality nearly 40 years later! 🫣- 97 replies
-
- 10
-
-
A very neat build. Now found your log will be following along! 👍
-
Now that would make a spectacular presentation for one of the Vanguard RN. models 😁
- 88 replies
-
- 1
-

-
- Erycina
- Vanguard Models
- (and 2 more)
-
Bristol Beaufort by AJohnson - FINISHED - Airfix - 1:72
AJohnson replied to AJohnson's topic in Non-ship/categorised builds
Thanks Mark. Okay guys you have twisted my arm, but I might not get chance to start the log for a few days yet. It is Airfix's new mould (but not without some very well documented errors - more of that later!) -
Excellent progress Sam, what did you paint the bottom of your Endeavour with? See you have gone for the historically correct way rather than the more often seen pure white. Though I think the fresh tallow was a off/creamy colour when initially applied and darkened rapidly when exposed to the sea.
-
Bristol Beaufort by AJohnson - FINISHED - Airfix - 1:72
AJohnson replied to AJohnson's topic in Non-ship/categorised builds
And finally.... I'm also on with this, if anyone would be interested in a log of this and another trip down 'memory' lane?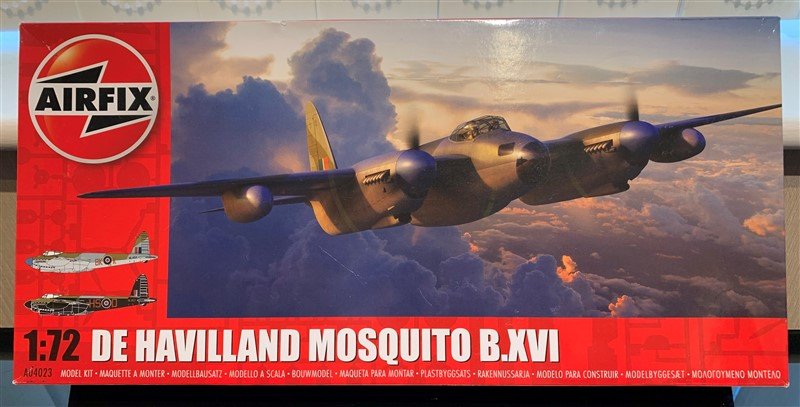
-
Bristol Beaufort by AJohnson - FINISHED - Airfix - 1:72
AJohnson replied to AJohnson's topic in Non-ship/categorised builds
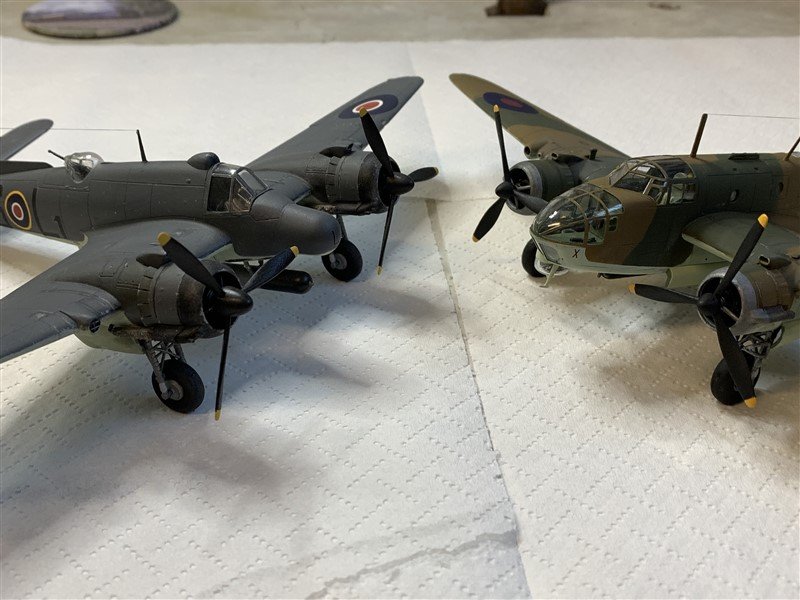
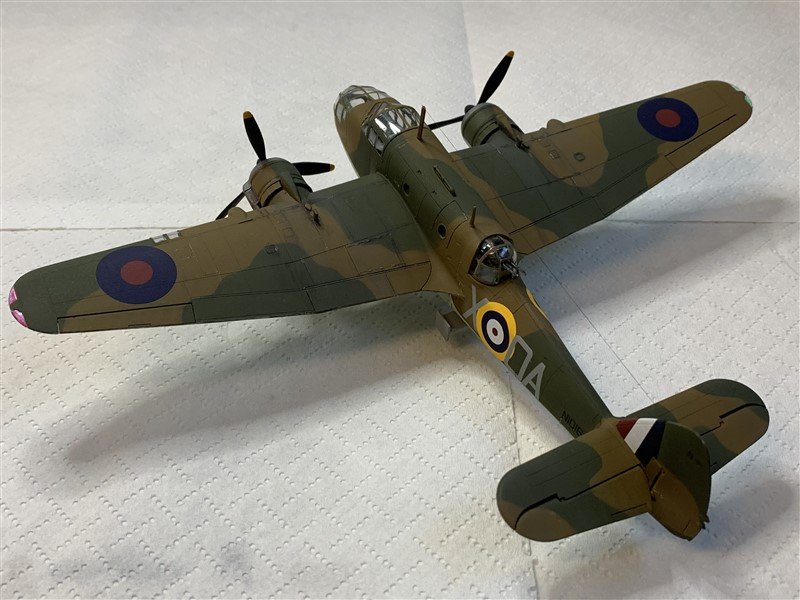
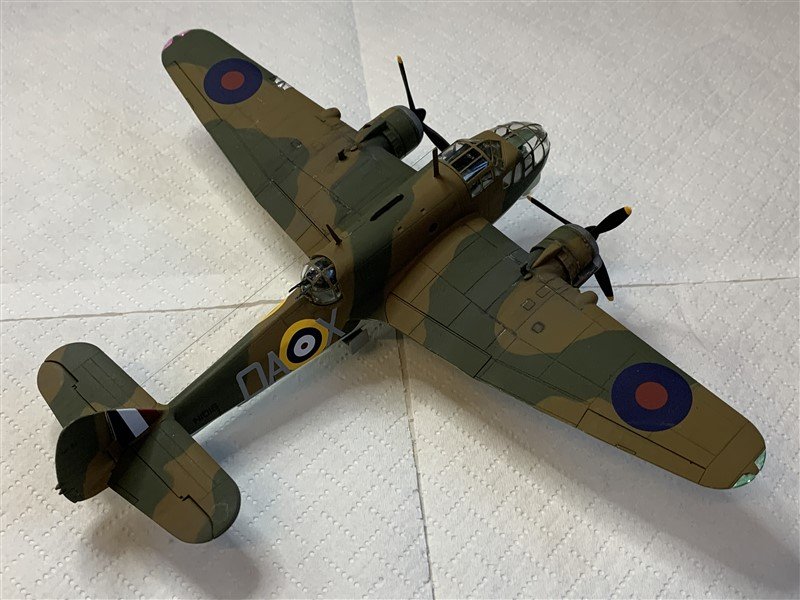
I thought some of you might like a few shots of the recently finished Beaufort compared to other Bristol types from the same stable I have made in recent years. A Blenheim (in French colours - Sacre bleu!) and a Beaufighter; probably the best of the three in terms of war record.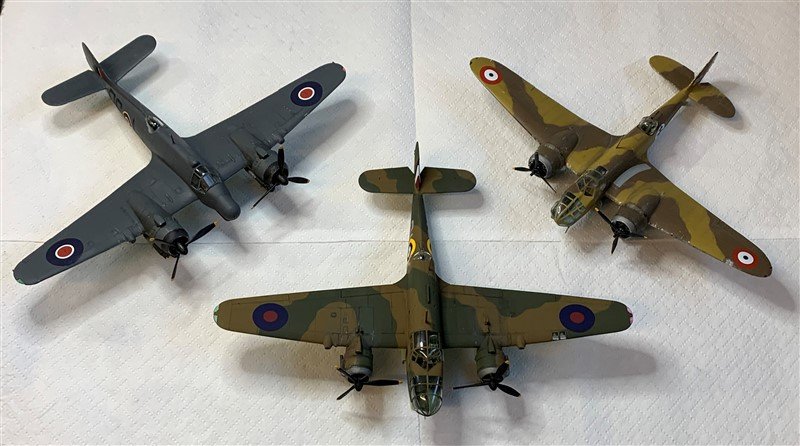
- 42 replies
-
- 11
-
-
-
Bristol Beaufort by AJohnson - FINISHED - Airfix - 1:72
AJohnson replied to AJohnson's topic in Non-ship/categorised builds
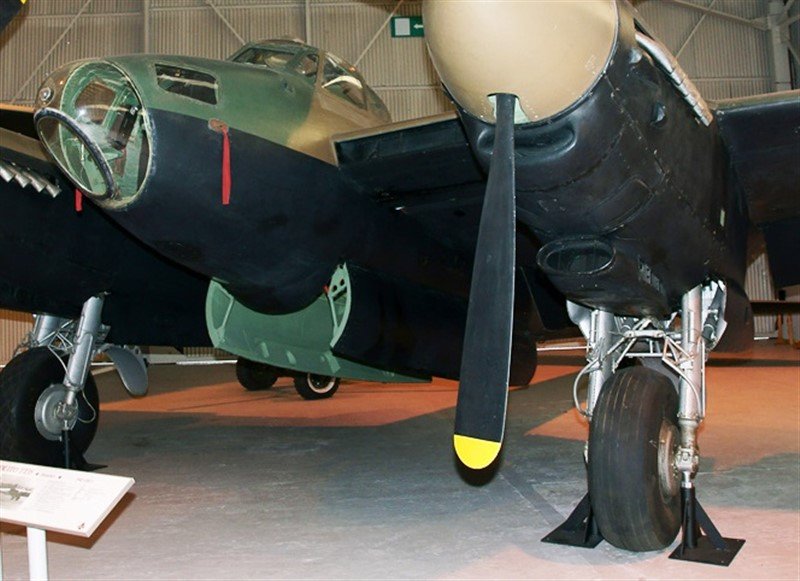
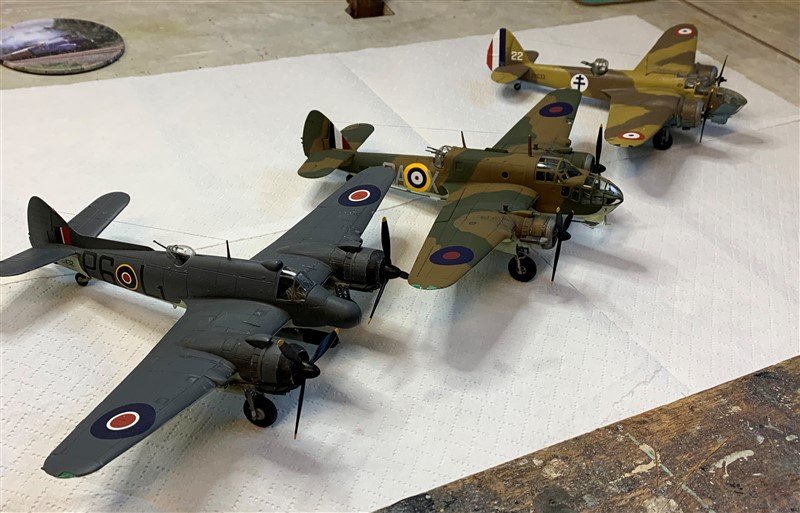
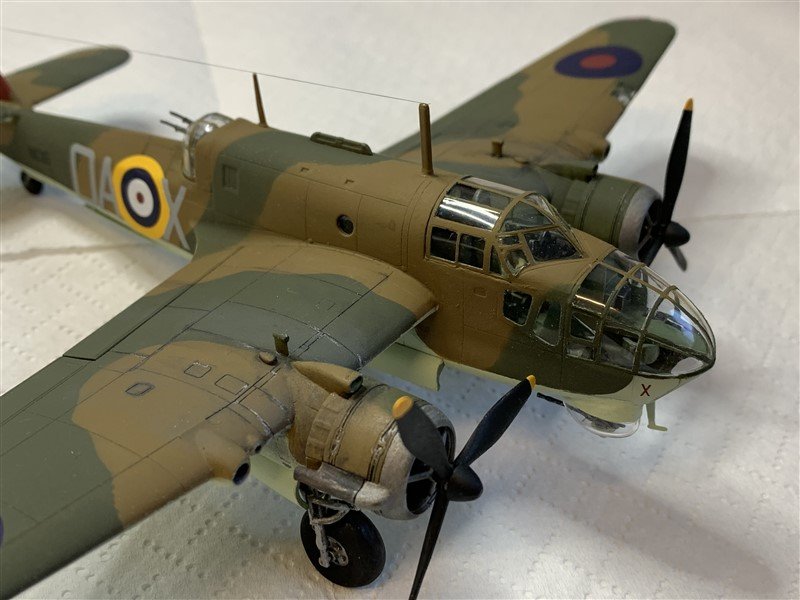
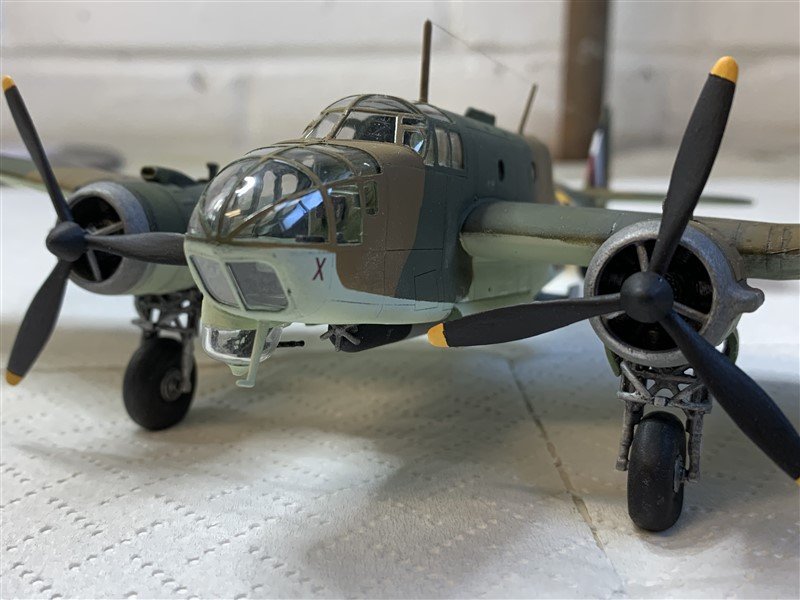
Here we go folks. the final pictures of my Bristol Beaufort. Final notes, the matt coat varnish is from Mig Ammo, I like the flat coat, but it is very fragile, just look at it and it scuffs. Managed to avoid 'silvering' under the fuselage letter codes, which is big 'Win' for me. Some 'losses' as with every build; the canopy is mostly clear, with the odd mark here and there and a mysterious line/crack on the lower starboard side? But overall for a "glasshouse" not too shabby. But most importantly on the prop scale of movability they are a "2" - not blow round ones, but they do freely move by finger prods. 😆 A couple more posts to finish before I mark this one FINISHED. A fun little build and thank you all for following and hope you liked the trip down memory lane, courtesy of good old Airfix!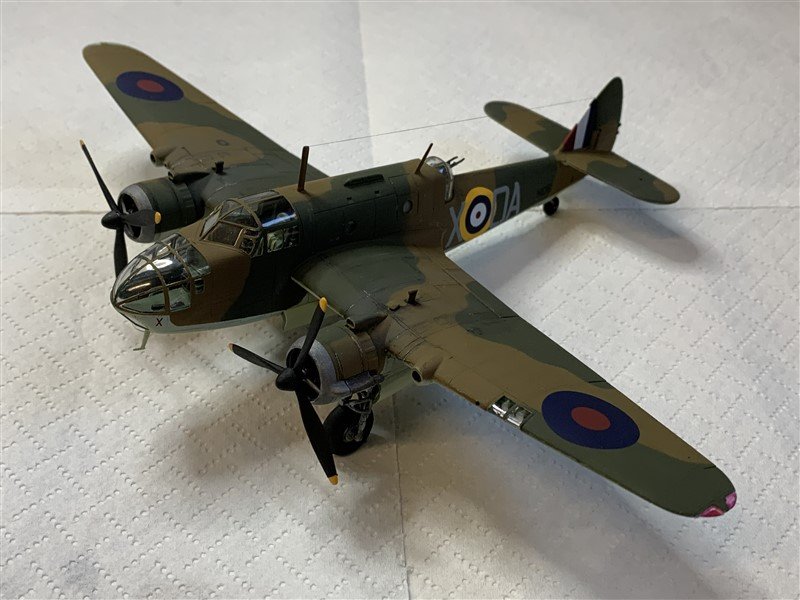


- 42 replies
-
- 10
-
-
-
Hi, glad to see you back in the saddle and hope your health issues don’t keep away further. Take care.
-
Hey Brian, I've just checked and although @Timmo is still active, he does not appear to be following his own build log, so might not have spotted your questions, maybe try PMing him, be a shame for you to miss out on some valuable input from him. Beautiful build and great presentation!
- 366 replies
-
- 1
-
-
- granado
- caldercraft
- (and 1 more)
-
Nice save with making your own pewter parts! Good idea leaving them off until later, I wish I had done that with my Bounty! 😣
-
Bristol Beaufort by AJohnson - FINISHED - Airfix - 1:72
AJohnson replied to AJohnson's topic in Non-ship/categorised builds
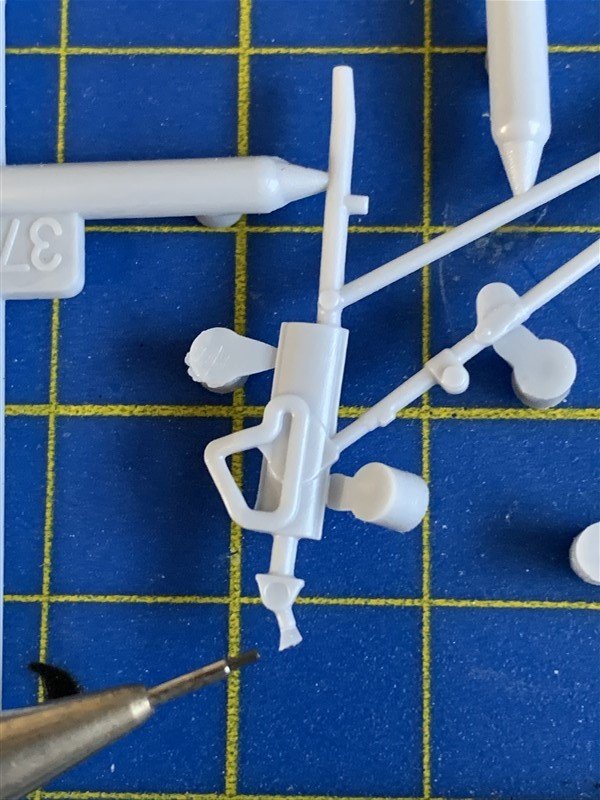
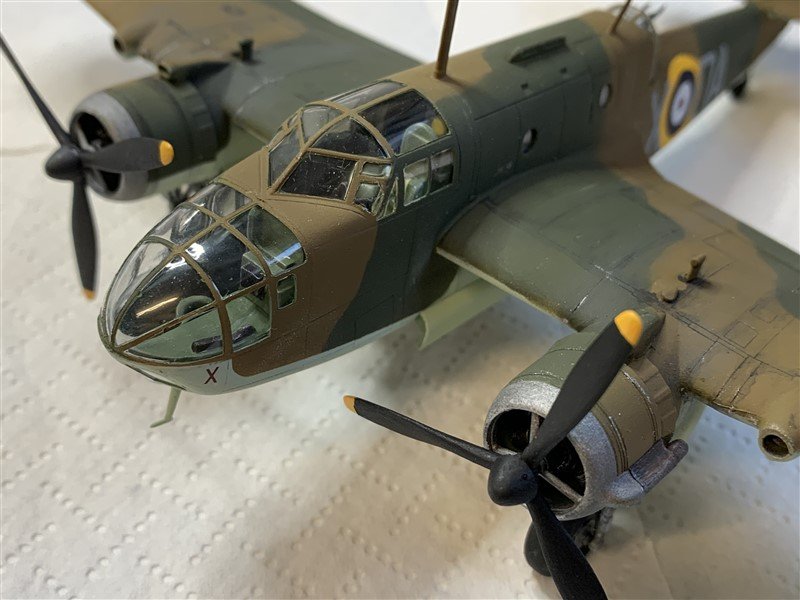
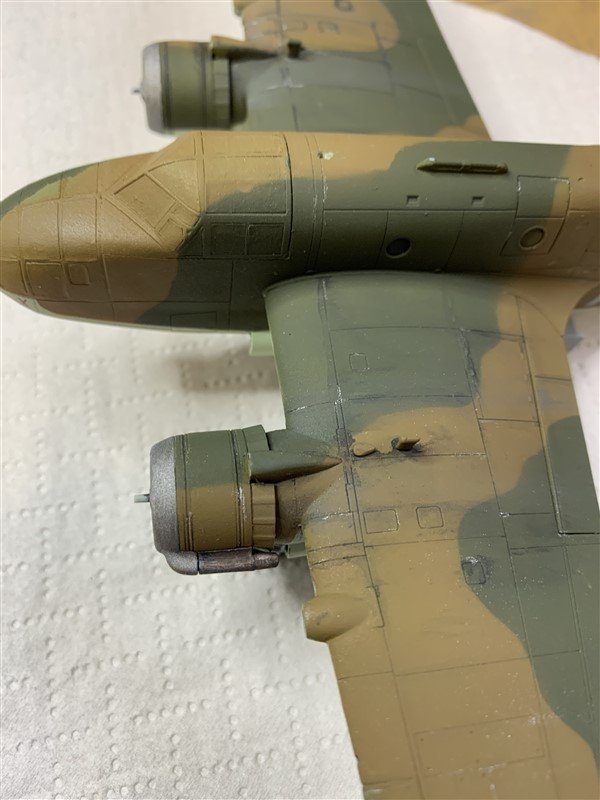
Small update probably the last before the "reveal" - Added the undercarriage, which was a pig to get in and also added the Torpedo/bomb bay door and the Torpedo itself. I've also started a little bit of weathering, but not going mad as 1/72 scale models can look pretty "scruffy" if overdone. Remaining tasks are adding the small glazed nose turret, three little aerials, finish the matt varnish, props and lastly the nerve wracking job of peeling back all the glazing masks to hopefully find a clear cockpit! Thanks for the likes and comments guys! 😁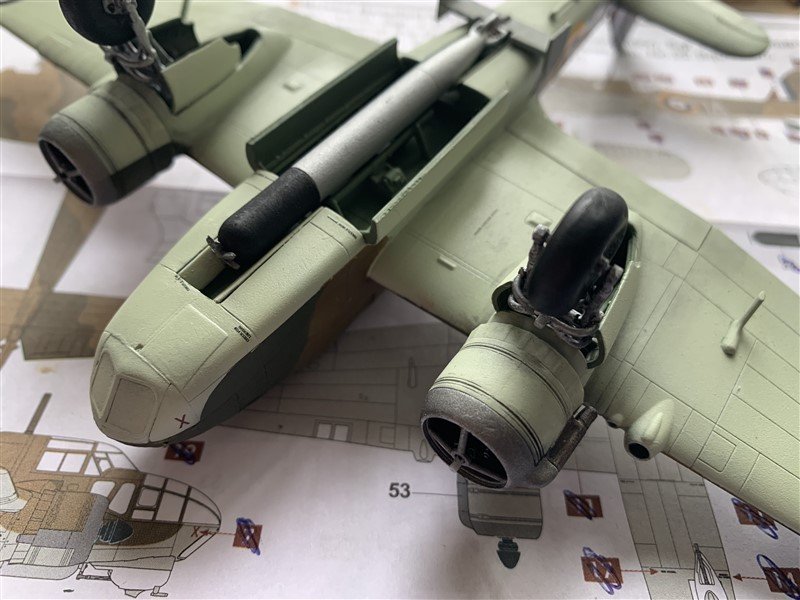
-
Very nice indeed 👏, feeling a bit seasick already looking at that scene! 🤢 pass the bucket!
-
Many years ago I had the Tamiya 1/48 version which was pretty basic. The after market parts will lift your build to a different level, nicely painted engine! 👏
