shipman
-
Posts
1,275 -
Joined
-
Last visited
Content Type
Profiles
Forums
Gallery
Events
Everything posted by shipman
-

15' Dinghy by Bedford - FINISHED - 1:1 scale
shipman replied to Bedford's topic in Non-ship/categorised builds
Superb. I'm full of envy. Happy sailing. -
After all that ratline work I wouldn't get too focussed on them. They could benefit from a colour wash to tone them down a tad. Once all the running/standing rigging and yards are installed the ratlines will get lost in the clutter anyway. You're doing a fine job.
-
Just enjoyed a skip through this excellent build. It is the first and only ships boat build which has a plausible method of rigging the masts. Impressed.
- 625 replies
-
- 2
-

-
- bounty launch
- model shipways
- (and 1 more)
-
Another practical reason for colour coding the boats may have been to ensure all the associated various parts for each boat were kept together. Thwarts, masts and oars would have been unshipped from stored boats on deck, especially when nested. Often I wonder where the heaps of temporary kit must have been stored when needed close by. Not all of it could have been put down into the hold. There must have been a lot of organised clutter that never gets depicted on models.
-
What a pleasure it is to see you putting so much effort into this build, I continue to be impressed with your work. I'm sure you are already putting ideas together for your next build. Many here would encourage you to 'progress' to something wooden. You're fast approaching the rigging stage having already done most of the work on the shrouds and ratlines. It's this area where the 'faff' aspect will come to your attention and try your patience. Looking forward to that. For what it's worth, may I suggest you give the Airfix 'Bounty' some consideration. Being 1:87 it's twice the scale of the 'Vic'. Like the AOTS book of the 'Vic', the Bounty title emphasises the accuracy of the Airfix kit. You will have the option of the Bounty (just a few guns to mount), or a simple kit bash and build the previous merchantman incarnation of the ship, 'Bethia' (no guns at all!). Both versions have full ship rig at a scale where each and every detail could be accomplished. No doubt you would learn all there is to rigging any ship model. That would be the value of that build. And of course it wouldn't break the bank. Looking forward to more of your posts.
-
Mini Lathe recommendations?
shipman replied to jfinan's topic in Modeling tools and Workshop Equipment
Returning to this topic; after studying what I have with regards to my Unimat SL. I've decided it would be nice to have a separate bracket for the mill post, so that can be mounted behind the bed (on the bench) purely for convenience, similar to the Unimat 3 arrangement. The simplest solution would be a spare bed casting. It could be a damaged/mangled one. if the bit that the post fits into is ok. It's true, getting anything for the Unimat is an arm and a leg. Here's my long shot.....has any UK member got one they don't want? I'm not in a rush. The obvious is to make one myself. I'm also toying with making my own steady for between centre's work. Just thought I'd throw my thoughts out there guys. Thanks.
-
A vivid demonstration that a thing is the sum of all it's parts. What a wonderful way to have ones eye's opened to what can be done. This helter-skelter of virtuosity gets faster by the day. Strap me down for the ride.
-
HMS Enterprise by AlexBaranov - 1:36
shipman replied to AlexBaranov's topic in - Build logs for subjects built 1751 - 1800
Another splendid model. Has anyone else spotted Vladimir Putin as the figurehead? Thanks for sharing. -
The car springs would have been plastered with grease. Being out there and exposed, the 'gaiters' stopped you staining your plus fours. Acres of leather and polished brass smacks of fetishism. These boats have spankers.
-
Looking at the last photo, someone cashed up big time on the leather clad blocks, yet look at all that tarnished brass! Pure neglect.
-
Ah ha! Now it's clear! Rubber sections separated by metal discs, in compression. Never seen this applied as it is. Aren't there some clever folk out there. Thanks guy's.
-
The shock absorbers.....a nagging thought:- the two grainy photo's of these units aren't very clear, but my simplistic interpretation of how these operate suggest the 'rings' along its length (as modelled) are in fact a spring (as on a car suspension unit) which is compressed from either end by the two shackle fittings. I've searched in vain for a clear image of these dampers.
-
Just a thought.....I do hope the awful bush fires afflicting Oz aren't giving grief to you and your neighbourhood. Be safe.
-
Replacement motor for Preac saw
shipman replied to Kevin Kenny's topic in Modeling tools and Workshop Equipment
Fleabay:- 120W scooter motors going for around £18. Several Unimat owners have converted to these. A bit of a faf to fit but possible. Hell a lot cheaper than the ones previously available. -
Cutty Sark by Cuda1949
shipman replied to Cuda1949's topic in - Build logs for subjects built 1851 - 1900
I know it may be an anathema to some, but the Hackney book on how to build the Airfix Cutty Sark gives a very methodical build sequence including most of the rigging and gives suggestions of scale cordage which can be used to interpret any other scale you may choose. It could clear elements of confusion. -
Replacement motor for Preac saw
shipman replied to Kevin Kenny's topic in Modeling tools and Workshop Equipment
Pardon my ignorance, but I always wondered what was meant by a 'Chop Saw' is. Now I've seen this photo, it's inspired me to design and make a useful mini table top version, using a natty mini drill just arrived. We aren't always cutting lumber. -
Cutty Sark by Cuda1949
shipman replied to Cuda1949's topic in - Build logs for subjects built 1851 - 1900
Enjoying your progress. I noticed your building 'stool' set-up.....and had a wave of the terrors. I do hope everything is lashed down firmly; wouldn't want the obvious to happen as you get absorbed in all that rigging. -
I just LOVE these ladders! Never seen this detail before. Are they unique to French ships?
-
Following your progress with interest. I admire your enthusiasm. The chainplates are always a problem at these scales, looking forward to how these work out once you put tension on the shrouds. Are you planning using proper deadeyes on the upper masts? The masts would could look much better if you had scraped the mould lines off, that's just me; it's your model and it's coming along nicely. Noticed you have a deft hand with a paint brush; well done. I did a build of this kit years ago; one mod I made was to carve out all the stern windows and applied stretched sprue on the back, depicting separate window frames. After painting I flooded the openings with PVA glue which dries clear. Certainly added deapth and bit of realism. You asked at the beginning how to open square ports and hatches. I do all mine (including those windows) by first drilling a hole in the middle, then gently carve the rest out with a 10a scalpel (the 11a's are longer and thinner and tend to crack and snap. EYE PROTECTION) If you follow Hackney's build sequence you can't go too far wrong....at any scale. I appreciate this is your first build. My advice would be to enjoy yourself, you're clearly learning as you go along. It's too easy to get over ambitious and possibly dissapointed. By the time this one is done, you will be building the next with different eyes. That's a good way to learn.
-
Thank's for that BE. Has the Floquil Verdigris special properties, or is it their version of a particular colour? (I have many paints in my hoard, but none of the Floquil range)
- 126 replies
-
- 1
-
-
- le superbe
- heller
- (and 2 more)
-
Thank's BE (LOL). I'll be looking forward to that.
-
Just goes to show what can be done with a well produced plastic kit as a basis. Some of these kits are truly remarkable, and with a bit of research and mods where required, they can look better than any of the wooden kits, unless you're an accomplished craftsman and prepared to throw away 90% of it! BE, your model is literally, er......Superbe. The link to your original build is unfortunately expired, which is a shame, as I was hoping to find out how you treated the hull 'coppering' colouring. I was fortunate enough to see the 'Cutty Sark' in the old days in her dry dock before fire and 'restoration'. Your treatment is the nearest I've seen to how I remember it.
- 126 replies
-
- 2
-
-
- le superbe
- heller
- (and 2 more)
-
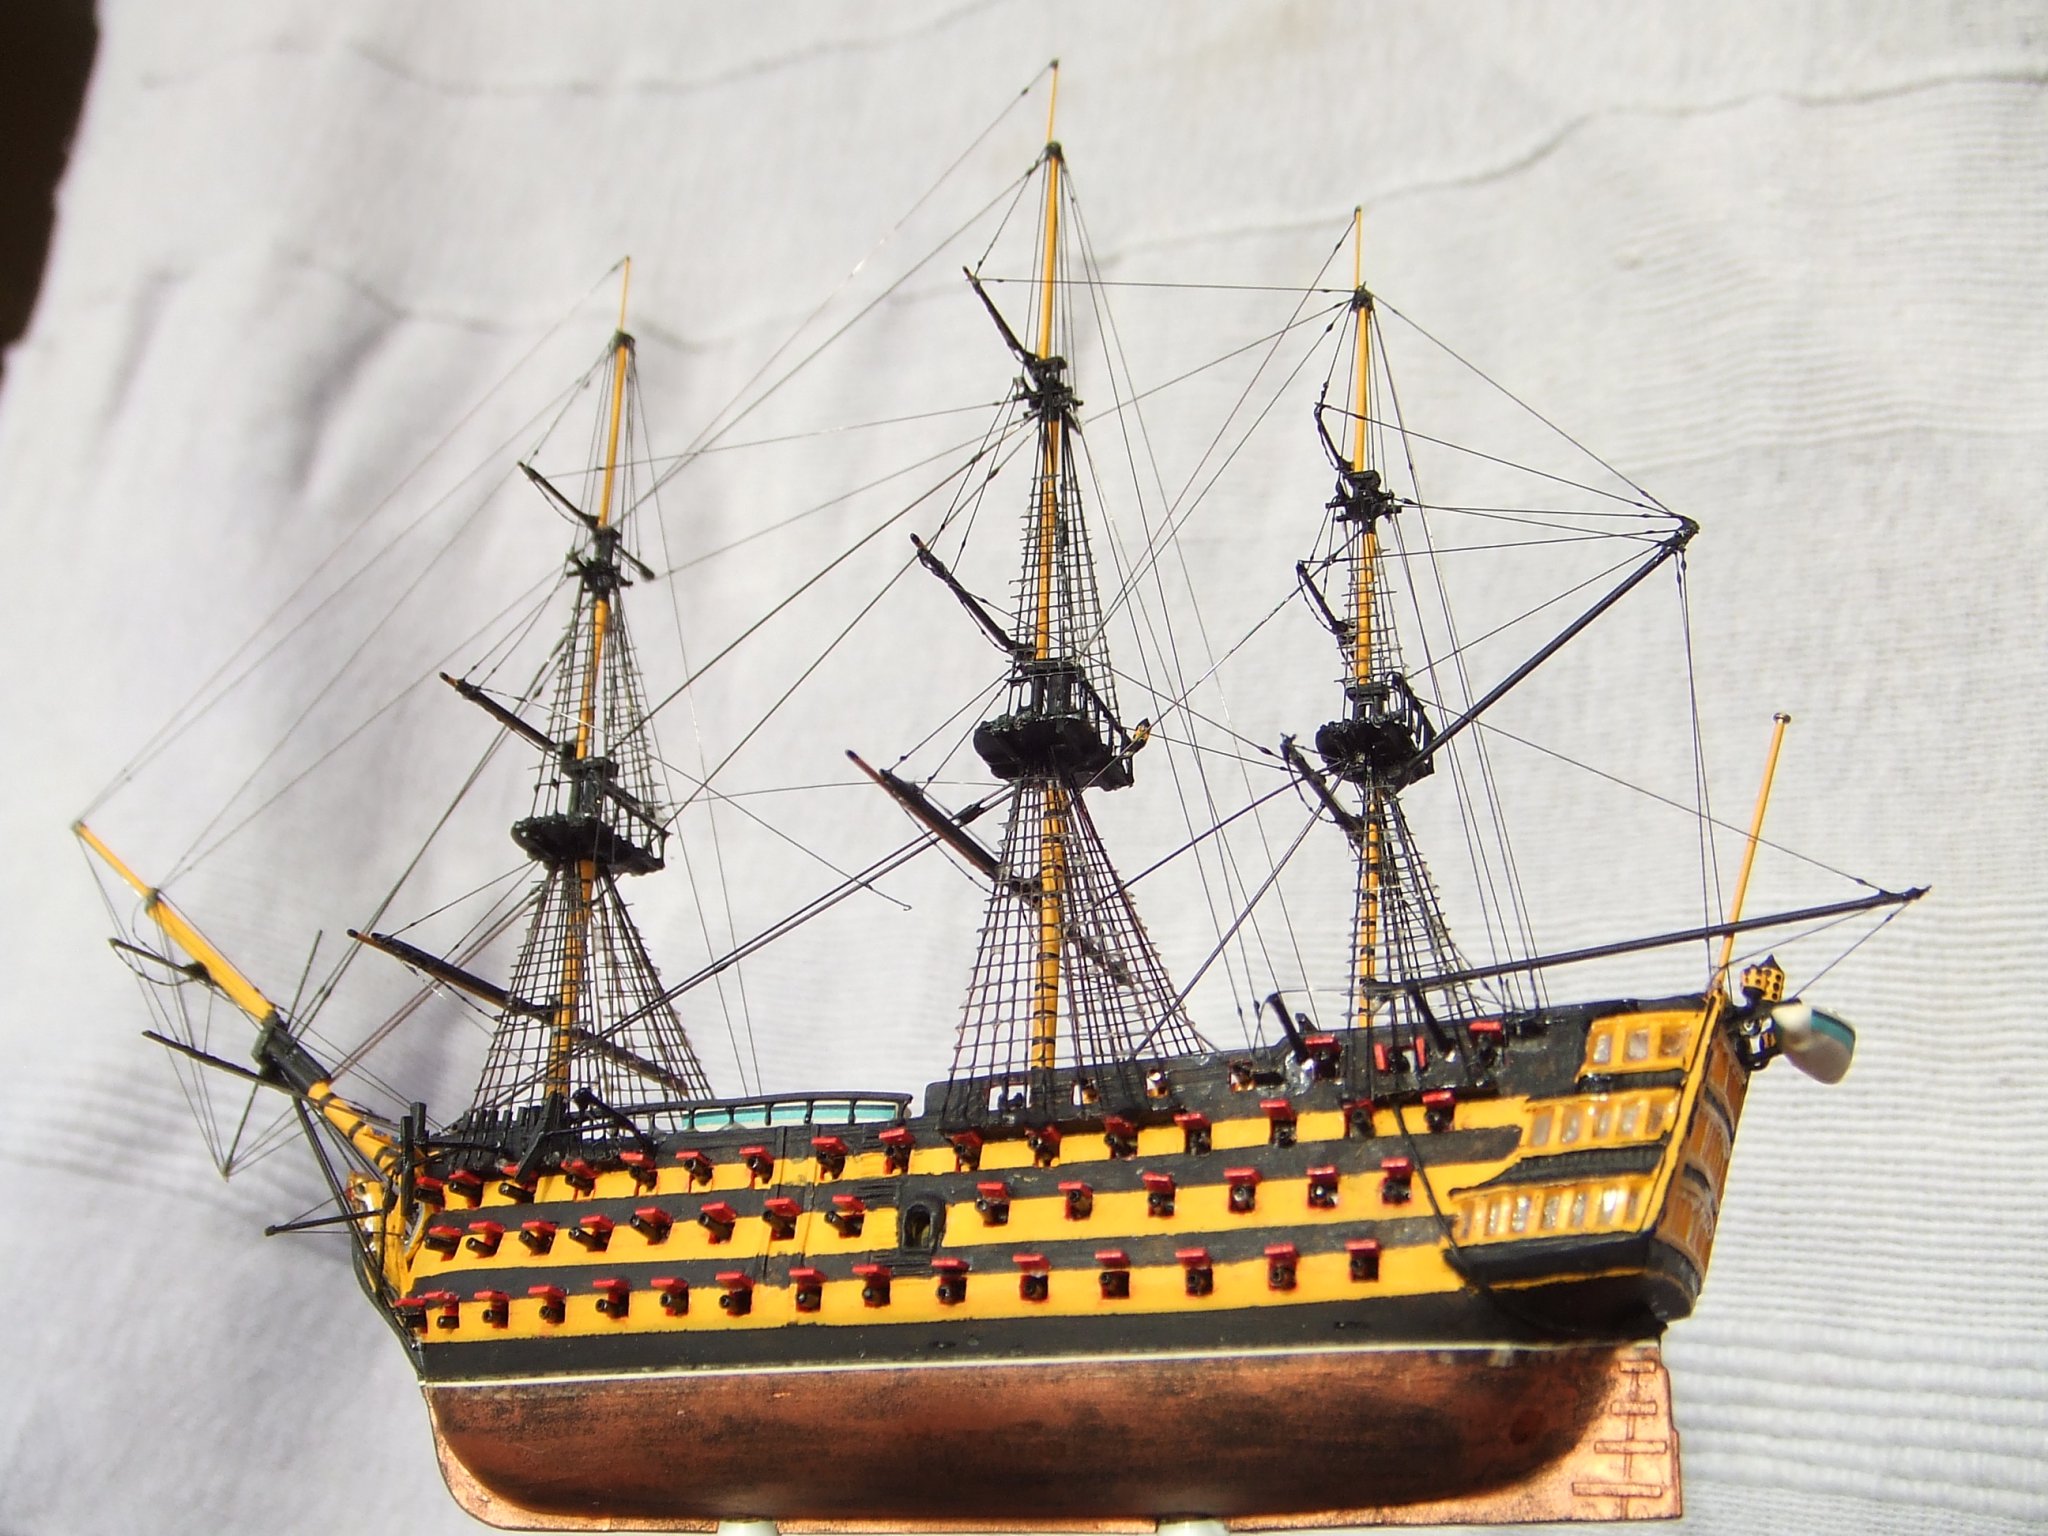
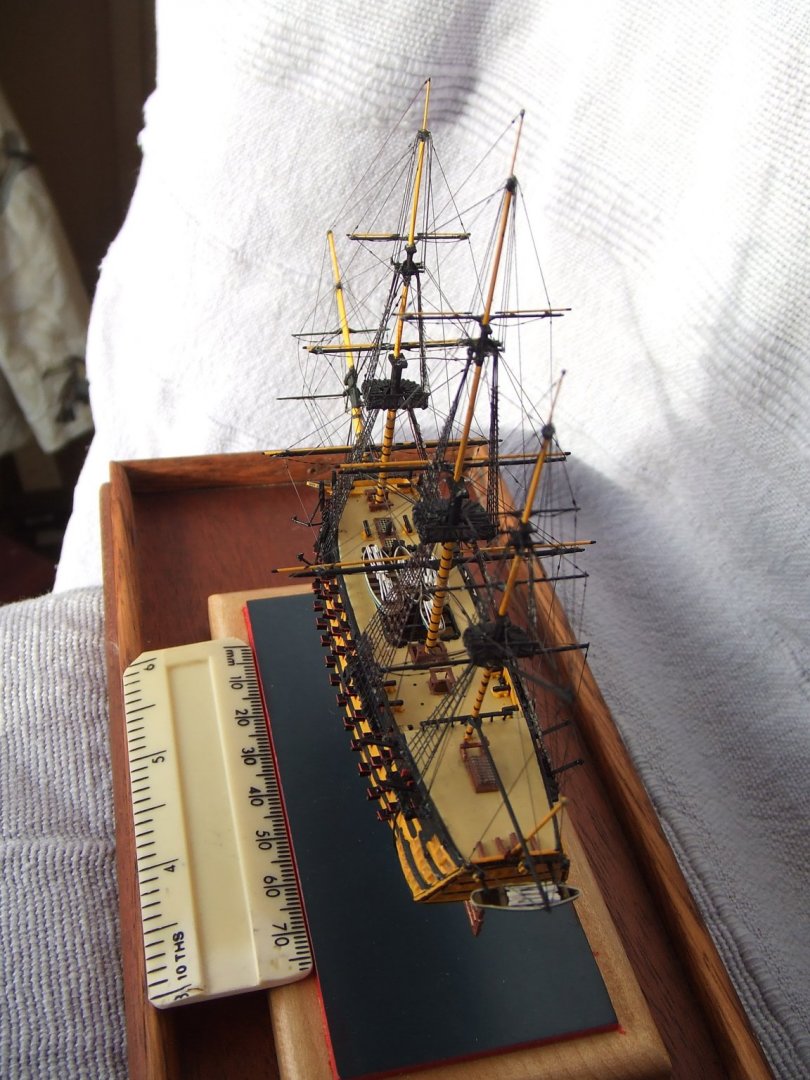
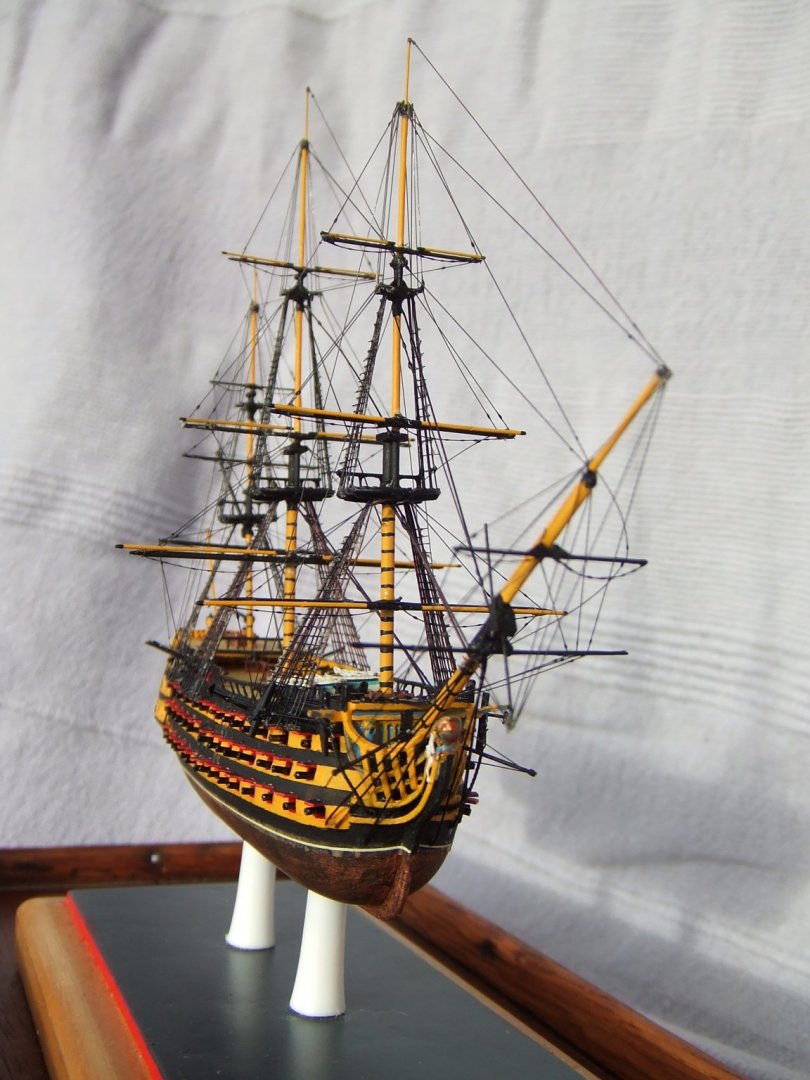
That's a fine model you're putting together. It's all about the pleasure. The Hackney books are well put together, with very clear step by step guides. I have all 3 he did; Victory, Cutty Sark and Mayflower. In my humble opinion these are very much under-rated. The Airfix kit is remarkably accurate if you compare it to the AOT drawings. I'd swear those drawings were based on this kit! Hackney reckoned the kit measures out to 1:171. For a laugh, here's my 20 year old rendition of their 'starter kit' in 1:600.

-
Sail design for 18th-century longboat?
shipman replied to Cathead's topic in Masting, rigging and sails
Not one of the contemporary models of ships boats I've ever seen has any indication or evidence that there was any provision in the hull for these 'dissapearing' bolts. Not even the lovely and comprehensive NMM collection, including their drawings which have every conceivable detail portrayed. An additional use for these bolts could have been utilised to lash the boat down on board ship: but no evidence of that either. But it would have been plausible. What you say makes practical sense, Roger; but why is this (important) feature not evident on the models? Returning to my original question:- 'I'm simply curious about this feature which surely demands some justification.' I'd be happy if someone could show me some contemporary evidence of the detail we've been discussing.