


CaptnBirdseye
-
Posts
153 -
Joined
-
Last visited
Content Type
Profiles
Forums
Gallery
Events
Posts posted by CaptnBirdseye
-
-
9 hours ago, glbarlow said:
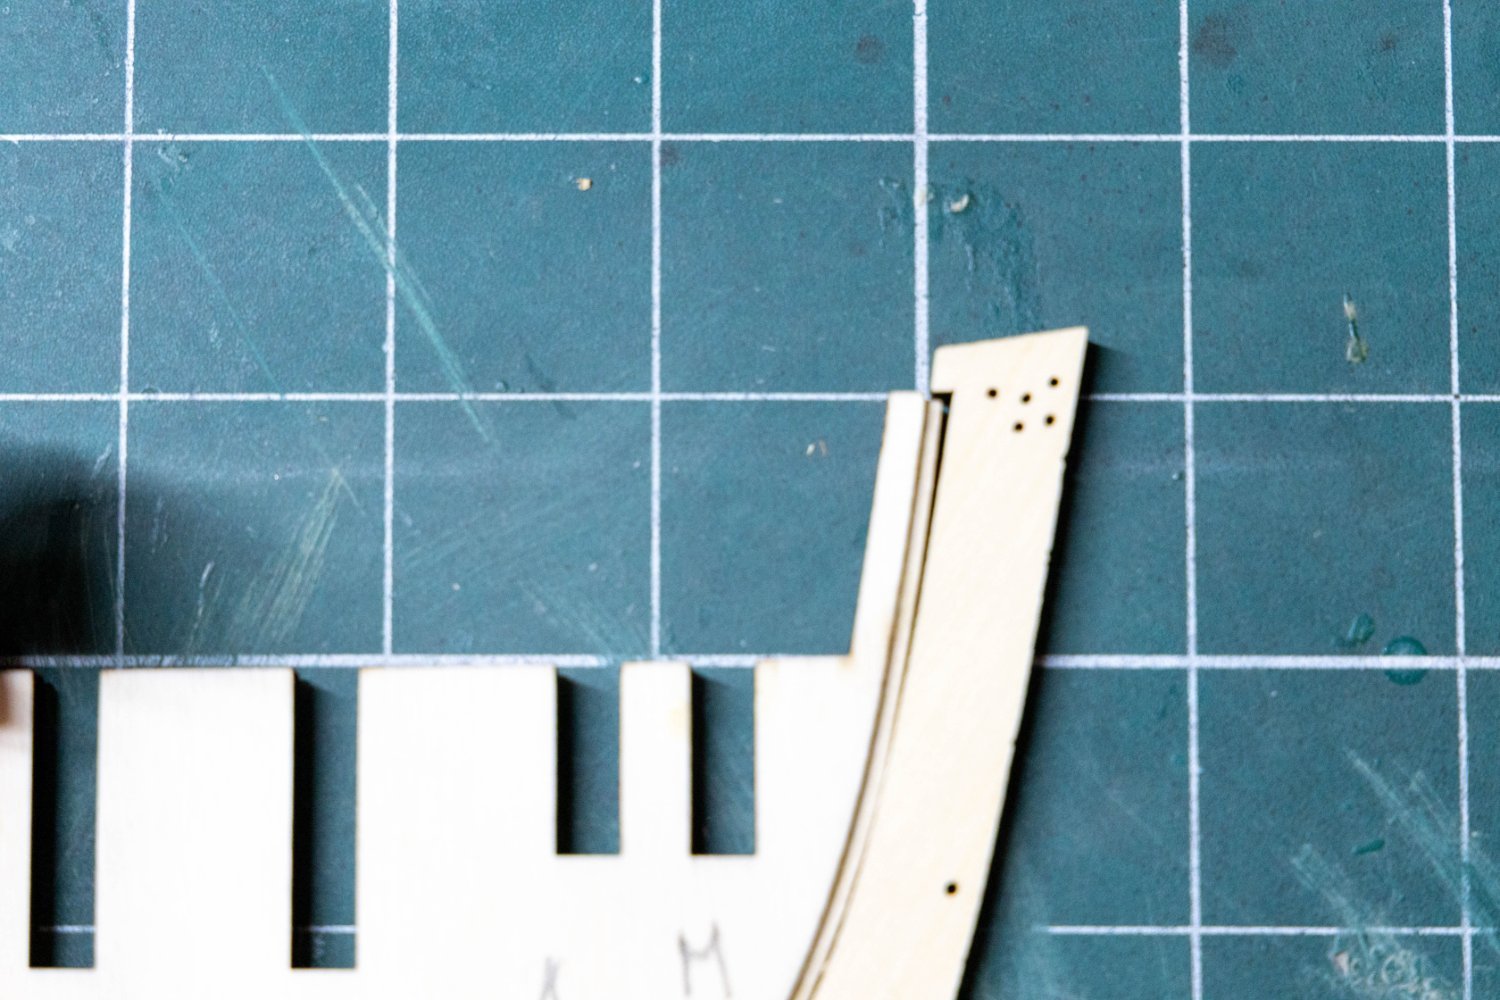
You should eliminate the gap by sanding inside the curve of the stem as needed to create the fit. I had the same issue with mine. It’s important to get the right fit for planking the bow into the rabbet and the only way to do that is reduce inside of the stem. No way to force it.
You’ll want to taper the stem as well, I recall Chuck explains that in the monograph. And that is an extra part.
Thank you. When you explain it like that, it seems the obvious thing to do. My inexperience shows, but would rather ask than get it wrong at this early stage.
- mtaylor and Ryland Craze
-
 2
2
-
10 hours ago, allanyed said:
Sounds like Paul solved the problem, but there is no false keel in your photo, just the keel and the piece with slots for the bulkheads above the keel so it was confusing when first reading your post. Most likely a terminology issue and happy the problem was solved.
Allan
Sorry probably worded incorrectly, but that is the front of the false keel.
-
Thanks Paul, you’re a star! Just needed reassurance 😀
-
Hi guys
I'm hoping one of you Cheerful builders could give me some advise please? I have added the rabbet strip and cut out the two stem pieces. However, their is a small gap where it meets the false keel. Is this going to be an issue? If so, how would be the best way to proceed? Should i just glue and then clamp it to shape? Also i cannot see why there were two smaller stem pieces provided. Is one used elsewhere, and if so where, please? Sorry, but my first attempt at something like this.
Many thanks in advance.


-
Following with interest 👍
-
-
Have to say, your diaries are as inspiring as they are educational 😀
Great save and an excellent read
- mtaylor, Blue Ensign and dunnock
-
2
-
 1
1
-
-
-
1 hour ago, Matt D said:
I think this would work fine, Gary. As Gregory noted above, the slots are the area that is most affected by the thickness. Once you have the bulkheads cut accurately, the thickness isn't very critical. Be sure to transfer the marks for the gun port sills to the plywood as accurately as possible. This is a fantastic project and we'd love to have you join us in building your own Winnie.
One last thing to consider: are you buying the laser cut chapter sets from Syren and having them shipped to you? If so, then the incremental cost of adding the laser cut bulkhead set may be worth considering. I don't know your experience level with a scroll saw. I thought I did a really good job and then found out down the road that I would have been much better off buying Chuck's. Unless you're scratch-building the whole thing, it might be worth shelling out the dough for the laser cut set. Please don't take this as discouragement if that's what you really want to do, because I understand that as well. I really wanted to cut out my own bulkheads.
I hear ya! Scroll saw experience - vertually nil but willing to give it a go lol. I've priced up the wood package from Vahur at Hobbymill.EU, but undecided which way to go yet. I've also got Cheerful in my stash and just received the wood package from him (Vahur). This is more of 'in the planning' stage at the moment. I've so far: downloaded and printed plans...and er thats about it so far 😬
-
Would 'Laser Grade Poplar lite plywood' be recommended? Sorry, but never bought my own before so all new to me
They also supply 'Ceiba' and Birch.
-
17 minutes ago, allanyed said:
Are you speaking of the false keel which is the thin (6" for a 36 gun) strip attached to the underside of the keel or the keel itself? If the keel itself, based on the Shipbuilder's Repository 1788 for a 36 gun British ship it was 1'3" square at midships and tapered to be sided at the stem and stern post 1' 0" This tapering may expose layers of the plywood. The tapering of the stern post and head are even more pronounced so there will surely be one, maybe two layers of plywood exposed which is not a great look. Other than for the bulkheads, you may want to consider using solid material rather than plywood for these various pieces if you are going to shape them for a more realistic look. The tapering of the head is shown in the following build log. It is a different ship, but same idea applies.
Allan
Hi Allan.
Sorry I guess I’m not making sense. I read in a build diary that Chuck recommended 6mm lite ply be used for bulkheads and false keel. I just wondered if anyone had used the ply supplied by Cornwall Model Boats
I had an idea to try making my one as the cost to import from US is very high. If I mess up THEN i can buy some from Chuck 🥺
-
4 hours ago, Matt D said:
Hi Gary. I can't answer your question about the 6mm lite ply. But regarding the false keel: it's designed in 3 pieces and shouldn't be built as one piece. The main reason is that it will tend to warp if it's not broken up. In fact, the middle piece is also reversed to negate the effects of any warping that might occur.
One word of warning I will offer is to make sure your printout is done a 100% scale, not "fit to page". I have a second Winchelsea bulkhead set that's about 96% scale from learning that lesson the hard way.
Hi Matt, thanks for the reply. No, I was thinking of the cost vs the 600mm one.
Have checked the plan measurements and the scale box measures 4 quarters to the inch. So fingers crossed there.
-
Hi guys
Has anyone this side of the pond (UK) used the 6mm lite ply from Cornwall Model Boats for their keel and bulkheads?
Or, does anyone think it would be acceptable and up to the job?
Here is the link: https://www.cornwallmodelboats.co.uk/acatalog/Lite-Ply-Sheet-6mm-x-600mm-P5521188.html#SID=2043
They also supply in 900mm lengths (for the false keel?). Not really much info on their website so thought i would ask.
Cheers
Gray
-
Looking good to me Rick 👍 I have just got mine, but this is going to be a steep learning curve for me too, so i hope you don't mind if i follow along? 😬
Oh and i freely admit that if i see any good ideas i will probably steal them lol
- Freebird and Ryland Craze
-
2
-
I cannot talk, having got a DeAgostini Victory to build (definitely NOT a quality kit!), but i do somewhat agree with Allan's comments above. Personnaly i would tend to look at the Vanguard range, or if skills permit Syren's Cheerful and/or Winnie semi-scratch builds and wait for the Amati Victory- IF you have the time/money to spend to build her 😬
Just my two-penneth .
-
10 minutes ago, glbarlow said:
Thank you. It is by far the most detailed rudder I’ve ever made for sure.
And your patience and skill shows. Well done that man 👍
- FrankWouts, glbarlow and James G
-
3
-
-
-
Just a thought, but……if you want to learn to do your own planking, what about the half-hull planking project from the NRG?
best way to learn.
- mtaylor, VTHokiEE, Keith Black and 1 other
-
4
-
Impressive stuff Fred! I've just received mine and awaiting timber package from Vahur. Think there's plenty of ideas to steal...er i mean borrow
")
Again, really well done. 👍
- Ryland Craze and JpR62
-
2
-
-
-
Impressive build so far. Really like the idea of the false lower deck and the way you've created it 👍

Cheerful build query
in Building, Framing, Planking and plating a ships hull and deck
Posted · Edited by CaptnBirdseye
Thanks for your input Chuck. As you designed it it is always worth listening to. I had thought to do a build log-especially due to the level of difficulty, and with that, the new skills to learn at least for for me- i thought i would get a bit of the build under my belt first.
Chers Gray