Dan Vadas
-
Posts
3,261 -
Joined
-
Last visited
Content Type
Profiles
Forums
Gallery
Events
Everything posted by Dan Vadas
-
What's wrong with a high-strength PVA? It'll dry quickly enough but still give you time for adjustments if needed, it'll bond more reliably than CA, and it won't have any effect on the glass. Danny
-
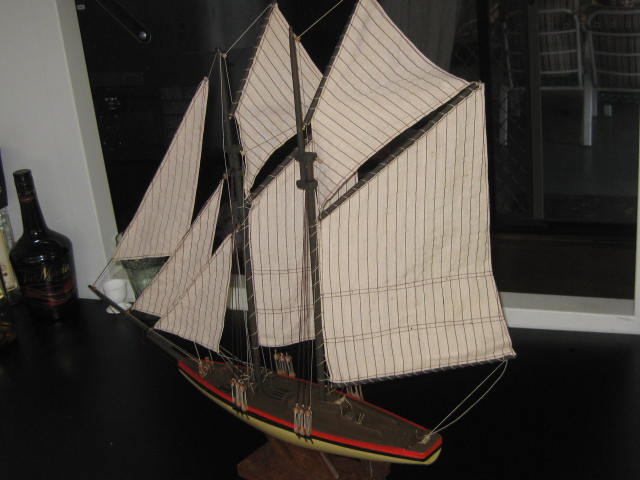
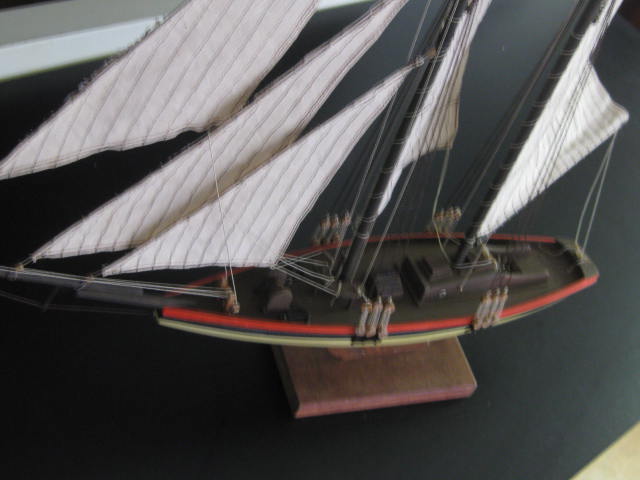
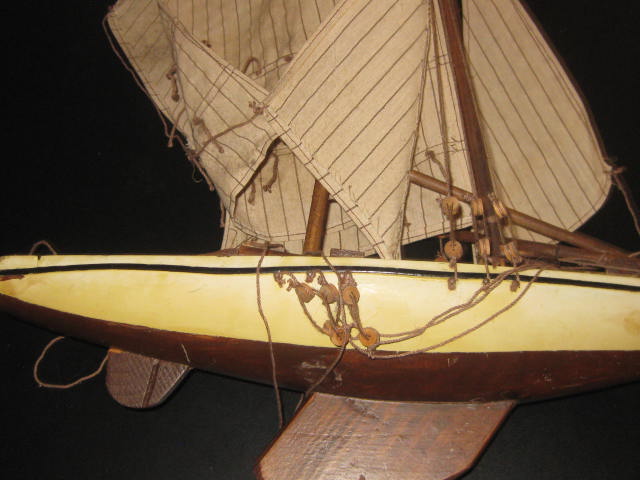
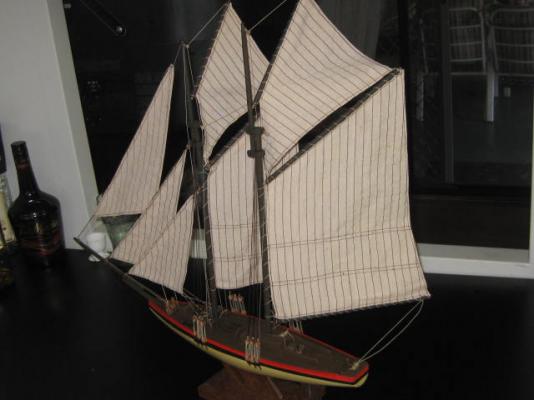
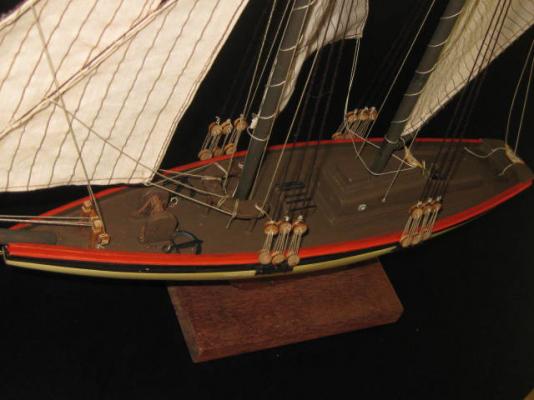
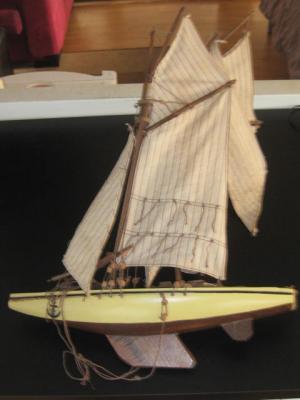
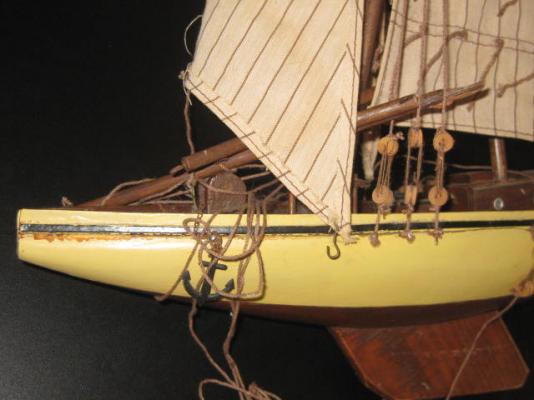
.... continued. I repainted the deck, fittings and cabin and painted a red stripe down the side to cover my repairs to the bulwarks and also to make it "sing" a bit more : And five minutes ( ) later I had it all re-rigged. It actually took me about a week, as I've had a bad back and couldn't spend more than a couple of hours a day on it : For my efforts I'm going to charge a bottle of a nice Single Malt Scotch - it sounds better than asking $80 for the work on a decorative model they bought in a garage sale for $5.00 . Note ; please don't follow any of the rigging I've done on this on your own model - nothing is "authentic", but it looks OK for what it is. Danny


- 14 replies
-
- 23
-

-
- yacht
- restoration
- (and 1 more)
-
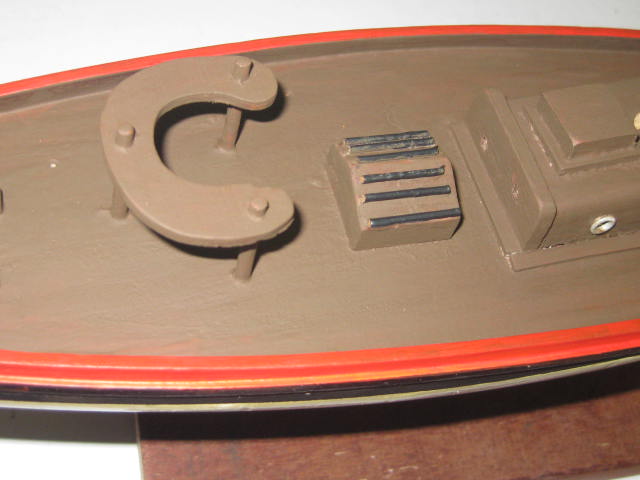
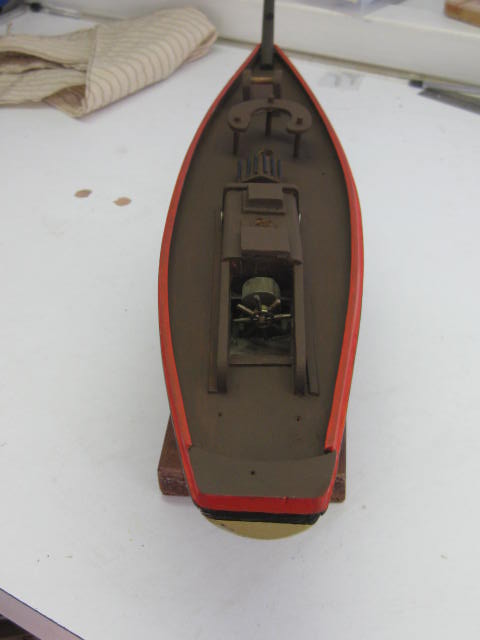
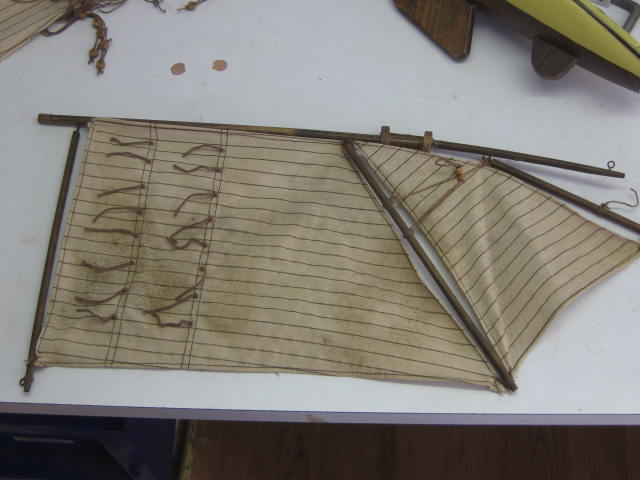
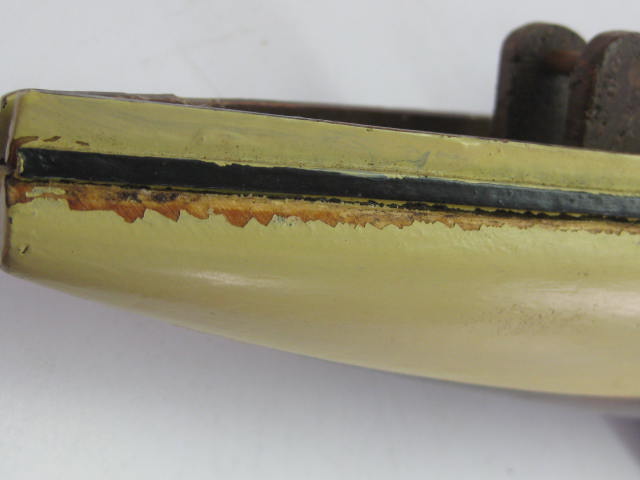
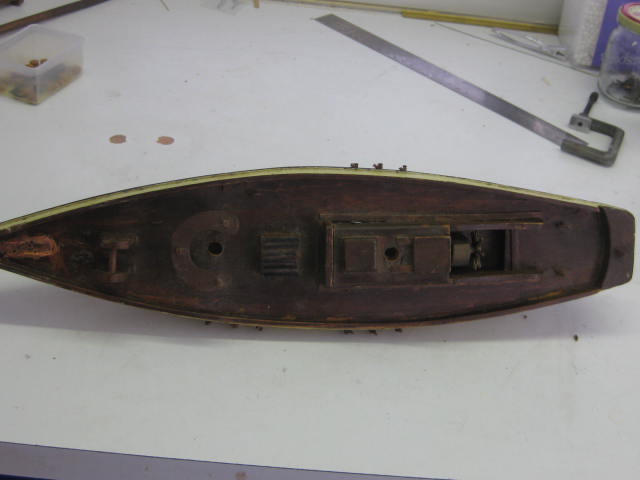
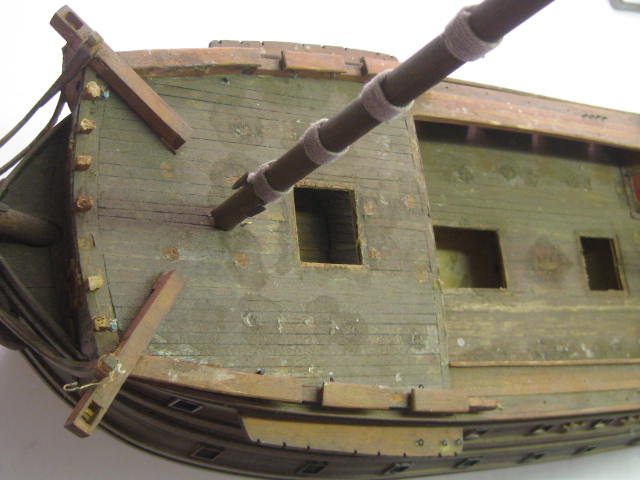
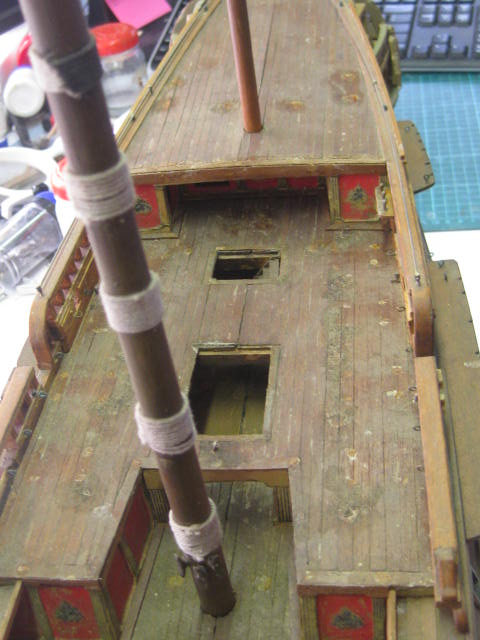
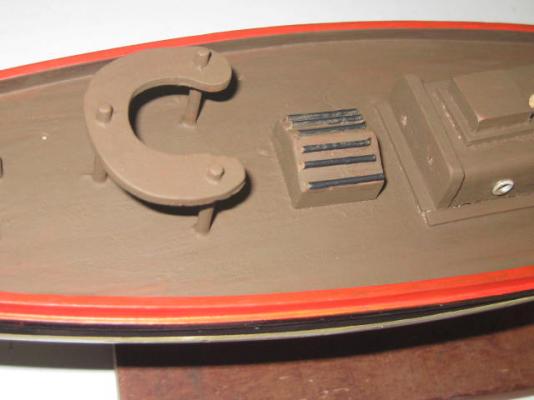
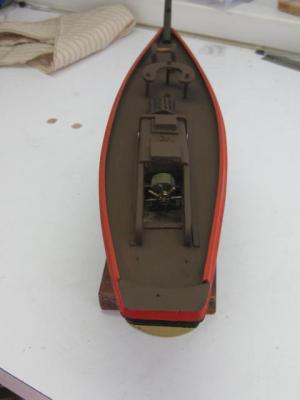
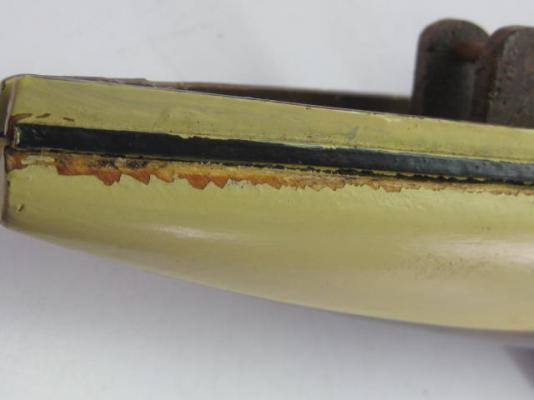
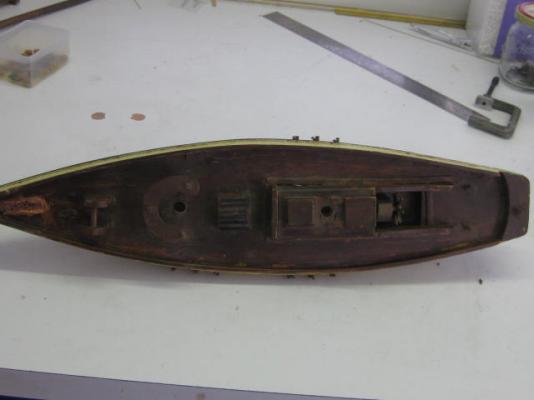
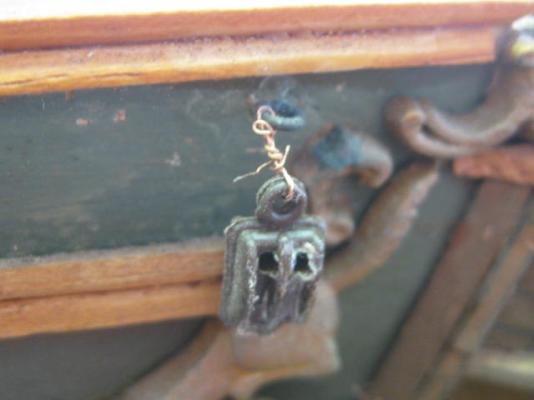
A few more pics before I started dismantling things. I decided it was easier to pull the whole thing apart and start over : The crack in the hull. It turned out to only be the bulwark had come loose : The original "Chains", some rusty nails : Someone had attempted to re-glue the bowsprit using Stud Adhesive (sheesh) : Everything removed : Continued in next post ......

- 14 replies
-
- 14
-
-
- yacht
- restoration
- (and 1 more)
-
Hi Biz, If you have any more pics of the Caroline put them in the Completed Ships Gallery. She looks pretty sharp . Danny
-
Thanks for the comments guys. Yes Steve, the deadeyes arrived safe and sound . Hi molset, I'm no authority on Danish ships of the period, I know more about the English ships of around the Napoleonic era. However, I'd stay with the round tops for this particular model - the English and French were quite a way ahead of the other nations in warship building design and introduced the "square" tops in about 1700. The Danish may have taken a lot longer to start copying them, if indeed they did at all. Besides, the round tops have more "character", in my eyes anyway . Danny
- 59 replies
-
- 5
-
-
- norske lowe
- billing boats
- (and 1 more)
-
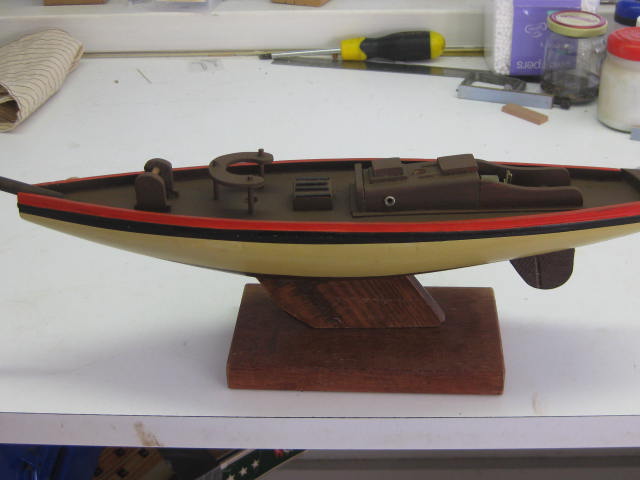
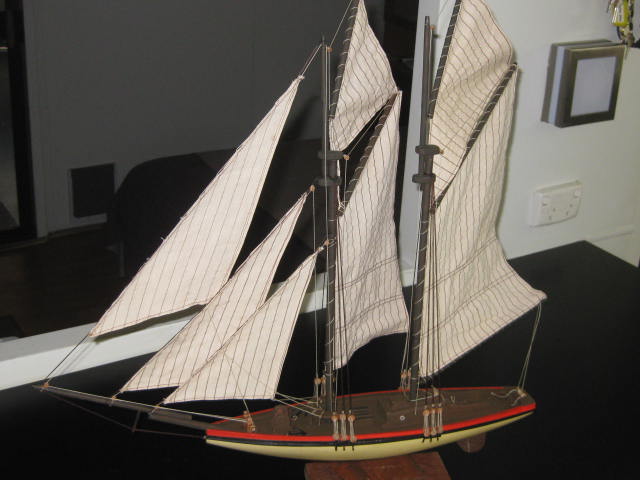
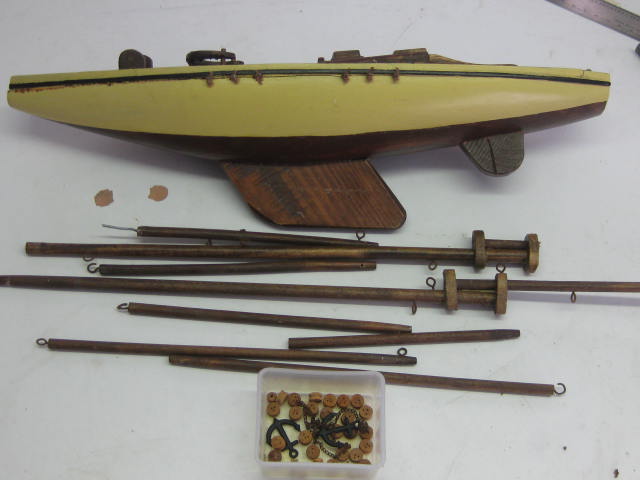
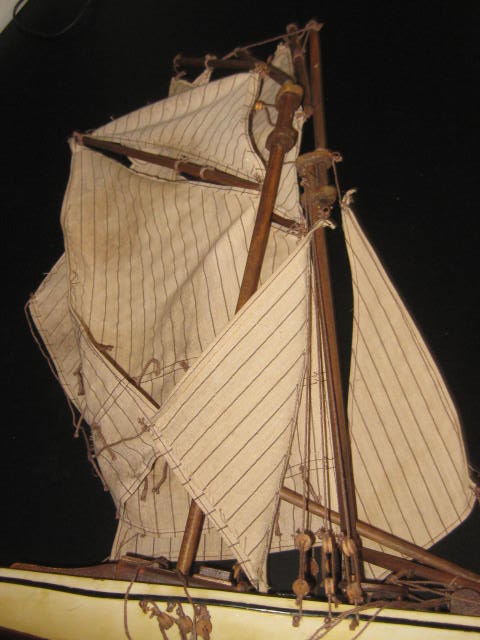
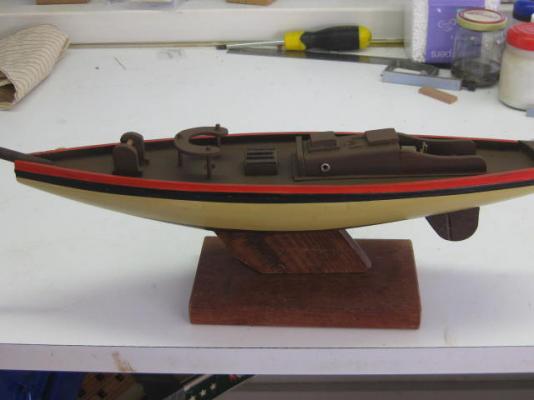
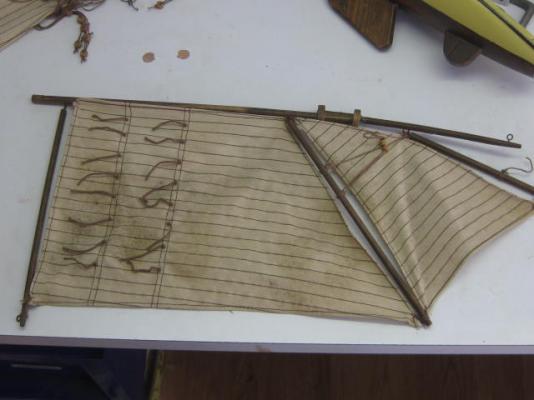
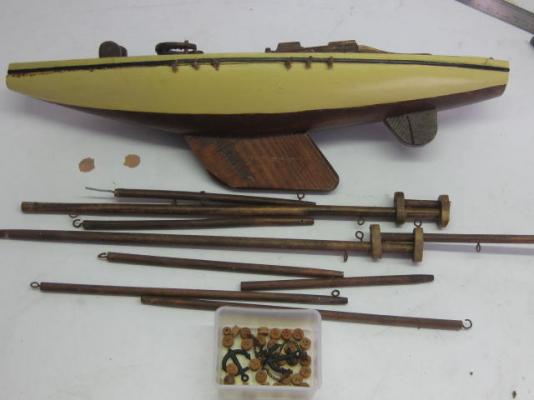
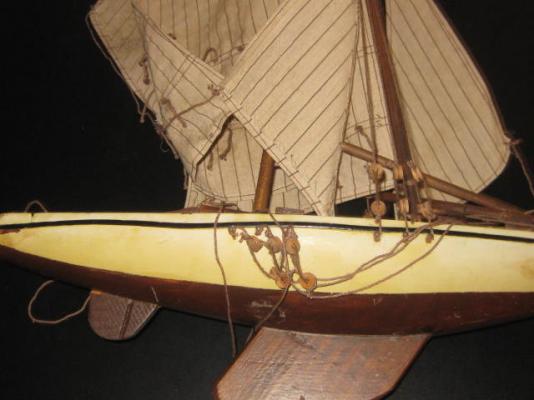
Hi all, My neighbour just handed me a Yacht that may or may not have been made somewhere in Asia, or could be Scratchbuilt, to do a Restoration on. It's not too bad for what it is - a couple of cracks in the hull (which makes me think Asian), the masts are loose, it's VERY dirty, and the rigging needs re-tying. It shouldn't take me more than a couple of days (where have I heard THAT before? ) Danny

- 14 replies
-
- 16
-
-
- yacht
- restoration
- (and 1 more)
-
Hi Greg and Brian, Not even in 6 MONTHS Greg . I've finished off worse for others Brian . Before I do any more on this I've just been handed ANOTHER Restoration job. This one WILL only take a couple of days. I'll keep you posted. Danny
- 59 replies
-
- 4
-
-
- norske lowe
- billing boats
- (and 1 more)
-
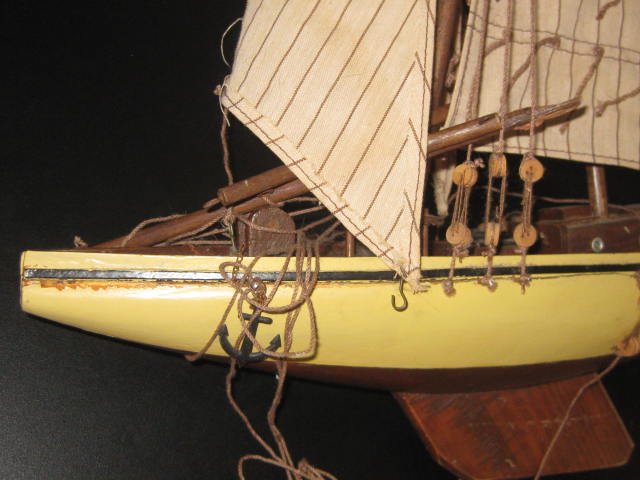
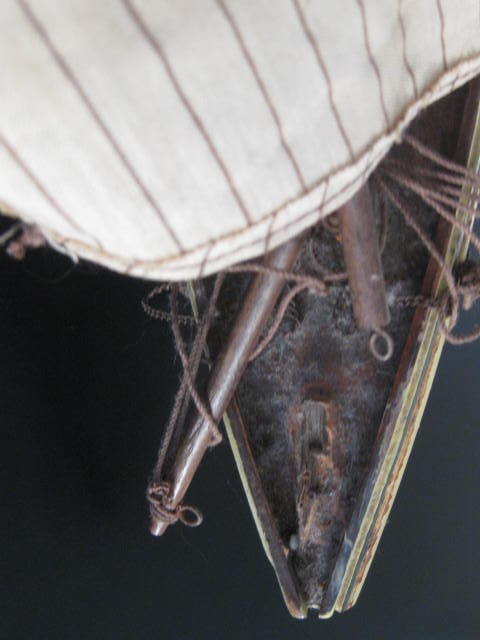
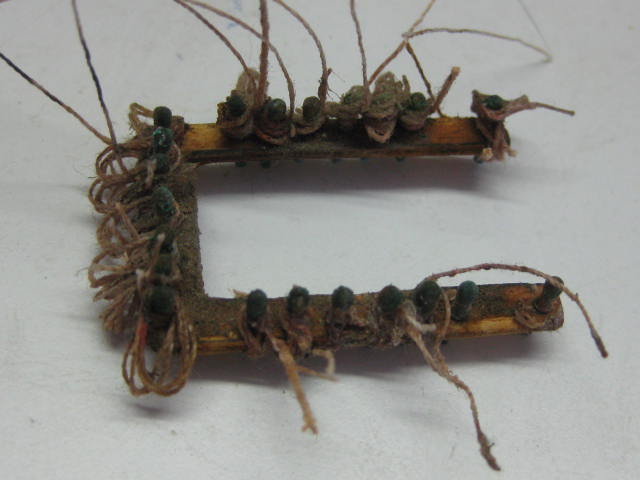
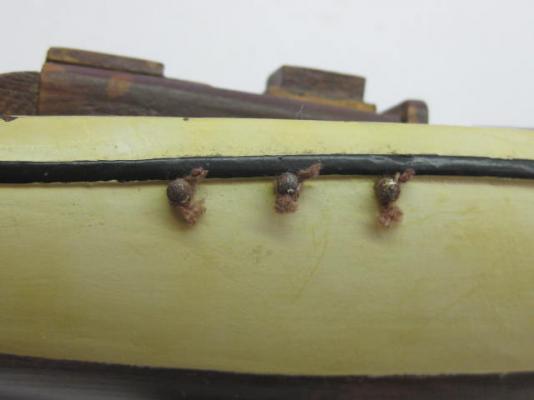
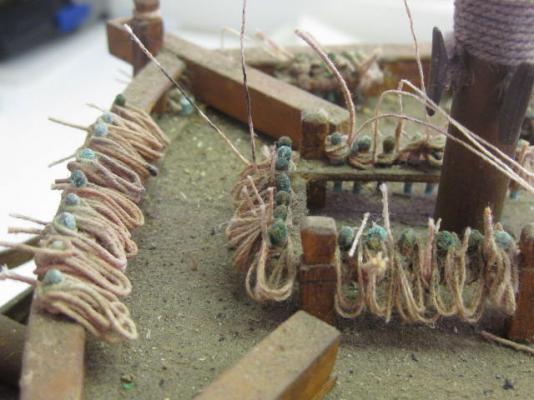
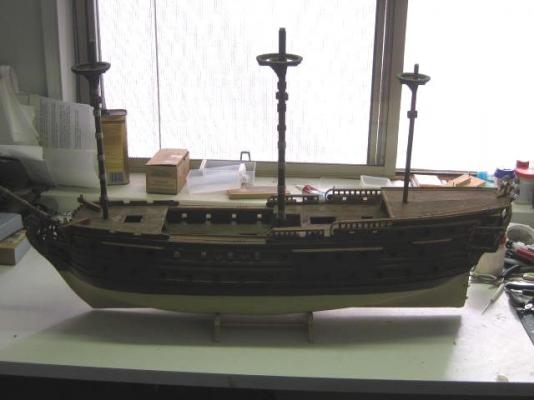
Alan, Peter, Nigel and Popeye - thanks for the replies . I'm OK for the Deadeyes now. There's a shipment of wooden ones coming from Captain Steve - thanks heaps mate . If I need anything else I'll post it when I find out, but I think I'll be OK from here on. Back to work - did I say it would take me about 6 weeks to do the Restoration? Not by a LONG shot . I took a closer look and found that "old mate" had used CA to glue on all the deck fittings, and also to finish off all the rigging. EVERYTHING I touched broke off on the glue joint. As well, all the brass fittings that had been near the CA had a green deposit on them. Yet another reason NOT to use CA for anything permanent . I had to strip nearly every part off the model. Here is the state of play at the moment - I've blown all the sawdust, cobwebs and years of accumulated dust off using a large compressor. Next job will be to wash everything : This was the way all the blocks were attached. It goes without saying that they've all been stripped off as well : Danny


- 59 replies
-
- 12
-
-
- norske lowe
- billing boats
- (and 1 more)
-
Thank you Pat, Christian, Duff, Nils, George, Cabrapente, Mike and Paul. Your congratulations are very well received . I totally agree Mike. As with other "stuff-ups" I've had with the model this is one I will fix later on. I didn't have a very good day for taking the pics - raining outside so I couldn't take it out into the sunlight, and I'd also left my tripod at my daughter's place. I'd also forgotten to re-set my camera to a higher Resolution . I'll take a heap of Hi-Res pics another day and replace some of the ones in the Gallery. Danny
-
Hi Al, The mis-alignment will be very noticeable later on, unfortunately. A perfect reason NOT to use CA glue for this step. PVA would have been a far better option, allowing you plenty of time for re-alignment and even de-bonding altogether if needed. You may be able to de-bond the joints with Acetone, but it'll be difficult - plenty of applications will be needed. PVA can be de-bonded with Isopropyl Alcohol quite easily. It may be a better option to fill the hole and re-drill it. I suggest you DON'T use CA for anything other than bonding metal to wood (and even then only for things like fixing eyebolts to a deck for example) or for making "needle points" in line when feeding through blocks. Lots of luck. Danny
- 265 replies
-
- 2
-
-
- finished
- artesania latina
- (and 1 more)
-
OK, that's IT - she's finished and pics are in the Gallery. There's a Link in my Signature which will take you there. Danny
-
Hi Maury, Thanks for dropping in to my Vulture log from time to time . Vulture took me a week under 4 years to build. I'm guessing that some of the "delay" in your build has been in waiting for further developments from Greg and Druxey? I suppose that's one of the "hazards" of doing a Group Build . To give you a "kick start" on the next step, and maybe a tip or two in their construction, here are the posts where I build the Pump Brakes on Vulture, to save you the trouble of finding them in my log. I'd say they would be similar to the Echo. Greg - lovely cross-section, that's almost exactly what I had in mind . Danny
-
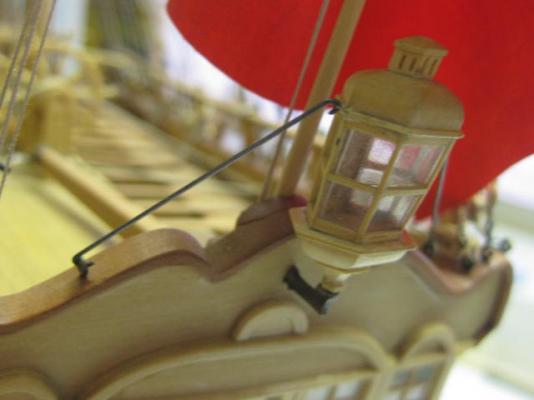
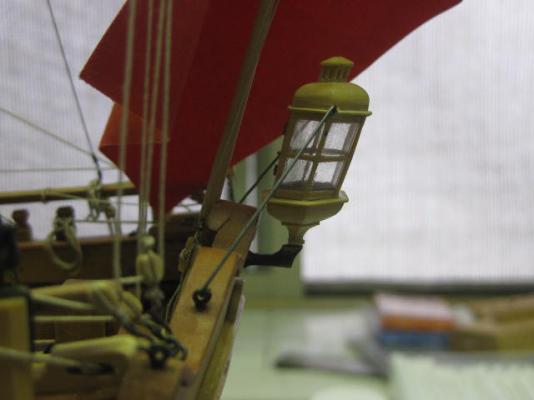
Thank you for the concern and comments Steve, Pat, George, Mark, Greg, Nils, Grant and Druxey . He had no need to be nervous. I knew the lantern was on the ship when I dropped it off to my daughter's van - it could only have come loose on the way back . It wasn't a case of forgetting the braces at the time I initially set the lantern in place - that was deliberate as I wanted it out of harms way while I fitted up the Ensign and Stern Lights. What I DID forget was to permanently glue the lantern to the crank when I'd done the rest . Danny
-
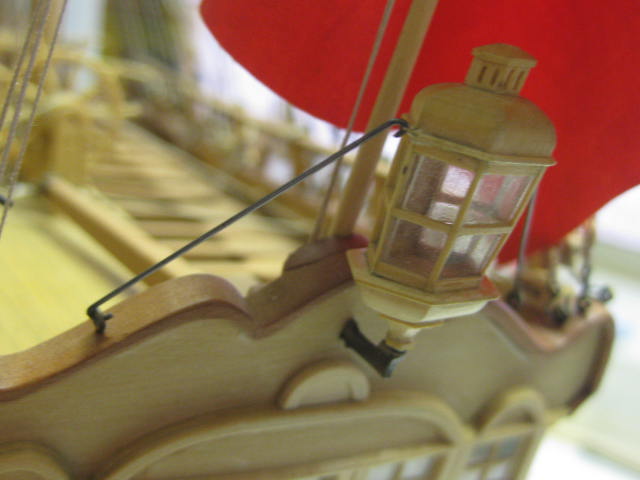
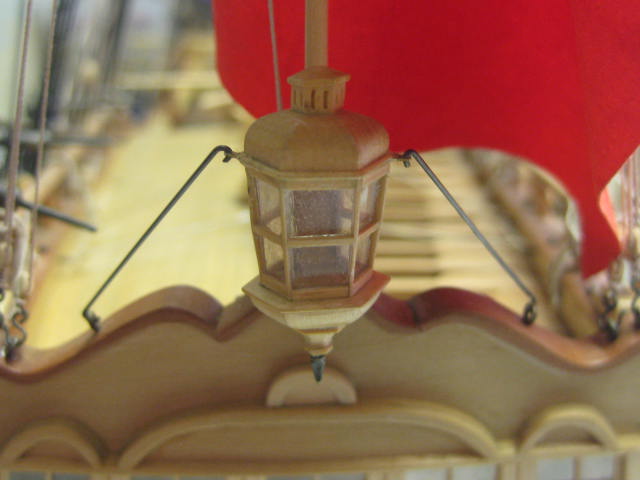
Thanks Scoot (welcome to my build log at last ), Jan ( the pics should be in the Gallery tomorrow), Ian, Harvey and safir3 (2 years on MSW and THIS was your FIRST POST???? Wow, thanks even more ). I almost had a major heart attack this morning. I'd realized that I'd forgotten to fit the Lantern Braces, so I retrieved Vulture from my daughter's holiday caravan where I'd been storing it while I worked on the base. Her van is about 50 metres away from mine, over grass and rough gravel roads ..... I placed Vulture on my workbench and prepared to make the braces - NO LANTERN !!!! This is where the heart attack nearly happened - it had taken me about 3 days to build the lantern, and I'd been quite happy with the result. I REALLY didn't look forward to making another this close from the end ! After back-tracking like a Bloodhound for 1/2 an hour I resigned myself to the worst. I'd have to make a new one . When I took a 2nd look at the Quarterdeck - there it was . It had become detached and rolled down to the quarterdeck rail. If it had rolled to starboard and fallen into the open lower deck I'd never have realised until I'd made a new one. How lucky was that? :D Anyhow - here are the lantern braces. They were a bit of a trick to get the lengths right. I had a couple of goes before I succeeded : At least the lantern won't come adrift now . Danny

-
Yep, exactly. They work the same as the shrouds and deadeyes on the masts. Danny
- 265 replies
-
- 1
-
-
- finished
- artesania latina
- (and 1 more)
-
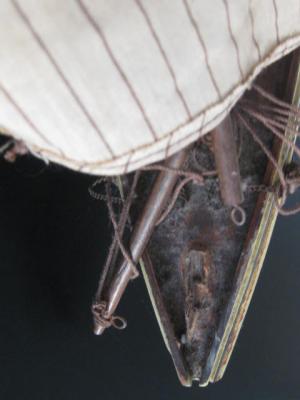
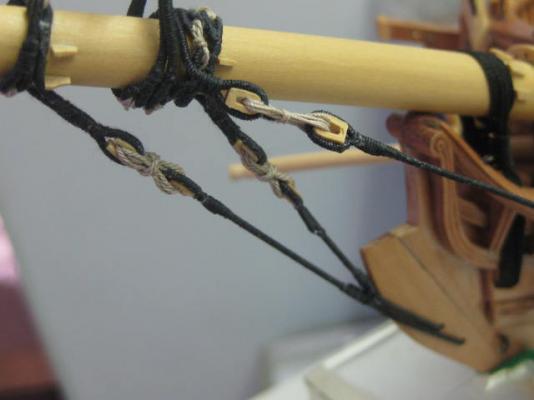
On the other hand, here is the bowsprit from Vulture. She uses Closed Hearts rather than Deadeyes for the bowsprit shrouds. I'd be more inclined to do it this way, as I said in the previous post I built Bounty as per AL's instructions. Vulture was built using James Lees' "Masting and Rigging of English Ships of War" and Vol 4 of "TFFM" and would most likely be the more accurate. Danny
- 265 replies
-
- 1
-
-
- finished
- artesania latina
- (and 1 more)
-
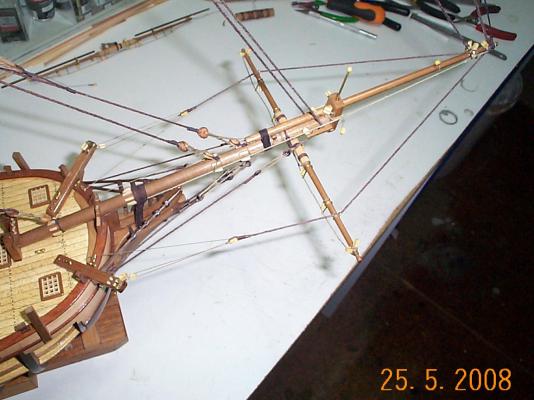
Hi Al, For what it's worth here's a pic of the Standing Rigging on my Bounty's Bowsprit. Maybe it'll give you some tips. BTW - I built this as per AL's instructions, well before my Scratchbuilding and Researching days . Click on the pic to enlarge it. Danny
- 265 replies
-
- 1
-
-
- finished
- artesania latina
- (and 1 more)
-
Hi Maury, Just found this build log - good work so far . It makes me all the more inspired to do a similar cross-section, but of "Vulture" rather than an Echo. It'll be a nice companion for my full model . Danny
-
Acetone won't remove soldering flux - vinegar will remove just about anything (except polymer coating on wire). Danny
-
I use white Vinegar as a cleaning agent - always works, especially good on silver soldered items. Danny
-
Looks great Erik. Don't forget, in "real life" you also get a lot of variations in colour from one piece of timber to the next . Danny
- 222 replies
-
- 4
-
-
- 18th century longboat
- model shipways
- (and 2 more)
-
Hi Chippa, You're doing all right so far . I did a Search of other Mantua Constitutions to see if someone else on MSW was building the same kit, but unfortunately you are the first so you won't have anyone to "follow" with this build. However, the basic techniques of building virtually any model are similar so help will come from other builders. Pay particular attention to "fairing" the bulkheads once they are all glued in square. This is critical for getting the planking to "run" correctly. Check out the methods used by other builders - it really doesn't matter which ship they are building, the end results will be the same. Take a look further into their build logs to see whether their planking looks good or not before using their methods - some builders are more experienced than others and their results speak for themselves . Have fun with the build, and don't be afraid to ask questions if you're not sure about the next steps. Danny
-
Thanks wyzwyk, Allan, Kevin and Russell. Almost - I've just got to finish off the base, should happen today or tomorrow. Yes . Russell - Can you get to Canberra on September 19/20? She'll be at the Model Show that weekend. It's being held at the Mt Rogers Primary School, 52 Alfred Hill Drive Melba - that's on the Yass side of Canberra Failing that she'll be in the Port Macquarie Maritime Museum immediately after the show. Danny
-
Very nice Erik . Are you going to use Minwax Wipe-on Poly? Danny
- 222 replies
-
- 1
-
-
- 18th century longboat
- model shipways
- (and 2 more)
-
Peter, I was just about to send out a plea for help in that regard. I don't have ANY of the larger Deadeyes. Scaling off the plan they are about 8mm diameter. I have more than enough of the smaller ones. Any help here would be appreciated, as they are going to be one of the first jobs. Danny
- 59 replies
-
- 5
-
-
- norske lowe
- billing boats
- (and 1 more)