Dan Vadas
-
Posts
3,261 -
Joined
-
Last visited
Content Type
Profiles
Forums
Gallery
Events
Everything posted by Dan Vadas
-
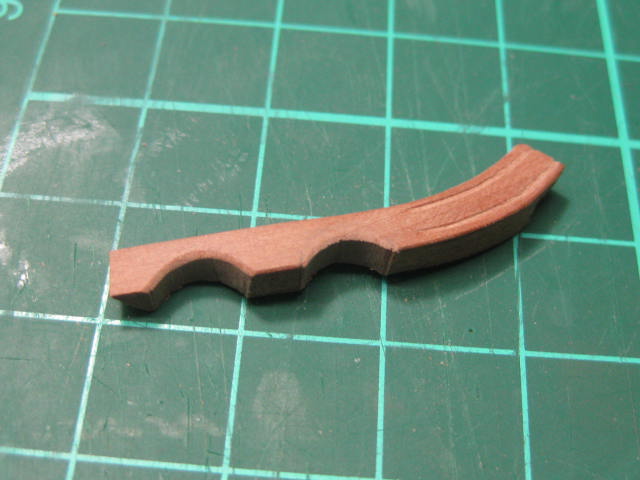
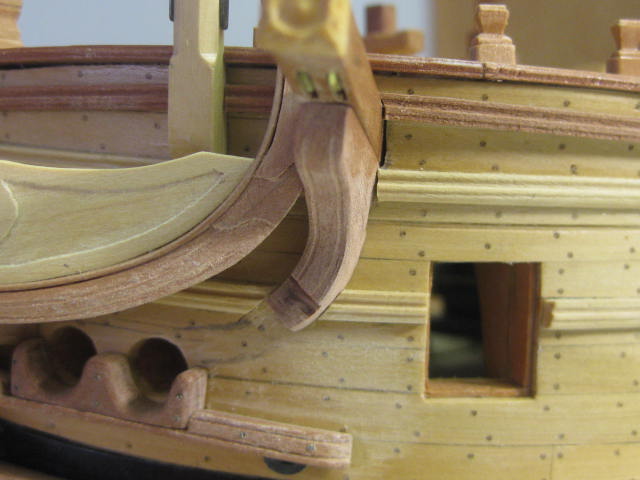
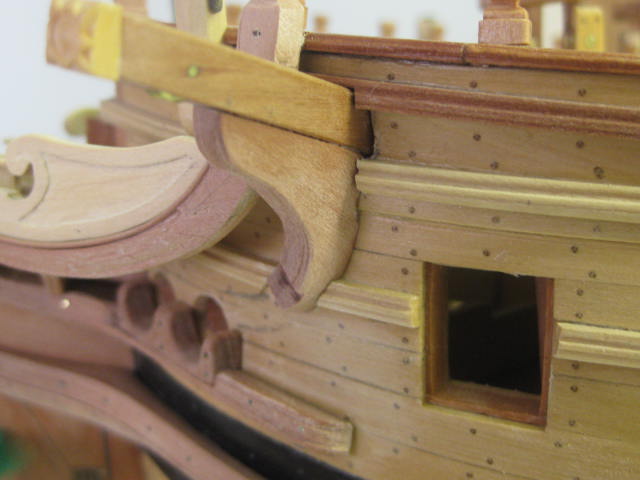
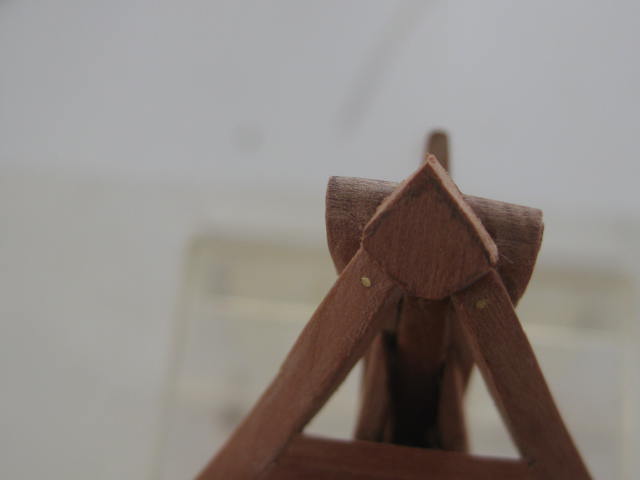
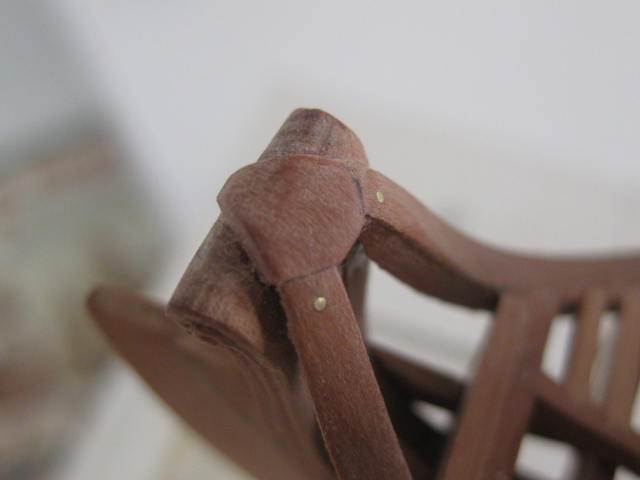
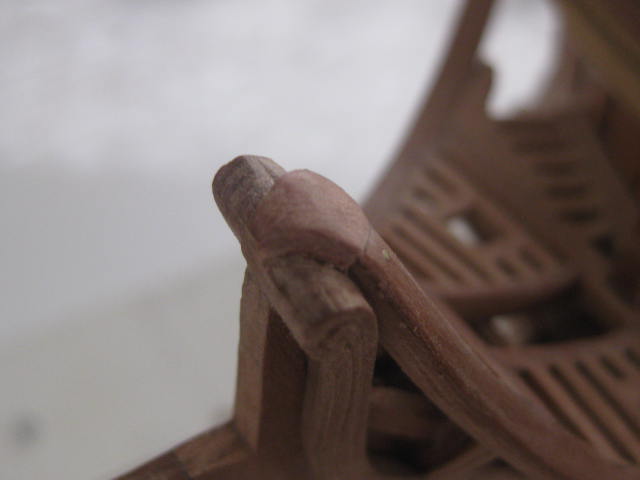
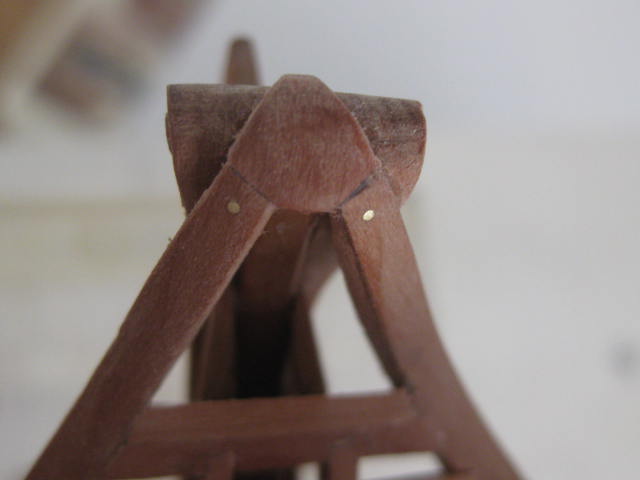
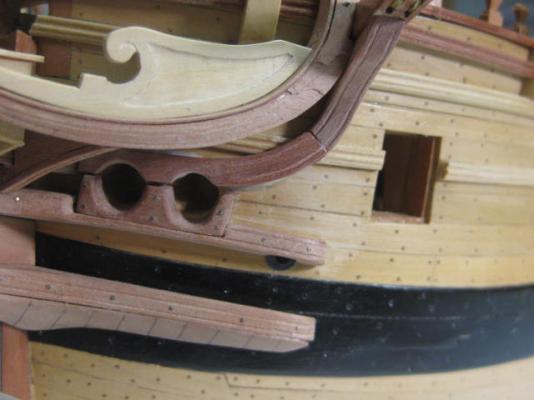
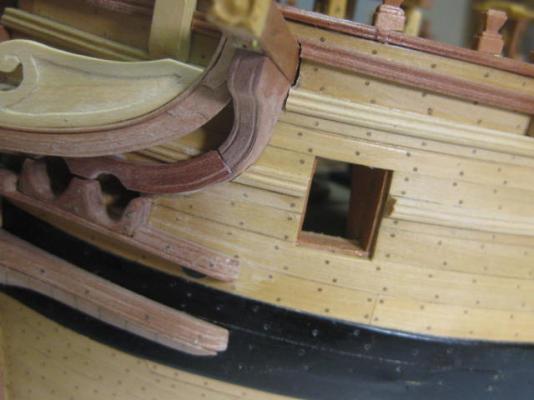
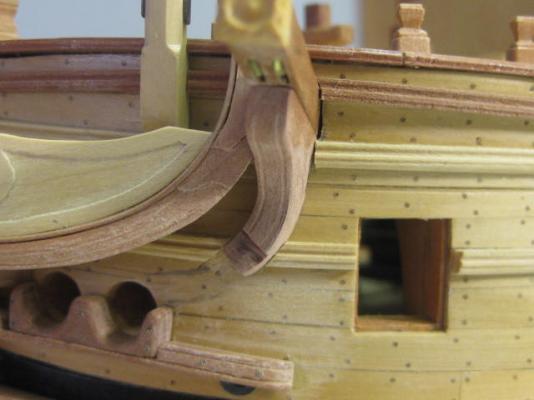
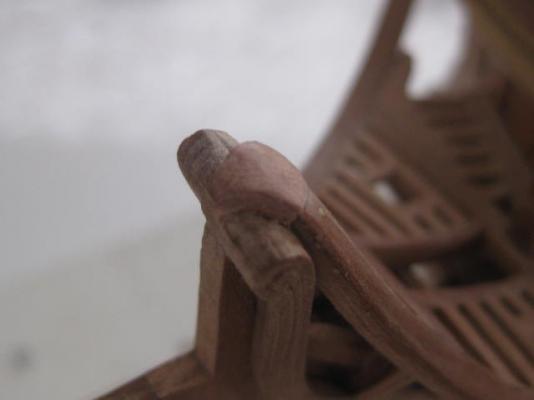
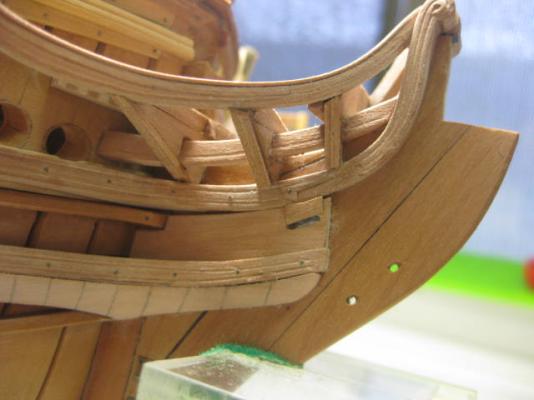
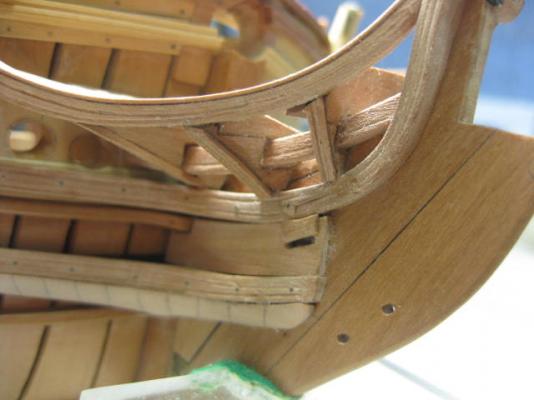
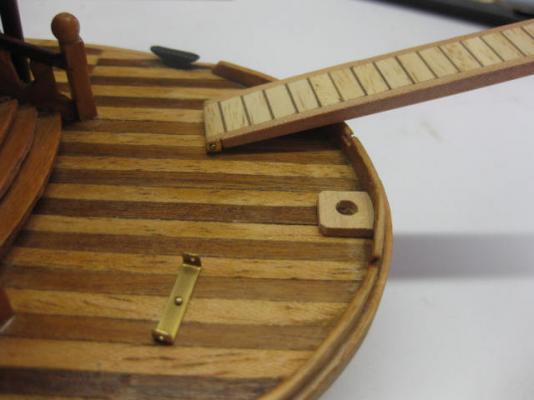
Thank you for the kind comments John, Brian, Dale, Pat, Ian, David and Cabrapente - always appreciated. Eking Rail The Eking Rail is an extension of the cathead support. It curves to match the hull, and cuts around the Hawse Holes : Danny


-
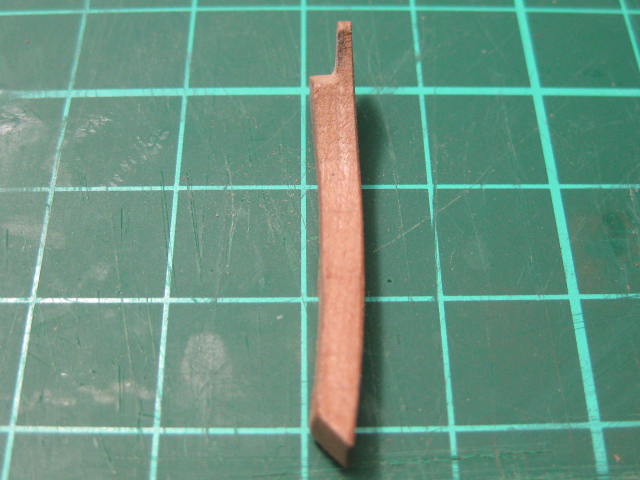
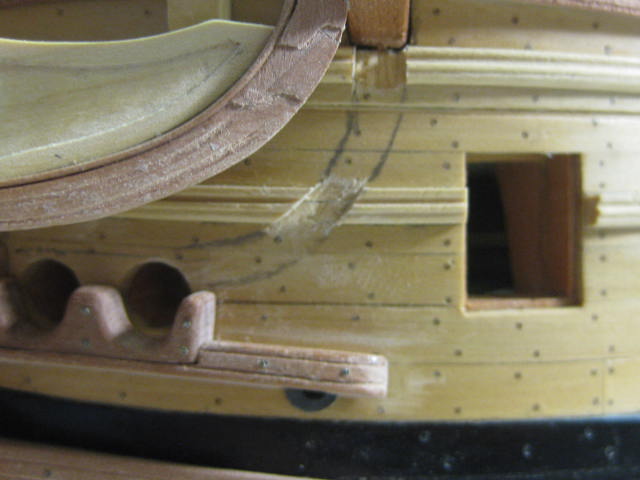
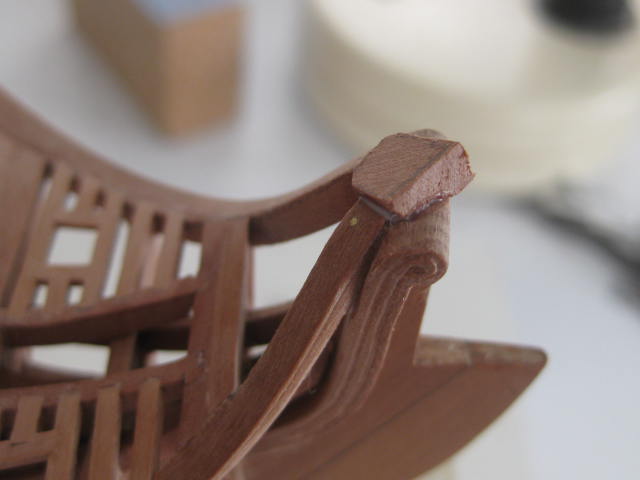
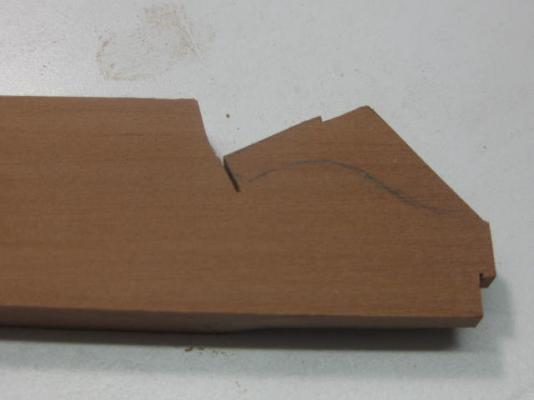
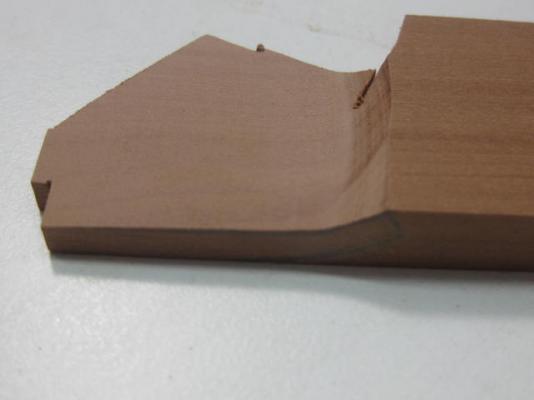
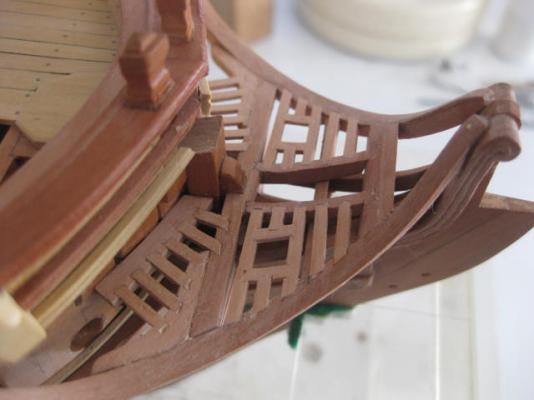
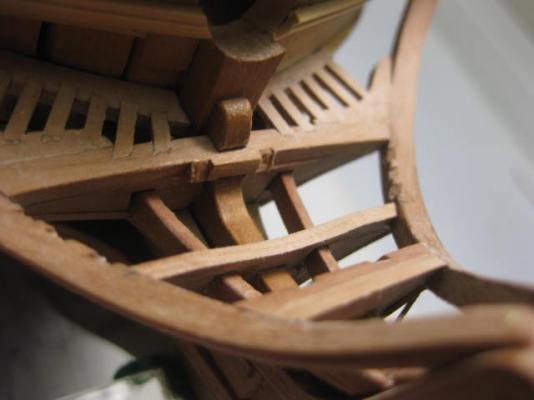
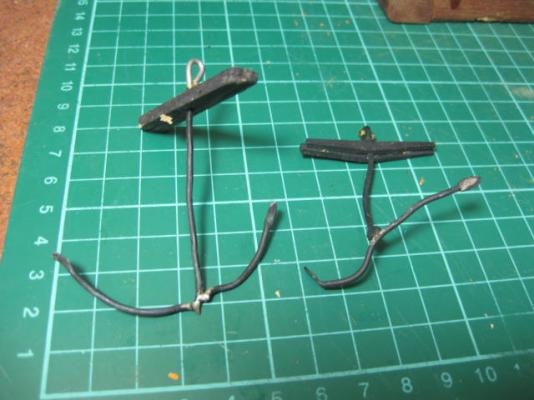
Cathead Supports These are quite tricky to make. They curve around between the Main Rails and the Upper Cheek, finishing at the start of the Eking Rail (which comes next). First I made a card template of the curve, and removed a section of the Sheer Rail and Waist Rail to accommodate them : To shape these I used a piece of over-thick stock into which I sanded the inner curve on the disc sander, finishing it off with a round sanding stick : After much dry fitting and adjusting a molding was scraped into the outer face and a scarf joint for the eking rail was cut in. Then I glued the supports in : Danny


-
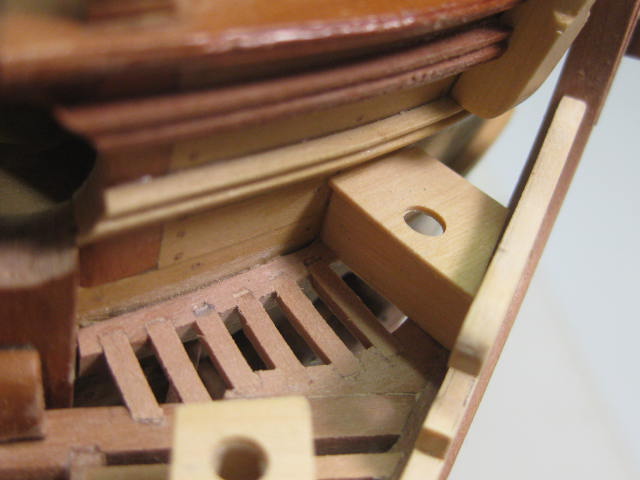
False Rails These are decorative boards which sit on top of the Main Rails. They give a little privacy to the aft Seats of Ease. The central portion of these are carved down : Aft Seats of Ease I've also fitted the Aft Seats of Ease. These fit into the space between the false rail and the bow of the ship : Continued in next post .....

-
Thanks for the replies Ben, Bryan, Duff, David, Michael and John . Plan your entire workshop before starting to build benches etc. A workshop of that size gives you a lot of scope to build a very good one . Keep the "dirty" area away from your Assembly bench as much as possible. Use an extraction fan or vacuum system for the saw, sander etc. A water supply and small sink is handy if you can incorporate one. You will be able to put at least three good size benches in. Use one for the power tools, one for an assembly bench, and one for "nothing in particular" - on that one you can lay out your plans and any other temporary things. The flooring should be something that is easily cleaned, and be a neutral color to make retrieving those bits that fly off the bench easy to spot. I suggest a greyish timber - I use "Floating Flooring" which is a faux timber copy of the real thing, but much cheaper than proper tongue-and-groove flooring. It will go over a concrete or chipboard floor with a suitable foam underlay. DON'T use carpet - EVERYTHING gets lost in it. Linoleum is OK but not as hard-wearing as timber. Good lighting is essential. I suggest at least three fluorescent ceiling lights, perhaps dropped on chains to compensate for the high ceilings, and a few adjustable arm lights above your power tools and assembly bench to direct extra light where you need it. Some guys like using natural light (windows) but I find it can be a pain if the sun is coming through a window and actually blinding me. I have pull-down blinds on those windows which can be so affected. Danny
-
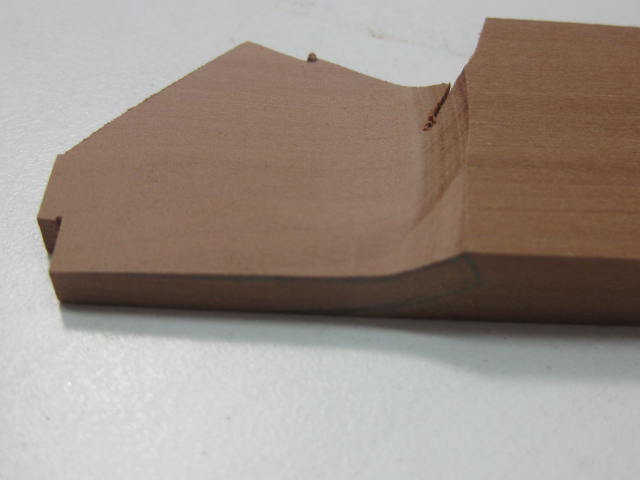
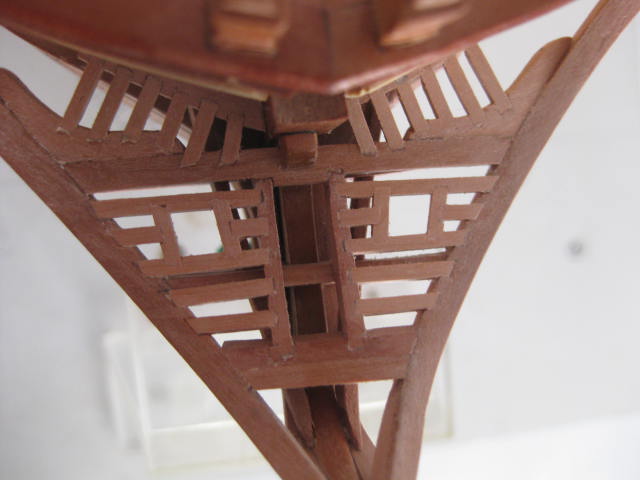
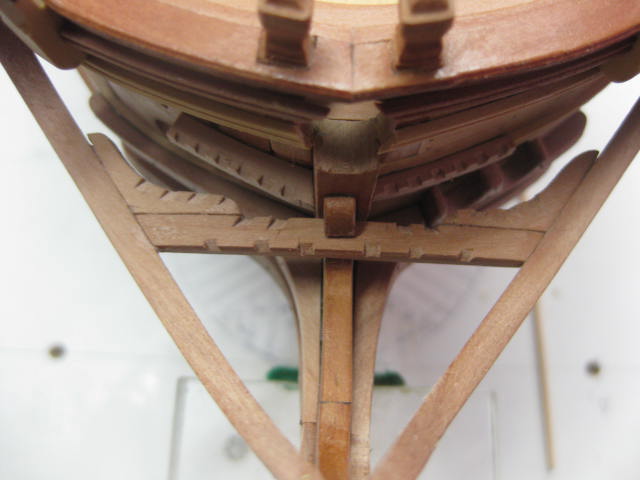
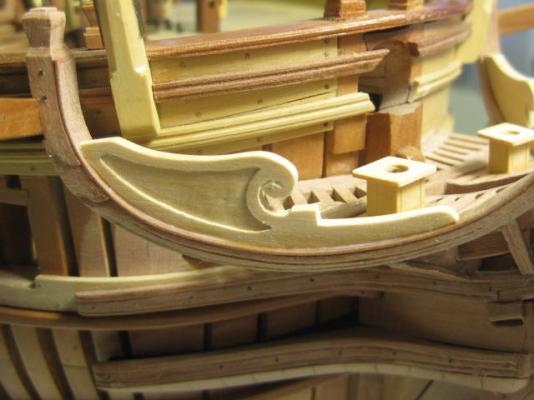
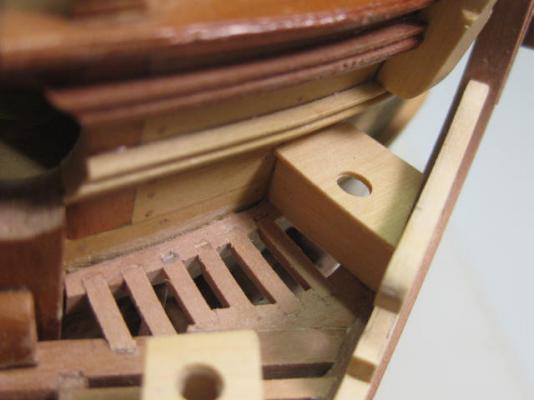
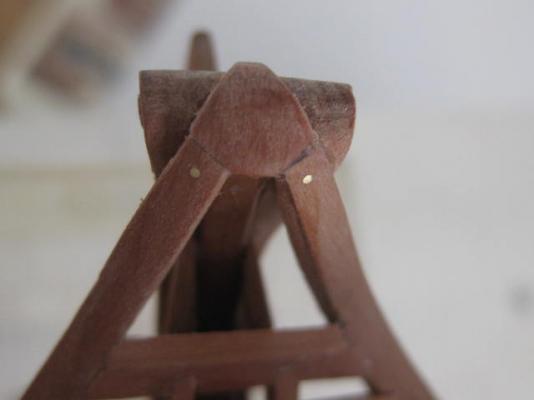
.... continued. Once the head timbers were all installed I could fit the rest of the ledges. Note the parallelogram shape of the carlings for the fore Seats of Ease. Apart from the aft ones which fan out the ledges are all parallel, even if they don't look like it (camera angle) - they have a slight roundup to match the head beam : Saddle Another thing that could now be finished off was the Saddle at the fore end of the main rails. First I cut a piece out oversize and finessed the under side to fit over the rails. This was then glued in place before final shaping : The saddle after shaping : Danny


-
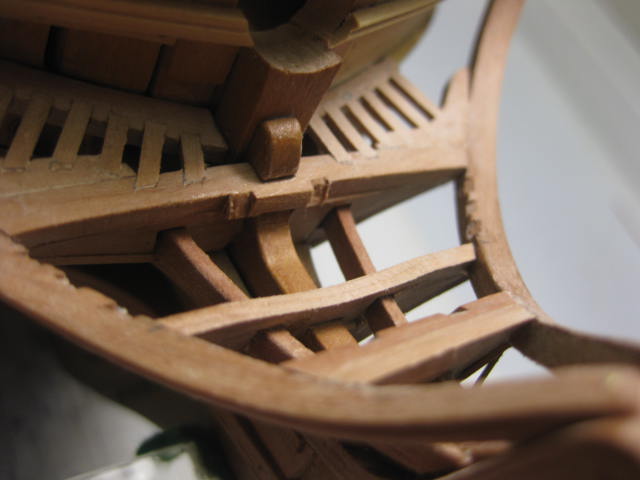
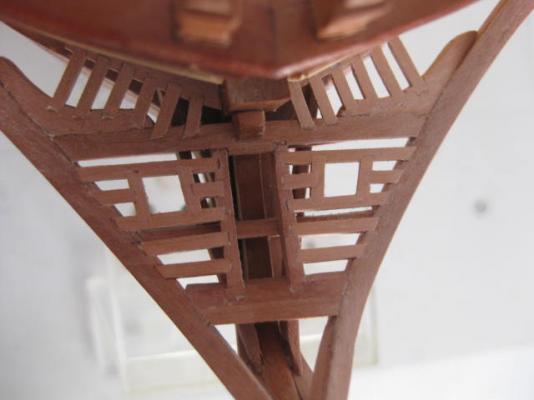
Thank you Druxey, Mark, Kevin, Brian, Geoff, Grant and Larry. I know I've had plenty of practice at building workshops over the last few years Geoff, but NO . It's not my screen going black that's the problem Larry. The actual Window shuts down and I have to click on it (anywhere) to re-open it so I can continue typing. For some reason it's working fine this morning - go figure. I'm still going to take the puta in for a cleanout later this week - I'm pretty sure I have some kind of annoying virus . Just for you Grant ..... . After marking the positions of the ledges on the head beam and knees I removed them and cut in the mortices : I then glued them back in permanently : Head Timbers Next up were some of the most difficult items to make in the whole ship - the Head Timbers. Getting the shape for these required a lot of measuring and card templates. Unfortunately I was without my camera for a while when I was building these, so I didn't get any pics of their actual shapes before I'd glued them in. Here are a couple of pics from above : And some from below. The head timbers have a molded covering board on their outer edges. The Lower Rail has also been fitted : Continued next post .....


-
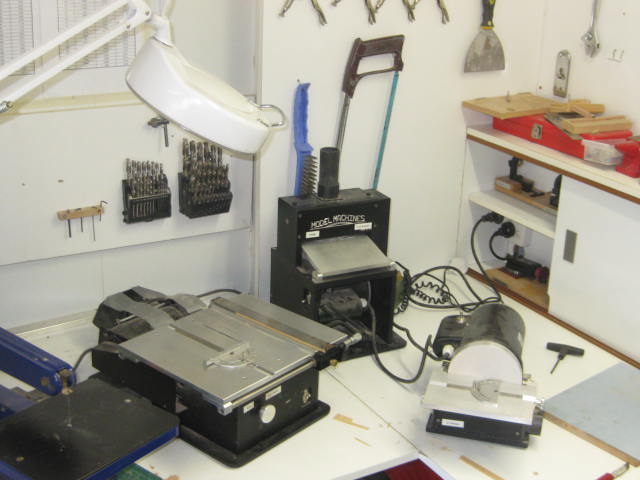
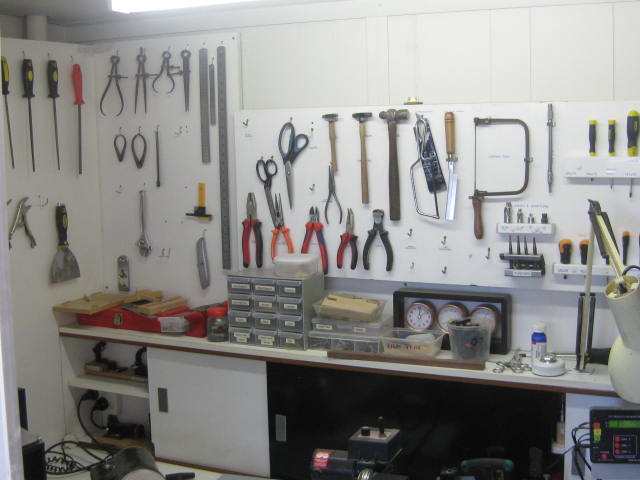
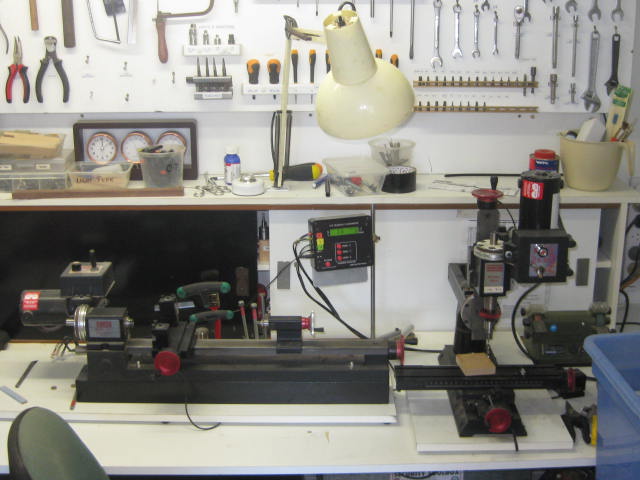
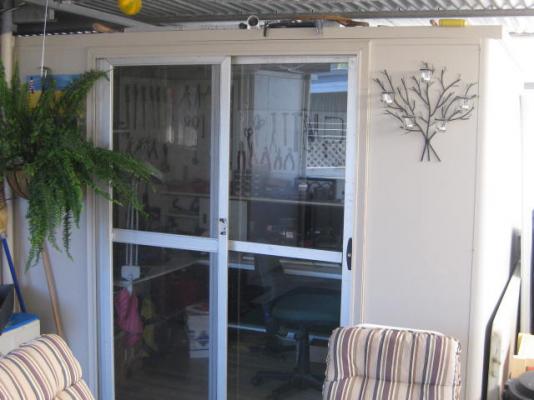
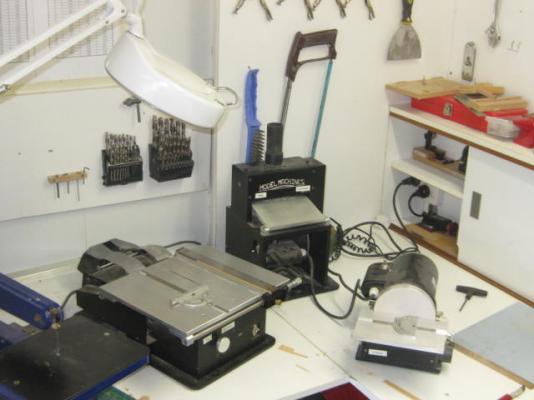
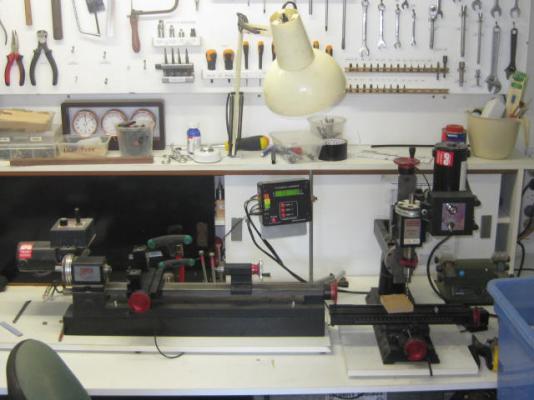
My apologies for not replying sooner - the wireless internet up here is as slow as three wet weeks, and I have a bug in my computer that turns the Window off every 20 seconds or so making it very difficult to type anything . Here are the requested pics of my latest (and hopefully LAST) workshop. I've built a small (2.7m x 1.8m) room next to the caravan annexe for the power tool part of my shop : The interior is very cosy to say the least - I have to move some of the tools around a bit as I need them : The Assembly bench is inside the van itself : All in all - quite workable. I still have to arrange some of the tools a bit better. Danny

-
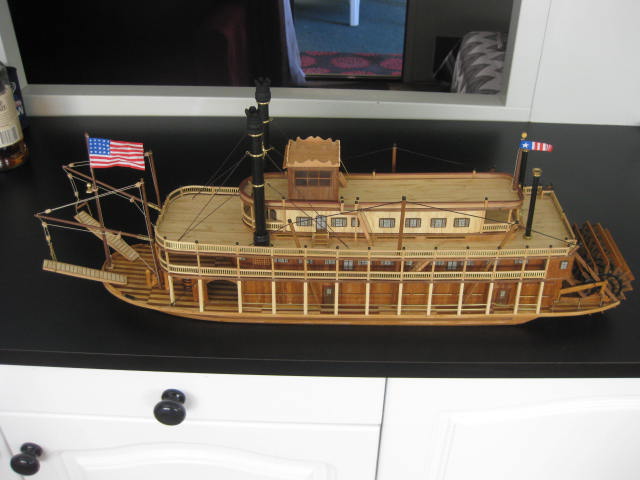
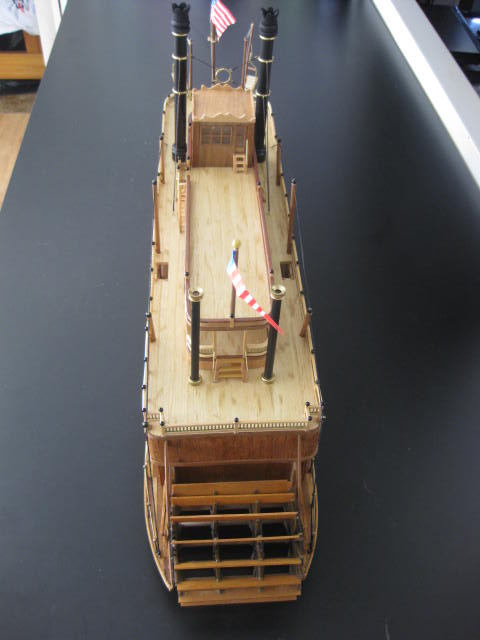
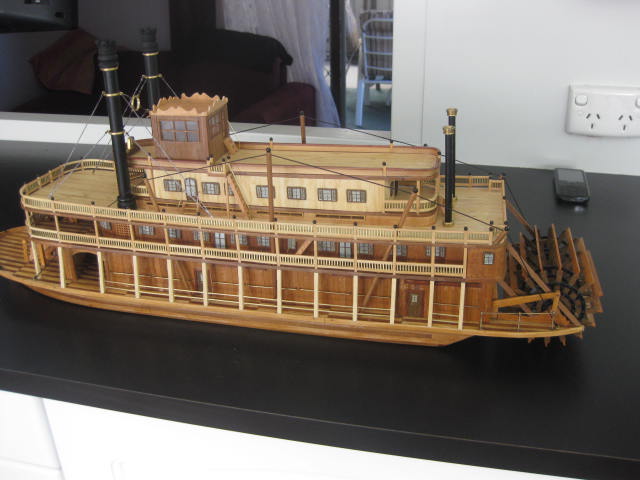
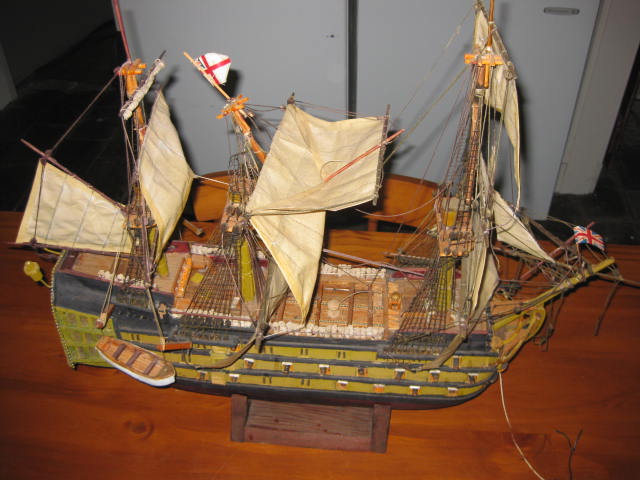
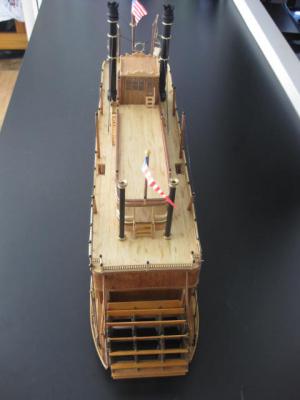
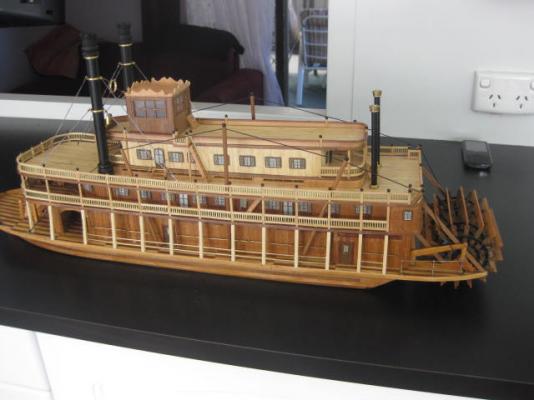
The model is now finished . My original estimate of 3 weeks to complete the model has blown out to 2 months, but I had a few distractions along the way (like building a new workshop) and my OCD dictated that I HAD to go a bit beyond the Call of Duty . Here are a few pics : Some observations about this kit. I made the same(?) Artesania Latina kit about 30 years ago, I remember it as being challenging for a virtual beginner as it was my 2nd wooden kit, but it turned out quite well and I still have it. This particular kit was released some time after mine, and in my opinion is verging on a piece of JUNK. The instructions were about the same - barely adequate for a beginner - and the plans don't match in measurements from the plan, elevation and fore and aft views . My main beef is with the materials supplied. My older version had very good timber - accurately dimensioned, more than enough material supplied to allow for mistakes, good quality castings, timber railngs and reasonable rigging thread. This kit contained NONE of the above . The timber was of very poor quality, there wasn't even enough to do the job ONCE in most cases and the dimensioning was a joke. The castings crumbled as soon as I touched them - I had to scratchbuild replacements for virtually ALL of them. The railings were diecut brass instead of timber. The rigging thread was garbage and I replaced it with aftermarket thread. Although this kit was also Made in Spain (not Asia) it must have been released after AL went on their big cost-cutting exercise - it was almost as bad as their more recent offerings . However, it didn't turn out too bad and I'm sure the owner will be happy with it. NOW - back to "Vulture" . Danny


- 62 replies
-
- 12
-

-
- king of the mississippi
- artesania latina
- (and 1 more)
-
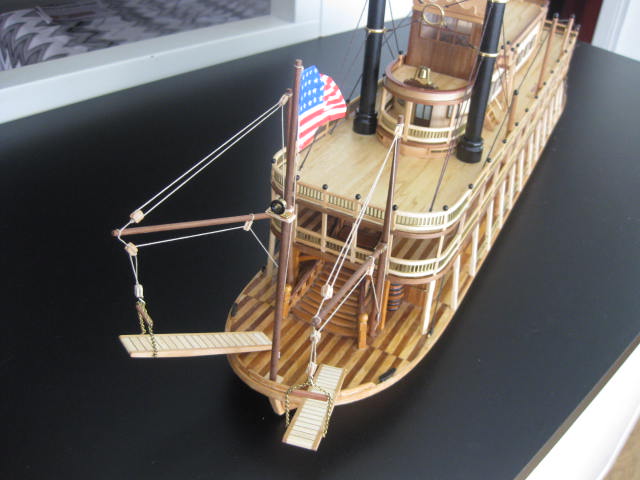
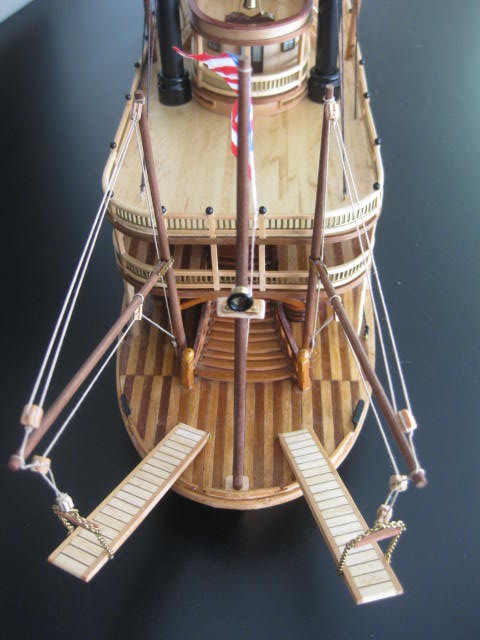
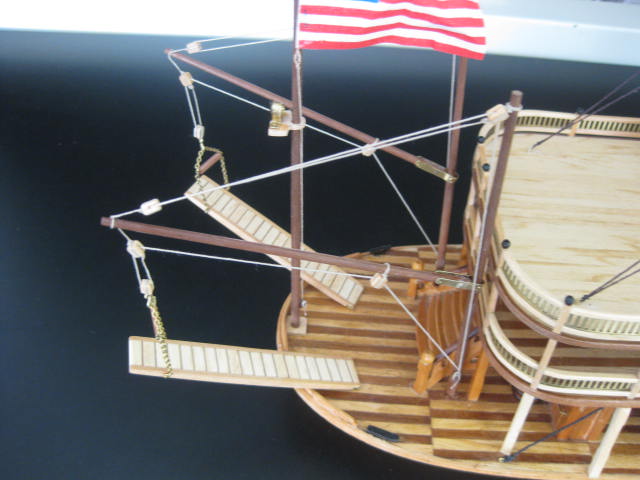
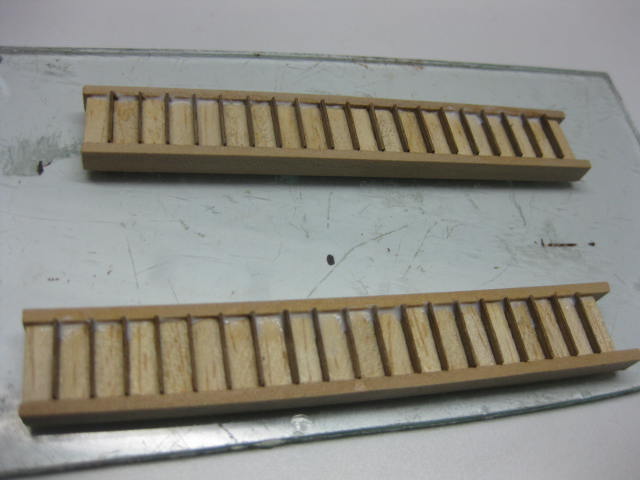
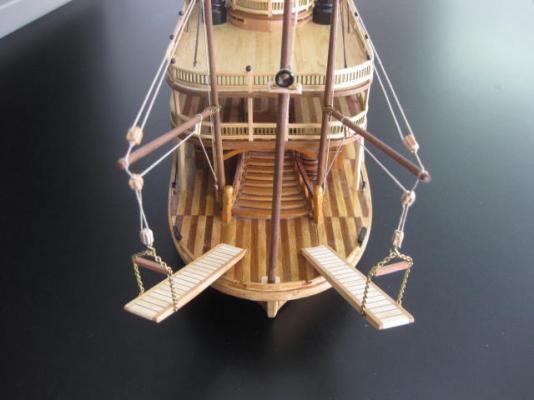
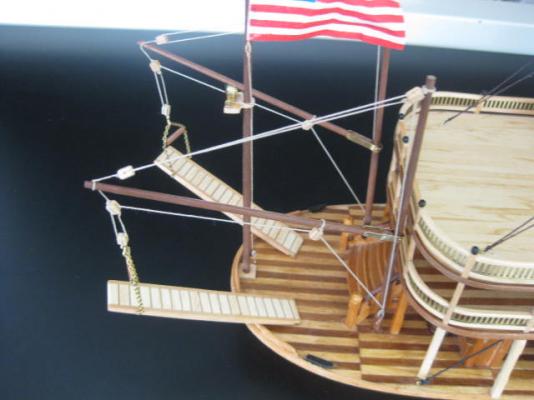
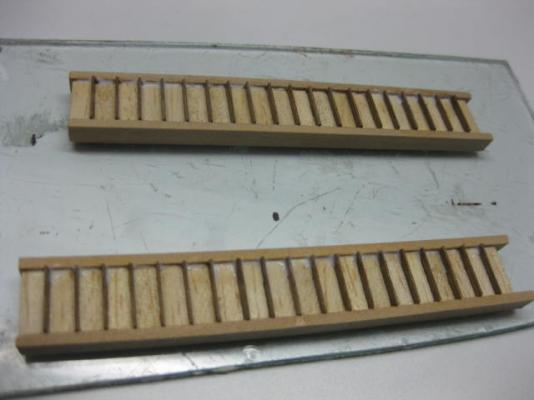
Thank you Grant and Scott. Continuing on with the Gangways, I've sanded and shaped them. The undersides have a taper forward and aft, the tops are flat : There was no specific instruction on how to attach the inboard ends, so I came up with this idea. It allows the gangways to be both raised and swiveled : The gangways fully rigged : Danny


- 62 replies
-
- 7
-
-
- king of the mississippi
- artesania latina
- (and 1 more)
-
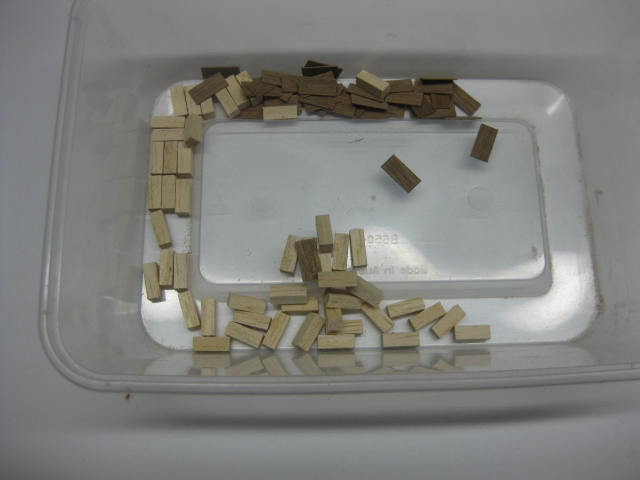
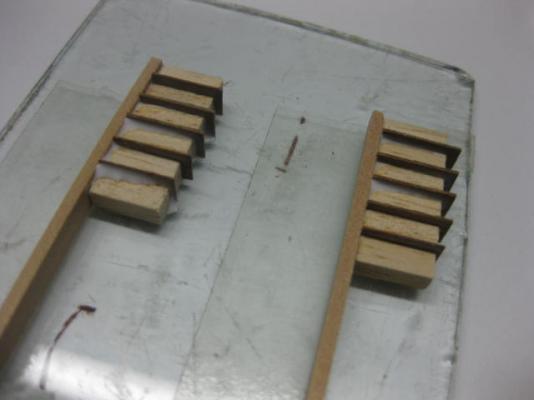
Thanks Joe. The Gangways are made from a whole lot of segments - one light, the next dark etc. I made a slight mistake when I prepared all the short pieces - I SHOULD have glued the 0.6mm walnut strip to the basswood one before cutting them to length. That would have made the job a little easier : I'll shape them tomorrow when the glue is dry. Danny

- 62 replies
-
- 5
-
-
- king of the mississippi
- artesania latina
- (and 1 more)
-
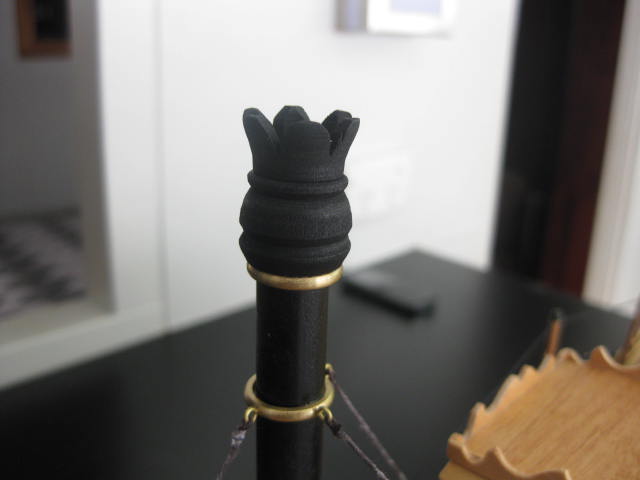
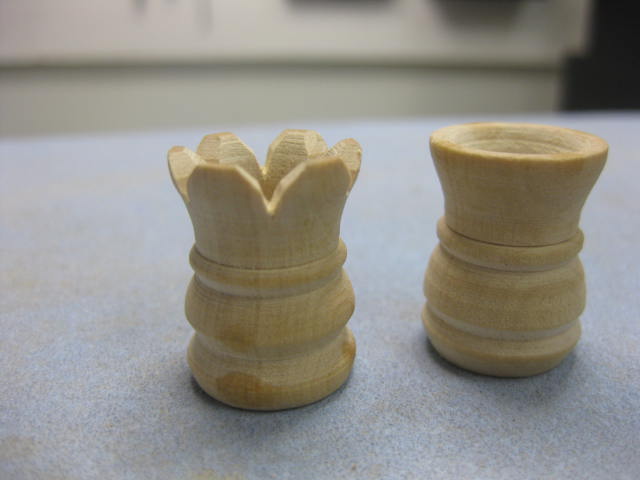
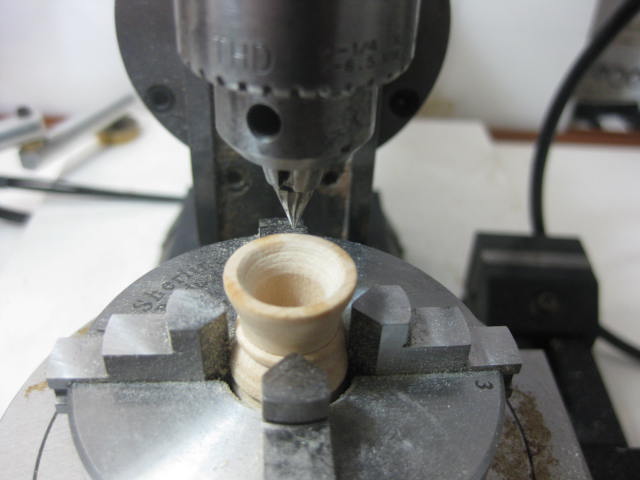
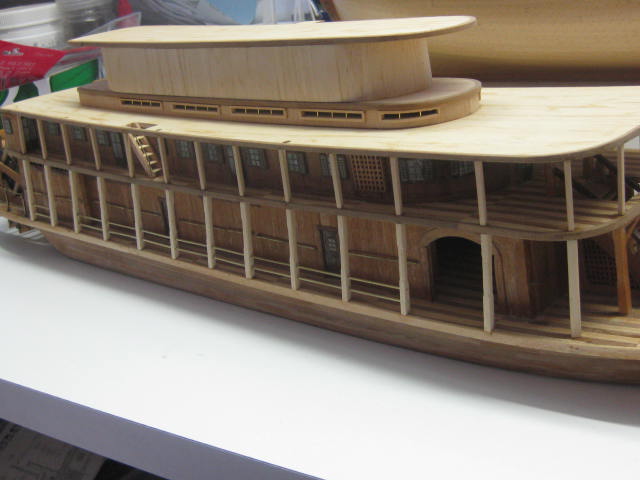
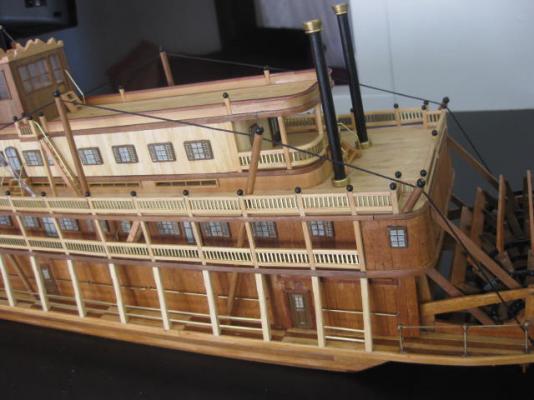
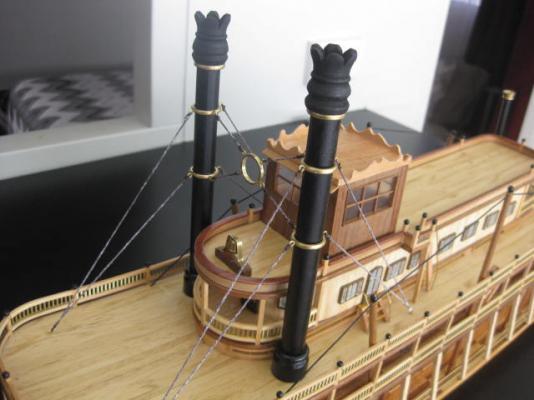
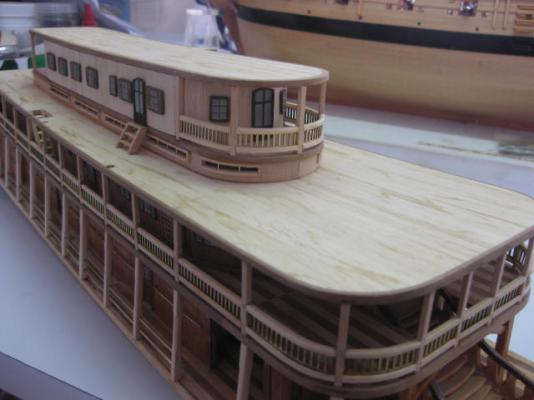
Thanks again Nils, Geoff and David . Actually David, my game's Euchre . All the Railings have been finished and I've moved to the Stacks. The fancy cast Tops were missing from the kit, so I've had to attempt to make my own. I used Castello Boxwood which I turned on the lathe : Cutting in the pointy tops proved a challenge. I used two V shaped cutters in the mill in conjunction with my new Rotary Table and Self-centering 4 Jaw Chuck : I've also rigged the Tensioning Lines : and the Stacks have also been finished off. In the pics below I've just painted the stack lines with diluted PVA which hasn't dried yet : Here's a pic overall. I only have the Gangways left to do to finish the model : Danny


- 62 replies
-
- 8
-
-
- king of the mississippi
- artesania latina
- (and 1 more)
-
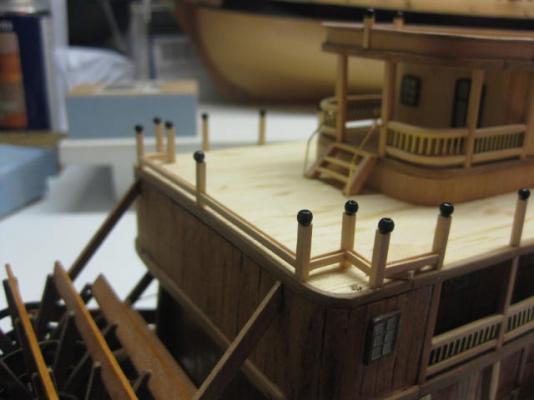
All good Edwin . Please excuse the poor pic quality - bad lighting. I've made inroads into the 3rd deck railings. These once again needed custom built upper and lower wooden rails around the fore end. All posts have been fitted. The aft end gets a different treatment, as one of the brace poles are in each corner : Danny
- 62 replies
-
- 11
-
-
- king of the mississippi
- artesania latina
- (and 1 more)
-
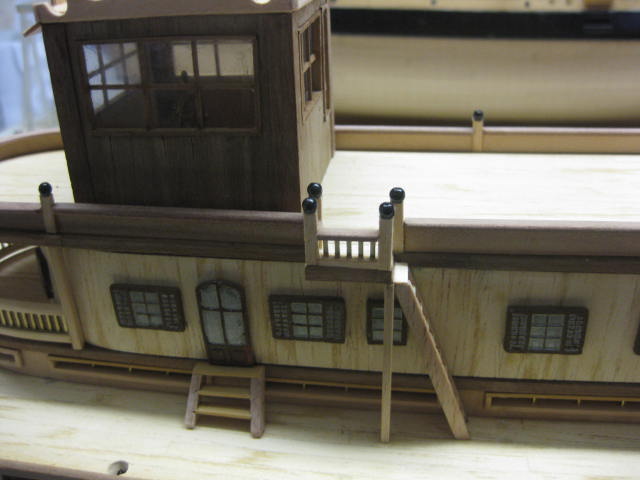
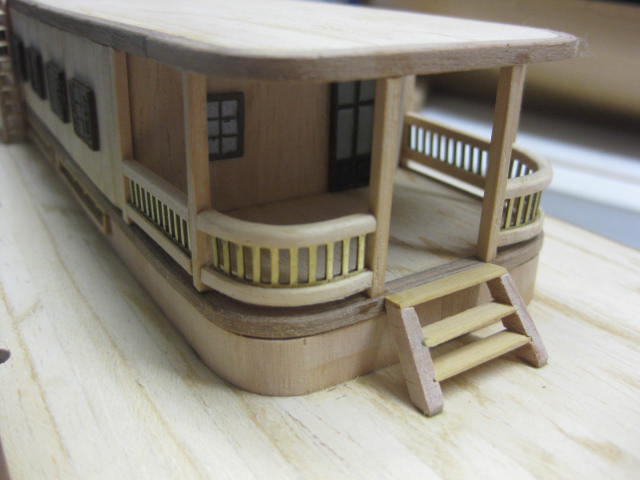
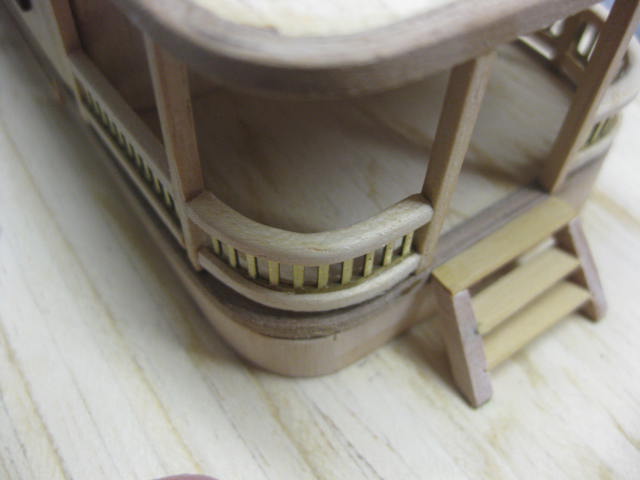
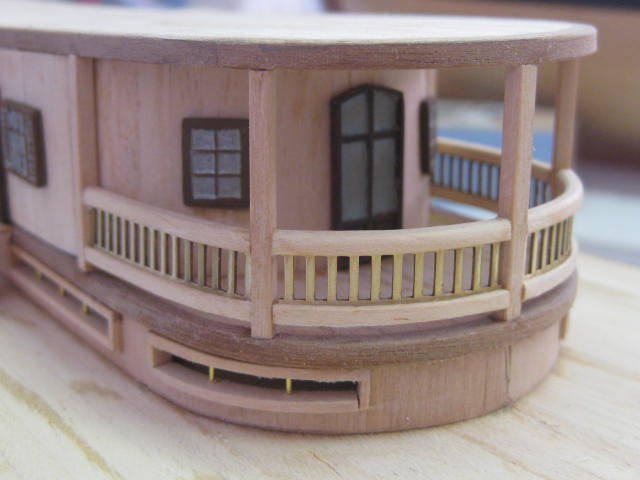
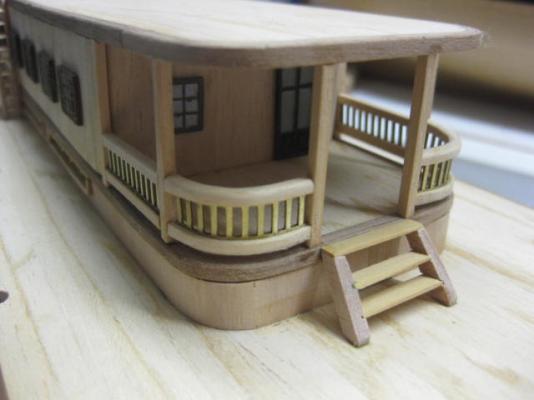
The Upper Deck Railing is a solid plank between the posts which I made from some leftover Norfolk Pine. The Handrail is made from Cherry Ballart, and needed the fore and aft ends made from several sections : Danny
- 62 replies
-
- 8
-
-
- king of the mississippi
- artesania latina
- (and 1 more)
-
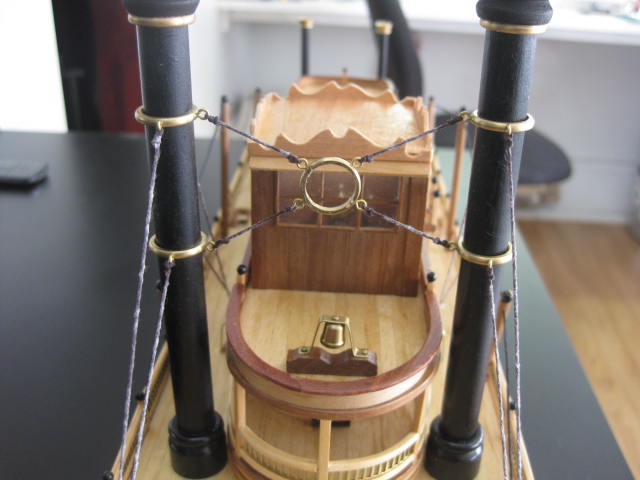
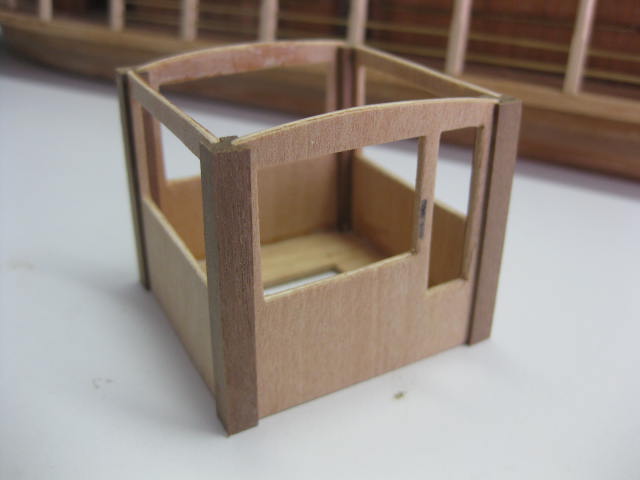
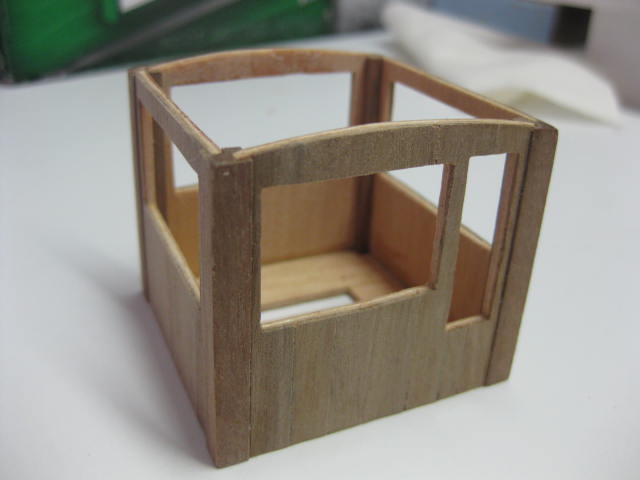
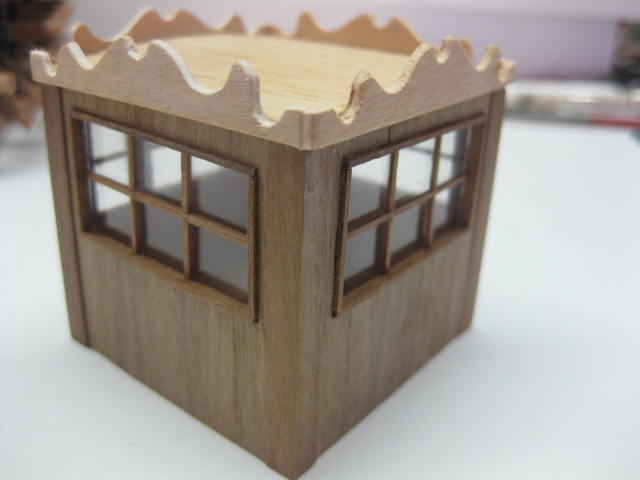
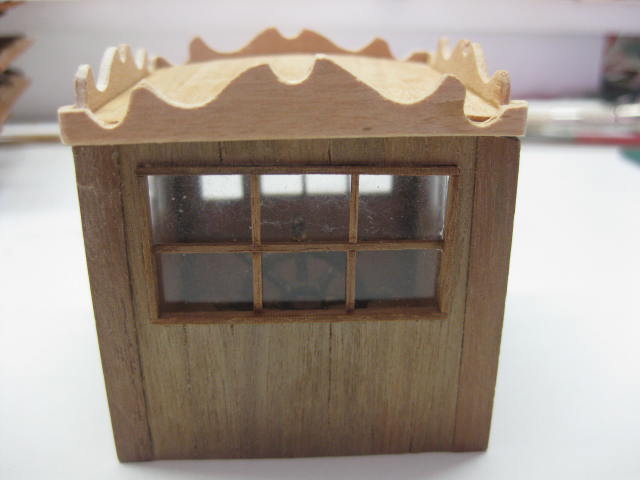
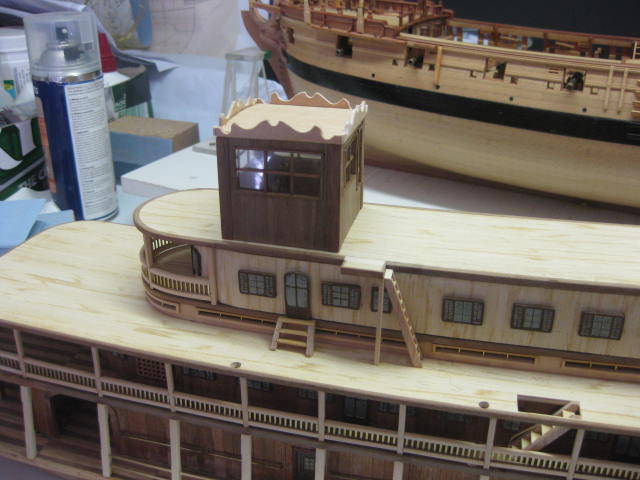
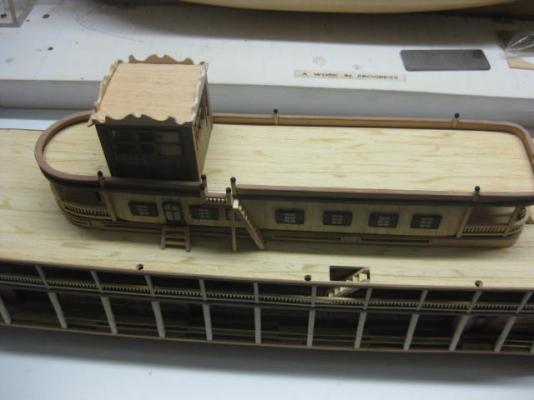
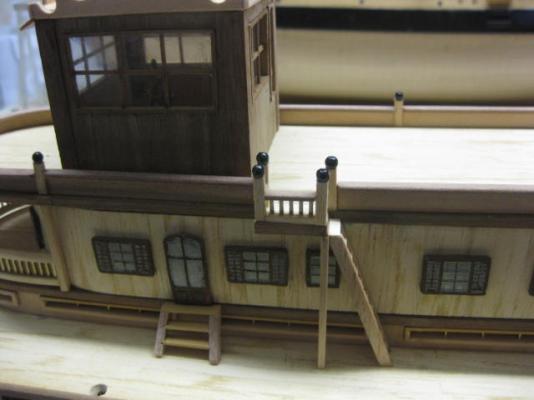
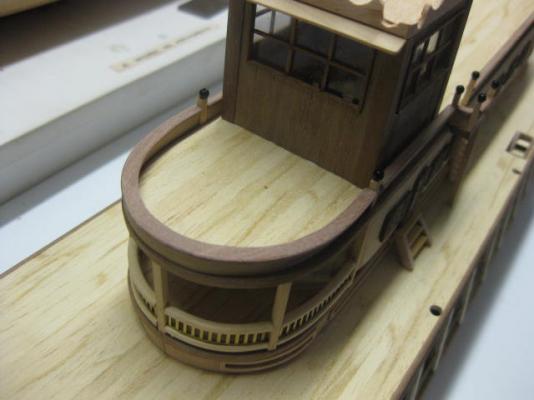
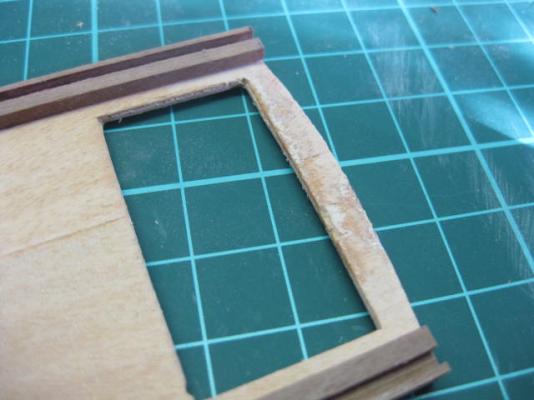
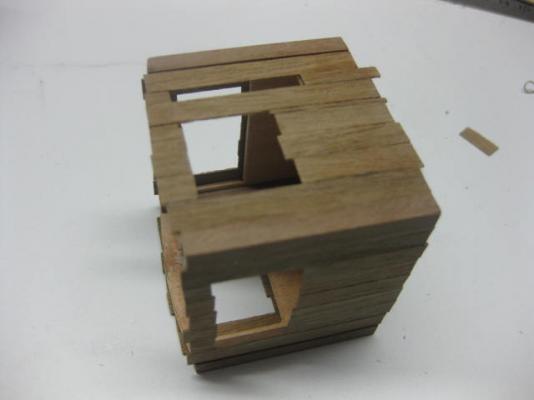
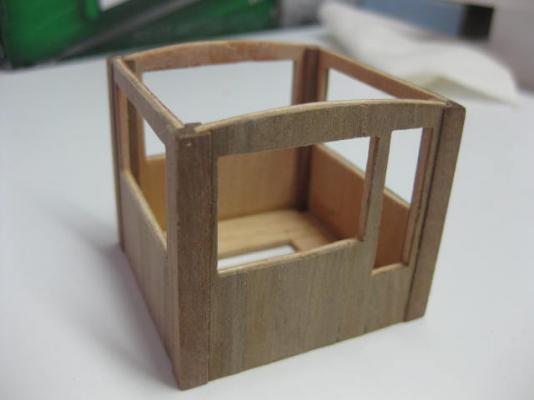
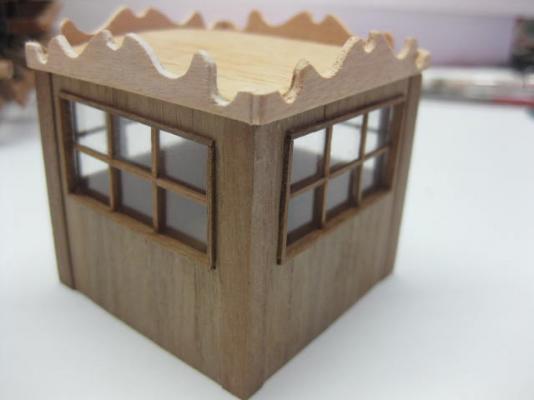
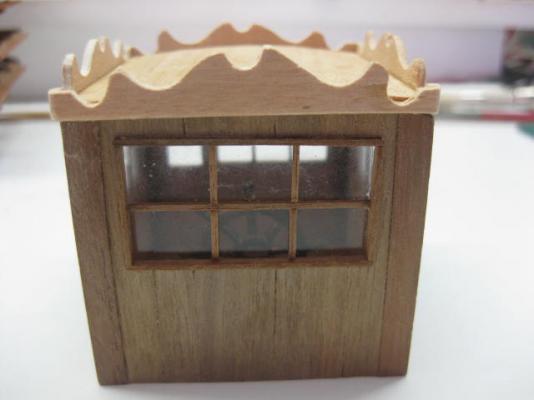
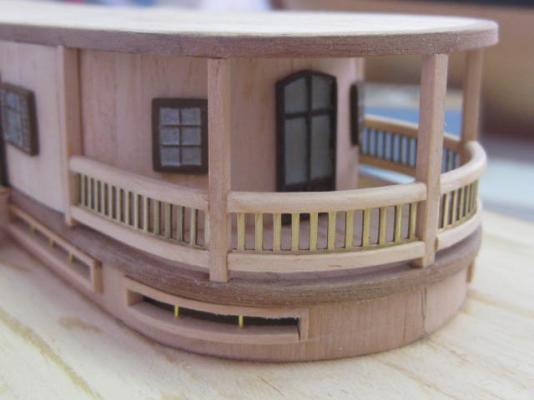
I've made up the Helm Cabin. The precut corner posts were missing from the kit, so I cut them from some leftover Walnut on the Byrnes Saw : This sheet of die-cut ply was horrible - the die had only scratched the surface, and squashed some of the ply to boot. I cut all the pieces out properly with my scroll saw and did some repairs to the inside : The walls of the cabin glued together : Planking the sides came next - I trimmed off the overhangs and sanded the planks after the glue dried : Window and door frames were made from 2mm x 0.6mm walnut. Acrylic window panes were fitted, and then the munions were made from 0.6mm square walnut : The cabin in position on the top deck : Danny


- 62 replies
-
- 11
-
-
- king of the mississippi
- artesania latina
- (and 1 more)
-
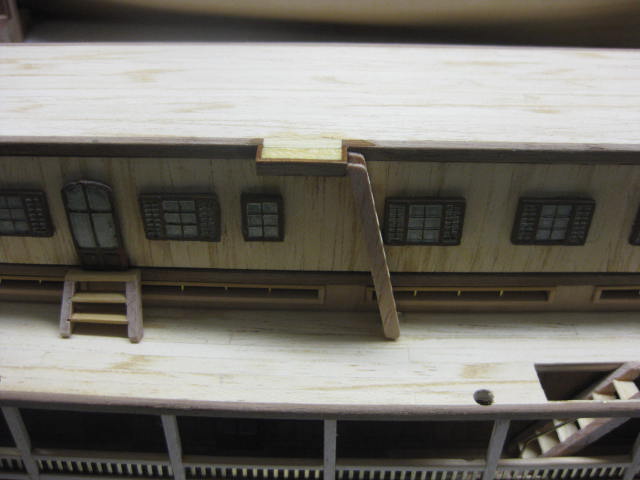
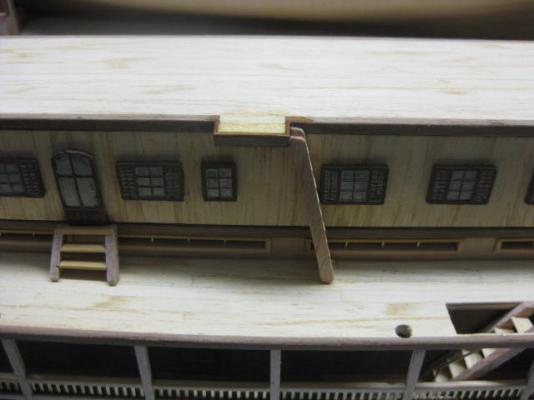
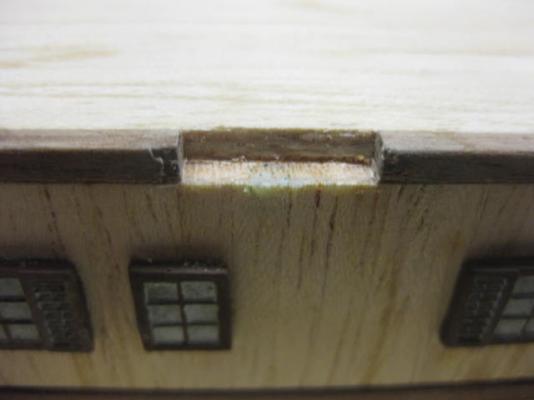
Thanks once again for dropping by John, David, Geoff and Mike. I'd fitted the upper deck ladderway in the wrong place - the AL plan and elevation don't match . The ladderway would have been too steep to clear the window aft of it : I decided to redo the upper landing to get it into the correct position. This involved removing the landing and a section of the edging of the 3rd deck : I'm happier with the final position : Danny

- 62 replies
-
- 6
-
-
- king of the mississippi
- artesania latina
- (and 1 more)
-
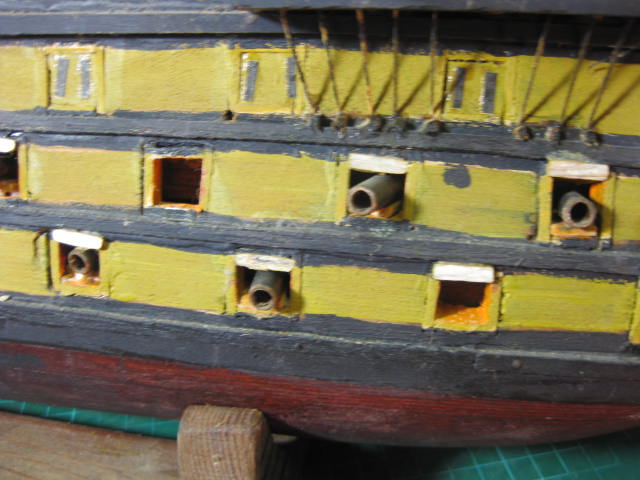
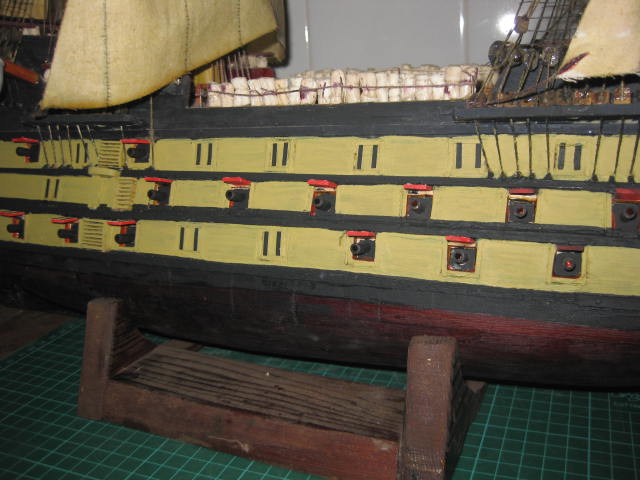
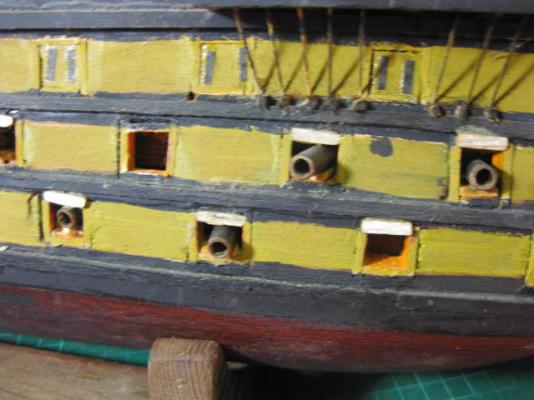
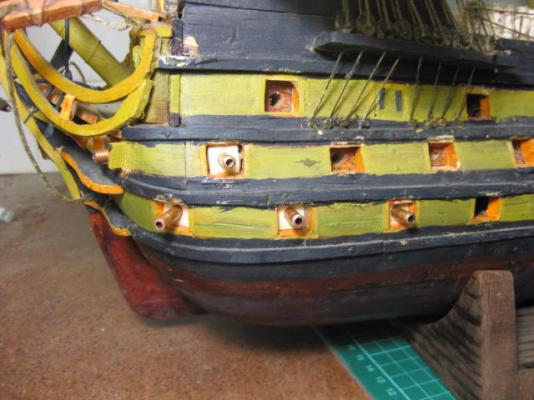
Hi Mark, To cut out my ports I used a Razor Saw which I'd ground a section about 50mm long off the end until it was only a couple of millimetres wide. This lets me get into some really tight places . Danny
-
Don't count on it Toni - there are a lot more tricky bits coming up later . BTW - I had the exact same problem with the Deck Clamps on Vulture .... except mine were wrong on the OTHER side . Danny
-
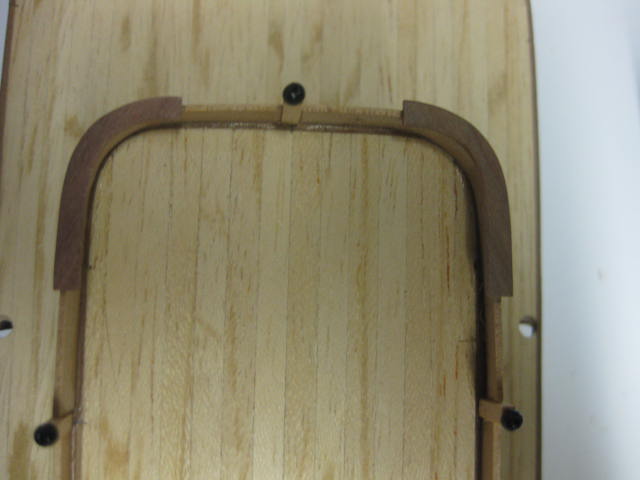
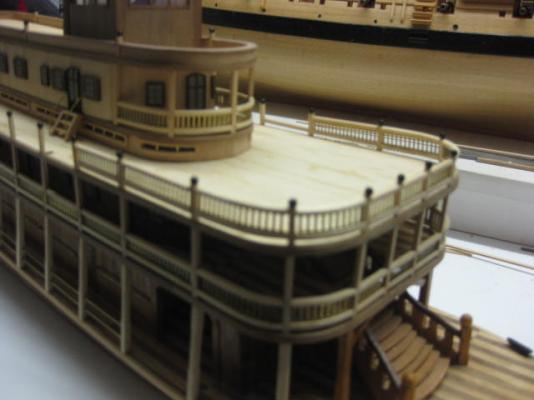
I've fitted the railings to the aft end of the 4th deck. The radius on these is the tightest of any of them, and was not an easy task to shape : Danny

- 62 replies
-
- 5
-
-
- king of the mississippi
- artesania latina
- (and 1 more)
-
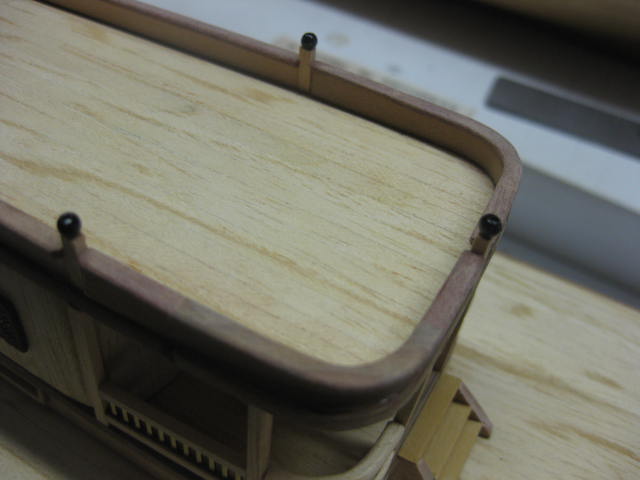
I've fitted the extra doors and the Railings around the forward part of the 4th deck : Danny
- 62 replies
-
- 5
-
-
- king of the mississippi
- artesania latina
- (and 1 more)
-
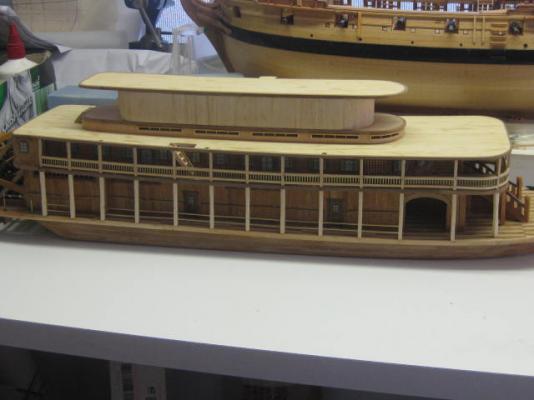
Thanks David, Scott and Mike (?). This one is not too bad compared with a couple of others I've Restored/Completed for other people . Yes, I believe it was his first attempt, which he'd either abandoned when the going started getting a bit tough, or passed away before he could get any further. I also have a "Norske Lowe" to complete from the same builder for his family - that one only needs some masting and most of the rigging to finish her. He hadn't done too bad a job on this model, and it should turn out reasonably well. Getting back to the other ones I've done - check out the "HMS Victory" in "Builds for Others" in my Signature. THAT one started out rough, but it didn't compare to the one below of an unknown ship (I think the builder MAY have been attempting another Victory, but I could be wrong ) . Here are some pics BEFORE : And some pics of the finished article : Check out the Anchors - this was a typical example of the "workmanship" on this tub : And my rebuilt ones : Danny


- 62 replies
-
- 5
-
-
- king of the mississippi
- artesania latina
- (and 1 more)
-
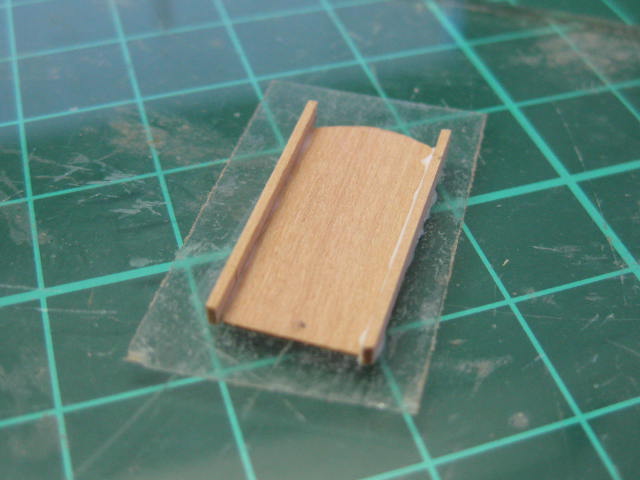
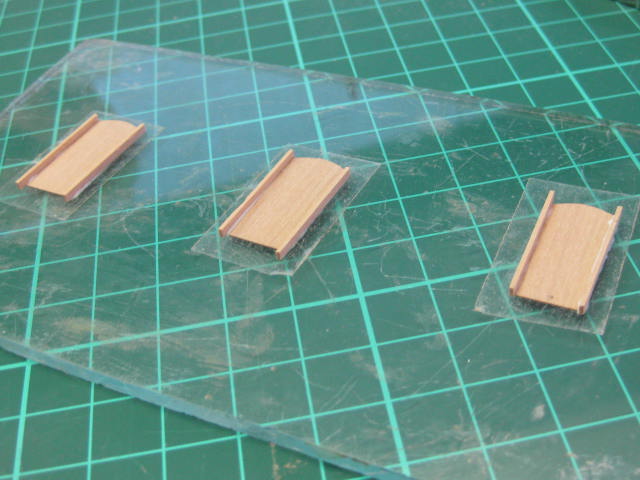
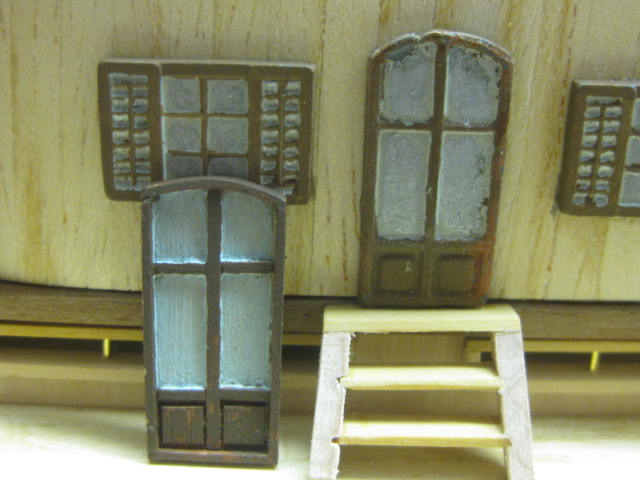
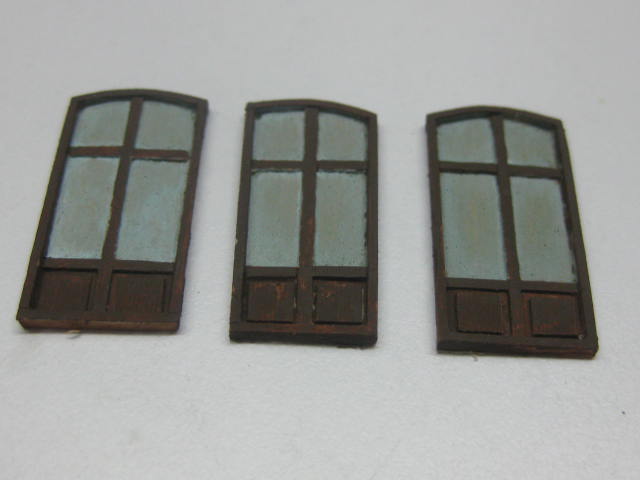
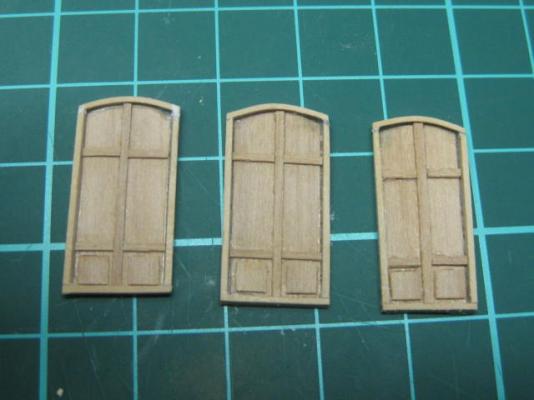
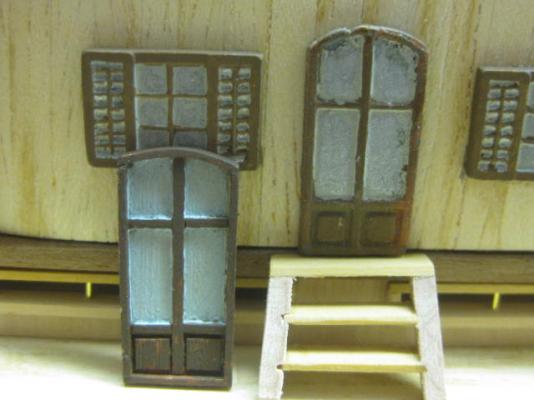
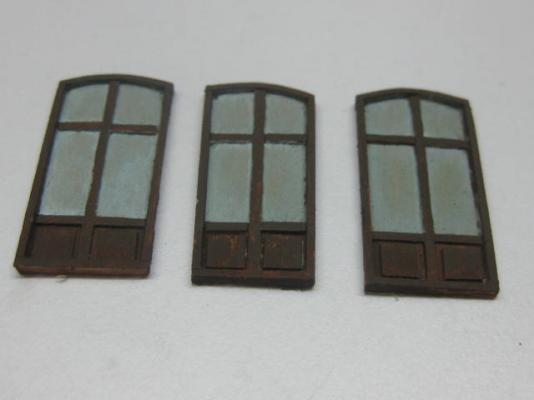
Thanks Bindy, Geoff and John. 3rd straight panel from the bow . There were three doors missing in the kit, so I had to replace them with wooden scratchbuilt ones. I used some 0.35mm stock from Hobbymill which came in my Masting Package for Vulture as the bases, and some leftover 1mm x 0.5mm English Boxwood that I'd used for window frames on the same : I had to try and match the paint on the doors and windows that had already been painted by the original builder. Fortunately I had some acrylic dark brown that was a good match, and I made up the window panes from a couple of other colors. Remember that I'm trying to make it look like the original builder did all the work - I may have gone a bit TOO far : Danny
- 62 replies
-
- 6
-
-
- king of the mississippi
- artesania latina
- (and 1 more)
-
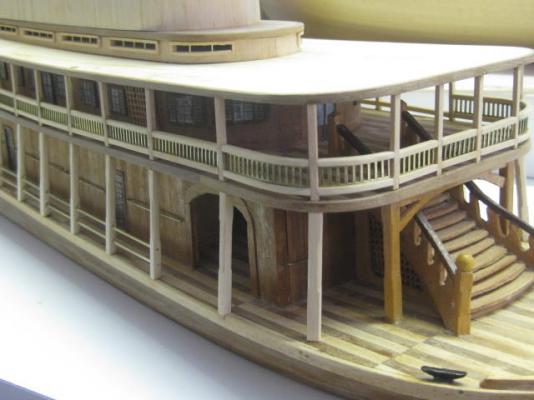
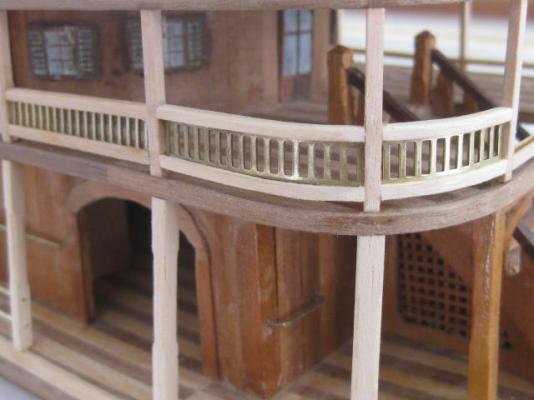
Thanks John, Dragzz and Grant. They are the same on both sides John. I've fitted all the brass railings to the starboard side, as well as around the forward end of the 2nd deck. They're turning out quite well and I've definitely decided to leave them in brass - as Grant mentioned they suit this particular model. There is only JUST enough brass railing stock to do them all, and they need to be cut from pieces that are about 1/3 longer than the openings. This means that I'll have to join some of them in the middle. See if you can pick the one that I've joined : Danny
- 62 replies
-
- 9
-
-
- king of the mississippi
- artesania latina
- (and 1 more)
-
This particular kit of the KOTM is a more recent version of the one I made about 28 years ago. The railings on the original version were made from die-cut timber, but these have been replaced with brass strips. They are easier to fit, but aren't particularly "authentic" (if there is anything authentic about a fictional boat ) and would need to be painted. As I prefer to use as little paint as possible on a wooden model I'm leaving them as brass. Besides, my girlfriend prefers the look and I'm sure that the owner will too (I hope). Danny

- 62 replies
-
- 3
-
-
- king of the mississippi
- artesania latina
- (and 1 more)
-
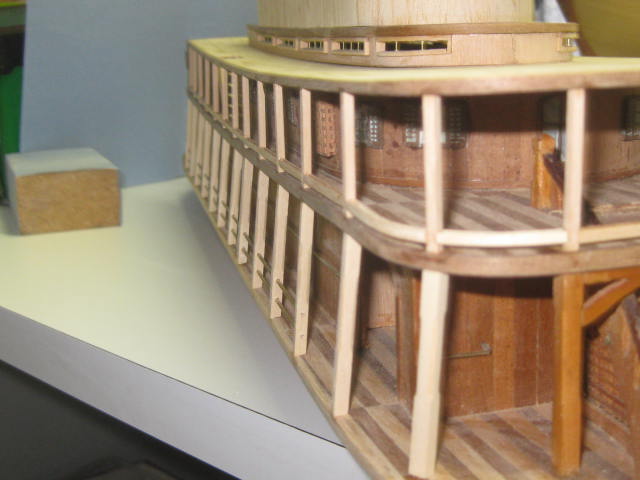
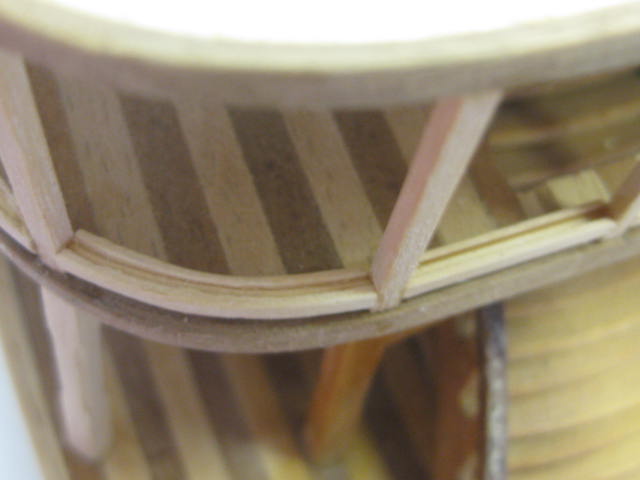
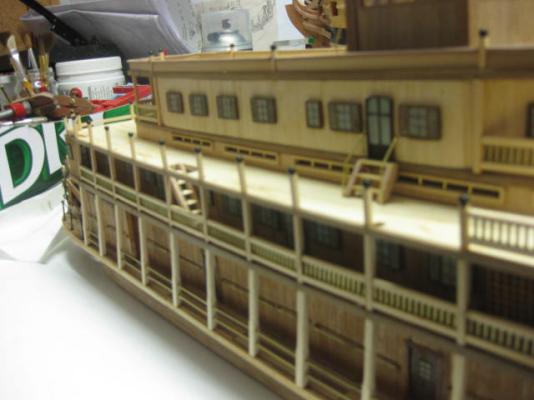
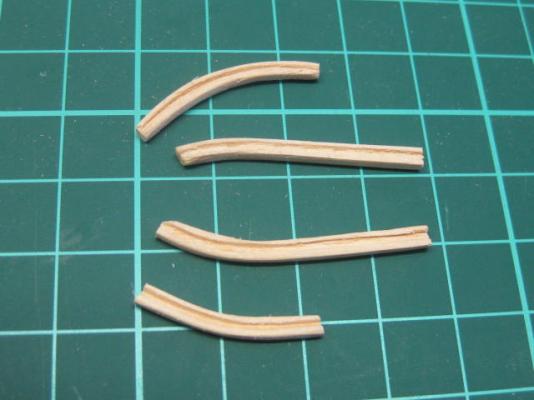
Thank you once again John and Bindy. The pic below might show the difference in angle between the lower columns and 2nd deck columns a little better. I think I may remove and straighten the foremost ones a bit - I have a little TOO much angle on them, which wasn't all that noticeable until I took this pic : I've made and fitted all the 2nd deck lower rails. The curved ones around the fore end were particularly difficult to make - I tried to soak and bend them but the crappy wood just wasn't up to it. Every piece snapped in at least one place, so I cut them from wide flat stock and chiseled the rebate into them. The 3rd deck rails will get a similar treatment. Danny


- 62 replies
-
- 5
-
-
- king of the mississippi
- artesania latina
- (and 1 more)
-
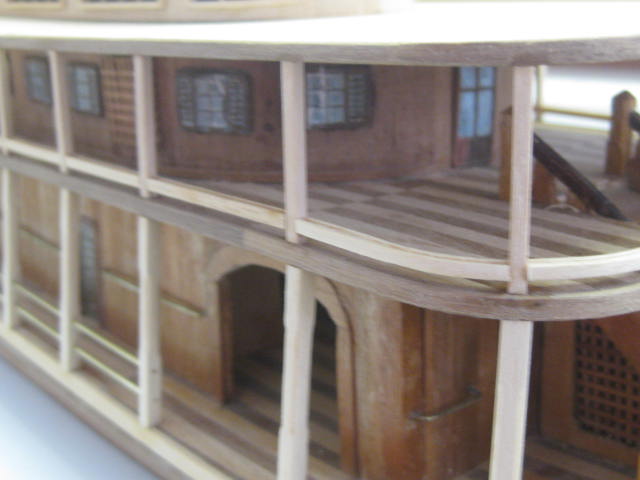
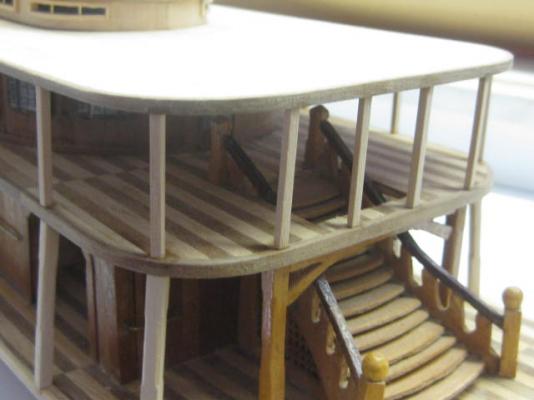
Thanks to the two Johns for dropping by again. I've fitted all the 2nd Deck columns. Unlike the lower columns these are vertical, so from certain angles they don't look right in the pics but they are all OK . Danny

- 62 replies
-
- 6
-
-
- king of the mississippi
- artesania latina
- (and 1 more)