HOLIDAY DONATION DRIVE - SUPPORT MSW - DO YOUR PART TO KEEP THIS GREAT FORUM GOING! (Only 27 donations so far out of 49,000 members - C'mon guys!)
×


Dan Vadas
-
Posts
3,261 -
Joined
-
Last visited
Content Type
Profiles
Forums
Gallery
Events
Everything posted by Dan Vadas
-
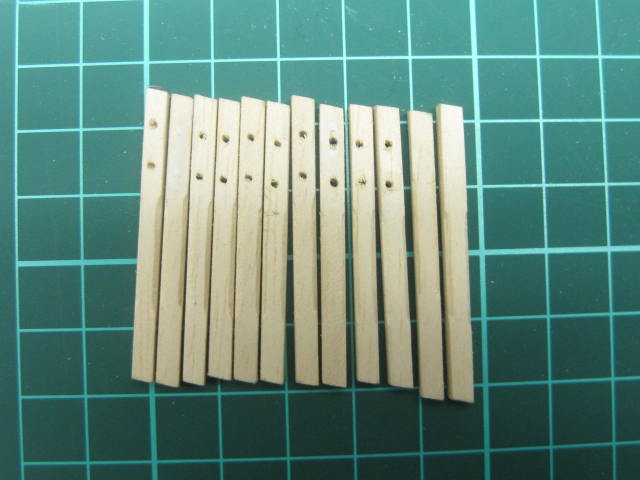
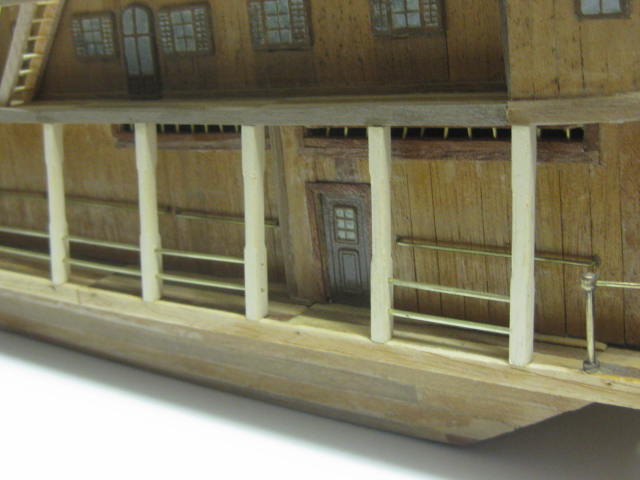
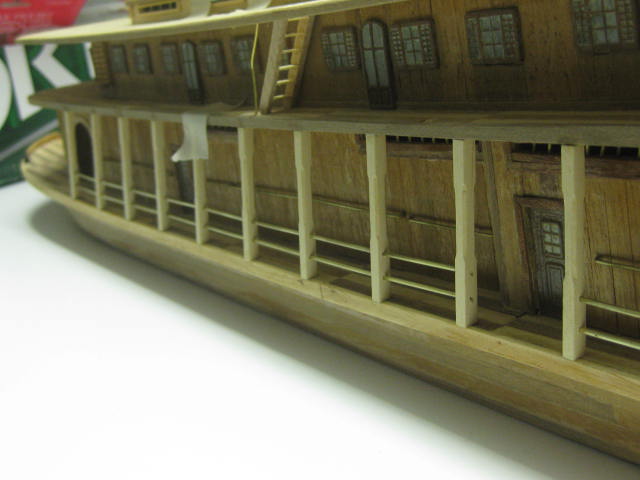
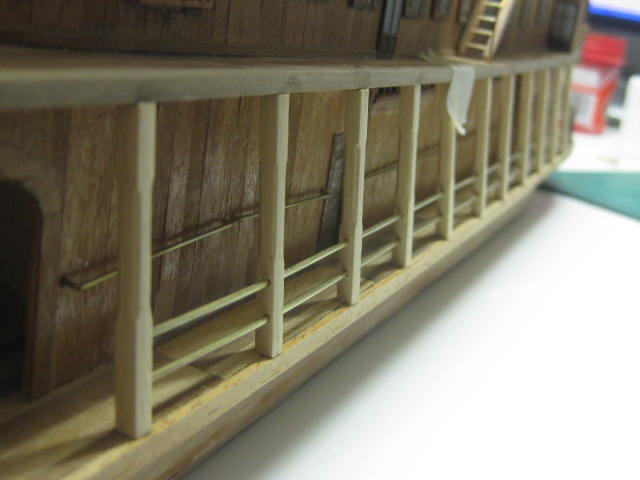
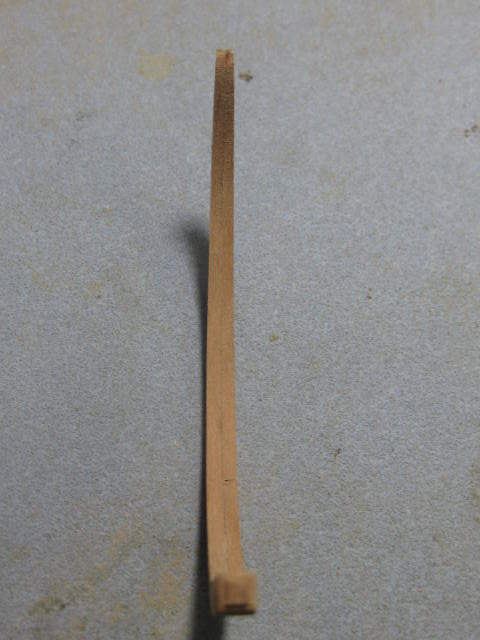
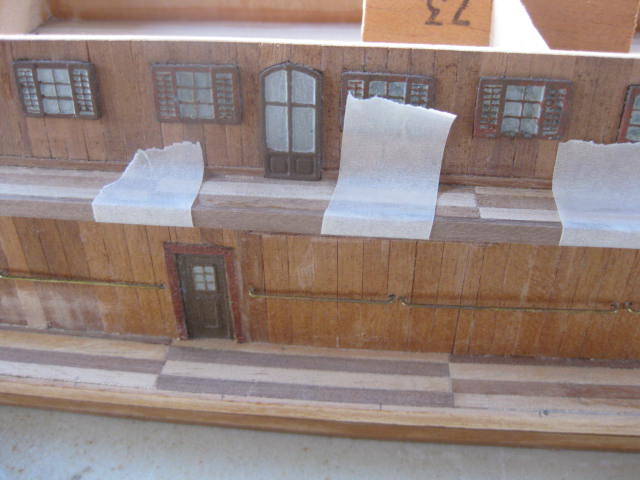
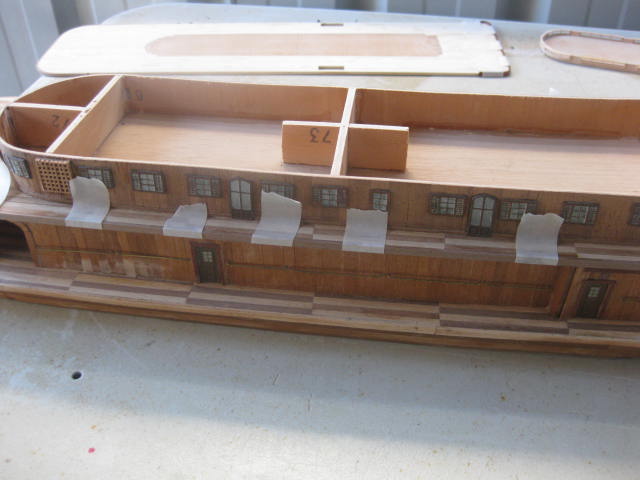
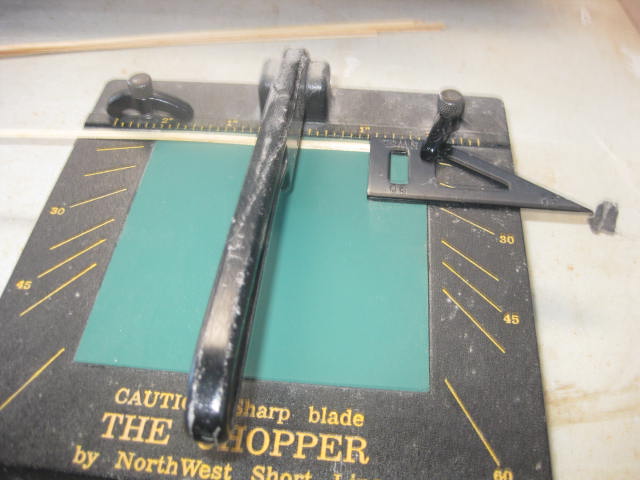
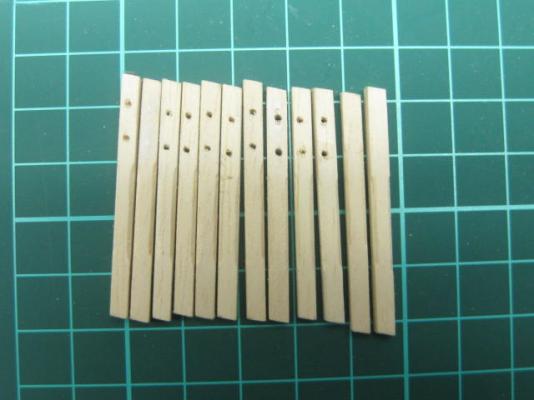
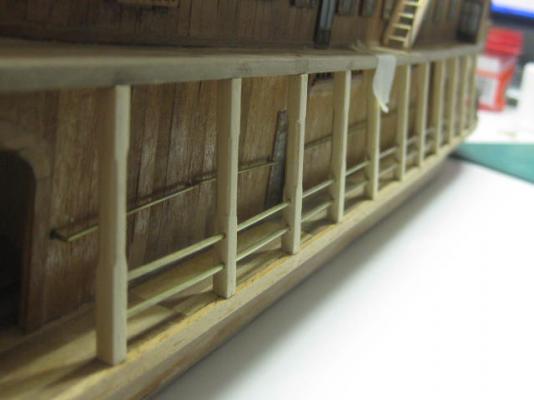
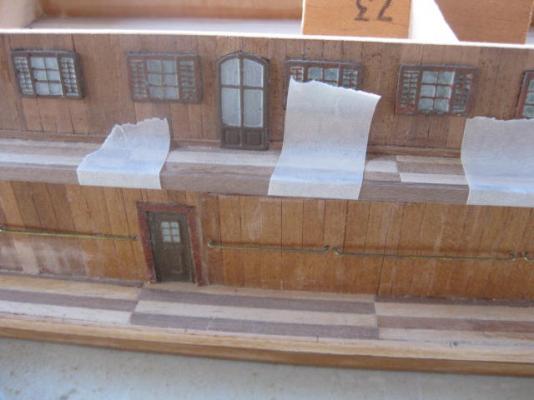
Thanks S.Coleman. The Chopper isn't very expensive - about $75 from memory - and is available at most of the larger hobby stores in Australia. It's made by Midwest Shortline in the US. Well I've pretty much finished my latest workshop, so work restarts on this model. While waiting for the glue to dry on the upper cabin I did some work on the lower posts. These have two (supposed to be three, but there wasn't enough brass wire left in the kit) rails running through them. They are also chamfered for about 3/5 of their length. The posts all varied a bit in height due to the second deck being already fitted, so each one had to be individually measured and cut with an angle both top and bottom - they slope inward about 8 degrees. I prepared and marked all the posts prior to fitting them (they are in no particular order for this pic) : I threaded both wire rails through the posts before starting to glue them in, first dry-fitting the whole assembly to ensure all fitted properly - so far so good . Once I was happy with the fit the port side was glued into place : Danny


- 62 replies
-
- 9
-

-
- king of the mississippi
- artesania latina
- (and 1 more)
-
Thanks once again Edwin, Rich, Cabrapente, Nils, Allan and Popeye. Your comments are always appreciated . The workshop is almost completed (pics next week), I only need to go back to the old one to pick up the two sets of drawers for all the smaller tools etc. That's almost exactly what I've done Popeye - one BIG vac . The extraction fan in my old workshop was for sawdust - it used to work brilliantly, but the "shop vac" does all right except I have to plug the hose into whichever tool I'm using at the time. No big deal. Danny
-
Thank you Donny, Spyglass and Bindy . Yeah Popeye - this is my workshop's FOURTH move. Unfortunately I only have room for ONE of the four workbenches I had in the previous one, and also no huge extraction fan . I'll have to learn to make do . Pictures of the workshop will be coming in a couple of days when I figure out where to put everything. Danny
-
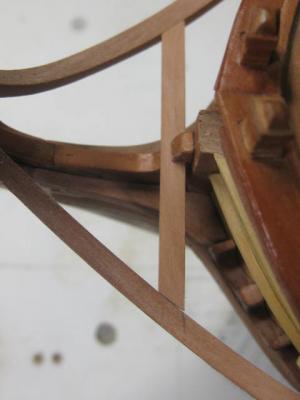
Hi gang, Sorry I haven't been on here lately to answer questions, but I'm at the end part of yet another major house (and WORKSHOP) move which has taken all my time. Hopefully this is the LAST one . First off, thanks for all the kind comments. I'll try to answer all the questions in order. Spyglass, David has answered the question perfectly. It's indeed using as little PVA glue as possible to maintain a join in position without too much work with Isopropyl Alcohol later on to remove the piece. This is fairly essential when you have one or more permanently glued joints close-by. I use a combination of clamps and masking tape to hold the piece in position, and sometimes just hold it with my fingers for a couple of minutes if all else fails until the glue bonds. I use a couple of types of PVA, some set a lot faster than others. A bit of picture angle, but there will be more work done in this area later - there is a chock to be fitted between the head rails, it's a lot easier to cut it in when the rails have been fitted. As noted above I also use tape and clamps, but the key word is PATIENCE . Toni and Russell - I'm glad you are following my build and getting the odd "heads up" about any problems I've encountered . Work will recommence on Vulture sometime in the next couple of weeks after I have my new workshop fully completed. Danny
-
Hi Toni, Lovely work as always. Pity about the discoloration in the Holly planking - I almost used it for Vulture, but was a little put off by the "too white" color. Wait until you get to the Headworks - they make the stern framing look like a walk in the park . Seriously, you'll get a lot of practice doing "3D" work, which will stand you in good stead later on. Fun though . Danny
-
Hi Grant, Where did you get that oversize novelty fake hand ? Fairly good work on the pinnace (note the "winky" smiley). Maybe your missus should get herself a hobby that takes as much time as ours? Then again, dinner wouldn't be cooked before 10:00pm . Danny
-
Yep, what Druxey said - I did exactly that on Vulture. And only glue the sandpaper to ONE face, turning it 90 degrees for each edge at a time (sounds obvious, but I've seen a few guys trying to do two edges at a time with disastrous results ). Danny
- 1,215 replies
-
- 5
-
-
- sloop
- kingfisher
- (and 1 more)
-
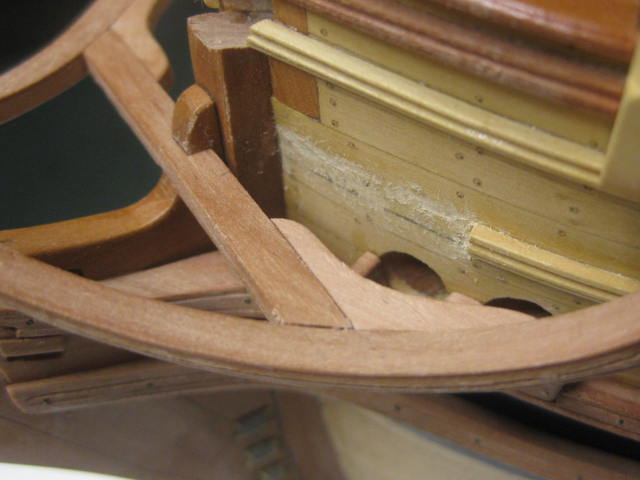
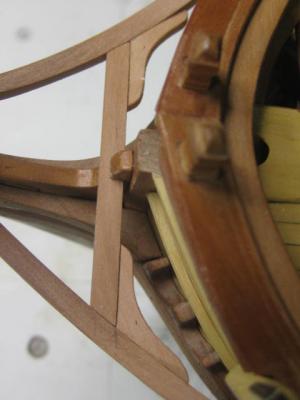
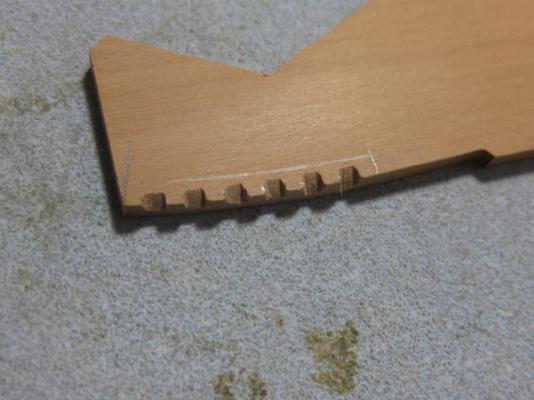
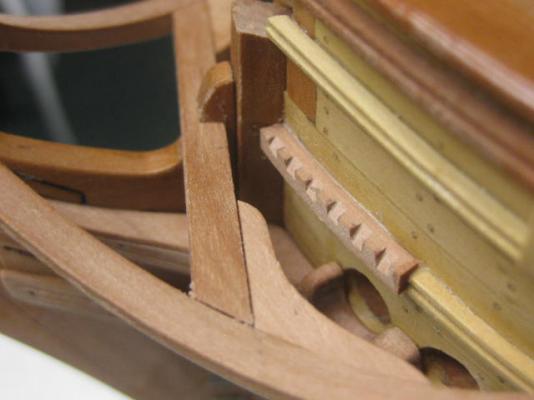
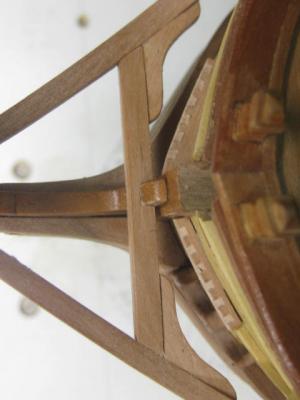
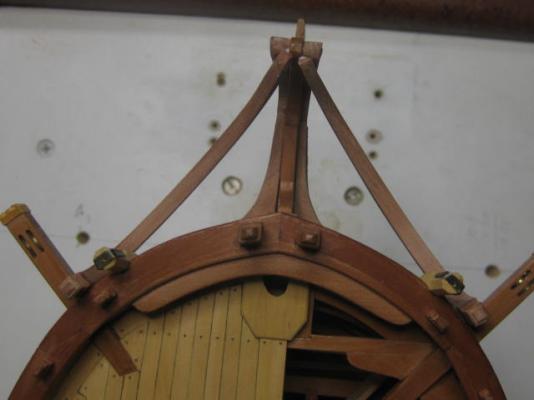
Thanks once again for dropping by my log David, John, Mark, Grant and Grant, as well as all those who "Liked" . Head Beam and Grating Battens A main Beam runs athwartships to support the lower sections of the head rails. This beam has a 1.5" roundup, and is recessed into the stem. Two knees attach the beam to the rails. At this stage I've only spot-glued the beam and knees into place so I can mark the positions of all the grating ledges which follow. I'll remove the beam and knees to cut the mortices for the ledges : A "Heads Up" to other Swan builders using TFFM. If you intend constructing all the Headworks I recommend that you start the Waist Rail a distance from the stem. The actual distance depends on whether you are going to fit the aft Seats of Ease or not (see Section 11.2). It's probably a good idea to leave the foremost section of the waist rail off until you get to this stage. The problem occurred on mine when it came time to fit the Grating Battens - the waist rail was directly in the way. This may be just a peculiarity of my ship, and others may be different depending on the exact height of the rail (it's possible I may have made a boo-boo regarding the height, but I don't think so ). I now had the tricky job of removing the forward section of the rail with a lot of headwork structures getting in the way. It took a while, but no harm done : The grating battens need mortices cut in for the grating ledges. This job was a lot easier to do before I cut the pieces from the stock : The battens fitted in place : Danny


-
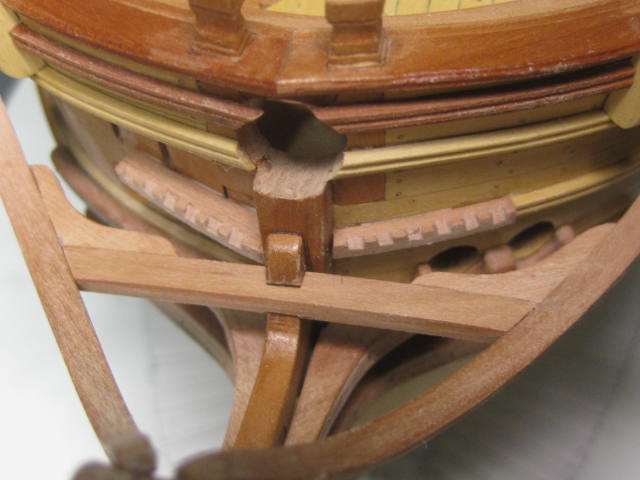
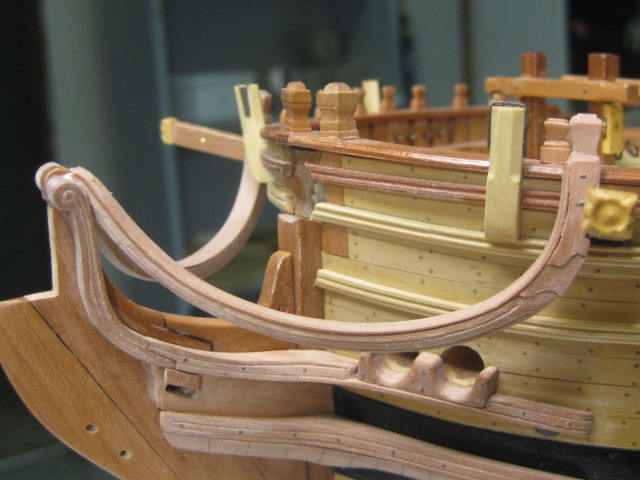
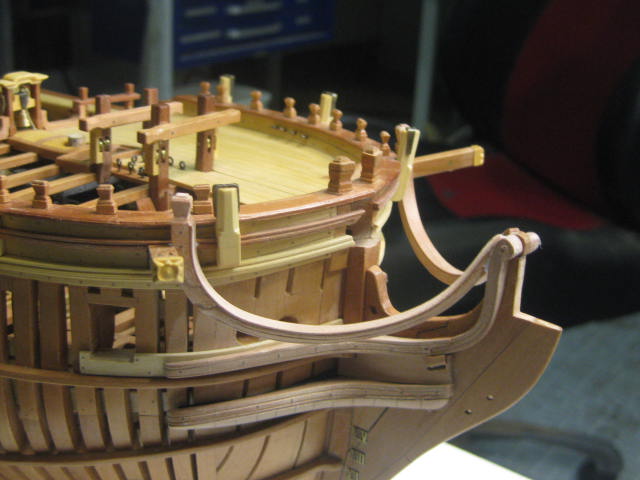
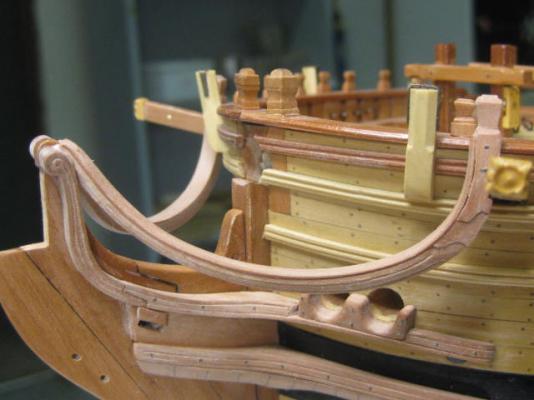
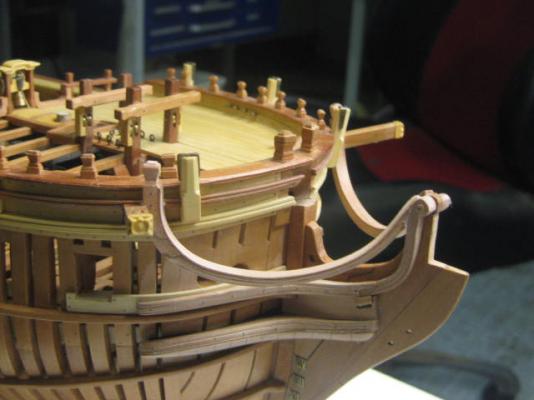
..... continued. The aft end of the rail finishes in a Knighthead : Moldings are cut and scraped into the outboard faces : A Planksheer is fitted to the top of the rail to give it protection from the elements and also add a bit of strength. The whole unit is extremely strong, due to it's design : The rails fitted to the ship. They need to be carefully placed to ensure they are vertical : No finish has been applied to any of the headworks yet - I'll do that when all parts have been fitted. Danny


-
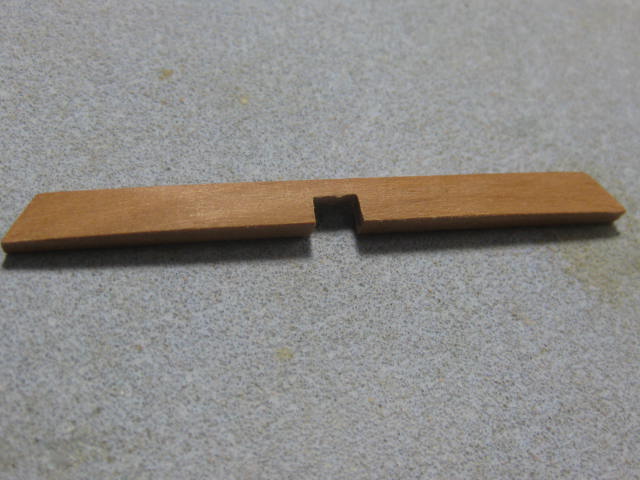
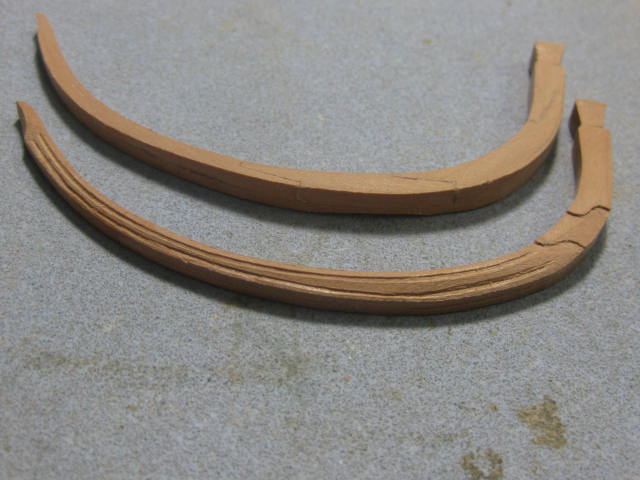
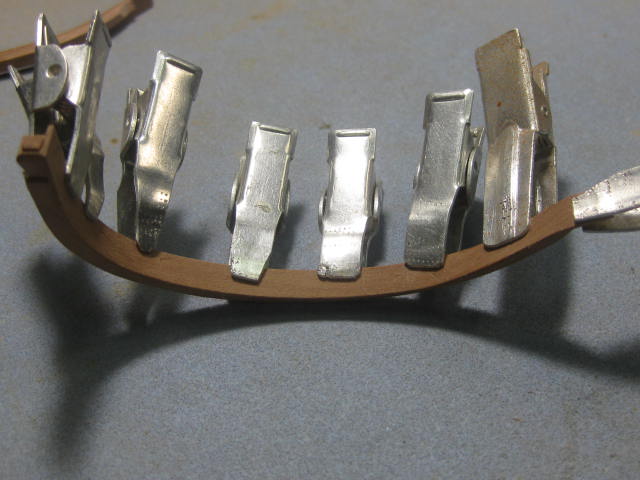
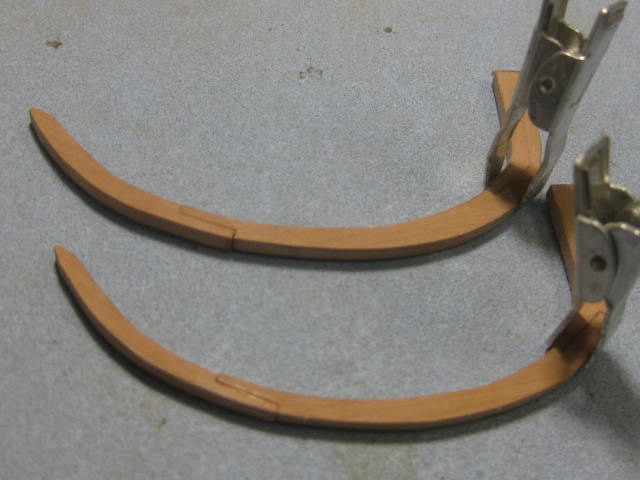
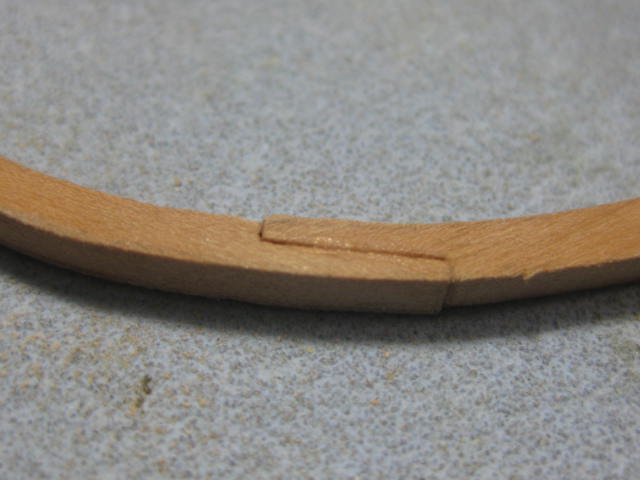
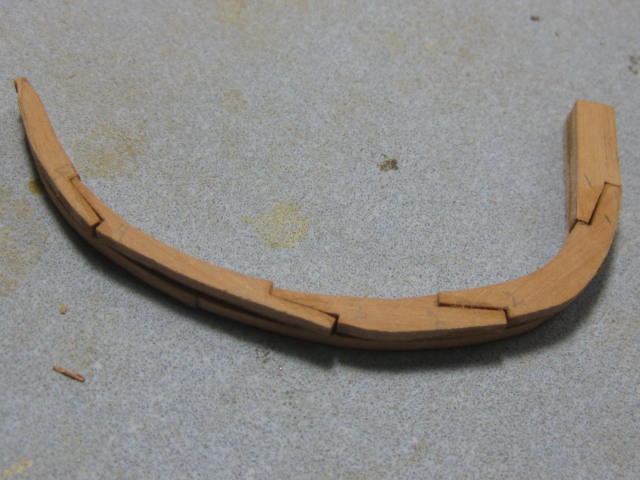
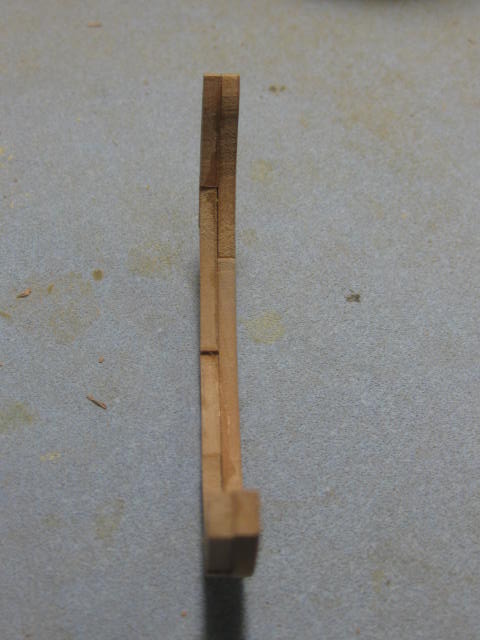
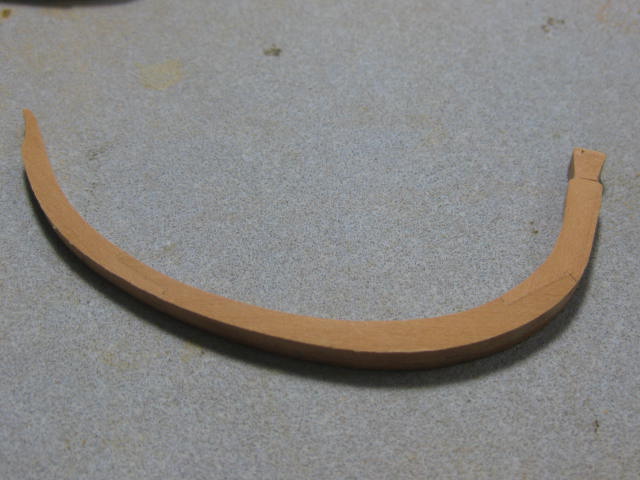
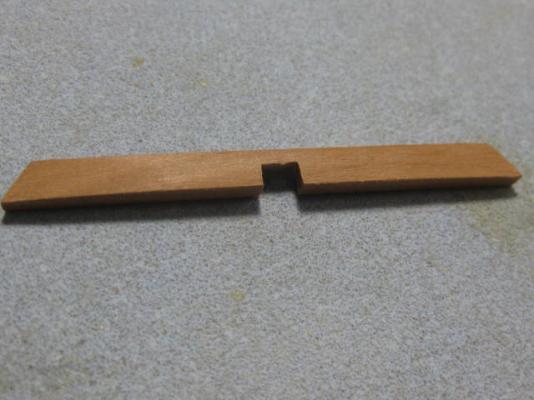
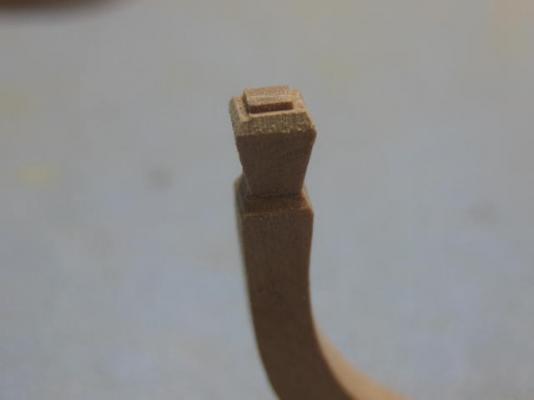
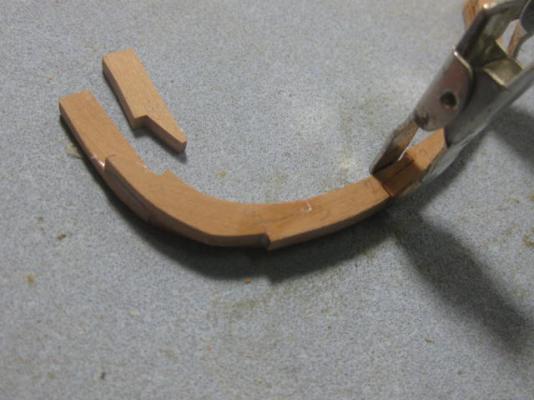
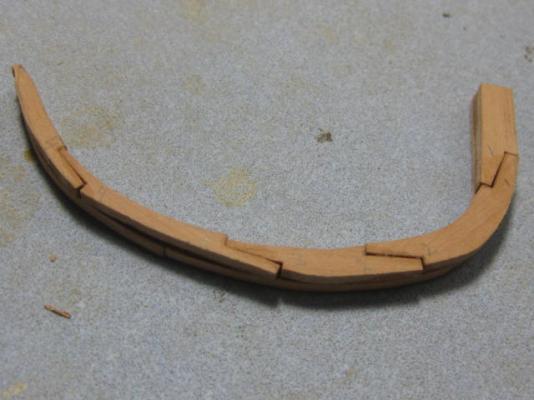
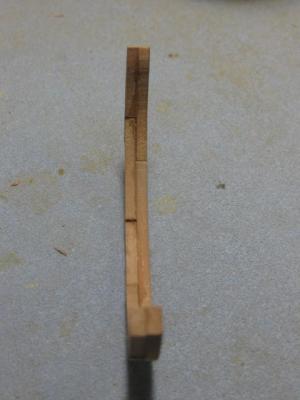
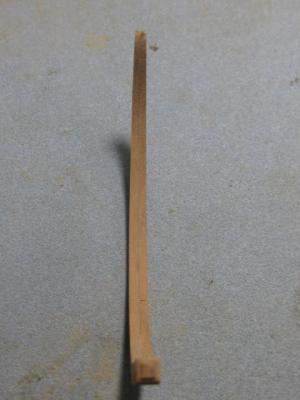
Thanks for the nice comments John . Main Rails These are quite complicated to make, and the whole Head depends on their accuracy. Each rail is made from 9 smaller sections which are scarfed together. There are two identically shaped parts, only the scarf joints are at different points so as to overlap each other : One rail after sanding down. Note the taper for the full length of it in the last pic : Continued in next post .....


-
You can't on a single "dice" for the very reasons you mentioned. The only way I can think of getting an even color on all six sides is by laminating the end grains with pieces of the same timber. This poses a small problem, and it depends a lot on your woodworking skills, but the two laminates would need to be recessed into the block with 45 degree angle rebates so that the edge joints don't show. You would need to use a router or mill to do it properly. Danny
-
This one's for daves, aka Dave from Dlumberyard. Allow me quote some of your previous comments regarding the validity of Jeff's poll : As I'm typing this reply we are about to hit 13,000 within a couple of hours. True about the number of members who have taken the Poll - I just added 1 to the total as I was unaware of it until today. Let's analyze some statistics. OK, so we have nearly 13,000 members. One thing to take into consideration is how many of those are actively involved in the site - i.e. have they actually made a post yet? 7,620 haven't made ONE post. I would consider a minimum of 10 posts as being "active". There are exactly 1,000 members who have made at least this number of posts. Starting to narrow the field a bit? Let's move on to your next quote : No argument from me here. Here are the numbers, or as close as matters. Bear in mind that there are quite a few completed Logs in both categories, as well as "will never be finished" ones, but they should even out to about the same percentage : Kit Build Logs = 880 Scratch Build Logs = 308 As you said, the majority are Kit builders - 2.85 times as many as Scratch. Also, as you said, very few Kit builders will buy aftermarket Milled wood, probably about the same percentage of Scratch builders will mill their own. I'm comfortable with that figure. Let's narrow the statistic down a bit further. Since this Poll came on air on May 27, 500 members have posted. Divide that number by 2.85 (Scratch builders) and we get 175 that may have had the interest in partaking in the Poll. Now we can subtract the number of members (like myself) who didn't know it even existed until today - I can't put a figure on THAT one - and your "statistic" has been blown out of the water .... miles high. Food for thought Dave? Danny
-
Neat trick, and one I haven't seen before . Masking tape usually does the job when there is NO WAY to use a clamp. Danny
-
Hi Woody, Probably too late for this particular "oopsie", but for the next one (and there WILL be a next one ) buy yourself a bottle of Isopropyl Alcohol from your friendly local drugstore. It's commonly known as Rubbing Alcohol. This stuff softens PVA - in fact it turns it into a gluggy mess which takes a bit of removing, but you can easily remove any pieces without damage. BTW - I'm into my third bottle . Danny
-
Hi Lory, and welcome back. To get a really smooth finish to the hull I suggest you use a Sanding Sealer, available at any hardware or paint store. Regarding your rigging line - what Mark said above. Chuck's rope is fantastic stuff - a bit dearer than any aftermarket kit rope, but you won't need all that much on this model and it's DEFINITELY worth the small extra cost . Danny
-
Yeah Grant, it only has space for ONE of my three workbenches so I really have to have a good think about how I'm going to set it up. Danny
-
Thanks very much for the "well wishes" Robert and Edwin - the way I'm going now I should be around for a long time .Thank you too for dropping in John. There won't be a lot of updates on this project over the next couple of weeks as I'm in the process of building a total workshop at my "holiday van". I've moved in there permanently now. The workshop will be quite a bit smaller than my previous one, but I'll manage. Stay tuned for progress on both projects - as soon as I get the workshop completed there will be some MAJOR work done on Vulture . I'll complete the Mississippi first though. Danny
-
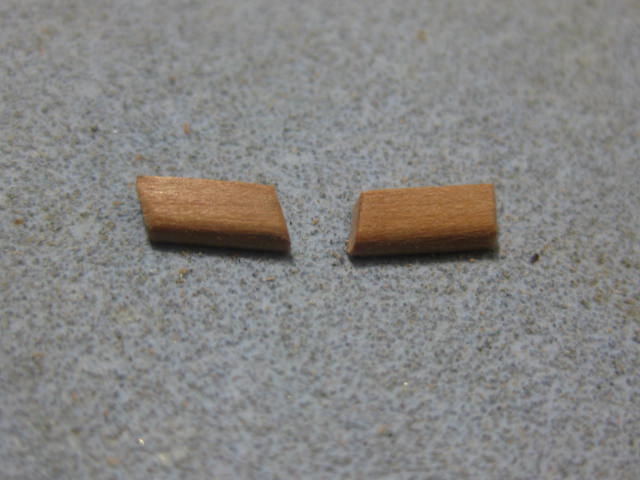
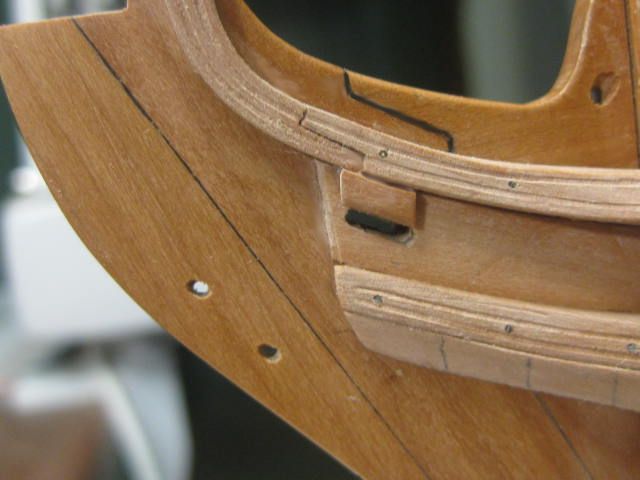
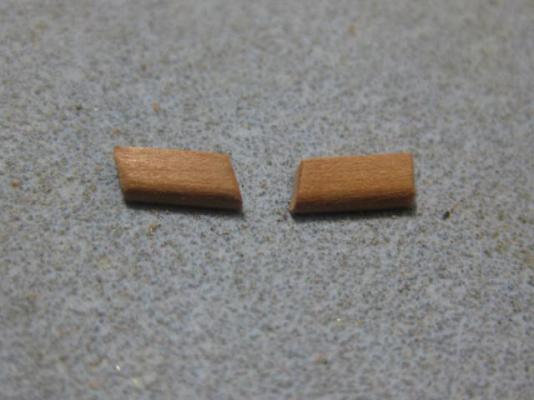
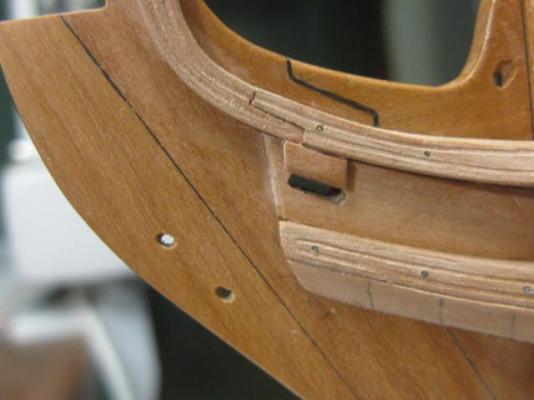
Gammoning Chocks These fit above the Gammoning slots and fill the angle below the upper cheek to prevent chafing of the Gammoning rope : Danny
-
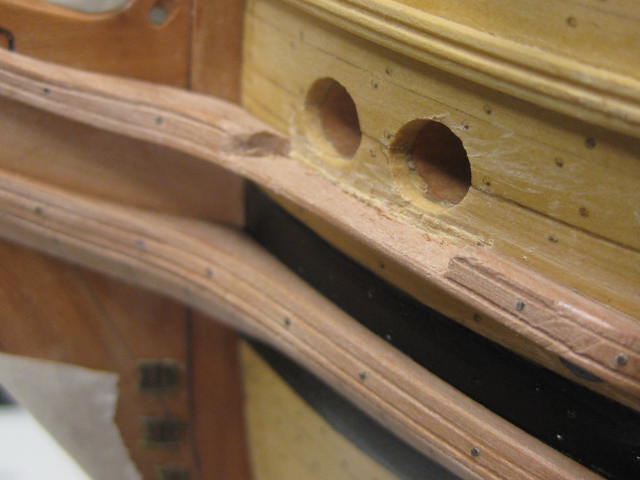
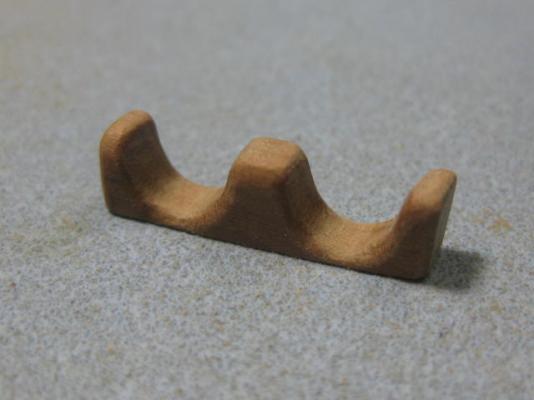
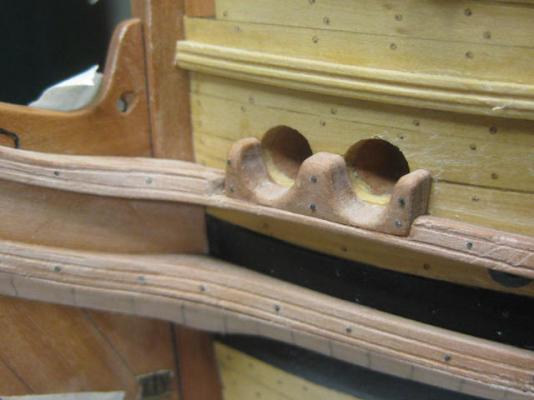
Thank you Mark, Druxey and Vivian. Bolsters The Bolsters fit forward of the Hawse Holes. Their function is to prevent the Hawse Cable from chafing on the upper cheek and planking around the holes. I'm only fitting the port side, as there is no planking around the starboard hawse. Making one of these was enough of a mission - it took me 3 1/2 hours to shape : I made an error when I cut the hawse holes. I angled them forward too far, and consequently the only way to fit the bolsters to make them look somewhere near correct was to cut them into the upper cheek a bit : The fitted bolster. Some tidying up will be done when the glue is dry : Danny

-
Hi Grant, Yeah, I know the price of Cases. The one I had made for "Bounty" was Tasmanian Oak and toughened 5mm glass - it cost THREE TIMES the price of the kit . The one for "Supply" was a lot cheaper - $0 in fact, well ..... a carton of beer . It's virtually identical to the one you just had made (even down to the rounded corners) but was made for me by a mate who worked in a Plastic Sign factory . Danny
-
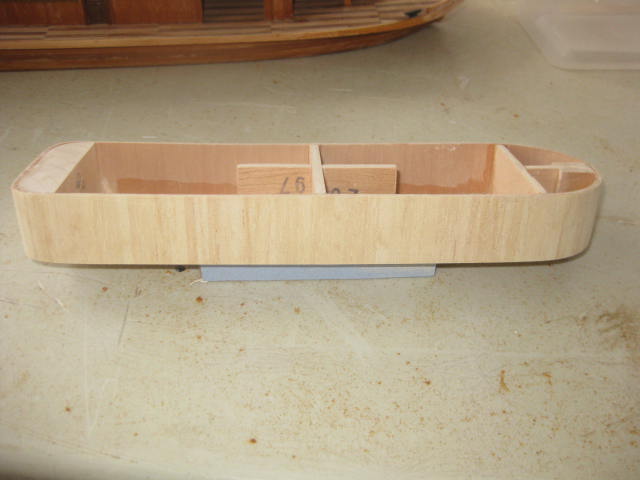
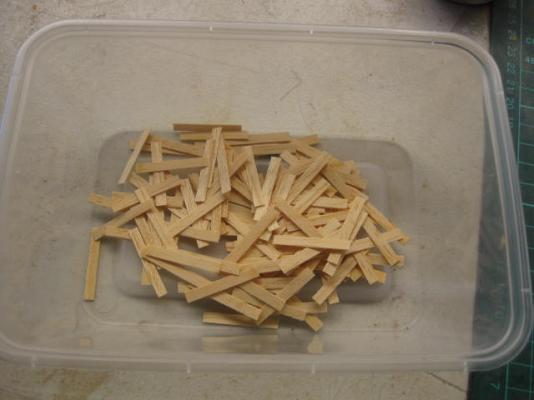
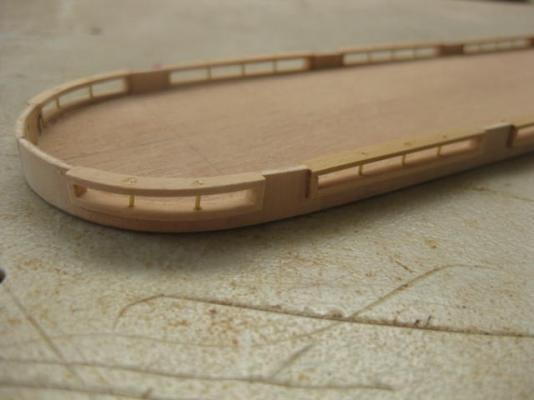
.... continued. I've glued veneer to the forward and aft curved sections to all the decks in similar fashion to the previous one. The straight sections of the edge strips were a lot easier - 2mm x 3mm walnut did the job perfectly. I used masking tape to "clamp" them whilst they dried. This whole step should have been done before the deck was fitted by "old mate" - it was considerably harder to do with the already fitted deck : To cut the 142 pieces of planking for the 3rd deck cabin I used my Chopper : The cabin after gluing on all the planking strips with PVA : And after sanding smooth : Danny


- 62 replies
-
- 8
-
-
- king of the mississippi
- artesania latina
- (and 1 more)
-
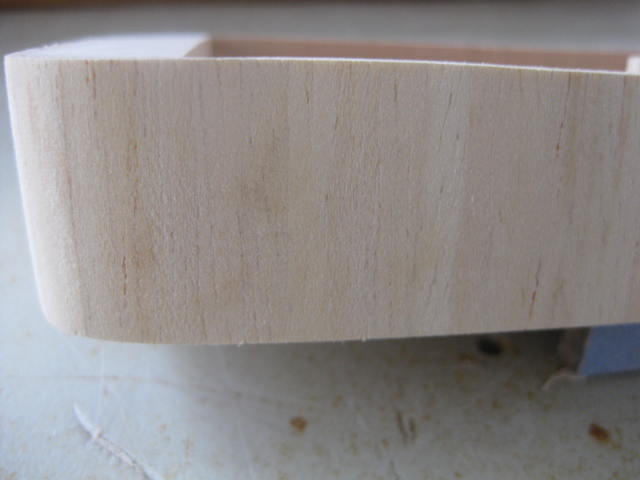
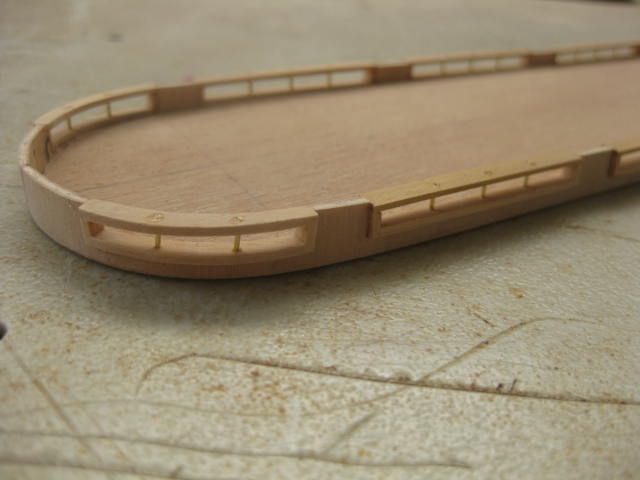
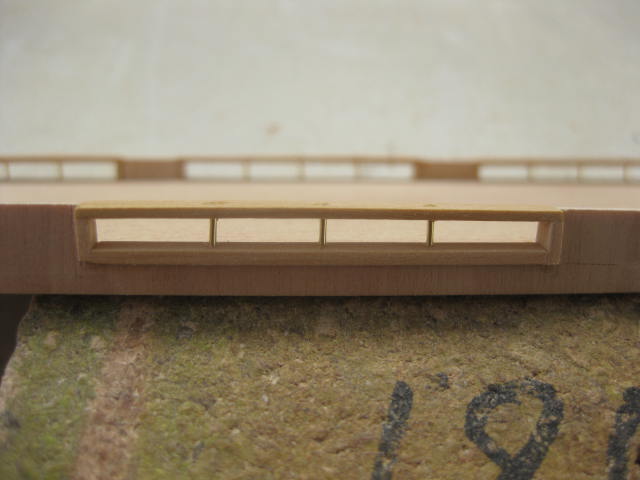
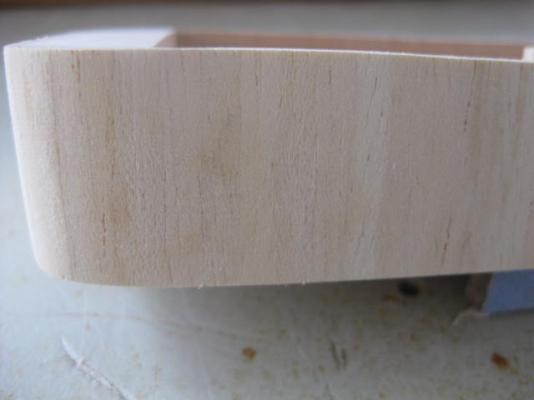
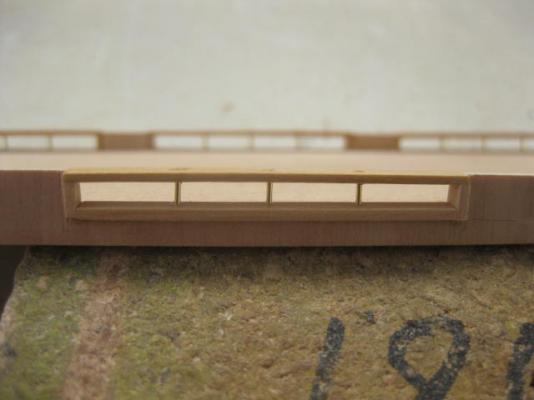
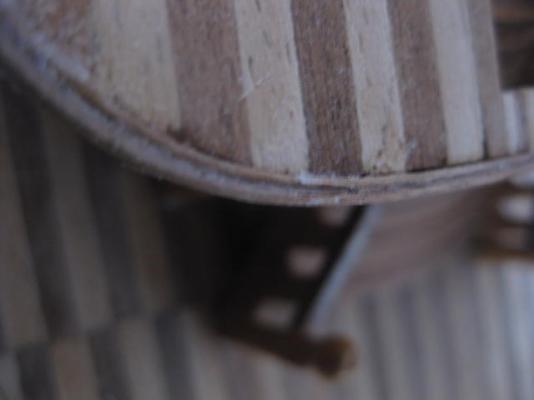
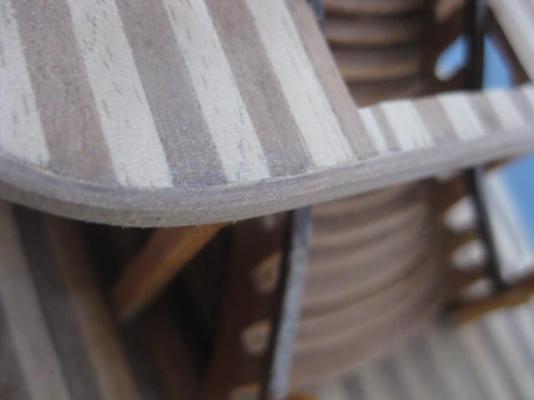
Very true David, but this time around I can't use bog and paint to hide the defects - it's all in natural timber. At least most of the "oopsies" were fairly easy to fix, and they're all behind me now . Continuing on from the last lot of pics, I've finished the Ventilating Chamber. Strips of the same stock used for the bottoms and sides of the cutouts have been glued in, and brass bars have been drilled and fitted : Apologies for the quality of the next couple of pics - I was using natural light at 6:30am. I glued three strips of 0.6mm walnut veneer around the curved section of the forward part of the deck - "rough as guts" in the 1st pic, and sanded to almost perfect in the 2nd : Continued next post .....

- 62 replies
-
- 7
-
-
- king of the mississippi
- artesania latina
- (and 1 more)
-
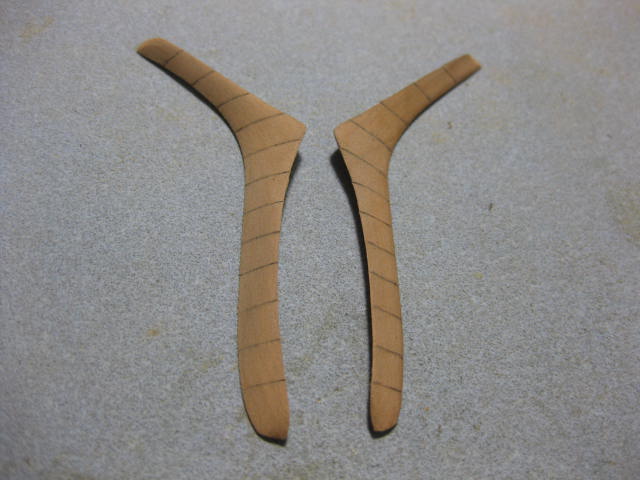
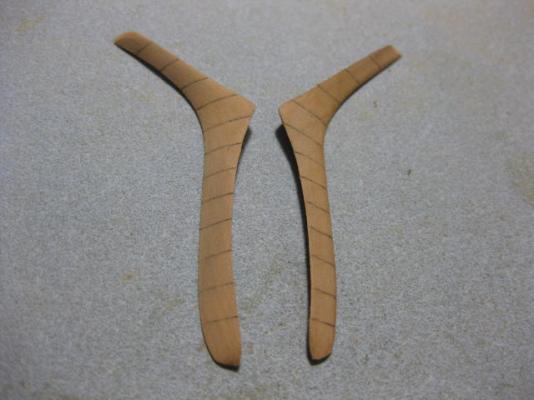
Too late David, I got there a long time ago . Both Wash Cants are now shaped, and I've simulated the joins in the sections they were made in with an Xacto and a pencil : Danny
-
Thank you Remco, David, Grant, Allan and Ben. Bamboo for treenails, blackened brass wire for bolts. One . Danny
-
Thank you Geoff. It certainly does, and as an added bonus I don't have to fork out for a kit . Although I find it a lot easier to get a good result by starting one from the beginning rather than doing a few (or a LOT of) repairs . Danny
- 62 replies
-
- 1
-
-
- king of the mississippi
- artesania latina
- (and 1 more)