HOLIDAY DONATION DRIVE - SUPPORT MSW - DO YOUR PART TO KEEP THIS GREAT FORUM GOING! (Only 68 donations so far out of 49,000 members - Can we at least get 100? C'mon guys!)
×


Dan Vadas
-
Posts
3,261 -
Joined
-
Last visited
Content Type
Profiles
Forums
Gallery
Events
Everything posted by Dan Vadas
-
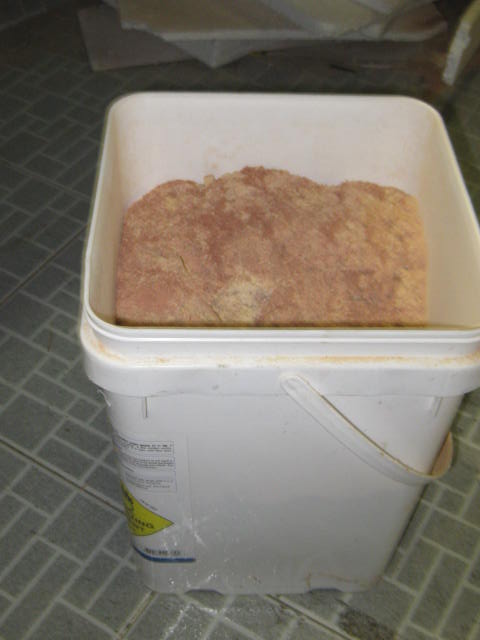
Ya reckon?? I've been keeping all the sawdust from my Vulture since I started - that's a 10 litre bucket, more than 3/4 full . Danny
-
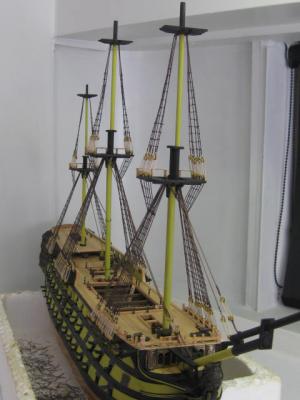
And HERE'S my contribution to this topic - my AL cutaway Bounty. Quite a good kit for the price, and mine was "built in Spain" not Asia so it didn't have all the junk cast pieces of more recent AL kits. I'm guessing that AL took the overall measurement including the Bowsprit, and OcCre used the hull measurement? Danny
-
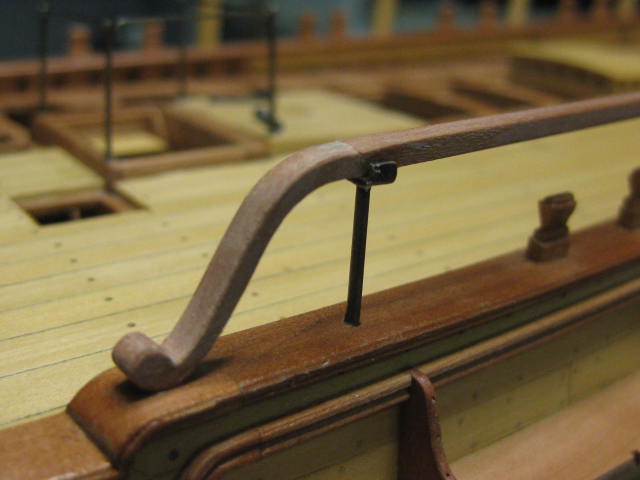
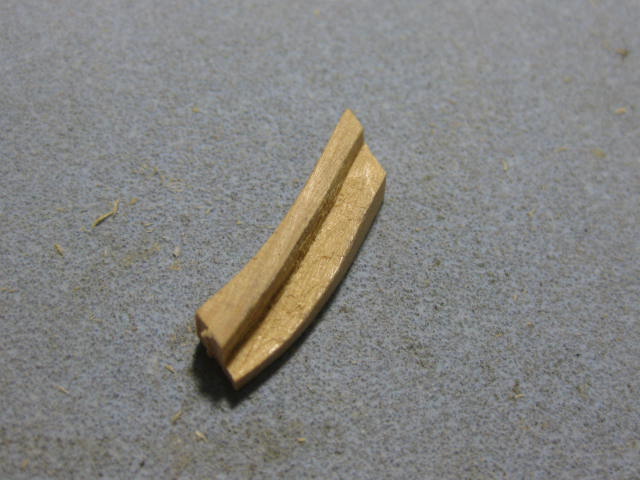
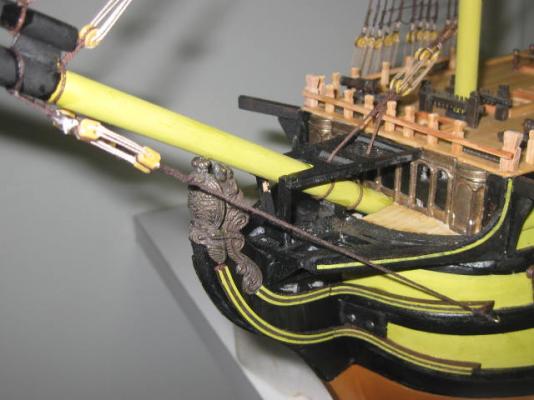
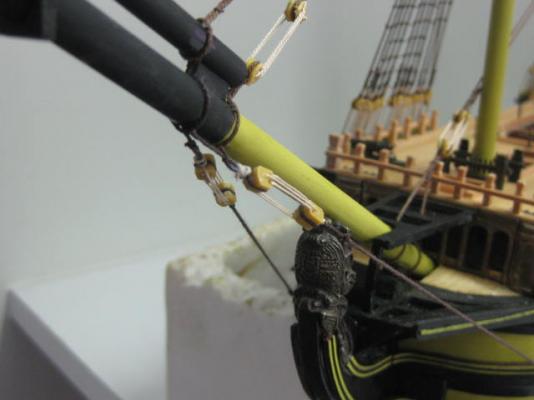
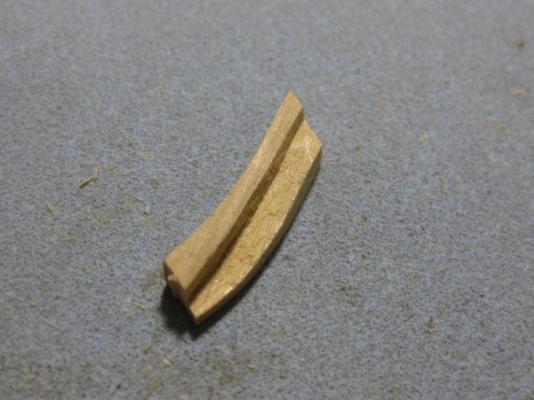
Thanks very much Brian, Frank, Janos, Patrick, Grant, Nils, Mark, Pat, Steve, John (welcome back), Spyglass, Dale and Albert . Good to see you have your Acetone problem sorted Spyglass - thanks for giving him the info Grant, I've been away on one of my extended holidays again . Roughtree Rail The final Rail to be fitted is the Roughtree Rail, also called the Quarter Rail. This rail is bolted to the Swivel Gun Mounts on the Quarterdeck, and also has an iron brace near it's fore end. I made the fore end from a piece of wide stock, cut on the scroll saw. A much easier way than trying to bend it into shape : Danny


-
G'day mate (you got a name?), If you're having trouble getting enough wood off with sandpaper I have two suggestions : 1. Use a fairly heavy grit paper to take off the bulk - 60 or 80 grit. Then use gradually finer grades (150 and 240) to finish the hull, ending with about 400 grit. 2. Use a cork block to which you can Contact Cement the 60 or 80 grit paper. This will give you a lot more pressure than you can apply with your fingers alone, and will make a flatter hull without dips. Use a 2nd cork block filed into a half-round for the concave areas around the stern. To replace the paper, heat it with a hair dryer set on MAX or better yet a heat gun - the paper will peel off the block easily. Danny
- 4 replies
-
- 1
-

-
- phantom
- model shipways
- (and 1 more)
-
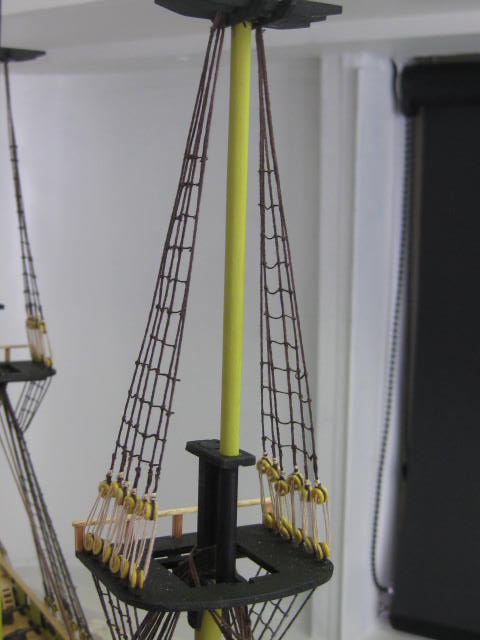
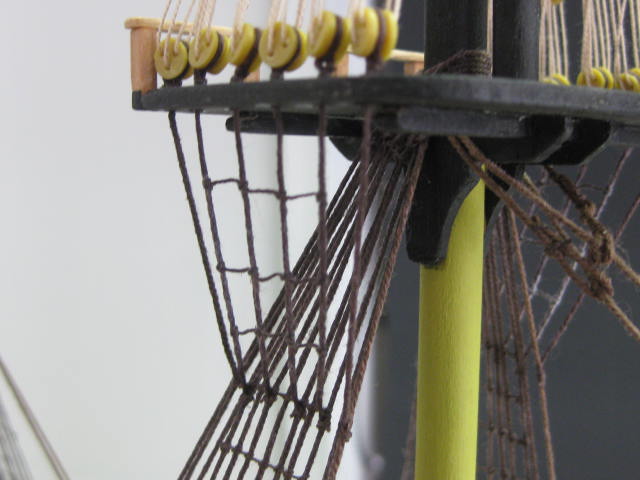
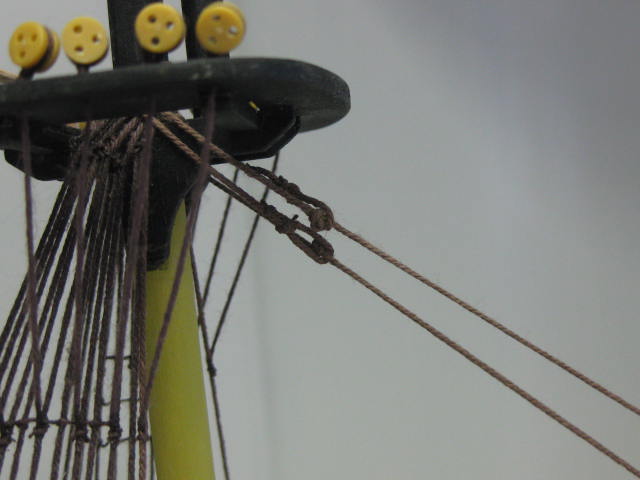
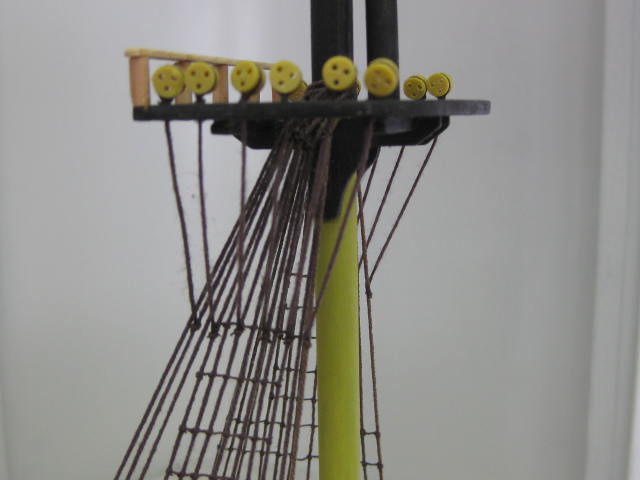
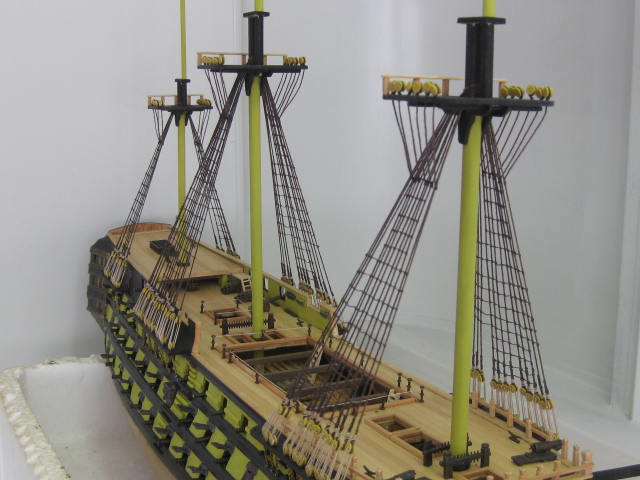
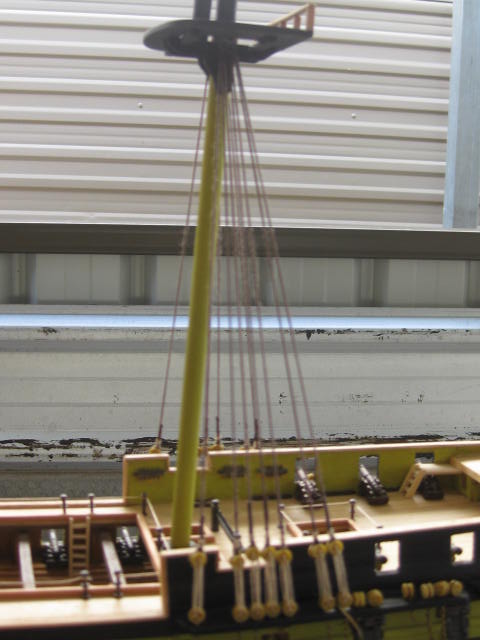
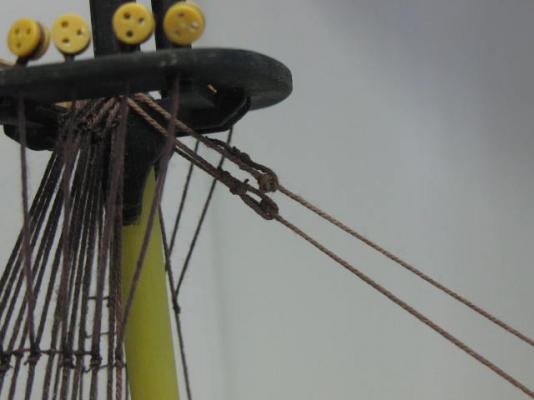
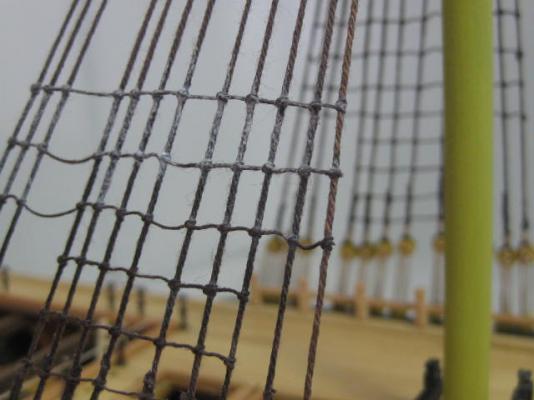
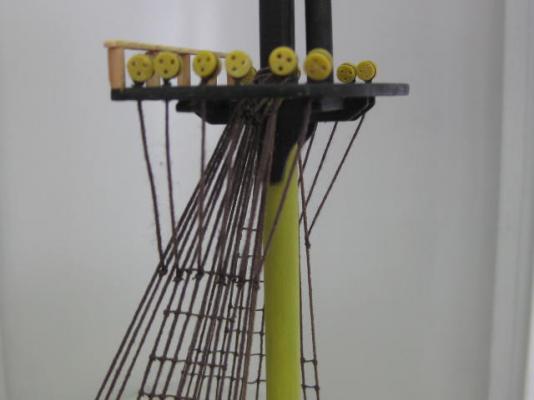
...... continued. Four days later and the Upper Shrouds are completed, including their Ratlines : The futtock shroud ratlines took a couple of hours : The Topmast Forestays were all fitted : Finally I added two Bowsprit Shrouds. The kit instructions didn't show ANY . I had to use four modified blocks, as there were only two deadeyes left and they were both damaged beyond repair : More work will come in a week. Danny


- 137 replies
-
- 13
-
-
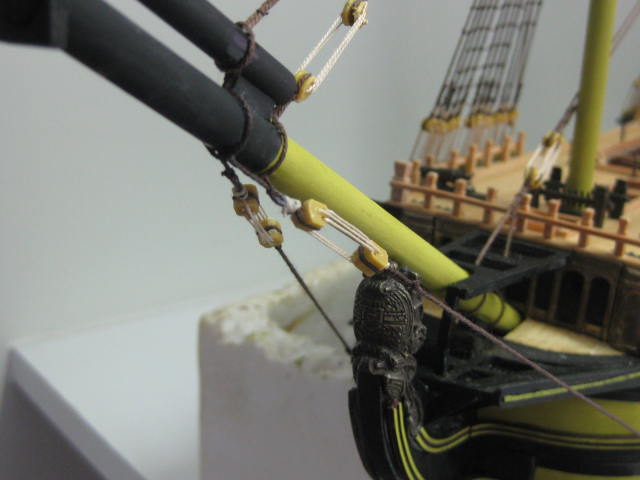
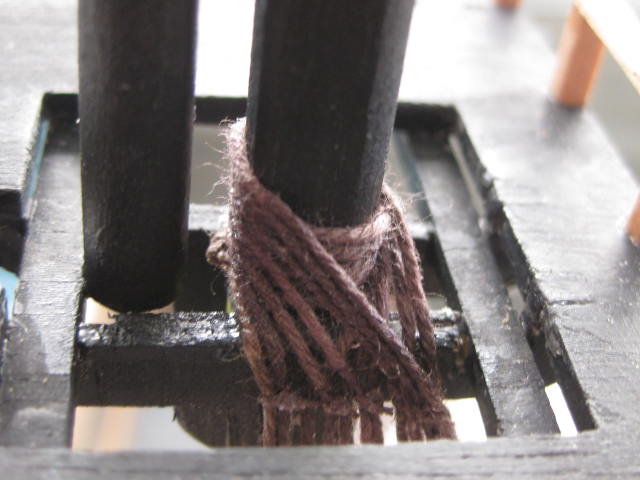
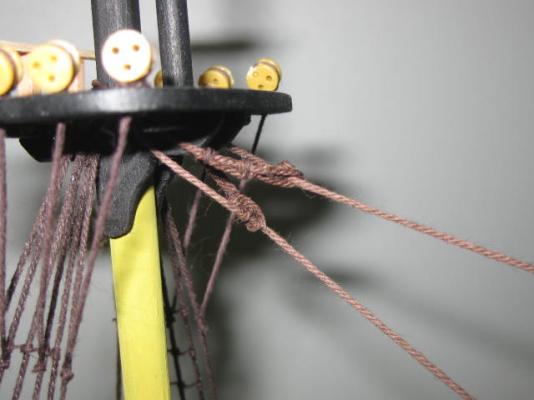
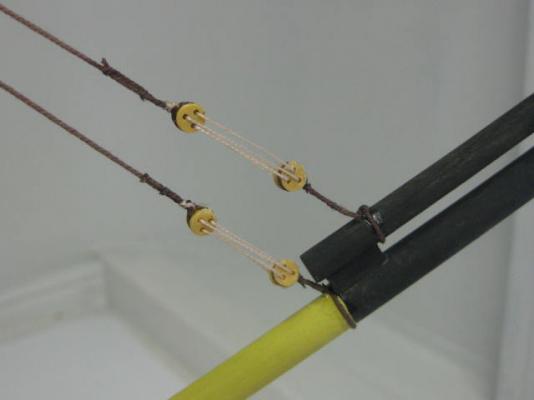
..... continued. The Lower Forestays were fitted in a day and a half, starting with the Mizzen Mast and working forward. This is back-to-front to the way I would normally do it, but the work environment dictated it to be the better way as I didn't have a great lot of space to turn the model on my bench : The attachment around the mast top is a reasonable facsimile of the real thing, using a "mouse" made simply by tying a double knot around the stay : I had to use Deadeyes for the lower ends of the stays, as no Heart Blocks were supplied in the kit : Continued next Post ..... Danny


-
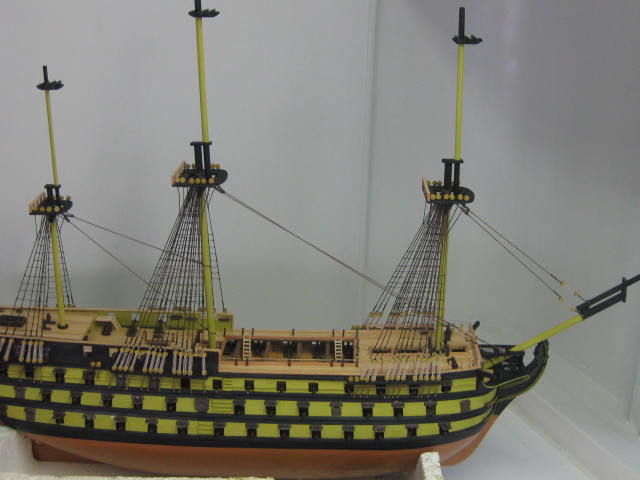
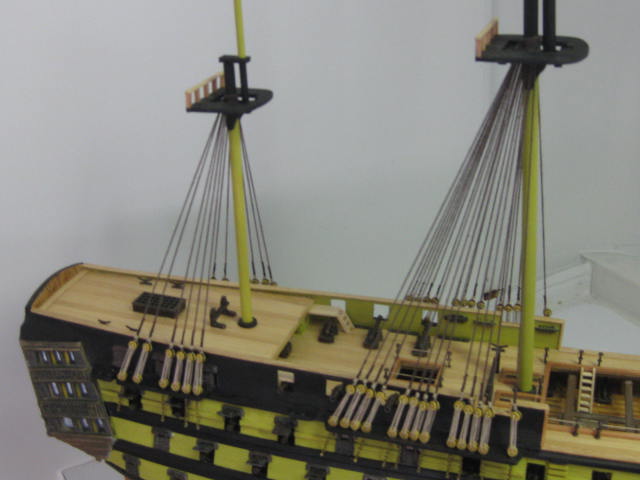
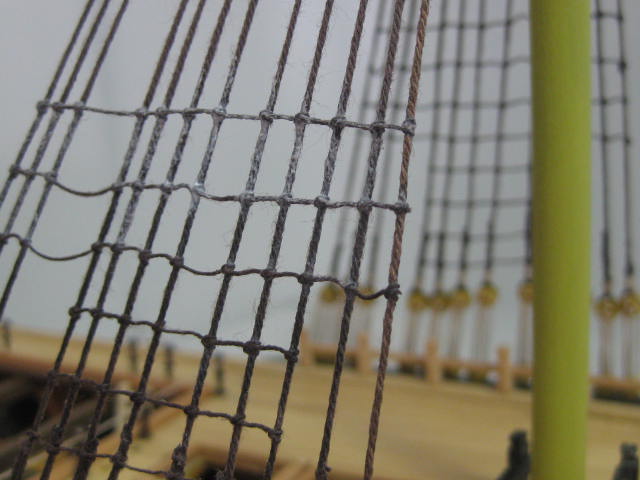
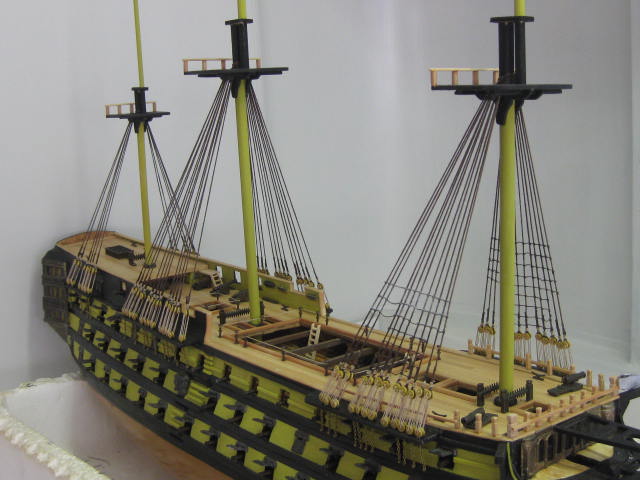
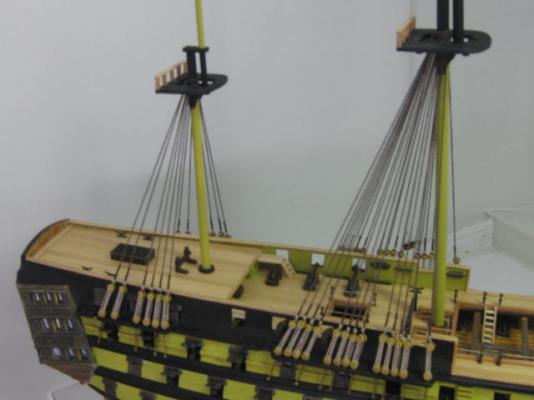
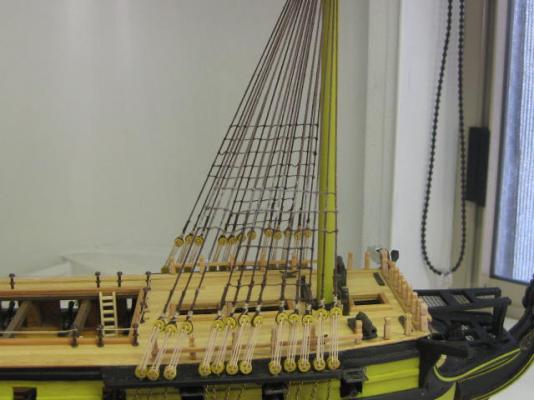
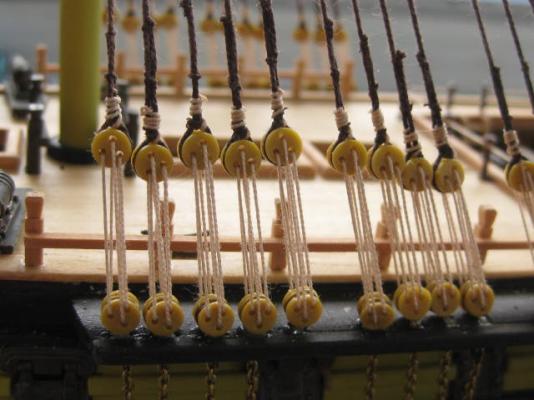
Thanks for looking in, and the nice comments John, David, Bindy and Karl. Don't follow me TOO closely Karl - I'm still trying to make a "Silk Purse from a Sow's Ear" and I'm rather limited by the work that had already been done and also the very poor fittings etc of this kit. It might be better to follow another build . Hi all, I've spent a good portion of the last eleven days working on this one again, while still managing to get a bit of "holiday stuff" in . Below are some pics, taken several days apart, as work on the Standing Rigging progressed. The first was taken two days after the re-commencement of work and shows all the Lower Shrouds completed, : Work starts on the most tedious part - the Ratlines. I faithfully (?) followed the Kit Instructions with the spacing of these, as they were at least twice as far apart as they should be (saved me about three days work ) : Two and a half days later all the lower ratlines were completed and the Futtock Shrouds installed : Continued next Post ........ Danny


-
Bugger ..... how did I miss those on my Vulture ? Bit too late now . Nice work Remco. Danny
- 1,215 replies
-
- 2
-
-
- sloop
- kingfisher
- (and 1 more)
-
Hi Al, You're doing quite well with your "workarounds". I'd say 90% of the problems that you have encountered are due to some "not so good" laser cutting by AL - I had exactly the same issues with mine. You're on the right track . Dominic - I'm not saying DON'T use pins if they are actually going to do something .... just don't RELY on them to permanently hold down the deck. PVA does that job very well. The pins are only a temporary thing to hold the deck in place, or DOWN in certain area if no other way can be used, until the glue dries. They can be easily pulled out with a good pair of sidecutters before any planking takes place. Which brings me to another point Al - don't try planking the upper deck until it is in place. It may seem an easier way to do it first as it will be easier to sand flat without bulwarks getting in the way, but the cutouts around the frames will be all over the place and you'll finish up with large gaps in places (at least I did at first on this particular kit). Danny
-
Hi Al, My best advice to you is - DON'T USE THE PINS, other than three or four to position the deck and stop it slipping. They do nothing that PVA alone can't do, except complicate things. Use spring clamps to hold the deck down (wooden clothes pegs work fine, you can modify them in many ways to suit special applications). Rubber bands around the hull is another way of holding the deck down. Or a combination of a few of the methods suggested. If you want to Treenail the deck that can be done well after the glue has dried. Danny
-
They are one of the few things I didn't make from scratch - they came with the Gun Barrels which I bought from Ukraine. Thank you David . Probably never John - carving isn't one of my strong suits . But ..... we'll see. I might get better at it, I can always add carvings later on . Danny
-
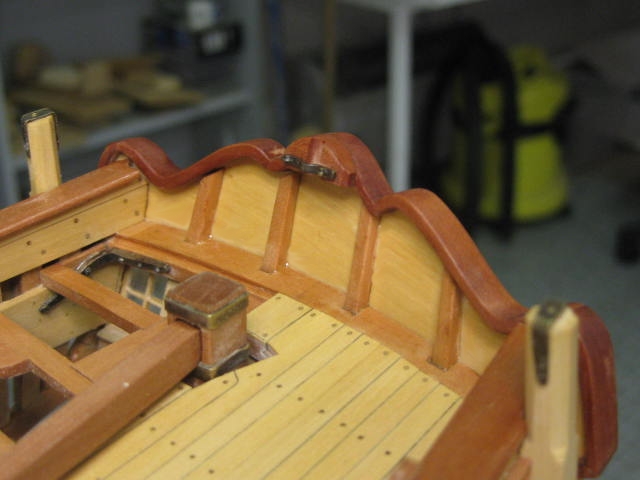
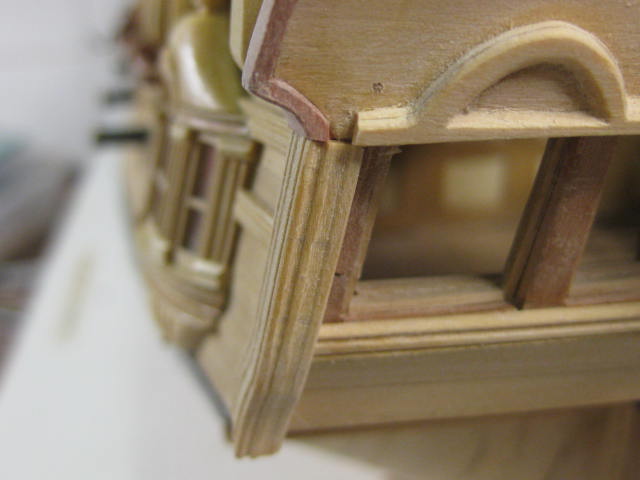
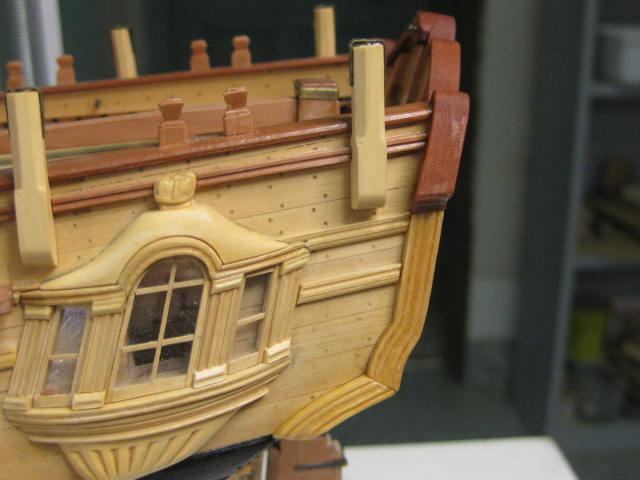
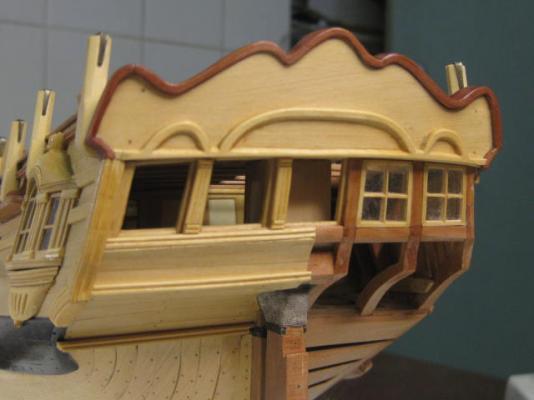
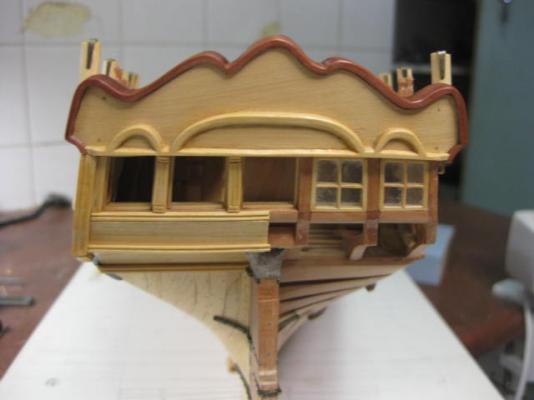
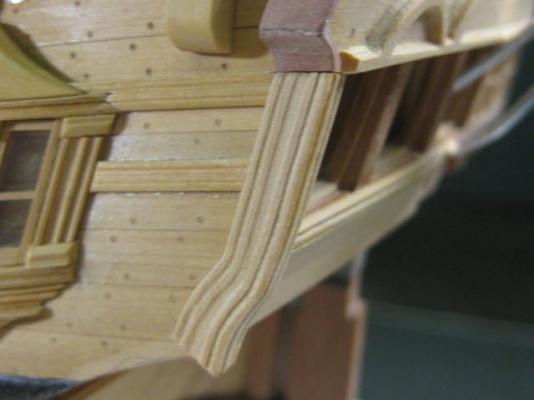
The finished stern for now - I'll fit the three remaining Lights much later in the build, as they will be in the open position and may get damaged during further construction : The Pilasters are of similar design to the Quarter Badge ones : Danny


-
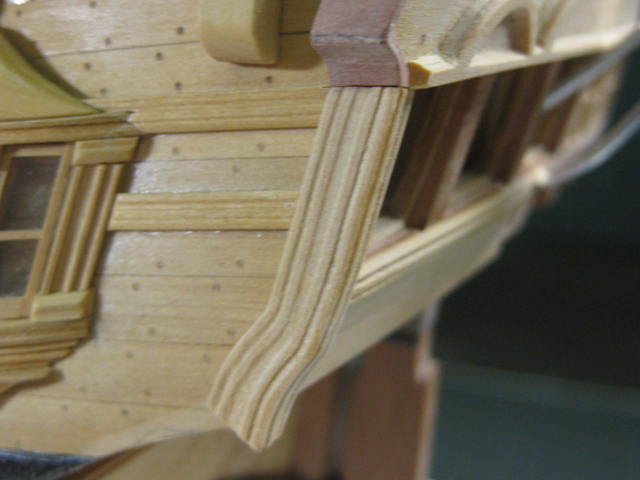
Thanks again Druxey, David and John. Quarter Pieces The Quarter Pieces on most Swan Class Sloops are elaborately carved, but the sheer plan of Vulture shows very plain ones. Whether this is correct or not I don't know - perhaps the draughtsman was just lazy . I've treated them in similar fashion to the Pilasters of the Quarter Badges and Stern Lights. To overlap the joints between the hull planking and counter planking I hollowed out the pieces : Some progress pics through the stages of fitting them up : Danny


-
Hi Remco, How did you establish the converging lines of the counter timbers? If they were to continue they should "meet" at a point at about the height of the Mizzen Crosstrees. BTW - I had more than one attempt at this piece myself . Danny
-
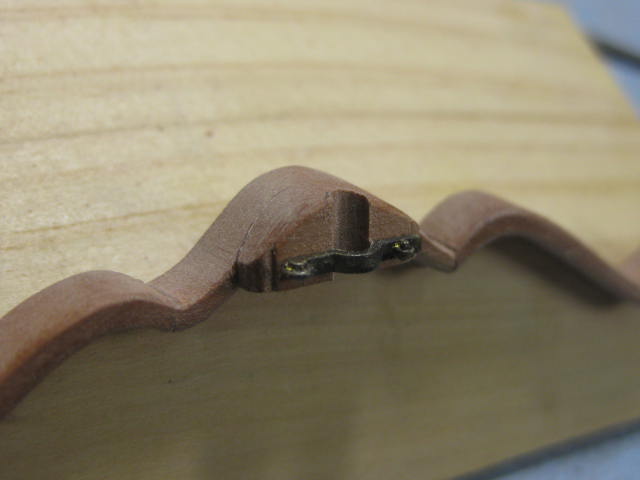
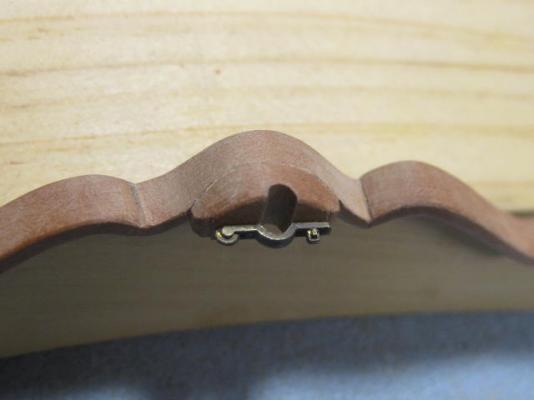
Thanks for looking in again, and the nice comments Geoff, Brian, Ben, John and Spyglass. Sorry about that Spyglass, I didn't realize that you were up to the same stage . Besides, the construction of your Pegasus is quite a bit different to mine . You're doing a fine job. Ensign Staff Block and Clamp There are a few more things on the taffarel that need doing prior to fitting the assembly to the ship. One of these is the Block and Clamp that hold the Ensign Staff, enabling it to be easily removed. The block is stepped into the fore edge of the taffarel and has two small molded sections at it's ends, The clamp is very similar to a Gun Trunion Cap, so I simply used a slightly modified spare that I had (I only had to enlarge the diameter of the half-hole slightly) : Danny

-
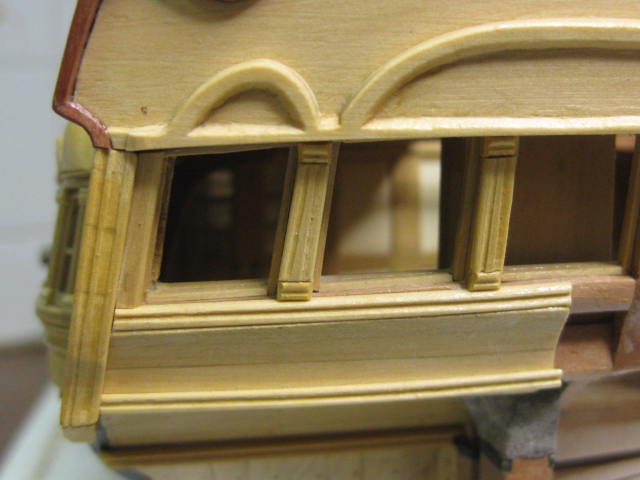
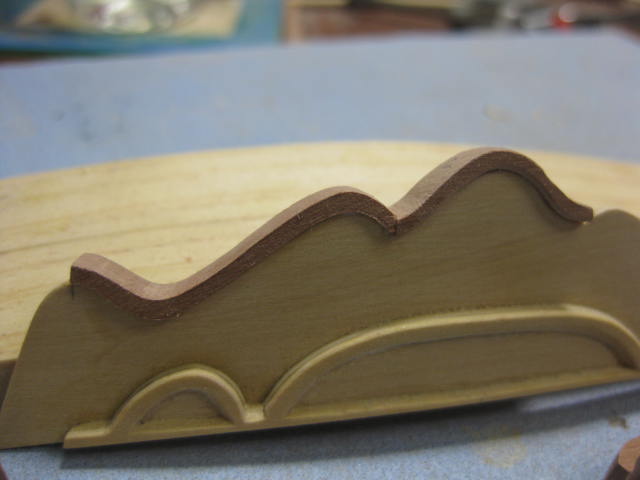
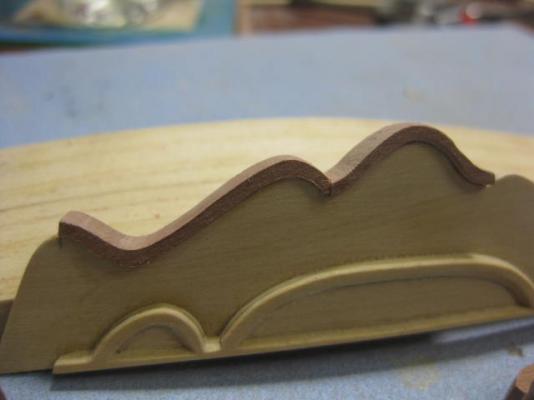
Thanks David - the wood for the taffarel is Castello Boxwood. I'm using dark Swiss Pear for the Capping Rail. Thank you Greg - I imagine it would have taken quite a while to hollow out all the Coving from one piece . I notice you didn't fit the Capping Rail or Quarter Pieces to your Pegasus - any reason for that? It would have been nice to see it all fitted to your ship - it was a little difficult trying to imagine the whole assembly from the plans. Thank you too Al. Capping Rail The Capping Rail is very tricky to make. I traced around the taffarel to get the inner shape for the five pieces which I cut on the scroll saw from dark Swiss Pear to match the rest of the railings. Much finessing was need to get a good fit . I found it best to work from the centre toward the ends : Danny

-
Thanks John. Yes. The upper piece is only about 1.5mm wide and of course has a lot of sections where the grain runs directly cross-wise. I was worried that it would have snapped in numerous places if I'd tried to cut out all the middles before gluing it to something more substantial. This method worked very well . Danny
-
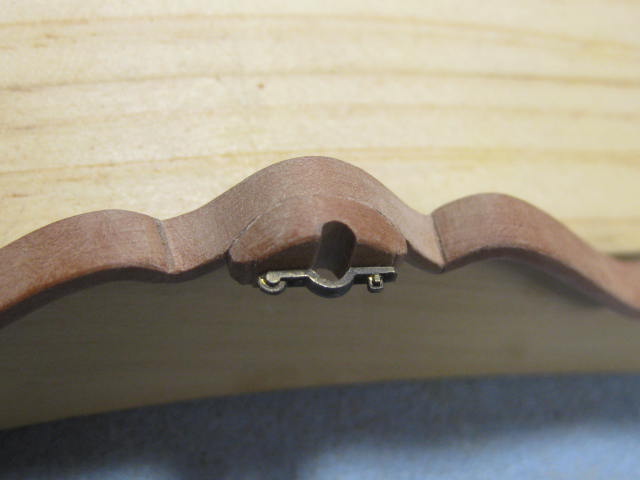
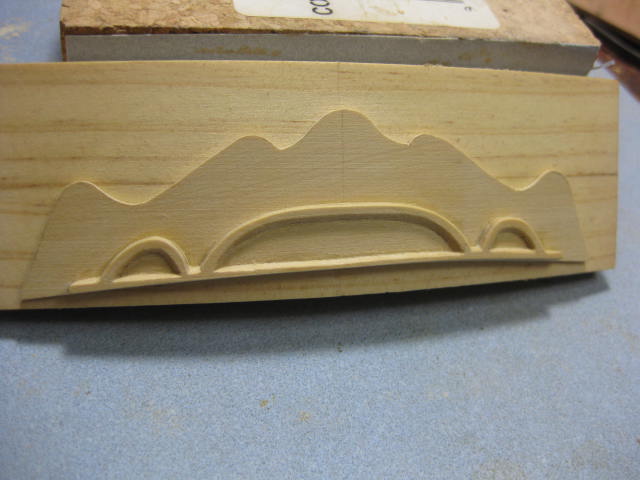
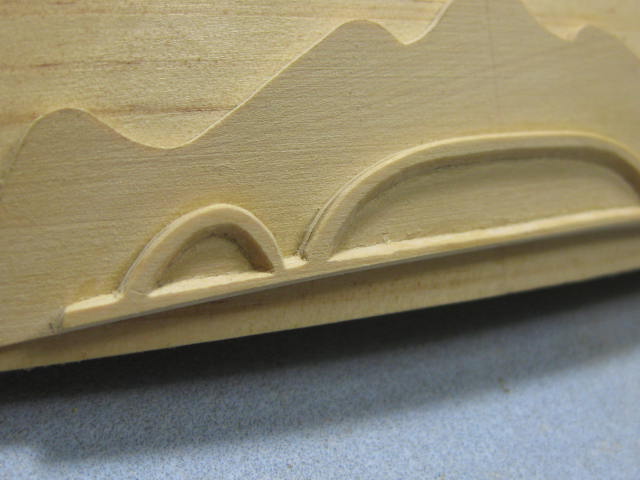
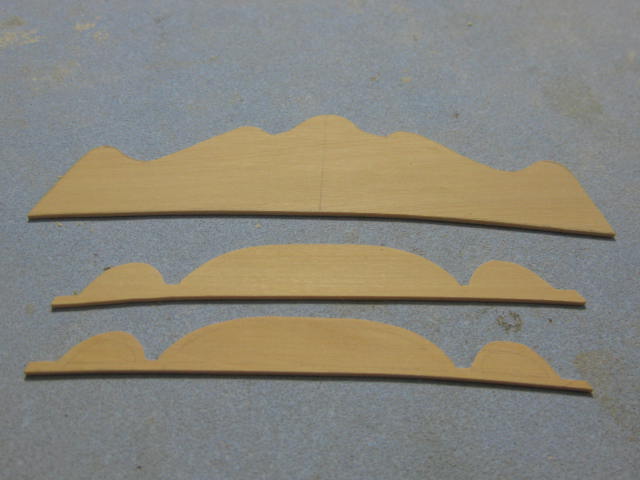
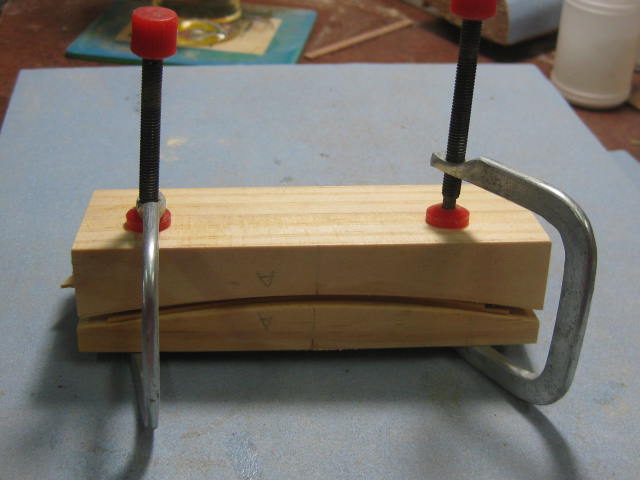
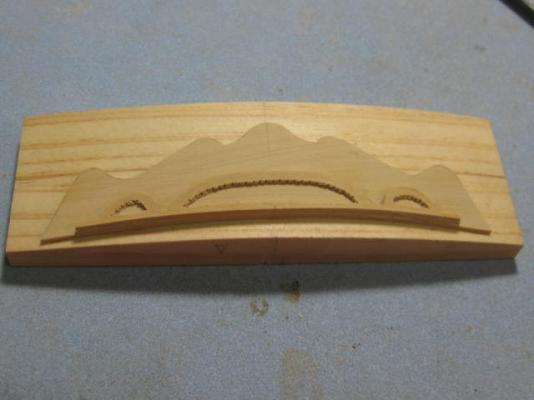
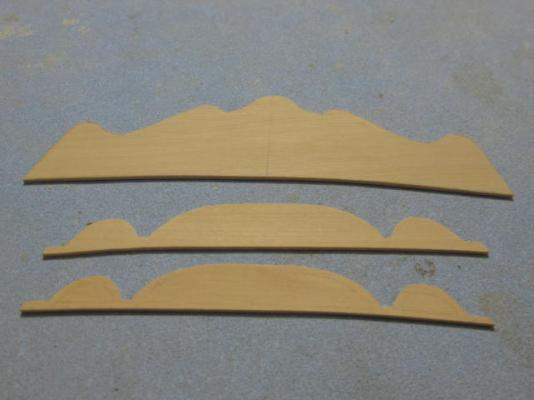
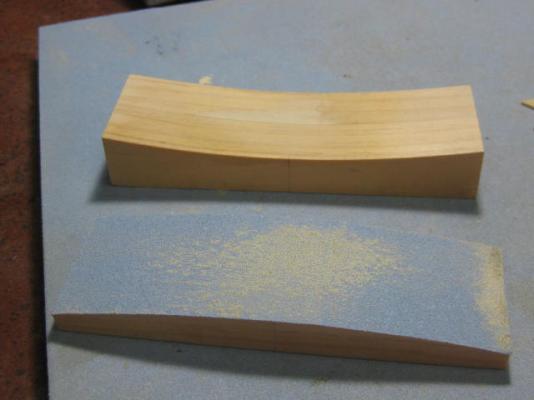
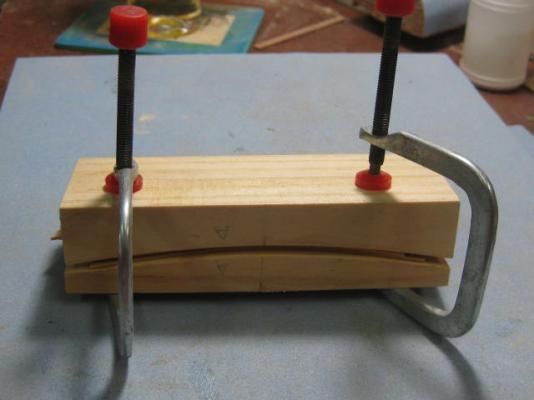
...... continued. I made the taffarel base from three pieces. This will save a lot of carving, and won't be at all noticeable. I drilled out the bulk of the inner parts of the top section, glued it to the middle section and clamped it into the baseboard to dry : Then I finished the outer edges and glued the pieces to the main lower piece and clamped it again. I spot-glued the main piece to the baseboard - this will ensure it doesn't straighten out and also gives a good steady rest for the carving etc : Once the three pieces had dried I started carefully carving and cutting the waste out of the middle holes. This was relatively easy, thanks to the earlier removal of most of the waste : Danny


-
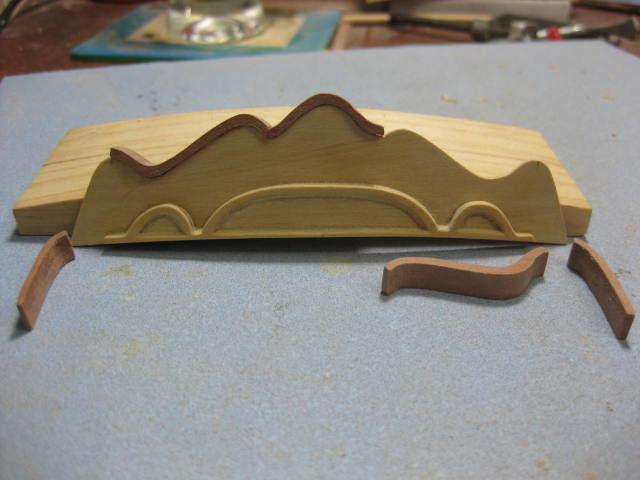
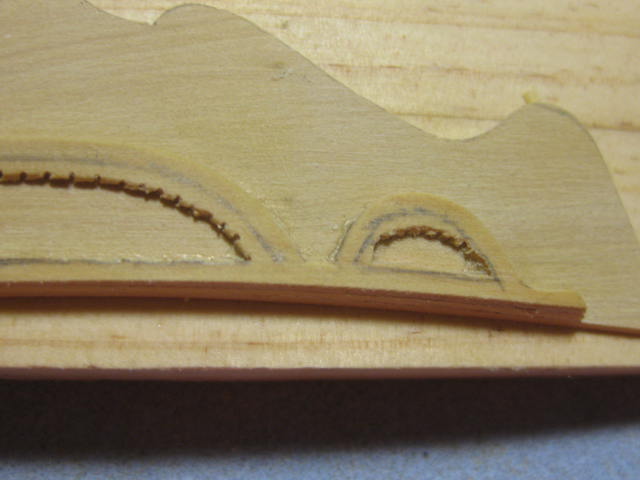
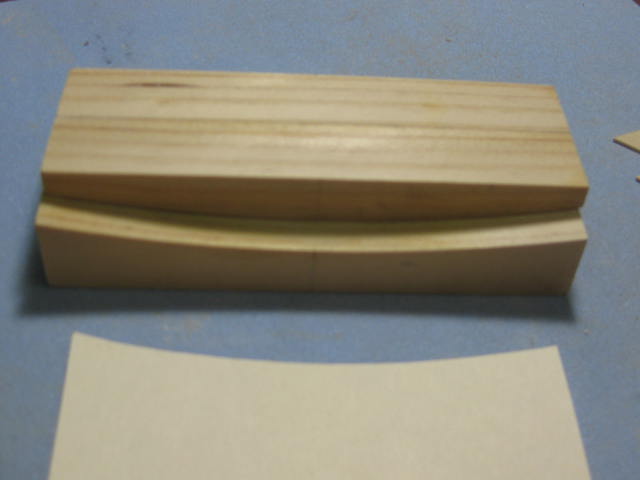
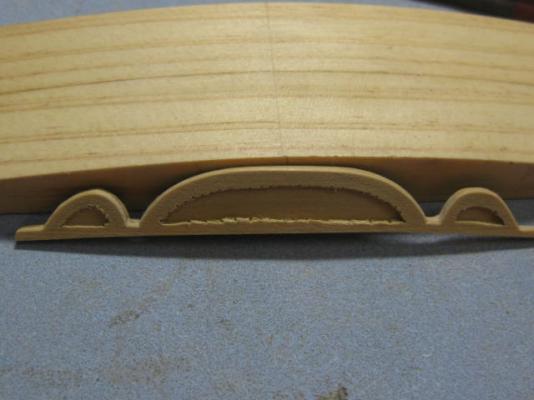
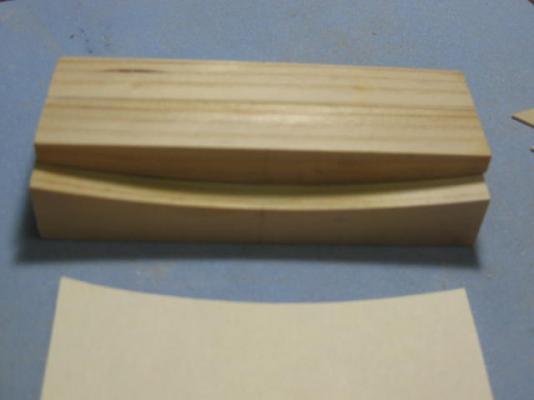
Taffarel The stern structures begin with the Taffarel Base. I started by making a "building board" which has the same curvature as the stern. I used a couple of pieces of pine - the lower convex one is the actual board, and the concave one is used to clamp the pieces of the taffarel whilst they are drying : Continued next post ..... Danny
-
Thank you John, E&T, Mike, Christian and Allan. It looks even better in "real life" Mike . Yes Allan. Danny
-
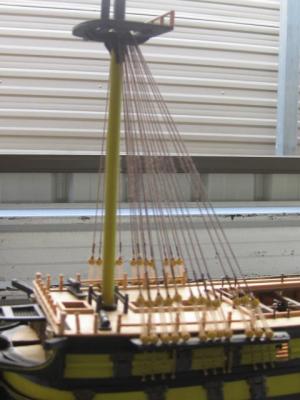
Thank you dragzz . I finally feel well enough to make a return to my van and therefore this Build . In three days I managed to fit the rest of the deadeyes and chains, and made a start on the Shrouds. The lower Foremast ones and half the lower Mainmast ones are now fitted. I'm not totally happy about the varying heights of the upper deadeyes, but they look in keeping with the rest of the ship . More work will be done in the coming couple of weeks, as I'll be returning to the van over Easter and the Anzac Day long weekend. Danny


- 137 replies
-
- 14
-
-
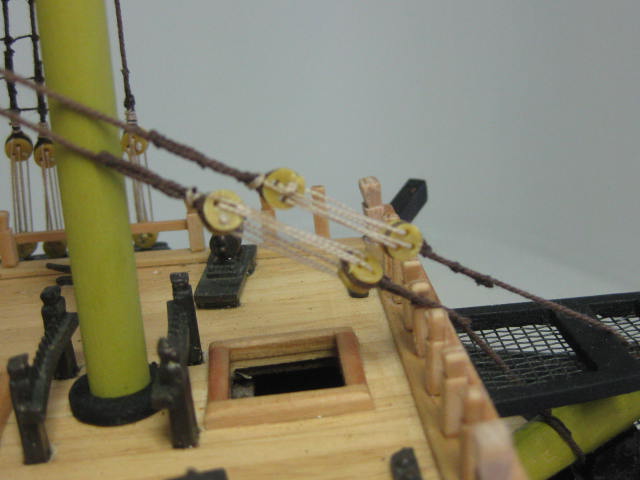
Thank you Michael and Patrick . The stanchions are pinned (with bamboo) and glued with PVA - you could hang the entire ship from them quite confidently, they are attached that strongly . And they WILL be used for rigging. Danny
-
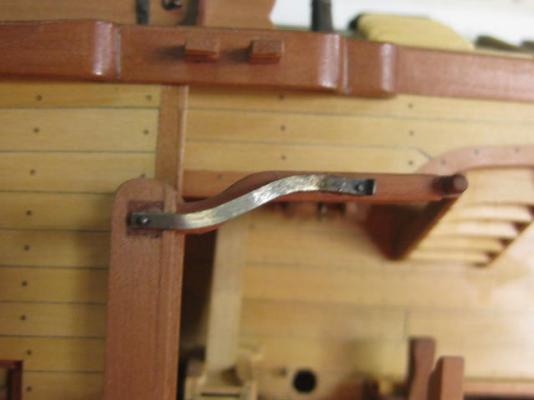
I bent them cold using two pairs of small pliers. I didn't have any brass of the correct thickness, so I filed down some sheet and cut the strips with snips - quite a bit of hammer and anvil work to straighten it out (hence the "hammered" look). Also quite a bit of work with a needle file to get out the plier marks. Danny
-
Thanks for the compliments on the straps Piet, David and E&T. Yeah E&T, these were considerably more difficult to make than flat ones . The previous pics didn't really show that they also have an "S" bend that roughly follows the wooden rail below : Doing the lateral bends was a trick, and getting Port and Starboard rails to look like mirrors of each other was a whole different ball game . Danny