Dan Vadas
-
Posts
3,261 -
Joined
-
Last visited
Content Type
Profiles
Forums
Gallery
Events
Everything posted by Dan Vadas
-
Thank you Nils. I agree with you Yambo - it DOES look wrong in the pics (much better in real life), but it IS supposed to be there . Danny
-
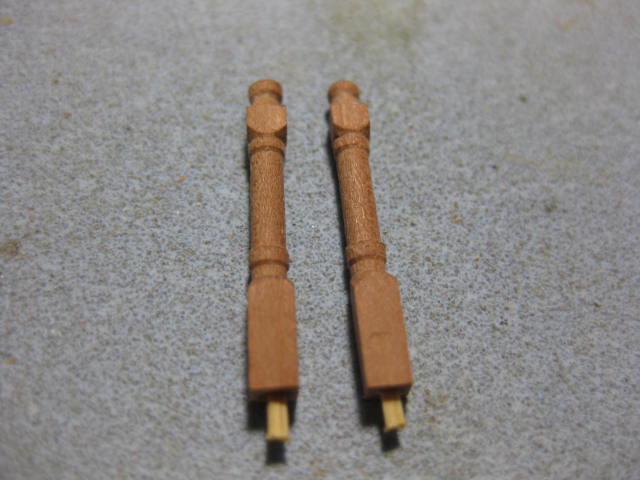
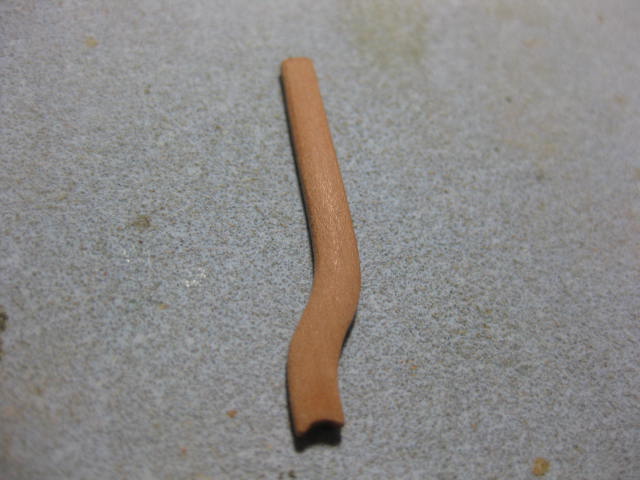
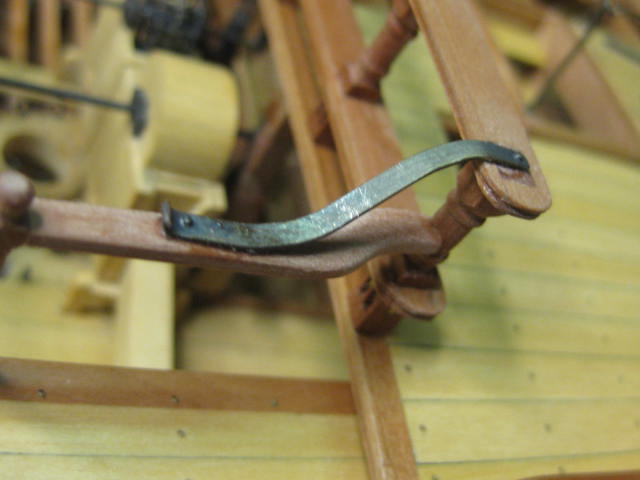
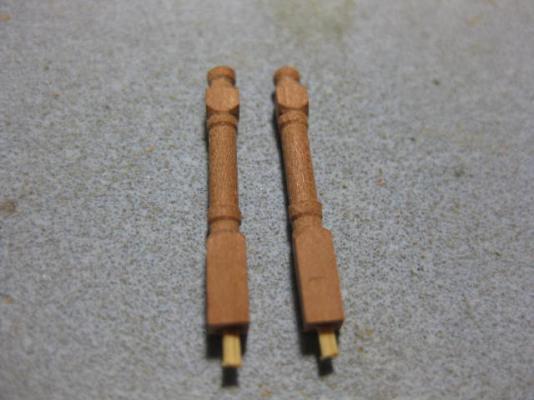
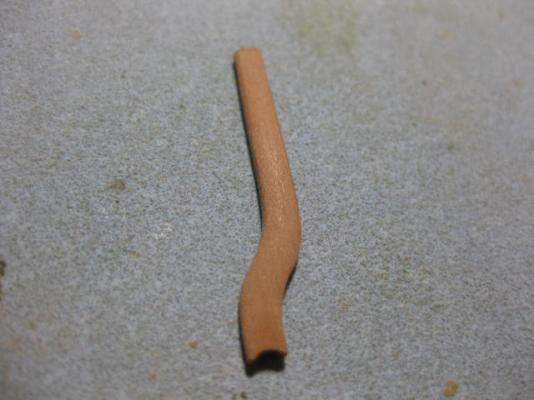
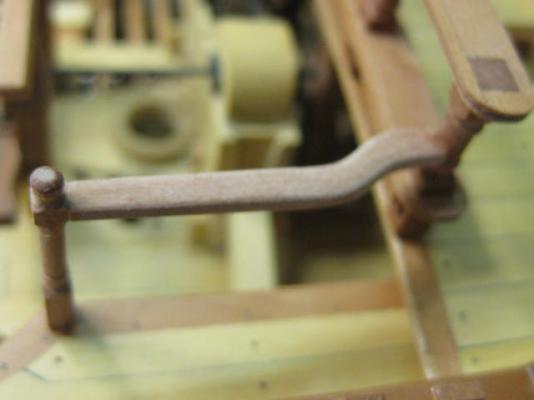
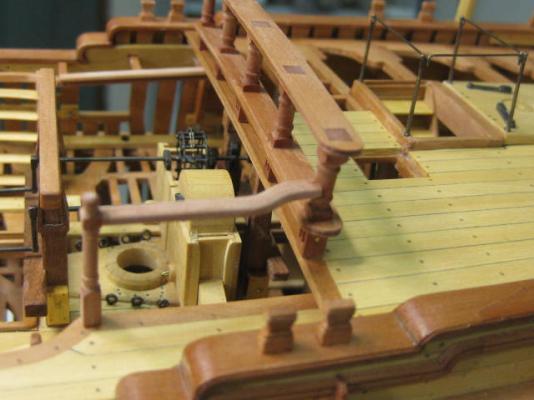
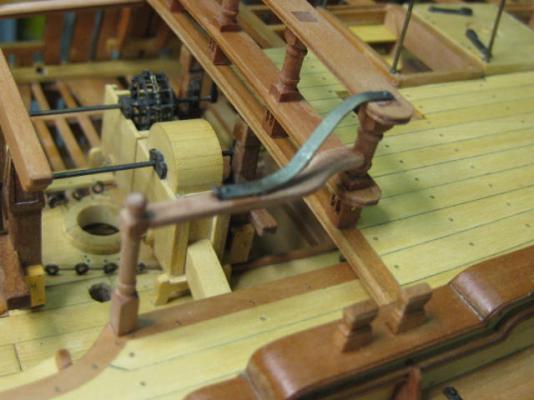
Thank you Remco. I'm still a LONG way off thinking about masts yet Brian . Fixed Gangway Newel Posts and Railings The last of the Posts and Railings. The railings have an "S" bend in them to allow for the differences in widths of the gangway : There is a strap which both reinforces the railing and gives an extra handhold : Danny

-
Thanks Pat . You got it right Grant. I set both the "normal" tool and the parting tool to the distance apart that allowed me to just use the "X" axis wheel to cut both without moving the "Y" axis. The sheave is 0.7mm thick. Danny
-
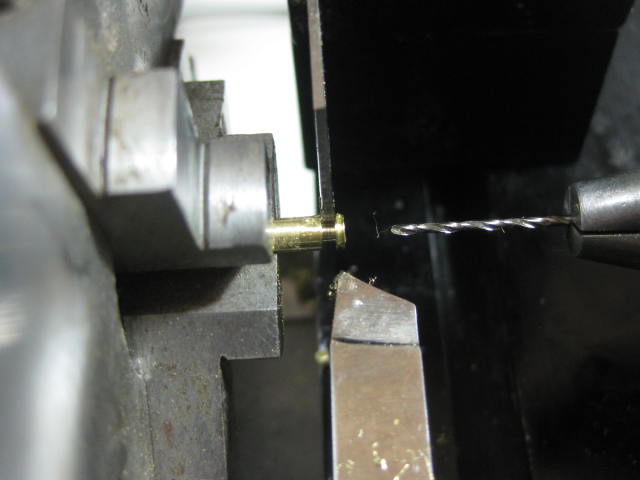
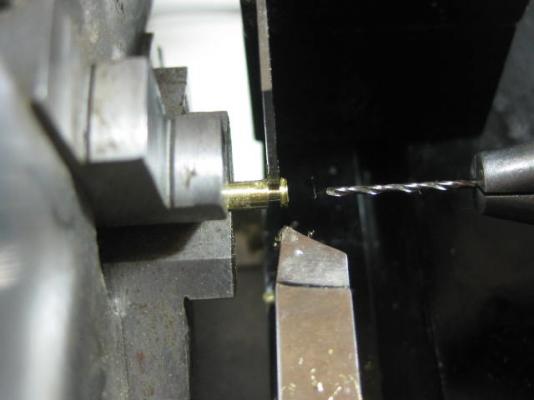
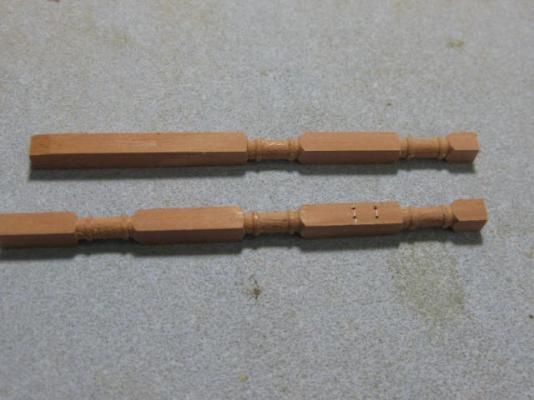
Thanks go out to Tim, David, John, Mark, Joe, Patrick, David, Druxey, Michael, Toni and Popeye. I surprised myself with how successfully the railings turned out too . Toni, next time I need to do some of this micro-soldering I'll make sure to document my method. It involves a block of Pumice stone to support the tiny rings. Quarterdeck Breastwork The Quarterdeck Breastwork was made in similar fashion to that on the Forecastle, with a few differences. The stanchions each have two sheaves (2.5mm diameter) instead of one, and there is a second rail. Here's a pic of the setup I used in the lathe to make the 10 sheaves. Because of the small diameter of the brass wire I had to work very close to the chuck. This setup minimized the steps needed - I made the sheaves one at a time and parted them off as I went, moving the stock for each one. The hole was drilled first, then I used the Parting Tool to score the wire to prevent it slipping sideways. The groove was cut next, and finally I finished parting the piece off. It took about an hour to set everything up and cut the 10 sheaves : The five stanchions were turned using the DRO - they turned out identically . The slots for the sheaves were cut in the Mill using a broken 0.8mm drill, going 1mm deeper with each cut : The sheaves were fitted, and the stanchions cut to length. There is a tiny difference in the angle of the bottom of each to allow for the roundup in the deck : I used a scraper to cut the molding into the edges of a long piece of stock for the rails. Then I marked out and cut the square holes for the stanchions on the Byrnes saw. As I did for the forecastle railing a second piece was glued to the other edge to get the rail to the right width : I used some 1.5mm bamboo pegs to secure the two outer stanchions to the deck and clamped the rail into place : After a coat of Minwax : This concludes Chapter 10 of "The Fully Framed Model - HMN Swan Class Sloops 1767-1780" Volume 2. Danny

-
Hi Al, Here's a pic of real Breadfruit so you get an idea of the shape of the leaves : I made the ones for my Bounty from thin aluminum sheet and painted them to suit. I used brown Plasticine (Silly Putty?) to bed them into the pots. You could use appropriately shaped real foliage, but make sure to use dried stuff. I don't know if anything of the appropriate shape and scale is available. Danny

- 265 replies
-
- 2
-

-
- finished
- artesania latina
- (and 1 more)
-
Hi Al, The rope handles would be an Off White color. Probably no need to stain the pots - they'd have been made from a light colored timber anyway. Glue them in - nothing worse than one or two falling out later when you can't get near the holes they came out of (which will of course be the most inaccessible ones ). Are you going to put Breadfruit plants in them? Danny

-
Pat, I wasn't suggesting that the boomkins weren't fitted - just removable when not needed or when the ship was at anchor or docked. Danny
-
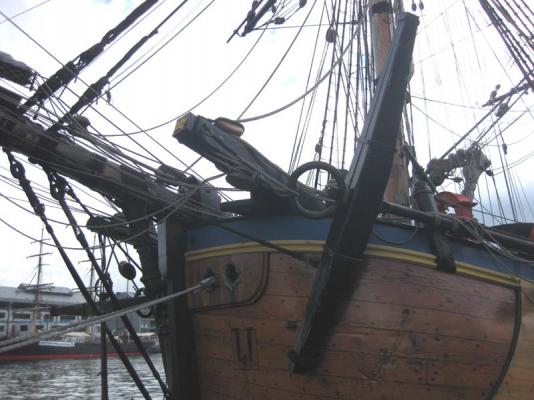
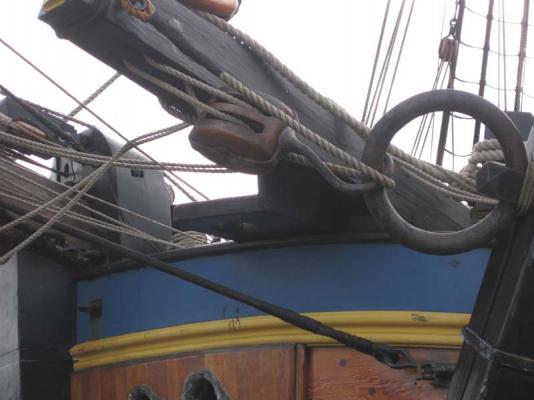
Good point Greg - Boomkins were easily detached and replaced. Here are two pics of the Endeavour Replica - no boomkins in evidence : Danny
-
Sandpaper alone won't get rid of all the "fluffies" - get a small tin of Sanding Sealer (Bunnings or hardware store) and paint that on first, then sand. The Sealer is totally clear and can be varnished over, or you can even use a final coat of it instead of varnish. Danny
-
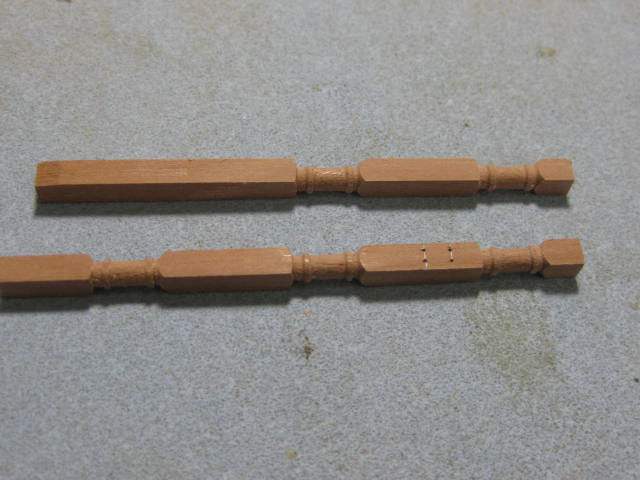
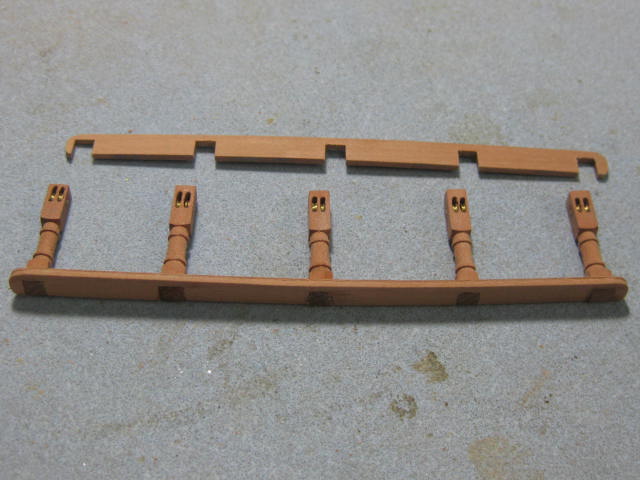
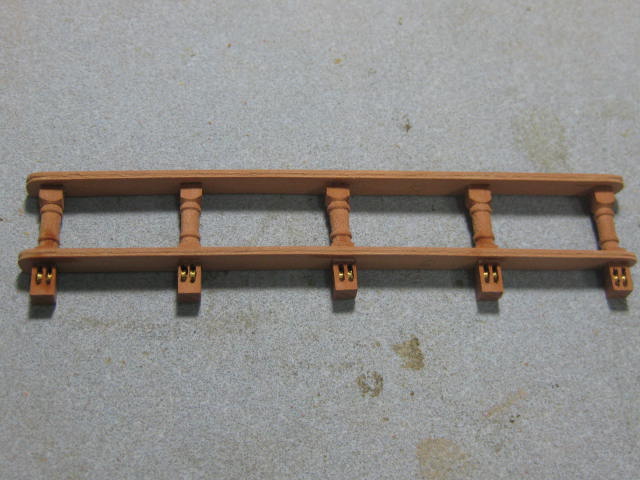
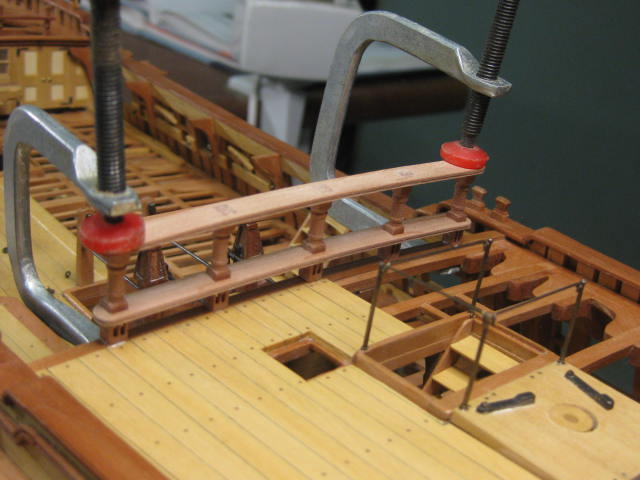
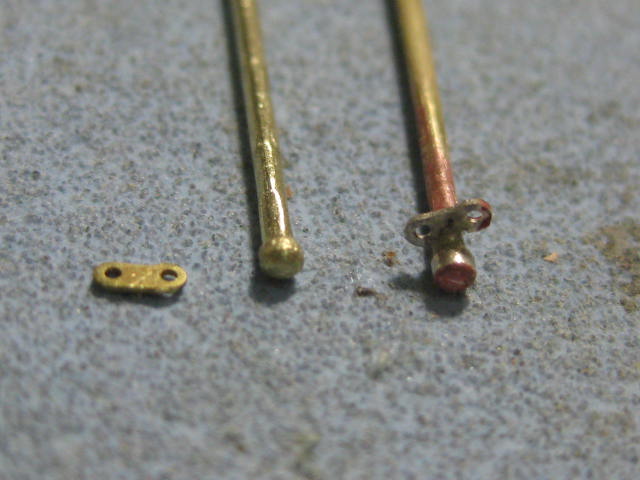
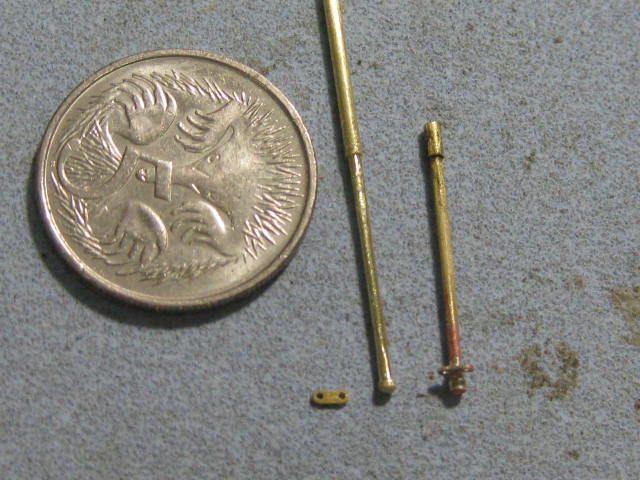
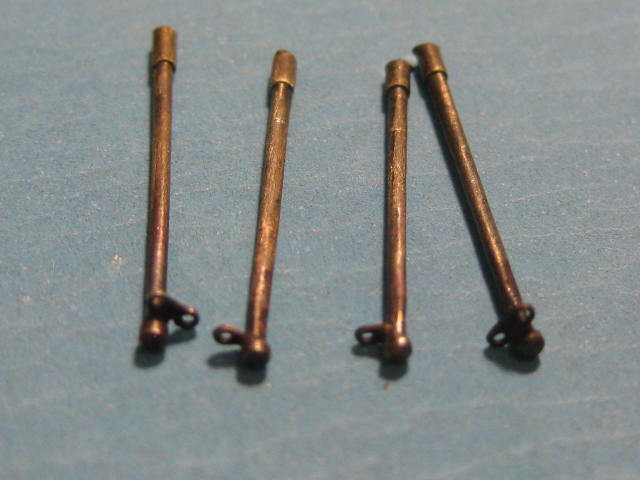
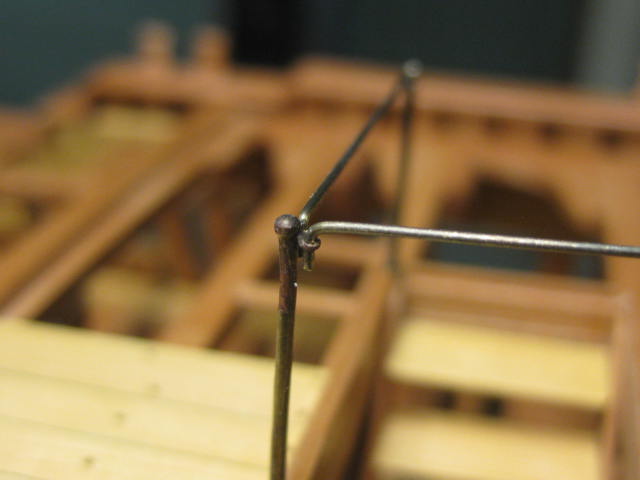
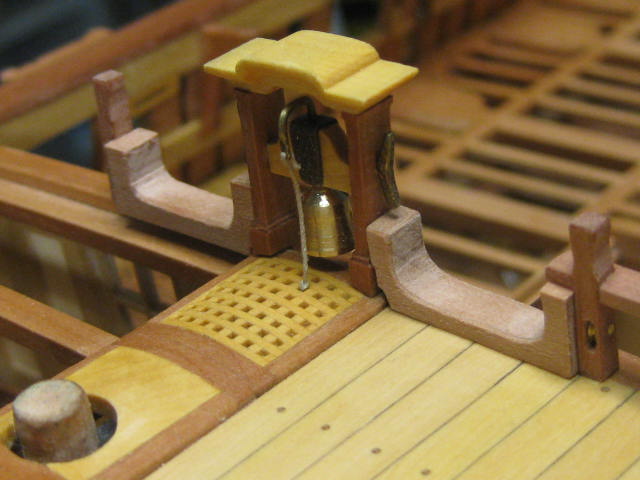
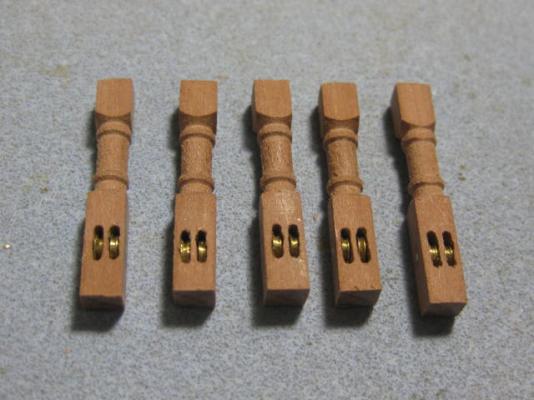
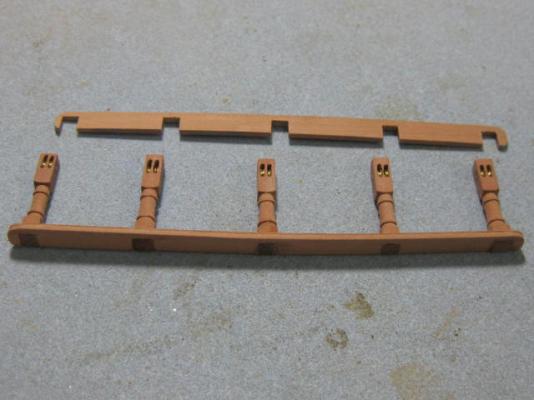
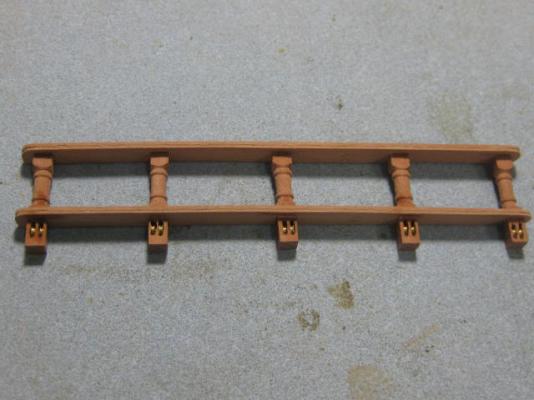
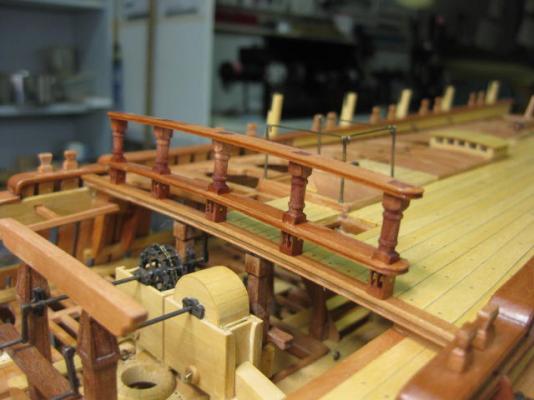
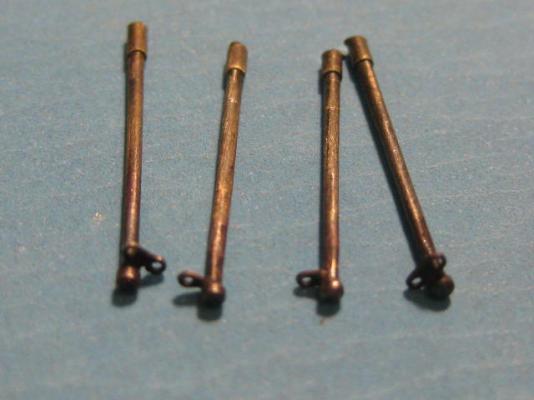
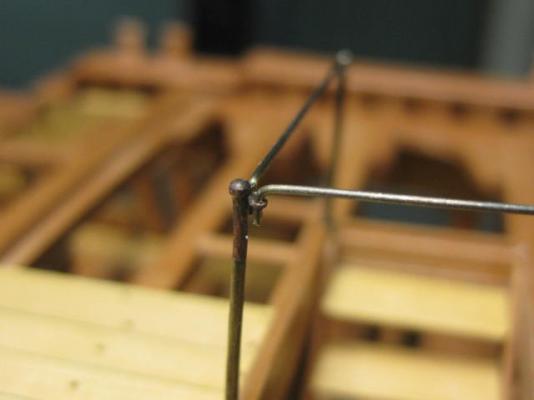
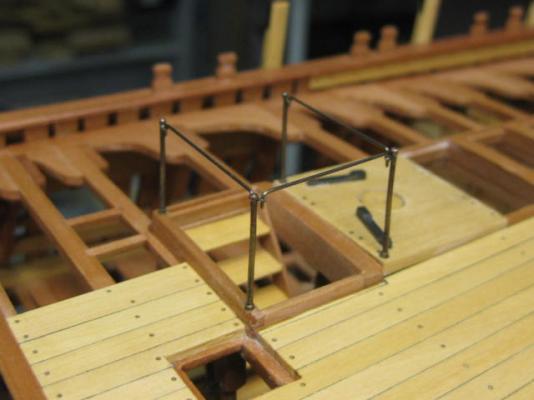
Thank you Russel, Timmo and Kevin. Well how about this then Timmo ? Ladderway Railings The Stanchions for the railings are turned from 1.2mm brass wire. They taper from 0.7mm at the top to 1mm at the bottom. The lugs that hold the railings are made from a couple of spare chain links (left over from the pump chains). They are silver soldered to the stanchions - a bit tricky to hold in position, as the double ones are only 1.6mm long and the singles are 0.8mm : Here's the coin again - the stanchions are 18mm long : Fitted to the ship : Danny


-
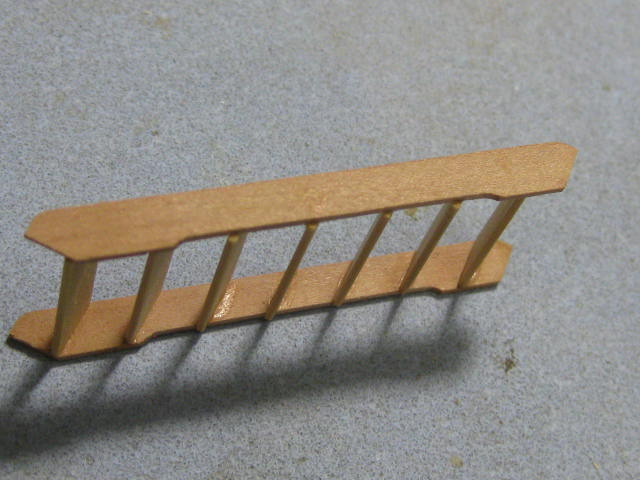
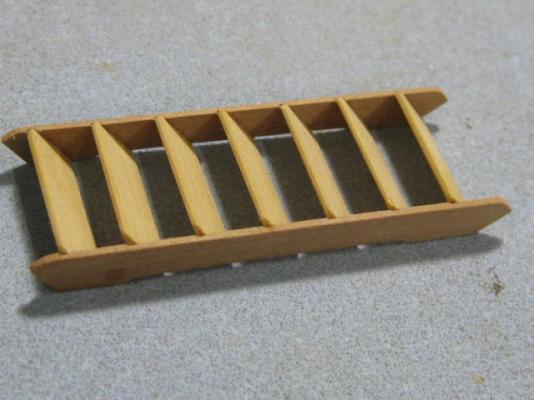
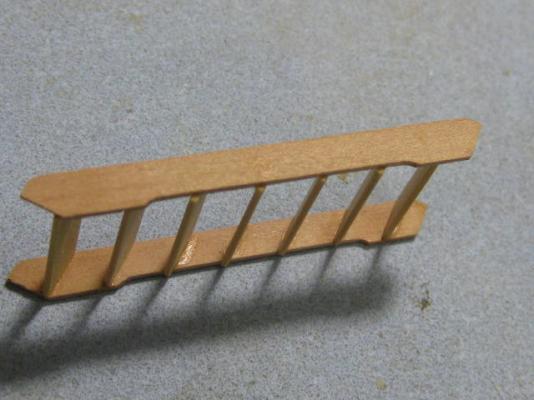
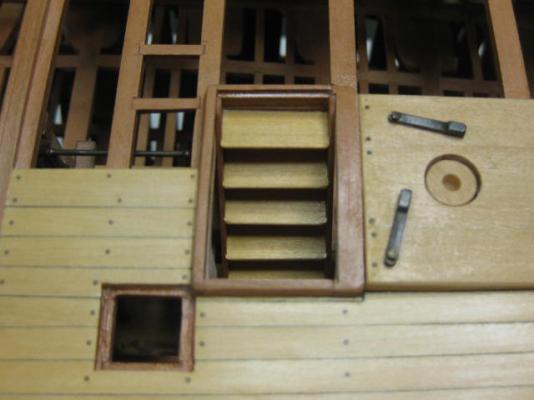
Thanks Theo, John, John, Nils and Edwin. Picky, picky ..... Quarterdeck Ladderway The last ladderway to be made and fitted is the one for the quarterdeck. This would need to have been removed any time the lower capstan would have been in use. I made it in similar fashion to all the previous ones : Danny
-
I used my Digital Verniers Grant - I hope they're accurate, as it would mean Vulture is way out of shape if they're not . Danny
-
Hi Al, Don't "overthink" details like this - if it LOOKS GOOD then it IS GOOD . Yours looks good . I usually attach the rings to the eyebolts first, but if the circumstances dictate otherwise I'll go the other way (e.g. maybe I need to seize a line through the ring - then it's definitely better the other way around). Danny
-
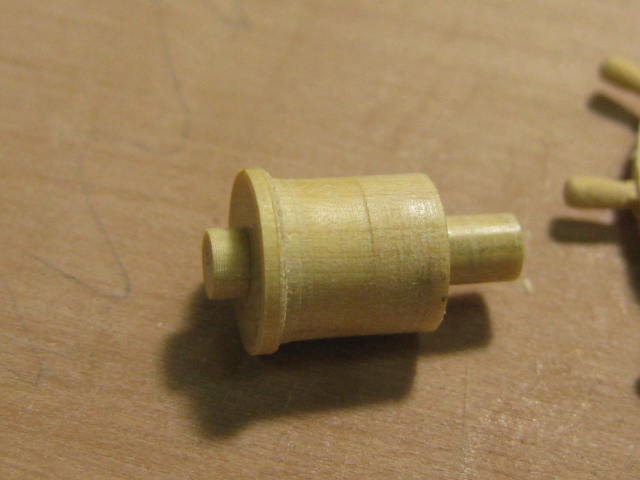
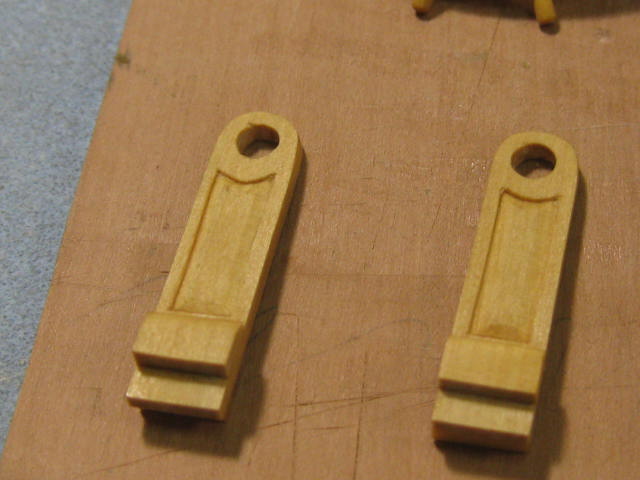
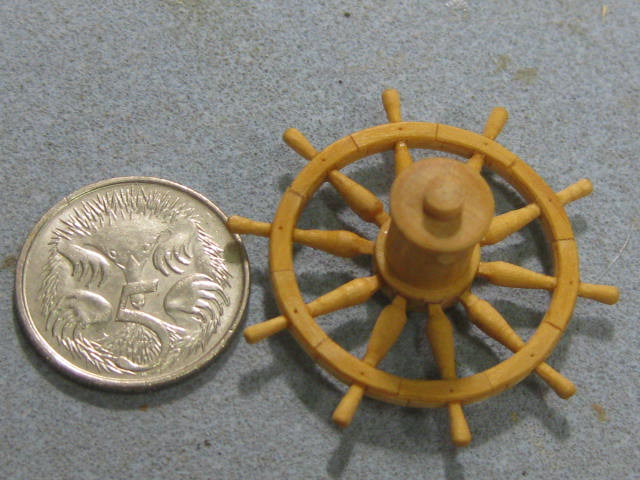
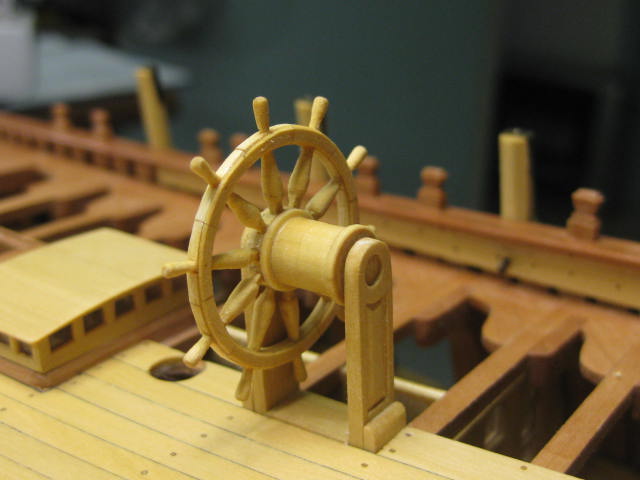
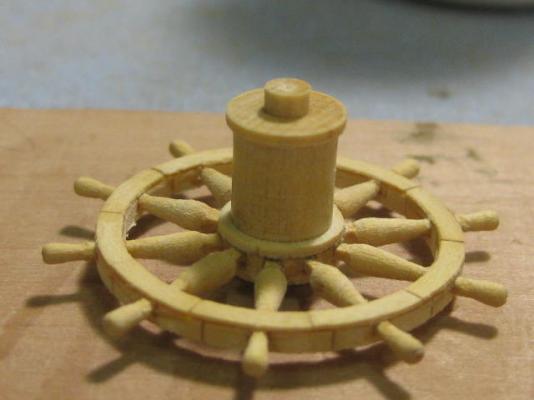
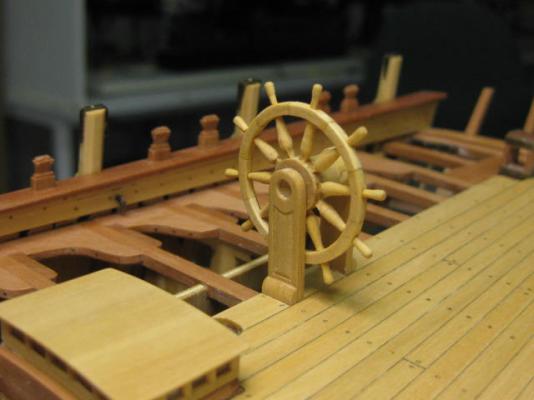
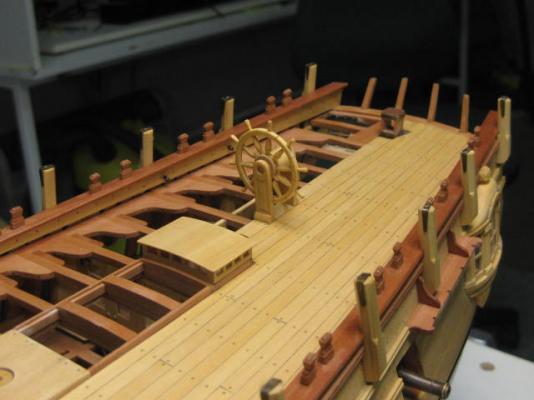
Thanks for the comments Alistair, Druxey, Joe, David, Mark, David, John, Remco, Alex, Patrick, Grant, Sherry and Popeye . Alistair, it probably depends on the particular ship as to how much camber (or "roundup") the gratings have. On the Swans it's quite a bit more than the roundup of the decks. Take a look down the page a bit Remco . Continuing on with the wheel .... I turned the Barrel and fitted it to the wheel : Last things to make were the two Stanchions that support the wheel assembly. These have a molded section in their faces, which I cut with an Xacto : Here's a pic showing how small the wheel is compared to a 5c piece : The wheel dry-fitted to the deck. I'll leave it off for now as it could get damaged fairly easily. Oh yeah, and the wheel is fully operational (or will be when it's rigged ) : Danny


-
Hi Al, Here's a FREE download of a program called Paint.net - I've been using it for years. There are a lot of Tool Upgrades available as well (I can't remember where at the moment). Danny
- 265 replies
-
- 2
-
-
- finished
- artesania latina
- (and 1 more)
-
Thank you Alistair. In hindsight there was one thing I didn't think about when I made the Building Block. I should have drilled a 4.5mm hole in it's centre to allow me to give the Hub an assist when removing the wheel from the block. The centre hole in the hub is 3mm, and this would have given me the "step" I needed to work the hub free from the block. I managed to do it by CAREFULLY drilling a couple of small holes through the block after all was glued together - SCARY . Good luck with trying to make a wheel at 1:64 - it was hard enough at 1:48 . Danny
-
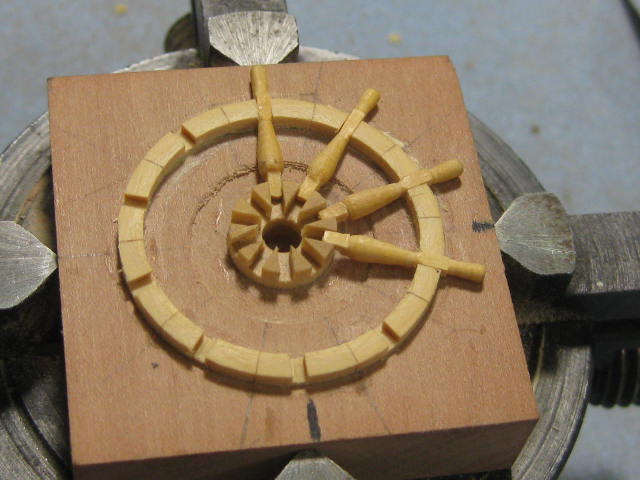
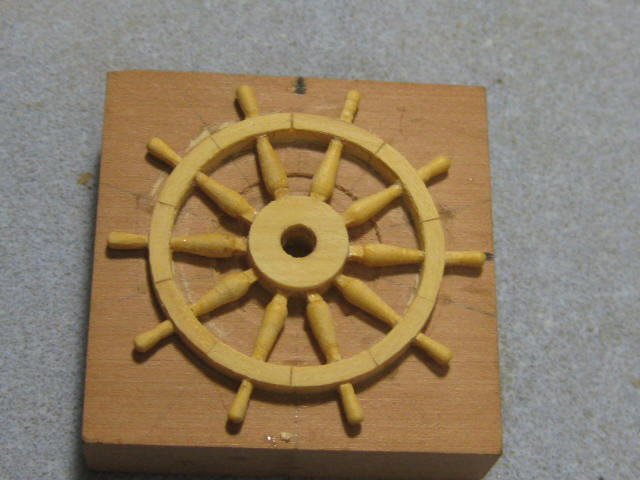
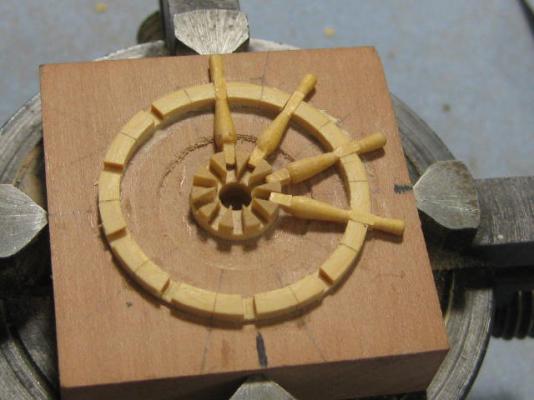
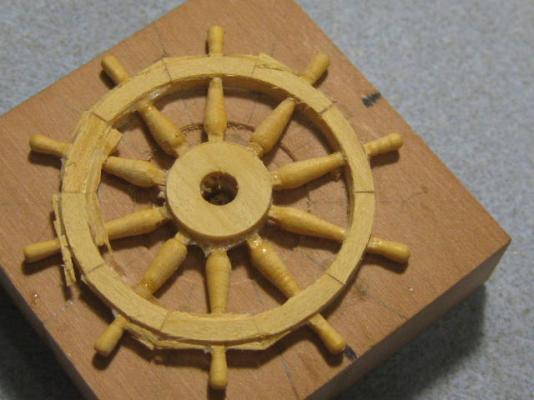
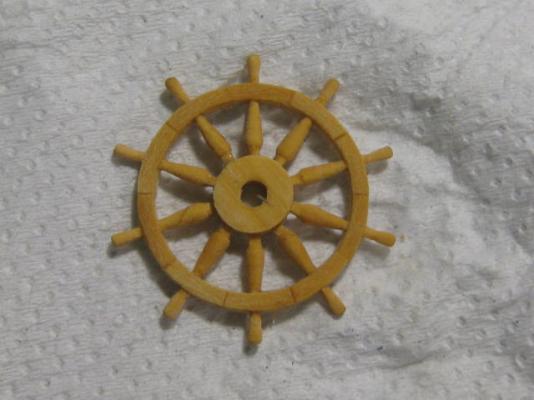
..... Continued (Thank you Geoff and Caroline) The unit after milling the slots. I must have miscalculated one of the cuts, but I later managed to correct it by cutting and gluing tiny portions of wood back in. The repair turned out invisible : The spokes needed the sections where they join the hub and rim squared off, and also reduced in thickness to keep the spokes central : The first three spokes glued in. I used CA for a temporary fix to keep them aligned : After gluing in all the spokes I cut another 10 thin segments of the rim and hub and Epoxied them on. Then it was back into the lathe to trim them down. The pic below is how they came off the lathe before cleaning up : Cleaned up with a very sharp Xacto : Last step, and the scariest , was to soak the unit in Isopropyl Alcohol to soften the PVA which attached the wheel to the block. I held my breath when I started removing it, but ..... SUCCESS :D : A little bit of final cleaning up is still needed after the alcohol has fully evaporated. Danny

-
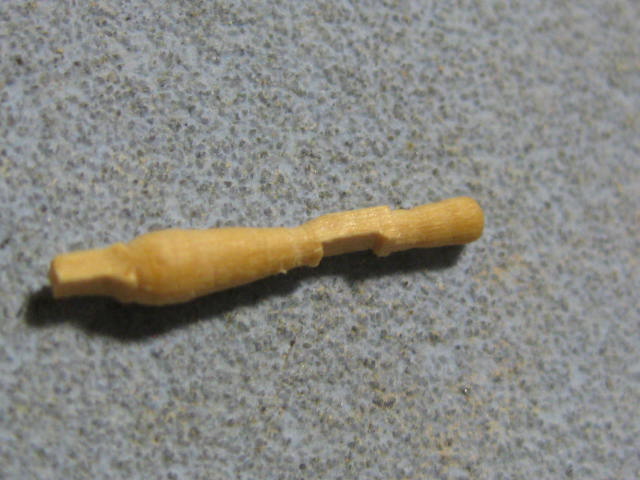
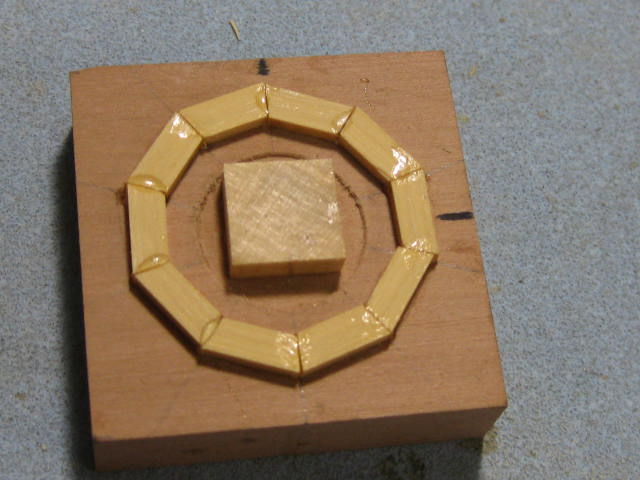
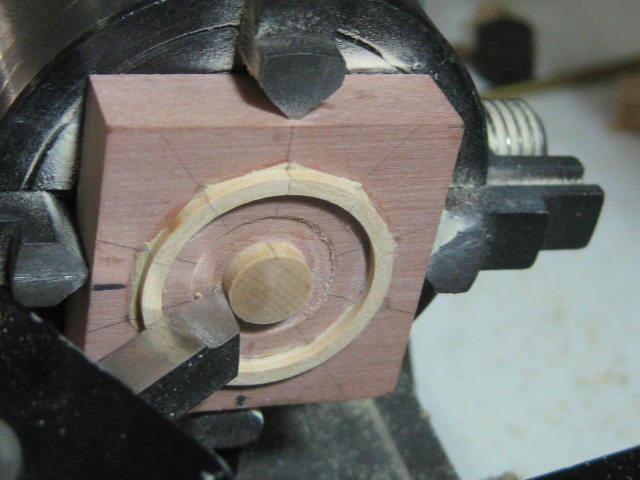
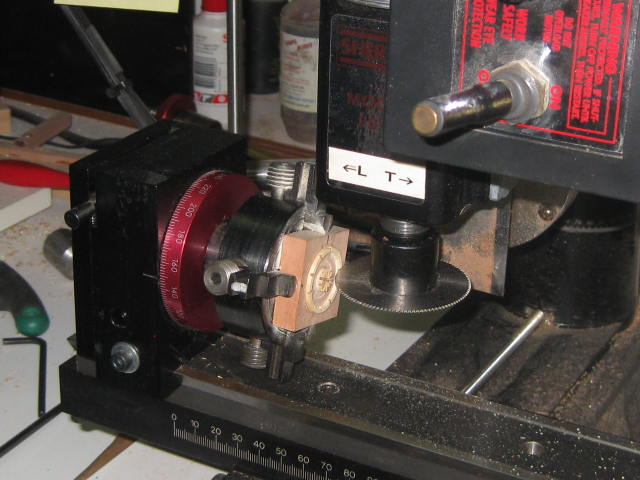
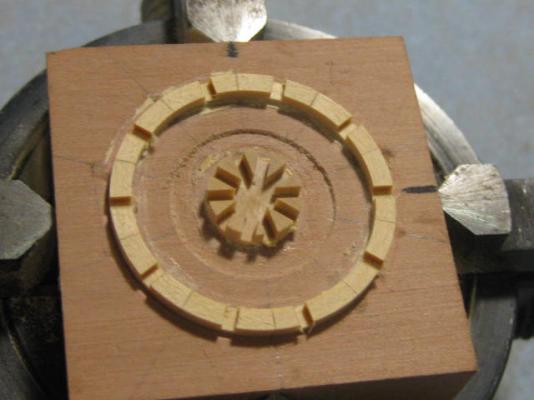
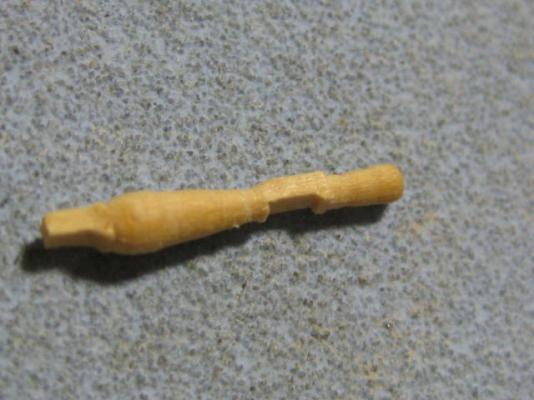
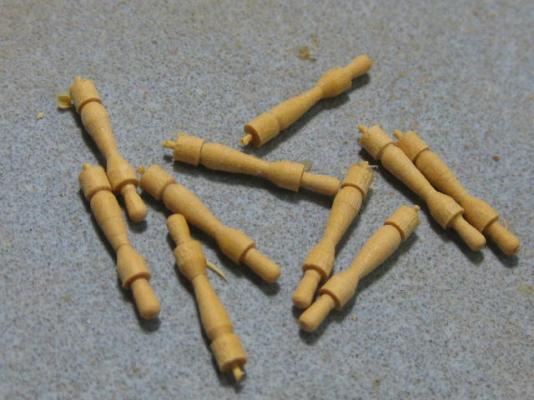
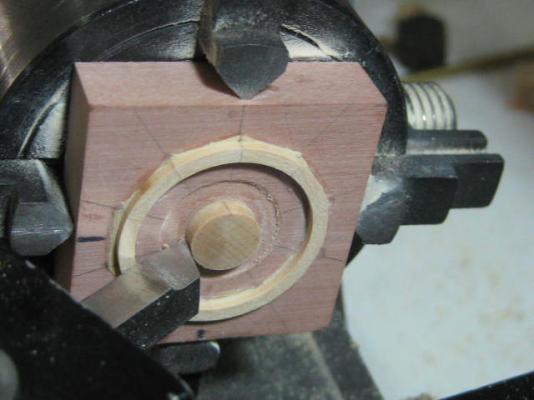
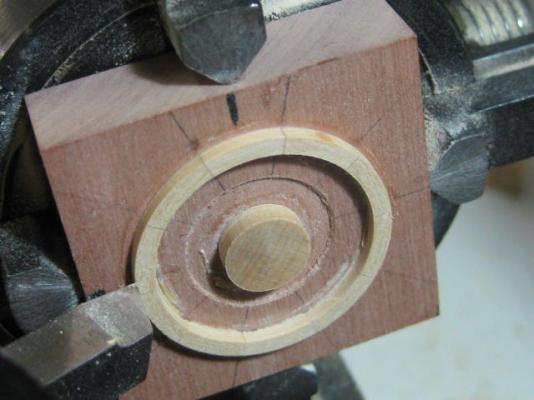
Thanks for looking in again, and the kind comments John, Ben, Pat, Sherry, David, David, Grant, Steve and Doris. I appreciate it . Ship's Wheel Making the Ship's Wheel is one of the most challenging, but FUN, parts of the whole Build. I used some of the method shown in TFFM, with some other ideas of my own. I used English Box, as some of the 32 parts are very thin and needed the best timber available. First I turned up the 10 Spokes. These were done using the Digital Readout on the lathe. If I'd failed with these then I'd have had to look at "Plan B" - buying a ready-made wheel. The only "failure" I had was with the first one .... I wasn't happy with the thickness of the handpiece (too thin). Version 2.0 looks better : I started by making a "building block" from a piece of 10mm thick Pear. The Rim of the wheel is 3" thick, whereas the Hub is 5" thick, so I turned out the centre portion 1" deeper to allow the hub to be centralised in the wheel (measurements are "real life"). After marking out the limits of the rim I cut and glued the hub to the block, and also the 10 segments of the rim. I used PVA to glue the pieces to the block but Epoxy to glue the segments of the rim together, for reasons which will become apparent later on : Next I turned the rim and hub to size : Leaving the block in the chuck I transferred the unit to the Mill, and cut the 10 slots for the spokes with the aid of my Indexing Attachment : Continued next Post ....


-
Hi Nils, Doctors? What would they know? (They are OK for SOME things .) Go to a Remedial Masseur - he/she will have you back at the workbench in a matter of hours . I used to have chronic shoulder pain - years of it. The Masseur fixed me in less than five minutes. I wish I'd seen him years earlier . Danny
-
That's not a problem if you give the part a polish with a Q-tip or similar - it removes any flaky residue and nothing will come off later. Danny
-
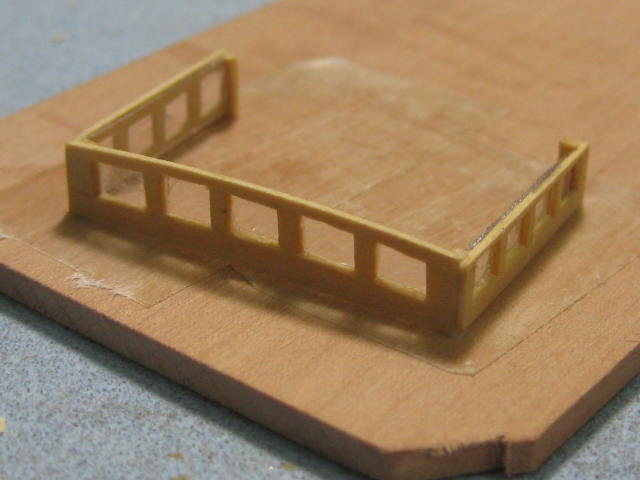
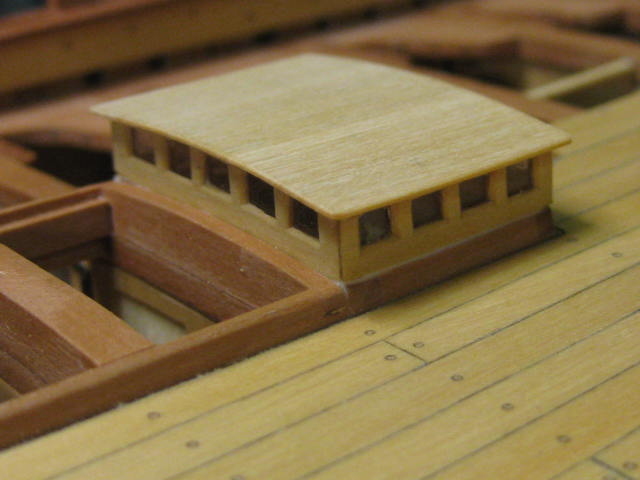
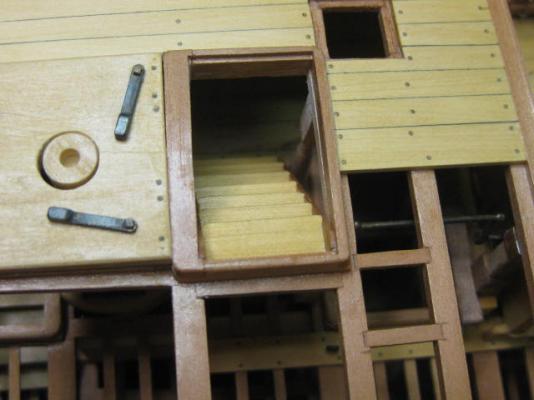
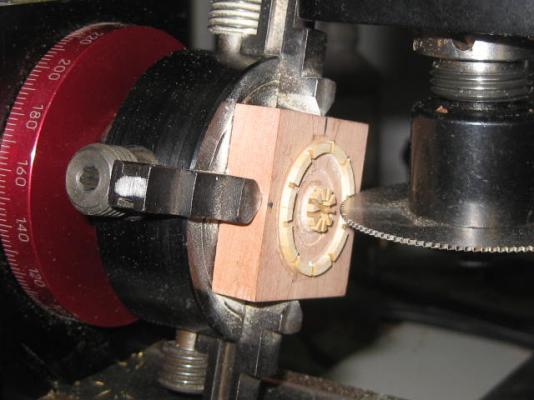
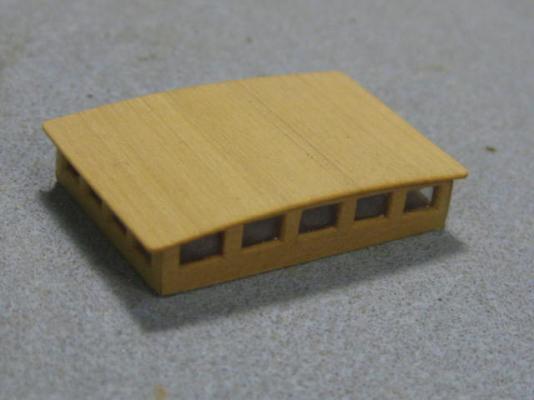
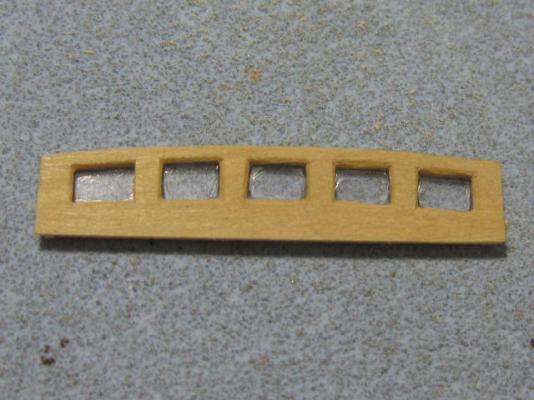
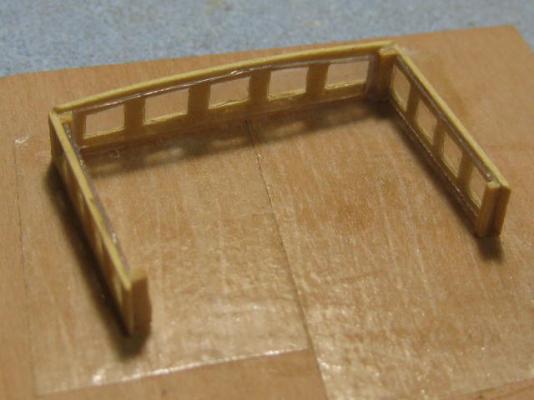
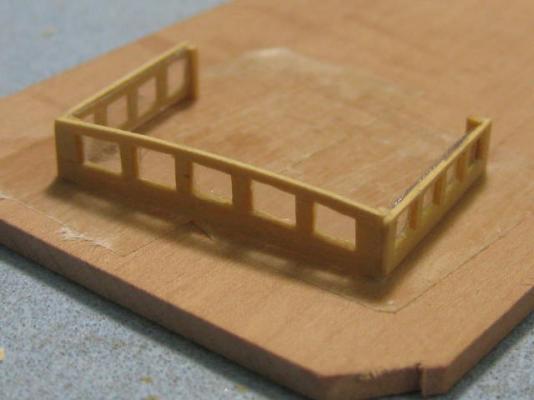
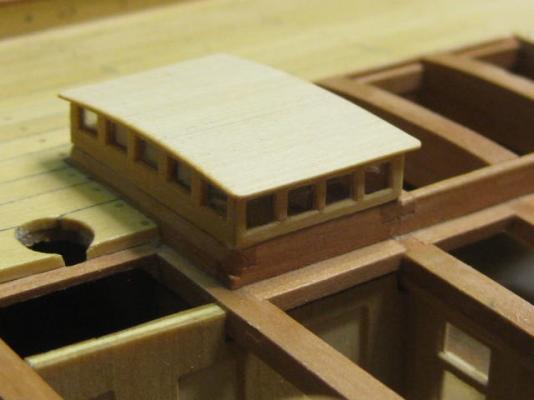
Companion Top The aft Companion has a clerestory-style top fitted to it. Cutting the 2mm x 3mm holes for the Lights was a challenge . I cut them with a #11 Xacto and a tiny chisel, and bevelled their outer edges : I "glazed" the lights with strips of very thin acrylic sheet, glued in with PVA. The corners of the four sections have been bevelled for a knife-edge fit : A roof was cut from a piece of 0.6mm thick Castello and glued to the sides : The assembly fitted to the deck : Danny

-
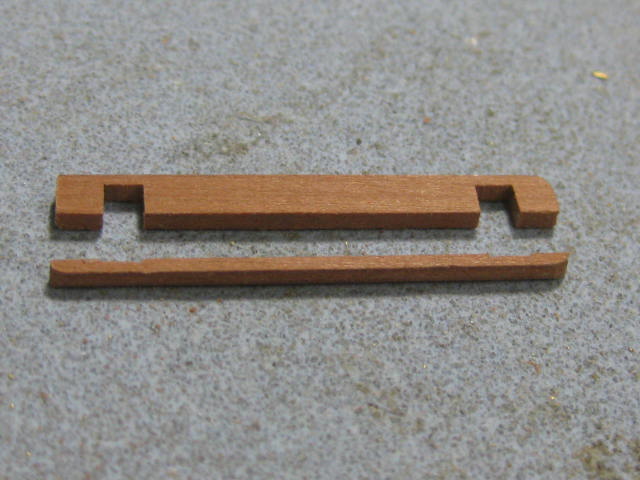
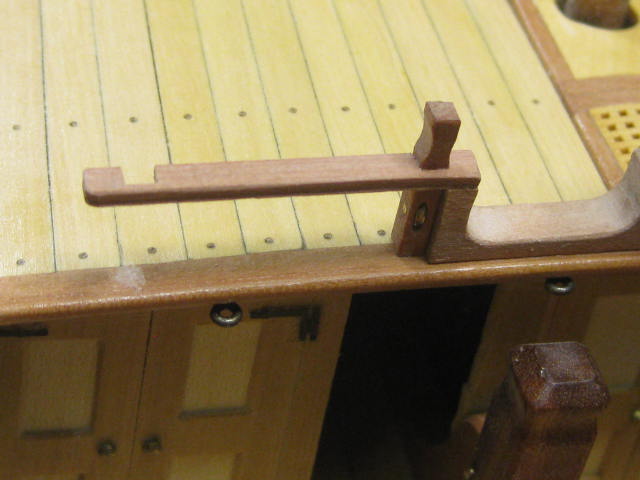
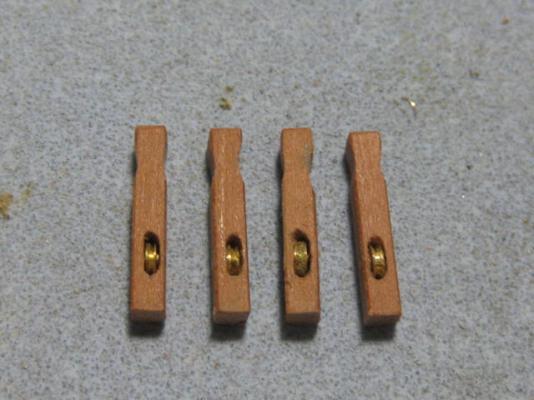
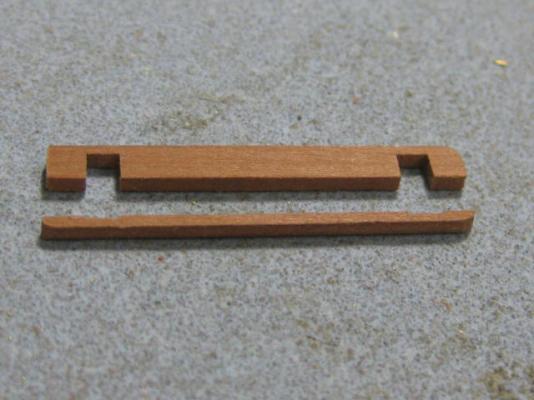
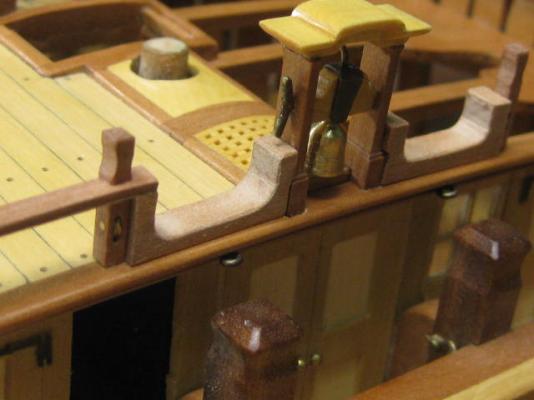
Forecastle Railing and Spar Rack There is a Railing on the aft end of the Forecastle. Two Stanchions support the port and starboard sections. Each stanchion is fitted with a 2mm diameter x 0.7mm thick sheave which I turned on the lathe : I made the rails in two sections, as it was nearly impossible to accurately cut the square holes for the stanchions without splitting the timber : Some time ago I mentioned that there didn't seem to be a forward support for the ship's boats - yes there is . The Spar Rack does this job - the boats are lashed to spare spars carried on the rack. The rack is the same width as the railings. They still need a finish applied : Danny


-
Thank you David, Michael, Patrick, Nils, Mohamad and Jan. David, that info can be found HERE Hopefully not for me Michael :mellow: . Jan, it's 5mm x 5mm. Danny
-
I have doubts as to the longevity of CA - Carpenter's glue will do the job VERY well . BTW - I fixed the post above with the "Thumbnails" in it. To check out what I did, open the "Full Editor" on that post and note where the text for the pics is. Danny