Dan Vadas
-
Posts
3,261 -
Joined
-
Last visited
Content Type
Profiles
Forums
Gallery
Events
Everything posted by Dan Vadas
-
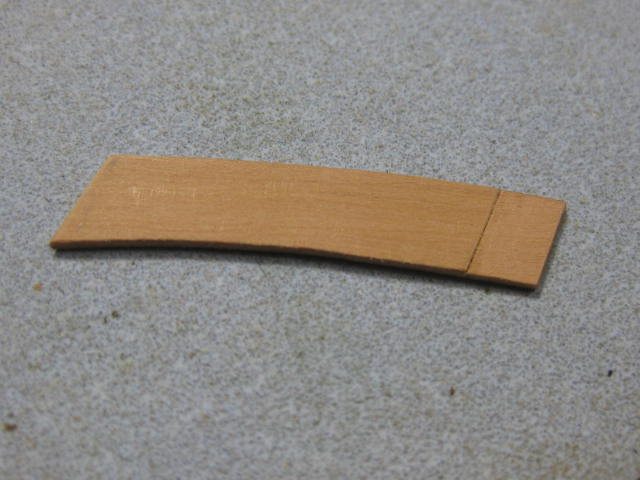
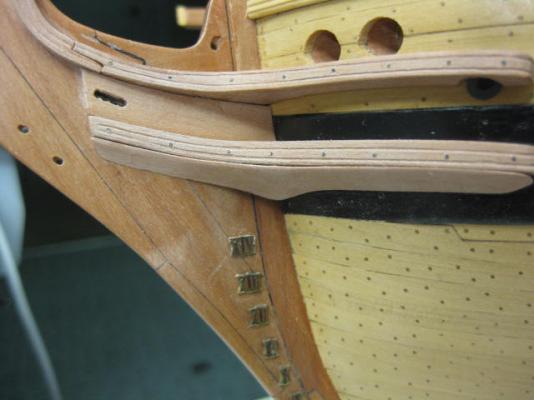
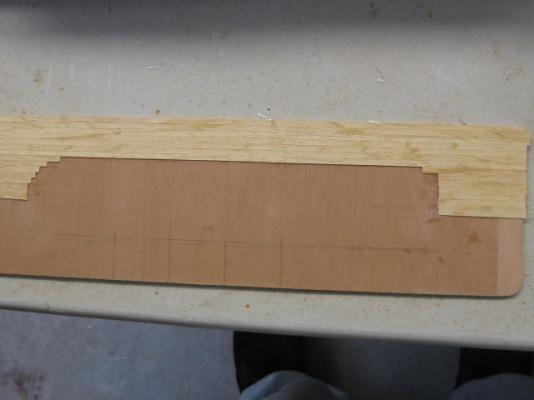
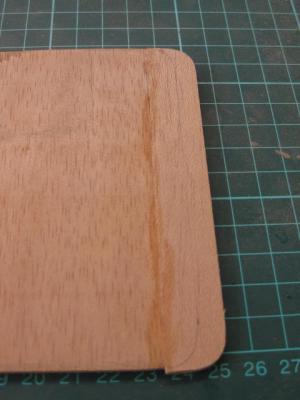
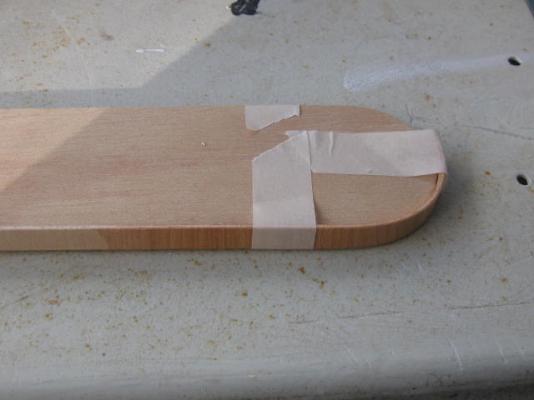
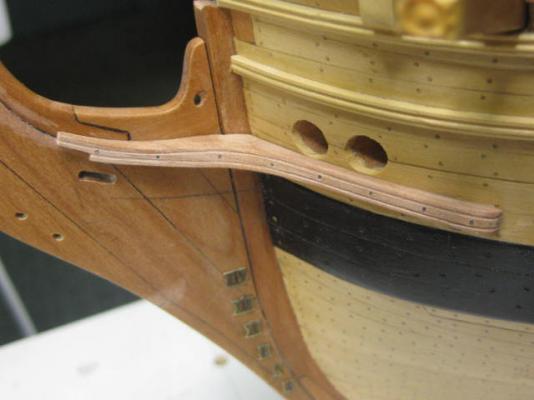
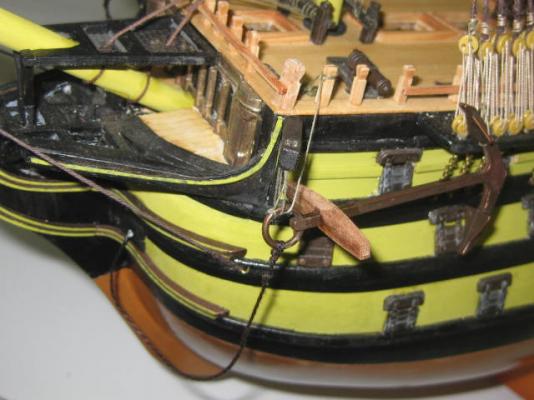
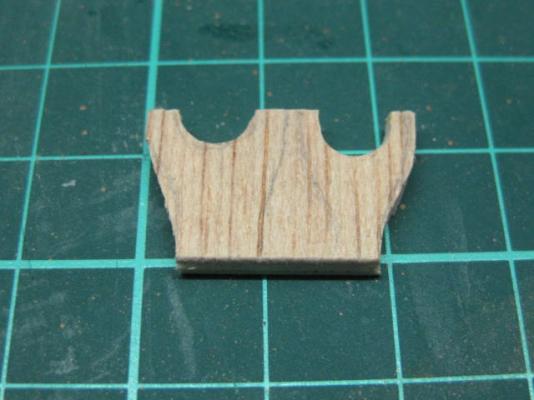
Thank you John, Patrick, Ben, Alan (welcome aboard), Popeye, Mark, Chris (thanks for answering Ben's question, all points correct ), Scott and Cristi (copy whatever you like ). Comments are always appreciated . Wash Cants These pieces are very rarely seen on models, but I thought I may as well add a bit more detail . The Wash Cants are designed to take the strain off the Lower Cheeks from the incoming waves, and are shaped to deflect the water away from them. First thing to do was cut a blank using a card template and then get it to fit snugly against the hull and stem. Then I used a drum sander in my Dremel to take off the bulk of the material between the upper outer edge and the lower inner edge, finishing with a sanding stick. Then I used a round sanding stick to cut a slight concave into the seen face - this shows up a lot better in "real life" than it does in the pics. Here are a few pics of the port side wash cant against the blank for the starboard side. If you've ever shaped an aeroplane propeller then you can appreciate the work involved in this piece - a very similar thing : I've tack glued the port side one in place just for this pic, it still needs a bit more detailing : Danny

-
I'm guessing about three weeks John, maybe a tad more . And thank you Grant, no major probs . Danny
-
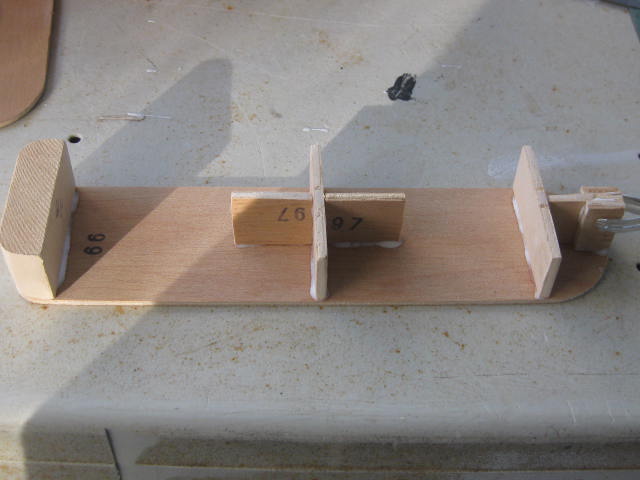
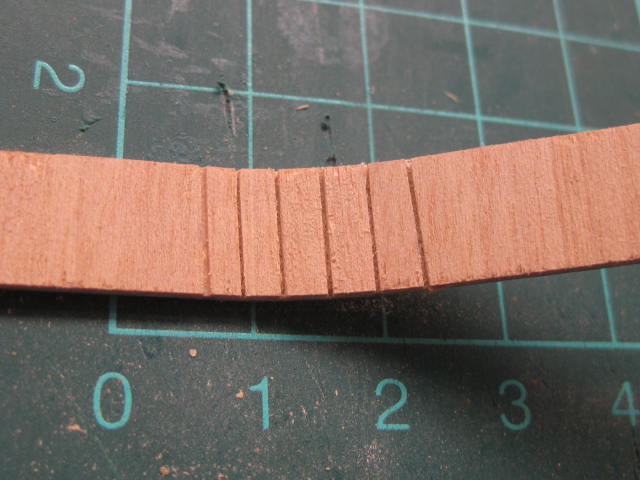
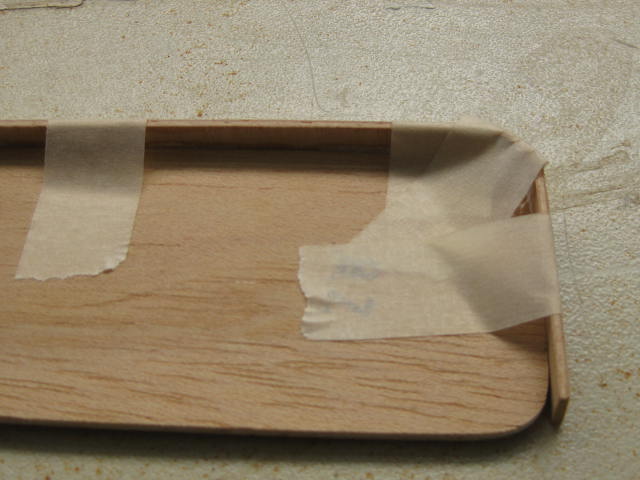
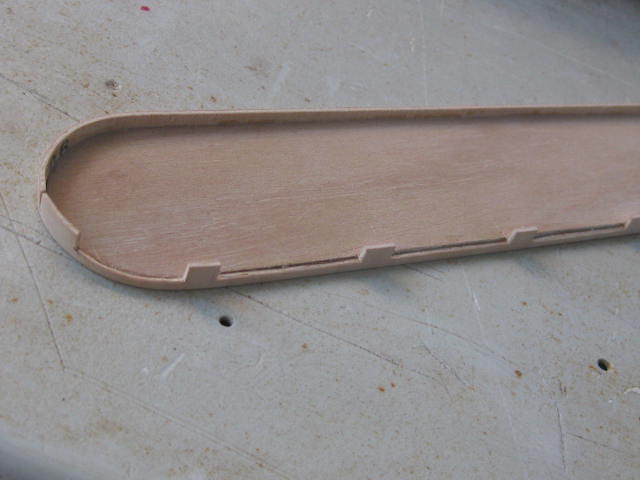
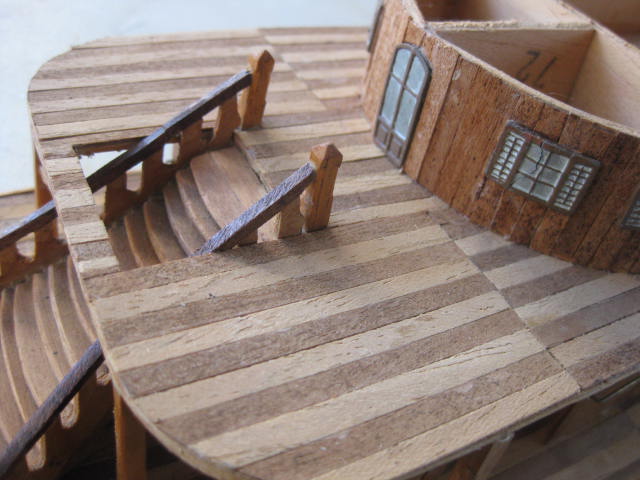
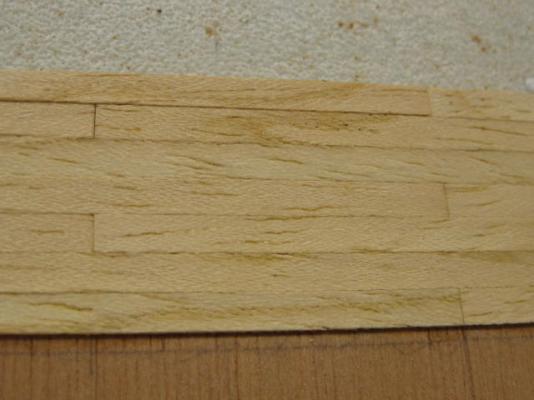
The 3rd deck cabin gets it's re-enforcing blocks : Halfway through planking the 3rd deck : Joins were used in a 3-butt shift pattern : To bend the ply around the aft end of the Ventilating Chamber I made some saw cuts halfway through and once again used masking tape to hold the piece in position for gluing : Next I cut out the spaces for the ventilators with a sharp Xacto : Then I glued the sides and bottoms of the frames into the edges of the spaces : Danny


- 62 replies
-
- 9
-

-
- king of the mississippi
- artesania latina
- (and 1 more)
-
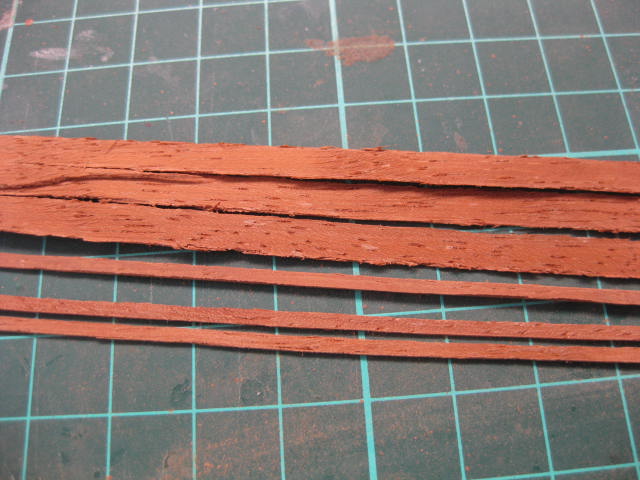
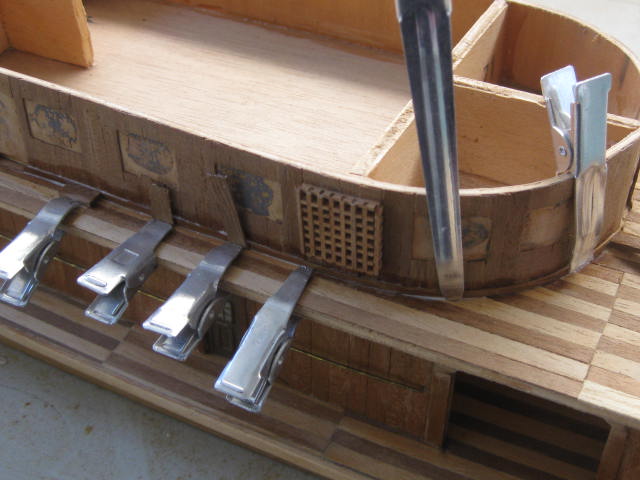
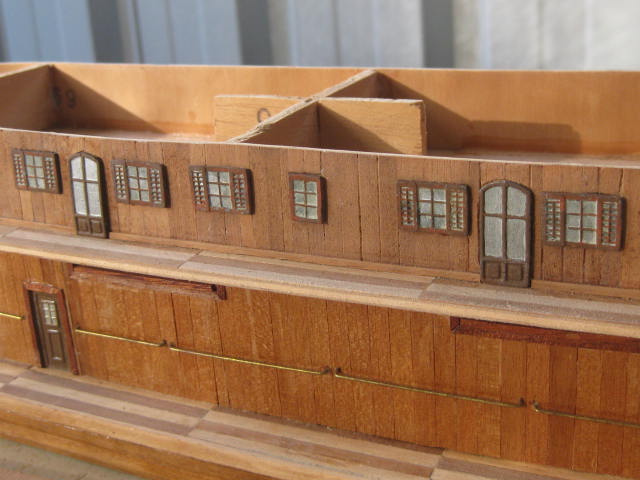
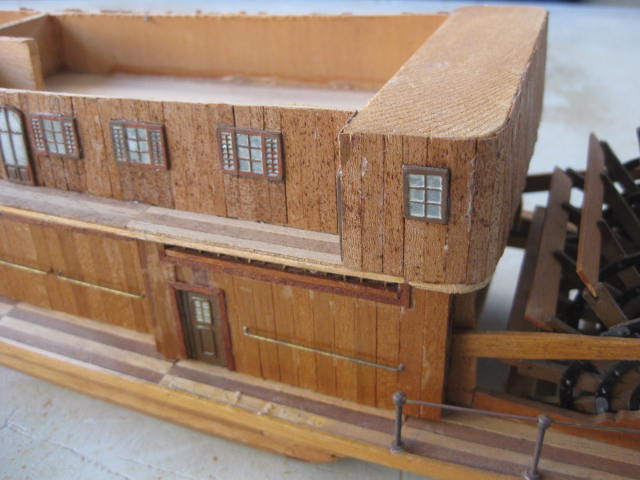
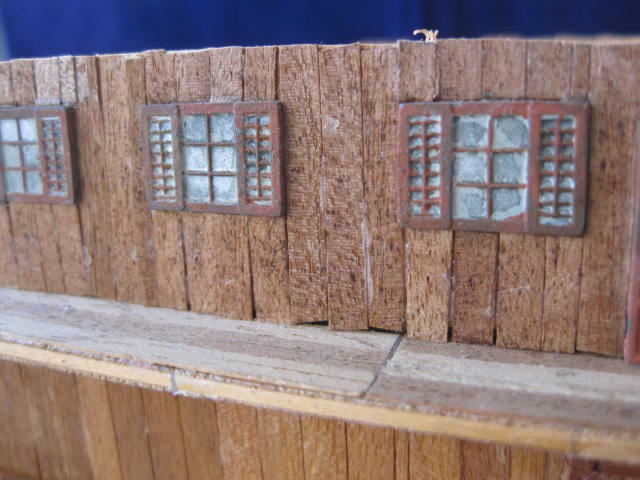
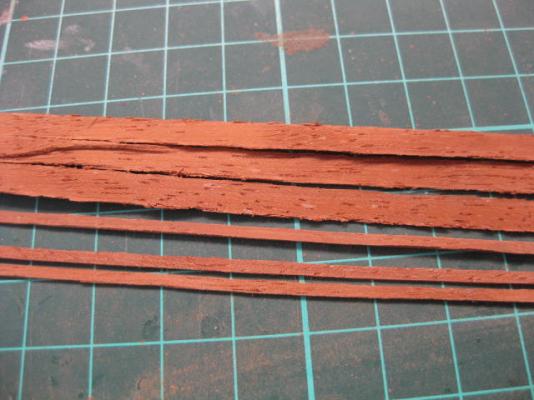
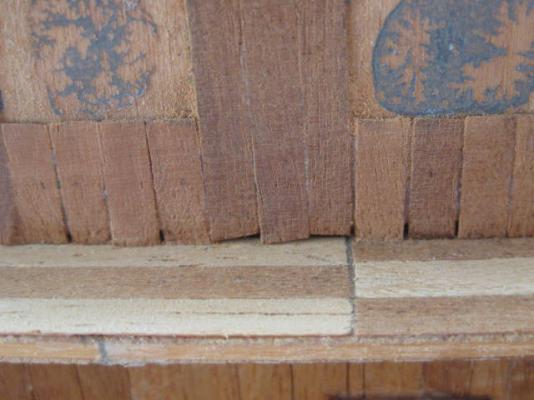
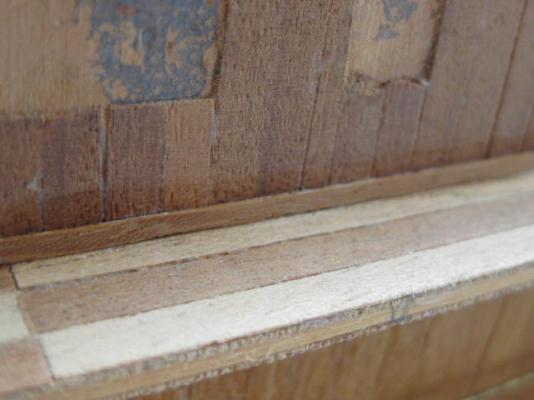
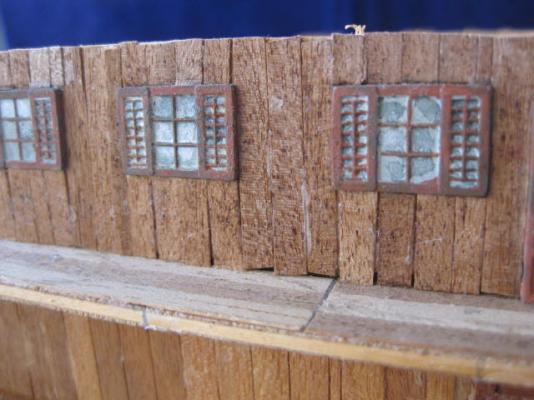
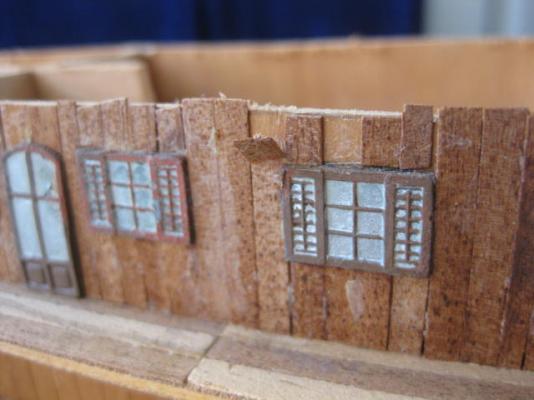
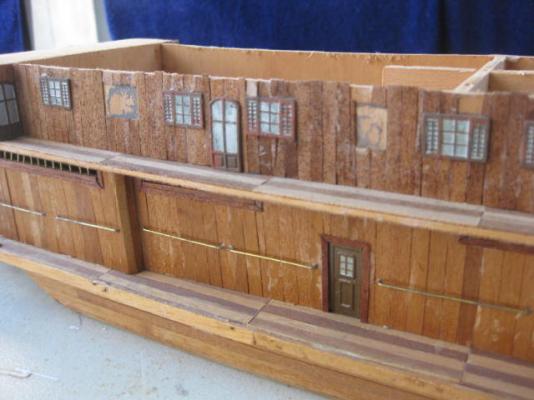
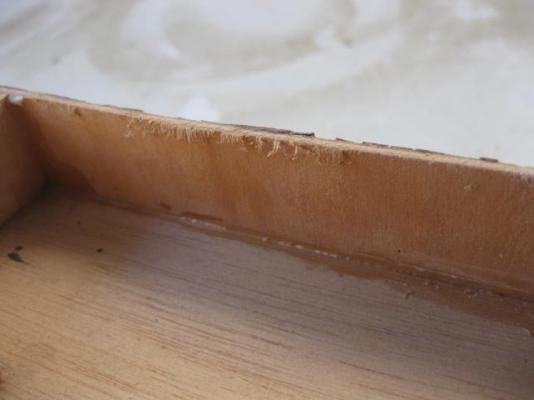
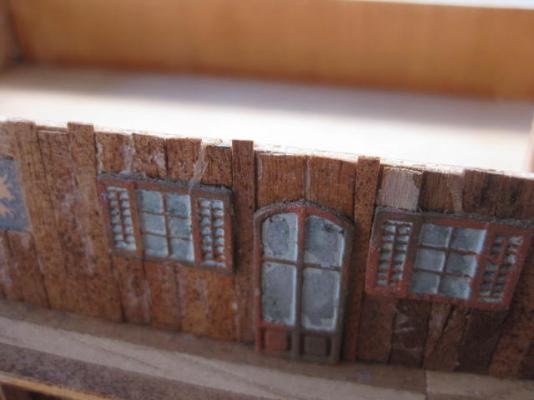
Yeah, just great Edwin. The docs are very happy with the way my treatment's going - I'll be around for a lot of years yet . Thanks Frank, you are SO right . Moving right along, I pulled out all the windows and doors on the 2nd deck cabin. This was very easy - just slip a flat knife blade under them and give it a twist and they all popped out. I'm not sure what type glue he used, but I suspect it may have been PVA, which doesn't bond metal to wood very well in most cases. I don't know what he was thinking when he recessed the windows into the planking (perhaps he glued the windows on first and tried to plank around them), but it made my job a lot more difficult than if he'd planked the whole cabin and then glued the windows to the planking. Much trimming and replacing of missing or short strips was needed. The easiest way to fix the gaps at the bottom was to fit a skirting board. There was no walnut veneer left in the box, so I made do with the only stuff I had on hand - some VERY VERY poor quality Sapelli left over from the "Victory" kit. I had to cut 1.5mm wide strips out of the middle of this stuff using a sharp Xacto and a steel rule : The 2nd deck cabin after replacing missing planks, sanding and windows refitted : The next problem I found belongs to AL - the 3rd deck was too short by about 10mm. From memory, I think I had the same problem with the "Mississippi" I'd built about 30 years ago (these two kits were about the same vintage). To fix the problem I simply glued a piece of scrap ply to the aft end : Next job was to glue a strip of ply around the Ventilating Chamber of the 3rd deck cabin. I used PVA and held the piece in place with masking tape until it dried. Then I did the other side : More follows ....


- 62 replies
-
- 10
-
-
- king of the mississippi
- artesania latina
- (and 1 more)
-
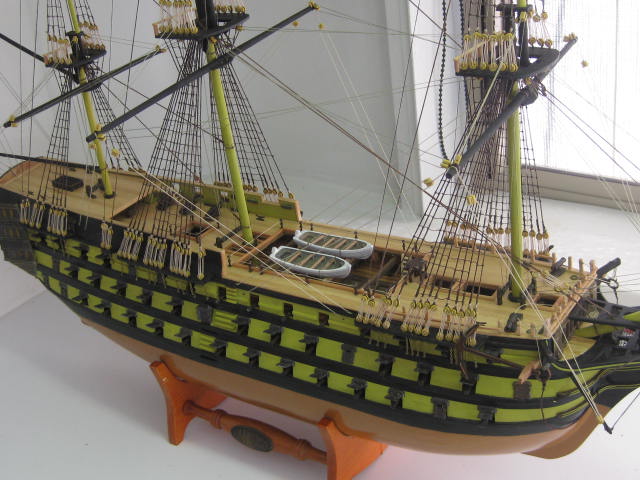
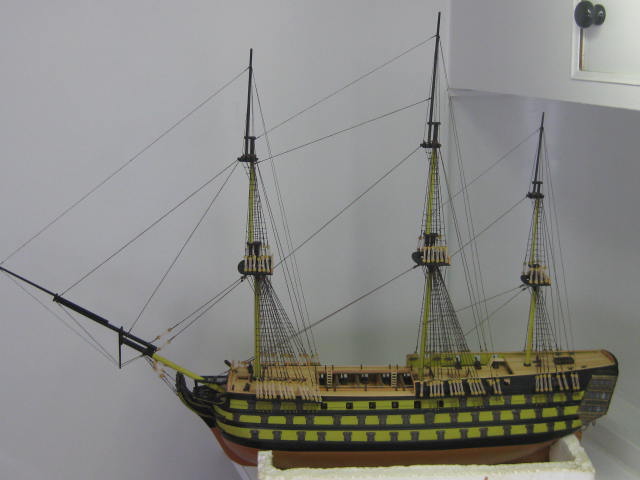
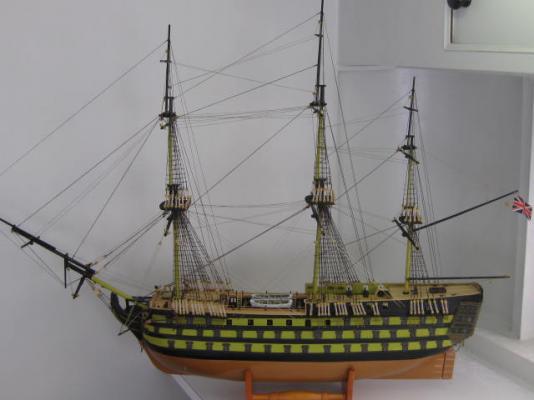
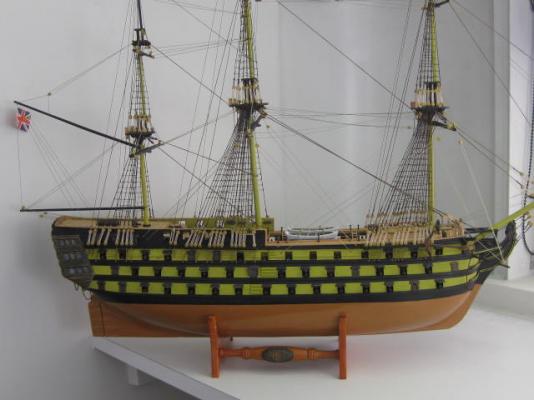
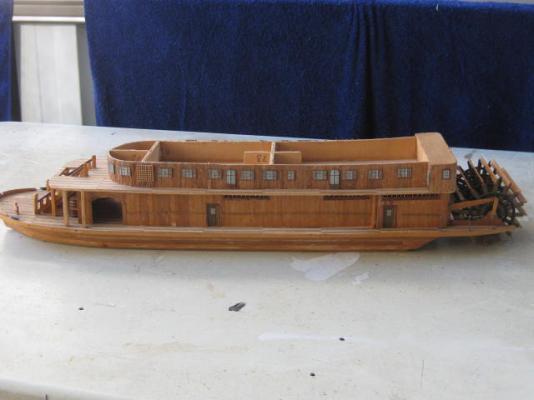
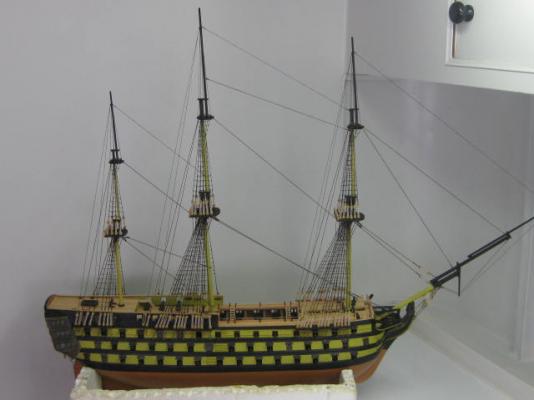
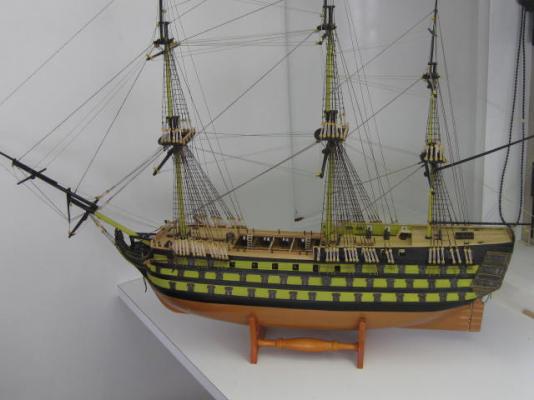
Thank you very much for the kind comments Patrick, Grant, Keith, Rowan Elia, Mark, Tony, Lawrence and Row . Well this project is finally finished and delivered to it's owner - to say she was delighted with the result would be an understatement . I told her at the start that I'd have to charge her for any materials I had to buy, and she said that was no problem at all. Total expenses were just under $150 for such things as a bottle of Acetone, another of Turps, paint, extra timber, glue, knife blades etc. I was going to donate my labour, but she would have none of that and I received a very nice surprise when I opened the envelope with the money later that day - an extra $100 . My total labour worked out at about 80c an hour, but like I said I would have been quite happy to do it for free . Here are the pics of the finished ship, with a couple of "before's" under some of them : Please ignore the way she's rigged - my aim was always to make this a "decoration", not a historically correct model. I only rigged the Lifts and Braces to all the yards, and threw in the Sheets and Tacks for the Fore and Main Masts to help "fill in the gaps". The rigging fulfills that aim. BTW - I know the Braces for the Main Yards should have been around the other way (i.e. toward the Mizzen Mast), but it would have left too much empty space in the middle . I'm already a fair way into my next "holiday van" project - a similar situation to this project where the original builder passed away before completing his model of an Artesania Latina "King of the Mississippi" and I'm completing it for his family. Here's a LINK to it if you're interested. Work will also be done on "Vulture" in the meantime . Danny


- 137 replies
-
- 20
-
-
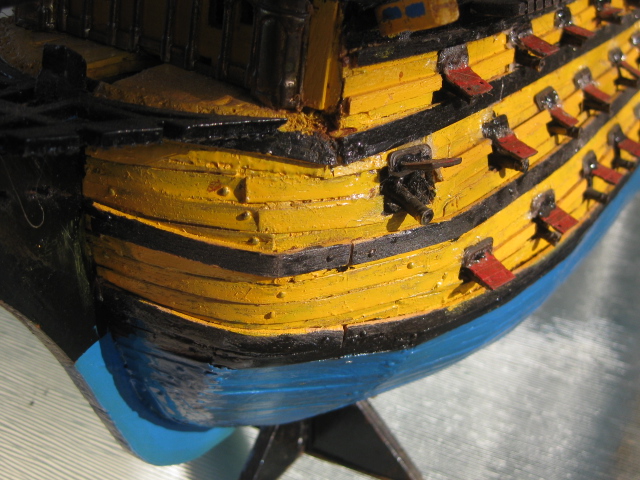
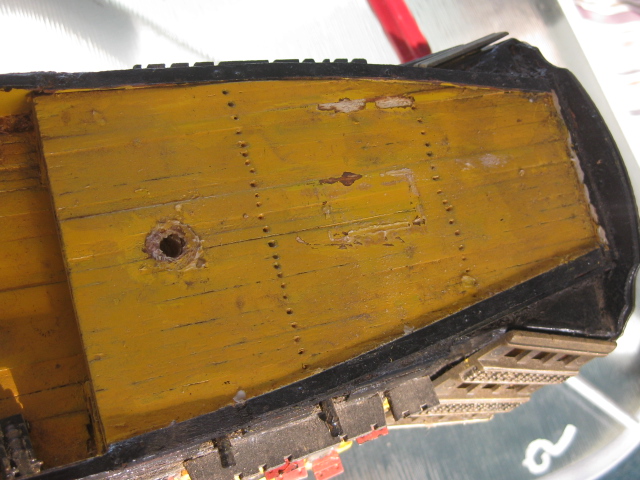
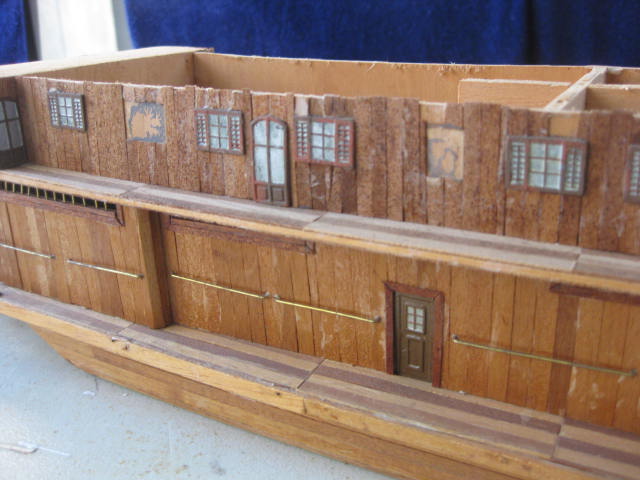
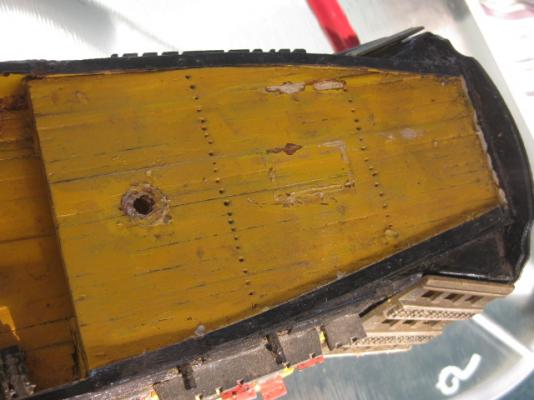
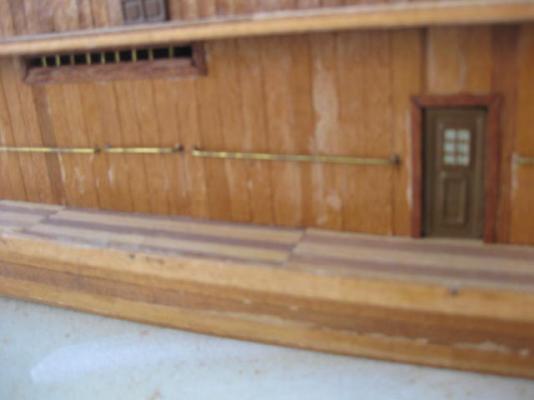
Hi all, Here's another project which I'll be doing at my "Holiday Caravan" (which will soon be my permanent address when I build a workshop alongside it ). This uncompleted model was given to me by a guy who's father had passed away before he could finish it, and he asked me if I could do it for him as he has no modelling skills whatever and he'd like to give it to his mum in memory of his dad. How could I refuse ? The old guy was a reasonably good modeller (unlike my last project on the Del Prado "Victory"), so I didn't have a real lot of things to rip off and replace before continuing on with the job. However, as his son said, he was "losing the plot" quite a bit not long before he died, and the last few things he did on this model needed a bit of reworking. Here are a few "Before" pics. The planking on the 2nd deck cabin wasn't the best, and the windows all had to come off again because the wrong glue was used on them : More will follow in the next post ....... Danny


- 62 replies
-
- 8
-
-
- king of the mississippi
- artesania latina
- (and 1 more)
-
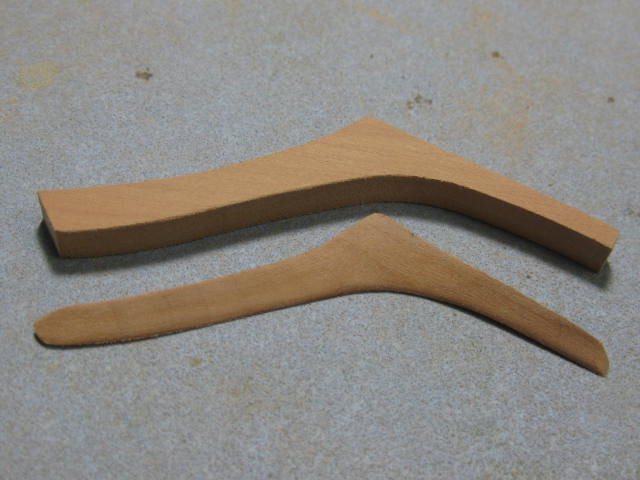
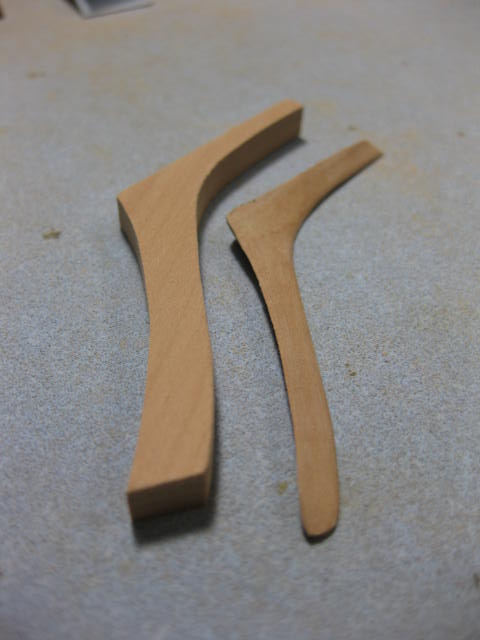
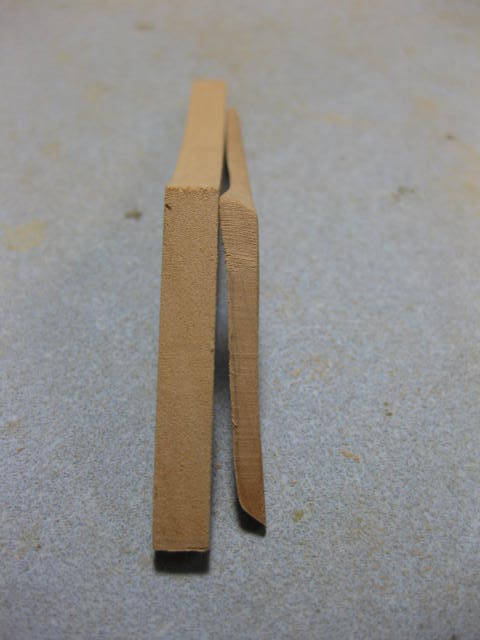
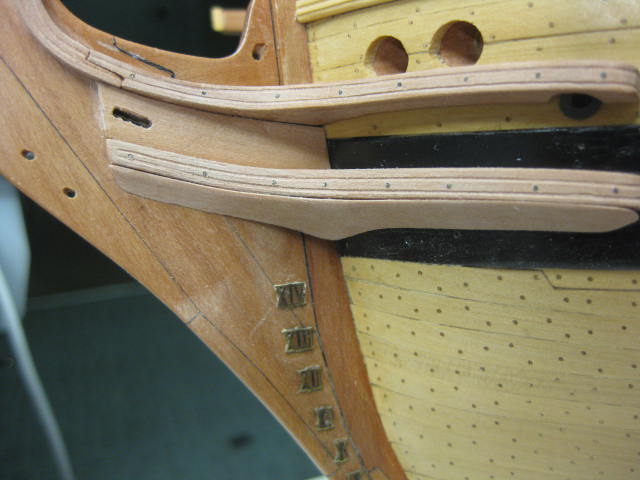
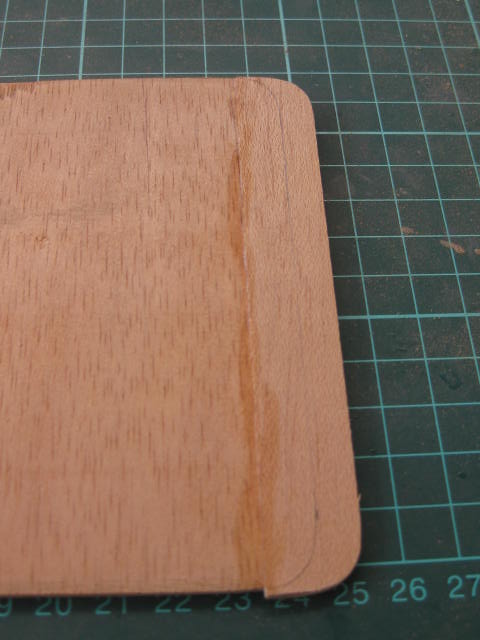
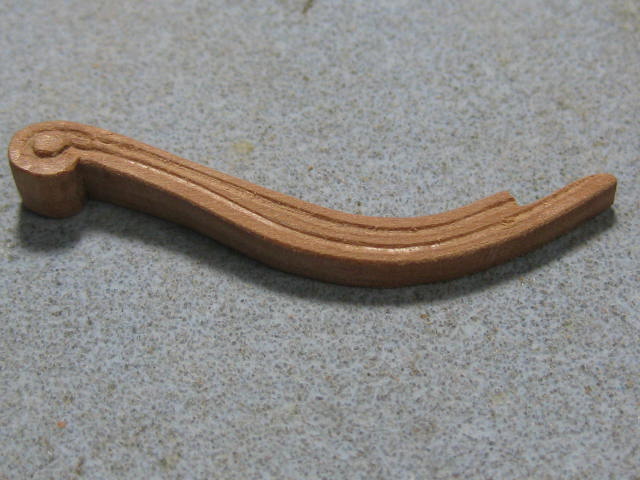
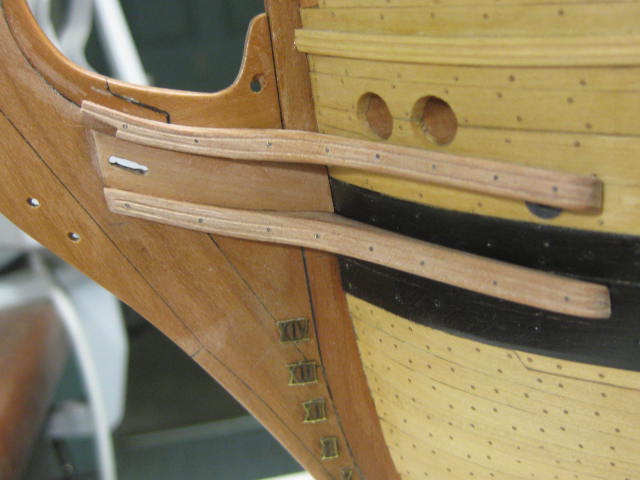
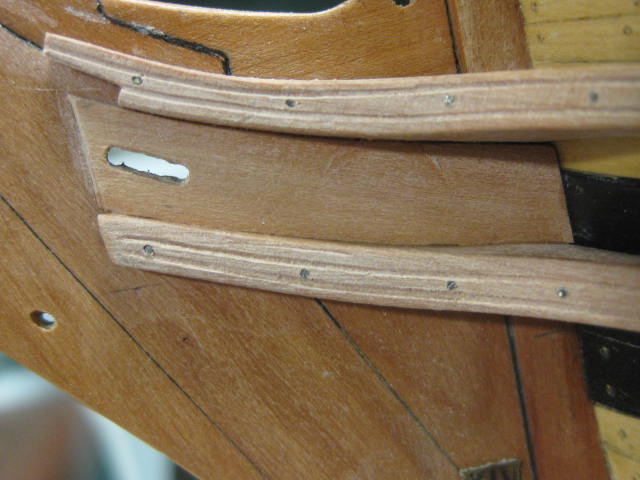
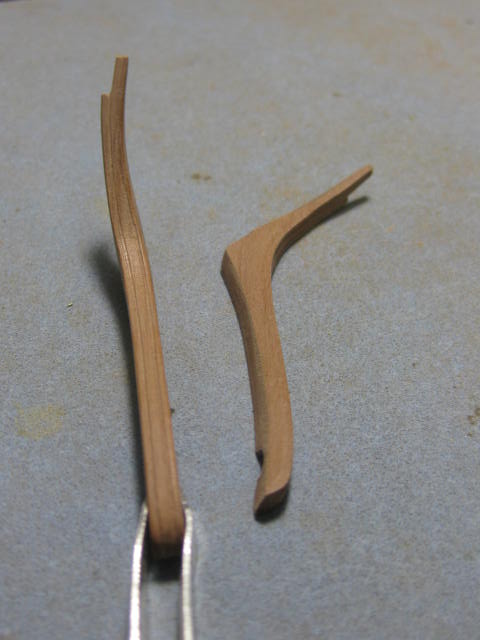
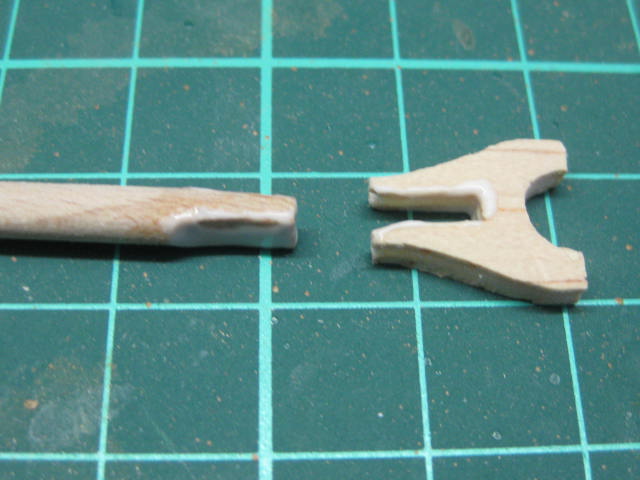
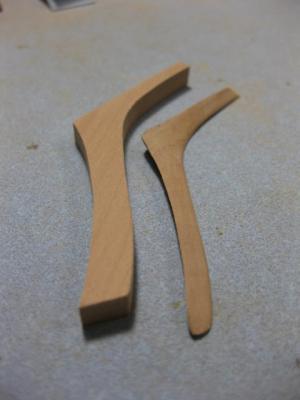
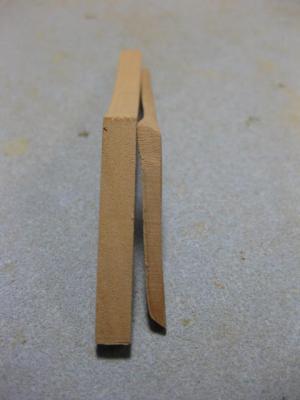
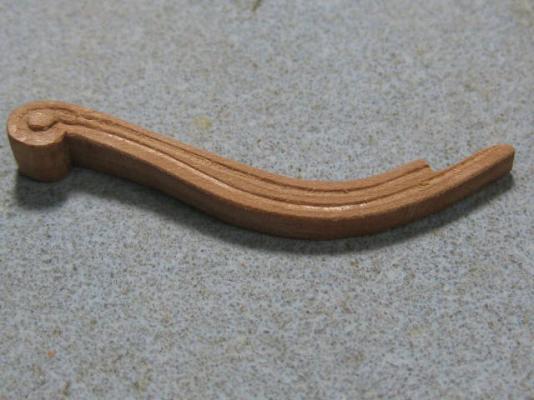
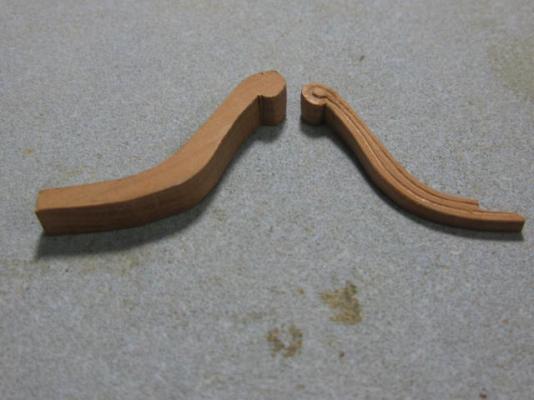
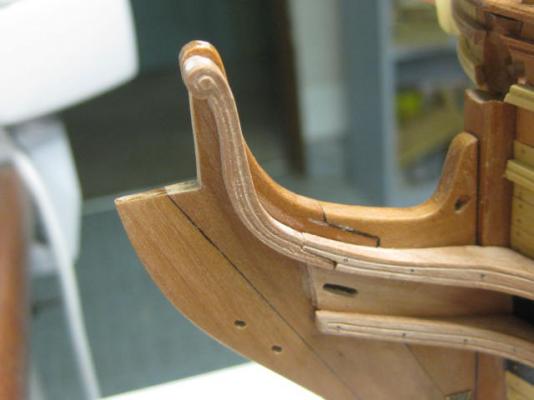
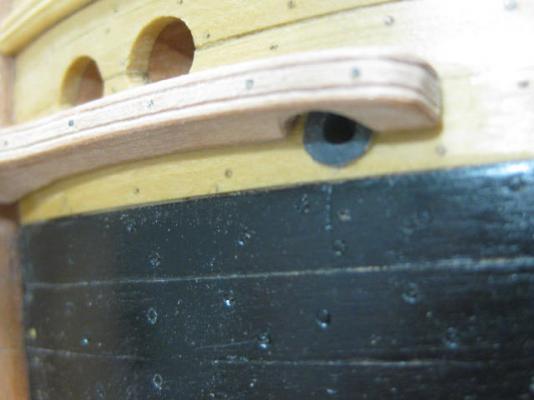
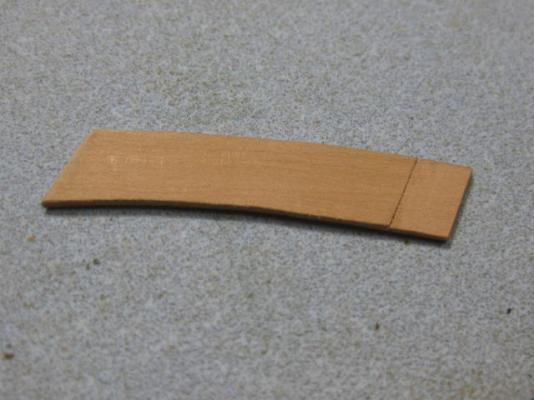
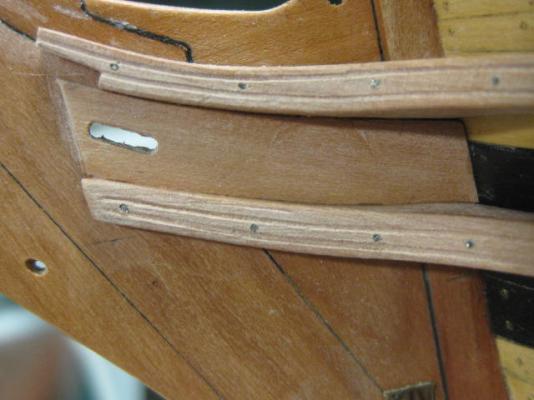
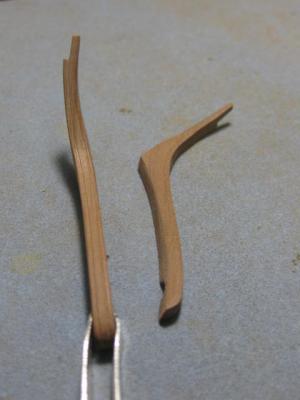
Hair Brackets The Hair Bracket is an extension of the upper cheek, and continues it on to the top of the stem. I made a card template of it's shape and cut it from the same stock I used for the rest of the cheeks. The bracket starts off quite thin where it joins with the cheek, but widens considerably as it rises : A finished bracket with the blank for the starboard side on the left : Considerable work was involved in adding the moldings and shaping the scroll. I'd have liked to have done better with the scroll, but I was at the limit of what I could achieve with Swiss Pear - it's too soft for really detailed carving : The port side bracket dry-fitted : Danny
-
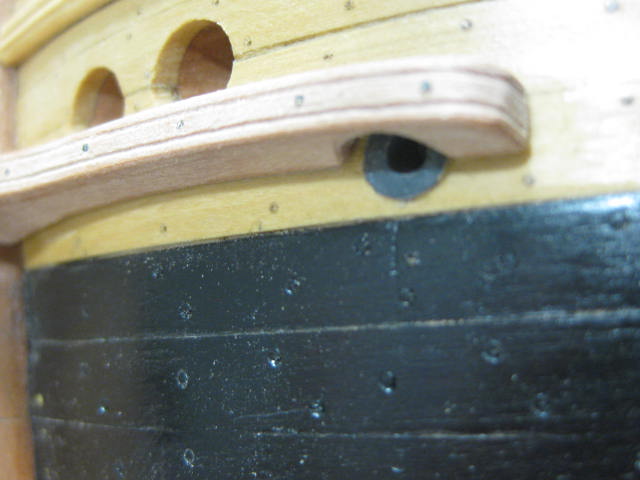
Thanks again for dropping by Janos, Pat and Adam. Your comments are appreciated . Moving right along, I've fitted the Upper Cheek to the port side in the following pic : The Manger Scupper caused me a few worrying moments, as it was halfway into the cheek. I came up with the following solution : Before fitting the lower cheek I made the Trail Board, which fits between the two cheeks on the stem. This gave me a perfect alignment, as I only have to butt the lower cheek to it's bottom edge. Next I glued in the Trail Board, closely followed by the lower cheek : Danny

-
Announcing the Model Ship World Ship Kit Database Project
Dan Vadas replied to SkerryAmp's topic in Wood ship model kits
Hi Adam, This Database has turned out great . Good job mate. One suggestion (if it's possible) - can you add a Filter to sort the Ship's Names alphabetically? This would be helpful to a builder who wants to build, say, a HMS Victory to give him look at the different kits produced by all the manufacturers in one area of the Database. If that feature is already there and I simply didn't find it, ignore this request . BTW - "Golden Hind" was a Galleon, "Santa Maria" a Carrack or Nau, "Nina" and Pinta" were most likely Caravels . Danny -
Question about shaping/sanding with files
Dan Vadas replied to Jwvanost's topic in Modeling tools and Workshop Equipment
Michael, go back to the last page and look at the video about acid-etching old files to bring them back to a new state. I haven't tried it myself, and I'm damned if I know HOW it works, but it might be worth a go for your older and blunter files . Danny -
Question about shaping/sanding with files
Dan Vadas replied to Jwvanost's topic in Modeling tools and Workshop Equipment
Yeah, that site seems to only deal with the BEST quality tools of all descriptions. No cheap rubbish on there . If you're after QUALITY tools that will last a long time then it's worth a browse - just be prepared to pay top dollar . Everything from Needle Files ($6.50 each) to Mill Tool Sharpening Machines ($3,500). And I haven't really had a GOOD look yet . Danny -
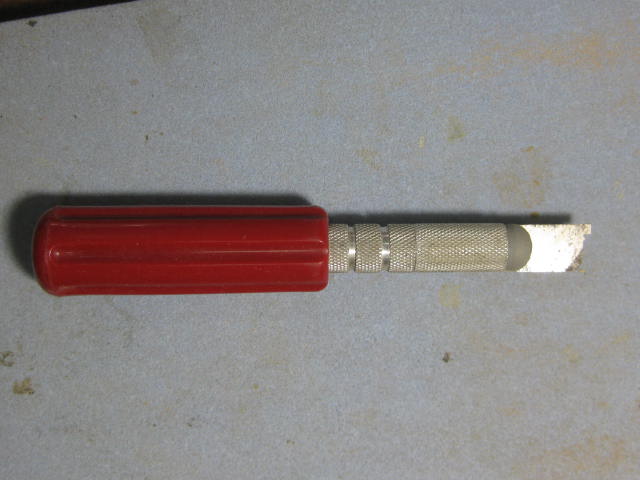
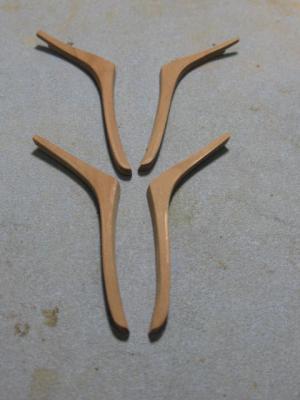
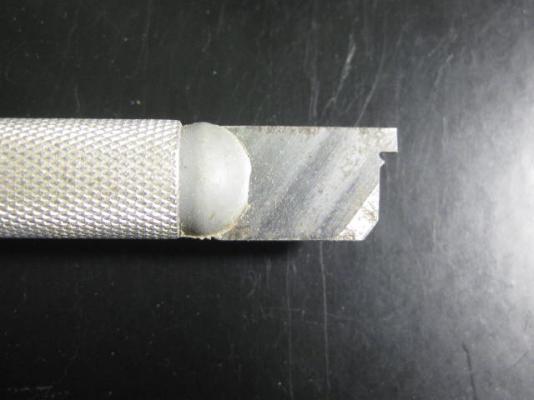
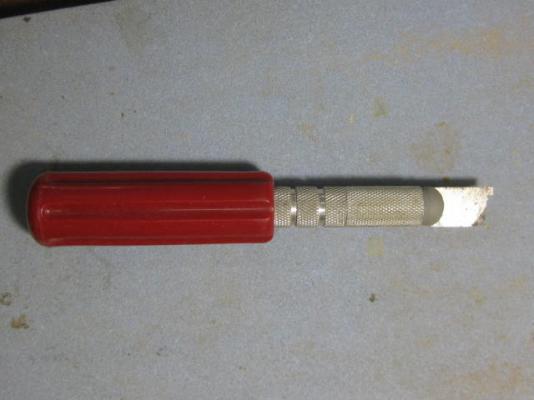
Thanks Toni, E&T, David and John. Toni, I made a Scraper : I've made all four Upper and Lower Cheeks. The upper ones have a more pronounced curve in the forward arm, and also a scarf joint for the Hair Bracket which continues to the top of the stem : Danny
-
Question about shaping/sanding with files
Dan Vadas replied to Jwvanost's topic in Modeling tools and Workshop Equipment
Hi Ben, I just checked out a really cool on-line store that sells the Grobet files. Wow, could I go berserk on that site - wish I had some money . Danny -
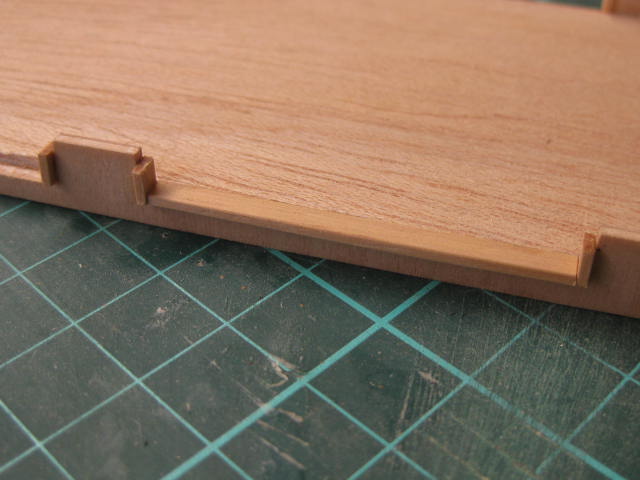
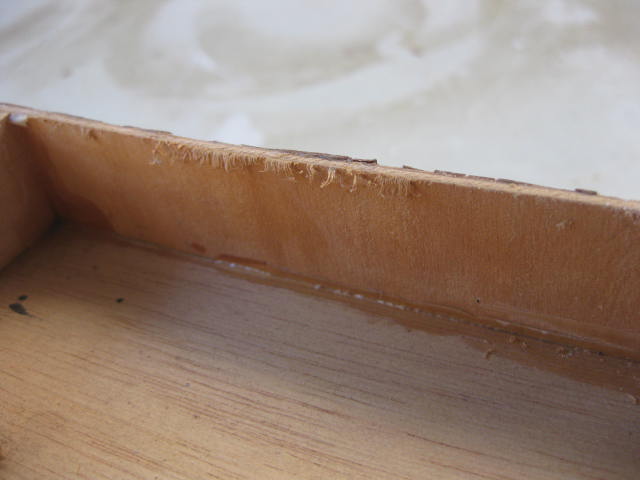
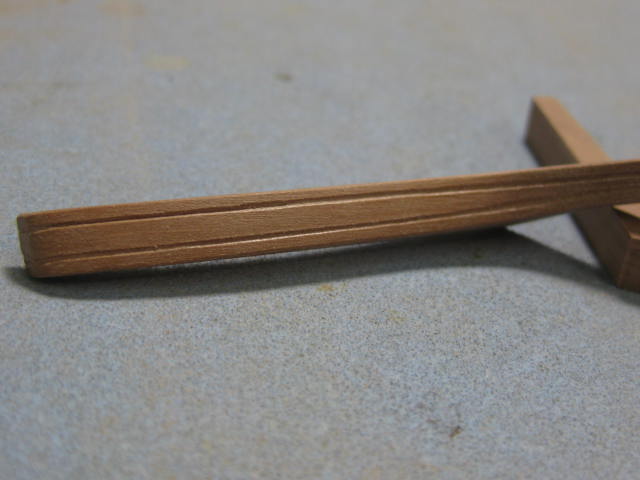
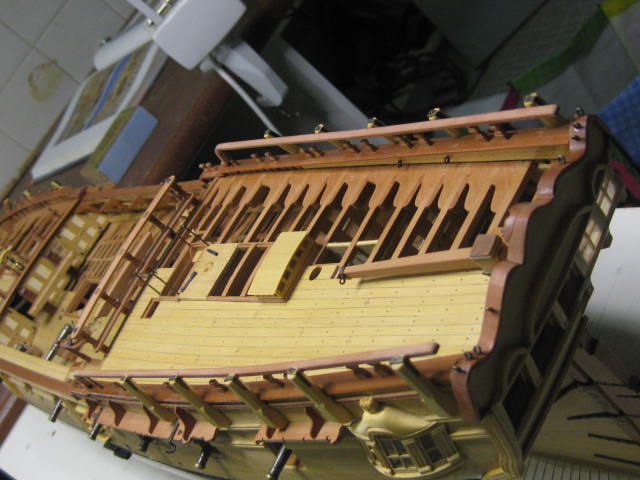
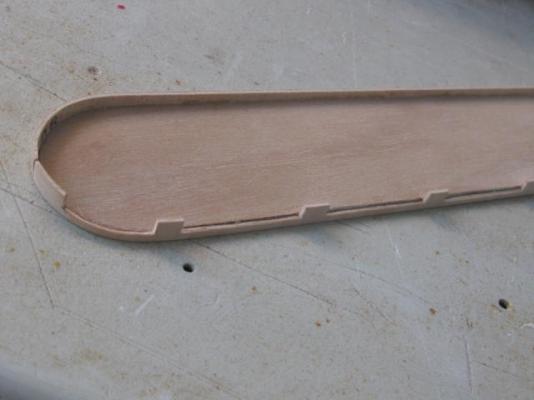
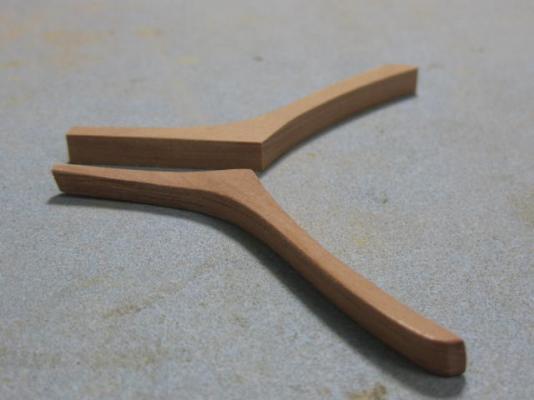
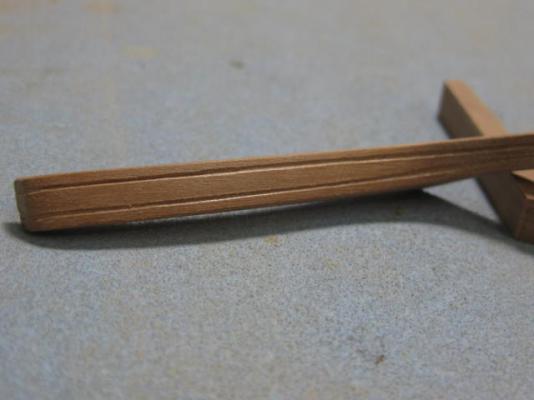
Thanks once again for the "likes" and the nice comments to Robin, Brian, Piet, Ben, Popeye, Michael, Nils and Mohamad. Always appreciated . Head Works - Cheeks I've started work on one of the most interesting and complex parts of the build - the work around the Head of the ship. First thing to do was remove the forward support which holds the hull in position on the baseboard. It doesn't really get in the way as such, but work on the lower cheek especially is a lot easier without it being in the way and there was the problem of it pulling the Knee of the Head out of position as work commenced in this area. I hadn't used the aft support for a long time - before the rudder was installed actually - so I had to move it backward a bit. This starts off with making the Lower and Upper Cheeks, which laterally brace the Knee of the Head. It's quite tricky to get the inner faces to mate up with the Knee and the curvature of the hull. A card template was used to get the inner faces somewhere near right, but my first attempt still resulted in a failure. The second go was spot on . The main problem is that there is a substantial bevel on the inner face where it curves around the hull to allow the forward part of the cheek to run at the correct angle on the knee. It took me a couple of hours to sort it out, but at least I now know where I'm going with the other three. The forward part of the cheek also has a slight upward curvature, so I made the piece from thicker stock and sanded that into it. You may be able to see this in the next pic against an unshaped blank : Two moldings were scraped into the outer face : Danny
-
Well done Mike - I suspected as much, but acetone usually dissolves the coating that's sometimes applied to brass. You may need to try a few different types of thinners until you find the one that works, perhaps a Polyurethane thinner may do the trick. They may need an overnight soak in the stuff. Danny
- 137 replies
-
- 1
-
-
- finished
- model shipways
- (and 1 more)
-
Very odd. My brass starts blackening almost as soon as it hits the Blackener. The main secret to it is to VERY THOROUGHLY clean the brass - try polishing it if the vinegar doesn't work, or use brass from another source and see if there's any difference. BTW - your ratio of 8:1 is about spot-on. It's not critical to get it exact. Danny
- 137 replies
-
- 1
-
-
- finished
- model shipways
- (and 1 more)
-
Hi Mike, Try soaking the part in vinegar for 10 minutes before the acetone bath. Sometimes there could be contaminants that acetone won't dissolve. Also, you're leaving the parts in the Blackener far too long. All this does is create a black crust which flakes off. Try leaving them in for as little time as you need to get an even coat - I only leave my parts in for between 30 seconds and 1 minute. I polish off any excess blackener with a paper towel or q-tip. Danny
- 137 replies
-
- 1
-
-
- finished
- model shipways
- (and 1 more)
-
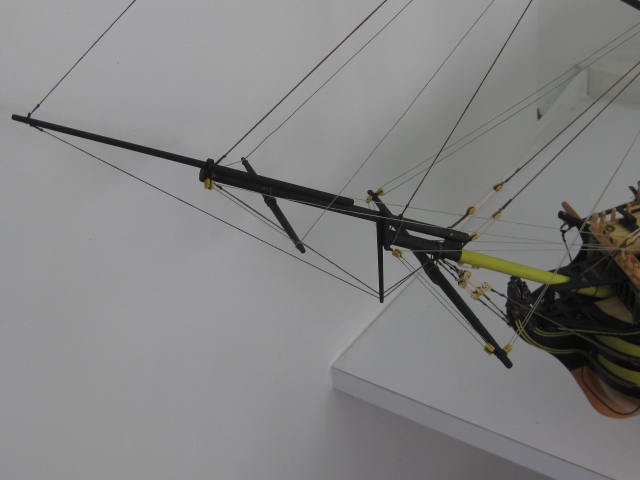
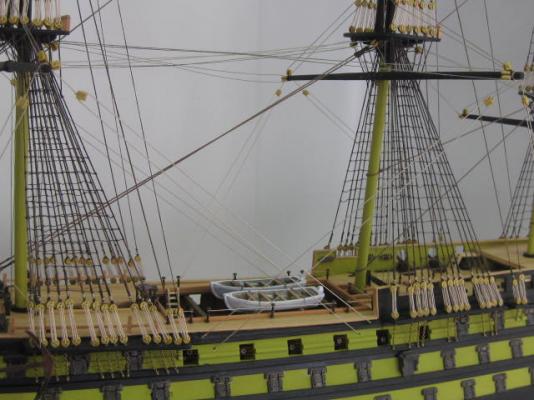
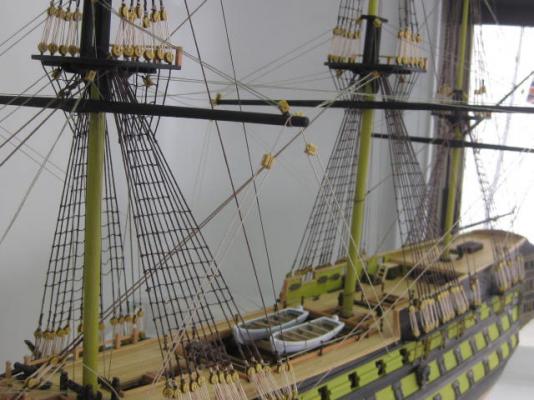
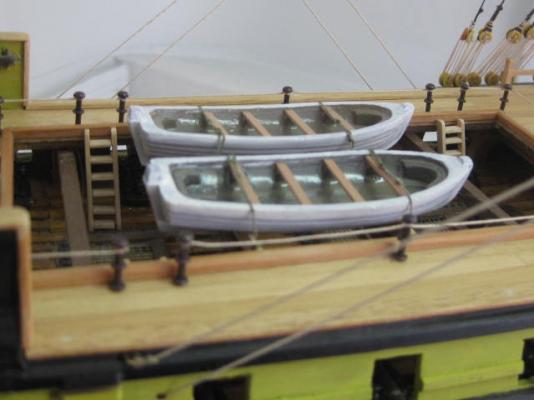
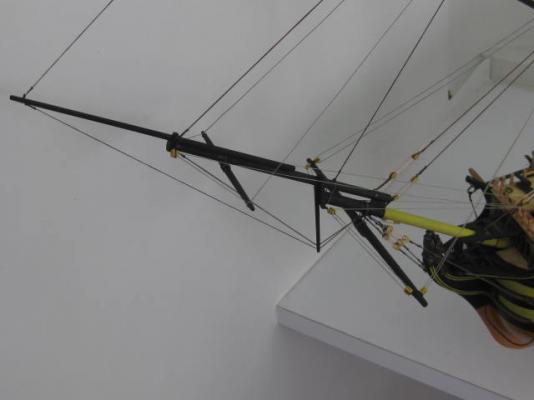
..... continued Below are a couple of pics of the completed Standing Rigging : The start of the Bowsprit rigging : About now I realized my camera battery was running low, so not many progress pics were able to be taken. Here all the Yards have been attached and the Running Rigging is complete : I'll take some more closeup pics of the rigging next trip. Bear in mind that I've done a VERY simplified rigging - virtually only the Lifts and Braces for each Yard. I might add the Sheets and Tacks for the lower yards - that area looks a bit bare. Last pic is of the port anchor : Apart from painting and fitting the ship's boats the build is now complete. The remaining work will take me a couple of hours, but that will be next week. Then I can deliver the ship to the owner . Danny


- 137 replies
-
- 14
-
-
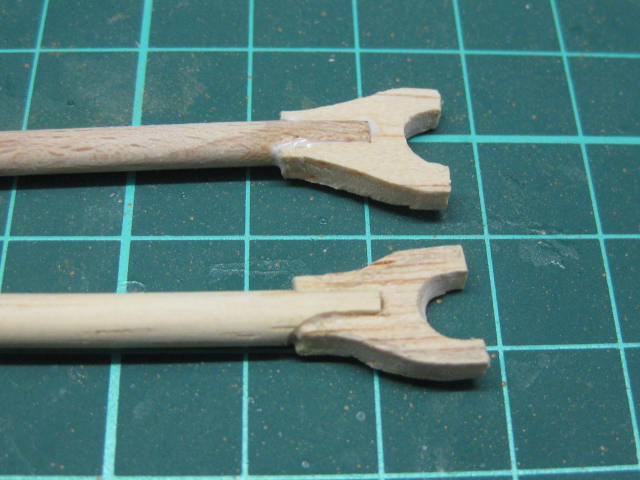
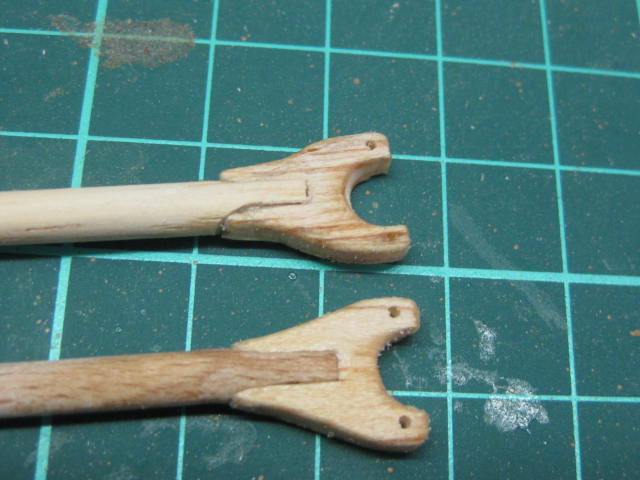
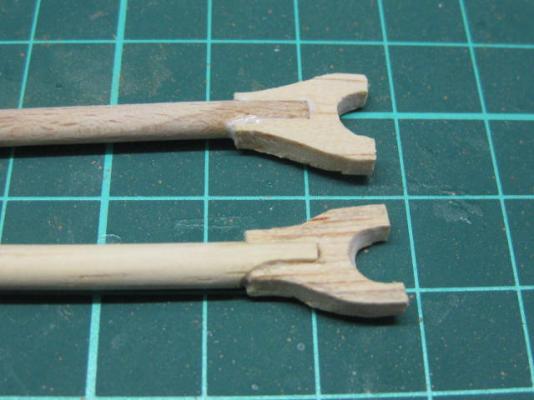
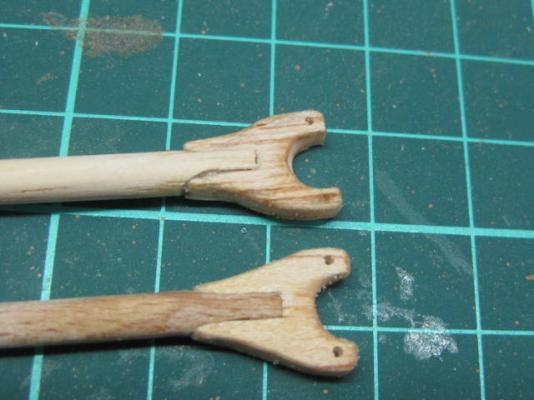
Thank you David, Ben and John . This time I only had a six day stint at my van, so I thought I'd spend as much time as possible on this build. I managed six hours per day . The kit instructions had me glue a stopper block under the Boom and Gaff and then glue them both to the mizzen mast - YUCKO . I made up two yokes from scrap ply : Continued next post ......

-
Hi Grant, Great work so far on the boat - I'll probably copy your method for my (huge ) 1:48 scale one for Vulture. Danny
-
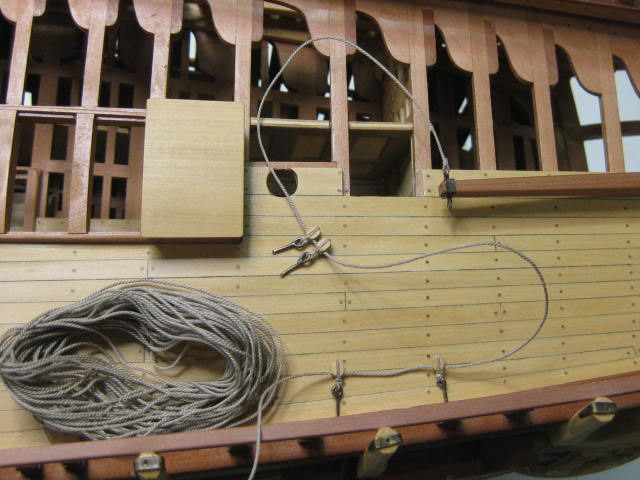
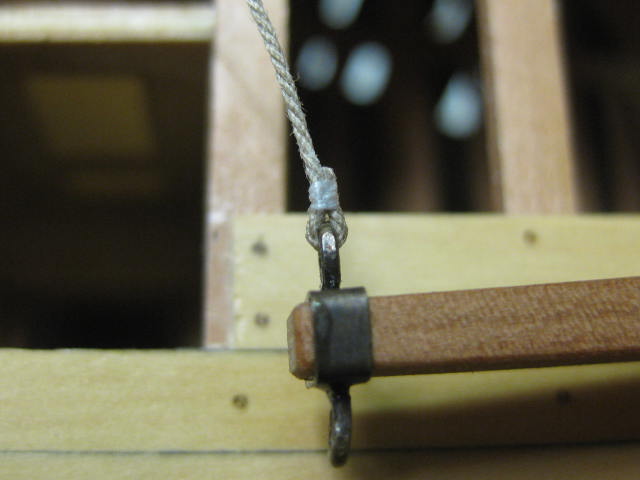
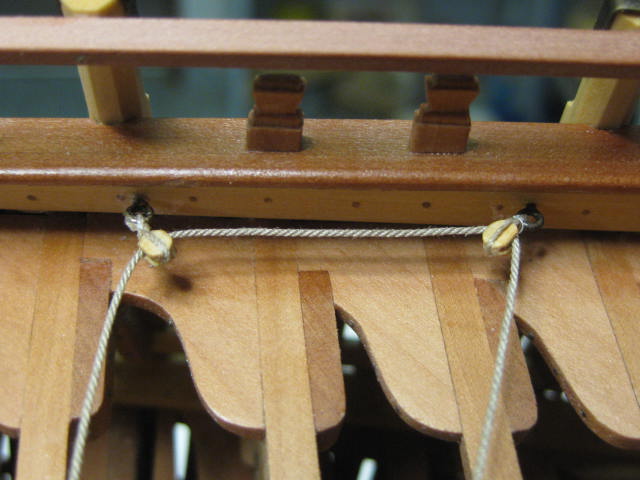
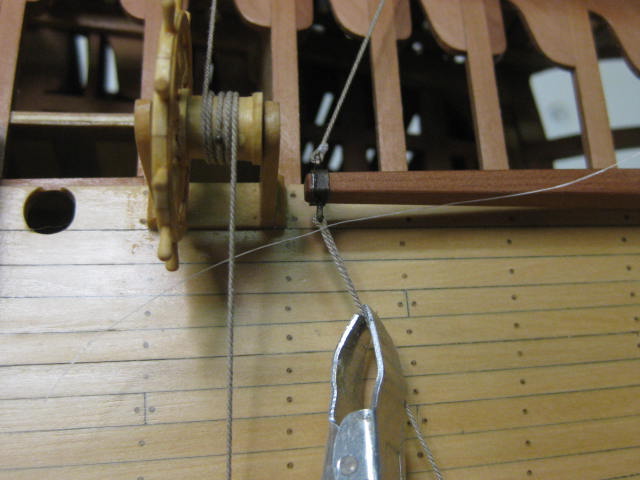
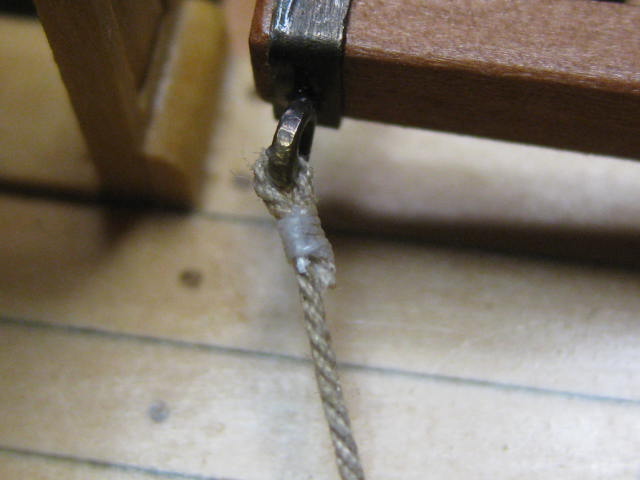
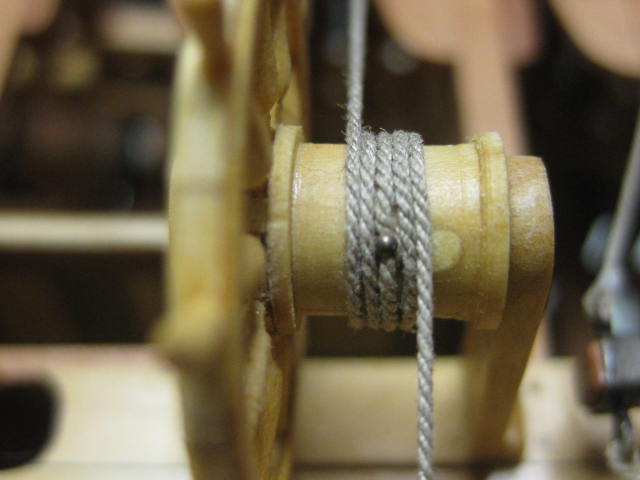
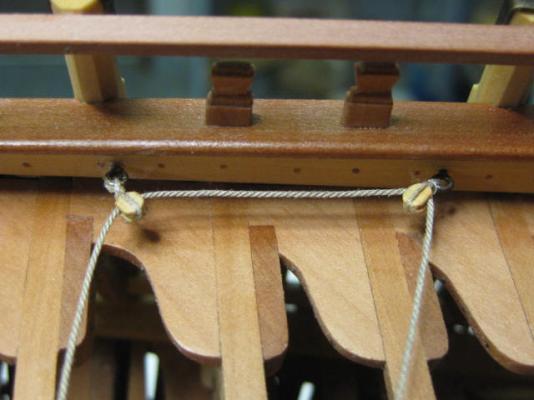
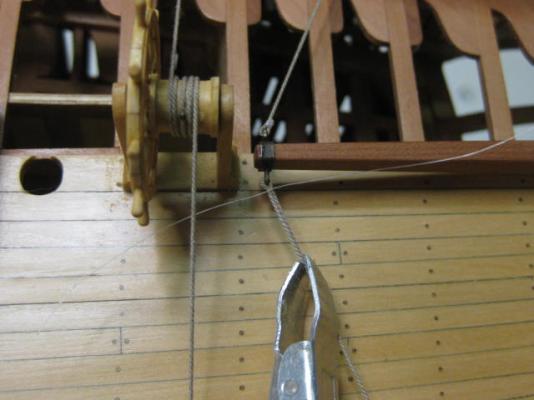
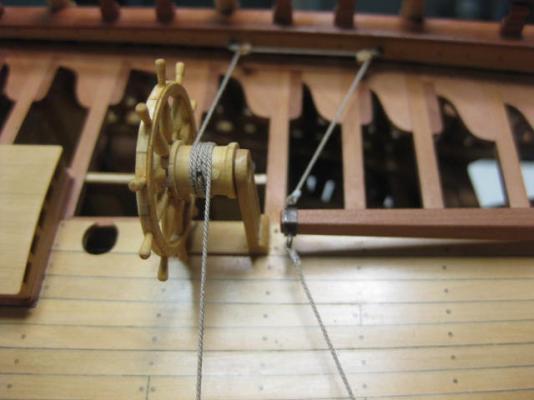
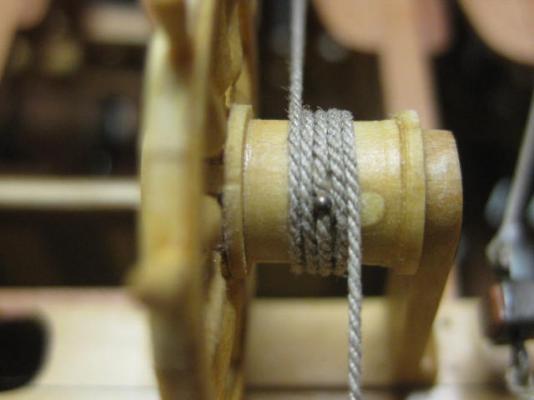
Steering Rigging I also rigged the Steering Wheel to the Tiller. I removed the previously fitted eyebolts in each side, as it's MUCH easier to strop the blocks to them in my vice rather than on the ship. The blocks are 6" (3mm) from Syren Ship Models, and the line is 3" (0.45mm) from the same place - great stuff, thanks Chuck . I also seized the line to the starboard side of the Tiller off the ship : Then I replaced the eyebolts/blocks on the starboard side and glued in the wheel : Five turns around the wheel Hub, replaced the Port side blocks and did the rather fiddly seizing to the port side of the tiller - TWICE. The first attempt wasn't as successful as I'd have liked - I took over an inch of slack out of the line the second time : Some views of the completed rigging. Note the very small nail in the centre of the turns on the hub : See you all in a couple of weeks. Danny


-
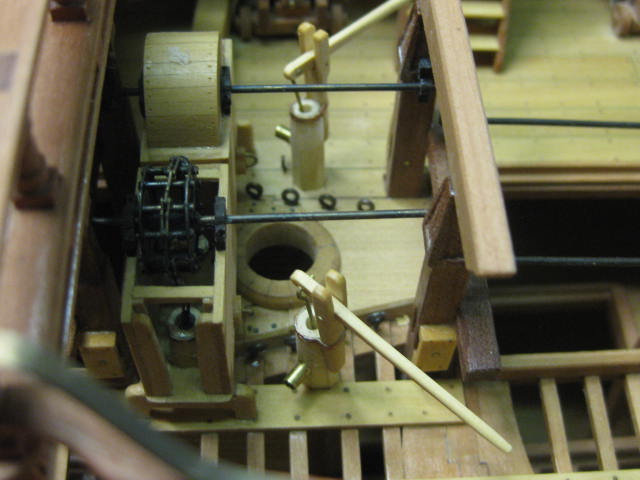
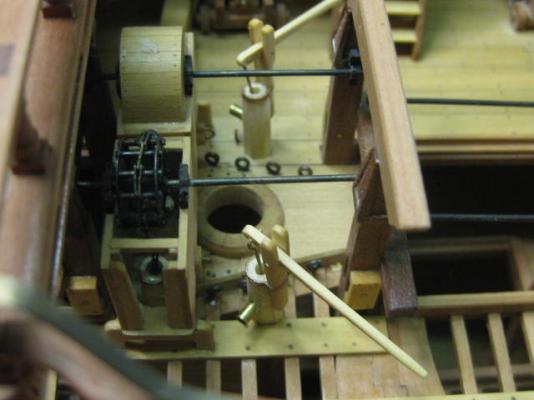
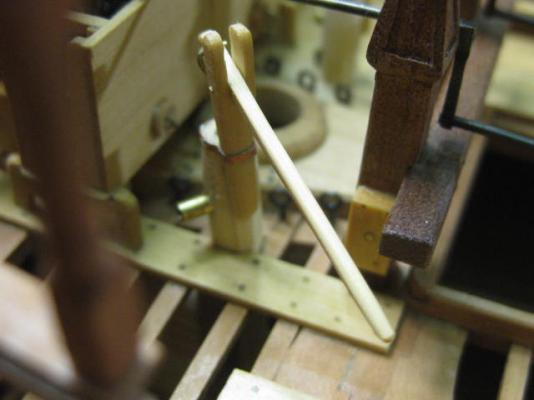
Thank you Geoff - you didn't have long to wait for this one, but the next update won't be for a week or two - I'm back up to the van and some more will be done on that Victory re-build (maybe even get her finished I hope ). Brake Pumps Fitted Going through my "Finished Parts" drawer this morning I realized I could fit the already finished Brake Pumps, so I did : Danny
-
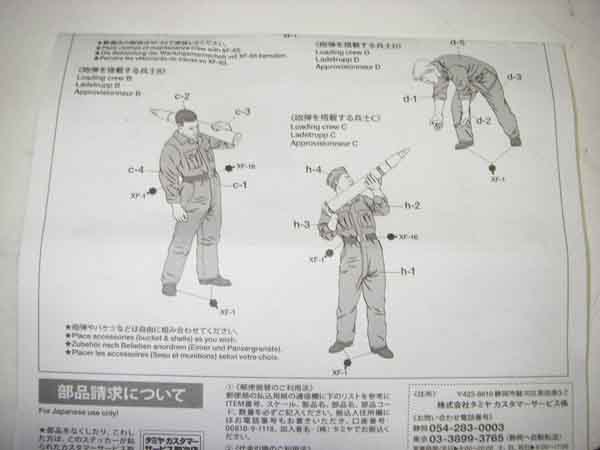
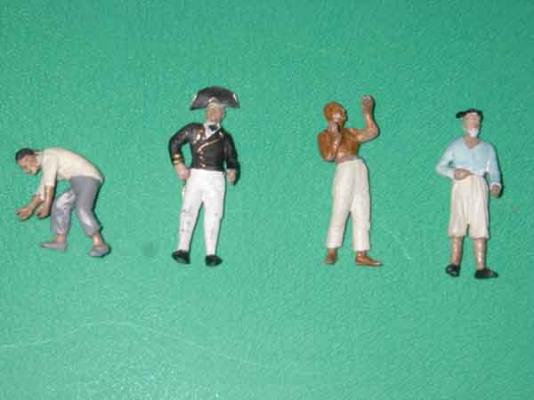
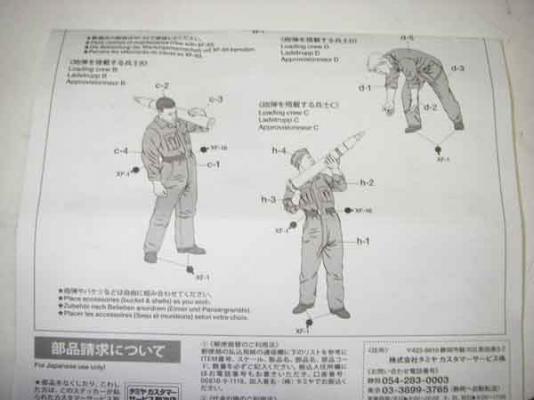
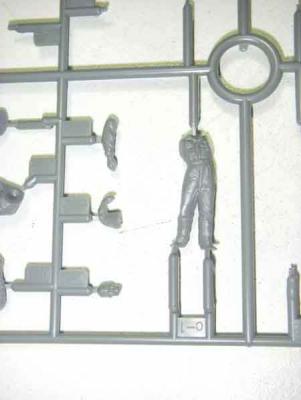
I'm glad you asked Mike . They are 1:48 scale Tamiya WWII German Tank Crew, "slightly" modified : Danny
-
John, David, Nils, Patrick, mij, Toni, Grant, E&T, Jason and Laman - thank you all very much for your kind comments. I ended it the way shown on the NMM sheer plan - in mid-air. It's only 16 (real) inches from the last gun mount, so doesn't need anything more : The NMM plans don't show a Taffarel Fife Rail, so none will be fitted. If it had been fitted the Roughtree Rail would have butted against it. Danny

-
I'd be leaving that well alone Al . Danny