Thukydides
-
Posts
1,362 -
Joined
-
Last visited
Content Type
Profiles
Forums
Gallery
Events
Everything posted by Thukydides
-
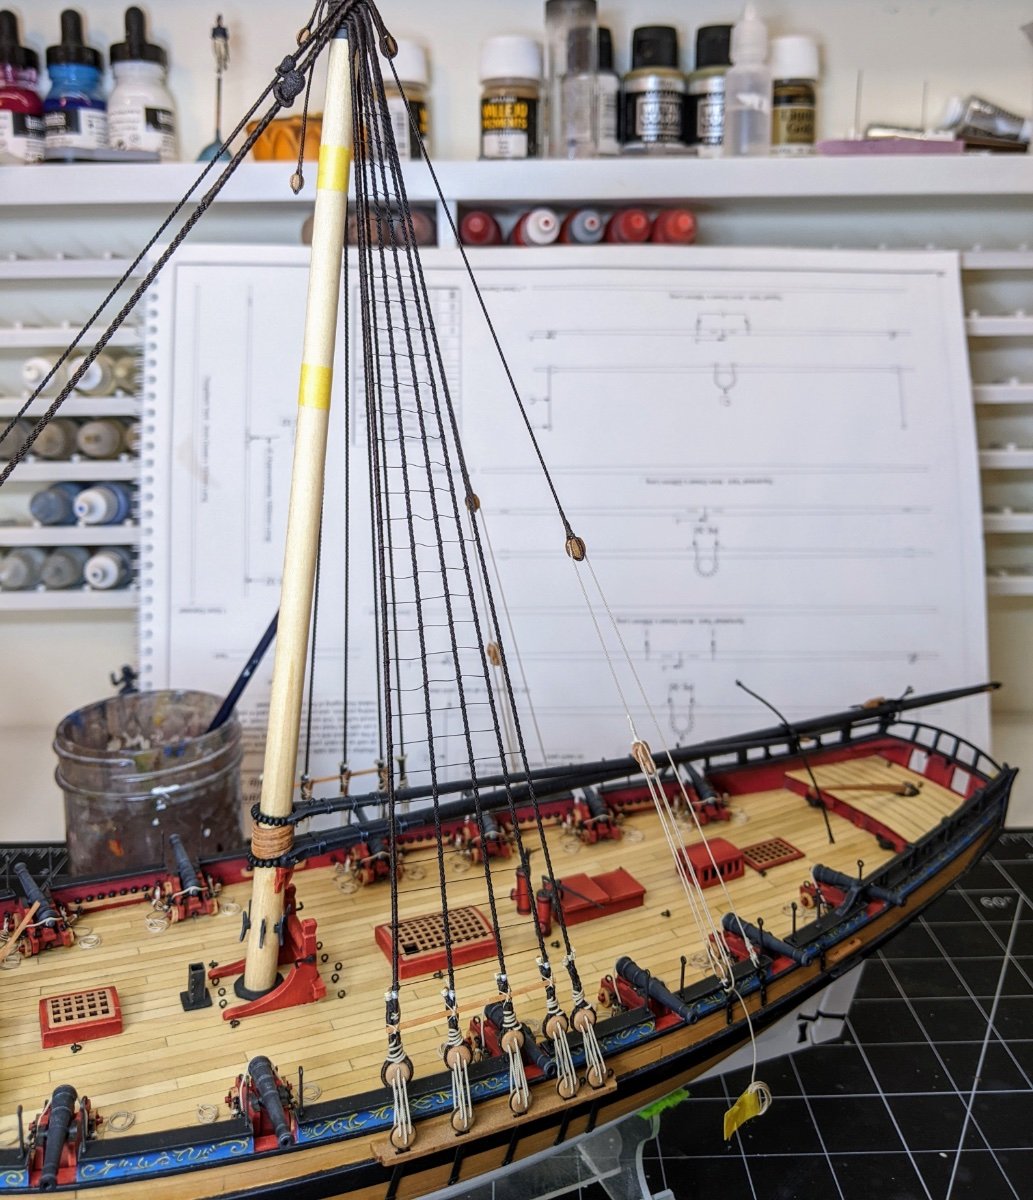
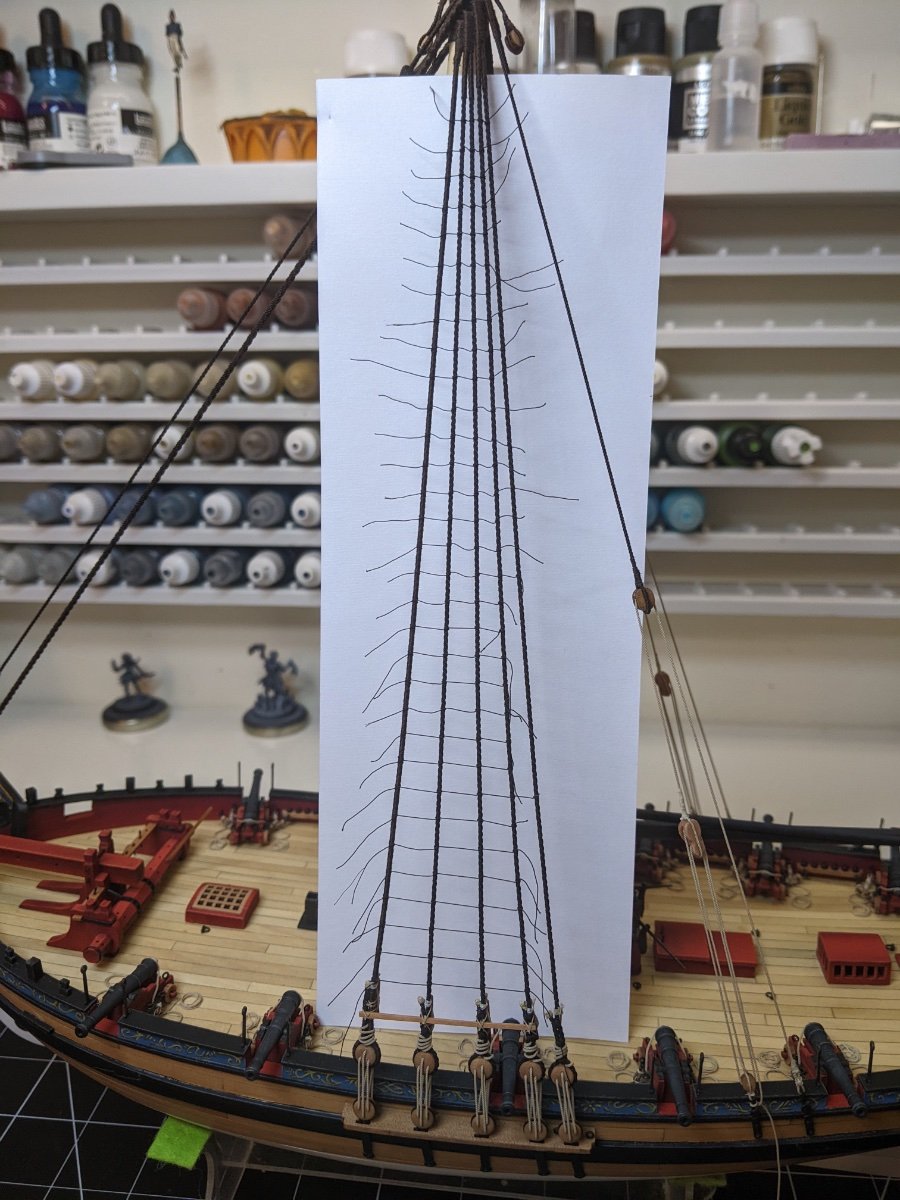
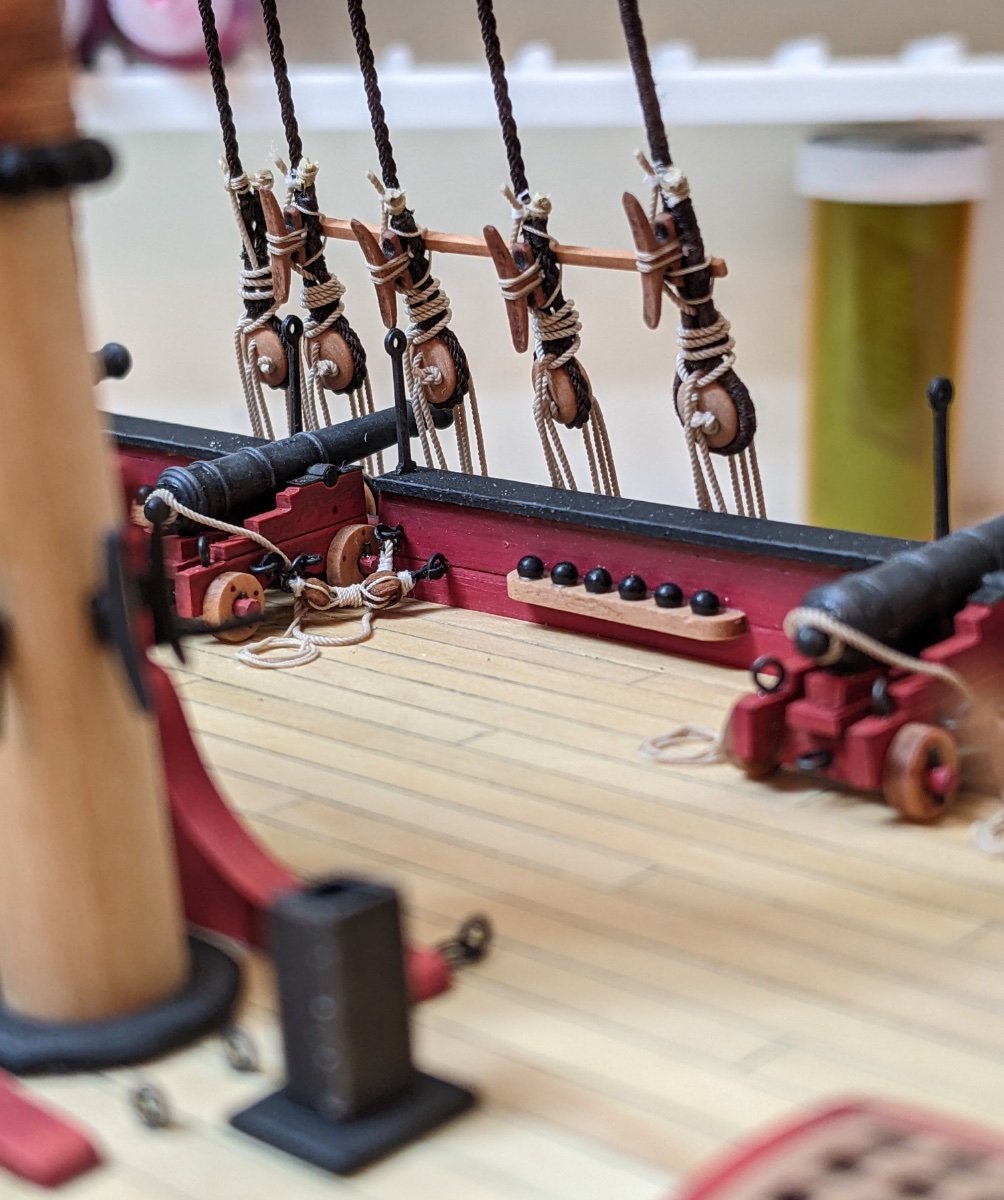
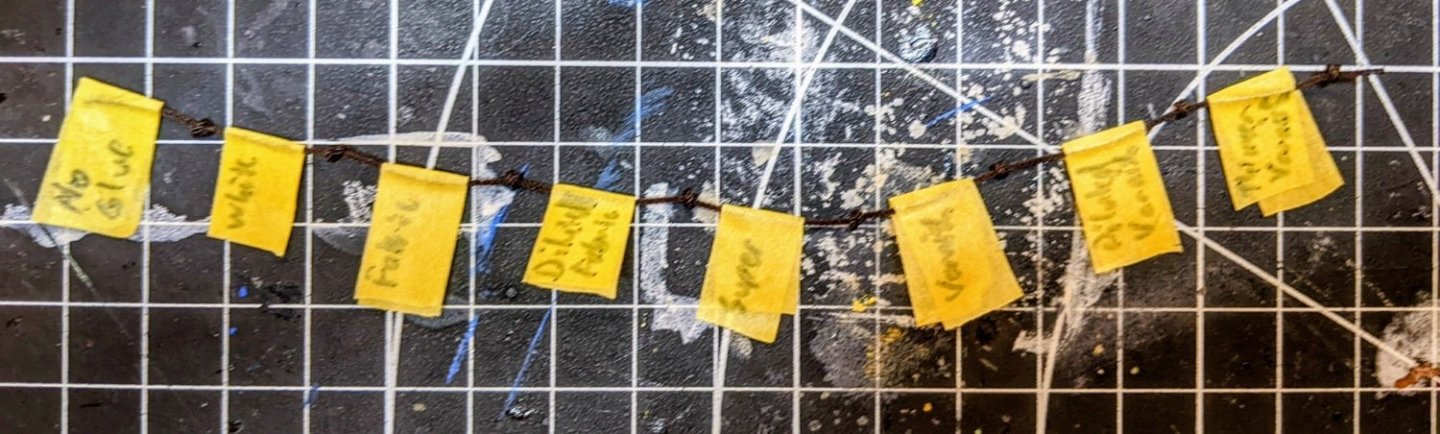
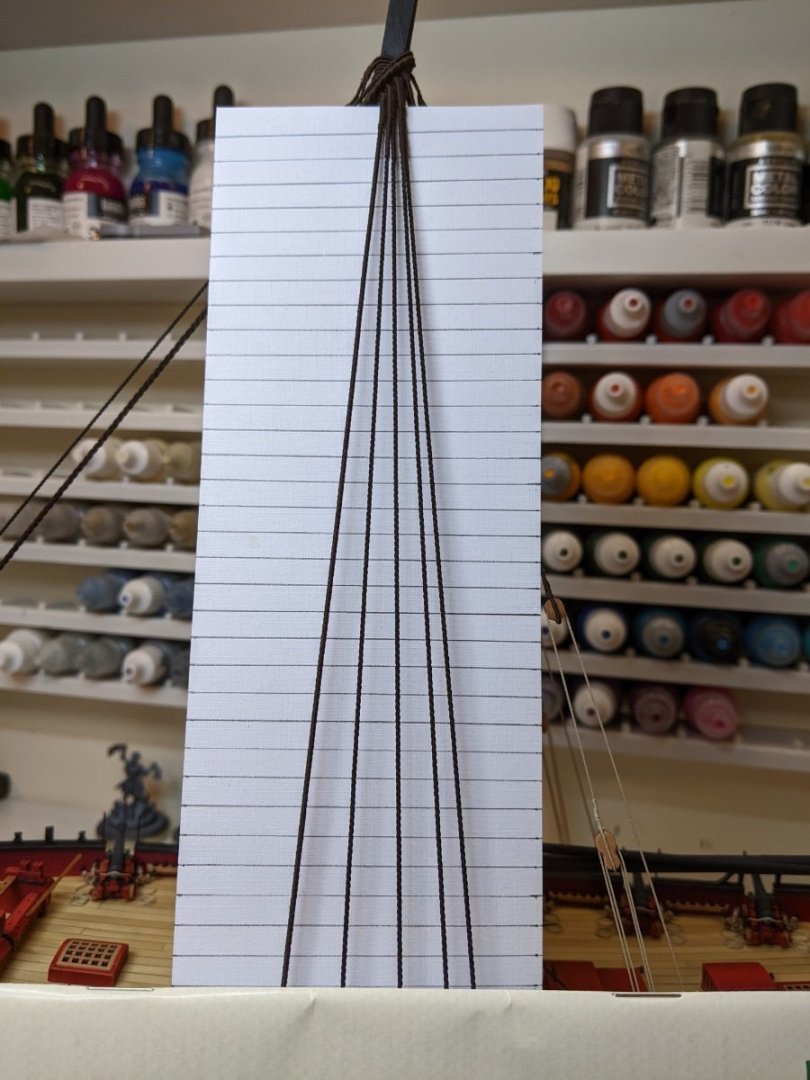
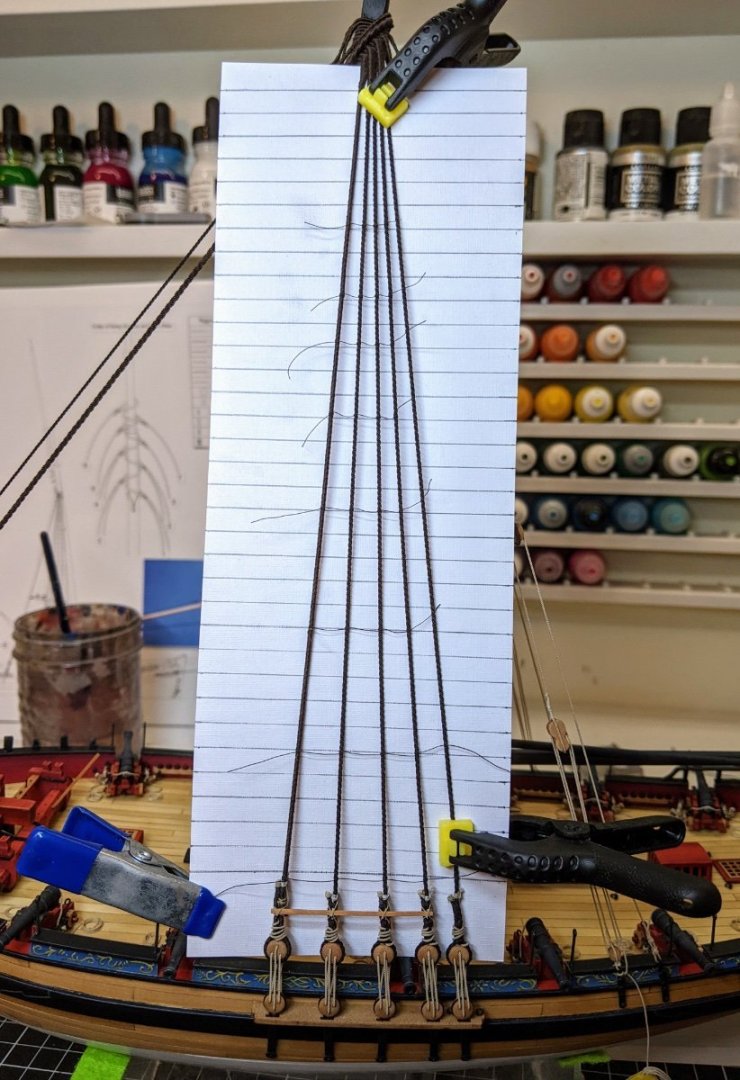
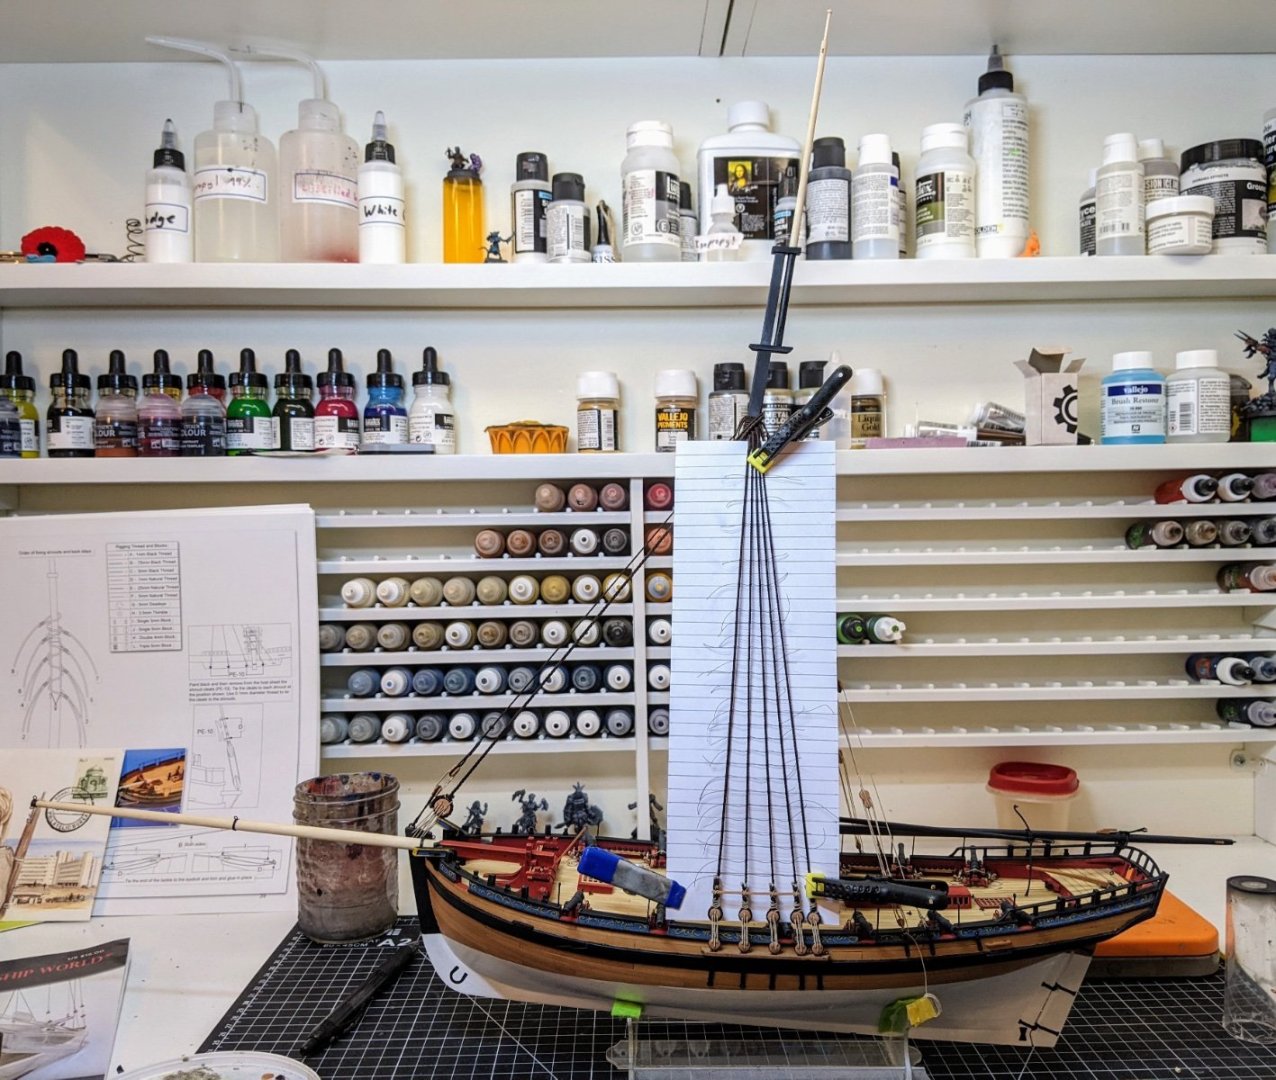
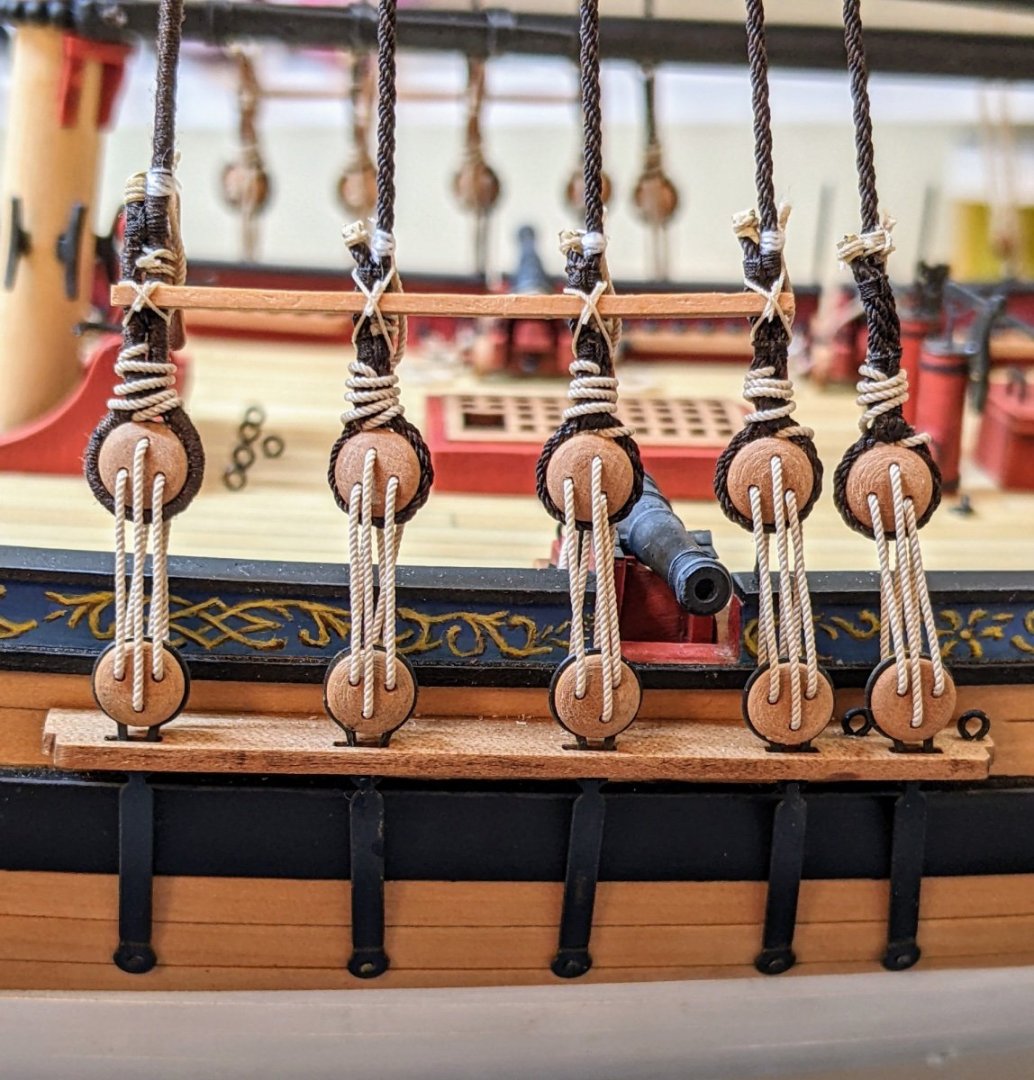
 Log #67: Ratlines, Ratlines & More Ratlines I have spent almost the entirety of last month working on and off on the ratlines. Granted Christmas and all the business that comes with it happened in the middle, but it has been a slow laborious process. I think I can safely say that ratlines are my least favourite part of the build so far. To begin with I marked the lines on a piece of card which I used small clips to hold it to the shrouds. I made sure Alert was in the correct position in her cradle and then used a book to line up the bottom line. For the ratlines Steel calls for 1.5 in circumference rope, which equates to 0.19mm diameter at our scale. I used 0.2mm rope that @BenD custom made for me. The upside of using polyester rope is that there is no fuzz and it has really nice definition, looking like it is at the right scale. The downside is that it is a pain to work with for this sort of detail. It is stiff and wants to hold its shape and so slips out of knots, holds itself at weird angles etc… I would say that on average I did each ratline 2-3 times to get it right. To try and make sure I had the spacing correct and to avoid over tightening and thus pulling the shrouds out of alignment, I did a few widely spaced out. Then I filled in the gaps. I then pulled both ends of each ratline once more to make sure it was secure and gave them all an extended shot with a hairdryer to try and relax them in position. I was a bit concerned the knots would give out and so I ran some test on a piece of knotted rope to see how various glue options appeared / held up. In the end the winner was diluted fabric glue and I coated all the knots with it. Once it had dried and I cut off the ends, I gave the entire set of shrouds a coat of diluted matt varnish. And that is the larboard shrouds done. I did realize in the end that I allowed the middle ratlines to get a little too tight. As this was a very gradual transition I didn’t notice till the end when I held up a ruler to the side. The foremost shroud has a slight bend to it (about 1-2mm at the midpoint). However, it is barely noticeable and I couldn’t face the idea of ripping off all my work on the ratlines and starting again. Next on to the starboard side, hopefully the experience I now have means it doesn’t take another month.

- 562 replies
-
- 16
-

-
- vanguard models
- alert
- (and 2 more)
-
Welcome to MSW
-
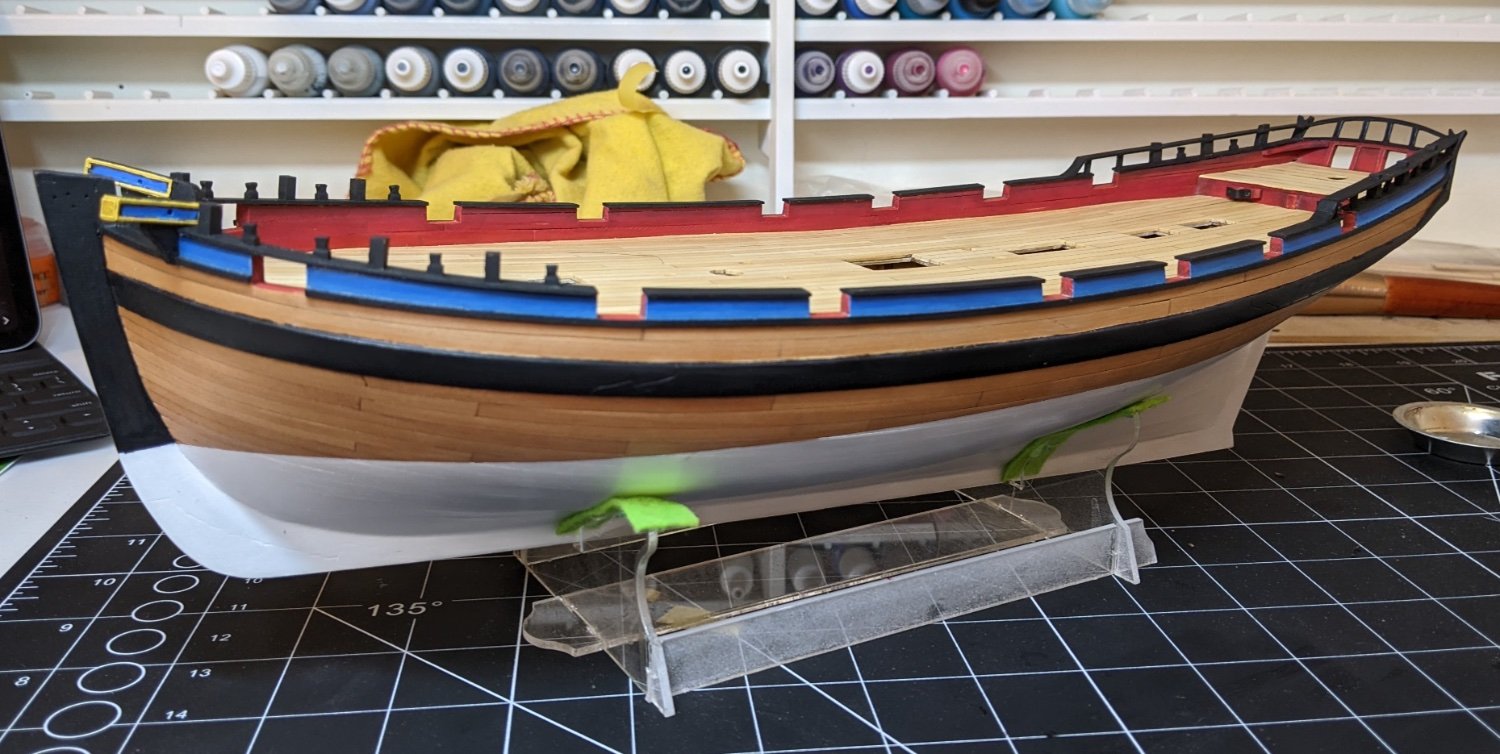
Log #66: Year End Review With the end of the year approaching I thought I would give a quick update on the status of Alert to round out the year and look back on the progress that has been made. In January of 2023 Alert looked like this: And today she looks like this: I am pretty pleased with the progress to date and am hoping to finish her sometime in 2024. The ratlines have been particularly tedious and I would say at this point I have done most of them between two and three times. That being said the end is in sight for the larboard shrouds and I am hopeful that the starboard ones will go a bit quicker given all the practice I have had.

- 562 replies
-
- 17
-
-
- vanguard models
- alert
- (and 2 more)
-
She is really coming together now. Great job, it is always a pleasure to follow along with your builds and listen to your thought process.
- 648 replies
-
- 6
-
-

-
- Indefatigable
- Vanguard Models
- (and 1 more)
-
Looking great. If you thought planking was unvaried, just wait till you get to the ratlines 😄.
- 152 replies
-
- 2
-
-
- Flirt
- Vanguard Models
- (and 1 more)
-
Looking good, I like the anchor stock planking you have going there
-
That ships wheel looks really good.
-
I am going to second @ccoyle's recommendation and suggest you might want to consider an intermediate step. I am currently doing a cutter and even with the one mast, the number of repetitive task that risk sapping your enthusiasm is high. Some intermediate step kits you might want to consider that will give you a good stepping point towards somthing bigger like sphinx might be: Flirt or Speedy from Vanguard Models - Small 14 gun Brigs Alert from Vanguard Models - Large 12 gun cutter Trial from Vanguard Models - another cutter featuring more precut parts. I would recommend this one over alert if you are planning to follow the plans, if you like to kit bash I feel Alert has a little more scope. Syren from Model Shipways - larger 16 gun brig
-
Ah yes, now I am looking back I see you already attached the deck fittings, for some reason I was thinking you hadn't done this yet. You could go half way and just leave it as is, gluing the bowsprit into place to hold it. Then just stick the some metal bits in the sides of the bitts to simulate the look of the fid going through the bowsprit. At least then it would make logical sense as the wooden crosspiece keeps it form flipping up and the fake fid stops it from sliding back. That would be much less messy than doing what I did. Getting the holes drilled all the way through straight was a royal pain.
- 152 replies
-
- 5
-
-
- Vanguard Models
- Cutter
- (and 2 more)
-
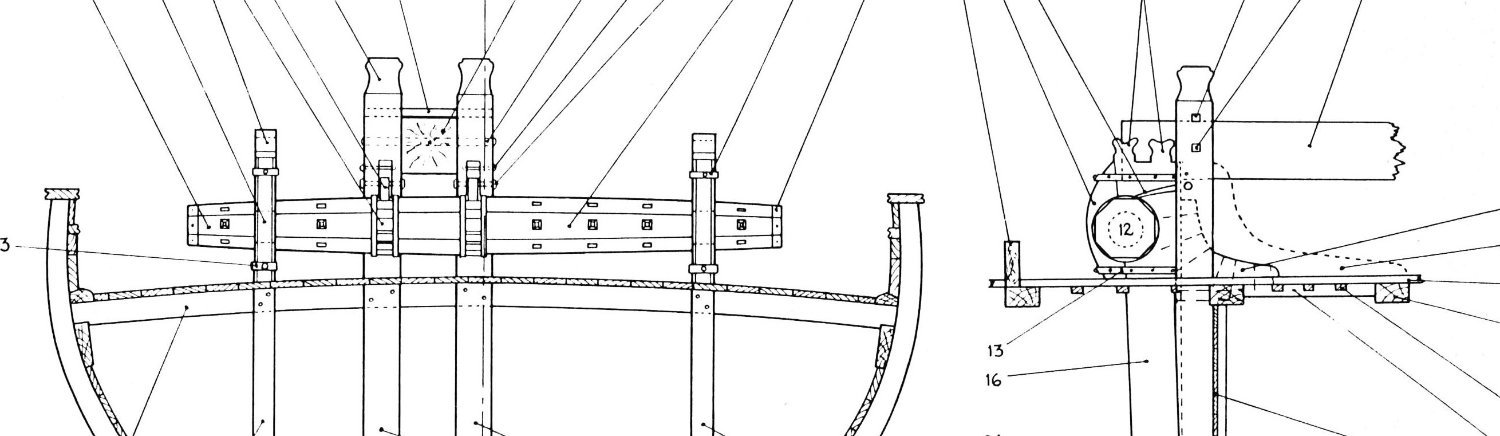
You can just look at my log if you want to see what it looks like. I have also taken a picture of the relevant section from Goodwin below if you want to see it.

- 152 replies
-
- 4
-
-
- Vanguard Models
- Cutter
- (and 2 more)
-
Alternatively if you want to go for more of a simpler more artistic look you could consider using edge highlights to pick out the detail. Use a medium grey on the upper edges and a slightly darker one on the lower edges. You could also consider glazing in gradients, but that is a slightly more complicated process as getting the light placement right takes a bit of practice.
-
It is a bit odd, there is also the question even if it is just friction, what if they wanted to shorten the bowsprit. Alert has holes to allow them to shorten it presumably to use less sail in worse conditions. The fact also that the end is round instead of square brings the problem of it potentially twisting. If it were me I would probably consider squaring off the end and using some iron bars similar to the alert arrangement in Goodwin as I can't see how the arrangement from the contemporary model makes any sense. Maybe it was a simplification by the model maker? The plans show an iron ring holding the bowsprit against the stem which is not on the contemporary model either.
- 152 replies
-
- 2
-
-
- Vanguard Models
- Cutter
- (and 2 more)
-
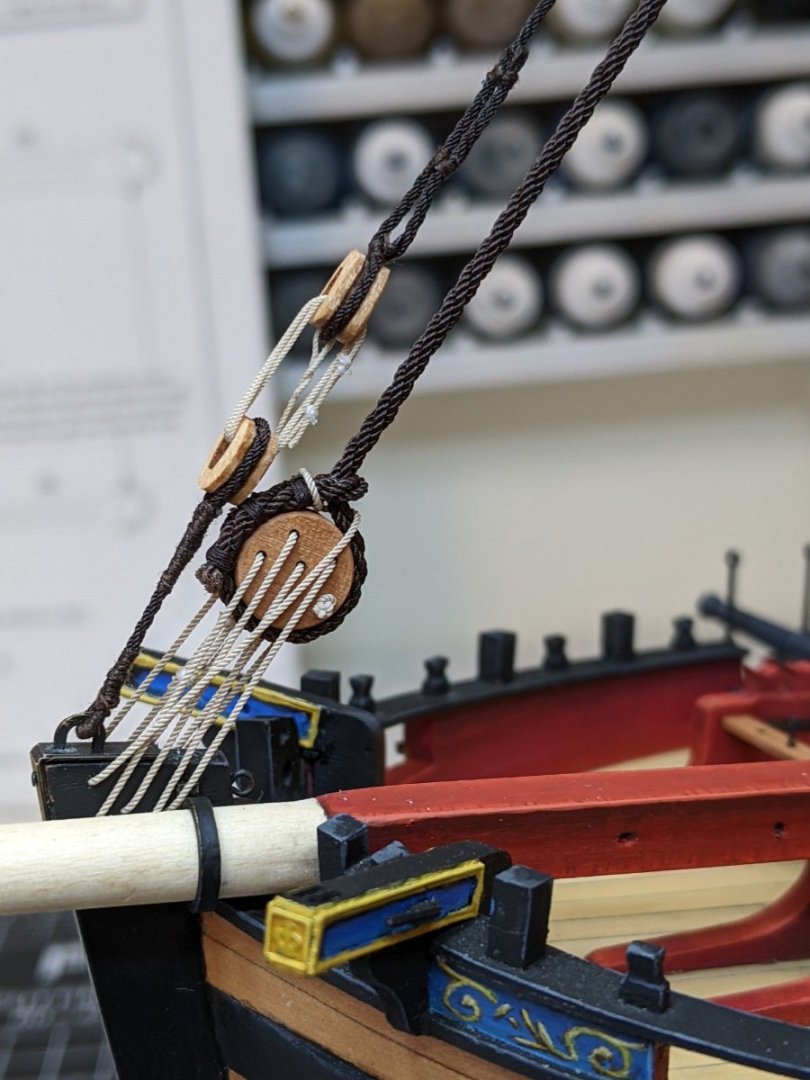
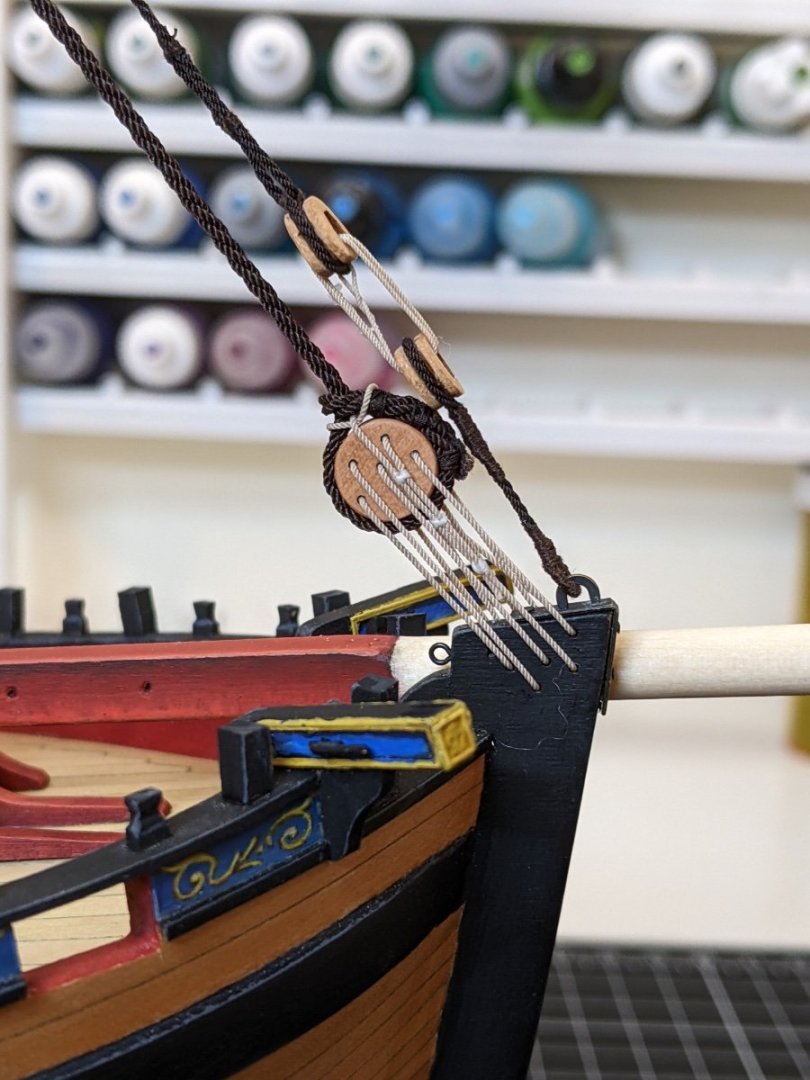
Log #65: Tying off the Stays and Shrouds I have been very slowly tying off the stays for the last week or so. The Mainstay was fairly straight forward, there was a clear diagram in Goodwin so I decided to go with it as it made reasonable sense. I tied the sizings with 10/0 white fly tying thread. Ideally I would have preferred to use an off white, but there was limited colours available and at least it does make the detail stand out. The preventer stay was sized in a similar manner. The shrouds were a little more confusing as the diagram in Lees seems to show them just wrapped around the shroud and then sized to it. However, when I did this I found that it would loosen and slide up the shroud to the point at which it was sized. To remedy this after wrapping them around the shroud as pictured in Lees, I slipped the end of the laniard through the gap between the sizings of the shroud. This held everything in place and then I just ran it straight up and sized it to the shroud. I first tried using the 0.25mm rope to size it (see the standing backstay on the right), but I thought that looked a little too big and so switched to the fly tying thread for the rest. I didn’t feel like going back and changing the standing backstay and since it is not really that noticeable unless you zoom right in I decided to leave it as it was. And with that the shrouds and stays are in place. Next I am on the the ratlines as I think I want to do them before too many more lines are all over the place waiting to be caught on somthing.

- 562 replies
-
- 26
-
-

-
- vanguard models
- alert
- (and 2 more)
-
Your work is so amazing it is borderline depressing as I look at it and see how poor my own looks in comparison :).
-
Great job, she looks very nice. You are motoring through all the Vanguard kits.
- 105 replies
-
- 1
-
-
- Grecian
- baltimore clipper
- (and 4 more)
-
Looking great. How did you make the grating like pattern for the windows of the pantry?
-
It is hard to tell for sure from the pictures, but think you are still going to have problems with your second planking near the stern. Try holding test strips against it to test how they should run and then sand some more to get the correct shape. Compare your shape to the one you are trying to achieve, there is a nice clear picture of it on page 29 of the manual. You may find that you will have to sand it down so much that you will need to re-plank parts of the stern, but this shouldn't be too much of a problem just a bit time consuming and if you want the final result to good it may very well be necessary.
-
The short answer is yes thin them, but not having used AL paints I can’t exactly tell you how much, but better to ere on too thin than too thick. Cheap brushes from walmart will work fine if you are just trying to base coat the model. I use cheap brushes for this sort of work all the time and only break out my good ones for the detail work. The longer answer: Acrylic paints are made up of three components: pigment, binder and solvent. The solvent in this case is water so you can thin your paints by adding more up to a point. If you thin them past that point, there won’t be enough binder in the solution to hold the pigment together. This is where acrylic medium comes in. You can buy this at any art store and you can use it if you want to thin the paint even more without losing its properties. For just painting coats on a model you will not however need to thin the paint this much. My suggestion is to test it on your palm. If the paint fills in the cracks (ie you can’t see the lines on your palm anymore) then it is too thick. It will not completely cover on the first coat (especially for colour such as white or yellow). You want two to three thin smooth coats. Make sure they are completely dry and sand off any imperfections between coats. What I will say is that if your paint is too thin you only loose time. If it is too thick you will ruin the model. For model paints such as vellejo or citadel, my rule of thumb is one part paint to one part water, but this will vary depending on the thickness of the paint. Make sure you have used a primer or a sanding sealer first and you have a smooth surface to work on. A good paint job can’t fix a poorly prepared surface. If you are painting both dark and light colours (for example black and white) paint the lighter one first. It will be much easier to paint the black over white than the other way round. Also if you are having trouble with a lighter colour covering you can build up to it by say for example painting on a light grey and then painting white over top. For brushes (I assume you are just painting the hull), I would recommend just pick up a pack of brushes from somewhere like walmart. That will give you a few sizes to work with and since you will inevitably ruin them anyways (I am assuming you are not familiar with painting since you asked the question), at least you haven't ruined expensive ones. In the future you can look into more expensive ones if you want to explore painting a bit more.
-
Yes you have it. By keel I am referring to just the straight bit along the bottom. So if you took the ship of the cradle and laid it flat on the desk the angle for the butts should be square with your desk.
- 152 replies
-
- 2
-
-
- Flirt
- Vanguard Models
- (and 1 more)
-
Looking good. A minor point, the butts of the planks should be perpendicular to the keel (they are attached to the frames on a real ship). So they will not always be at right angles. A relatively minor point that I also didn’t realize until part way through my second planking.
- 152 replies
-
- 5
-
-
- Flirt
- Vanguard Models
- (and 1 more)
-
I unfortunately do not have anything to add to this discussion, but I wanted to pop in to mention how much I appreciate reading these sort of topics both as they happen and also when while researching some obscure topic I come across them.