Paul Le Wol
-
Posts
1,060 -
Joined
-
Last visited
Content Type
Profiles
Forums
Gallery
Events
Everything posted by Paul Le Wol
-
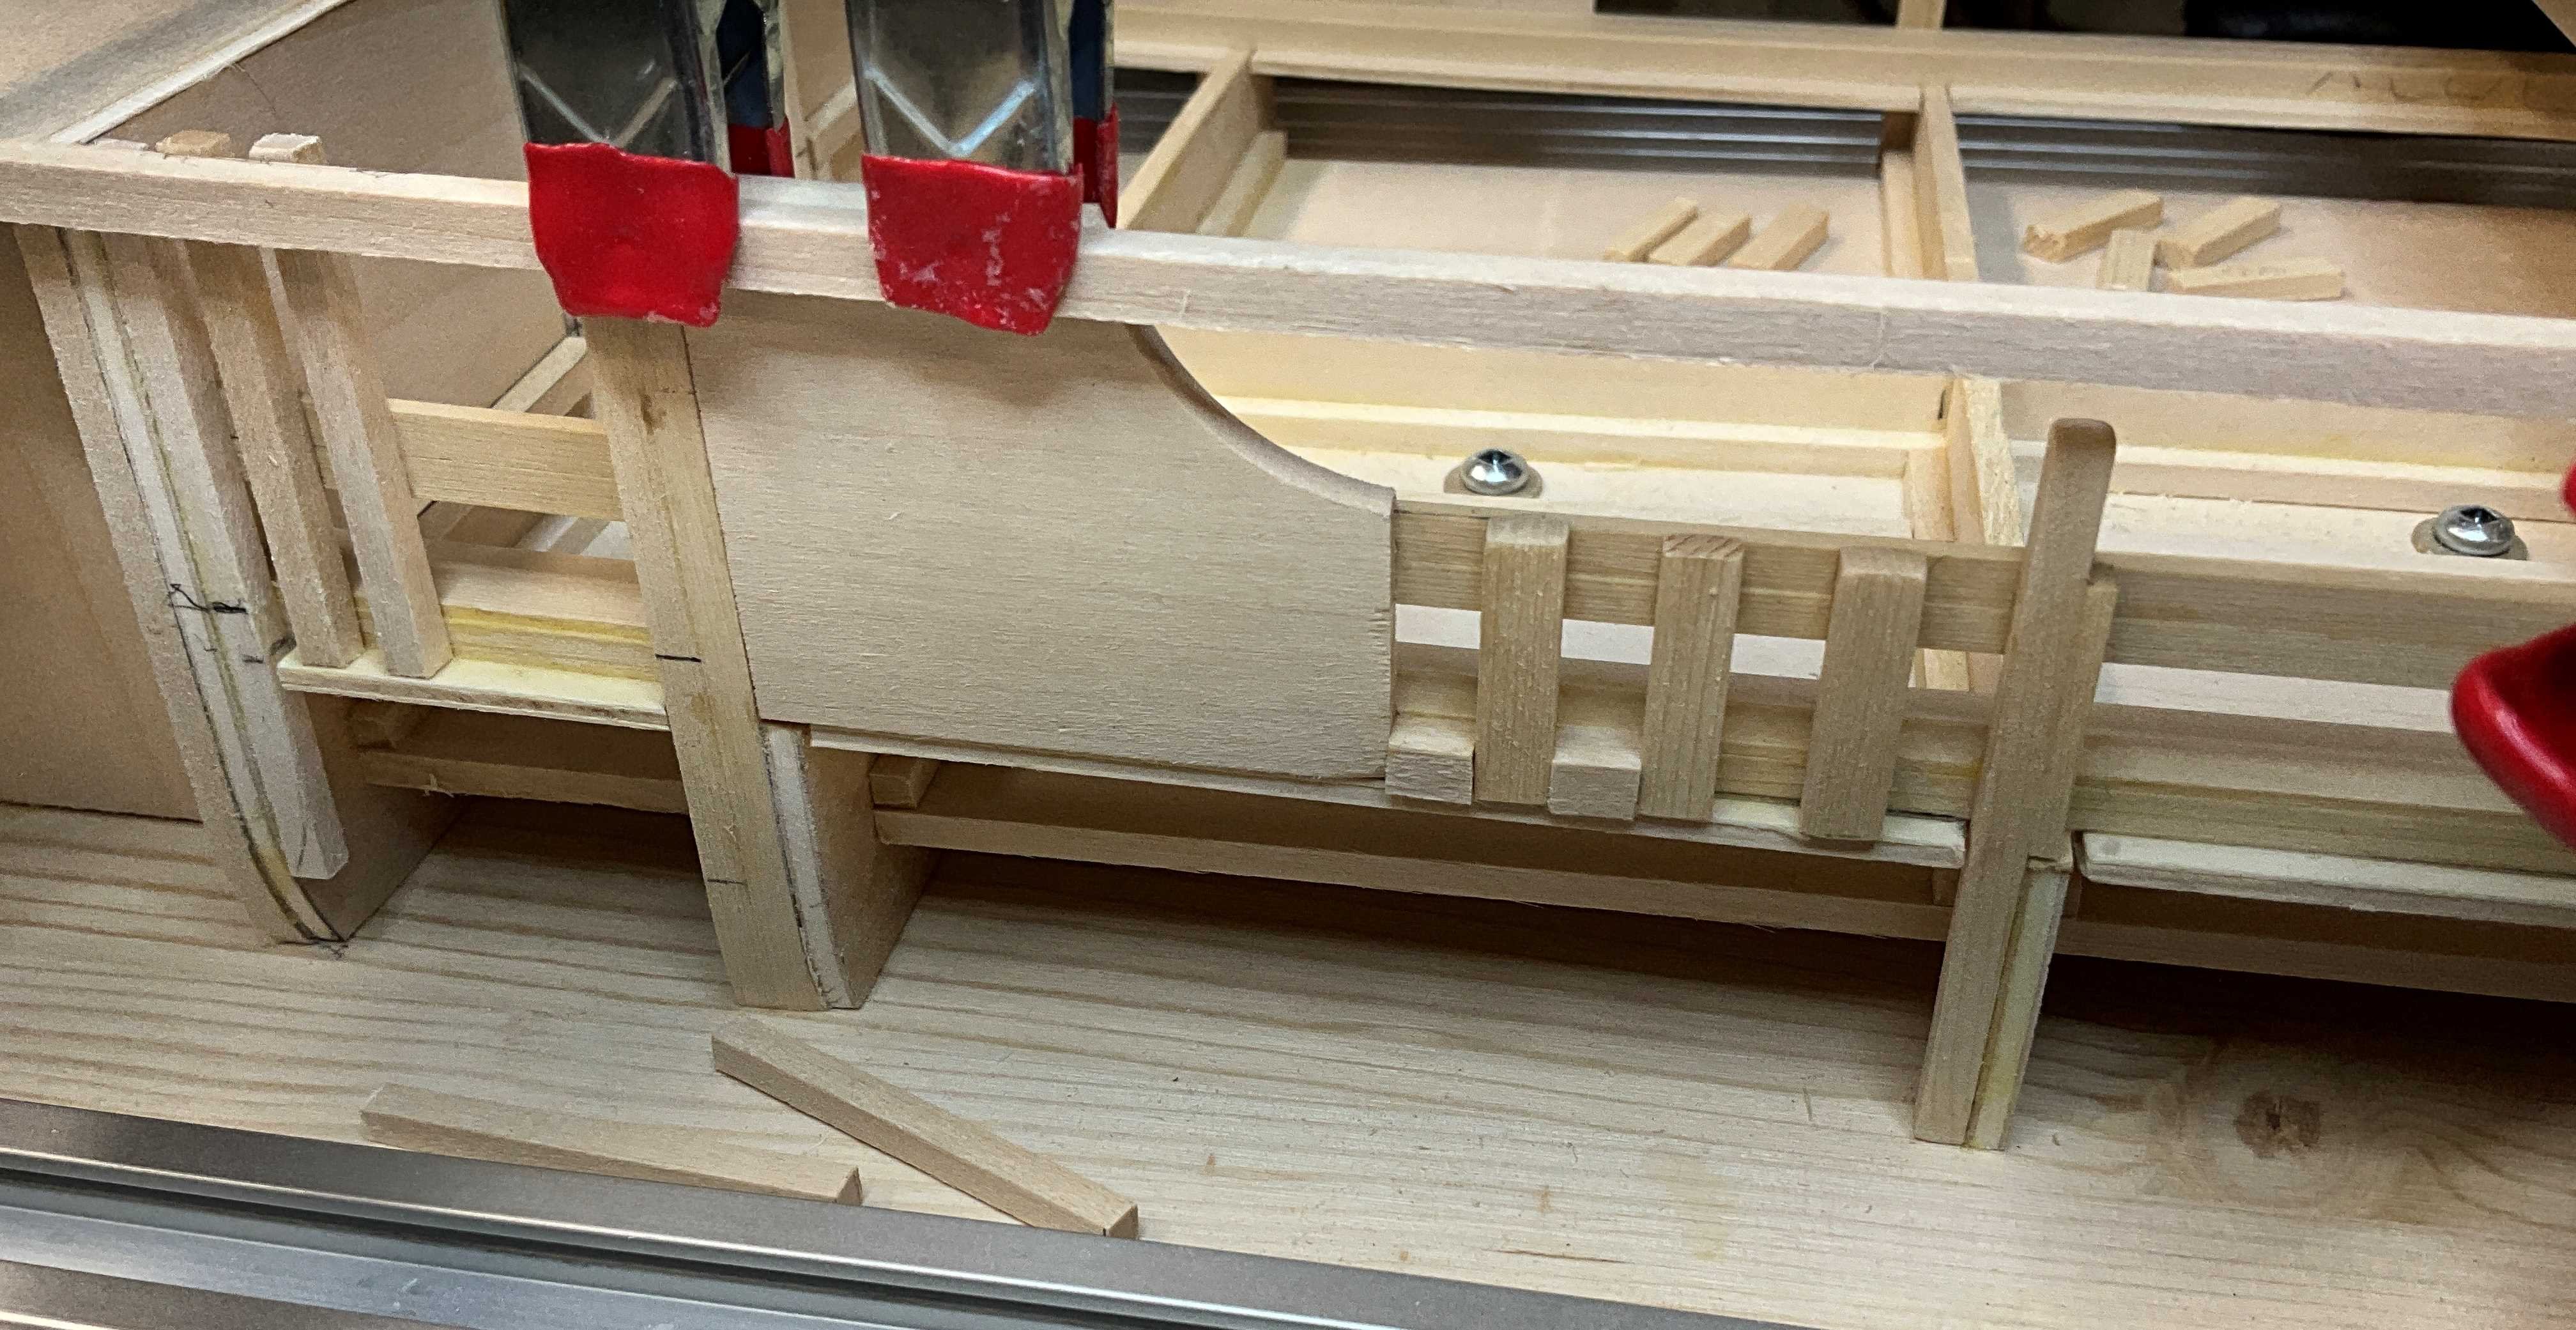
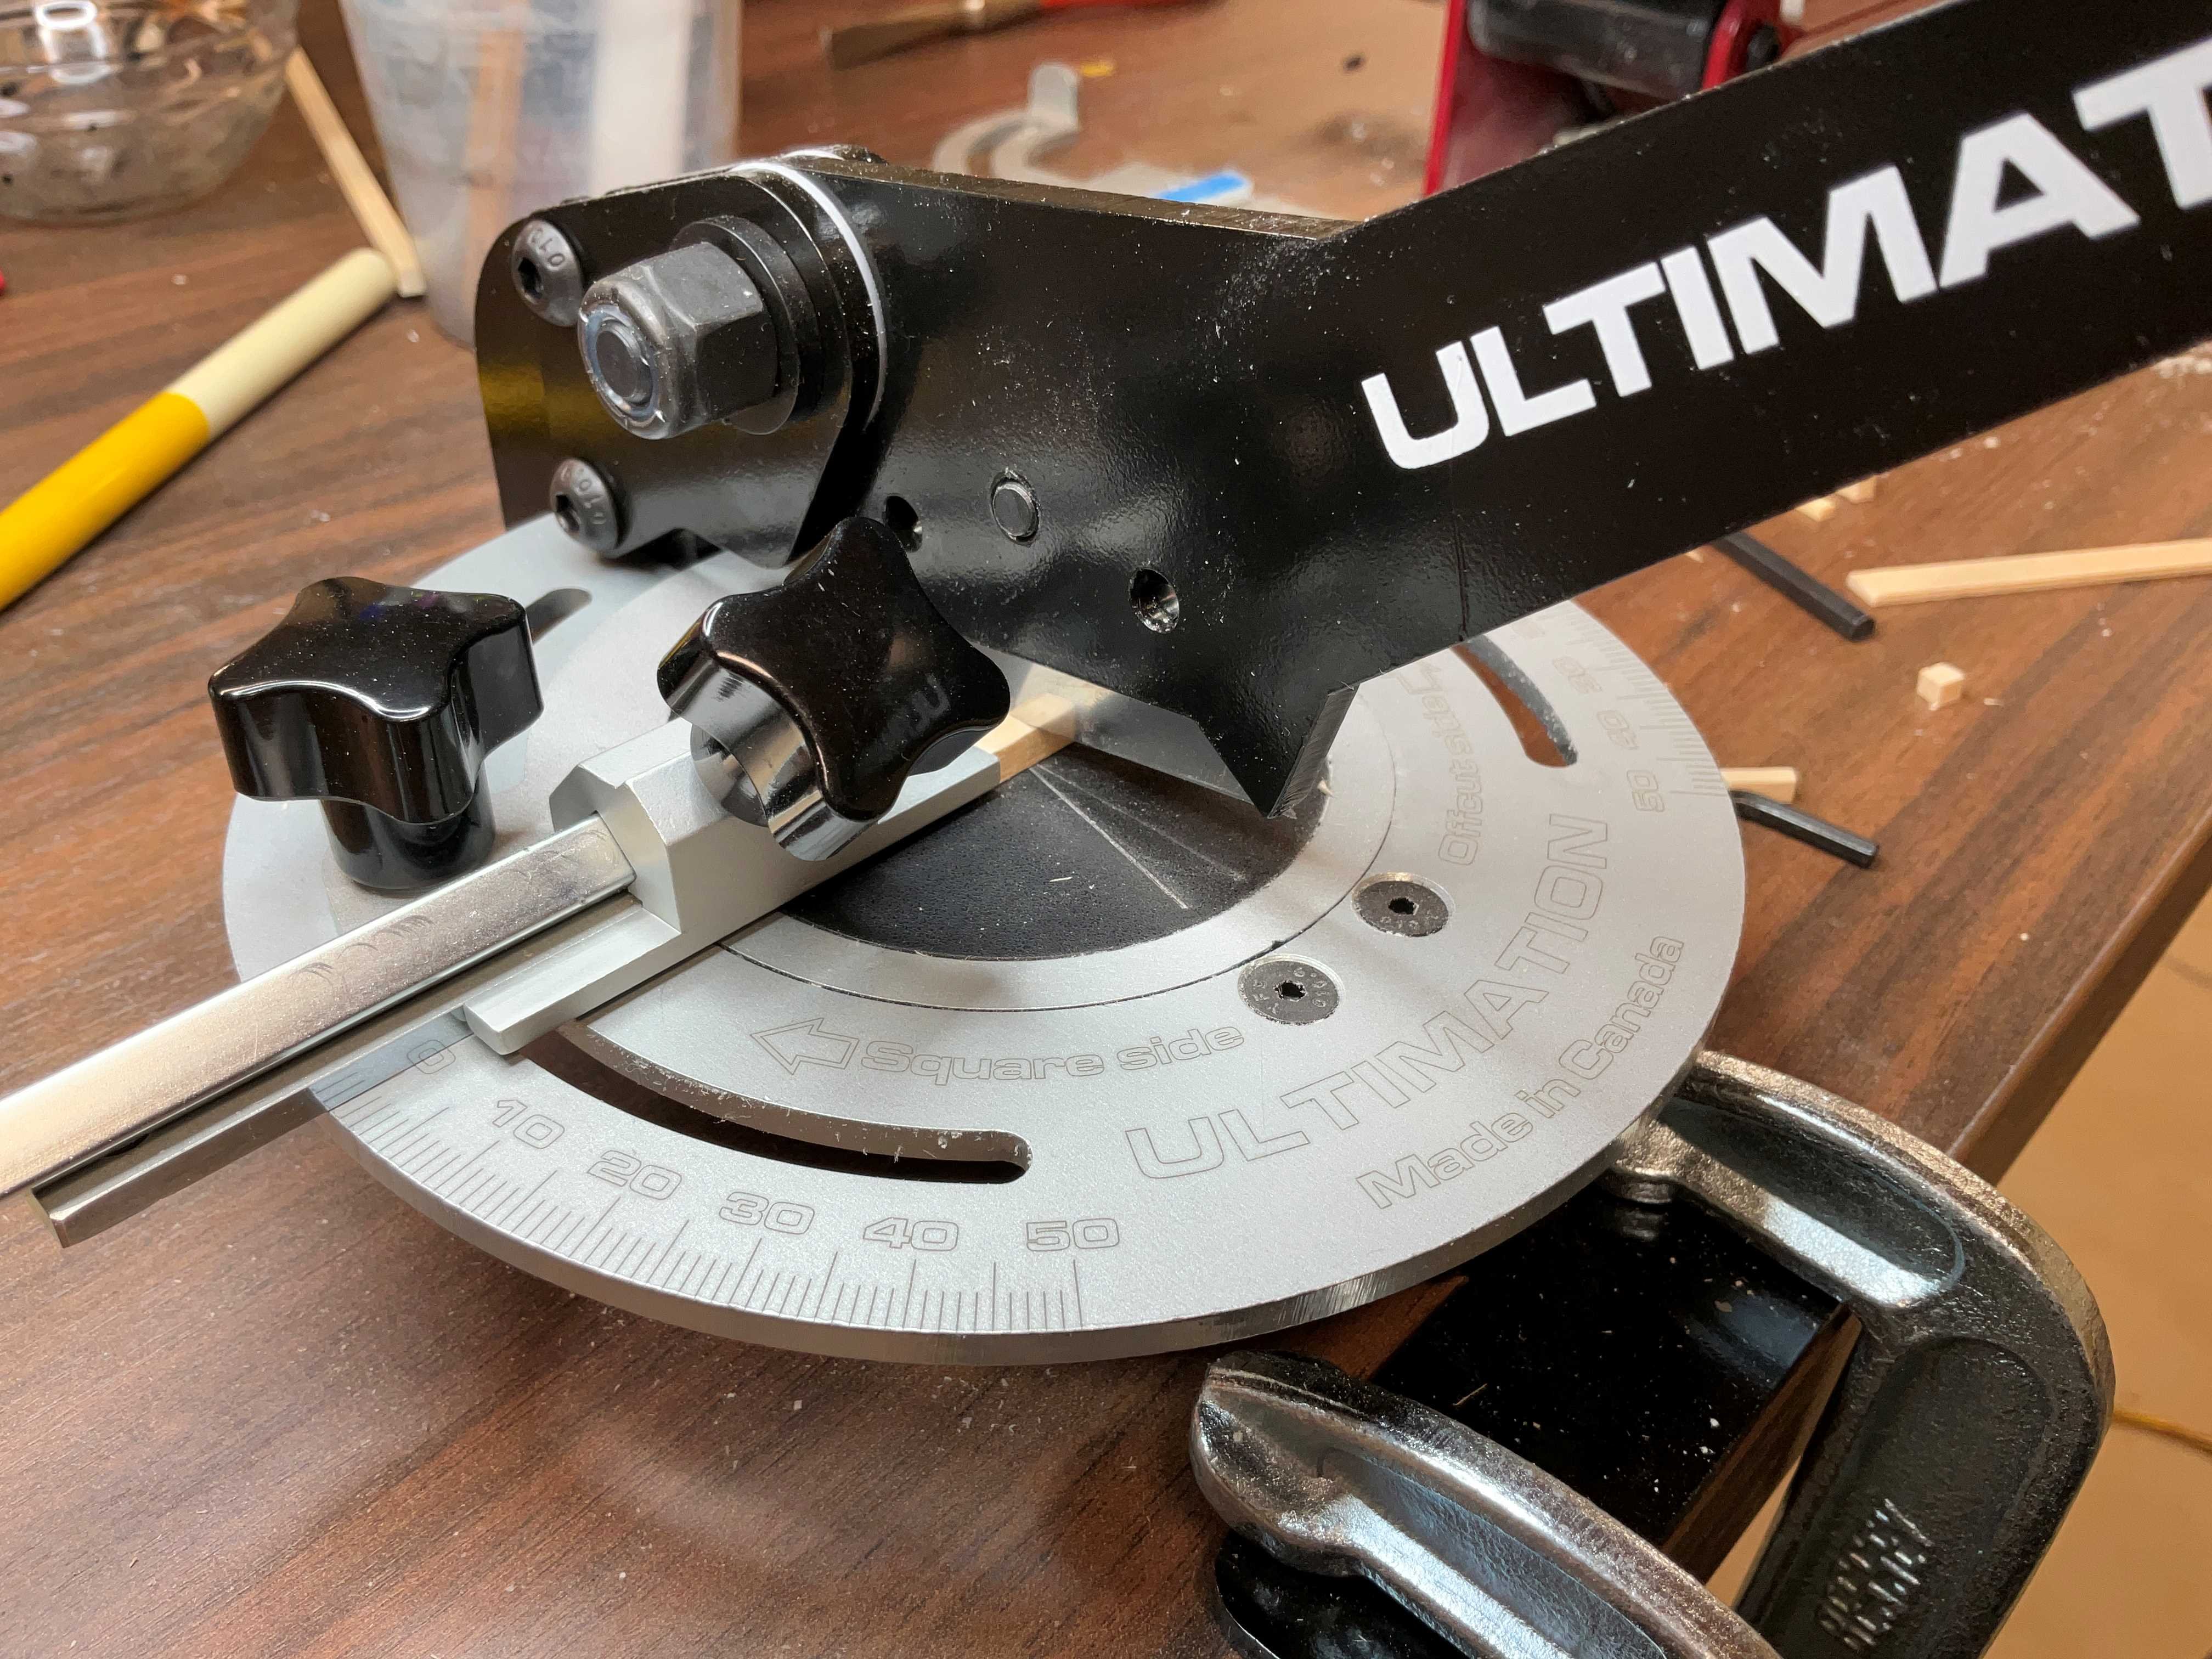
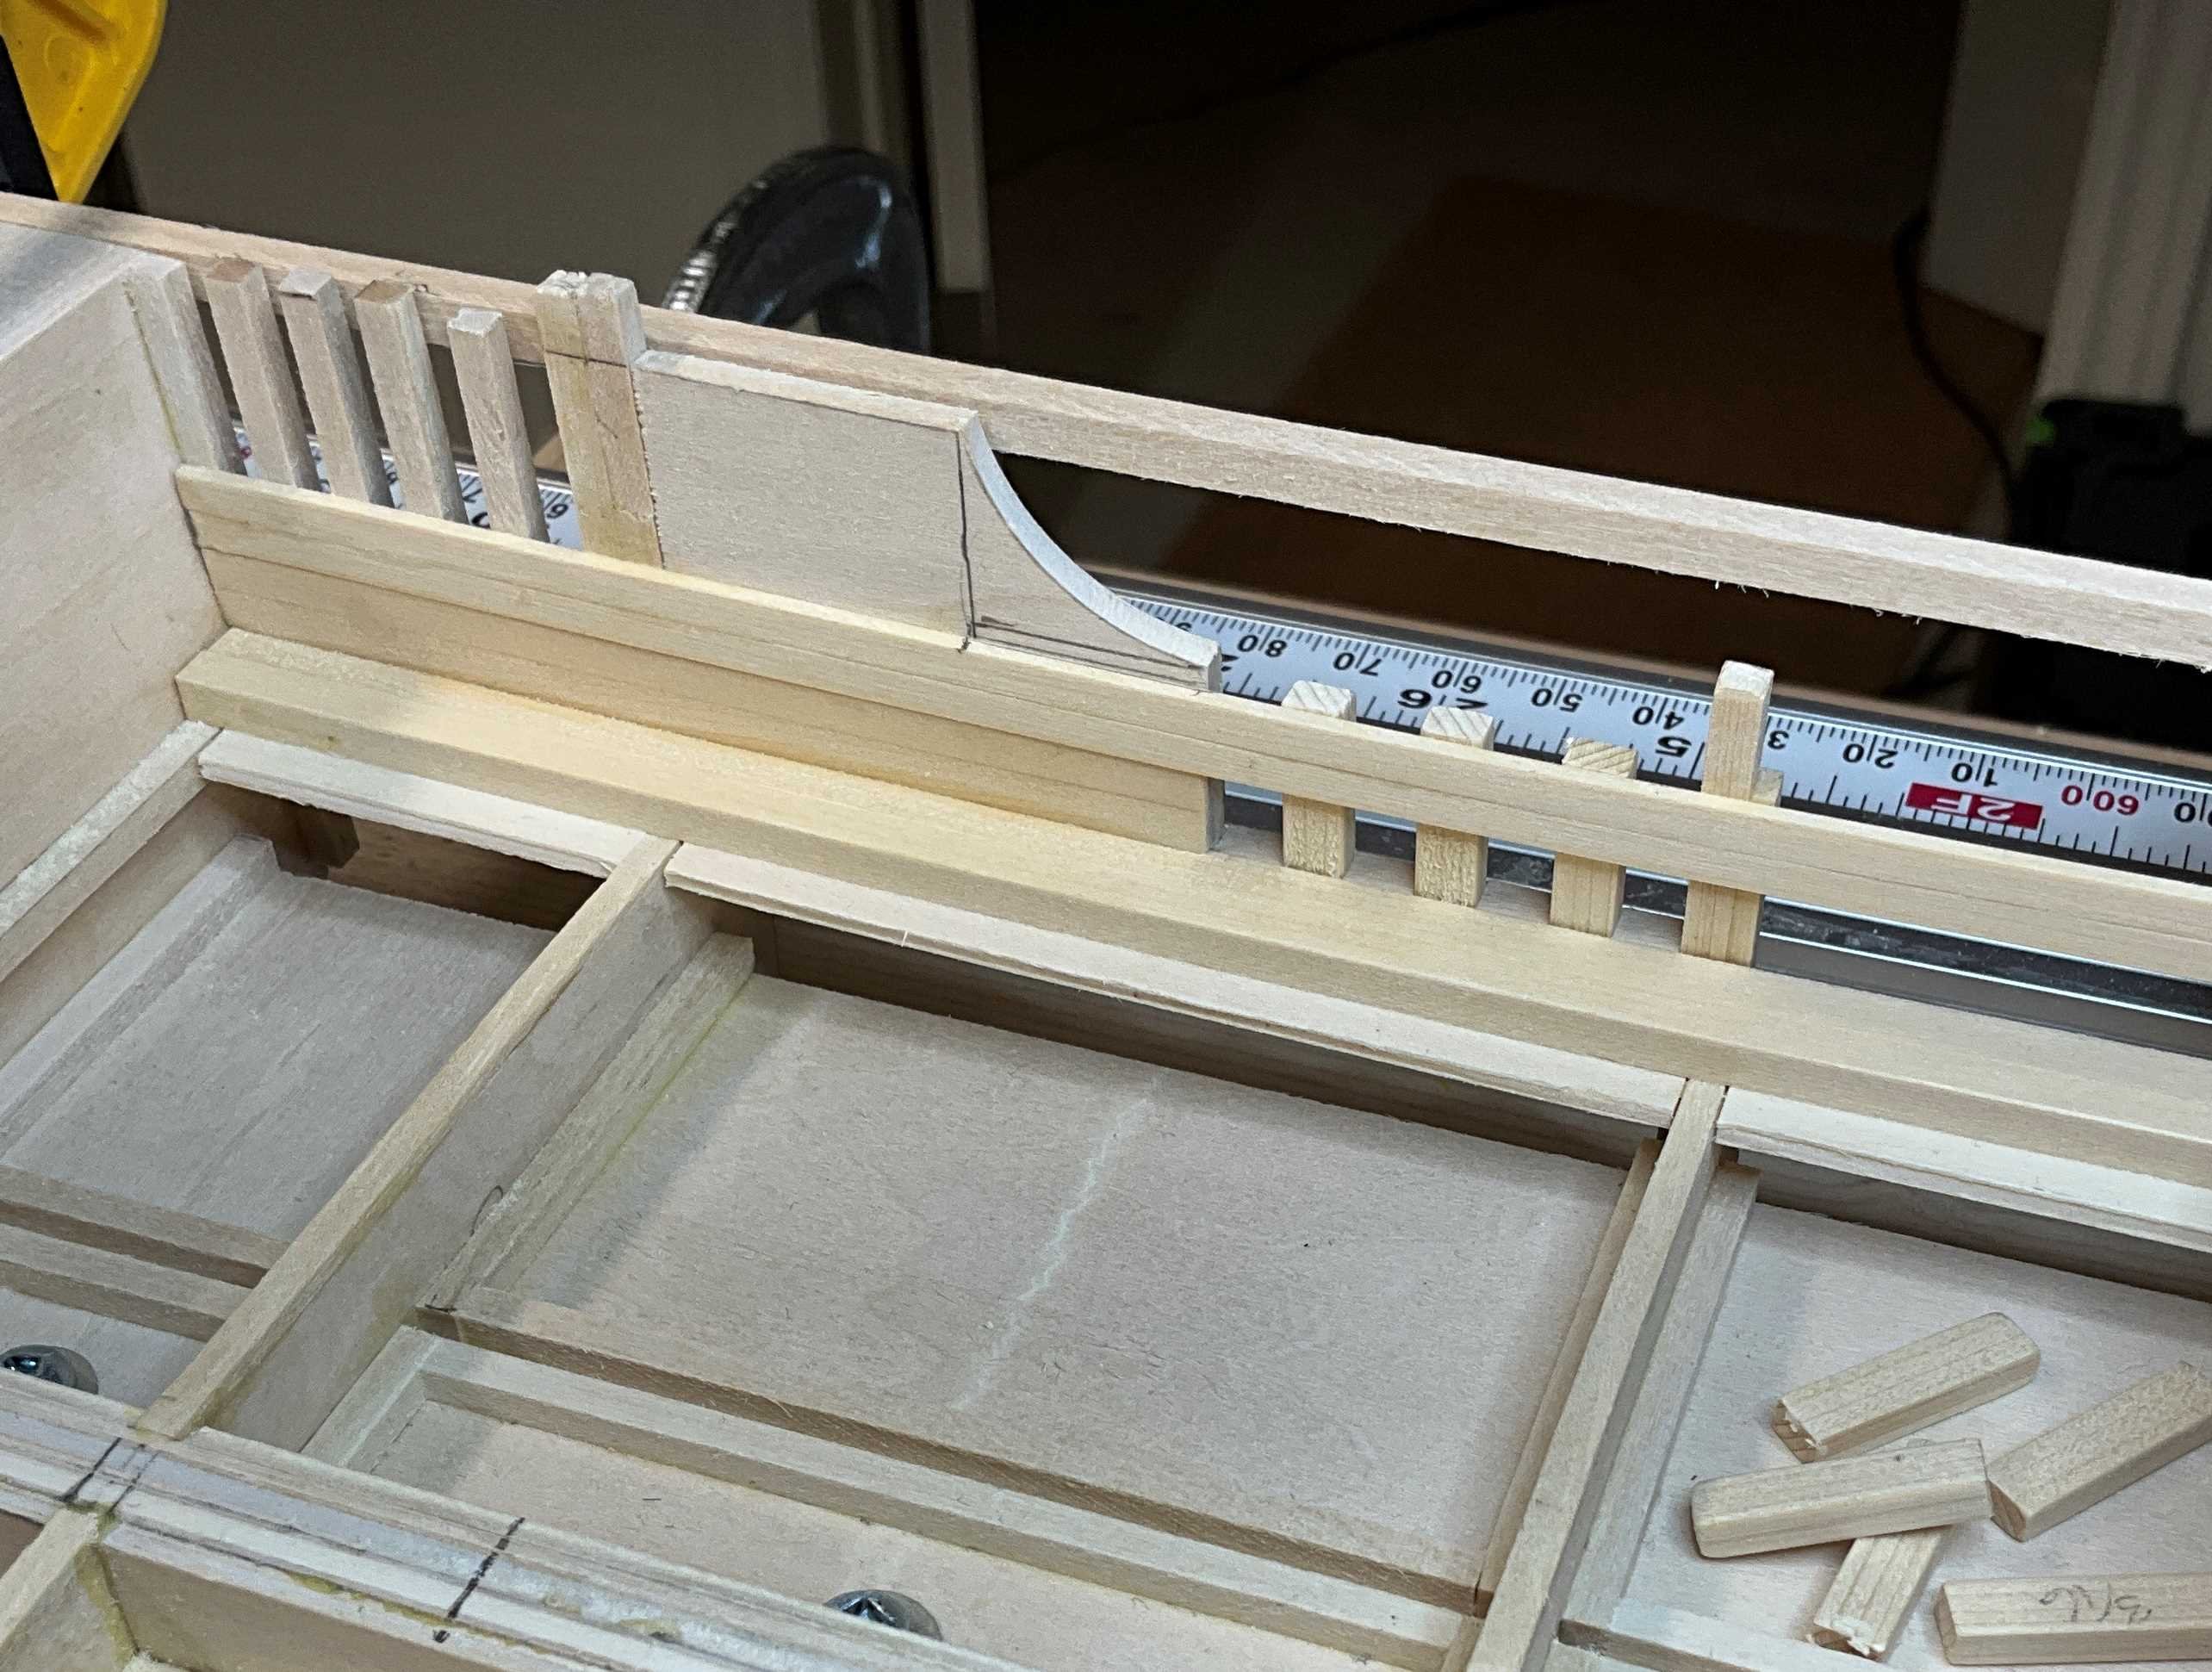
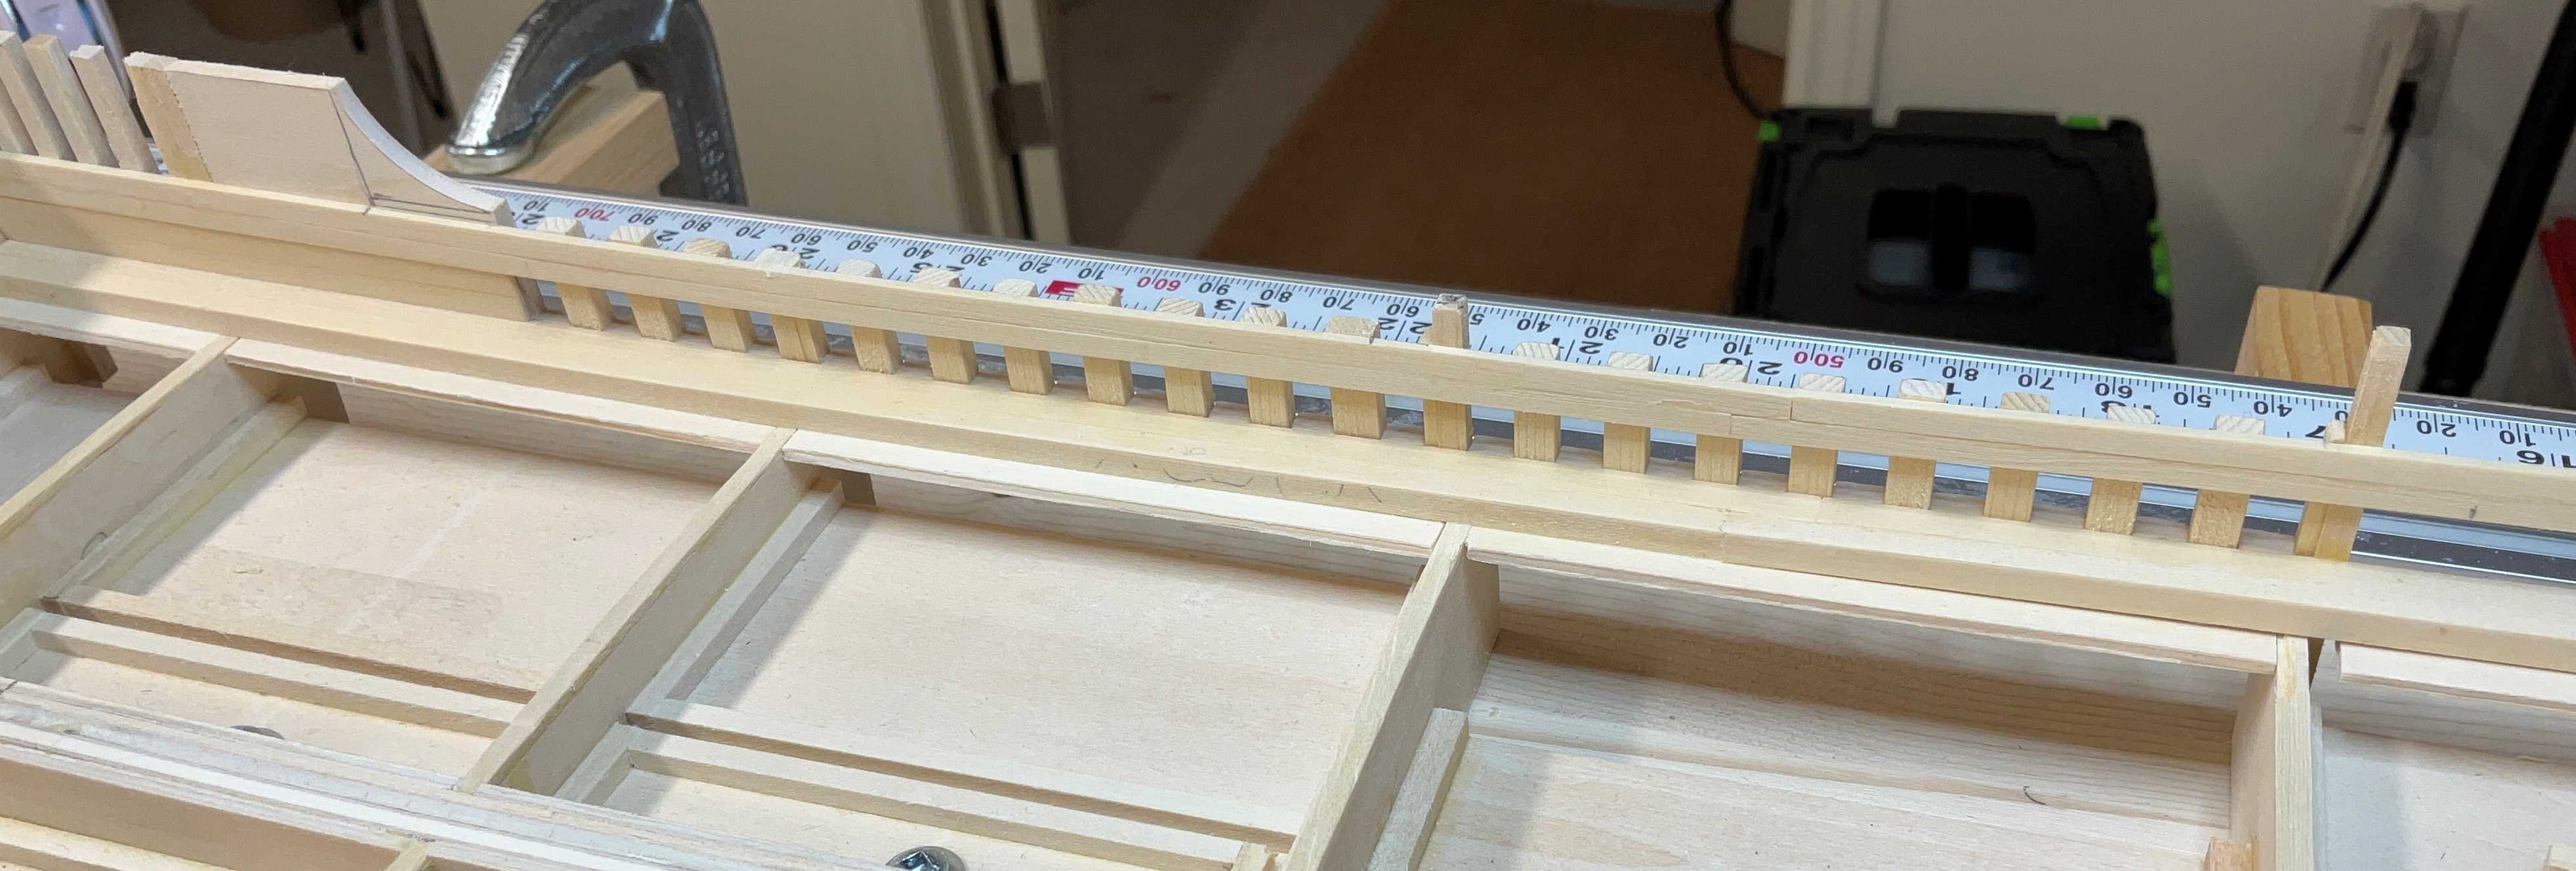
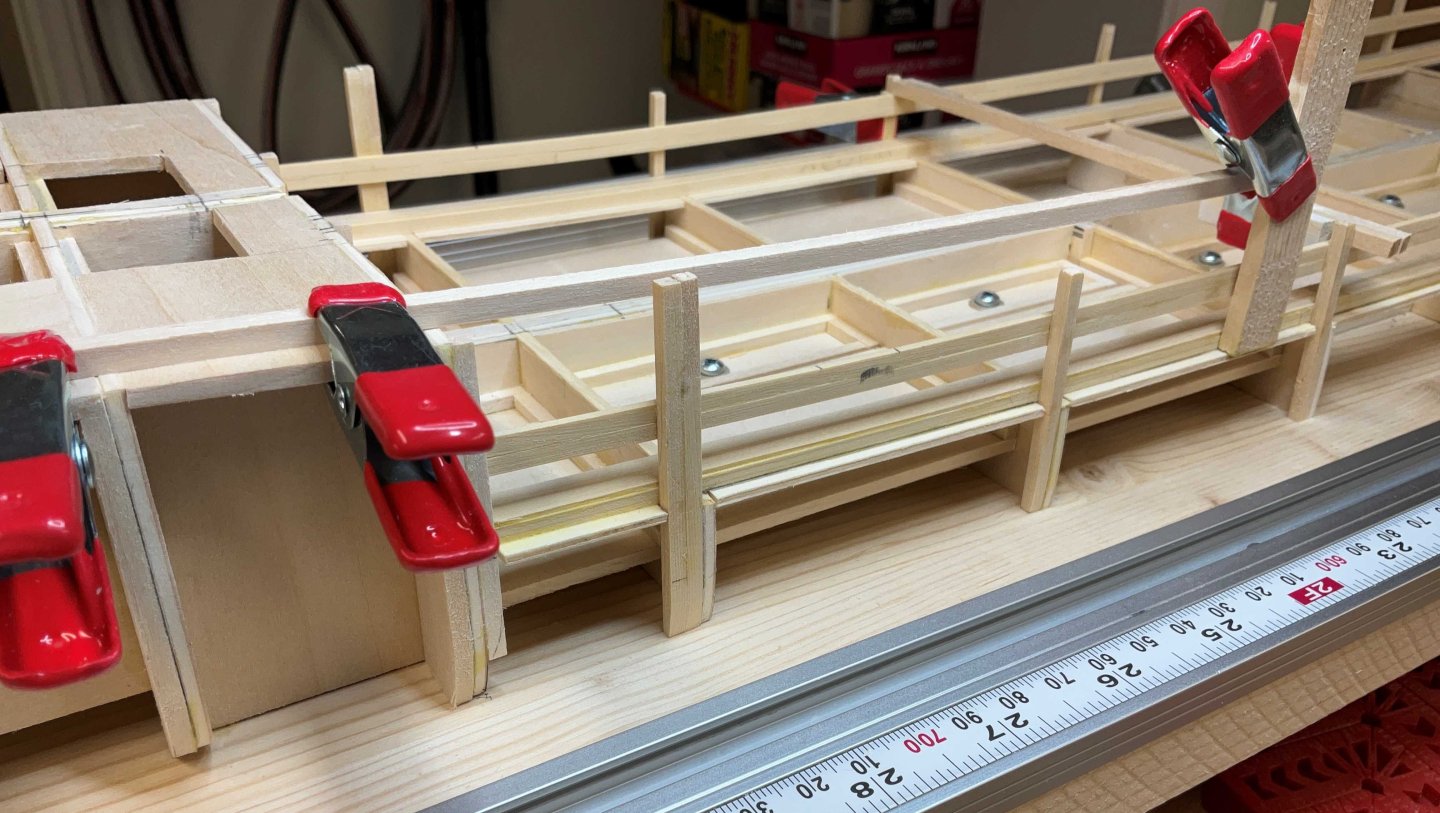
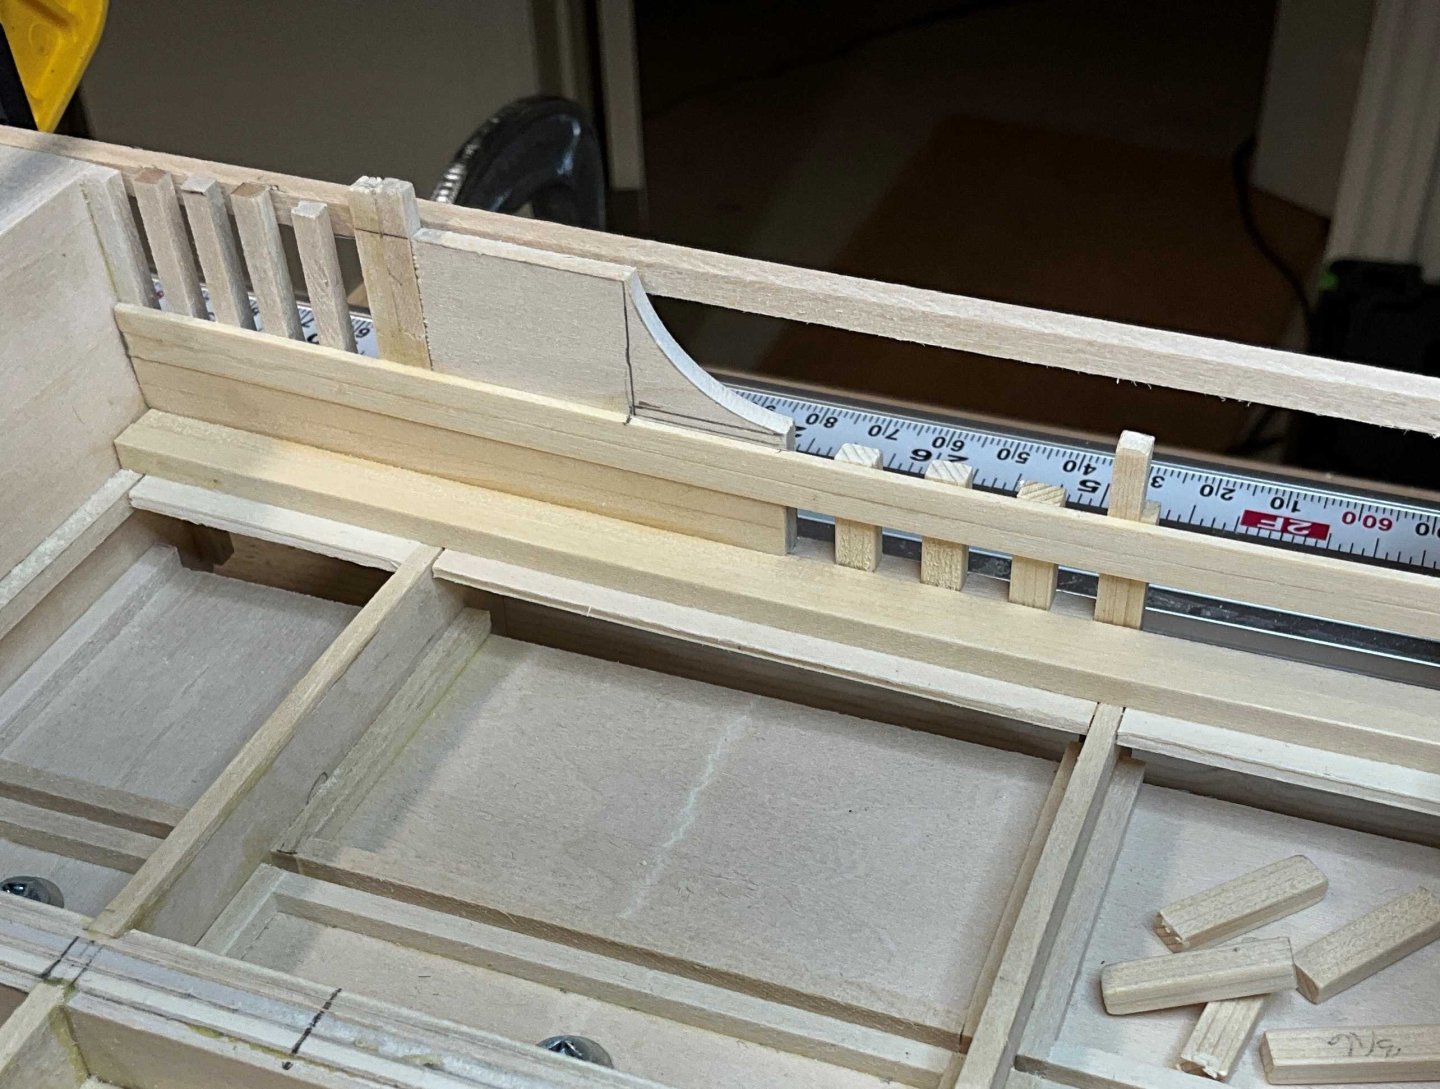
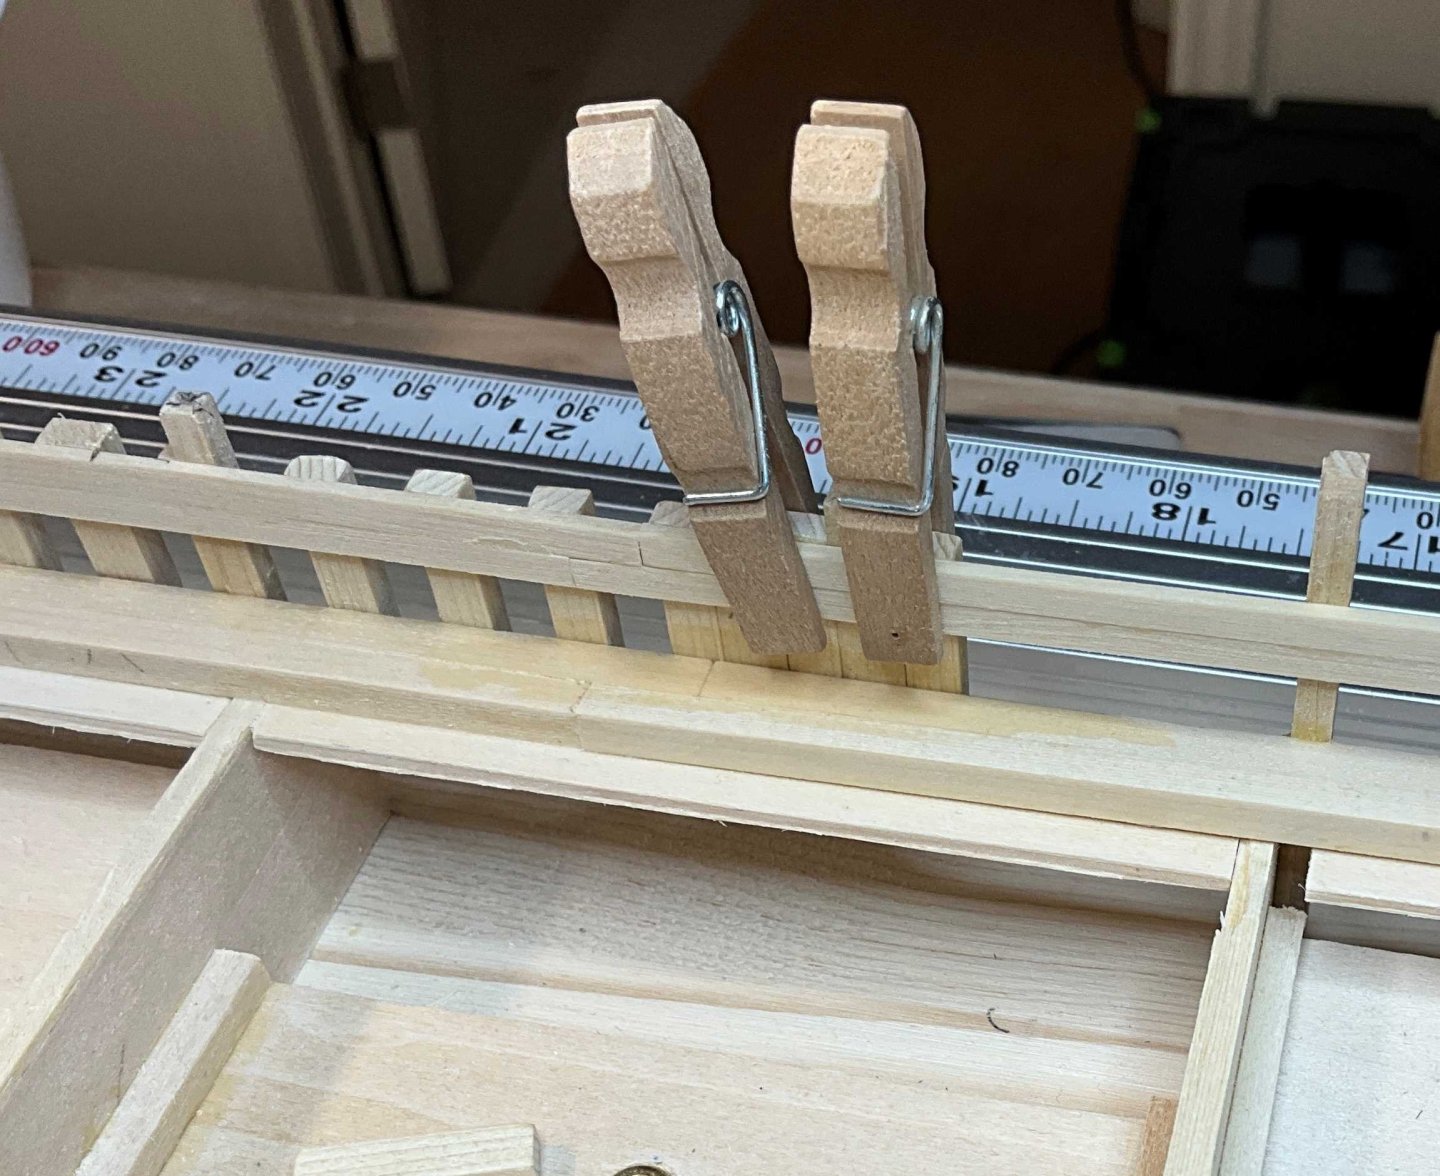
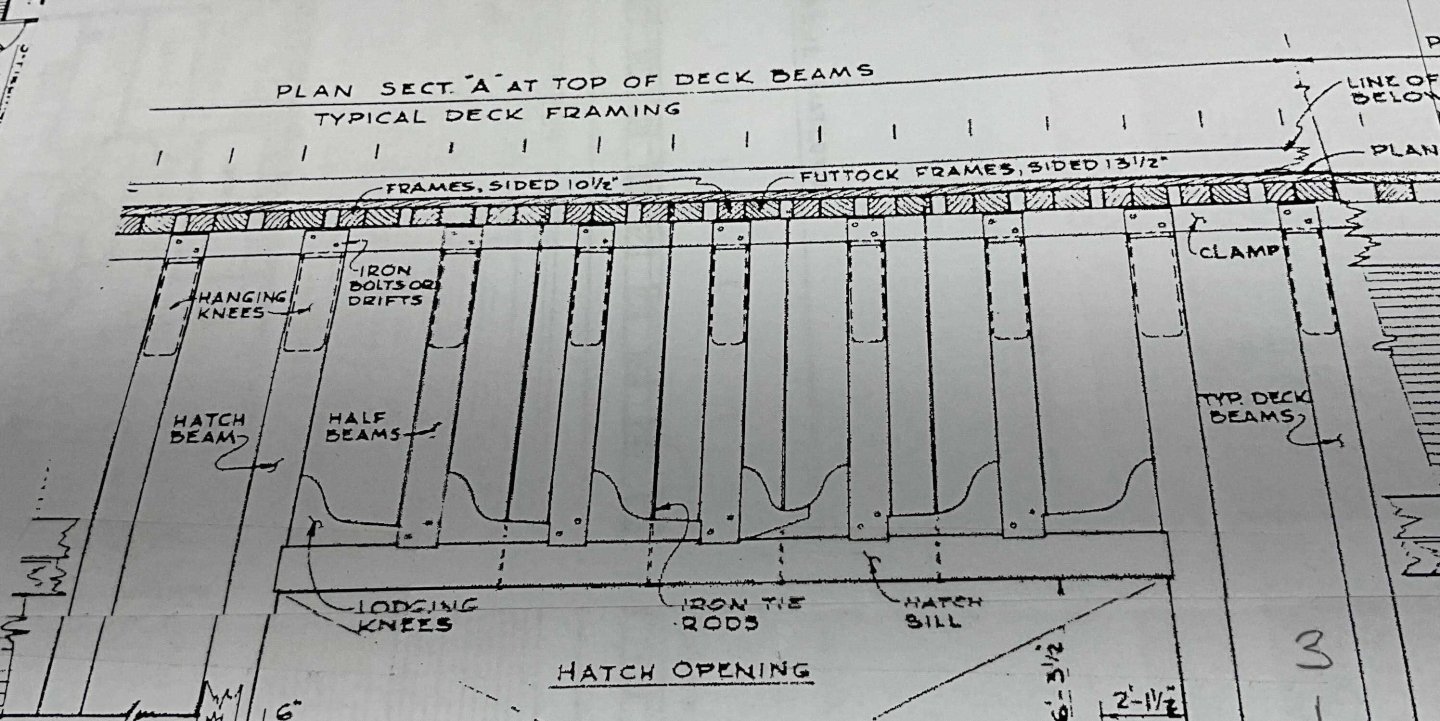
Hey Everyone, wishing you all well. Thank you very much for the Comments and Likes. In the last post I mentioned that I would like to attach the main deck cabin but after some thought decided that it would get in the way of laying out the planking. The planking I chose to start with are the ones that run along the inboard side of the bulwark stanchions as seen in the next photo. They are labelled LONG'LS which I take as being short for longitudinals. Some spacers were made and laid on the waterways and then the long'ls were glued to the bulkhead extensions. The bulwark stanchions that rise up to the cabin deck where laid out to get the shear. I used the same process as when laying out the main deck cabin. A piece of 1/8" basswood sheet was used where the height changes. Next came making a multitude of bulwark stanchions and covering boards. A couple of months ago I decided that this build would require some machine assistance so I bought a Slicer from Ultimation Tools. It really shines when it comes to making these small pieces. Port and starboard stanchions were done simultaneously. I'm now halfway down the main deck. **** The frames that pass either side of the main hatch will be reinforced with an additional frames as seen in the next picture **** ( This statement is not true. The stanchions in that area have the same spacing as the others. The 10 1/2” frames stop at the deck beams and the 13 1/2” frames continue up to become stanchions. The two 10 1/2 “ frames that were installed have been removed. Now back to the slicing.


-
Hi Jacques, that’s a great idea shaping the Billing part into a hook. Good luck with replacing the eyebolt!
- 312 replies
-
- 4
-

-

-
- Chile
- Latin America
- (and 6 more)
-
Hi Jacques, your Chilota is looking amazing. If you look in Chapter 9 of Chuck’s Cheerful monograph, it shows filing the upper portion of the chainplate to make it thinner in order to form a hook. Perhaps you could try something like that.
- 312 replies
-
- 3
-
-
-
- Chile
- Latin America
- (and 6 more)
-
Mark, congratulations on completing this fine model. Looking forward to your next set of photos!
-
Hi Mike, thank you for your comment. It is greatly appreciated!
- 201 replies
-
- 3
-
-
- Oyster Sharpie
- first scratch build
- (and 1 more)
-
Hi Joe, I agree that operating everything from the cockpit would be quite a challenge. The USVMYG is the US Vintage Model Yacht Group. I believe they are mostly about pond yachting. They have a very nice website ( usvmyg.org ) . Pond yachts look like so much fun! There are also some higher resolution photos of Chapelle’s drawing out there. If you haven’t seen them go to villagecraftsmen.com. In the banner at the top of the page click on “Journal “. The next page has a menu on the right hand side. Click on 2013 and then September. There are three photos in the North Carolina folder. Sorry but I’m not very good at posting links. It is a great site to browse through with tons of articles on local history .
- 201 replies
-
- 2
-
-
- Oyster Sharpie
- first scratch build
- (and 1 more)
-
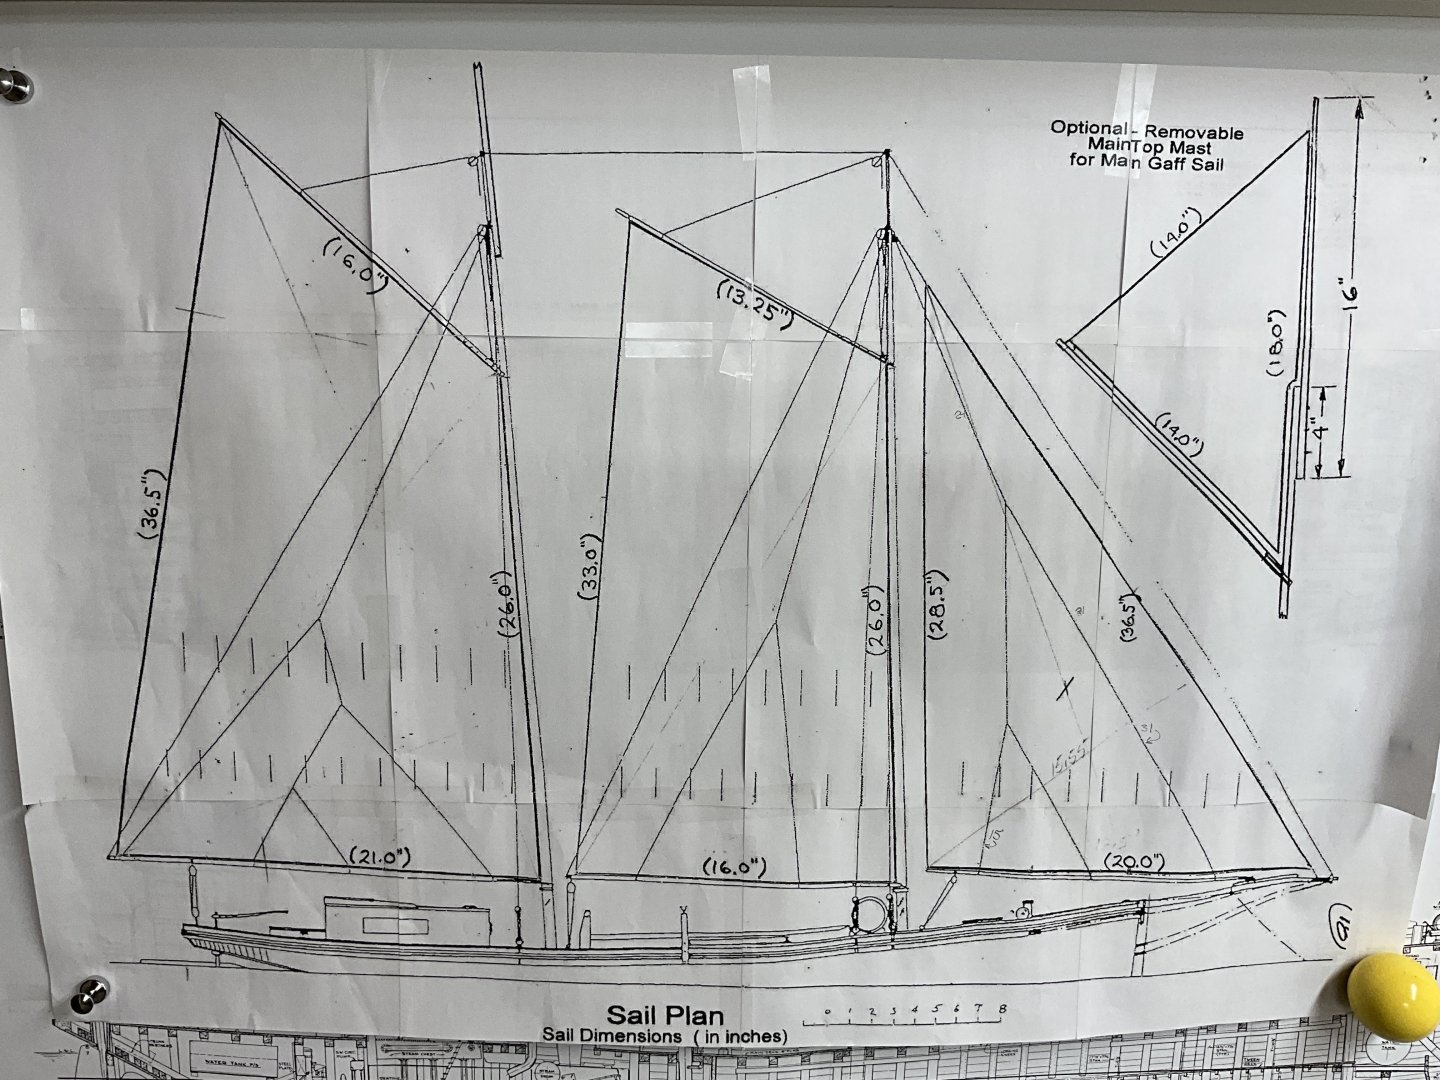
Hi @Thistle17, I just went through the plans that I got from USVMYG. This is the rigging diagram for their 50” Sharpie. Another piece to the puzzle.
- 201 replies
-
- 4
-
-
- Oyster Sharpie
- first scratch build
- (and 1 more)
-
Hi Joe, nice to hear from you. I looked at those pictures of the Sharpies that you posted for a long long time. They were very helpful. For the most part I used the rigging diagram from the Glad Tidings and made a lot of assumptions as to how this boat was rigged. Too many lines and not enough places to attach them to.😀
- 201 replies
-
- 3
-
-
- Oyster Sharpie
- first scratch build
- (and 1 more)
-
“And your address is? ......... no way, Paul. She's way too nice a model to be adopted out” Its been finished for a while now and no one has met the requirements yet so I will probably have to get going on making a case for it.
-
The first visitor I get that looks at it more than once is taking it home with them. 🙂 Thank you Keith, I really appreciate your comment !
-
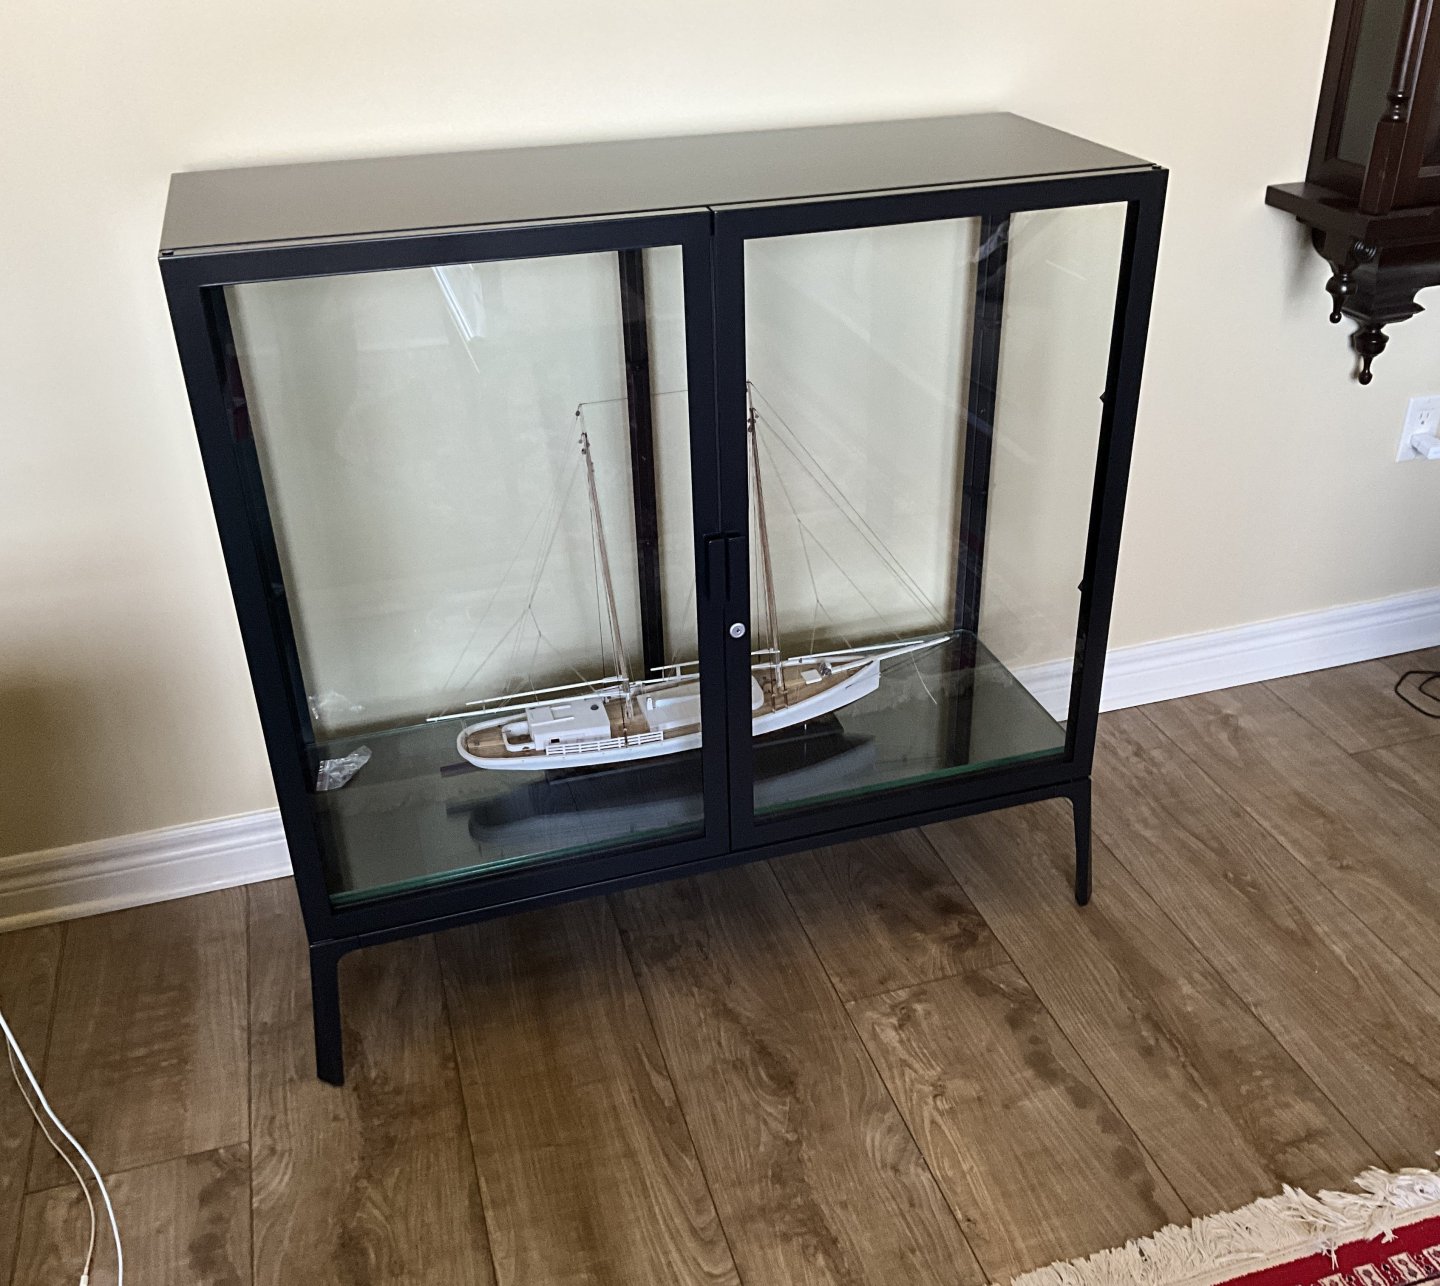
Hi Keith, I bought this cabinet ( Milsbo ) from IKEA just before starting Wapama. There are two glass panels in the back separated by a shelf support. I plan on replacing them with one big sheet of acrylic and have the doors at the back against the wall. It is about 40” wide and 39” high from the floor and 14” deep. I just looked it up to see how much it costs but it wasn’t listed. I paid just over 200 CAD for it. Around here you can’t even buy the glass for that. Right now it is acting as a storage area for the Sharpie.
-
Thank you John, I hope you had a nice getaway.
-
Thank you Jacques. When you stand beside it , it doesn’t seem as big as in the photos. I think it’s one saving grace is that it doesn’t have a bowsprit 😀 Thank you Gary, I find myself more looking at this model than actually working on it
-
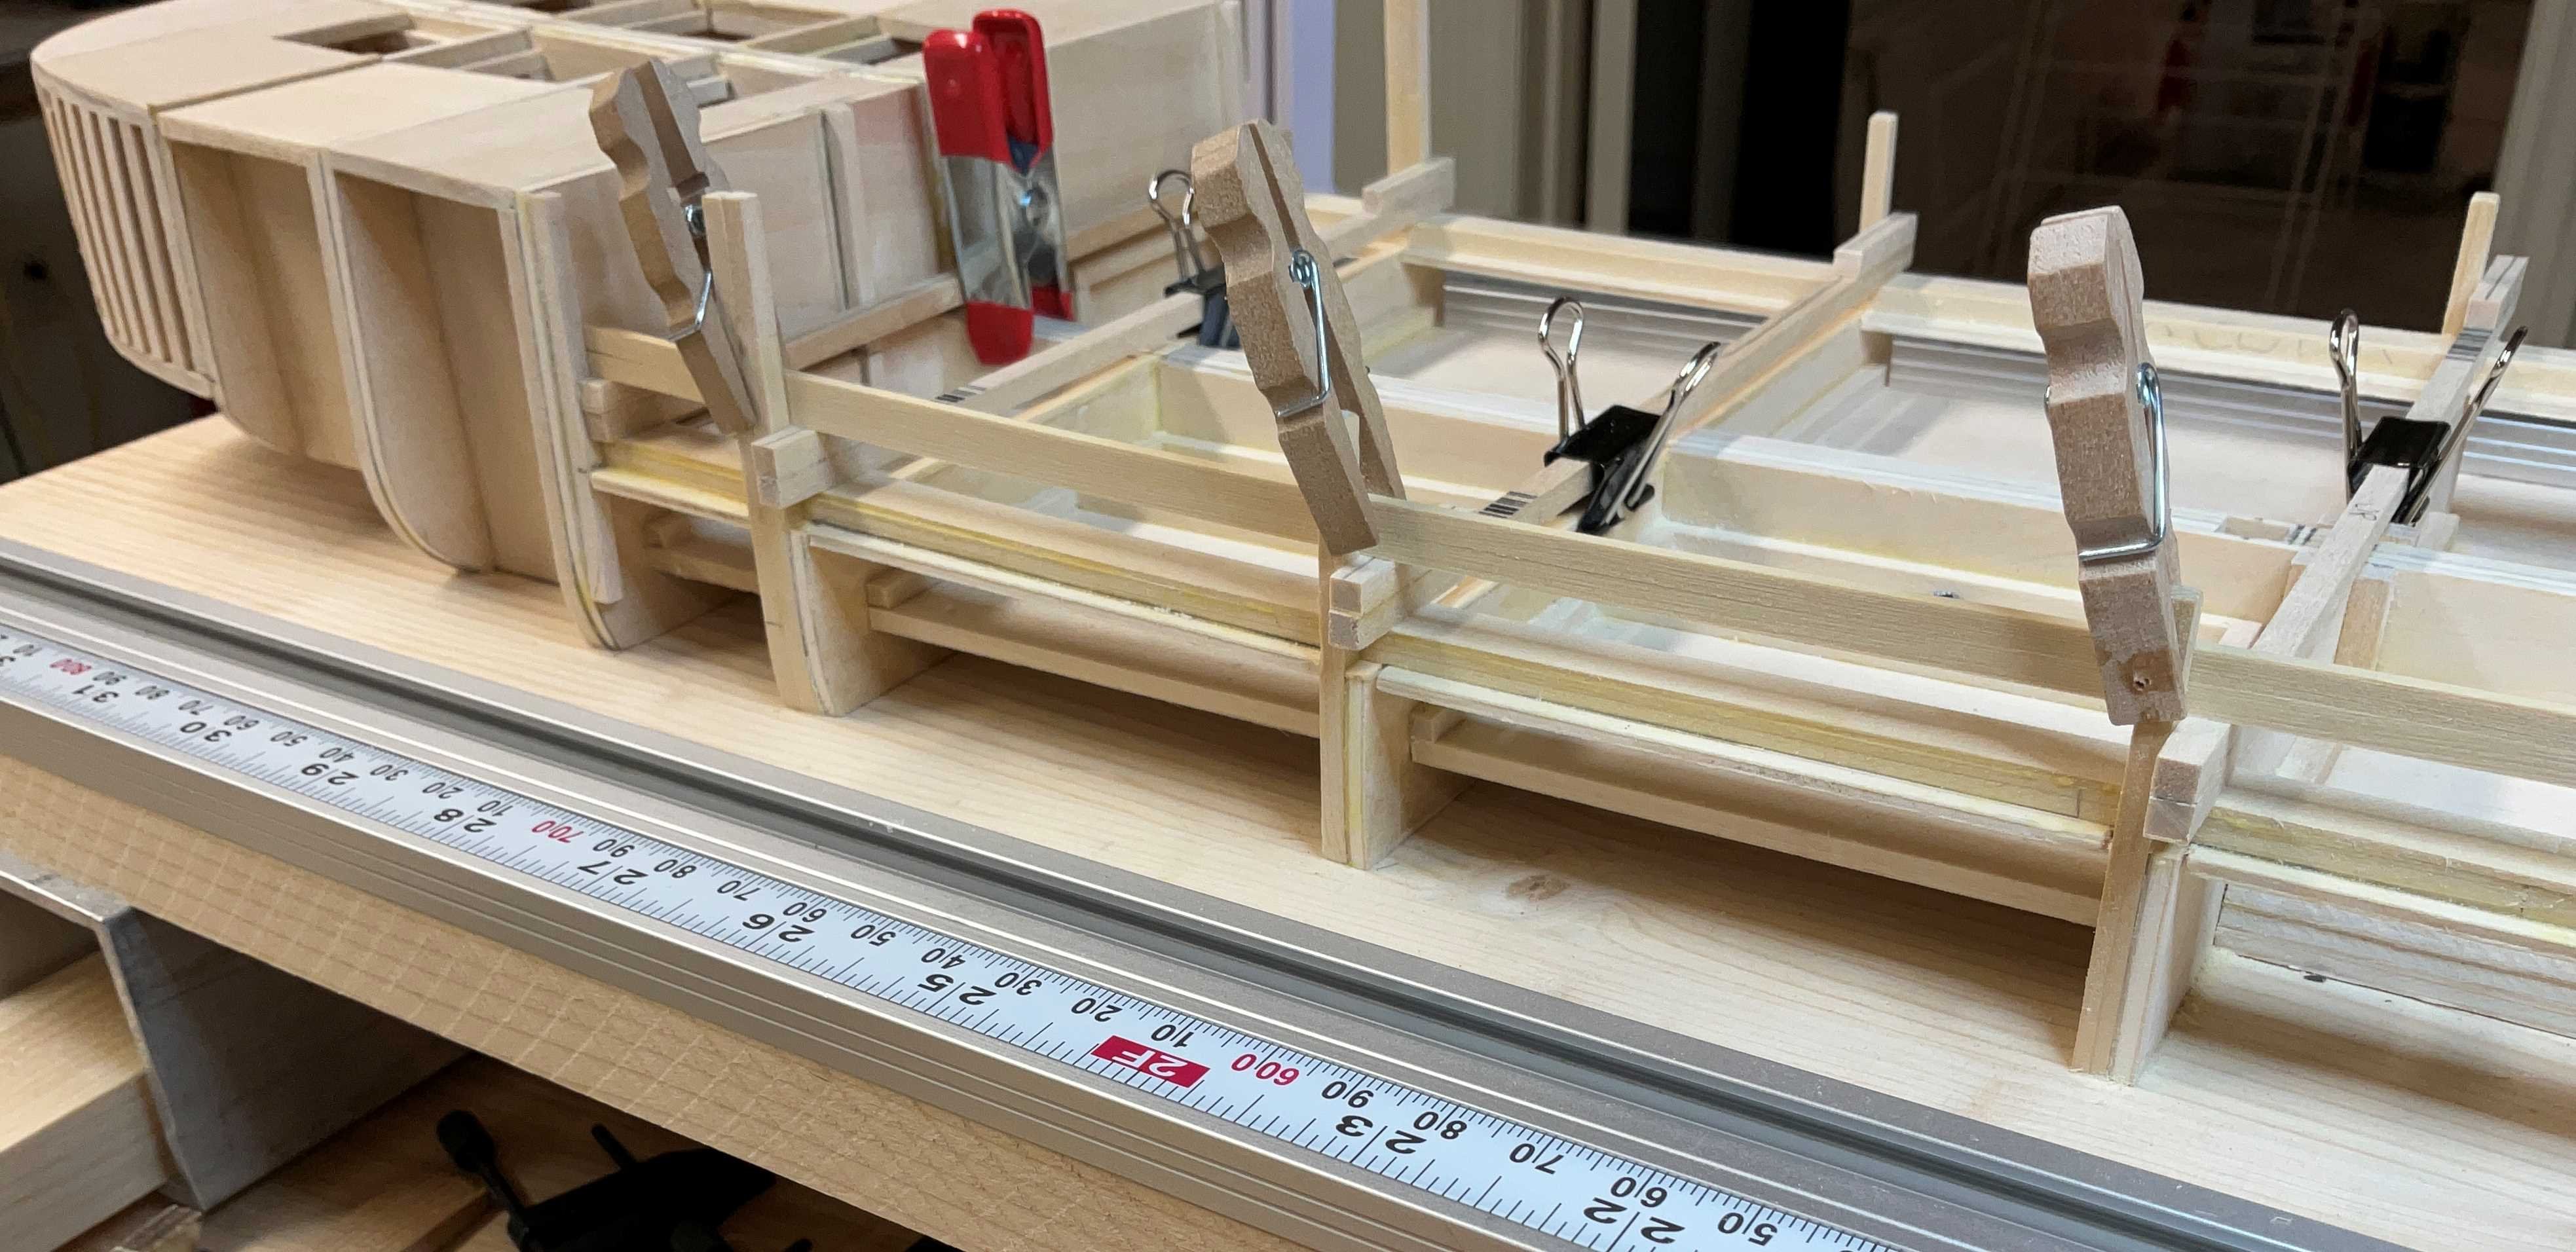
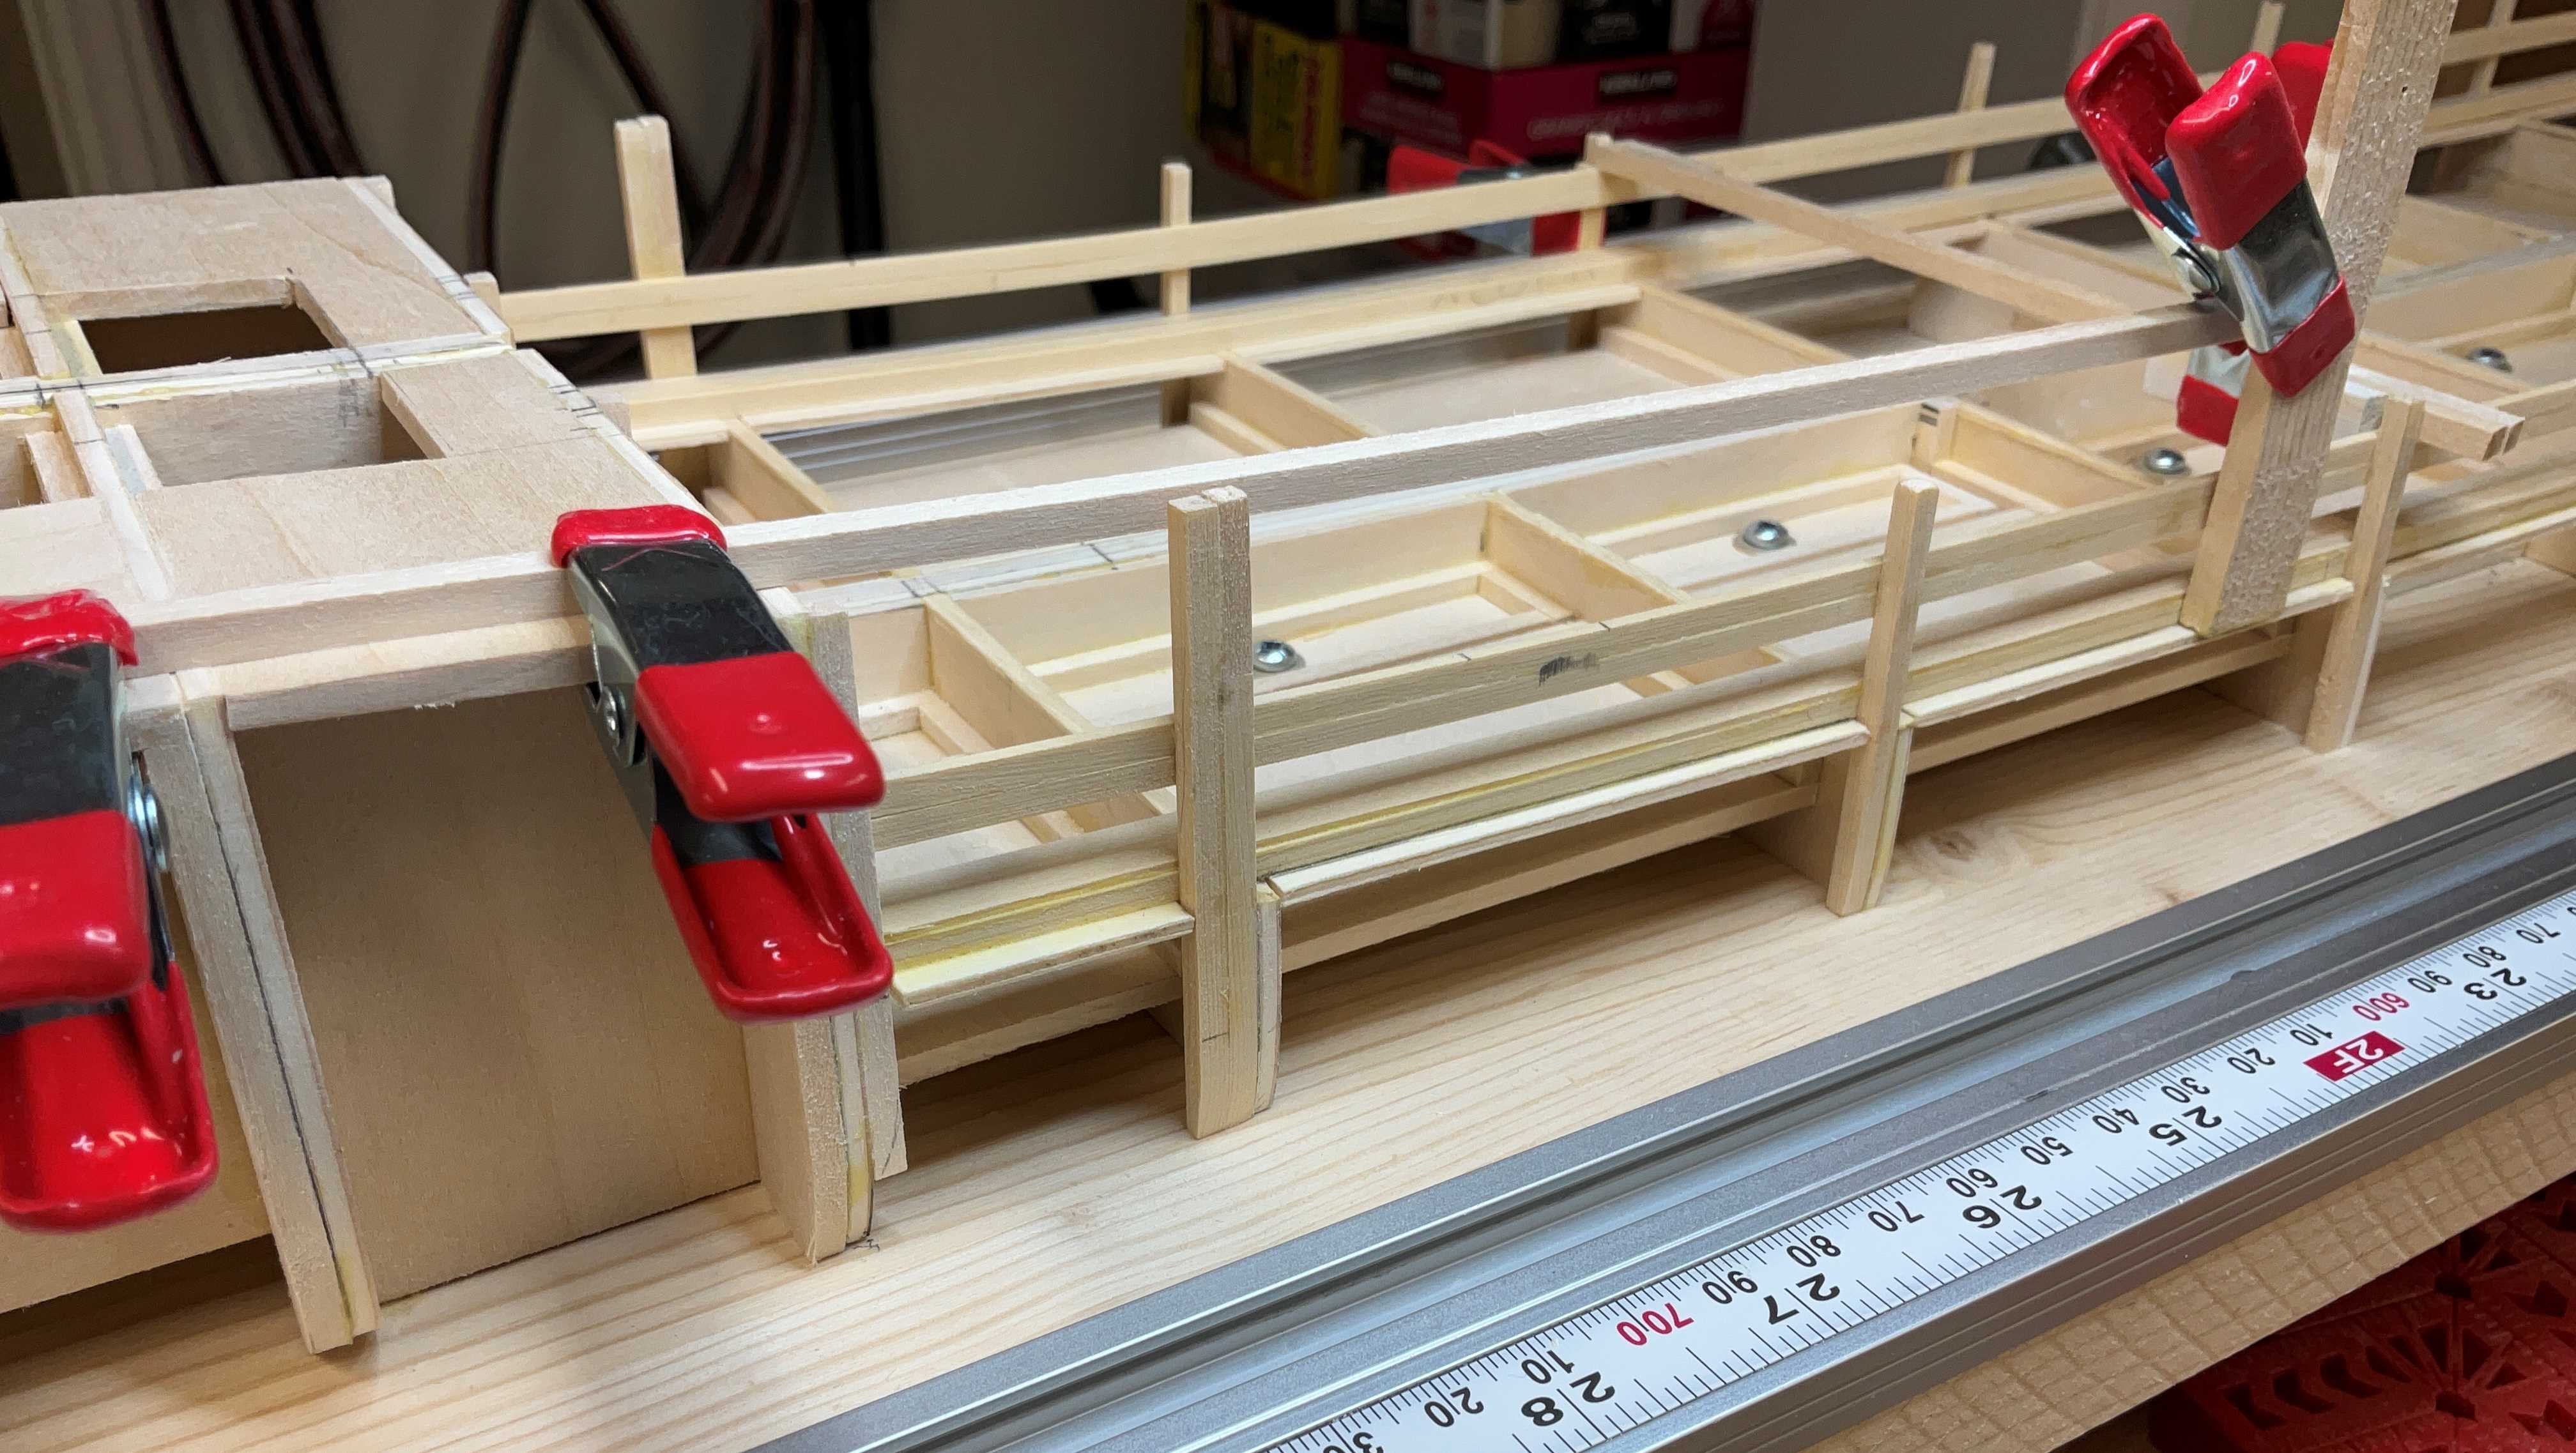
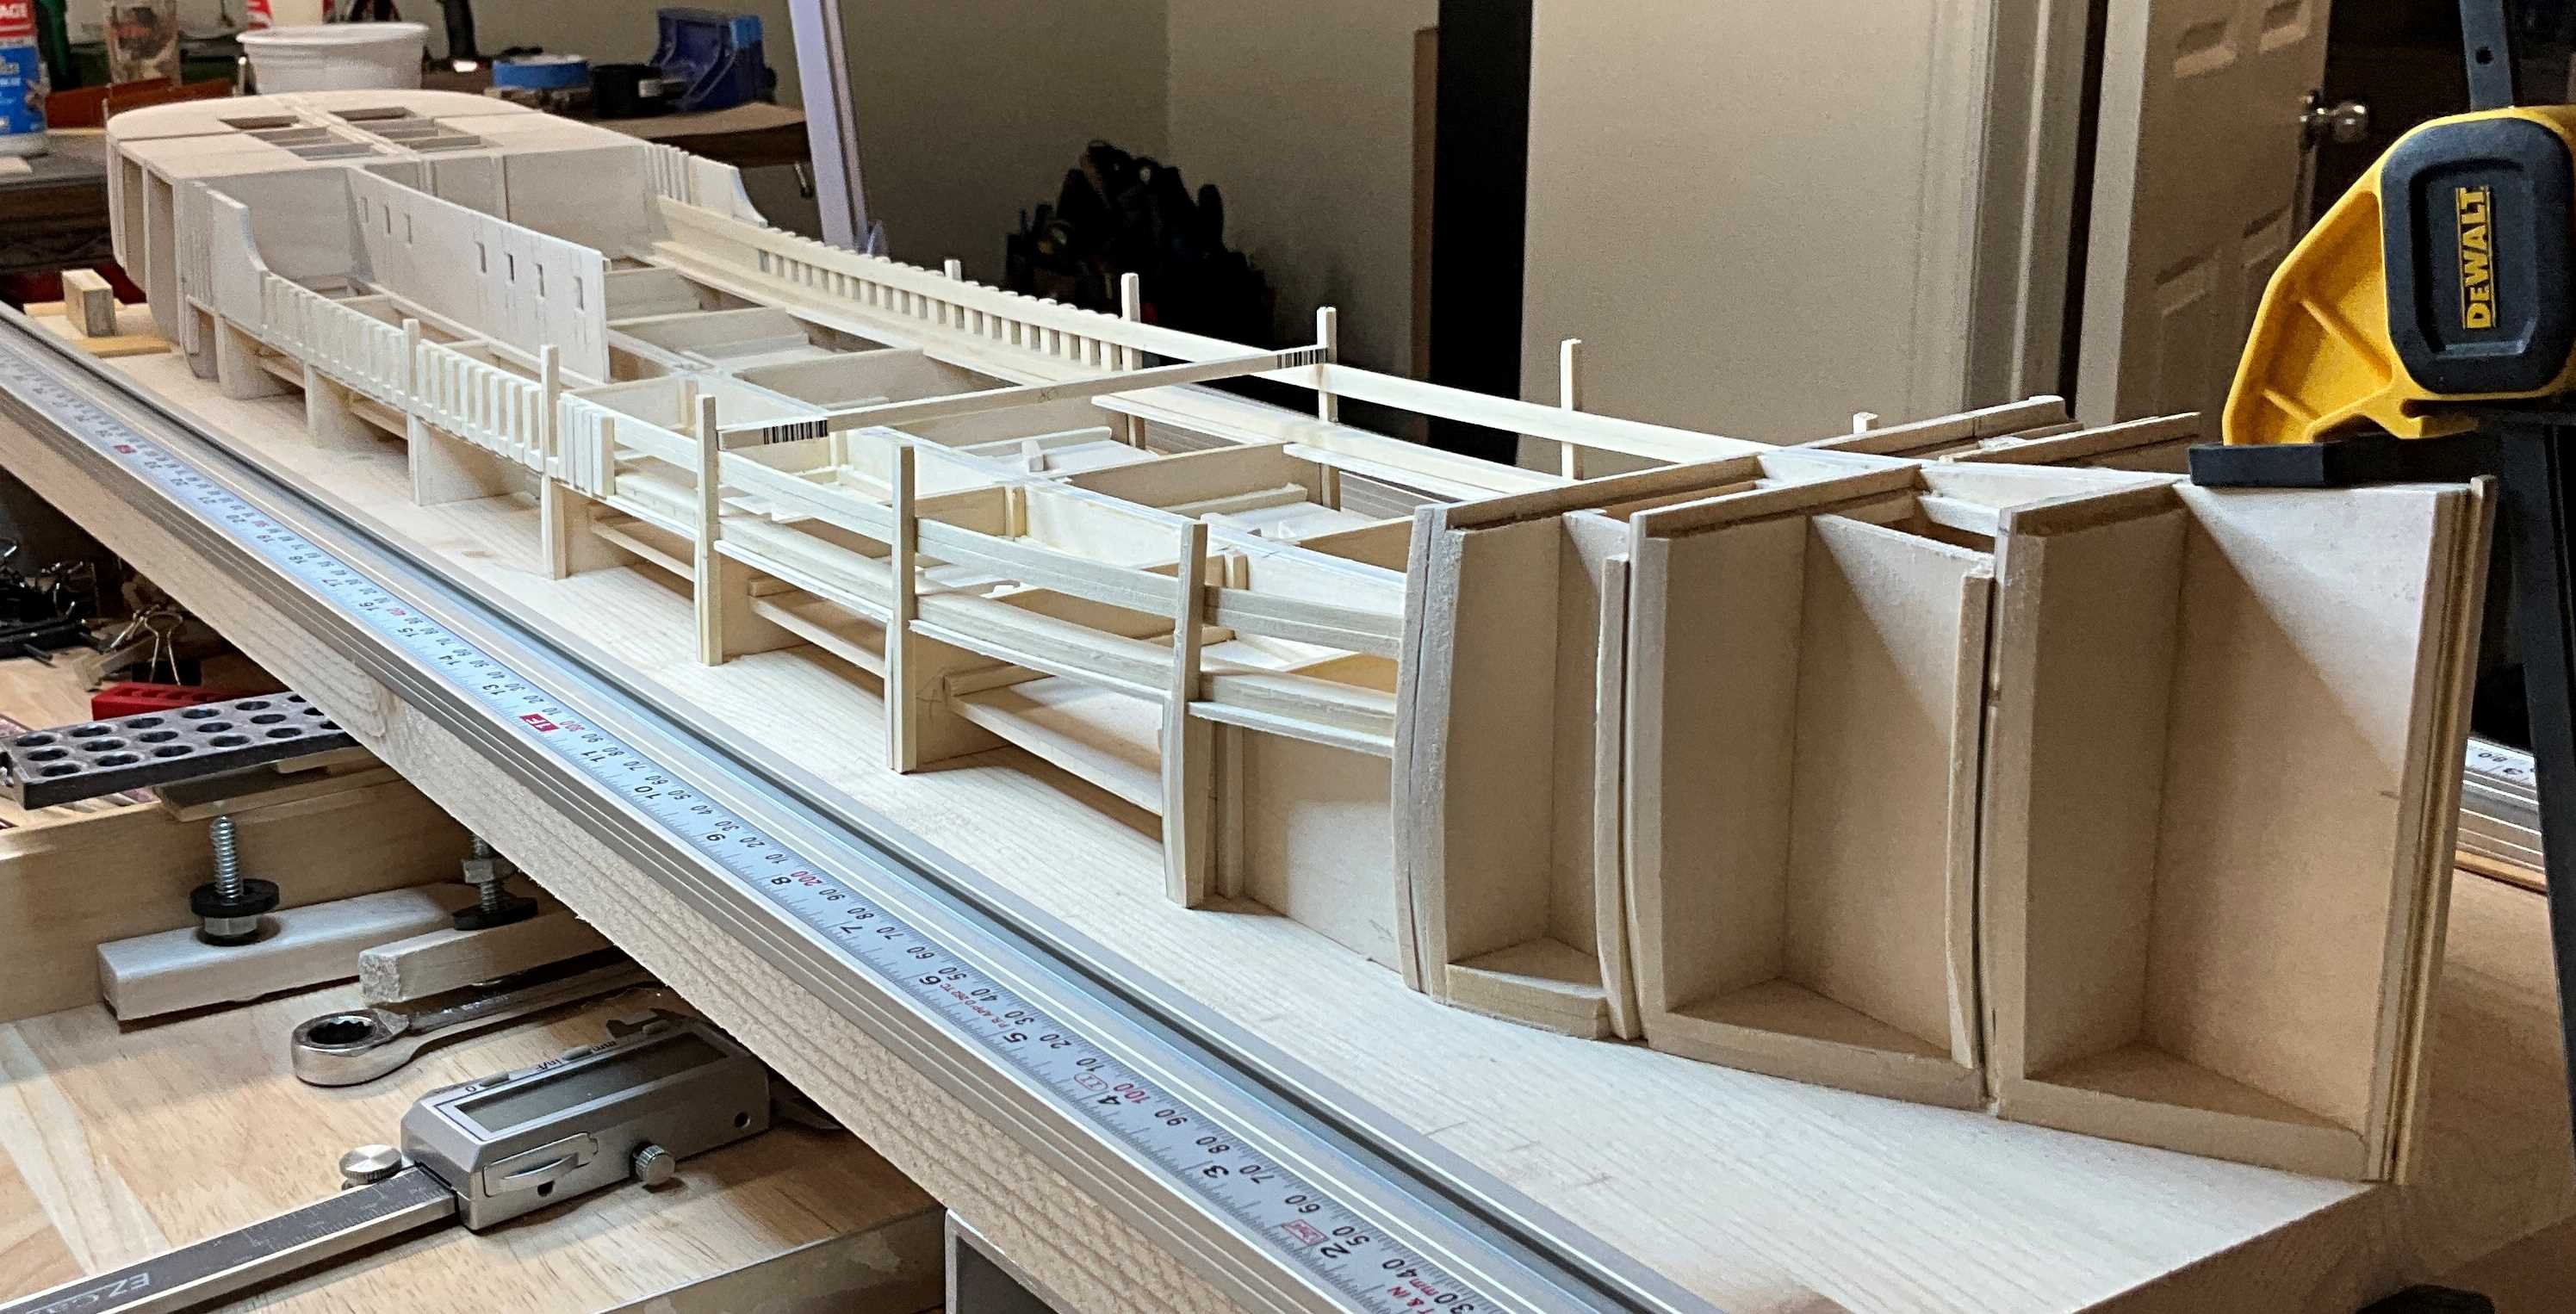
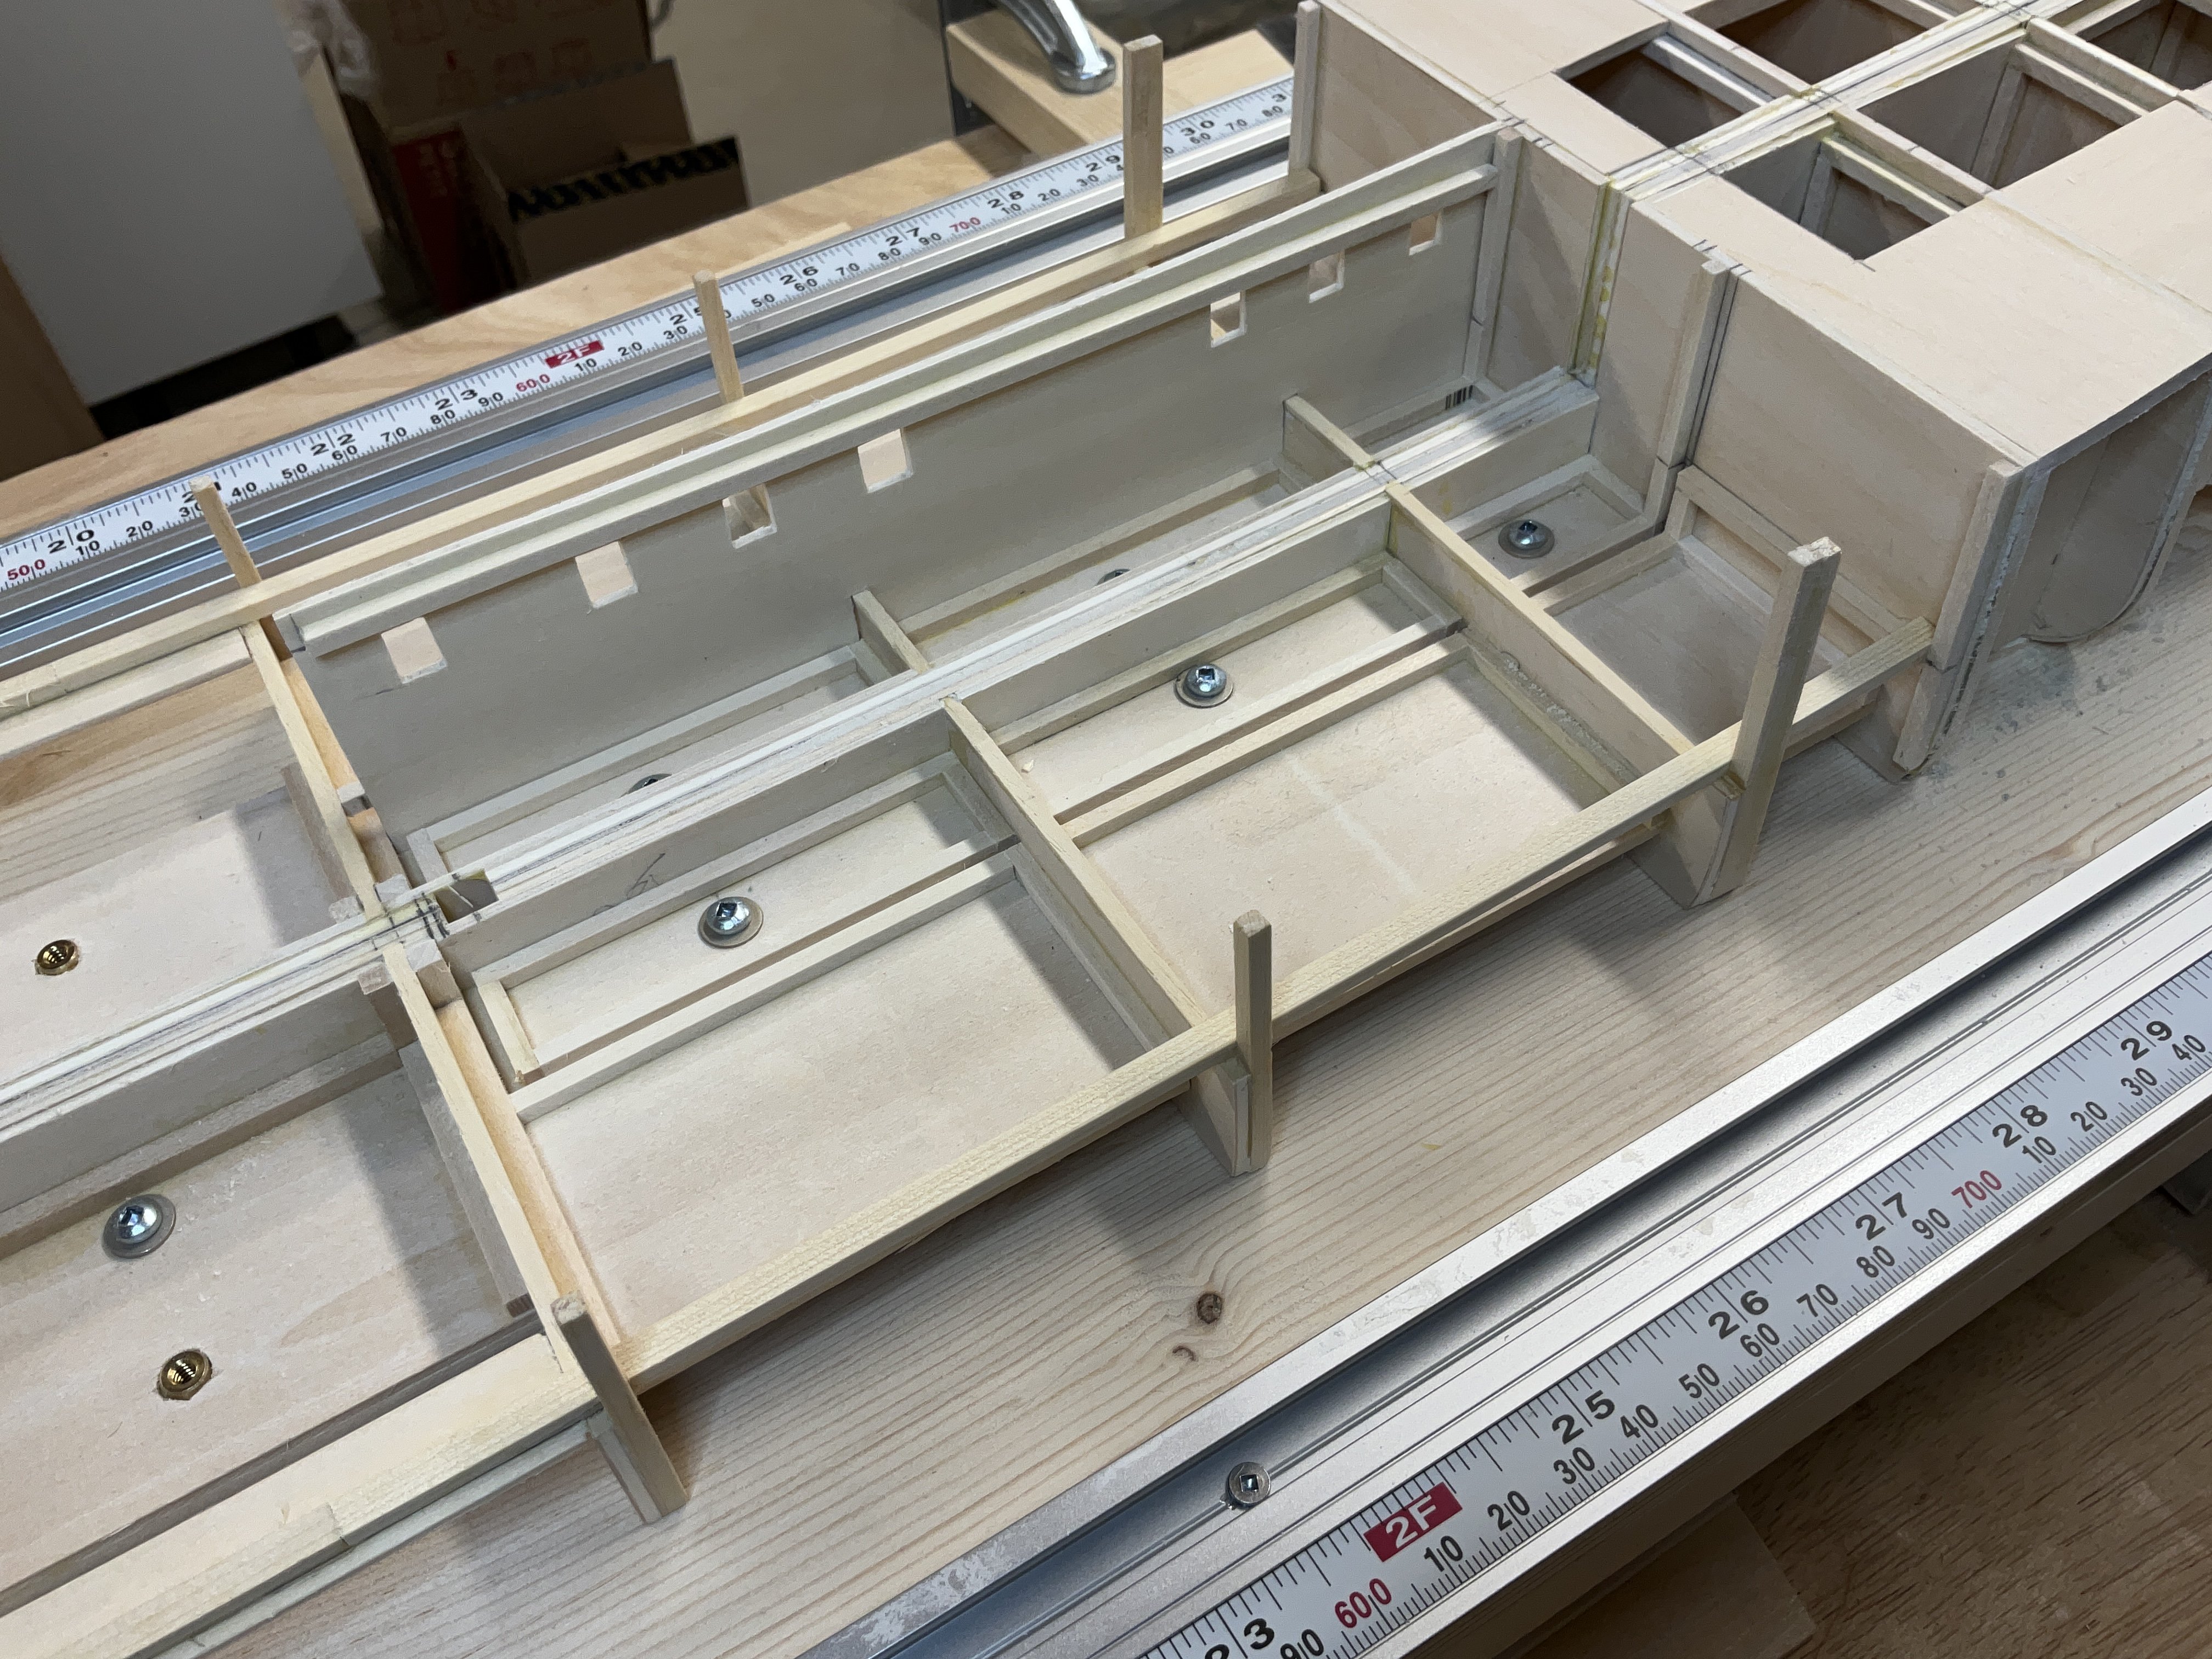
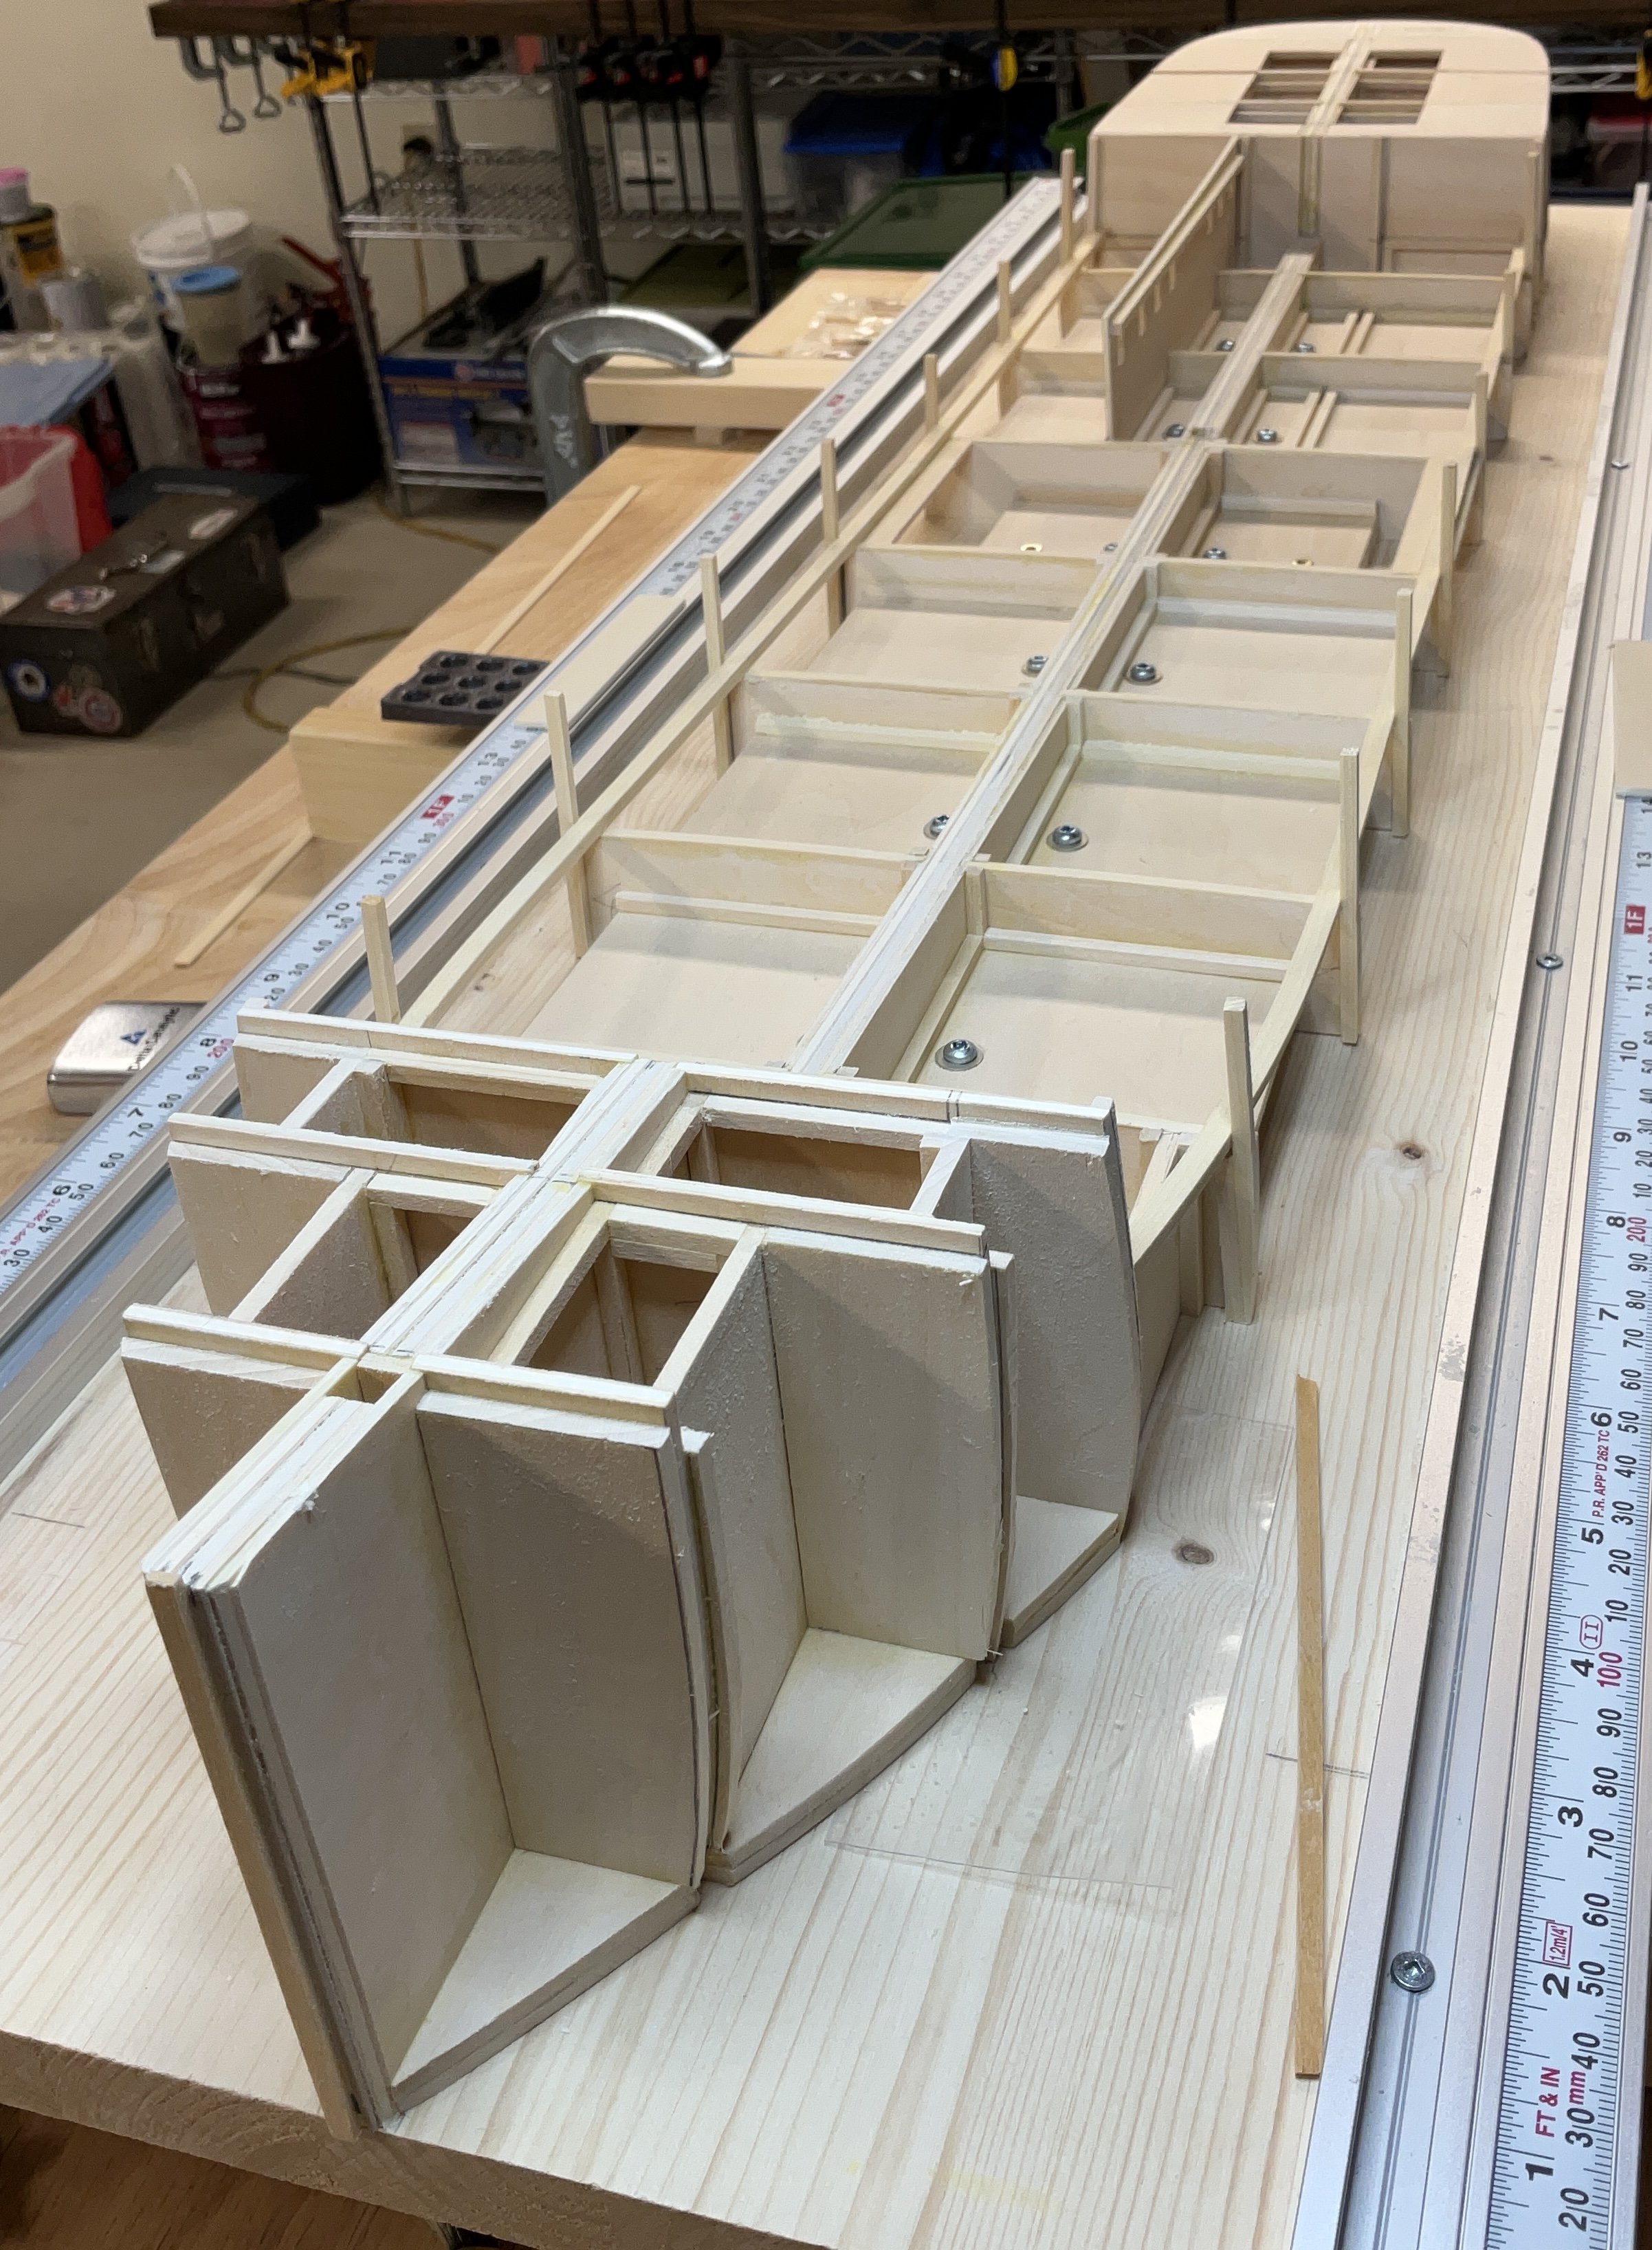
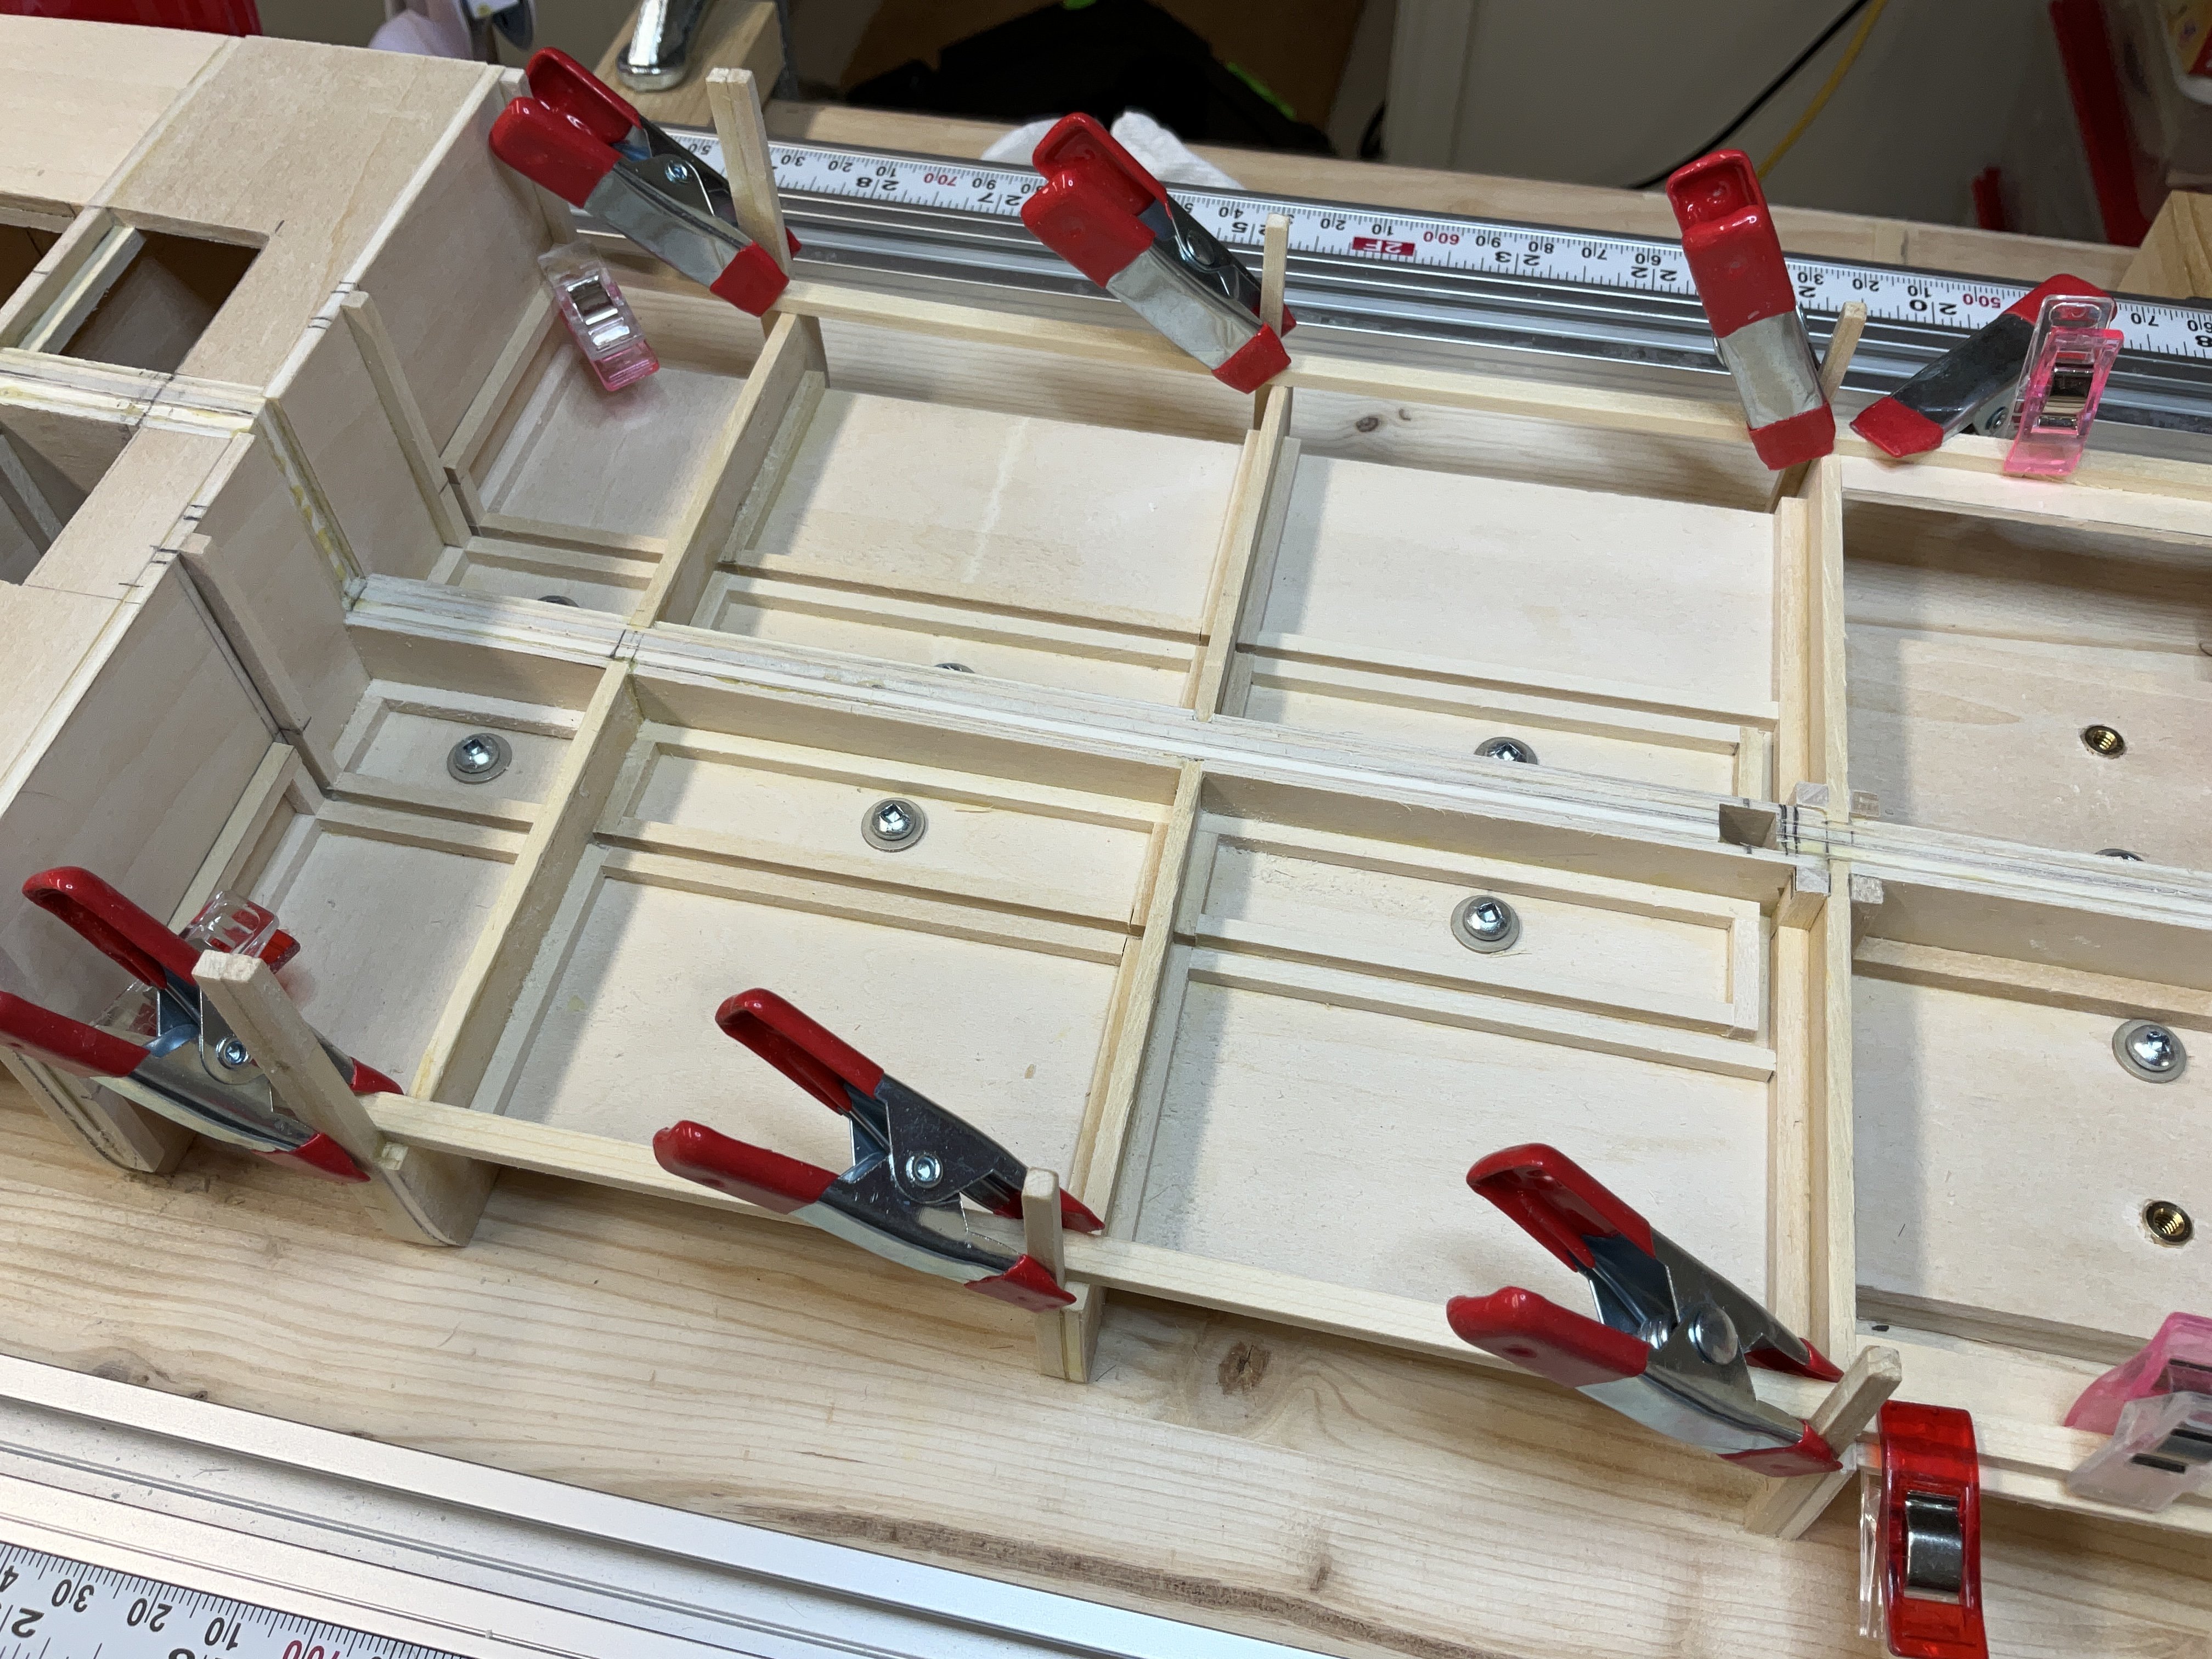
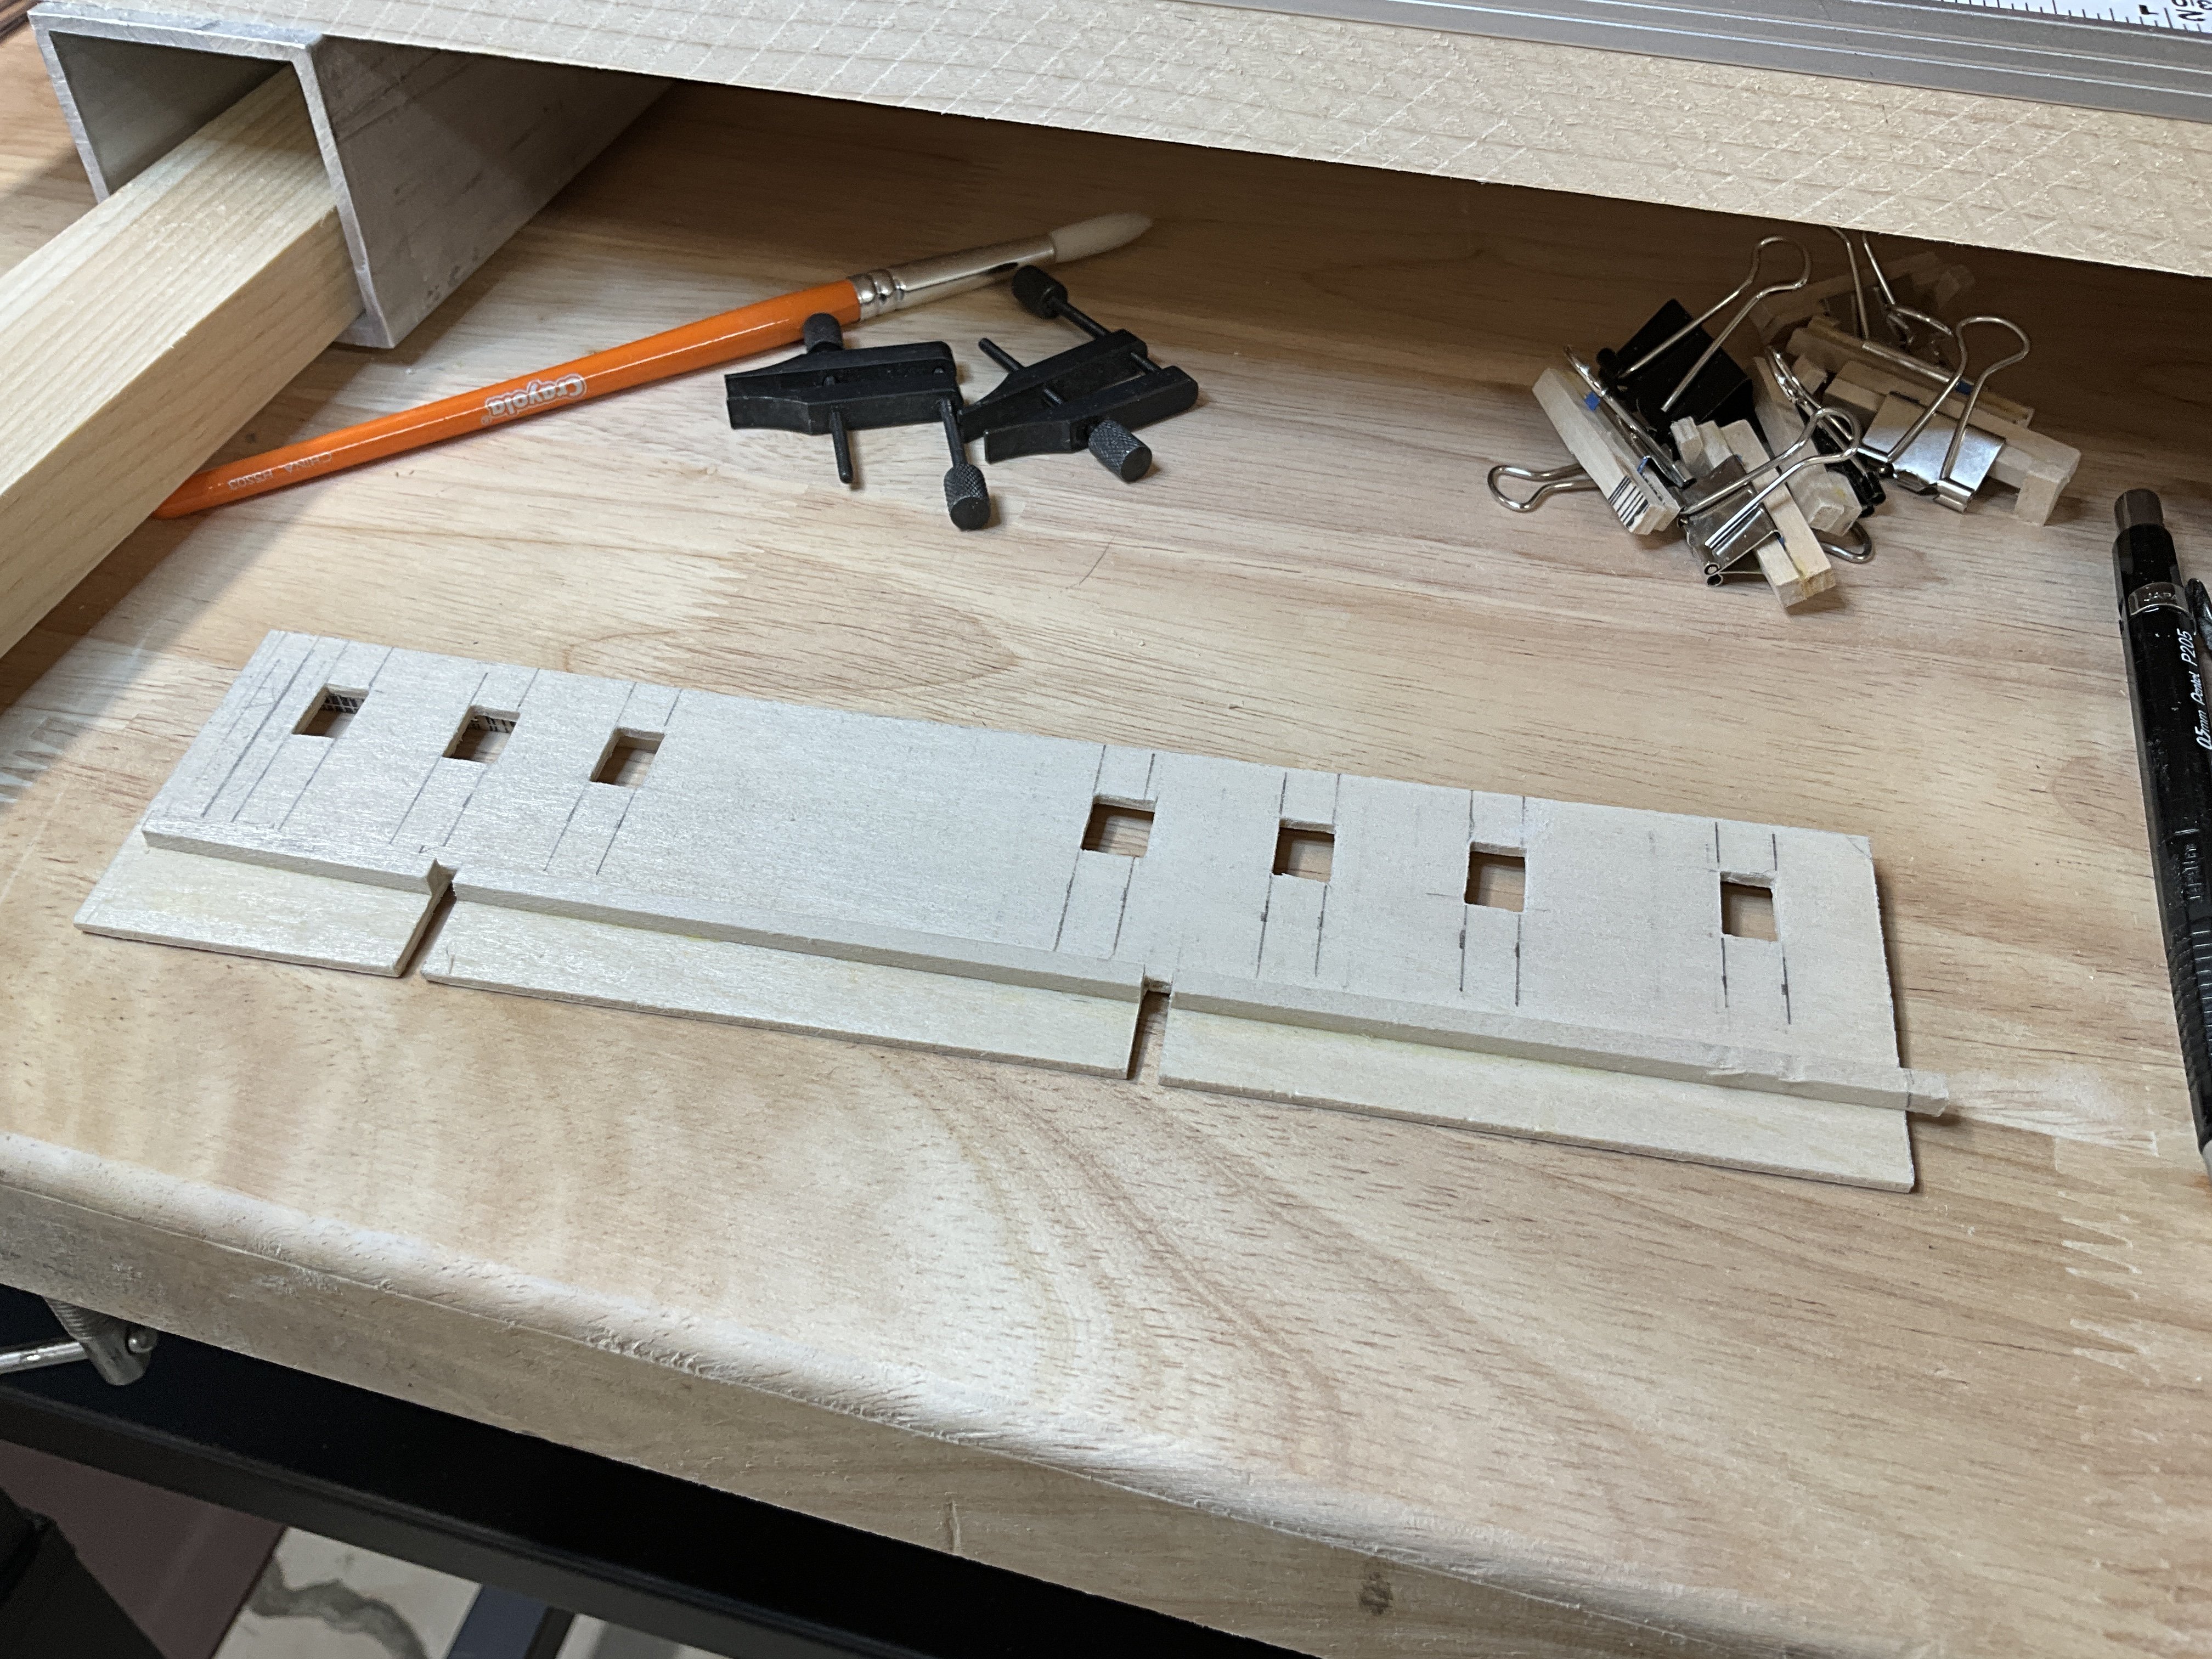
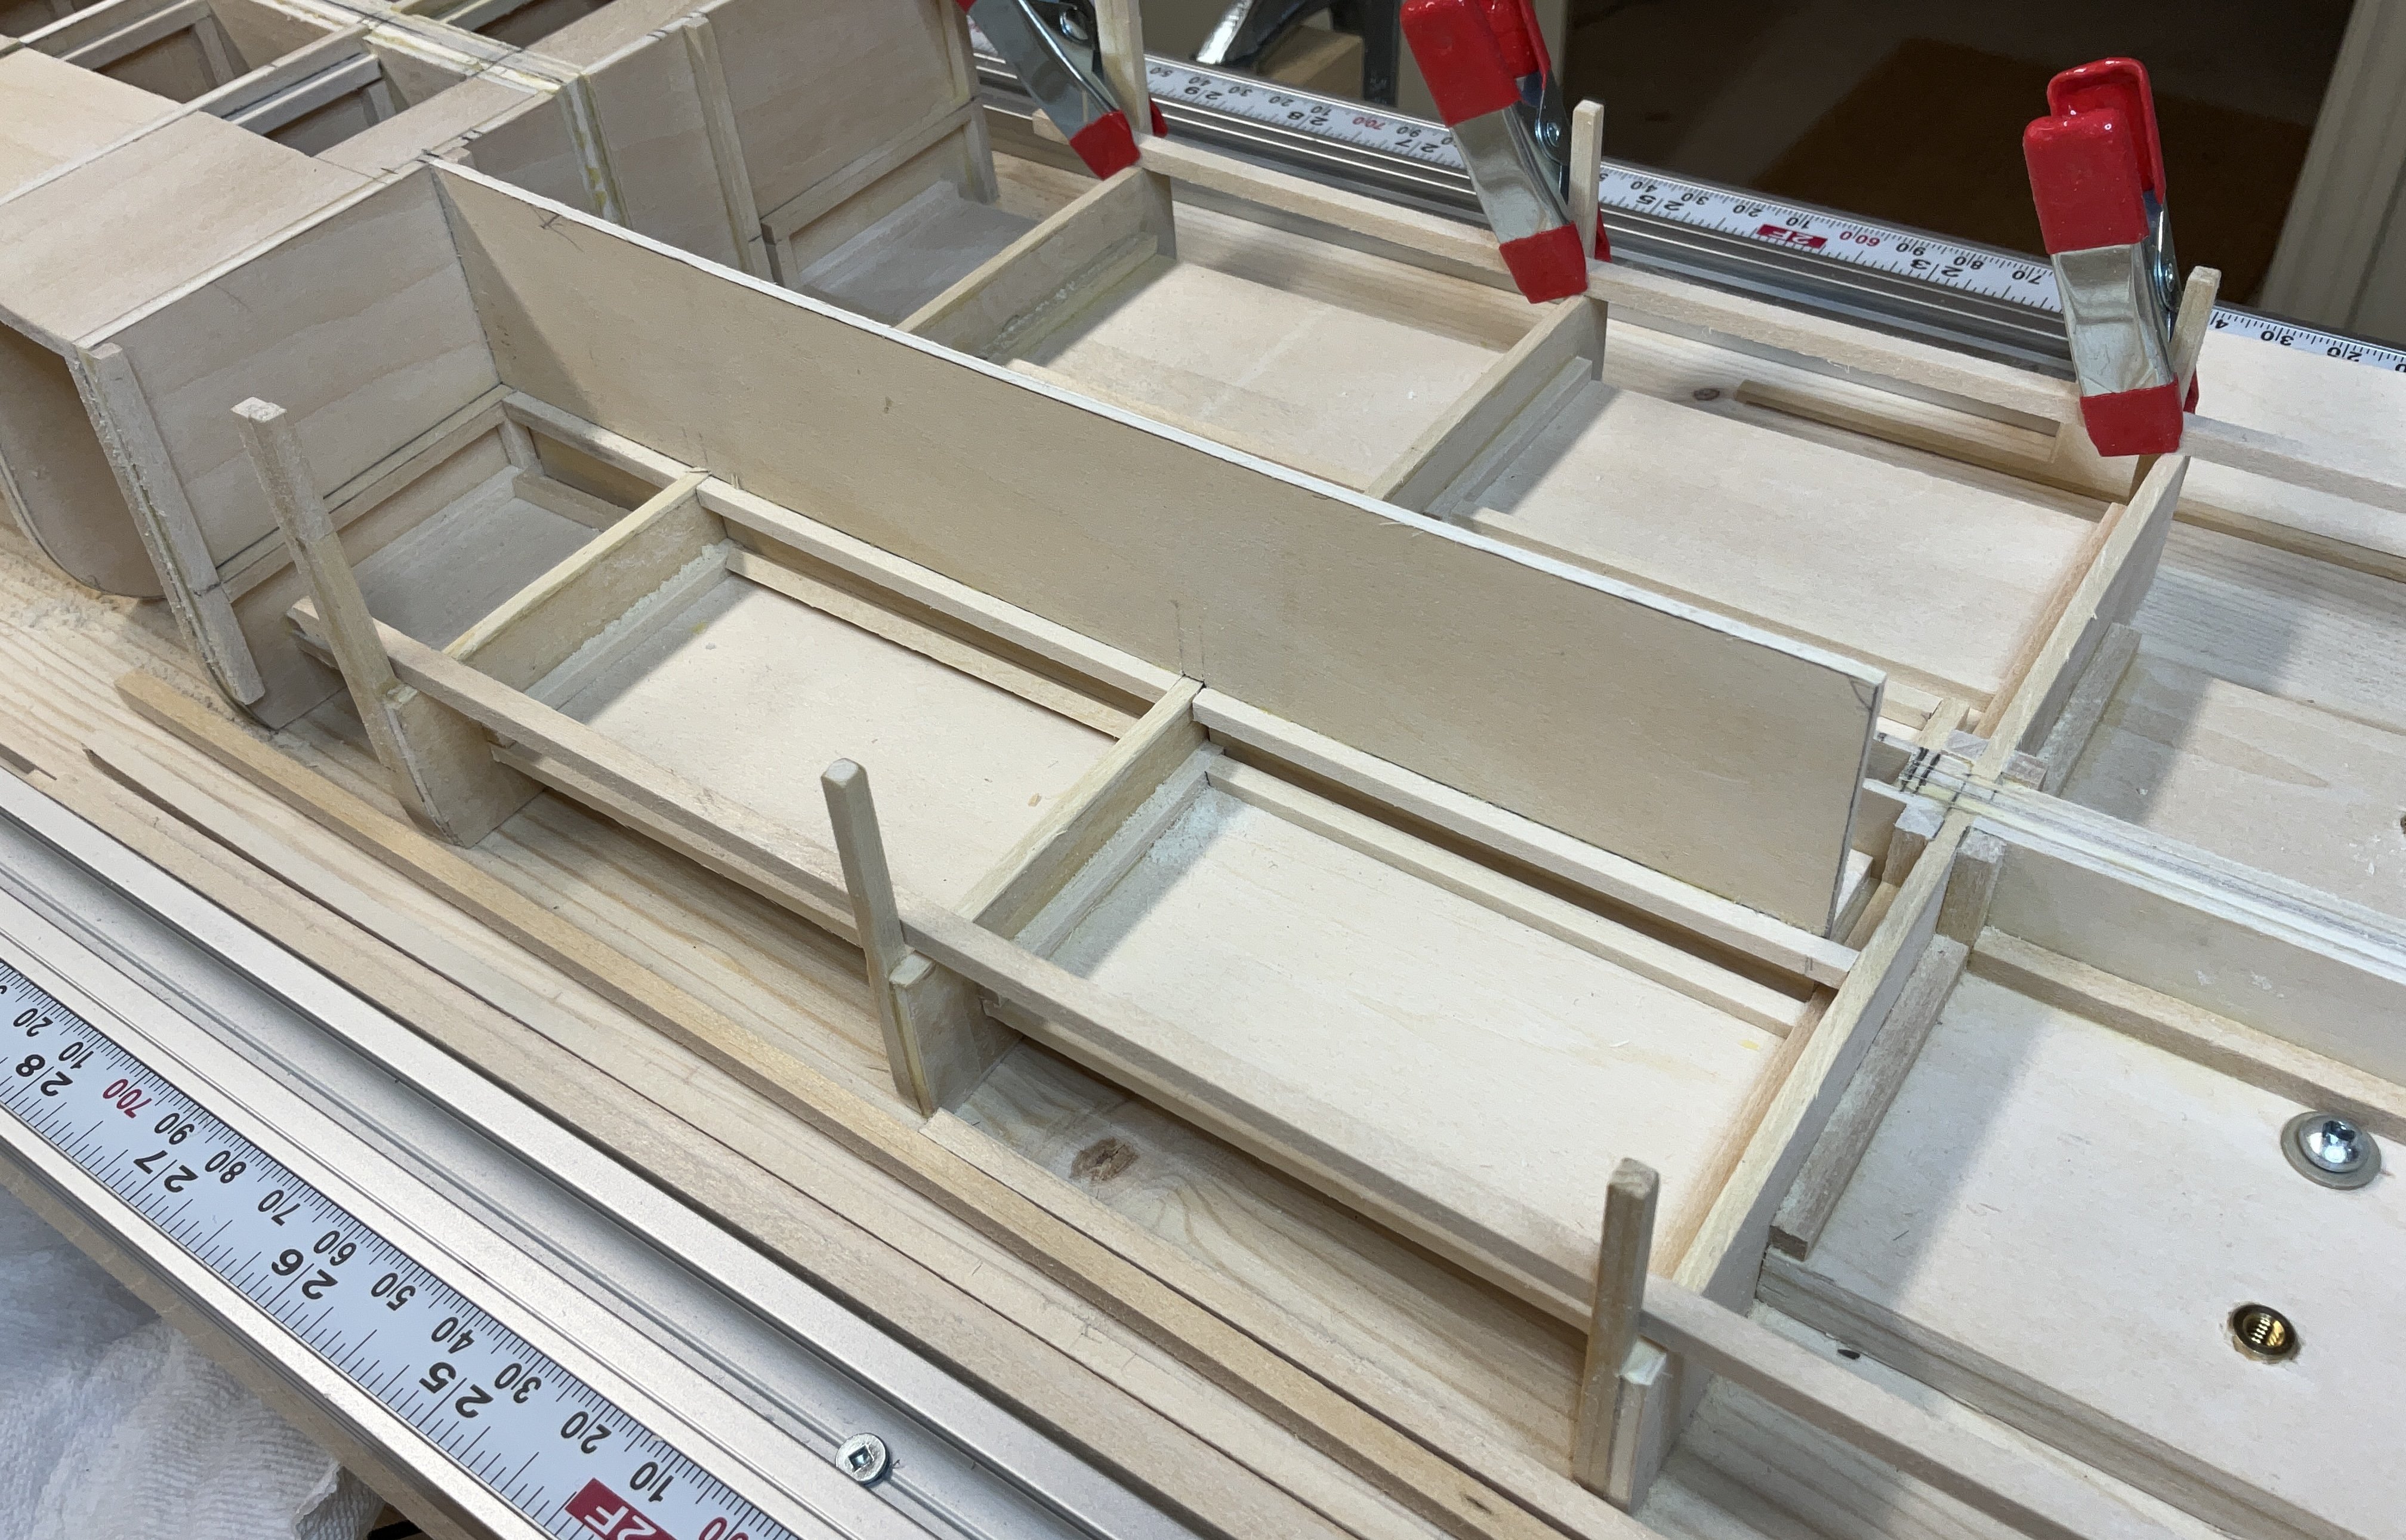
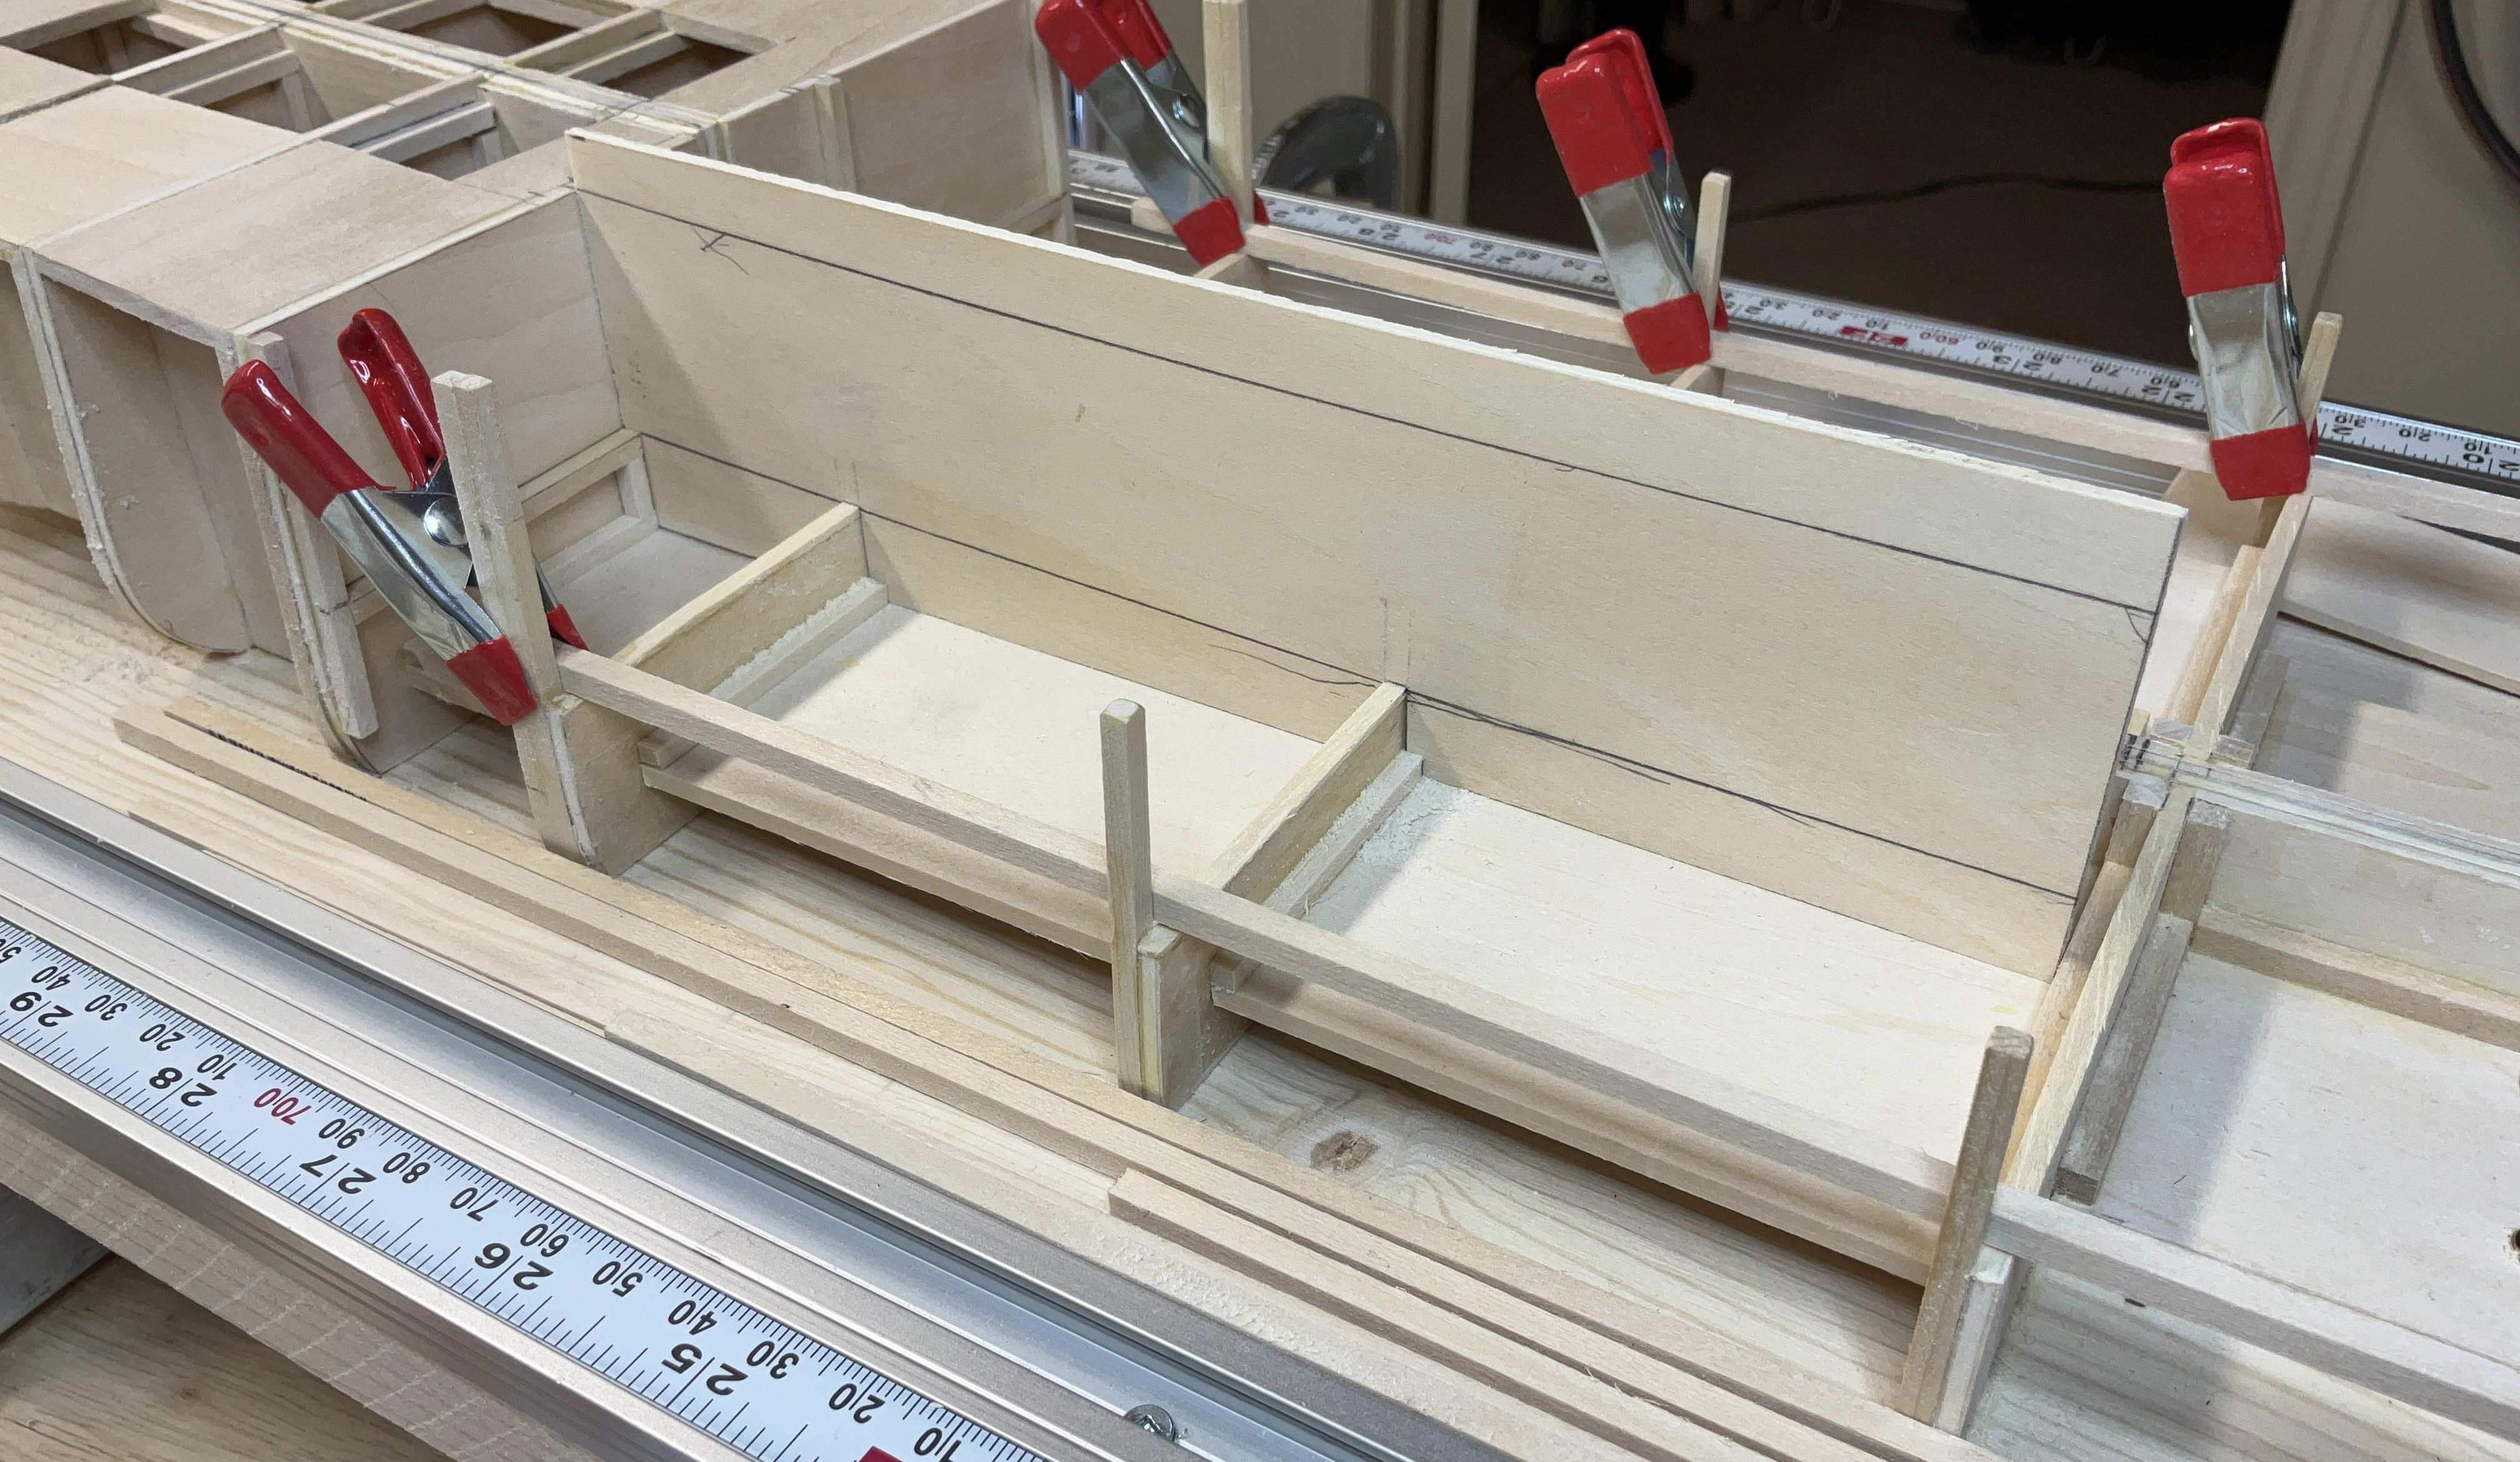
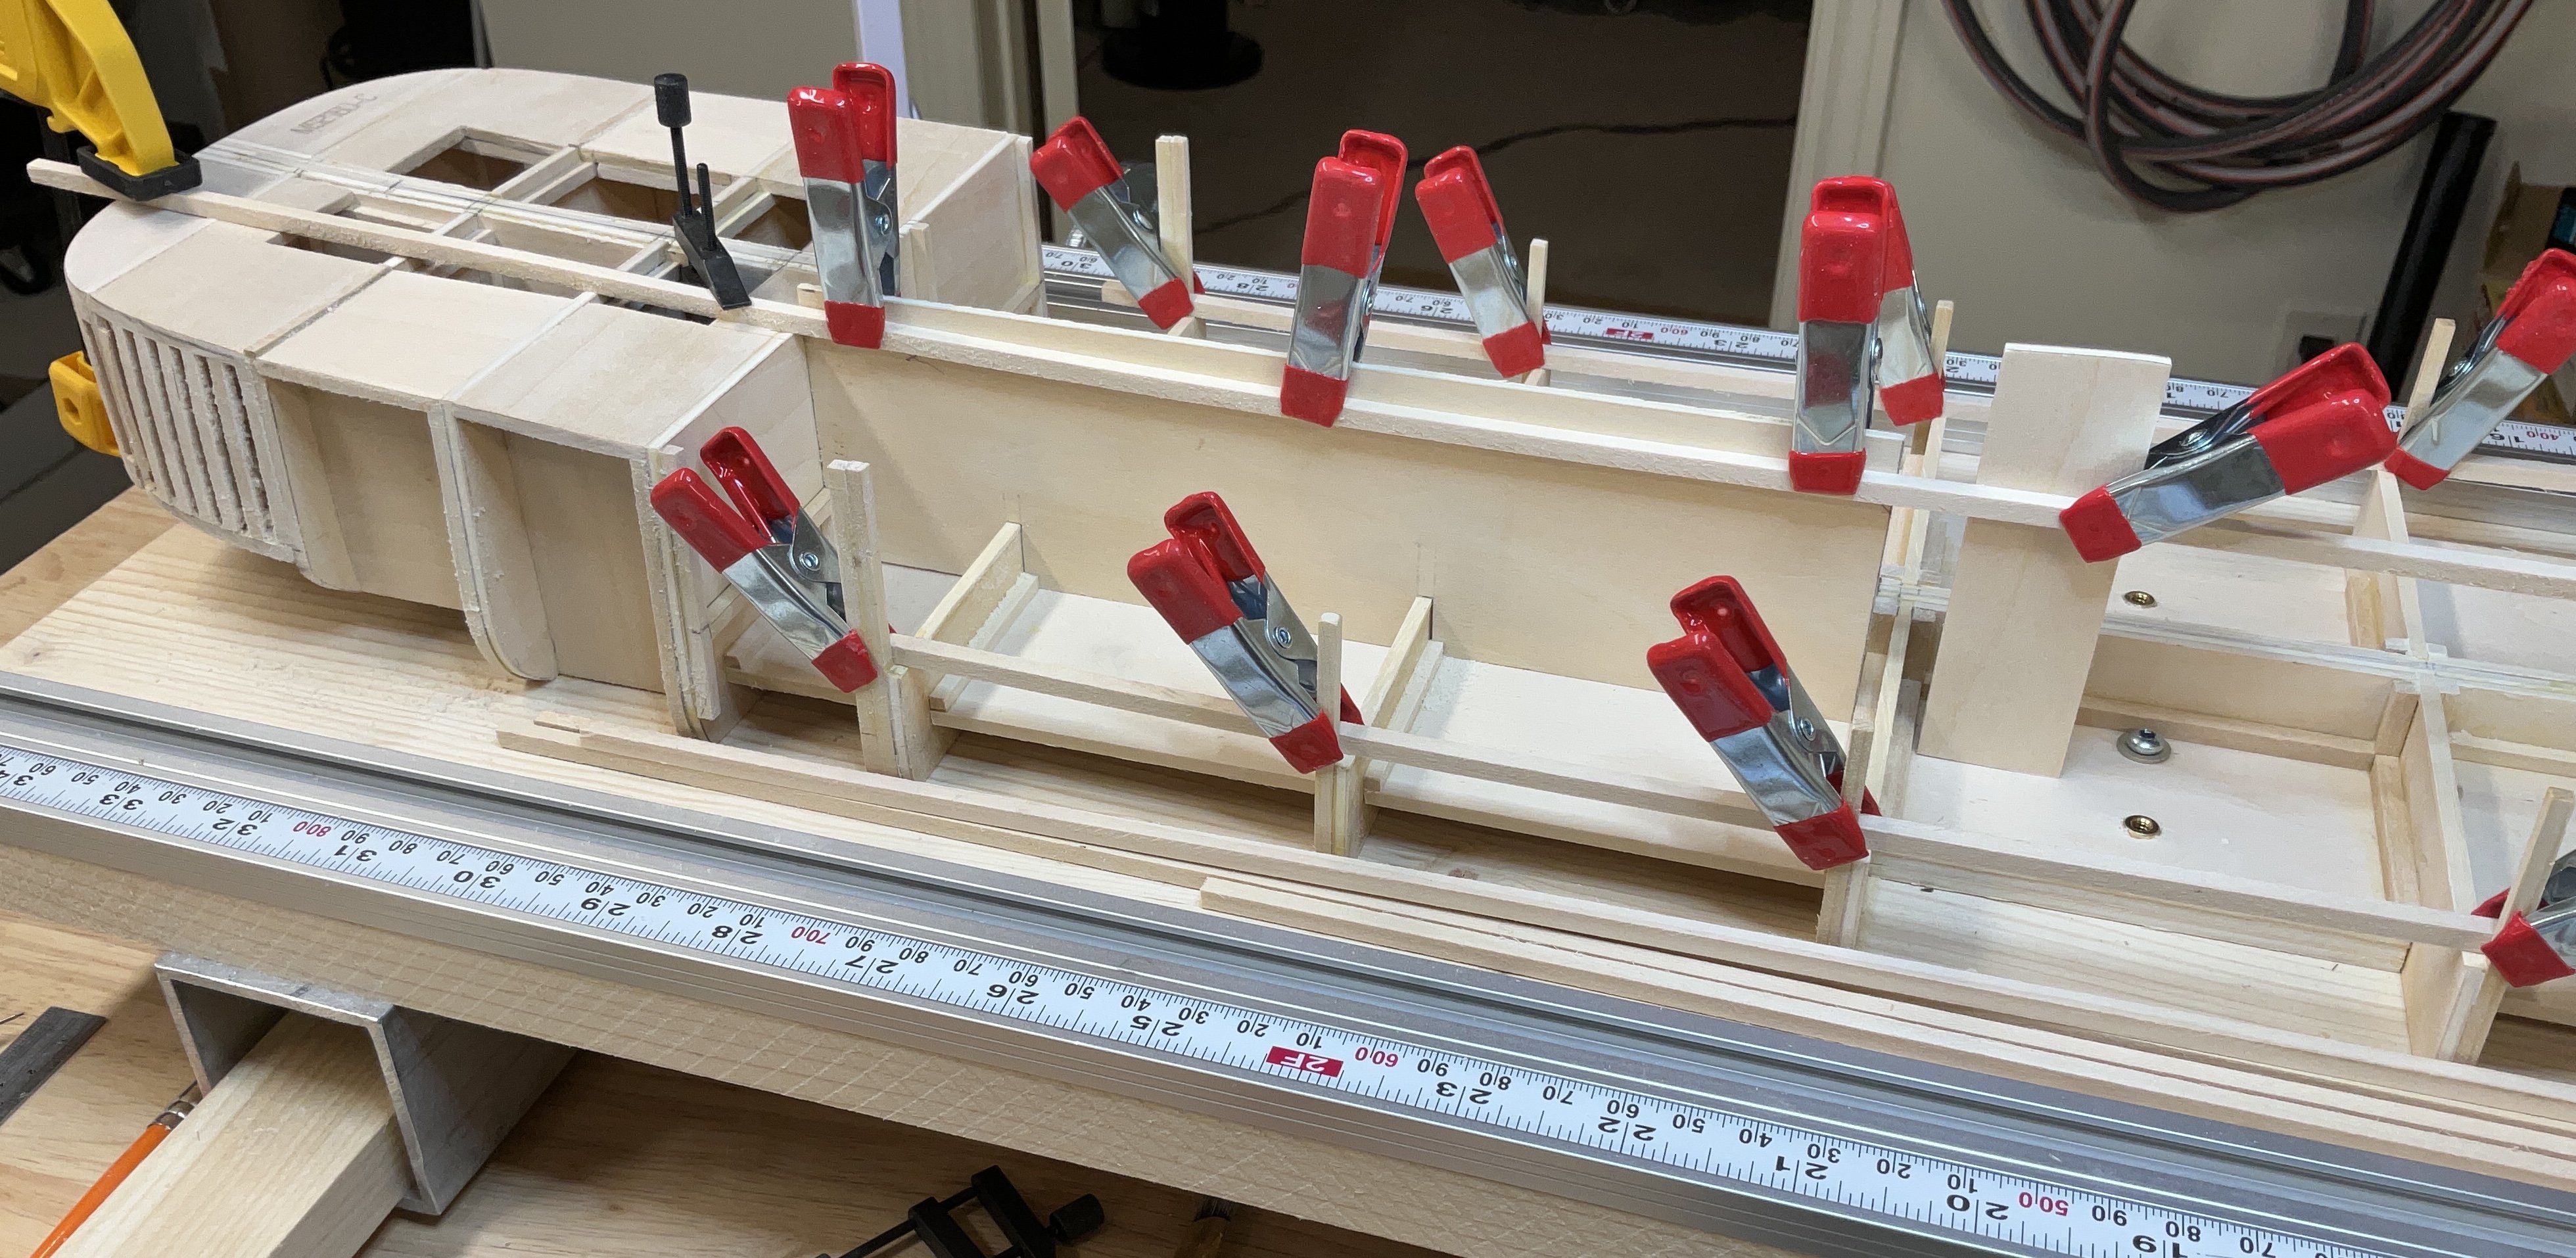
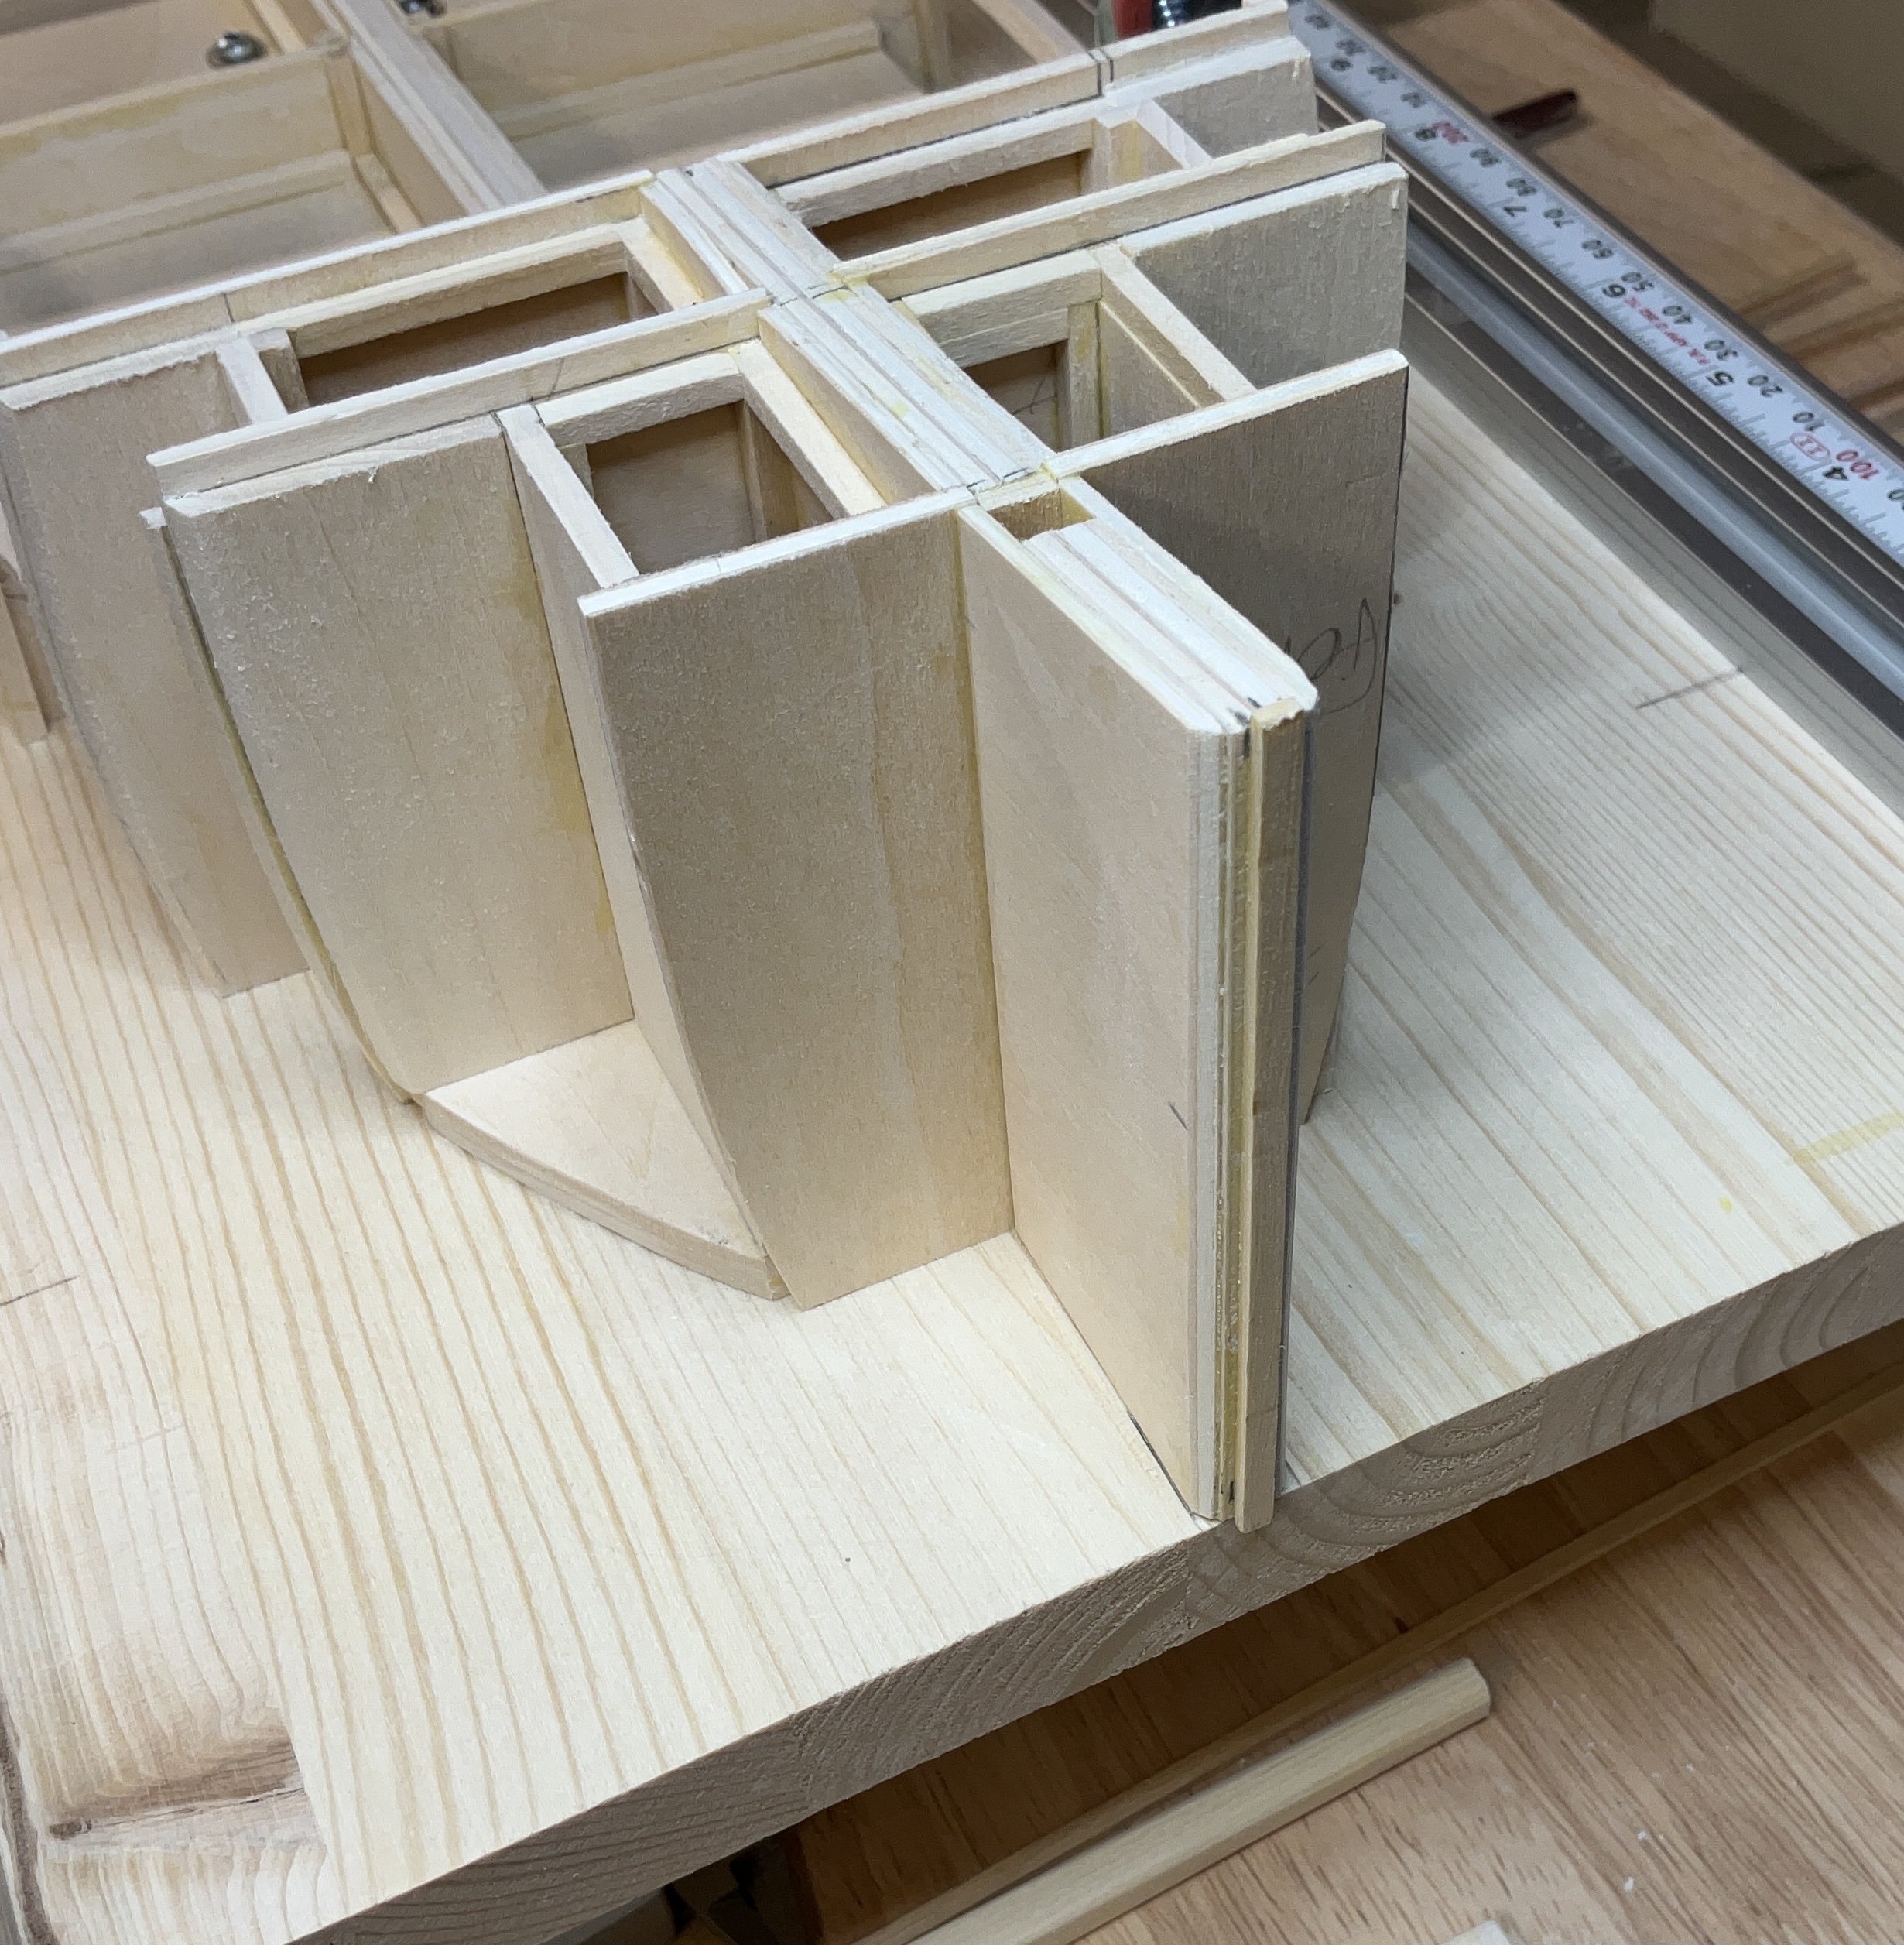
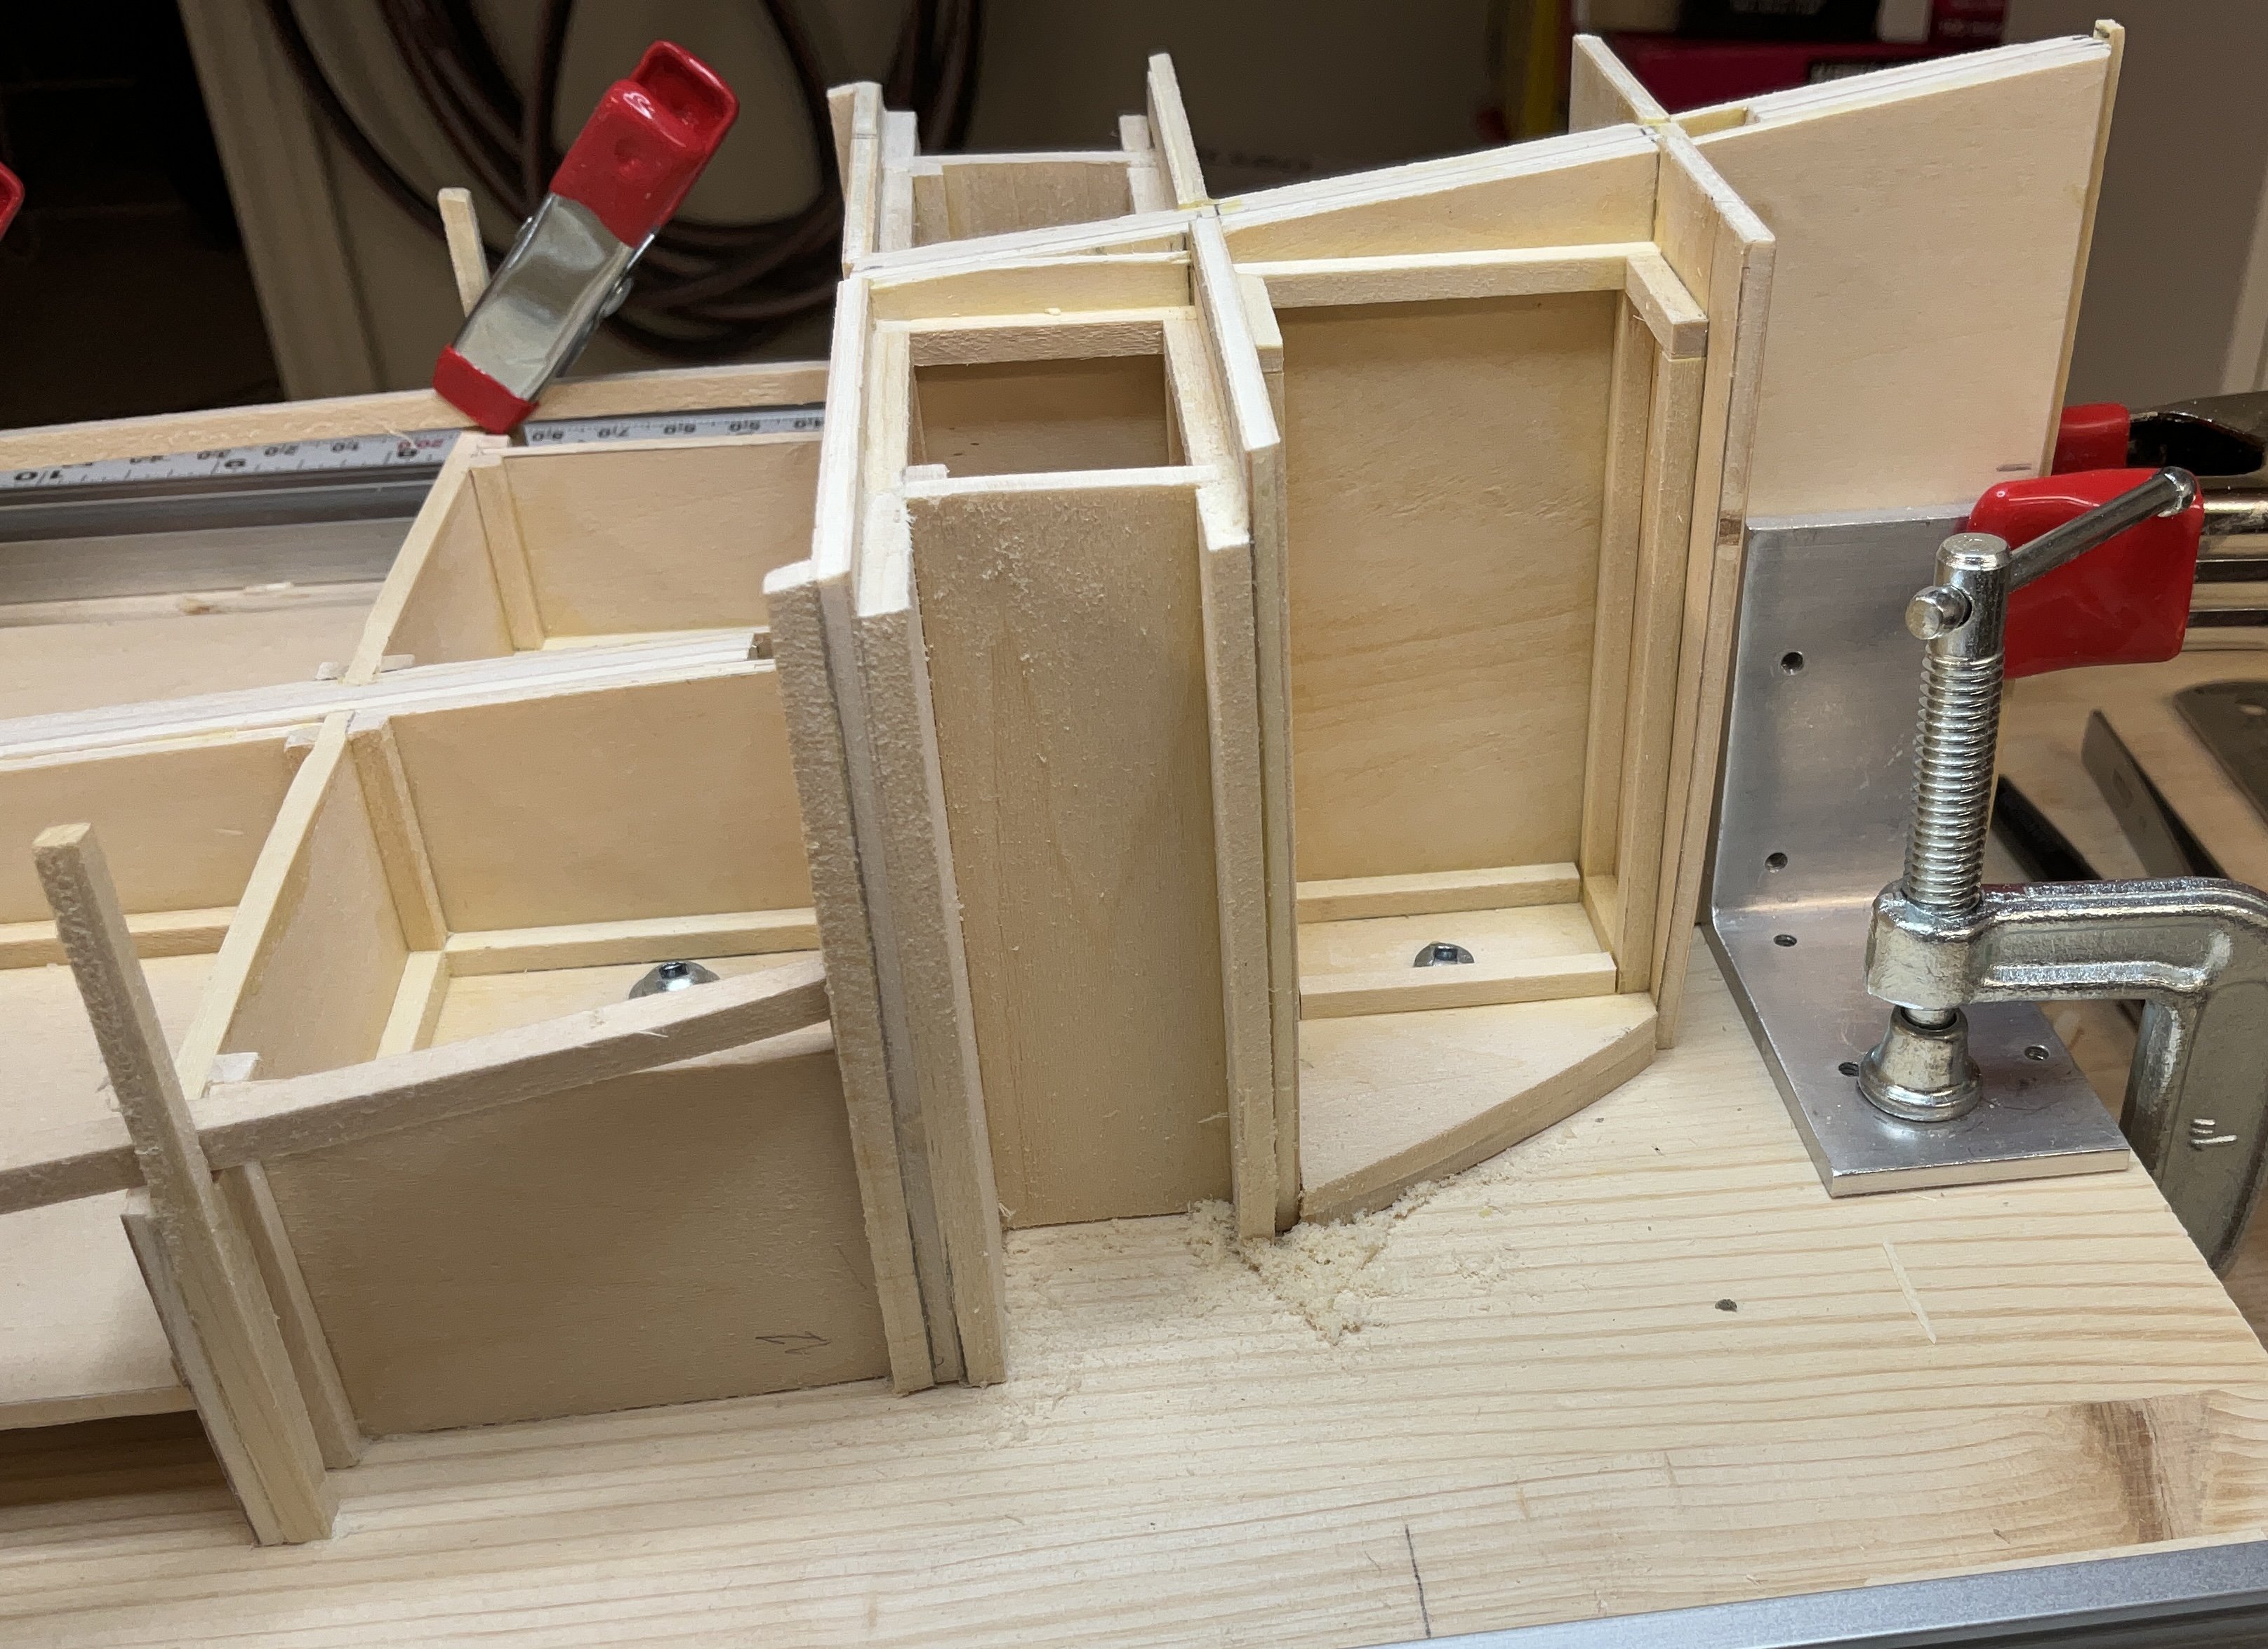
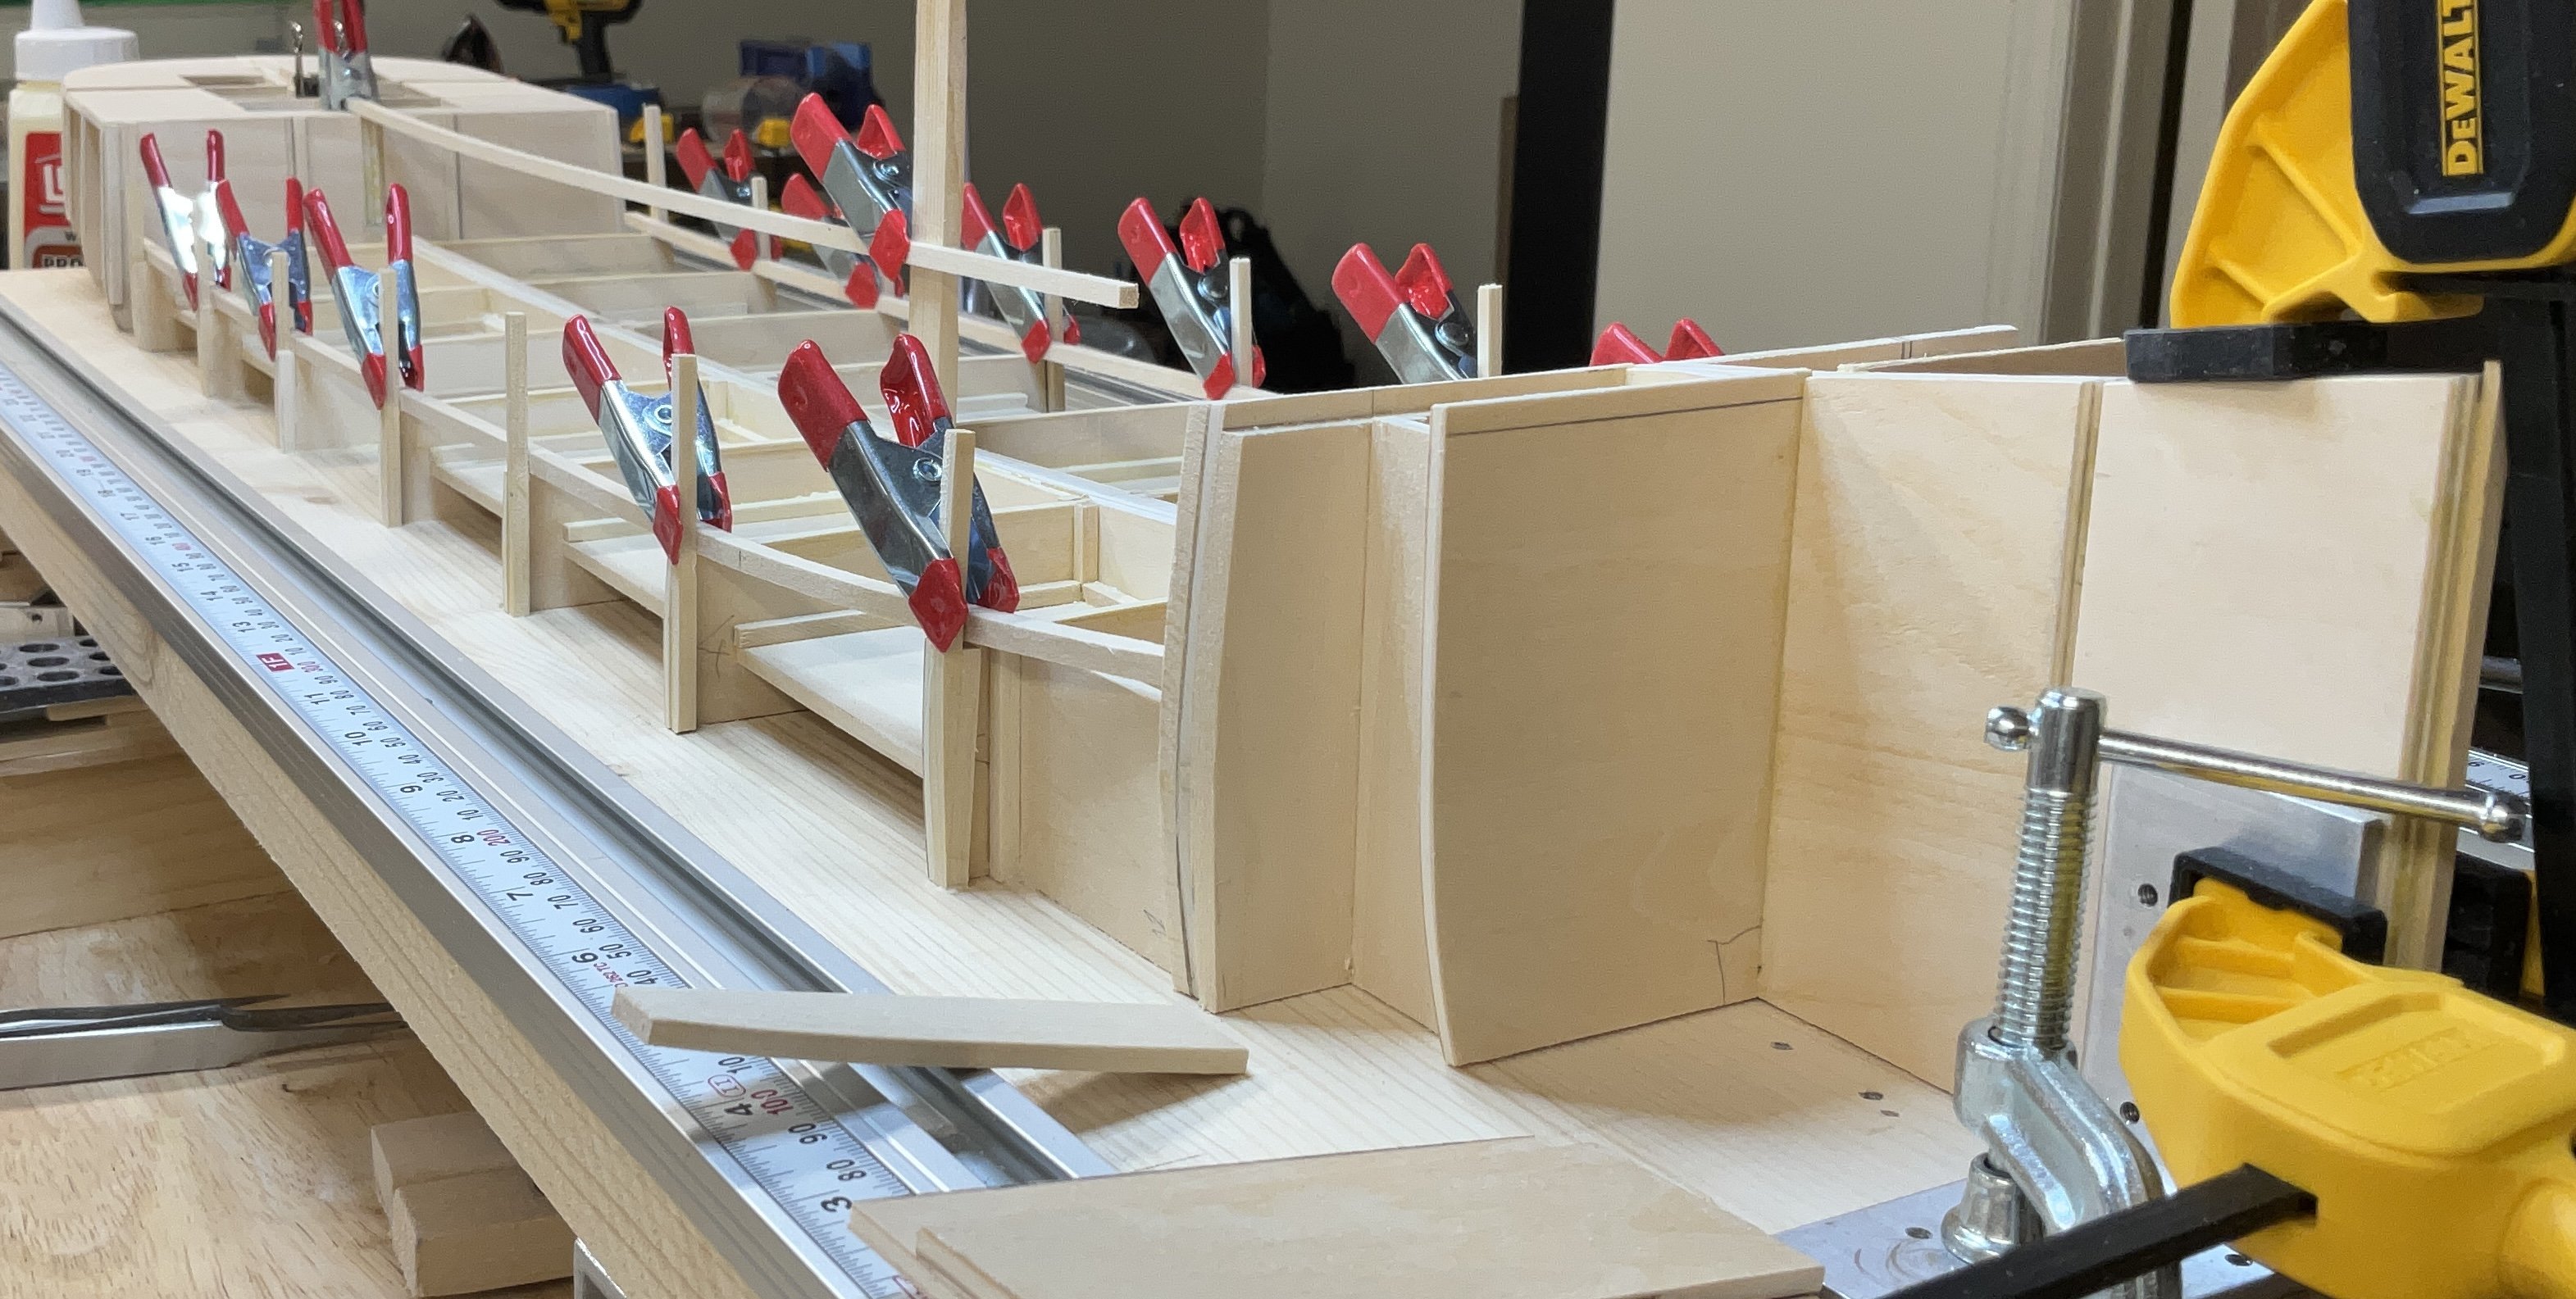
Hi Everyone, I hope you are all well. Thank you for your support! The bulkheads are now all attached and reinforced. A strip of 1/16” x 1/8” basswood was glued to the inner stem to act as a rabbet and to aid in fairing the bulkhead former. Been adding 1/8” basswood to each side of the 1/8” plywood bulkheads to give the hull planking more support. The tops of the supports between the bulkheads will be covered with 1/8” basswood once the model has been removed from the board. They are perpendicular so that the bitts that protrude from the forecastle deck will have a flat surface to support them. For a change of pace I started laying out the main deck house. I would like this to be attached before removal from the board in order to gain some longitudinal support. The 3/16 x 3/16” strips of basswood are clipped to the bulwarks to see if the deck shear needs any tweaking. Another strip was clamped to the cabin deck and supported at the forward end to get the shear of the main deck house. The wall of the house was put into position and the roof line was marked. Support foe the main deck was added to the wall as one continuous strip to get a smooth curve and notches for the bulkheads were cut when dry. The rough openings for the windows were cut. There is a sliding door on each side of the house but they will be closed. The base of the main deck house was laid out previously using 1/8” x 1/8” strips to keep the 1/16” plywood walls straight. Next the waterways will be attached. Wapama’s waterways consist of two massive beams that total 27” wide and protrude above the deck planks by 9”. The deck is planked with 4” x 4”s Thanks for dropping by.


-
Great job repairing the membrane Gary. The stove pipe is exceptional!
-
Thank you very much Keith. I have to admit that this has been my favorite build.
- 201 replies
-
- 4
-
-
- Oyster Sharpie
- first scratch build
- (and 1 more)
-
I like the thought of using the long iron hooks to connect to the turnbuckles because are interesting, different and accurate. The rig in the center seems to have one of those wire cable clamps just above the turnbuckle. Lots of interesting stuff on these boats
- 312 replies
-
- 4
-
-
- Chile
- Latin America
- (and 6 more)
-
Hi Keith, thank you very much for your Comment. My one concern right now is that it doesn’t turn into a big boomerang when I release it from the build board 😀
-
Hi wefalck, thank you very much for your Comment. From what I’ve read, metal was expensive and harder to acquire so reinforcement was provided by massive amounts of timber. This would later be partly the cause of her demise because of the difficulty of repairing the rot. I goofed on the scale when I started the build but have since changed it to 1/72.
-
Hi Gary, thank you very much for your Comment. This has been an enjoyable part of the build. Reminds me of when we were kids making things like log cabins and bridges out of match sticks and toothpicks. The good old days Hi Nils, thank you very much for your Comment. Your Ergenstrasse build has been very inspirational for me so in a way this is all your doing 😀
-
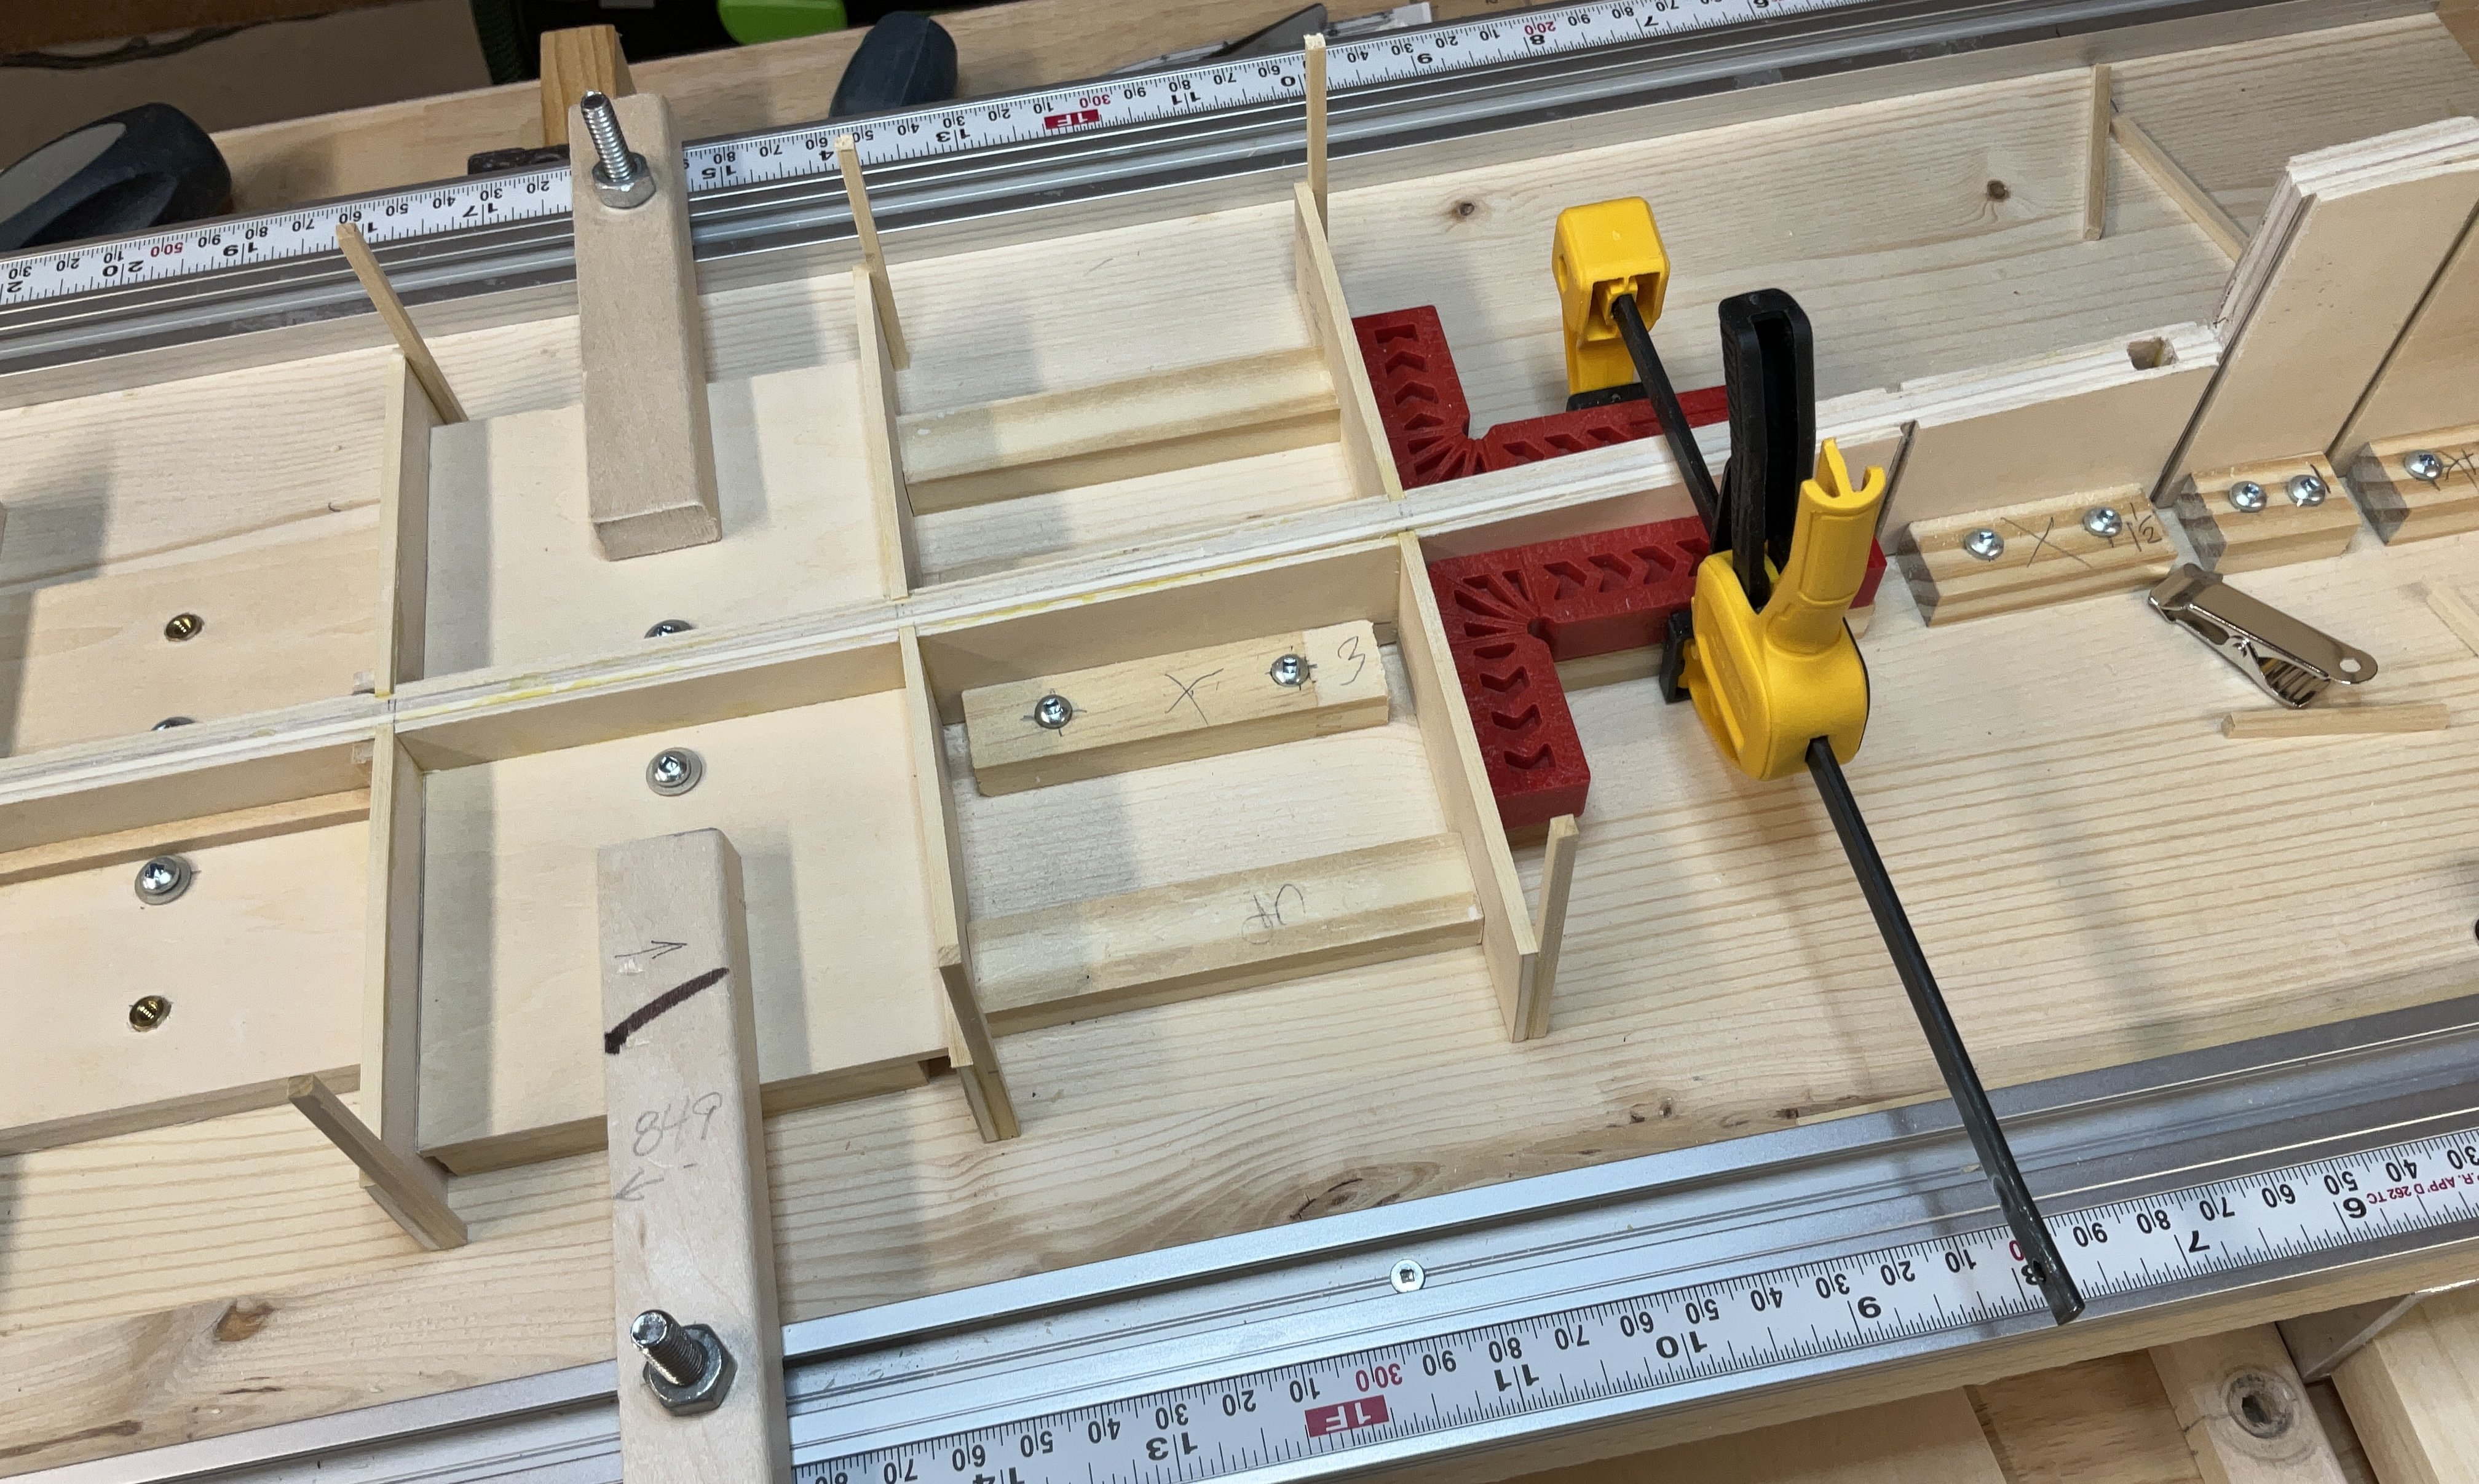
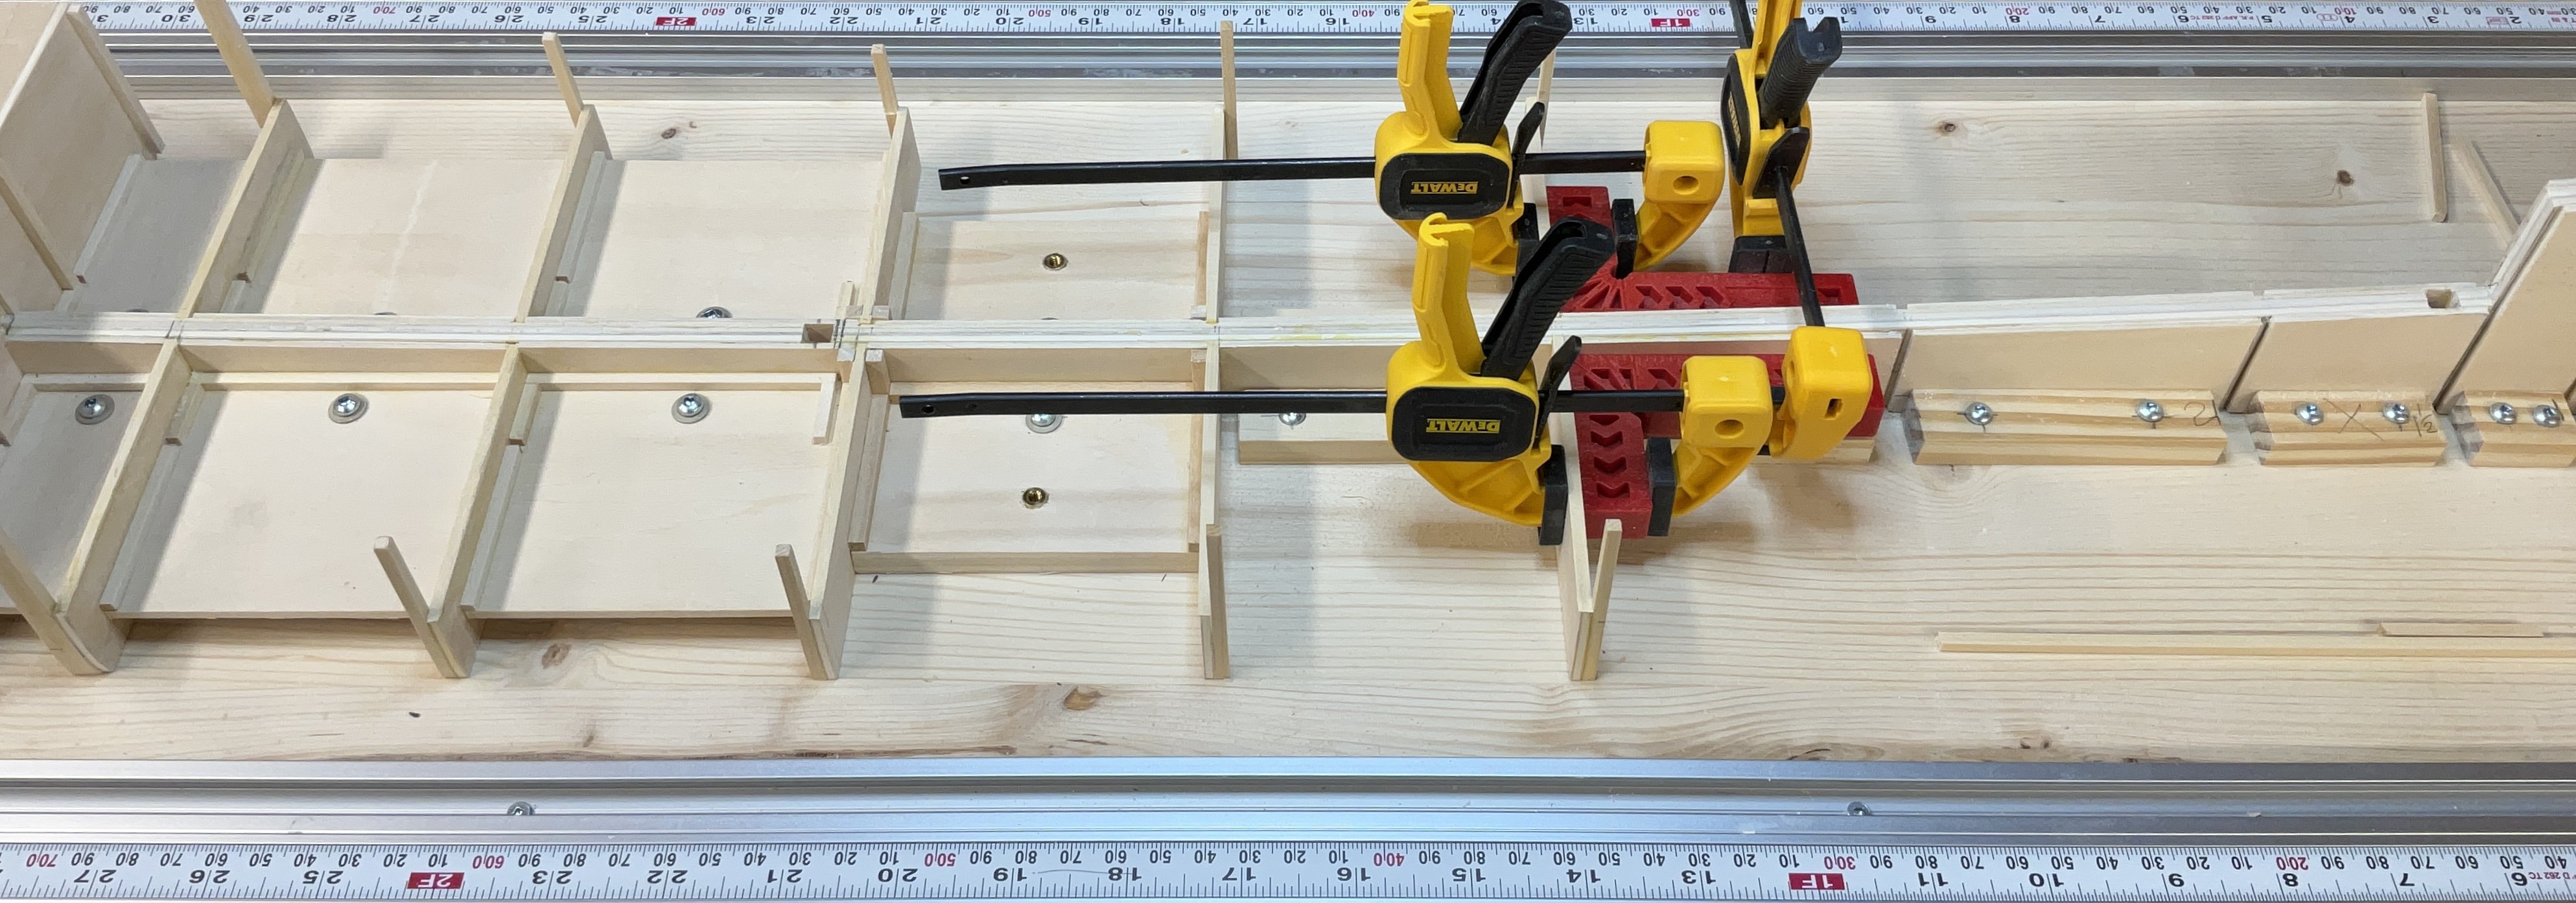
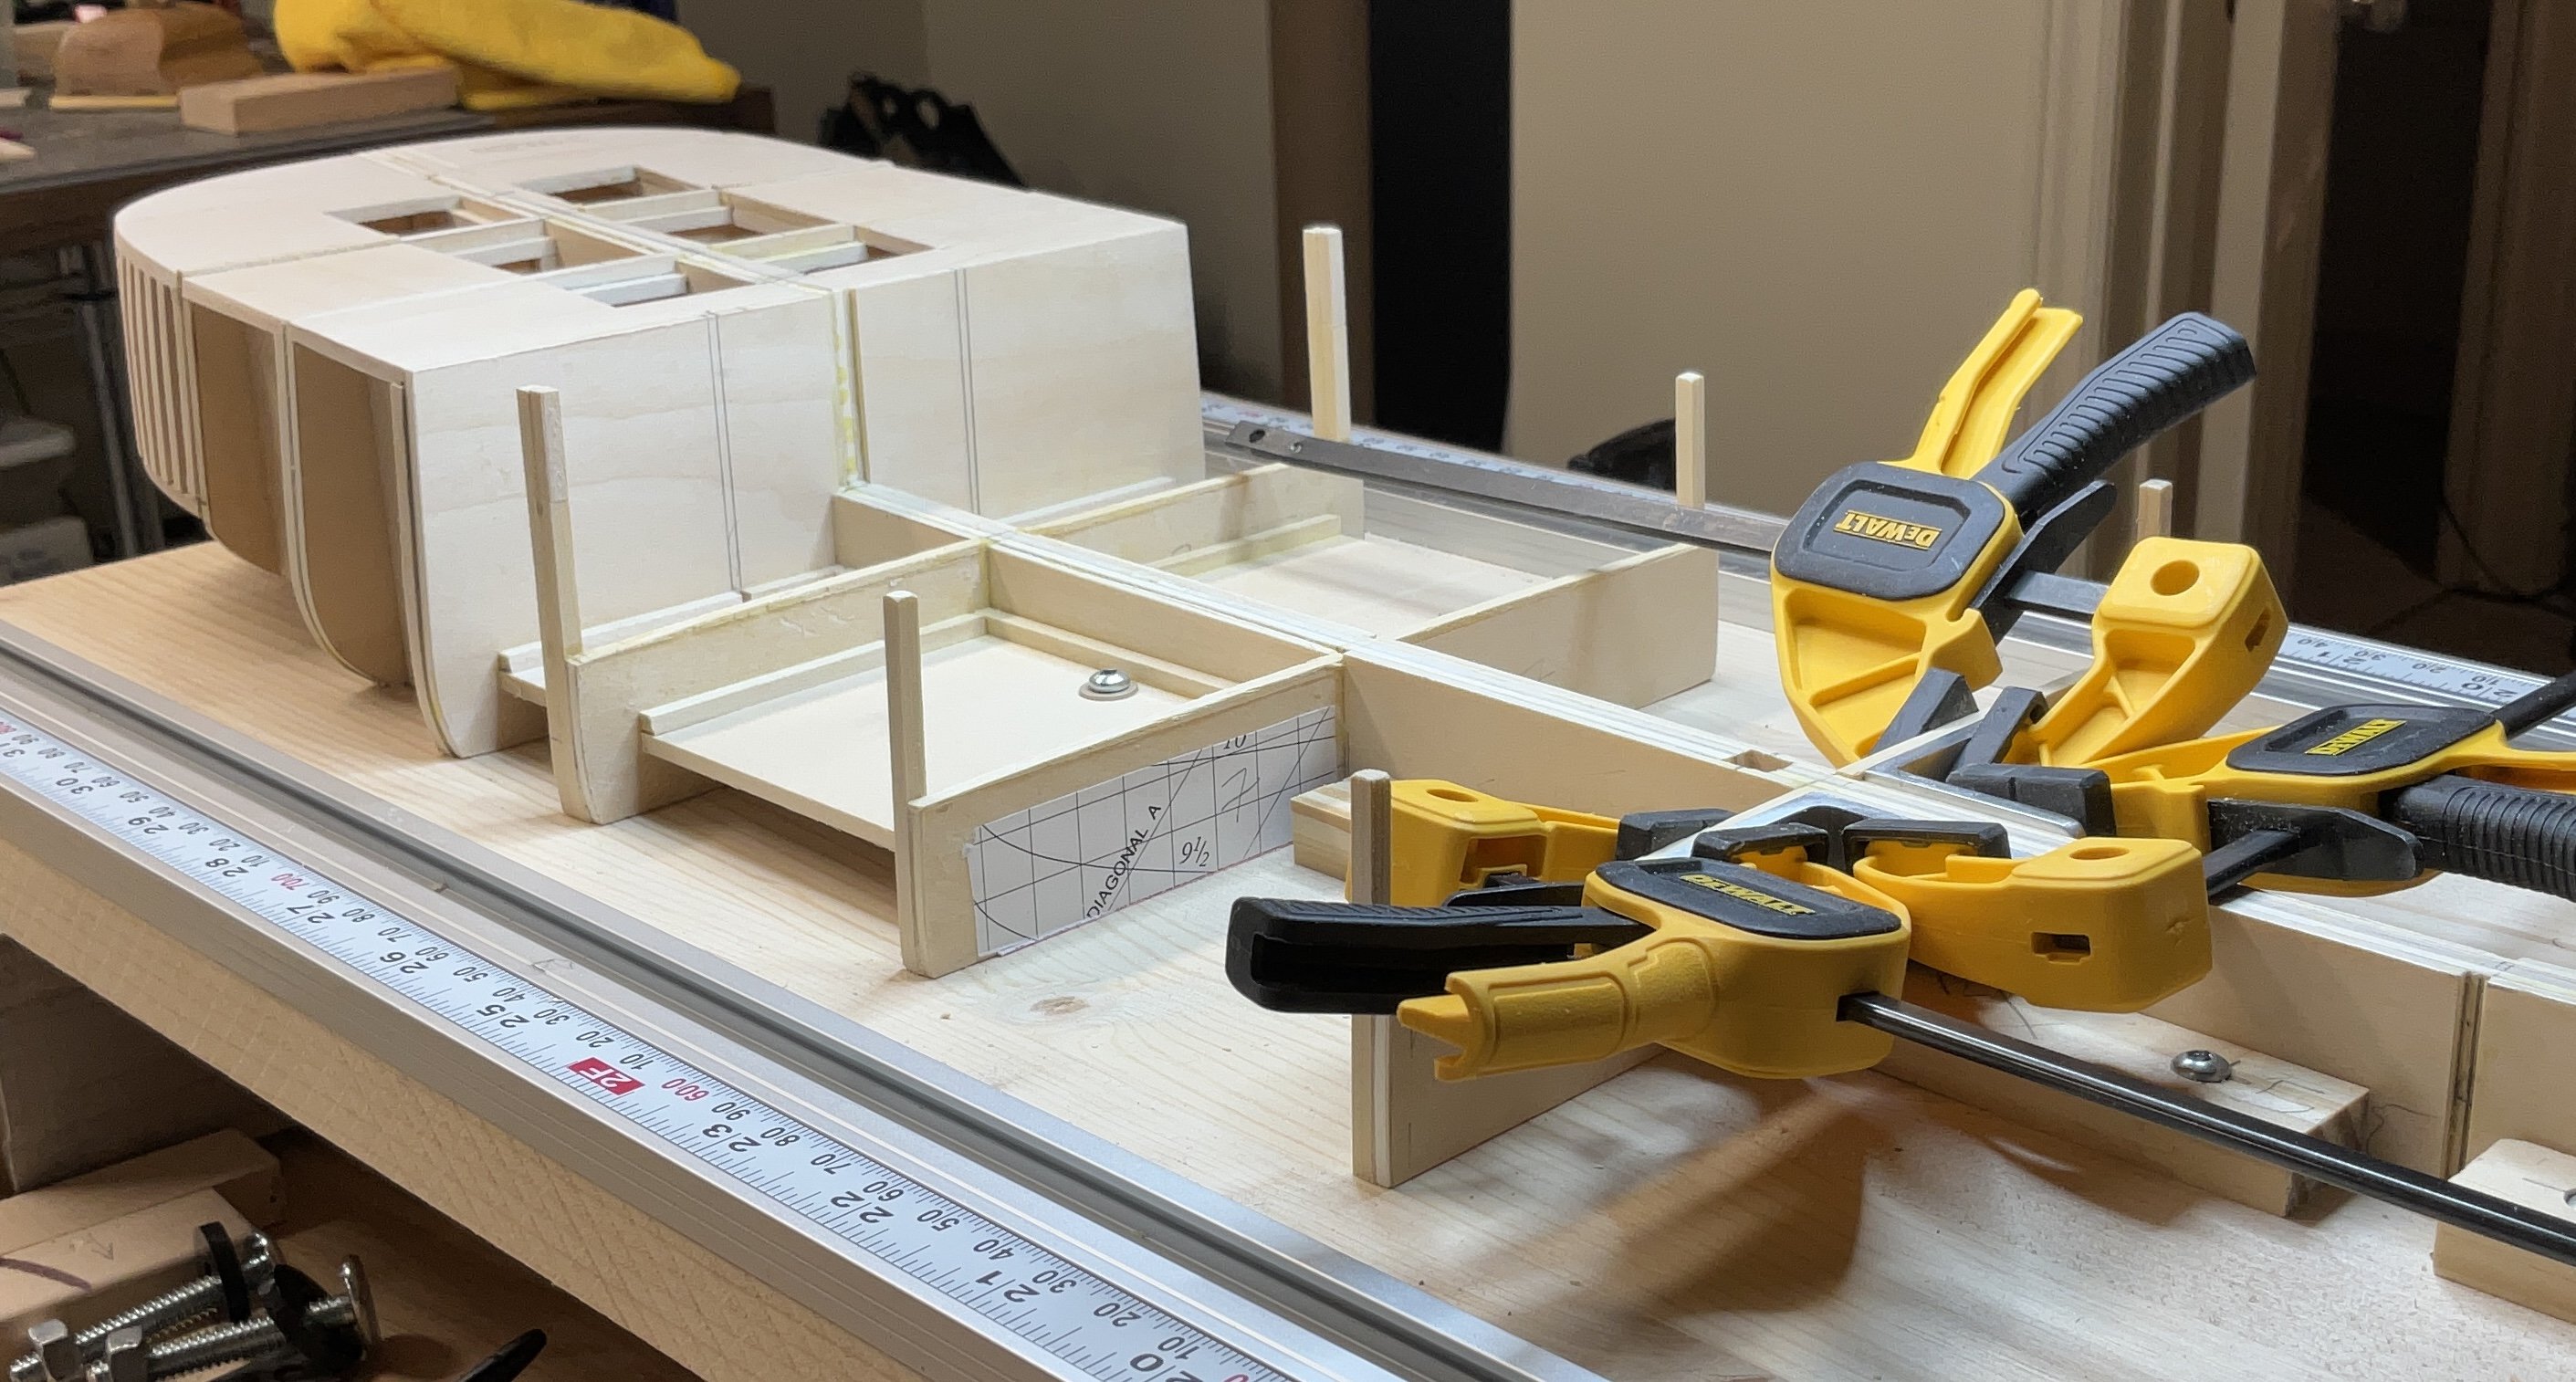
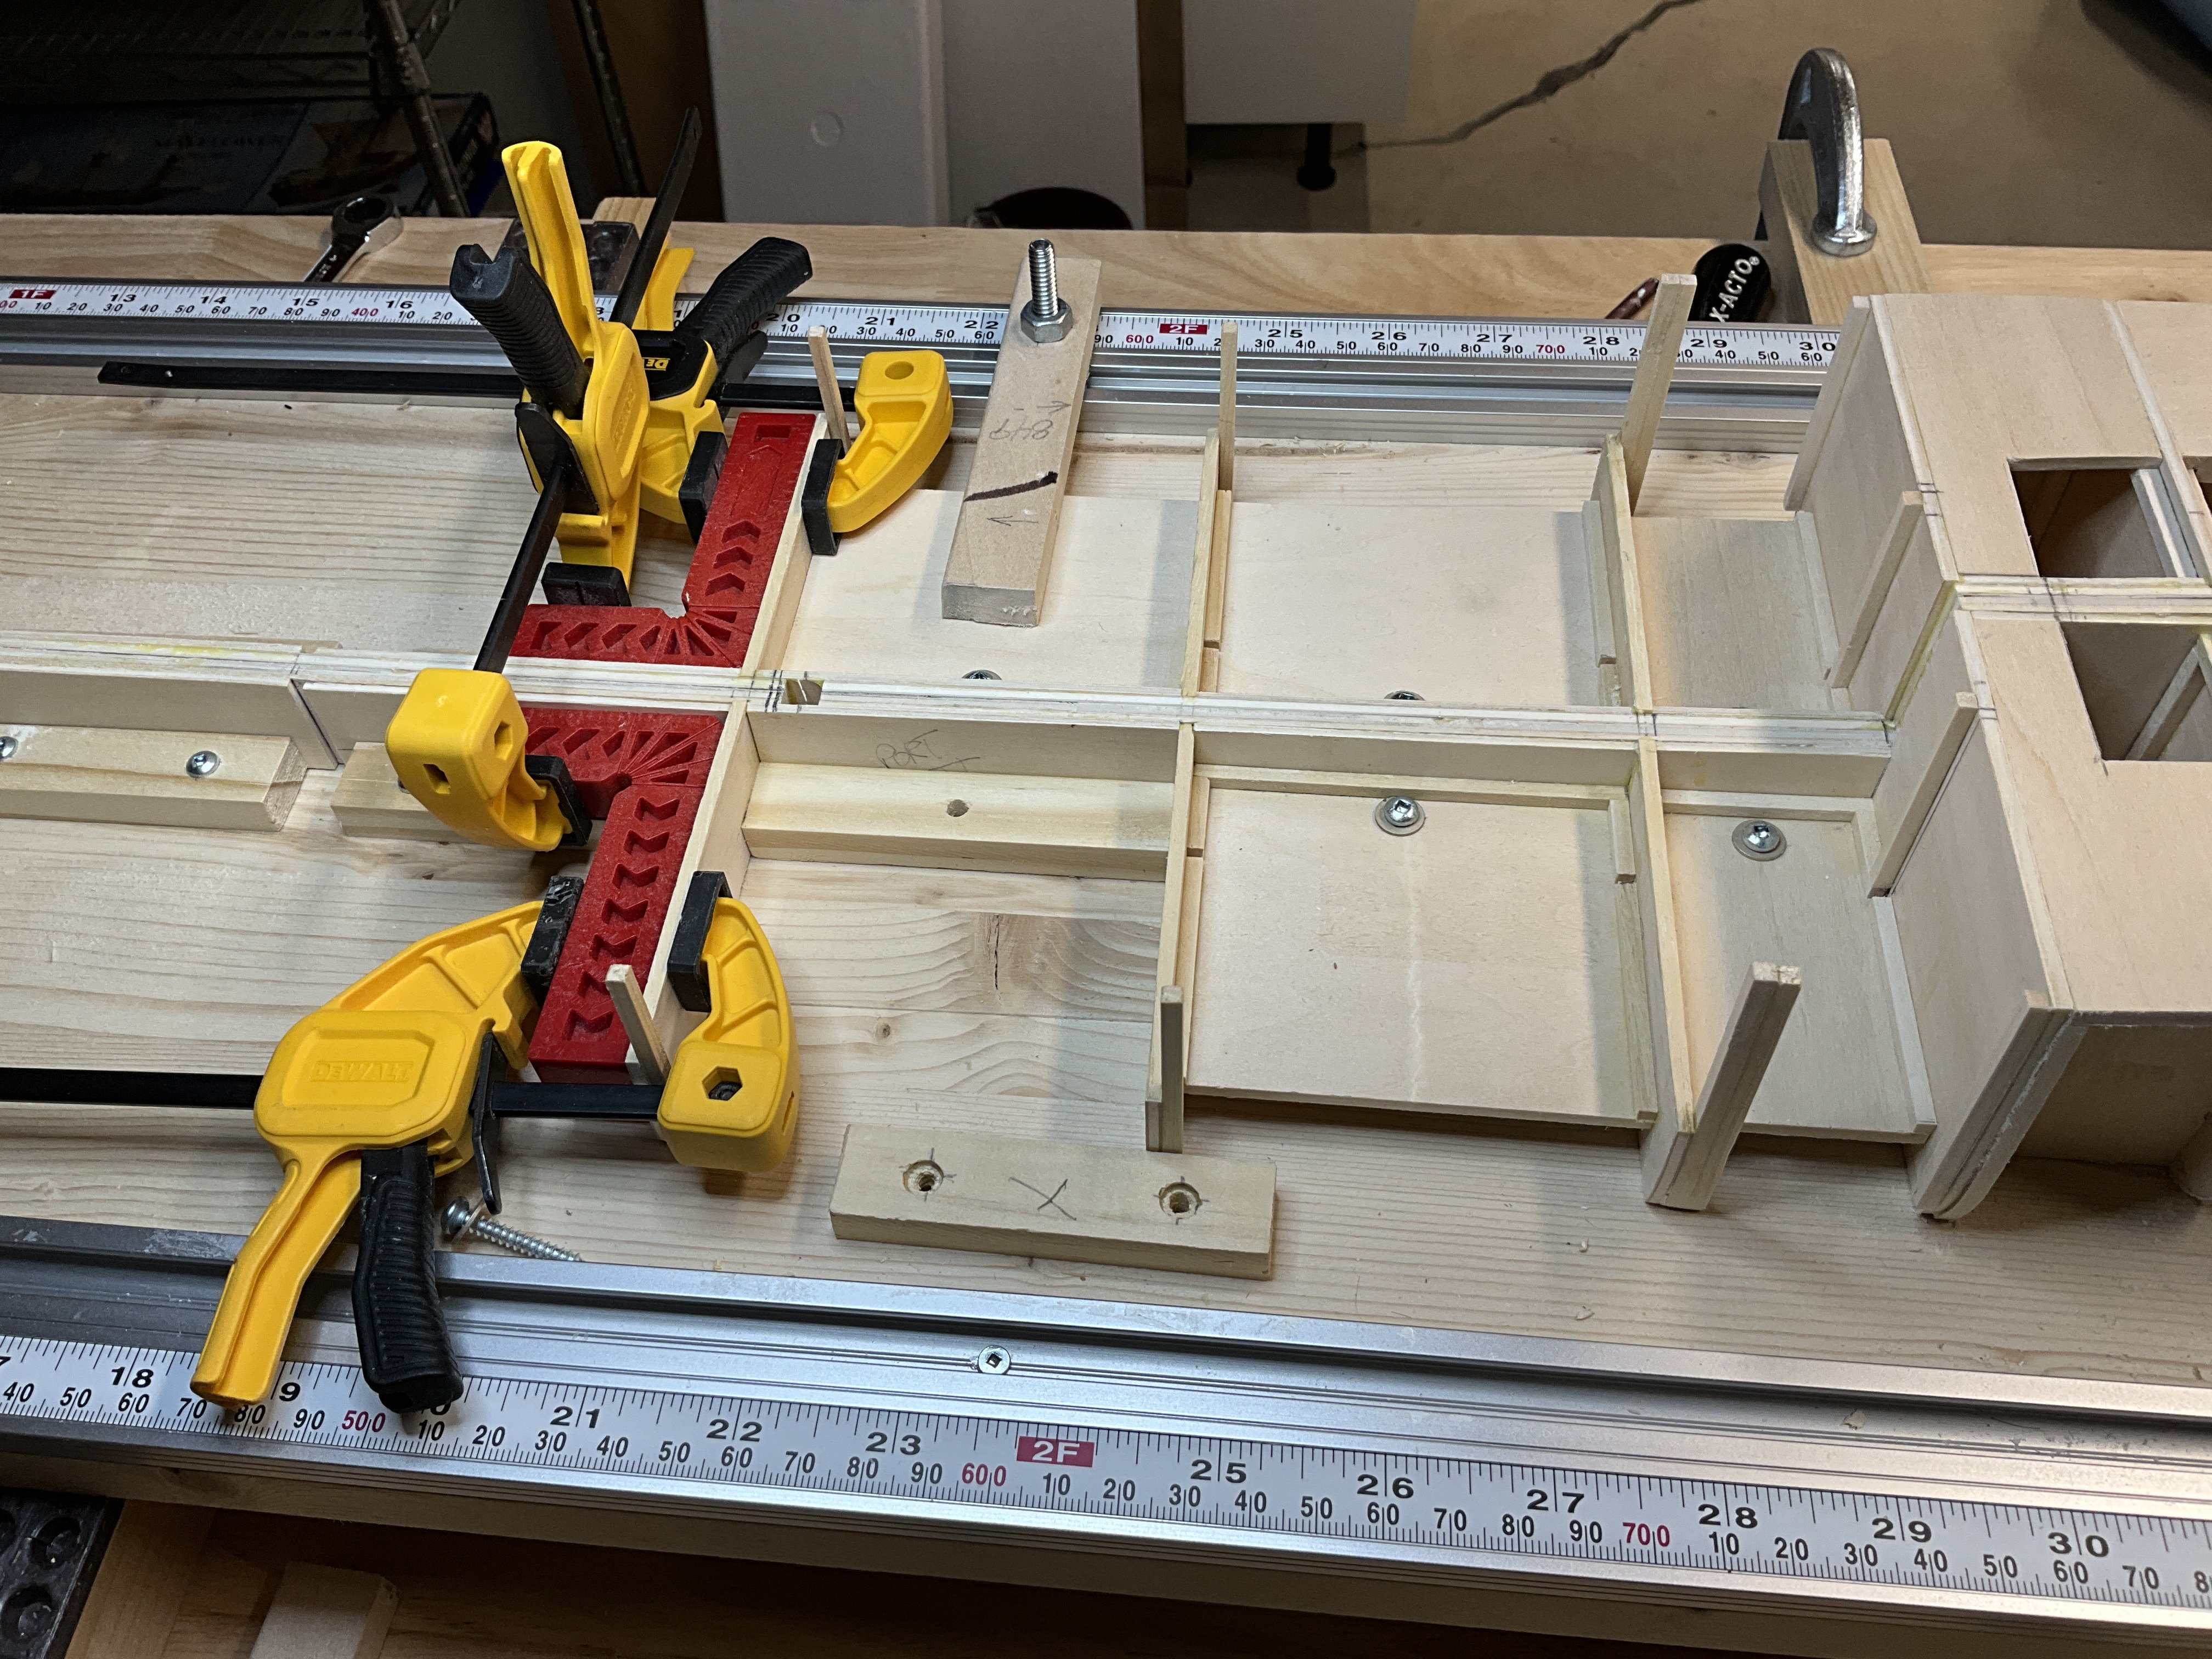
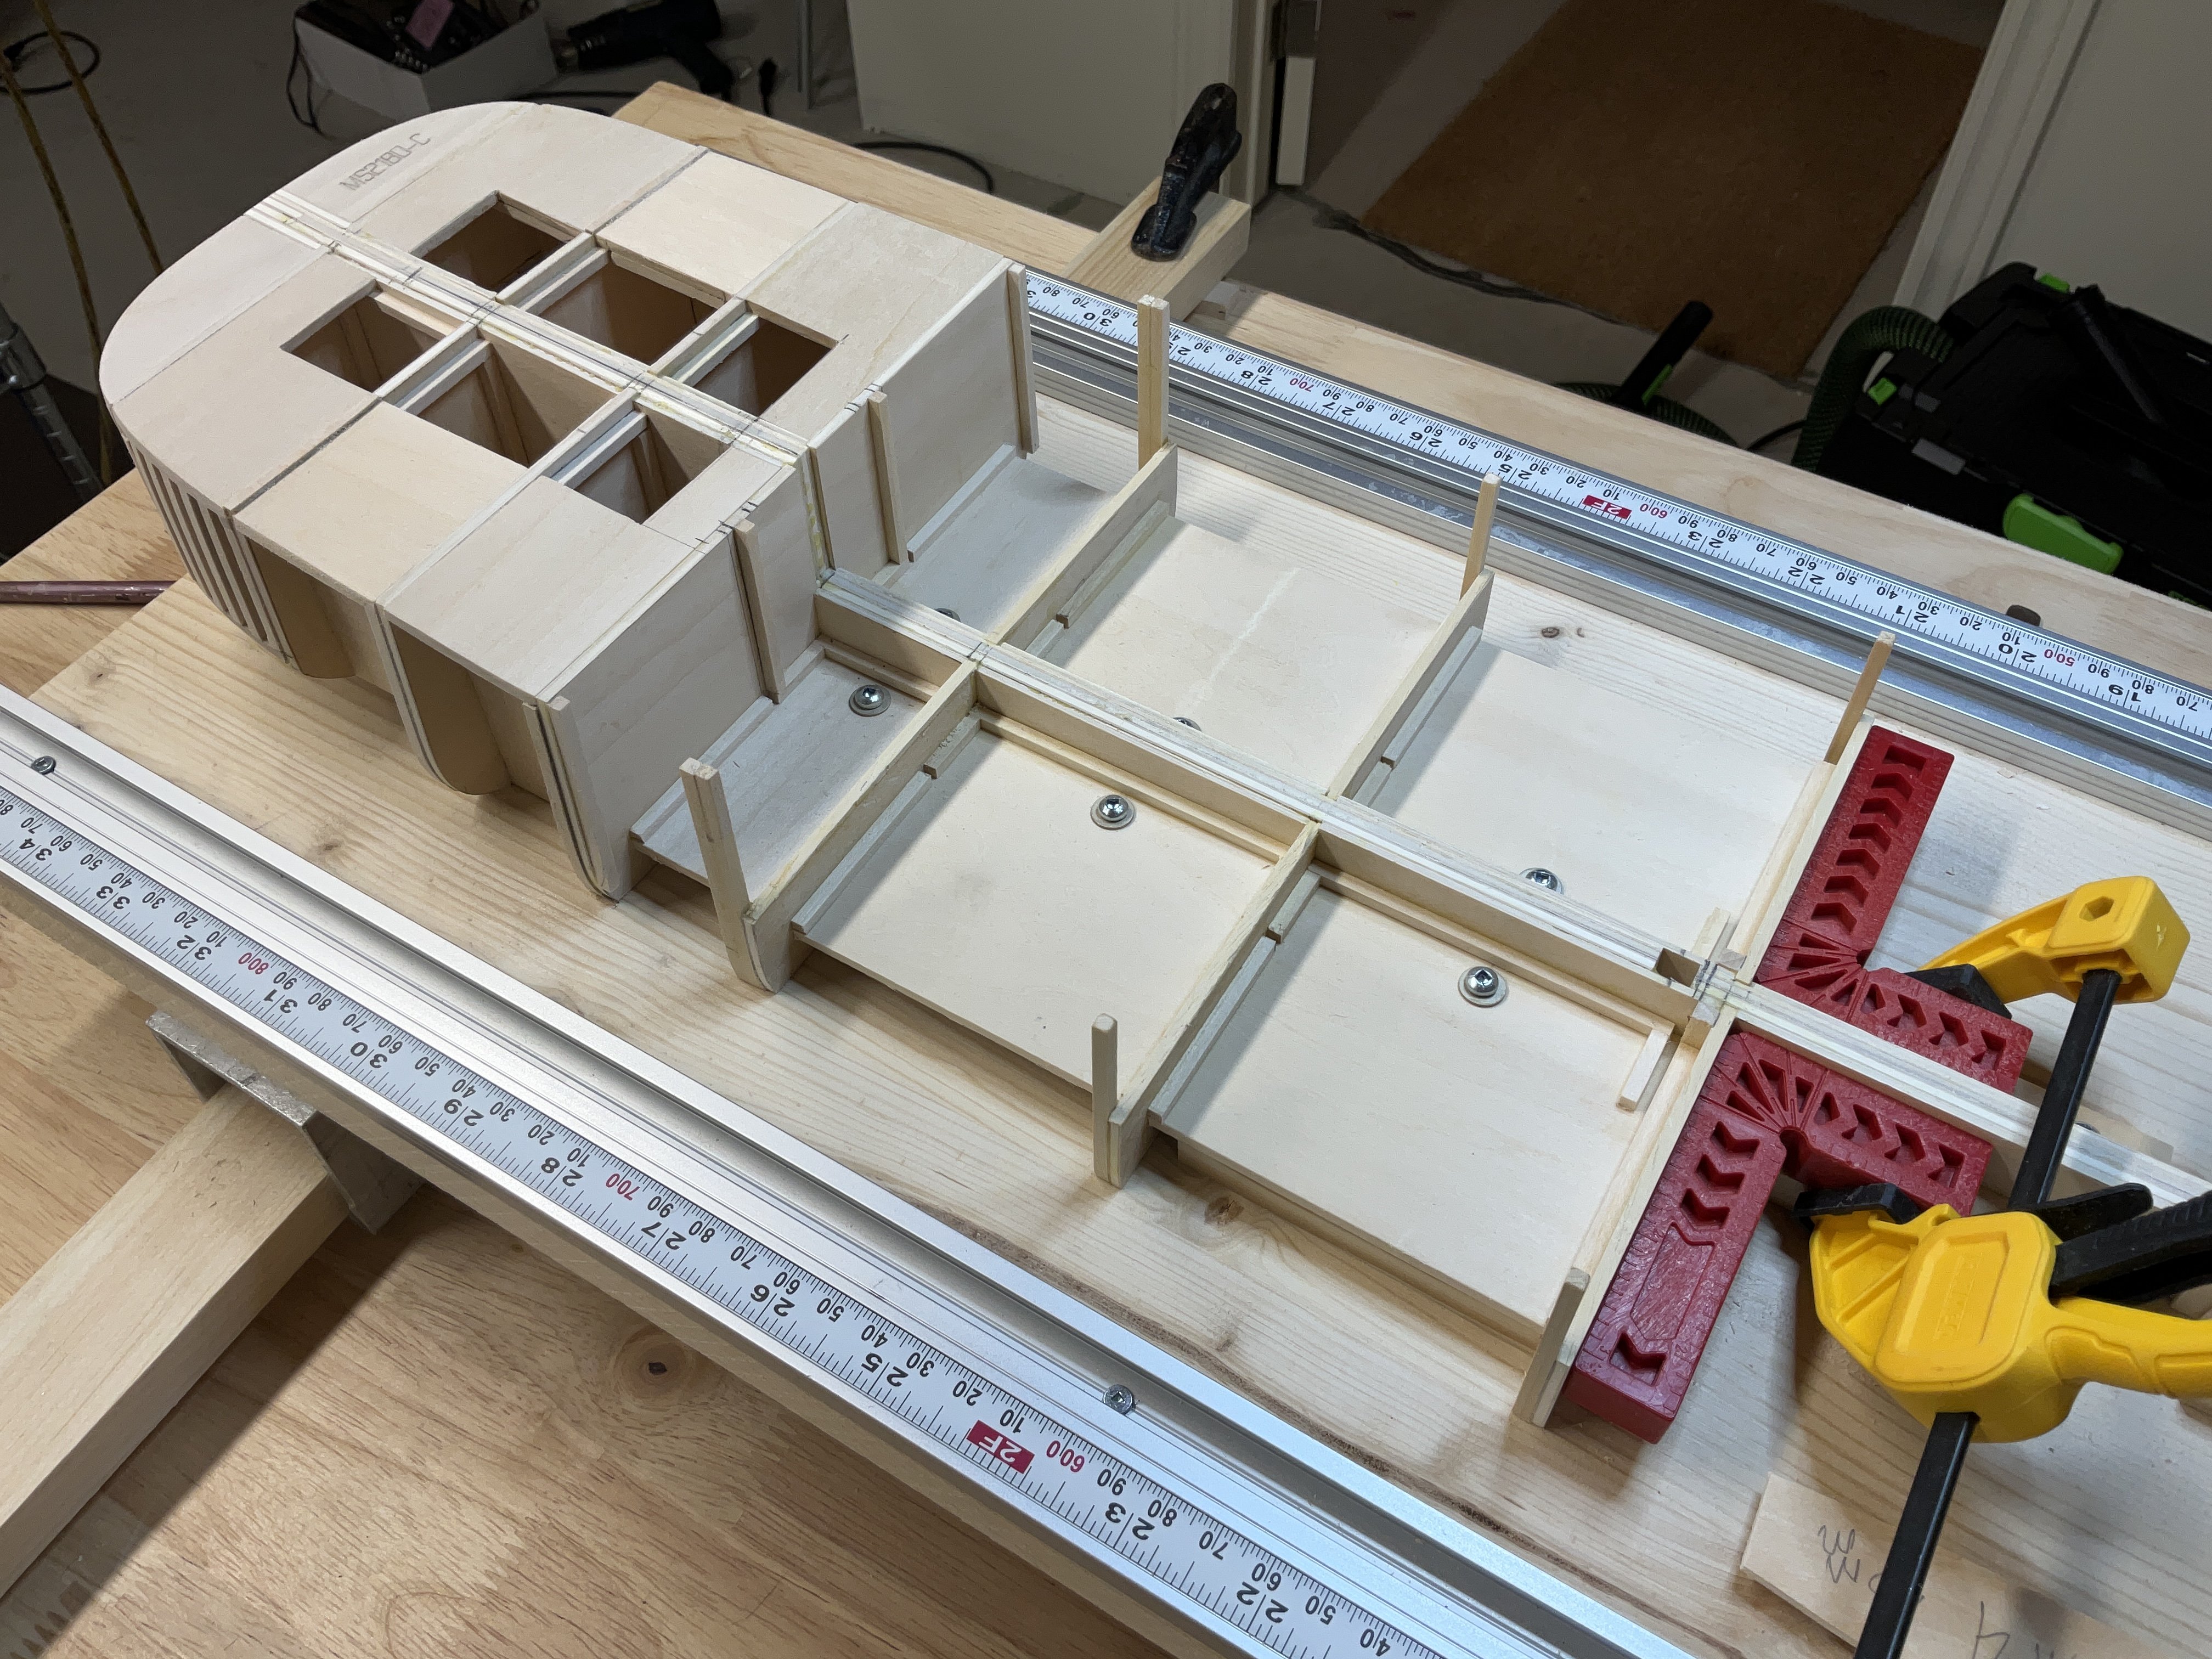
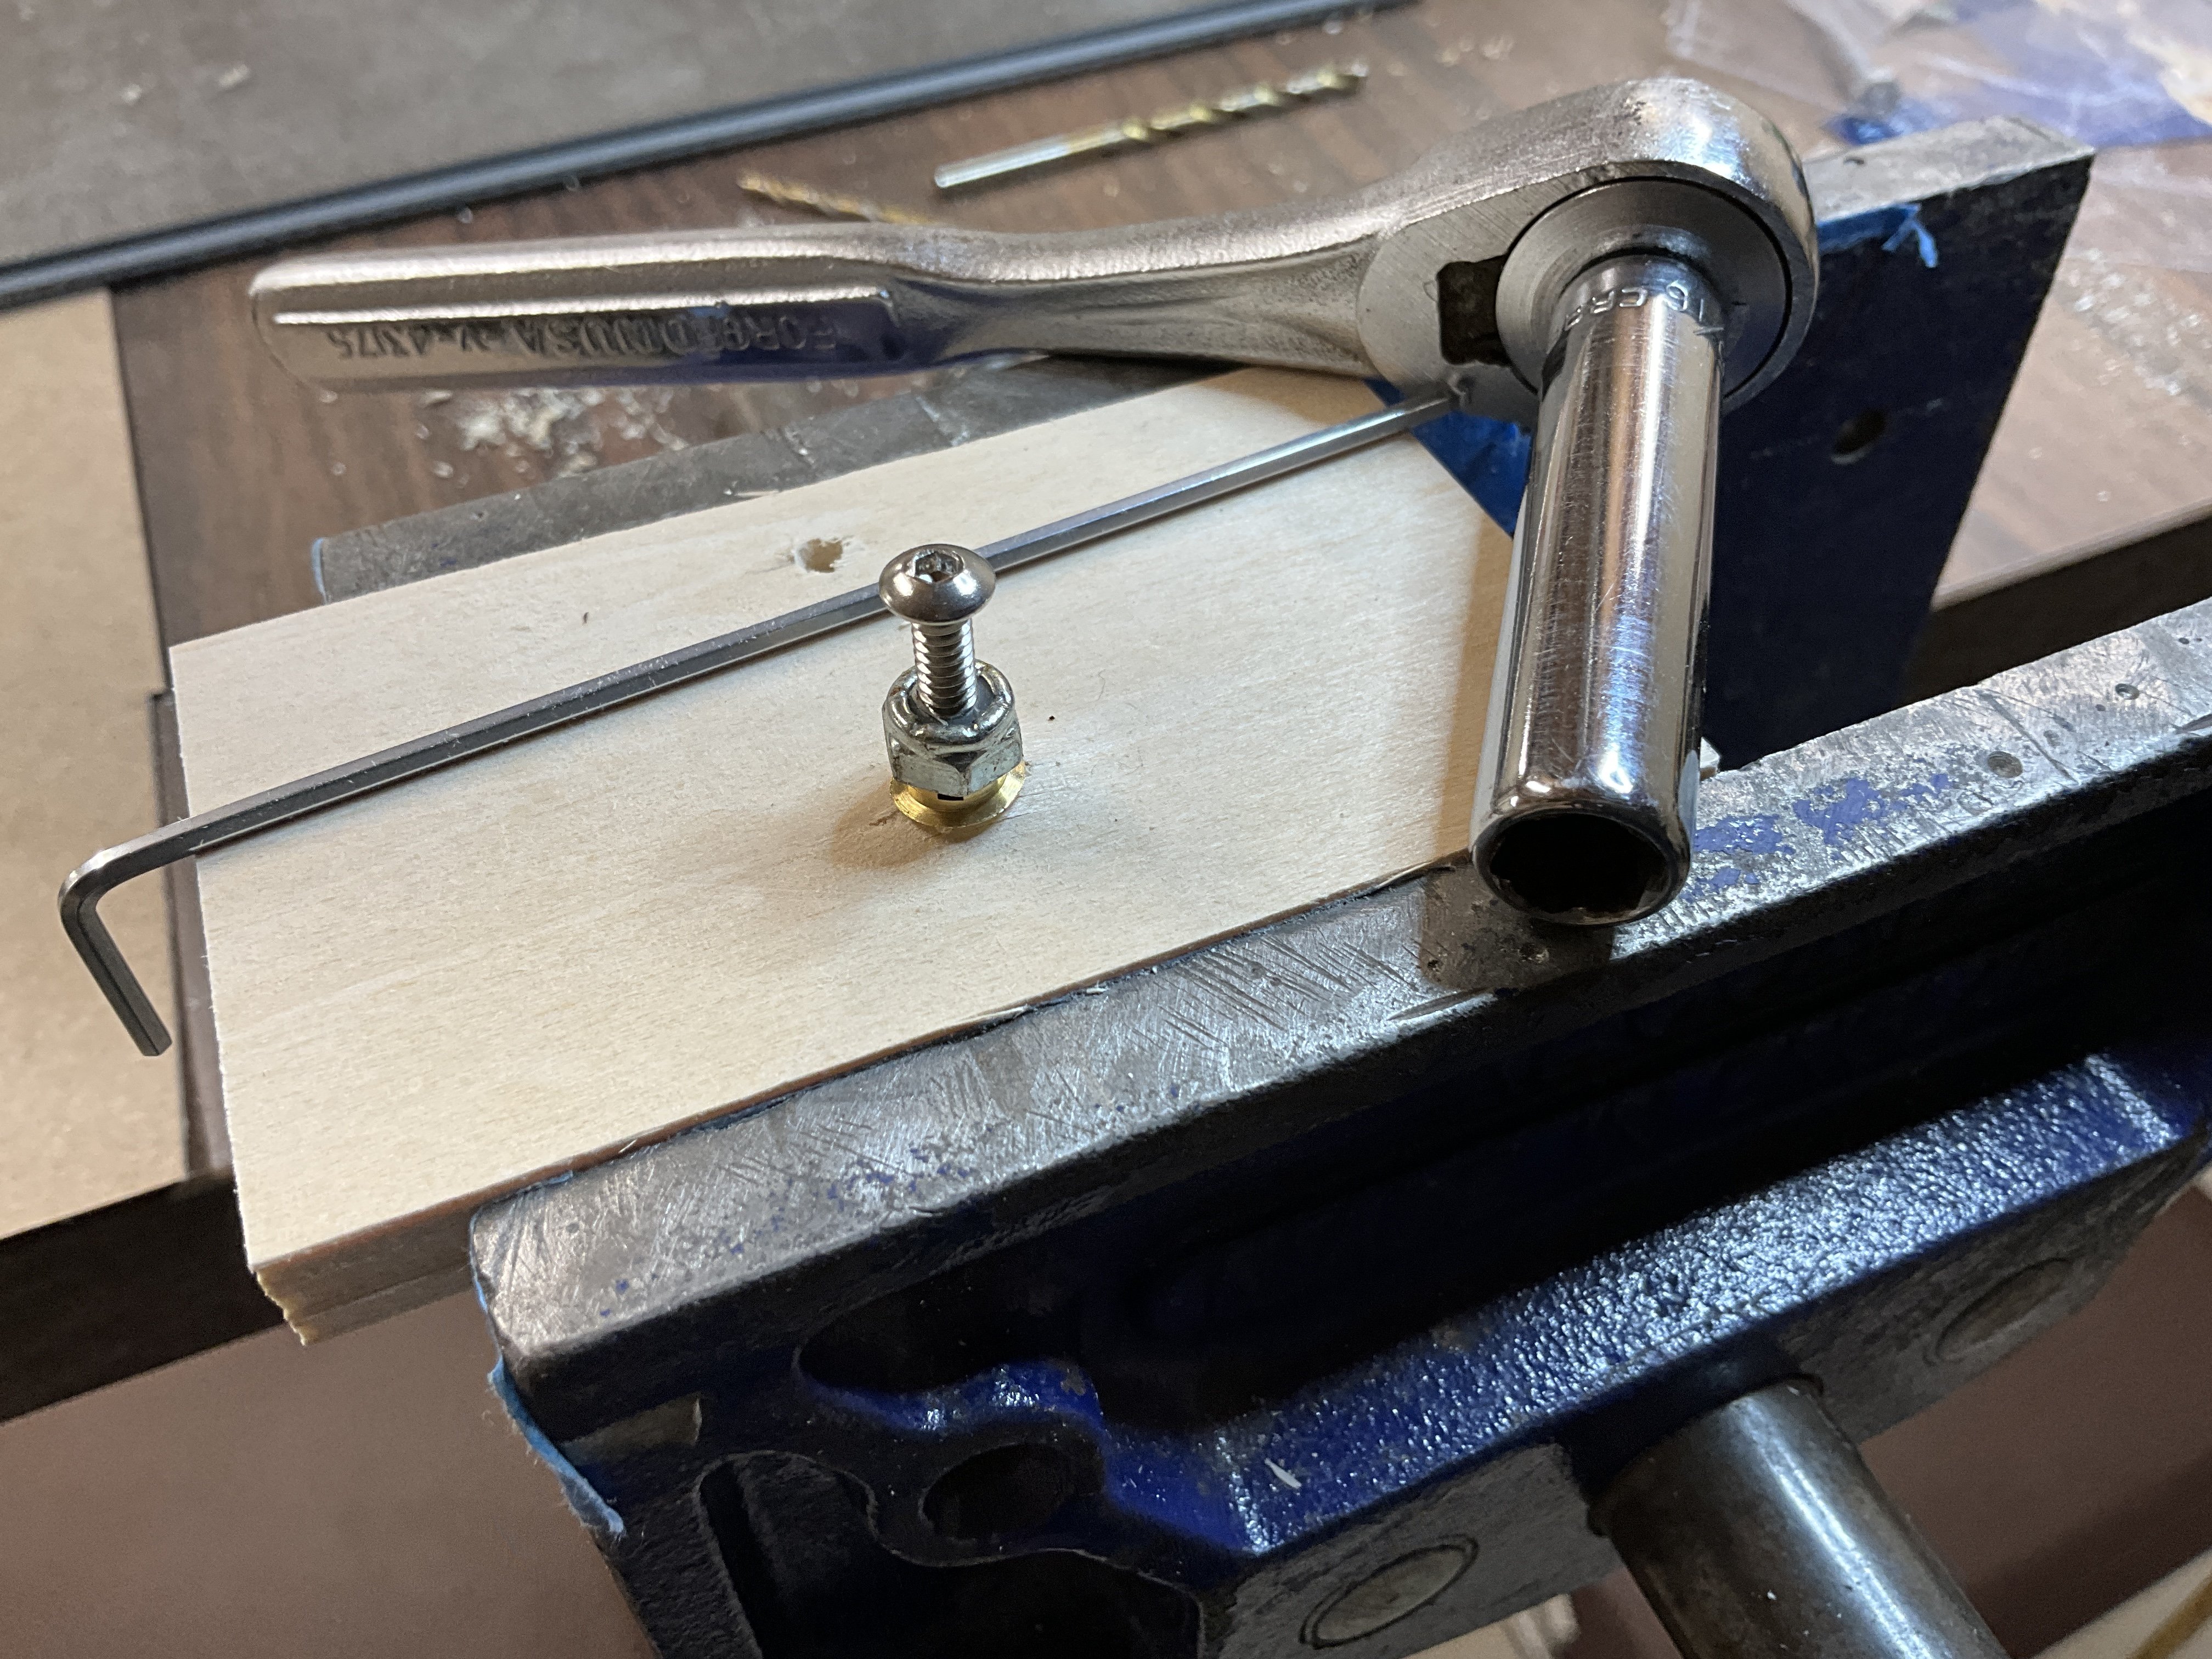
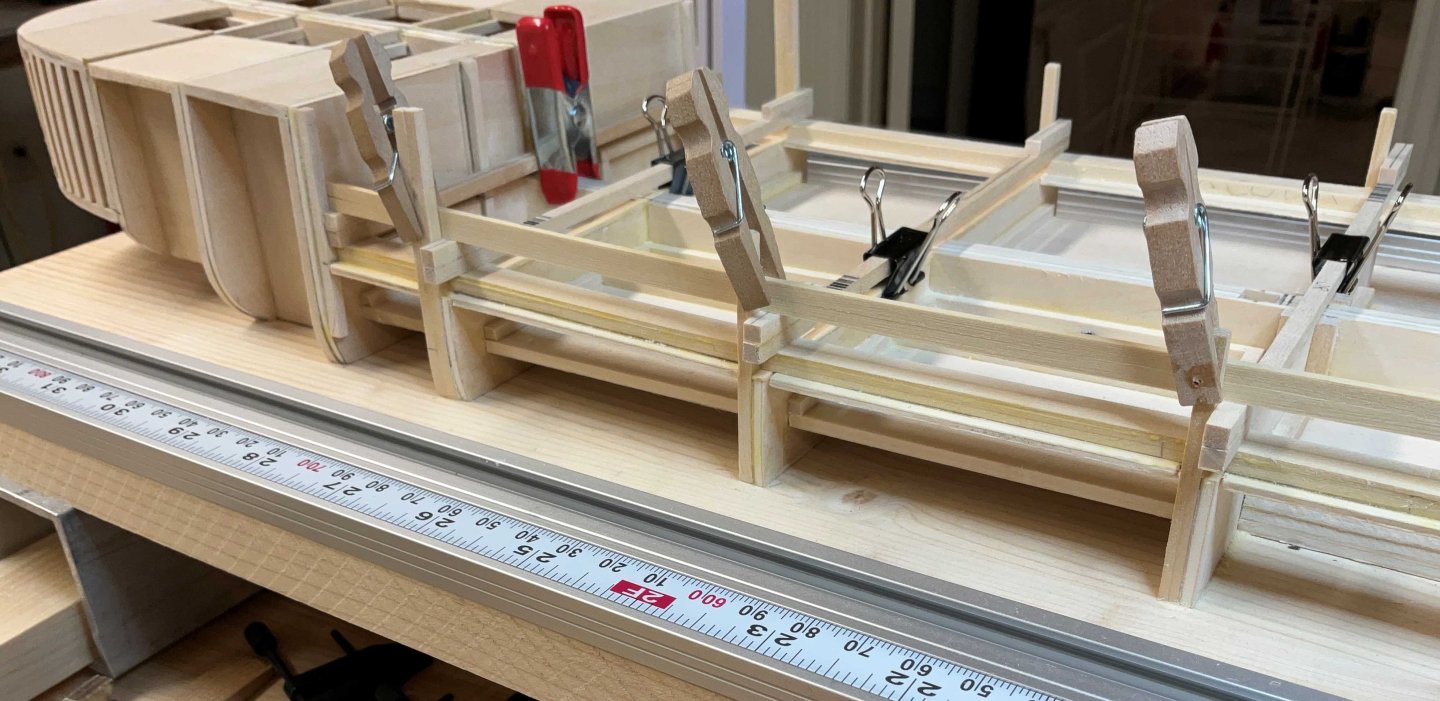
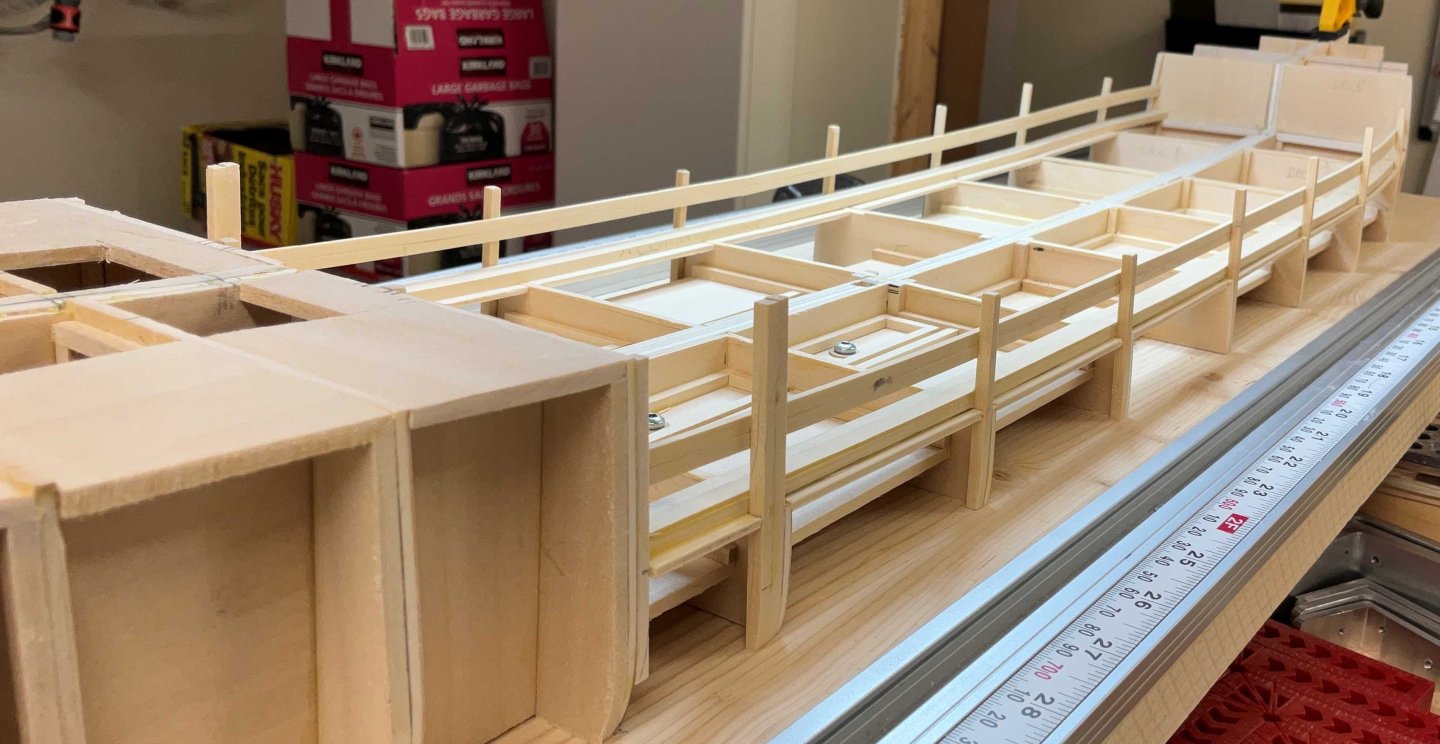
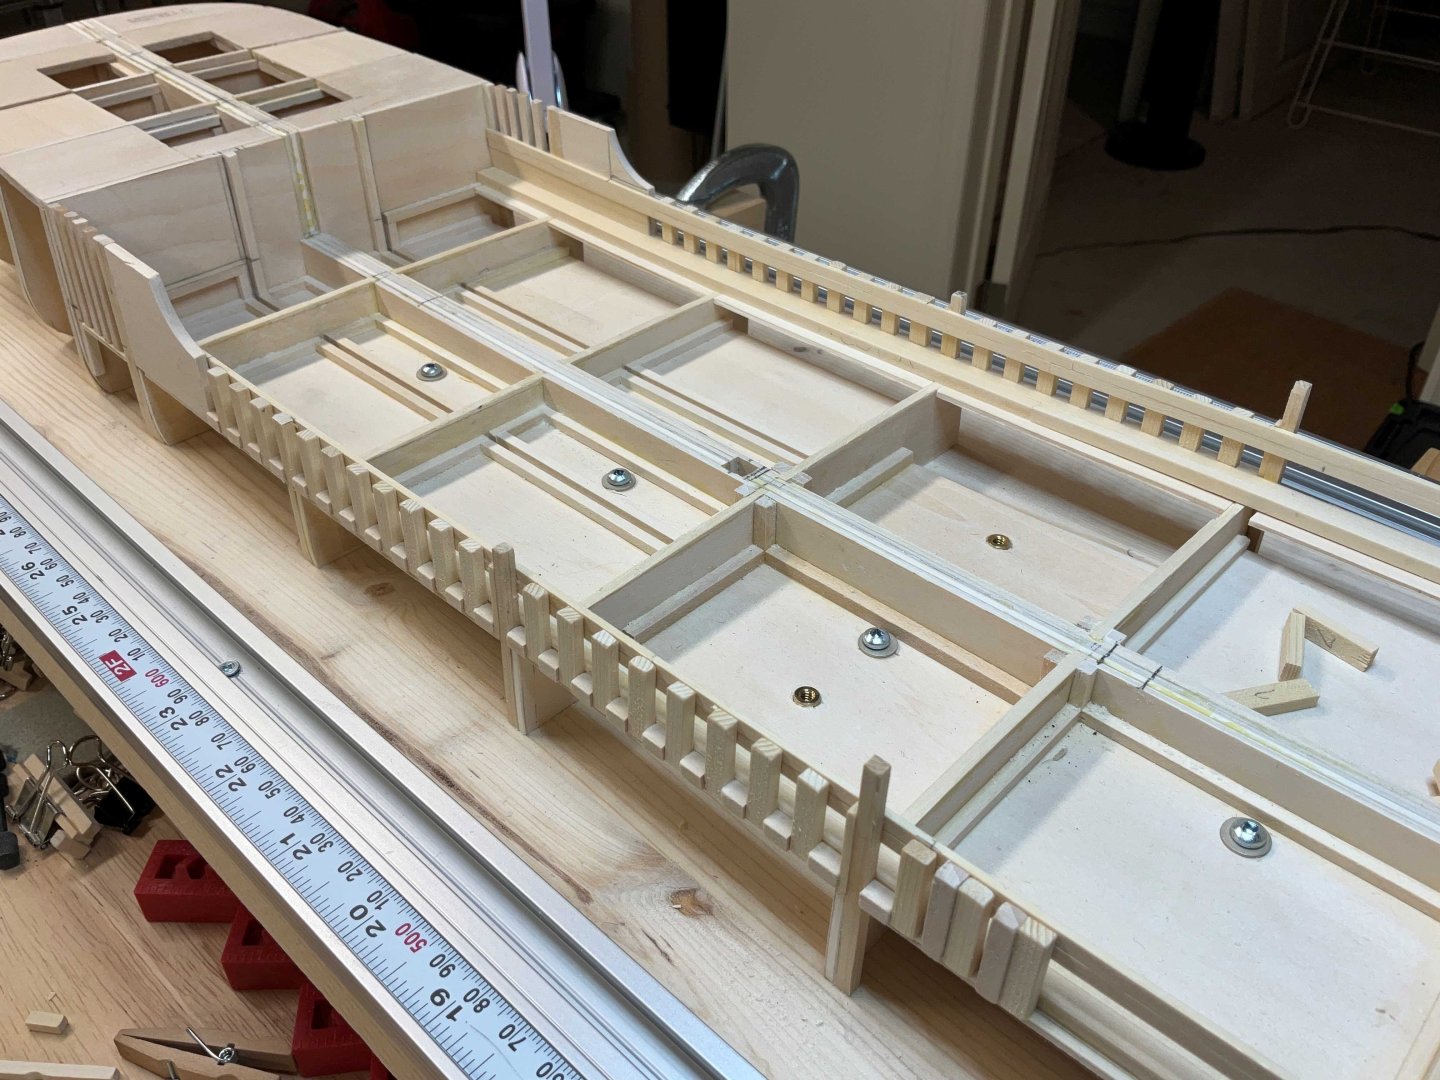
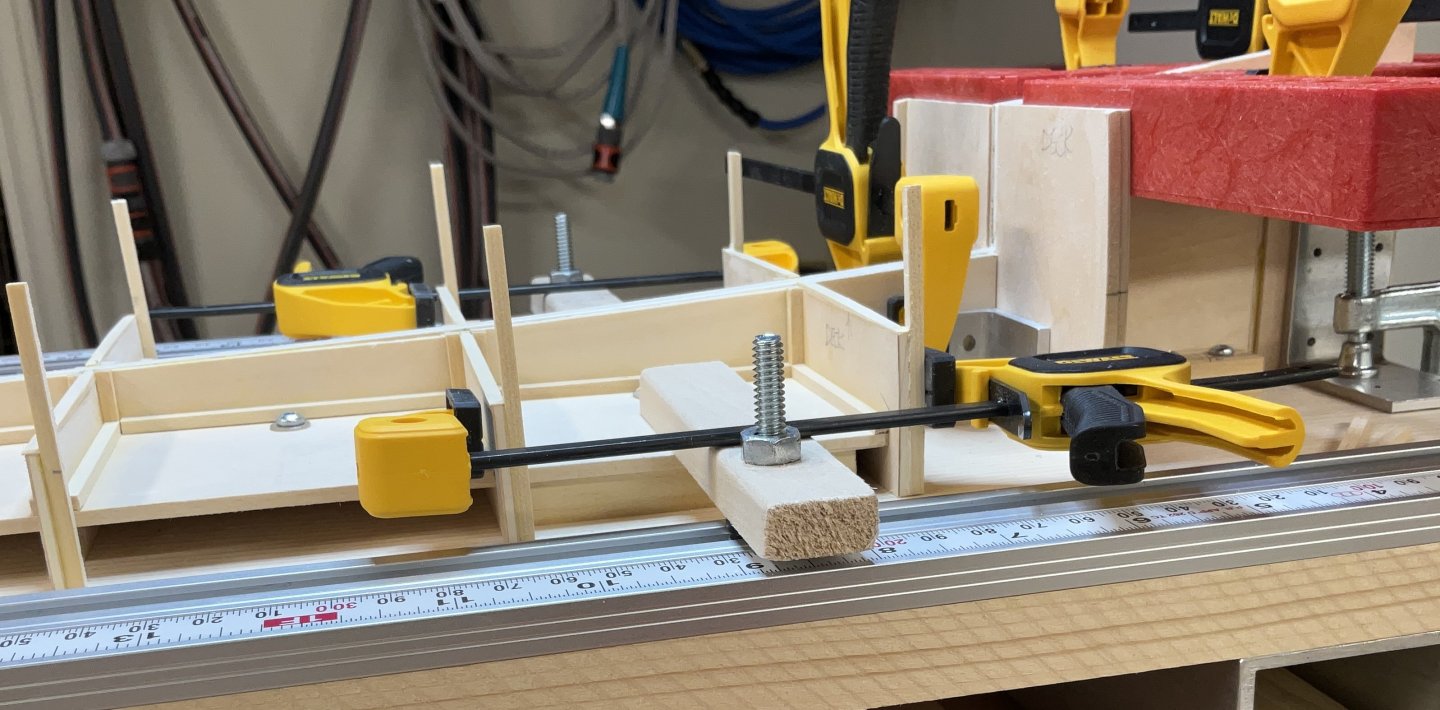
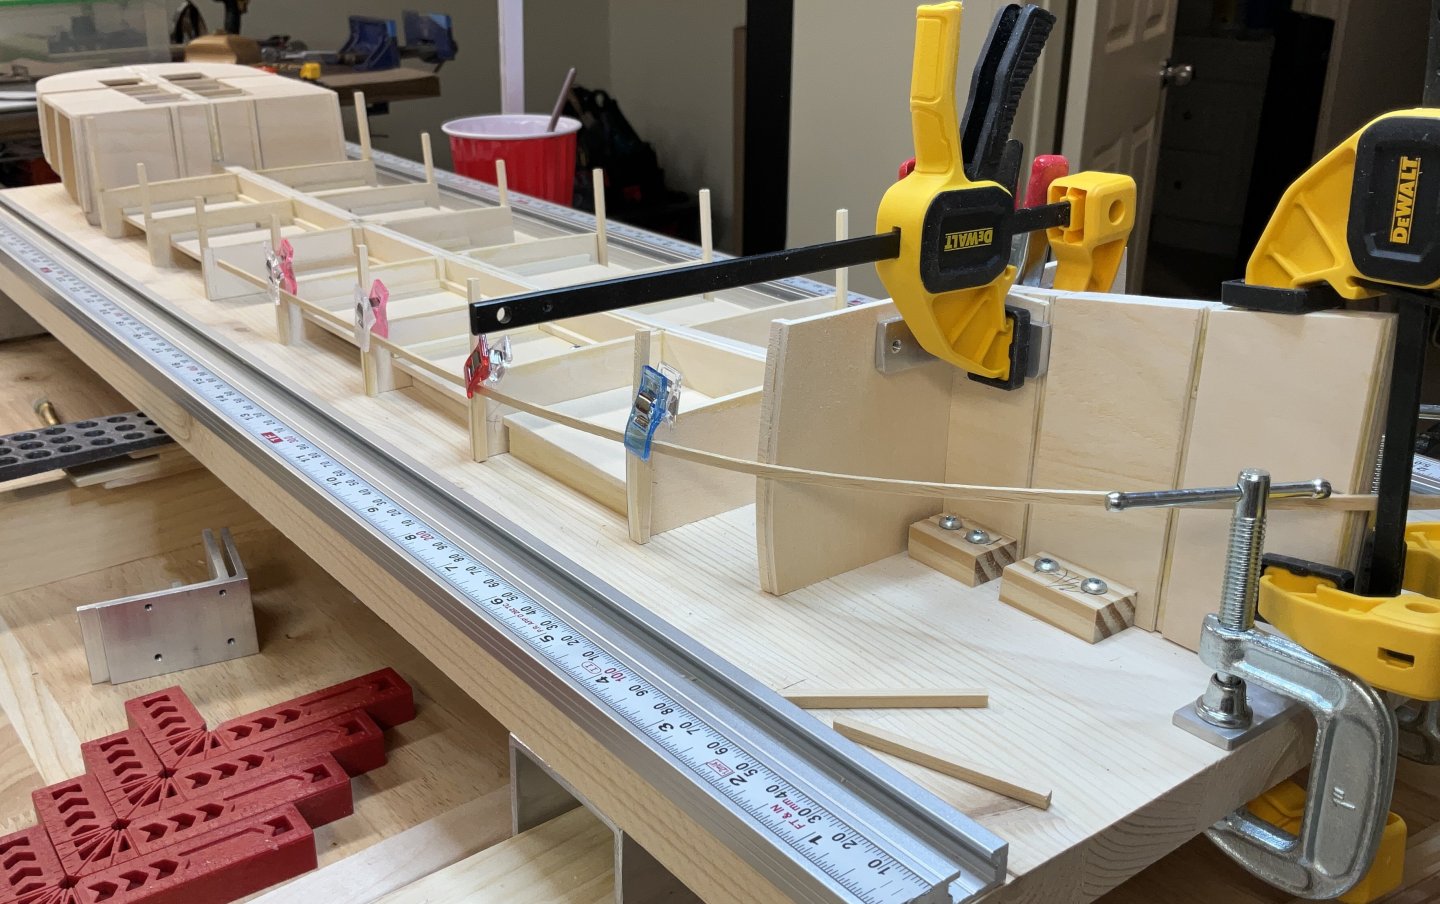
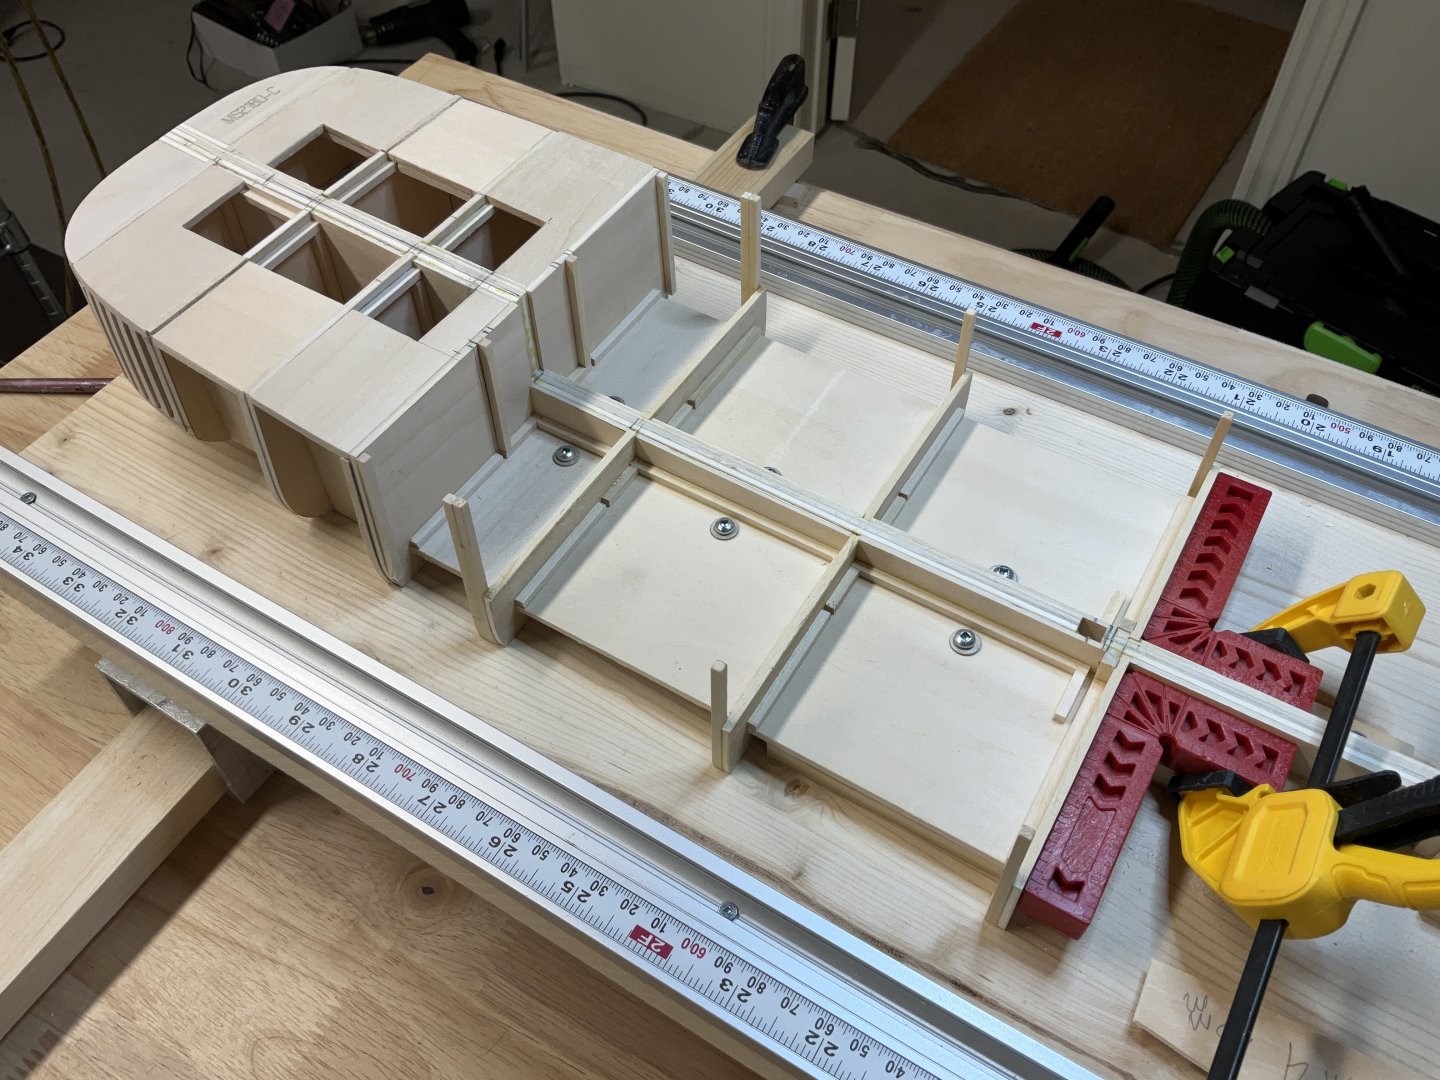
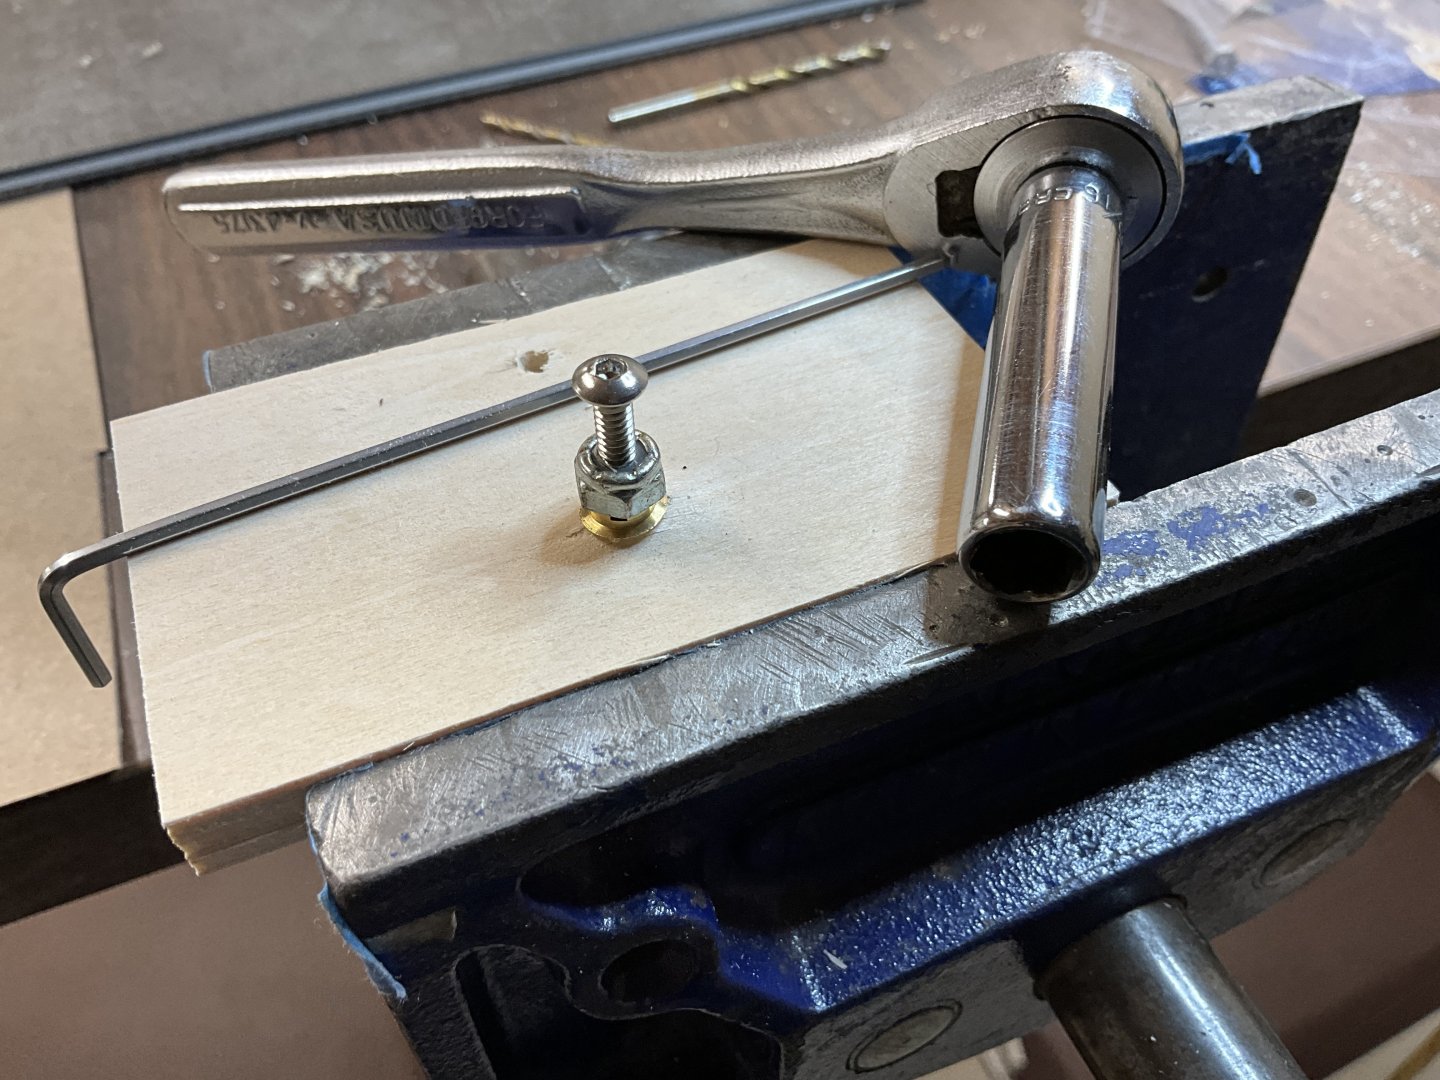
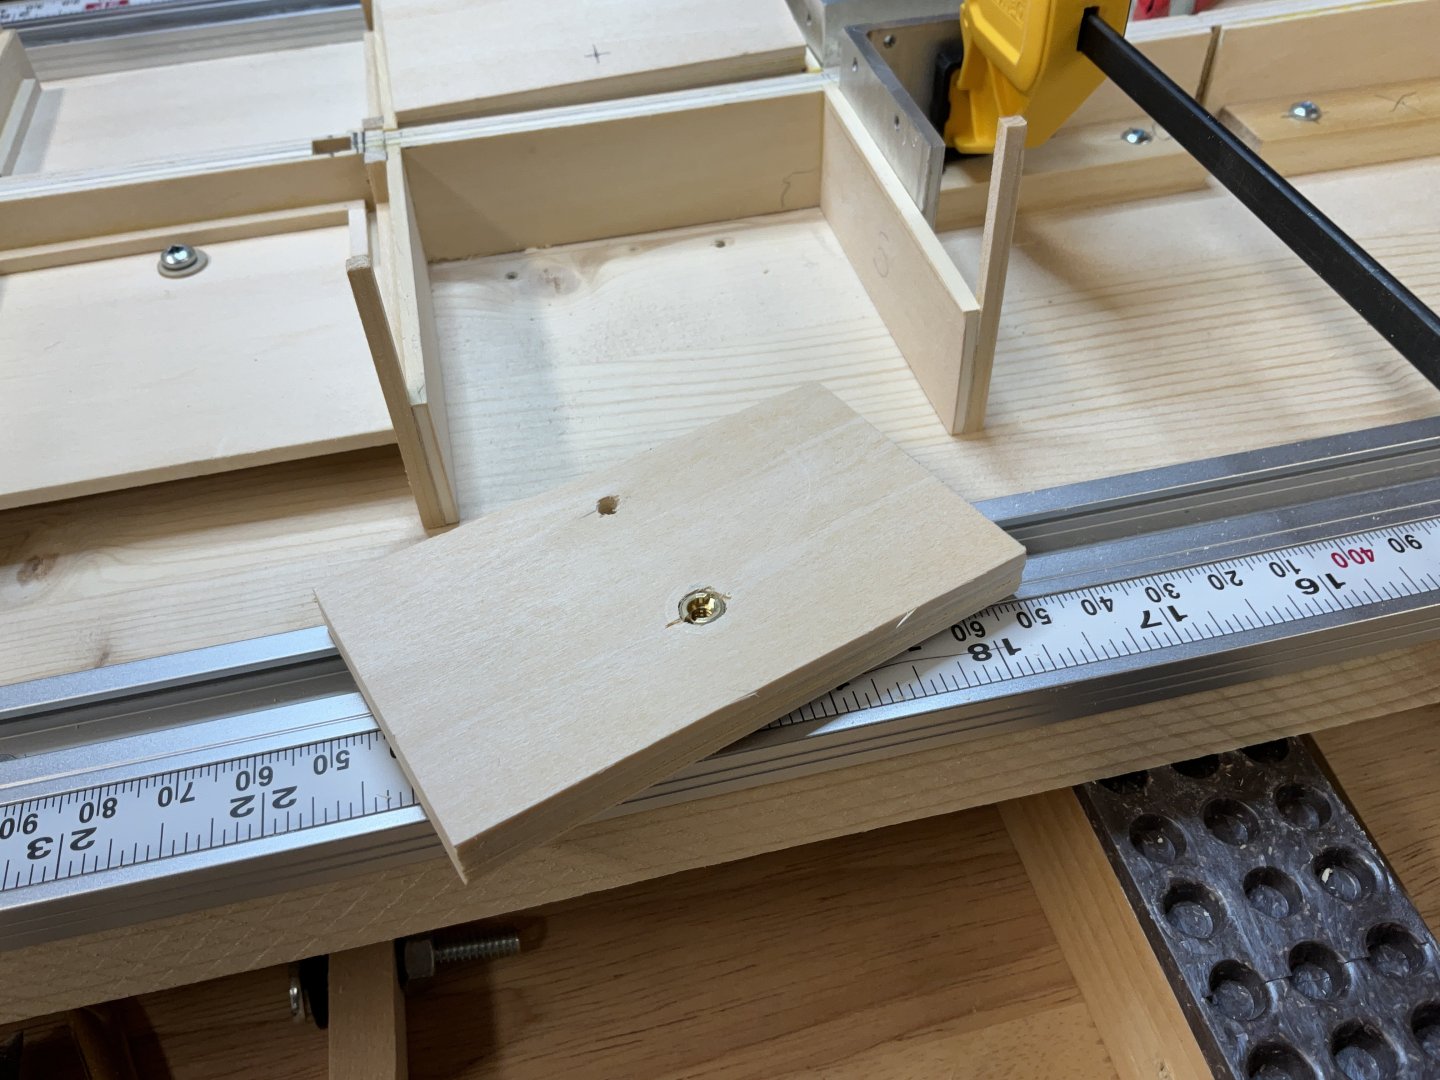
Hi Everyone, hope you are all well. Thank you for your Comments and Likes. They are really appreciated. The long march down the main deck has come to an end. I took lots of photos but they all look the same. Here are just a few of them. Lots of repetitive stuff going on. The brass insert nuts were not the easiest to install straight using the provided slot for a straight bladed screwdriver. Used a machine screw and a jamb nut to turn them in with a long socket. Plastic from clamshell packaging was slid under each glued joint and removed after the glue had dried. Finally arrived at the bulkhead that extends up to the forecastle deck. Not far now to get to the stem. Hope to see you soon!


-
Hi palmerit, I apologize for posting the picture to your build log. I thought that I was posting to the Model tips and tricks thread. I can delete the photo if you want.
- 133 replies
-
- 2
-
-
- Ranger
- vanguard models
- (and 1 more)
-
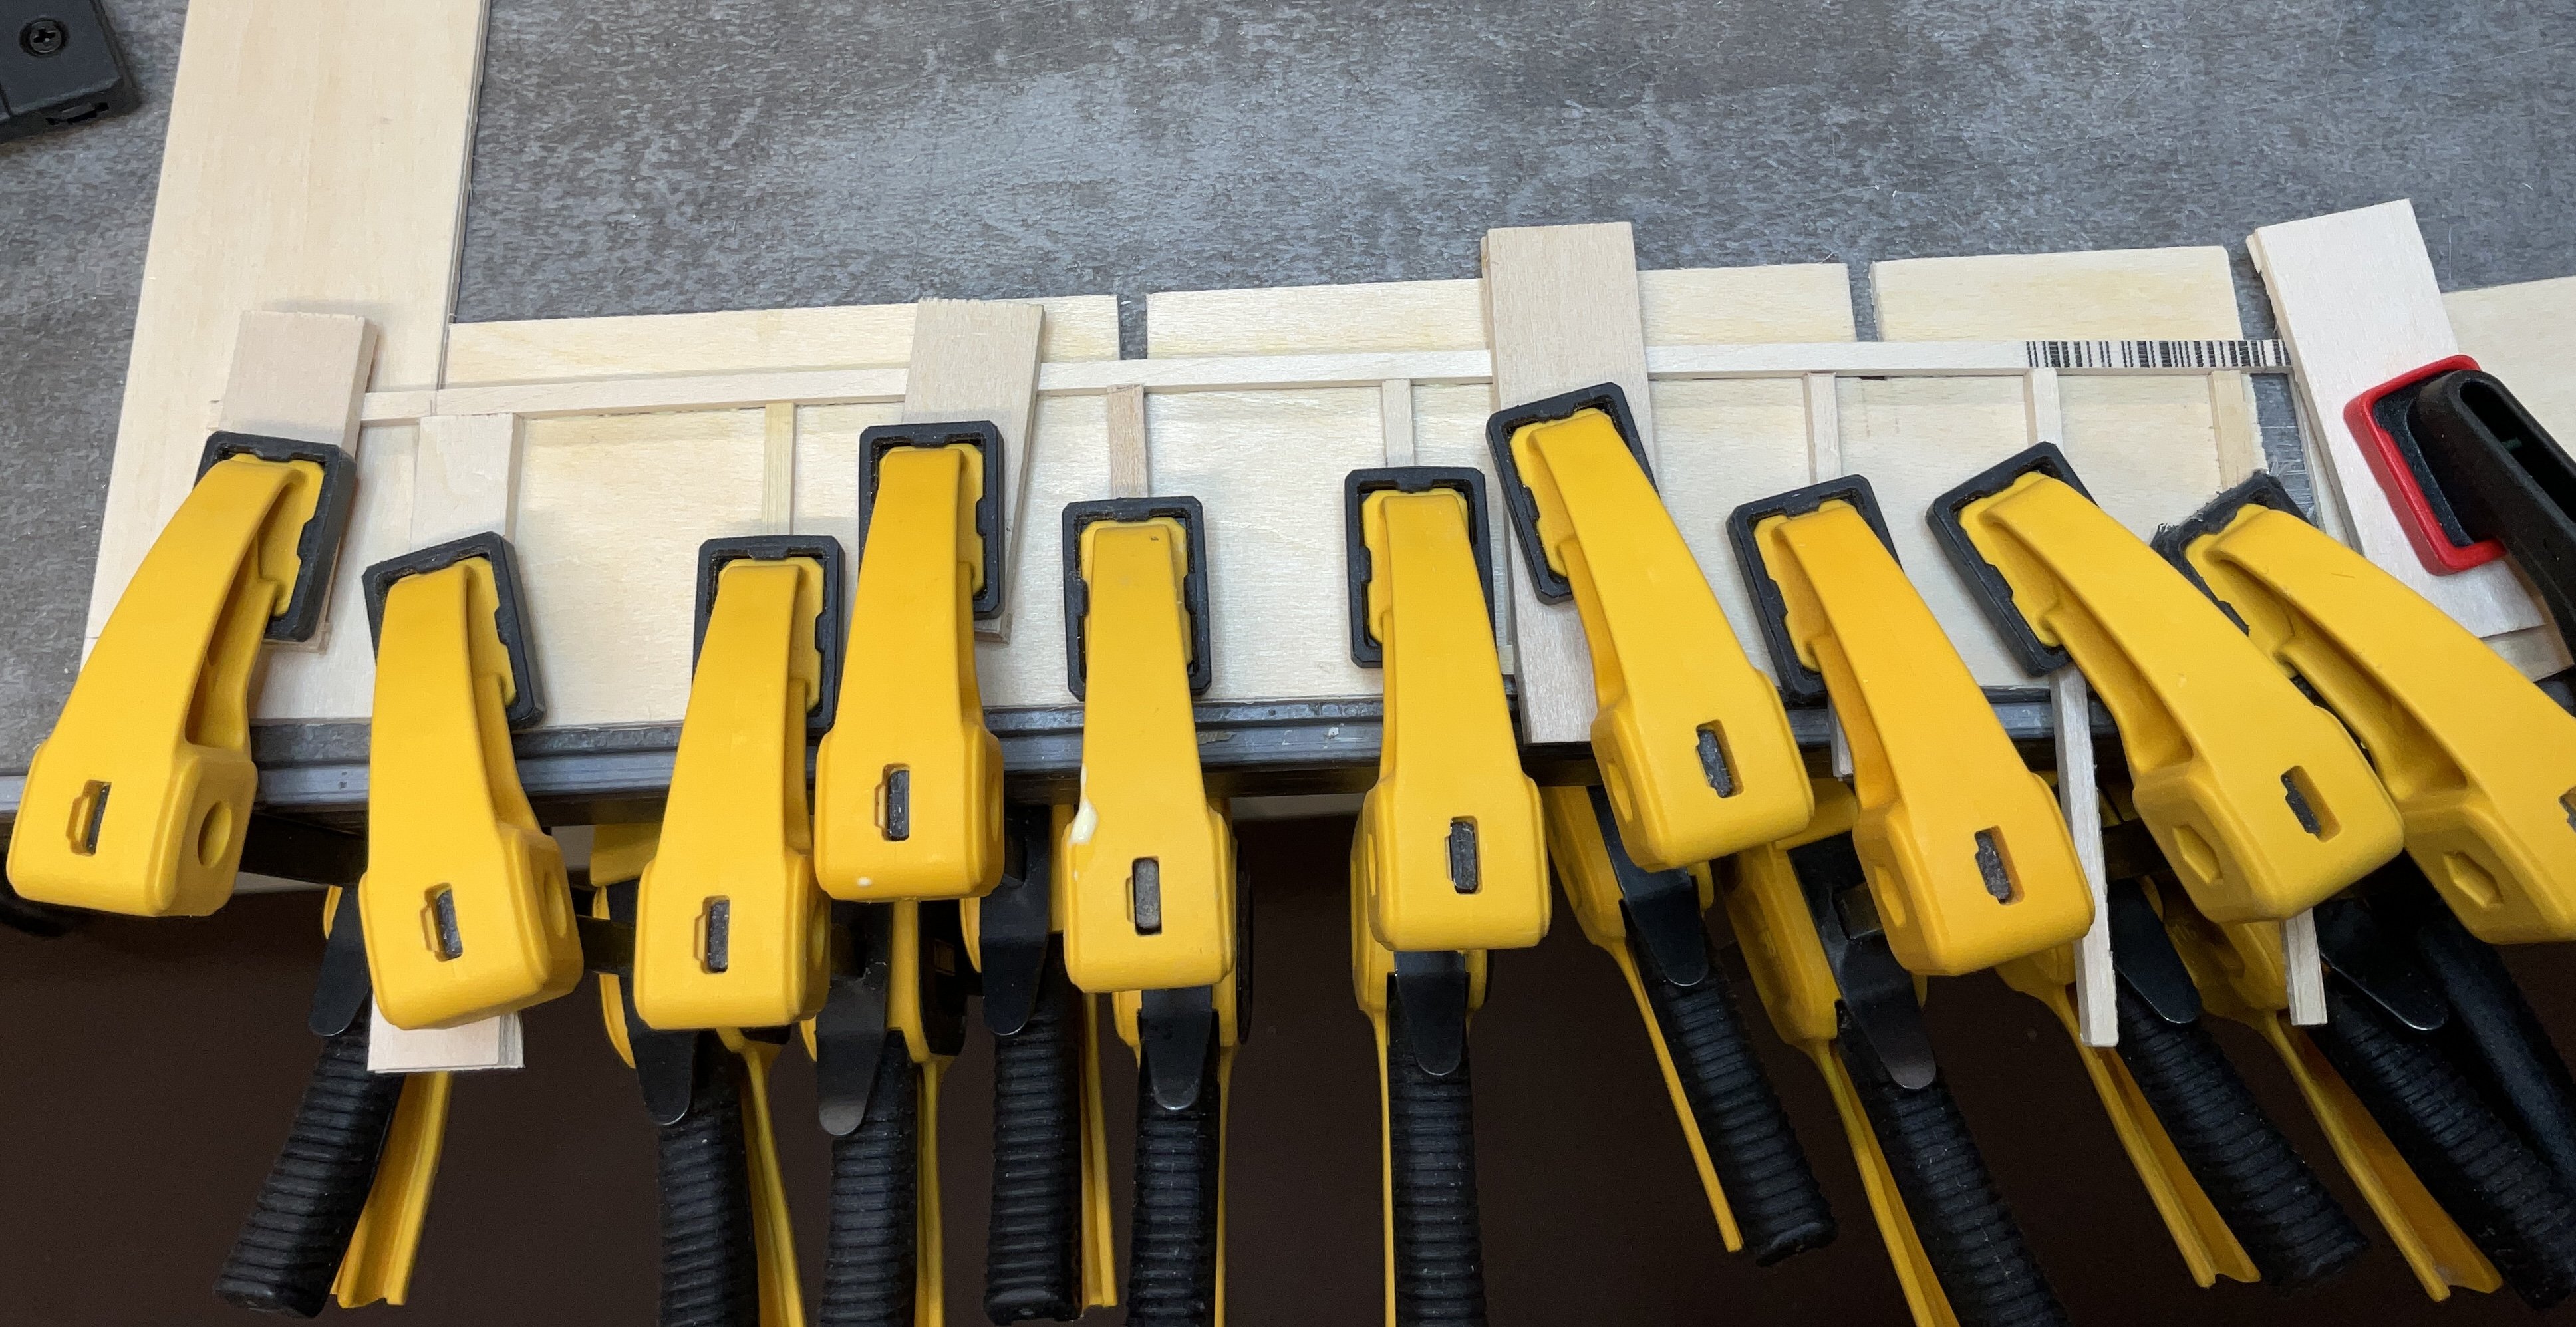
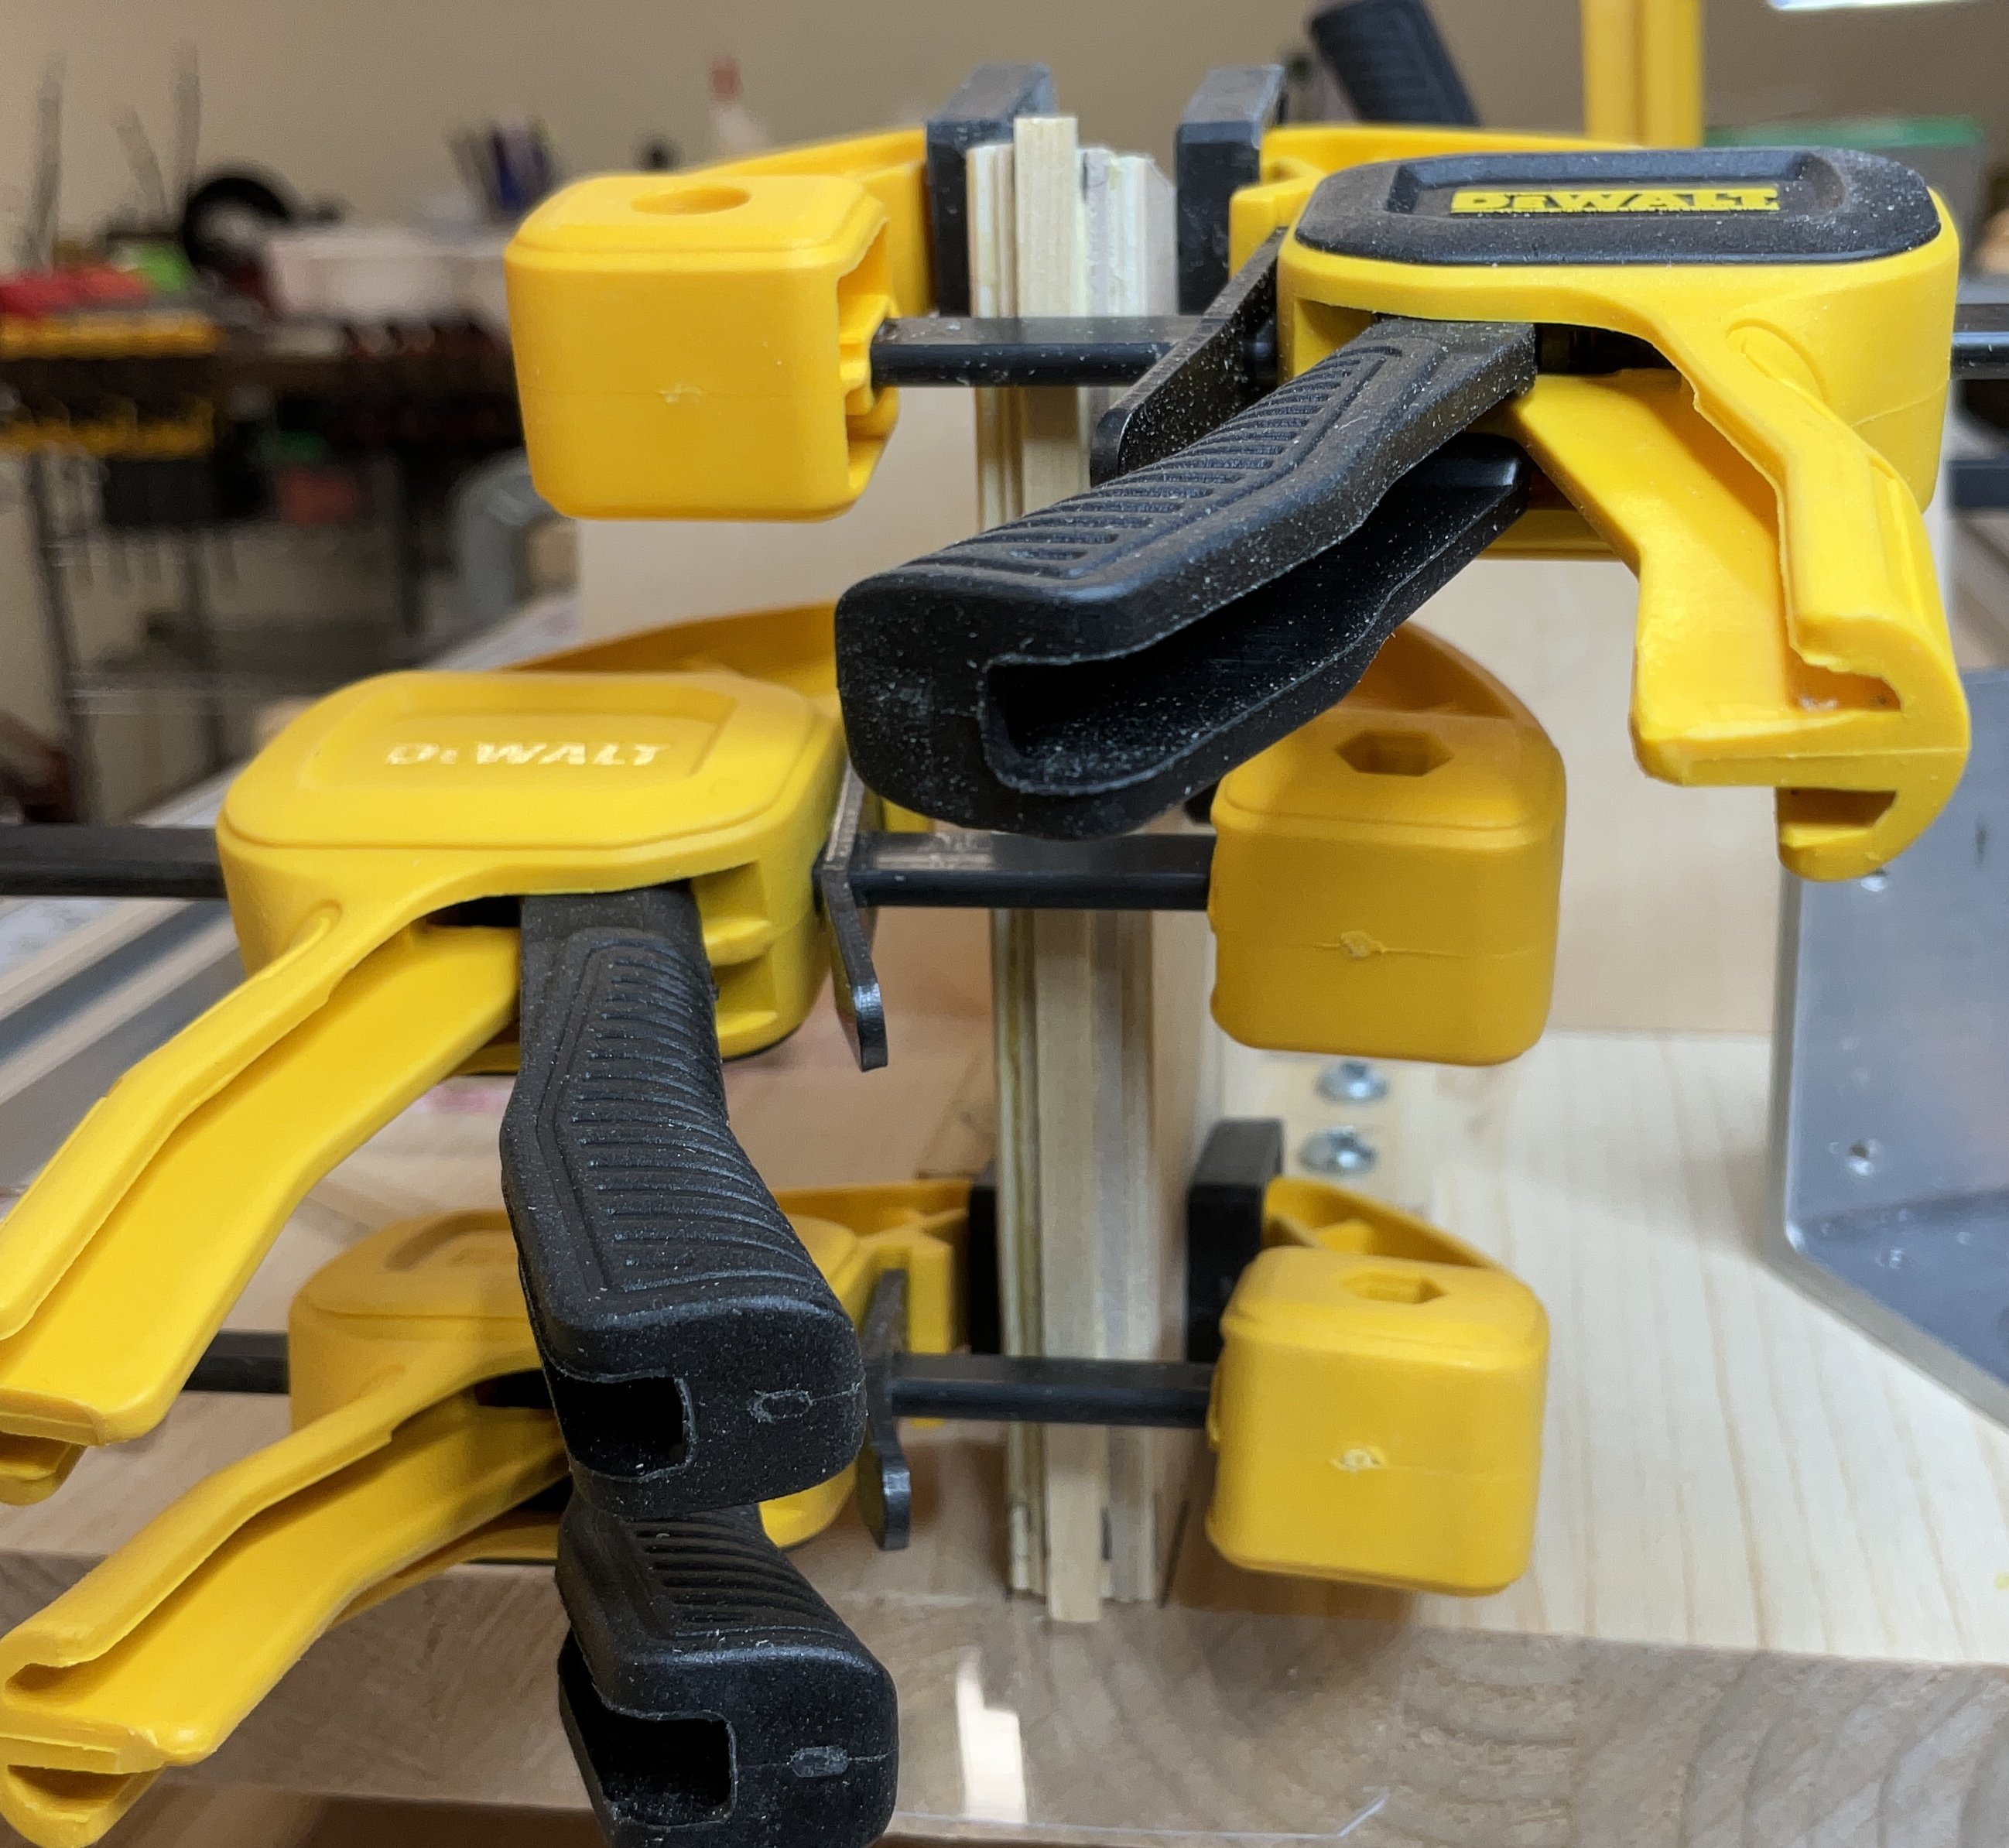
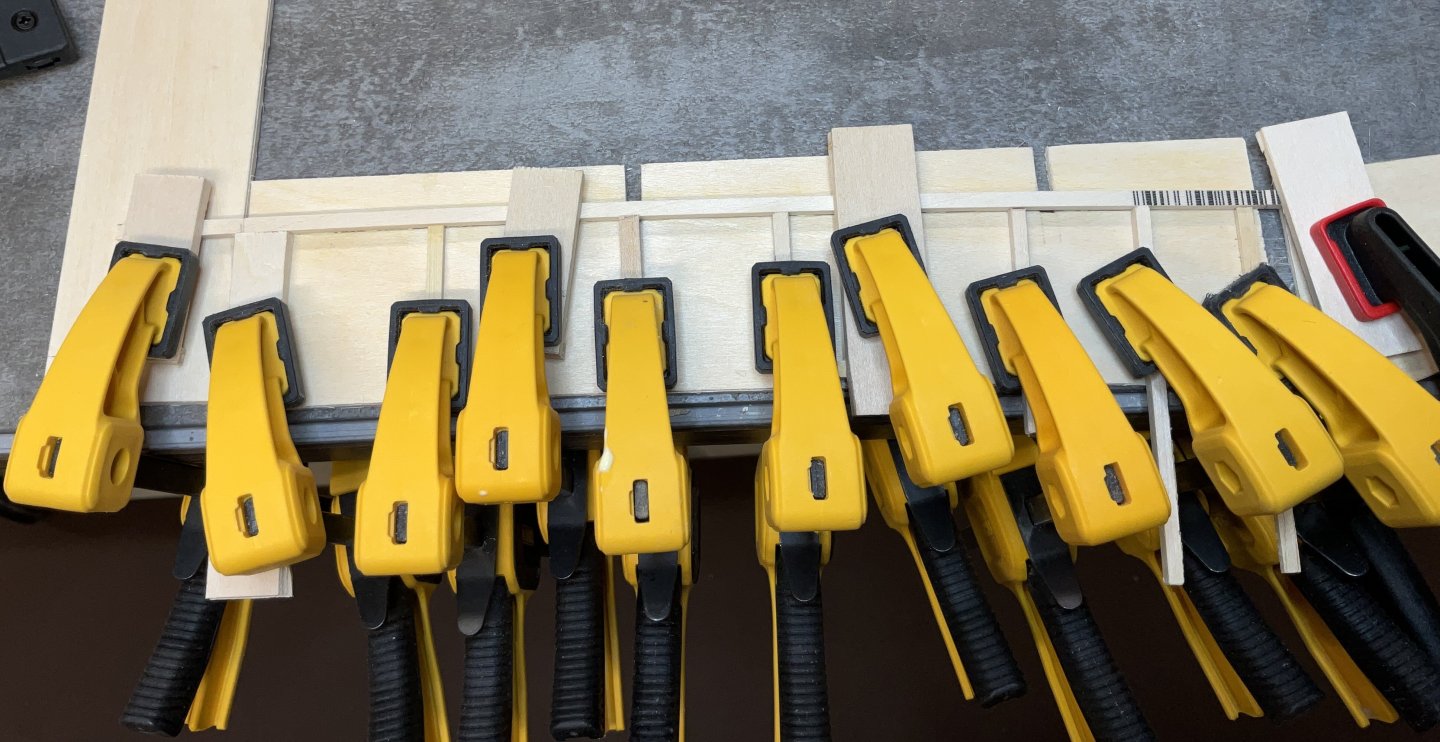
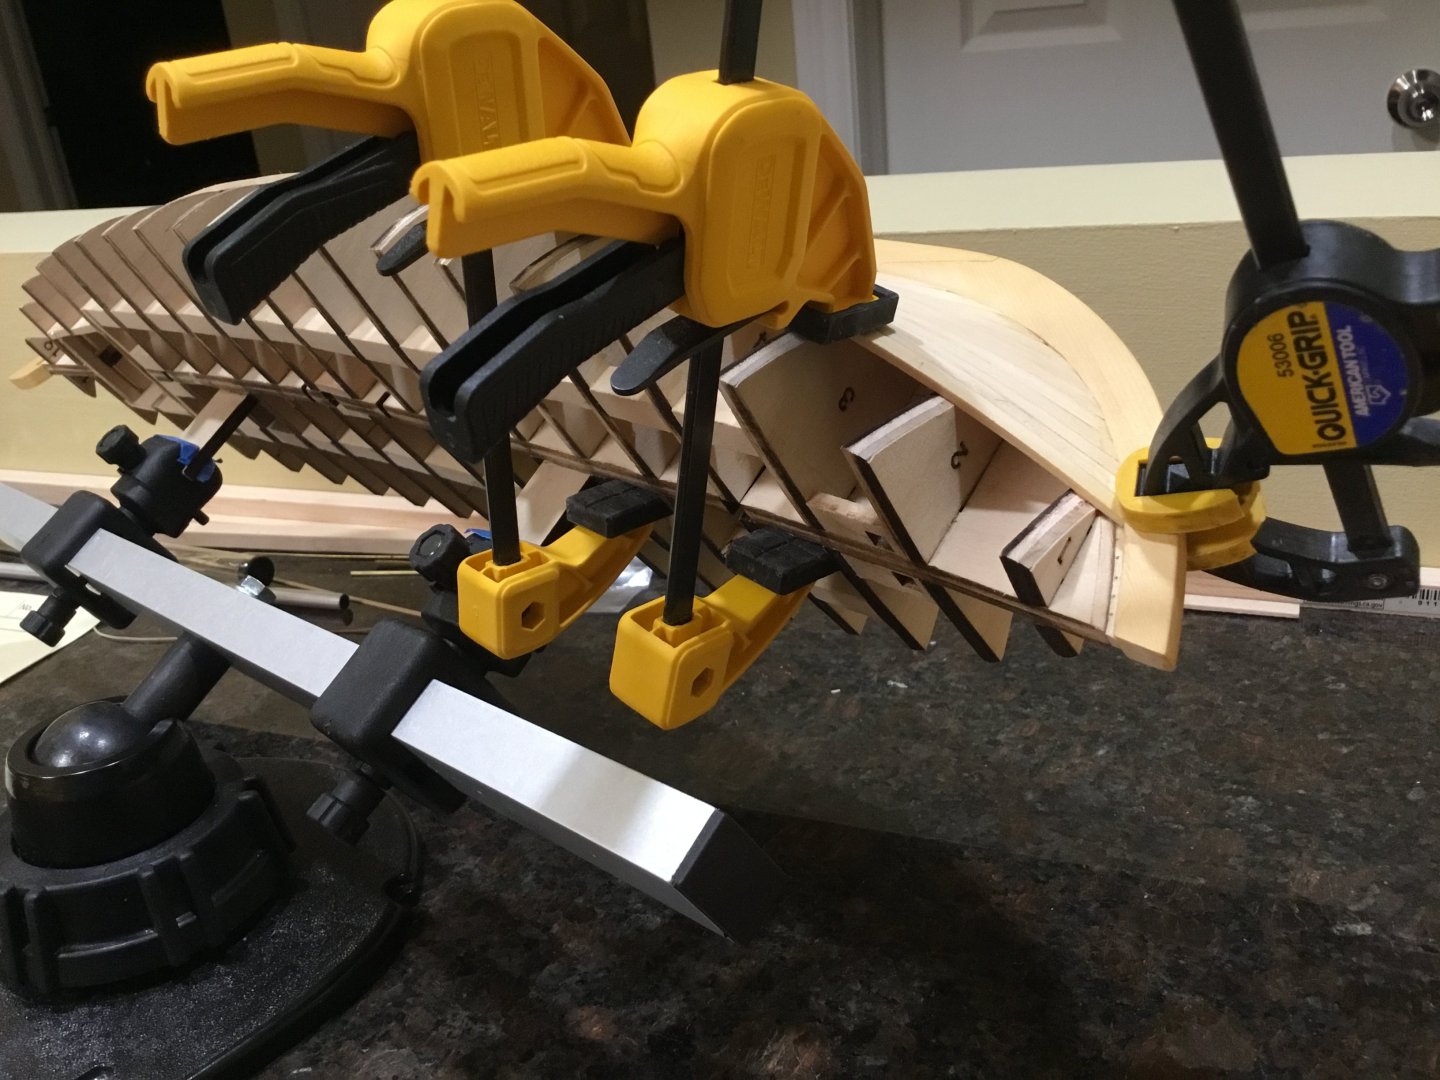
Hi palmerit, I have had the best luck using these mini trigger clamps that have the soft covers for the jaws. I usually start the strake at the stem after shaping and bending the plank. I CA the end of the plank into the rabbet and clamp it. Then use pva for the rest of the strake. Good luck with whichever clamping method you choose!
- 133 replies
-
- 3
-
-
- Ranger
- vanguard models
- (and 1 more)