HOLIDAY DONATION DRIVE - SUPPORT MSW - DO YOUR PART TO KEEP THIS GREAT FORUM GOING! (78 donations so far out of 49,000 members - C'mon guys!)
×


Paul Le Wol
-
Posts
1,020 -
Joined
-
Last visited
Content Type
Profiles
Forums
Gallery
Events
Everything posted by Paul Le Wol
-
Jacques, such great news! Congratulations on your wedding. Good to see you working on the Bateau again.
- 139 replies
-
- 4
-

-

-
- ancre
- Bateau de Lanveoc
- (and 2 more)
-
Hi Ian, I may have to keep editing my post. Don’t know what is going on over at Amazon but those clamps are now 40 CAD.
-
Hi Glen, thanks very much. Those clamps are used to re-attach the screens after fixing mobile devices. Got them from Amazon. 33CAD for eight of them. They come in handy every once in a while. I think I searched for mobile device clamps.
-
Keith, she’s looking more amazing every time I see her.
- 457 replies
-
- 5
-
-
-
- sternwheeler
- Hard Coal Navy
- (and 1 more)
-
Thank you John, have a nice holiday. Wishing you well!
-
Hi Gary, thank you very much for your comments! Hi sheepsail, thanks very much for your comment and extreme like😀
-
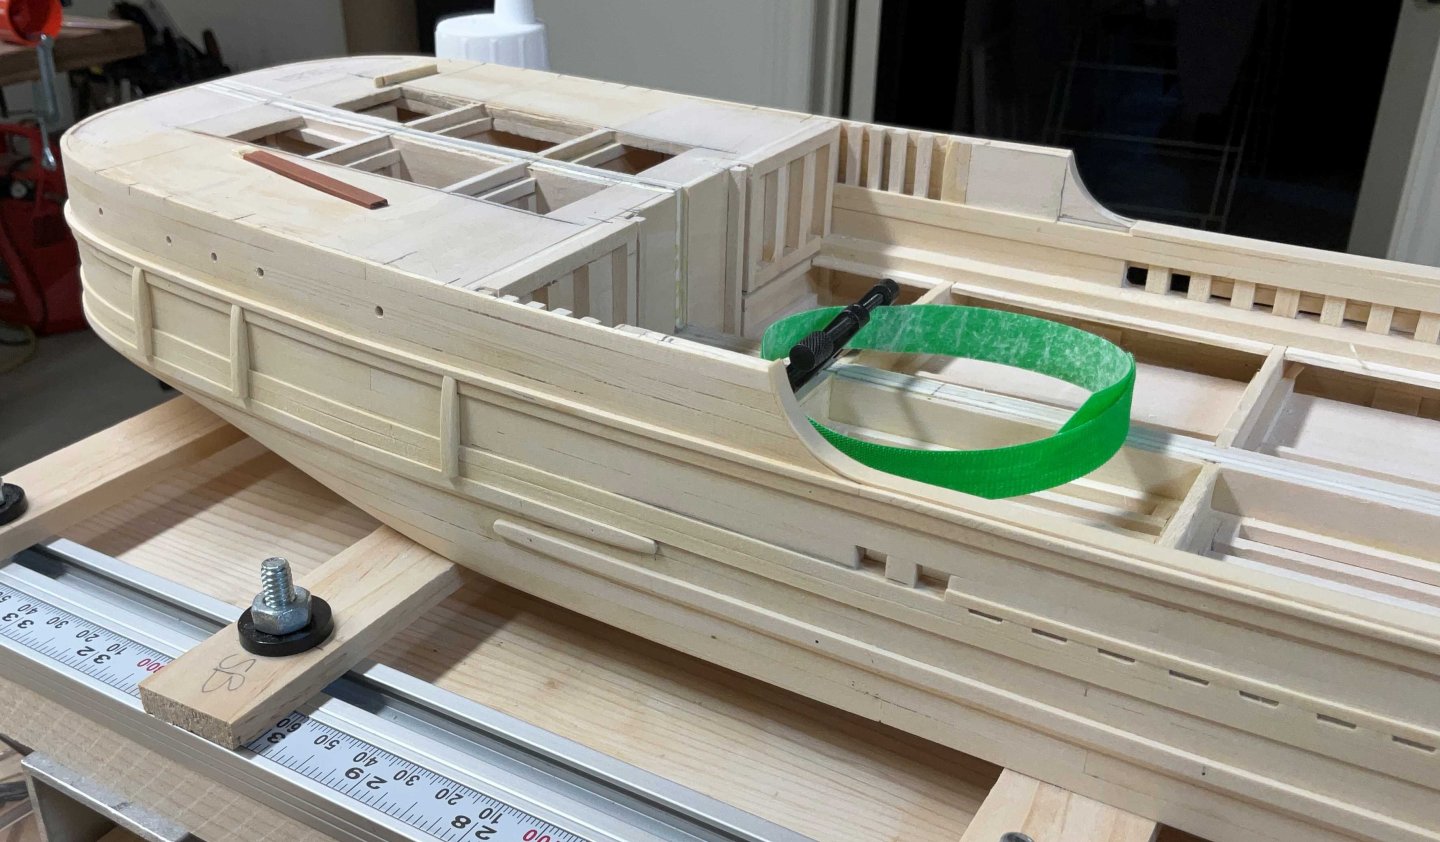
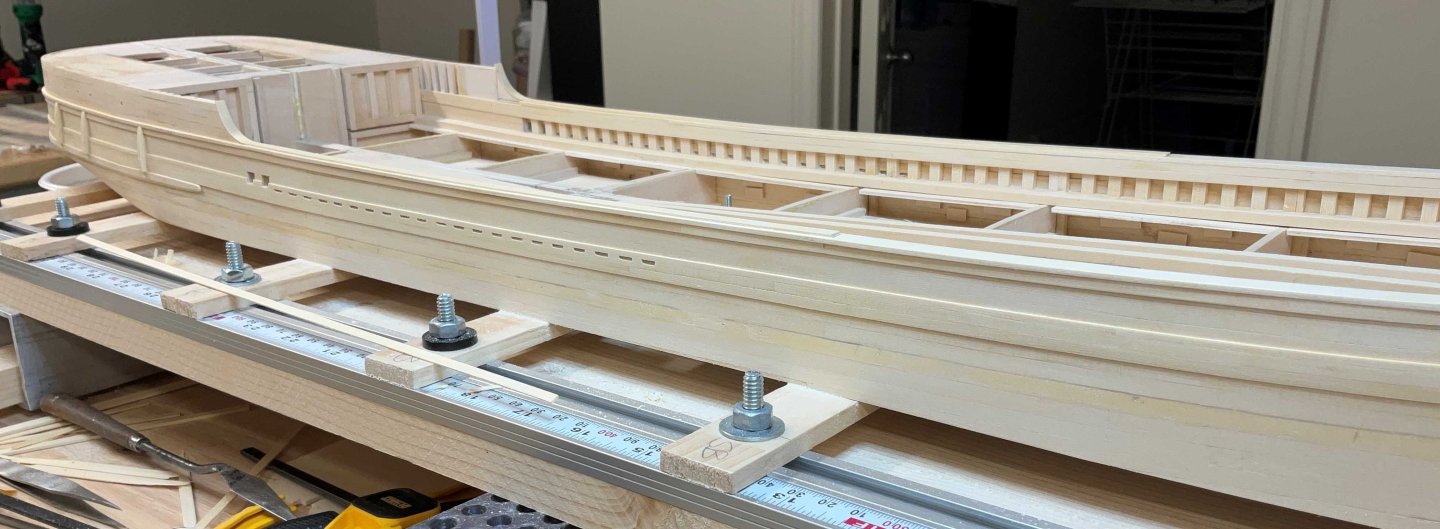
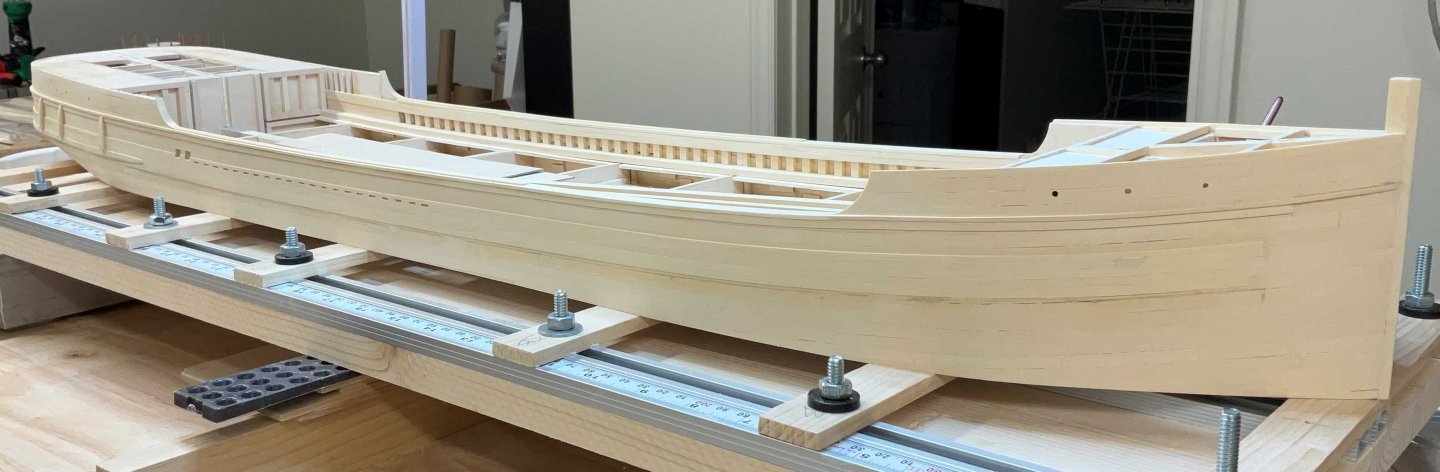
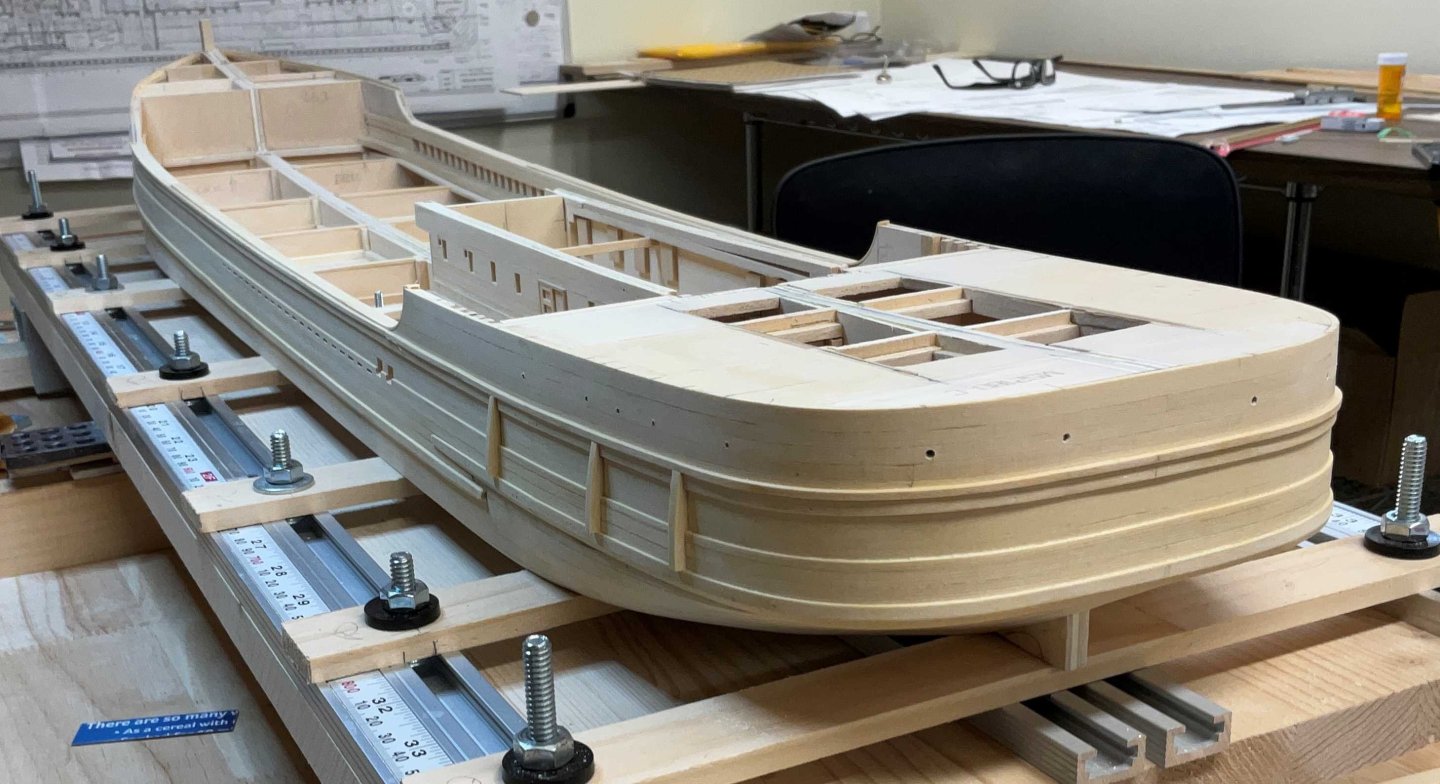
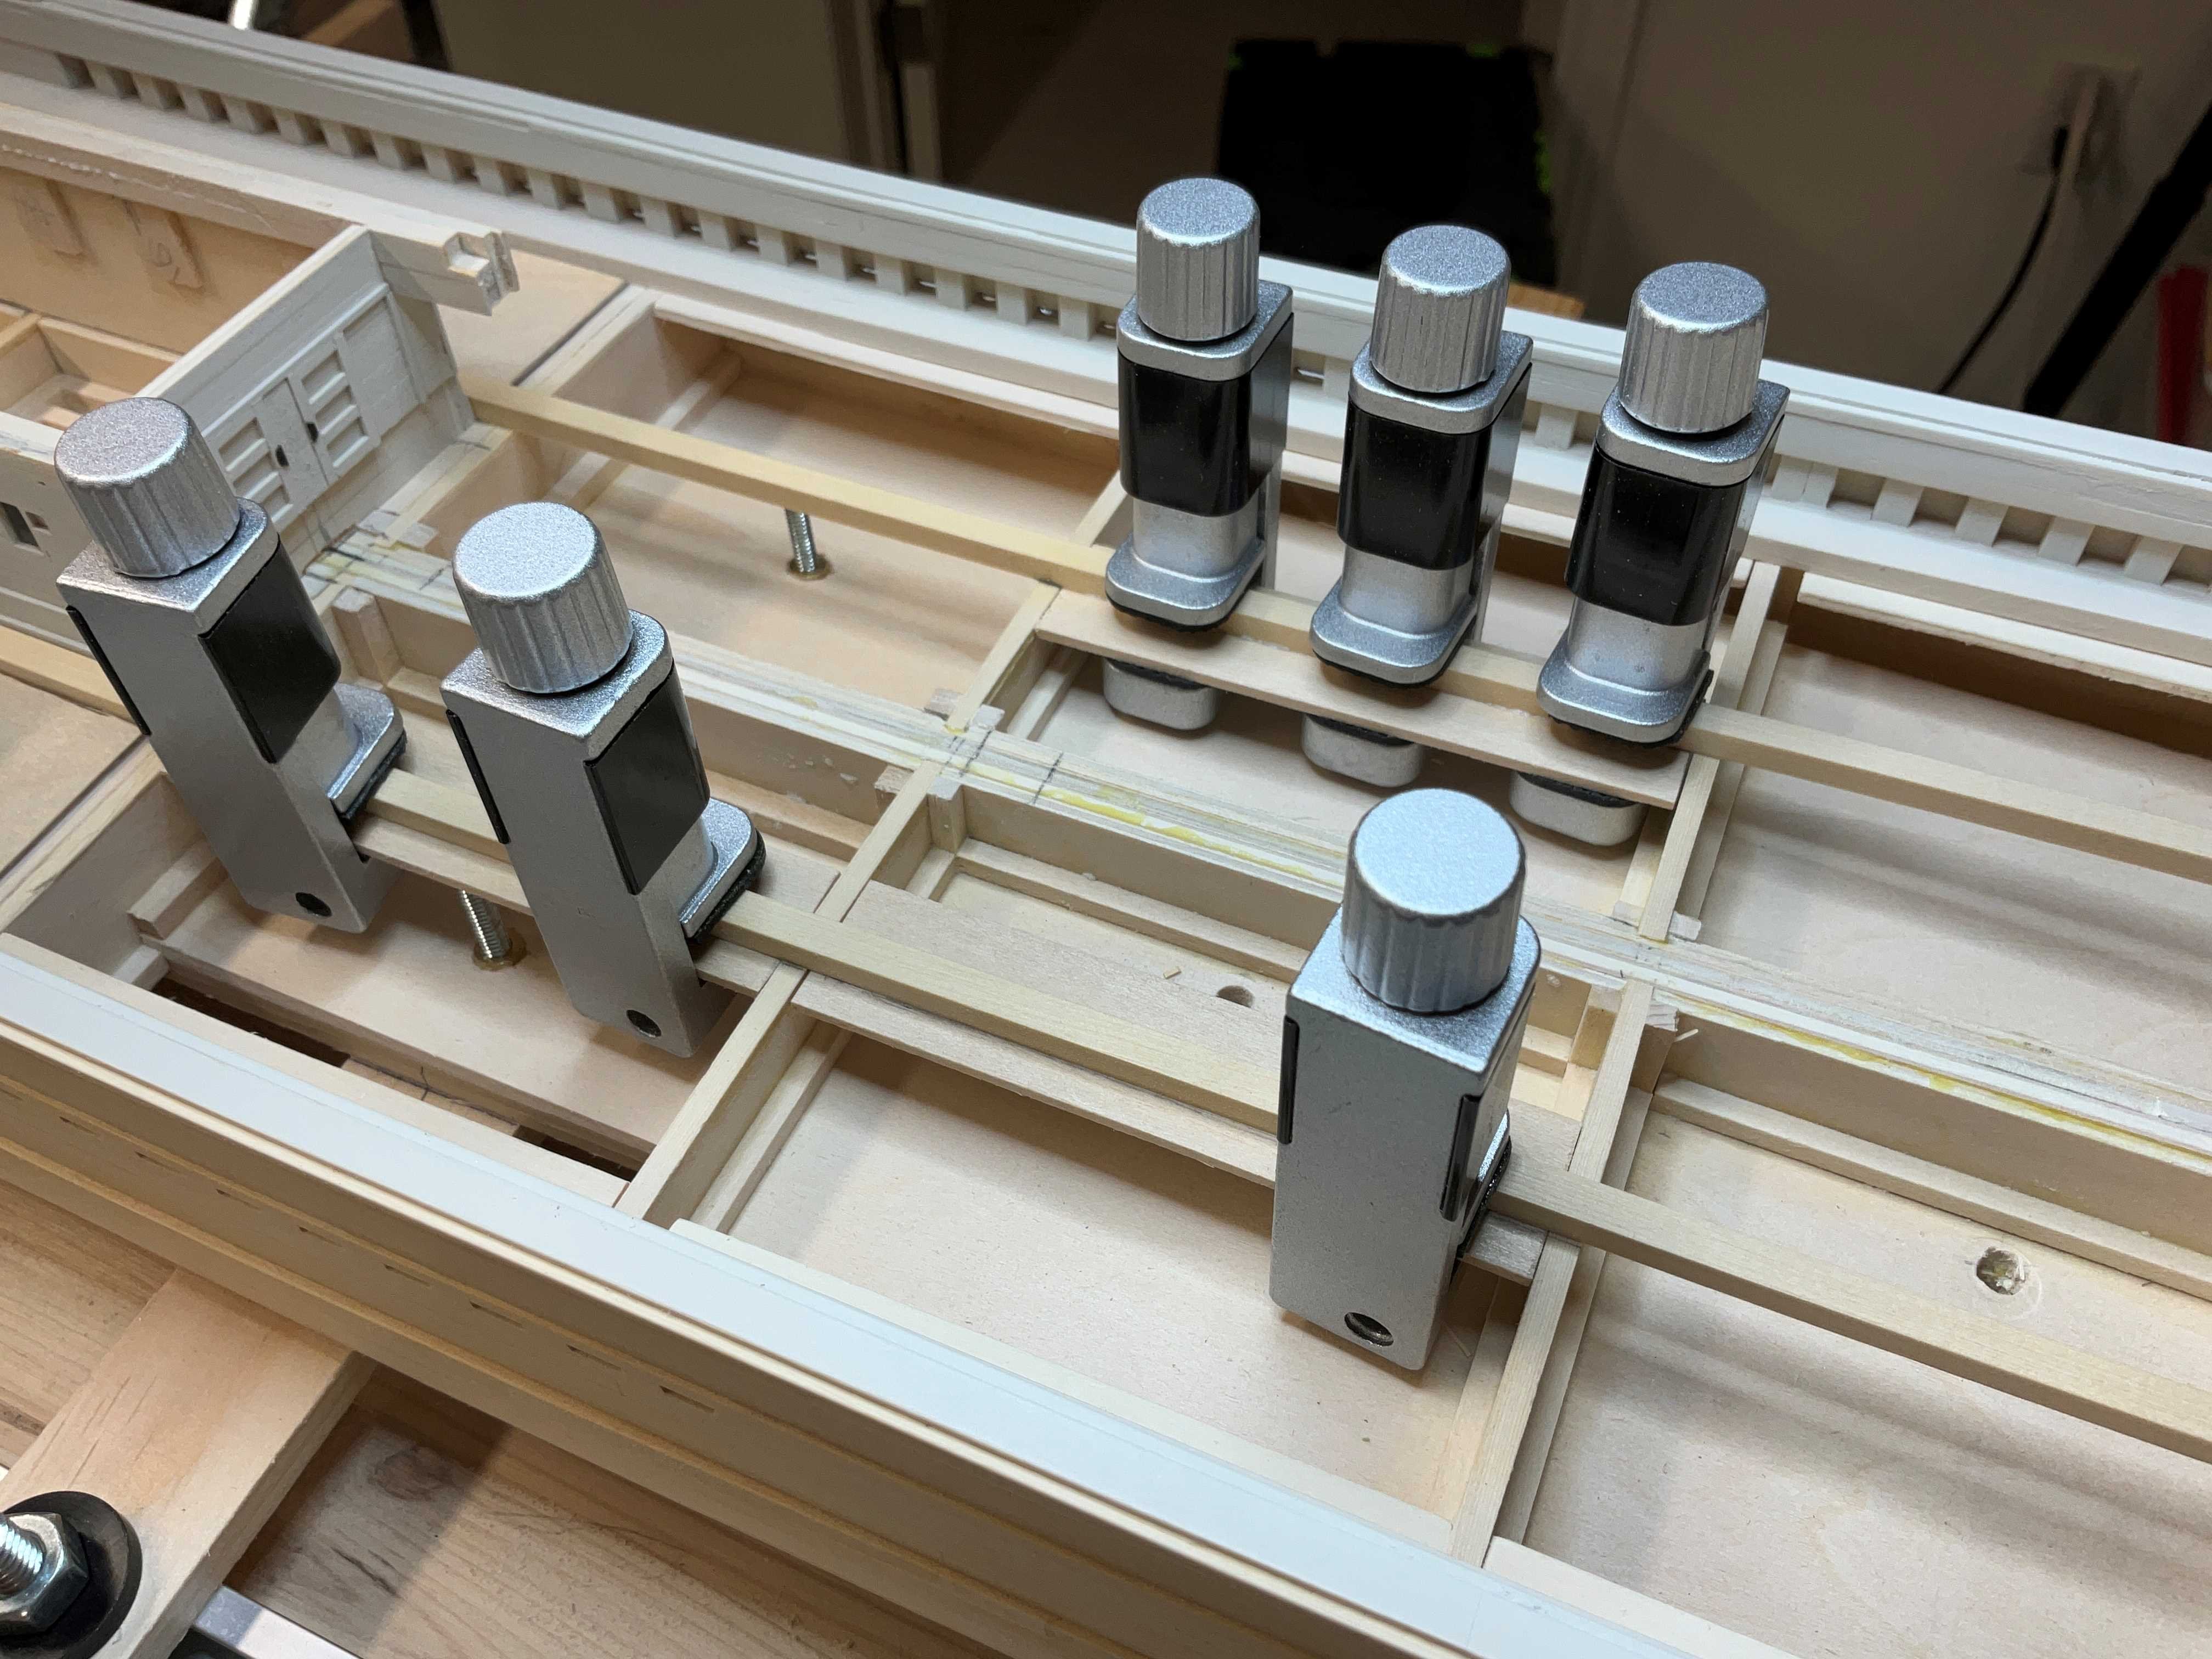
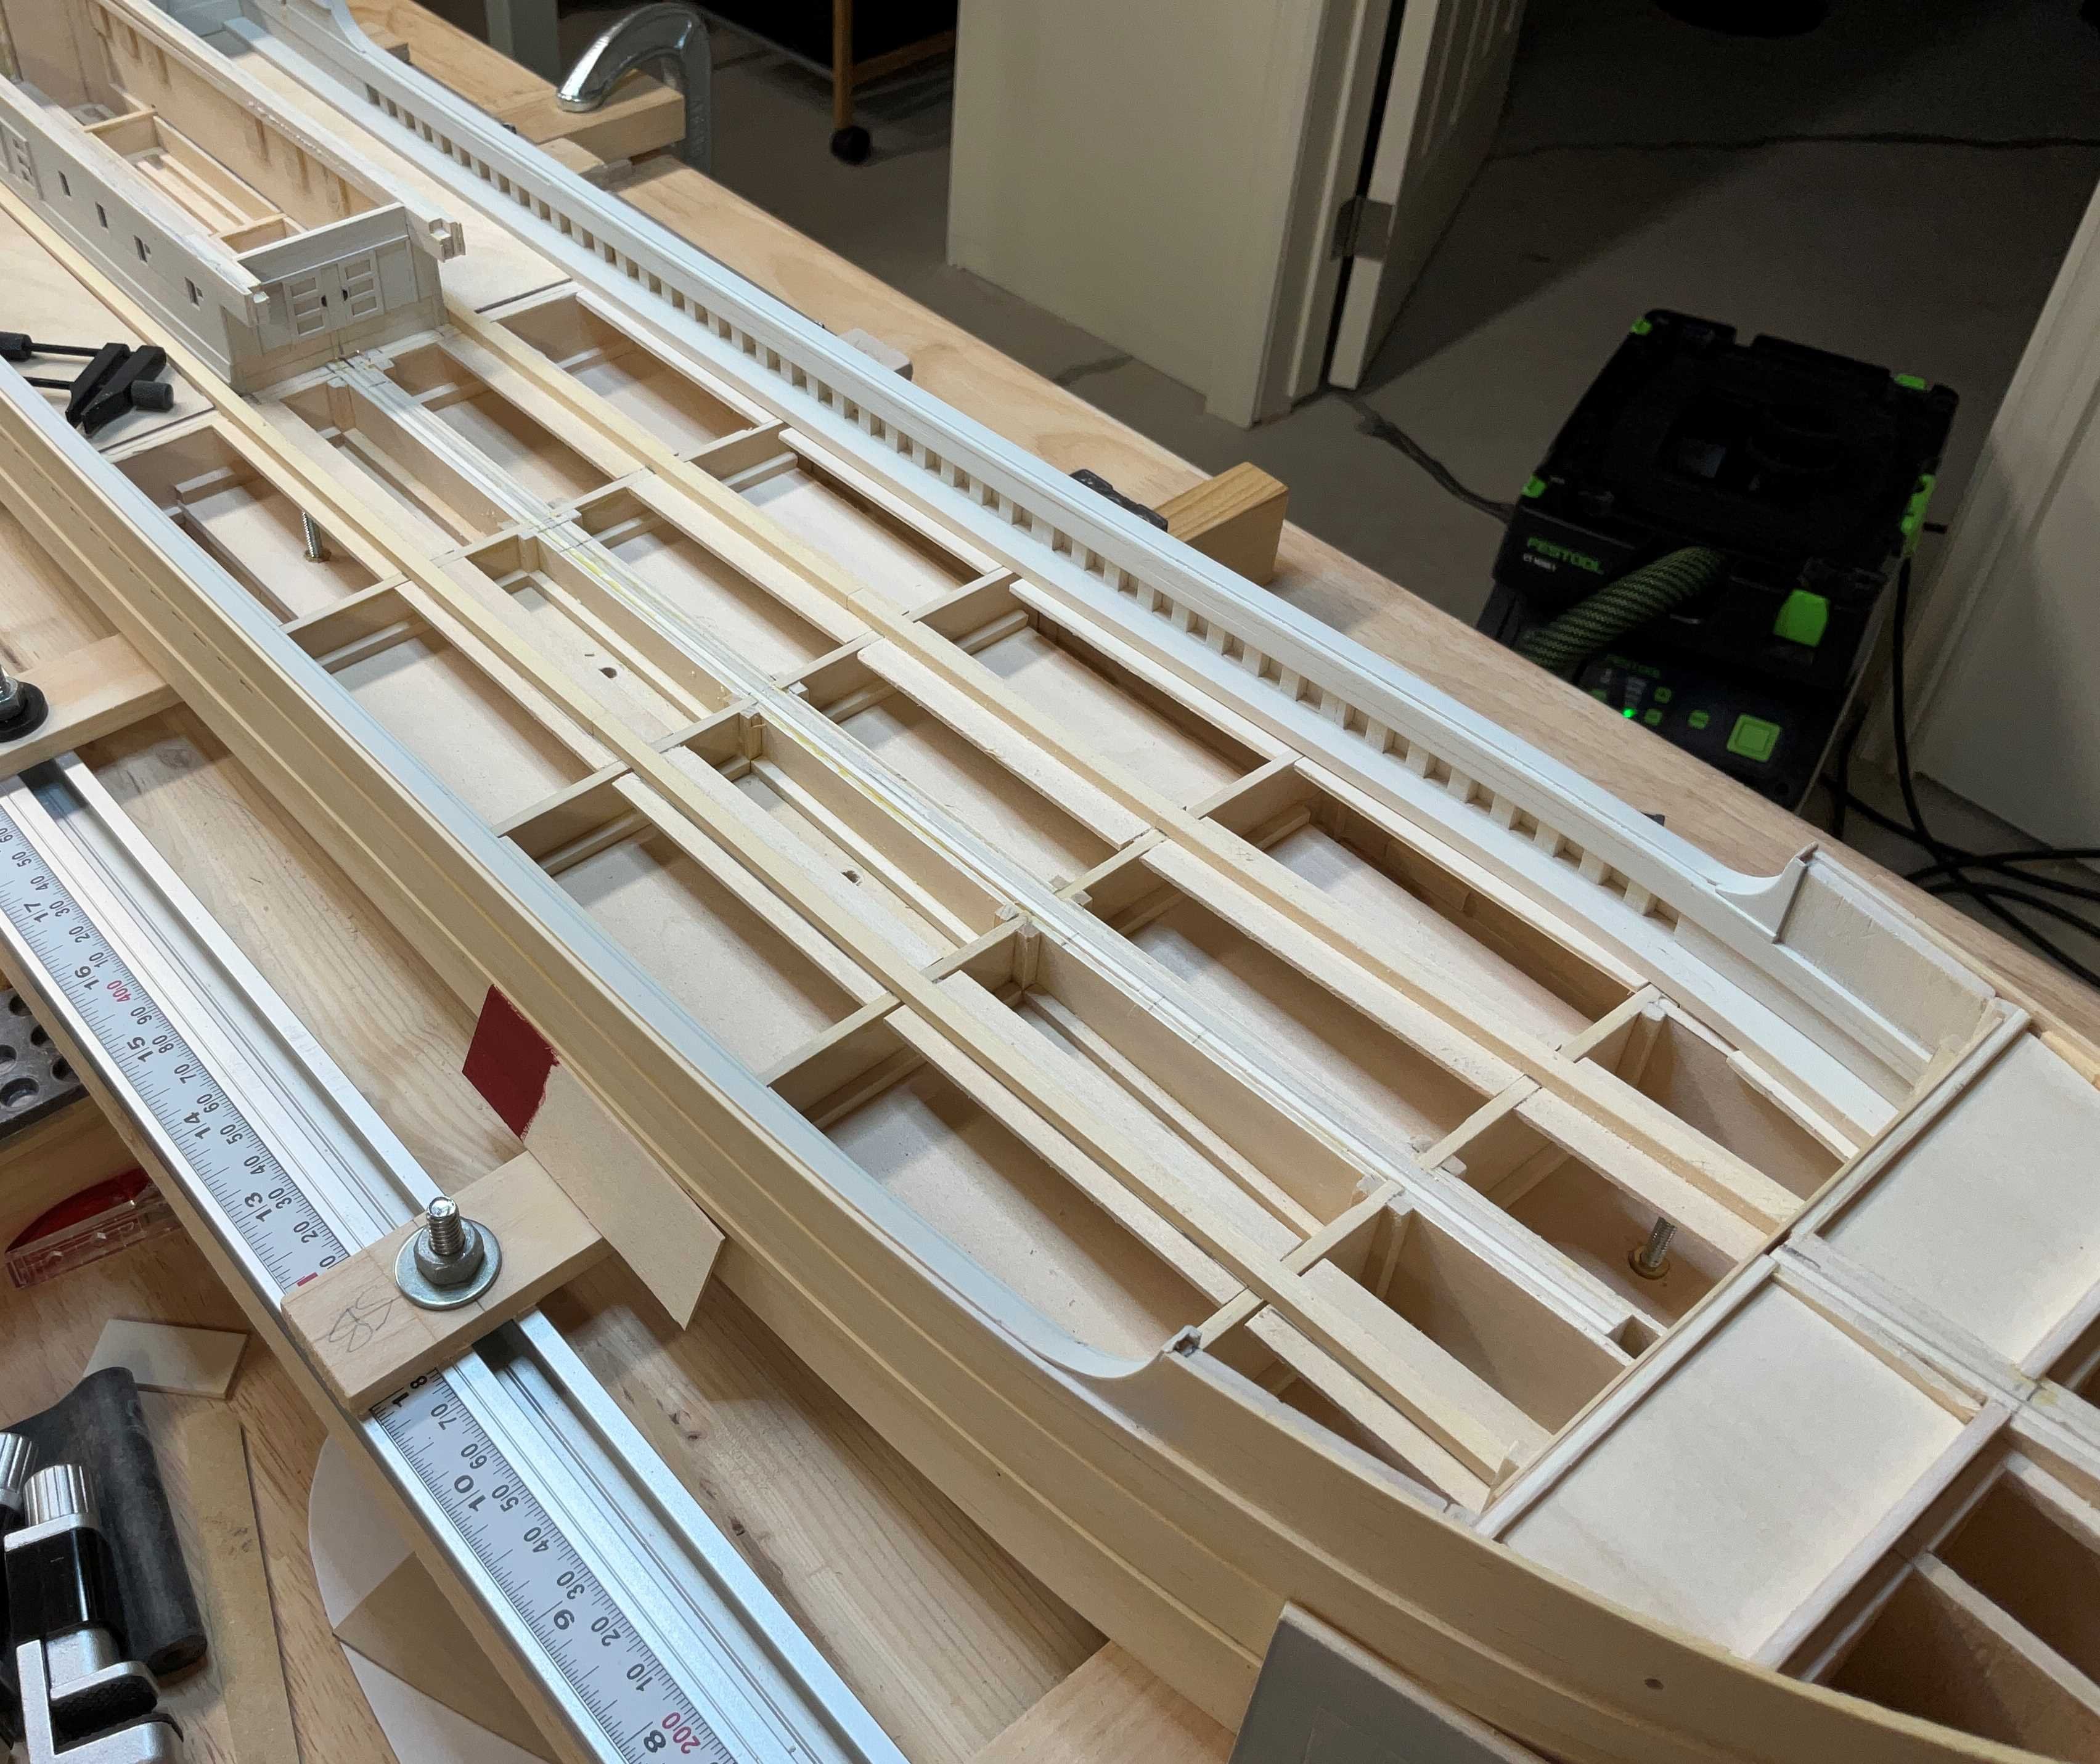
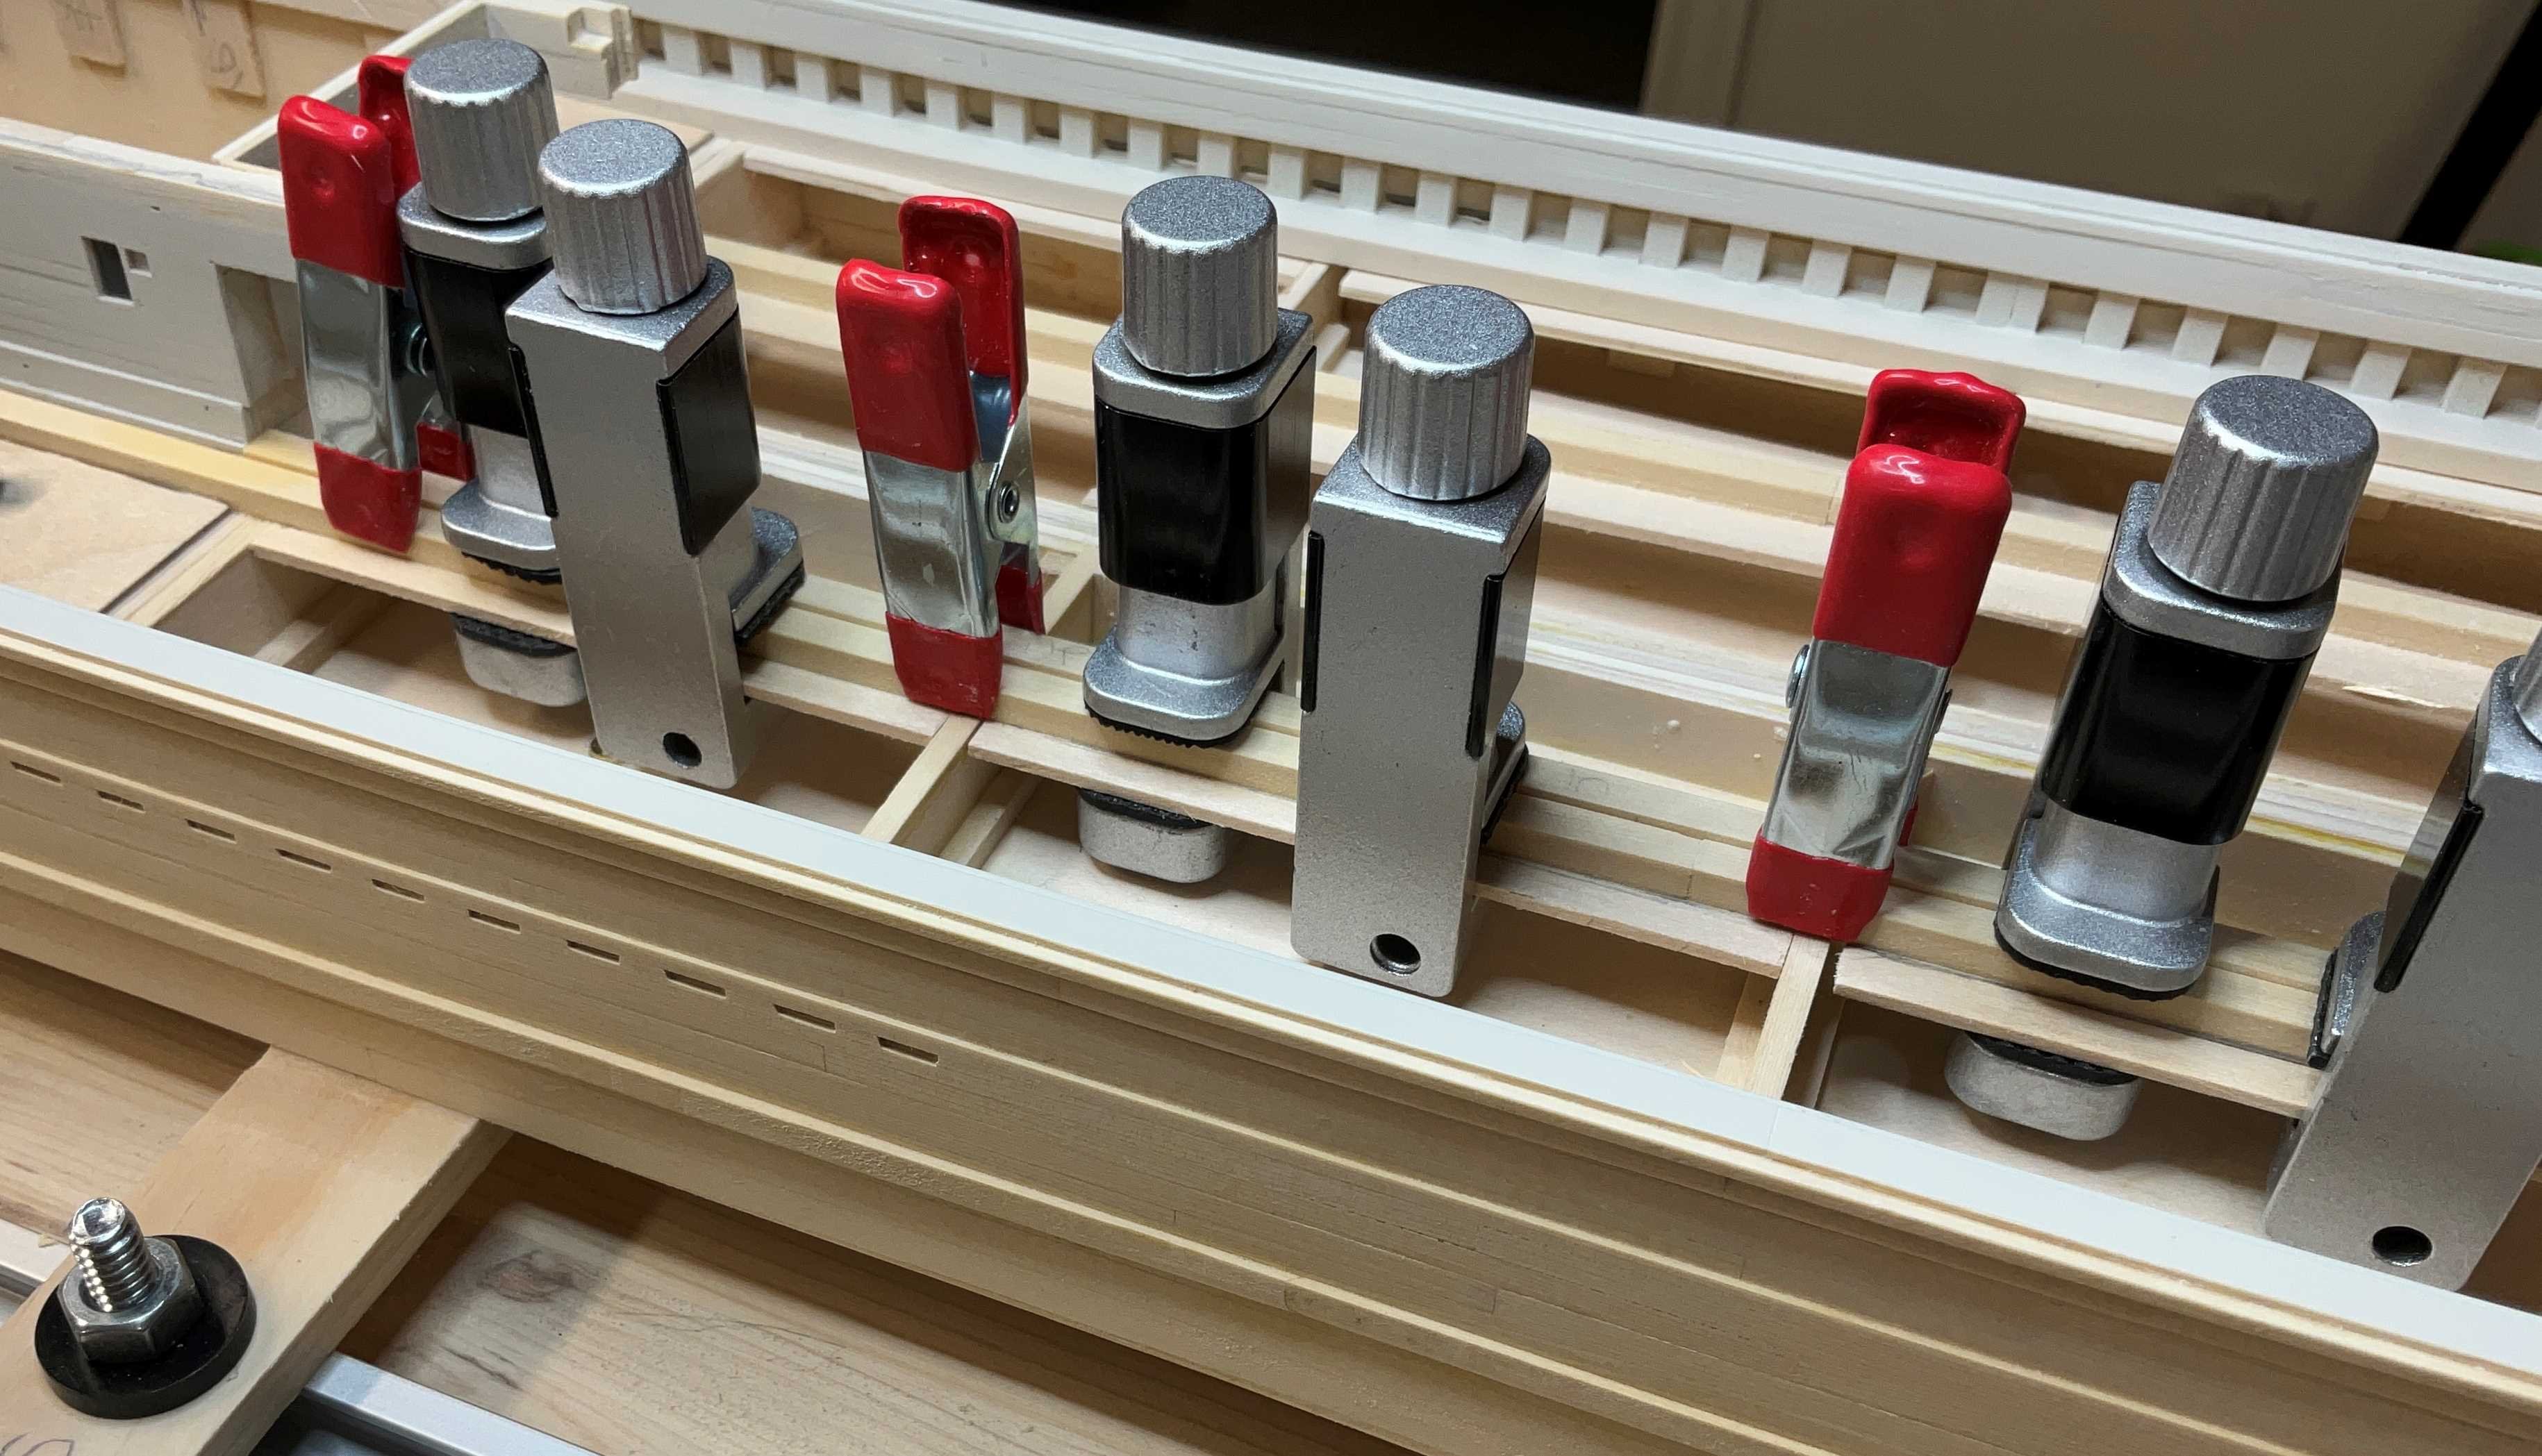
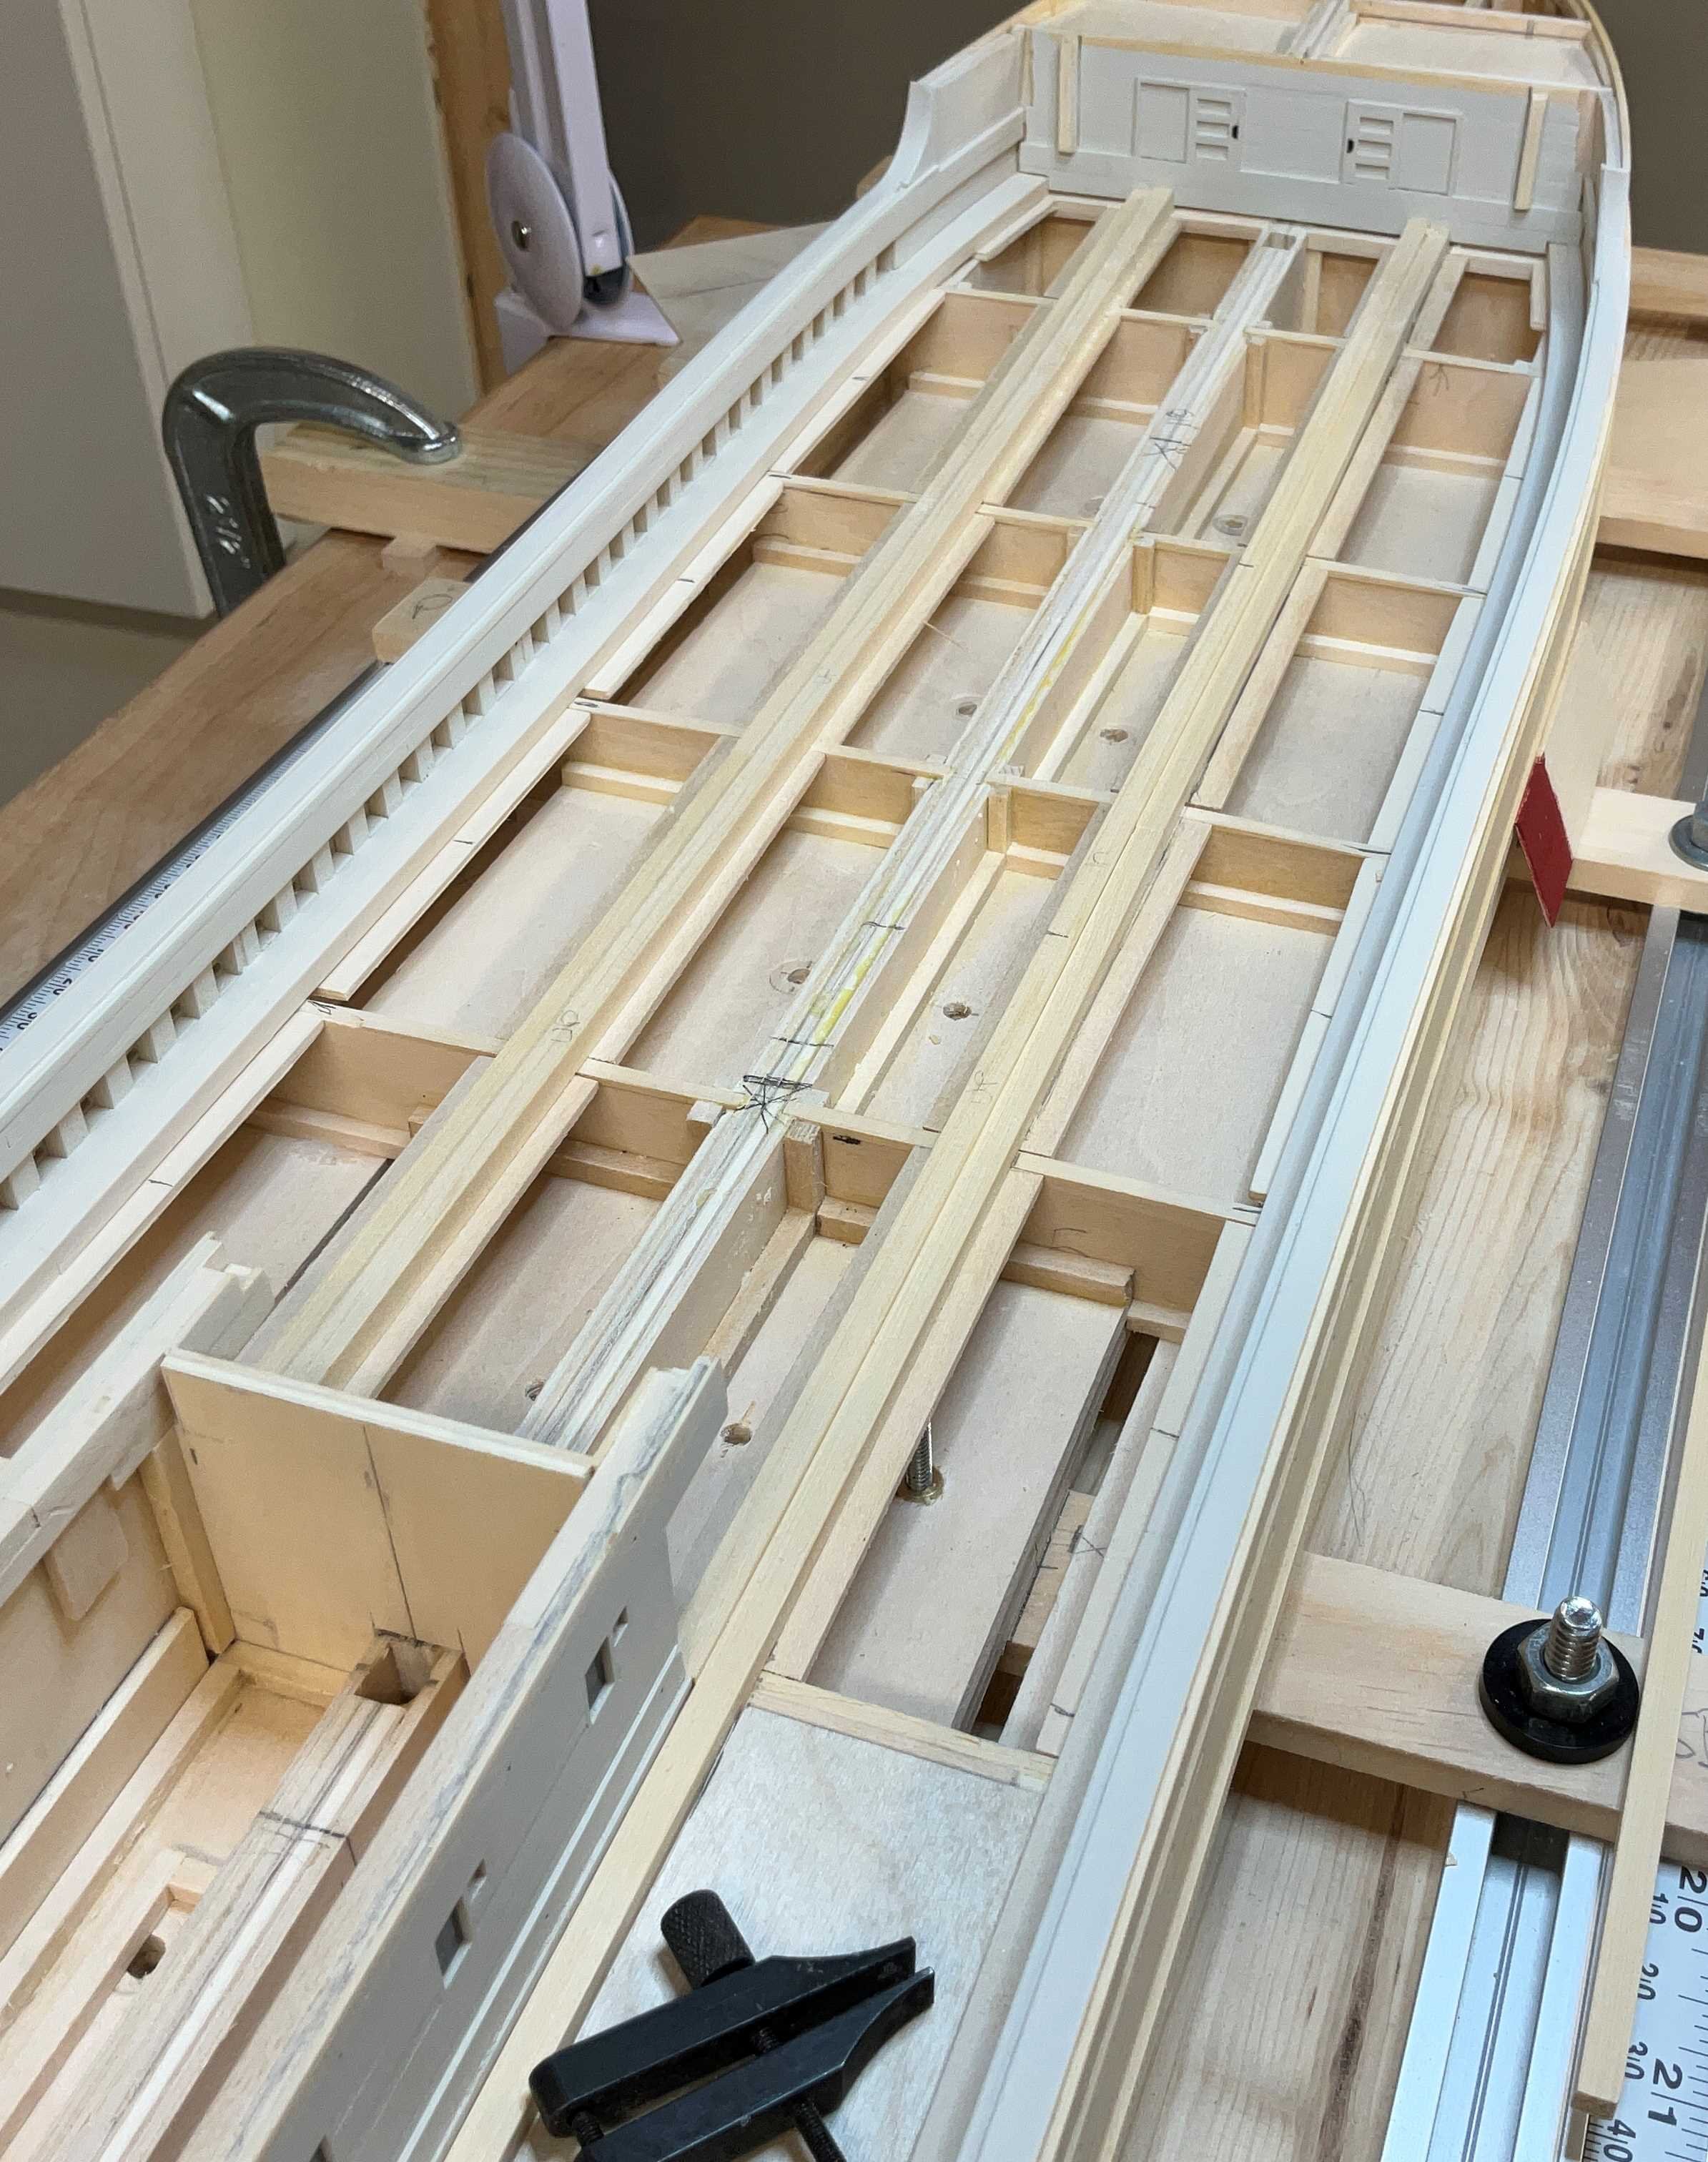
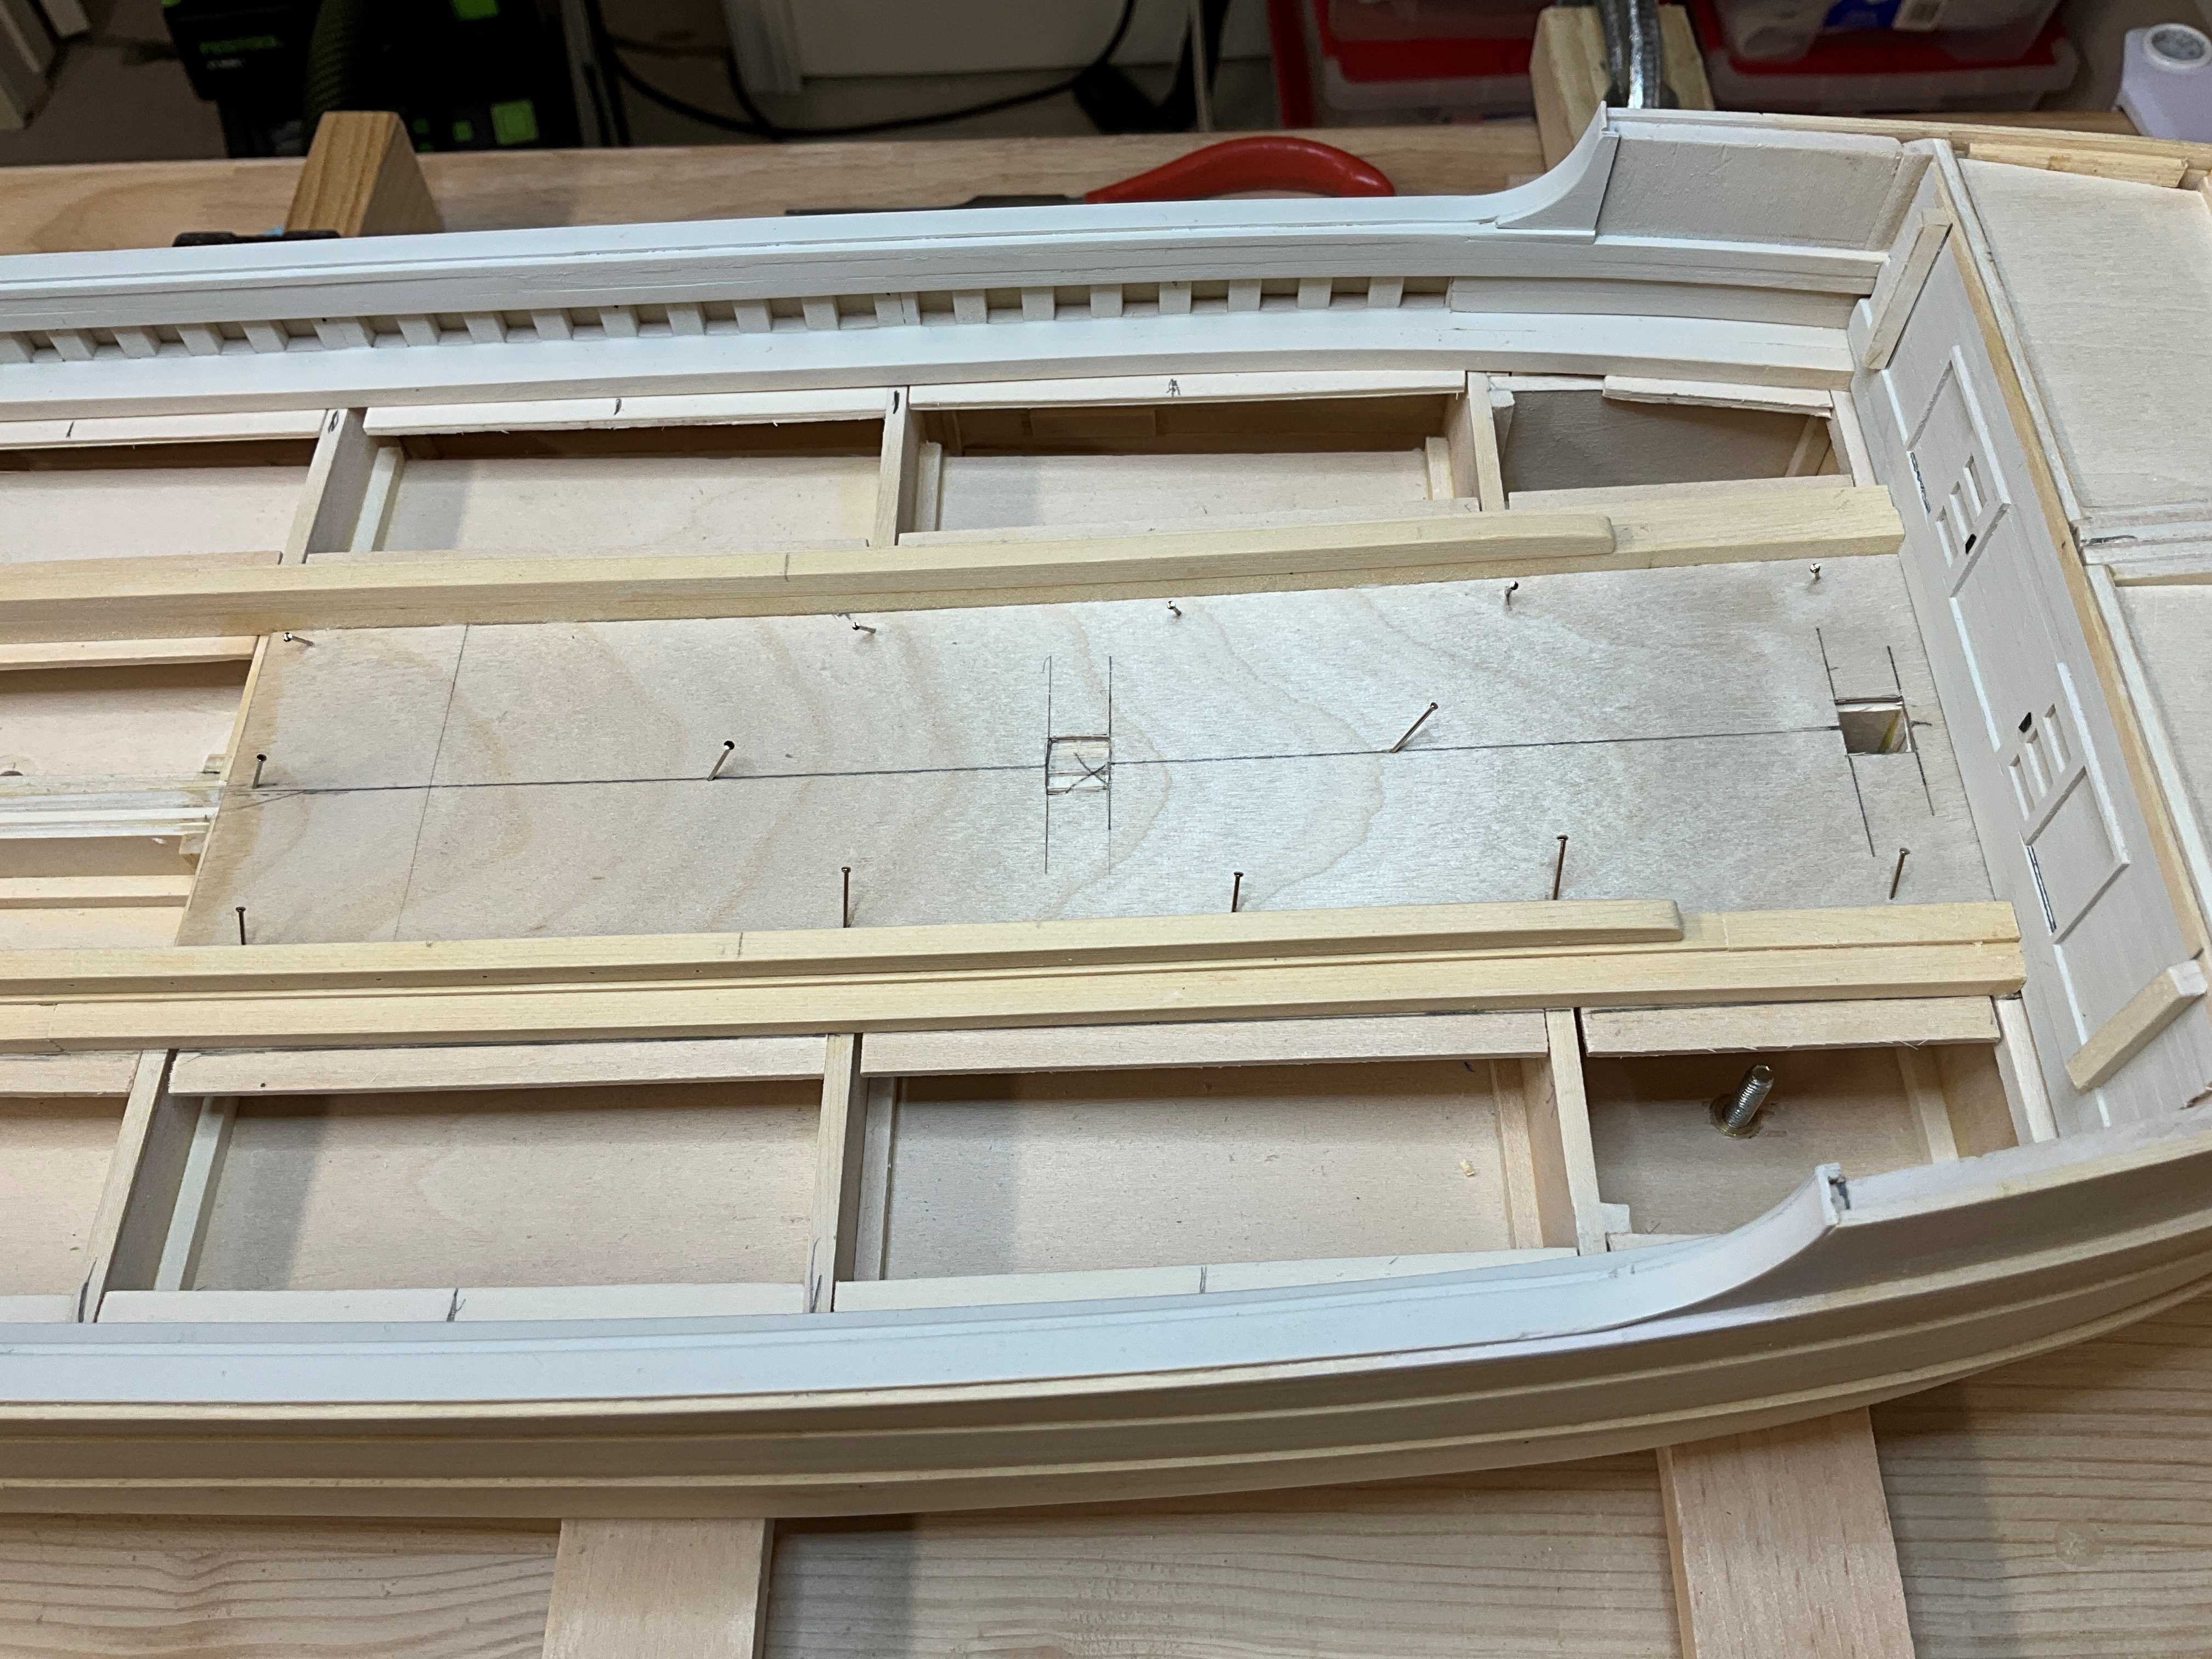
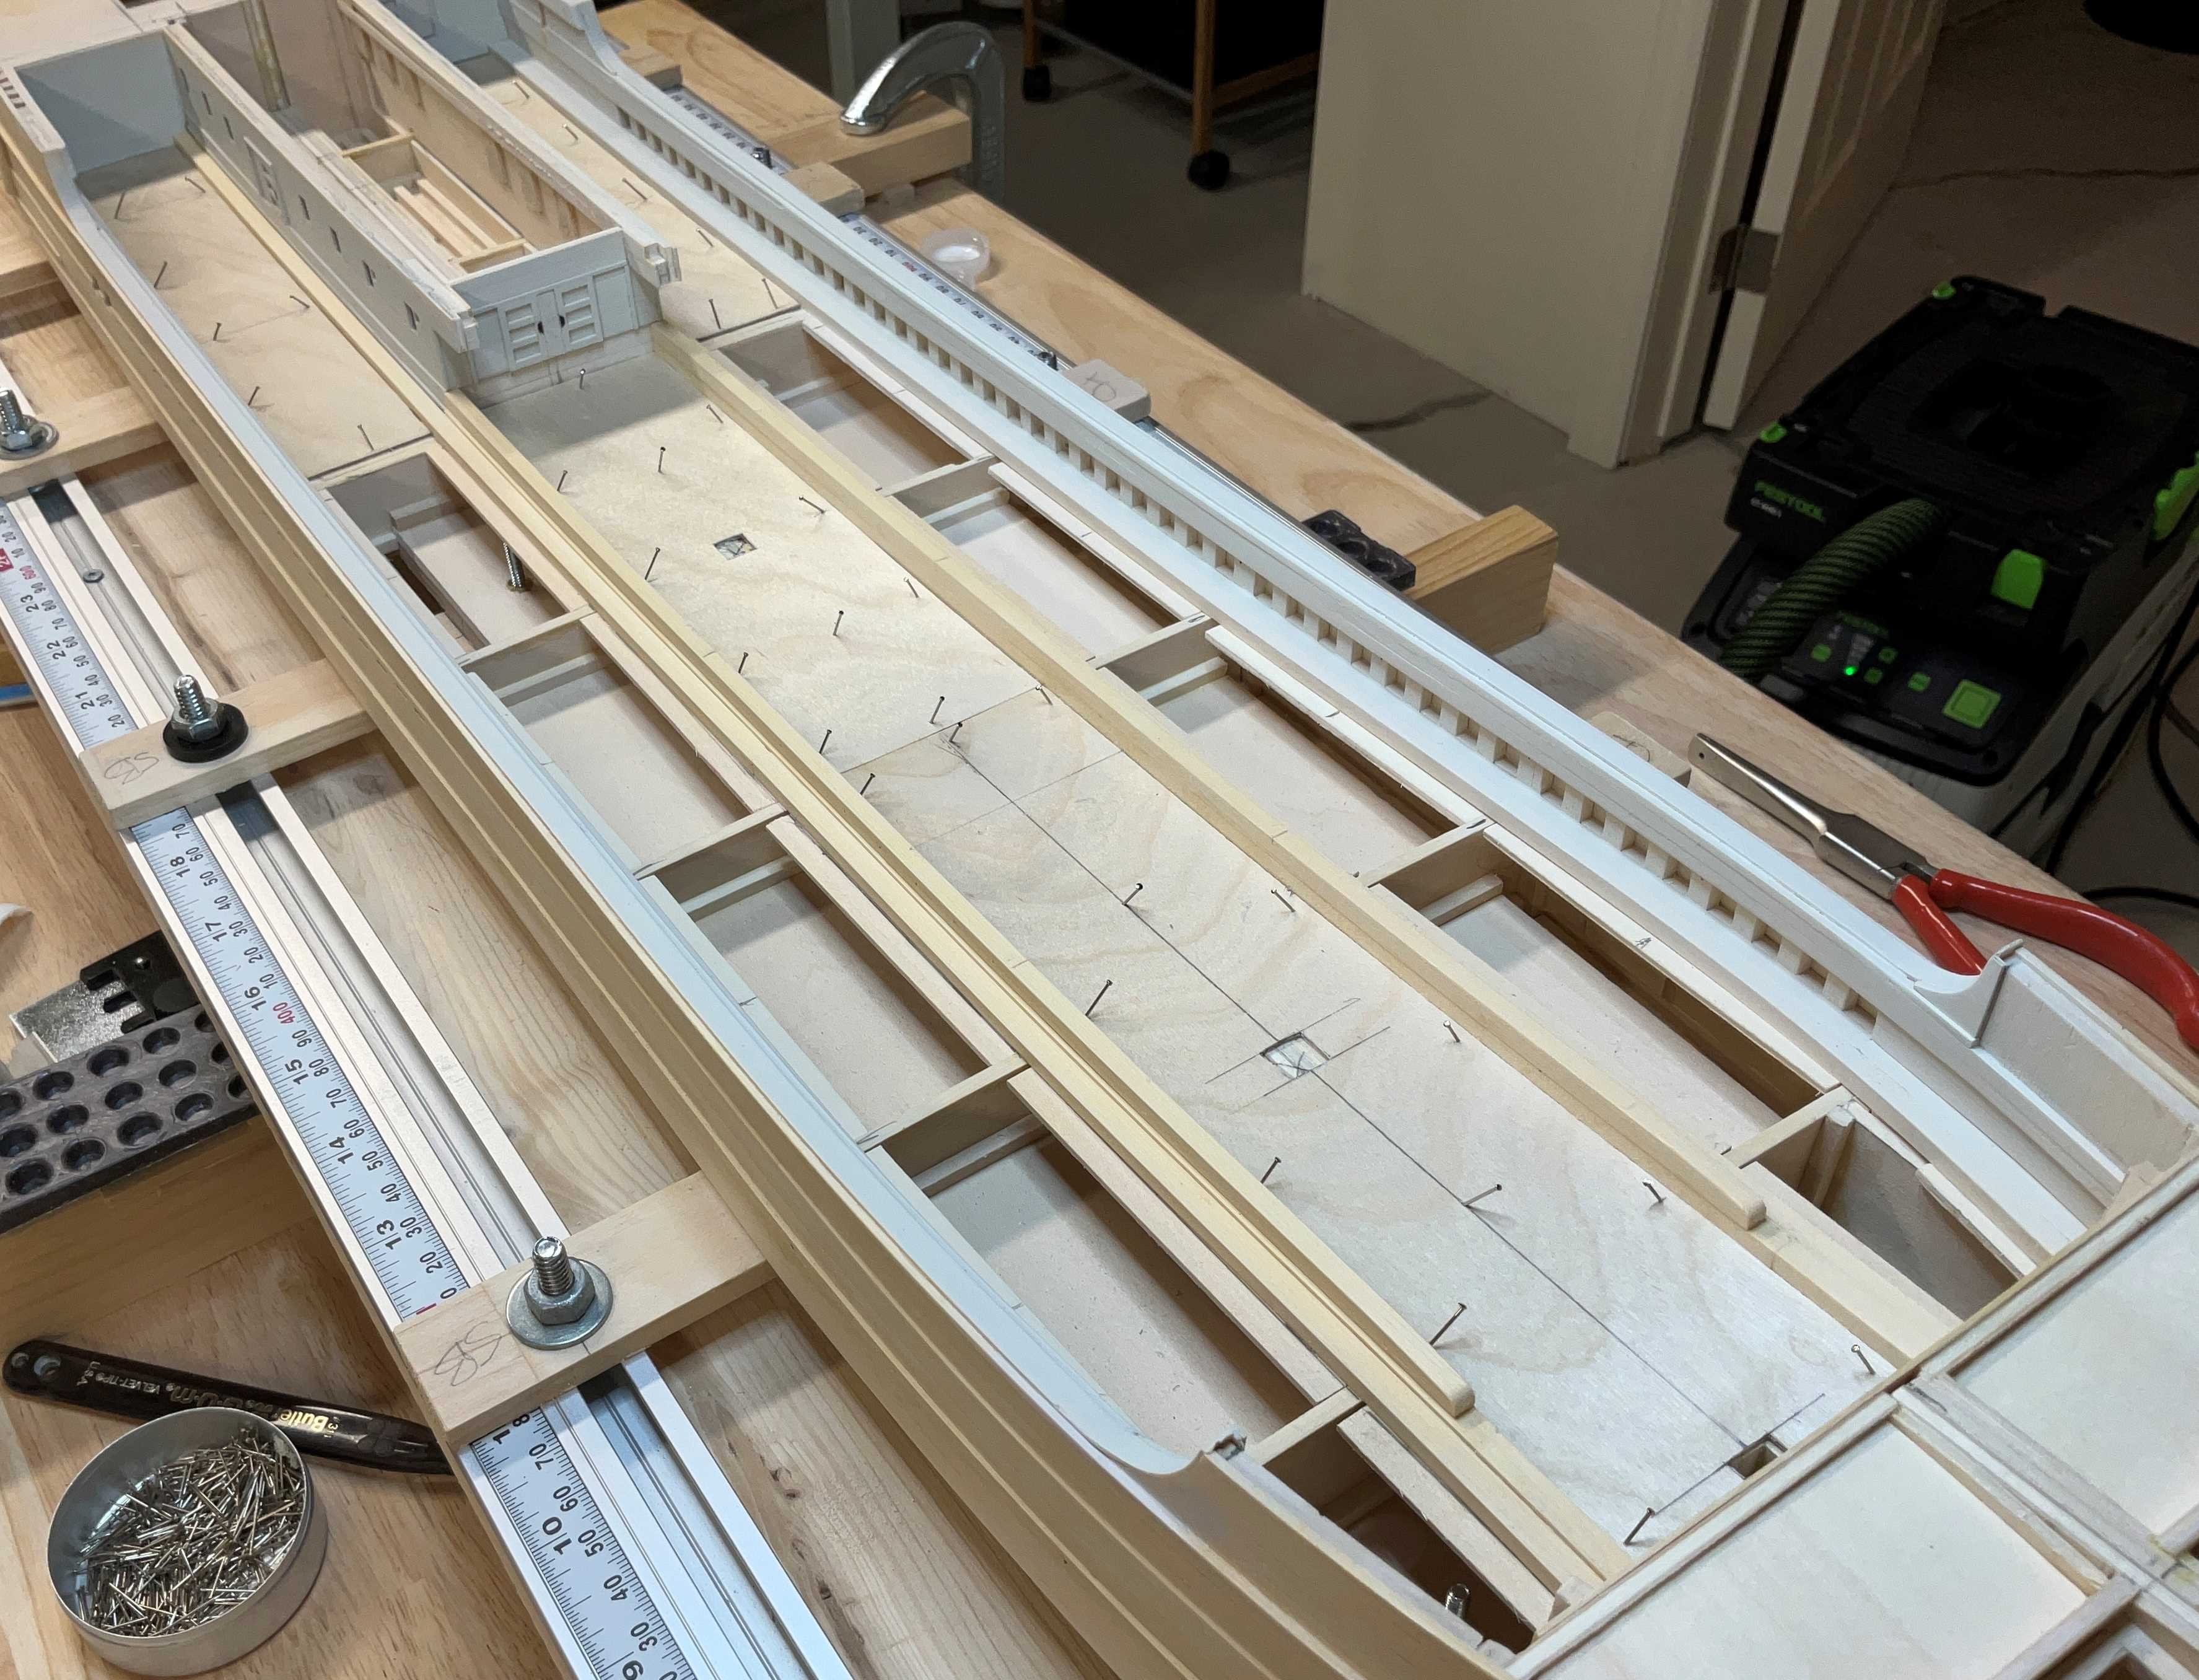
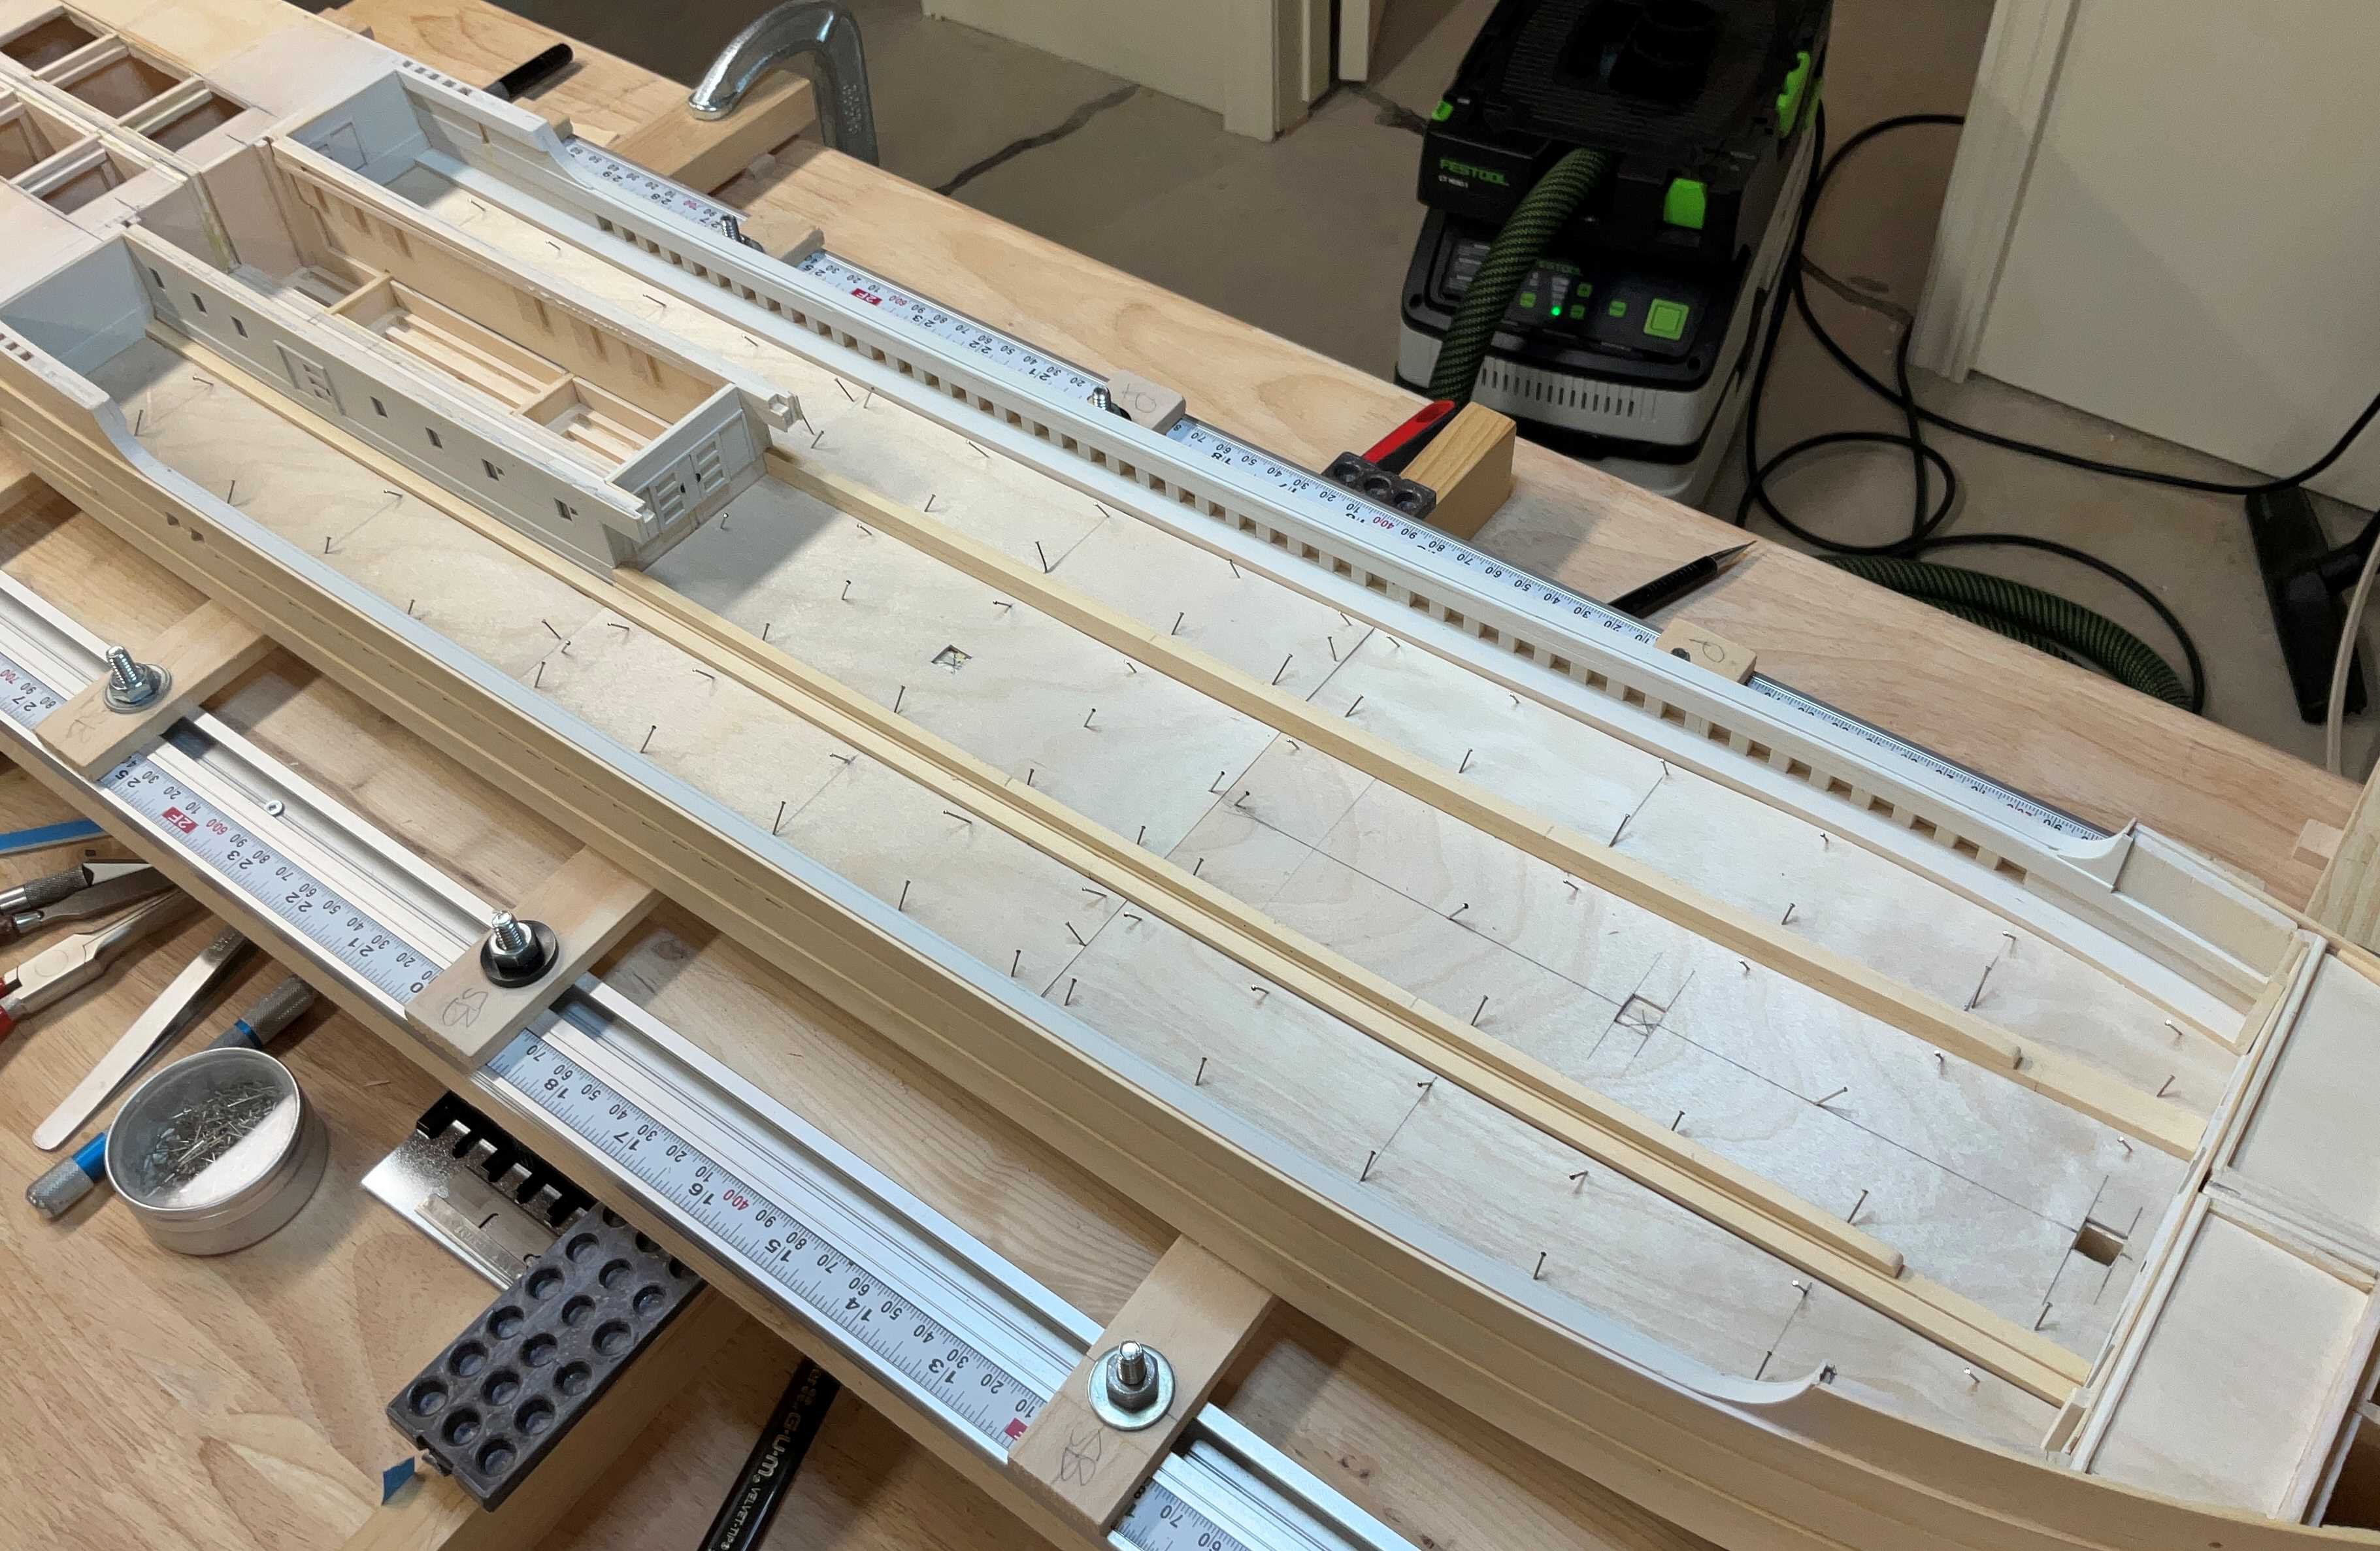
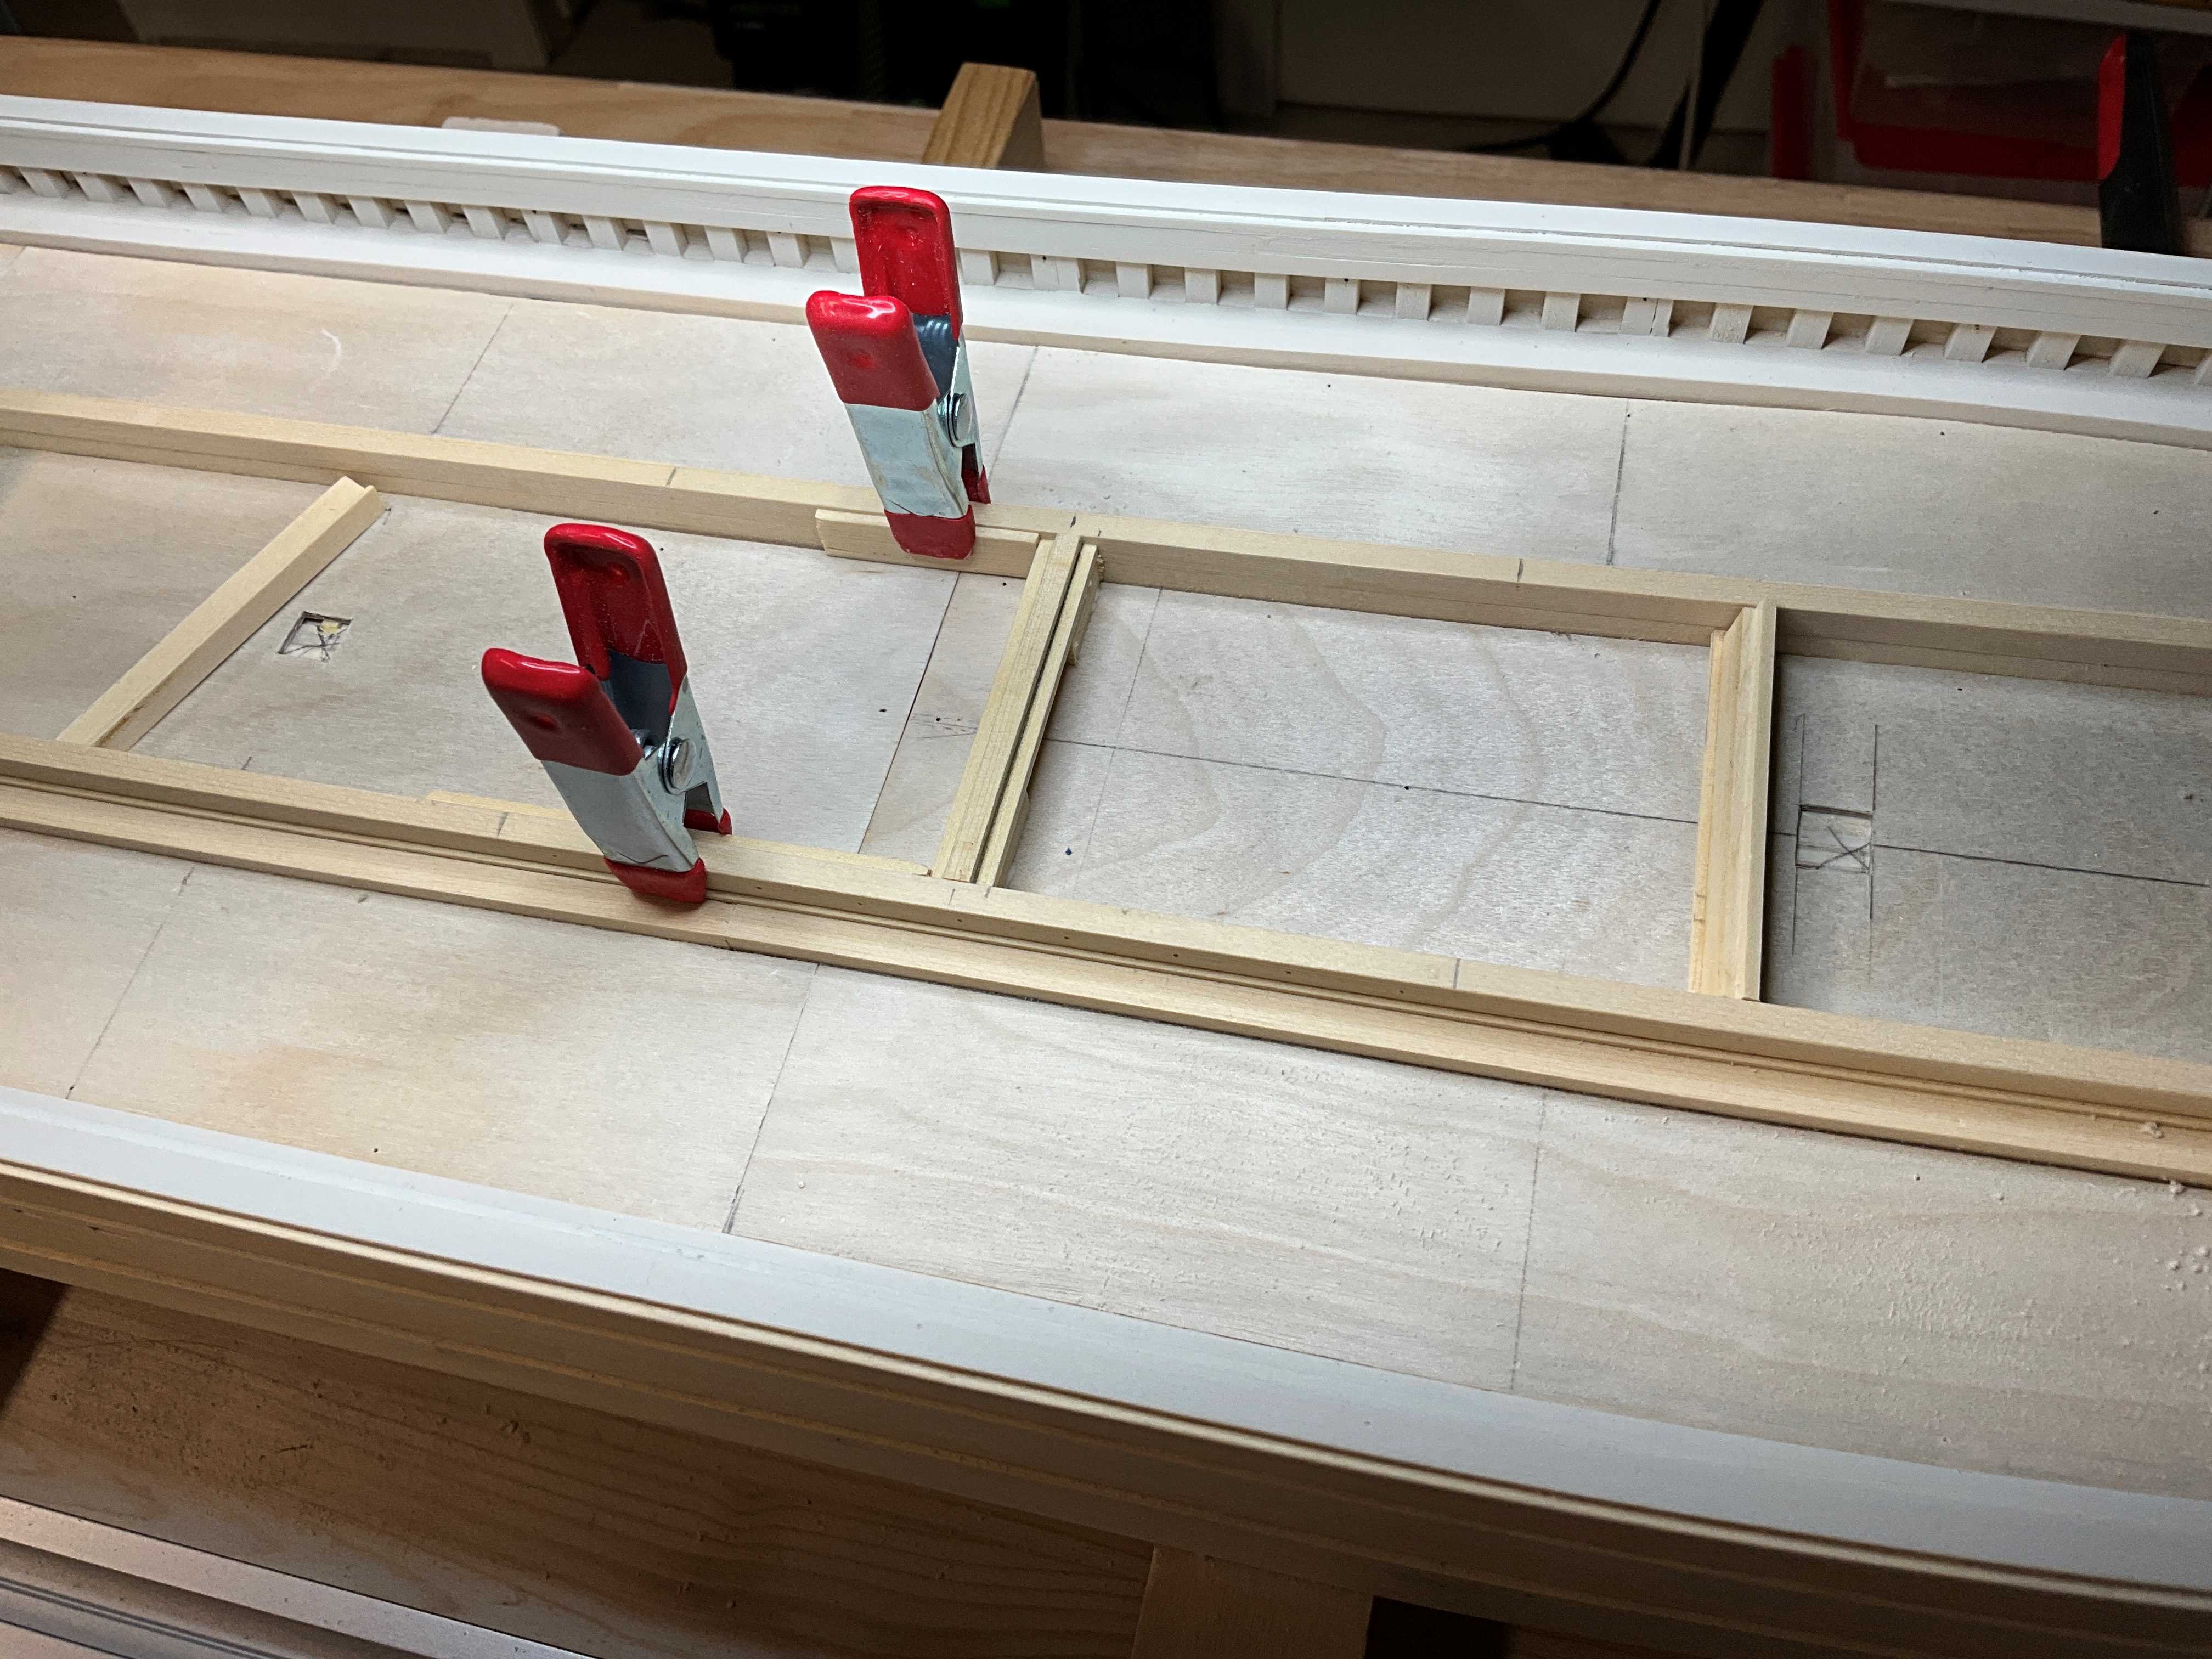
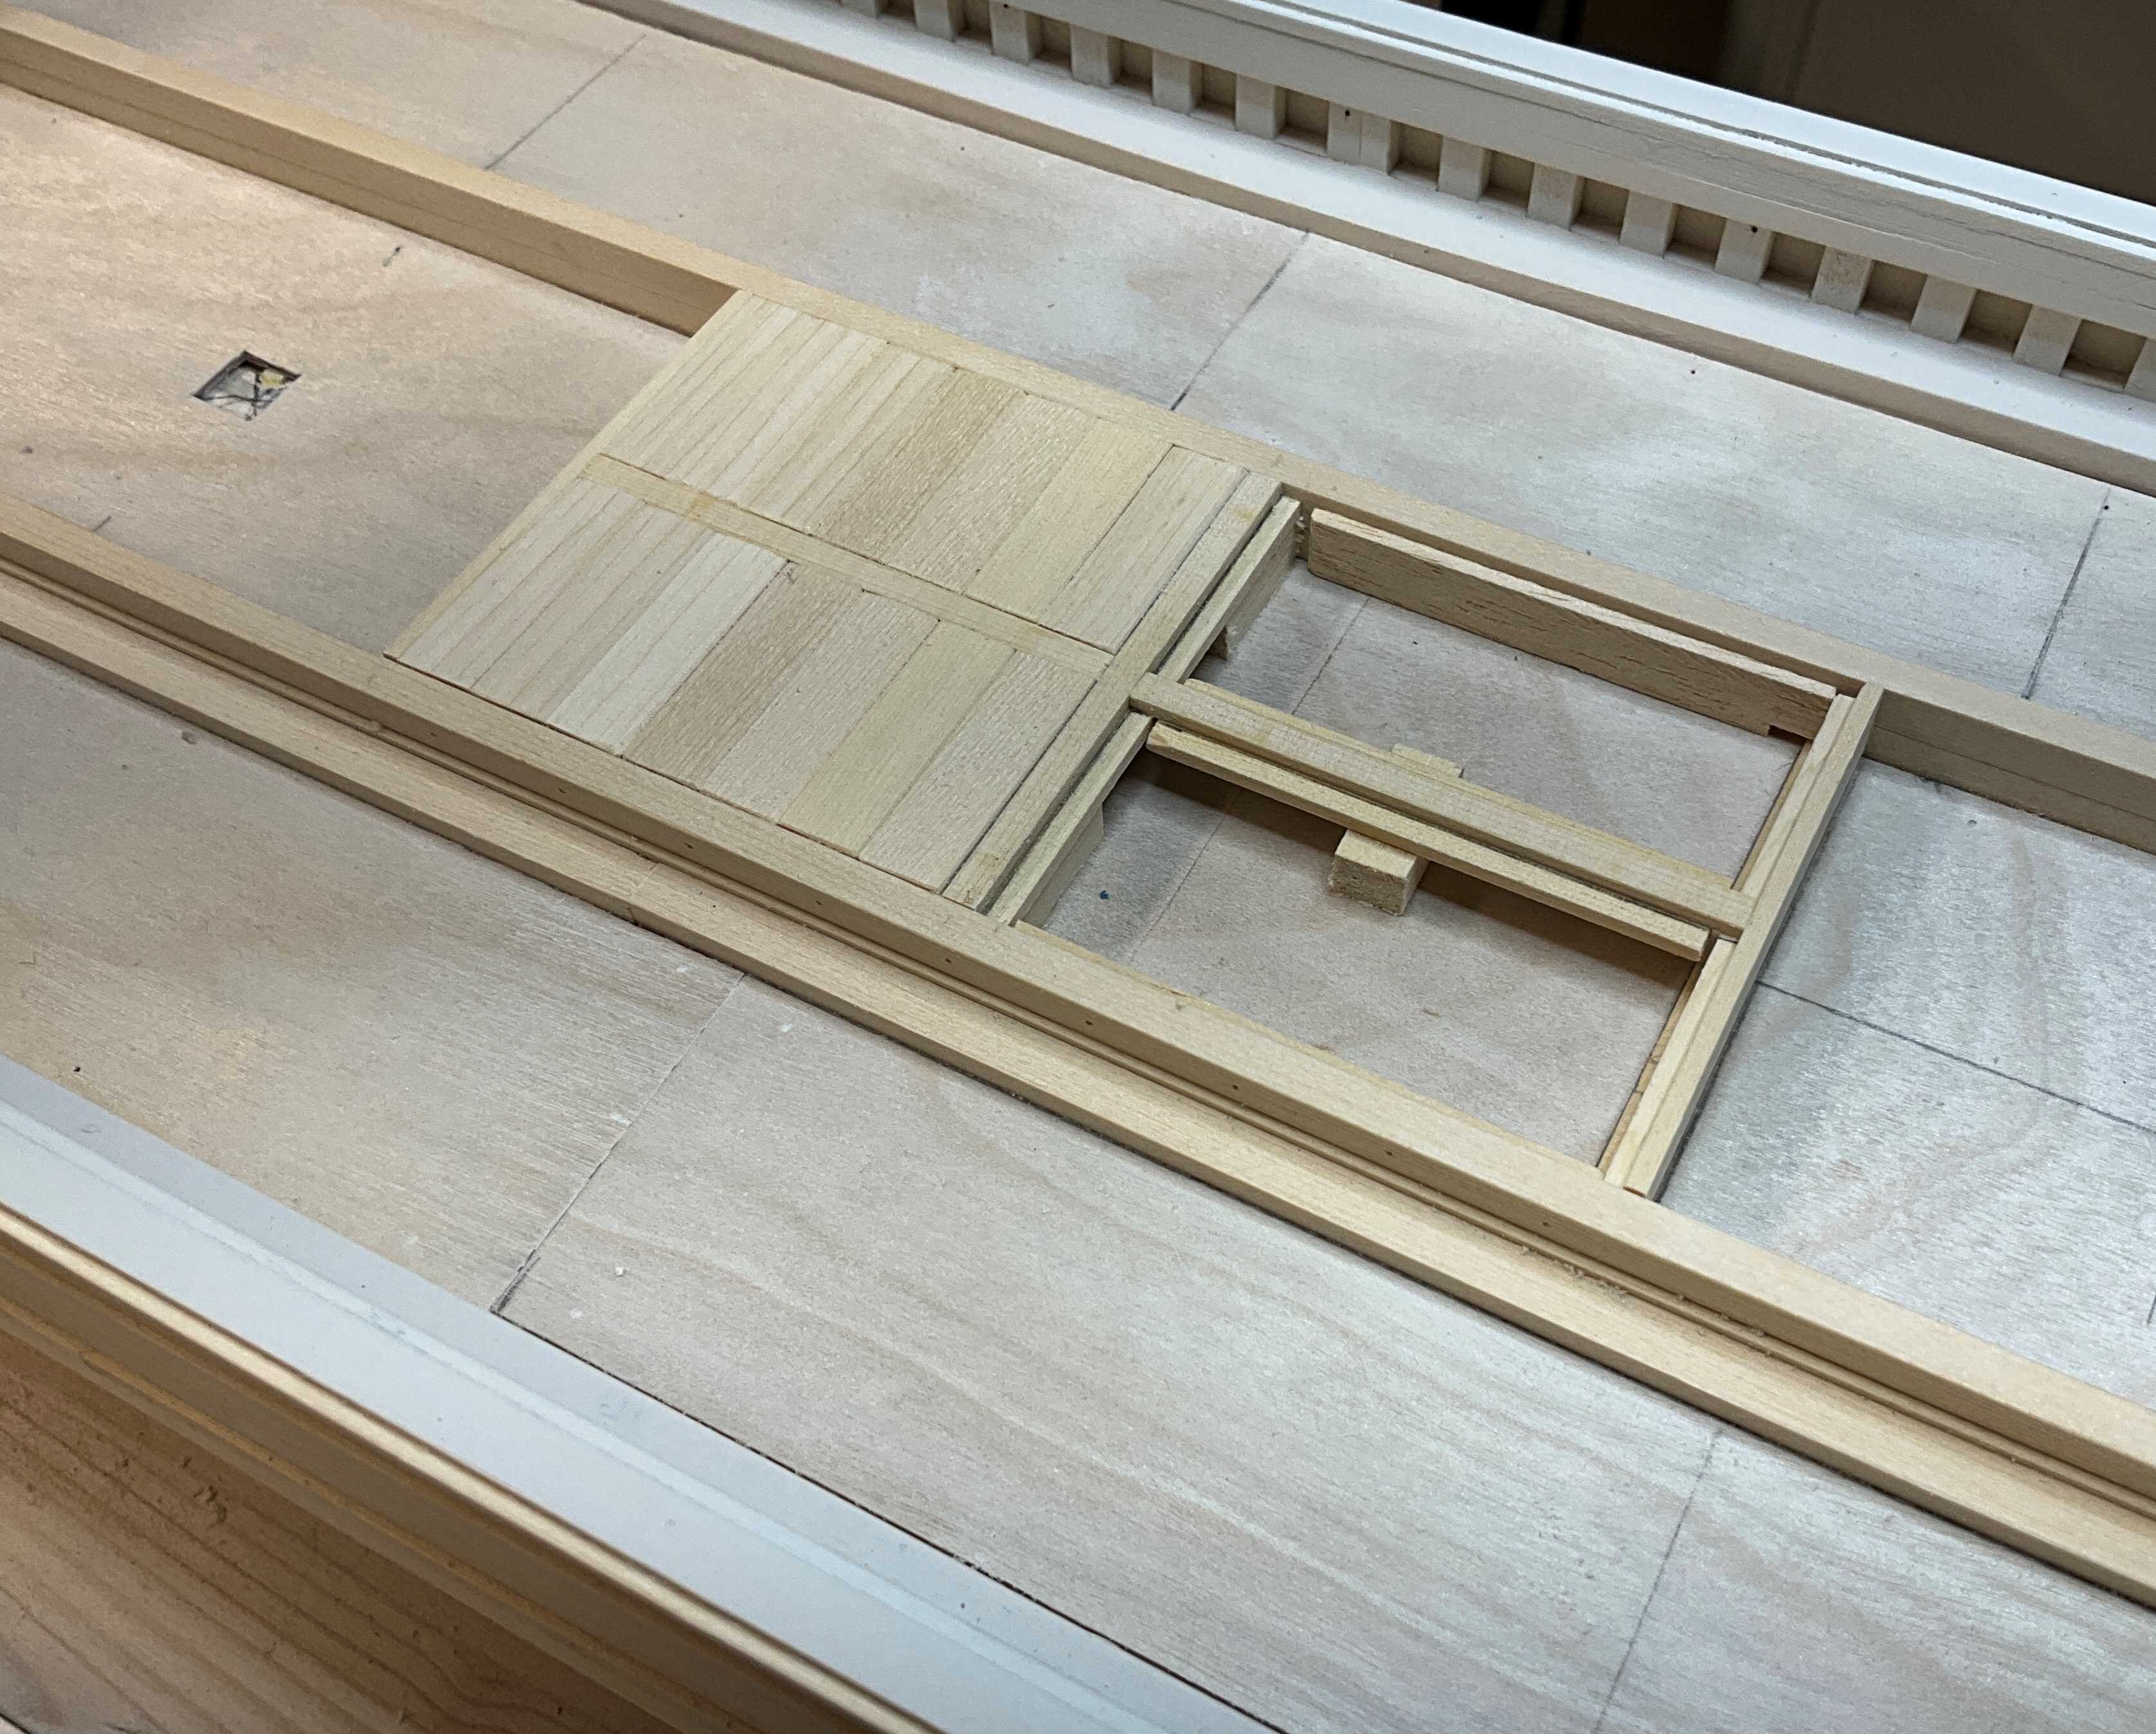
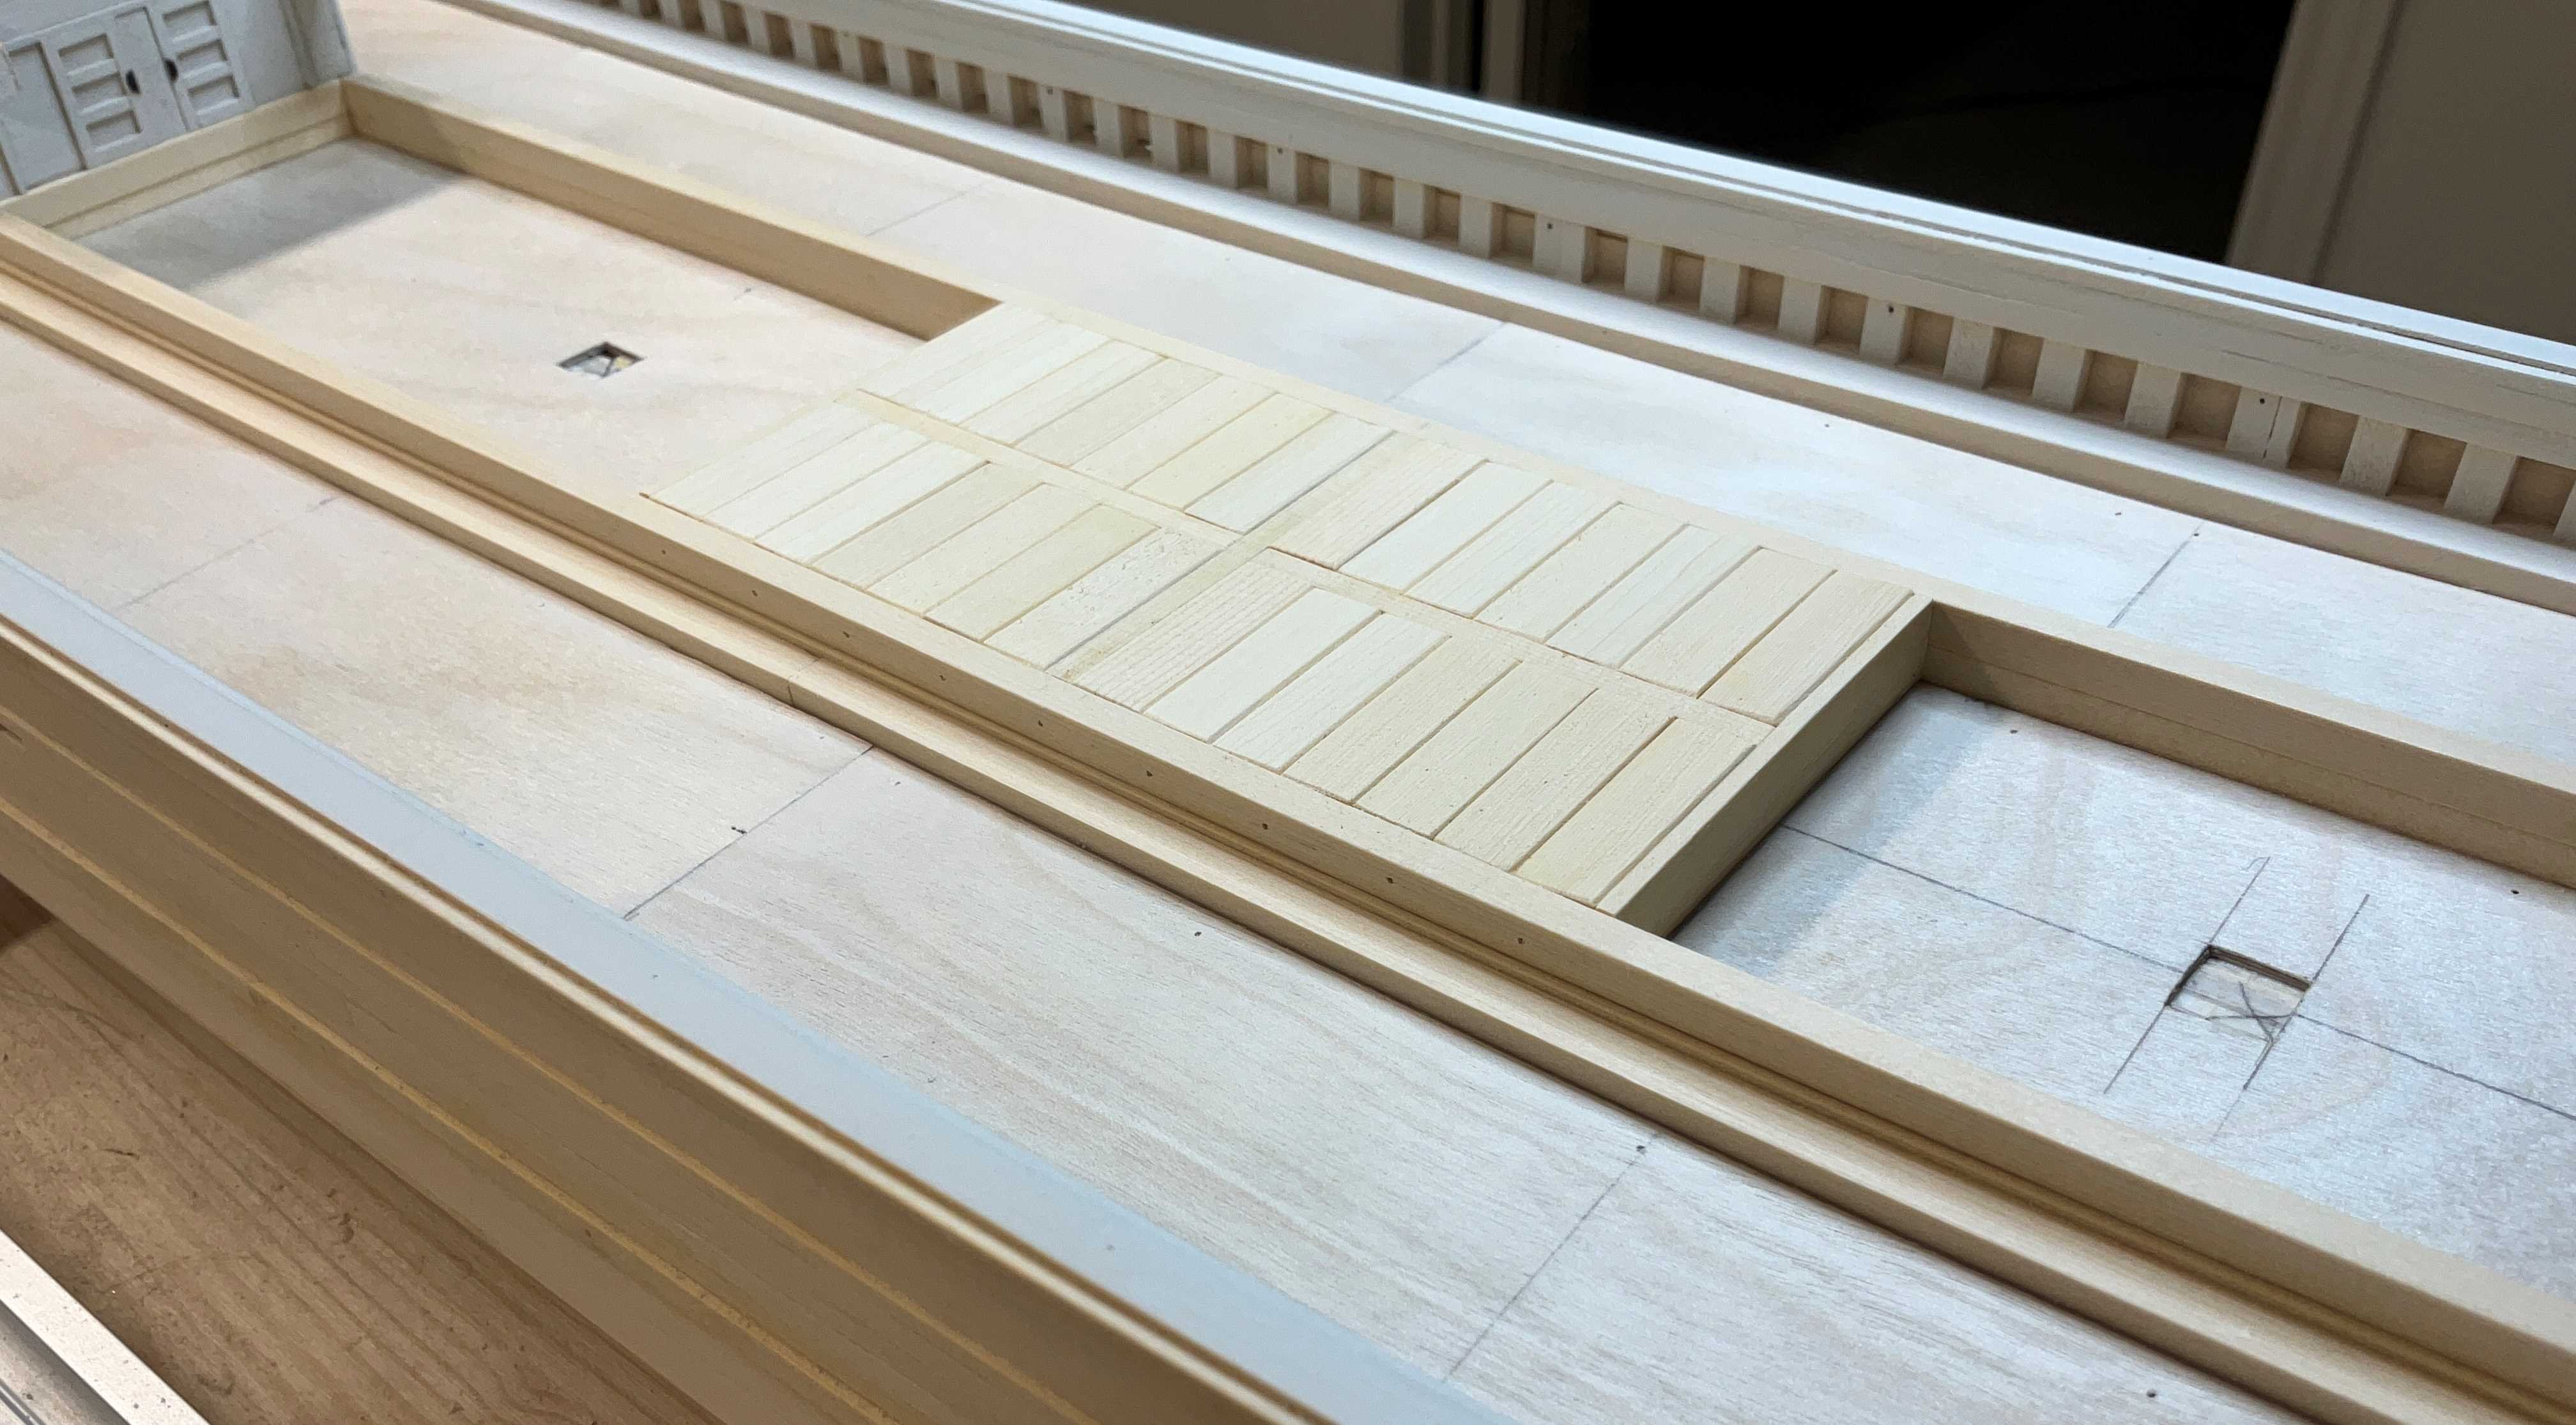
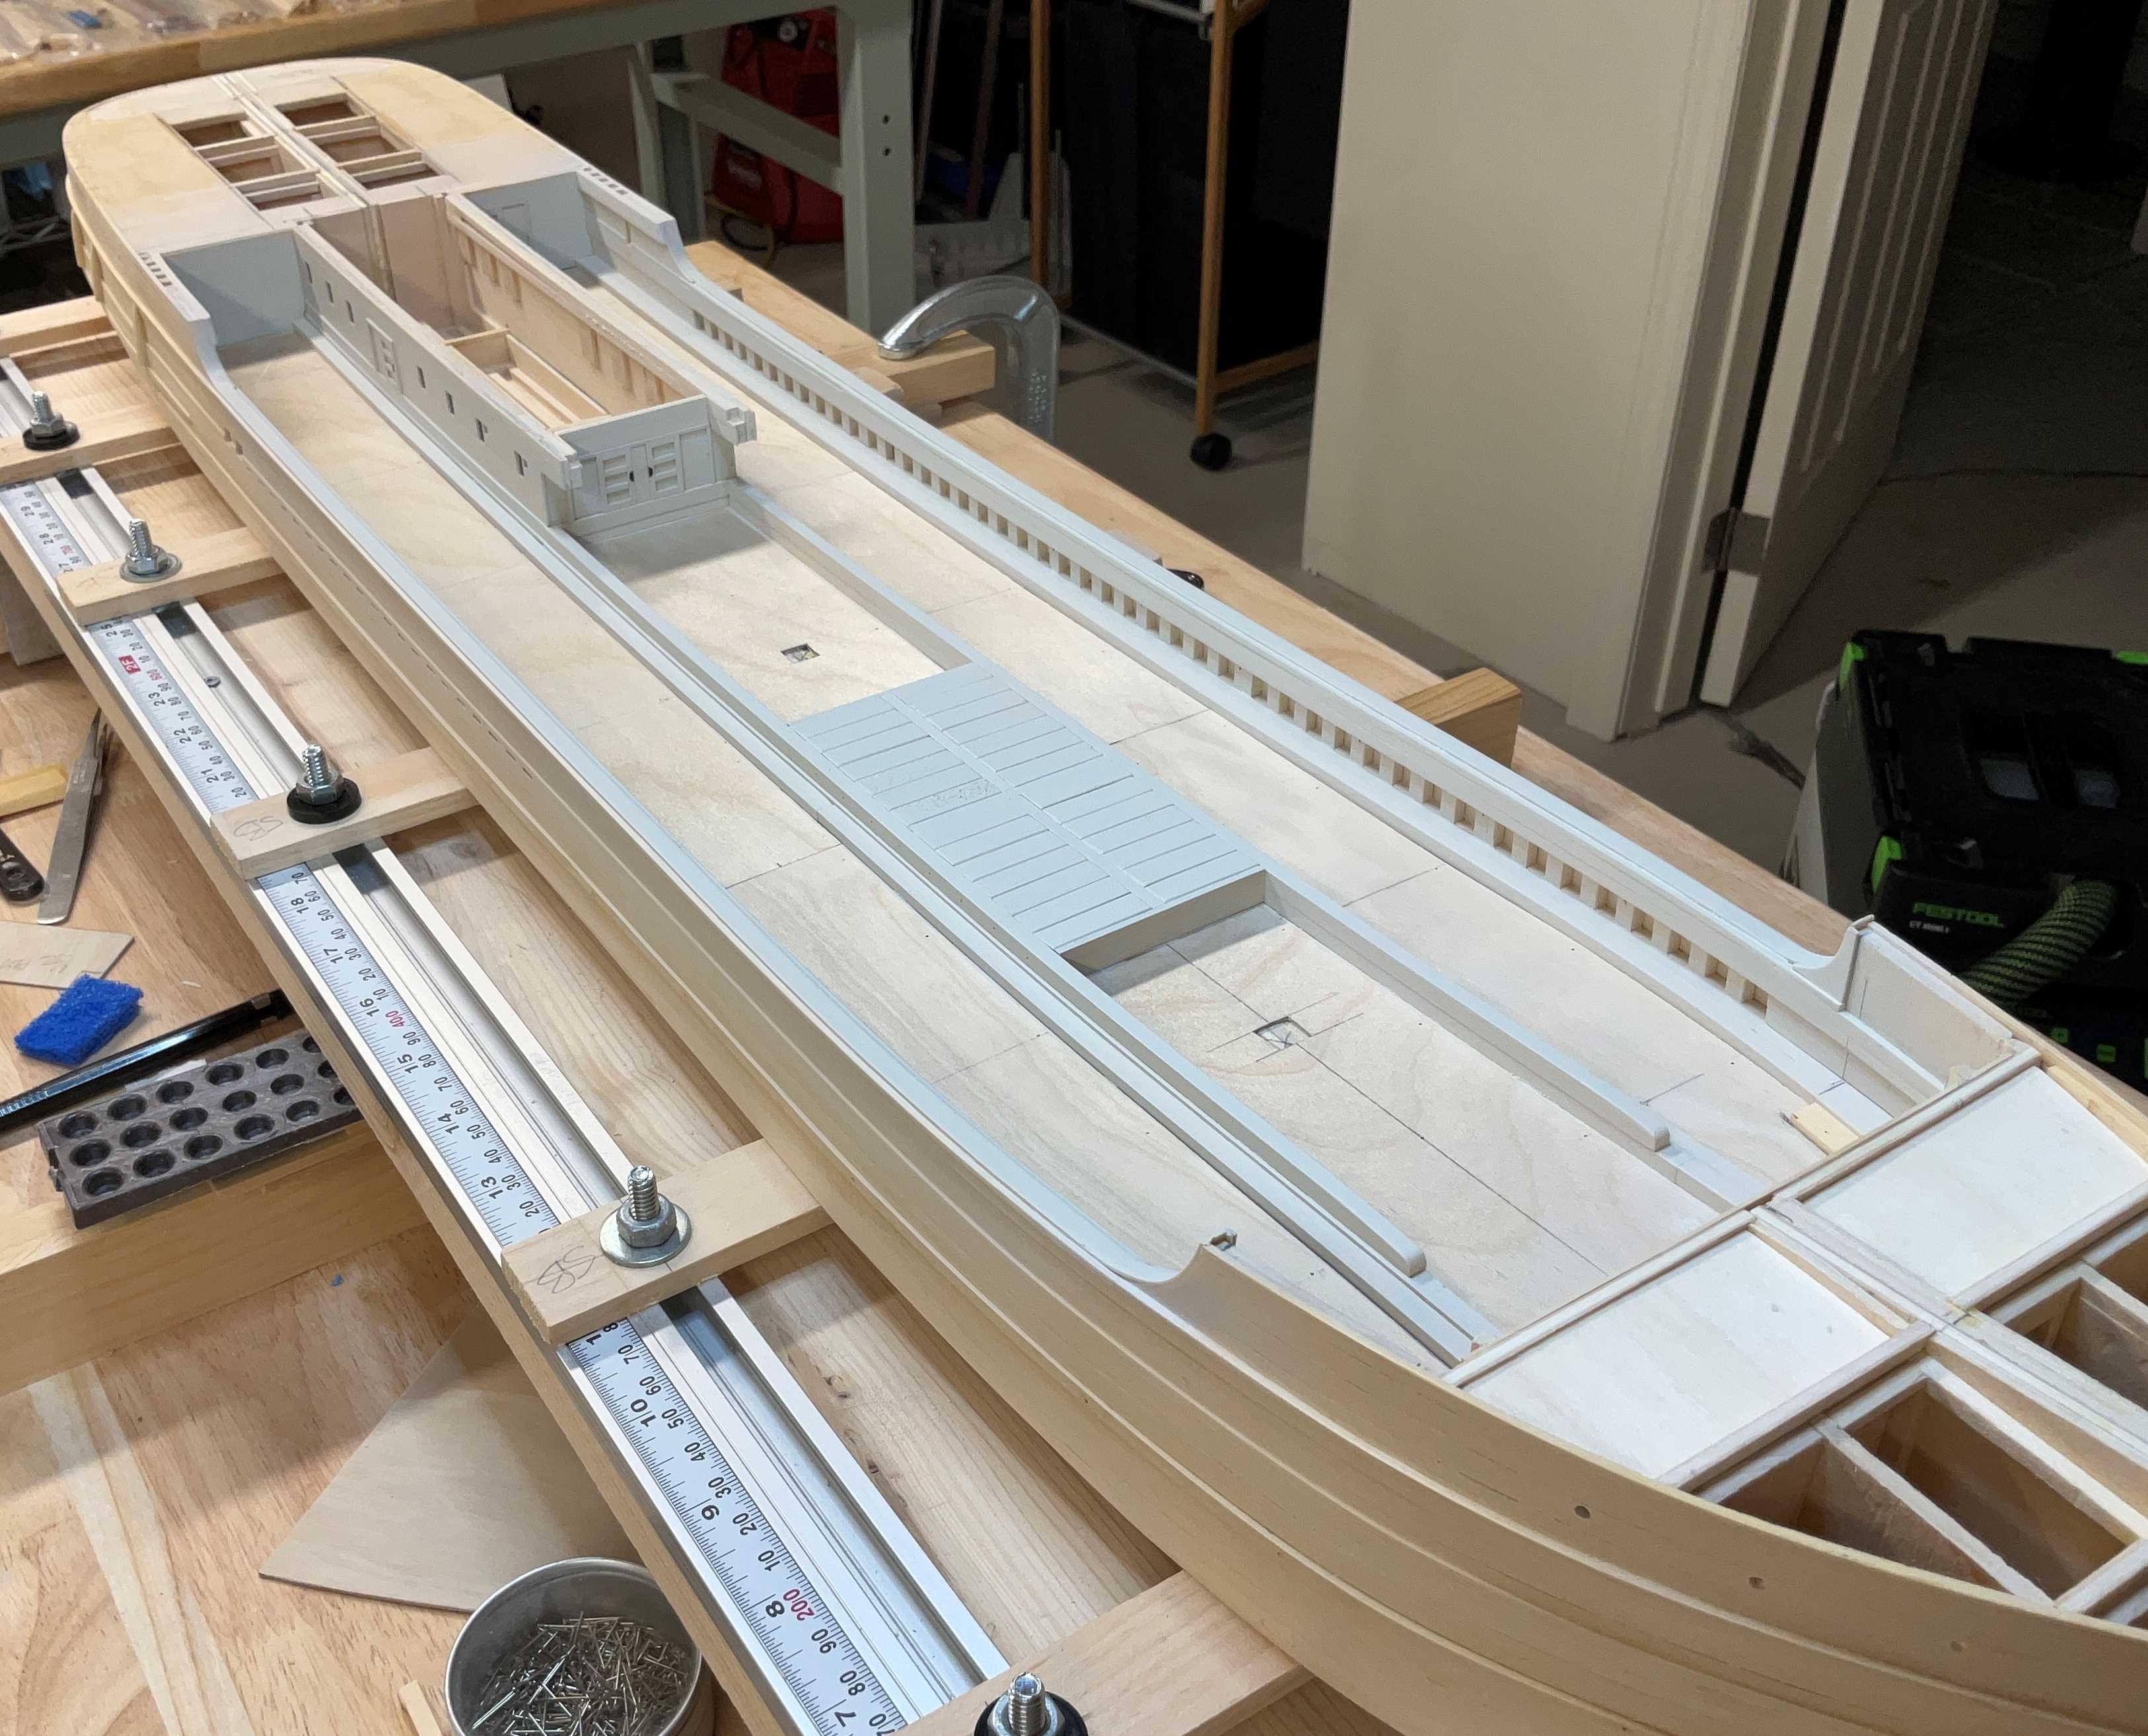
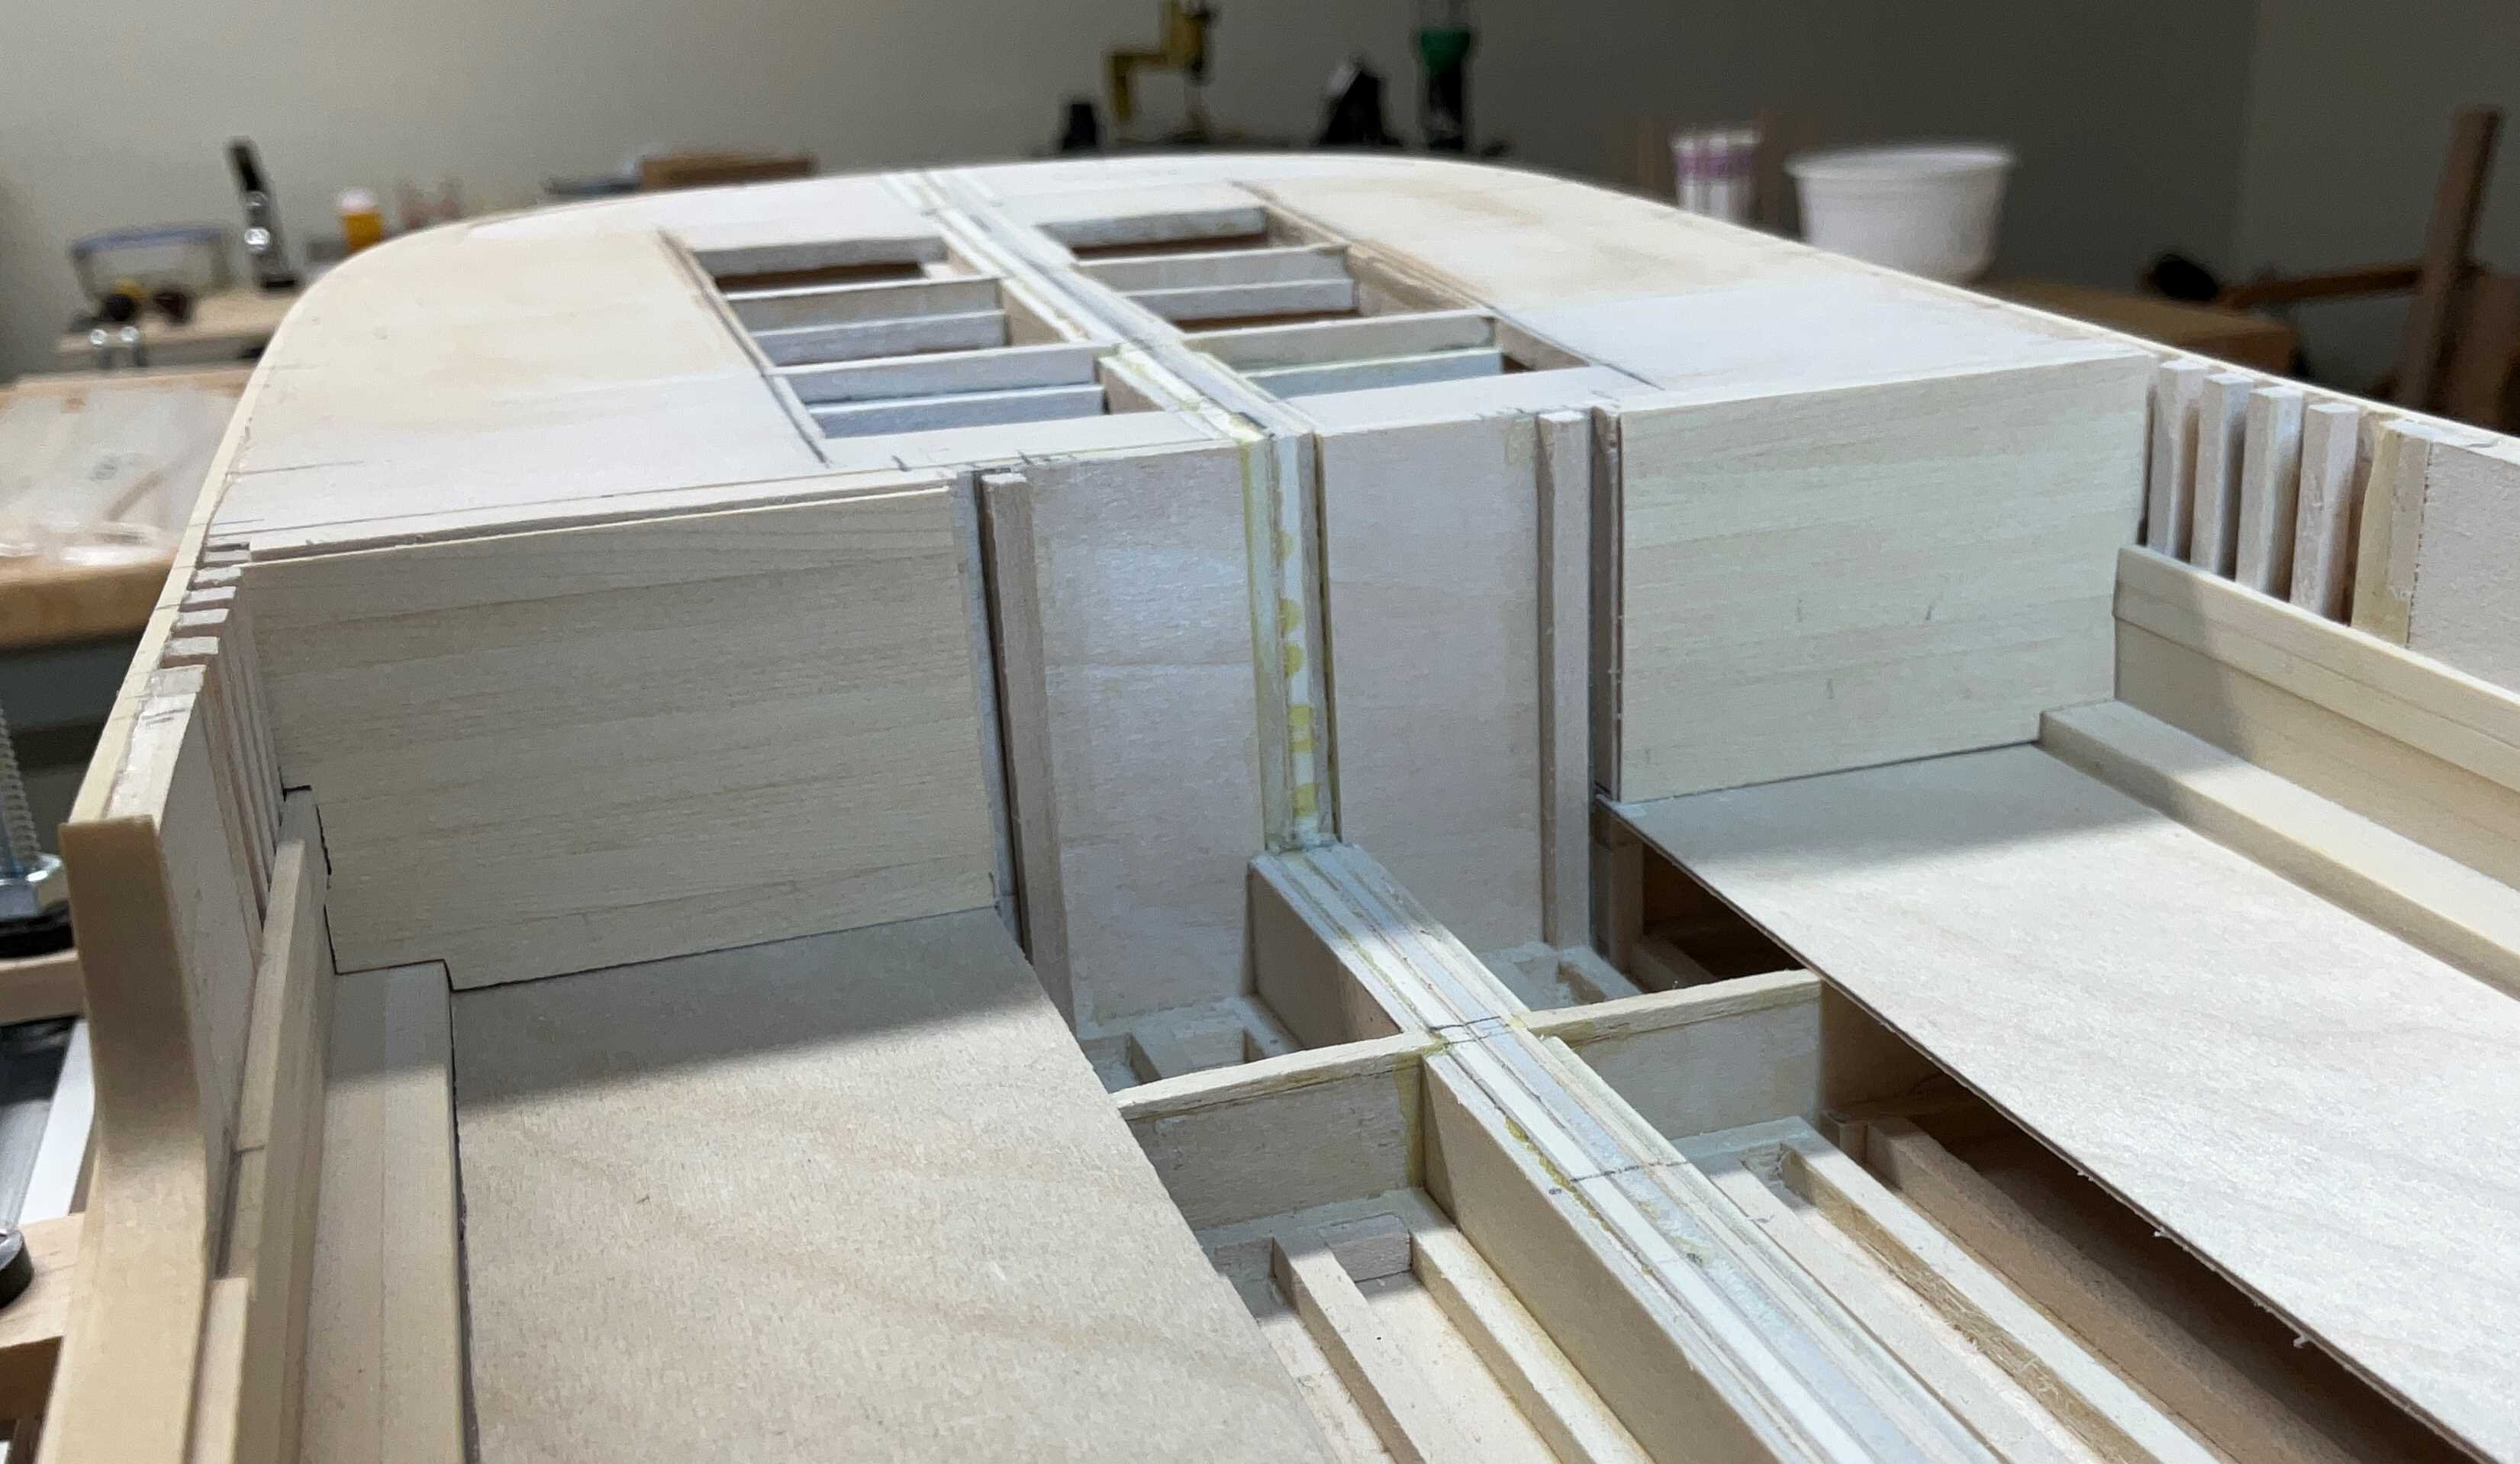
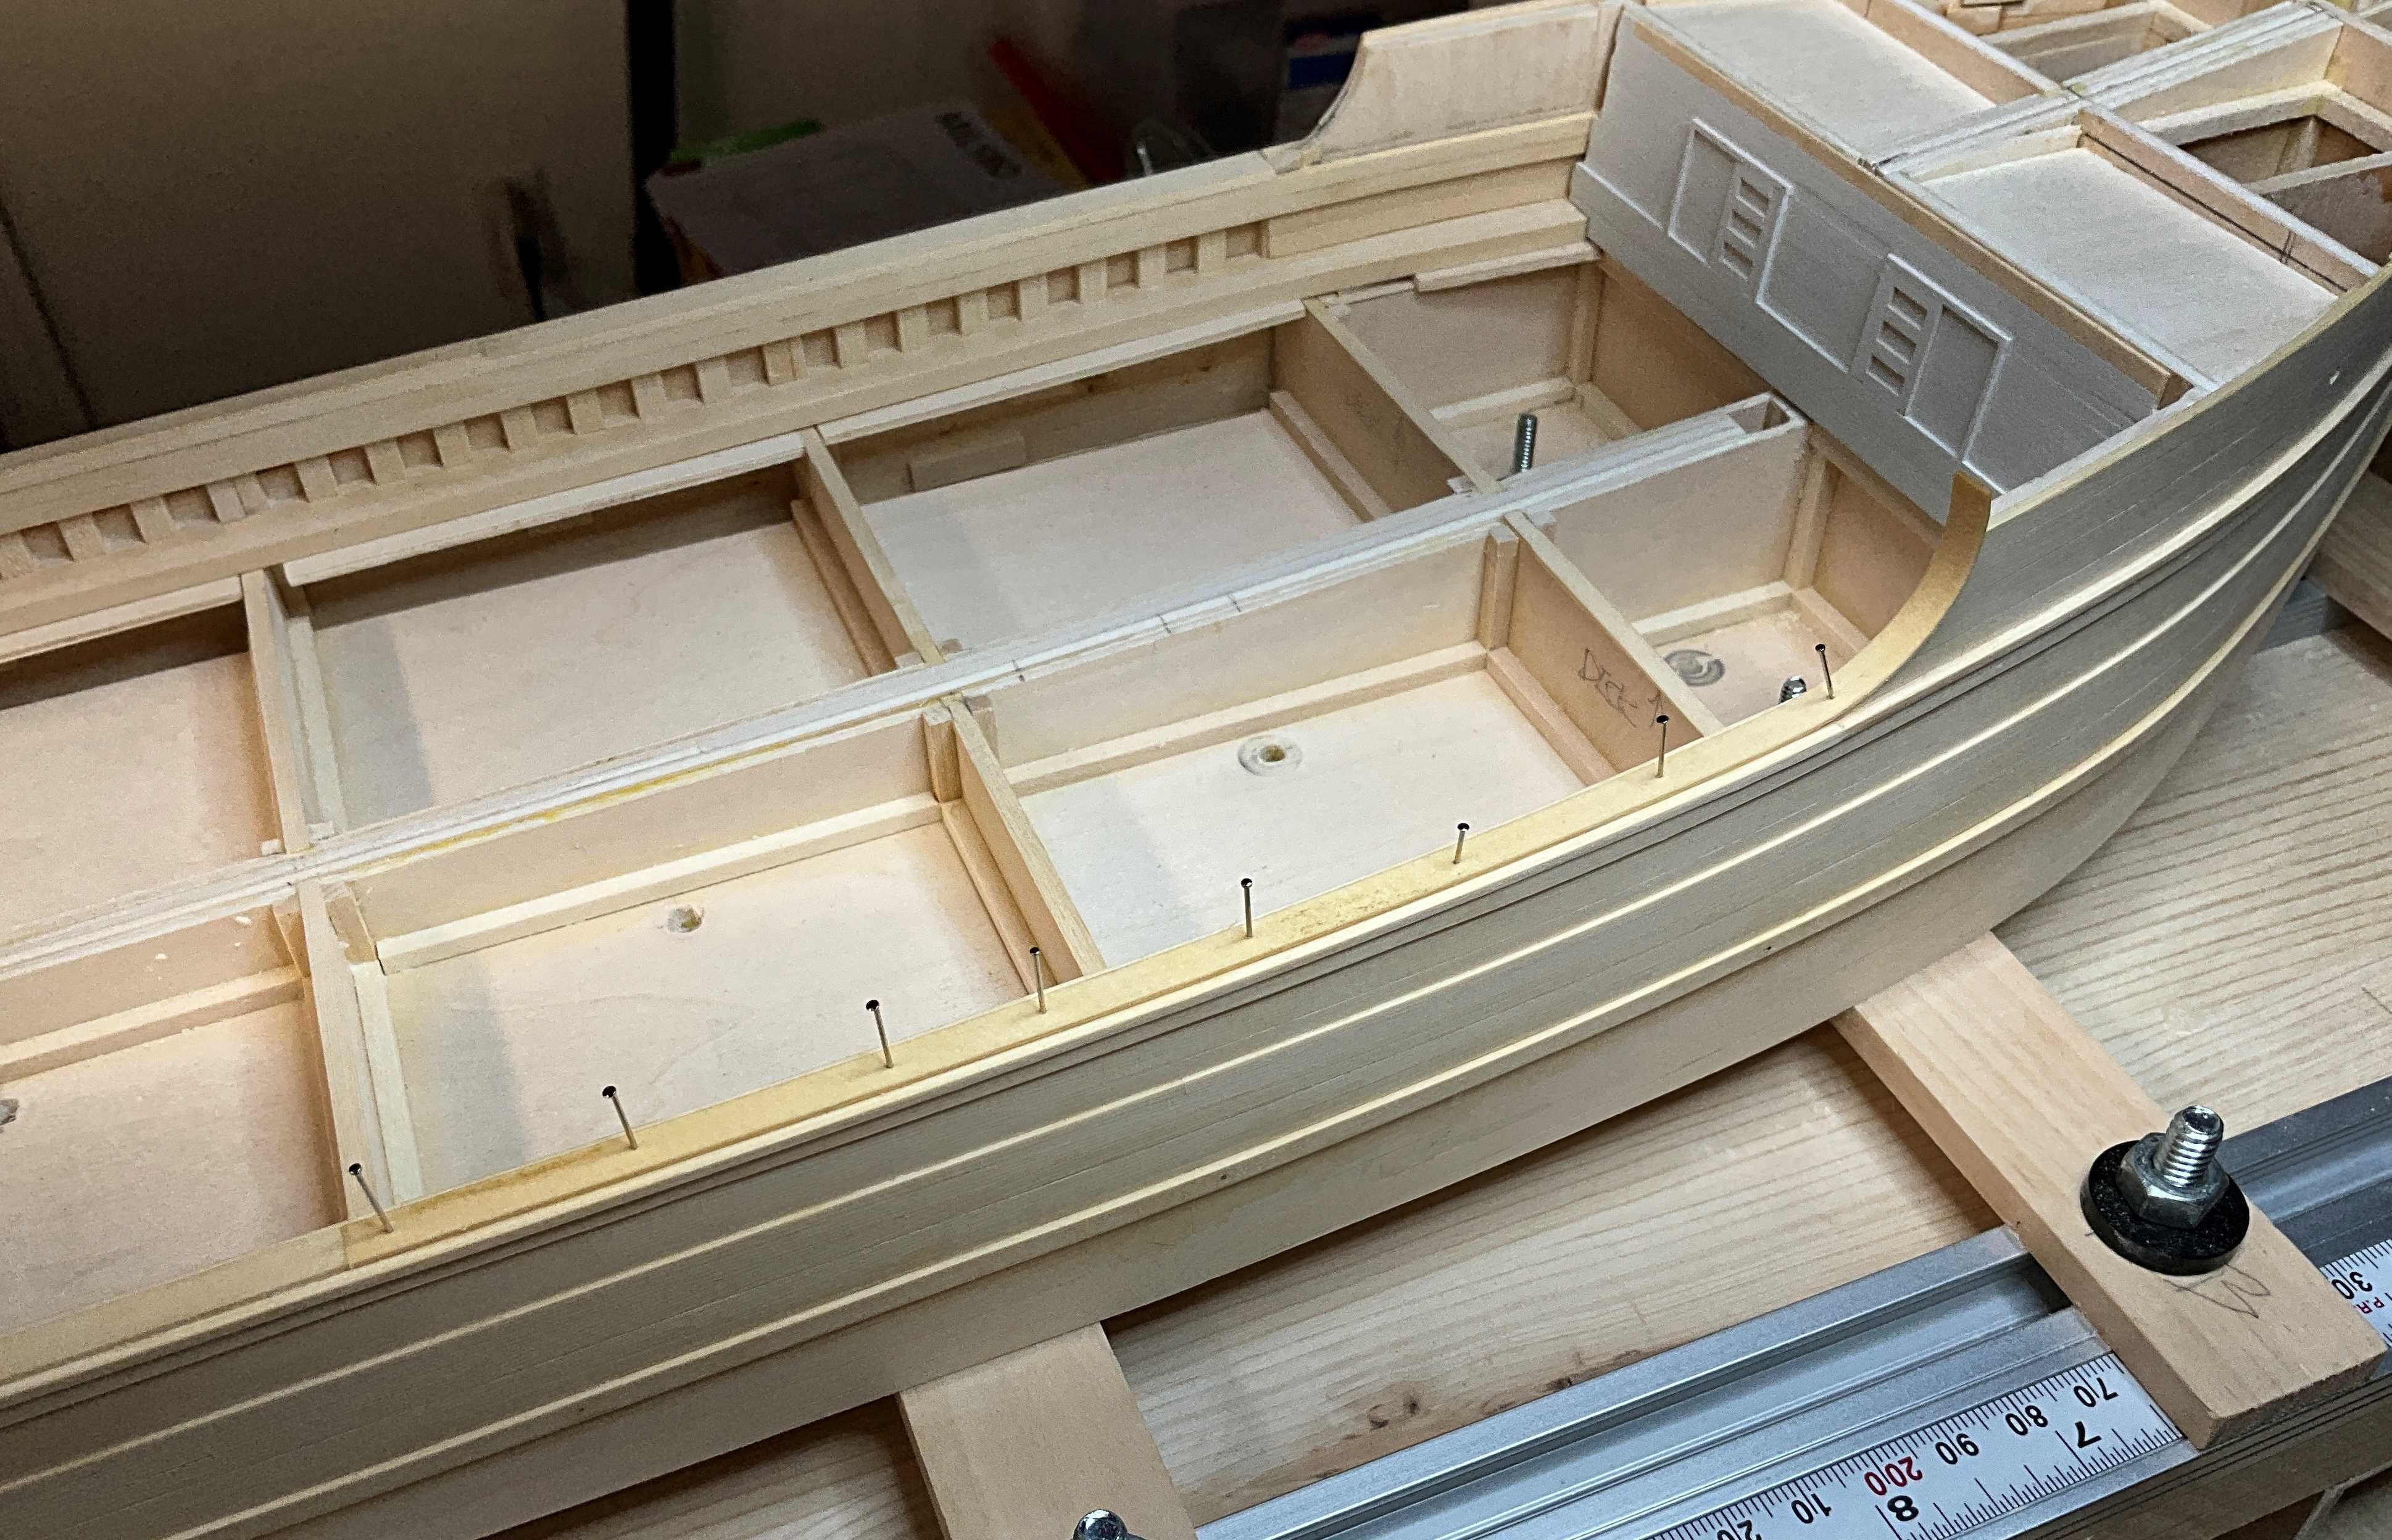
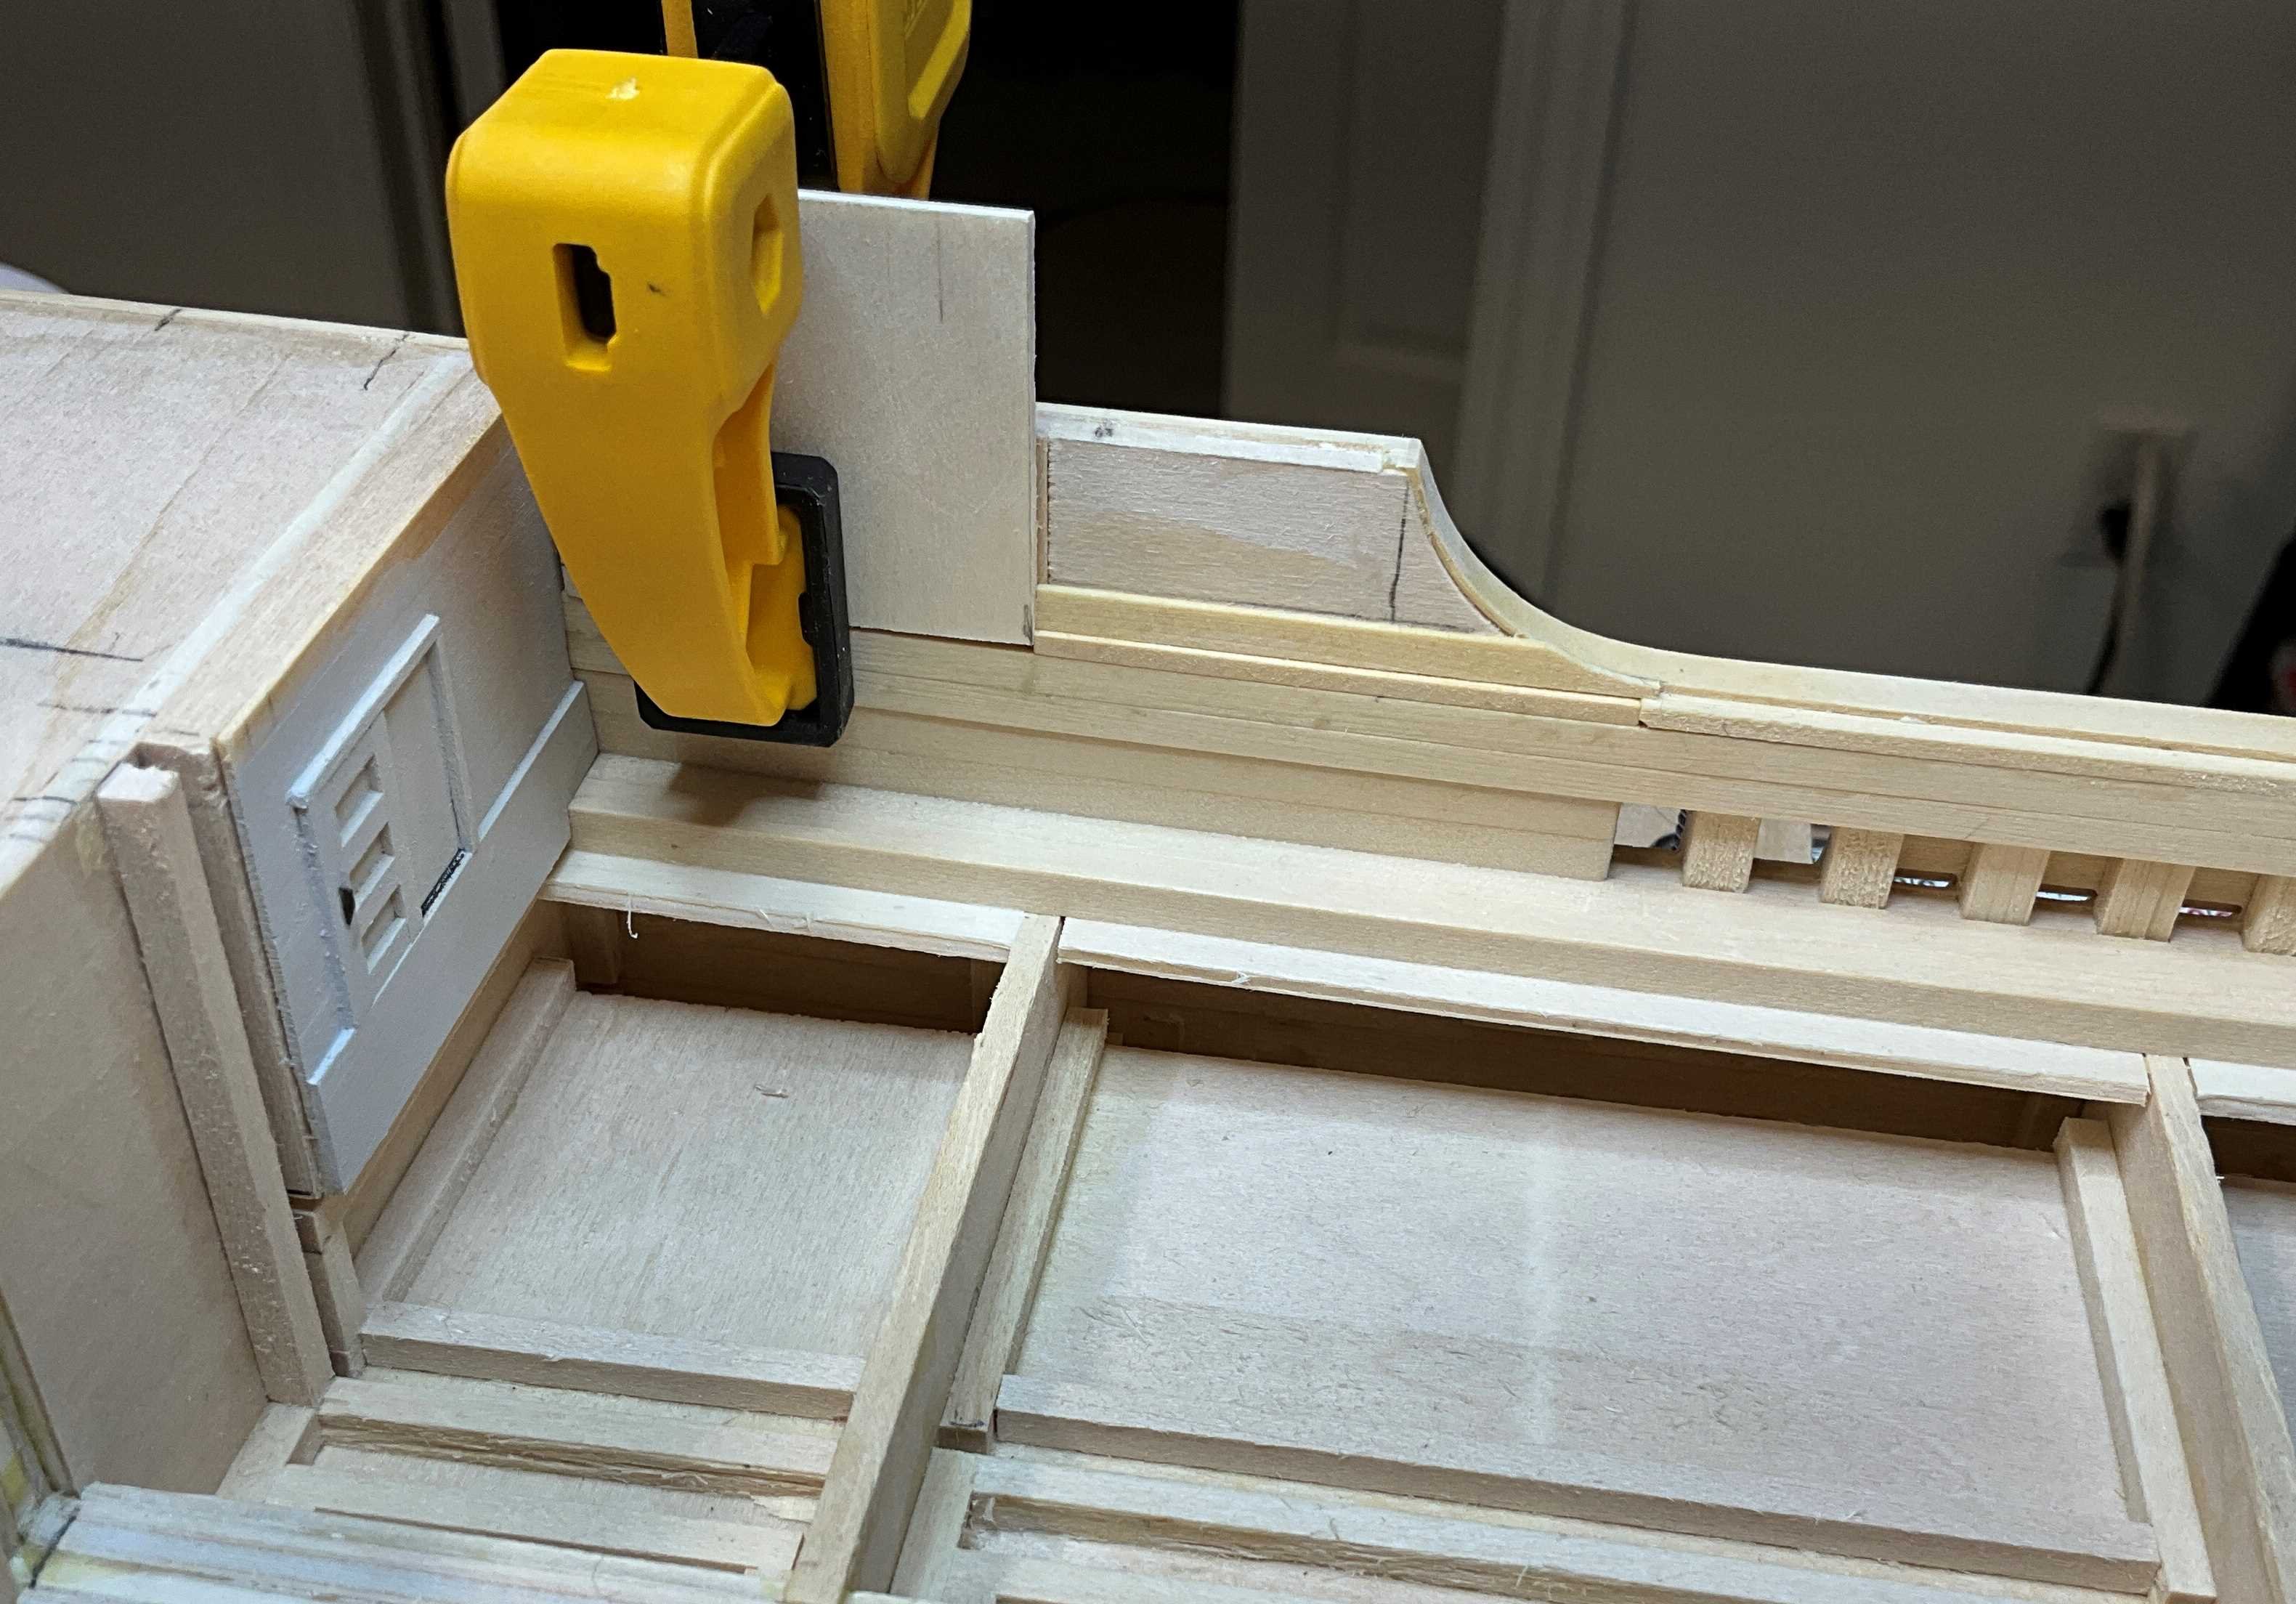
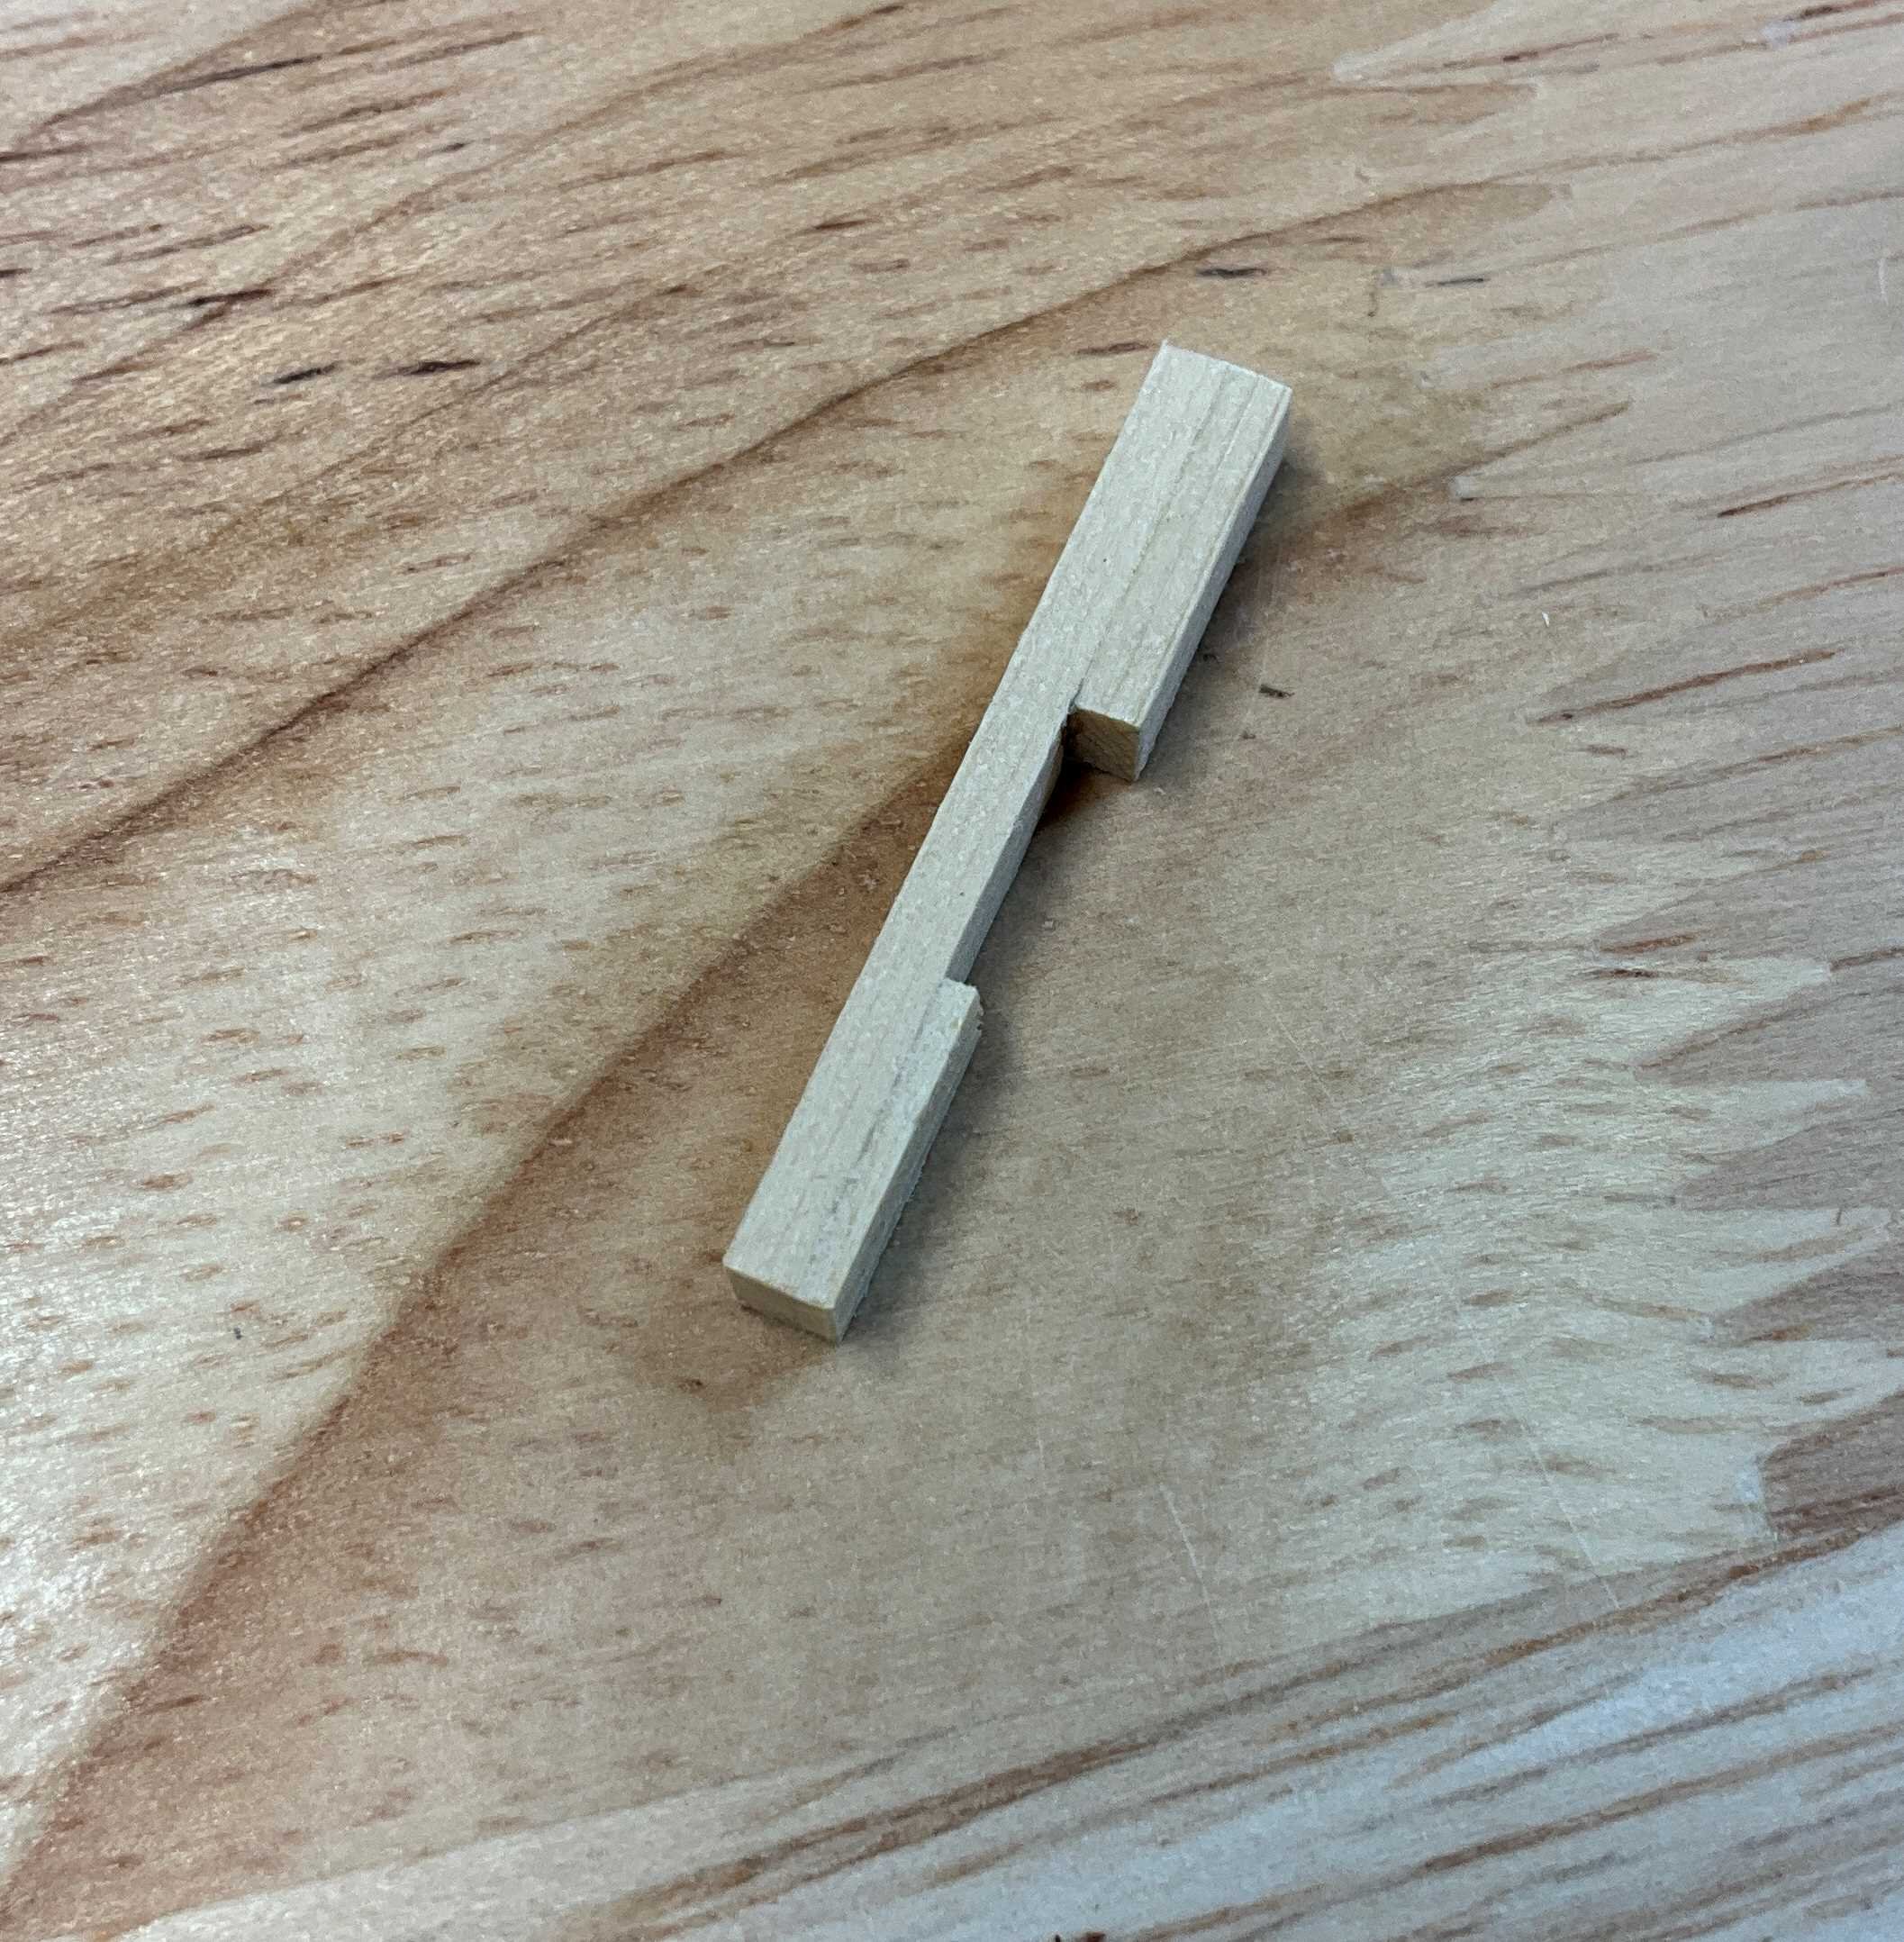
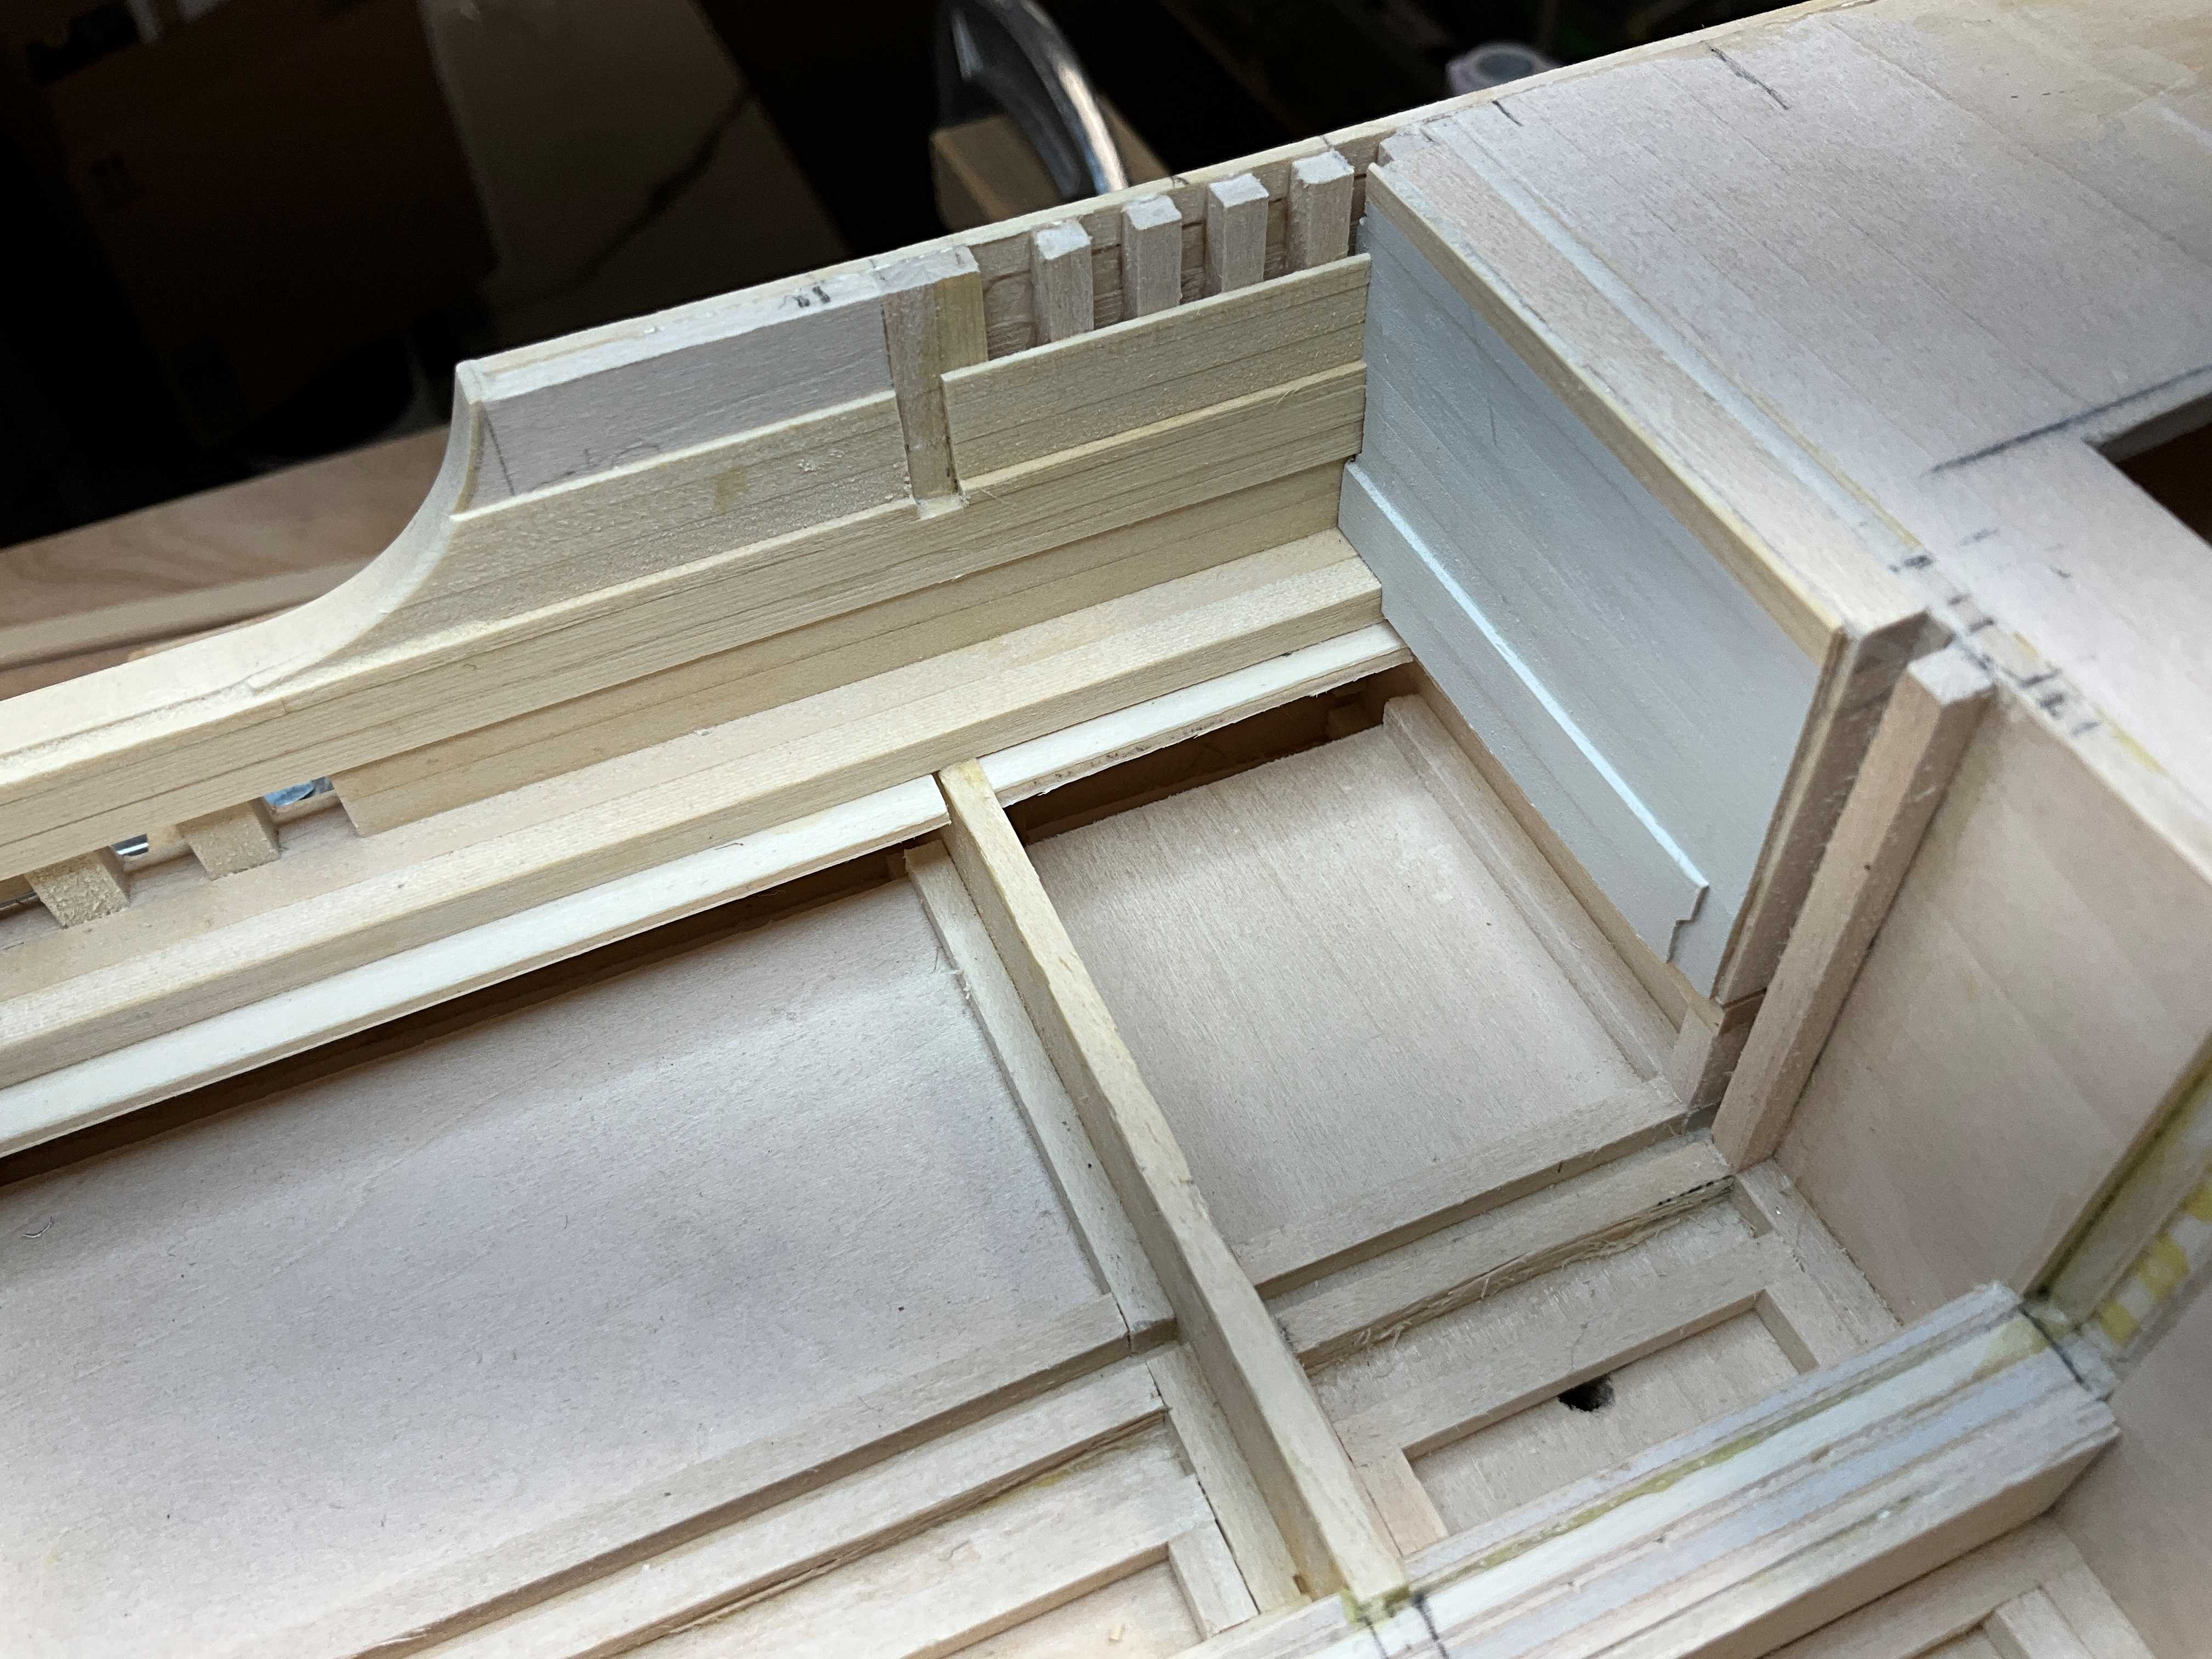
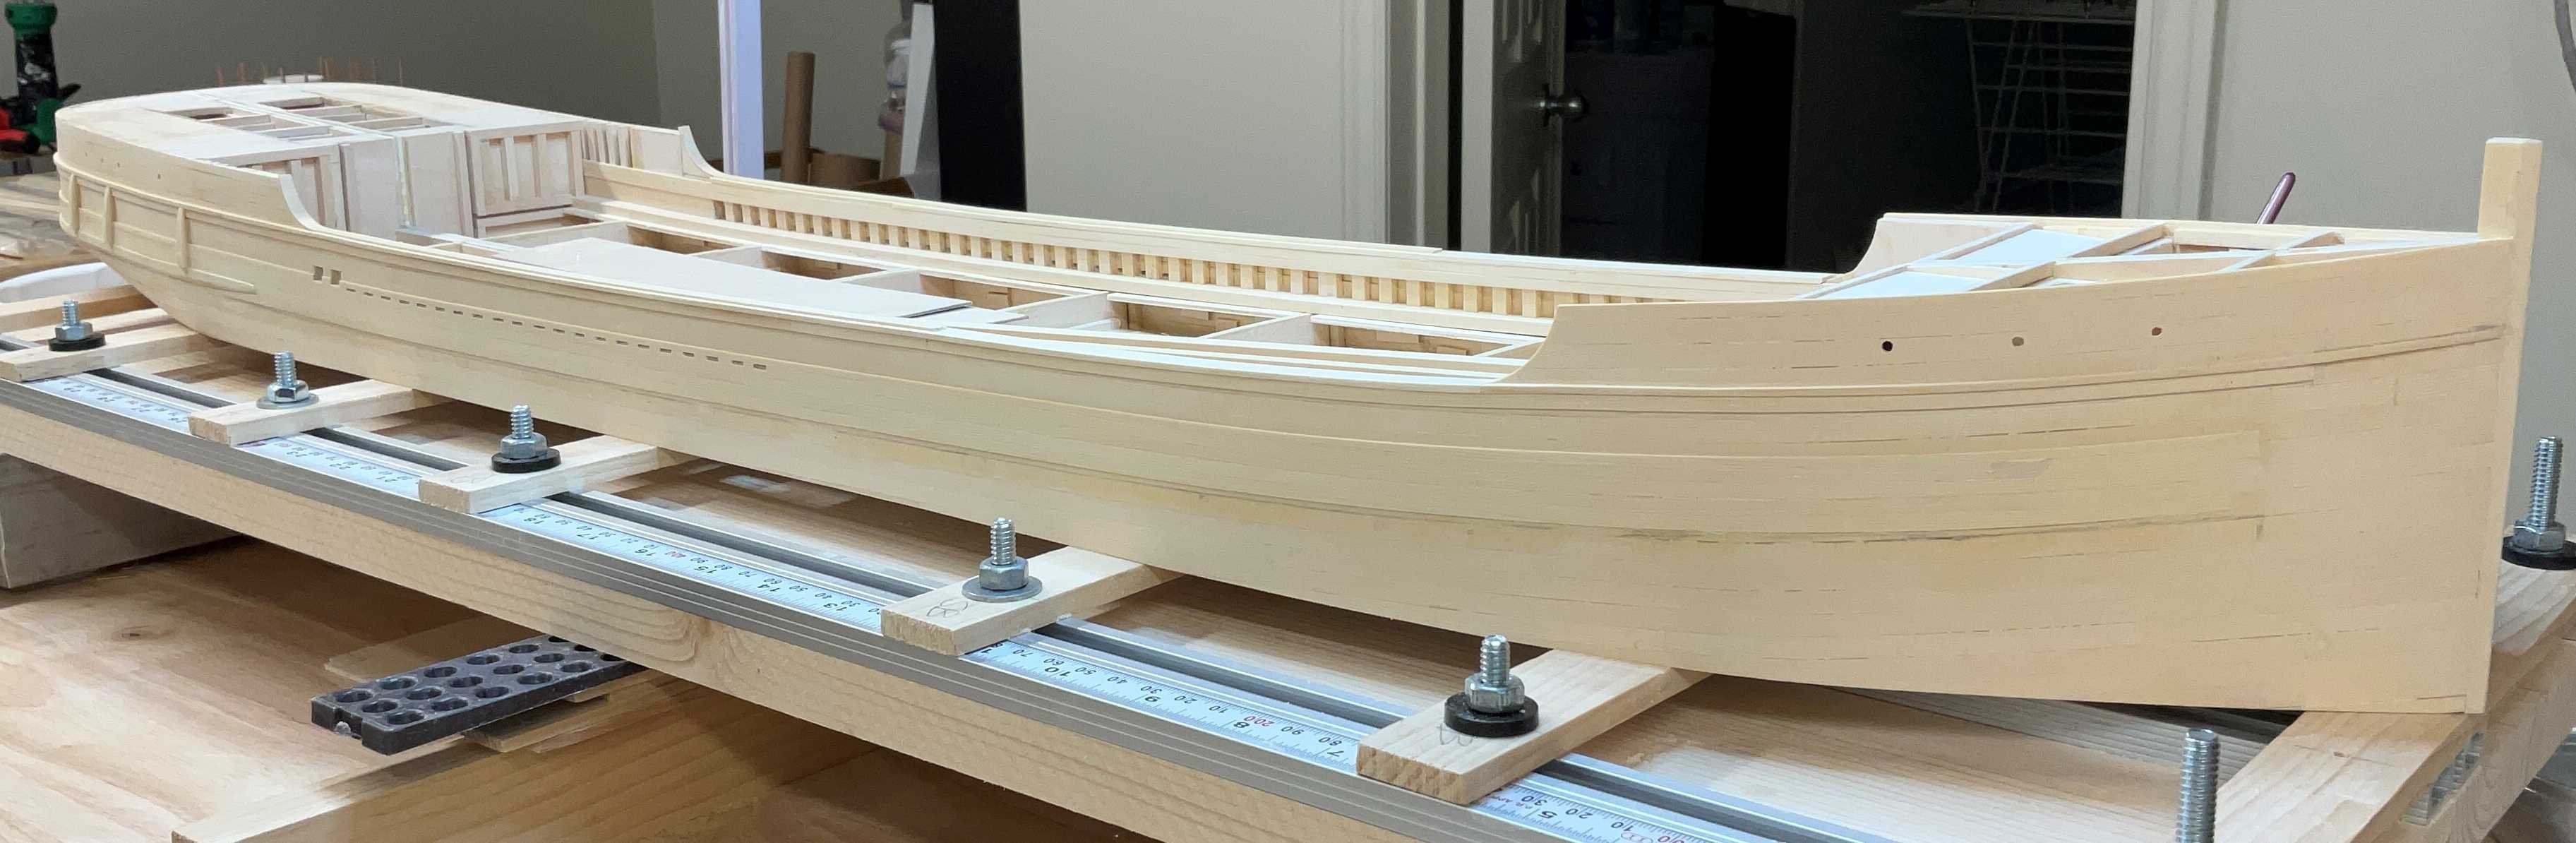
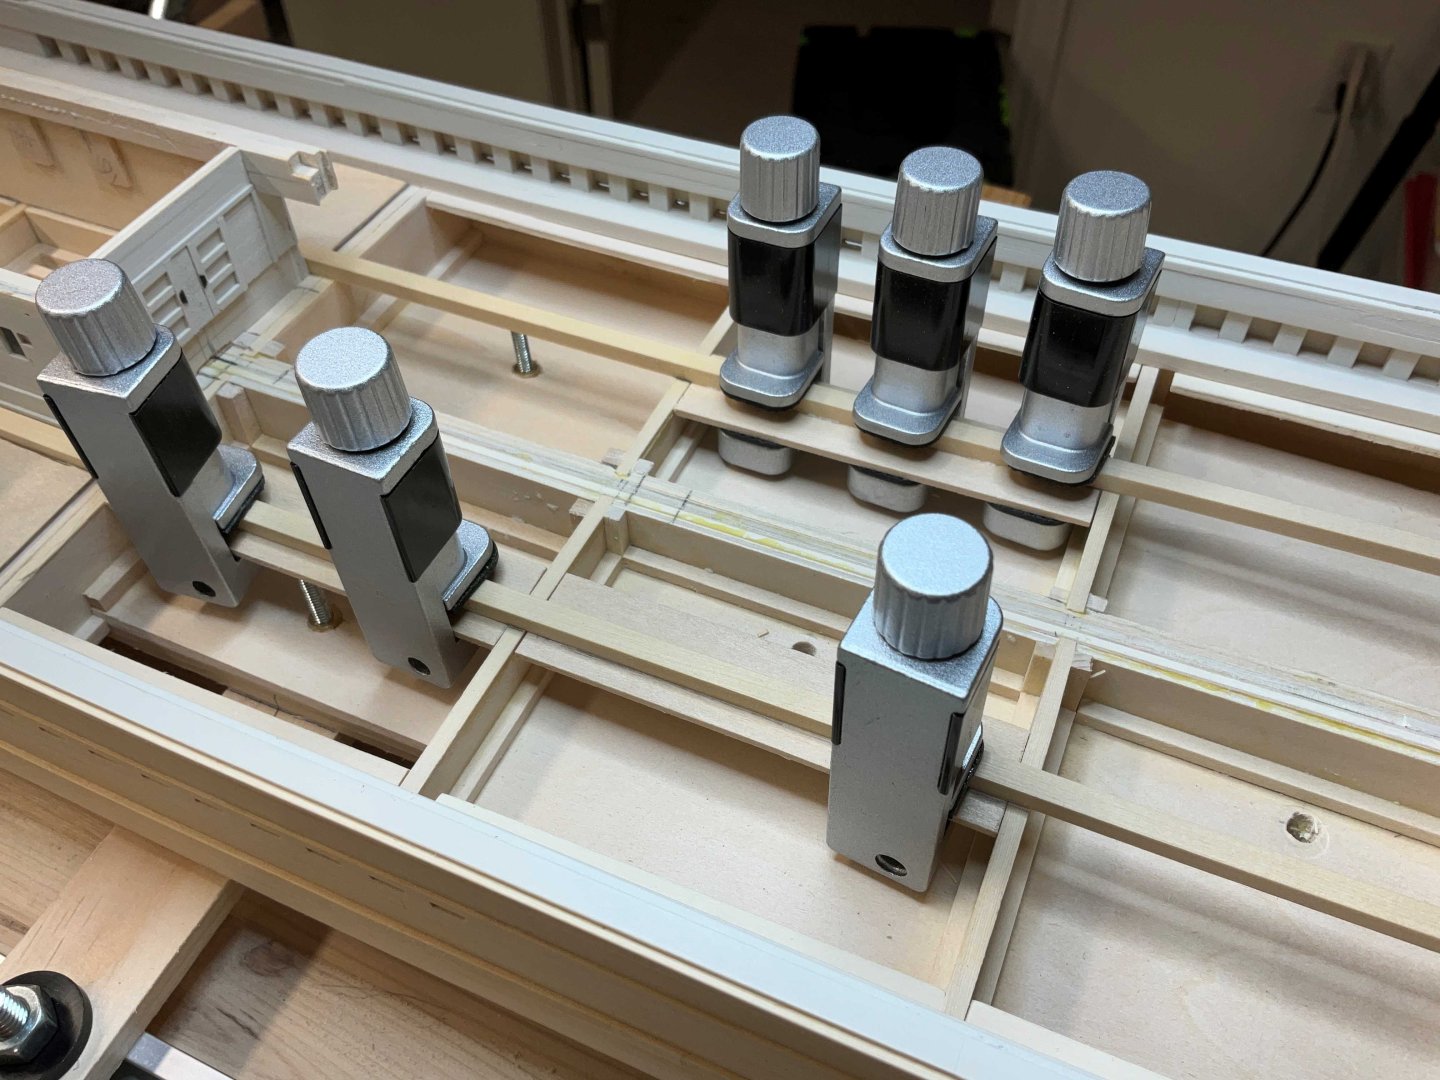
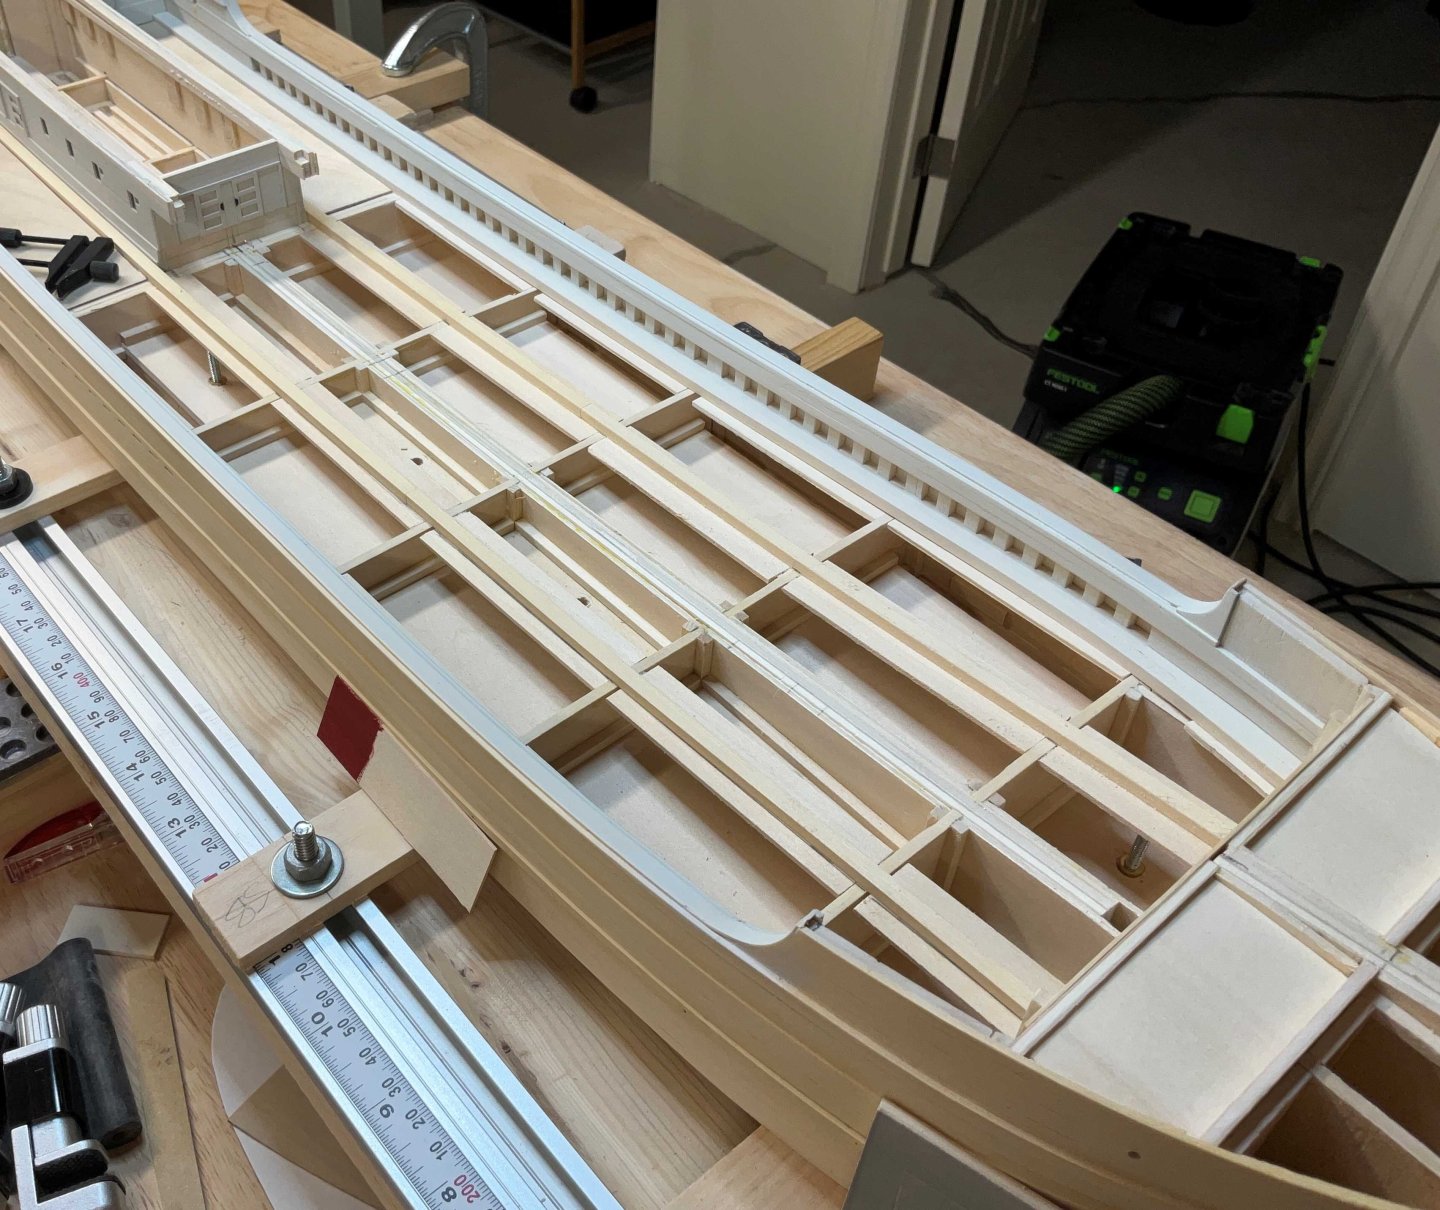
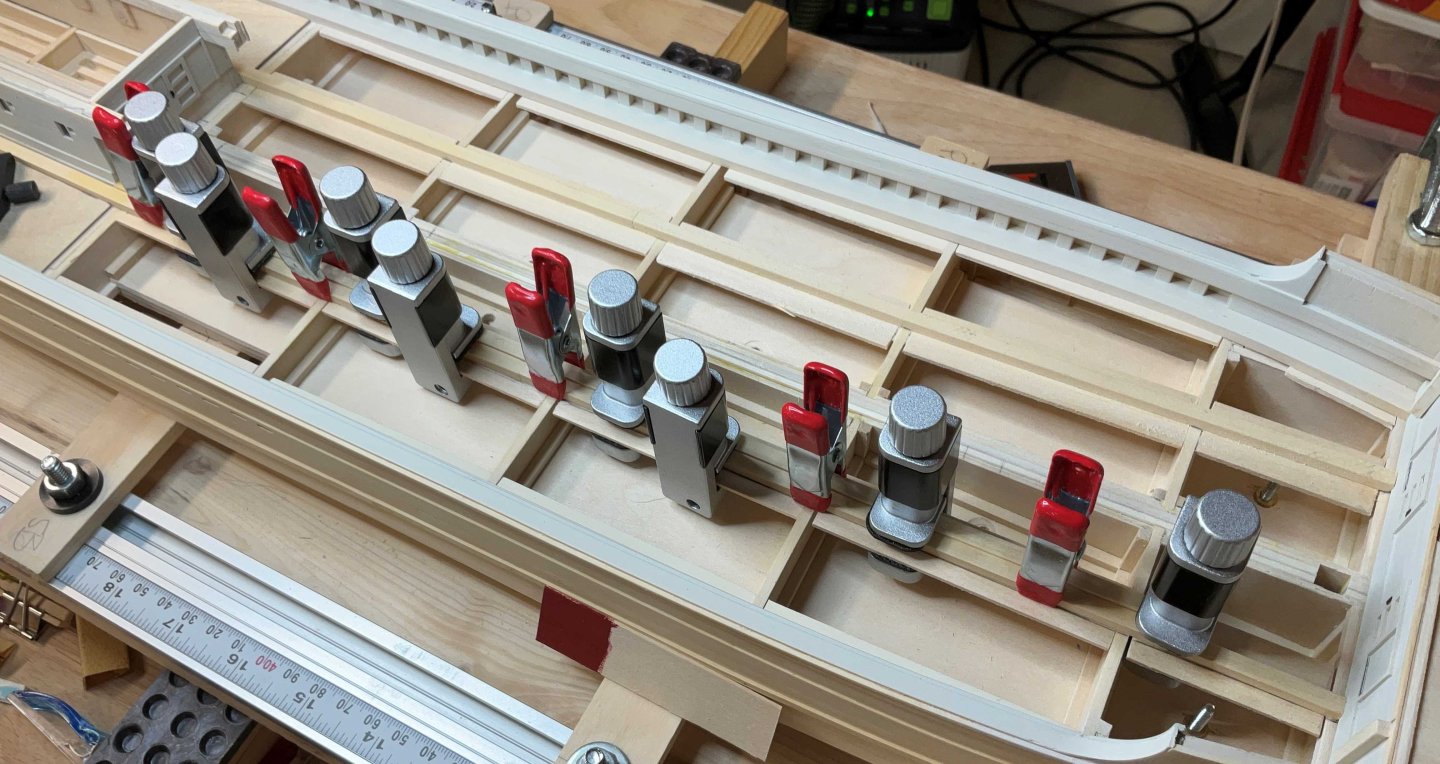
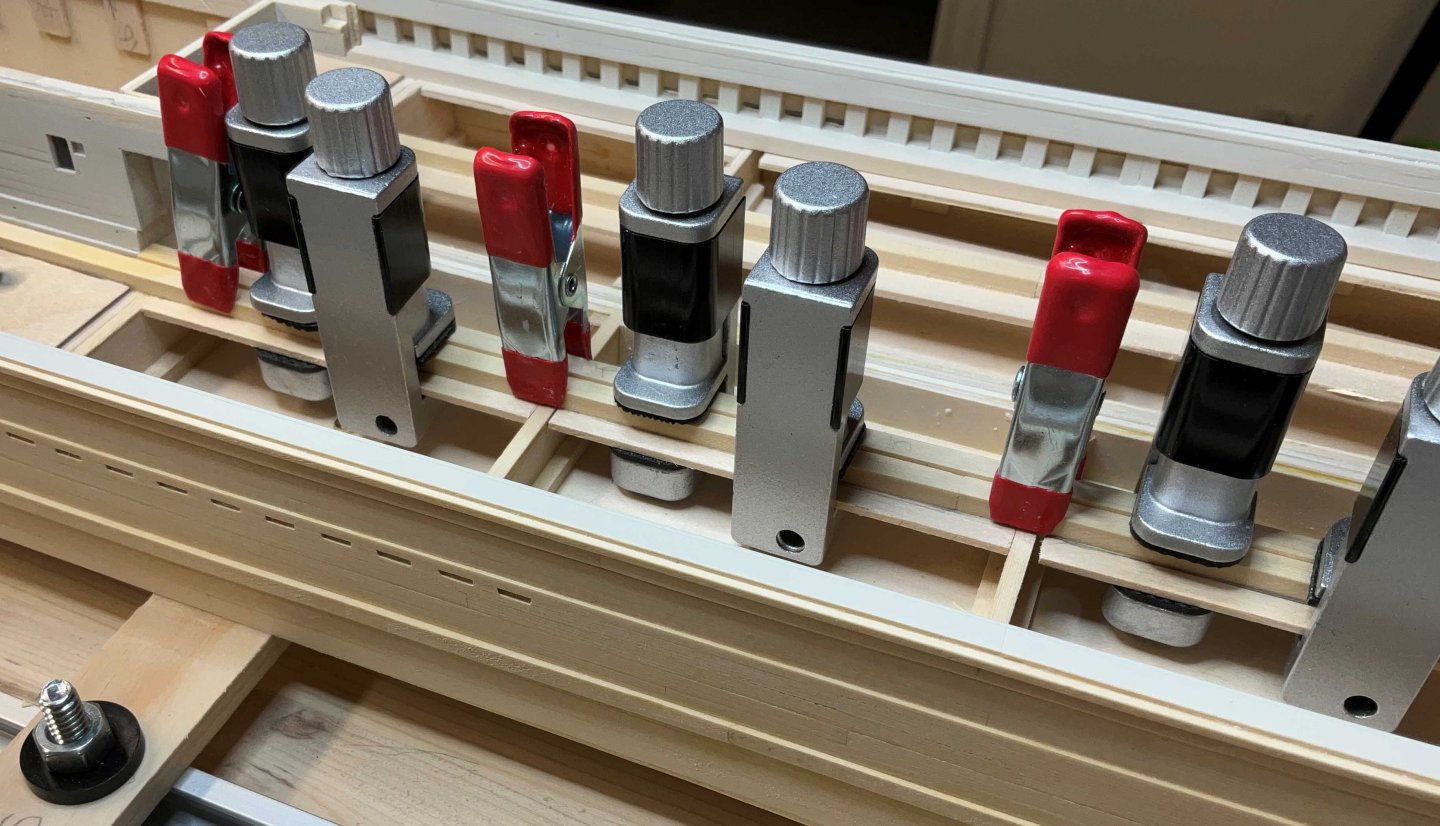
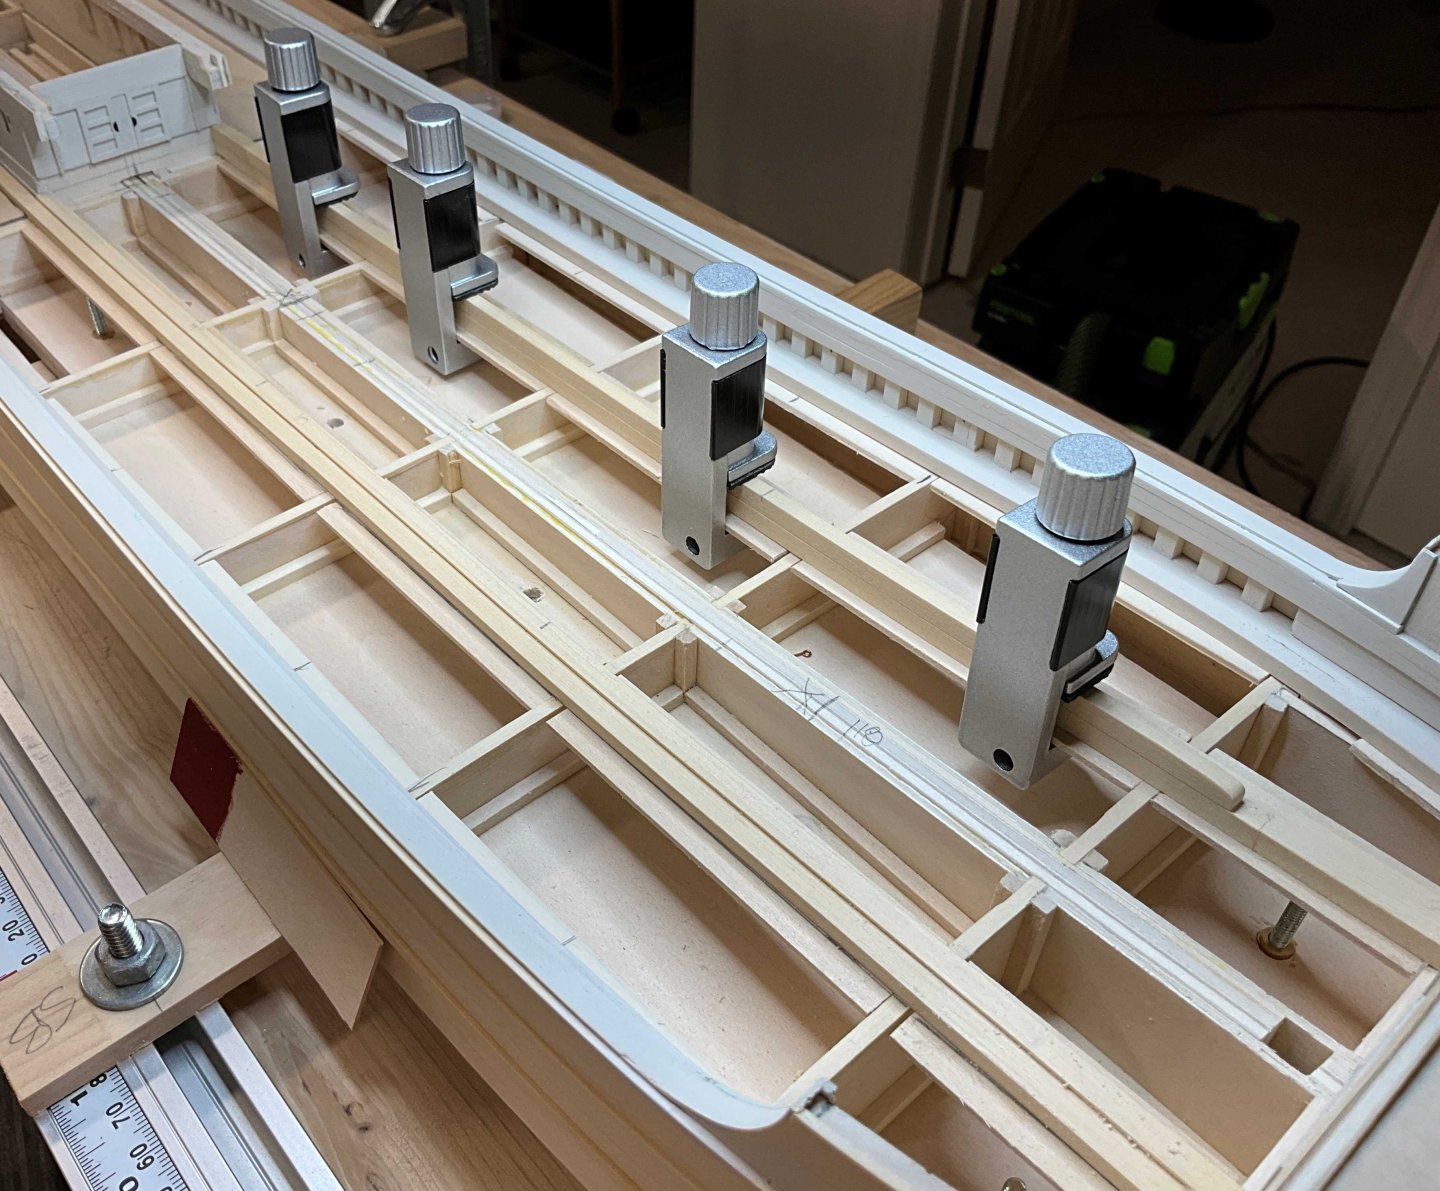
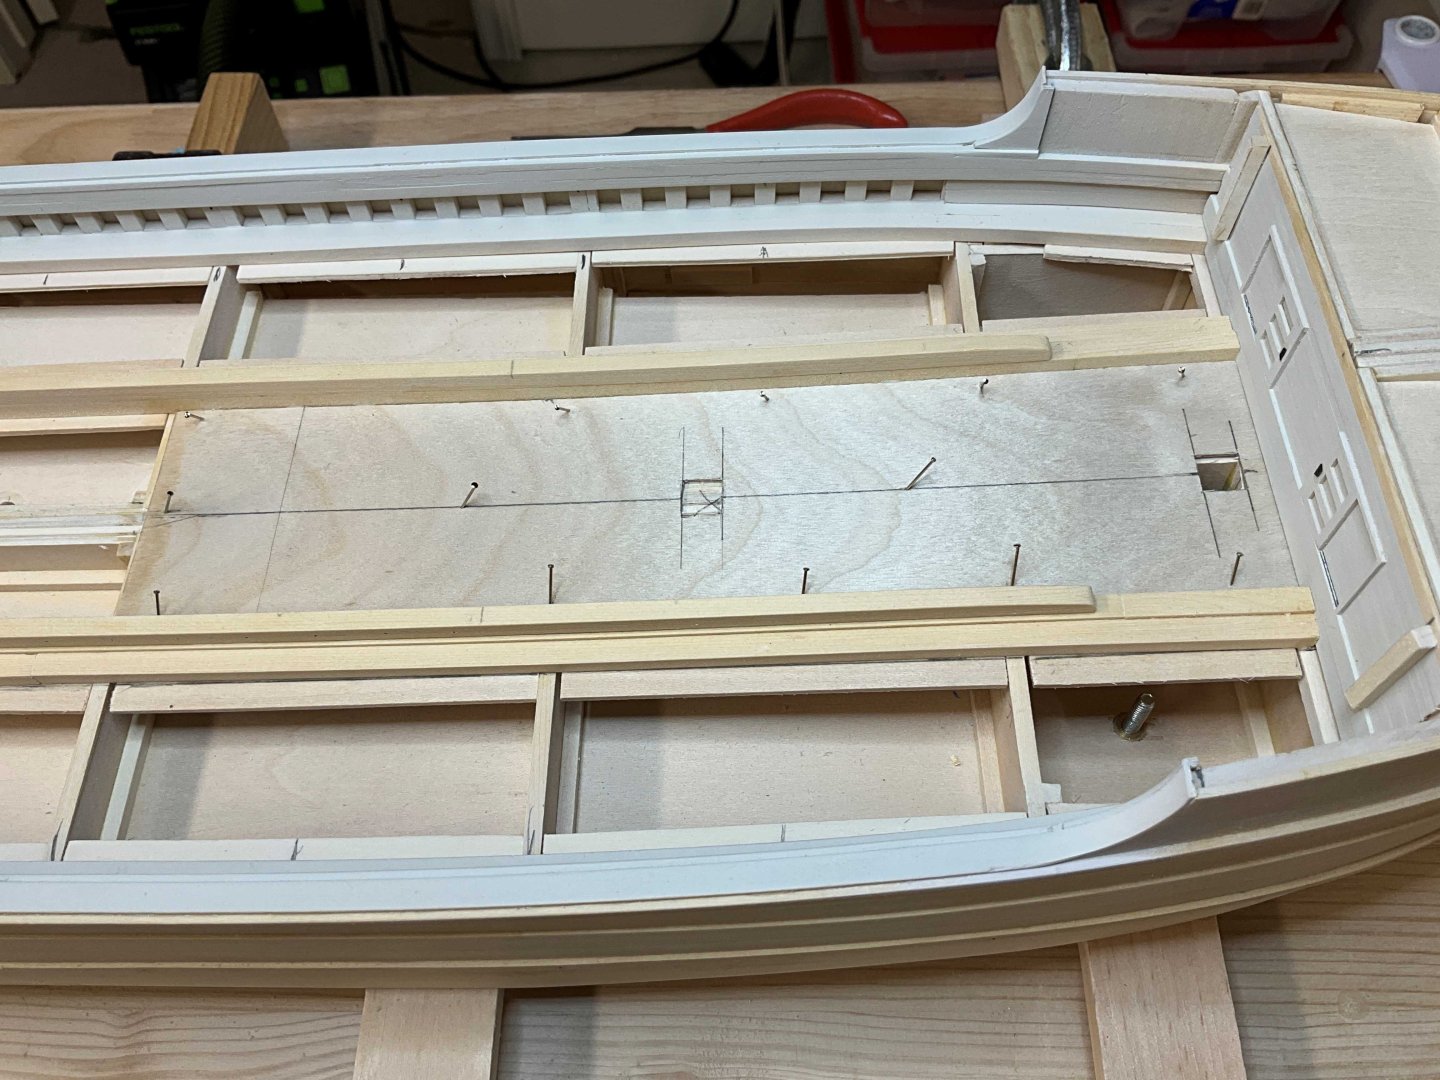
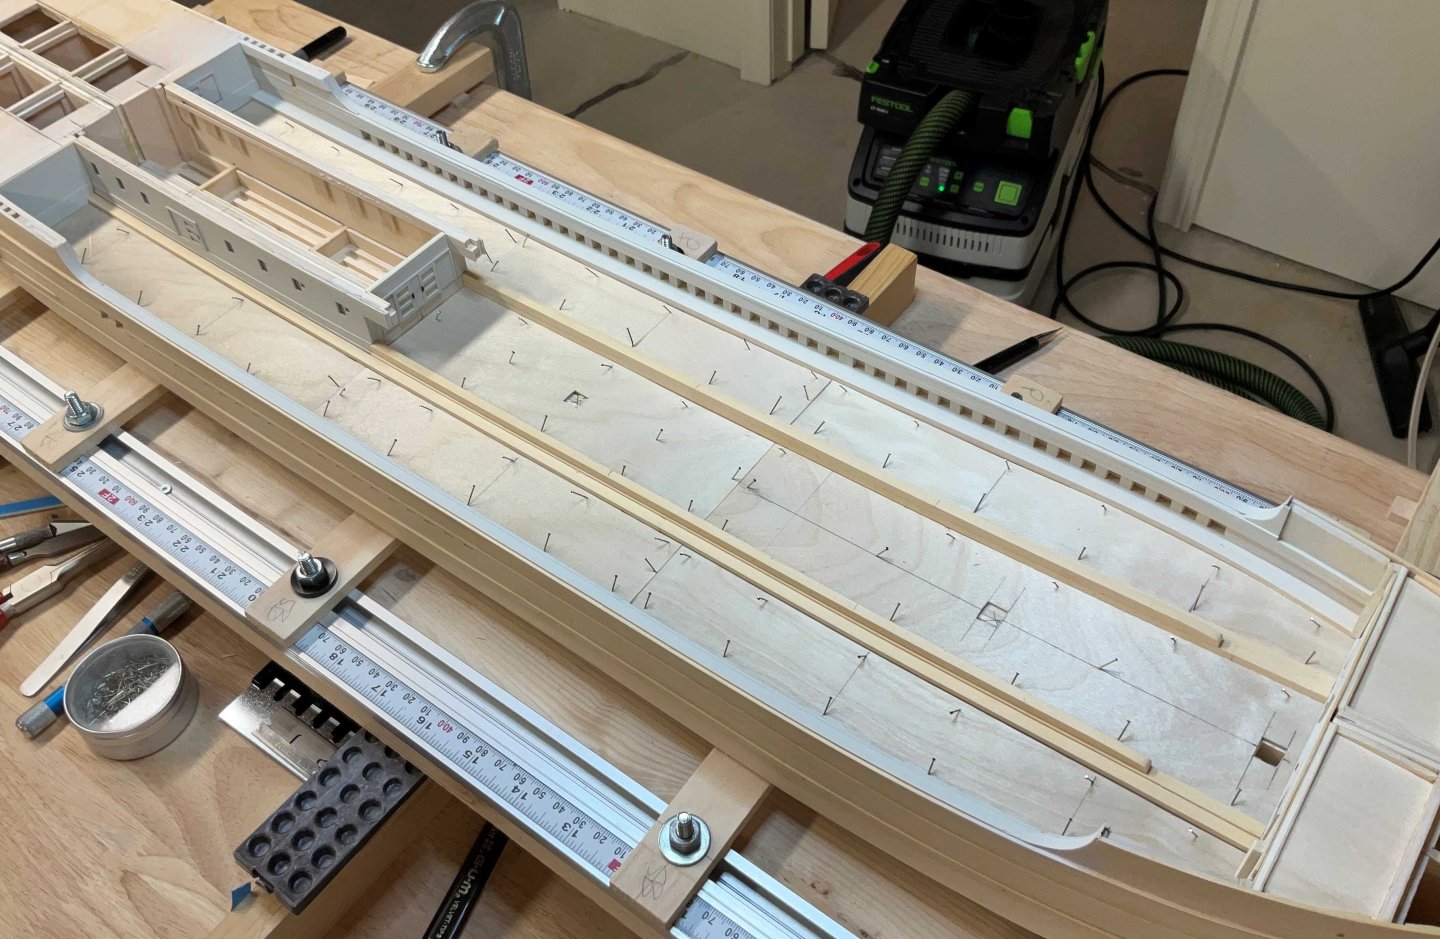
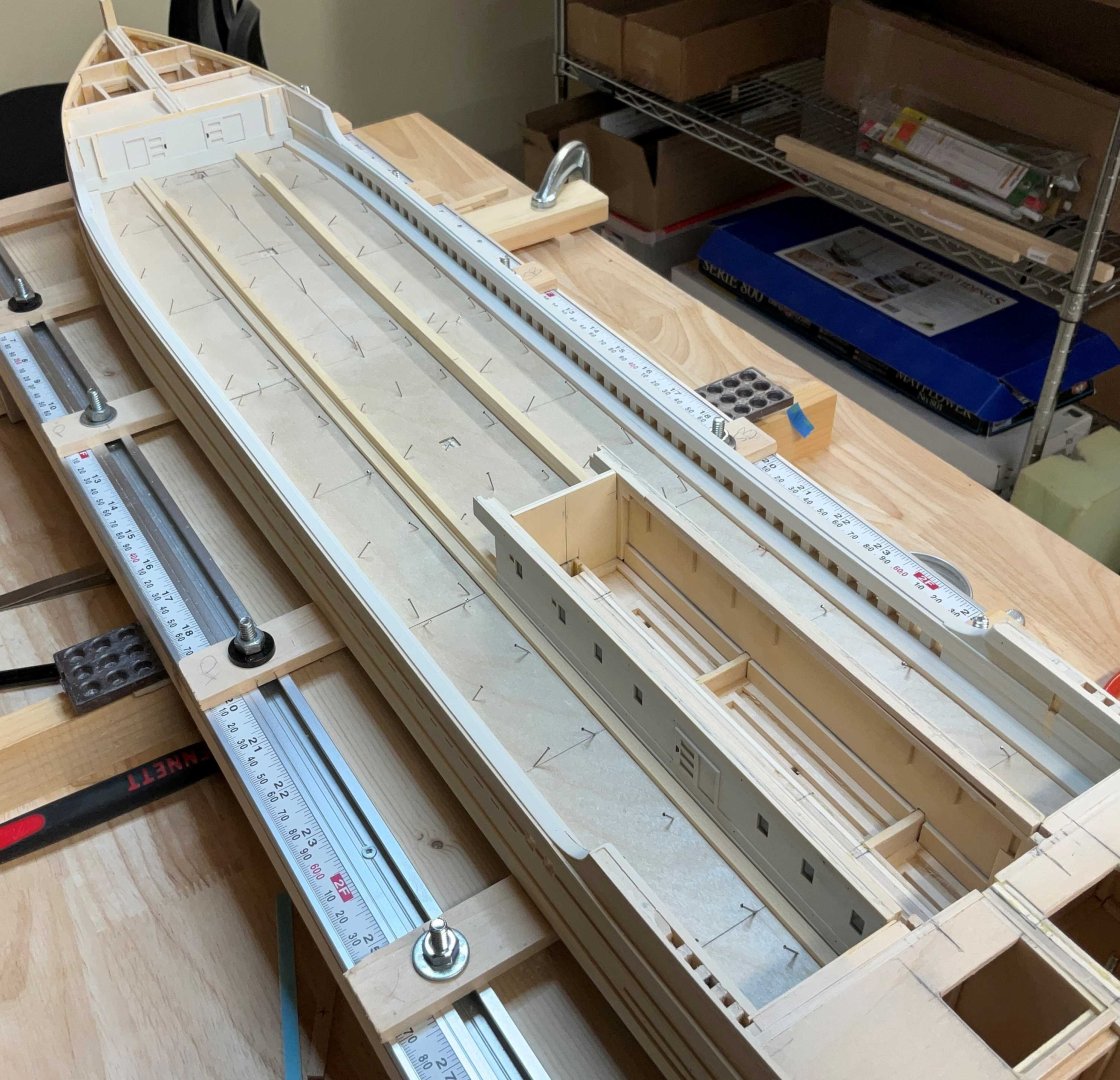
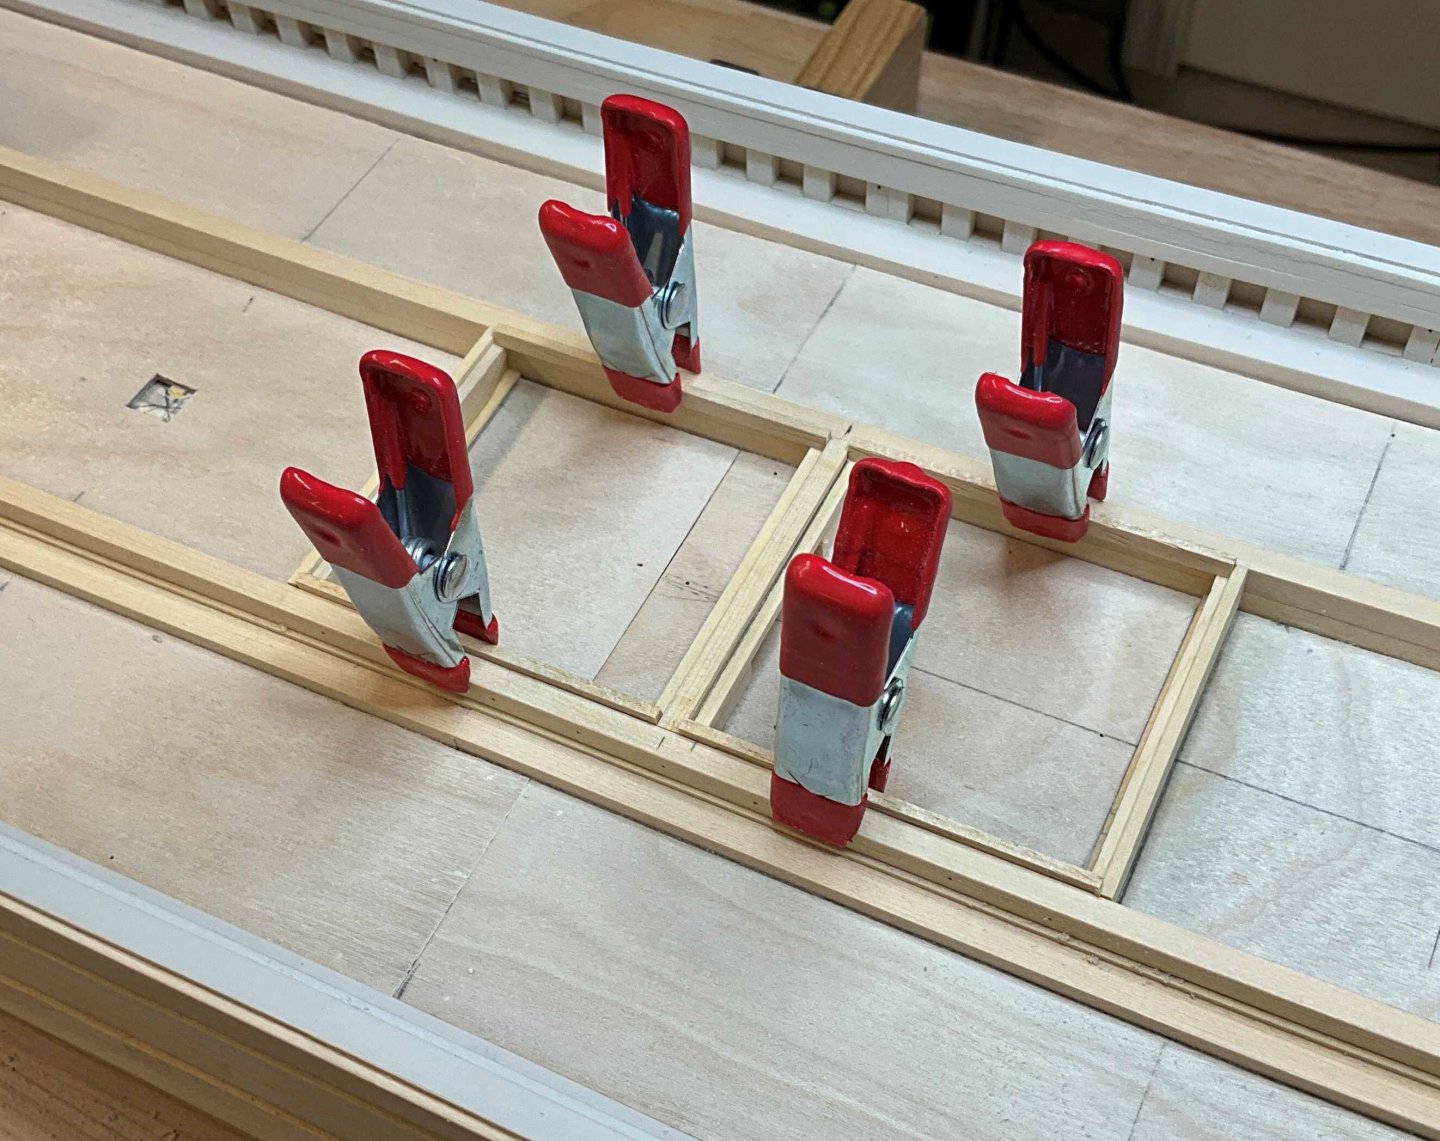
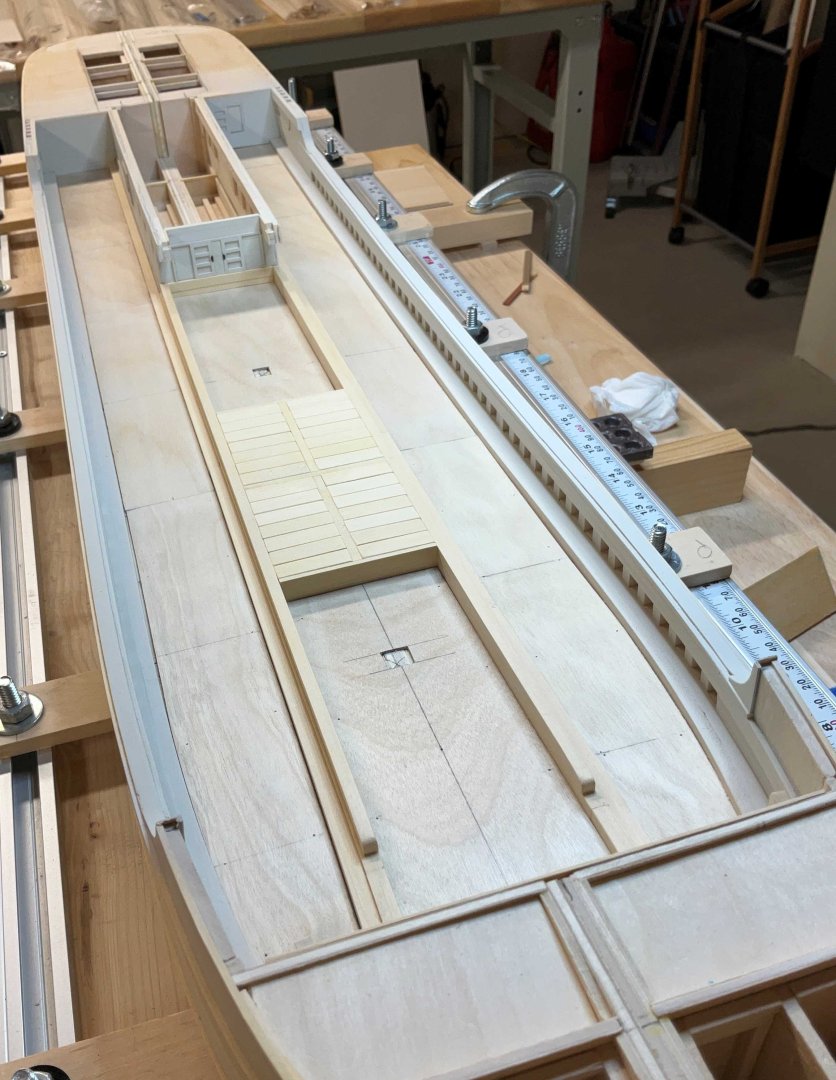
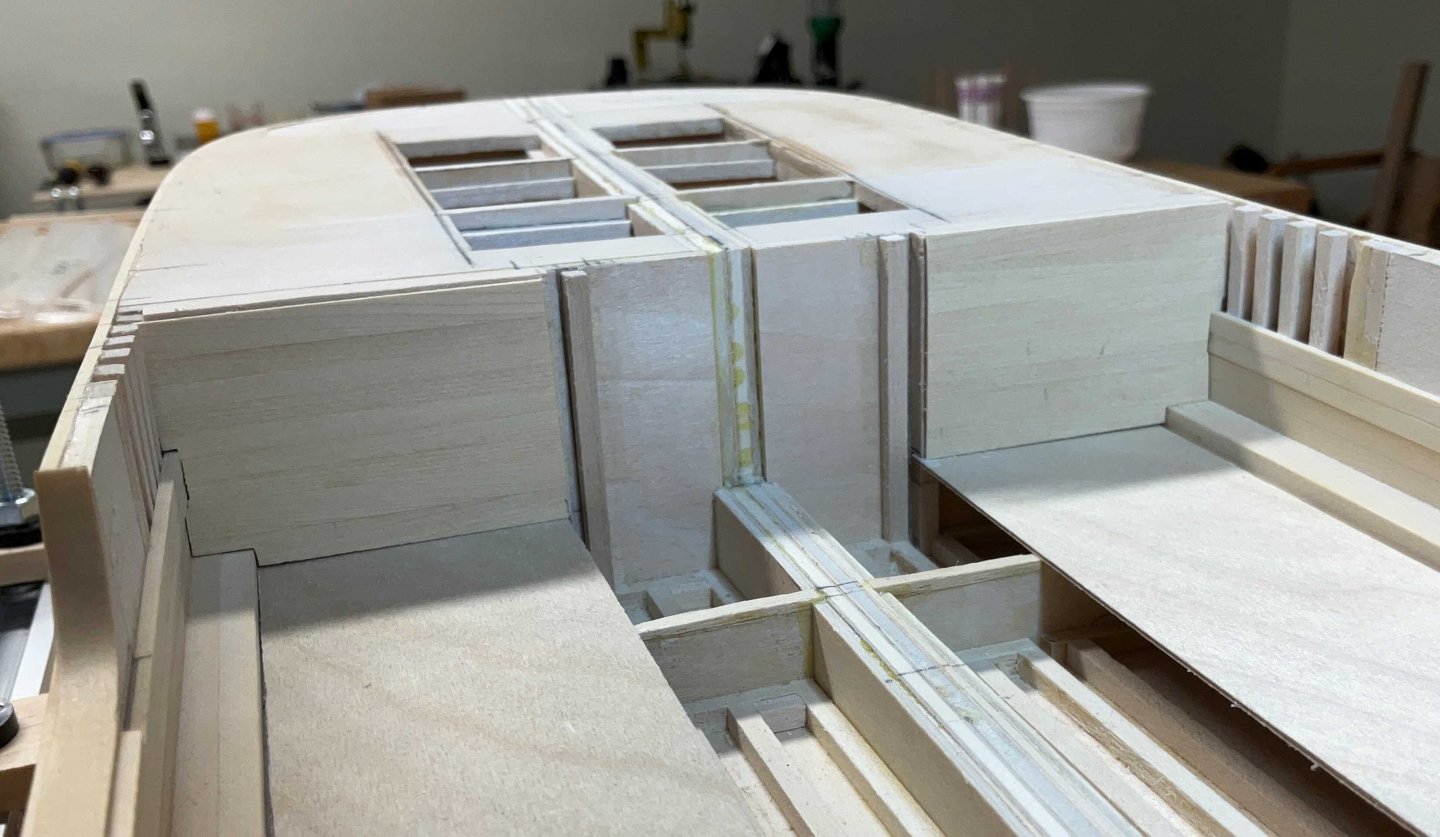
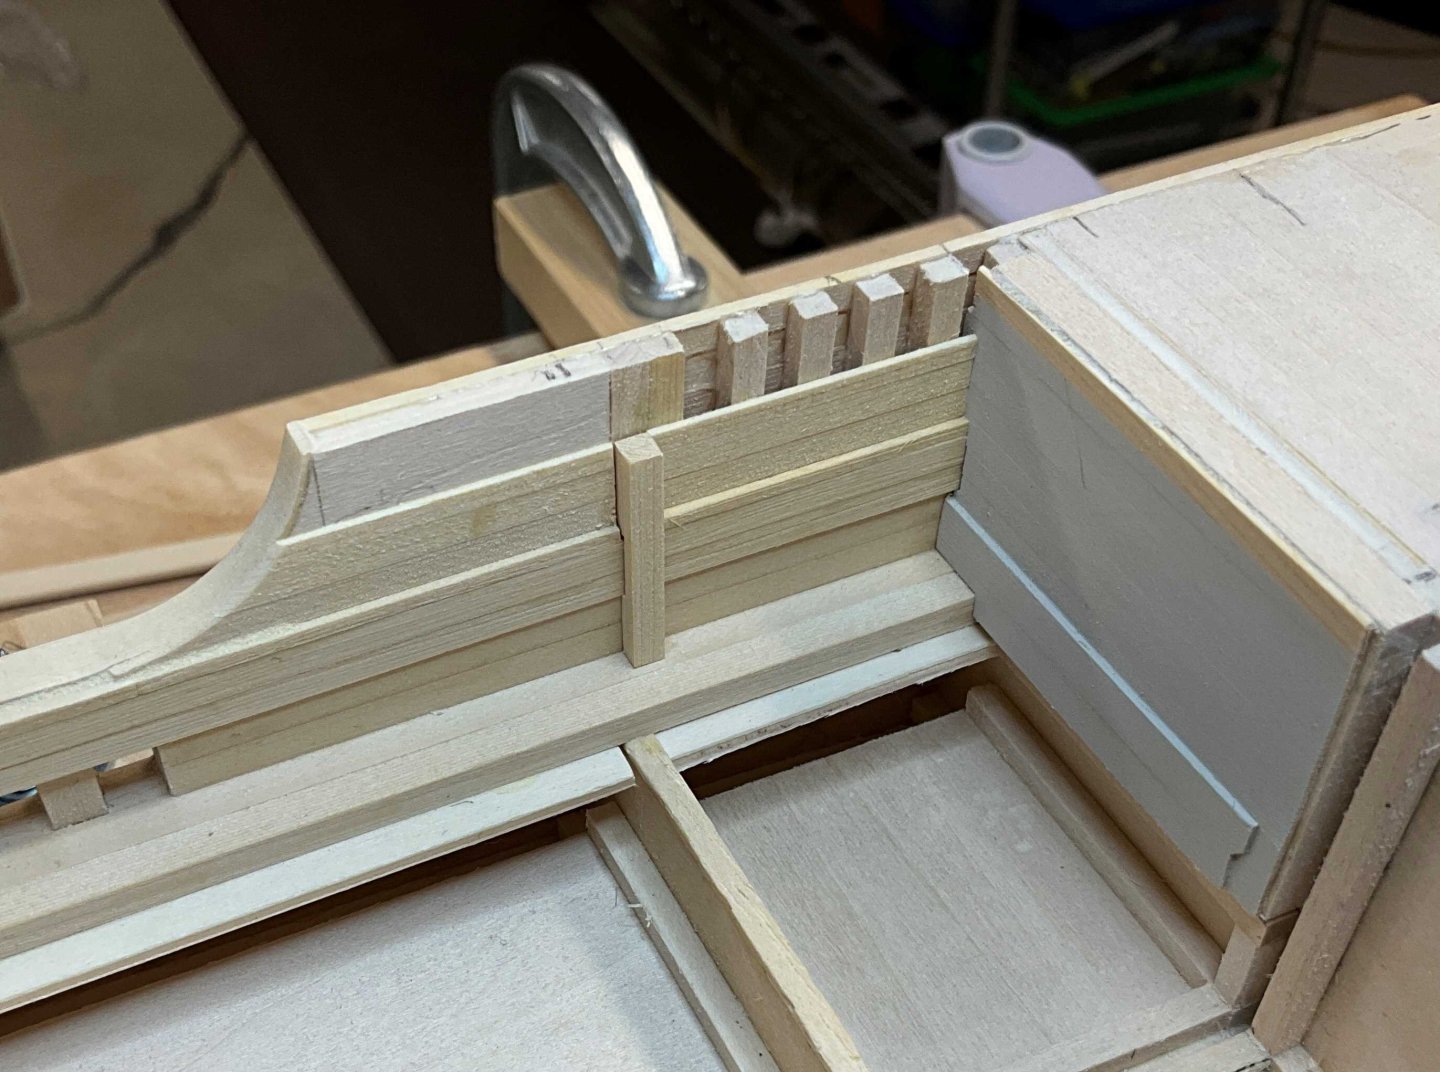
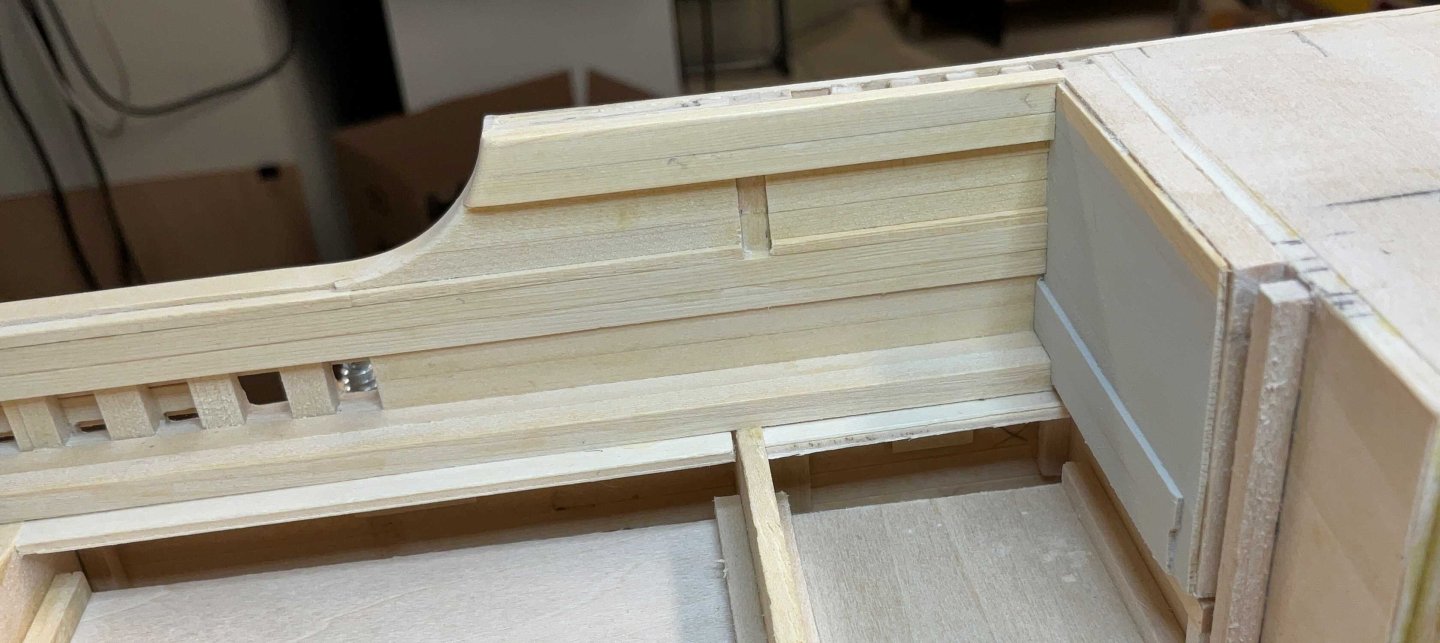
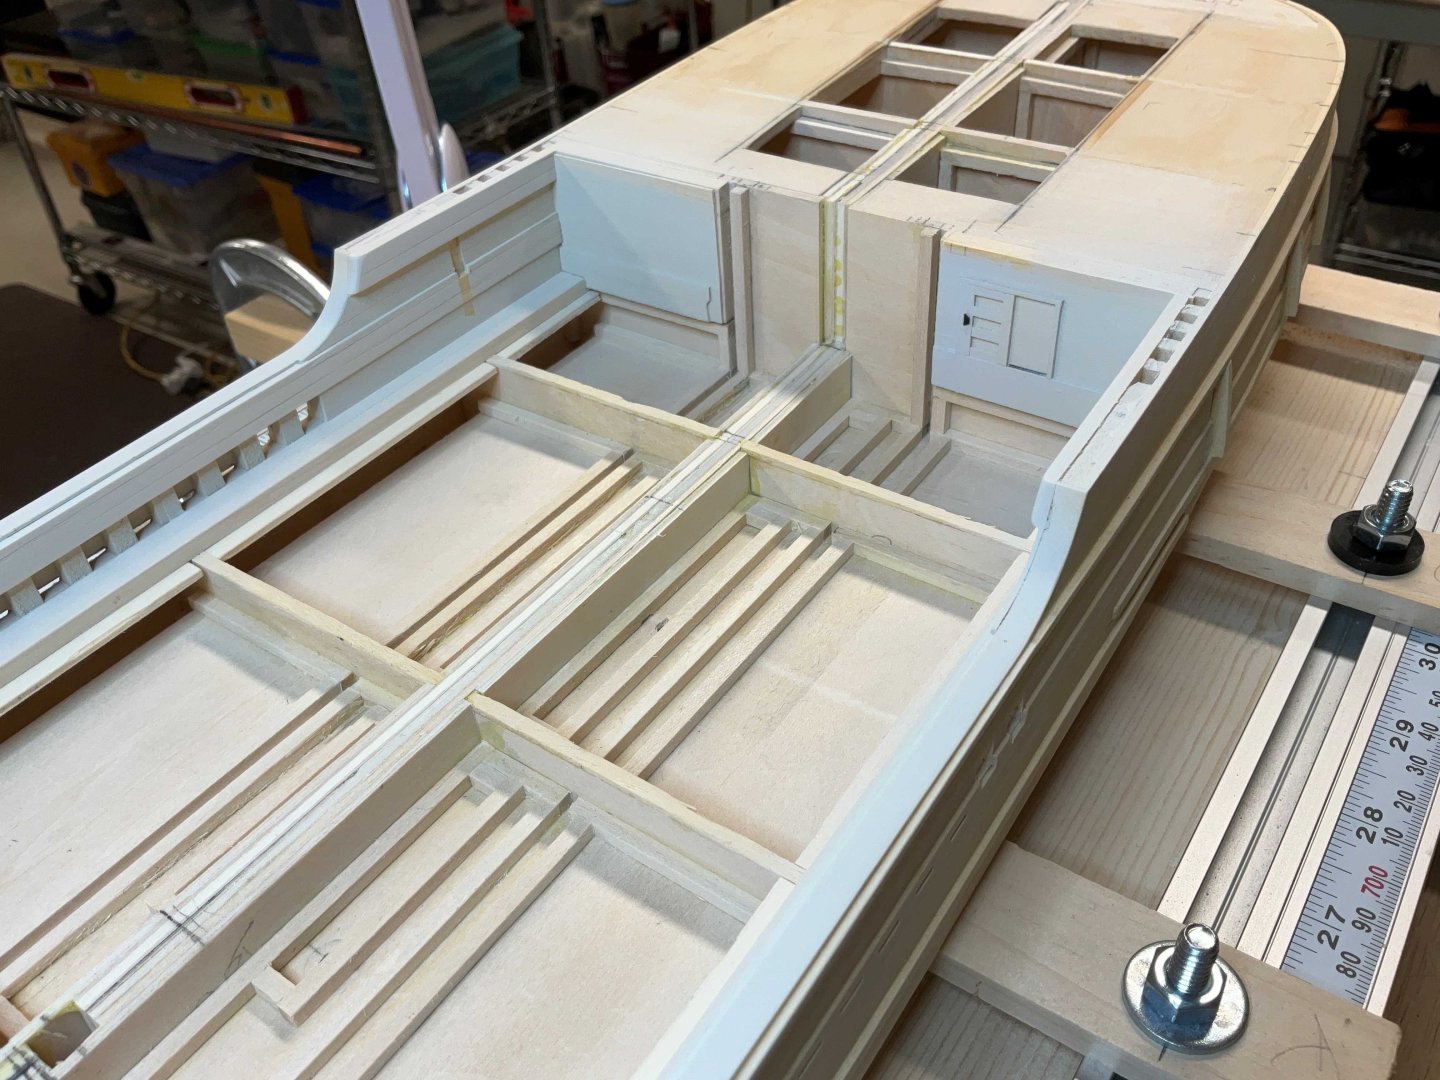
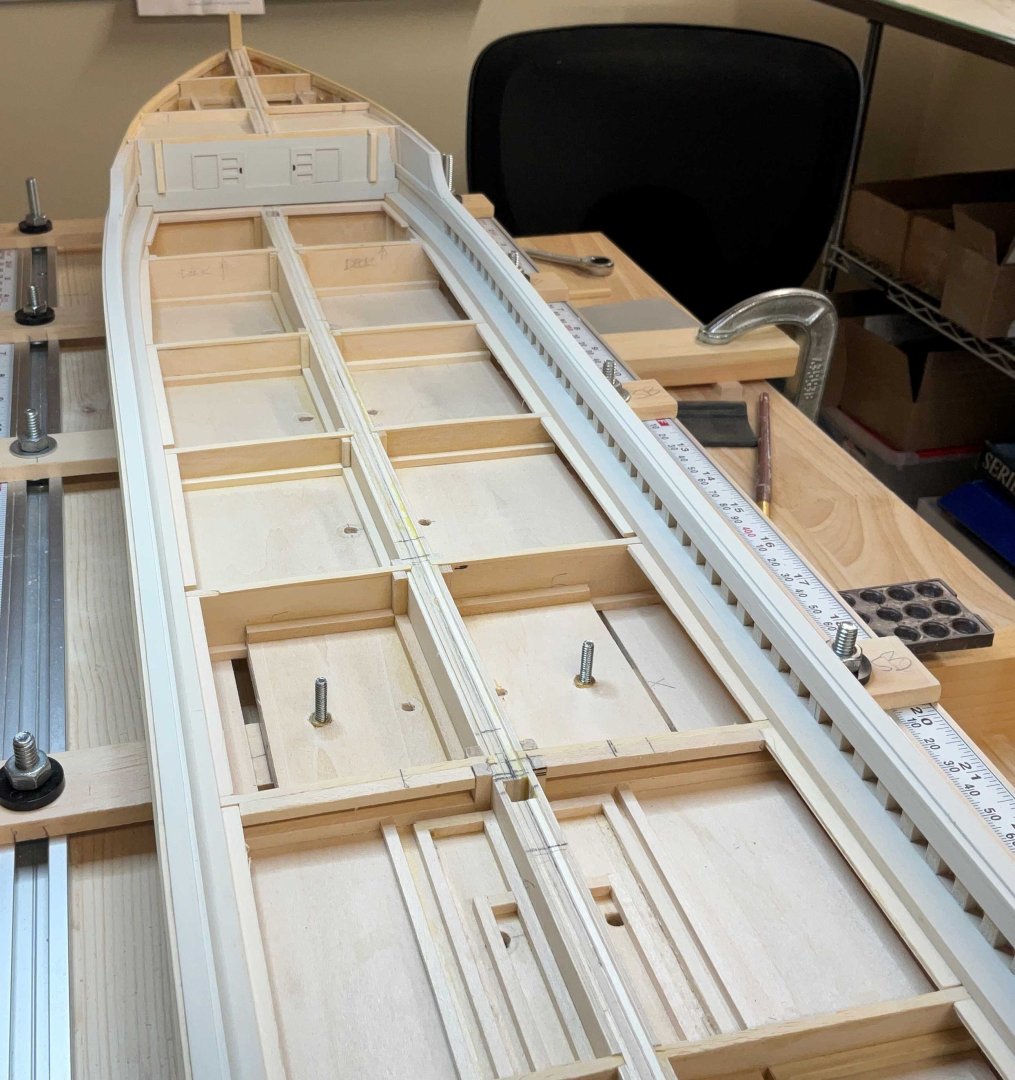
Hi Everyone, hope you are all well. Thank you for your Comments and Likes! This update is all about the stringers that run run the length of the main deck. Now that the main deck house is permanently glued in place the first stringers to be installed will be the assistant stringers. They run on either side of the deck house so they were the easiest to locate. Strips of 1/16 X 3/4" basswood were glued to the underside of these stringers between the bulkhead to support the other stringers and the 1/32" plywood subdeck. Next came the main hatch stringers They are glued inboard of the assistant stringers. Lastly came the side stringers that sit on top of the main hatch stringers. The subdeck was then laid. I used 8 pieces just to make the gluing easier. The main Hatch was laid out and the coamings were glued to the subdeck. The strongbacks were hung on the coamings and the hatch boards were glued into place. A few coats of paint. I think the painting of the hull will be next. I hope to see you then!


-
Gary, congratulations on completing your Lucia A Simpson! She is exceptional. Hopefully you have inspired others to build this beautiful model.
-
Keith, those small changes made a huge difference. Nice!
- 457 replies
-
- 6
-
-
-
- sternwheeler
- Hard Coal Navy
- (and 1 more)
-
Hi Frecap, I think they look great. Fine work!
-
John, she must be really something to see in person.
-
Thank you very much Gary. Paint colors certainly can be a challenge. I think I’m going to wait to see what you choose for Pelican below the waterline 🙂
-
Hi John, thank you very much!
-
Gary, thank you for sharing all of these techniques. This is all truly amazing!
-
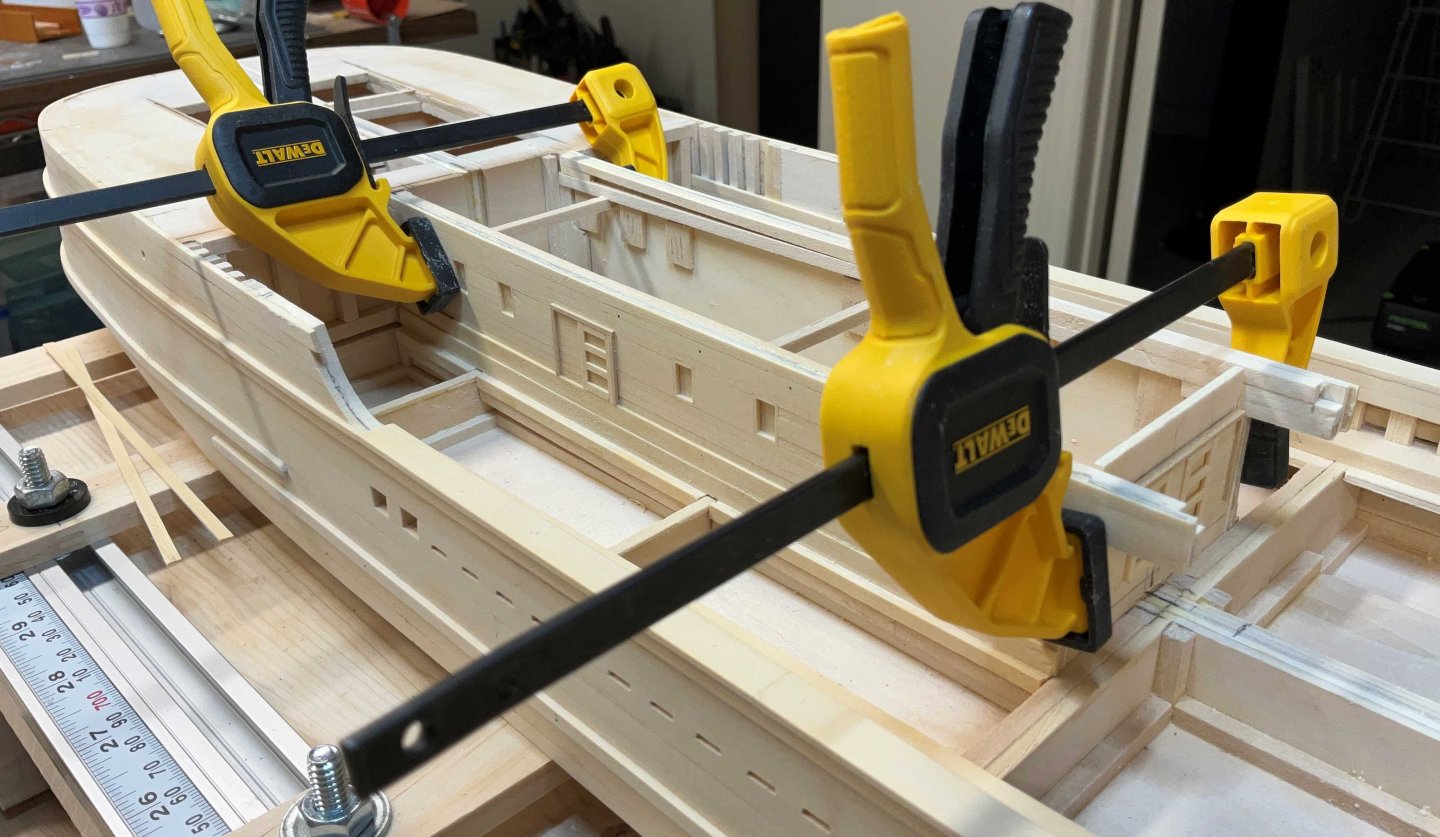
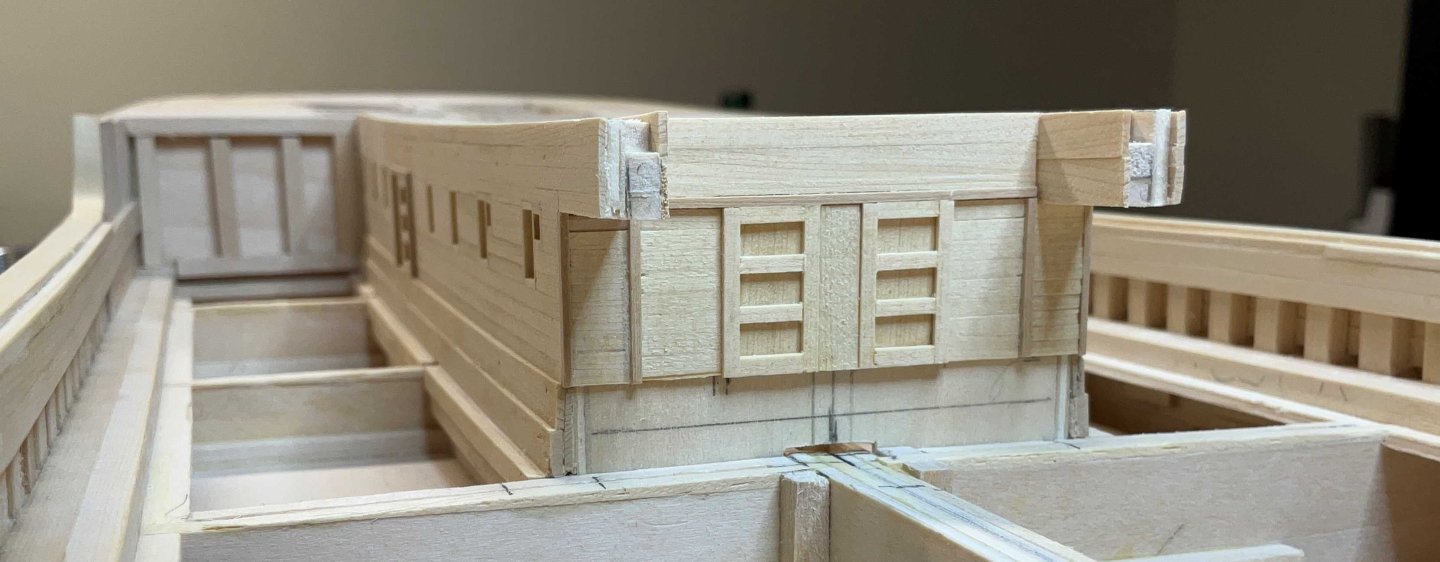
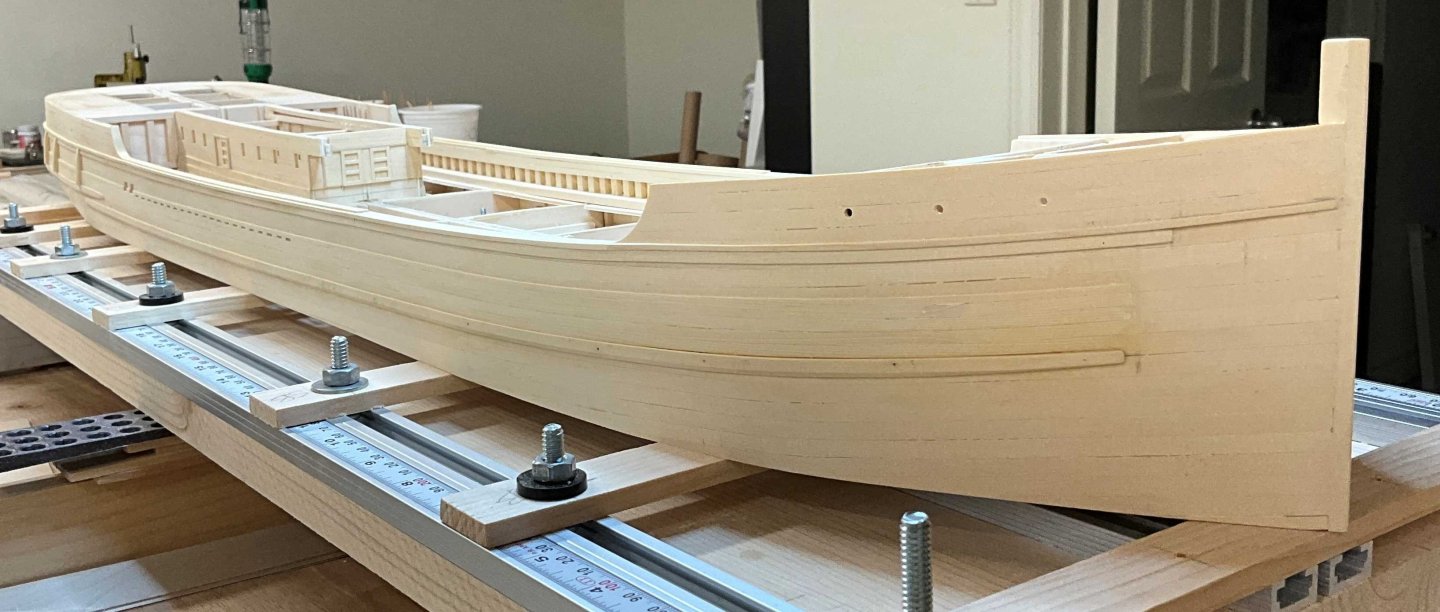
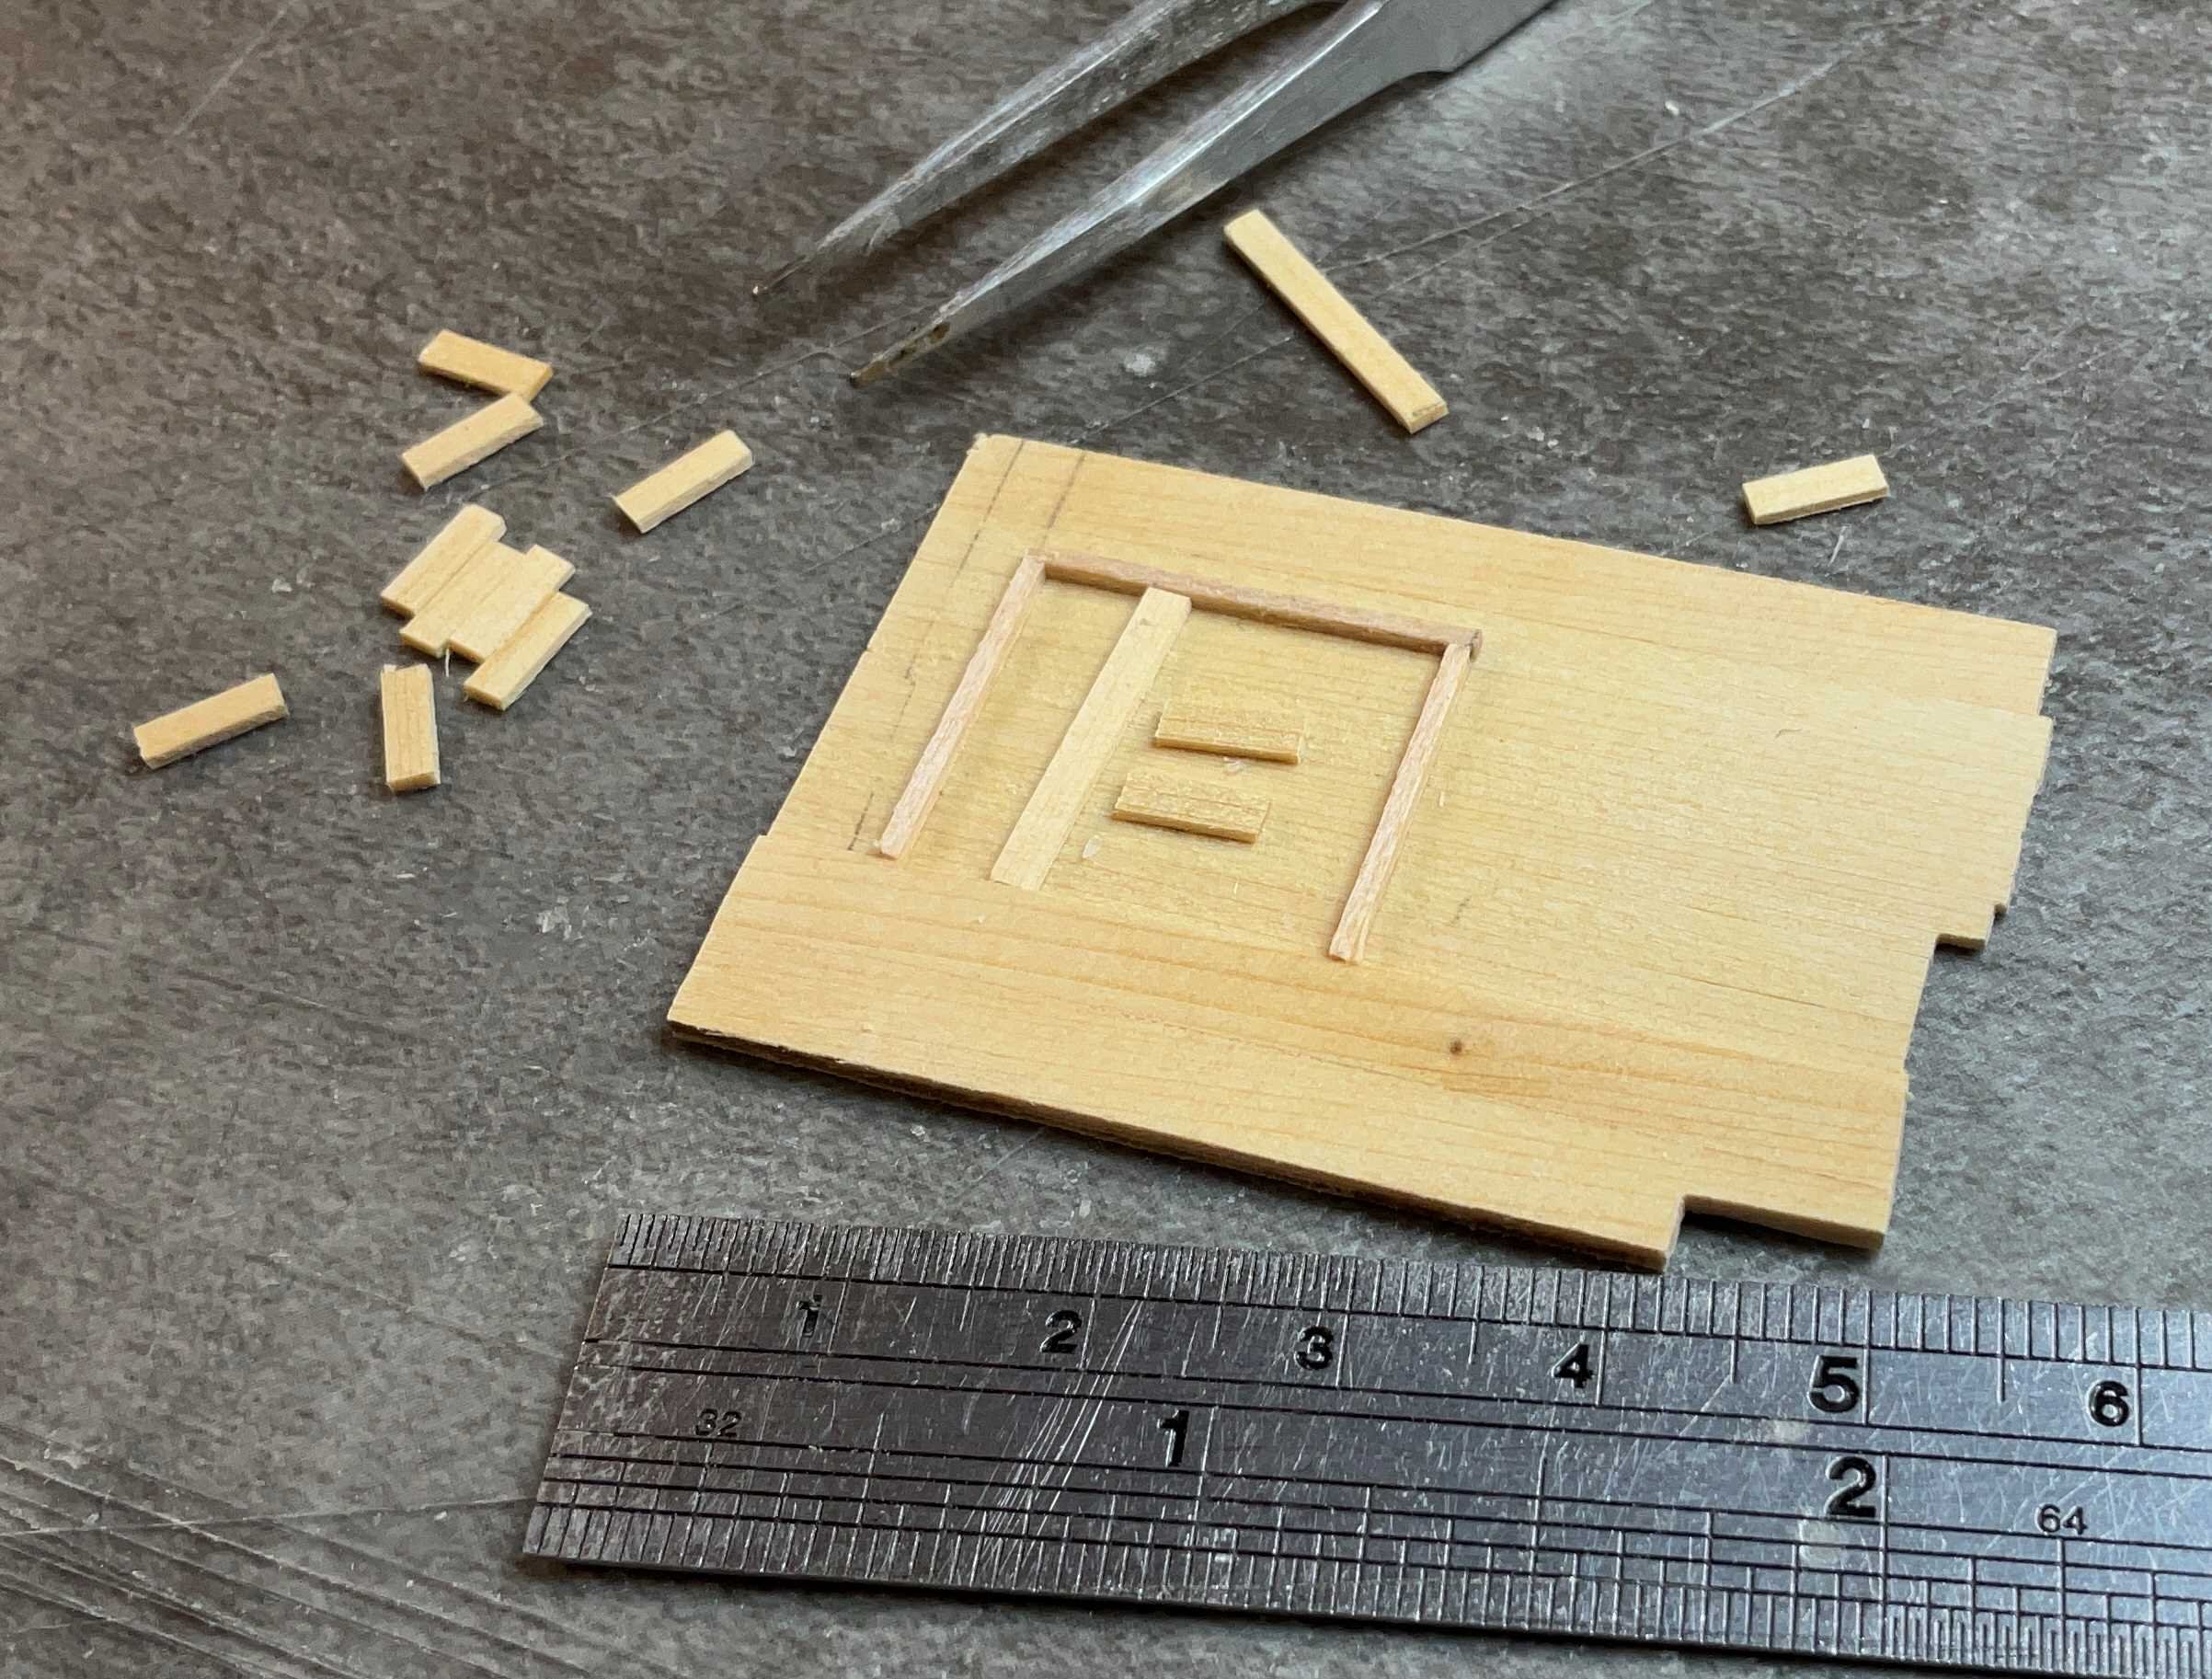
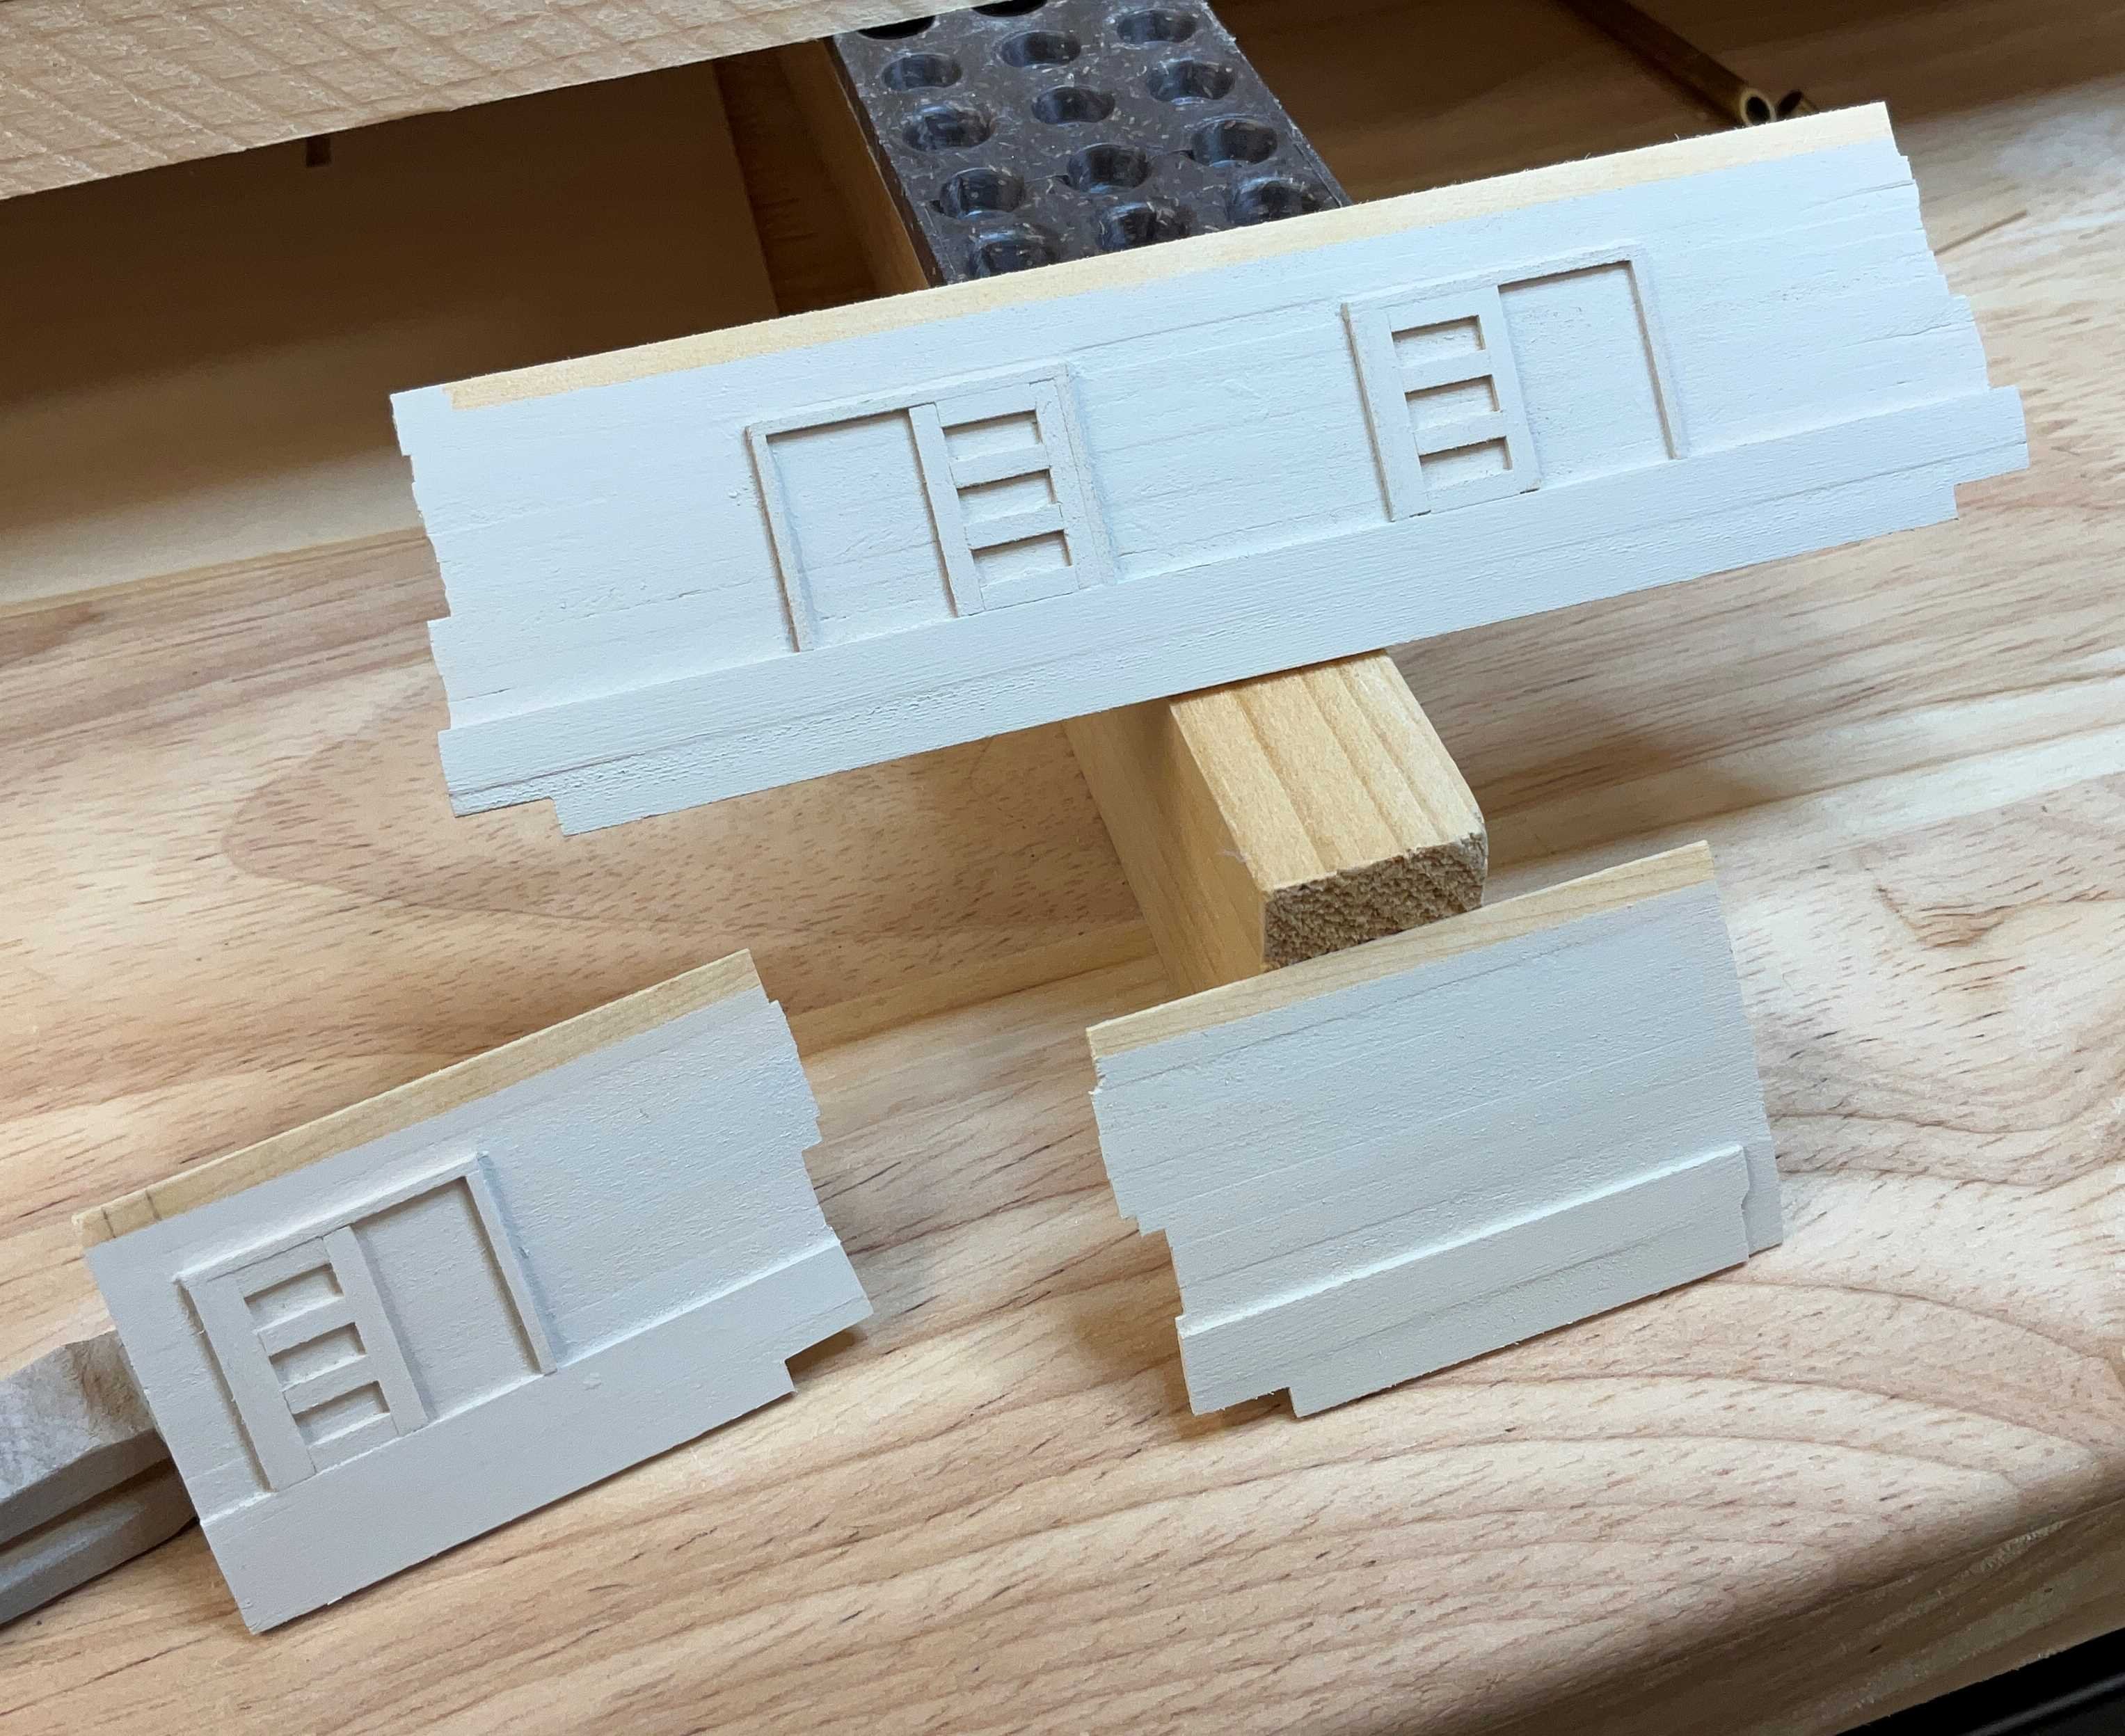
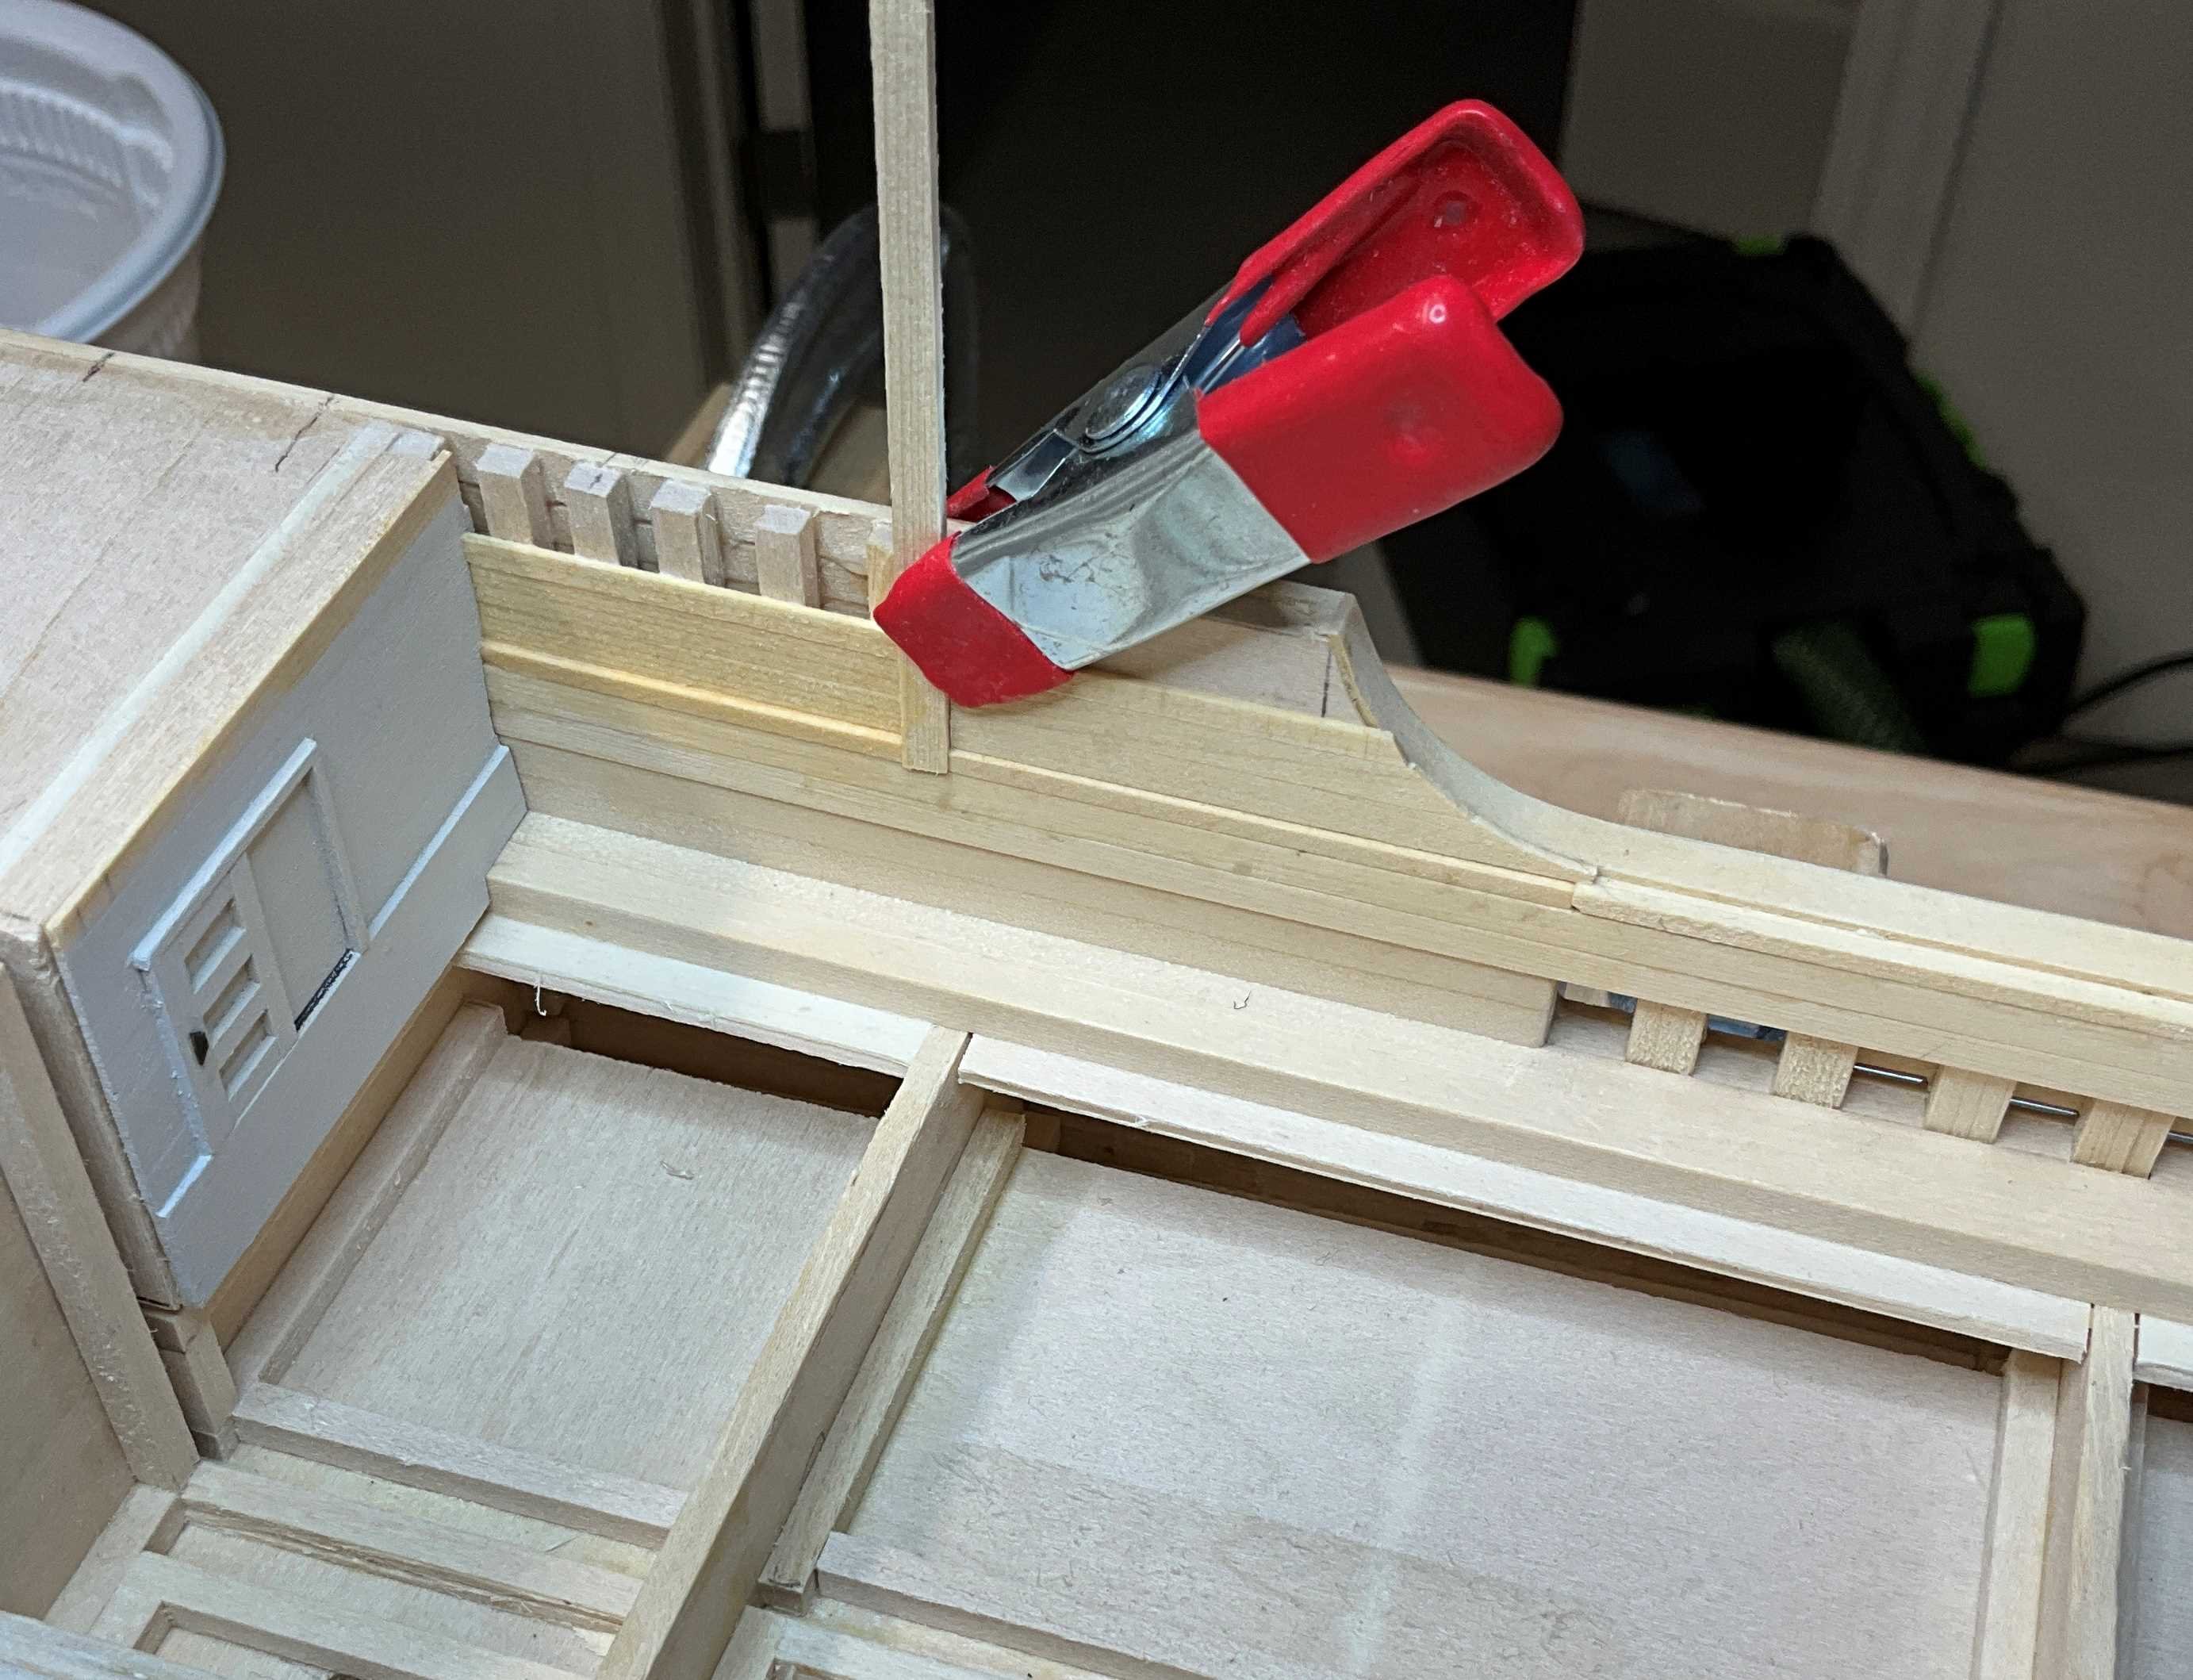
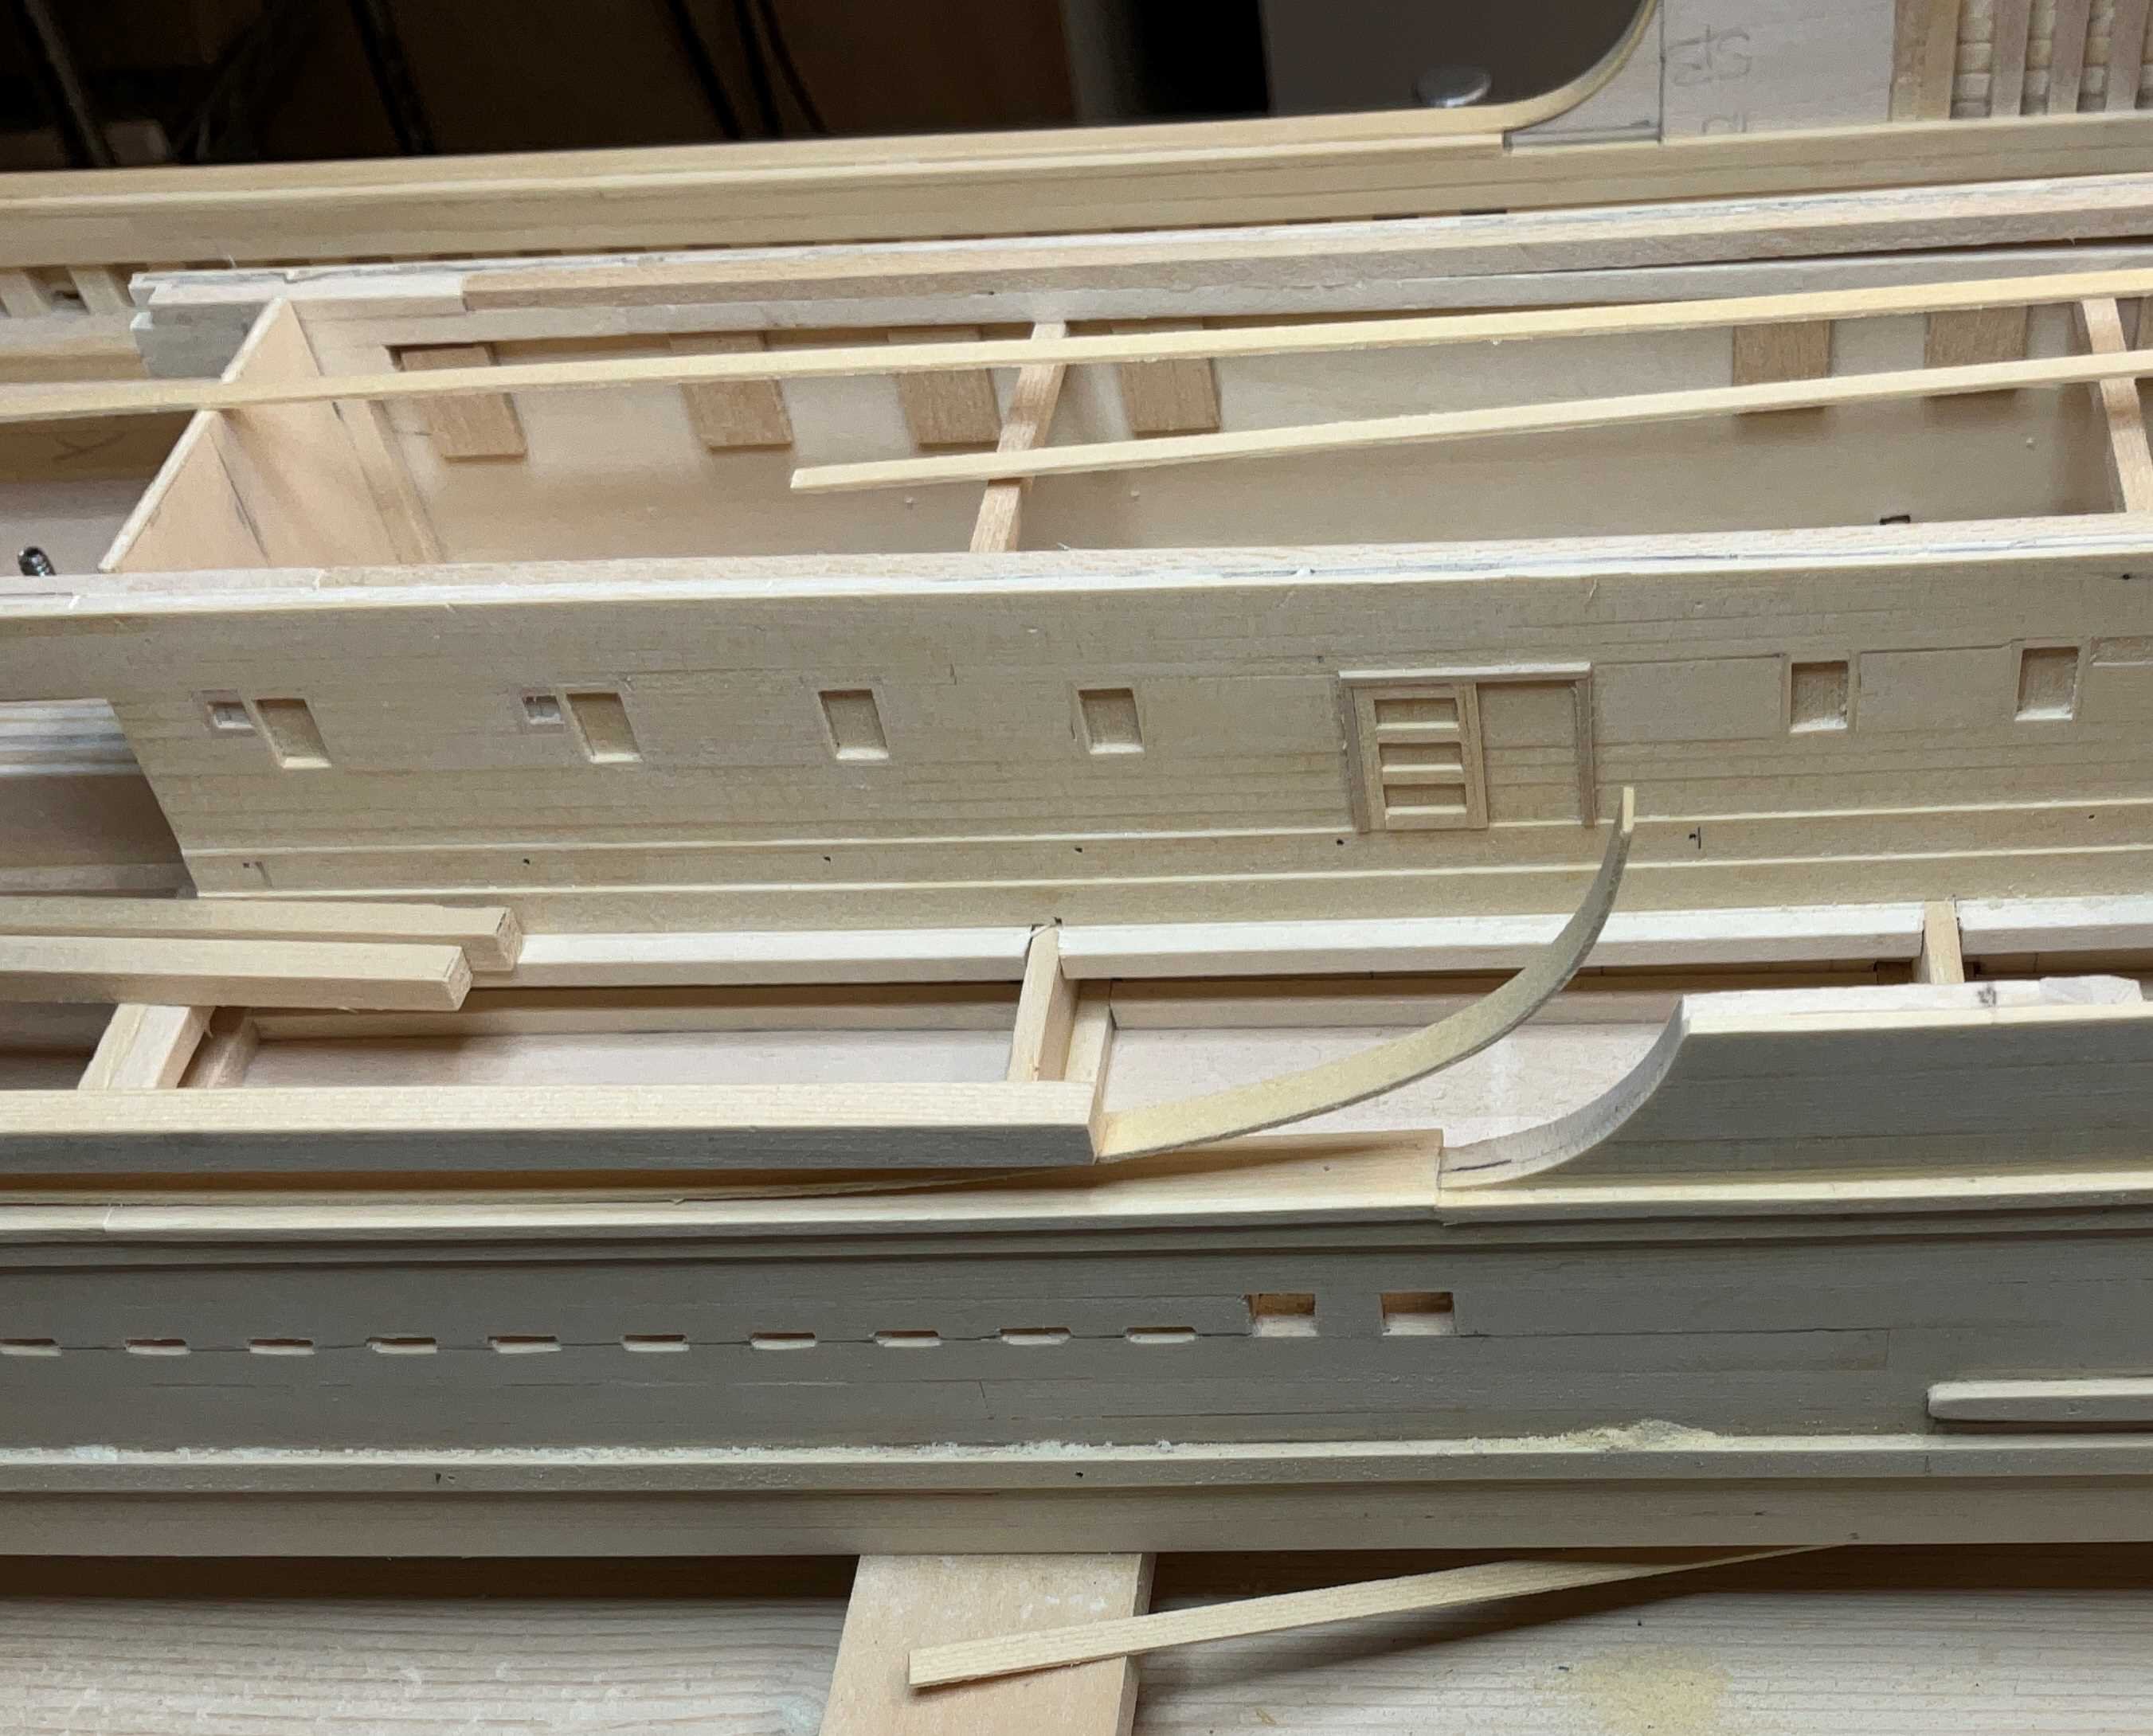
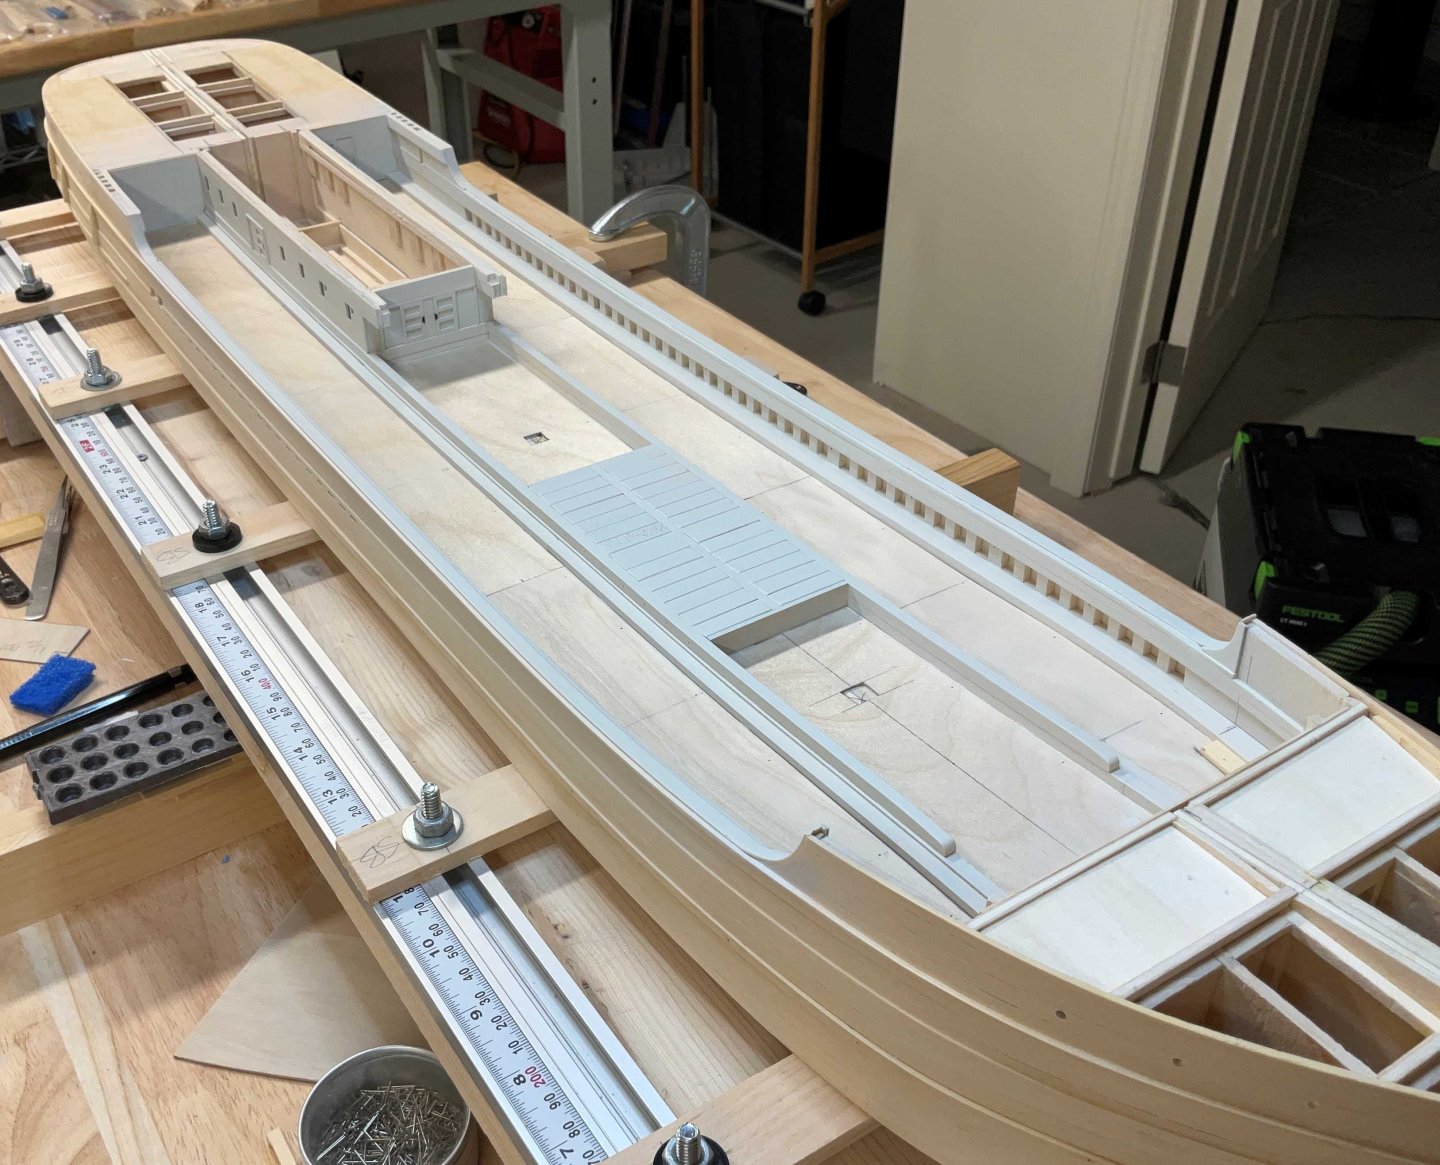
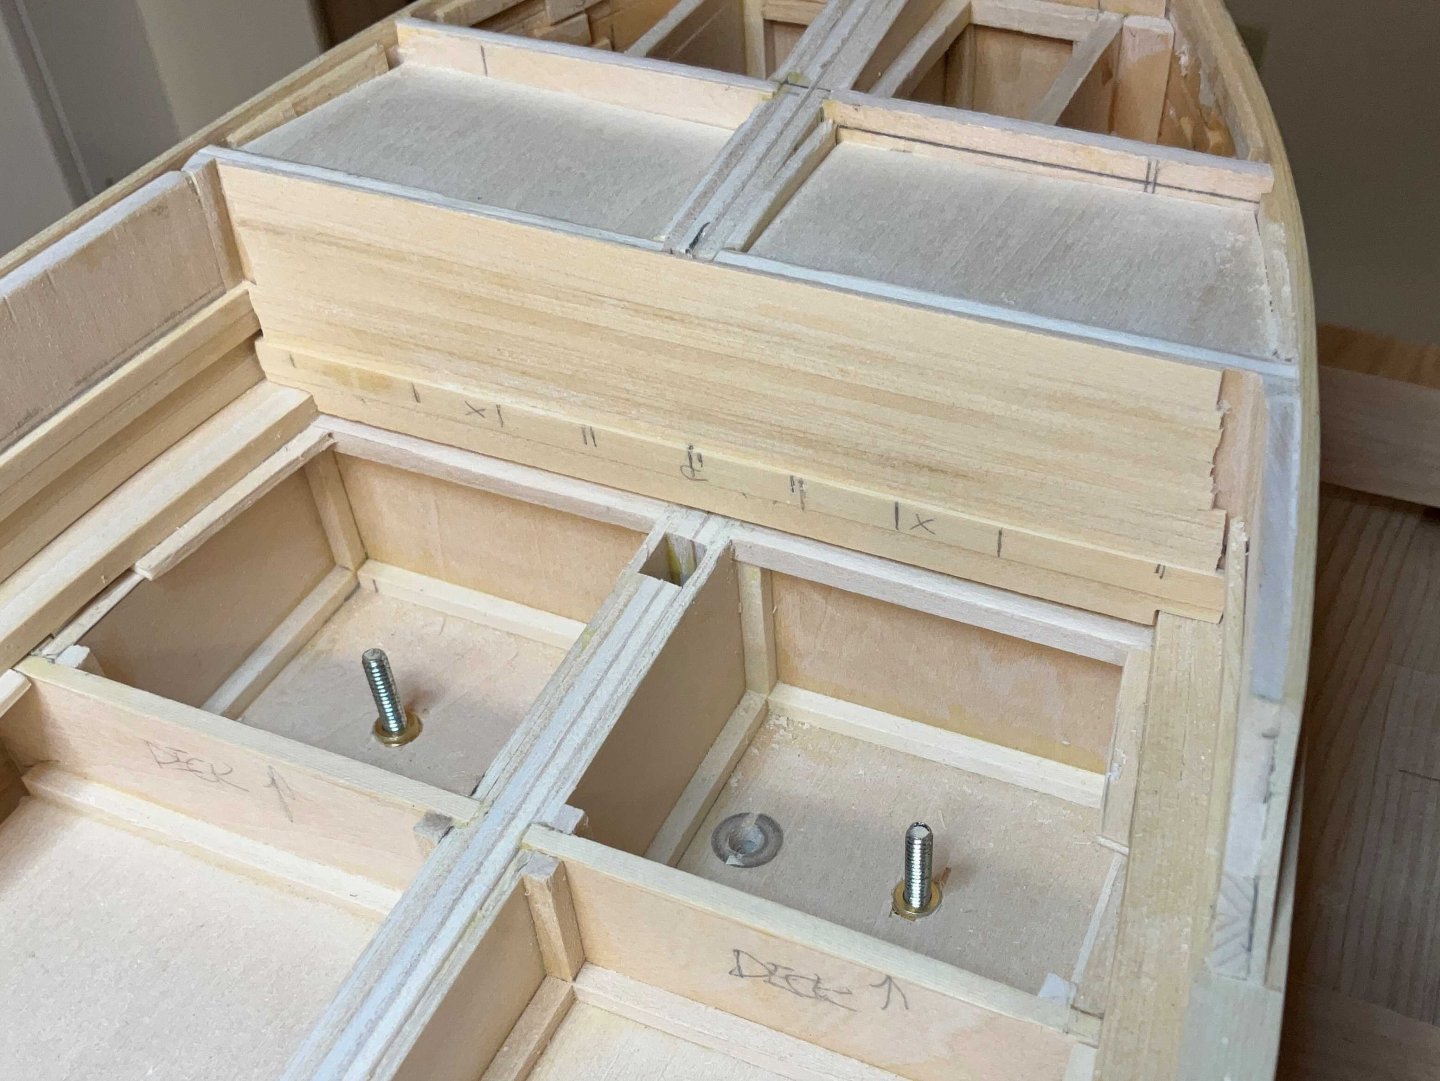
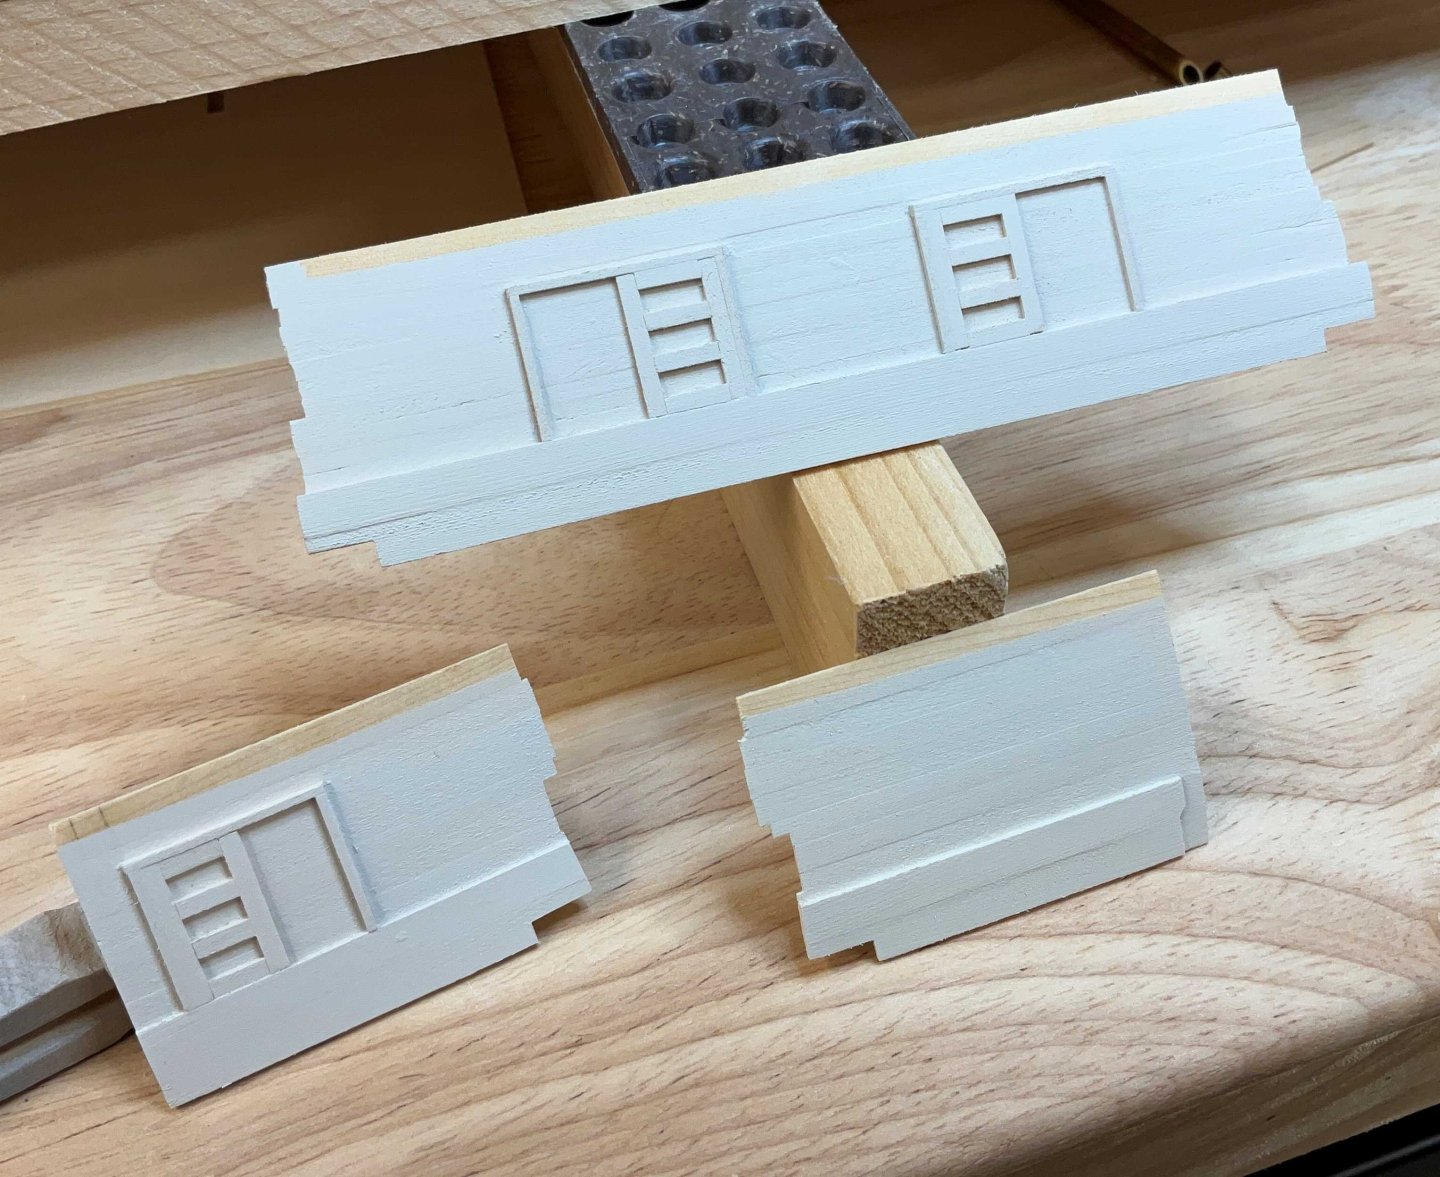
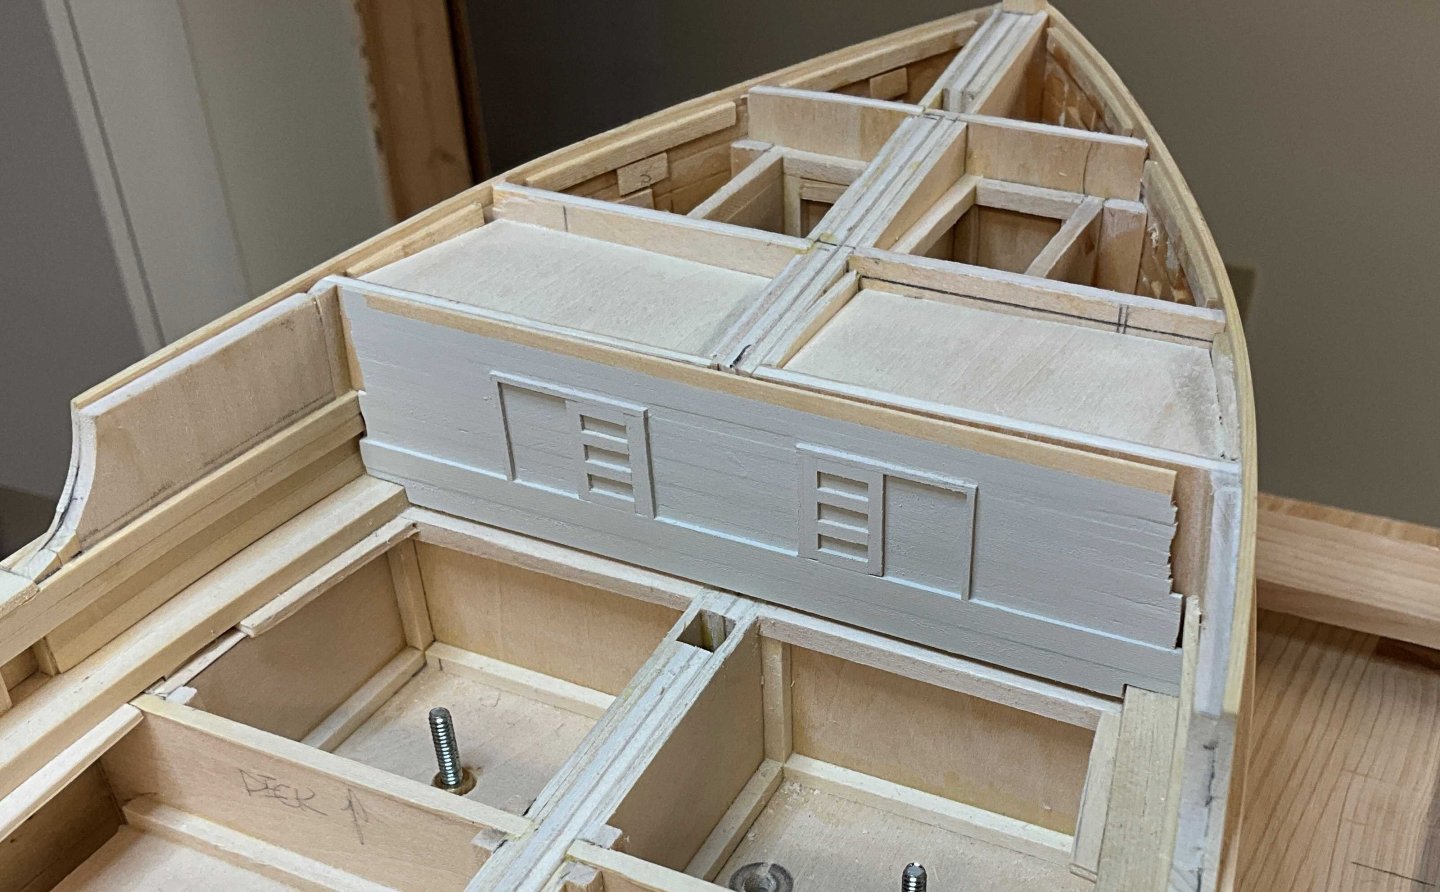
Hi Everyone, I hope you are all well. Thank you very much for the Comments and Likes. The bulkheads at the fore and aft ends of the main deck have been sided with 1/32" horizontal edge glued strips of 5/64" AYC. The sliding doors were glued to the siding and then everything was painted with Vallejo Model Air White Grey (71.119). The chafing planks were finished to the forward end. The bulwark planking was done next. There is a stanchion in there so there was a lot of measuring and cutting These areas had to be completed before the Main Deck House could be installed. The bulwarks were airbrushed and except for a few attachment points she is ready for the deck house and the sub deck. Hope to see you soon!


-
She looks beautiful Gary! Good luck in the Photographic Competition.
-
She looks great Roel! It must be incredibly difficult to make sure everything is done in the correct sequence.
-
Hi Gary,thank you very much. Good to hear from you.
-
Bob, congratulations on completing your Golden Hind! She is exceptional.
- 46 replies
-
- 2
-
-
-
- Golden Hind
- airfix
- (and 2 more)
-
Hi John, thank you very much!
-
Hi Yves, thank you very much! Hi Keith, thank you so much!
-
Thank you Jacques, I agree. It didn’t seem to have much going on. If there’s any more changes though, they’d better not involve scuppers 😀
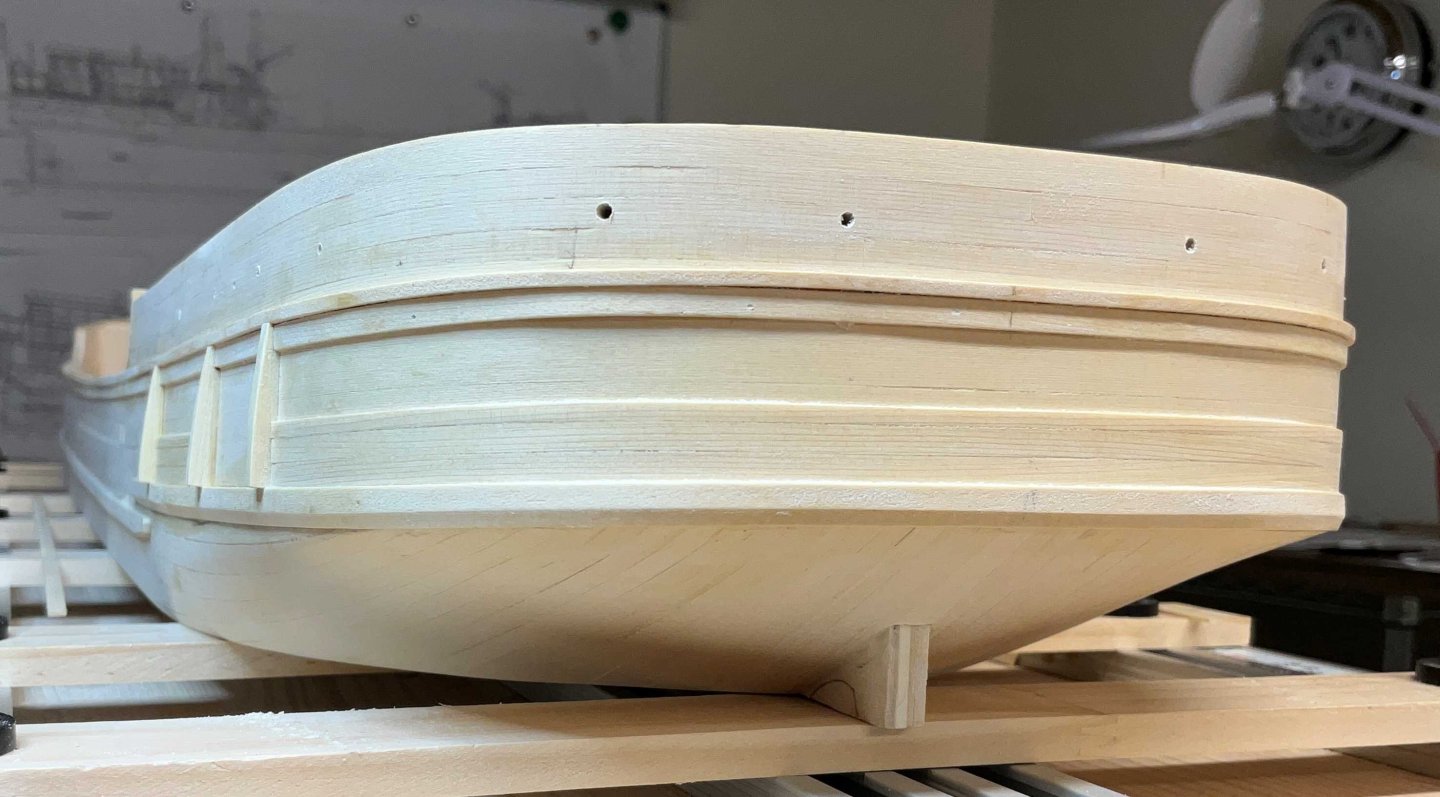
-
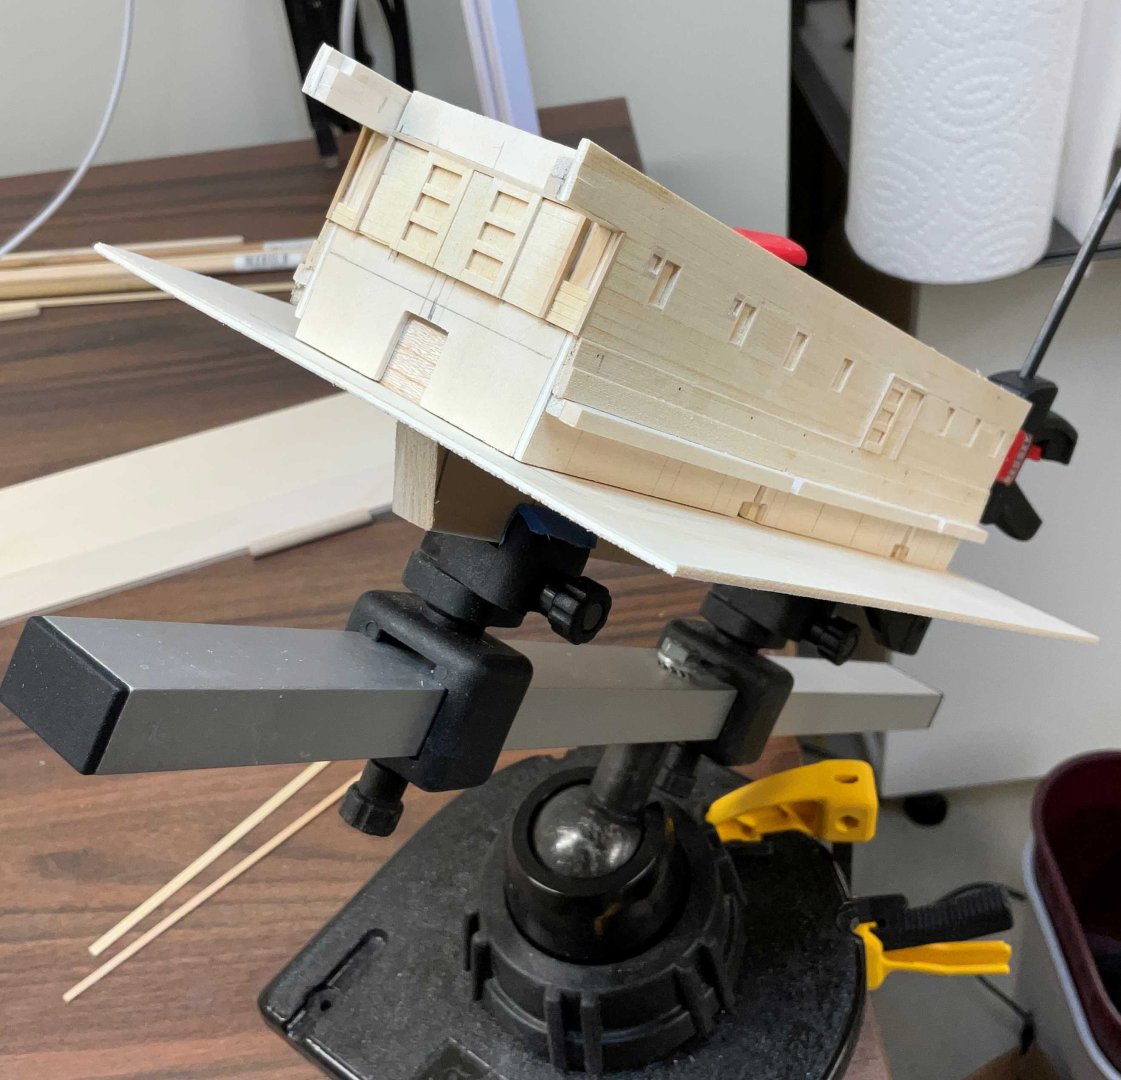
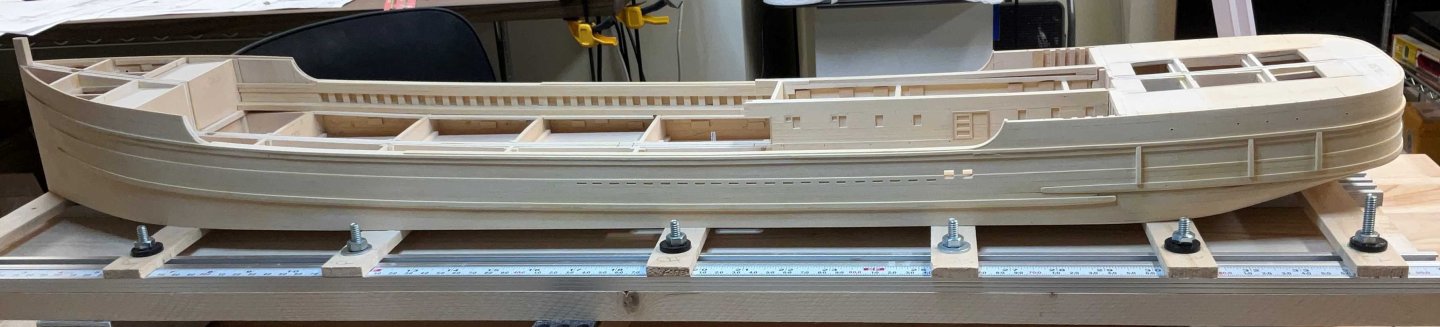
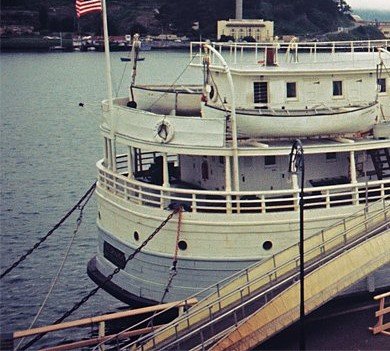
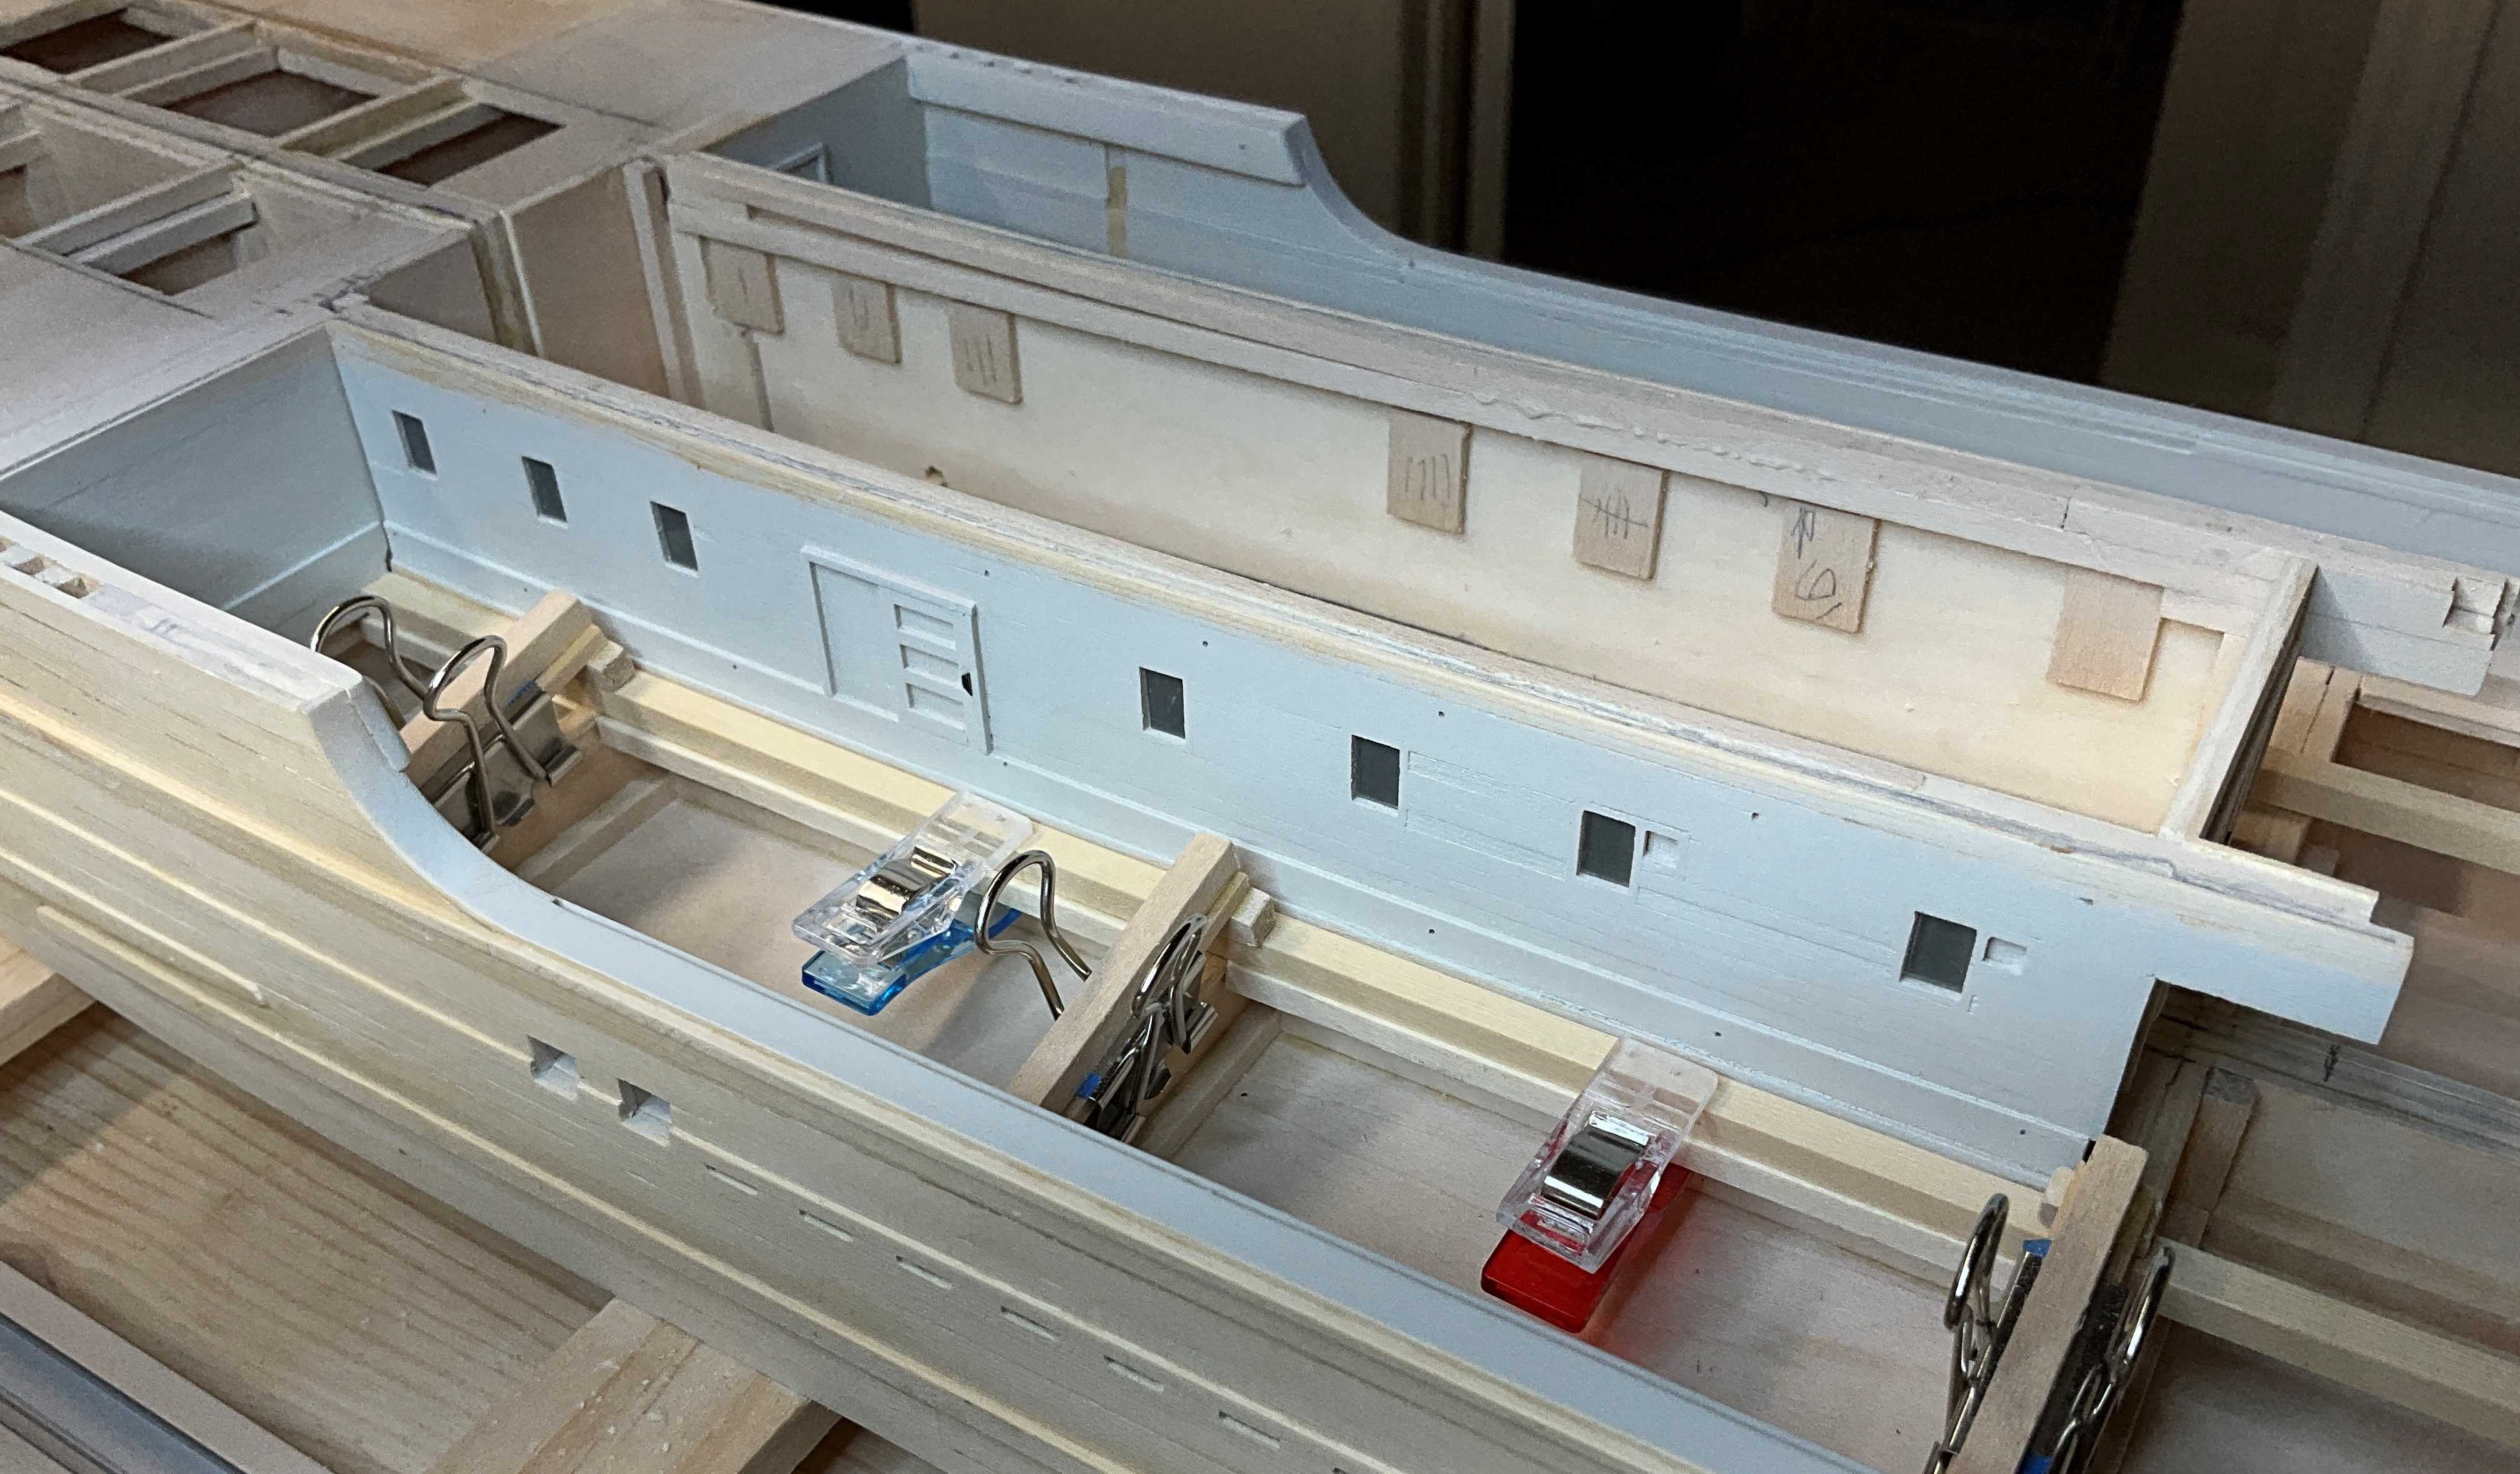
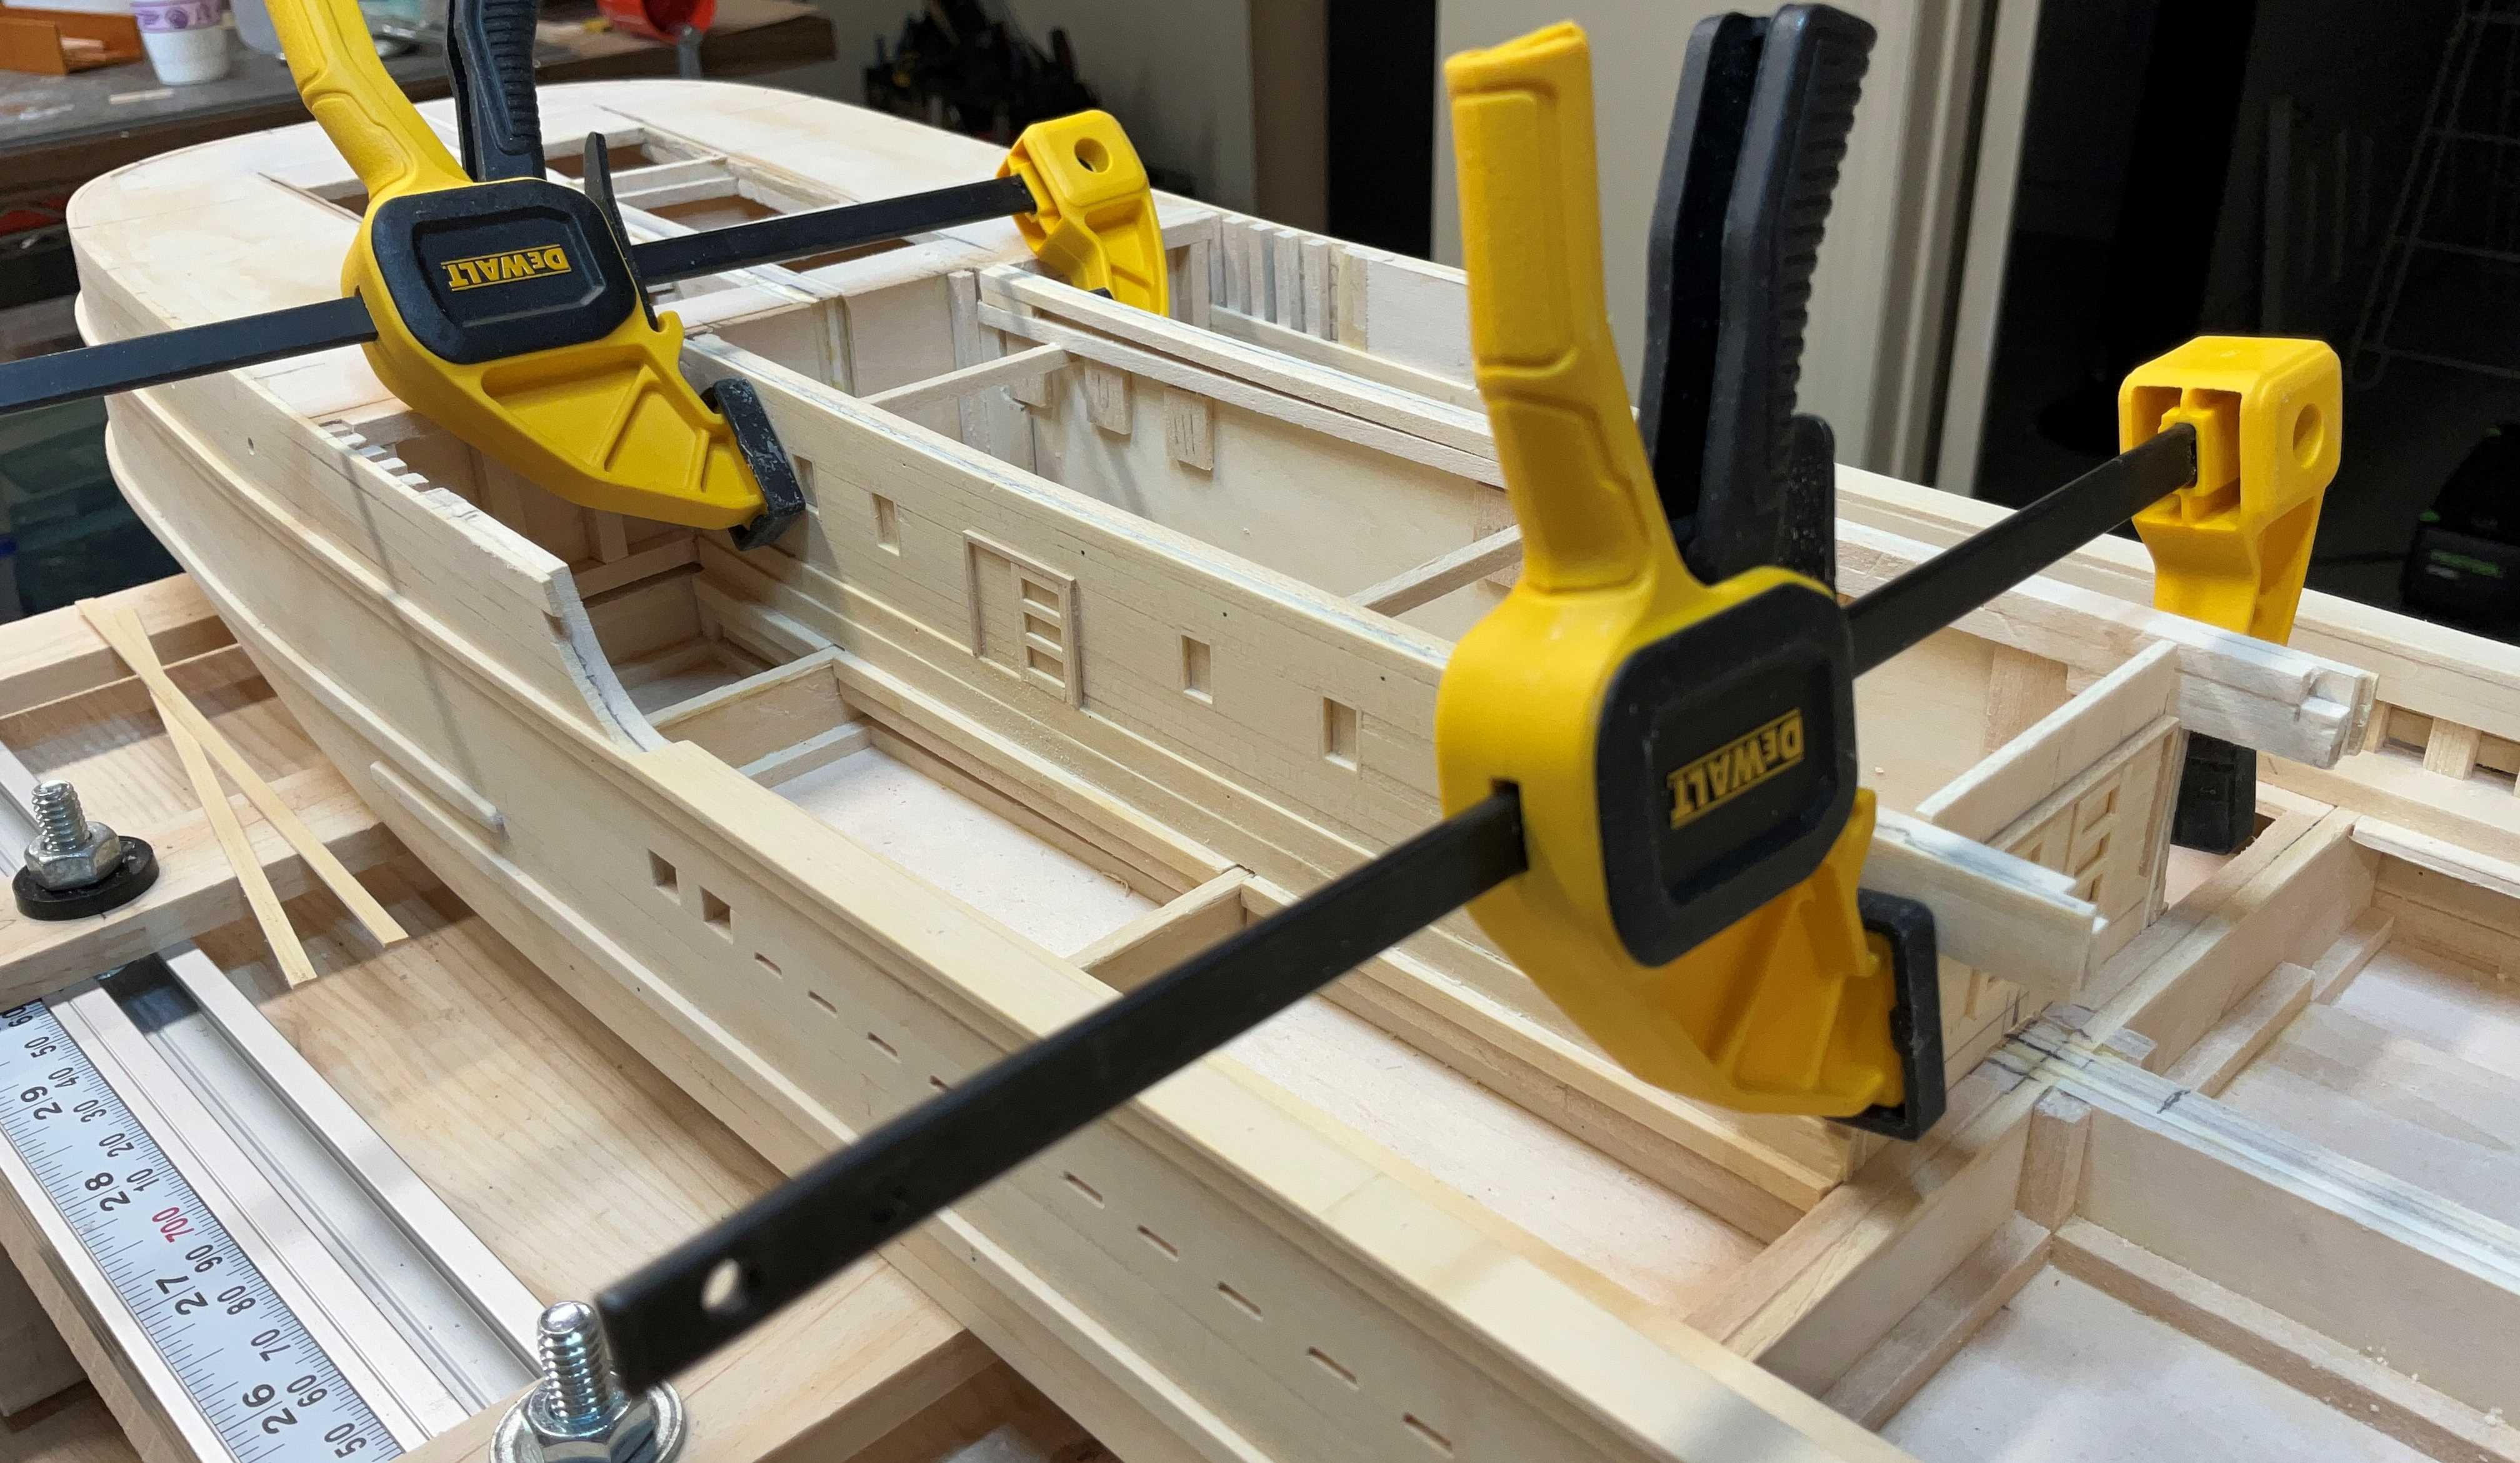
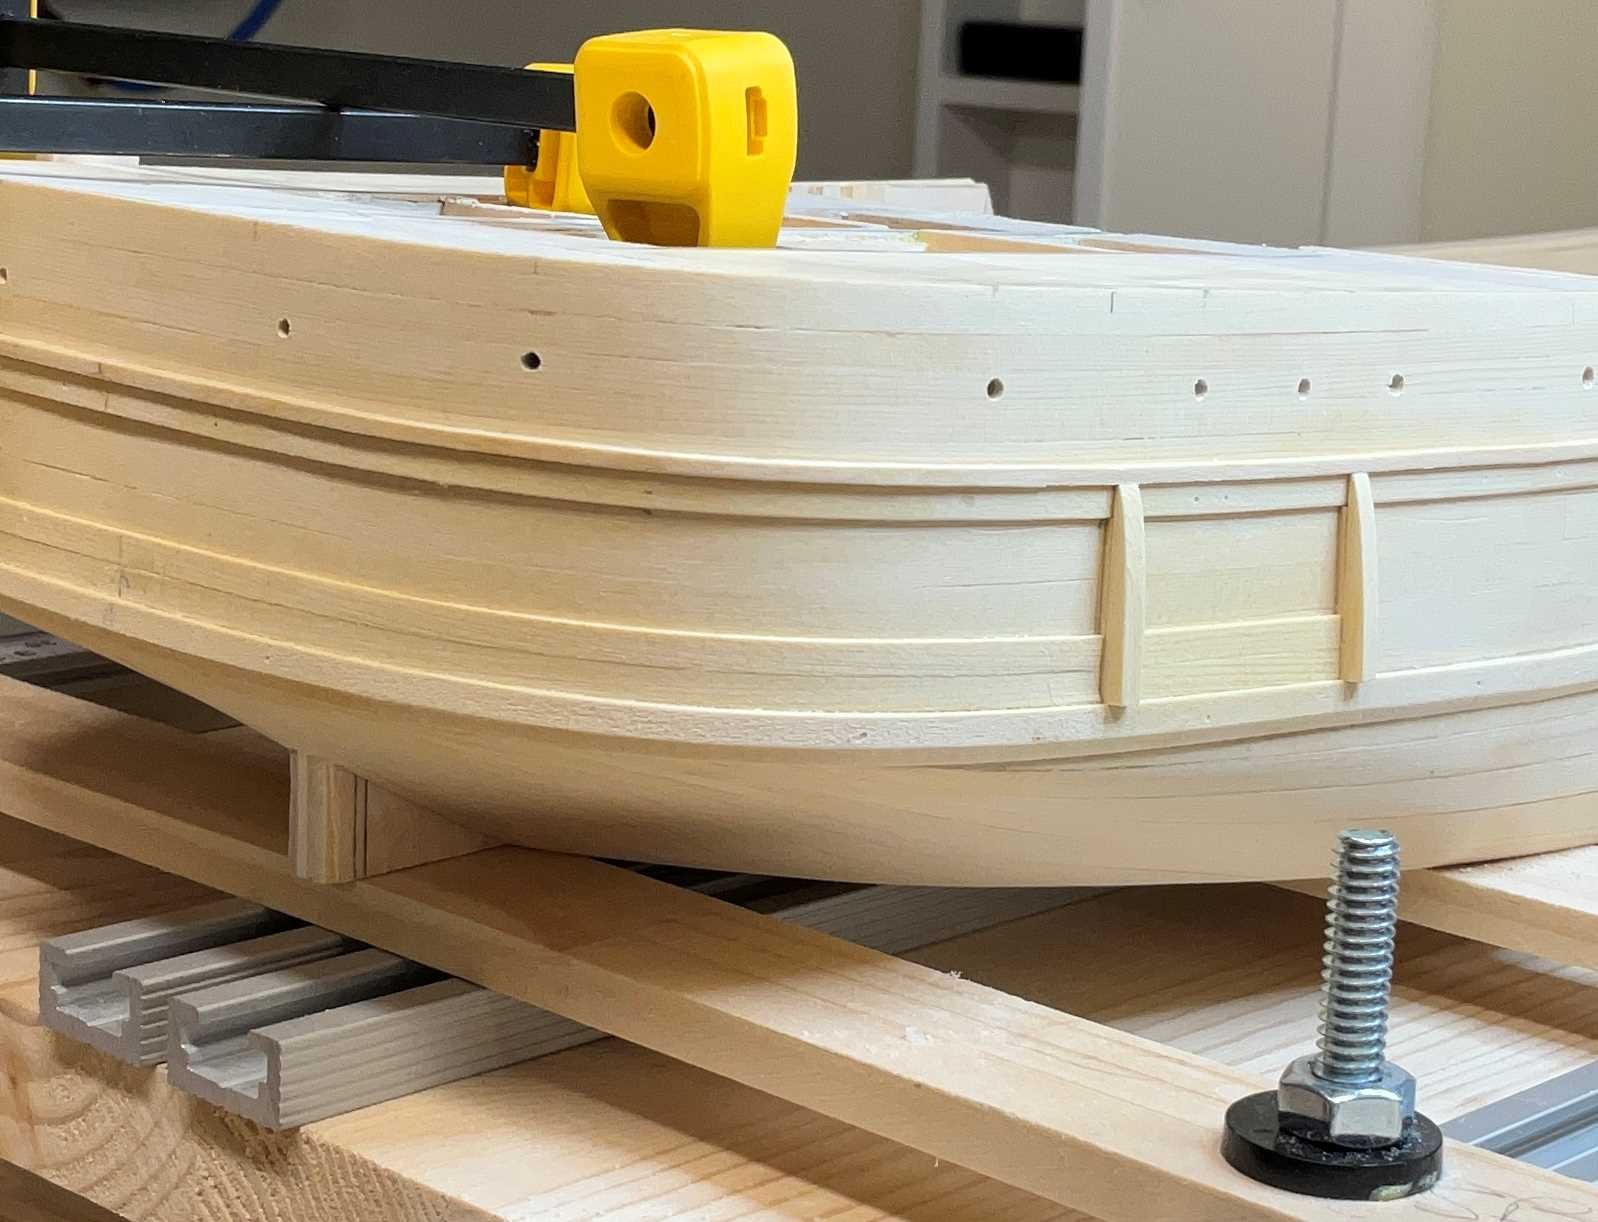
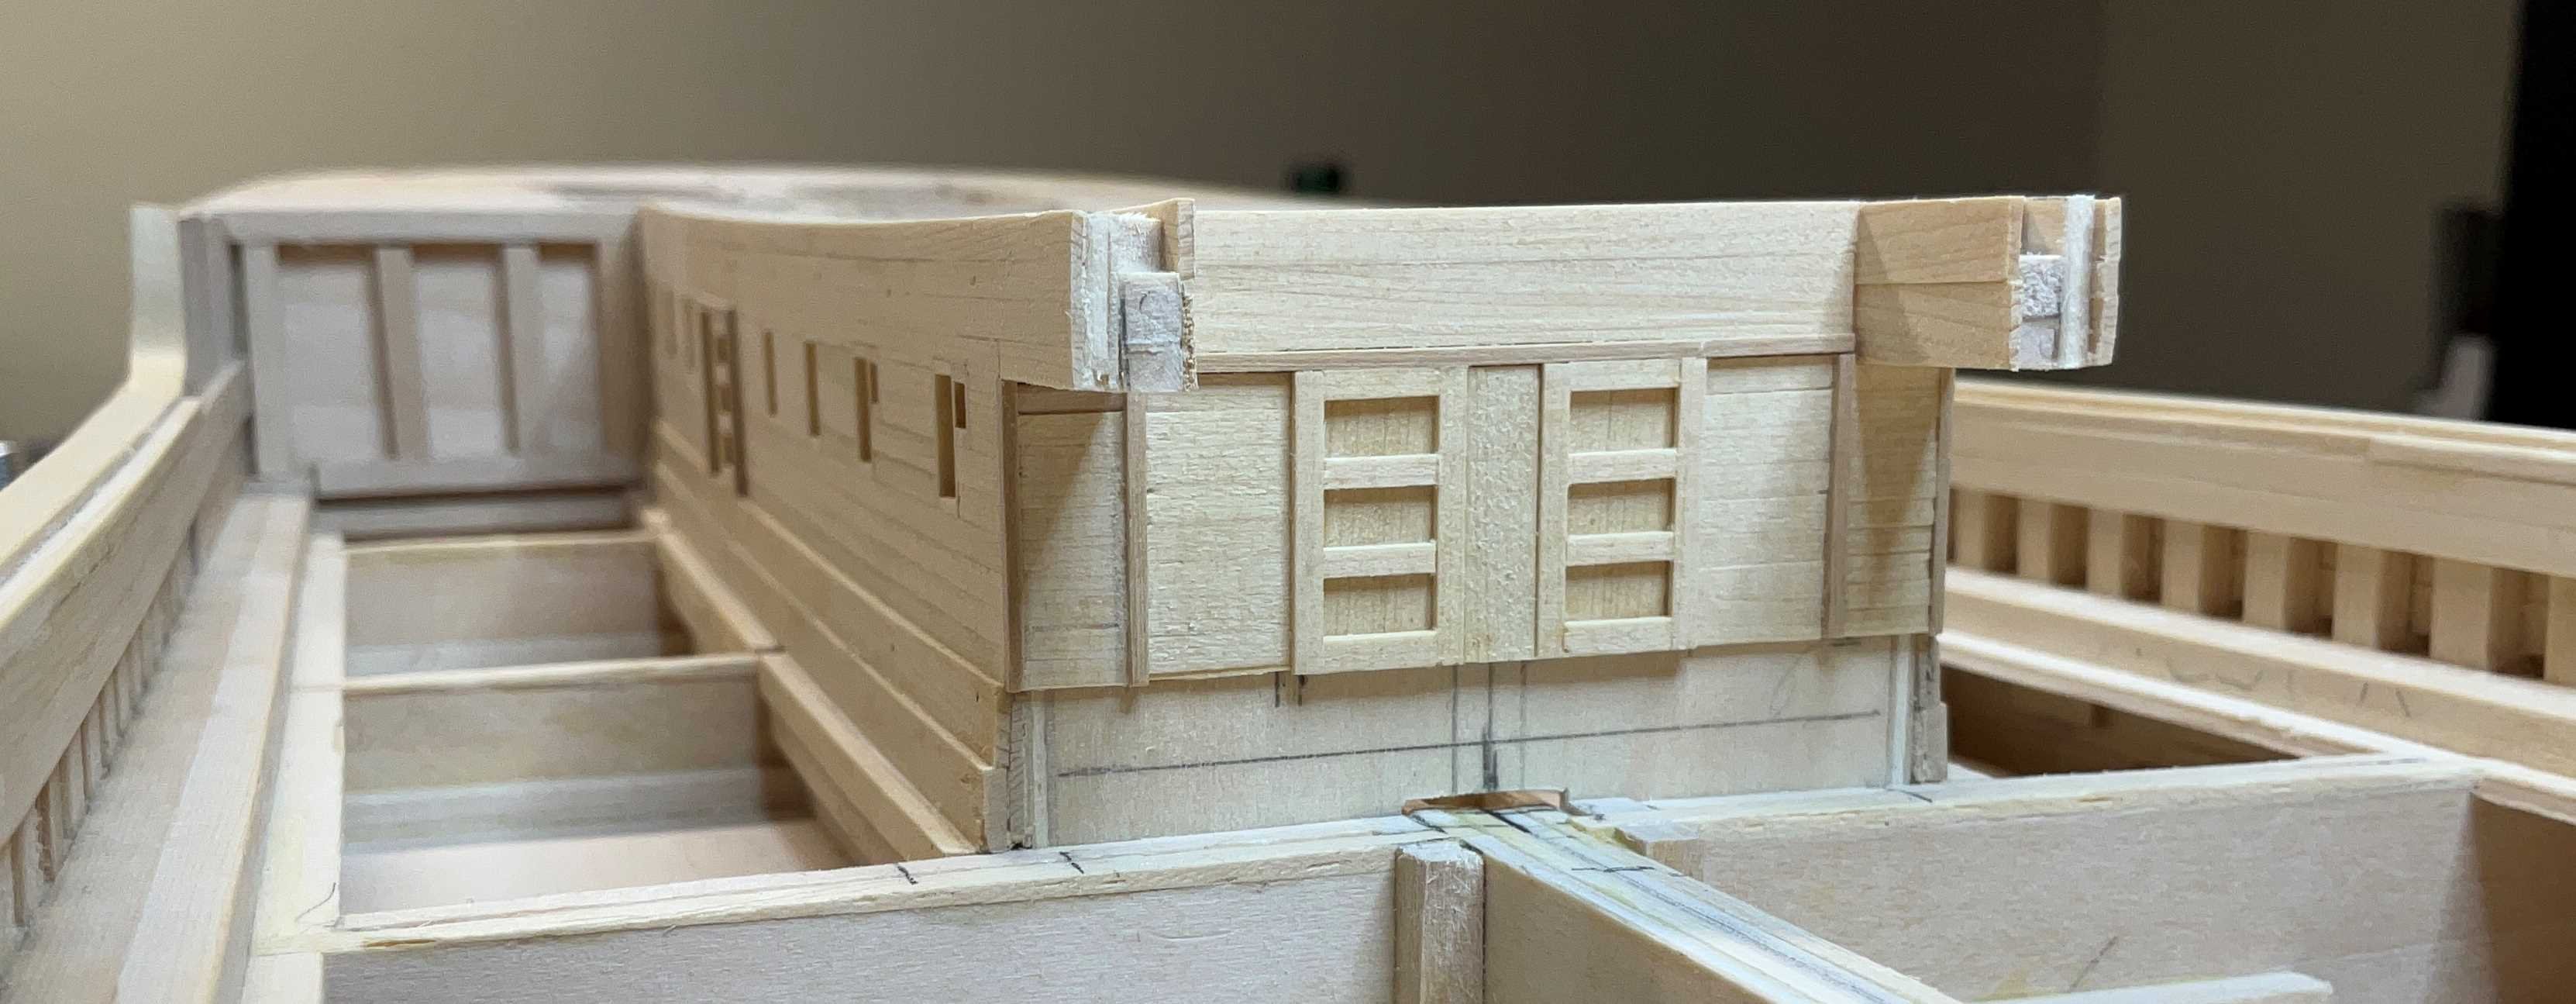
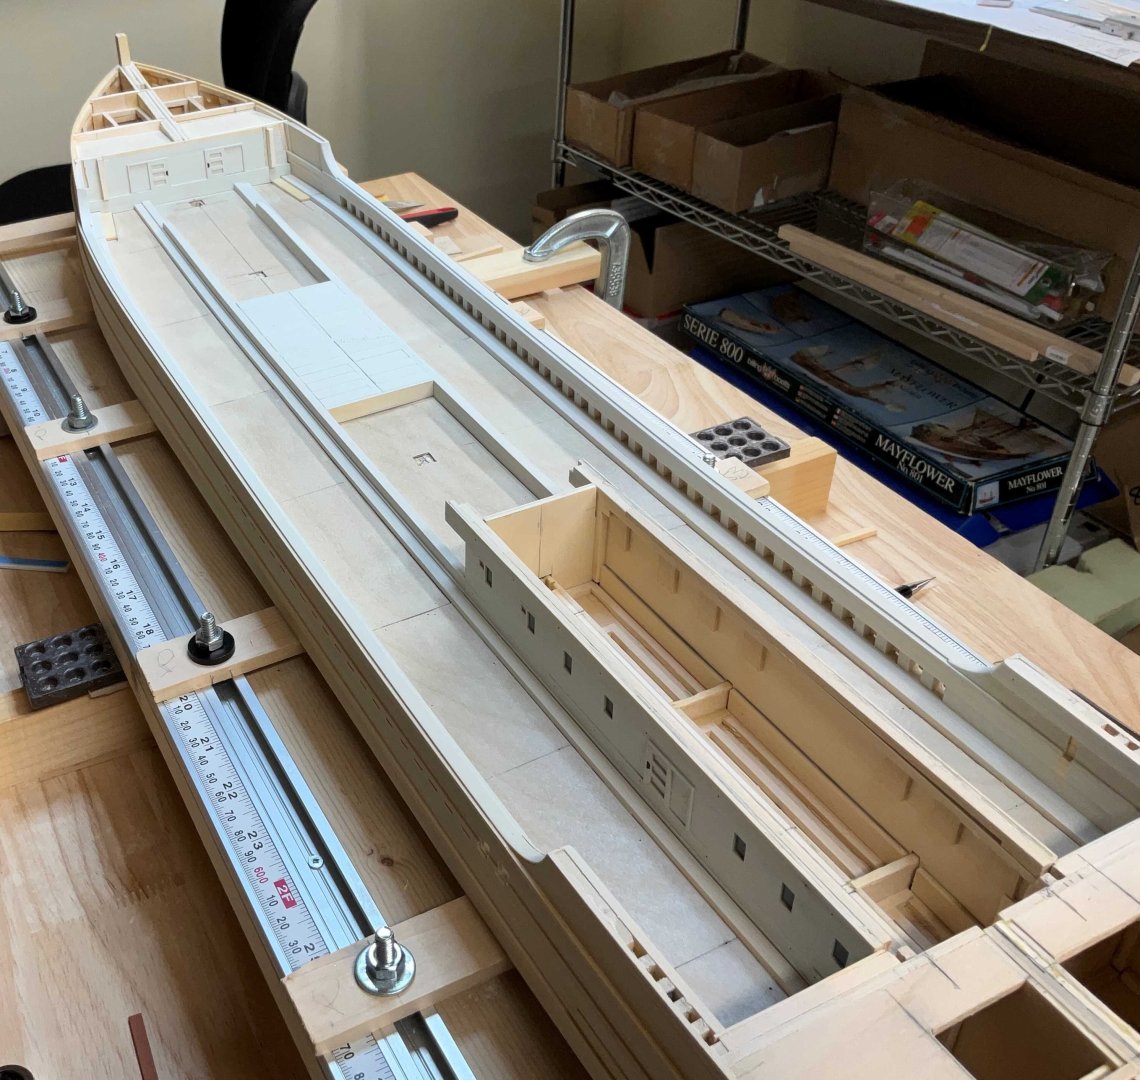
Hi Everyone, hope you are all well. Thank you for the Comments and Likes. I had a bit of a setback last week. This is part of a photo that Phil @Dr PR posted in his SS Wapama 1915 Steam Schooner thread. I had not noticed in other photos or drawings how prominent the planks just above the guard at the stern were. The drawings show that the bulwark planks are 3 3/4" thick and the hull planking is 4 1/2" thick. Adding this detail would mean that these planks would have to extend down to the guards all the way to the bow. The guards would hide the fact that 1/32" planks were added. Well that's the hope anyway. Starting at the stern, three strakes were added. Two @ !/32"x1/8" and one @ 1/32"x5/64". The scuppers had to be filed into the new veneer planks. I decided to remove the guards port and starboard because they drifted down a bit at the bow. Gluing the new guards back on under the new planking went a lot easier. The new planks were feathered into the hull planks at the bow before they get to the metal anchor protection plates While this was going on the chafing planks were attached to the main rails. I just happened to have a rigid cardboard shipping tube that was the right size to hold it at the curved part. The main deckhouse was glued together and placed on a jig in order to complete the doors and siding. This is what she looks like today. Next will be the hawse pipes and portlights. Hope to see you then.