MORE HANDBOOKS ARE ON THEIR WAY! We will let you know when they get here.
×


pompey2
-
Posts
511 -
Joined
-
Last visited
Content Type
Profiles
Forums
Gallery
Events
Everything posted by pompey2
-

Starting Solidworks
pompey2 replied to AntonyUK's topic in CAD and 3D Modelling/Drafting Plans with Software
NGR, I would definately advise against extruding for the hull thickness, it will make any swept plank shapes very difficult due to the plane you are extruding on. Don's suggestion sounds like a much better proposal. You can define the plank section, position, orientation in the sketch so can represent clinker built. Then by extruding (sweeping) in the other plane you have much more control. You can repeat the plank sketch at each bulkhead, changing the size, shape, orientation as you go. The sweep wil then follow your series of sketches blending between them. Some work will be needed to finish the ends and the transitions at the bulkheads may need some smoothing. Nick -
Love the Clinker built ships boats, what great work all round
-
Are there other sites like Cornwall model ships out there
pompey2 replied to kpnuts's topic in Wood ship model kits
I've used Westbourne before for a caldercraft kit, i went in person so no problems there. However they weren't very interested in supplying some missing parts, eventually went back to Caldercraft who supplied no problems. Nick -
I think the Admiral might have something to say about the bald patch in her broom But that is a good idea
-
Kind of depends on the definition of 'using' Where many countries have adopted the metric system, common usage is still predominately Imperial. The US being a good example. And also different Industries confuse the issue further, the Aircraft Industry will never move away from using feet for Altimeters. That would lead to unacceptable risk when trying to convert, imagine 'reduce you height to 2000 metres' -whoops. I remember hearing a tale of a certain African country, when moving from driving on the left to driving on the right followed the rule: cars change on Monday, Trucks on Tuesday, Bicycles on Wednesday
-
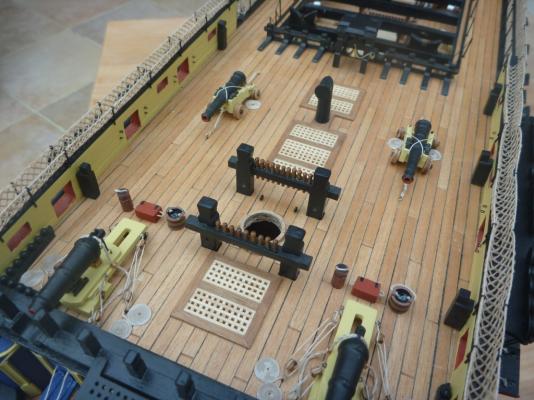
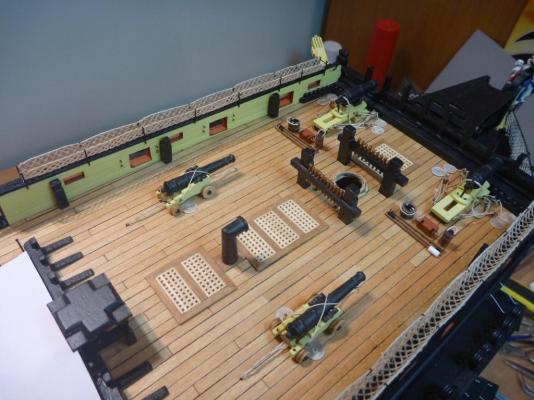
I thought I might share this with you all. I decided to make some guns furniture for my Victory and that included a straight water bucket for each one. I used a plastic tube for the body with a shaped top, a rope and a blank for the bottom. But the thing I was most pleased with, and wanted to share was reproducing the water in the bucket. I mixed some two pack epoxy and 'dripped' a little amount into the bucket. Once dry it has a good shape and water like quality I think here is a photo, not very close up I'm afraid Nick
- 1 reply
-
- 4
-

-
Rob To be honest I dont recall the brush. But I imagine it would have been about 1/4", I know I have a couple that would have suited. i also recal trying to size the red boxes. My logic was - box was 15" to 18" long (best guess) so to scale .2" to 1/4". But I agree that seemed a little large on the ship, so I kept mine down to about 5mm, the lower end of the scale at about 14" Then adjusted height and depth to seem correct. Nick
-
Hi Rob I brushed. Clear, matt finish. You wouldn't know it was there once dry. Nick
-
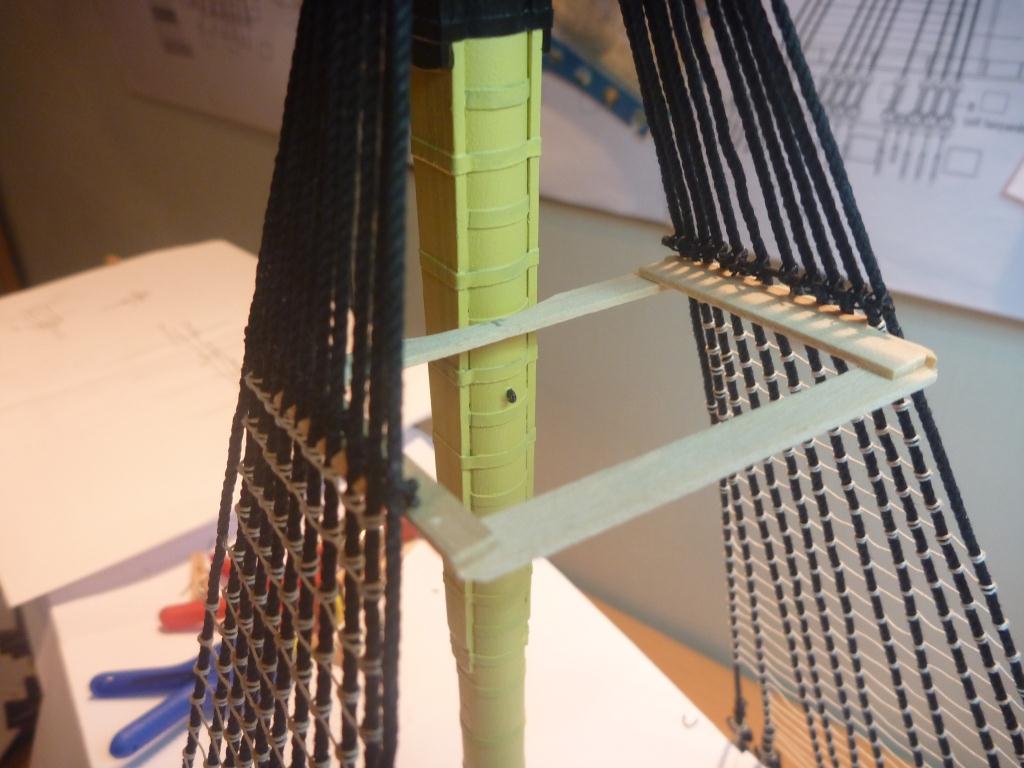
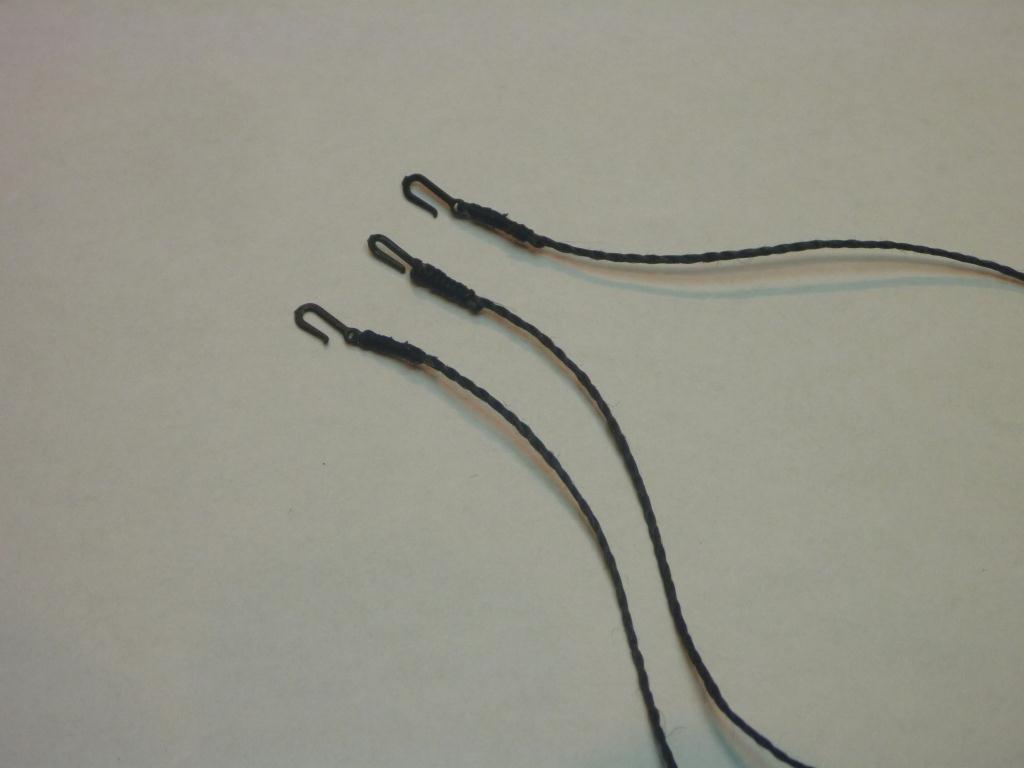
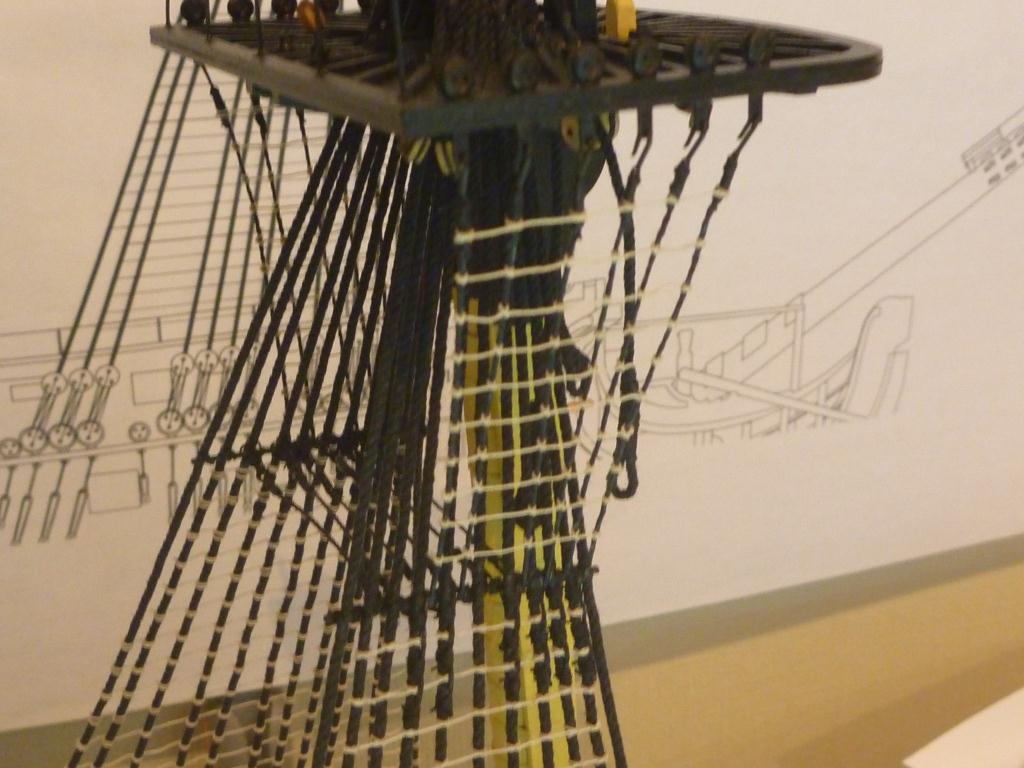
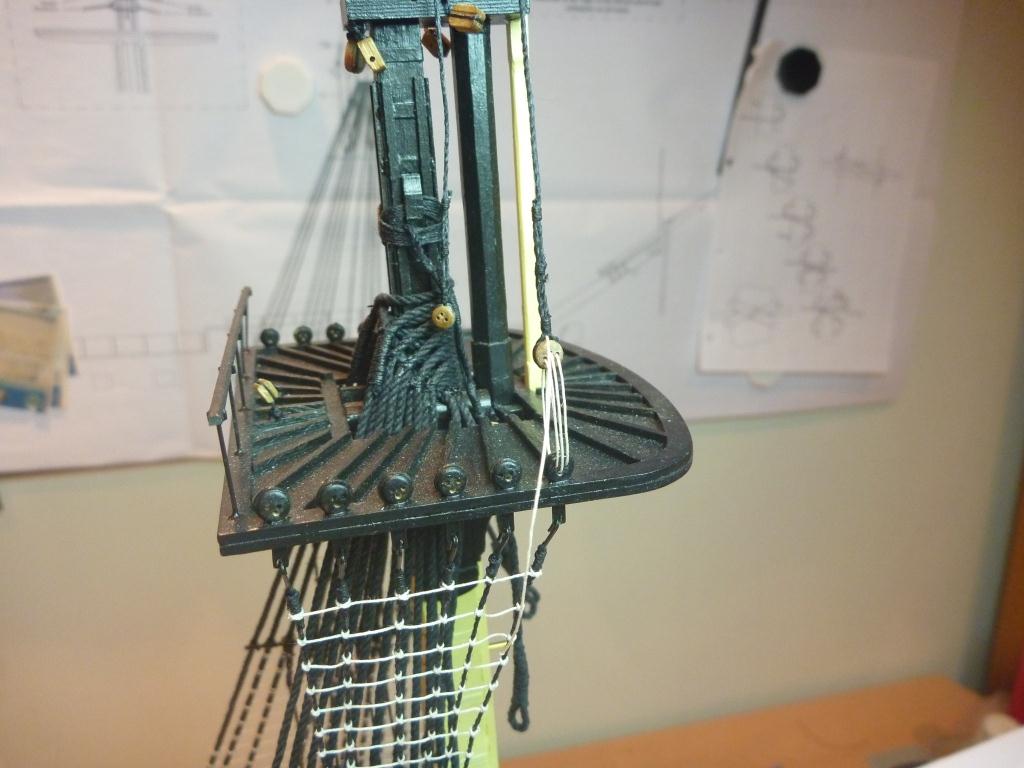
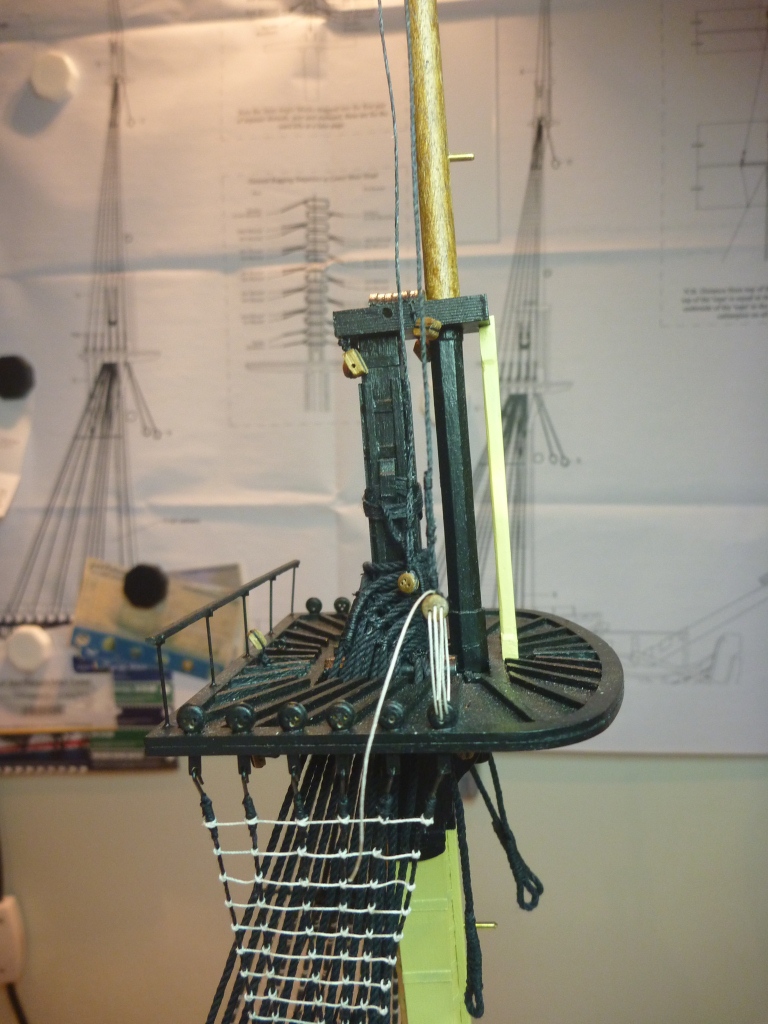
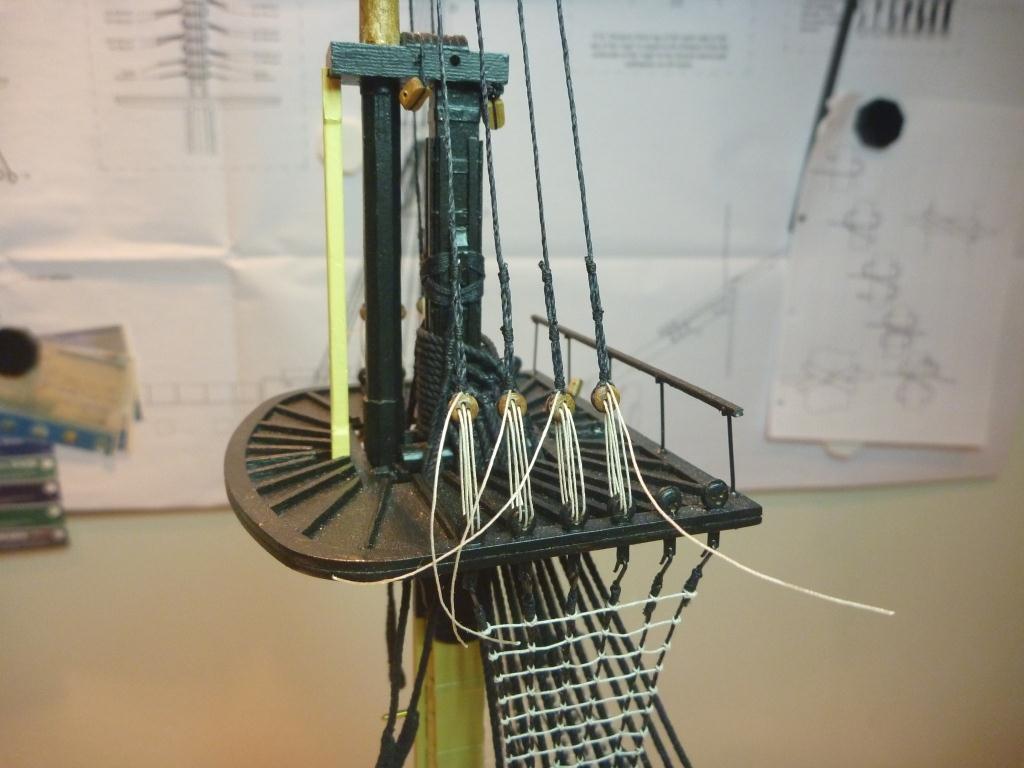
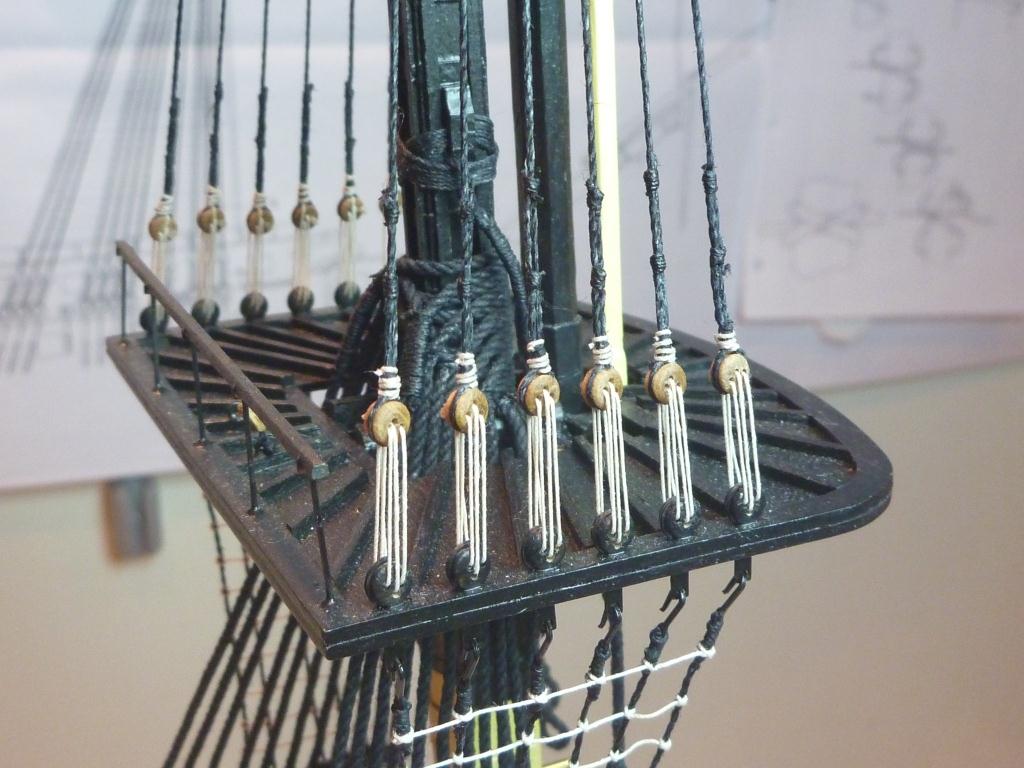
Hammock netting This is a great source for netting. http://www.meshuk.co.uk/index.php?option=com_ixxocart&Itemid=121&p=product&id=4&parent=8 In the UK but might export? They offer a large range of materials and sizes. For instance 'Pet polyester mesh Black Counts per inch 15 ((1"/15) x scale 72) = 4.8 inch pitch They also do woven stainles steel wire.
- 396 replies
-
- 2
-
-
- Idea
- Bright Idea
- (and 1 more)
-
Drilling Sheave Holes For Masts
pompey2 replied to Stuntflyer's topic in Modeling tools and Workshop Equipment
Funny I had exactly the same thoughts looking at QA's tooling. Sorry Mike we have wandered completely off topic. Nick -
Hi Rob It's good to catch up with your log The copper looks great, a lot of effort. Difficult decision on finishing, I polyurathaned mine. I remember what a huge relief it was to get that behind me and move onto something more interesting. I have finished with the hull now and have been getting into masts and ratlines. Like the idea of using your 'Victory' for coamings etc, a nice touch. Have you given any thought to putting on the brass sections? The manual seems to suggest fitting them last. But I decided to do them early, weilding rigid brass about with delicate gun port lids etc seem a bit daft. And I would recommend that too, much more room to measure, trim fit etc. And more space to fabricate something to hold them in place for gluing. I will be following your progress. Nick
-
Antony Could you be encouraged to name the company, we would then be advised to avoid them. Especially us UK bods. Nick
-
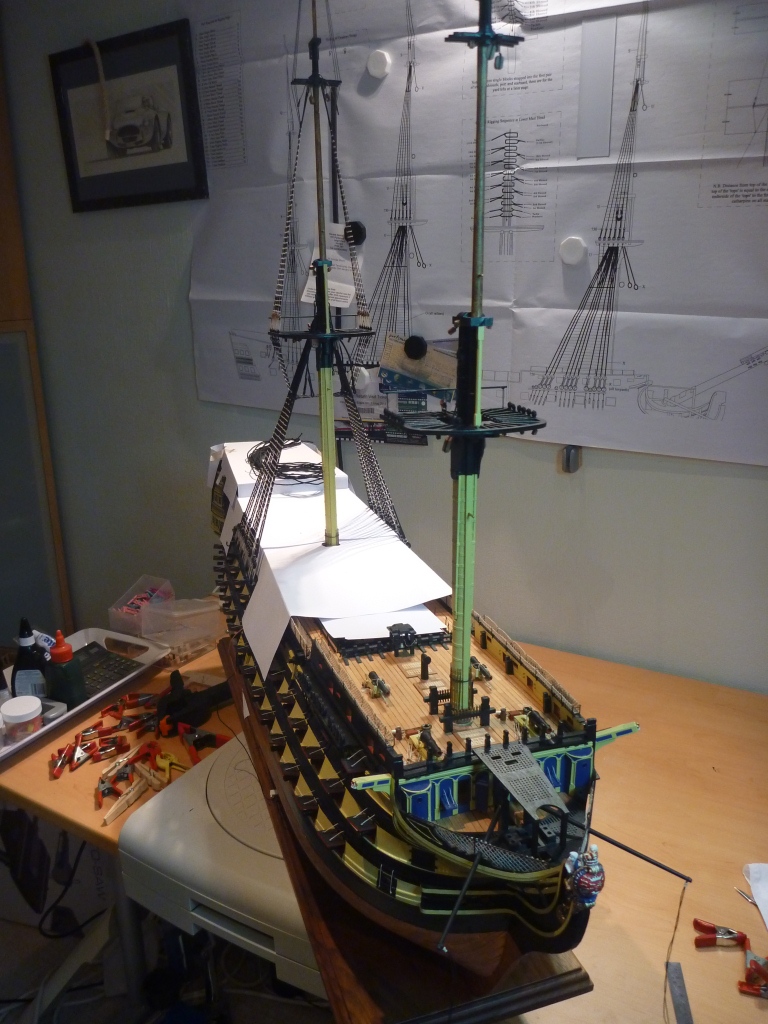
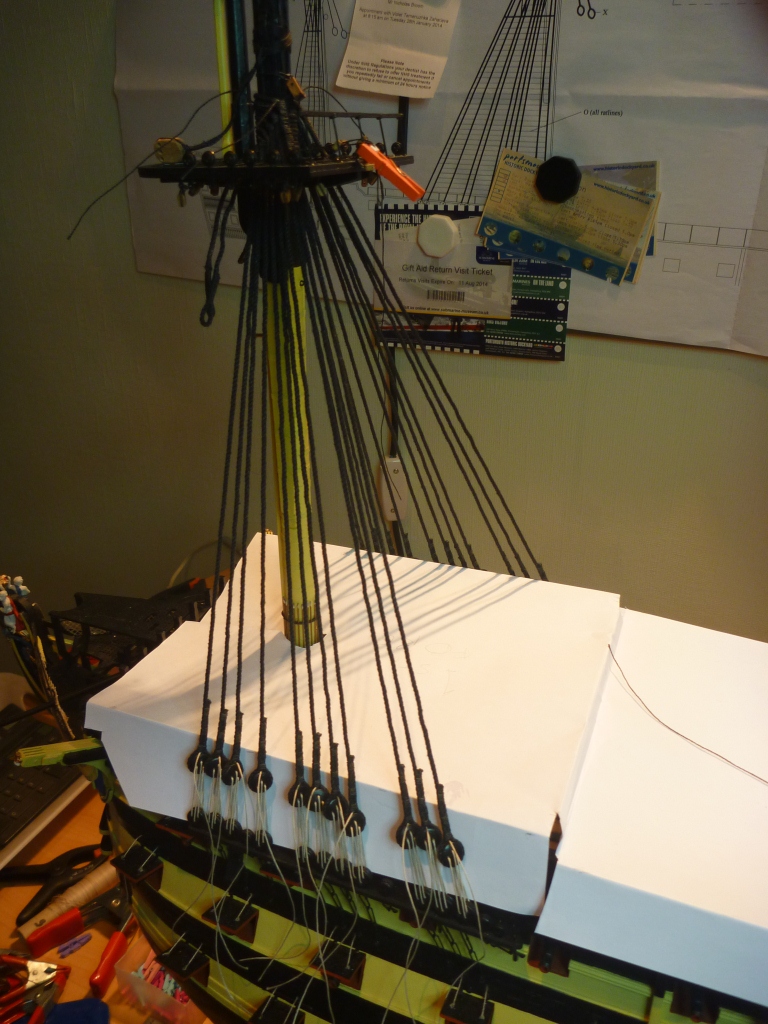
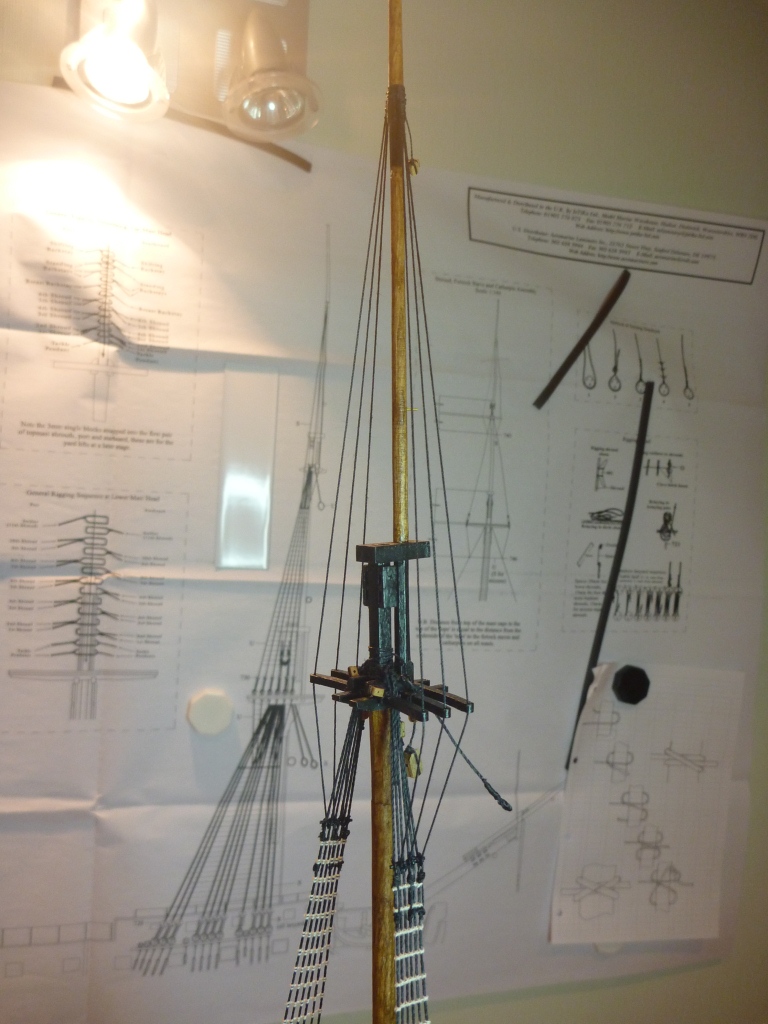
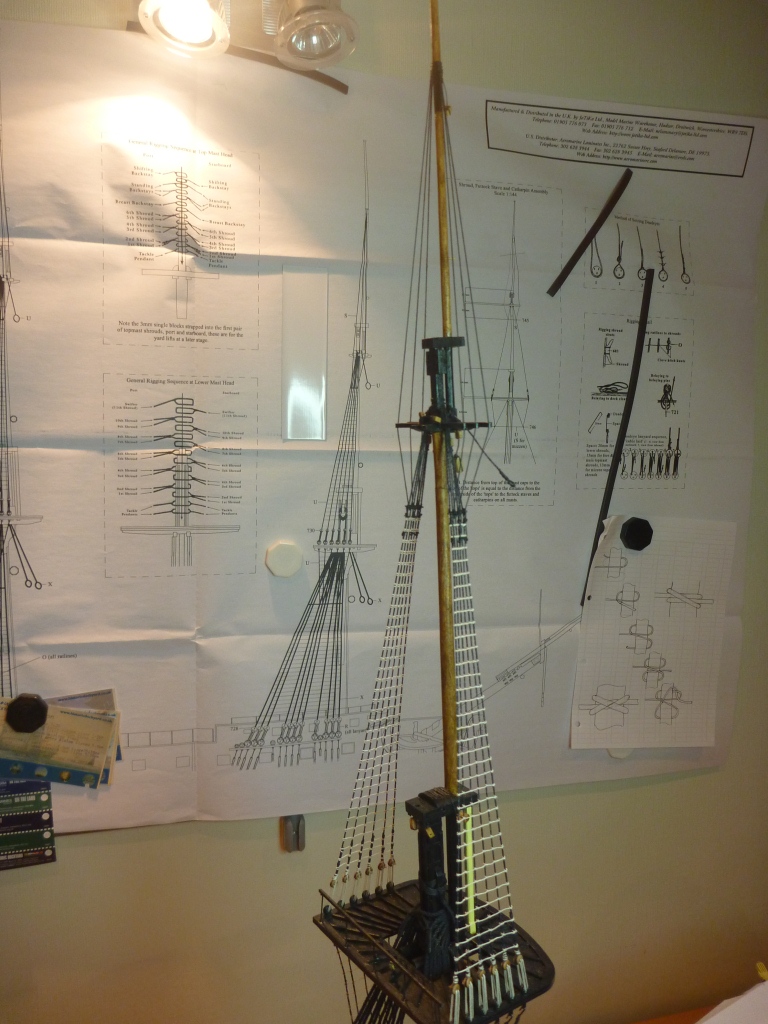
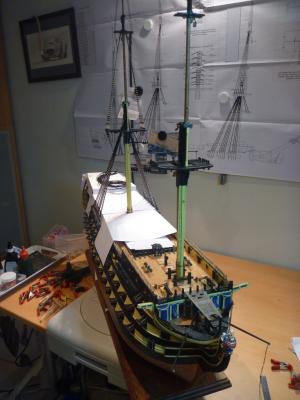
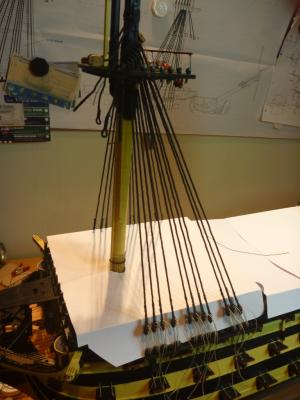
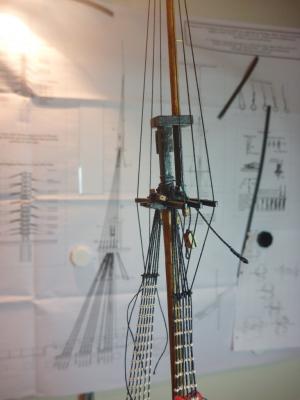
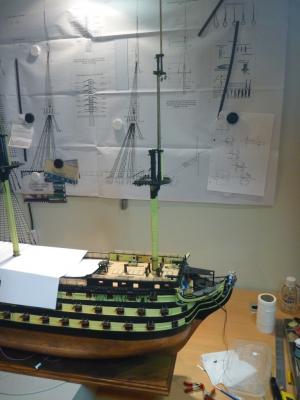
To continue: ready to get going And all the shrouds loosely rigged waiting to be tightened and lanyards tied off. Thats it for the moment - all up to date. Nick

- 84 replies
-
- 4
-
-
- finished
- caldercraft
- (and 1 more)
-
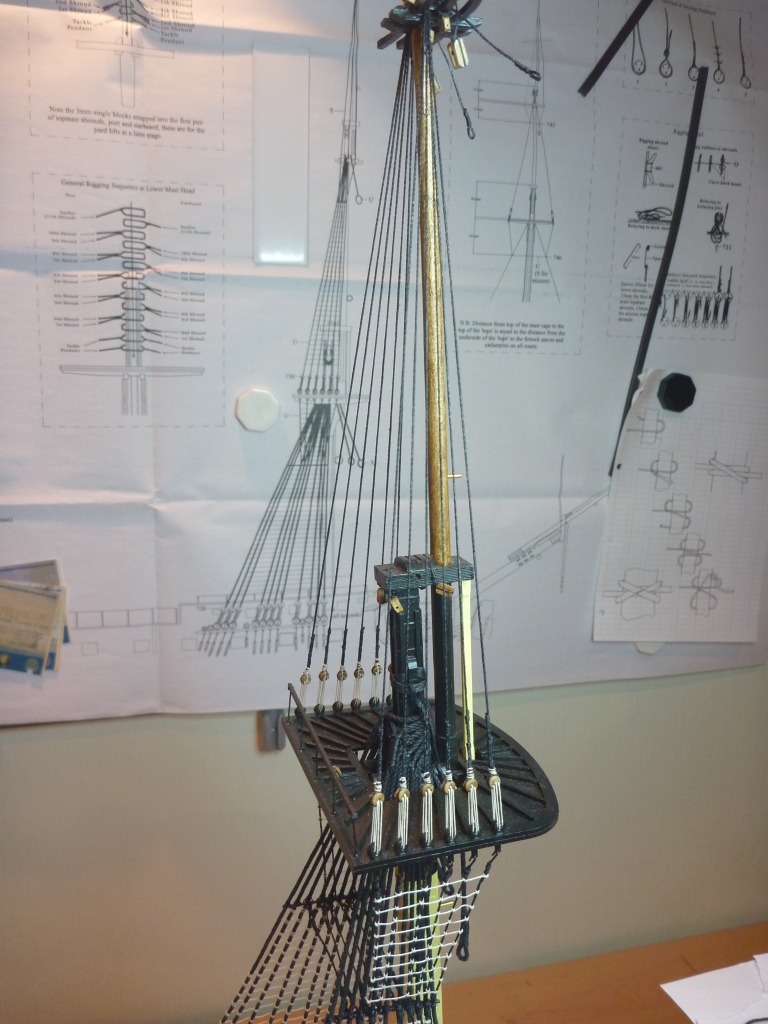
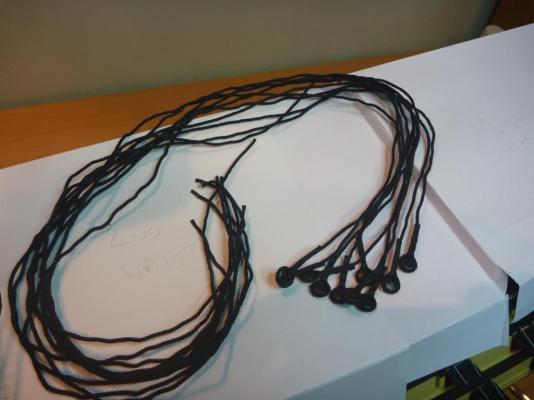
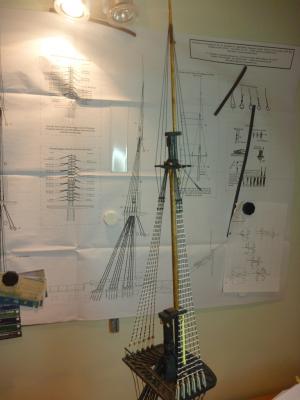
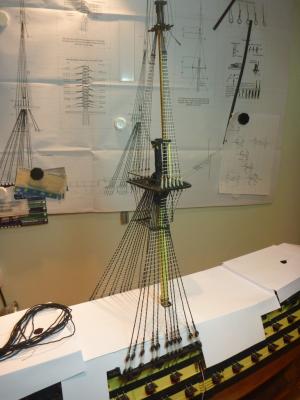
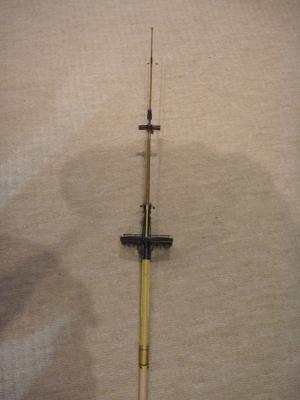
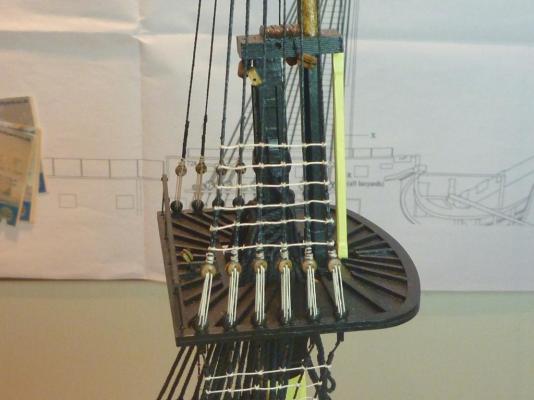
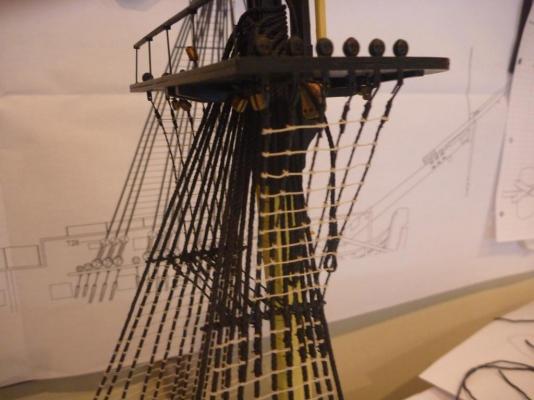
Tying ratlines for the top mast shrouds Then starting on the Topgallant shrouds And finished Which now means main mast is done for the moment, all shrouds and ratlines etc. Next to do the Formast, The 'hole' waiting to accept the mast Shipping the mast Alignment chaecked and gluing done ready to go to work on this mast now Shrouds prepared


- 84 replies
-
- 1
-
-
- finished
- caldercraft
- (and 1 more)
-
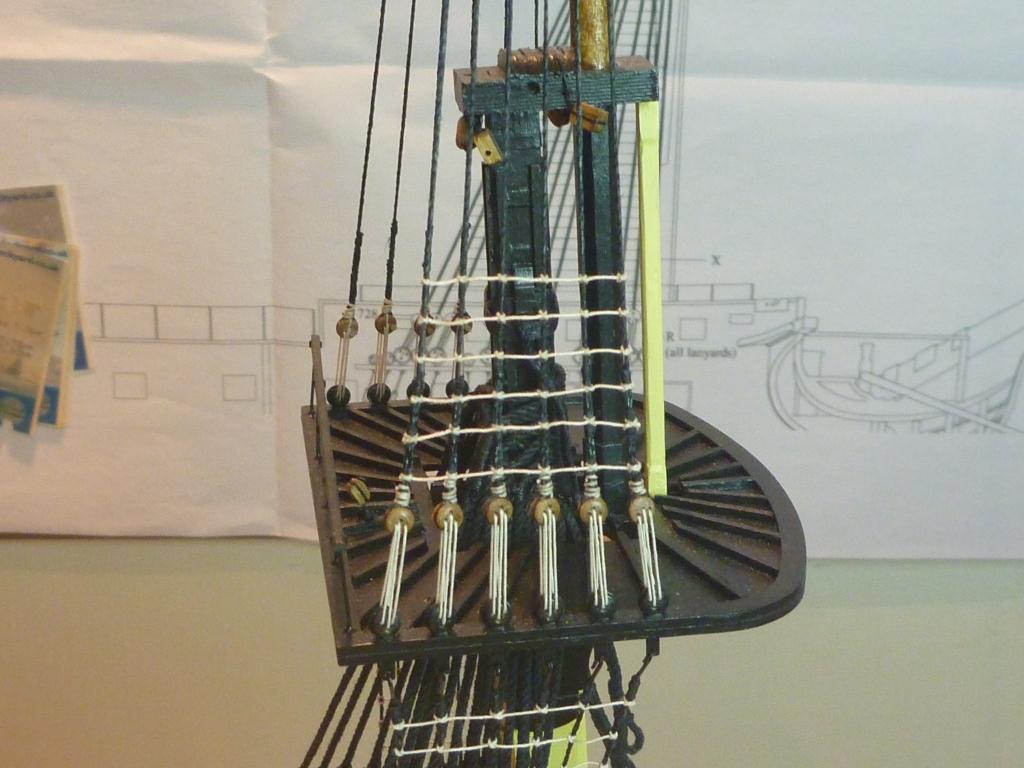
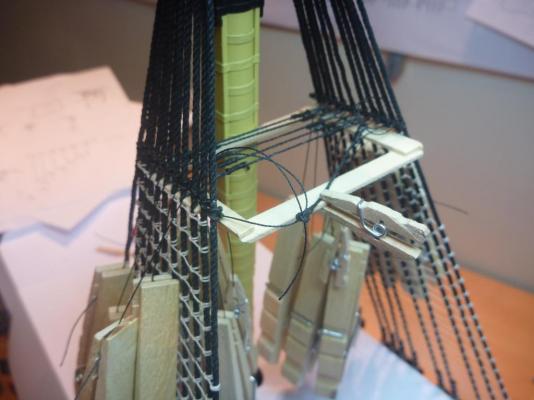
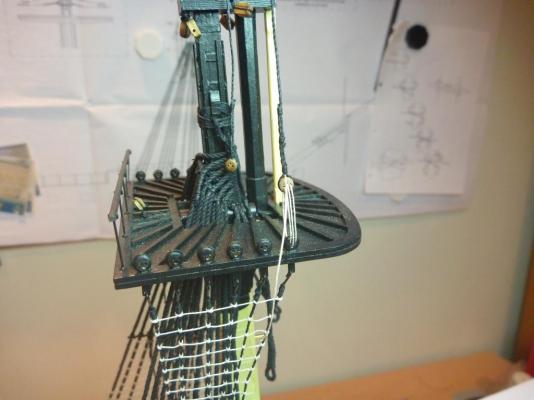
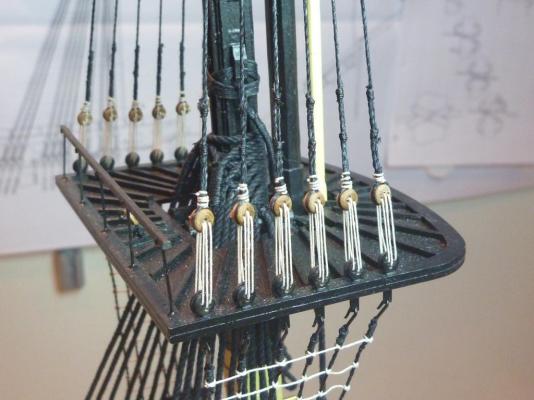
sorry it's been a while but here are some updates. To rig the catharpins i made up a little frame to hold the shrouds in place as I tied them off. Next was preparation of the futtock shrouds Futtock shrouds now rigged and ratlines tied. next the first of the topmast shrouds. Top mast shrouds on one side And then other side and lanyards tied off will continue on another post Nick


- 84 replies
-
- 2
-
-
- finished
- caldercraft
- (and 1 more)
-
Dremel, pretty easy choice Unless you allow hobby lamp, without that the rest would be immaterial Nick
-
Gary, yes afraid so, all top masts struck. However still tons to see, catch the section of original Trafalgar formast with a hole from a ball passing clean through I hope you enjoy the visit, is this a first? Give yourself plently of time. Nick
-
Gary I would wait a little yet, at least till the ports are lined. I made a small jig, - square to fit into the rebate left by the lining being 1mm inside the face. A drill bush or similiar in the square to try and keep the barrels horizontal to one another. Bear in mind the changing angle of the tumblehome in relation to the decks Nick
-
Hi Keith It's Caldercraft for me. It is a good scale, allowing a lot of extra detail to be added. It is sold as an 'advanced' kit so the manuals assume a certain level of knowledge. Having said that I find them comprehensive and easy to follow. The drawings are very good, 18 full size sheets. And I have had good response from them on damaged/missing parts Nick
-
Hi Glenn I will be keeping an interested eye on your log, best of luck with it. I'm following the same journey but started a few years ago. I'm sure you will enjoy the kit. regards Nick
-
Tony here is the 'stem', search the site for the cross bars etc http://www.turners-retreat.co.uk/1-tool-rest-stem Nick
-
Enjoying this thread. I have a few questions and observations. I have a through bore headstock which is great for longer lengths but be warned thinner material can somtimes result in a 'whip' which will break the material sticking out the back. i generall go for a three jaw chuck (four jaw is really fo centering odd shapes) i centre drill the other end and use a live centre, Interested to hear others choice? Unless using the original stock diameter I dont find exact centering a big issue, provided i finish turn in one setup it will all come out concentric. I'm interested in how small a diameter people find they can turn too. I have done to about 2mm but generall go to sandpaper before that. I found a great tool rest online, A stainless 'T' bar the rest part being round seems to improve the smooth chisel sliding. The other thing that I would like to hear is how people deal with long lengths, turn a bit and pull stock through or try in one hit? Thanks Nick
-
Shamrock Here's a method that works for me. Cut a couple of small squares form a piece of plastic sheet, those A4 paper wallets are good, provided the surface is smooth. Take a standard dress making pin and a piece of the line Push the pin through both bits of plastic, trapping the line beteen them and through the second hole. Push the plastic pieces together. wind the line applying small drops of watered down white (PVA) glue as you go. You can geta pretty small coil and the centre hole is only a pin diameter. After the glue has dried the plastic peels off easily and the coil can be mounted to hide the line. Nick


-
Glennard Here is a photo of one of Victory's dead eyes. You can see that the shroud was not that tightly secured around the dead eye. A triple seizing above the dead eye and the tension once tightened would ensure it stays put. On a model you might want the first seizing to be reasonably tight though. Nick

-
Gil I applaud your views on presentation. I am also making the JoTika Victory. I painted the rudder hinges and pins etc. black because it looks so much better. I saw the manual instructions to use copper but that hides the detail away, so black was a conscious decision. I also pondered on the 'perfect' yellow ochre, eventually decided that a mix would require constant accuracy when making a batch. I didn't want to risk subtle changes so chose a colour as supplied from a maker and stuck with it. Might not be perfect but I'm sure my local audience will never know. Great work by the way, THAT is the thing that blows people’s minds. Nick
- 755 replies
-
- 2
-
-
- finished
- caldercraft
- (and 1 more)