MORE HANDBOOKS ARE ON THEIR WAY! We will let you know when they get here.
×

pompey2
-
Posts
511 -
Joined
-
Last visited
Content Type
Profiles
Forums
Gallery
Events
Everything posted by pompey2
-
I find that one of the primary skills needed when it comes to rigging (on ship) is the use of 2 pairs of tweezers. Keep your podgy finger out of the way, they are a liability, practice tying knots, keeping and 'passing' tension beteen tweezers etc. Nick
-

OcCre planking system
pompey2 replied to hamilton's topic in Building, Framing, Planking and plating a ships hull and deck
Do you have a photo Hamilton? -
June 17th 1940 sinking of HMT Lancastria - St Nazaire. The largest ever loss of life on a single British ship sinking. Jammed with people / soldiers escaping Europe two weeks after Dunkirk. Estimates between 4,000 on 9,000 people on board, just 2,477 survivors, one of which was my Grandad. Official capacity 2,200 Hit by three bombs as it tried to clear the coast, sunk in twenty minutes. A horrible story if you read it in detail. N
-
I've tried the cheaper ones and binned them. I now use the optivisor and i think it's great. You can get a range of lenses to match focal length against magnification. Don't be tempted to just go for the higher magnification you end up working an inch from you workpiece. Also a limited field of view can be a factor, easy to break the fragile bit just out of the field of view. Nick
-
Glenn Copper plating looking great, one hell of a task but very satifying once done. Enjoy your visit to Pompey and the Victory. If you need any advise on Portsmouth - transport/what else to see etc then just drop me a line. Nick
-
Metal vs. wood files - how to tell the difference
pompey2 replied to rtropp's topic in Modeling tools and Workshop Equipment
The impregnated files (diamond and similiar) are really only for wood. Cleaning can be done with a wire brush. -
True enough David. On my Vic, come hell or high water one of them wil end up on the davits. I want to show the boat there but also want to clear a space above the skid beams to show the detail below. Nick
-
David. Great work, your Vic sure looks nice. It's great to see a near completion ship, so much to look at. A real credit to you. Nick
- 439 replies
-
- 1
-

-
- victory
- caldercraft
- (and 1 more)
-
D Day - 70th Aniversary. My hat off to all of them. Lots of stuff going on around here in Southsea, few interesting planes about. I'm going to dinner tonight at a pub in Southwick. The old landlady there told a story about serving Eisenhower his G&T and Churchill his Brandy. Southwiack house was where a lot of D Day was planned and directed from and they were both there during the invasion. The map room can still be visited with the original wall map. http://www.gigapan.com/gigapans/103188 The two guys who created it (toy makers) where then held in Southwick House until September for security. I know a lady that lived in Southsea at the time, just before D Day her and a friend were amazed at the sheer number of tanks gathering. So they decided to follow the column back to see how far it went. Several hours and fifteen or more miles later they gave up and came home! Nick
-
Chris Great looking ship
-
Further thought, hell I could be a golfer. I would be spending more than my kit cost just for a set of those long bat things! Brrrrrrrr what a thought
-
Ageed on Caldercraft. But remember it is a lot of money compared to others, but worth it IMHO My workrate is slow due to limited free time, but working it out I come to about 30p and hour. Not many hobbys can be had for that sort of cost. So my opinion is always invest whatever it takes for the best, hence my Caldercraft opinion. Nick
-
Hi HOF Is the problem that you need to reach in behind the shrouds when threading and knotting? If so then try using two tweezers with angled ends. you can normally reach through one gap and pick up the thread pushed through the adjacent gap. That way you do not need to reach behind the shrouds at all. A clove hitch tied off in front completes things. Hopefully working from the front provides much more room even when fully rigged. Nick
-
Ageed Chuck. a lot is about the look of the finished item and how others see it. To the untrained eye a coil will look very ship shape and seaman like, whilst a loose laid out line might look pretty messy. I guess it depends on the audiance and if you want to expain that it is actually more realistic. Each to his own. Nick
-
I have tried using black thread. The first impression is that they look great. Then tried sanding and of course the tread tears and fluffs up - horrible, start again. So I have alays stuck to a black permanant marker (after testing)
-
Certainly done to show the framing, and by comparison the planking is a lot cleaner in termination.
-
I use a small lathe but that's partly because i really enjoy wood turning and it gives me an excuse. The main problem is the workpiece pushing off as the dimaeter gets smaller. So I built an adjustable steady which helps. But anything smaller than about 3mm needs mostly sandpaper. To control a taper I divide the taper length into 'portions' then do the same for the diameters (same number of portions). Then turn/sand to the required diameter at the required distance. gets pretty good results, can normally hold to within 0.1mm Nick
-
Hi Erik Been catching up on your log. It's all looking real good. I remember the feeling once the sanding was done, a relief that it ended up a nice clean shape. The only thing I remember about the galleries etc was to keep repeating the dry fitting, it is a very tricky area. I found it very hard to get any effective clamping across the bottom of the rear pattern (pulling it into the ship). If I did it again I would make up some sort of bracing which I could use to exert a force from. Hope that helps, enjoy Nick
-
Looking good Jerry. It really comes together as the rigging and spars start to grow. Nick
-
Reeving the deadeyes is one job I really enjoy. loose fit all the lanyards then adjust the tensions to bring the top eyes into line with the correct spacing, great fun Nick
-
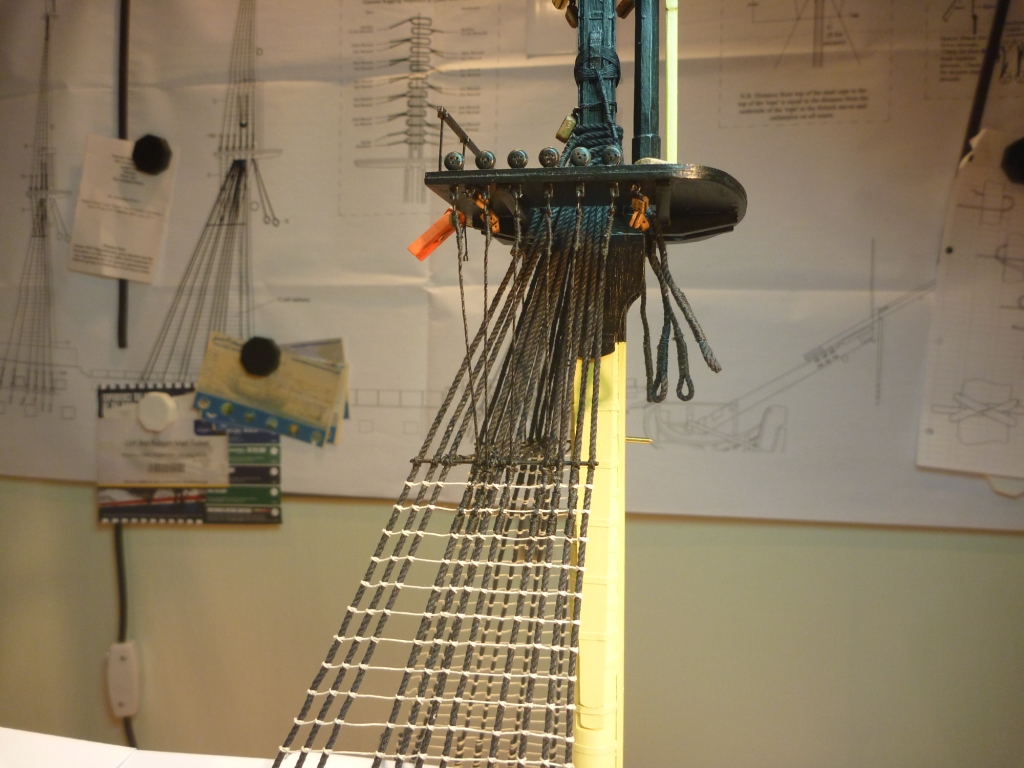
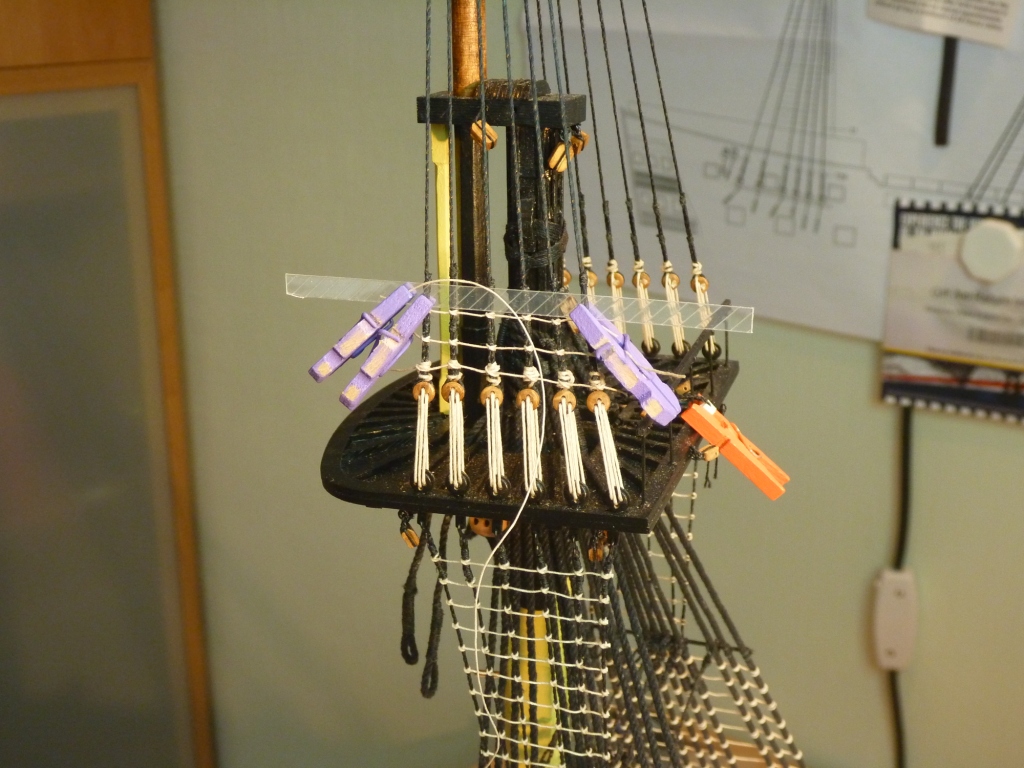
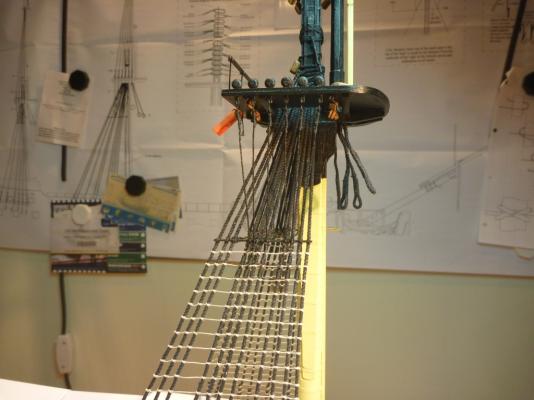
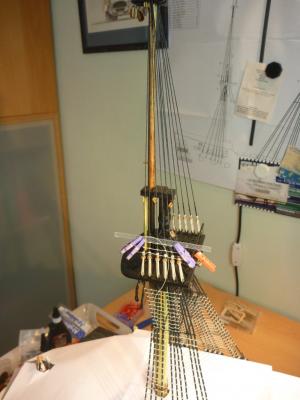
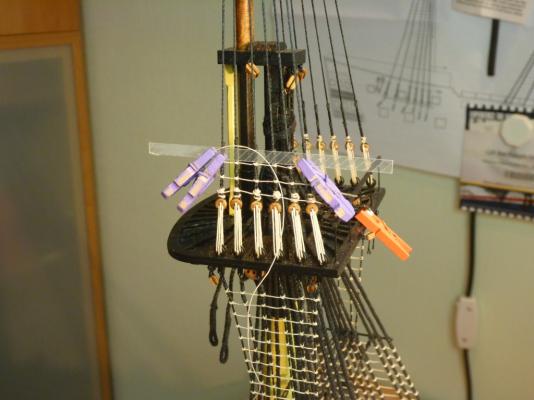
Hi All. Thank you all for the generous comments. Here is a brief (very) update. All lower shrouds and ratlines done. Here we are tying the Fore mast Futtock shrouds Then getting the Fore top mast shrouds in place. And currently doing the ratlines for same. Thats it for now. Nick
- 84 replies
-
- 2
-
-
- finished
- caldercraft
- (and 1 more)
-
Grant great detail, you are a god amonst men, thanks And don't think I wouldn't visit if the Admiral didn't have other plans. Nick
-
I wonder if somebody can help me out a bit. I'm working on Caldercrafts Victory and have reached the stage where i want to attach the shroud cleats. The instructions say 'see sheet 18' for positions. Sheet 18 only has a vauge note, no positions. No other drawing shows the positions. I have 24 cleats in the inventory. So my question is, can anybody steer me towards positions and quantities for the cleats? Thanks Nick
-
Looking very nice Patrick. Lovely work Nick
-
cable laid vs rope (left vs right twist)
pompey2 replied to davec's topic in Masting, rigging and sails
Nice explaination, thanks Bob