HOLIDAY DONATION DRIVE - SUPPORT MSW - DO YOUR PART TO KEEP THIS GREAT FORUM GOING! (Only 13 donations so far - C'mon guys!)
×

pompey2
-
Posts
511 -
Joined
-
Last visited
Content Type
Profiles
Forums
Gallery
Events
Everything posted by pompey2
-
I have a tool similiar to the 'linisher' shown. It is from Sheppach and they call it a 'belt and disc sander. Good for heavy duty work but I wouldn't use it for anything delicate. Removes material at a hell of a pace. Nick

-
 Coming on nicely Jerry. Interesting isn't it that each task moves from 'cant wait to do xyz' to 'this if fun' to 'wow there's a lot to do' to 'cant wait to do ABC' Nick
 -
Announcing the Model Ship World Ship Kit Database Project
pompey2 replied to SkerryAmp's topic in Wood ship model kits
Adam How about adding '1st-3rd Rate' as a ship type? Nick -
Announcing the Model Ship World Ship Kit Database Project
pompey2 replied to SkerryAmp's topic in Wood ship model kits
Hi Adam Great idea Here's a thought, if members sumitted PDF's of build instructions, could they be hyperlinked to the appropriatte place in your spreadsheet? I guess there may be a copyright issue but sure would be helpful Nick -
I love the idea of designing and making something like this. But I really need to spent the time tying ratlines. Dooh Nick
-
John That old bug is biting. Buying tools to improve things 'next time' is a sure sign. Sorry mate but there's no hope for you. I like the choice of ship too very elegant those romans. Keep up the good work. Nick
-
Nick That's a great little model. I can see the learning process in action from the things you are doing differently now, like reproducing metal parts in wood. Great job Nick
-
Where Do You Keep Your Working Plans
pompey2 replied to BubbleHead's topic in Modeling tools and Workshop Equipment
TJ, those plans look familiar. i have the same up on my wall. I have a sheet of steel on the wall. Then i use whiteboard magnets to hold up the plans. One good point is that I can put up any other paper bits and pieces - photo copies from a book, sketches, lists etc. Nick -
I have a metal one but to be honest it's been at the bottom of the toolbox forever. Maybe i will also put it to good use one day. nick
-
As pulling out is a horrible scenario I also use a blob of 2 pack epoxy to fill the gap, never can be too careful. Nick
-
Not sure if a link has appeared on the site before. But take a look at this. It is time delay type animation of the full building of a ship, every detail. Fantastic piece of work, both the modelling and the animation. http://www.youtube.com/watch?v=6JUS9zbd00o Nick
- 1 reply
-
- 1
-

-
Help with question regarding HMS Victory at Trafalgar
pompey2 replied to AllanP's topic in Nautical/Naval History
Thanks Pete, just registered. -
I guess that if you see us all as a logical continuation of a long established model boat building tradition then you wouldn't generally use paint. I agree that my greatest enjoyment is with the working of a wood model, that's what started me off. Having said that here I am doing a Victory and fully painted. There should be no reason why an individual doesn't mix and match as they think appropriate. Good topic! Nick
-
Great work Anthony, I'm enjoying this immensly Nick
-
We just got our first 3D printer in the office. very simple little thing and very cheap circa $1600 (£1060) Surely the future of manufacturing, we currently make(outsource) quite a few very complex parts in some exotic metals, parts that would be impossible to machine conventionally. Im would like to resist but it's tempting to think that in the future, when I get a very poor quality casting for a part (figure head/ deck furniture) that I can model it and 3D print it. It seems to defeat the point in some ways, however the finish results could be greatly improved. This sort of cost also means it falls into the budget for the more serious home user. I find this stuff really interesting, history in the making. Nick
-
It's horses for courses. I find that the more detail on a model the better it looks, the higher the challenge and naturally the fruitier the cursing. Nick
-
Interesting replies regarding adhesives used. I use two part epoxy for anything important like this. I have a basic distrust of CA. Nick
-
I heard an almost identical story during a recent visit to HMS Alliance, Royal Naval Submarine Museam, Gosport. A medical orderly having to carry out an emergency appendectomy onboard the sub. The guide described telling the story a few years ago to a tour only to find out that he was addressing the orderlies son. Nick
-
Hi Derek Saw your post on my Vic, many thanks. Just been taking a look through your log (only dipped in a bit before) Great Job! I see you say you enjoy the masts, same here. I have done most of the turning on my yards/spars but not a lot of fitting out or painting, so you are ahead of me there. You must be getting close to the rigging now, another fun job (although ratlines can be e bit of a ballache) Your Vic is a credit to you, I will be keeping an eye on it. All the best Nick
-
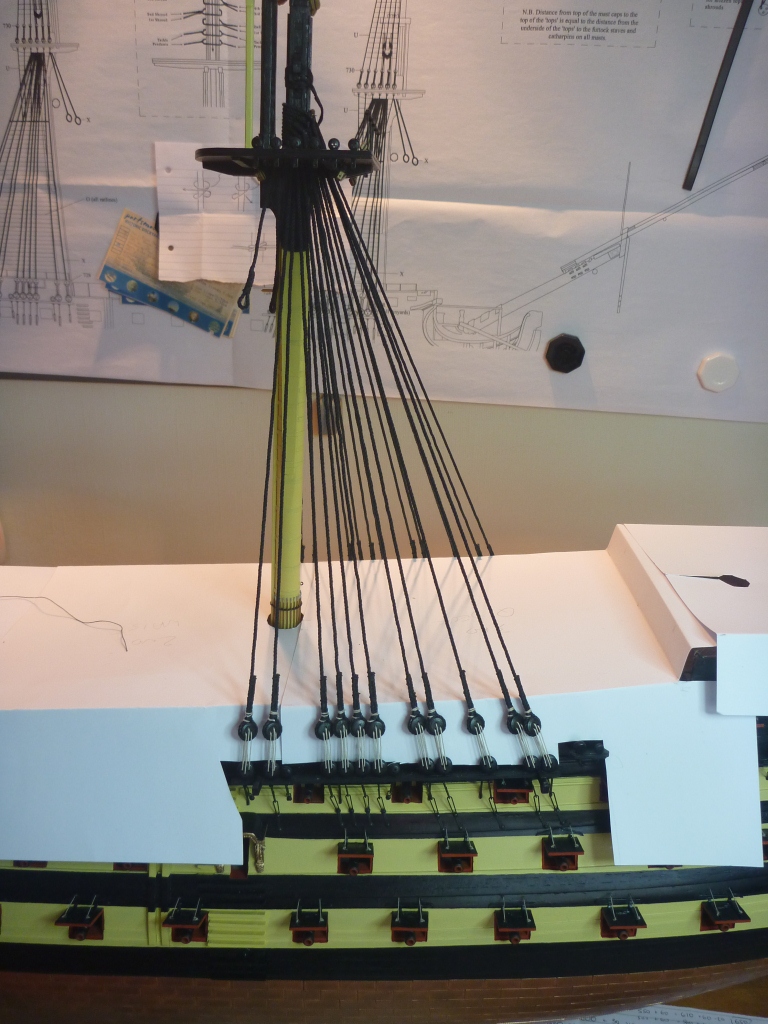
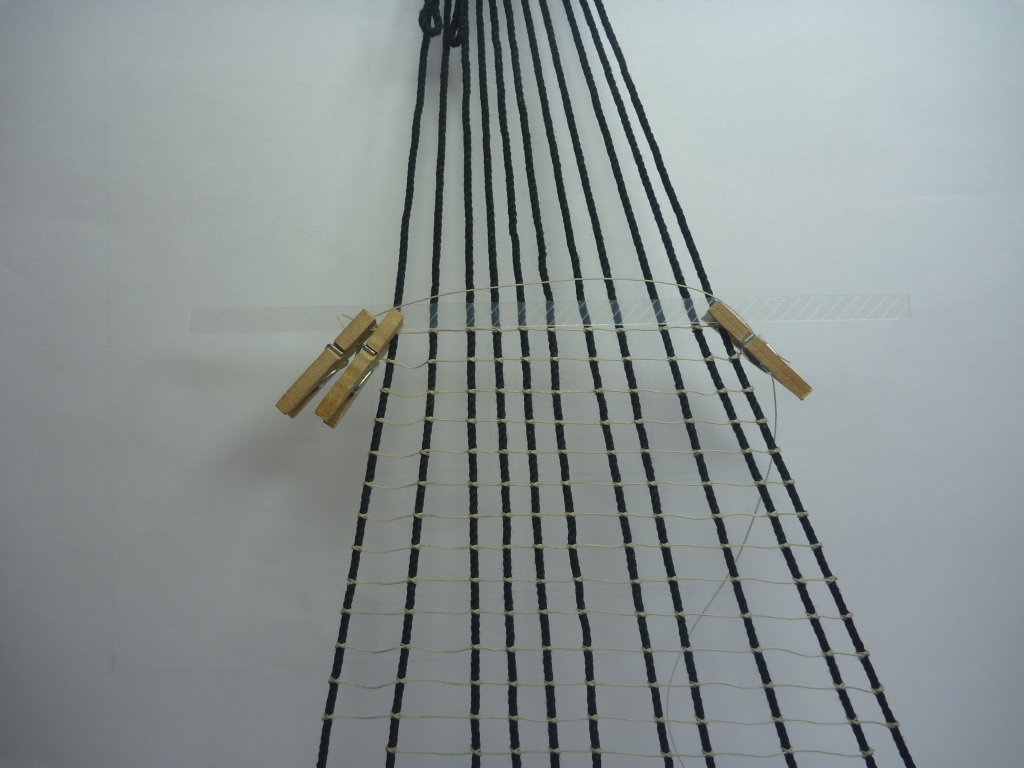
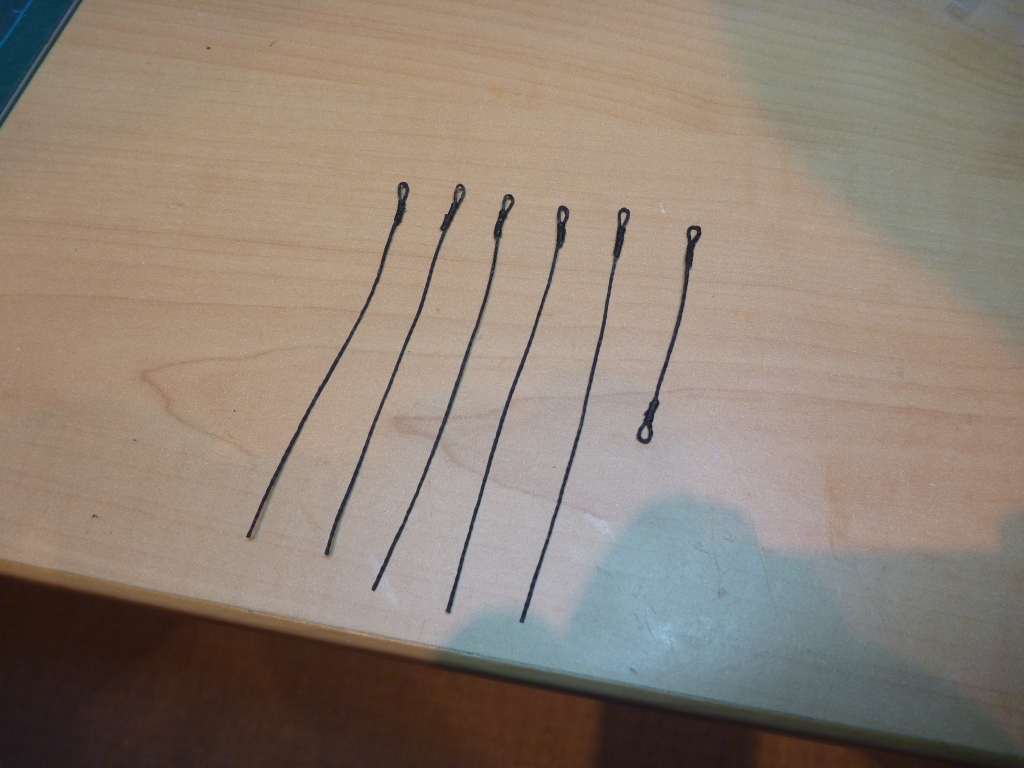
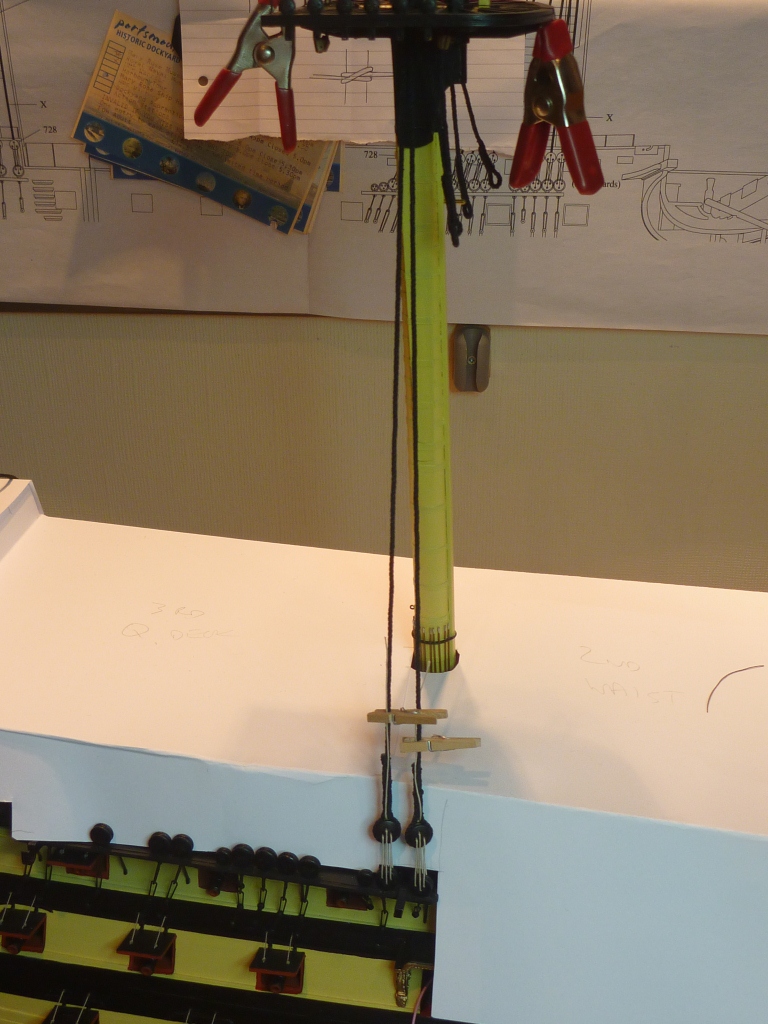
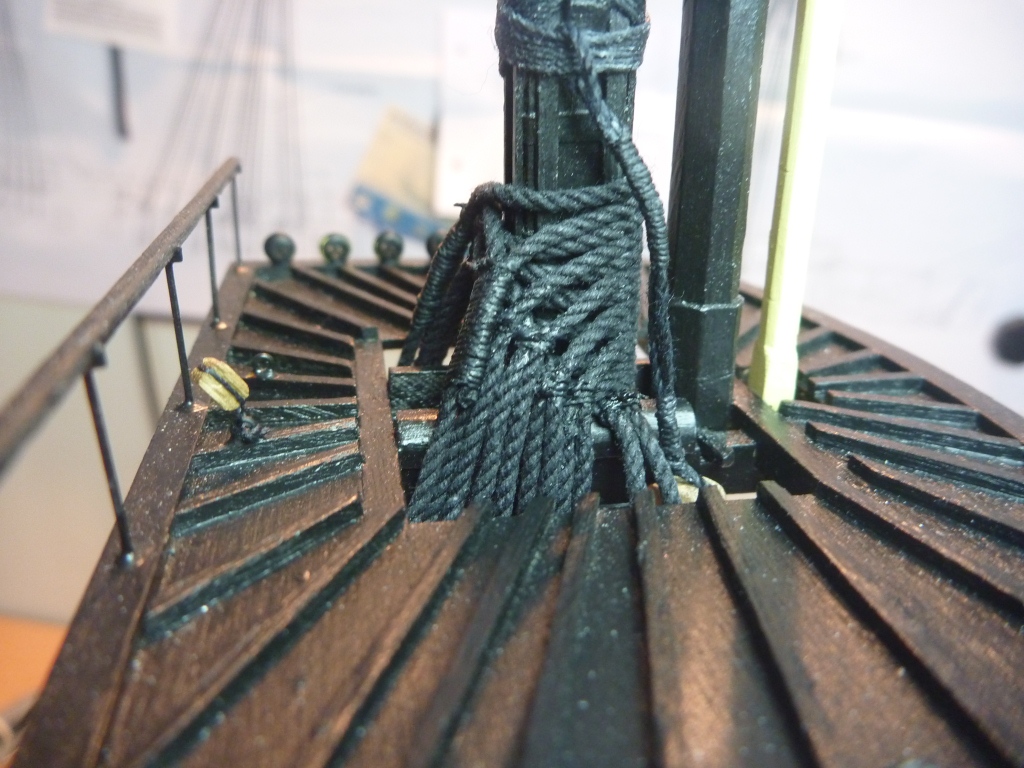
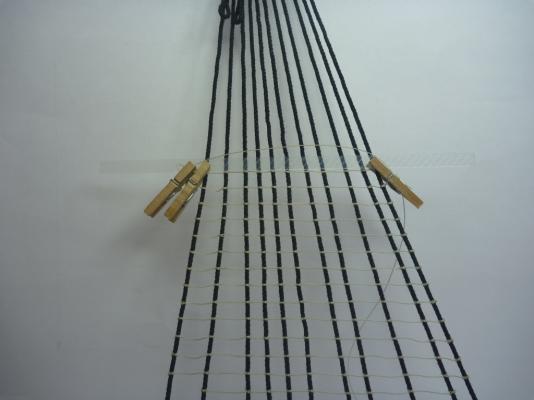
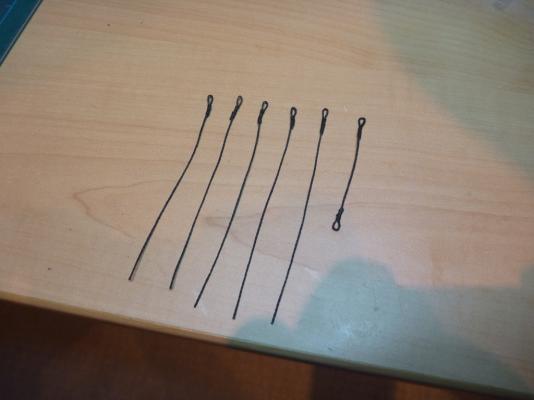
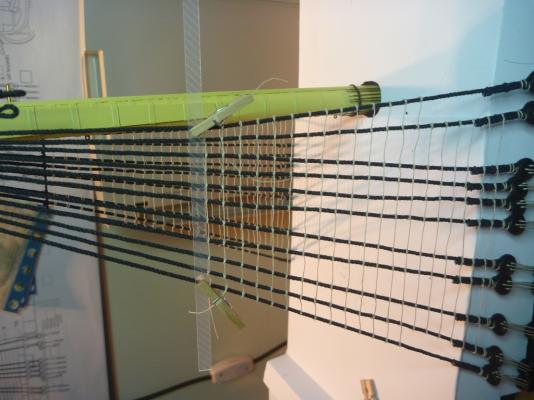
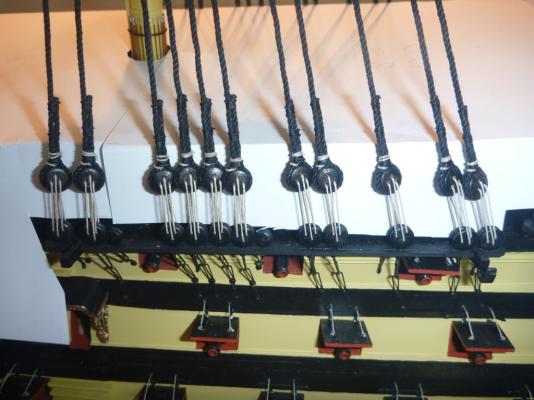
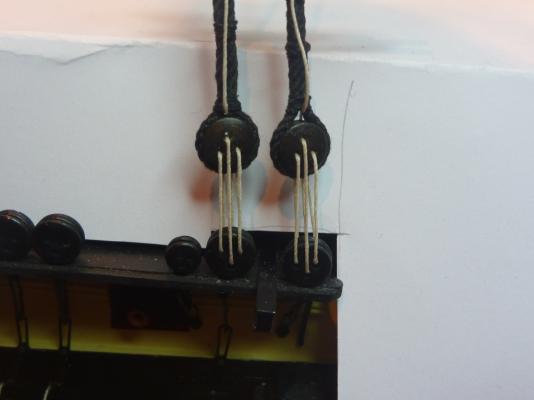
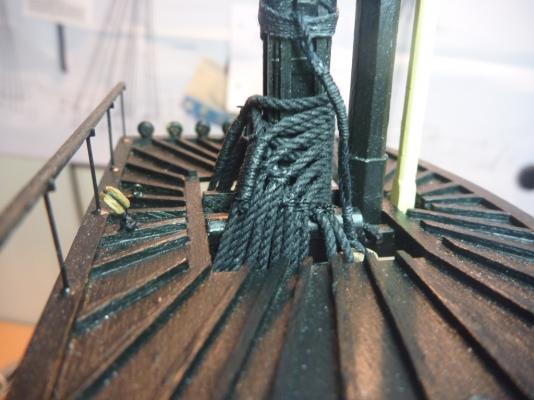
To continue Shrouds done for the main. Ratlines well underway. part way up one side. I use a piece of rigid clear plastic stip cut to width. That helps space the lines. I also find these tiny clothes pegs are a great help. For those interested they seem to appear in card shops around Xmas. They are actually for pinning up Christmas cards. Working my way up the second side. You can just see the futtock stave tied to the shrouds on the other side. Just to break it up a bit I have been getting the Cartharpins ready for fitting, here they are mid preparation. That is it for now. Last night i tied of the last of the ratlines for lower main. Will fit a second stave and rig the catharpins next. Watch this space as they say. Nick

- 84 replies
-
- 2
-
-
- finished
- caldercraft
- (and 1 more)
-
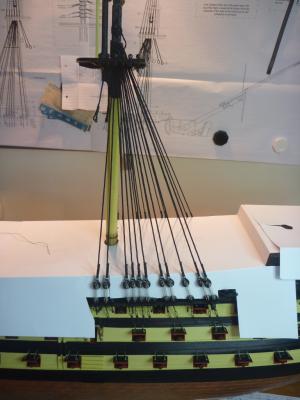
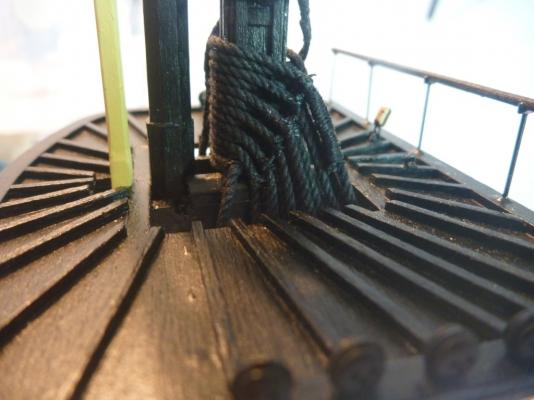
So, it's about time I posted an update. I decided to rig the masts one at a time in the early stages, that is lower shrouds and ratlines. Started with the main. First job to hange tackle pendants, a pair each side. Next start on the Lower shrouds, a pair at a time, Starboard then Port. This is the first pair mid rigging. Before getting started I cut and shaped pieces of light white card and covered all the open decks. I find this has a lot of advantages. Keeps dust of the deck details, stops me dropping rope cuttings, blocks, tools etc down holes. It also helps stop me snagging on details with loose clothing etc. Its a good background to work against, and finally makes a good work top for lighter items. Anyway back to progress. Loose rigging the first pair of deadeyes. I used two little jigs to hold two pairs of deadeyes apart whilst rigging the shrouds. Jumping ahead a bit - all shrouds now rigged and lanyards secured. The shrouds around the mast above the bolster, couple of shots. Ever noticed how dirty your work looks under the scrutiny of a close up camera shot? I will continue on a second post.


- 84 replies
-
- 4
-
-
- finished
- caldercraft
- (and 1 more)
-
Larry Chathams a good choice, great rope walk Nick
-
Good general advise about keeping the Admiral happy, mind you Max said she had just got a new sewing machne, so careful dont want to spoil her (that will get me in trouble). Lots of good advise about reserving judgement on tools. But of course if we only bought tools that we could justify on a use/cost basis then we would all have empty slips. ....Ooooh look a shiny thing, and what straight lines it cuts, gotta have one, 'yes darling of course I will get plenty of use from it' And the end of the day it's also about what keeps you engaged. Nick
-
I'll be keeping a eye on your build as well. problem is that all the good seats have gone, only rear circle left. best of luck