MORE HANDBOOKS ARE ON THEIR WAY! We will let you know when they get here.
×

pompey2
-
Posts
511 -
Joined
-
Last visited
Content Type
Profiles
Forums
Gallery
Events
Everything posted by pompey2
-
 Hi Nick Welcome, always good to see another Vicory, Ii hope you are enjoying her. Your Arizona looks great by the way. Nick
 -
Starting Solidworks
pompey2 replied to AntonyUK's topic in CAD and 3D Modelling/Drafting Plans with Software
Hi Antony. Same here, I have been using SolidWorks for my 'real' job for about 8 years. If I can help please feel free to ask. My thoughts are that using 3D is certainly harder that 2D (AutoCAD etc) but a lot more satifying and ultimately a lot more useful. Nick -
Got to agree with the comments on Caldercraft, good and extensive plans, pretty fair instructions, detailed parts list.
-
There is another interesting spur to this thread. How often, with a kit do you find that you reach a point and are unsure on how to proceed? The plans are unclear, the instructions don't make mention. If your ship was a 'real' one then you can do the reasearch and resolve the subject more often than not. If it is still a 'real' one (Vic, Conny, Vasa, Cutty Sark) then you may actually find pictures as well. So your task is a lot more satisfying if you can resolve these issues correctly. Nick
-
I find a pin vice to be a must have. When drilling on the bench most options work fine, I use a dremel mostly. But for there are occasions when you need to drill a hole directly on the model. When that model has furniture and rigging to aviod you really dont want a clumsy dremel plus wizzing collets. So threading your hand in carefully and slowly using a pin vice seems to get the job done in the safest manner. Nick
-
Geoff You are dead right, that was a good spot. I recall at the time I found it difficult to get the castings to fit correctly and tried all variations. Not sure now if I opted to go for the one that fitted but was wrong or just missed the completely obvious. Oh well, theres another thing to sort out Thanks Nick
-
Nick A diificult call on the clamps. One thing I would say - your need for larger range clamps is mostly on the earlier stages of build. Later on you might find you need a lot of smaller ones. Not sure if that helps much? Nick
-
I have tried hand held vacuums but have now settled on a full power vacuum. Because of the extra 'suck' you can afford to hold the nozzle a little way of the ship to avoid catching delicate items. So i hold the nozzle and with the other hand use a soft bristle paint brush to loosed/move the dust The vaccum then does a pretty good job of snatching away the airborne particles. Nick
-
Alexandru, Outstanding simply outstanding! Nick
-
Hi Patrick I've been enjoying your log, thanks Victory is coming along very nicely, a great job. looking forward to seeing latest progress. Nick
-
Hi Jerry Hope you had a good holiday. Victory looking good. Always a good feeling finishing a long job like coppering. Step back and enjoy the finished article, then 'whats next?' whcih is always a nice question. Enjoying your log! All the best Nick
-
Hi Rob Real sorry to hear about the problems in Calgary, glad to hear you are back in now. I hope you and yours are all ok. I remember to copper tiling, seems like it will never end. But the thought of new things to progress to keeps us going. I am now just starting the rigging on the main. All the best Nick
-
Hi Nick, another Nick here. I did built this kit a few years ago and still have the finished ship. But I'm afraid there is no build log. If there is anything I can do to help then please just let me know. best of luck with the build, you changes sound like a good challenge Nick
-
Here is a link to my build log which has some photo's of the finished netting http://modelshipworld.com/index.php?/topic/2415-hms-victory-by-pompey-caldercraft-172-1805/page-2#entry71388 Nick
-
Kevin here is a link to my post expaining my netting. (if I got the linking correct) Nick http://modelshipworld.com/index.php?/topic/2463-creating-hammock-netting/#entry63802
- 84 replies
-
- 1
-

-
- finished
- caldercraft
- (and 1 more)
-
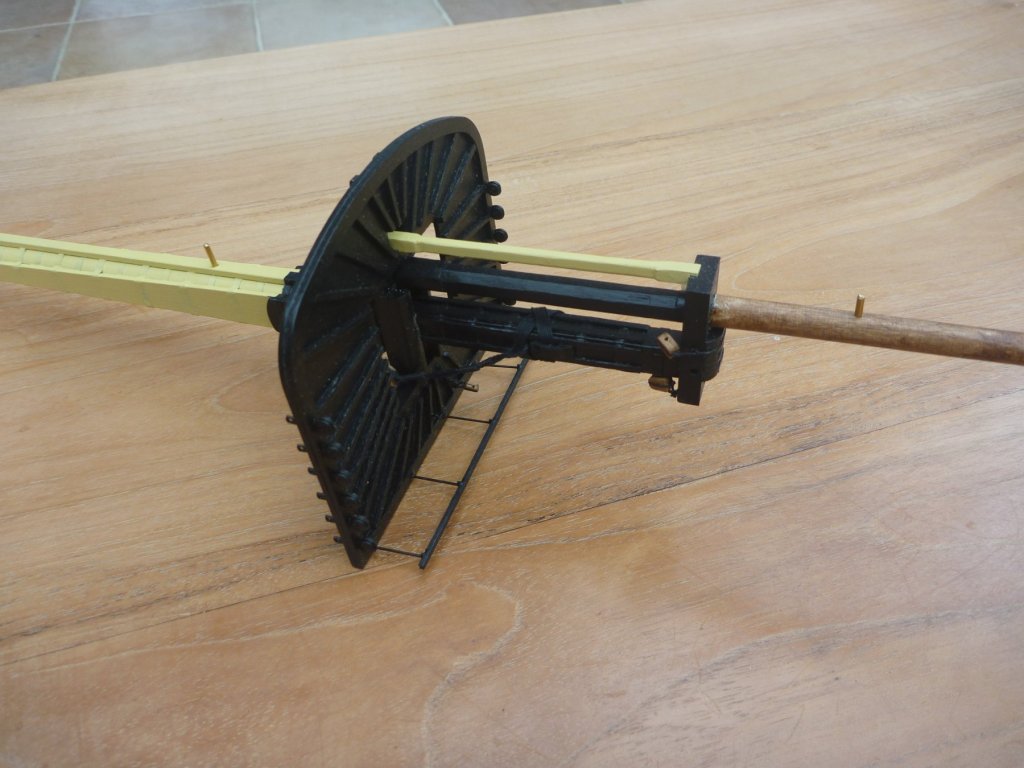
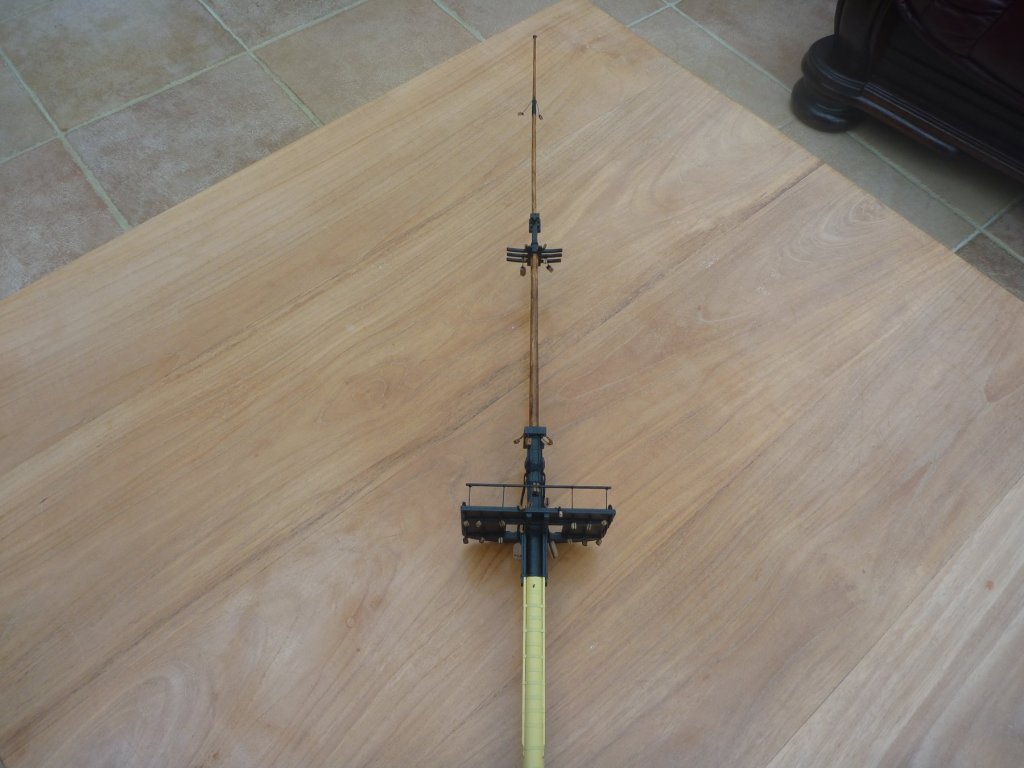
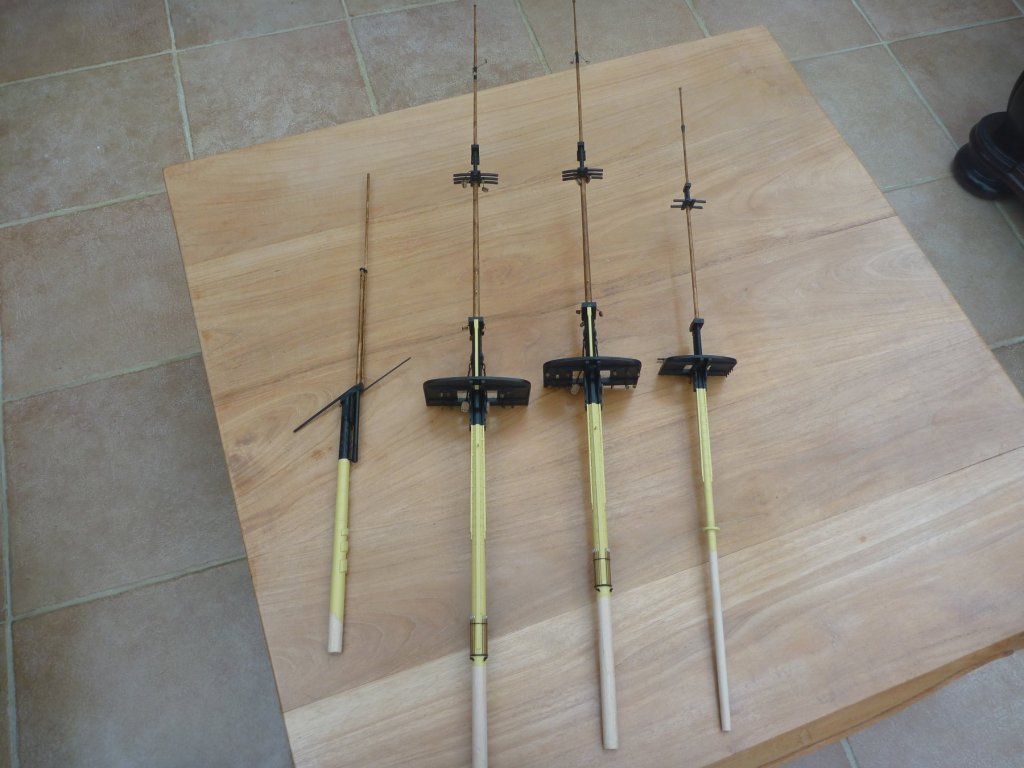
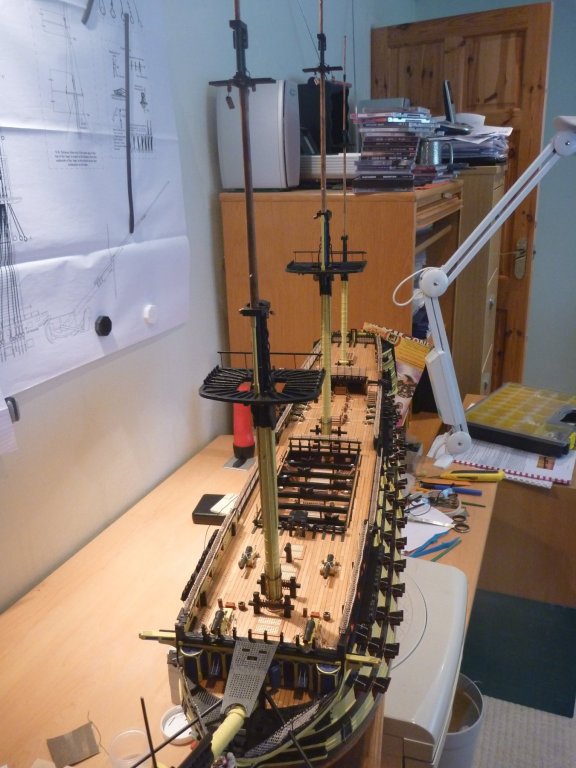
Finally my recent work. I have finished turning/shaping all the masts. They are all assembled and painted. Main and Fore masts prepared with rigging etc. Dry fitting all the masts to the Hull Starts to give a good impression of how big the finished model will be. Now where could I possibly show it, hmmmm, might have to move house. Another view with masts shipped. Finally I am now making up the Shrouds with a deadeye at one end in preparation. I have made up this litte fixture to allow me to put in three small seizings. Here's a finished one. That's it for now, enjoy Nick


- 84 replies
-
- 1
-
-
- finished
- caldercraft
- (and 1 more)
-
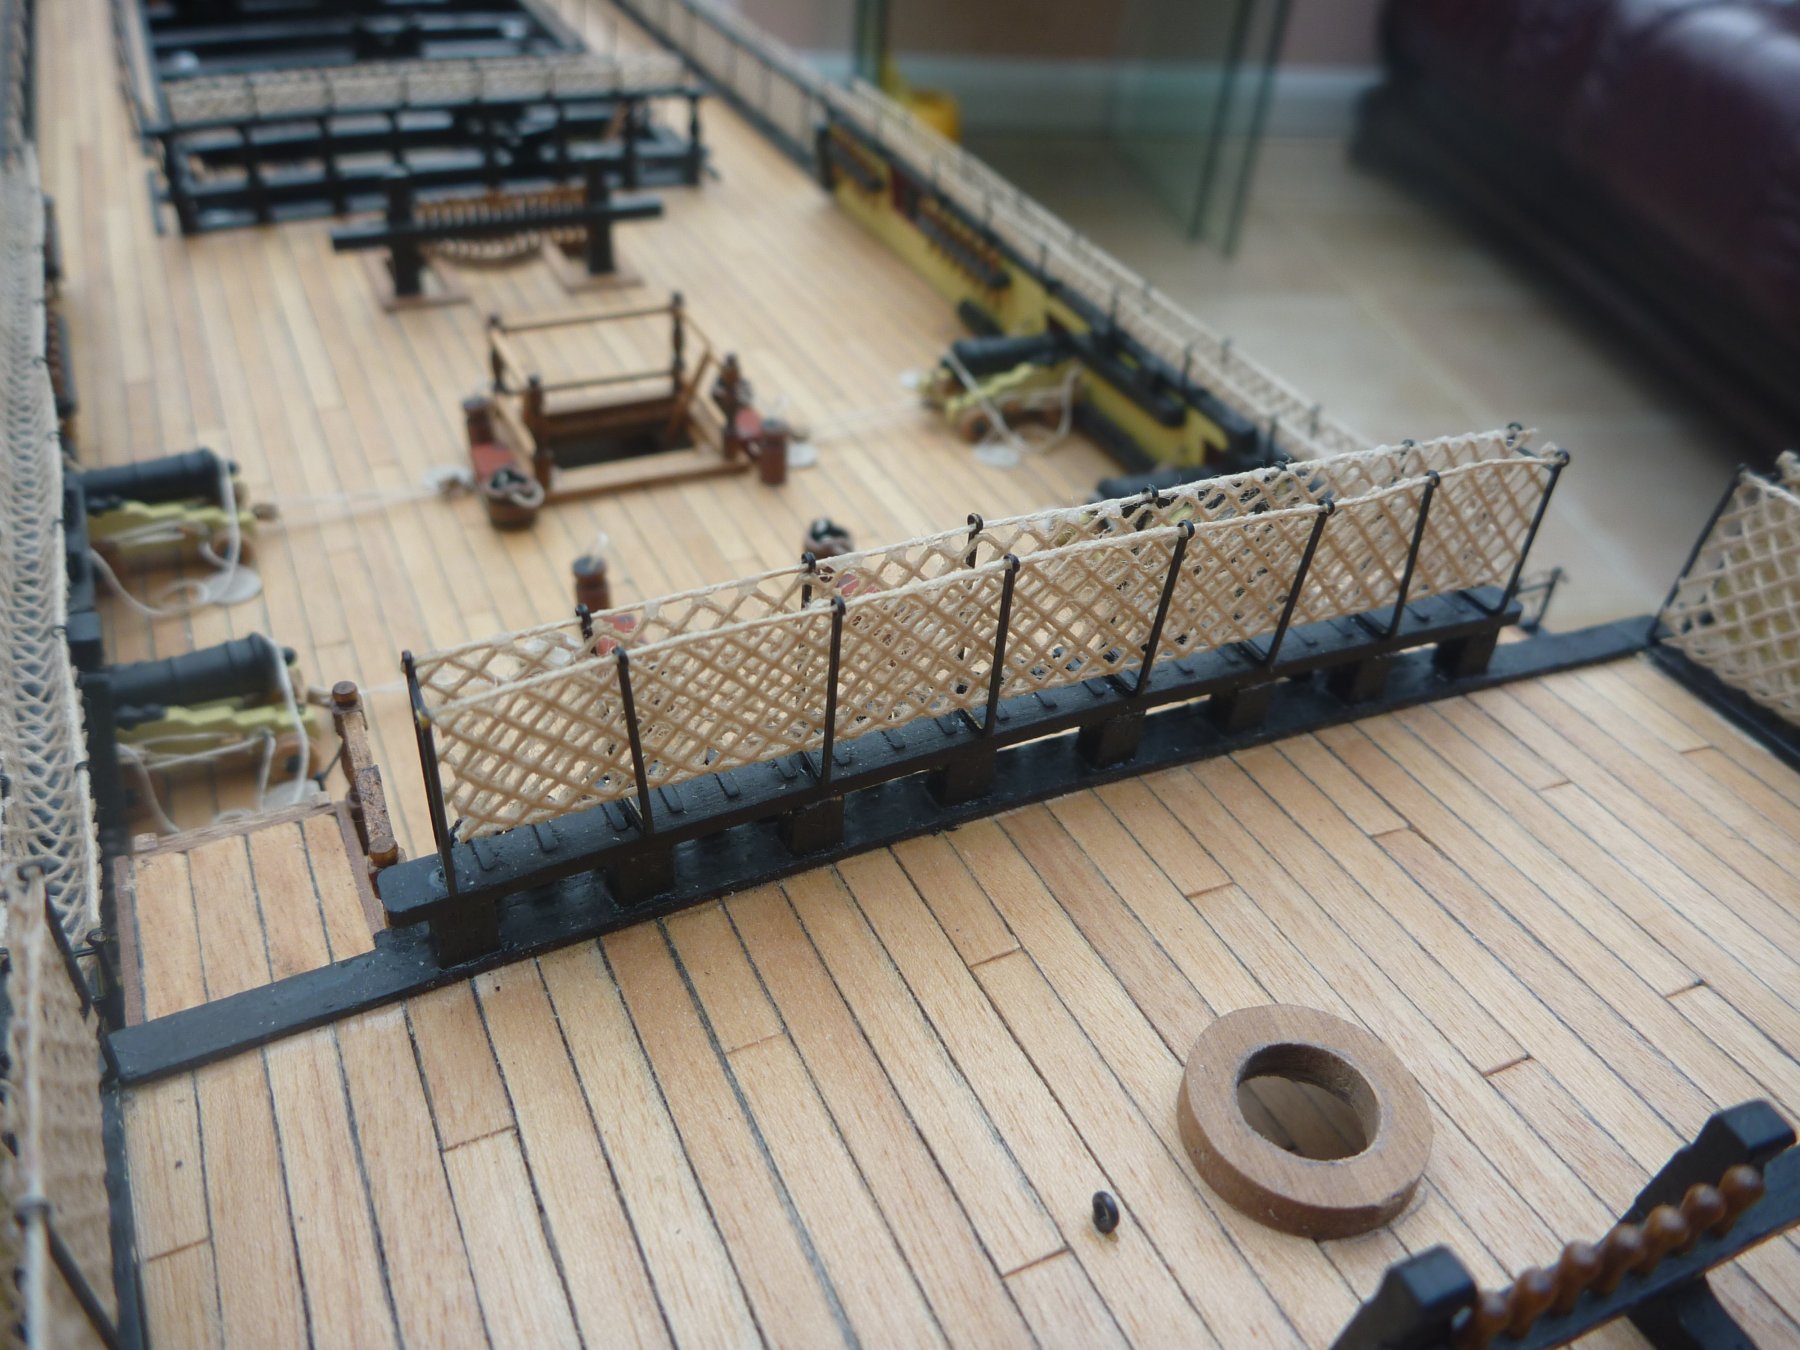
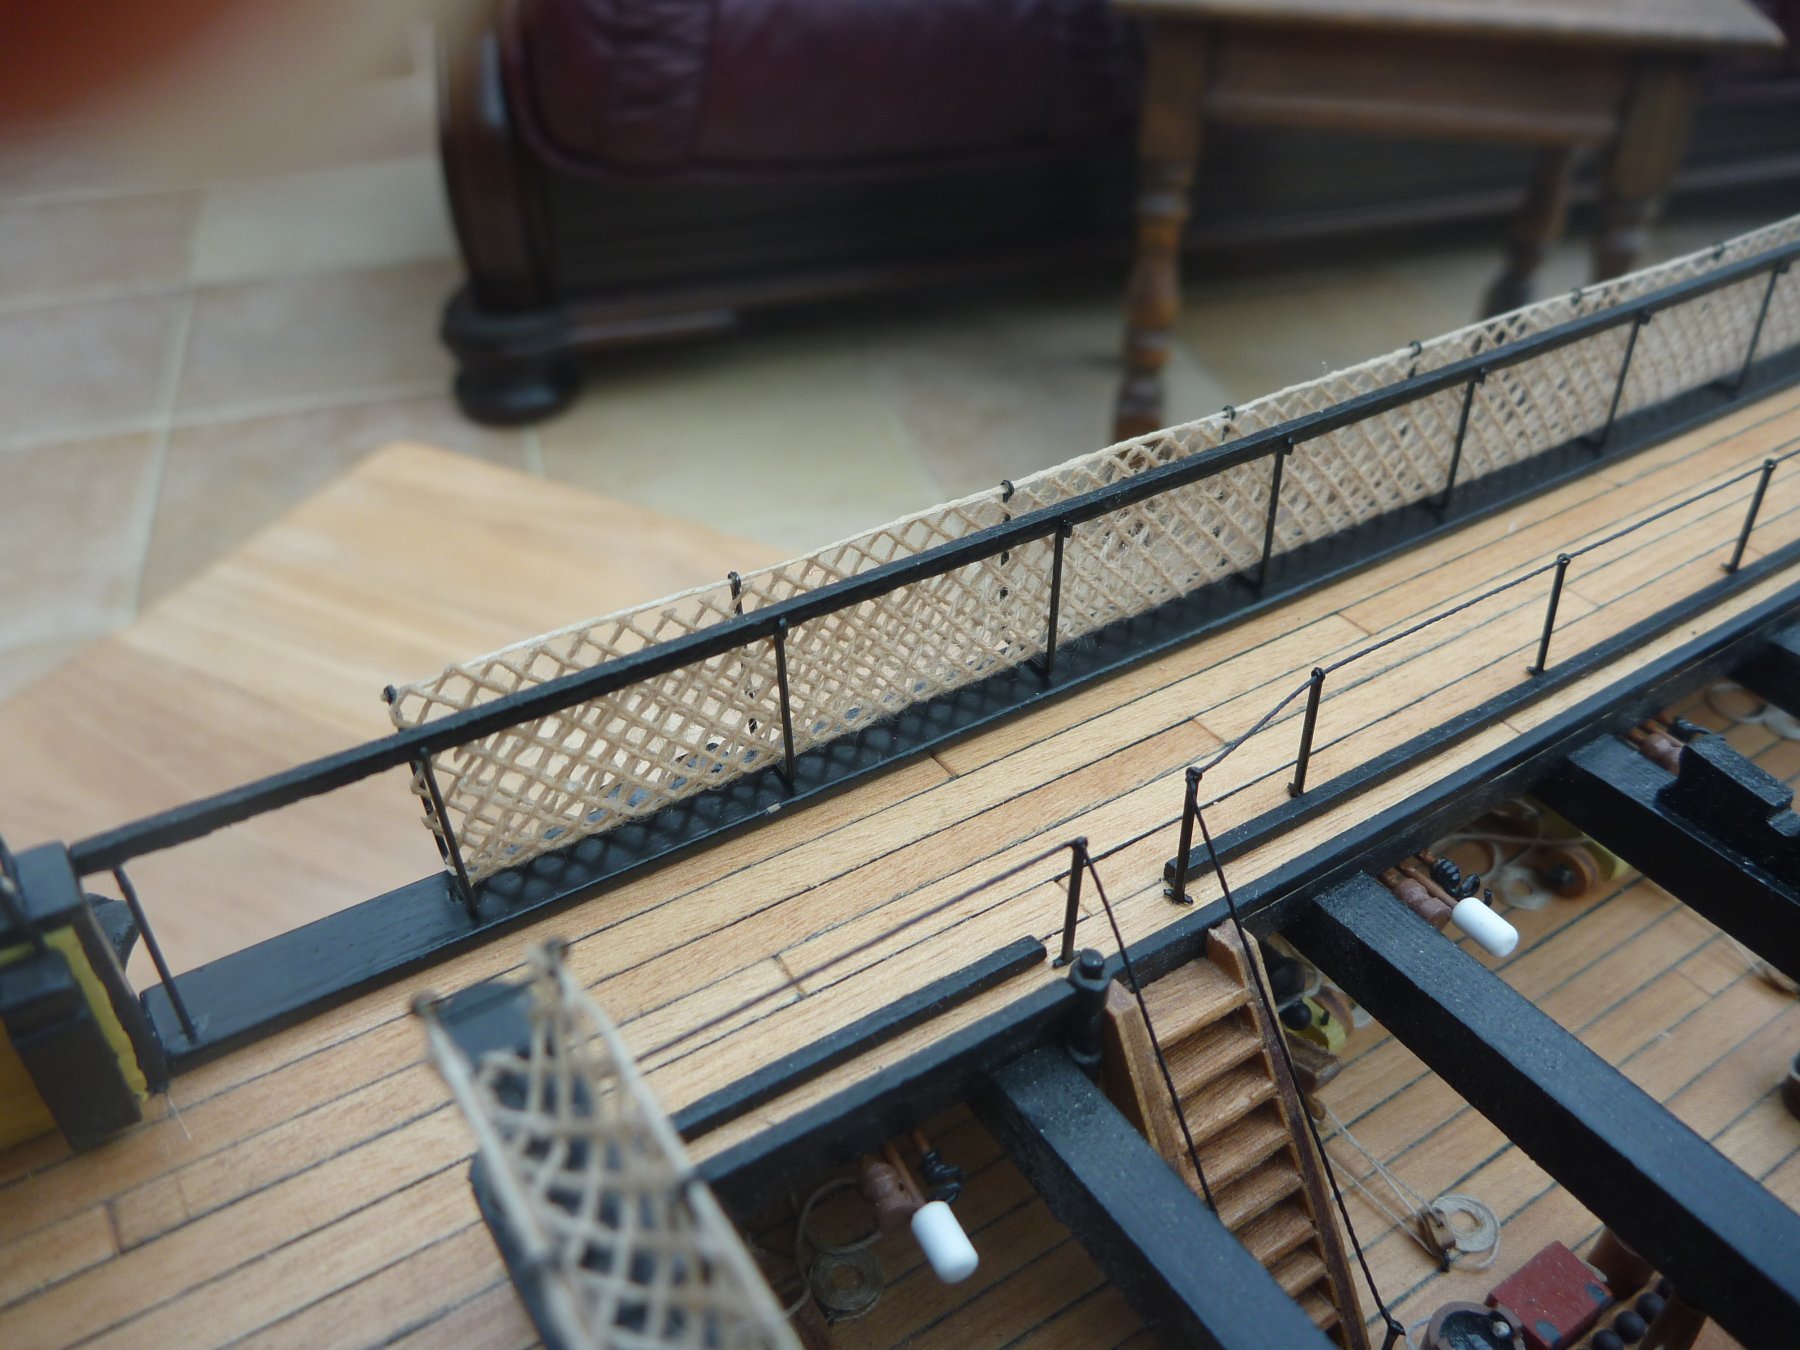
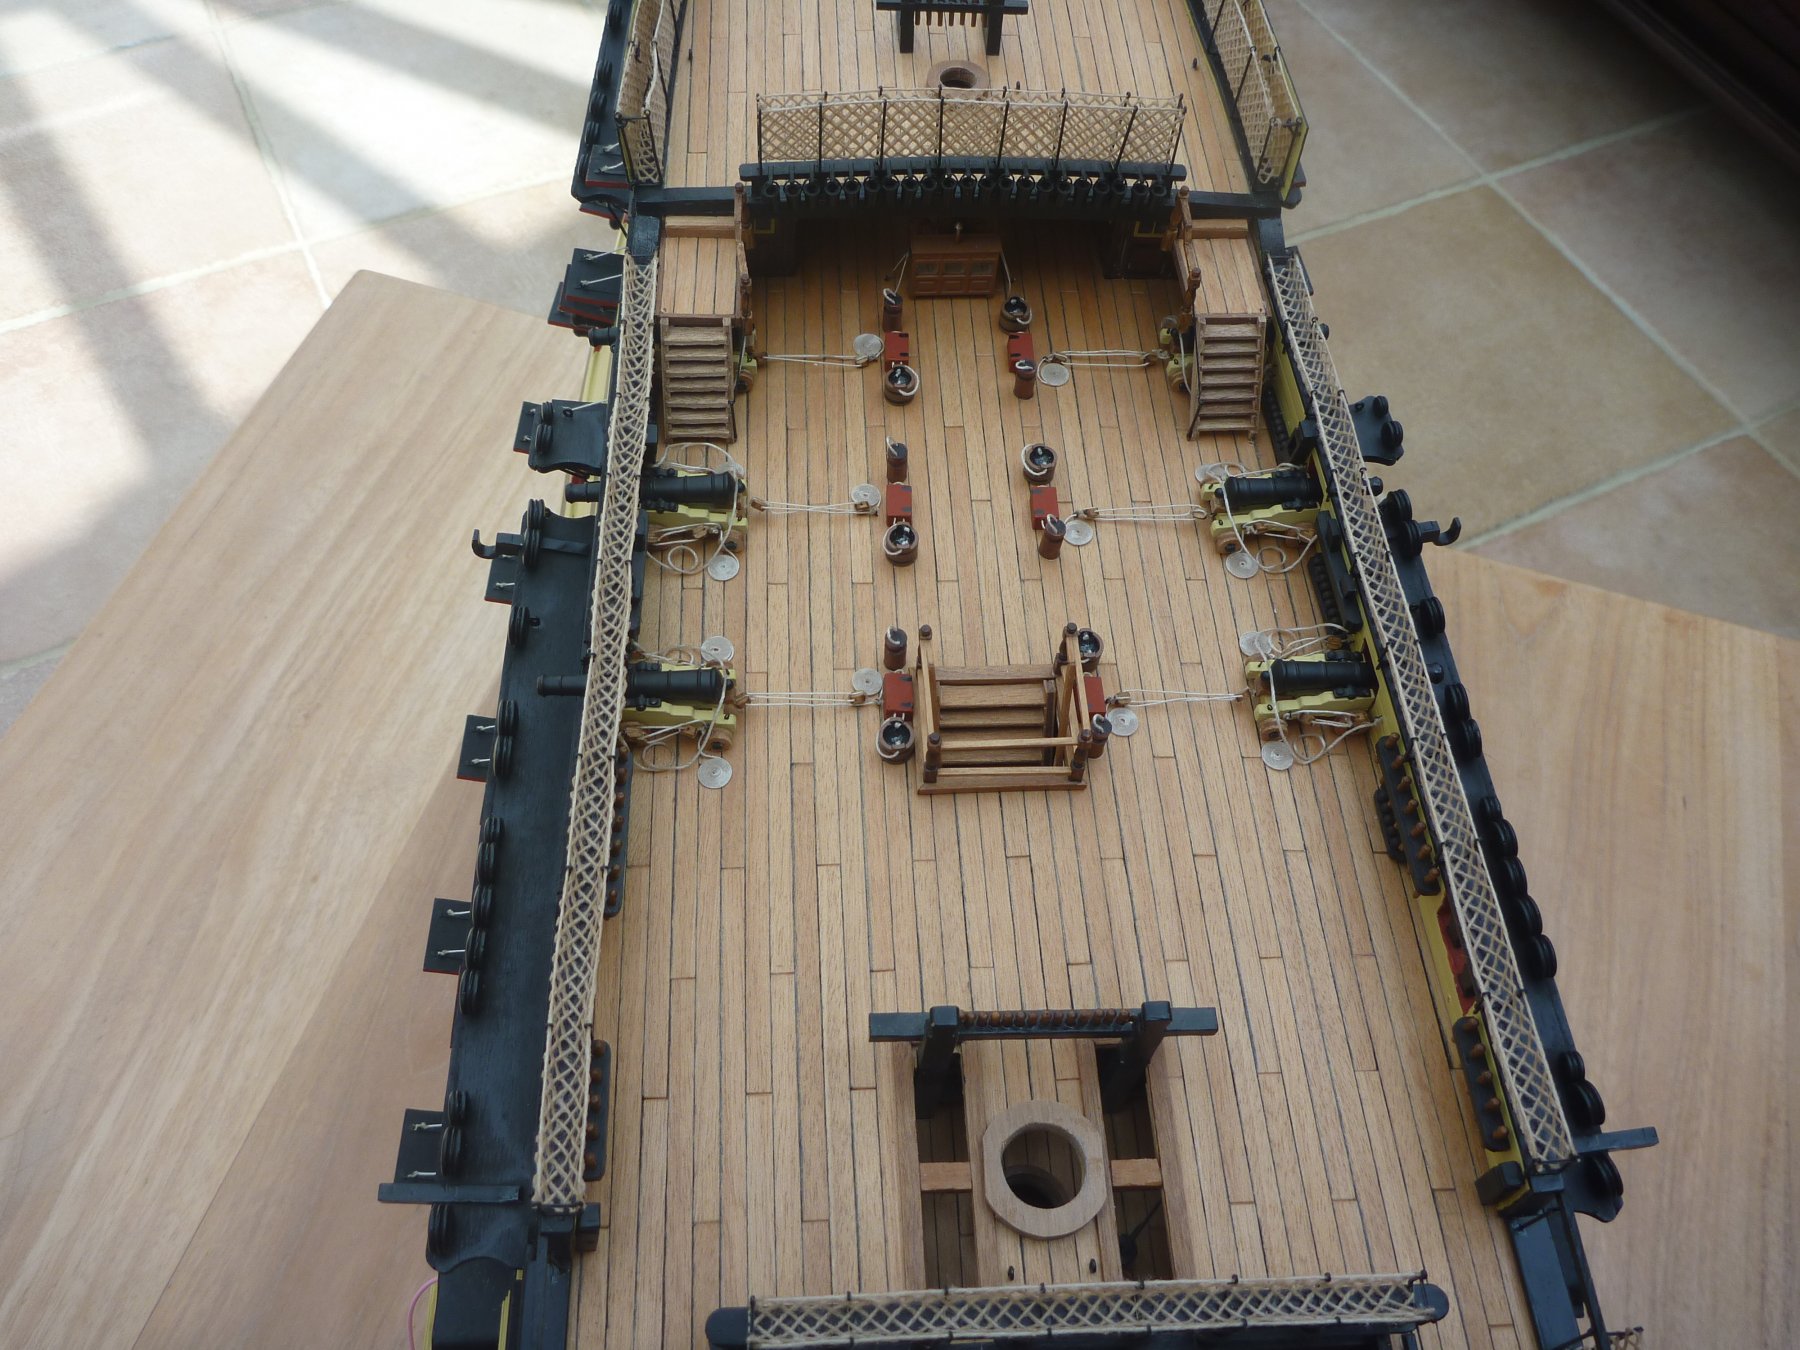
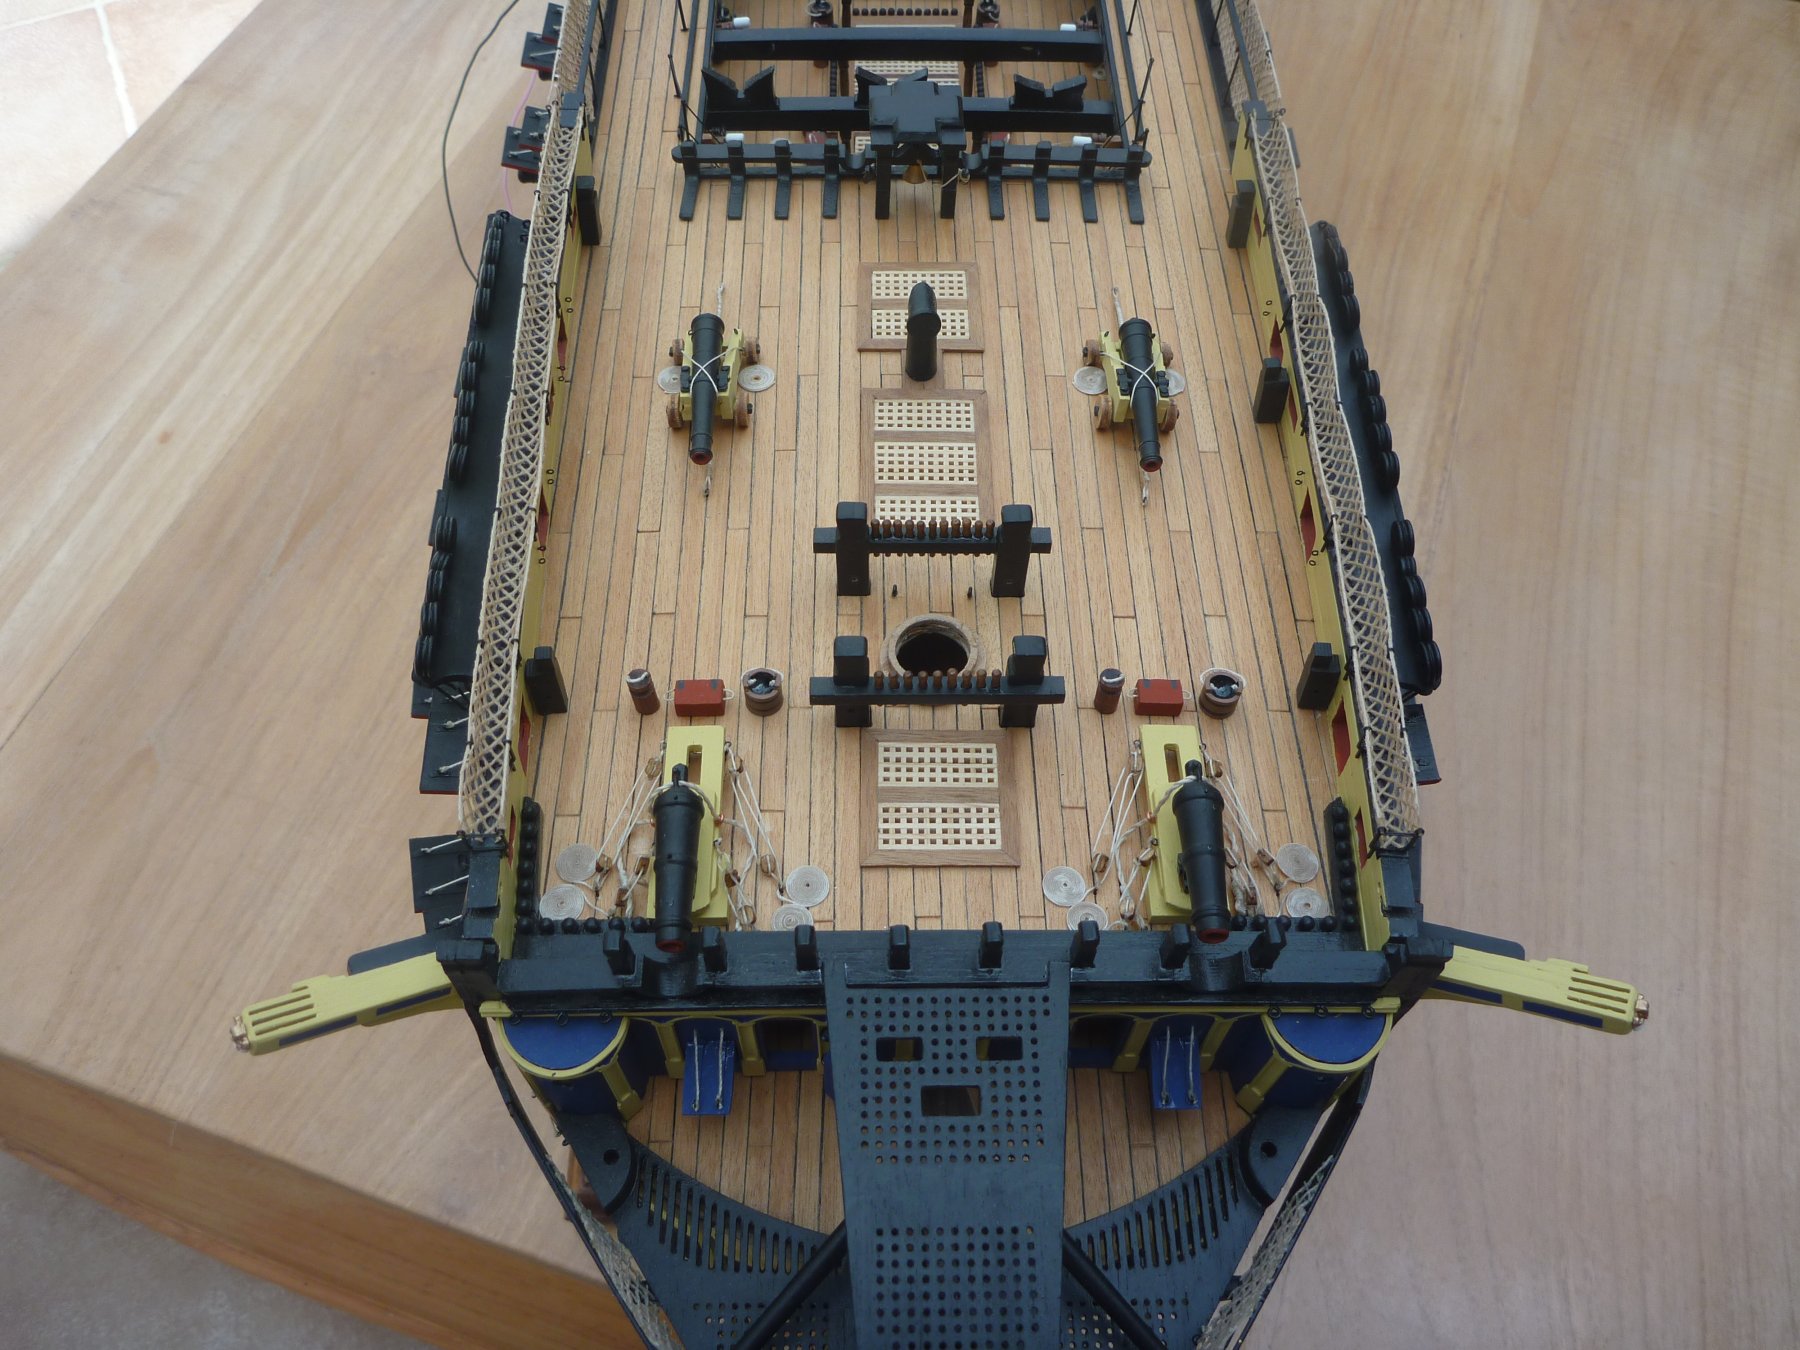
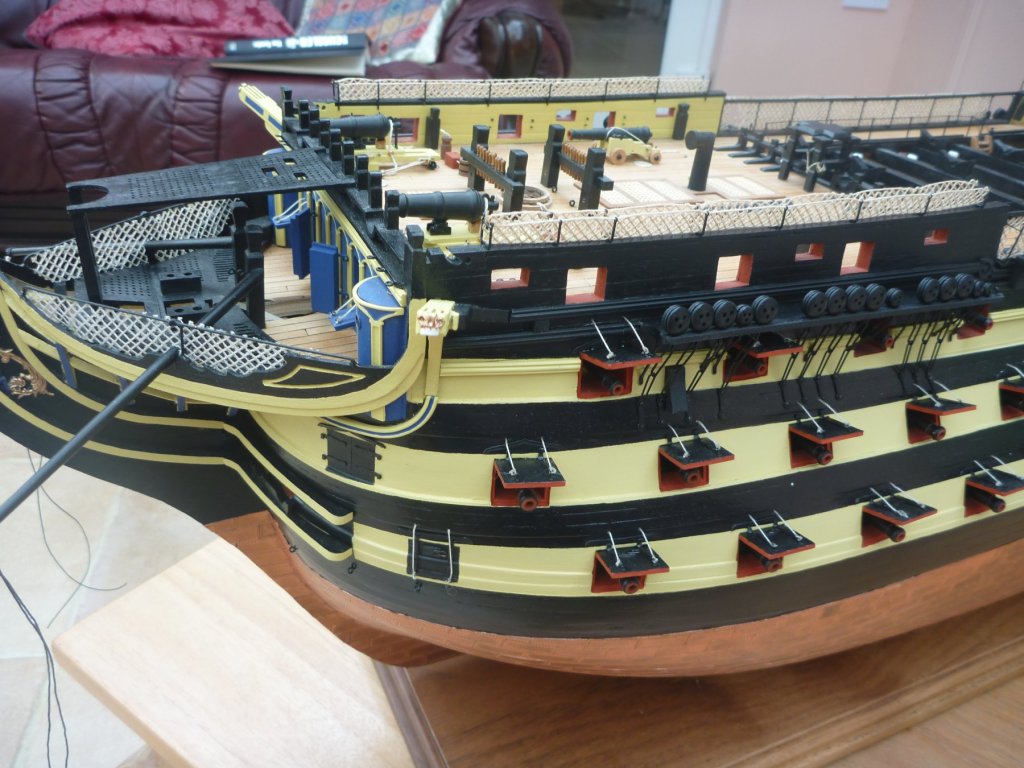
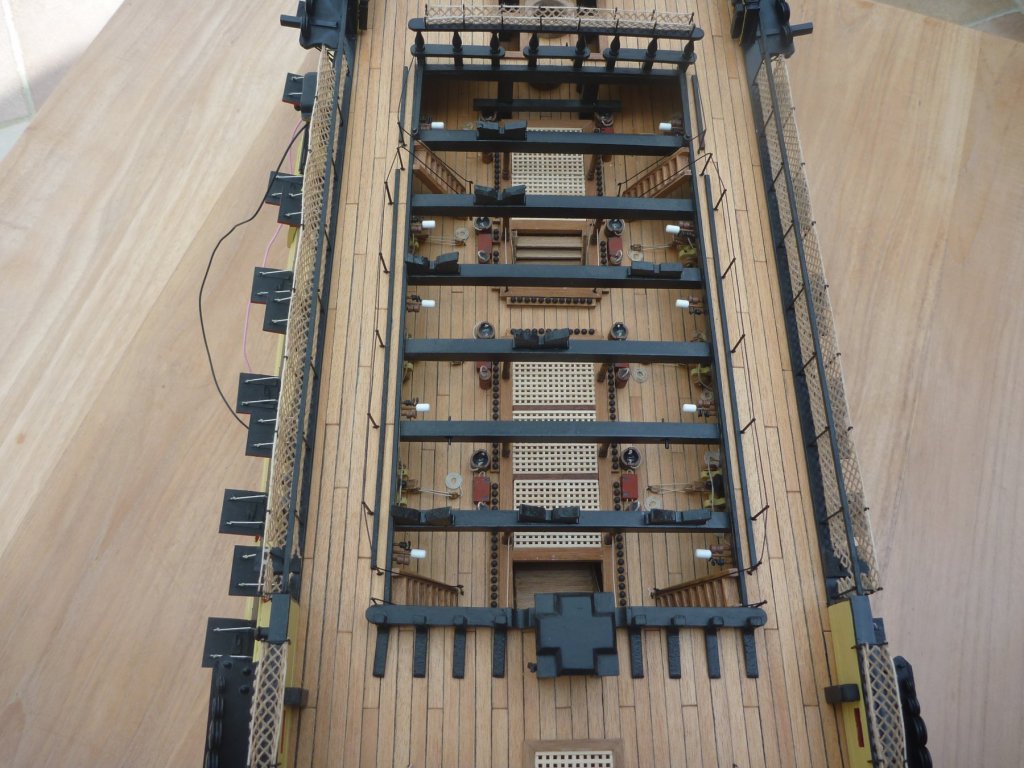
To continue, some close ups. I decided to include the Poop deck baracades. They look a little out of place in my opinion and I know some makers leave them out. But I opted to be true to the Trafalger build. I also decided the extra effort to weave my own hammock nettings would be worthwhile. Although this was quite time consuming and tedious I'm very pleased I did. Nick (still a little more to come)


- 84 replies
-
- 5
-
-
- finished
- caldercraft
- (and 1 more)
-
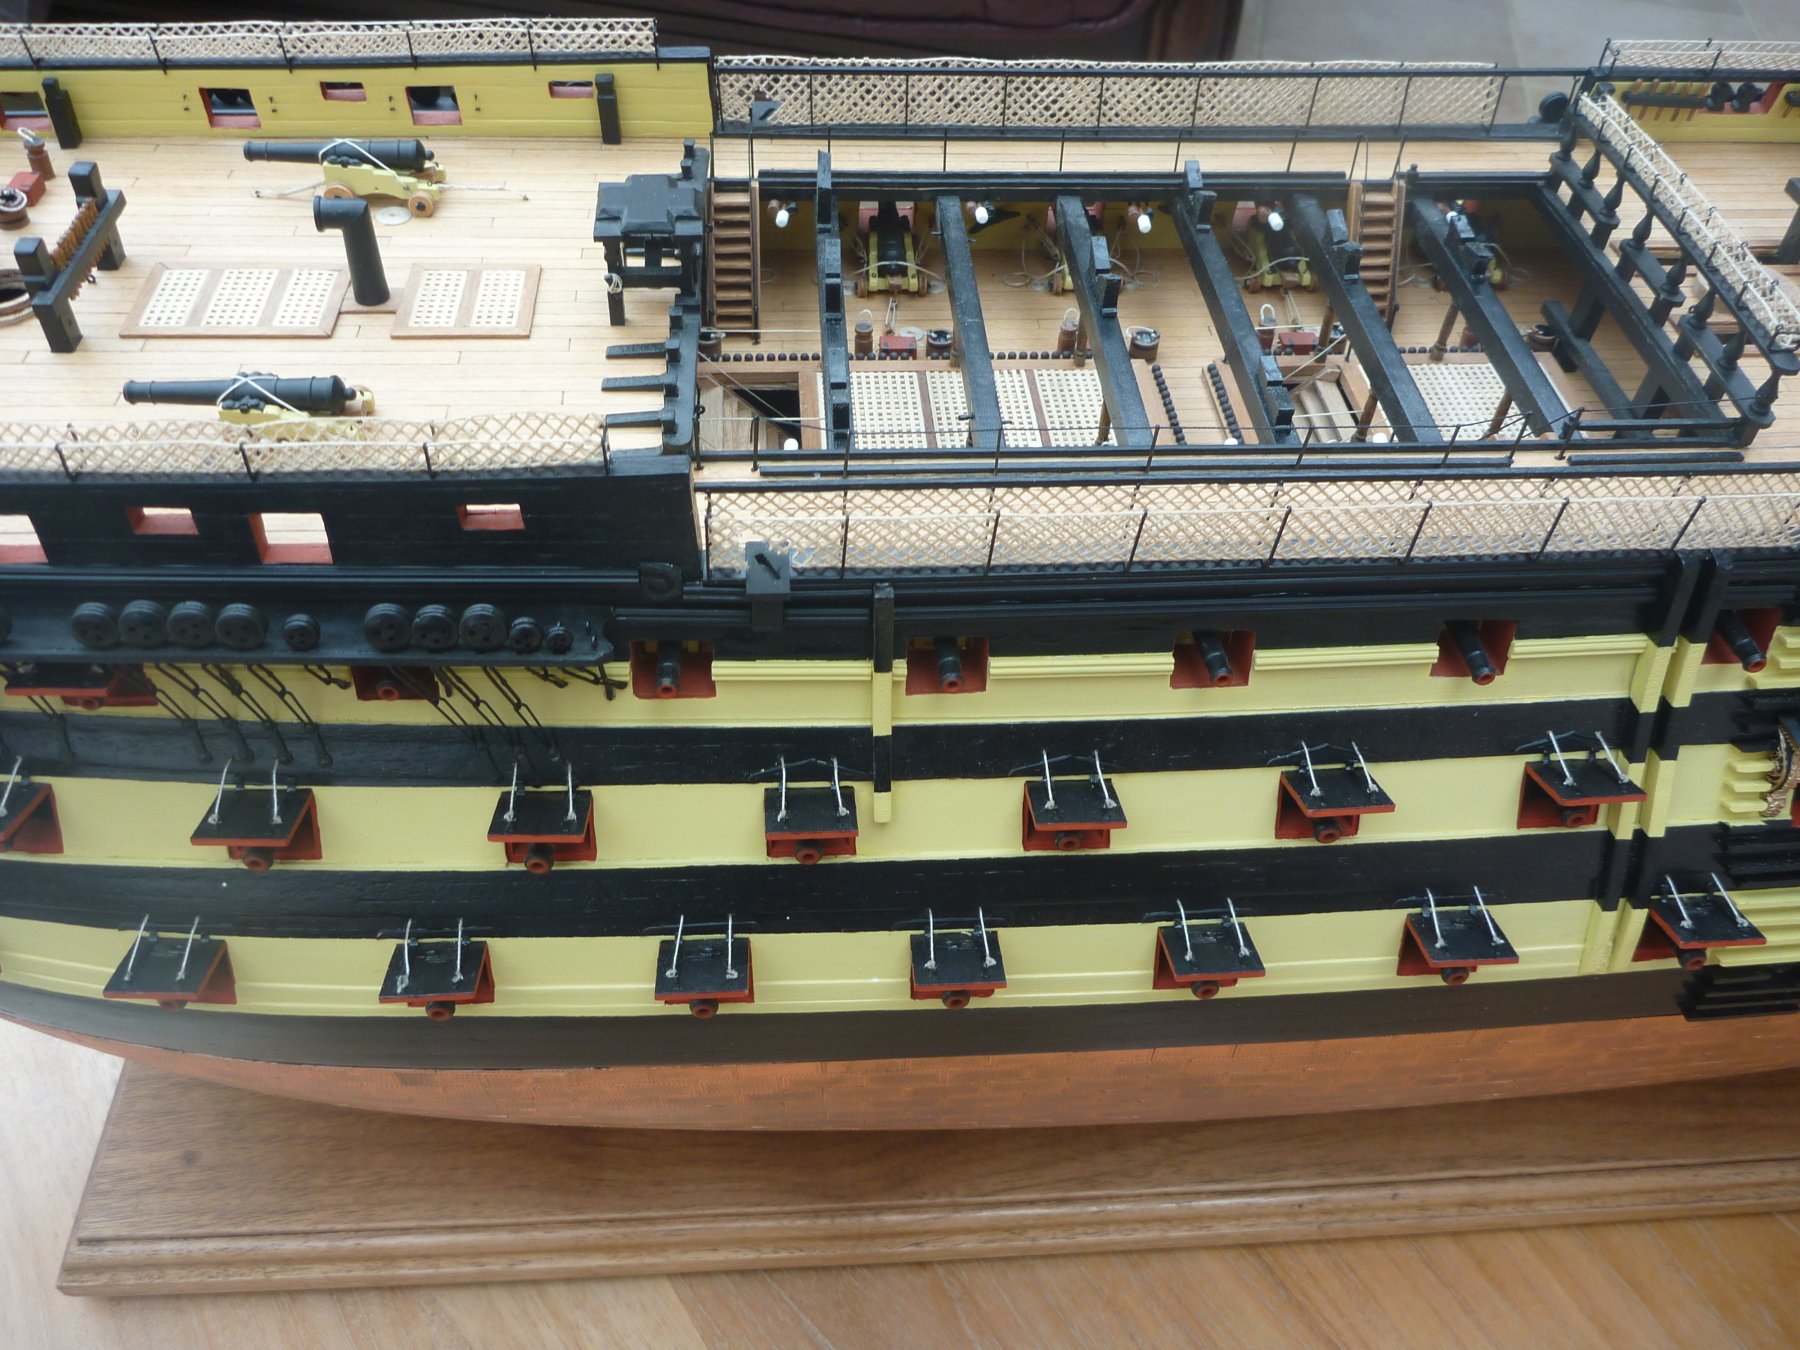
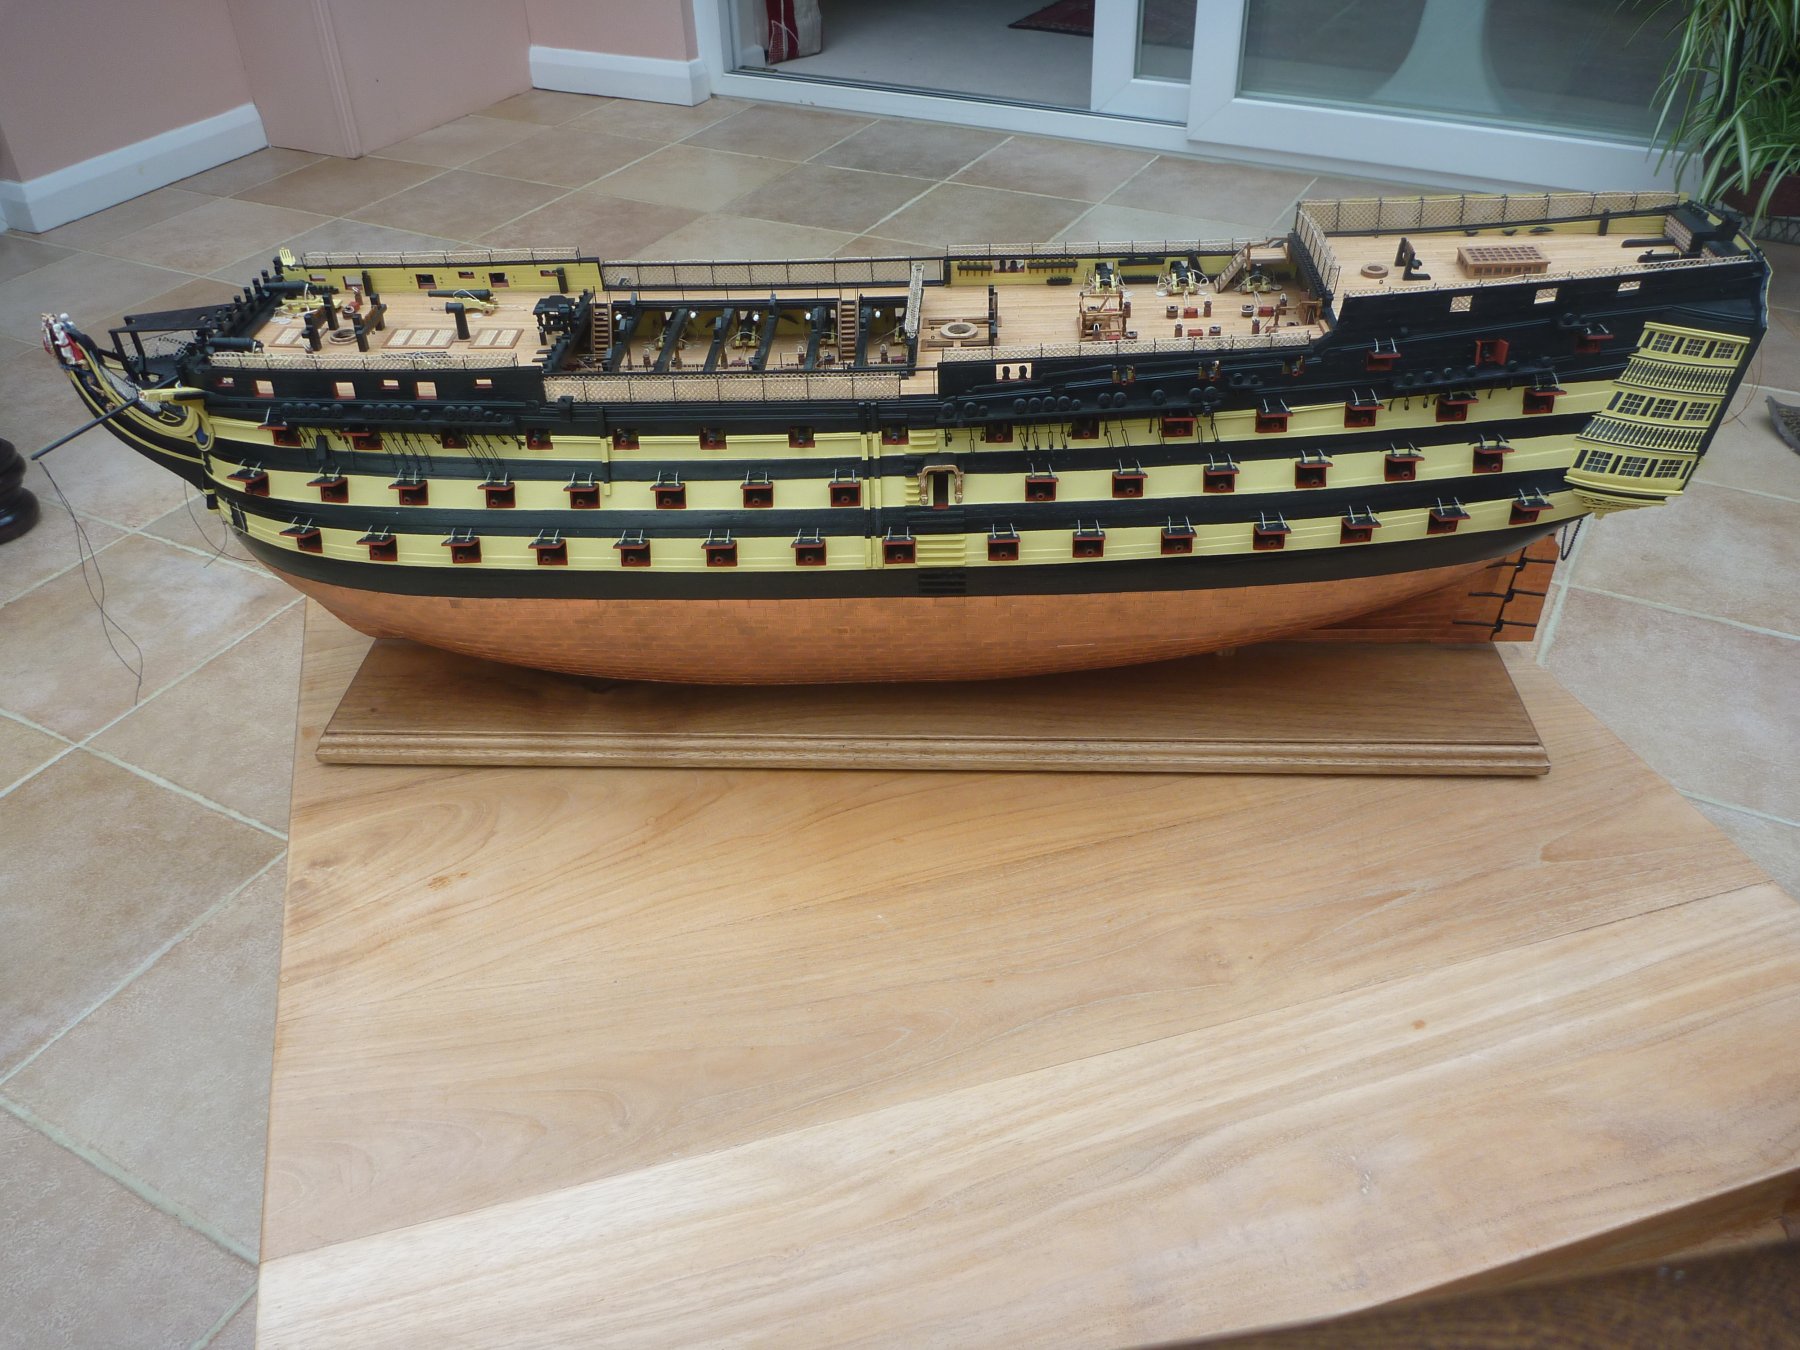
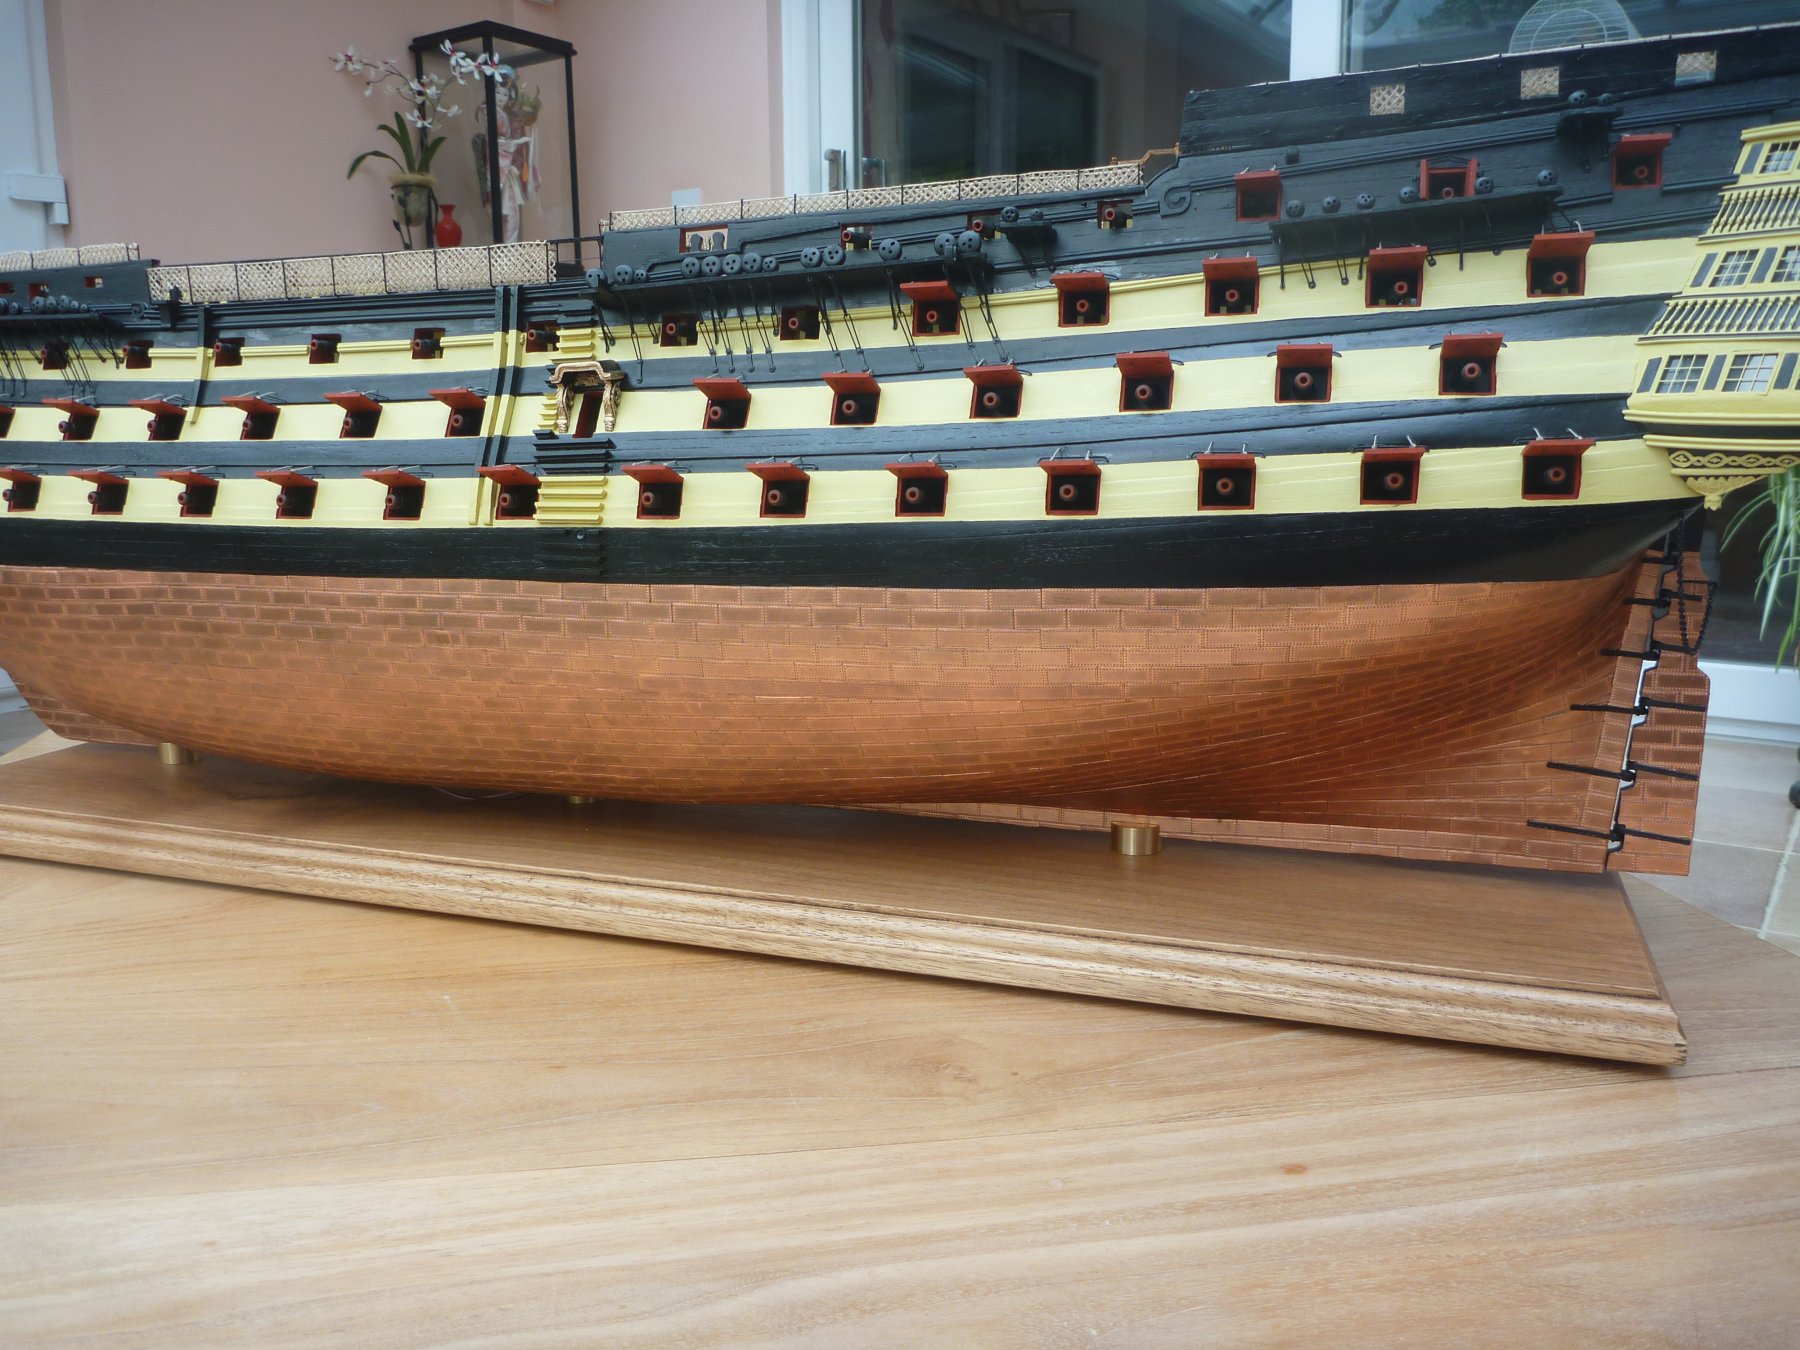
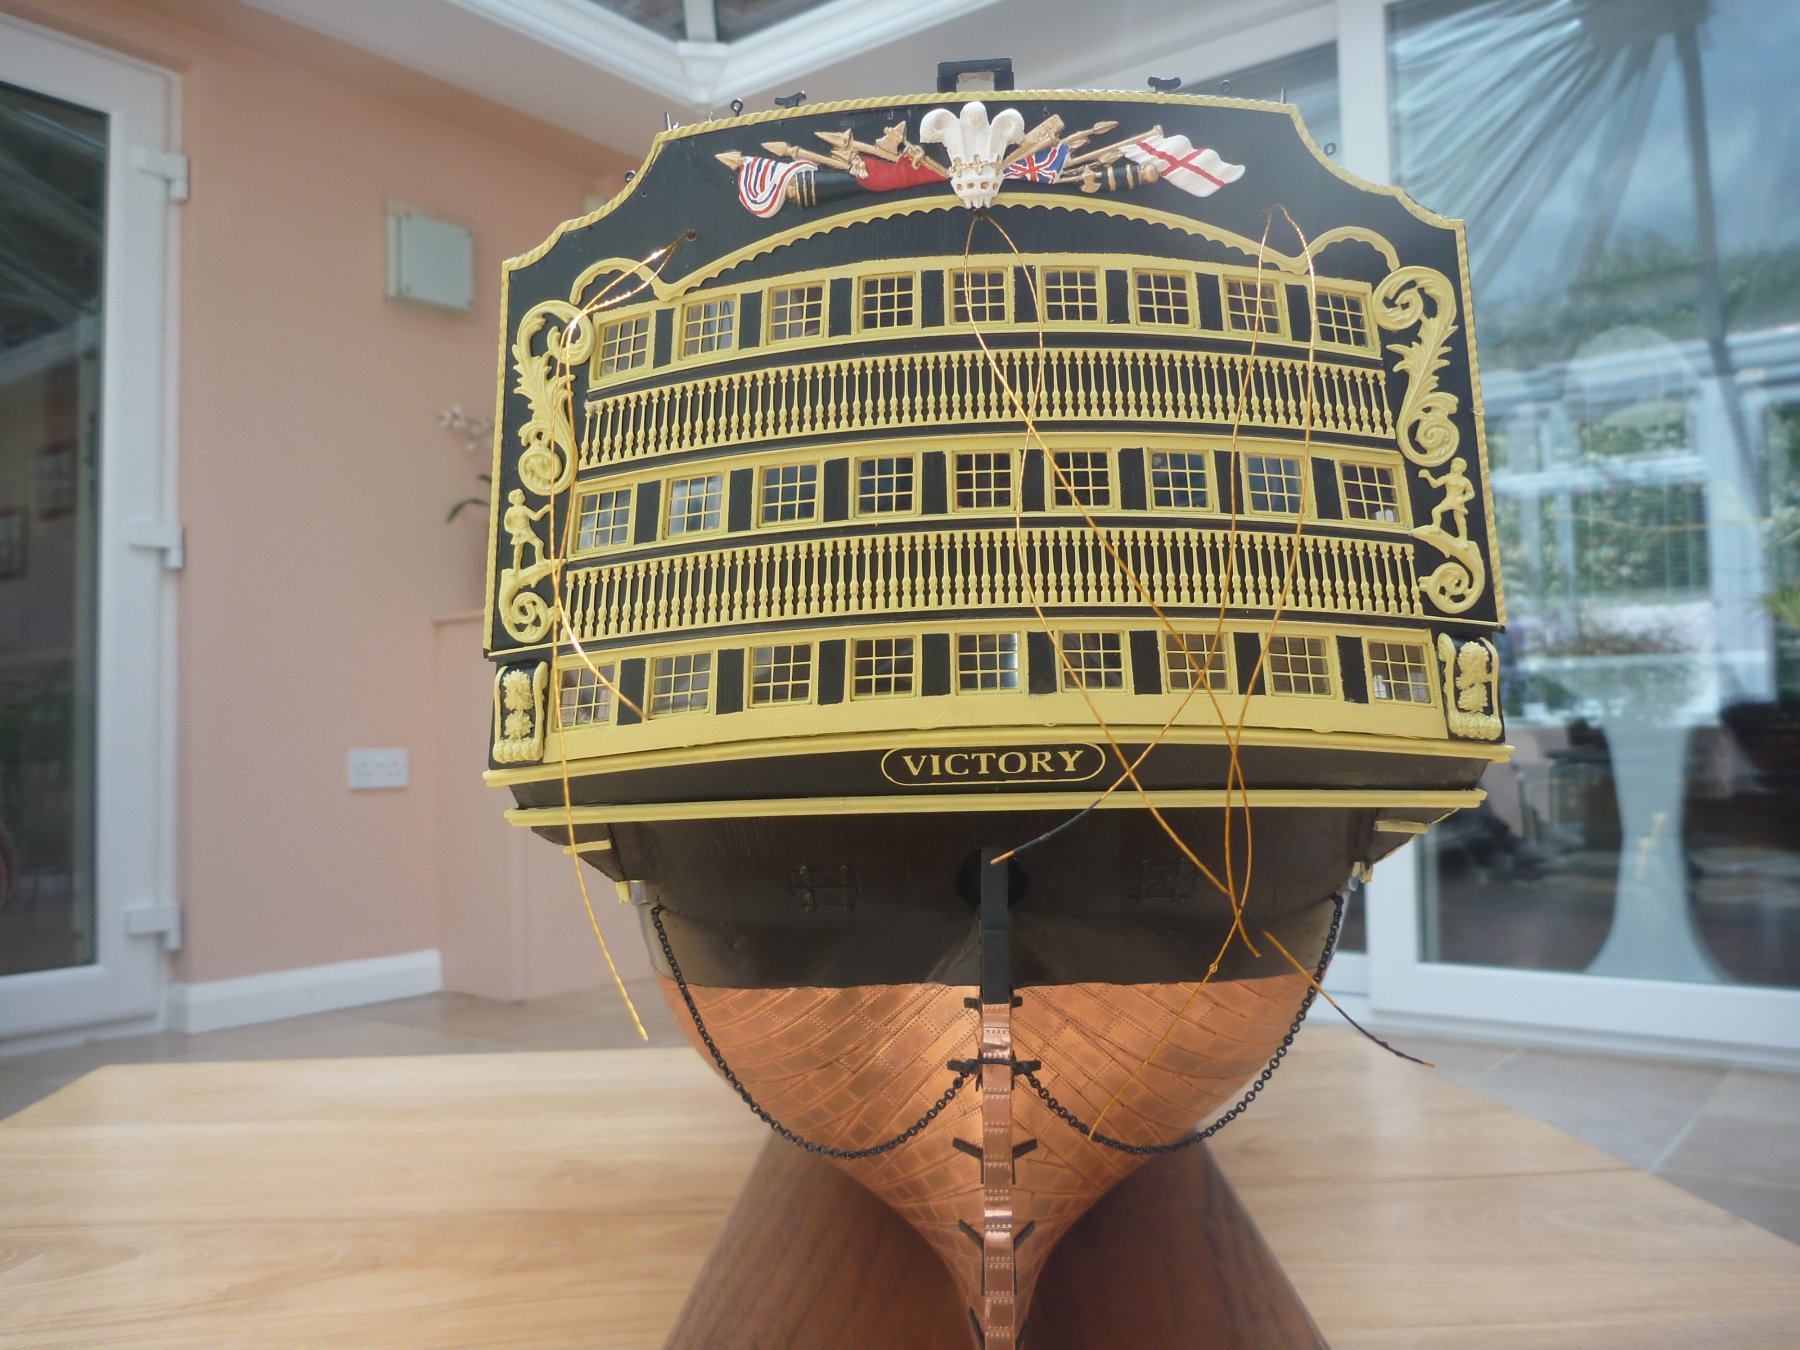
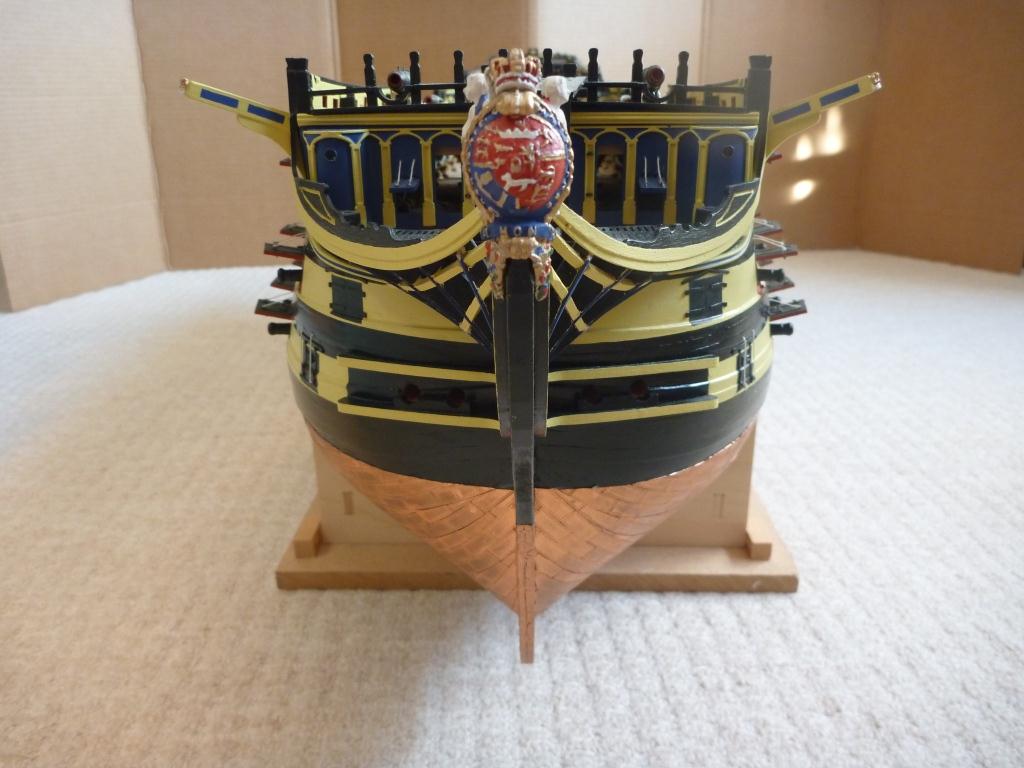
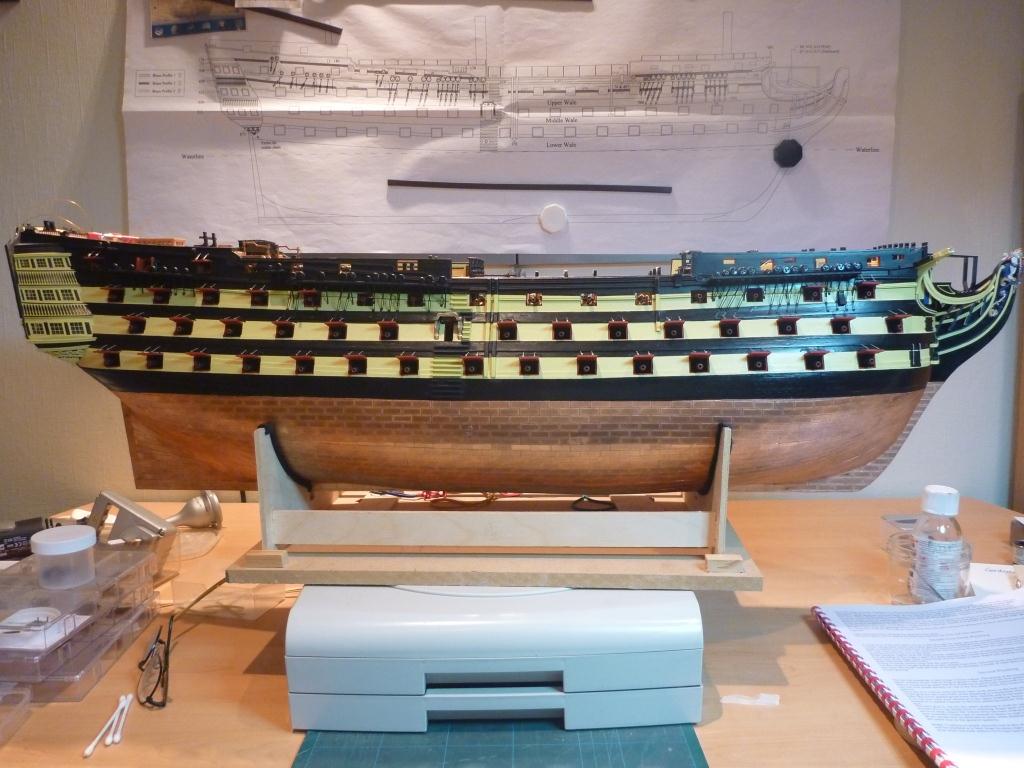
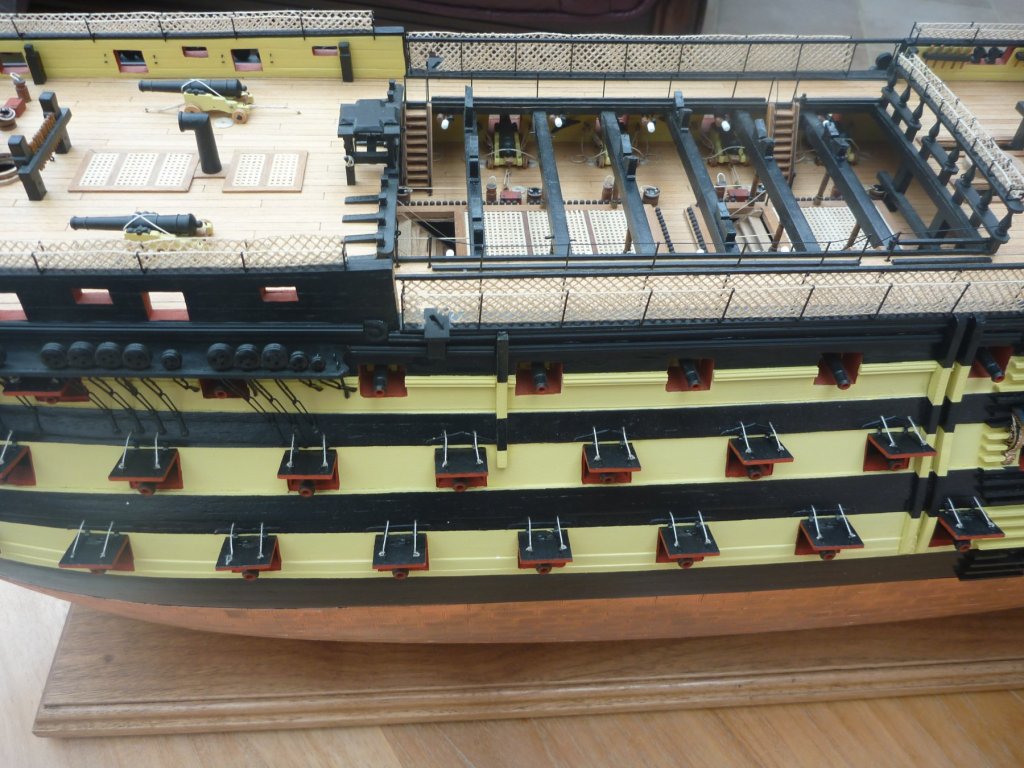
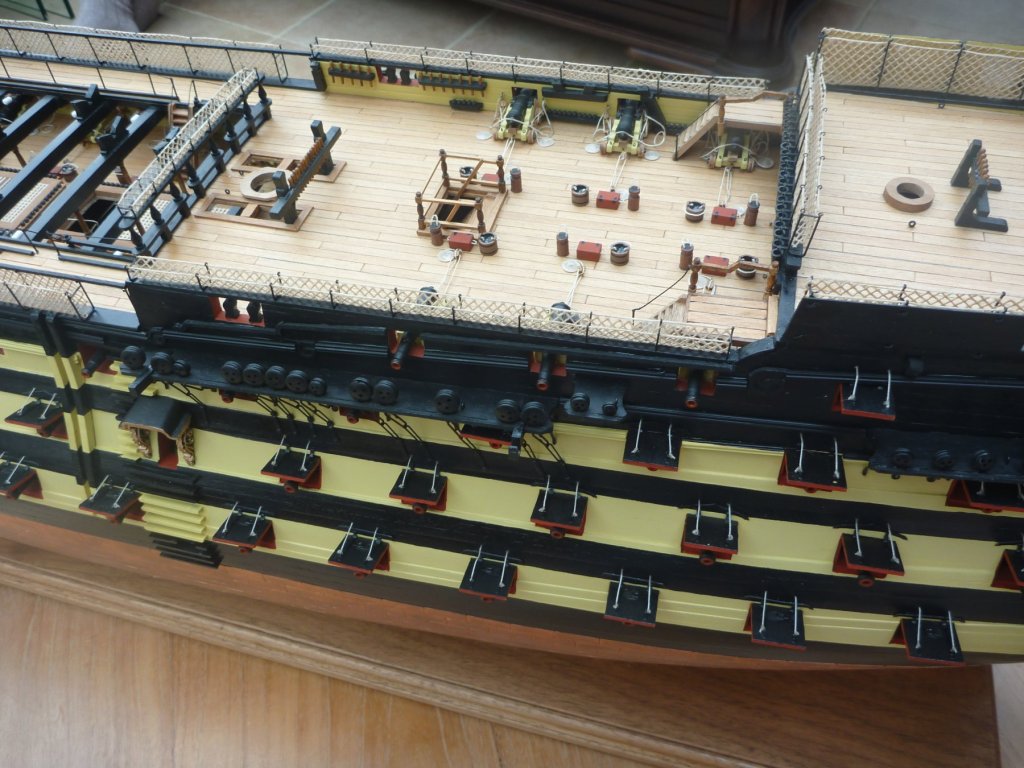
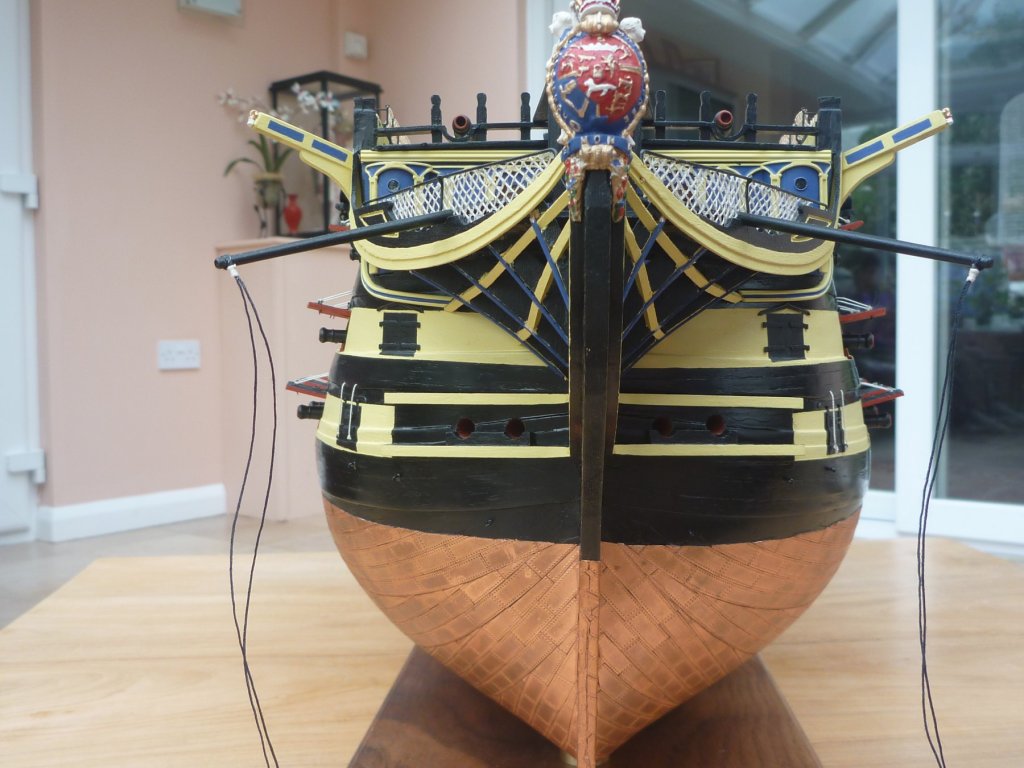
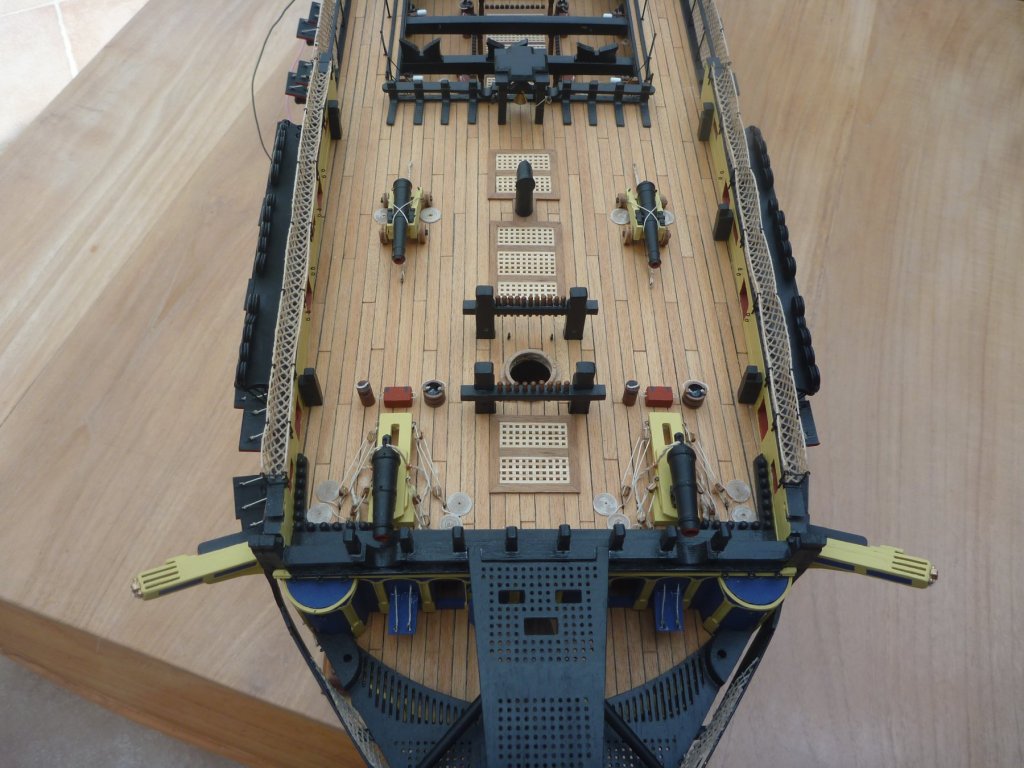
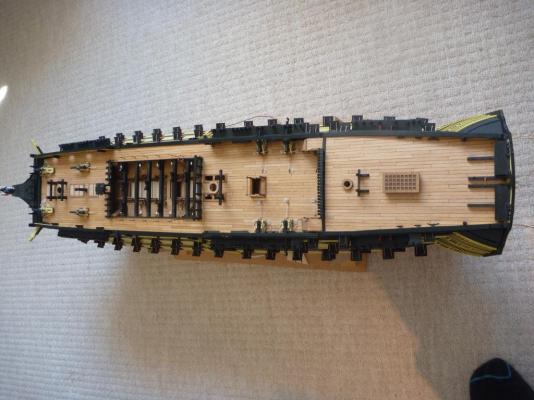
So, the next batch of photo's will bring me up to date. Happy to say that the Hull is now complete, at least everything apart from some items to be left to very last thing. Here it is in current state. I sourced a nice piece of Walnut to use as a base and turned three brass pillars for attachment. Bows including some pre-rigging. Stern with wiring for lanterns left hanging for now. Rudder with chains. View down onto Quarterdeck And onto Waist And Forecastle And along full decking.


- 84 replies
-
- 5
-
-
- finished
- caldercraft
- (and 1 more)
-
Drafsight v's Autocad LY2002
pompey2 replied to michael mott's topic in CAD and 3D Modelling/Drafting Plans with Software
Draftsight is an unashamed 'clone' of Acad really. Dassualt bought it and made it a freeby to entice Acad users to SolidWorks rather than Inventor. That way potential customers can continue editing legacy Acad documents whilst converting away from Acad to SolidWorks. Which means we all benefit from a free Acad look alike. I have used all three in anger for years. DraftSight is a very good replacement for Acad. However SolidWorks or other 3D offerings are where we want to be for modelling. Nick -
Rigging sizes in relation to scale of model
pompey2 replied to HKC's topic in Masting, rigging and sails
Jim Lad First time I have seen this spread sheet. Wow, no really, wow. Great work Nick -
Steam plank bending tool
pompey2 replied to captainkangaroo's topic in Modeling tools and Workshop Equipment
Wow Ulises Victoria, that is some bend. Must be going on a very unusually shaped hull I will remeber this for my next planking -
If you look at it from a forces point of view: It the chain plates and shrouds were all perfectly adjusted and tensioned, then the channel would only be in compression. In those circumstances supports would not be required. Of course perfect alignment is never going to happen so there will be a bending element, up or down. That would then need supports to counteract. Also from an ideal perspective the chanel would be 90 degrees from the face it mounts to to maintain the 'compression' picture. And again, if that is not so, supports would be needed. Like most things on these types of ships, the balancing of forces, opposing tensioning etc is a really complex and interesting subject. A huge compliment to the designers of the day.
-
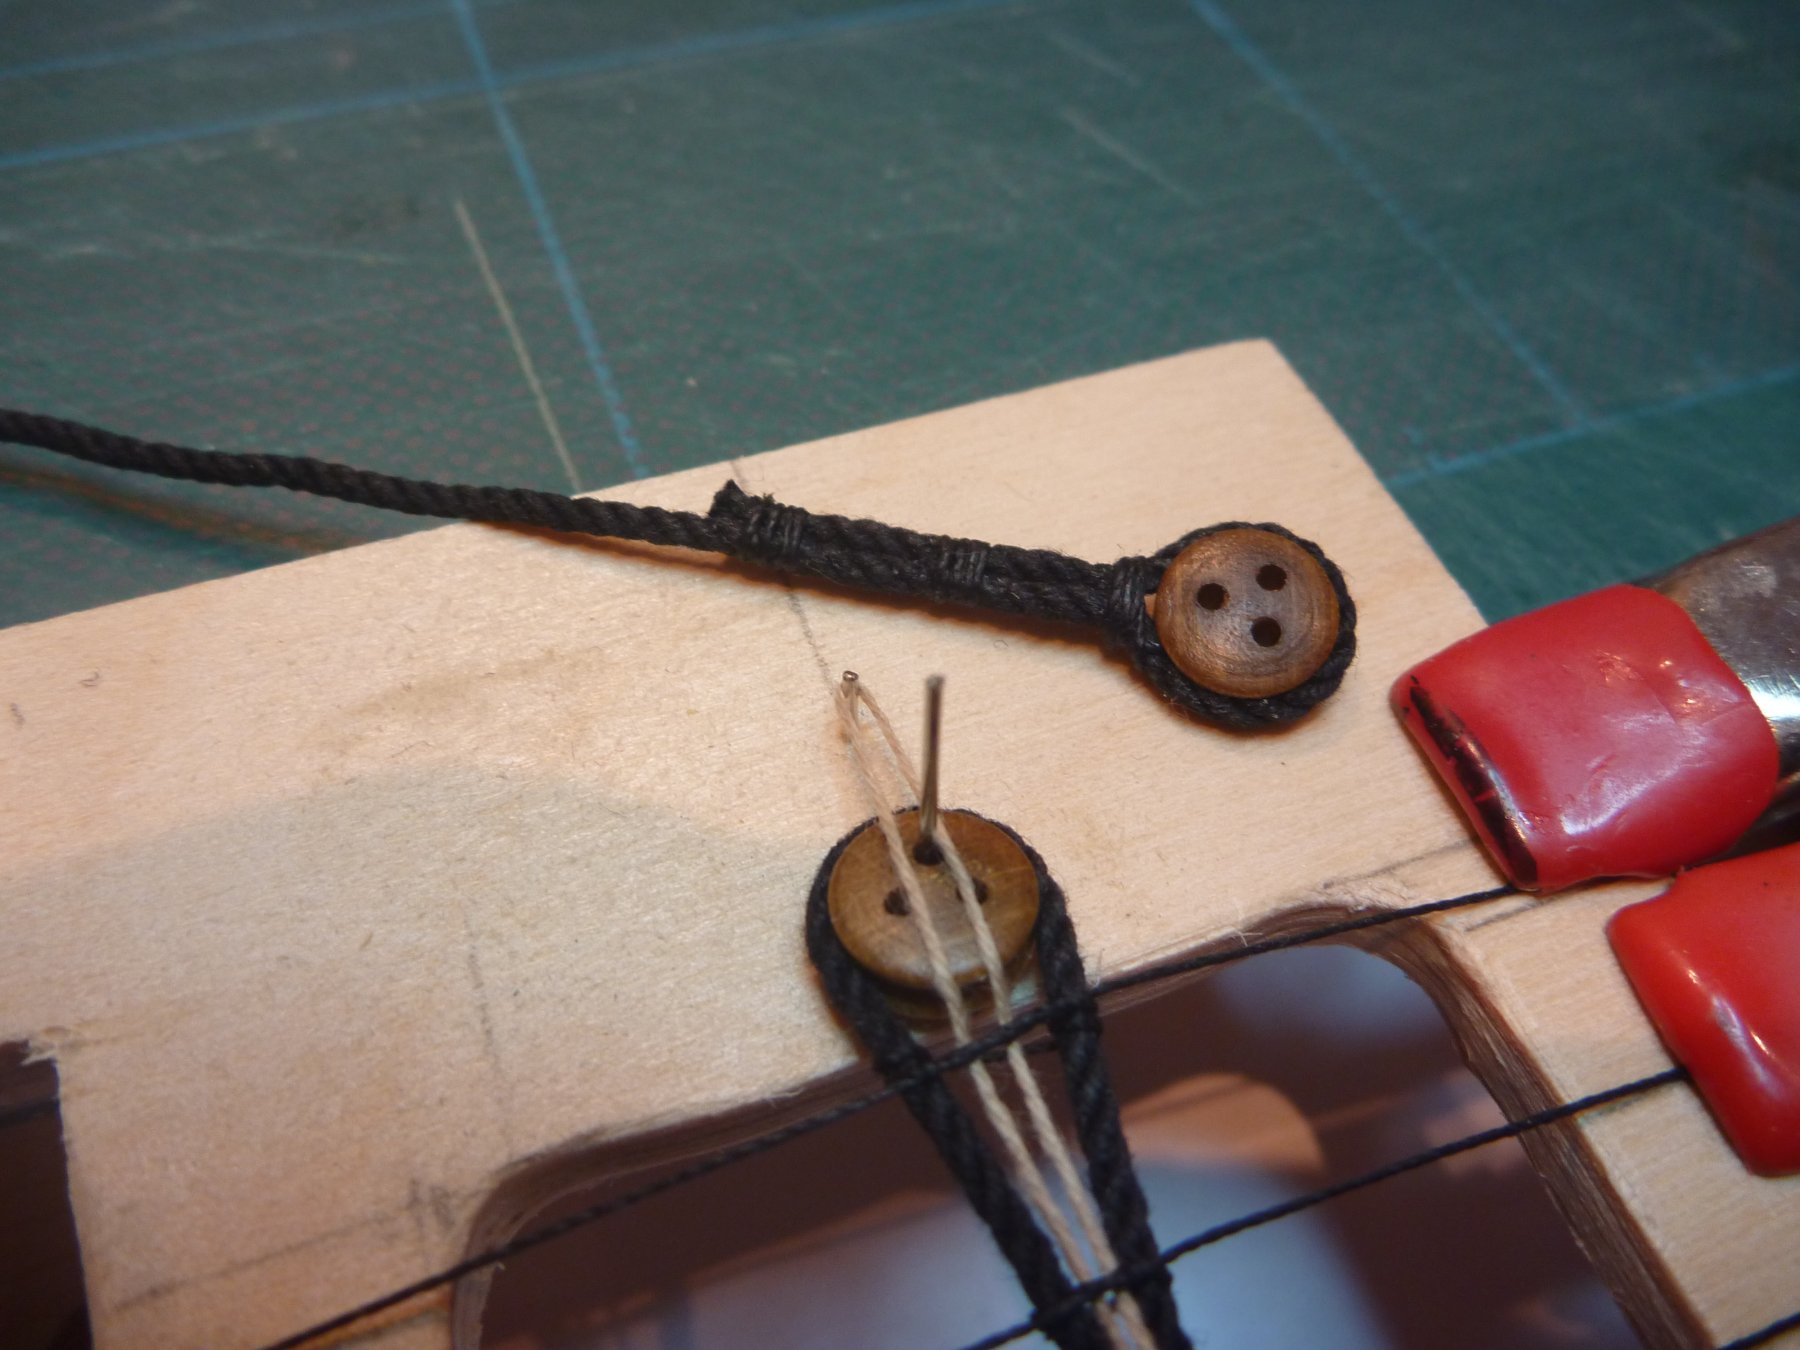
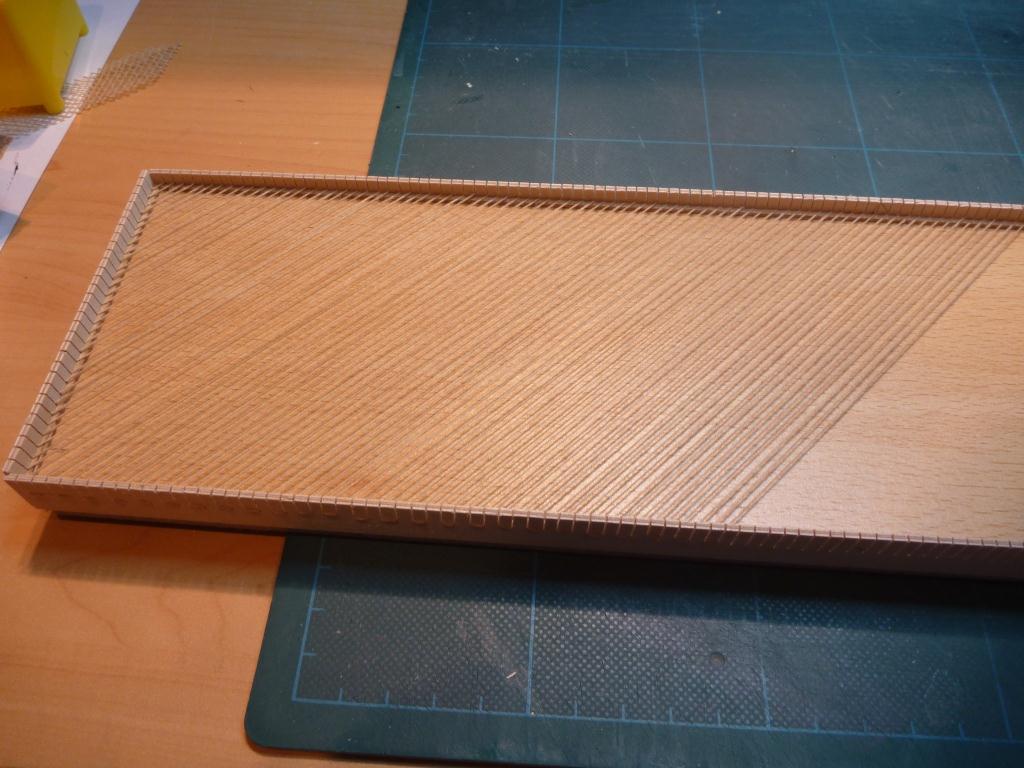
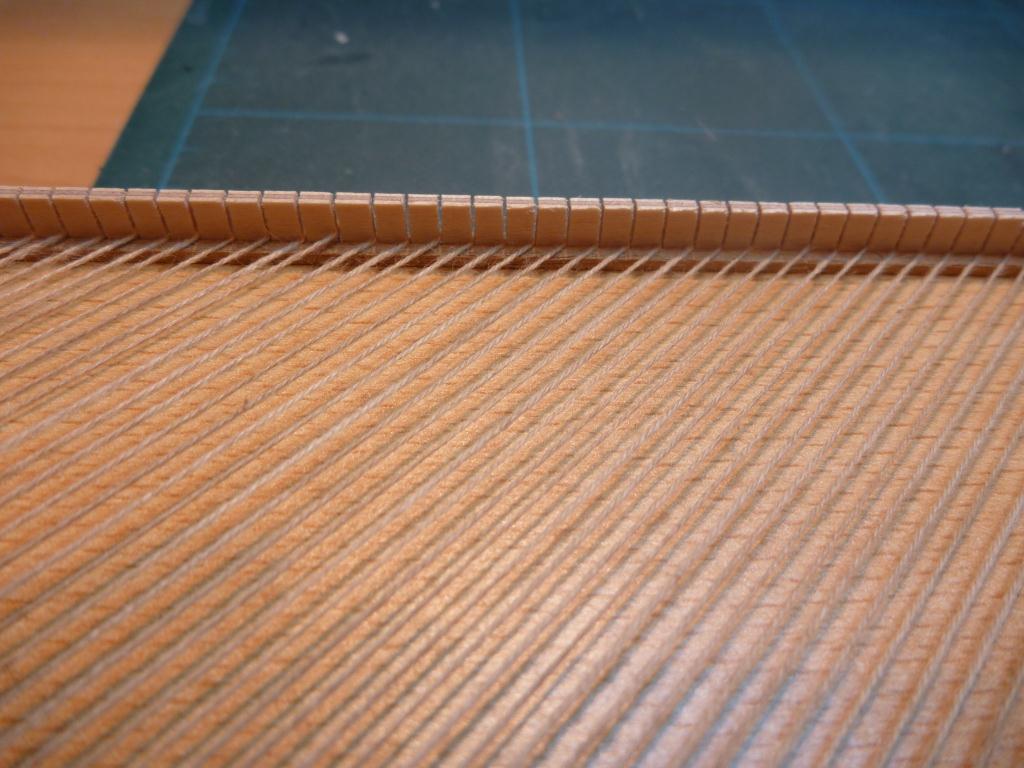
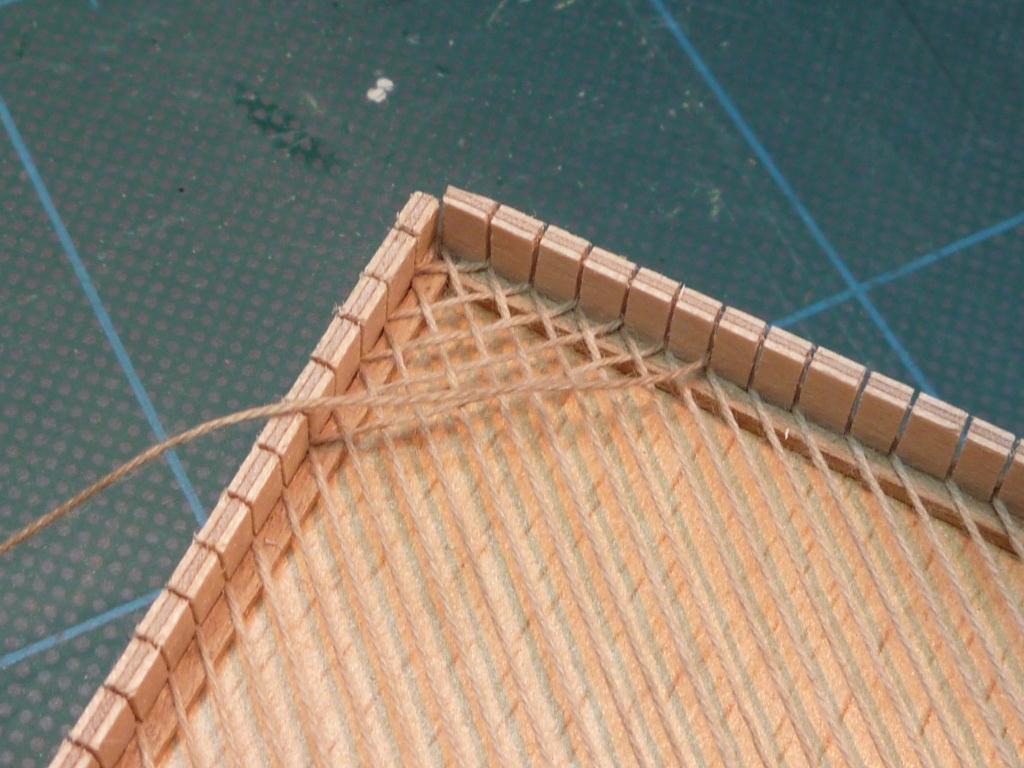
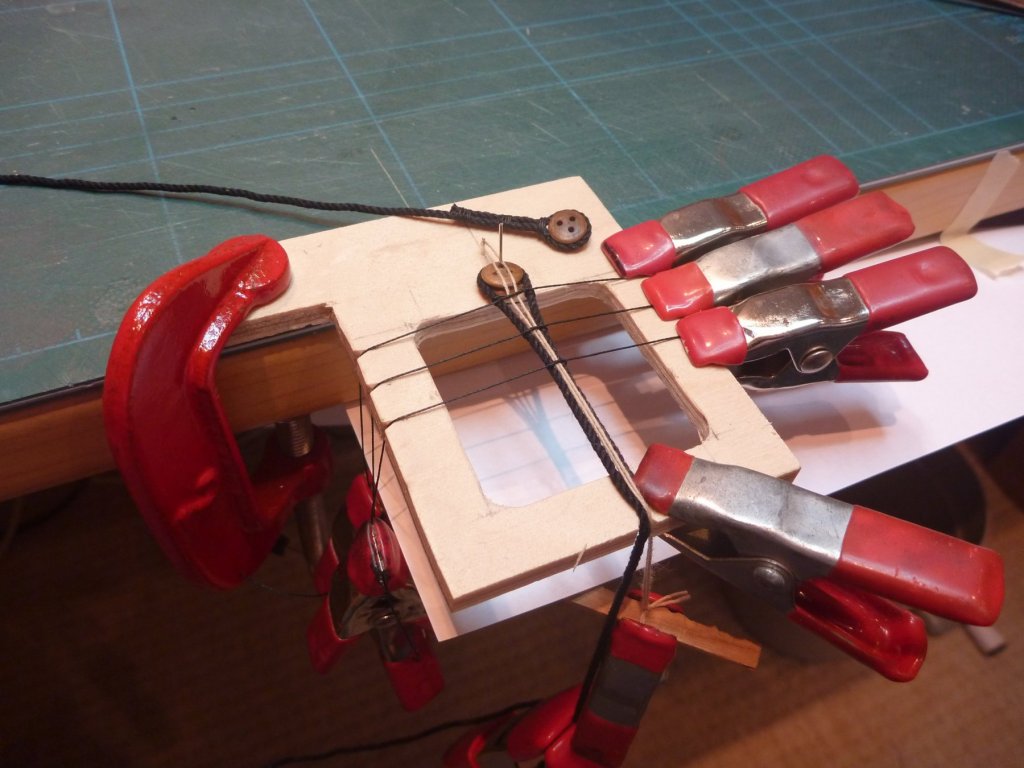
I thought I might post the method I recently used to create my Hammock netting on Caldercrafts Victory 1:72. I tried a couple of different things, couldn't find anything to buy-either wrong scale or wrong colour. Victorys nets are diamond in natural. So I decided to 'weave' them. Again I tried a couple of methods. Pins were not the best idea because the pin diameter offsets the thread and you get into more complex winding. Plus with pins you have to keep constant tension. So hit on a different method. First i spent an age getting the nesting optimal. Picked a shape fairly oblong and found a bit of ex shelf unit (nice shiny surface) Then I took some offcuts of ply clamped them together and ran a fine tooth saw through them, used a gauge to space the cuts every 3mm. The pitch between threads is 2mm Mounted the strips to all four sides. Placed a bit of .5 x .5 section inside each wall. That meant that the thread sat off the surface and made threading easier and stopeed the glue sticking it down Then ran a thread in one diagonal across the whole surface (25 metres!) The really good thing is that the thin slots grip the thread and no tensioning is required except for each run. Then ran in the other direction, under, over, under, over etc....... A light brush with watered down PVA as I went. I 'tweeked' the spacing to get it even just prior to the glue. hey presto a bunch of good looking netting, pliable but with good glued joints. All is cost was a big serving of time and patience Nick


-
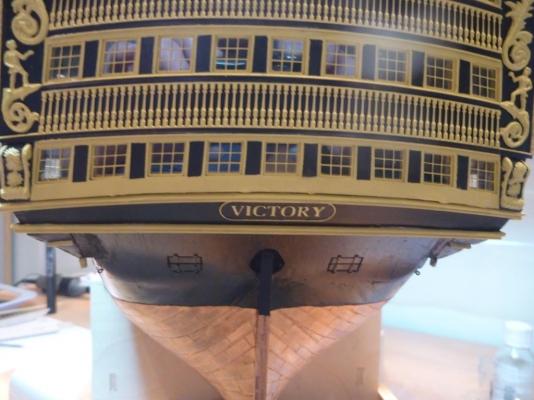
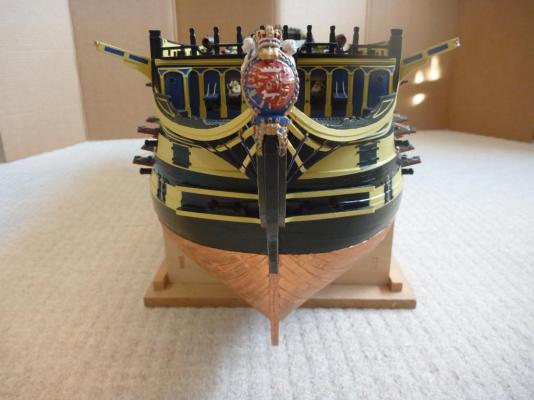
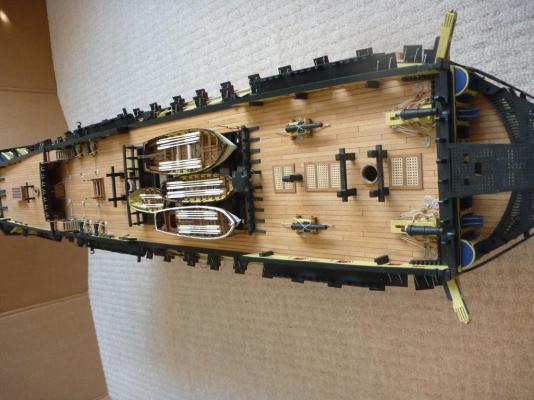
Thought I should stick the name on. Bird's eye view Dolphins view Shipd boats placed in place to see how they fit. And same again. Thats it for now. I'm a couple of months further on now but need to be taking some new photo's. I have been working on masts and spars and also hammock netting. I will get some updates uploaded when I have a moment.

- 84 replies
-
- 3
-
-
- finished
- caldercraft
- (and 1 more)
-
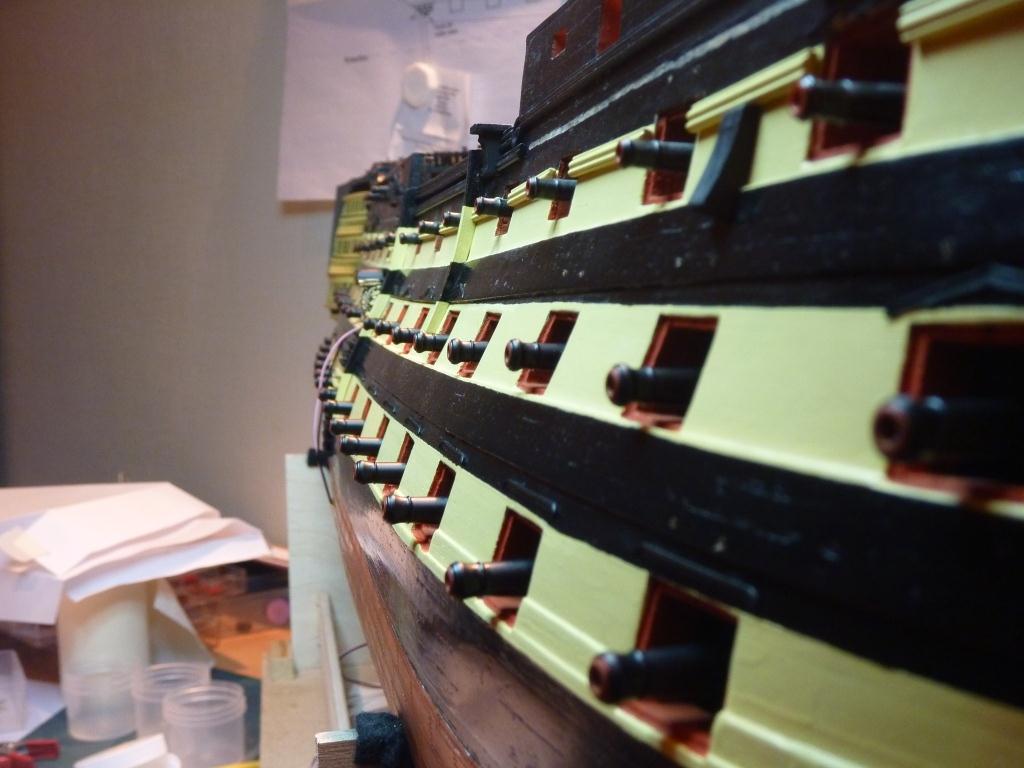
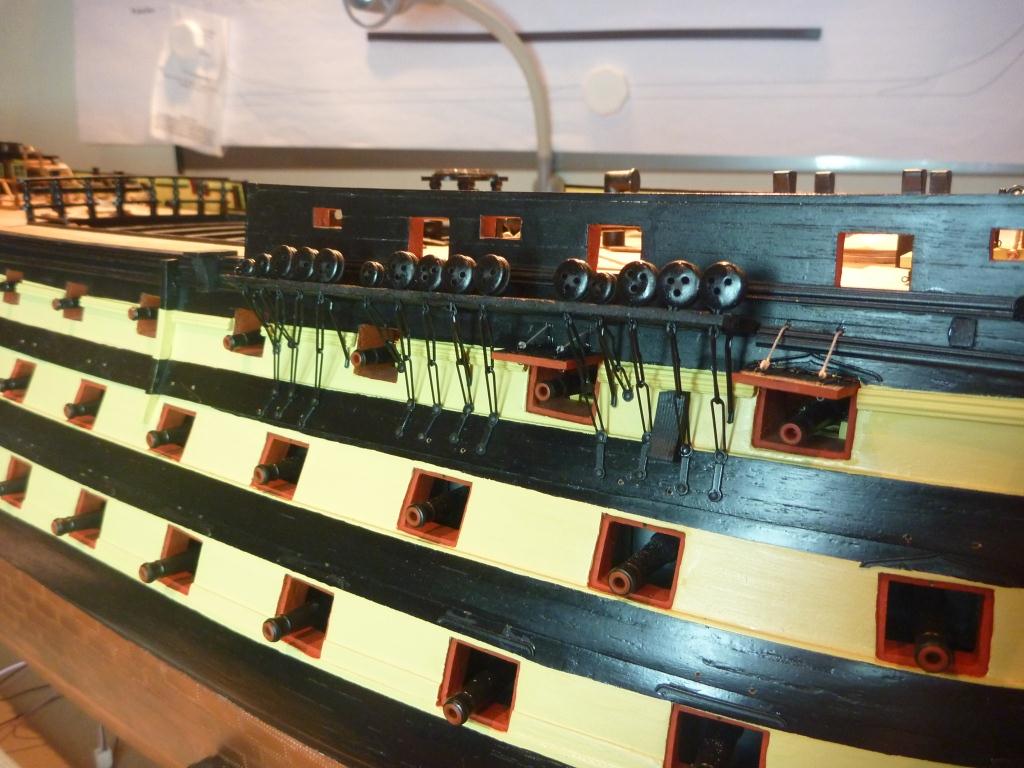
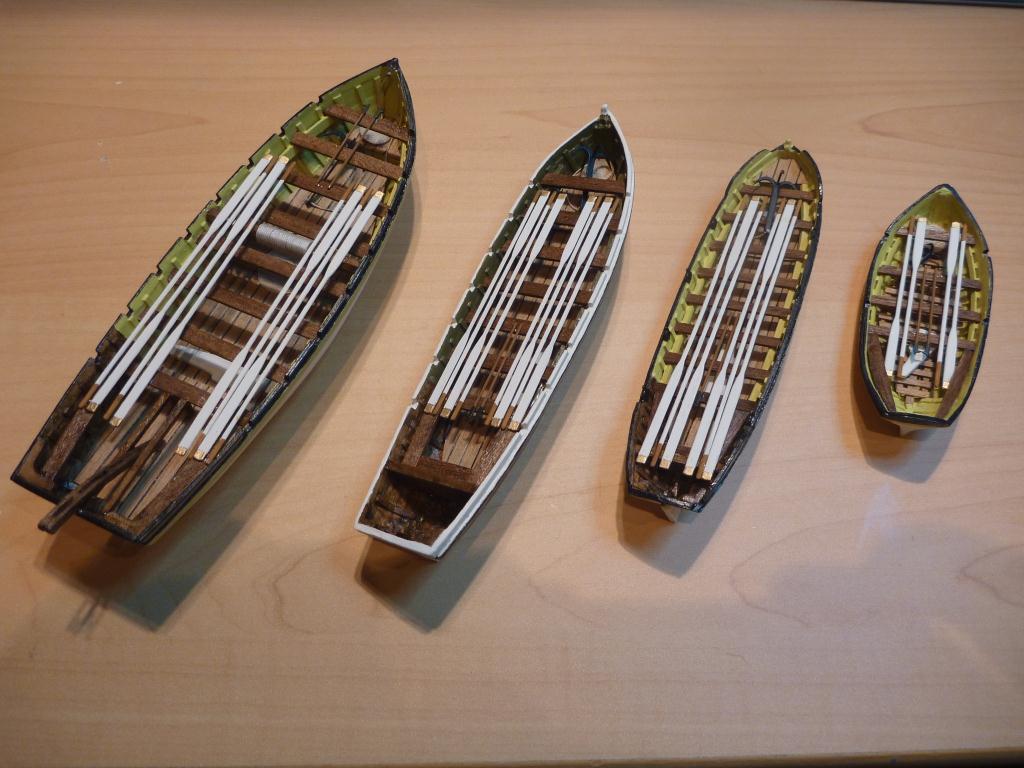
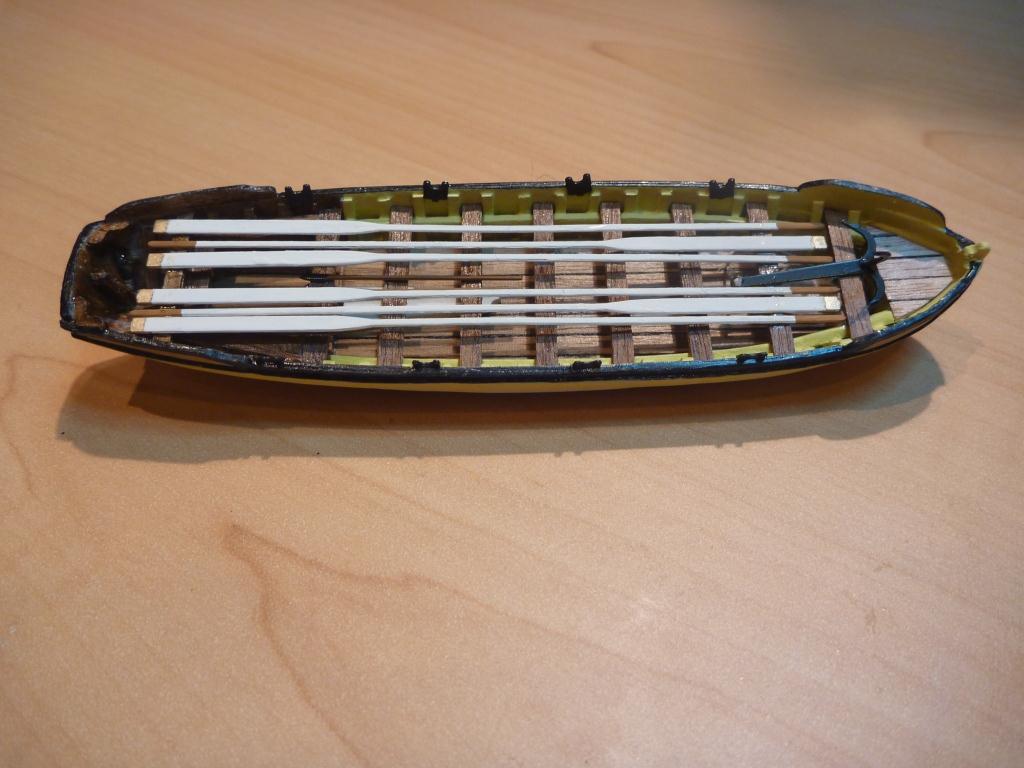
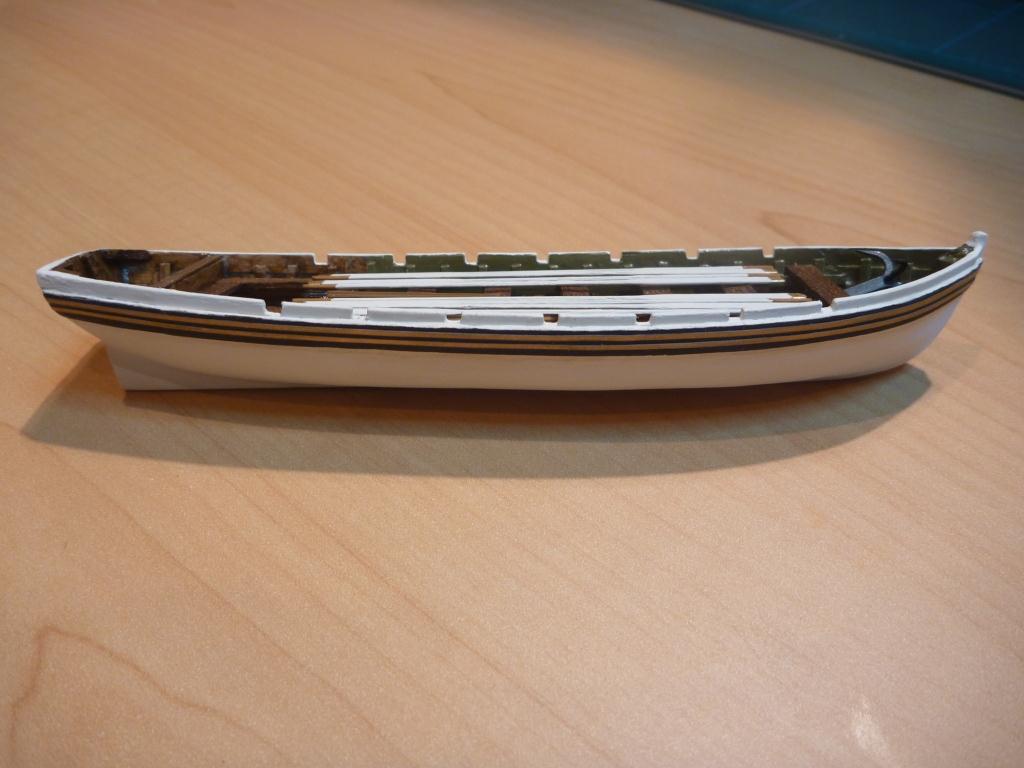
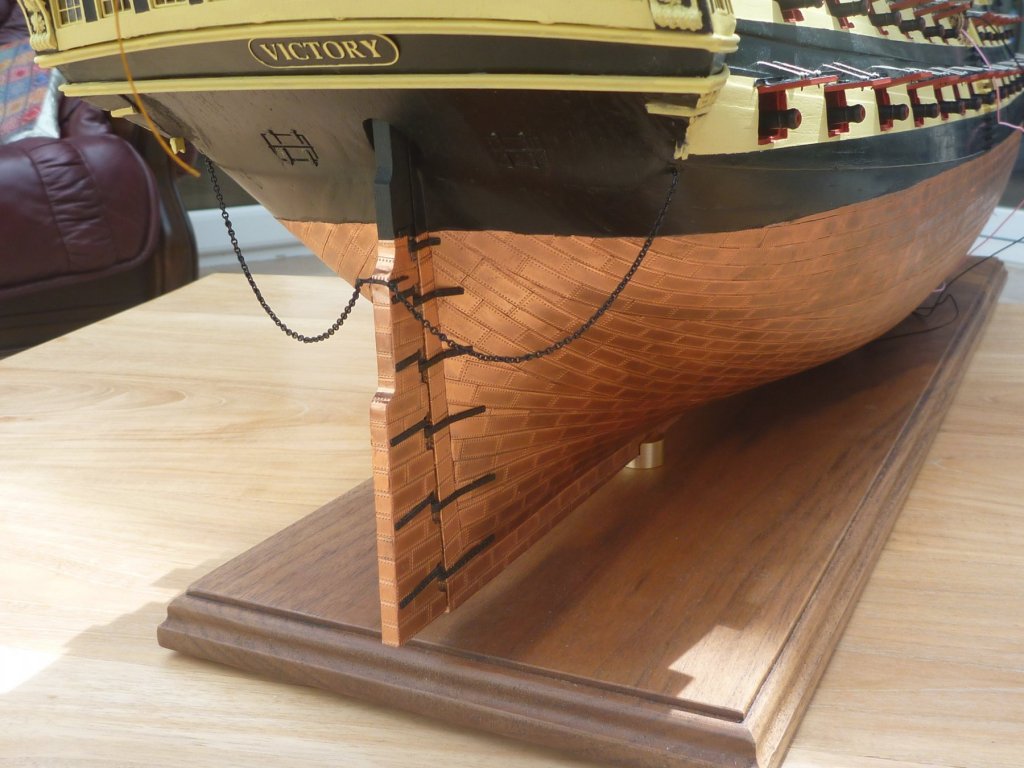
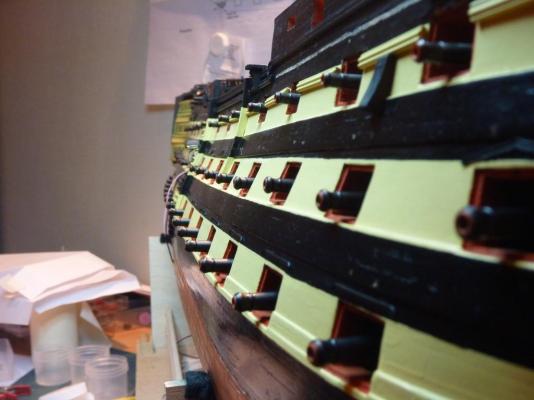
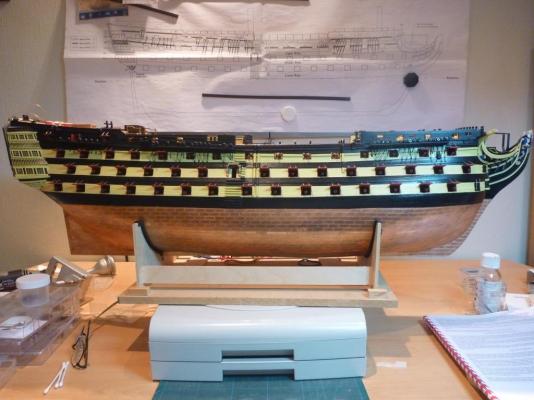
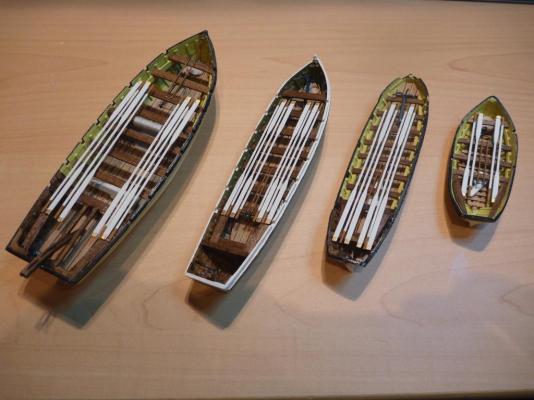
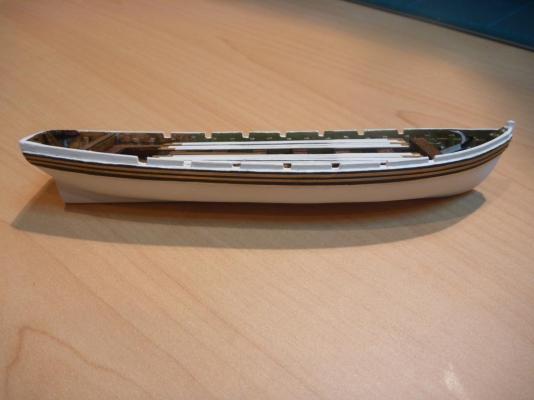
Dummy Barrels dry fitted, you wouldn't want to be facing the angry end of that lot would you! Starting work on the port lids Front chanel and chain plates done. Side steps finished and needing some paint, sorry a bit out of sequence. Gun ports fitted and rigged, dummy barrels in. Starboard pretty much finished. It's great to reach a stage like this. Sit back, pat yourself on the back. Then remember that a ship has two sides. Completed the ships boats for a bit of something different. I'm afraid I didn't capture any progress on them. Here's the Pinnace And the Barge


- 84 replies
-
- 3
-
-
- finished
- caldercraft
- (and 1 more)