MORE HANDBOOKS ARE ON THEIR WAY! We will let you know when they get here.
×


pompey2
-
Posts
511 -
Joined
-
Last visited
Content Type
Profiles
Forums
Gallery
Events
Everything posted by pompey2
-

Second Planking
pompey2 replied to Chuckaug's topic in Building, Framing, Planking and plating a ships hull and deck
Sanding sticks can also help a bit, you can be gentler with your sanding Glue sandpaper strips to a backing strip about 1/2" x 6" -
Mark Can you help by telling us what the dimensions refer to? Is it the size of the finished model or a component?
-
Hi Nick Great to see a catch up. She's looking good, a real credit to you. I love the work you did on the lathe for masts, I'm a sucker for jigs and fixtures (in my DNA) I expect you're looking forward to rigging and the fiddly work? That's were I'm at with my Vic. All the best Nick
-
Before you glue in the bulkheads work out how you will keep them square whilst drying. If they are out then pretty much everything else is. Some people use lego blocks (surprisingly square) or you can make up some braces to hold them. It's a good idea to have all of that detail prepared before any gluing. Nick
-
Another point of course is that the colour is natural.
-
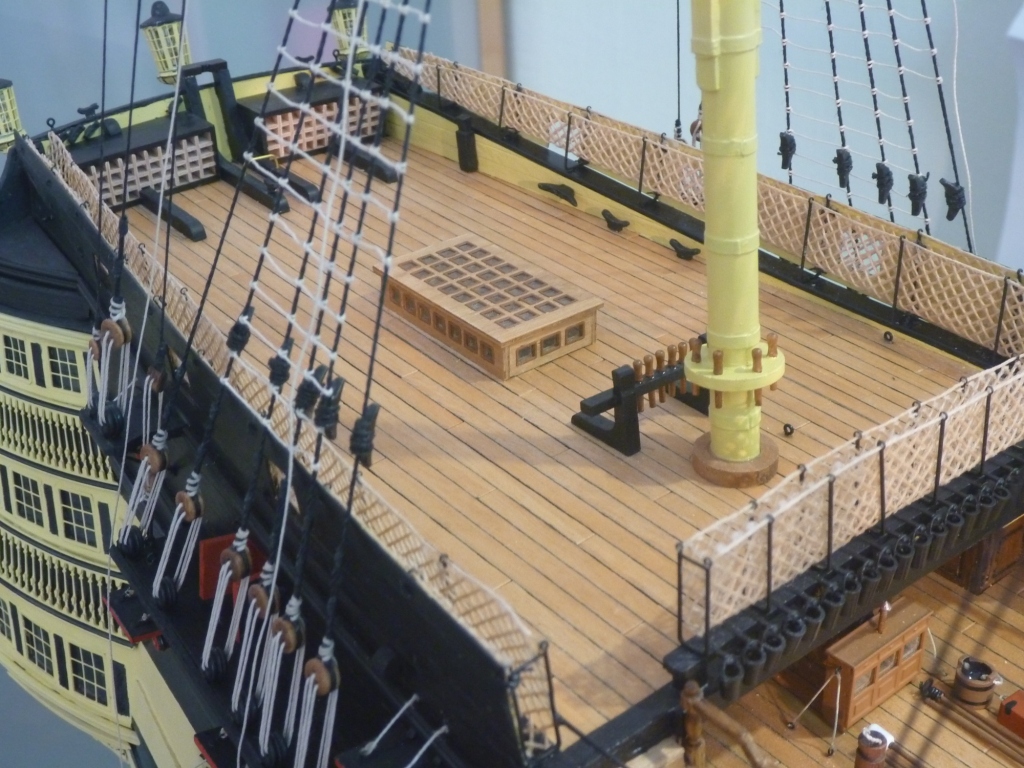
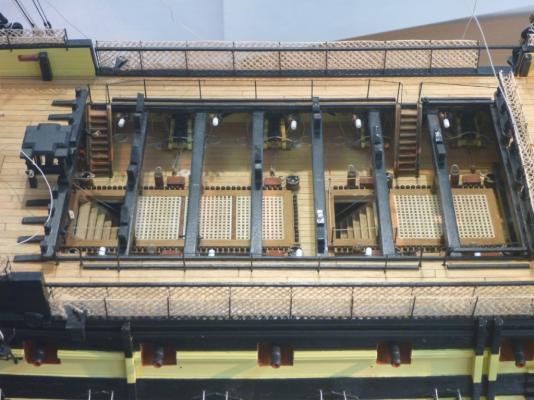
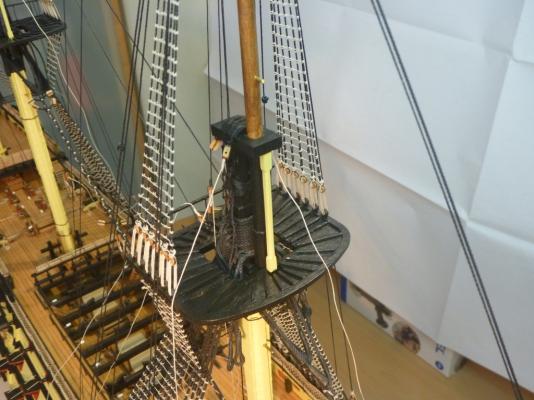
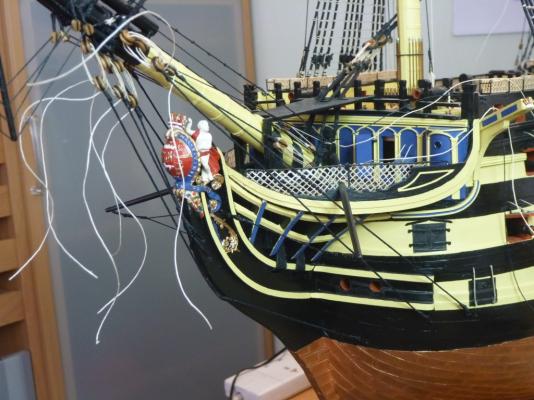
Hi Rich For my Vic netting I followed this calculation I estimated the 'pitch' on the real hammock netting to be approx. 8" square. At a scale of 72:1 that comes out at about 3mm pitch I guess the rope is about 1/2" - 3/4" Again to scale that is about 0.2mm hope that's helpful Nick
-
The UK ran a documentary piece on the TV recently. they interviewed the guy in Leicester and showed how they established the details etc. Nick
-
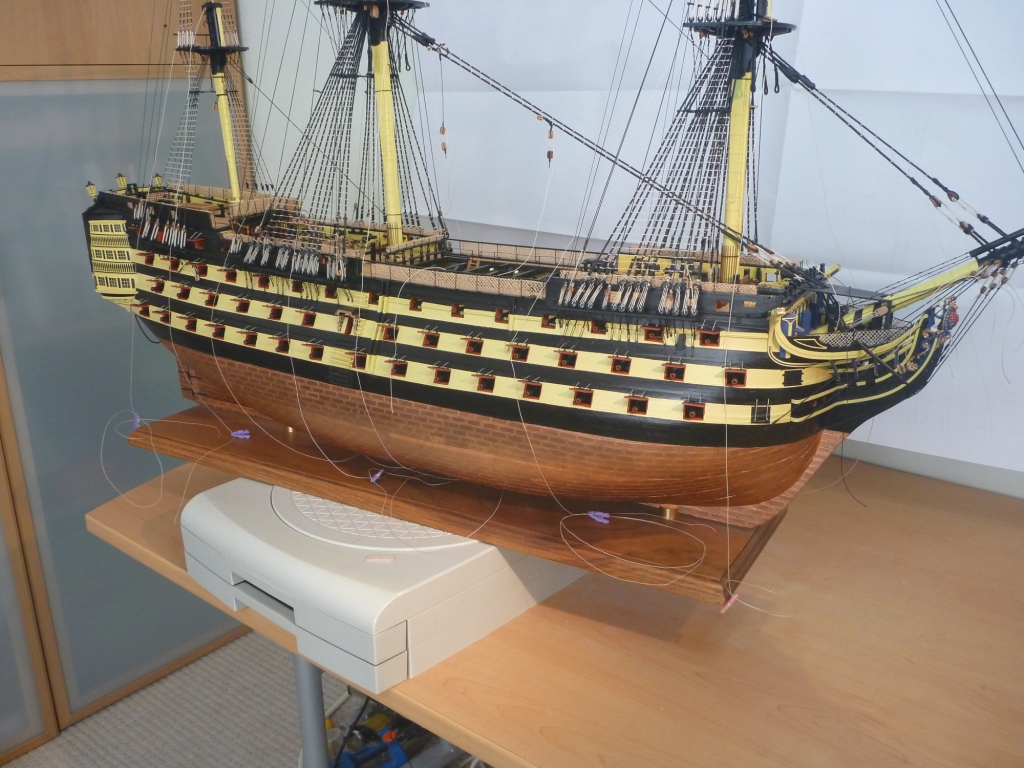
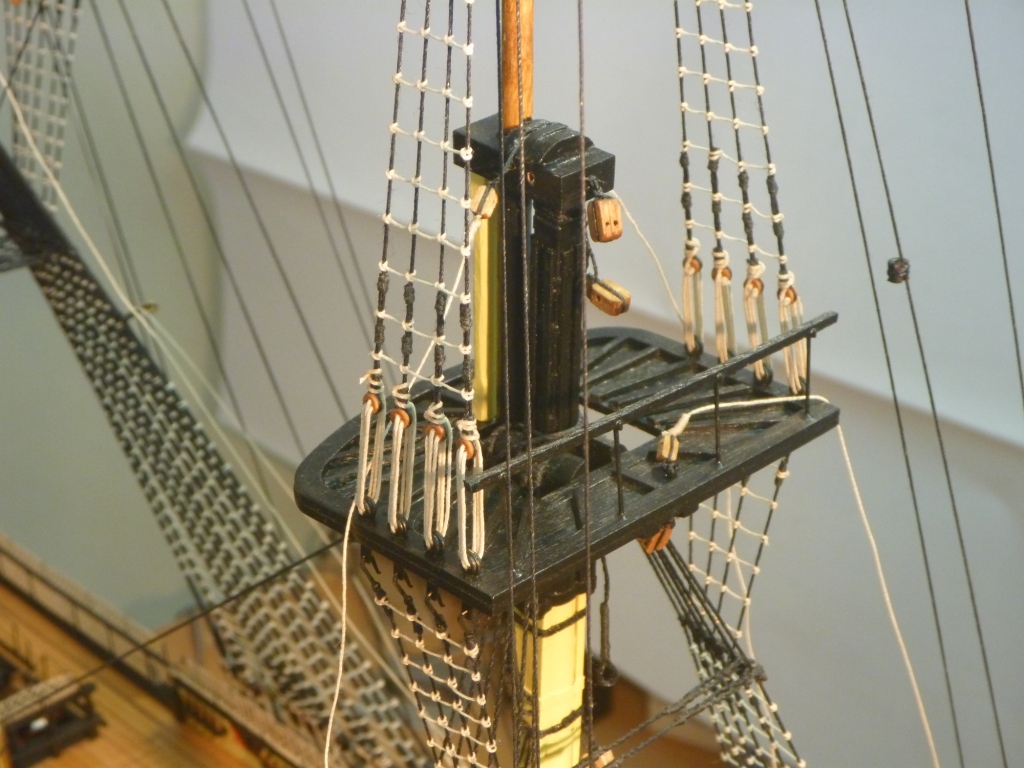
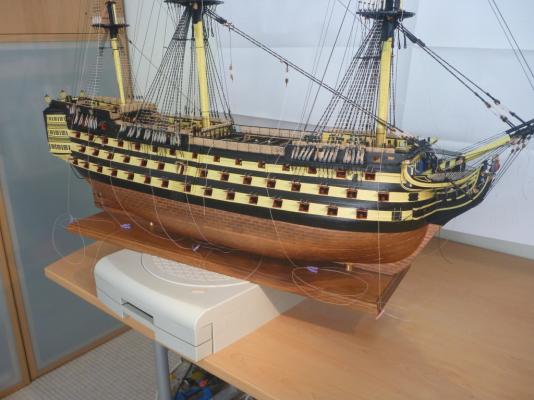
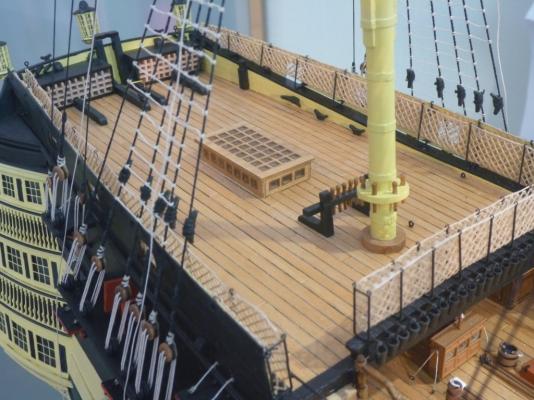
And a few more. Now ready to start raising the Yards. But I considered that once the rigging was all done, cleaning off the dust would be more difficult. So decided to have a good spring clean before starting Yards. I use a piece of rigid plastic tube about 1/4" dia taped into the end of a standard vacuum cleaner. It still gives a pretty good suction. Then I use a soft brush to brush off the dust with the tube right up behind. So this is where I stand before the Yards and once cleaned up. And so onto the first yard, the Fore Mast Yard. held with a pin and a small drop of epoxy to the mast. That's the lot for now Thanks for dropping by Nick


- 84 replies
-
- 7
-

-
- finished
- caldercraft
- (and 1 more)
-
The research into the HMS Victory paint colour was done by Leicester University across quite a range of samples. They found 72 layers. Most interesting though, they layer they attribute to 1805 (Trafalgar) showed distinct scorch marks on the outer surface. Nick
-
Hi Sam yeah it's exactly that. Nick
-
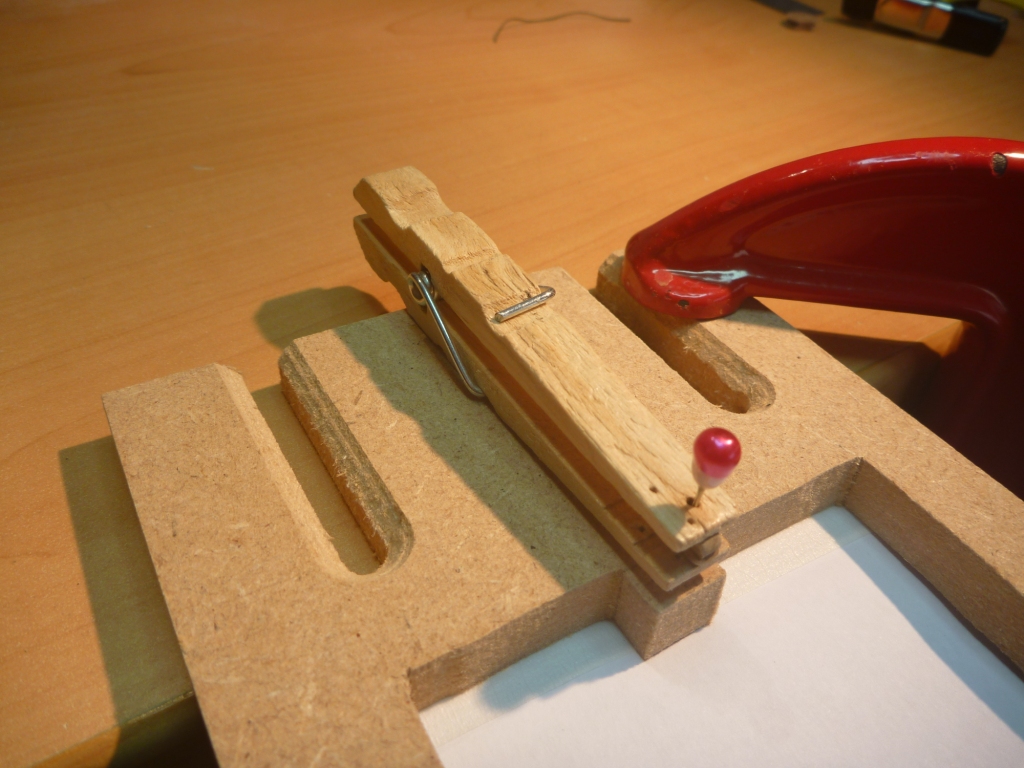
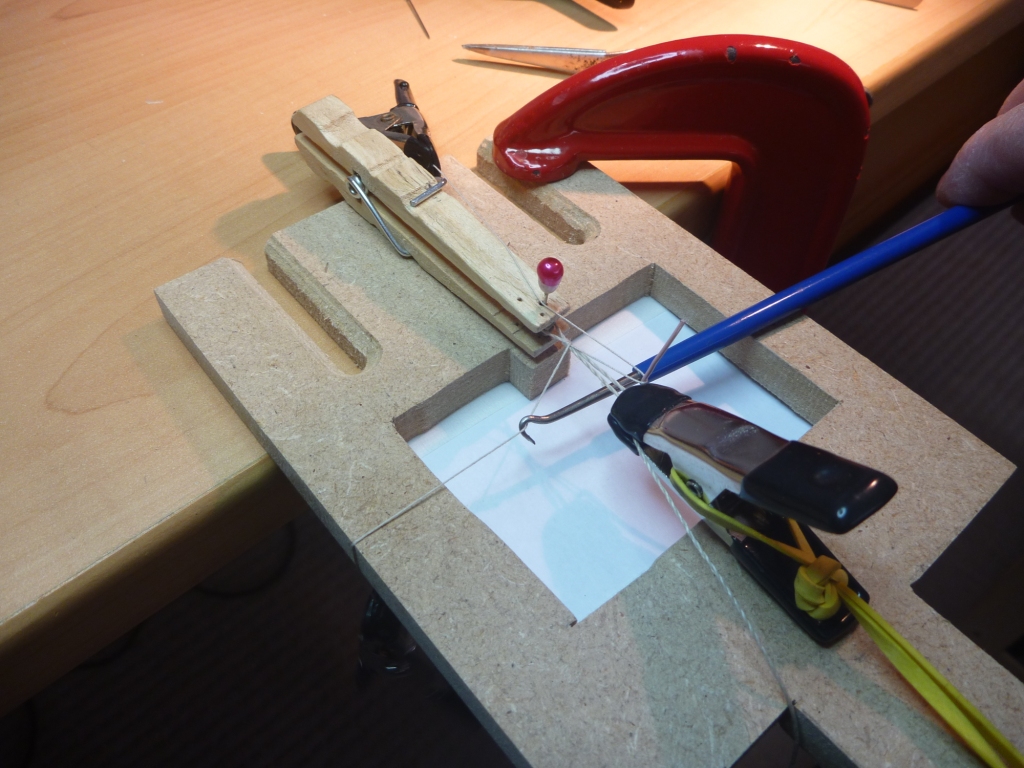
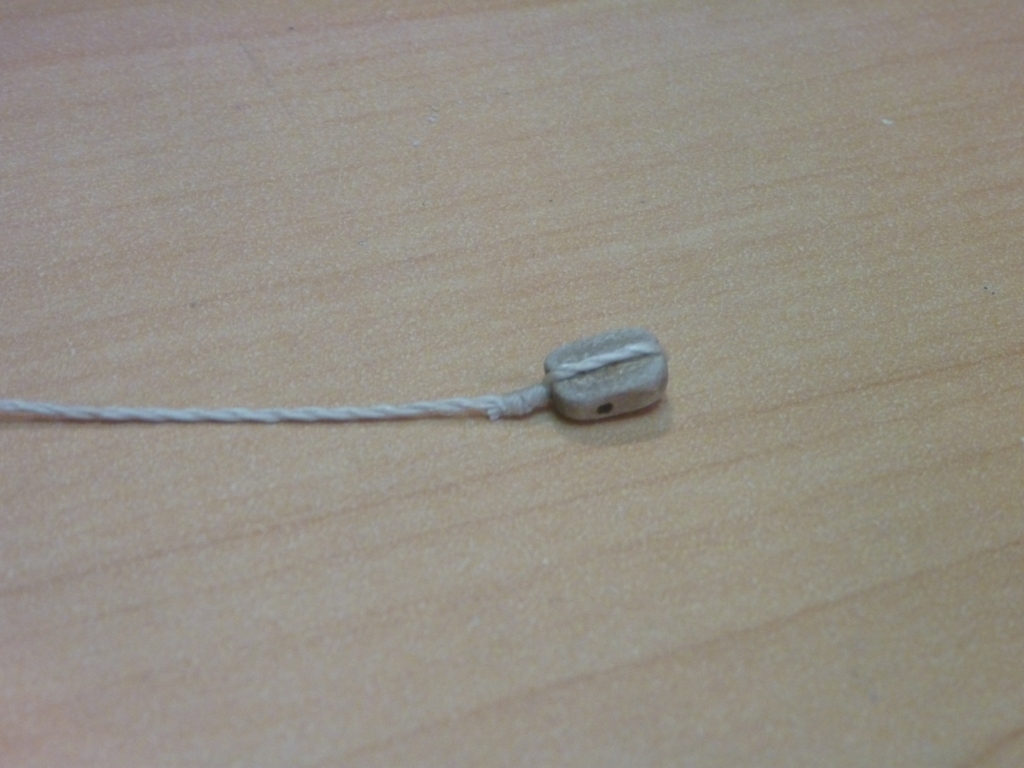
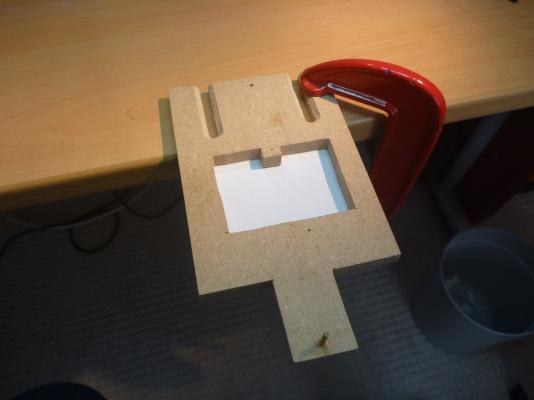
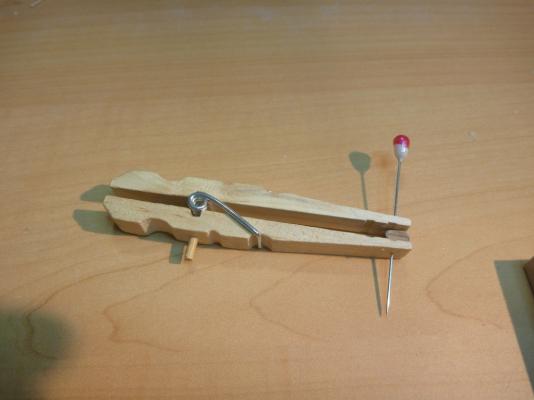
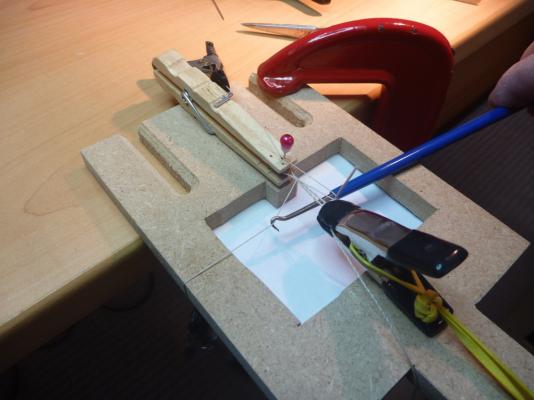
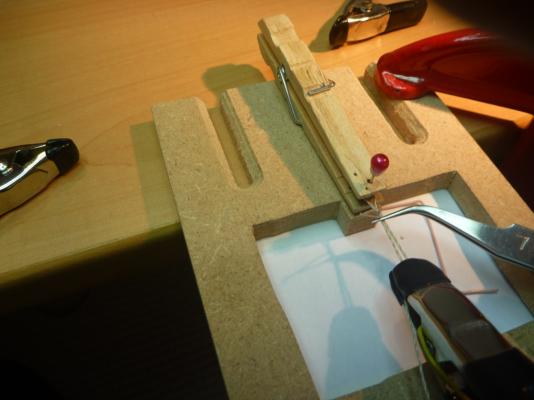
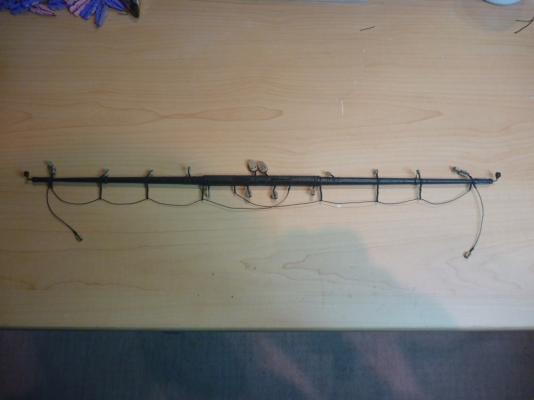
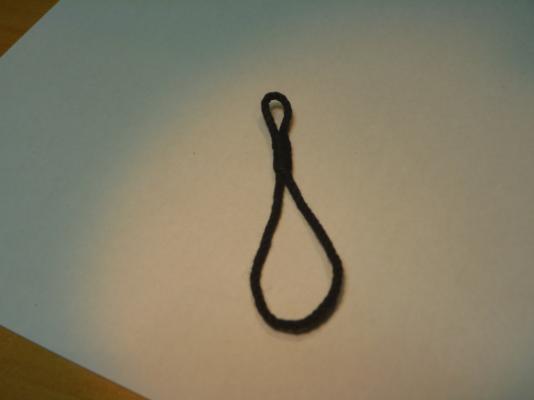
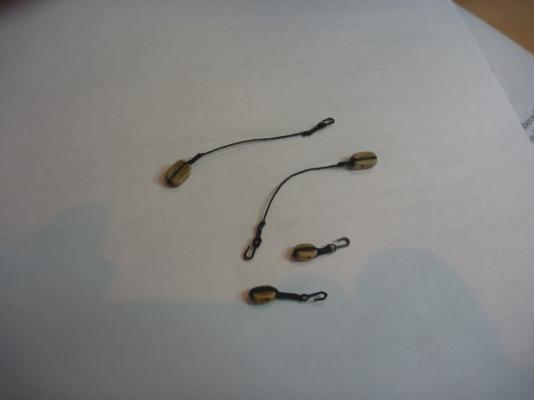
Richard This is the Jig I use. It is good for blocks, dead eyes, rigging hooks, eyes and just loops. I clamp the base to the desk. Then use a modified clothes peg, push a long pin through holes in the peg and the hole in the block. Then the peg fits into the base. There is a 'dowel' on the peg and a hole for the pin. Thread is fed through around the block, caught with a clip and an elastic band tensions the thread. I then seize the number of turns I want using the traditional ‘trapped loop’ method. I pull the end of the thread through the loop and pull out the loop. Push the siezing up tight to the block. Take out of jig, paint with 50/50 PVA and trim when dry. I'm sure some will think this overkill. But I have done hundreds of blocks (even the smallest of sizes), loops, eyes etc. so have gotten pretty slick. And I love the way the it looks. Nick


- 49 replies
-
- 18
-
-
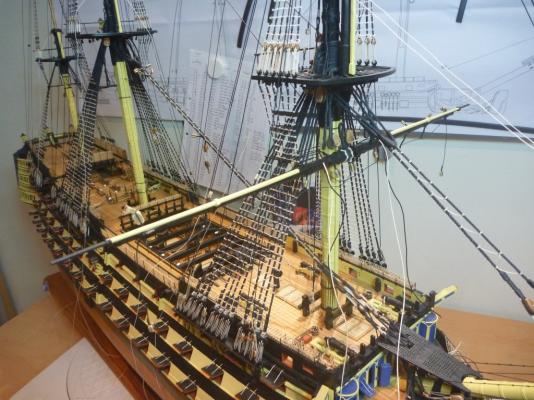
All the standing rigging now done. I moved on to thinking about the Yards To make things as easy as possible and to avoid clumsy hands breaking things i wanted to do as much of the running rigging either off model or on yards before fitting. Yards are at this stage I made up all of the loose rigging beforehand. like the Fore yard Sling parts And the hooked blocks with/without pendants. I also went through all of the running rigging a bit at a time and added standing ends etc to (already fitted) blocks where required. Drilled a few missed sheave holes through masts and hull, trucks in shrouds, eyes with blocks in sides, fixed blocks in slings etc. Will continue Nick

- 84 replies
-
- 7
-
-
- finished
- caldercraft
- (and 1 more)
-
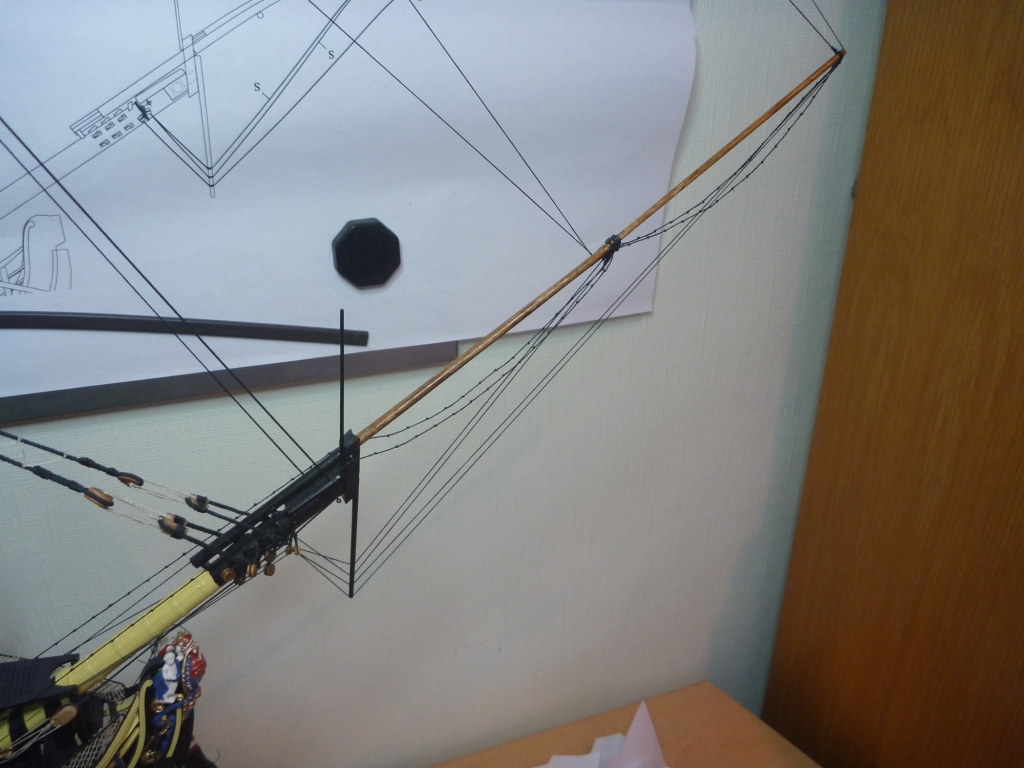
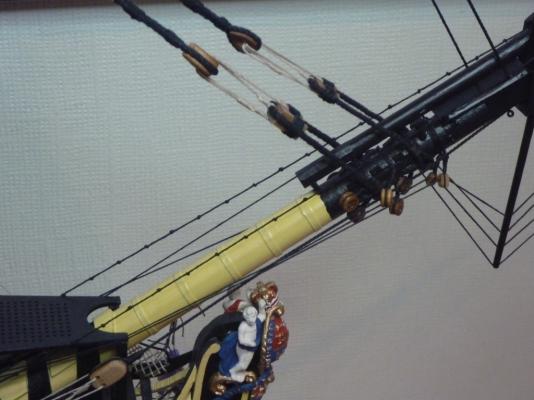
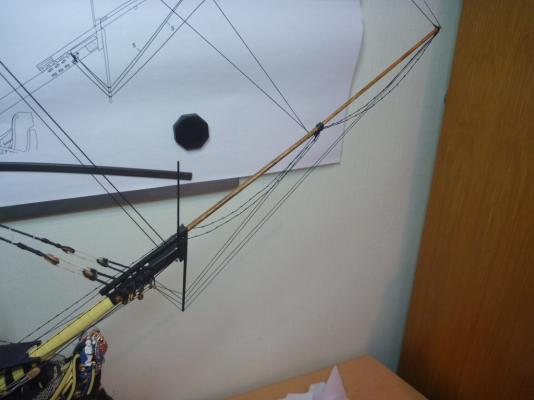
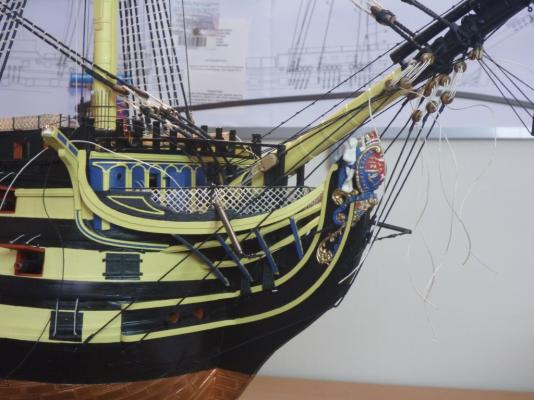
Time for an update, if fact long overdue. First some of the Bowsprit rigging. Doing the Jibboom horses and manropes. The martingales. And Bobstays. And the BS Shrouds. I will split up my update posts into common sections. Nick

- 84 replies
-
- 6
-
-
- finished
- caldercraft
- (and 1 more)
-
Best wishes for a speedy recovery. My next build is Confederacy, should start beginning 2016. So your log will be much scanned, hope you can get back to the shipyard soon. Nick
- 2,191 replies
-
- 6
-
-
- confederacy
- Model Shipways
- (and 1 more)
-
Brian I have the Motosaw and I'm very happy with it. I don't think it would be up to constant use or heavier jobs but occasional shapes from reasonable thickness, no problems. Nick
-
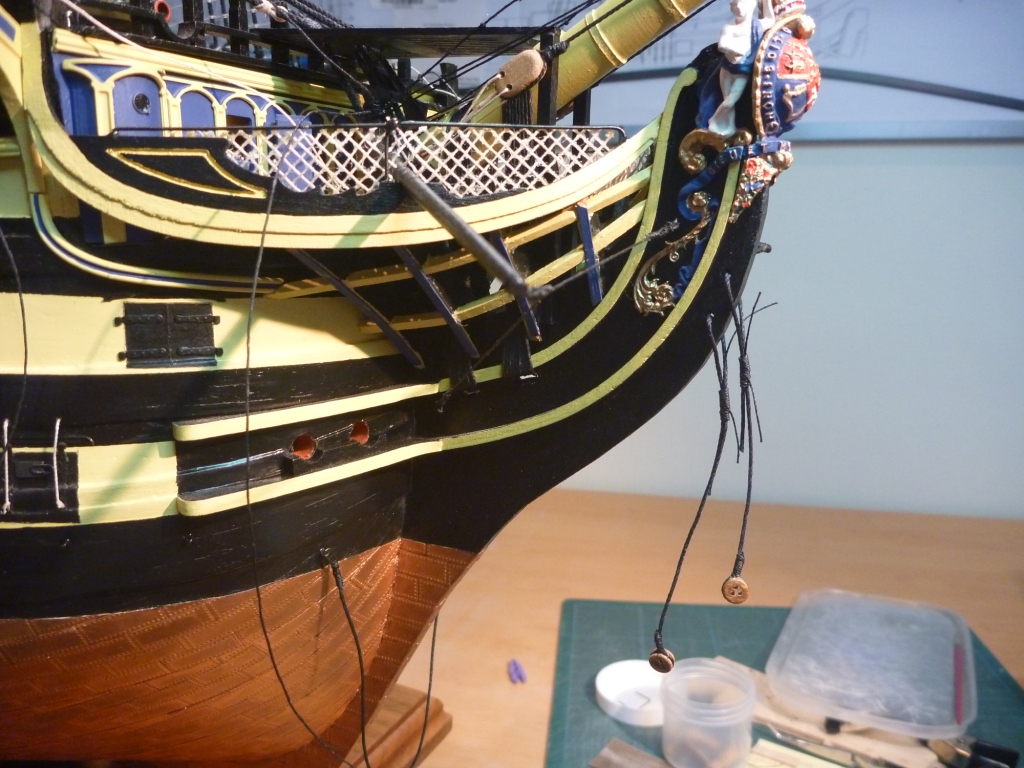
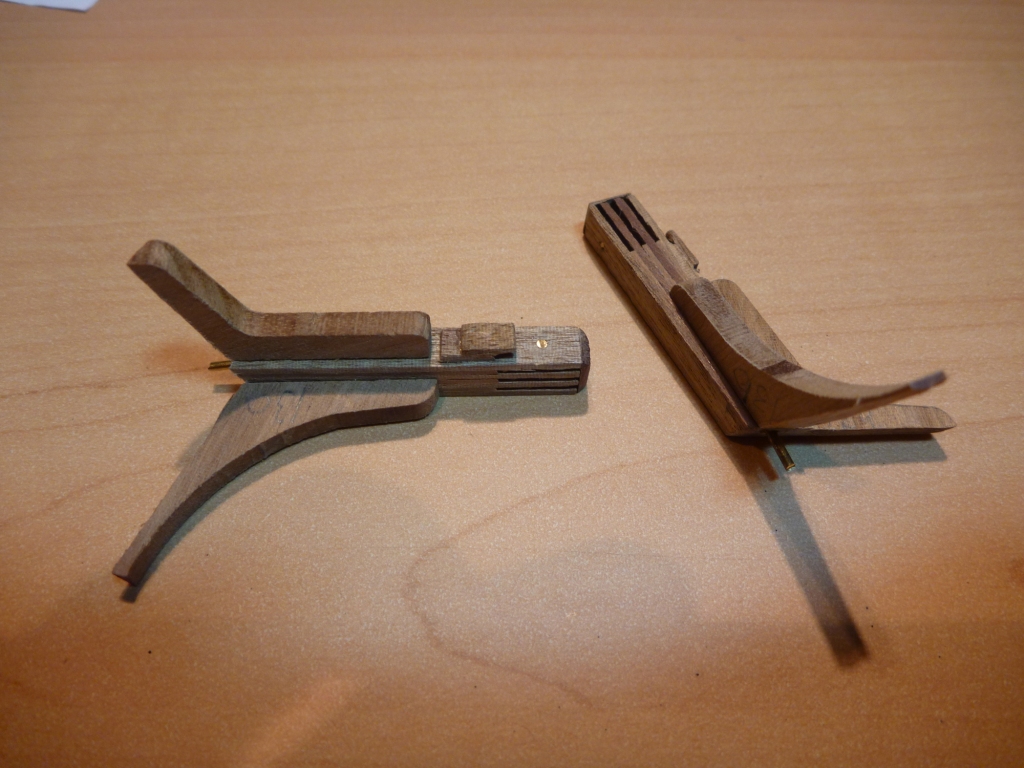
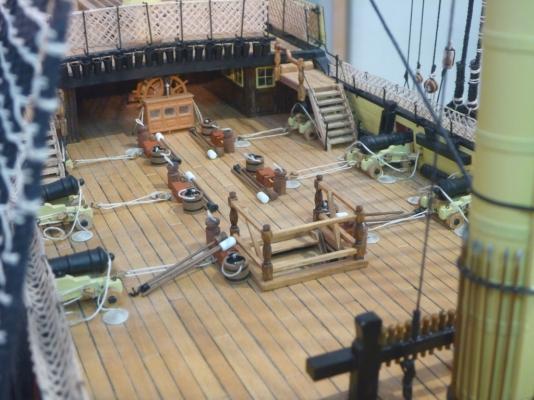
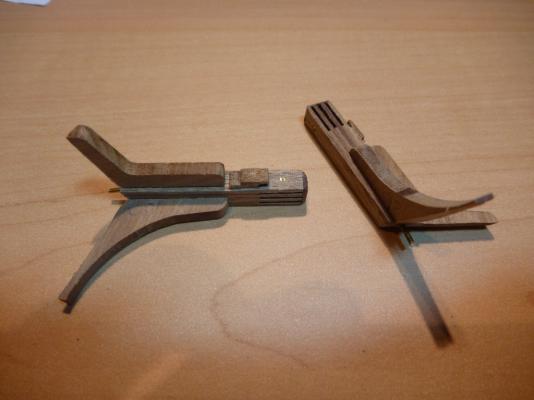
Hi Rich Your Vic is coming on great guns. The question you asked - yes it is the Catheads that go on there. Here's photo's of the assembled bits (great fun that little assy) and in position. Keep up the good work Nick

- 414 replies
-
- 5
-
-
- caldercraft
- victory
- (and 1 more)
-
I have often thought to add some pictures here, I use it all the time. I will see what I can scare up and post it here. Nick
-
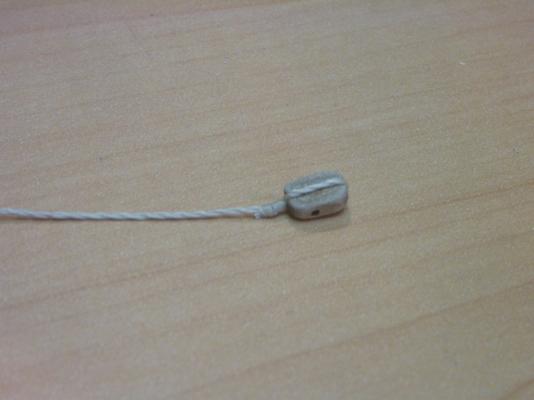
I use a little jig I made that holds and tensions the lines. I form a loop around an old deadeye and serve a half dozen turns. Take it out of the jig, use tweezers to hold the block in the loop and pull the ends to tighten the loop. Brush with 50/50 PVA and trim when dry. Nick
-
Hi Mikiek it's quite difficult to picture your issue. A photo tells a thousand words as they say. If you can post a few I'm sure you will get some good advise. Nick
- 1 reply
-
- 1
-
-
Favorite new hand tool discovery
pompey2 replied to Senior ole salt's topic in Modeling tools and Workshop Equipment
Certainly agree with the tweezers. I also find my side cut cuticle cutters invaluable. For trimming excess thread they cut well and right up to the knot. -
One possibility, extending the 'S' and 'D' codes you might get - S Core. ie metal block with a single core???
-
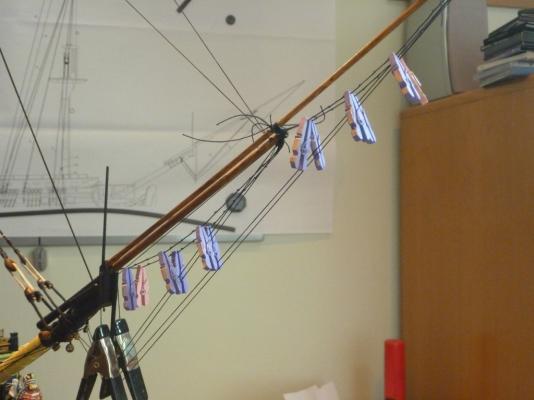
October 21st - Trafalgar Day. - 210 years. The NMM is displaying a Union Jack that was flown at the Battle. It was on HMS Minotaur and now sits alongside Nelson's uniform. Nick
-
Agree, watered down PVA for rigging. You do see lots of comments using CA to fix a stopper knot. In that case even a later fracture is unlikely to be a problem so I do use it that way sometimes. And of course to create a 'needle' for threading Nick
-
Gluing 101
pompey2 replied to CPT_D's topic in Building, Framing, Planking and plating a ships hull and deck
Several people here refer to 'Waxed Paper' for glue dispensing. Of course Cereal boxes are normally waxed. So I cut up old boxes, then cut off an inch square, then after use fold it over and throw away. Good for CA, PVA and Epoxy. One box will last for years. Nick -
Will depend a bit on scale but at .15mm it is likely to be less than 3/8" scaled. So going up a bit would likely be more in keeping with practice.