HOLIDAY DONATION DRIVE - SUPPORT MSW - DO YOUR PART TO KEEP THIS GREAT FORUM GOING! (Only 44 donations so far out of 49,000 members - C'mon guys!)
×


HIPEXEC
-
Posts
2,698 -
Joined
-
Last visited
Content Type
Profiles
Forums
Gallery
Events
Everything posted by HIPEXEC
-
 Great job. Much better than my Swift.
 -
This was my first build and I learned a lot from it. I salvaged and covered up most of mistakes and it sits on my desk. I can't wait to watch your build log. Good luck. Rich
-
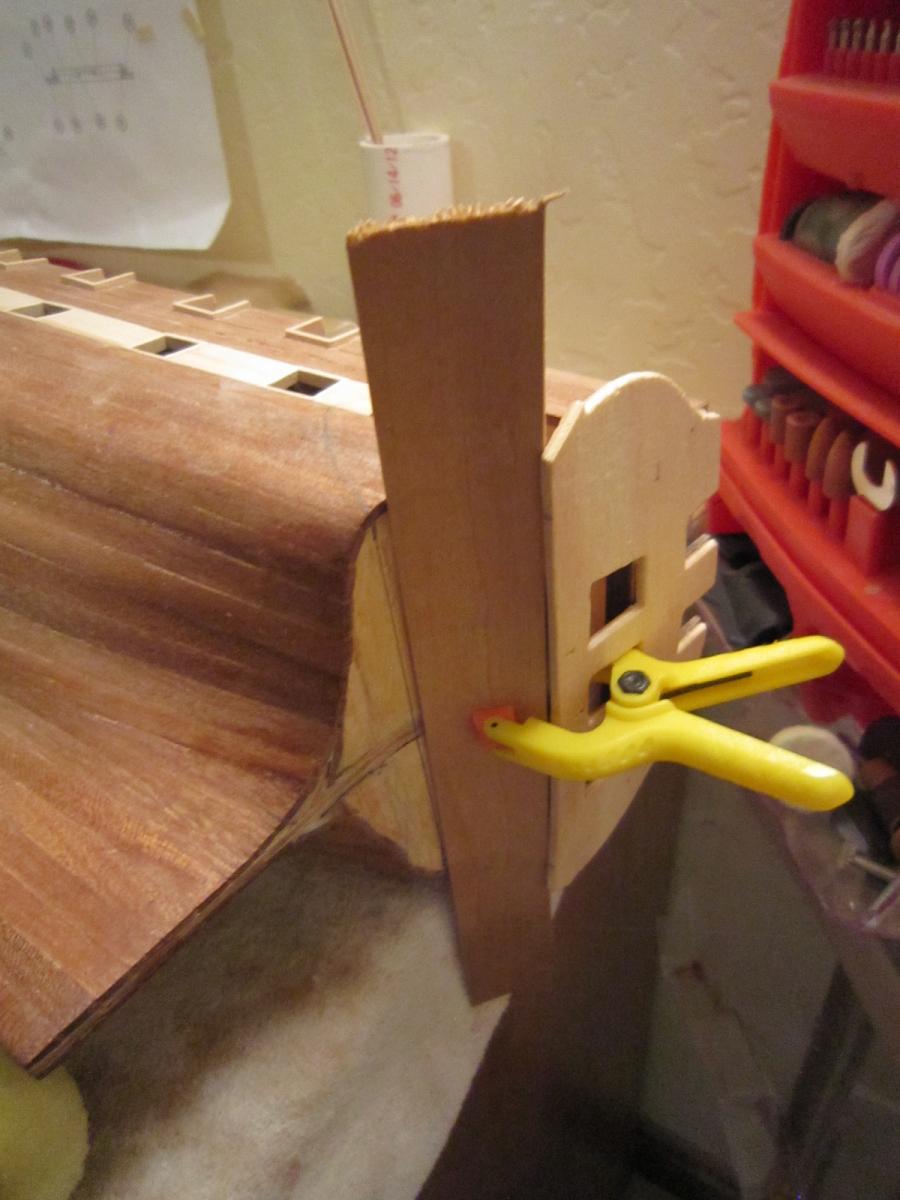
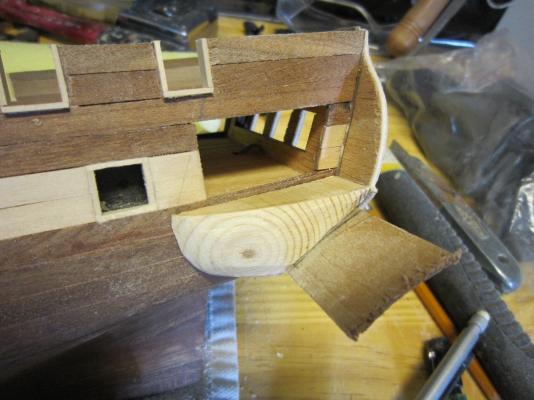
It is with great apprehension that I am in the process of gluing all the parts I fabricated on this aft gallery. I'll have no one to blame but me if it goes wrong.....here goes!!
-
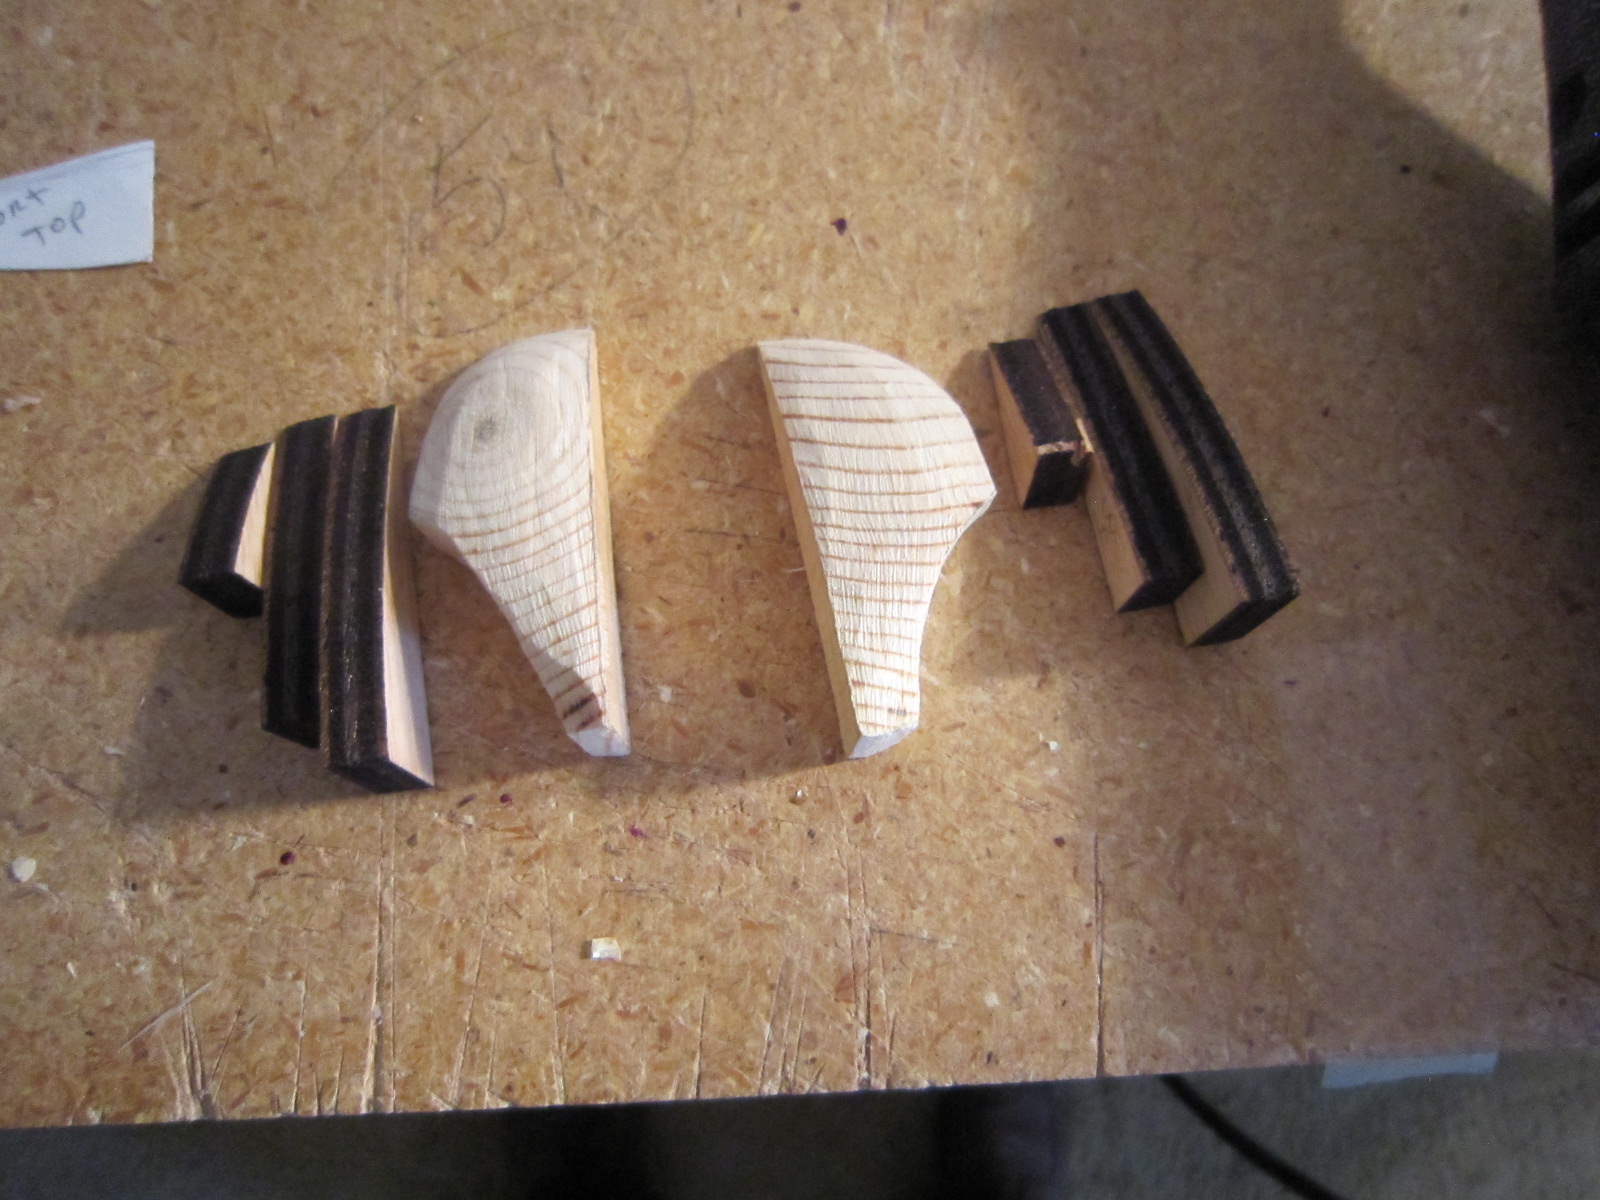
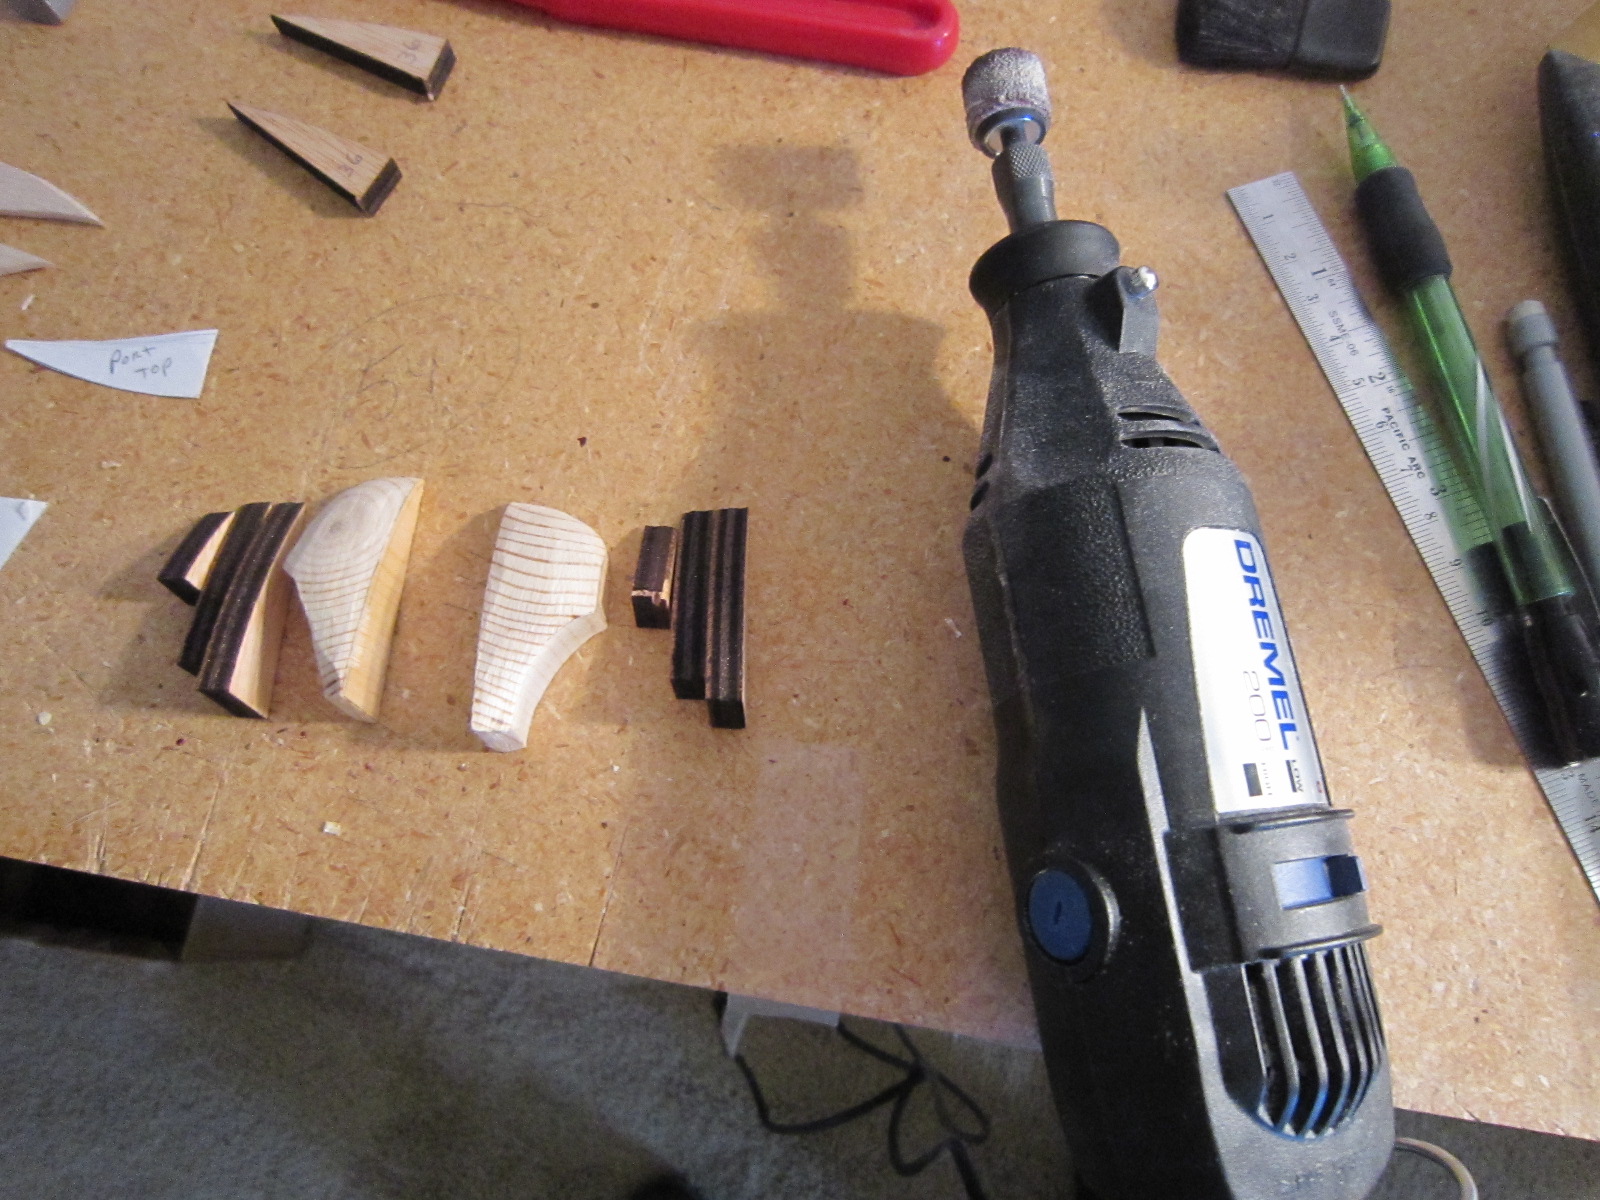
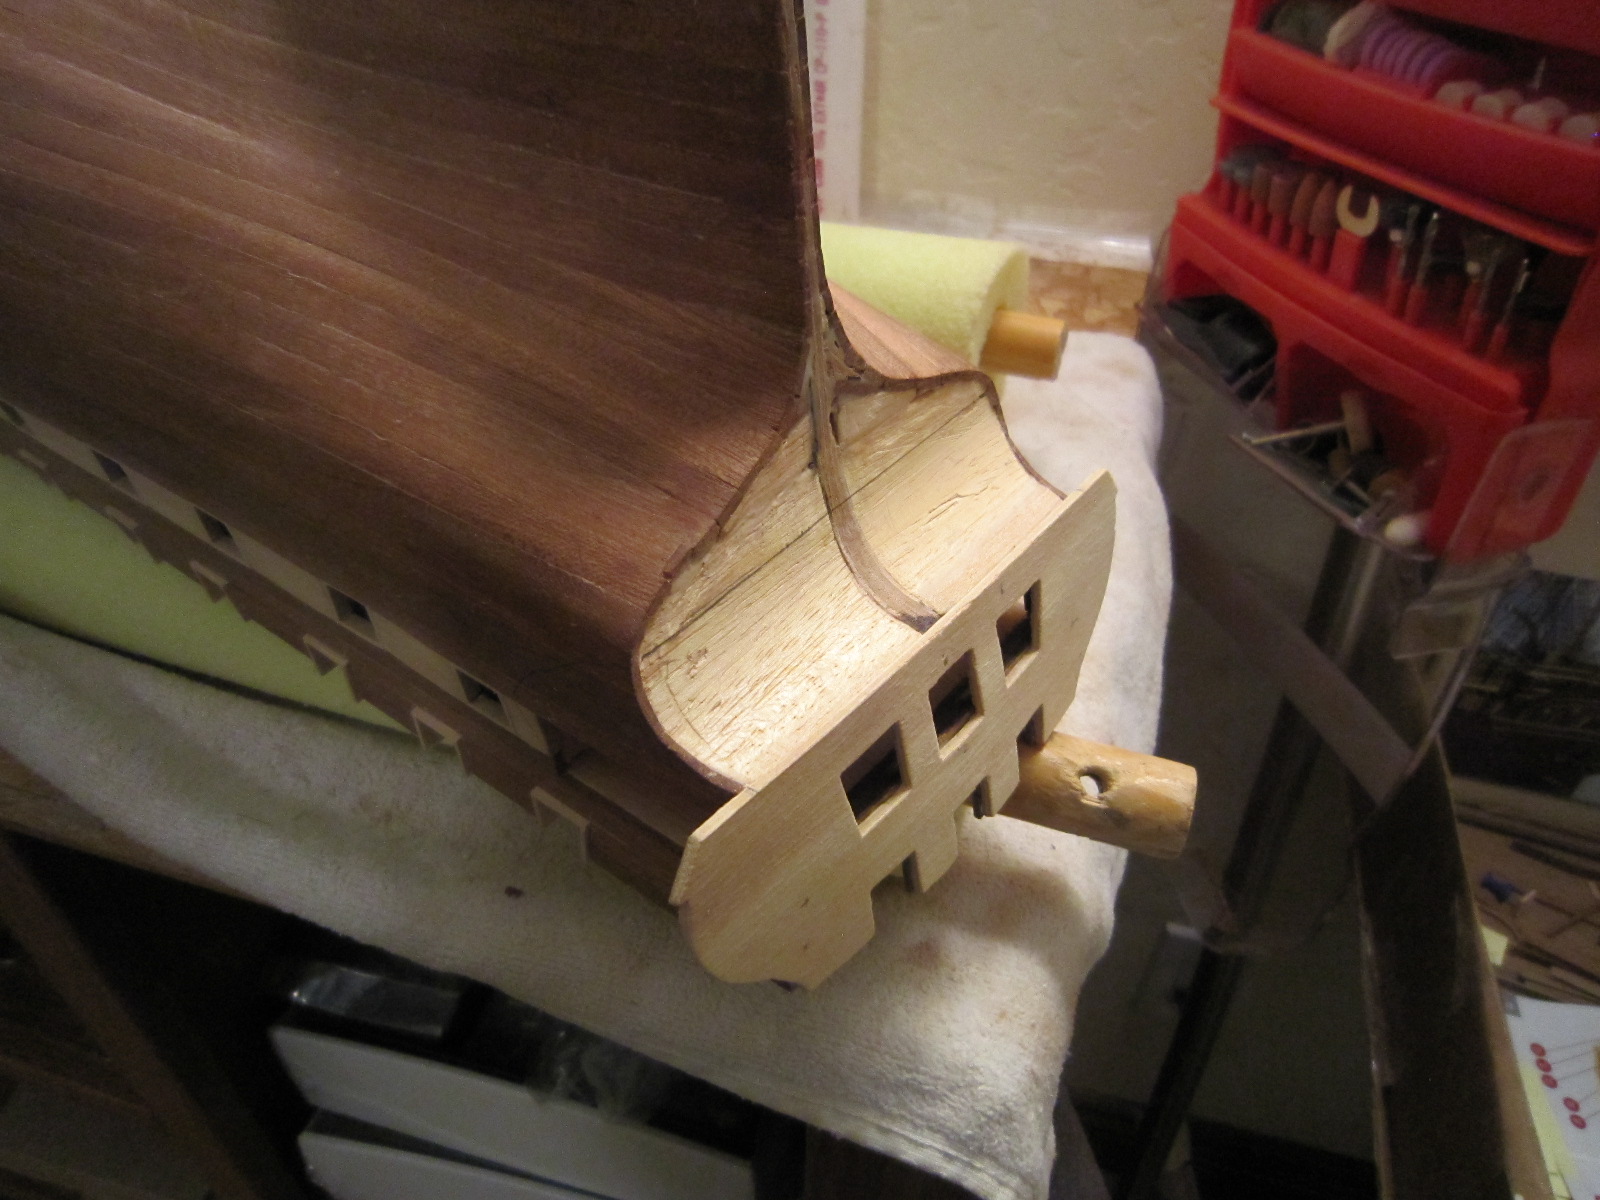
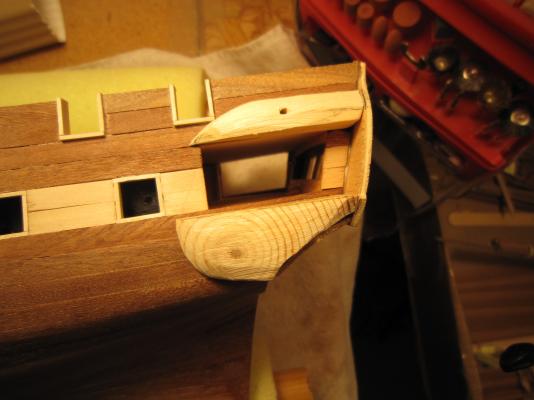
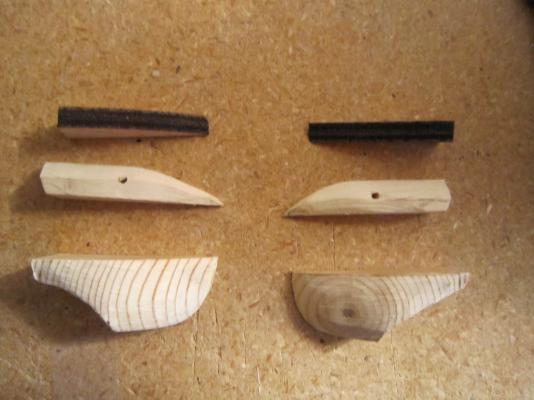
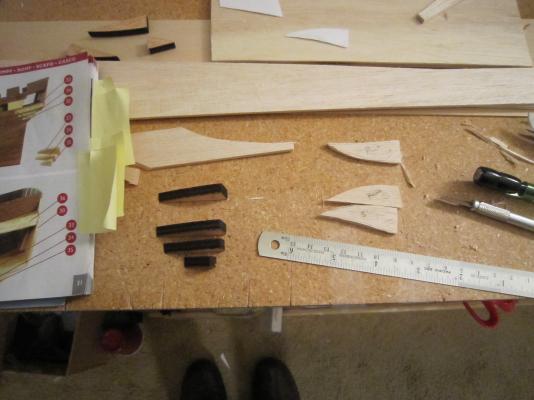
I used my trusty Dremel again to rough in the tops for the aft galleries or castles. I've included in the photos the pieces Constructo provided to to that job. It seems I would have had to build these parts up with a layer or layers, so making my own seems a better way to go. By the way...I researched what goes on in these aft galleries. It turns out that's where the ship's captain's quarters are and in one of those protruding wings resides his toilet. I wonder for the sake of realism I should make a hole in the bottom of the wing where this toilet opened to the sea?
- 1,756 replies
-
- 2
-

-
- constitution
- constructo
- (and 1 more)
-
I'm with you....no power drill for the bowsprit hole. I''ll go in like you did...small hand drills building an ever bigger hole. I think I'll build a small jig to match the angle on my plans. Constructo doesn't show actually drilling into the deck, though, so I guess I'll stop after I get through the bow rail and see what I can find out about setting the bowsprit into the deck.
-
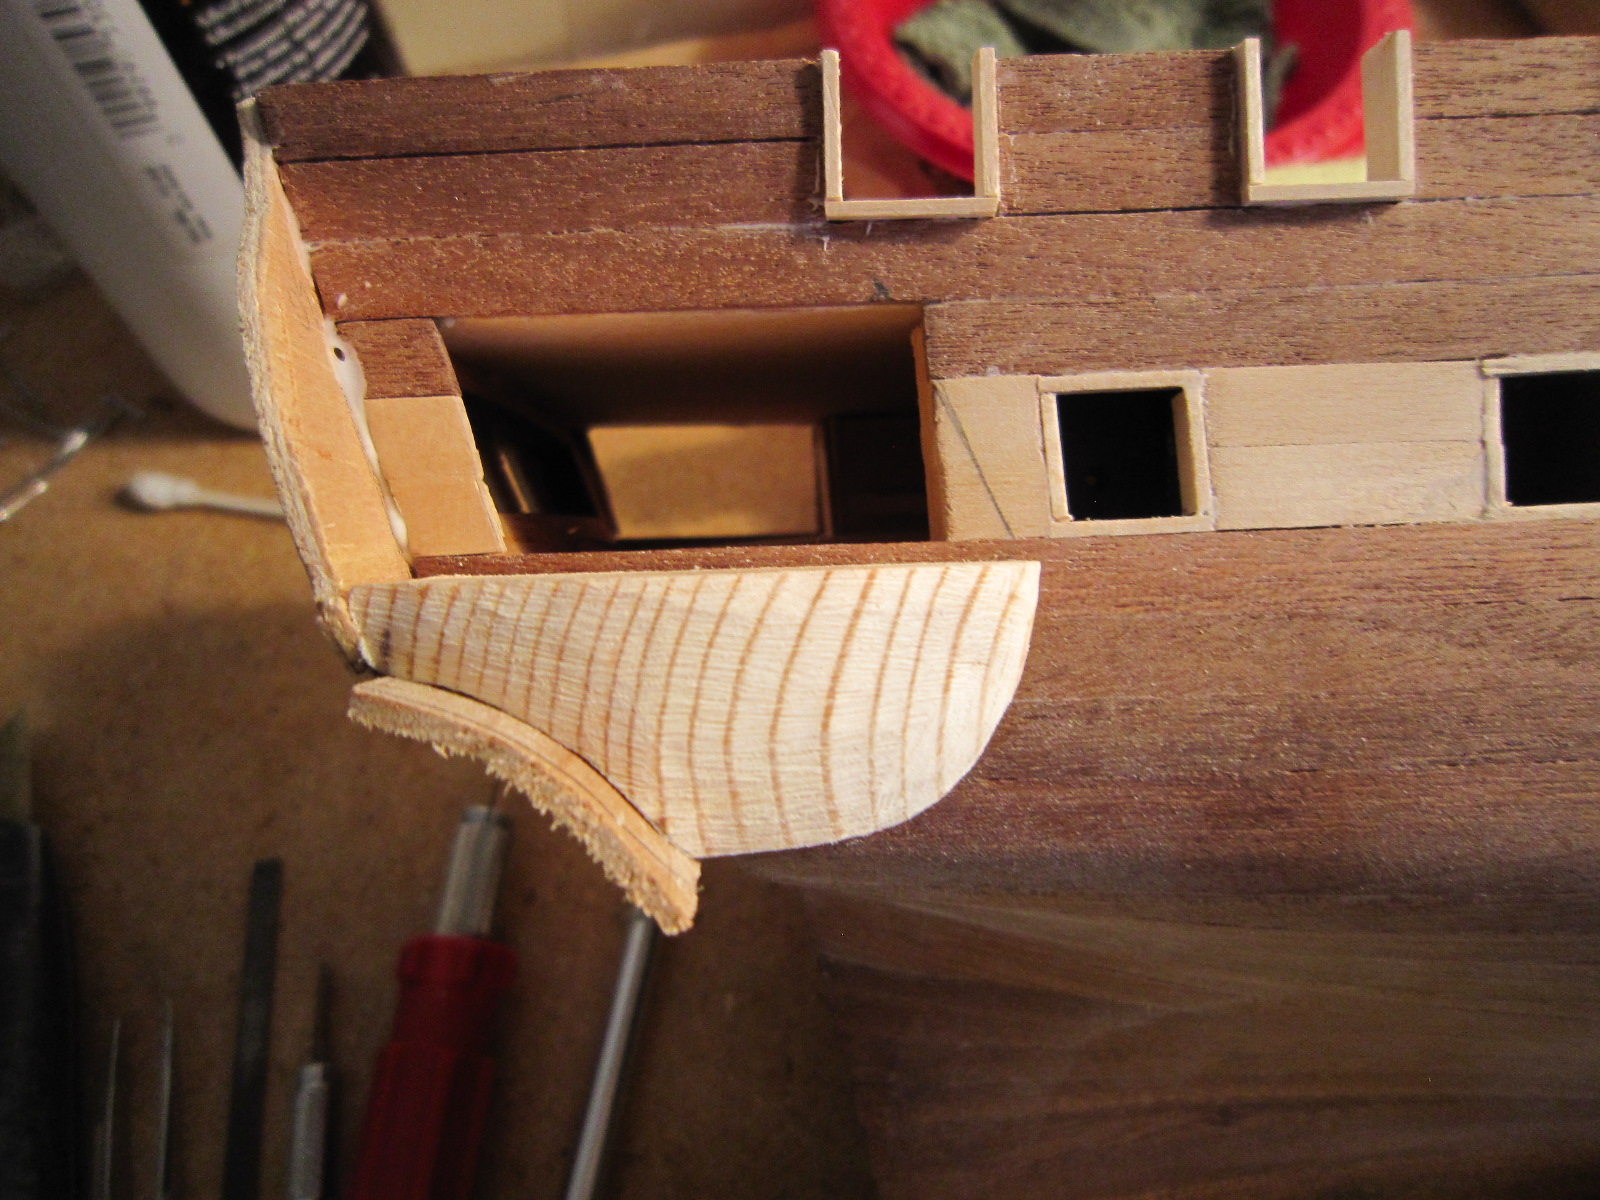
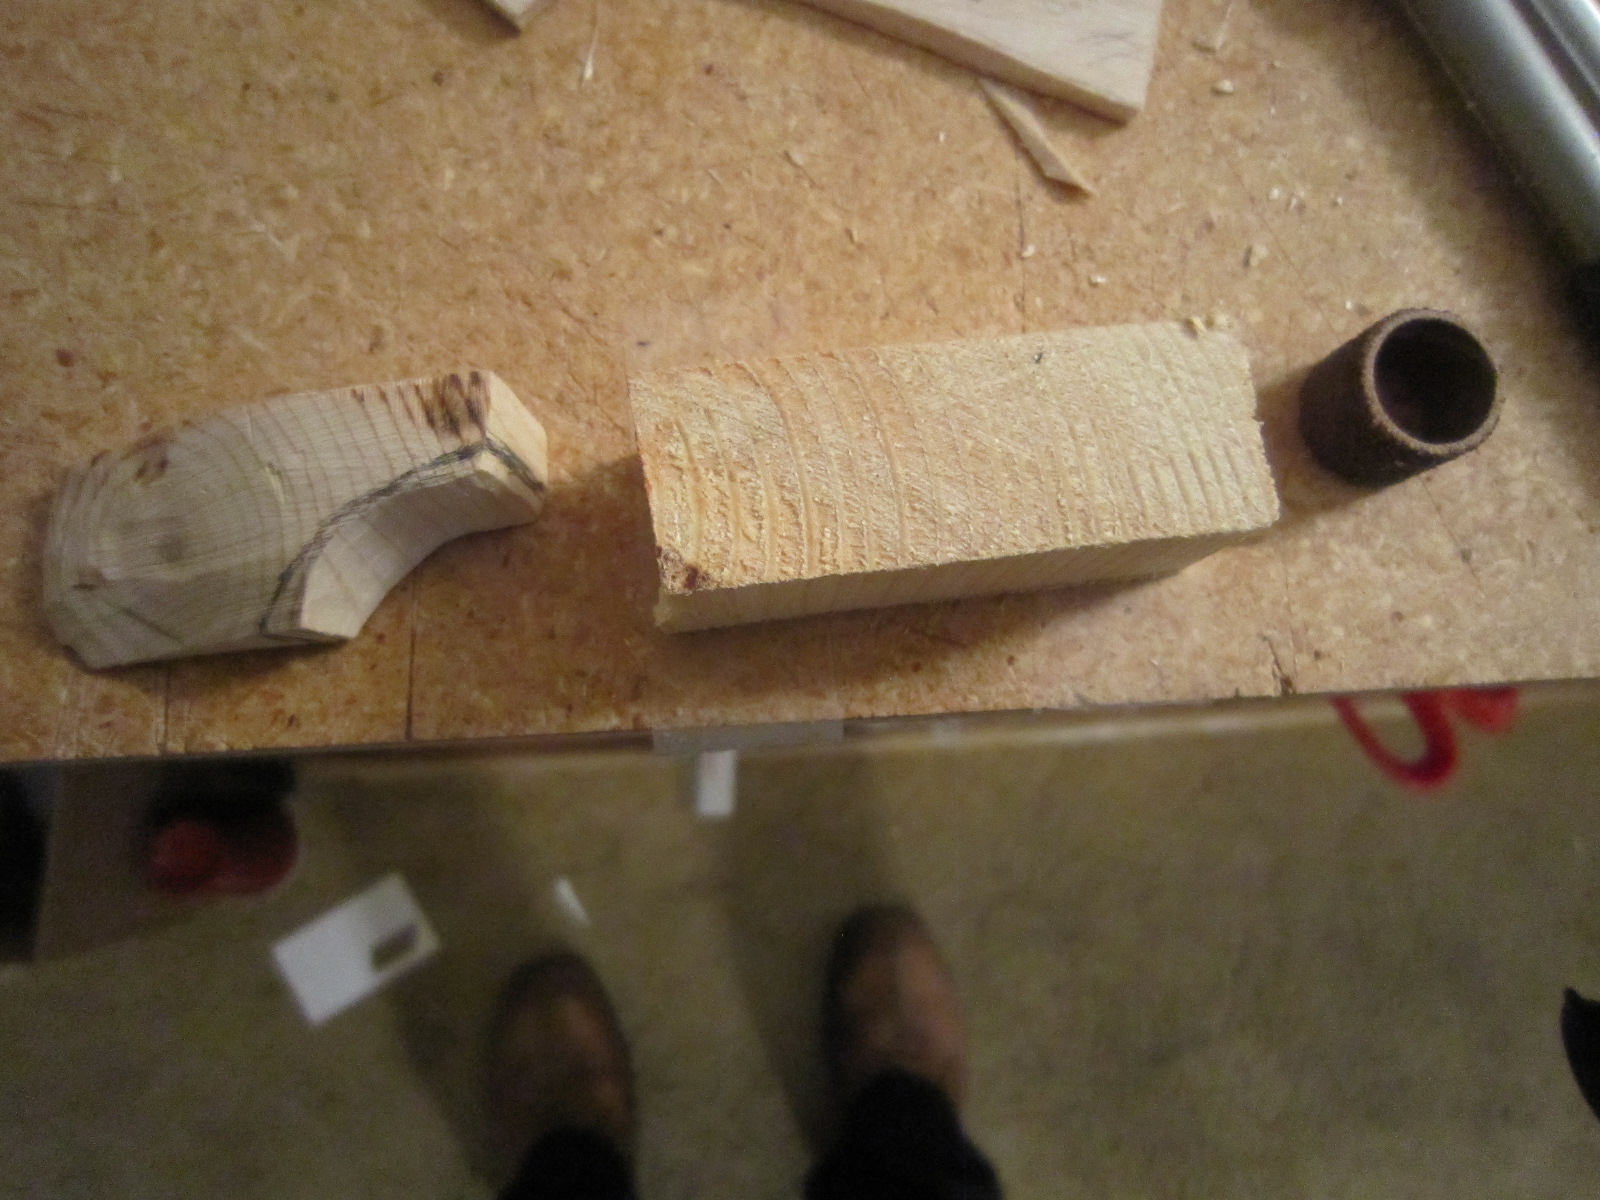
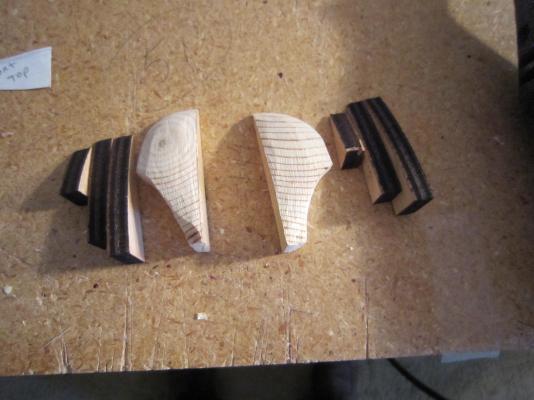
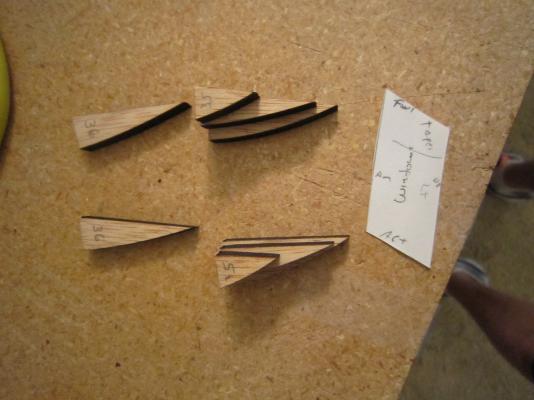
Starboard side Castle base roughed in. Got better with the Dremel and it took half the time. You can see what Constructo gave me sitting next to what I made.


- 1,756 replies
-
- 1
-
-
- constitution
- constructo
- (and 1 more)
-
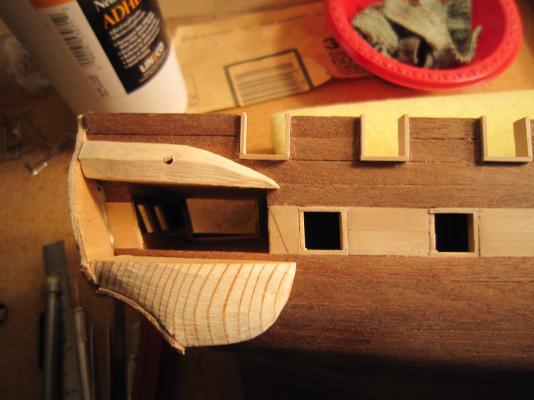
I just finish rough finishing the port Castle base. It's a heck of a lot better than what the kit gave me. Now I'll rough out the starboard base. I just realized it looks like a bullseye! That's why they invented veneer planks.
-
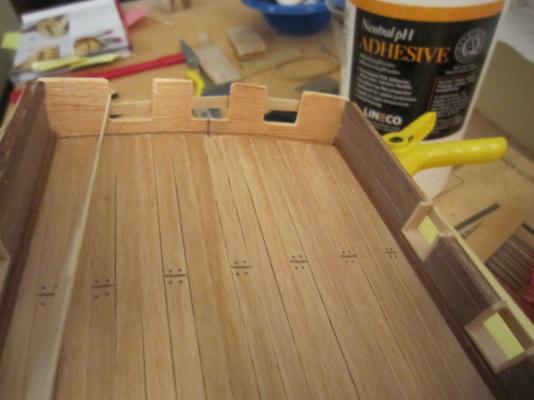
I could even put some furniture in there. It's deck has even been planked and varnished! While I'm waiting for all the Dremel sawdust to settle (even my Admiral is sneezing), I planked the aft rail while I continued to carve and Dremel the castle bases.

- 1,756 replies
-
- 2
-
-
- constitution
- constructo
- (and 1 more)
-
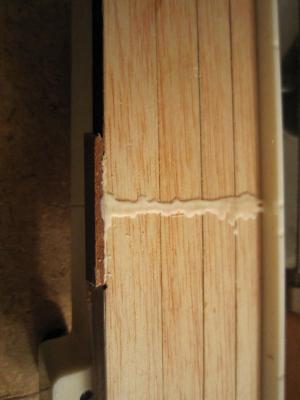
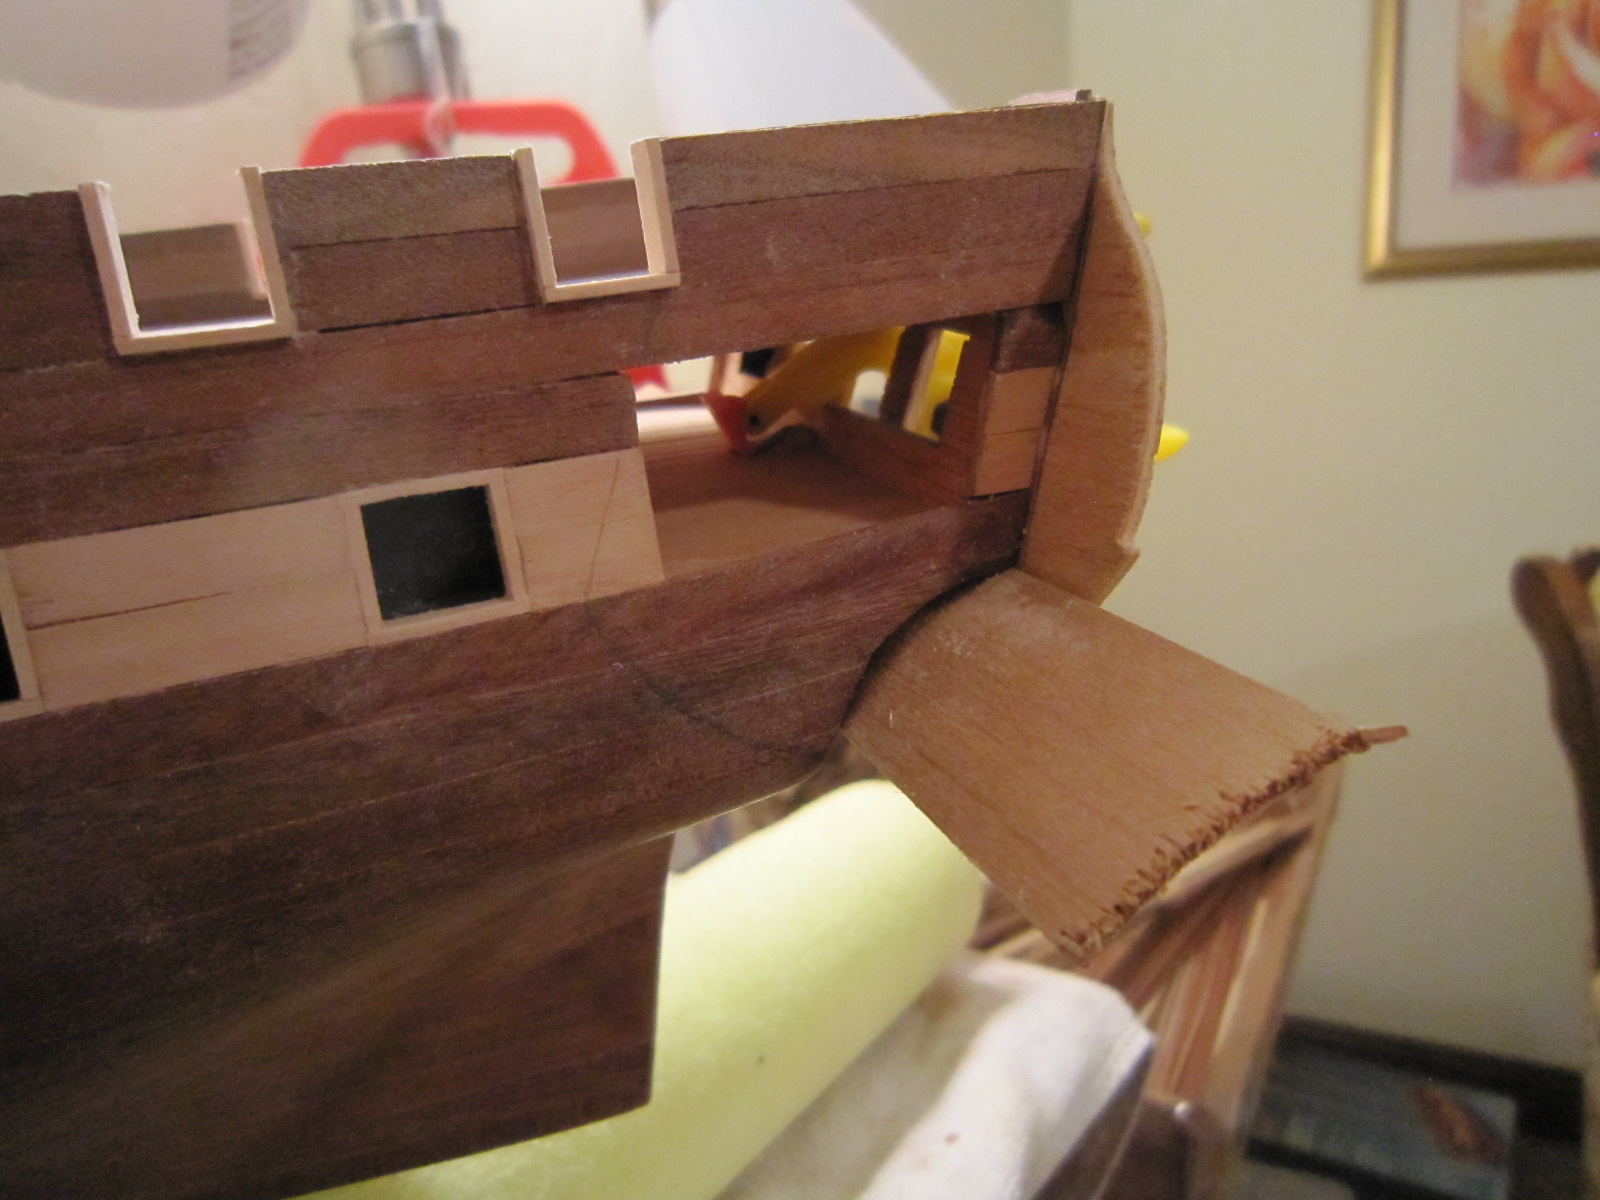
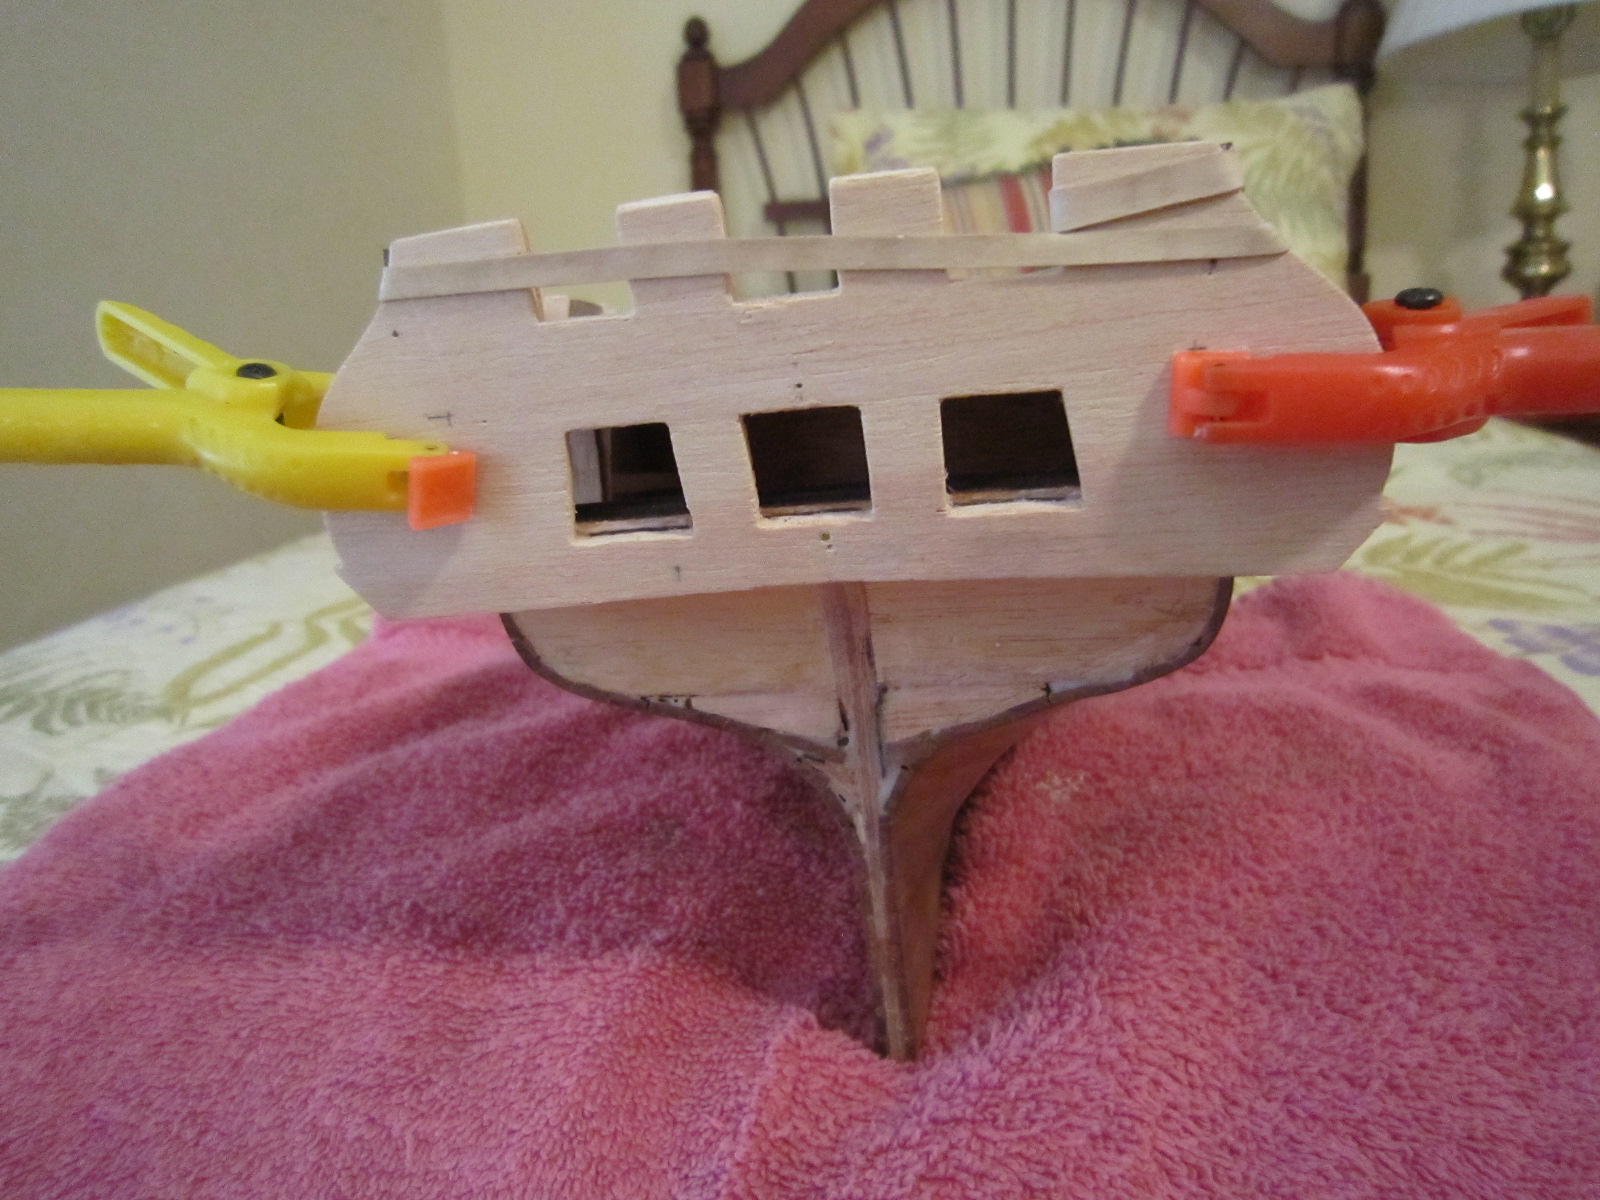
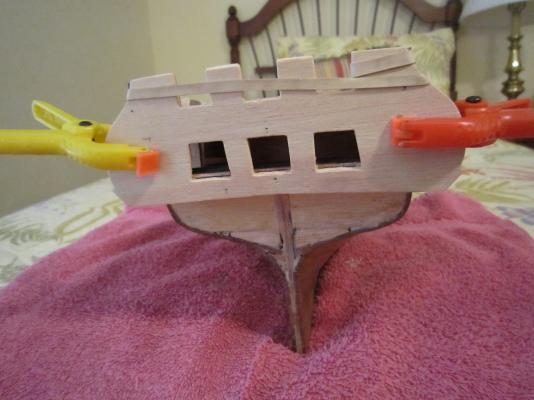
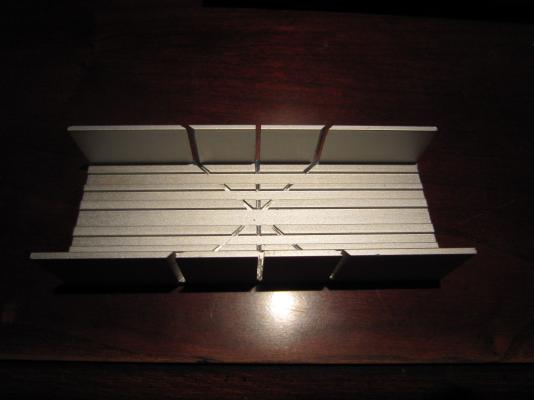
Sam, Here's another view of the 2 mm filler piece I made to fill in the stern. It'll have a veneer layer of planks, so by the time I blend it in, no one will know it's not the original transom. I bowed it by soaking it and then rubber banding it to a magic marker which gave it the correct curve.

- 1,756 replies
-
- 3
-
-
- constitution
- constructo
- (and 1 more)
-
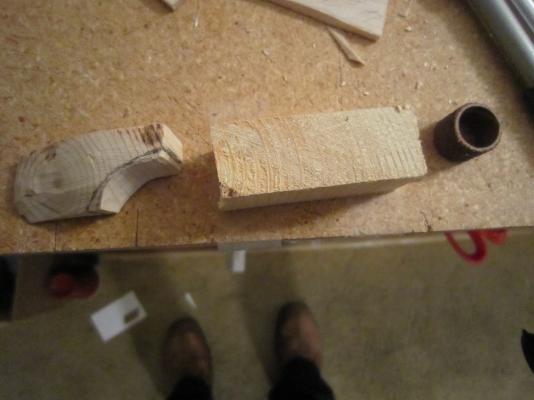
I feel like Michaelangelo with my Dremel as I carve out the castle base to fit my hull. Many strange curves. I also found a 2mm sheet of wood that will take up the 2mm space the poor plans left me with. It seems like this solution will work if I don't get too crazy with my Dremel. It's hard not to take off too much.

-
Dremel!
-
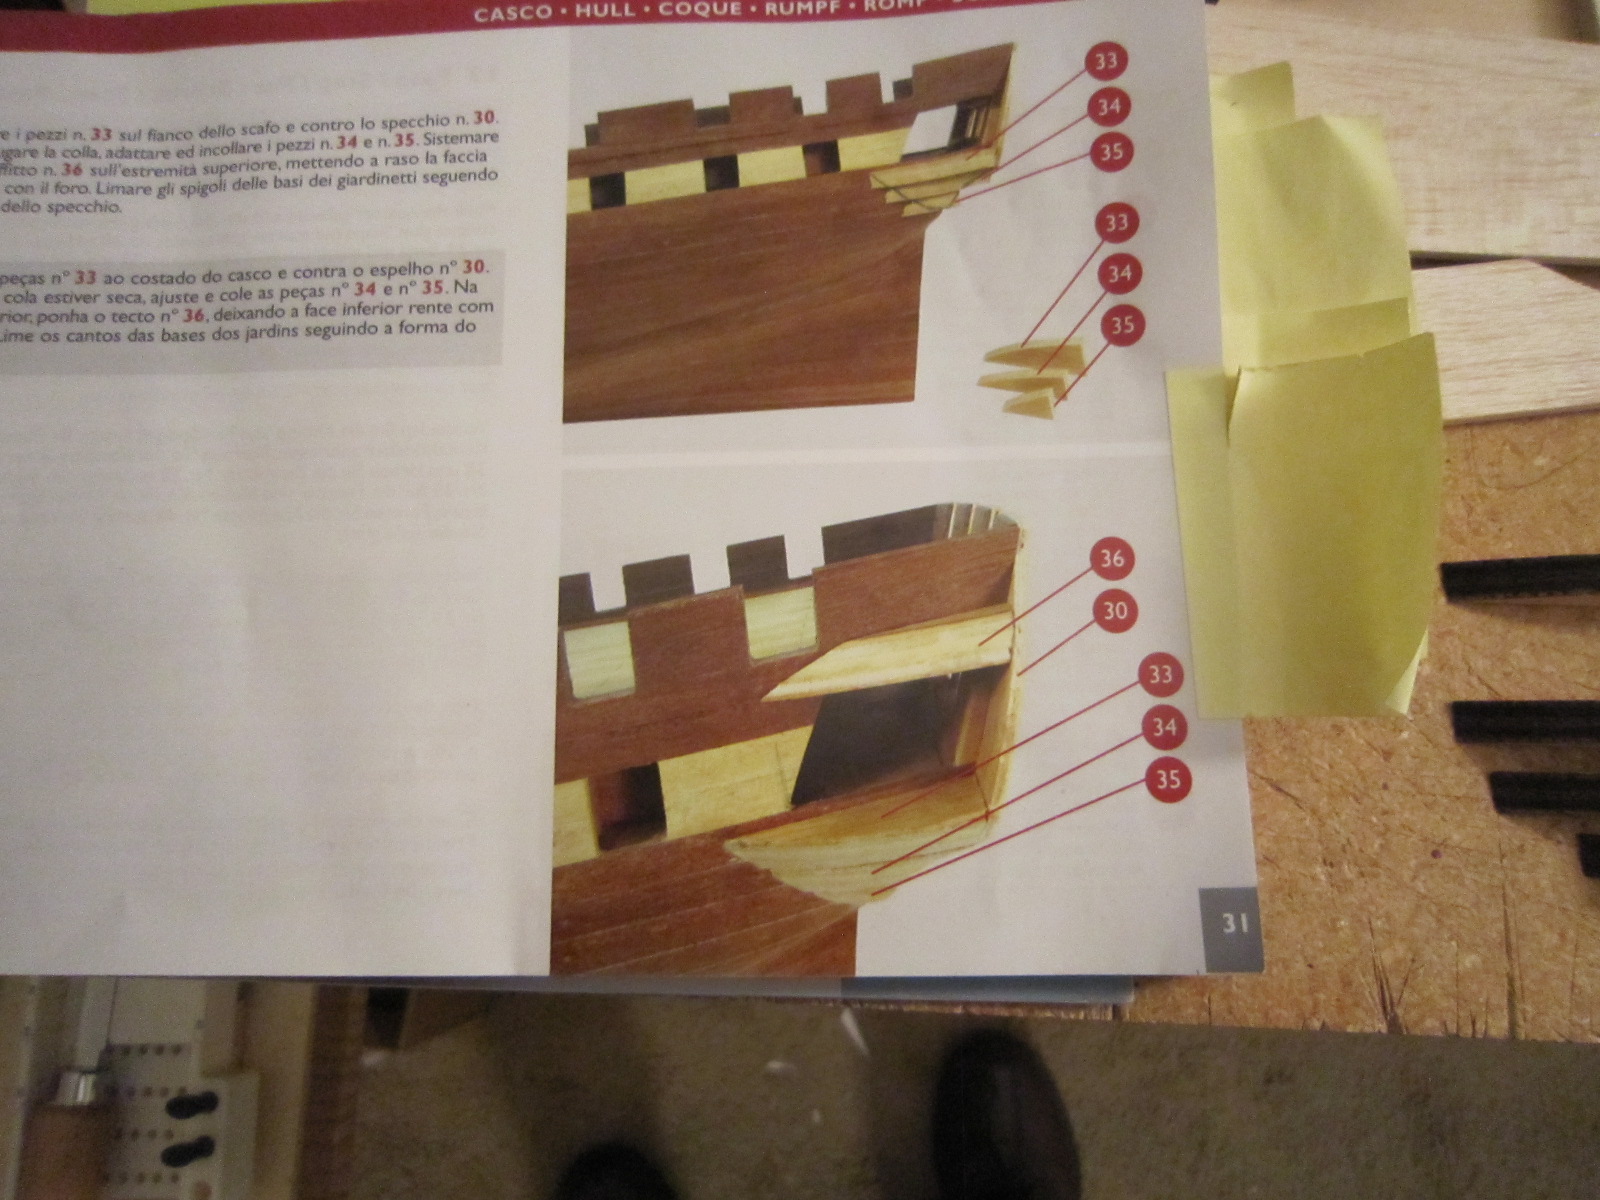
Bob, Thanks for providing all of us with a great build site. I've downloaded the pics of your stern castle construction since my plans (Constructo) don't provide me with all angle photos like you did. Thanks, Rich
-
I'll be trying to solve the riddle of making the aft castles for quite a while. The plans are too vague and the provided parts do not seem to be the right size. I've scoured most of the USS Constitution builds and found Bob Riddoch's photos will help me much more than Constructos instructions. Thanks Bob!


-
Well I finally glued on the stern piece. The lack of detailed plans as to how to construct the rest of that aft cabin structure is maddening. Constructo gave me eight pieces of very hard plywood to glue in place and then carve into shape (with no details of exactly what that shape should be). I'd wreck my hull trying that after gluing them in place. I think I'll get some balsa blocks and carve my own shapes ( before gluing) after studying many pics of the Constitution. The pre-cut stern piece provided by Constructo seems historically accurate. At least that's a good beginning.

- 1,756 replies
-
- 1
-
-
- constitution
- constructo
- (and 1 more)
-
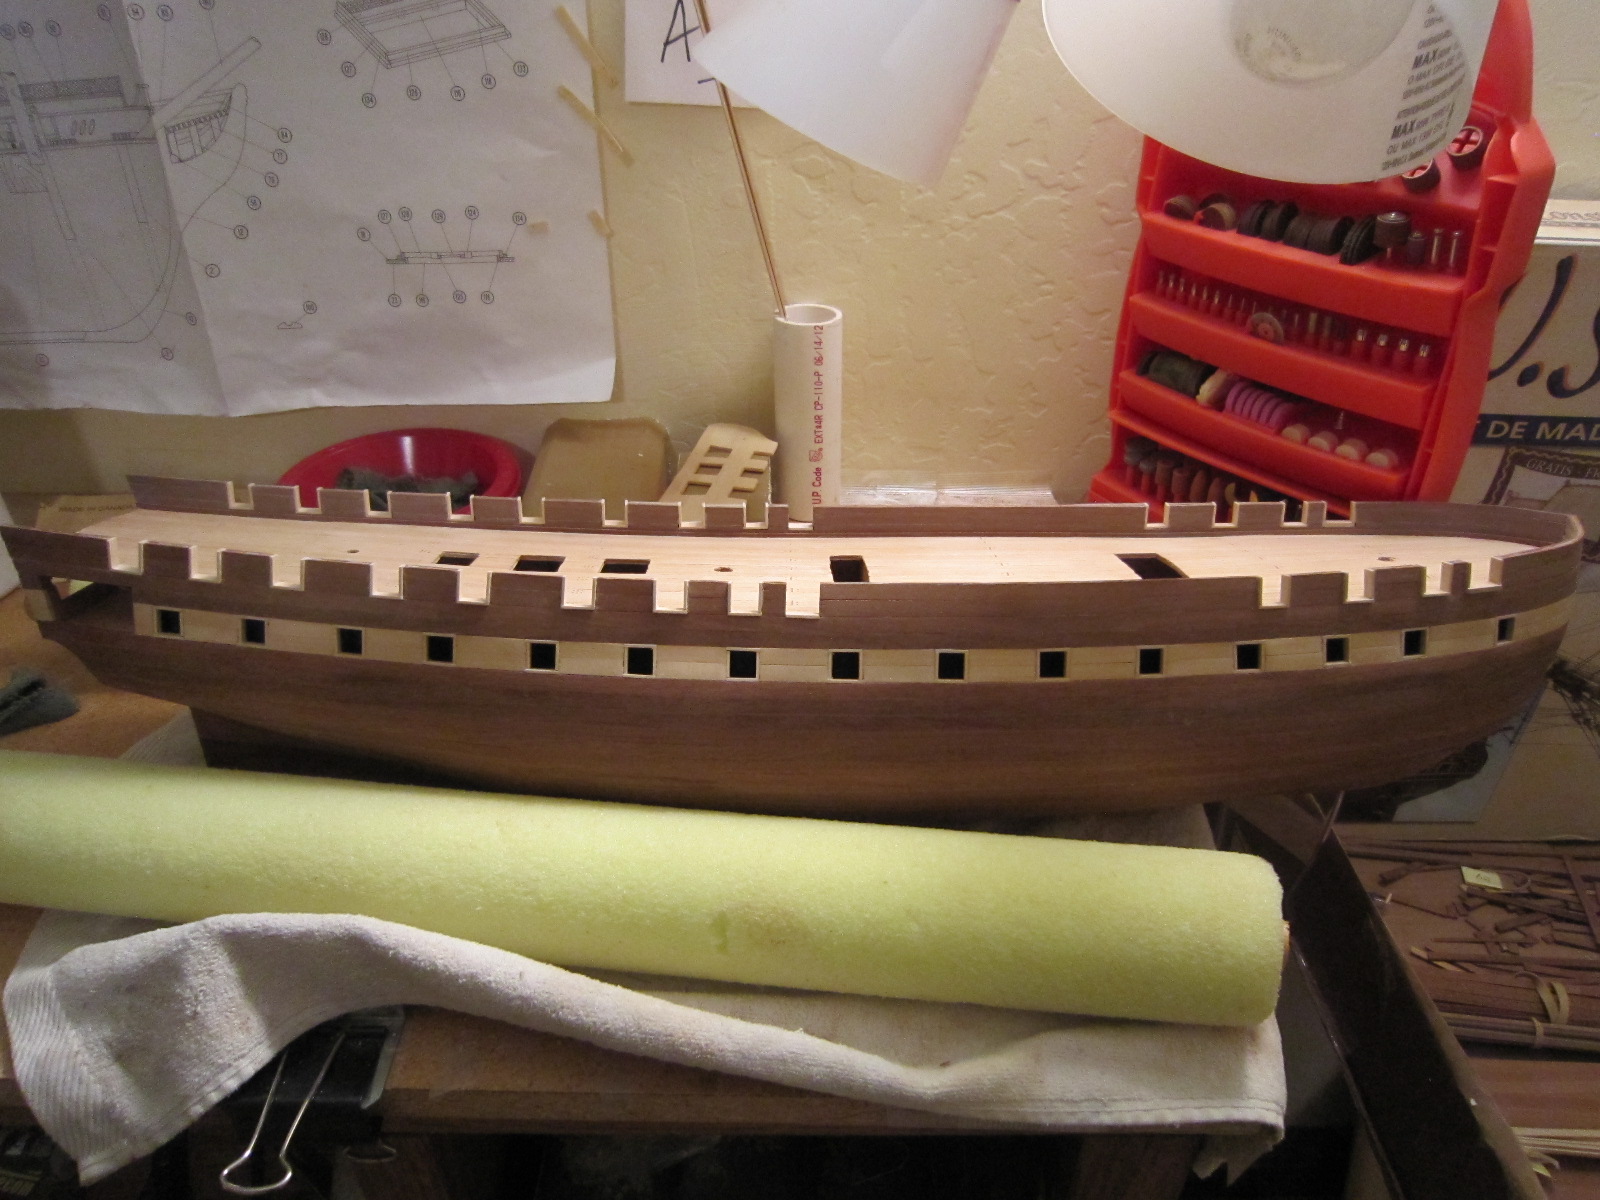
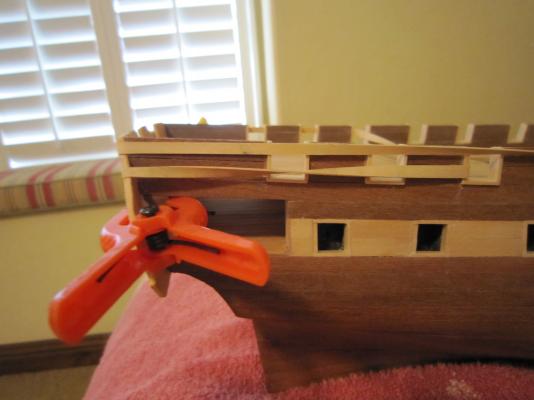
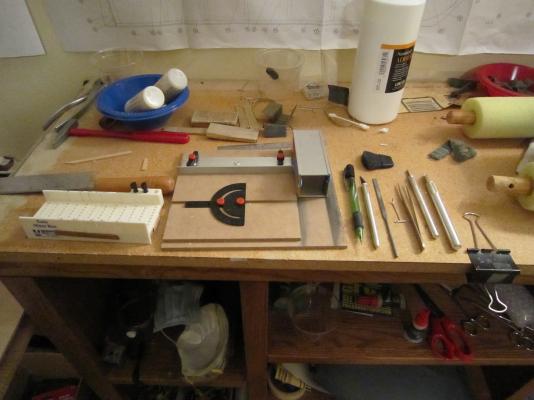
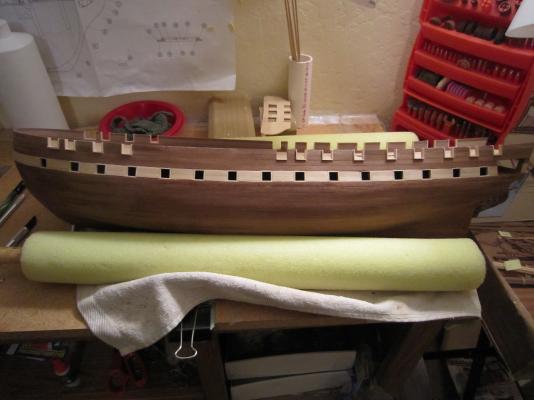
I finally finished framing all gunports port & starboard. What a tedious job. I've included a picture of the array of tools to cut, square and glue in place those tiny pieces of wood. Now I've got to sand and fill those all in to give them a finished look.
- 1,756 replies
-
- 2
-
-
- constitution
- constructo
- (and 1 more)
-
Edge bending planks
HIPEXEC replied to ortho85's topic in Building, Framing, Planking and plating a ships hull and deck
I successfully used a jig. -
Start with what you already have and add when you get to a point where you can't do the next step without a new tool. This website is a wonderful source to help you find the right tool for you. Good luck!
-
I'm enjoying watching your build. I like the care you're taking with each piece. I'm now having stern problems myself. Oh well....life is just a series of problem solving.
-
What's that rectangular hole in the mid ship top gunwales for? My Conny plans don't call for that.
-
Looks real nice. Keep up the good work.
-
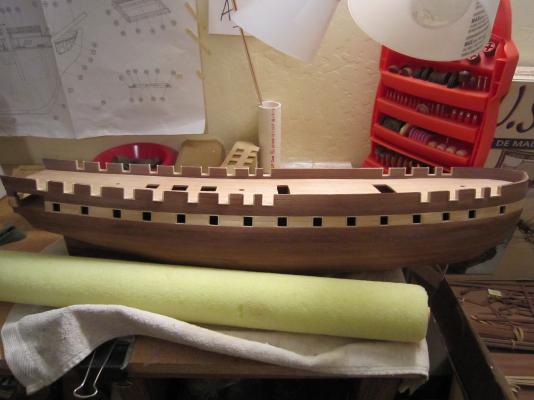
Just finished framing lower gunports on the port side. Now they need cleanup. Then I'll start on the starboard side. Then I'll tackle that oversized stern piece.
- 1,756 replies
-
- 3
-
-
- constitution
- constructo
- (and 1 more)
-
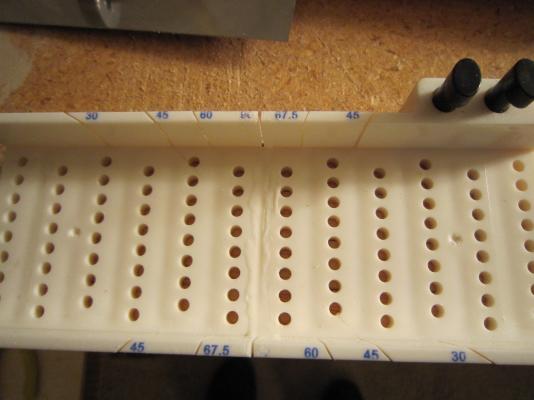
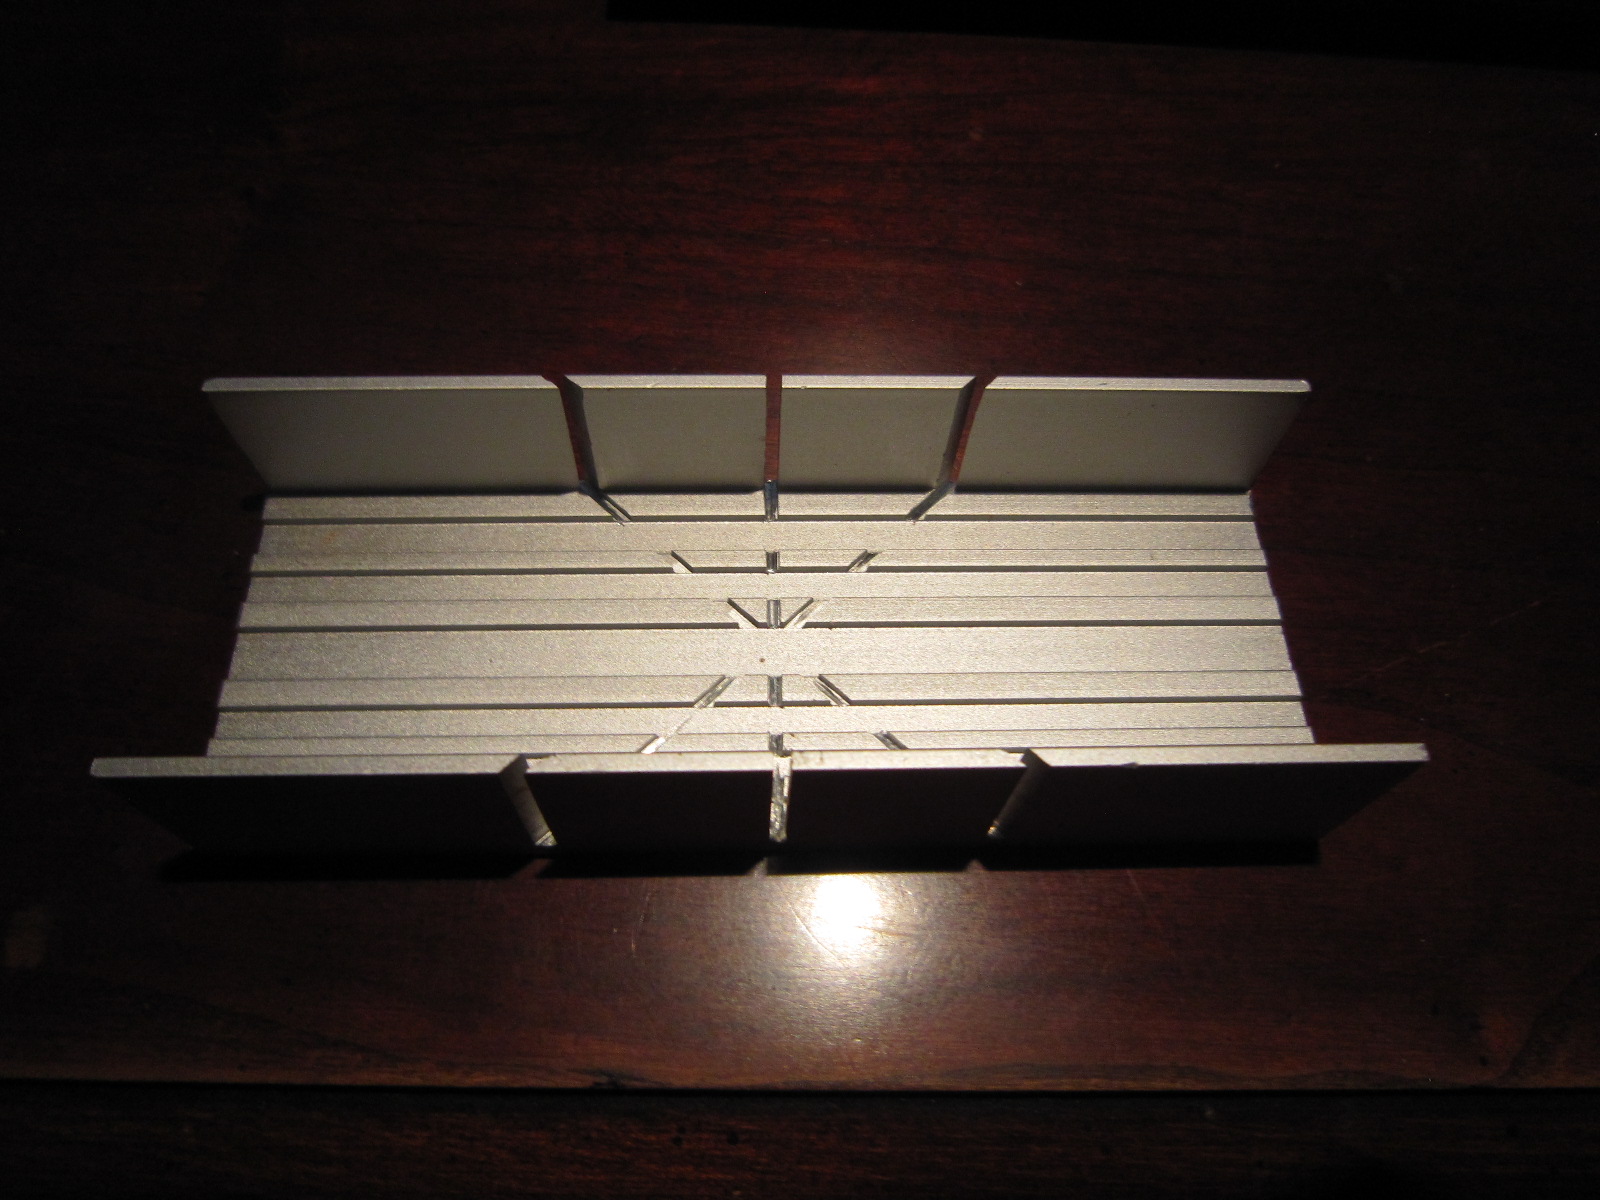
Here's my new metal miter box. Nice and strong with a major flaw....it comes with pre-measured tracks that don't let the wood get cut all the way through? I just took my hacksaw and deepened the tracks. Go figure?
- 1,756 replies
-
- 1
-
-
- constitution
- constructo
- (and 1 more)
-
For cutting shapes on the long axis, I would mark exactly the shape I needed with a pencil, then carve or whittle the plank with a very sharp razor knife until almost to the pencil lines, then sand the rest off down to the line.
-
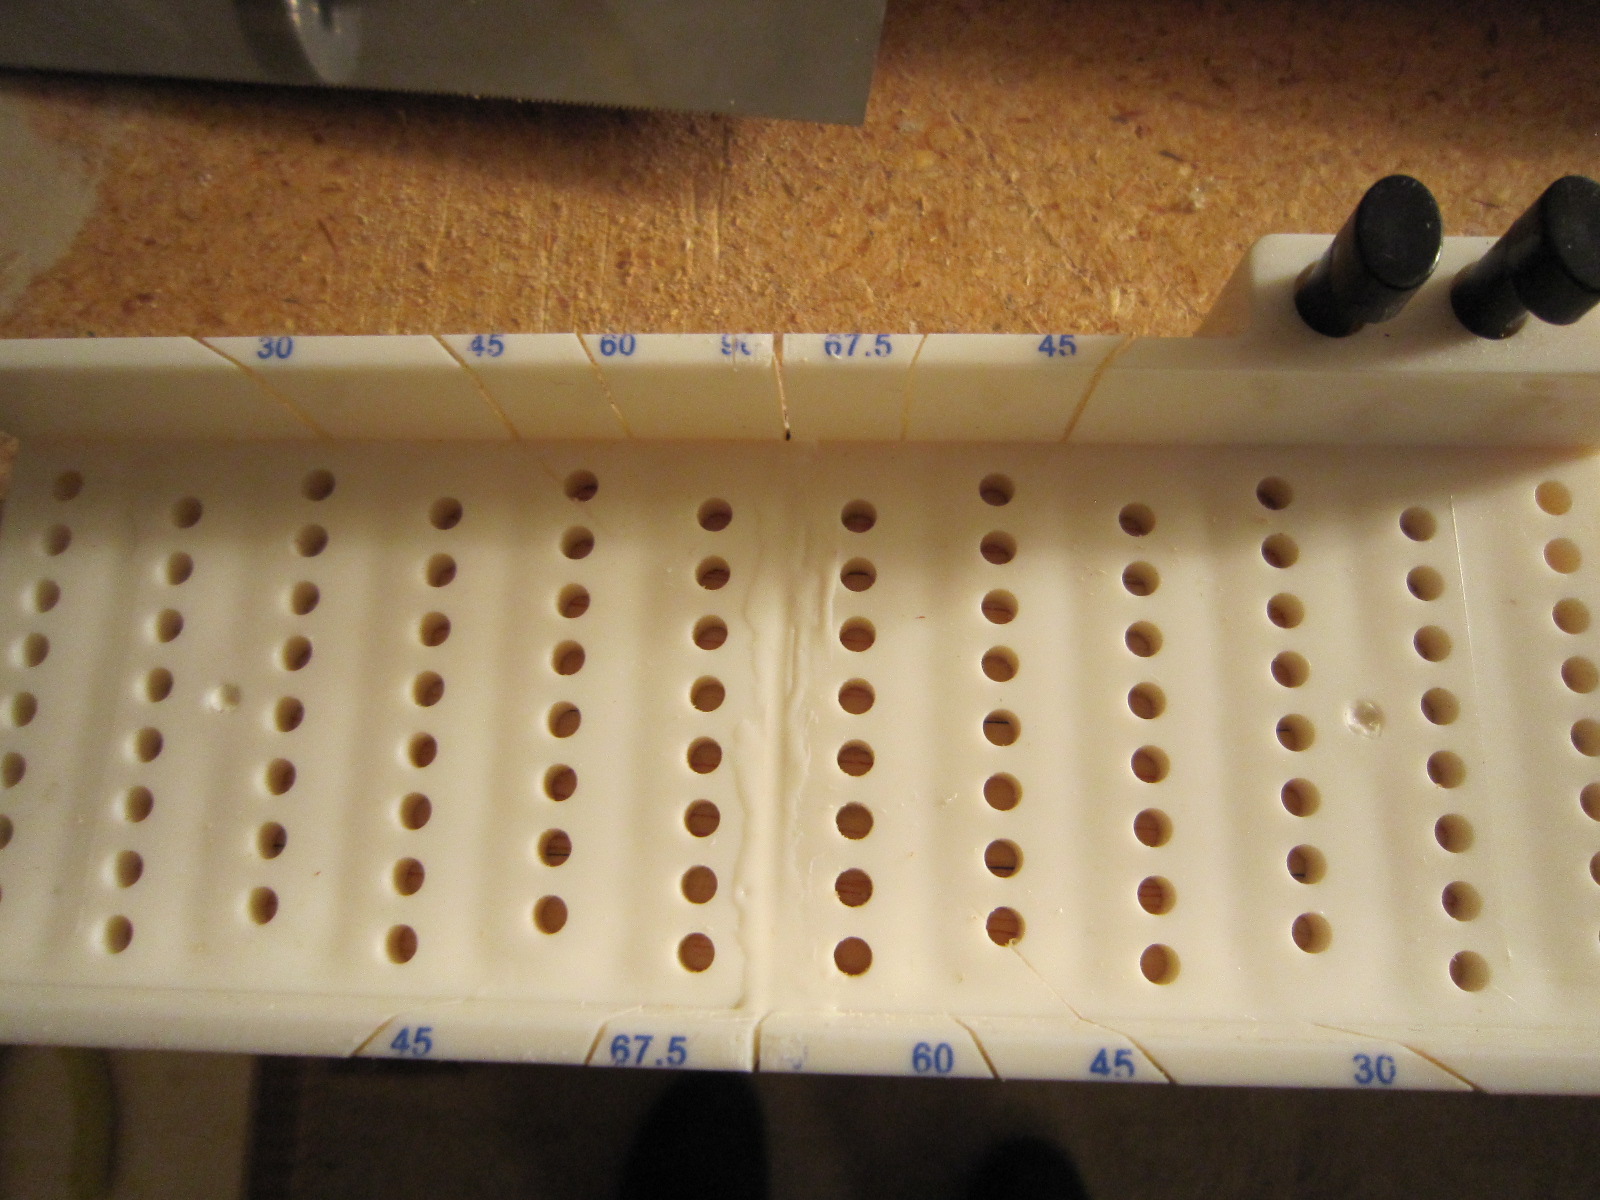
So much for plastic! My miter box split in half after my last cut last night! That's not only through the plastic, but through a quarter inch plywood support I added when I first bought this thing. You would have thought I kept sawing after the wood was cut, but I quit sawing immediately after each piece was cut and still this thing was cut in half. I'm buying a metal one today. I've glued this one in hopes of salvaging it, but I'll still buy a new one.