HOLIDAY DONATION DRIVE - SUPPORT MSW - DO YOUR PART TO KEEP THIS GREAT FORUM GOING! (Only 51 donations so far out of 49,000 members - C'mon guys!)
×


HIPEXEC
-
Posts
2,698 -
Joined
-
Last visited
Content Type
Profiles
Forums
Gallery
Events
Everything posted by HIPEXEC
-
 Good luck! I just finished planking the main hull on my Constitution. You're right... it's a challenge.
 -
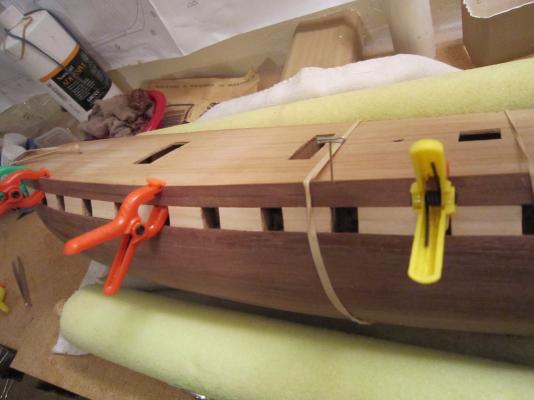
I just glued on the first plank to go up from the deck. This was the most tedious, longest plank prep I've had to do for any plank...and believe me some of the previous planks drove me crazy. This one is the port side plank. I've pre-bent the starboard plank, now when the glue dries on this one, I'll shape the starboard plank in place. These two planks will be the only ones to go on in one piece. The rest of the four courses up will be custom cut to make the gun ports, anchor ports and stairway ports. The pencil marks you can glimpse on the deck are where these ports will be located. I used the plans, photos and my electronic micrometer to pre-locate where they will go. I used this method when I did the below deck gun ports with great results. The plans call for me to glue whole planks and cut the ports. My cutting skills while planks are in place are terrible. I can used my new, very sharp plank cutter to precut all the rest on the pieces.


- 1,756 replies
-
- 3
-

-
- constitution
- constructo
- (and 1 more)
-
I've started fitting the first plank going up to form the upper gun ports.

- 1,756 replies
-
- 4
-
-
- constitution
- constructo
- (and 1 more)
-
Pretty darn good for a first build.
-
Storing and using those tiny drills
HIPEXEC replied to Modeler12's topic in Modeling tools and Workshop Equipment
I'm jealous of your drill bit set up. I still just keep mine in tubes. -
I took the picture on Christmas Day. I've been working on the fit for over three weeks.
- 1,756 replies
-
- 1
-
-
- constitution
- constructo
- (and 1 more)
-
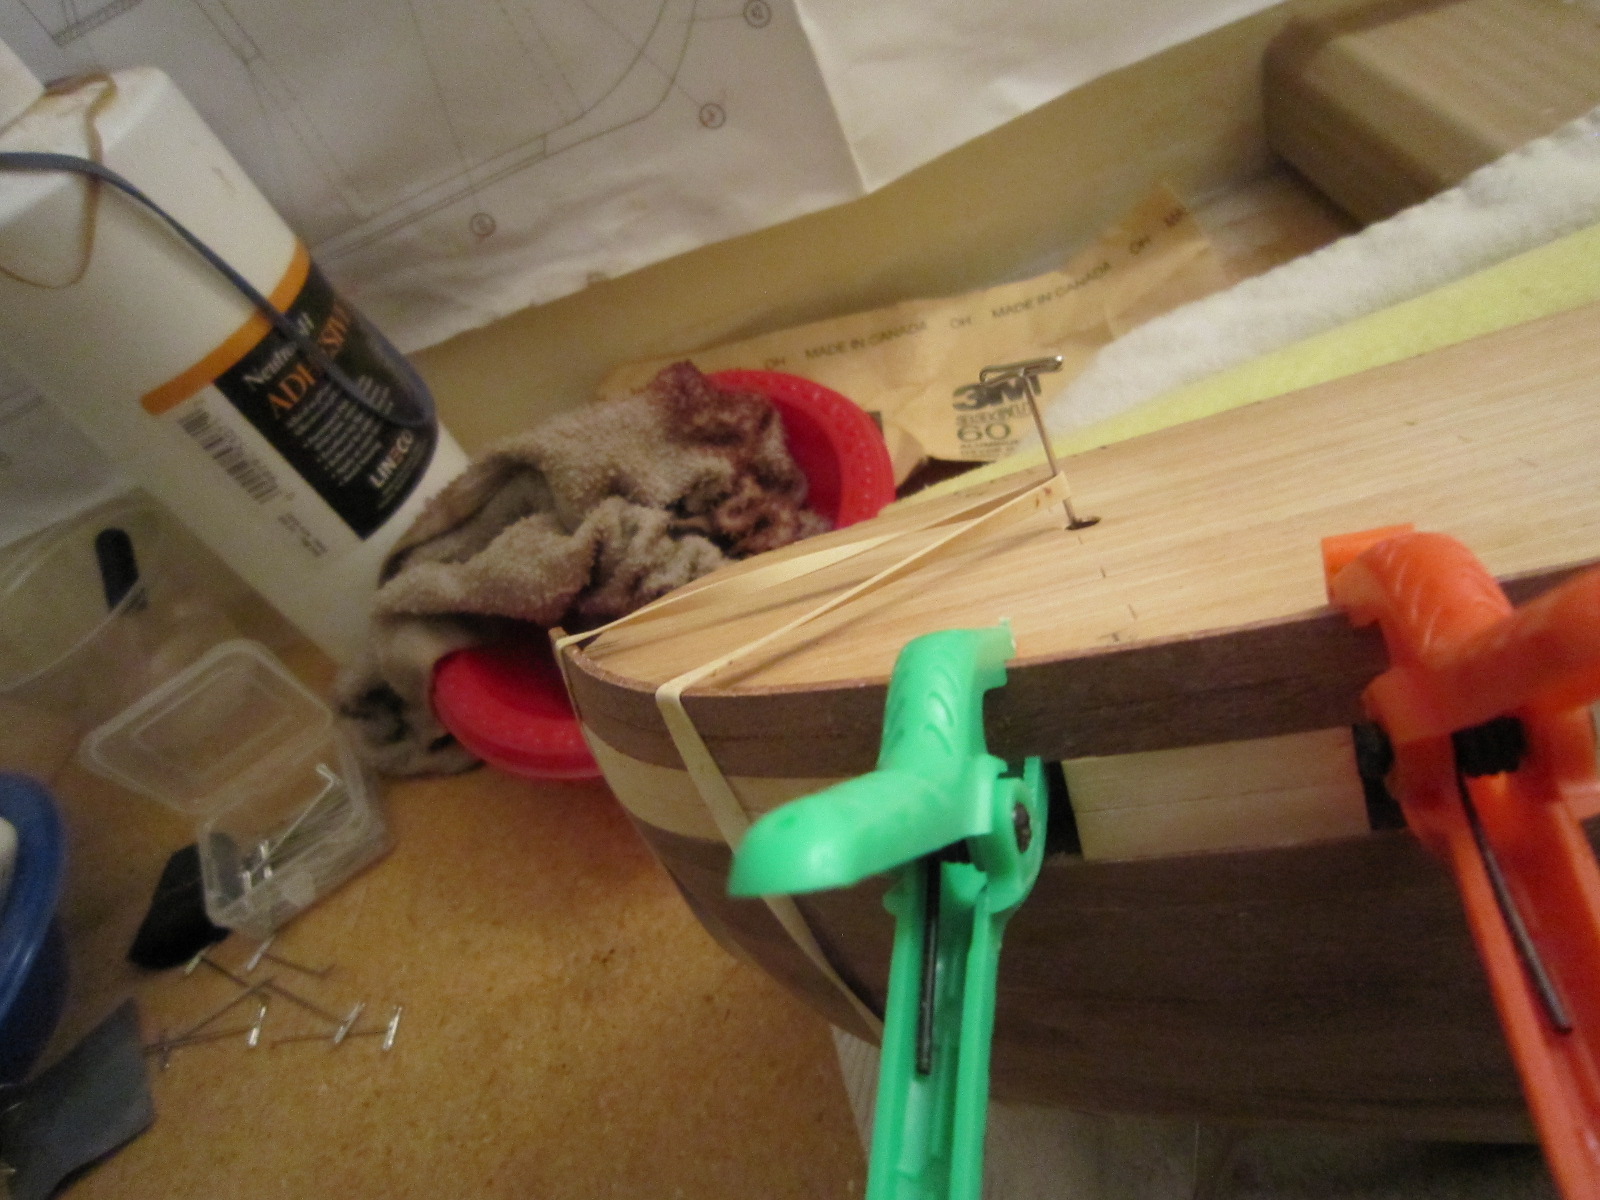
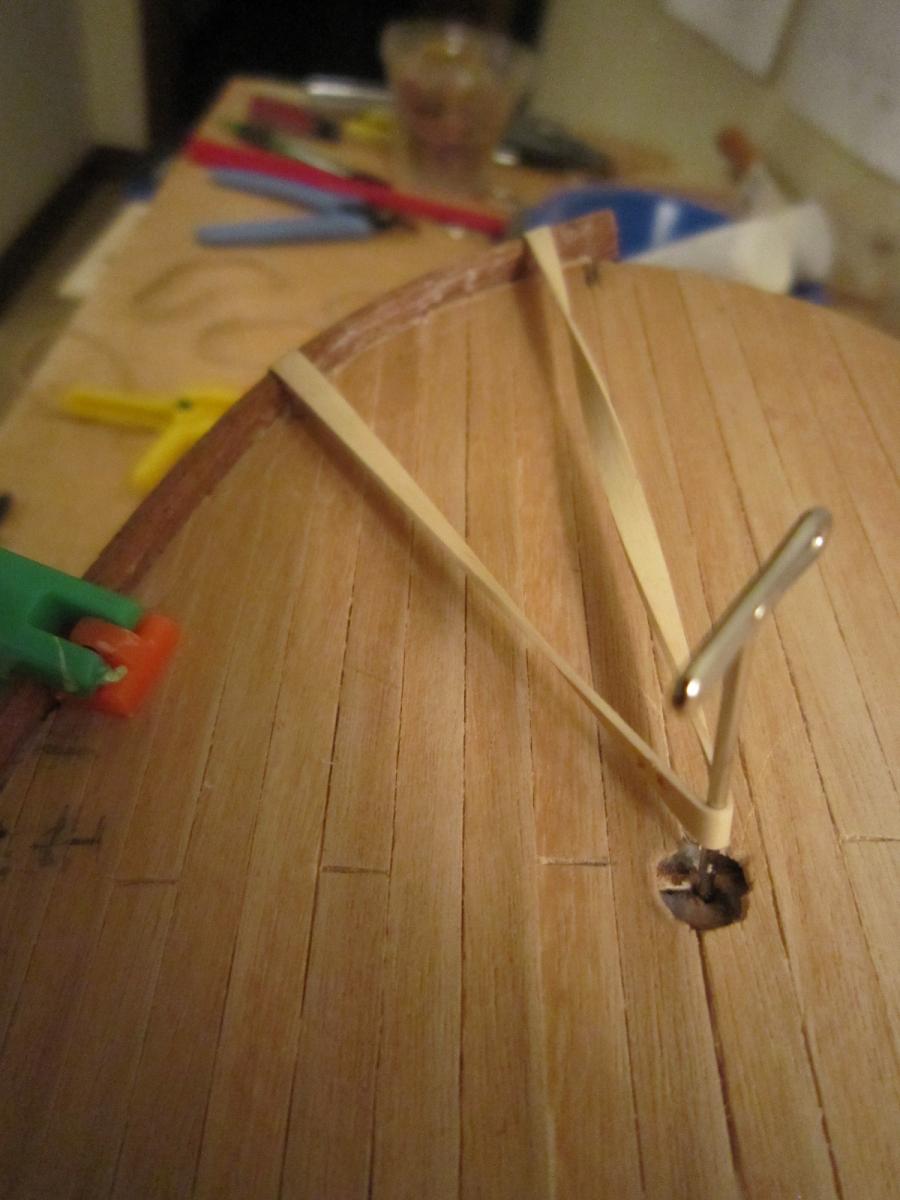
I'm now fitting the bow stem. I've used two pins to make sure I'm locating in the exact same location as I micro-sand the bow the get a tight fit. It's tedious and time consuming. I'm almost there, though. The pins will disappear when I glue it in place down the road.

- 1,756 replies
-
- 1
-
-
- constitution
- constructo
- (and 1 more)
-
I use a heavy duty mask especially made for toxic dust.
-
A friend of mine is a surgeon and gave me a bunch of hemostats. They're great!
-
Even though I am no where near rigging, I've already bought my supply of beeswax.
-
Merry Christmas and a HappyNew Year to all. See you all next year!
-
No varnish just yet. Still have to go up a few courses for the upper deck gun ports. Then a coat of varnish.
- 1,756 replies
-
- 1
-
-
- constitution
- constructo
- (and 1 more)
-
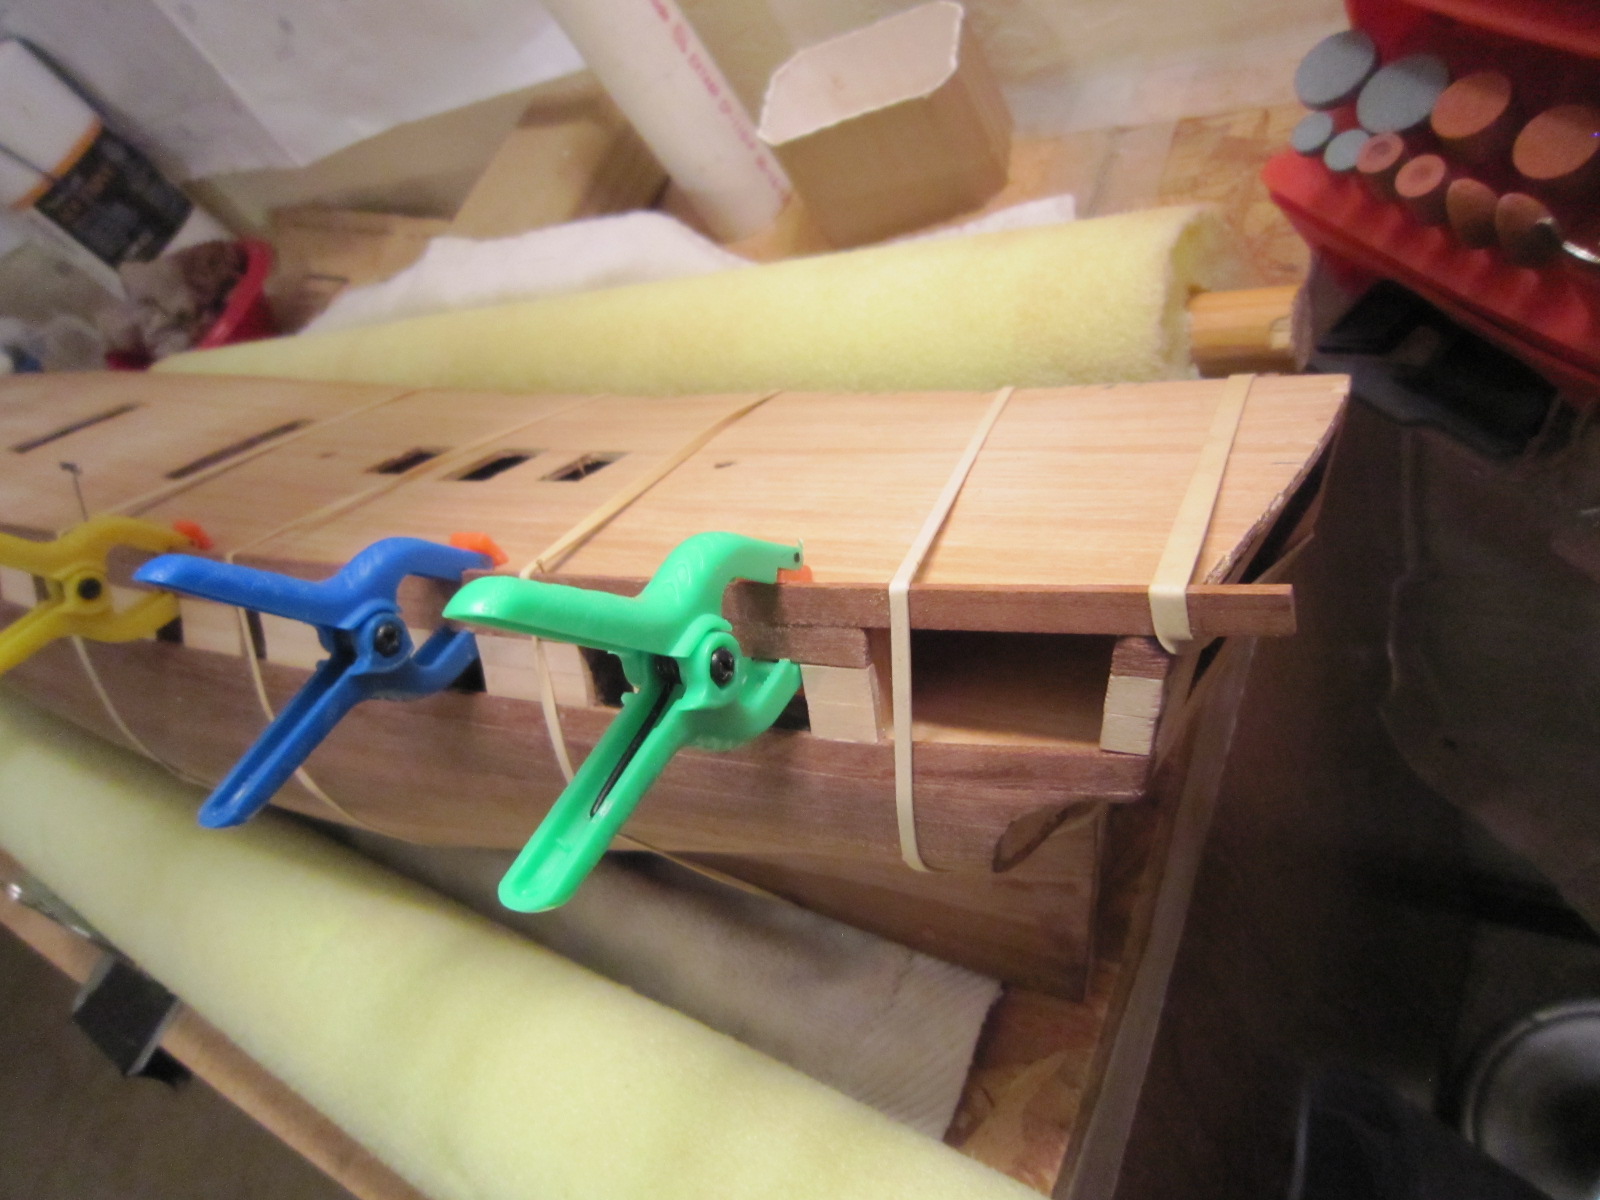
I built foam rubber cradles out of swim noodles with a broom handle it the center hole to cradle the hull in all its crazy angles during planking. There's a picture of them on my build log. I use three of them, but remove the center one when I want a perfectly upright model. I use all three when I want it upside down laying on her deck. Someone thought they looked like rolling pins from my wife's kitchen. They gave me ( and continue to give me) a soft, well supported system no matter what angle I'm working on. When I start the topside and rigging, I'll make something more sturdy.
-
I think I'm finished filling and rough sanding. I've also rough fitted the bow and stern posts, but they don't get glued for quite a while. It's a good planking job as far as I'm concerned (compared to my first model it's great!), but no where near as perfect as some of yours. I had to use too much filler in some places especially the bow with the convergence to a point of all those planks.


- 1,756 replies
-
- 4
-
-
- constitution
- constructo
- (and 1 more)
-
Thanks everyone....I'll look into scraping. Merry Christmas to all.
- 1,756 replies
-
- 1
-
-
- constitution
- constructo
- (and 1 more)
-
I wouldn't paint over all that beautiful woodwork. It's a work of art and should be seen by all to admire.
-
In case anyone thinks I got lost....I'm busy sanding and sanding and sanding my hull. I'm having a hard time getting a thin layer of dried white glue off the planks where I made my own filler and spread the stuff in those micro cracks. The dried glue is harder that the wood and doesn't want to easily sand off? I want the hull to be super smooth and gleam when it's varnished. I'll be doing this well into January since I'm taking eight days off to go snorkeling in the Bahamas, Aruba and Curacao. Merry Christmas everyone. Happy New Year, too.
- 1,756 replies
-
- 2
-
-
- constitution
- constructo
- (and 1 more)
-
Welcome aboard.
-
Homemade Rudder Hinges
HIPEXEC replied to lamarvalley's topic in Metal Work, Soldering and Metal Fittings
The hinges are a work of art, and what little I can see of your planking job, your planks are first rate also. -
I feel like DaVinci who mixed his own paints. I mixed my own filler with sawdust from my planks. This is what the filler looks like before sanding.

- 1,756 replies
-
- 3
-
-
- constitution
- constructo
- (and 1 more)
-
I just did my first experiment with making and using my own wood filler. I had been collecting the dark sawdust from the Sapele wood I used on my hull. I took a small amount of it and made a thick mud using a few drops of water, then mixed in some white glue until it looked like the commercial wood fillers I had used in the past. I applied this paste to various nail holes and small cracks in a few palces on the hull and and let it dry overnight. What a nice surprise when it set up nice and hard and was very sandable and blended in just fine. Thanks for the tips I got on this great website.
-
Looks just great!
-
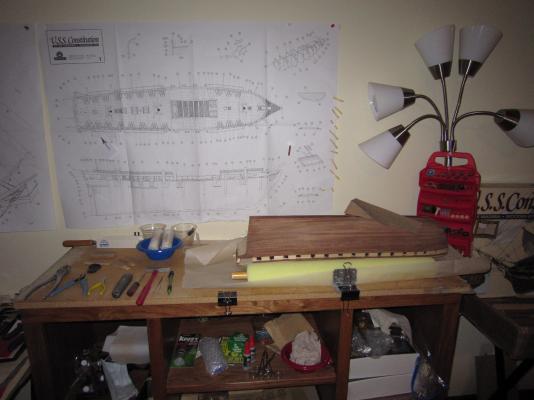
This is the first time since September 1st that I cleaned my workbench! There was so much debris I wiped off that the bench went....Aaaahhh! I placed a large peice of parchment paper under my sanding area to catch the sawdudt to use as filler as needed. I'm lucky that I only have very small places to fill. Compared to my first build, this is heaven. There will still be a month's worth of careful sanding to get the finish I want.
- 1,756 replies
-
- 1
-
-
- constitution
- constructo
- (and 1 more)
-
I've begun the tedious job of sanding, shaping and filling the hull. I've fitted the bow stem to be mounted later, I fitted the keel to be mounted later and the rudder post. That too will be mounted later. I'll probably have a month of filling, filing and sanding to get the hull as smooth as I want it to look. I shall not be painting this model since I want the wood work to be part of the charm. The few spots I've done look very good.