


DocRob
-
Posts
724 -
Joined
-
Last visited
Content Type
Profiles
Forums
Gallery
Events
Posts posted by DocRob
-
-
19 minutes ago, Baker said:
A very beautiful model.
it was great to follow this build.
Thank you Patrick, the ´Finished´ in the header was sneaked in by a moderator, but I have to continue to paint the planned figures, which are only started now. That my take a while, as I´m out of my comfort zone.
Anyway, it was great to have all of you around with likes, encouragement and input.
Cheers Rob -
For the Corsair you can also use the Eduard Brassin engine. I built it many years ago and liked the detail. I think, I substituted the PE wiring harness with my own interpretation made from lead wire.
The best, you get some side cowlings made from ultra thin resin as well.
F4U-1 engine 1/32 - Eduard Store
Cheers Rob -
-
-
15 hours ago, mtaylor said:
Great looking build of an interesting aircraft. The infant industry really produced some interesting aircraft (and sometimes really bizarre looking) in the early days of flight.
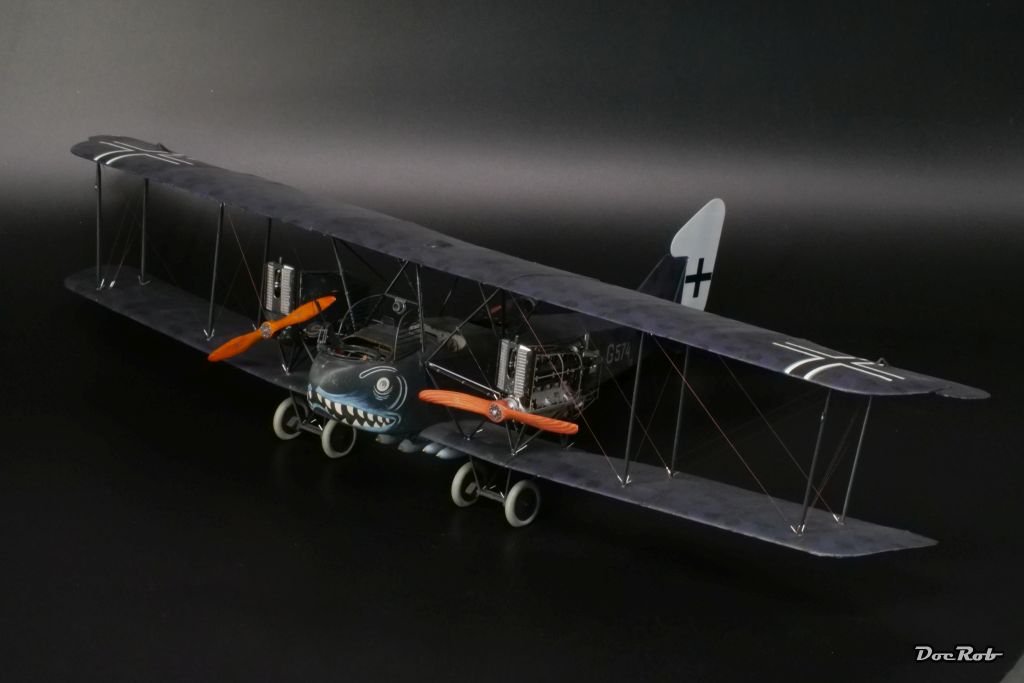
Thank you Mark, quirky as the AEG looks, it was a successful design, meaning, I saw stranger things flying, like pancakes (Chance Vought V-173) or the like. I can only admire the courage it must have taken to fly with these wood/tube/cloth/string crates with relatively unreliable engines in the dark of the night.
Cheers Rob -
On 5/6/2024 at 9:52 PM, king derelict said:
Absolutely spectacular. Congratulations on a wonderful creation. I thoroughly enjoyed the build log and it has been a great teaching opportunity. I learnt a lot of techniques that I hope I will be brave enough to try in the future.
Thank you Alan, glad you enjoyed the log. I benefitted so much of forum input myself, it´s a pleasure to give back a little. It´s not completely altruistic though, as it helps me to keep track of my builds and enhance learned techniques for myself as well.
If you are about to enter the WWI plane building universe, I can tell you, it´s quite rewarding and not as complicated as it first looks. Kits of WNW quality help a lot due to thorough design. If you haven´t started exploring these kind of builds, it might be best to start with a German WWI fighter. Less rigging and colorful liveries do help.
Cheers Rob -
54 minutes ago, gsdpic said:
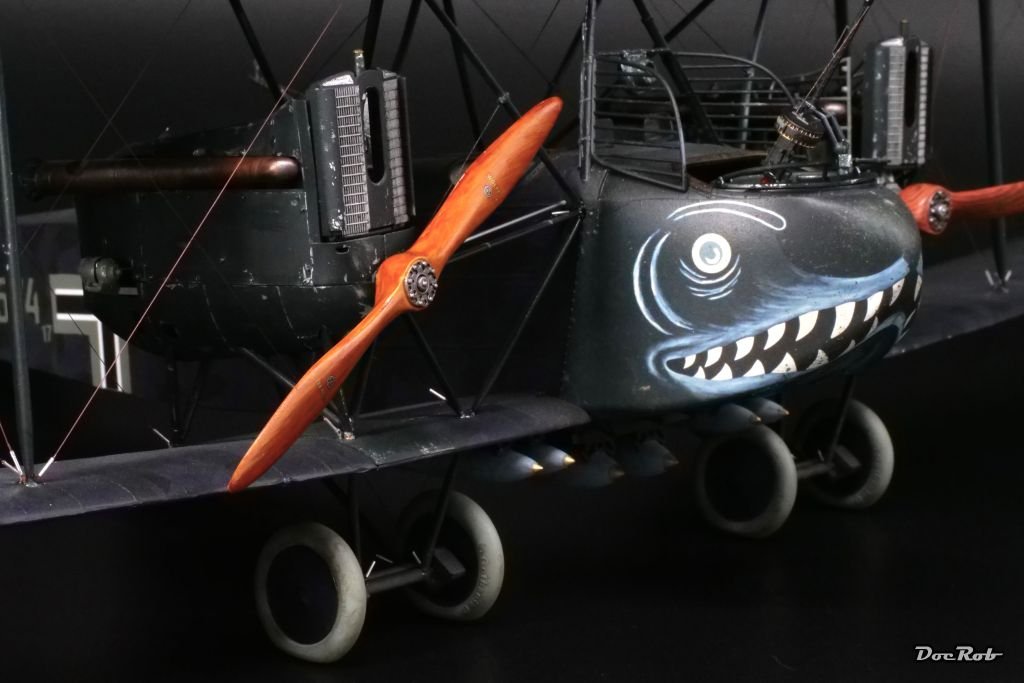
Wonderful result! All the details and minor weathering look great. But it really is a strange looking bird, or should I say bat. Long wings, stubby fuselage, big engines, short propellers, cartoonish tires. I assume it is an accurate representation of the prototype, but it still looks odd.
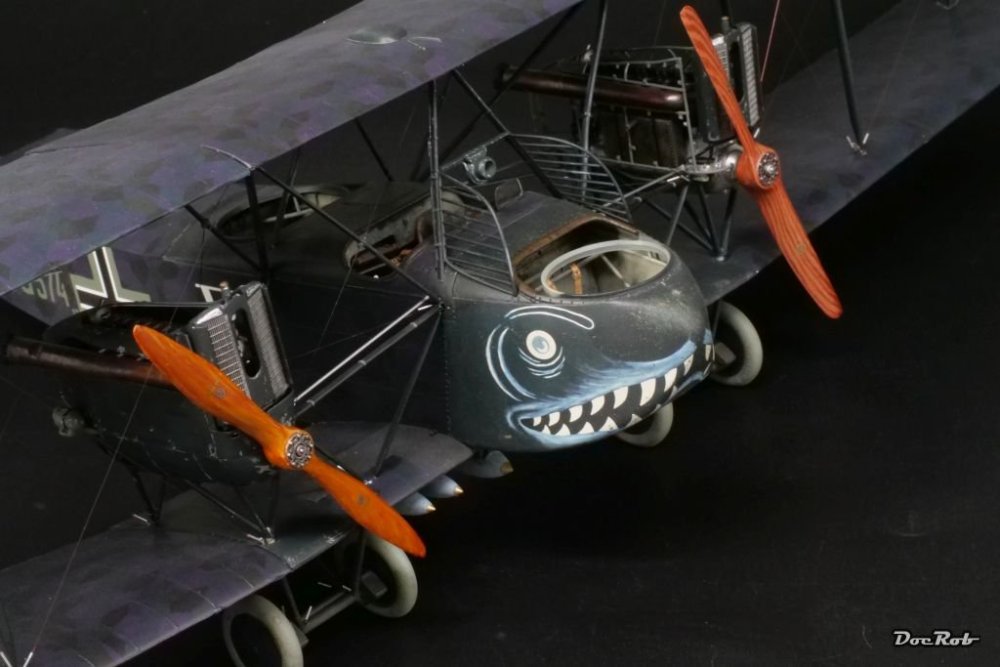
Thank you Gary, I like the look of the AEG somehow, but I have a soft spot for quirky designs. The really interesting fact is, how advanced this plane was, about a dozen years after the Wright Flyer.
From a modelers standpoint you couldn´t ask for more, the wide fuselage allows for equally wide cockpits, which show a lot of detail. The engines were often flown without the cowlings, again a possibility to show a lot of detail work.
Cheers Rob -
The Tamiya Corsairs are absolutely fantastic kits. If you are willing to spend the money, you shouldn´t hesitate. I built two so far, a Birdcage was my re enter the hobby kit many years ago and recently I built the -1A variant, of which the log can be found in my signature.
I´m eager to see your progress with the B-25 dio. I have the Gun nose variant and would have started the build as a Navy PBJ version, if another member of Large Scale Modeler hadn´t started the same build in our recent twins group build over there. That´s why I build the WWI AEG bomber instead.
Cheers Rob- king derelict, mtaylor, Canute and 3 others
-
 6
6
-
-
18 hours ago, chadwijm6 said:
Fantastic model Rob. And a fascinating build log, I learnt a lot! 👍🏻
16 hours ago, RGL said:Absolutely marvellous mate!
Thank you James and Greg, I learned a lot too through that build. I really like to replay the work I´ve done and write it down in a halfway structured form. This way, I can think about the used techniques and try to do better next time, when I reference at my build logs.
I learned so many things through build logs, it´s a pleasure to give back in form of some lessons learned posts. I live a bit isolated, so no model shows, hobby shop talk or even fellow modelers around, which leaves the internet as my only connection to the modeling world.
Cheers Rob- Old Collingwood, Canute, Egilman and 4 others
-
7
-
19 hours ago, Egilman said:
Stubby sucker wasn't she? All wing, no wonder they had a habit of nose diving on landing....
Beautiful model Brother.... Absolutely outstanding....
Thank you Egilman.
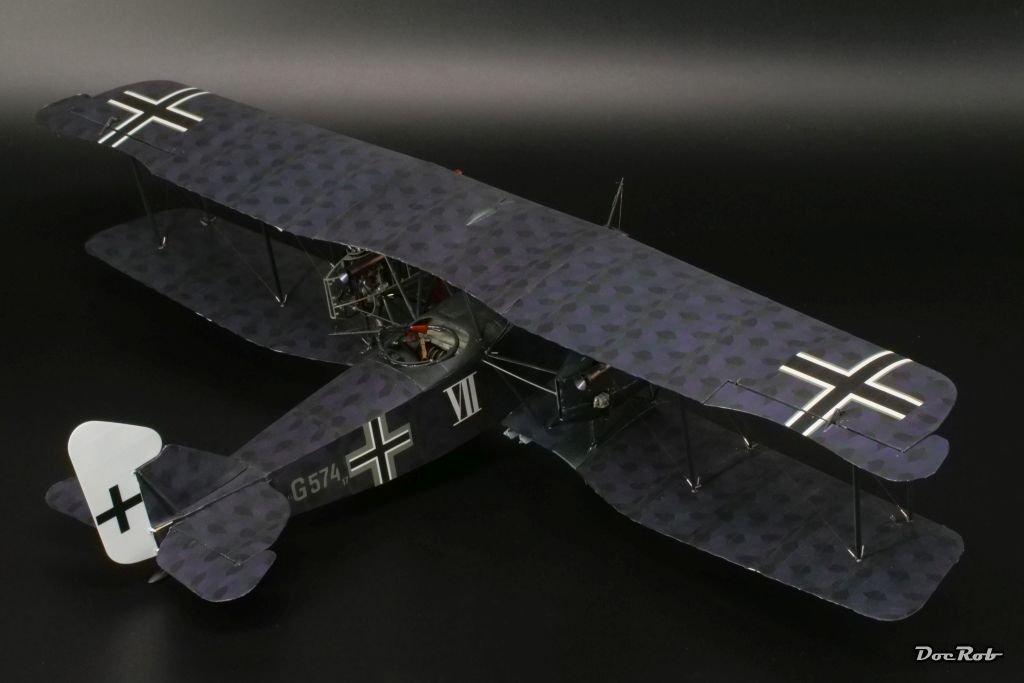
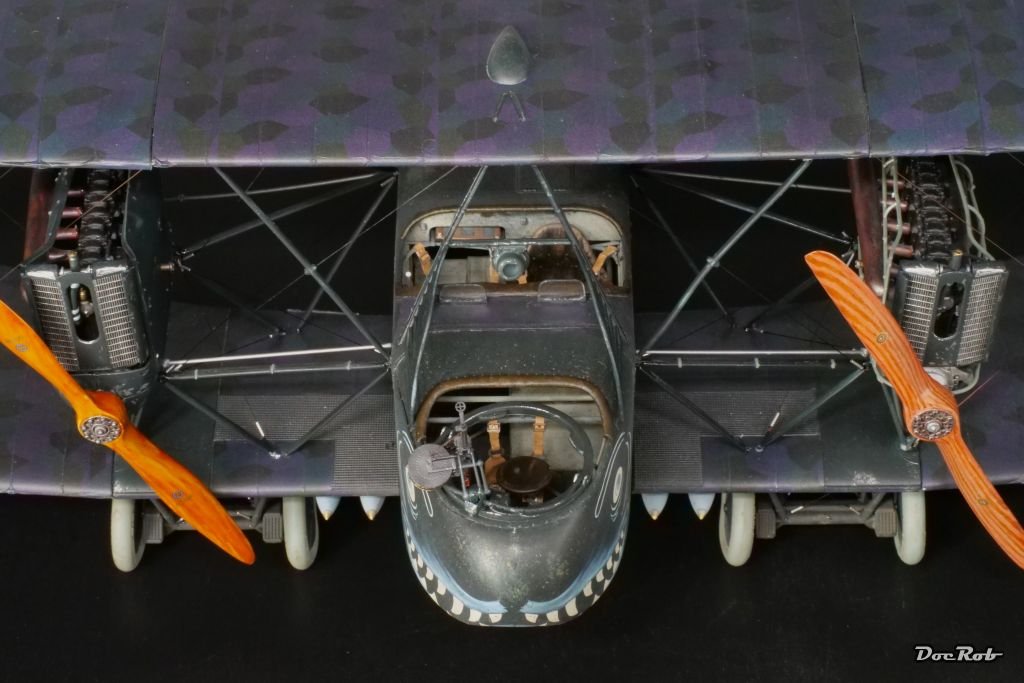
He he, indeed, the design is a bit strange. The commander normally left the front cockpit through a crawling tunnel for start and landing, to not get smashed, when nose diving. In general, I read, that the AEG was superior to the more famous Gotha.
I have a soft spot for lozenged planes and consider buying the early day bomber variant as well.
Cheers Rob- Old Collingwood, Egilman, Canute and 1 other
-
4
-
-
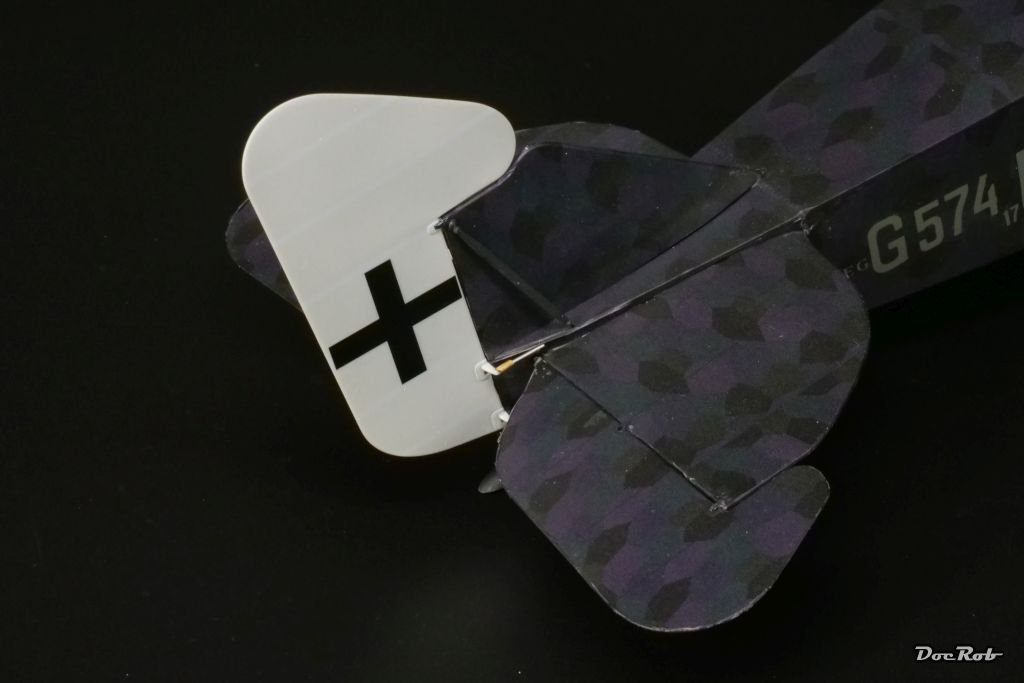
Final steps ahead, luckily. The huge airframe and the delicate details make working on the big bat more and more difficult. The issues fixed to parts torn loose ratio turns worse
 .
.
I assembled the elevators and the rudder and added steering cables for the rudder. the fittings were made from split brass rod to add some more detail.
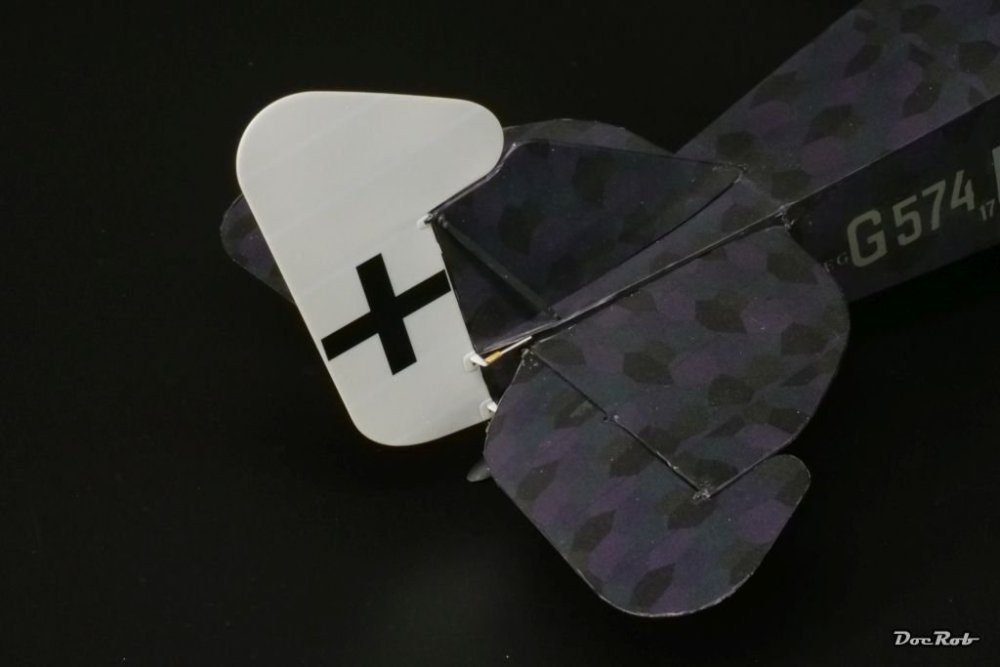
Finally, I reassembled the guns, the worst part of the build and installed them into the gun mounts onto the gun rings.

There will be a lot of final touch ups and then the big bat is finished.
Cheers Rob -
-
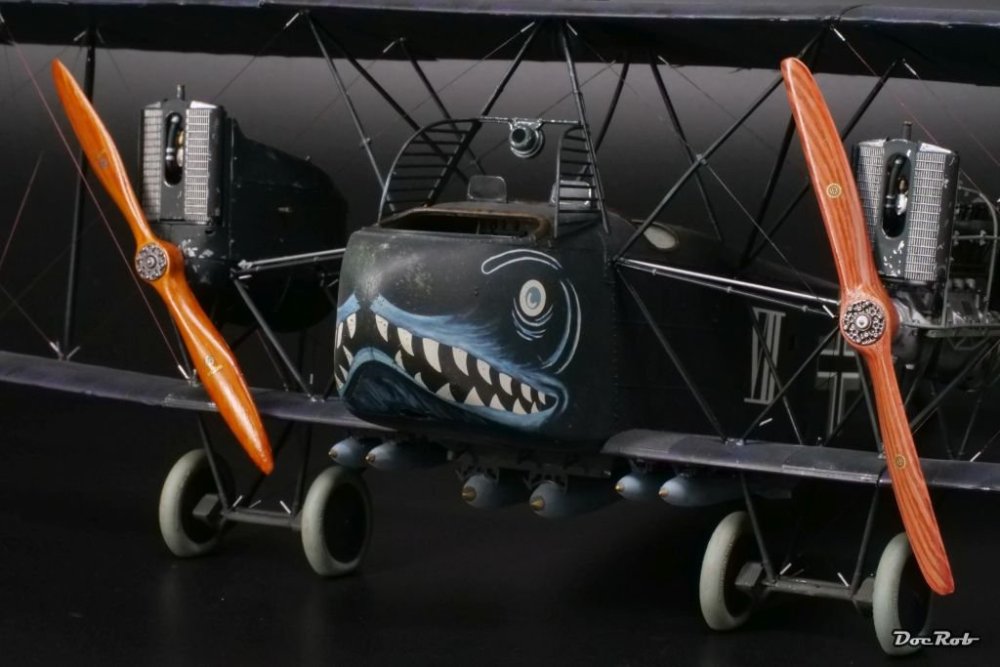
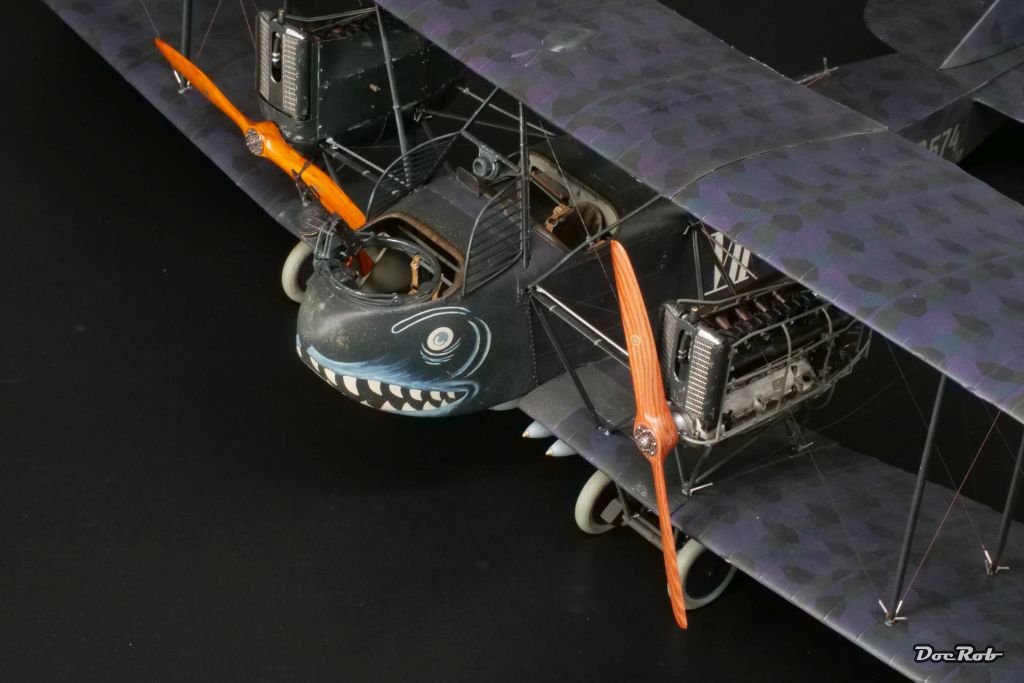
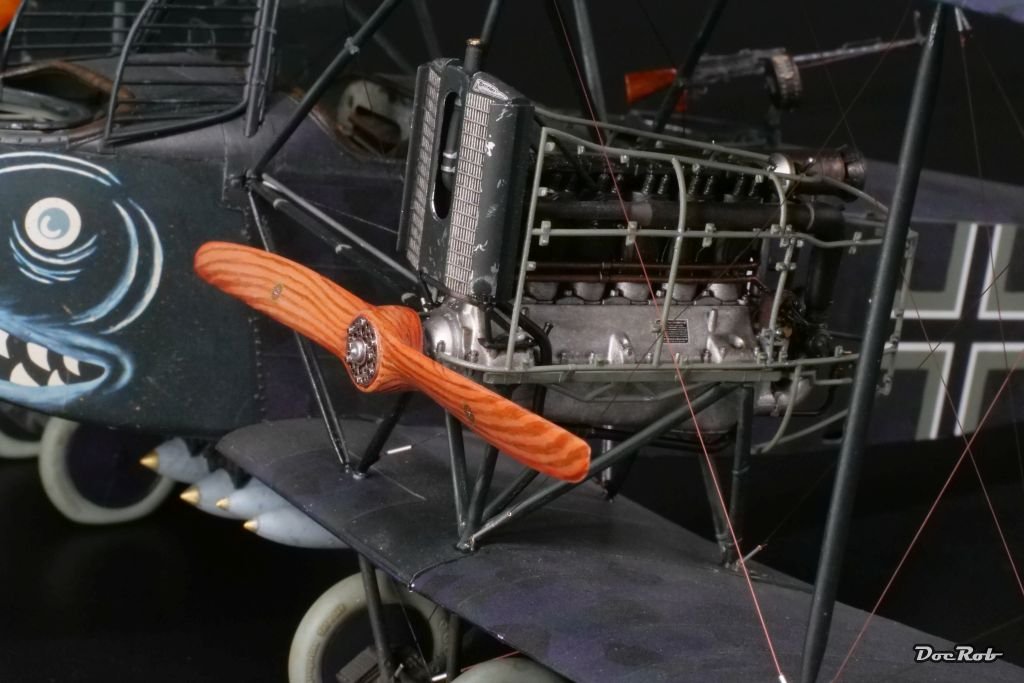
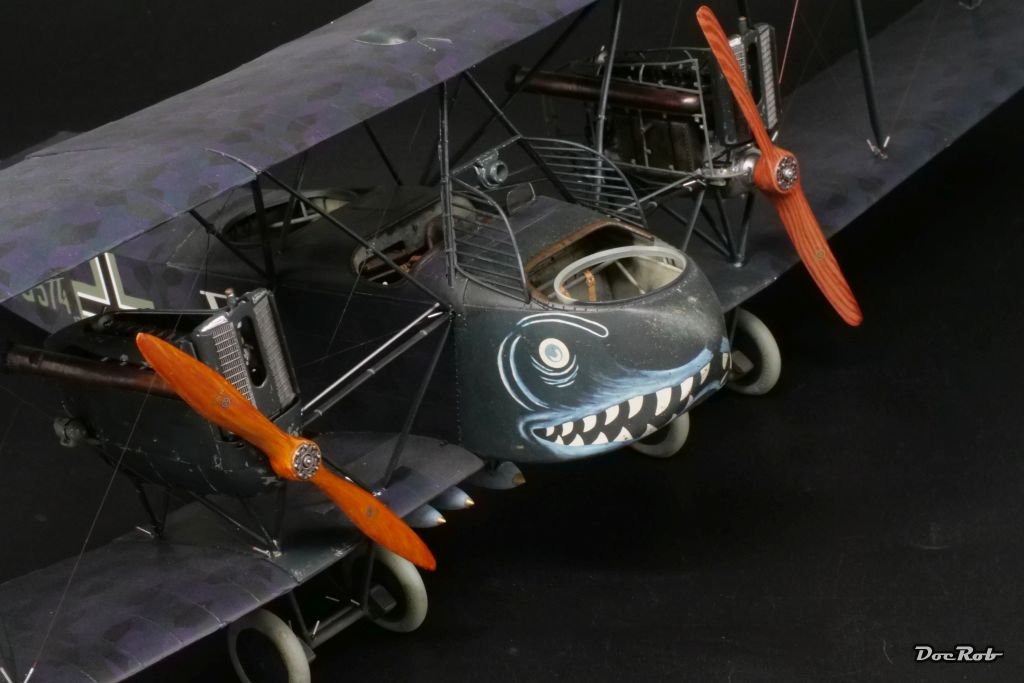
Meanwhile, I finished the propellers, painting the hubs with gun metal, later pointing out the screws in silver and last adding black panel line wash for accentuation. When dried, I added the propeller brand logos and on they went.
This was followed by two very frustrating hours, where all the guns fell apart, which were only temporarily fitted. The two in the gun rings while adjusting and worse ,the one in the fuselage fell out. After said two hours, I somehow managed to get the one in the fuselage back in place, using different tweezers and a torch, to reach into that now hard to access area. The other guns fixing is for tomorrow, but I used the chance and varnished their stock and grip with transparent orange.
Cheers Rob
-
Congratulations, both, Indy and Sphinx look absolutely fantastic. Scrolling through your build, I more and more liked the idea of building a ship without masts and rigging. As I still struggle with my first rigging of the Duchess of Kingston, it´s definitely an option for my Sphinx kit or even Indy.
Cheers Rob- Blue Ensign, rcweir and Mr Whippy
-
3
-
-
-
19 minutes ago, wefalck said:
These acrylic paint pens (assuming that is what the AK pens are also) are handy and their soft sharp tip allows good control - in the meantime I have a whole range of Faber-Castell Pitt Artist's pens.
I can only guess, that these are acrylics, wefalck. The artist pens from F-C should also work fine for this kind of work. Where the AK weathering pencils really shine, is dampened. You can use them as a multicolored wash and weathering medium. I really love to work with them.
Here are some examples of a Sci-Fi build, where weathering was done with the AK pencils dampened:

Cheers Rob
-
2 hours ago, CDW said:
Hey, those look super, Doc. I like that technique.
Thank you Craig, I just wanted to try that technique, after I had seen it in described in a book. It´s a bit less time consuming and more flexible, than cutting tiny strips of mask and apply them onto the props, like I did before.
Cheers Rob- Old Collingwood, Canute, Egilman and 3 others
-
6
-
I´m closing in on the finish line. Due to some back spasms, bench time is somewhat limited lately, but I started painting the figures and props.
These were primed and sprayed with Tamiya Buff then.
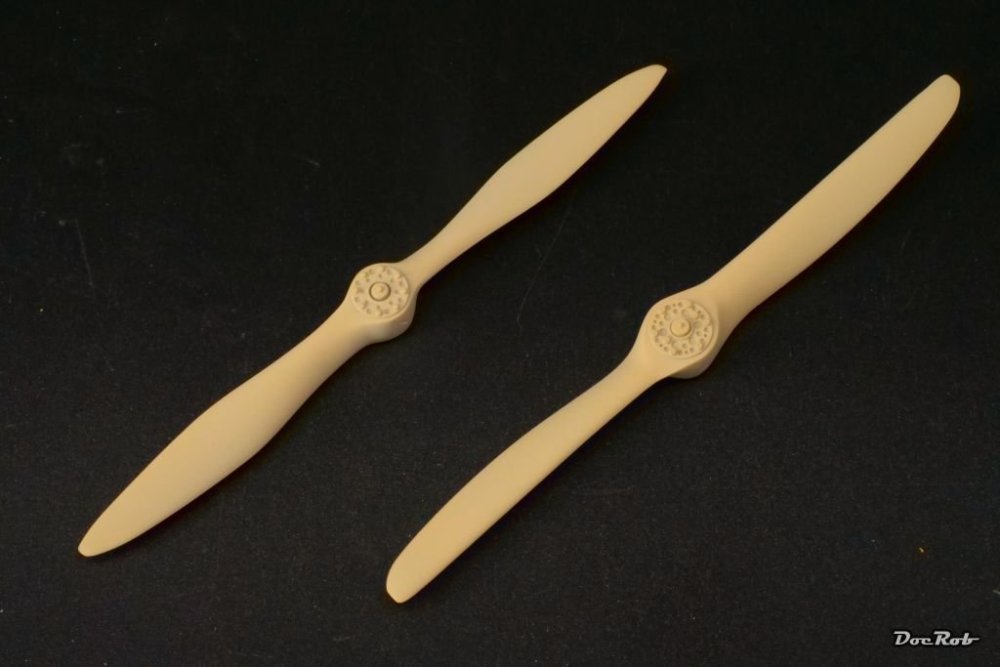
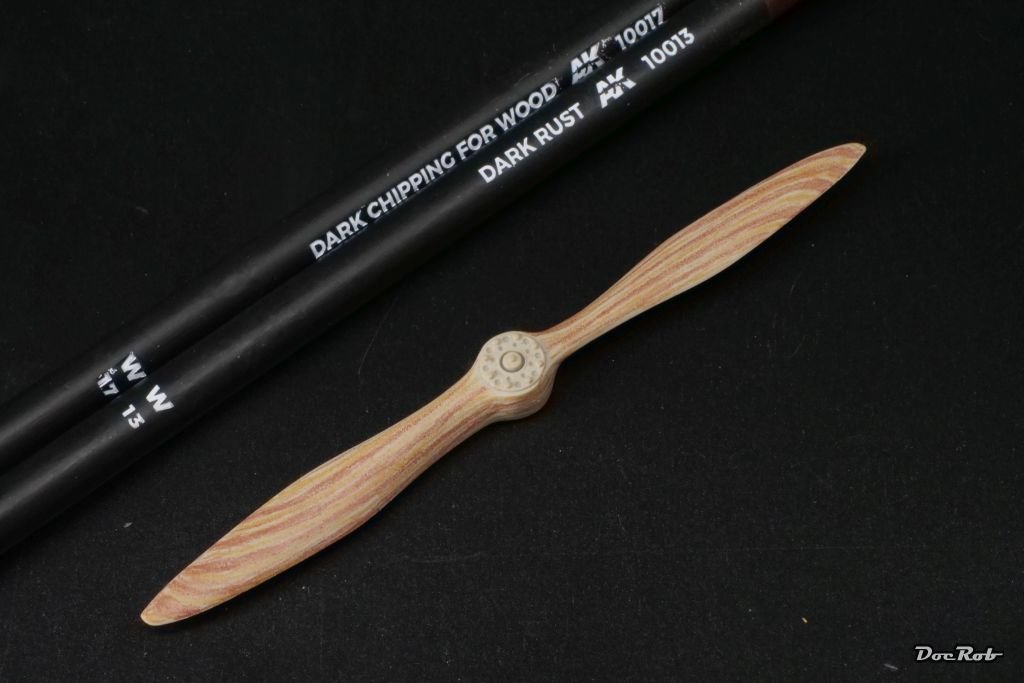
I wanted to try a new technique for the laminated wood and graining with pencils. My AEG has two different propellers, a good opportunity to finish the props a little different.
Number one was ´laminated´ with AK weathering pencils Dark Chipping for Wood and Dark Rust by hand following the logical ´flow´ of the lamination.

Number two was ´laminated´ with Sand and Sepia for a bit more contrast
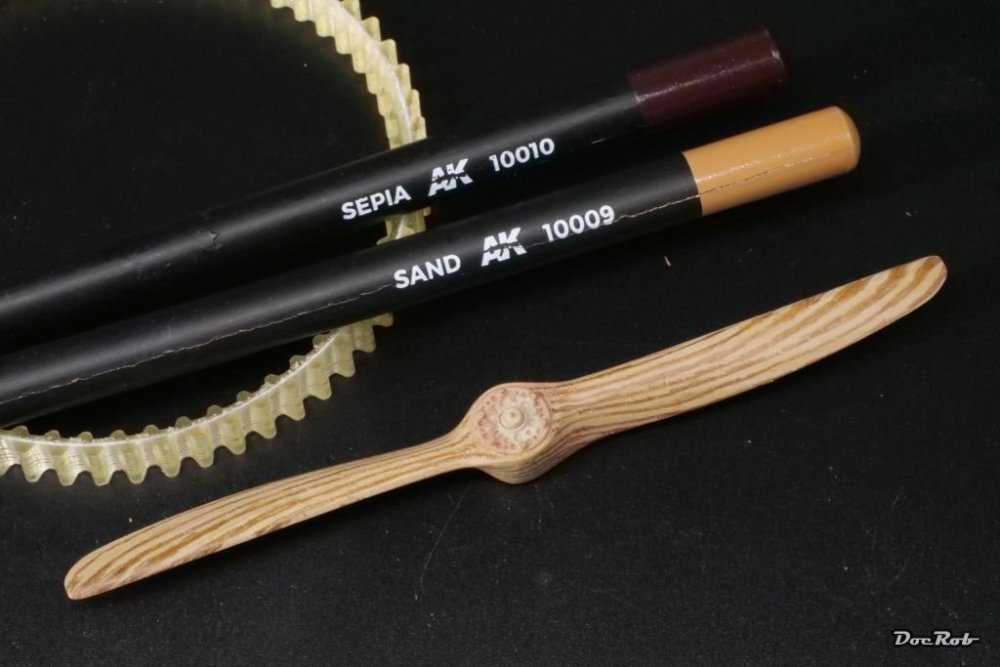
The props were varnished differently,
Number one got Tamiya Clear Orange applied by brush, which removed a lot of the laminating effect. Not all propellers of the time had a verry apparent lamination effect, so I let it be.
Number two was varnished with the airbrush using Tamiya Clear Red, which lead the wood layers show through much more.

Cheers Rob -
2 minutes ago, Frank Burroughs said:
What would you consider a proper primer for Photo-etched ornaments?
In this case, i used Tamiya grey rattle can primer, but as this is not available anymore, where I live, I use Mr. Surfacer primer as my all purpose primer for plastic metal and resin and shoot it with the airbrush. For the PE, every decent metal primer should work.
Cheers Rob- mtaylor, Canute and Frank Burroughs
-
3
-
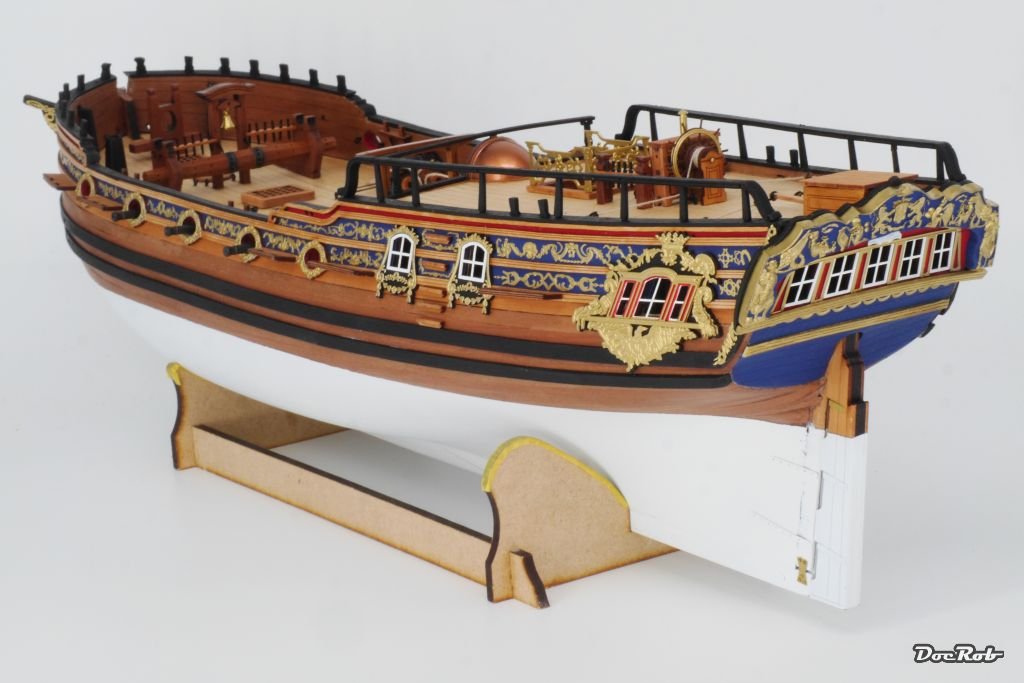
Yes Frank, I think you could hand paint PE-ornaments. It´s best done, when they are still on the fret. Make sure, you degreased the photoetch and use a proper primer before painting. When it comes to golden ornaments, you can use Vallejo Liquid Gold, which is good to brush or spray, covers well and has a great shine. It´s thin enough to flow into all the tiny crevices. The Liquid Gold color was recommended by our Moderator James in the Vanguard manuals of my Duchess of Kingston and it proved to be the best gold color for the job, between all others, I tested on my model.
That´s how it looked on my PE, albeit sprayed with the airbrush
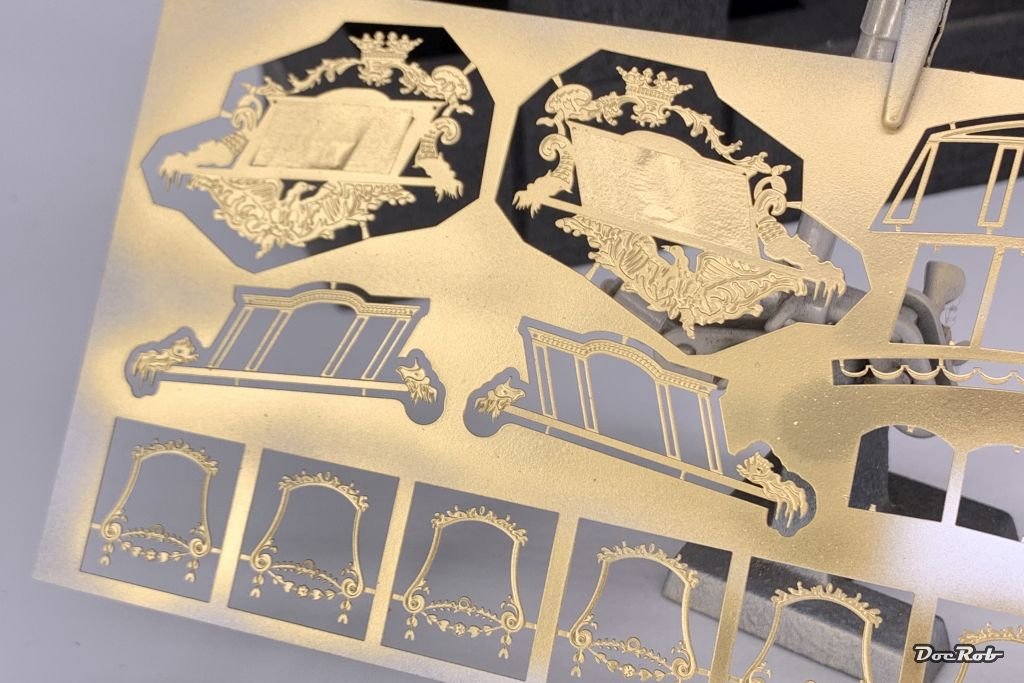
Placement was made free hand for the ornaments, but some of the frames had tiny holes, where I could use a pin for guiding and securing. For the other ornaments, I used tiny dots of CA glue on the backside, which I spread with a toothpick, that not glue can be squeezed sideways and spoil the surrounding surfaces. Of course, I test fitted every ornament before glu
ing.
I didn´t use transfer paper, as it possibly lifts color from the PE part, while removing it. I use tweezers to place the PE and with larger ornaments, I glue a starting section, to fix the ornament and then apply the rest step by step.
Well that said, I did this just once with my only wooden ship build so far, but it worked very well and I have lots of experience using PE with plastic models.
Cheers Rob
.
- Landlubber Mike, Canute, Baker and 3 others
-
6
-
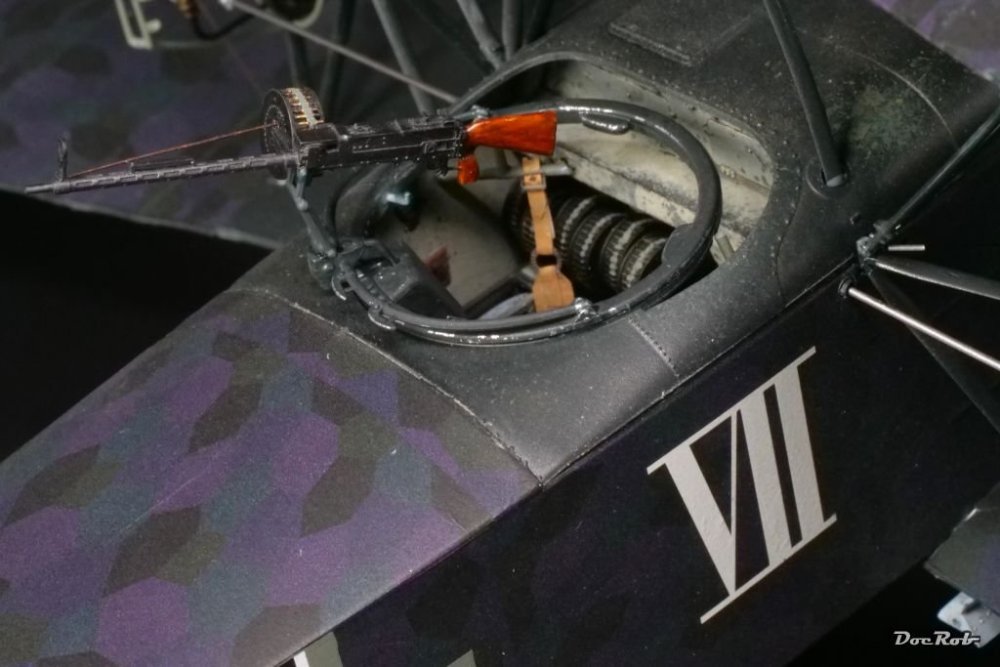
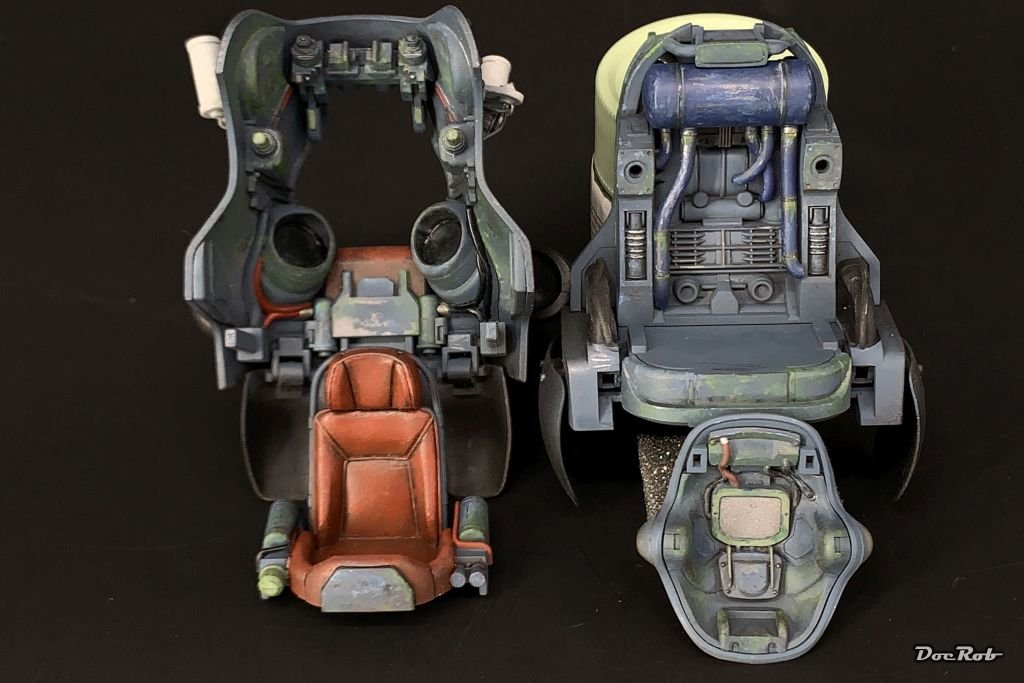
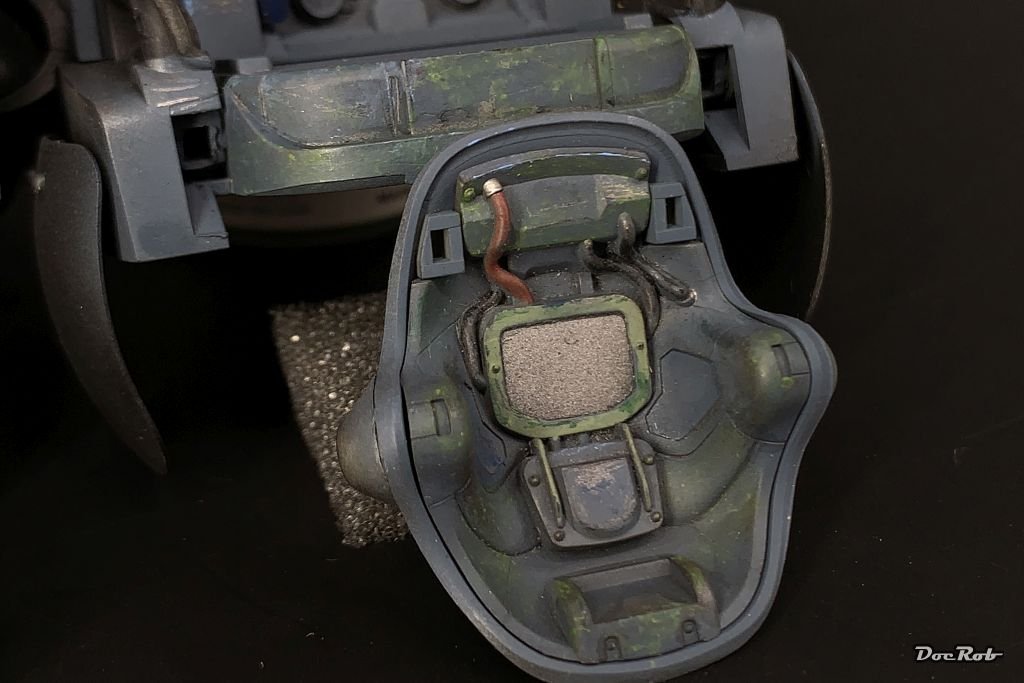
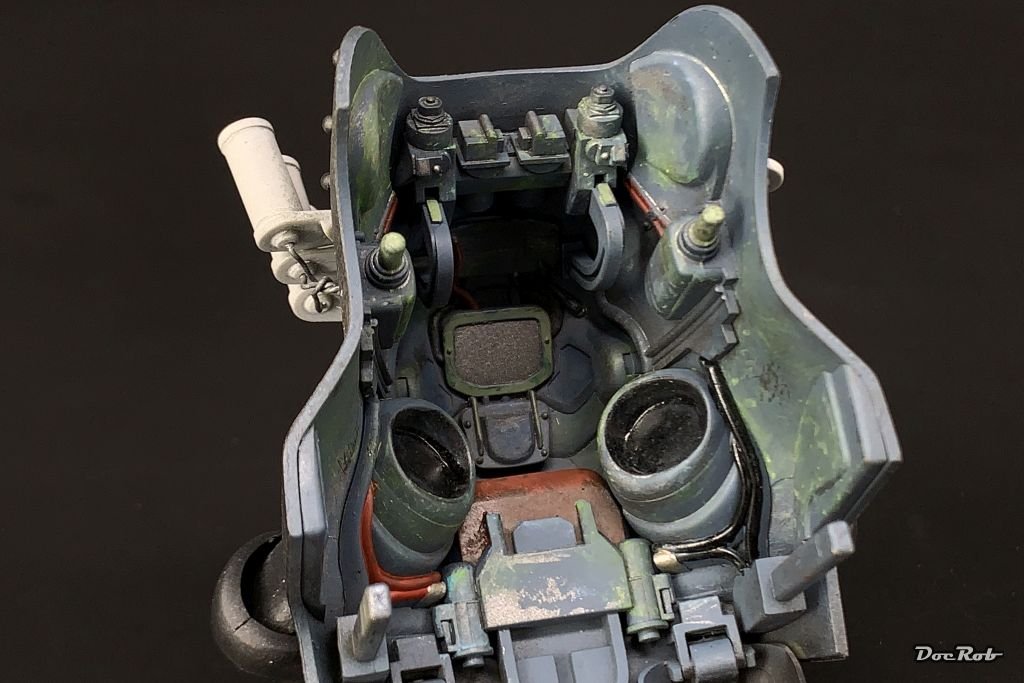
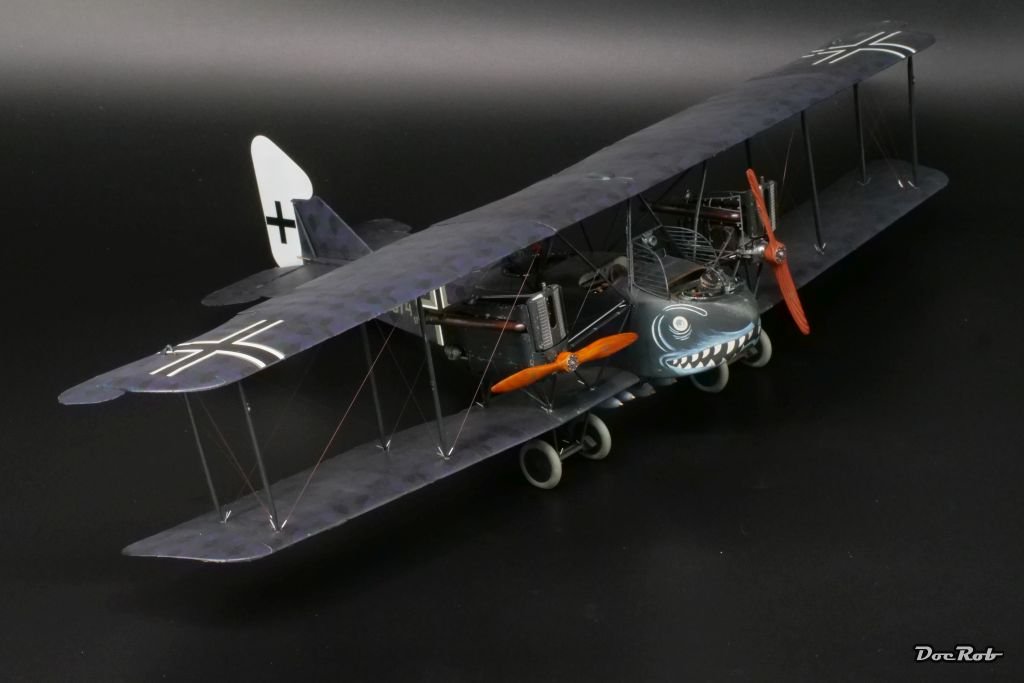
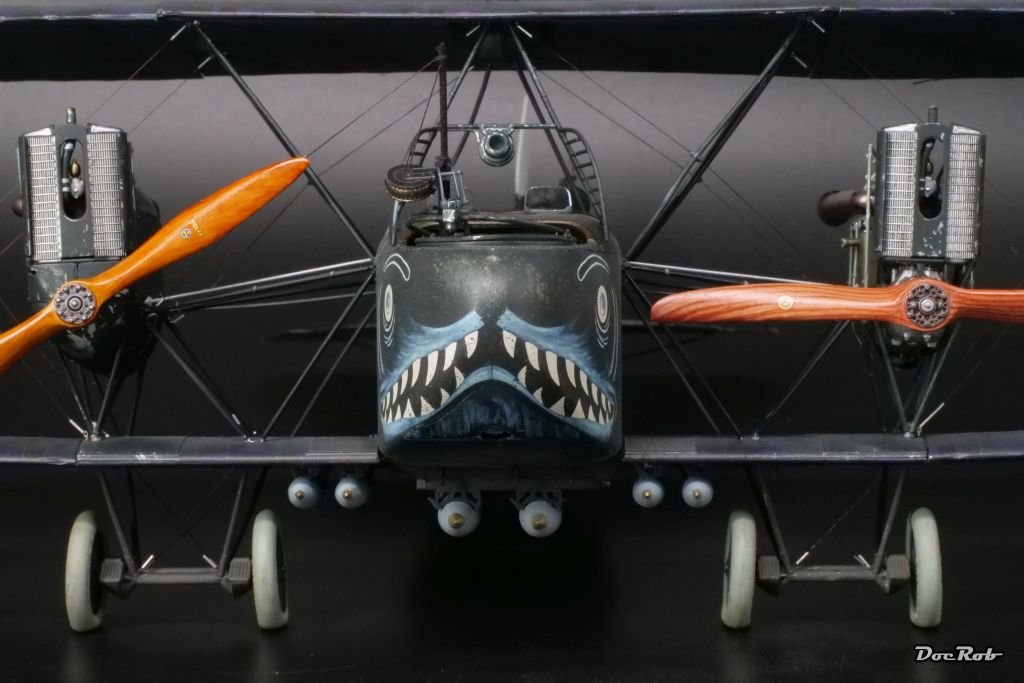
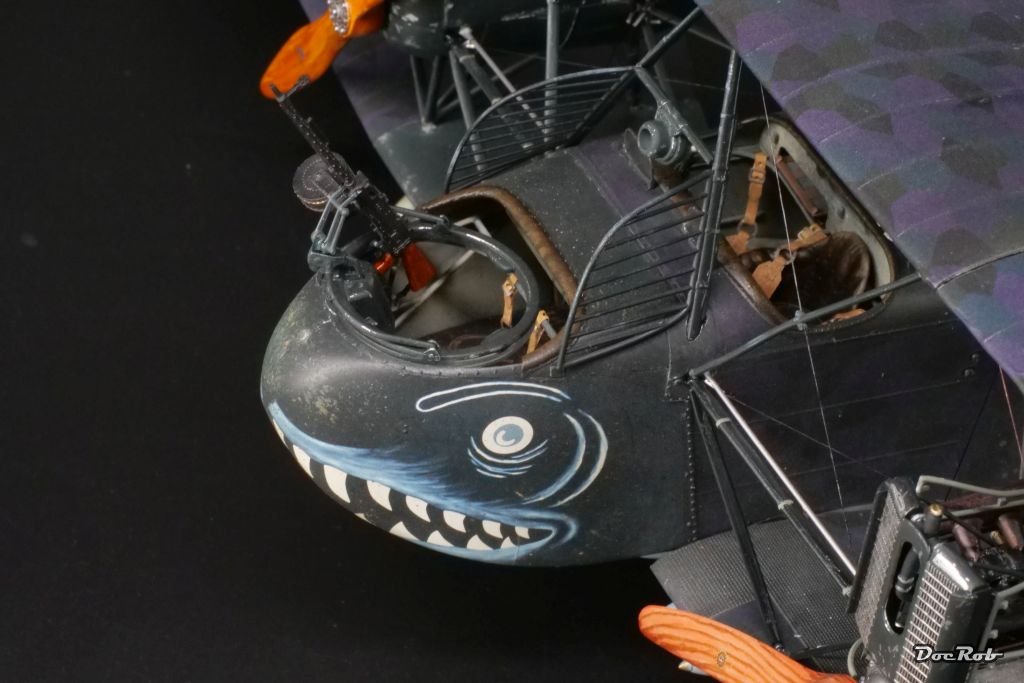
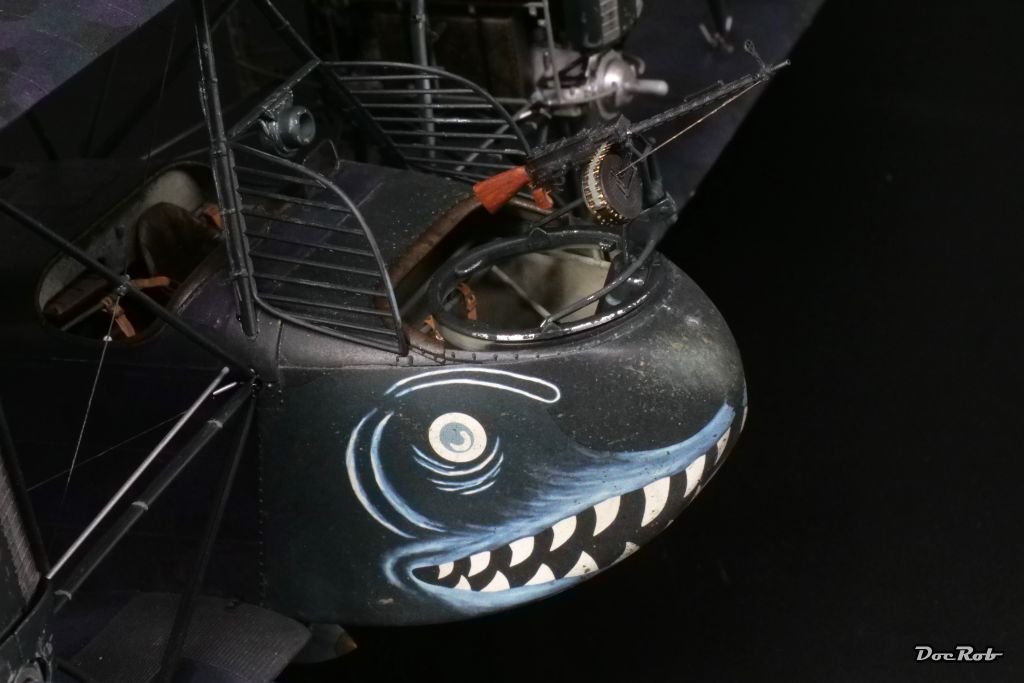
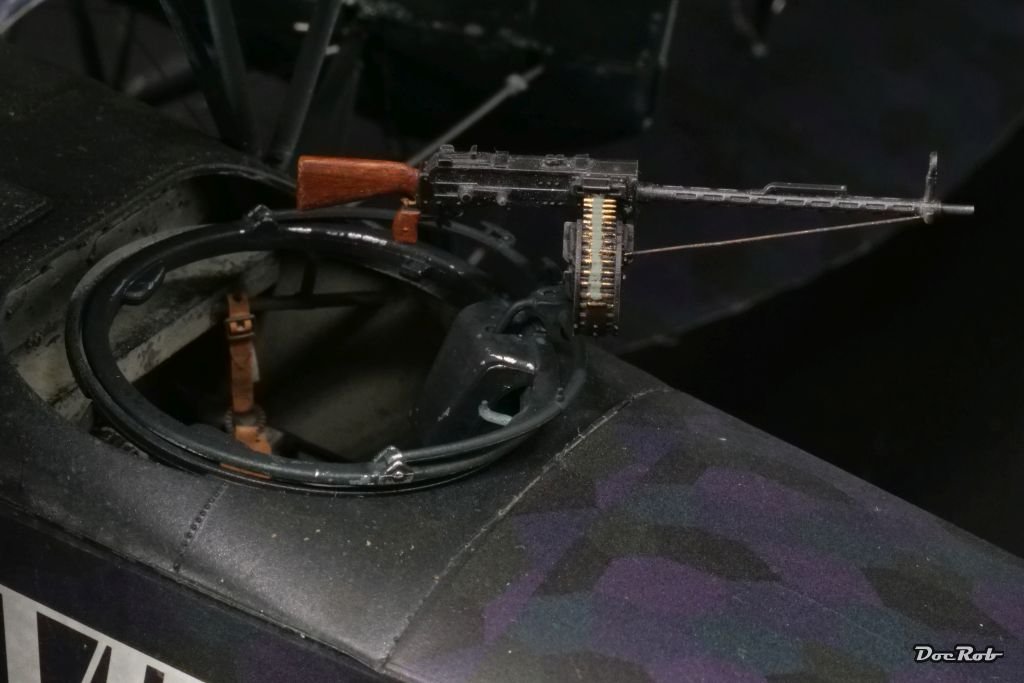
The AEG got it´s teeth - hmmh, well - besides the painted on jaws I mean. The LMG 17/17 Parabellum are from Gaspatch, airbrushed satin black and then I rubbed on steel pigments with a cotton swab. Stock and grip are painted with oil colors and after seeing the pictures, I decided to put on some varnish for a more realistic look. The kit guns are not bad and I used one inside the fuselage, but detail of the Gaspatch ones is absolutely fantastic.
Positioning of the guns is not final. I also made some touch ups and detail painting and added the artificial horizon.
Gun mounts and other details got sprayed aluminum, then covered with hairspray with the dark sea blue on top and finally weathered with a toothpick.


Cheers Rob


AEG G.IV - Creature of the Night by DocRob - FINISHED - Wingnut Wings - 1/32
in Non-ship/categorised builds
Posted
No harm done, Chris. With my expertise in figure painting you may did me a favor, but I will try anyhow
Cheers Rob