


DocRob
-
Posts
1,153 -
Joined
-
Last visited
Content Type
Profiles
Forums
Gallery
Events
Posts posted by DocRob
-
-
13 hours ago, Landlubber Mike said:
For some reason, I tend to lose interest in builds as I get near the finishing point. Part of it I think comes down to hitting a point where I feel like I want to figure out how to approach something I've never done before - so rather than hit build paralysis, I just pick up something else. Part of it might also be avoiding finishing the build, as it seems anticlimactic, if not depressing, as it is like saying goodbye to an old friend.
A more recent development for me is that my mother-in-law passed away a couple of years ago, so my father-in-law is living with us in a spare bedroom in our basement. My power tools and airbrush are down there, so it's difficult to put much work into models in late evenings like I used to as he tends to go to bed early. It's much easier for me to do early construction parts of builds upstairs, so that's a big reason why I have a number of kits in various stages of completion.
Along those lines, I started a Planet Models 1/72 Gamma a week and a half ago. It's a quick build, and I'm already at the painting stage. Given the size, I can run downstairs in the early evening to throw some paint on, then work on other things in the later evening. That was originally my palette-cleanser build, but got stuck with the painting. I probably won't put a build log on here or LSM as it's not particularly topical or likely interesting for folks, but I have a project log on Scalemates going so that I can remember what I've done on builds -- or re-live some of the painful moments
")
I know that anticlimactic feeling as well Mike, happens to me all the time. During a build, I like to build up a certain grade of tension, which keeps me on the heels and drives me through obstacles during the ride. Crossing the finish line is rewarding, but I can only enjoy it, when I have an interesting follow up project in mind. It´s the same with good books to me. I don´t like to end one, without some other decent stuff in vicinity.
One thing, which usually keeps me in a build is my dislike for the SOD idea. I hate to shelf projects, as I rate it as a kind of failure. I have a finished model´s picture in my head, when I start a project and I want to fulfill that image with all my abilities. I felt very bad about shelfing my 1/32 Arado 234 twice and was very relieved when I finished it two years ago. Same with the Duchess of Kingston, which I built like in great flow, hurdling all the obstacles, which were new to me, only to shy away from the rigging phase. That´s like an open wound and I have to close it soon.
A hobby like modelling is about passion to me and that leads to various states of minds during a project and I try to keep each project on a demanding but satisfactory level. As I have no competition around in my isolated place, I´m always my fiercest competitor myself.
Cheers Rob -
Nice little craft in very large scale, Mike, this should be interesting and hopefully refreshing, as you wanted it to be.
Cheers Rob -
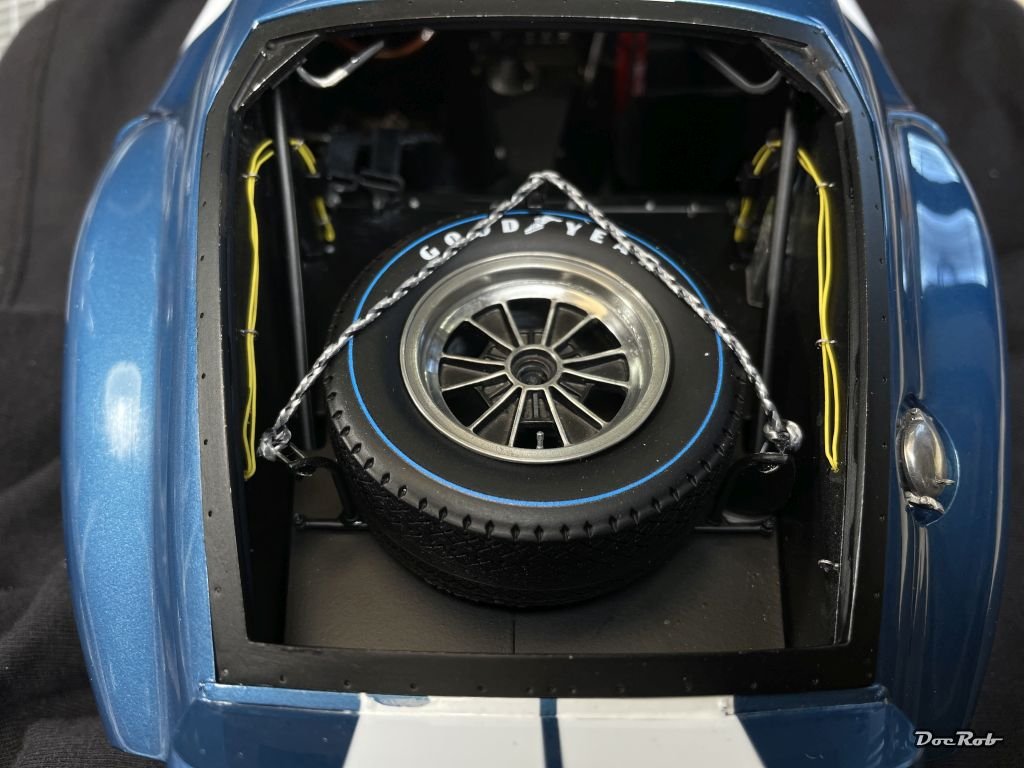
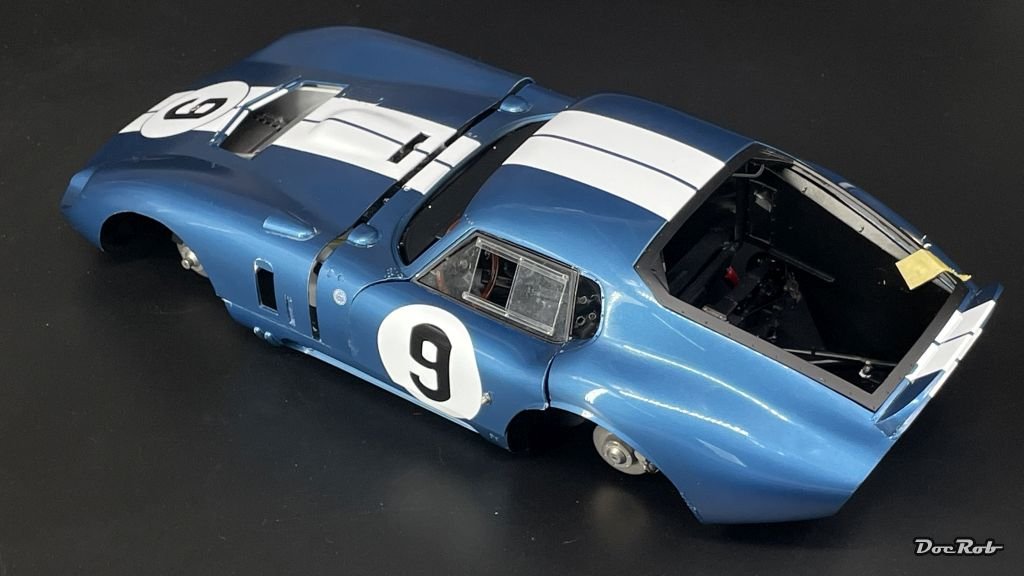
The rear section got finished with the spare tyre rack. I´m not sure about the rope and have to find some pictures of the real car to verify, but this is, how it is shown in the manual. I don´t want to have a collision with that huge heavy tyre behind my head.
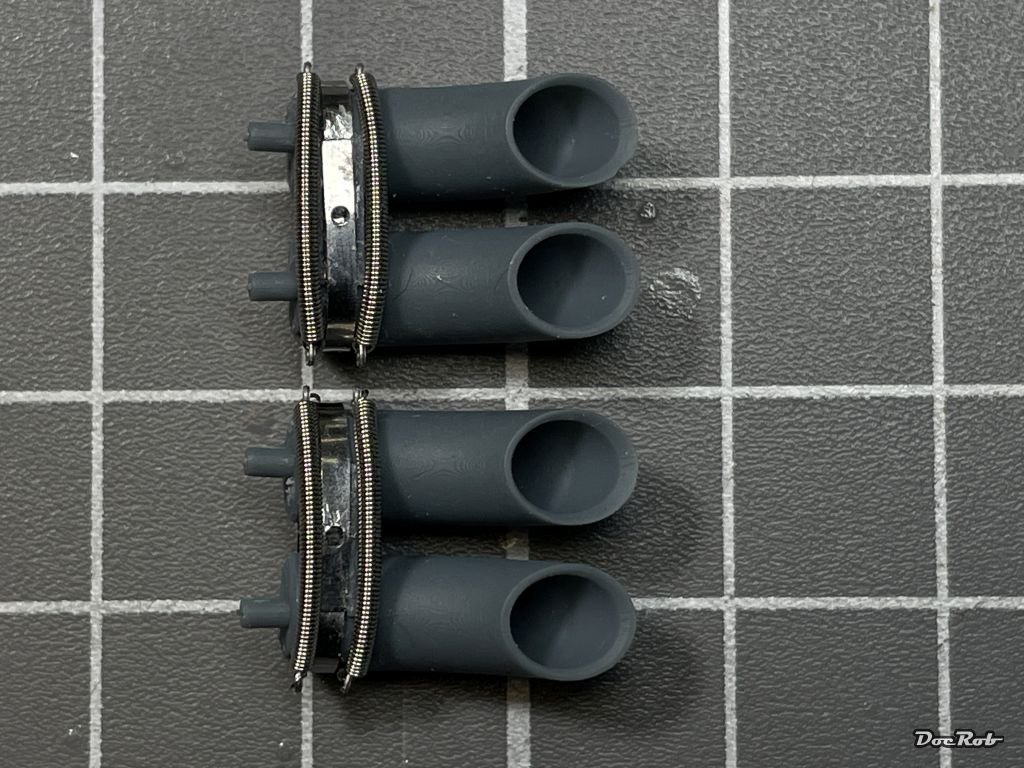
Next, I started to prepare the exhausts. The manifolds are made from white metal, which has to be fitted into the confined space of the engine compartment. The side pipes are produced from resin and the exhaust ends are 3D printed which added PE- and rivet fittings. Every time, little coil springs are involved, it gets creepy. These buggers are really hard to fit into the PE fittings properly and you don´t want them airborne. Anyway, here are the end pieces.
Cheers Rob- Old Collingwood, davec, gsdpic and 10 others
-
 13
13
-
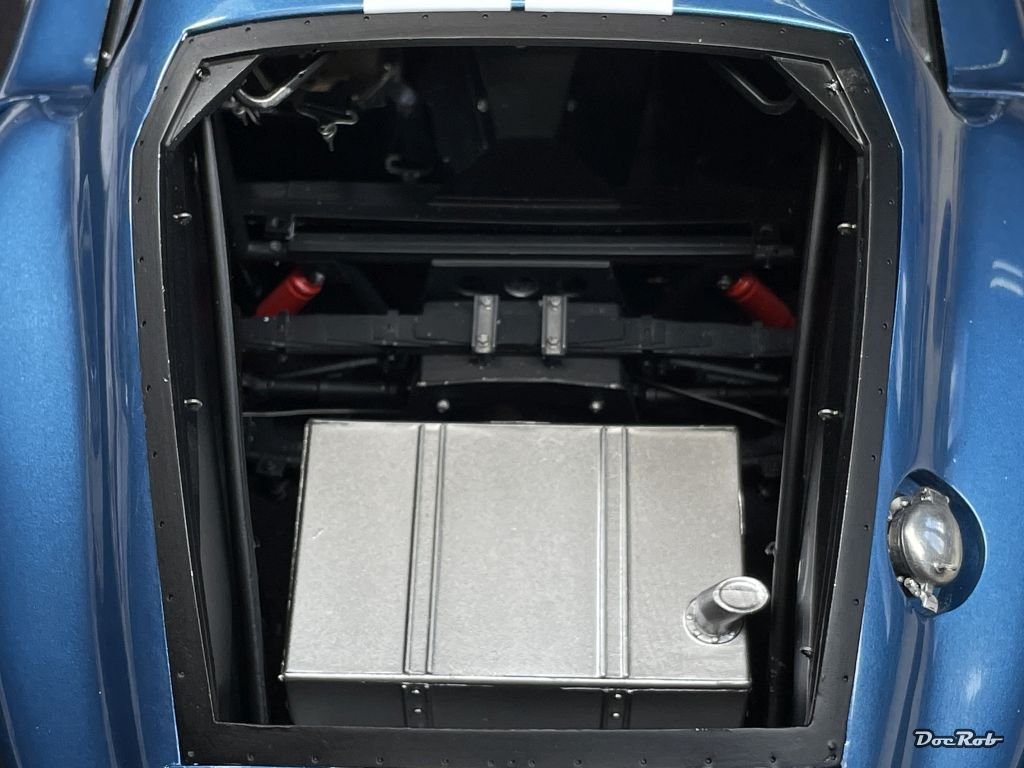
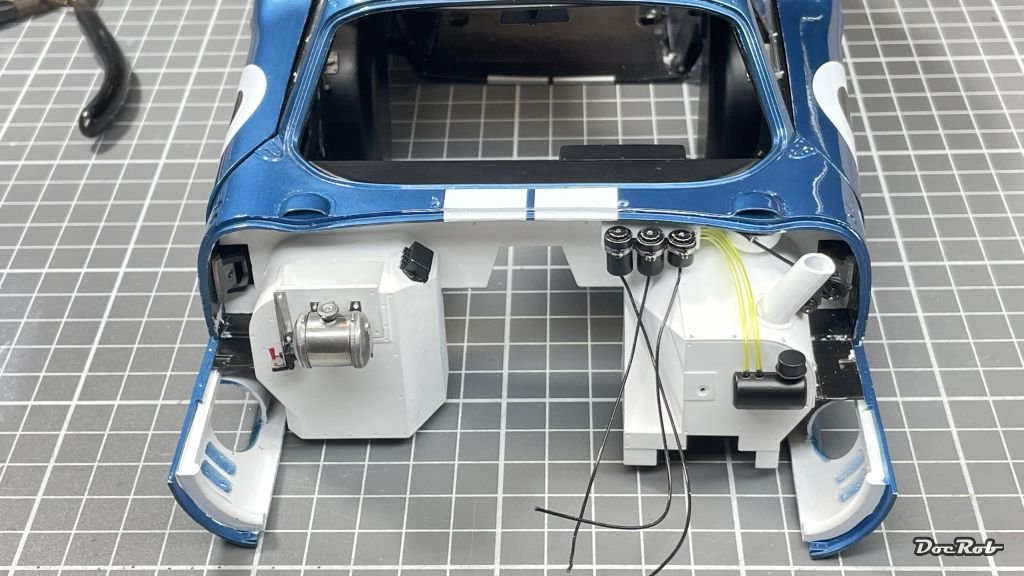
I decided to let the implications of the exhaust system stew for a bit and went to the rear interior area. There is an internal framing down under the tank, which is connected with the chassis as well as the body and it fits like a glove. The framing holds the tank, which I only painted in aluminum without detailing, because it will never be seen again. Next, the right and left rollcage bars were added, not too easy, but they also fitted perfectly, which shows how good the engineering is.
The difficulty with these parts, it´s all black in there and you have to use an extra light for proper orientation.
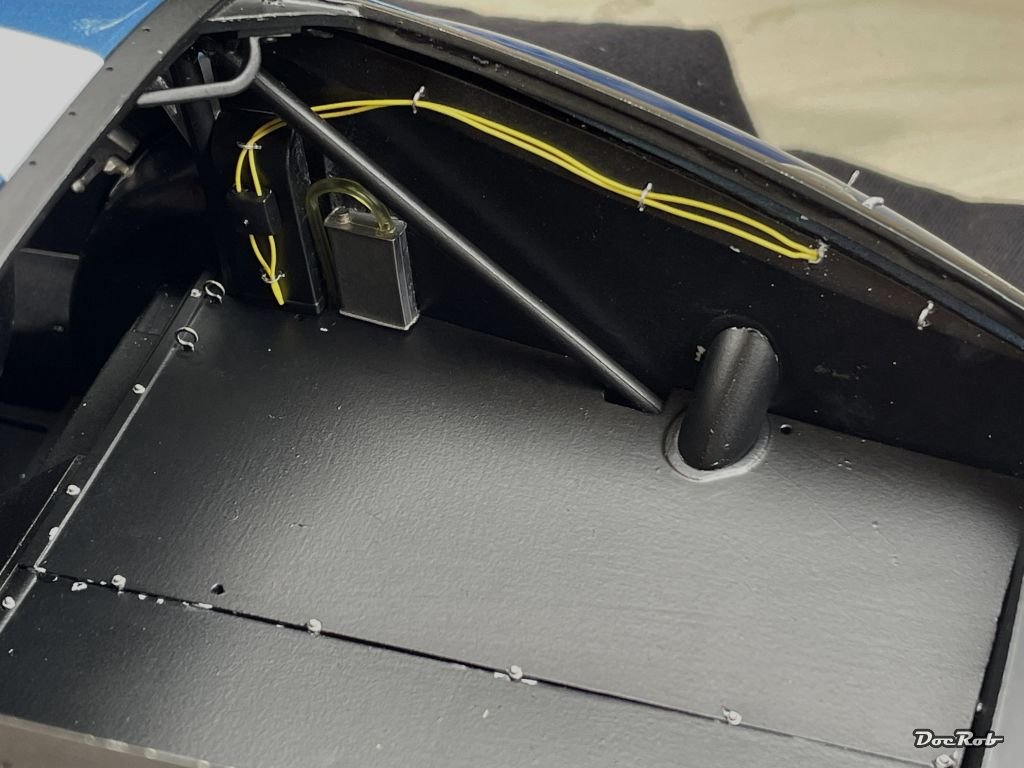
Now the tank got covered with a two peace (smart) flooring, which also has a lot of fittings for the seat belts and seat supports as well as rivets added. I then added the wiring for the backlights onto the rear air ducts. Unfortunately not enough yellow cable was supplied and I decided to drill a hole and let the cable end there. Last was the small oil tank with it´s tubing and now it will be time to install the spare wheel. But this will be done after some touch ups.
Cheers Rob
-
3 hours ago, Canute said:
Hard trials and great tribulation, Rob. The wheels look the real deal, nicely done. I feel your pain on the fitting of components.
Thank you Ken, in the harder moments the build is a test of patience, but the fun parts are predominant, it´s all part of the experience. At the moment, I reached a phase, where all the work intense sub assemblies have to be mounted to together, which is a bit nerve testing somehow. Spaces got more and more confined and the really heavy kit becomes difficult to handle. On the other hand, I can see a finish line, which is quite motivating.
Cheers Rob -
-
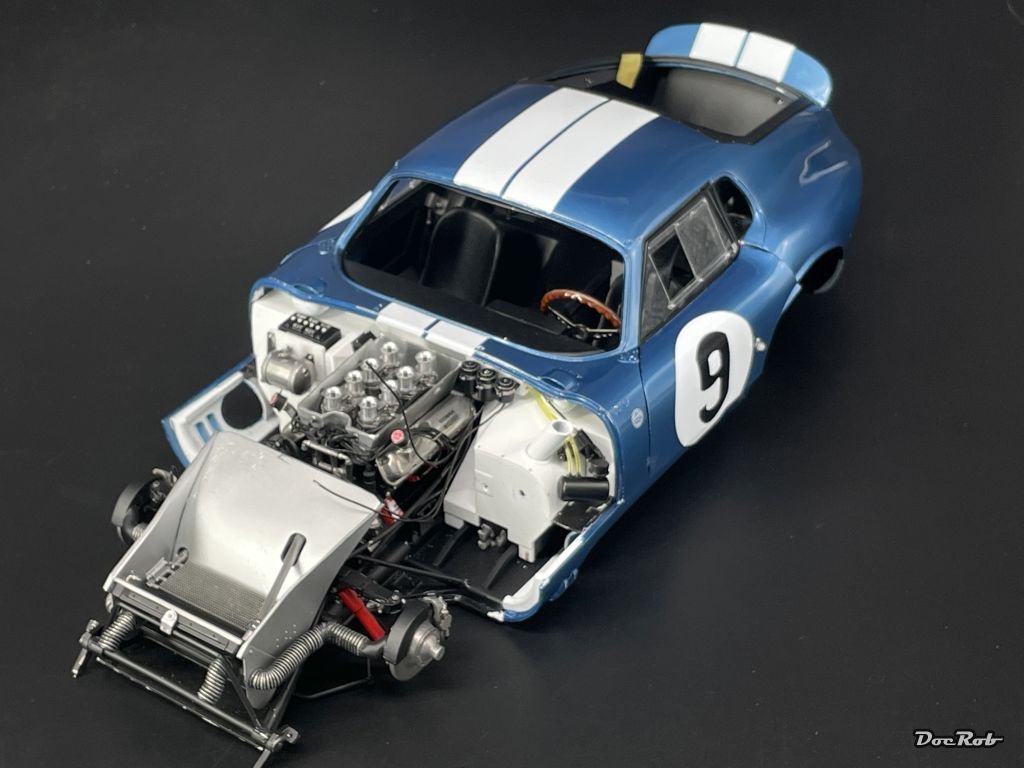
Today, I had the second attempt with adding the body to the chassis. Yesterday, I tried to identify the obstructing parts and gave them a little workover. This is not like you can pull the body off the chassis as often as you like. All the tolerances are really tight and it involves a lot of bending causing nasty sounds to get it right. When the body was halfway into position, I used a lot of finger force to push everything carefully into place and added screws into pre drilled holes. There were not too many damages to report, only some more scratches and one or two parts knocked off.
It´s hard to describe, but there are so many elements all around, which have to fit, I expected worse, but it was no walk in the part and it´s about make or break with the Cobra. The engineering is fantastic, I don´t know how they are able to do it, this is not the average " I close the fuselage of my plane job".
Attentive readers might see, there were parts removed from the firewall. This is necessary due to the preparation for installing the exhaust system, the next obstacle in this confined space. There is an additional sheet in the manual, showing the sequence of every part, but I couldn´t make it properly during test fitting.
Anyway, I´m lucky, I managed to marry the body to the chassis without too much fuzz. The bonnet is only laid on and the doors need some fine tuning later on.

Cheers Rob -
18 hours ago, Egilman said:
That is one CLEAN set of wheels....
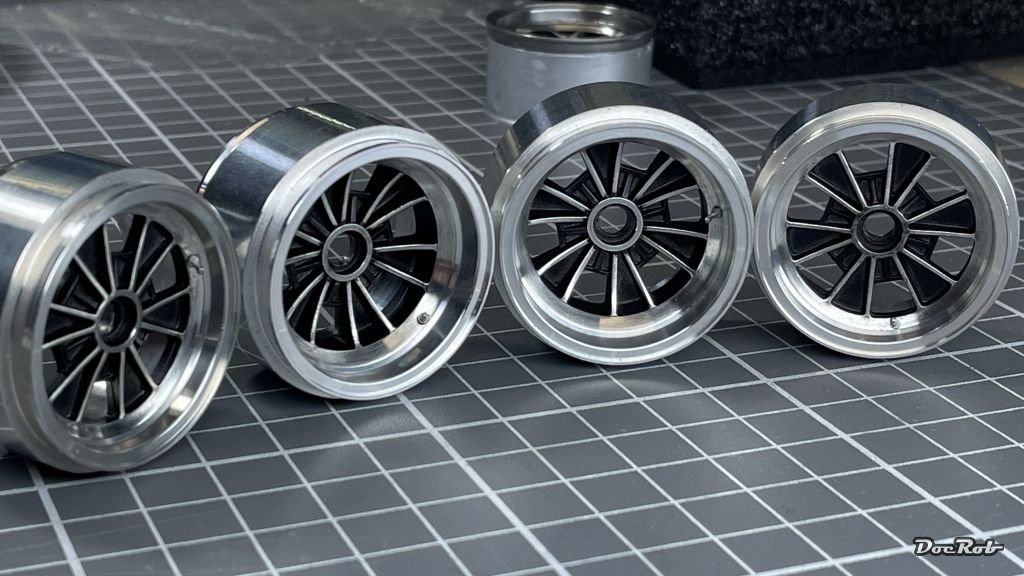
I like them too, Egilman. The extra work was well spent. There were cast imperfections visible and the near polished look of the turned metal rims would have contrasted sharply against the greyish casted inner parts. Luckily the white metal MFH uses is easy to work with and polishes relatively fast.
Cheers Rob -
I will take a seat here Andrew, I always liked the quirky Lysander a lot and also found the stories around this airframe very interesting. In my youth, I butchered a Matchbox 1/32 Lysander and always wished for a decent large scale release.
You can reduce the risk of fogging up the clear parts with dipping them in Future / Pledge. It also enhances the general transparency of the parts. I have a jar of Pledge for this task, where I dip the clear parts in and let them dry properly, clipped to a small holder, so that the excess Pledge samples on the lowest corner. There I touch the edge with a toothpick, to get rid of the excess Pledge. This has to be done maybe thrice over the first half Hour of drying and then you are fine.
Cheers Rob -
2 hours ago, Egilman said:
I'm sure they look stunning brother, but, you can't really see it against a diffuse black background...
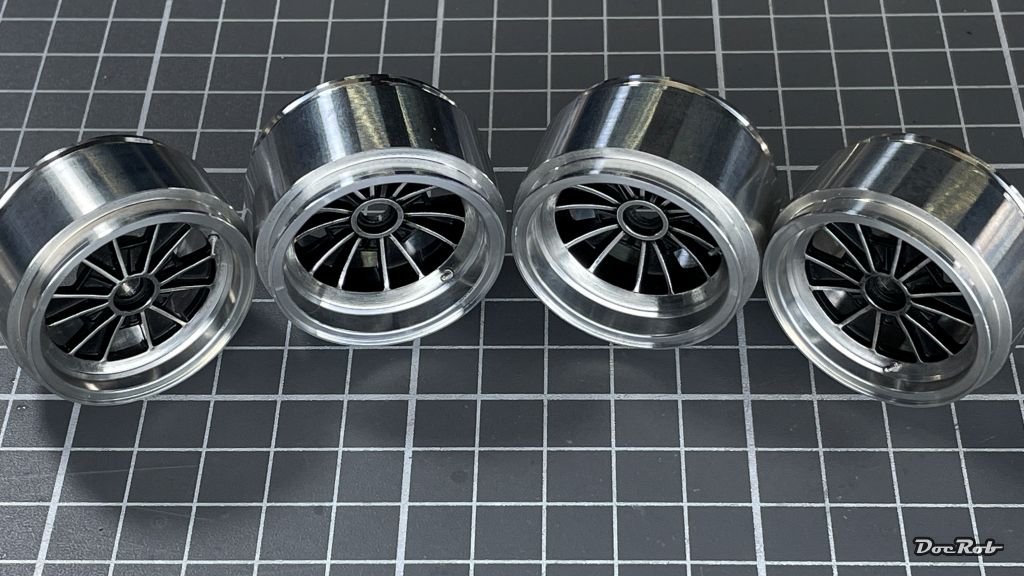
I hope, I can de-diffuse the appearance of the rims with some new pics, Egilman.
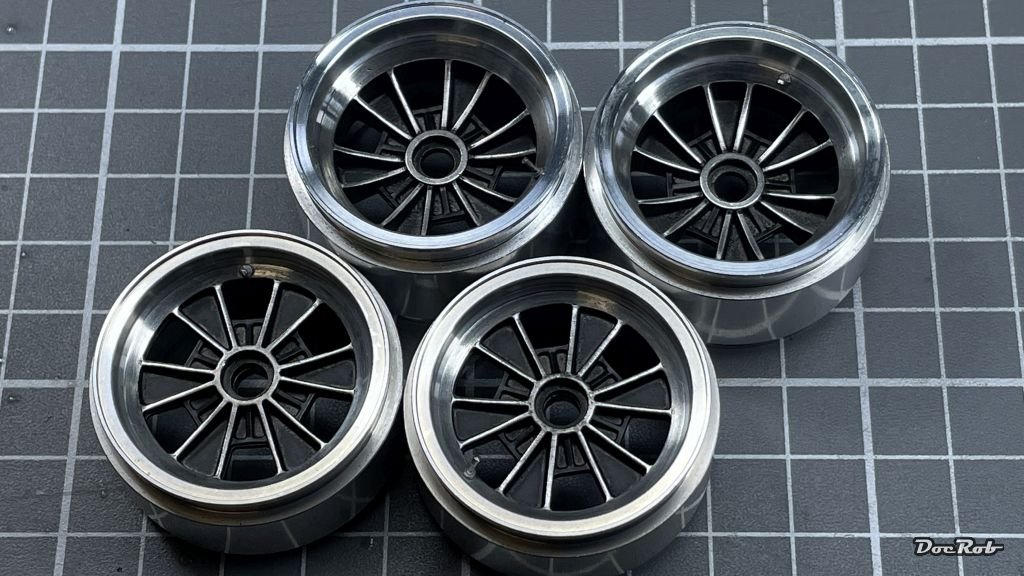
I finalized the rims with installing the painted and polished center parts into the turned aluminum rim. I also added the air valves, but didn´t add the tyres for now, because I fear, the CA fumes might affect them.
Cheers Rob
-
39 minutes ago, Kevin-the-lubber said:
I’m guessing you’ve done that before? Either way, you certainly got a great result. The parts look much better than if you’d masked the polished areas, maybe because the transition edge is smoother.
Thank you Kevin, it´s the first time, I use this method on metal rims. I tried similar things during my Crocker build, but with smaller parts and usually polishing away the dried color with abrasive fine sanding sponges. I didn´t want to leave sanding residues onto the wheels, therefore, I chose the swiping method.
Here I thought, the adhesion of the Tamiya Lacquer wouldn´t be too god without primer on polished metal. The curing time was thumb measured, with hopefully dry paint as a result, but not thoroughly hardened, to have perfect transitions without risking breakouts while cleaning the rims off.
When I mask objects for airbrushing with kabuki tape, I let the paint dry for only some minutes, before removing the masks. This way, the paint borders are cleaner and smoother.
Cheers Rob- king derelict, AJohnson, Canute and 3 others
-
6
-
45 minutes ago, Egilman said:
I'm sure they look stunning brother, but, you can't really see it against a diffuse black background...
The wheel black just blends into the background...
Not the best picture for sure, Egilman, it was only a fast phone snap off the bench. I promise to do better, when the wheels got assembled.
Cheers Rob- Egilman, Old Collingwood, Canute and 1 other
-
4
-
Today, I made the first attempt of a very crucial step, with marrying the body to the chassis. As you can imagine, there are a lots of contact points on the chassis, around the firewall, under the instrument panel, the rear body framing, the rollcage, ...., to cut it short, I failed. Now I´m inspecting everything for color abrasion, which might show problematic areas, which may need to be tweaked. Fortunately, I didn´t brake too many parts, but the rear hatch framing needs to be reinstalled.
I´m very happy, that I didn´t follow the manual with the rear hatch window and windshield installed. before joining the chassis and body. It would have been a nightmare to handle the heavy kit with these mounted.
Before all this, I finished the shoulder straps of the seat belts, which is an easy task with the supplied PE buckles, belt material and double sided tape, which holds the belts perfectly together and in place.
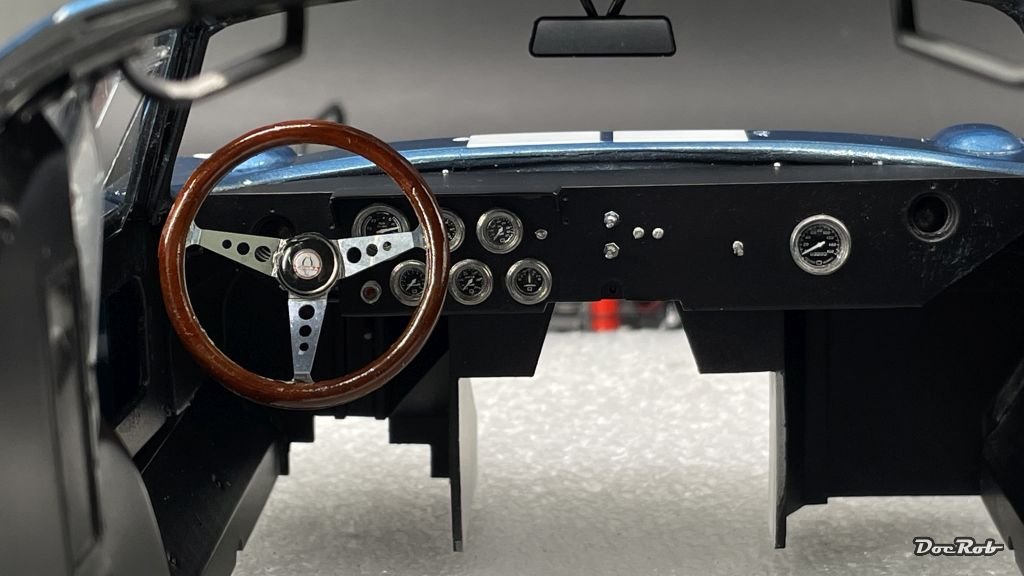
I finished the steering wheel with a coat of Tamiya´s clear orange onto the dried oil colors and then assembled the PE and center knob. That was more difficult then expected, but finally it worked. The clear center part is made from resin and was not clear at all from the beginning and had some tiny scratches. I polished the lens with Tamiya´s polishing compounds and adhered it with Pledge on the decals.
Next were the wheels, which were sprayed with Tamiya´s semi matte black (LP-5). After two hours of drying time, I didn´t want the paint to cure too much, I swiped the rims with cotton swabs and cotton cloth, slightly dampened with Tamiya lacquer thinner and cleaned off the polished areas.
Cheers Rob- Old Collingwood, Canute, gsdpic and 4 others
-
7
-
Juten Morjen Joachim and welcome to MSW. It´s good to see somebody here from my old hometown and place of birth.
Cheers Rob- Jolly Jo and Keith Black
-
2
-
14 hours ago, CDW said:
Beautiful details, and the wheels look awesome!
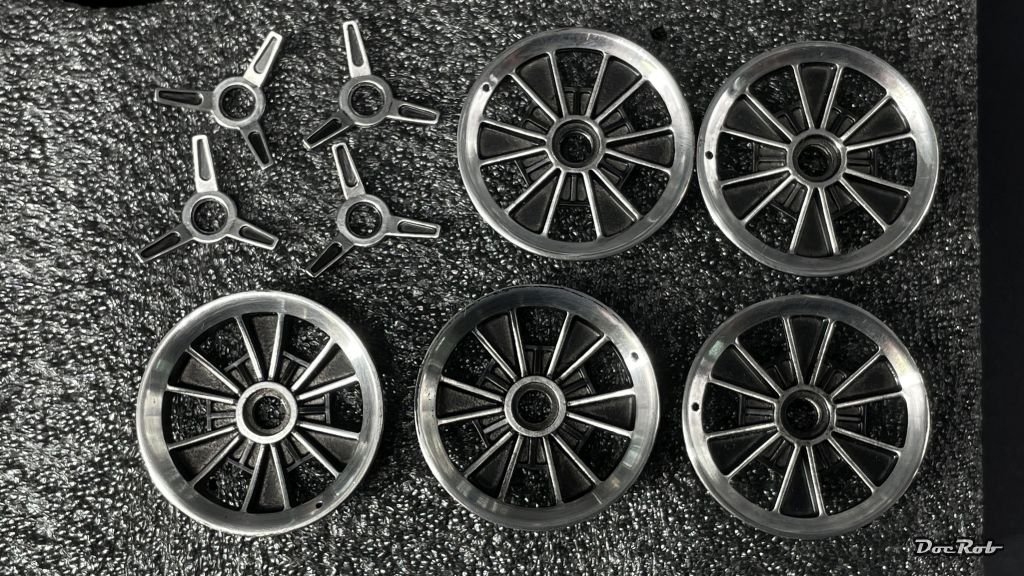
Thank you Craig, I just sprayed the wheels in semi matte black, after test fitting them into the rims and drilling holes for the valves. I hope, I can get rid of the color on the protruding polished parts.
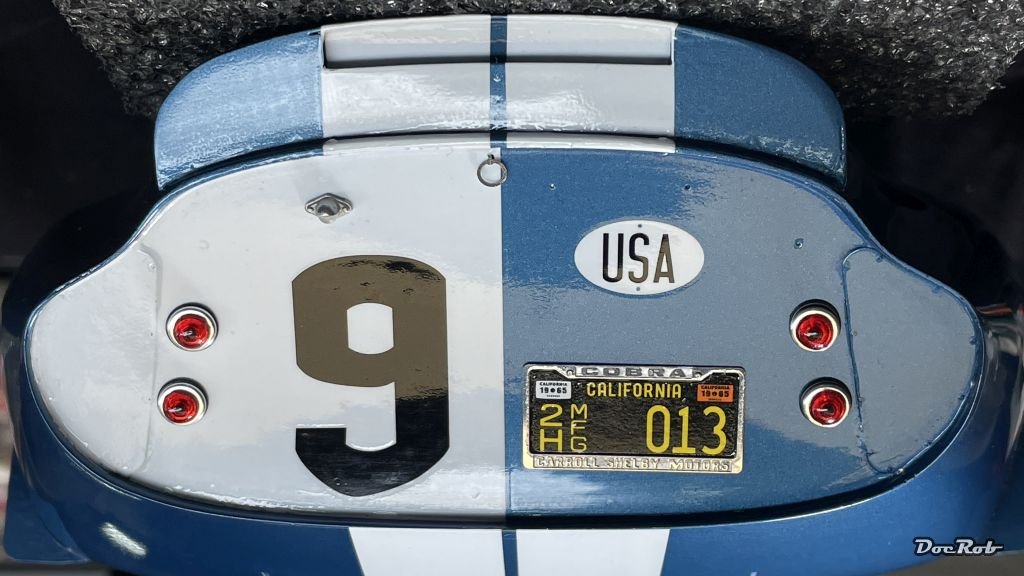
One reason, why I chose this Cobra Coupe chassis (#9, 2286) were the black underlayed wheels. The other chassis had white painted wheels, which doesn´t look cool. The other reason, was less sponsor decals, which let show the shape of the Cobra better.
Cheers Rob -
21 hours ago, Kevin-the-lubber said:
Insane level of detail! MFH certainly give VFM. And I love the steering wheel, from here it looks quite like walnut.
Thank you Kevin, had to google VFM, but yup, that´s about it. These are the best car kits, I ever saw. The metal cast and resin quality is fantastic, the engineering is splendid and there is a lot of kit for your (many) bucks. In my opinion the kits are good value, if you get them for a good price and not a scalpers one. A Tamiya 1/12 Porsche 935 is about 120 to 150 Euros. A ScaleLab24 detail up set with turned rims and all the galore is about 350 Euros. Together that is almost the same, I paid for the Cobra, but the Porsche is a kit of the 80´s and has many flaws.
Glad you mentioned the walnut steering wheel, because that was what I had in mind. I toyed with longer grained wood first, but thought, at this scale, I can give walnut a try with it´s more dotted appearance. The steering wheel is now finished and I will shoe pictures in the next update.
Cheers Rob -
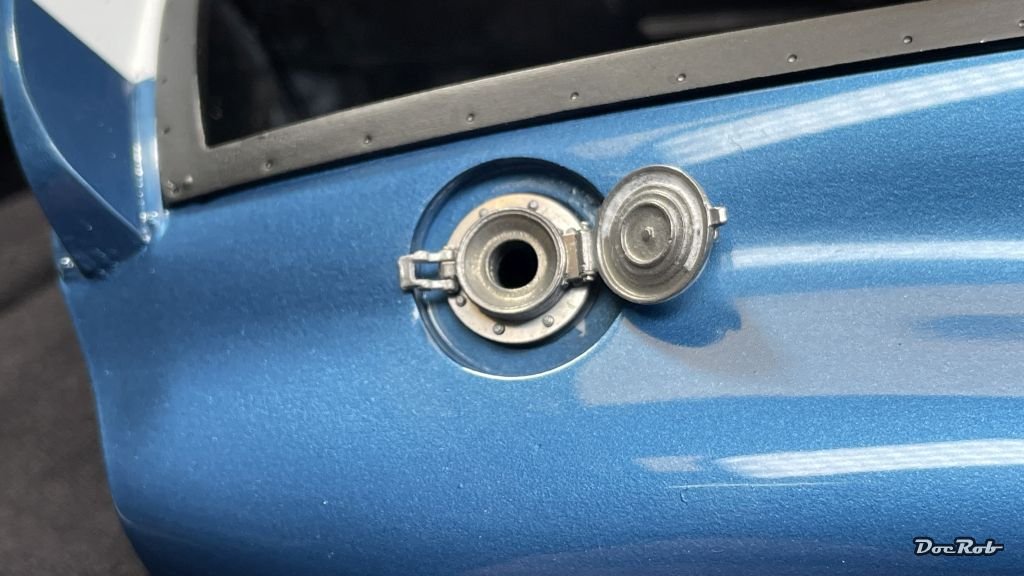
The tank filler cap is really working, just open the tiny latch on the left and put in the juice - errr - not so fast, the tank isn´t installed right now
 .
.
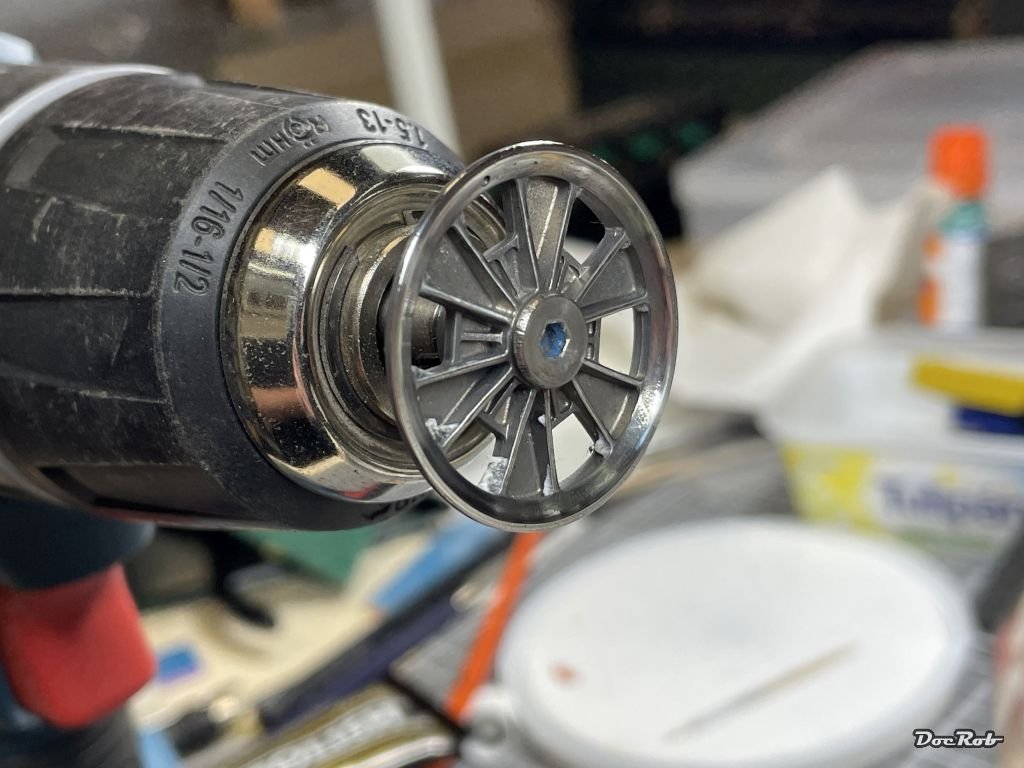
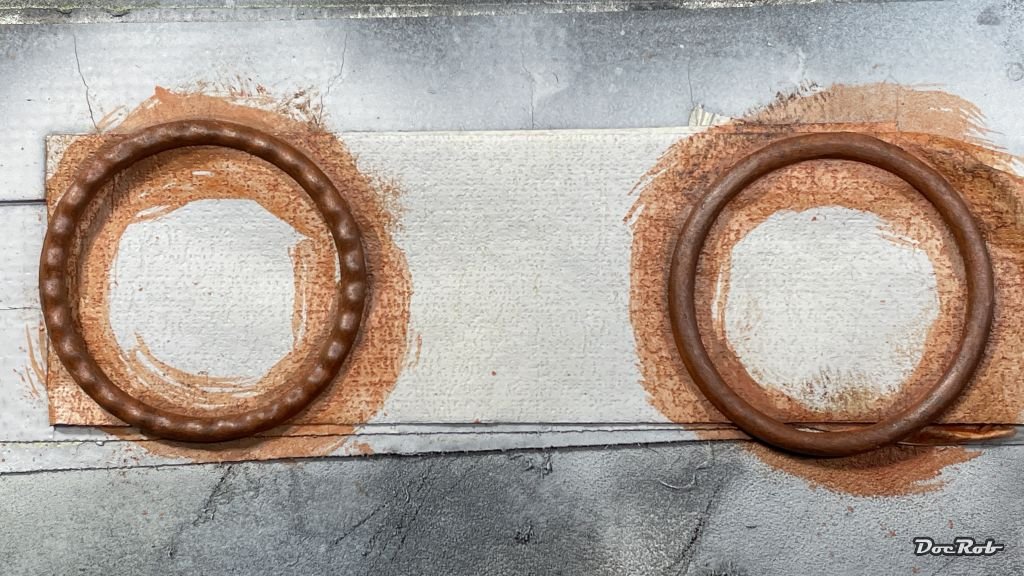
After priming some interior parts for later stages, I had an idea about how to deal with the wheels. They are made from cast white metal and were cleaned in the tumbler polisher at the beginning of the build.
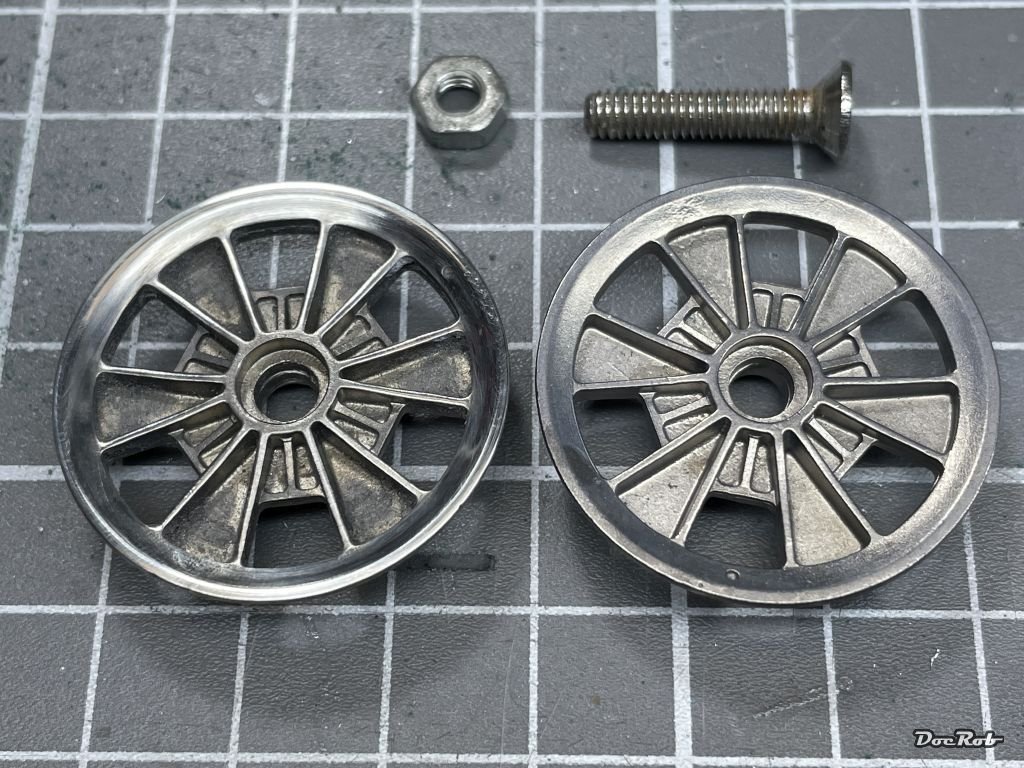
I thought, I have to give them a bit more shine, to keep the eyes trained on the wheels, letting some other mistakes skip more easily. Hand polishing proved difficult and I found, a conical head M4 screw holds the rims in place in my accumulator drilling machine´s chuck. Then I sanded the wheels with fine grit sanding sponges, followed by polishing with Autosol polishing paste on a cotton rag.
Now, I like the result. Later the wheels will be airbrushed in black and then I polish off the higher parts again, which are now shiny. Of course, before airbrushing the rims will be cleaned properly. the polished left one on the pic has a lot of dirt accumulated.
Cheers Rob -
Poco a poco, I grind my way through the Cobra build. Today, I assembled the tank filler cap, a seemingly small task, but it involved about twenty parts and is functionally. I polished the cap itself with Autosol metal polish and added the numerous etched parts and rivets.
Then I started with the steering wheel, which got primed, airbrushed in a mix of red brown color and sand. After drying, I applied several layers of dark brown and red brown oil colors, thinned with fast drying thinner for a realistic looking wood texture. Tomorrow, I will apply a clear coat as finish.
Finally, I repaired the damages to the firewall and pinned the lower side to the door fairings with brass rods for enforcement, to close the gaps in this area.

Cheers Rob -
I use pin vises a lot for resin and white metal and sometimes wood. I have one from Tamiya since years, which is very good, has a rotating knob at the end and uses collets for the drill bits. Four diameters are supplied.
The other, I use frequently is from DSPIAE, also equipped with a rotating knob at the end, but uses a chuck to hold the drill bits. That is very useful, when you have drill bits with varying shaft diameters in frequent use. Though the changing of bits is much faster, the quality of the chuck isn´t that good, but sufficient for most uses.
For infrequent use, I recommend a collet pin vise, but I learned to love the one with the chuck during my MFH car and bike builds, where you have to drill hundreds of tiny holes with varying diameters permanently.
Cheers Rob -
12 hours ago, king derelict said:
This has seemed a massively complex model from the start and it’s been inspiring watching you knock down the challenges one by one. I know that feeling when dry fitting damages stuff you already did. I usually find having successfully dry fitted a part as soon as I apply glue somehow everything changes and it won’t fit.
I think MFH will go on the list of kits to admire watching others build but stay well clear of myself. I class you as one of the heroes of this site. I’m the kid in the corner eating the glue.
Thank you Alan, I´m blushing with your praise, but you shouldn´t sell yourself short. When I see your figure painting skills, I can only marvel. You built that weird Yak kit into a beauty, if I remember it correct.
MFH kits are special. Demanding due to the use of different materials and very complex, because of the level of detail and being closer to the real thing construction wise than others. But that doesn´t mean, they are not buildable by an experienced modeler. What you need is a very thorough and methodical approach and a lot of perseverance. The Cobra was possibly not the best choice for a first MFH car kit, but it is still mainly fun, except for the last days. So often, when I work on this kit, I have a smile on my face, when I see the ingenious design of parts or intelligent choice of materials, more than with most other kits.
Cheers Rob- Egilman, Old Collingwood, Canute and 1 other
-
4
-
14 hours ago, Kevin-the-lubber said:
Yup, macro is an evil something, isn't it. The worst of it is that getting back into model-making led me to buy a new camera and 2 macro lenses, which shows up every last, tiny blemish. Vaseline all over the lens is the way to go 😄. I can't wait to see the engine in the bay, this one super-realistic model kit!
Good old Vaseline filtering, but I´m not David Hamilton. I like my macro lens for model pictures not only because of it´s capabilities of showing my failures in large, but also for it´s angle of view (90mm lens), which grants a distortion free image.
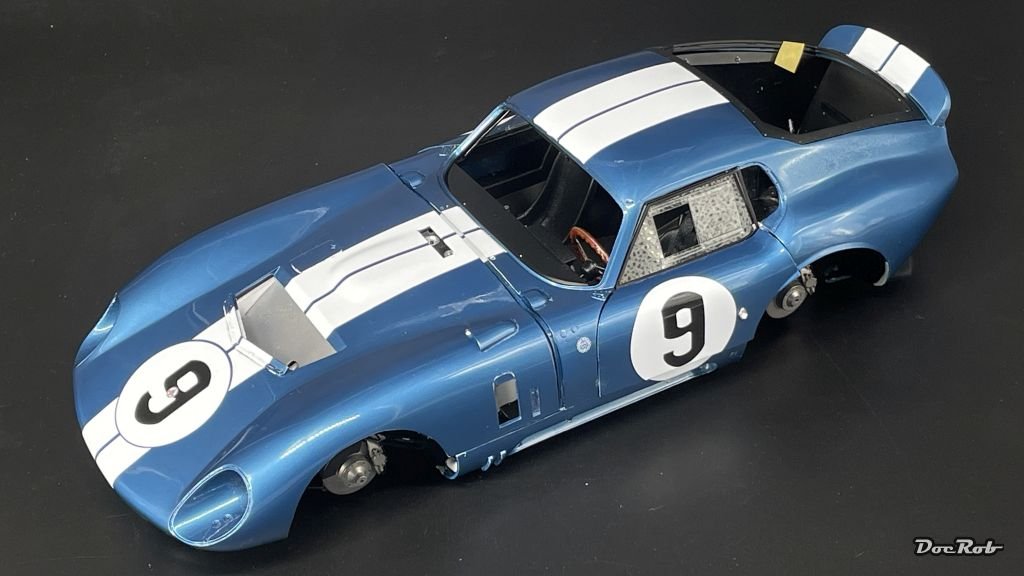
In case of the Cobra, I use my Iphone mainly, where the body is involved, because my camera is not capable to render the blue metallic correct, equal which white balance or color parameterizing I use, it is wide off the mark.
I hope the chassis will be married with the body soon, without loosing half of the kit parts during the process. Only thinking about the many intersecting parts makes me shiver.
Cheers Rob- Egilman, Jack12477, Old Collingwood and 1 other
-
4
-
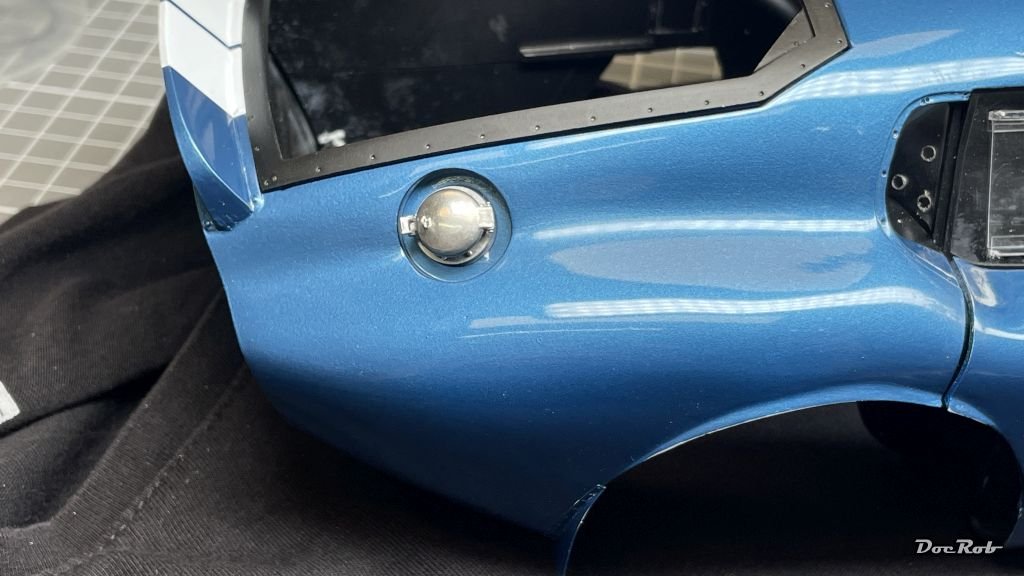
To do something productive and without destruction, I added details to the rear area. The rear lights were painted with Tamiya clear red, have a turned aluminum base and a small rubber ring around.
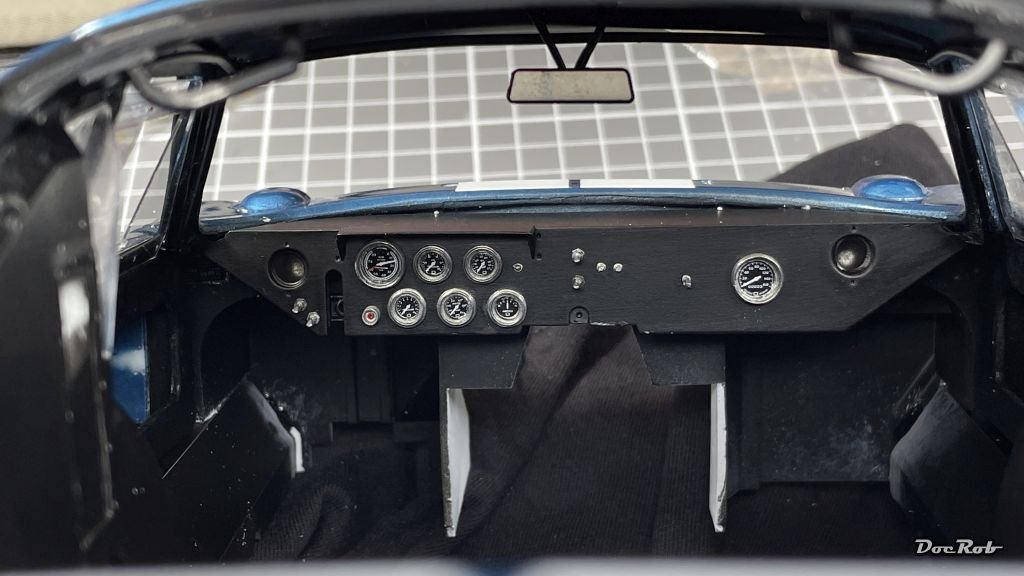
Next was the feared addition of the firewall, which fitted after a lot of sanding and grinding and is held in place wit a screw. Of course, there are a lot of scratches to be repaired. I also knocked off some parts during the process, which will be added later.
Then, I added the dashboard, which luckily was an easy task. Concerning CA fumes, if you are spotting into the foot wells, you notice chalky white residue. I never experience this kind of CA-fogging before and I always use the same glue and used the semi matte black often. Strangely the fogging reaches very far from the gluing area.
Cheers Rob -
What a beautiful Canary bird, Andy. Earnestly, I like how this unusual plane came out, definitely an eye catcher on the display shelf.
Cheers Rob -
37 minutes ago, Kevin-the-lubber said:
I’m late to the party but have to say what an incredible model and build. You are being way too hard on yourself Rob (says one perfectionist to another) and you are clearly more than up to this challenge!
Thank you for your supportive words, Kevin. I think, I will skip macro photos for this build from now on. Most from the frustration arises from the level of destruction, I conduct during this important phase of the build. It was challenging but rewarding to build up all the sub assemblies, but now it seems like I´m tumbling downhill with the build, adding scratches, paint lifts, CA fogging and not perfect fitting doors, etc.
When starting a build, I have a picture of the finished model rendered in my head, with every detail sharp and clear. Reaching this image in the end is my main motivation in modeling and leads me through all oncoming challenges. Where I´m not good at, is a change of plans. If I´m not able to fulfill my projected result, I easily get annoyed and may bin the project, which luckily doesn´t happen often to me. Quality wise, I´m closing in onto the black hole with the Cobra, but I hope, I can somehow have a partly satisfying outcome.
Cheers Rob- Old Collingwood, Canute, Jack12477 and 1 other
-
4


Shelby Cobra Coupe by DocRob - FINISHED - Model Factory Hiro - 1/12 - multi-media - Le Mans
in Non-ship/categorised builds
Posted
Exhausts and manifolds, an assembly, I didn´t look forward to, because it´s multiple parts in very confined space. I took my time, dry fitting the manifolds before painting. After airbrushing all in Tamiya lacquer matte white, there was no way around continuing.
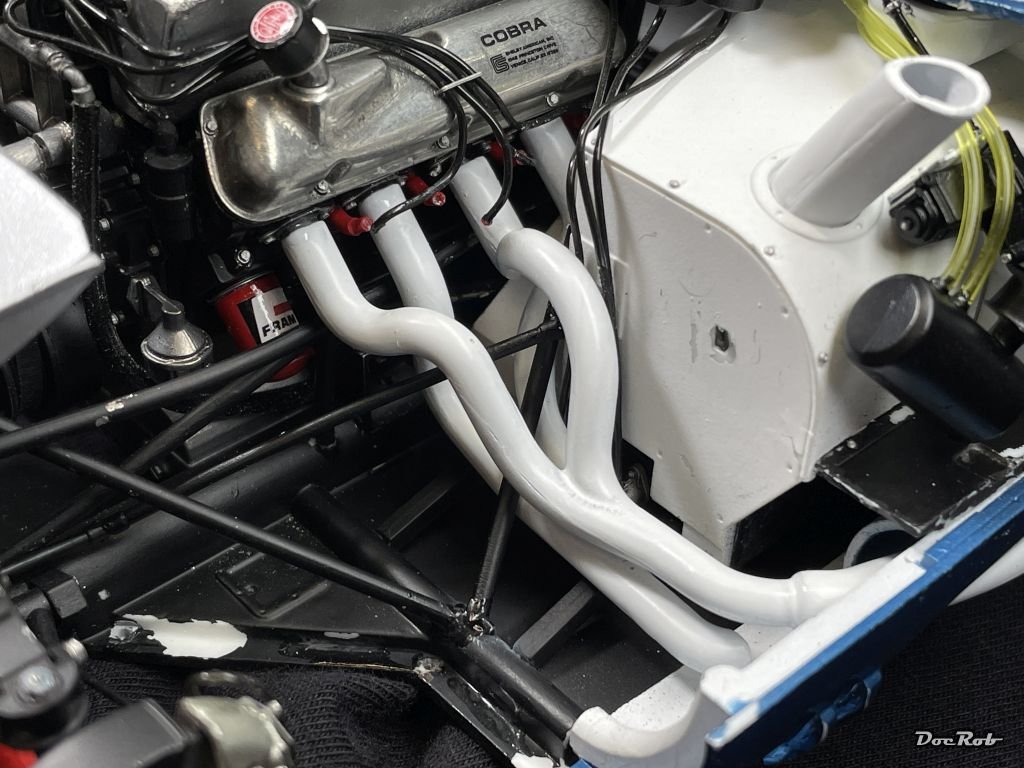
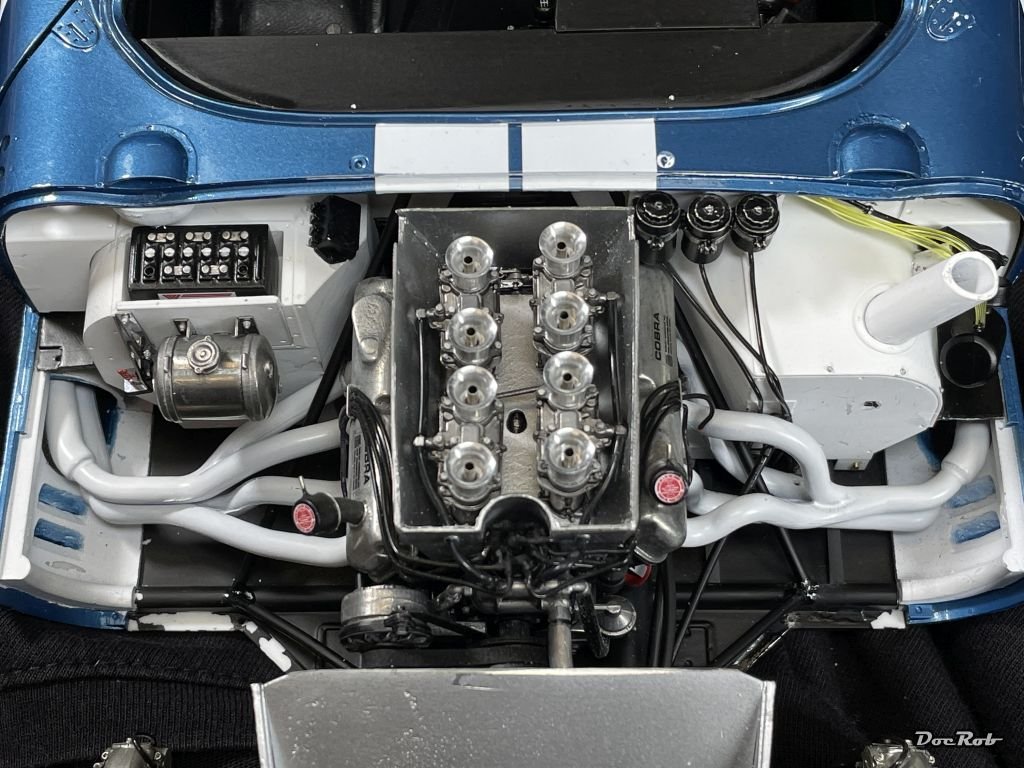
Fortunately there is an additional manual page provided by MFH, which shows the sequence, how to mount the parts. With the sketches in the normal manual, I would never had made it.
Especially the right side was delicate, as there are frame rods and the steering column to add, which are all intersecting, it´s a true 3D puzzle. It took some time and some damages occur during the process, but somehow I got it done finally. Mind, these are bench shots without touch ups and repairs, which will be done after test fitting the side pipes.
Cheers Rob