Rokket
-
Posts
20 -
Joined
-
Last visited
-
 maurino reacted to a post in a topic:
USS Constitution by ERS Rich - Model Shipways
maurino reacted to a post in a topic:
USS Constitution by ERS Rich - Model Shipways
-
Marcus.K. reacted to a post in a topic:
USS Constitution by Rokket – Revell - 1:96 - PLASTIC
-
Marcus.K. reacted to a post in a topic:
USS Constitution by Rokket – Revell - 1:96 - PLASTIC
-
piter56 reacted to a post in a topic:
USS Constitution by ERS Rich - Model Shipways
-
BobG reacted to a post in a topic:
USS Constitution by ERS Rich - Model Shipways
-
 I found a free 3D printable STL file. If you know someone with a 3D printer (preferably a resin printer)... I could do it but I'm in Australia. https://www.thingiverse.com/thing:4769472

-
mtaylor reacted to a post in a topic:
USS Constitution by bthoe – Model Shipways – Scale 1:76.8 – 1812 era
-
hollowneck reacted to a post in a topic:
HMS Sphinx 1775 by aydingocer - Vanguard Models - 1:64 - Revision #2
-
Thanks for the info guys. And the details about the case. Beautiful.
-
Dave_E reacted to a post in a topic:
HMS Victory by Bill97 - FINISHED - Heller - 1/100 - PLASTIC
-
Ian_Grant reacted to a post in a topic:
HMS Victory by Bill97 - FINISHED - Heller - 1/100 - PLASTIC
-
dafi reacted to a post in a topic:
HMS Victory by Bill97 - FINISHED - Heller - 1/100 - PLASTIC
-
The case looks really sharp. I know what you mean about tempered glass and marriage! I was going to (attempt) to build a case but glass is very, very expensive here. Almost as much as a case. So I'm going to save up and just buy a pre-made case. I have about 4-5 years, I imagine.
-
Looking like a ship now. Well done.
-
I’ve taken a small detour. A couple actually. I have to finish some models, my 1:72 Gato submarine and Graf Zeppelin airship (1:245 which seems "box scale"), but I’ve started learning 3D CAD. I have a friend with multiple 3D printers. He usually takes my terrible drawings, makes 3D files, and then prints parts for me. But it would be better if I could at least supply the 3D files. I’ve spent six weeks trying various software. I can’t afford $2,000 or $3,000 (especially a year in a subscription). Forums say many people don’t want subscriptions either. I stuck with trying inexpensive or free. Many free programs are online and all documents are public. My stuff isn’t secret, but people don’t need to know everything I do. I have two issues: learning 3D CAD concepts and using specific programs. We all need a hobbyist option. Some of the free are good but clunky. My favorite for power and use was Design Spark Mechanical, but there were weird bits and being free, no support. I ended up with the “lite” version of Alibre, Alibre Atom3D for about US$300.00. While learning, the Secretary of the Treasury/Finance Minister suggested I get a 3D printer. “You would learn and enjoy it and it could be useful.” Dumbfounded blinking. Maybe a little drool as my brain shut down and air escaped my lungs. Obviously my wife was replaced by a Pod Alien who has unfathomable and nefarious purposes in mind. Yes! Yes! YES!!! Wherever this leads, it should be fun getting there. Even if she uses the printer to bludgeon my skull. Though there are easier ways. There must be a cartoon here, of 3D printing a hammer and having it used on me. “Um, yeah, sure, OK…” I now have a resin 3D printer (US$ 179.00!) and am trying to understand how to use it. I’ve already made my first 3D CAD part and printed it (a tiny joke, non-model related). I plan on making guns, cannon balls, barrels, figures and various bits. As mentioned on this site, you can make figures on Hero Forge and download files for US$7.99 each. Scale and print (I'll cast them with different arm and leg poses). When I get back to the ship work, I’m trying to find a way to drop the decks into a finished hull. The gun deck won’t be too bad because the edges aren’t visible, but the spar deck will show. I need a good waterway solution.
- 8 replies
-
- 1
-
-
- Constitution
- Revell
- (and 1 more)
-
Off to a good start, looking good. Both interesting subjects. You'll have to do a "Bligh Jolly boat" to go along with it...
-
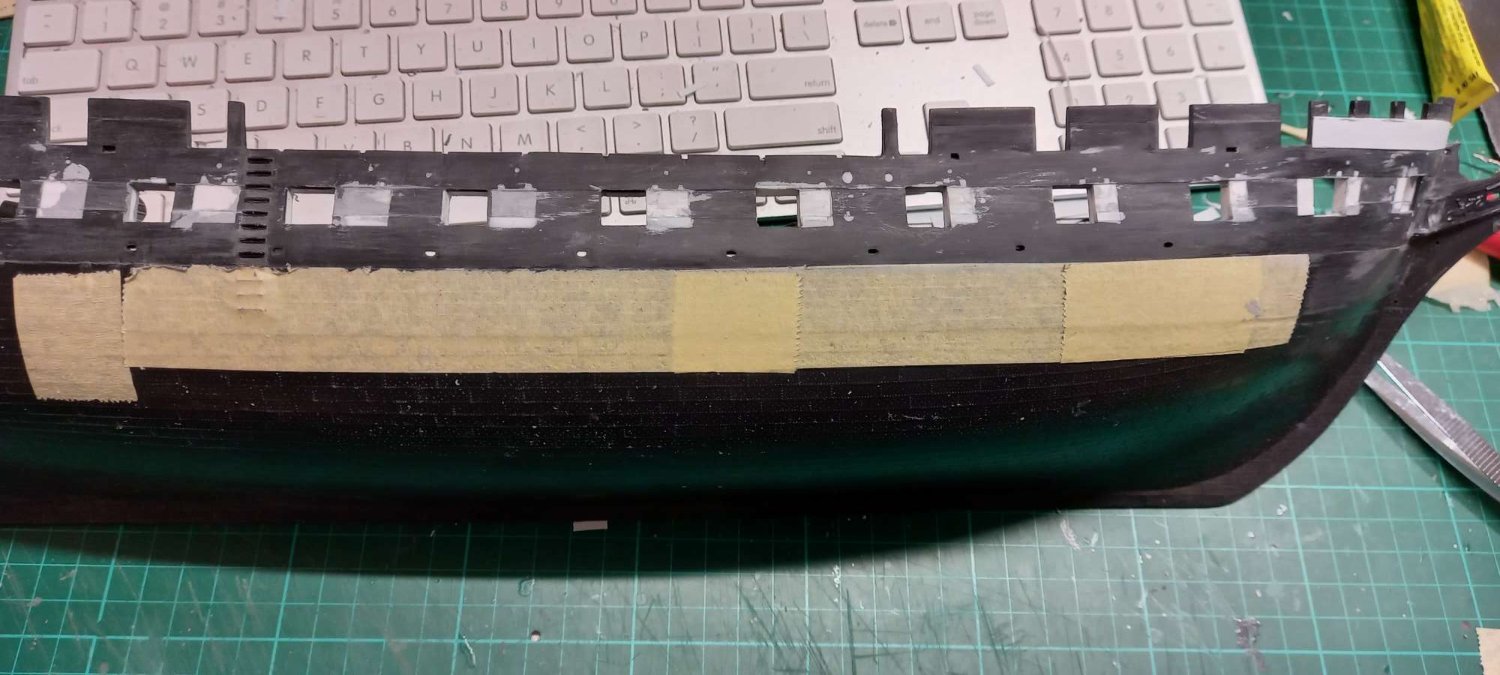
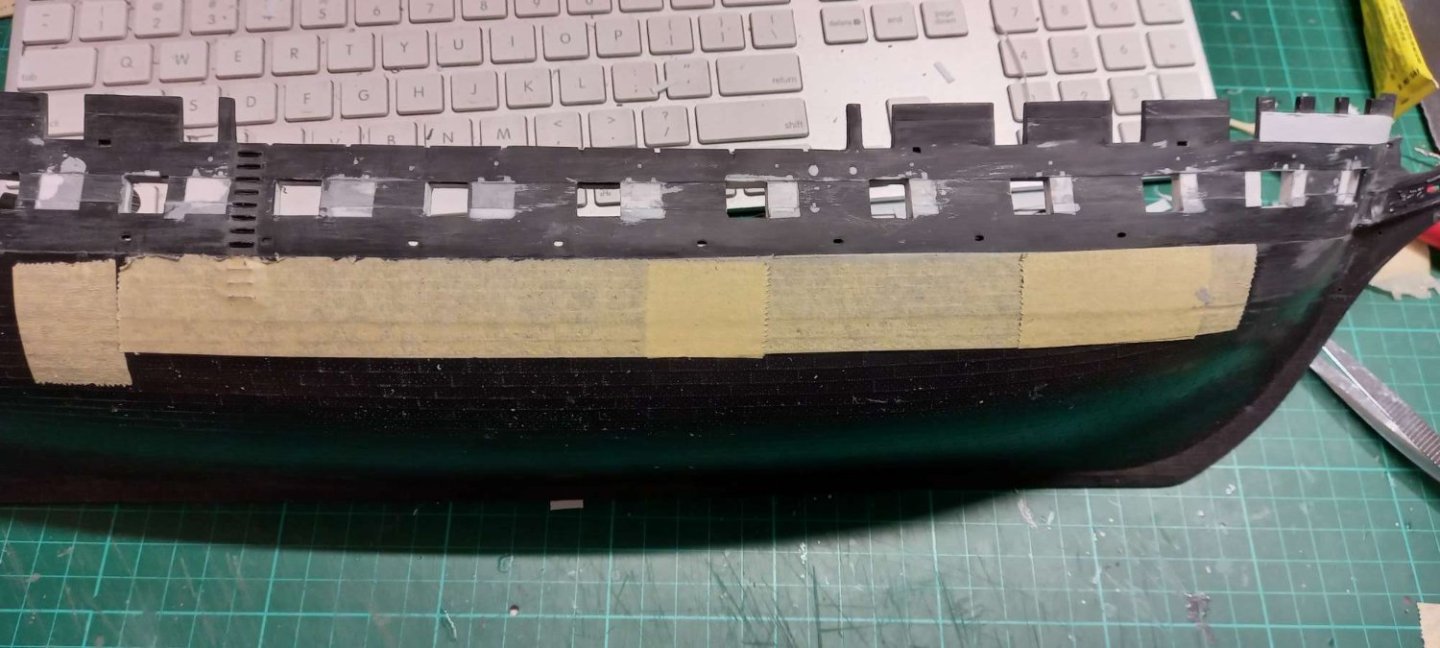
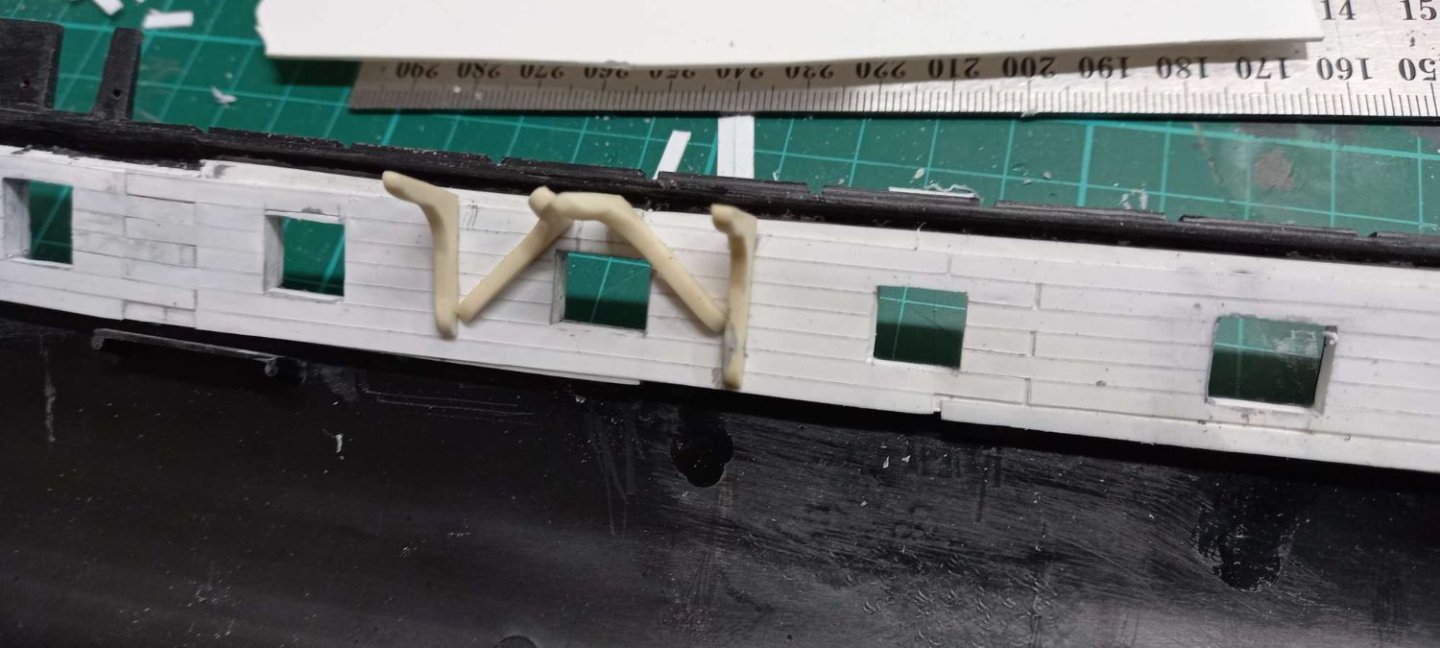
I’ve started with the ship hull. The Hull model has 15 gun ports and the Revell kit 16. Many modelers choose to block out the forward gun port at the bow. Bainbridge cut bridle ports, so blocking takes the ship back to the original configuration. It’s a good idea if you want the 1812 era, like myself. But that makes the new first port pretty far from the stem/beakhead, way past the front of the bow and practically on the straight, flat side of the hull down midships. To use a new unit of measure, GPW (“gun port width”), the new location makes port #2 become #1 with a distance from the stem of 6.3 GPW. The Hull model has the first port at 3.6 GPW. The Revell kit also has the last port very close to the gallery, at 0.48 GPW, the Hull model 1.3 GPW. So I placed the first and last ports according to the Hull model, then through the magic of software, evenly spaced the ports in-between (if I had done it manually I would still be calculating with at least two calculators and a ream of paper.) I overlayed frames from the plans over the Revell models. I figure even with massive overhaul the frames stayed the same, I’d think it would be quite something to change them. The frames mostly match up. All in all, I’m satisfied that the “Hull Port Arrangement” works on the kit. I’ve cut in the new ports and started blocking the old. I also thickened the hull. I have added beams, planks with a cutter and knees and diagonal riders. I've used a too long knee in my test but it may not be noticeable. Many modelers say you can't see this details through gun ports blocked with guns, but I'm hoping the hints will make people think this is shrunk ship. We'll see. Lots of cleanup and the port side to do.
- 8 replies
-
- 4
-
-
- Constitution
- Revell
- (and 1 more)
-
Lovely detail. I really like the knees and the accessories. Beautiful.
-
Very nice. Watching with great interest.
-
Very nice work. She'll be ready to depart in no time.
- 162 replies
-
- 1
-

-
- Model Shipways
- Constitution
- (and 2 more)
-
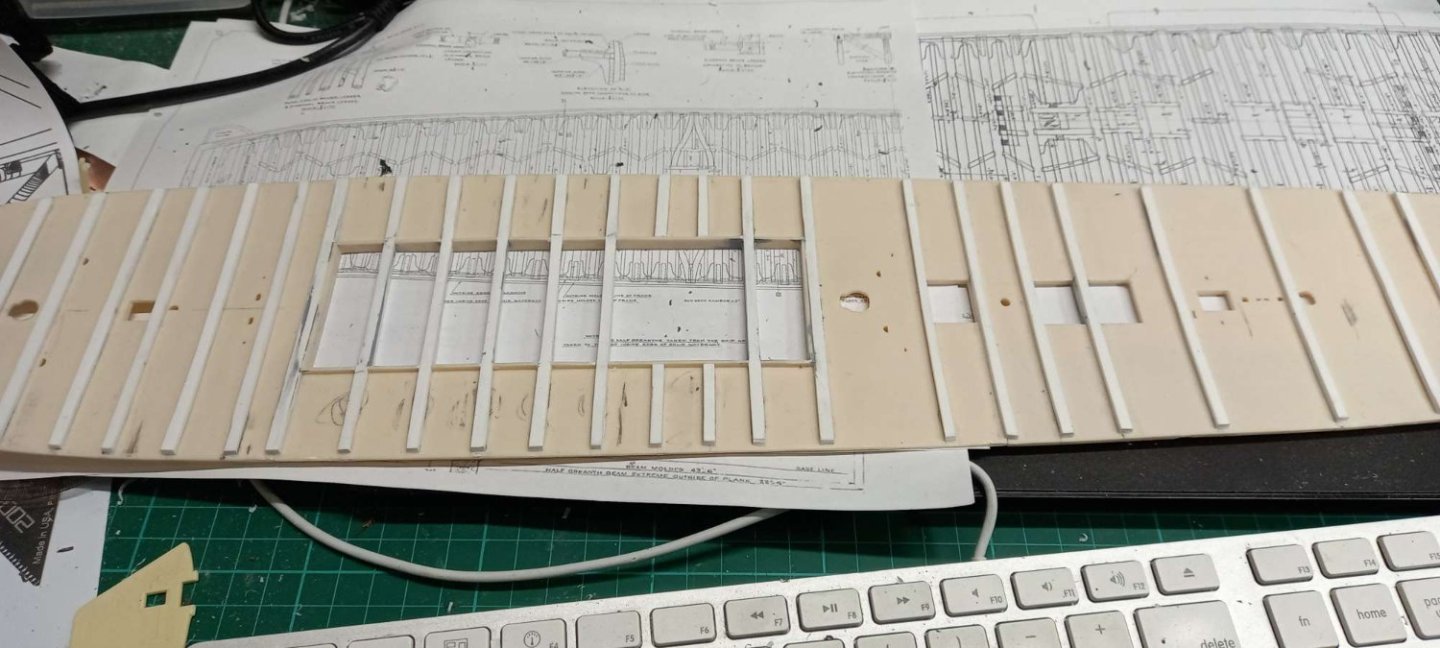
It's here! To quote Calvin from Calvin and Hobbes: Boy-oh-boy-oh-boy! I've unwrapped my 18+year old kit and had a 'splore. It's exciting! The decks are not warped! But I didn't realize the plank seams were raised. I'd planned to sand off the grain (using the electric toothbrush trick), but was counting on the seams being concave so they'd be visible). I have a new plan that will require testing: Cut planks from 0.010"/0.25mm sheet plastic and paint them. I have three wood colors and can mix them to make more. Then paint the edges black. Then manually plank the spar deck. I think the gun deck won't be noticeable. If necessary only plank the edges near the guns. It's a step I didn't want to take. I hope it works. I'm so impressed by painted plastic really looking like wood. Many fine examples on this site. Plus a wood deck adds $130+ to the cost of construction! Any deck thoughts?
-
Really nice. Great detail and workmanship.
-
Thanks. I'm trying to do a logbook and other books, and sea charts. Maybe a decanter of port. But 1:96 is small! The pirate flag was just for to see who was paying attention, I won't be turning Connie into a pirate ship. (Though she was fast and strong, perfect for a pirate!)
- 8 replies
-
- 1
-
-
- Constitution
- Revell
- (and 1 more)