.jpeg.882f0a147f14858c9e673da7e13d8ebe.jpeg)
RossR
-
Posts
531 -
Joined
-
Last visited
Content Type
Profiles
Forums
Gallery
Events
Everything posted by RossR
-
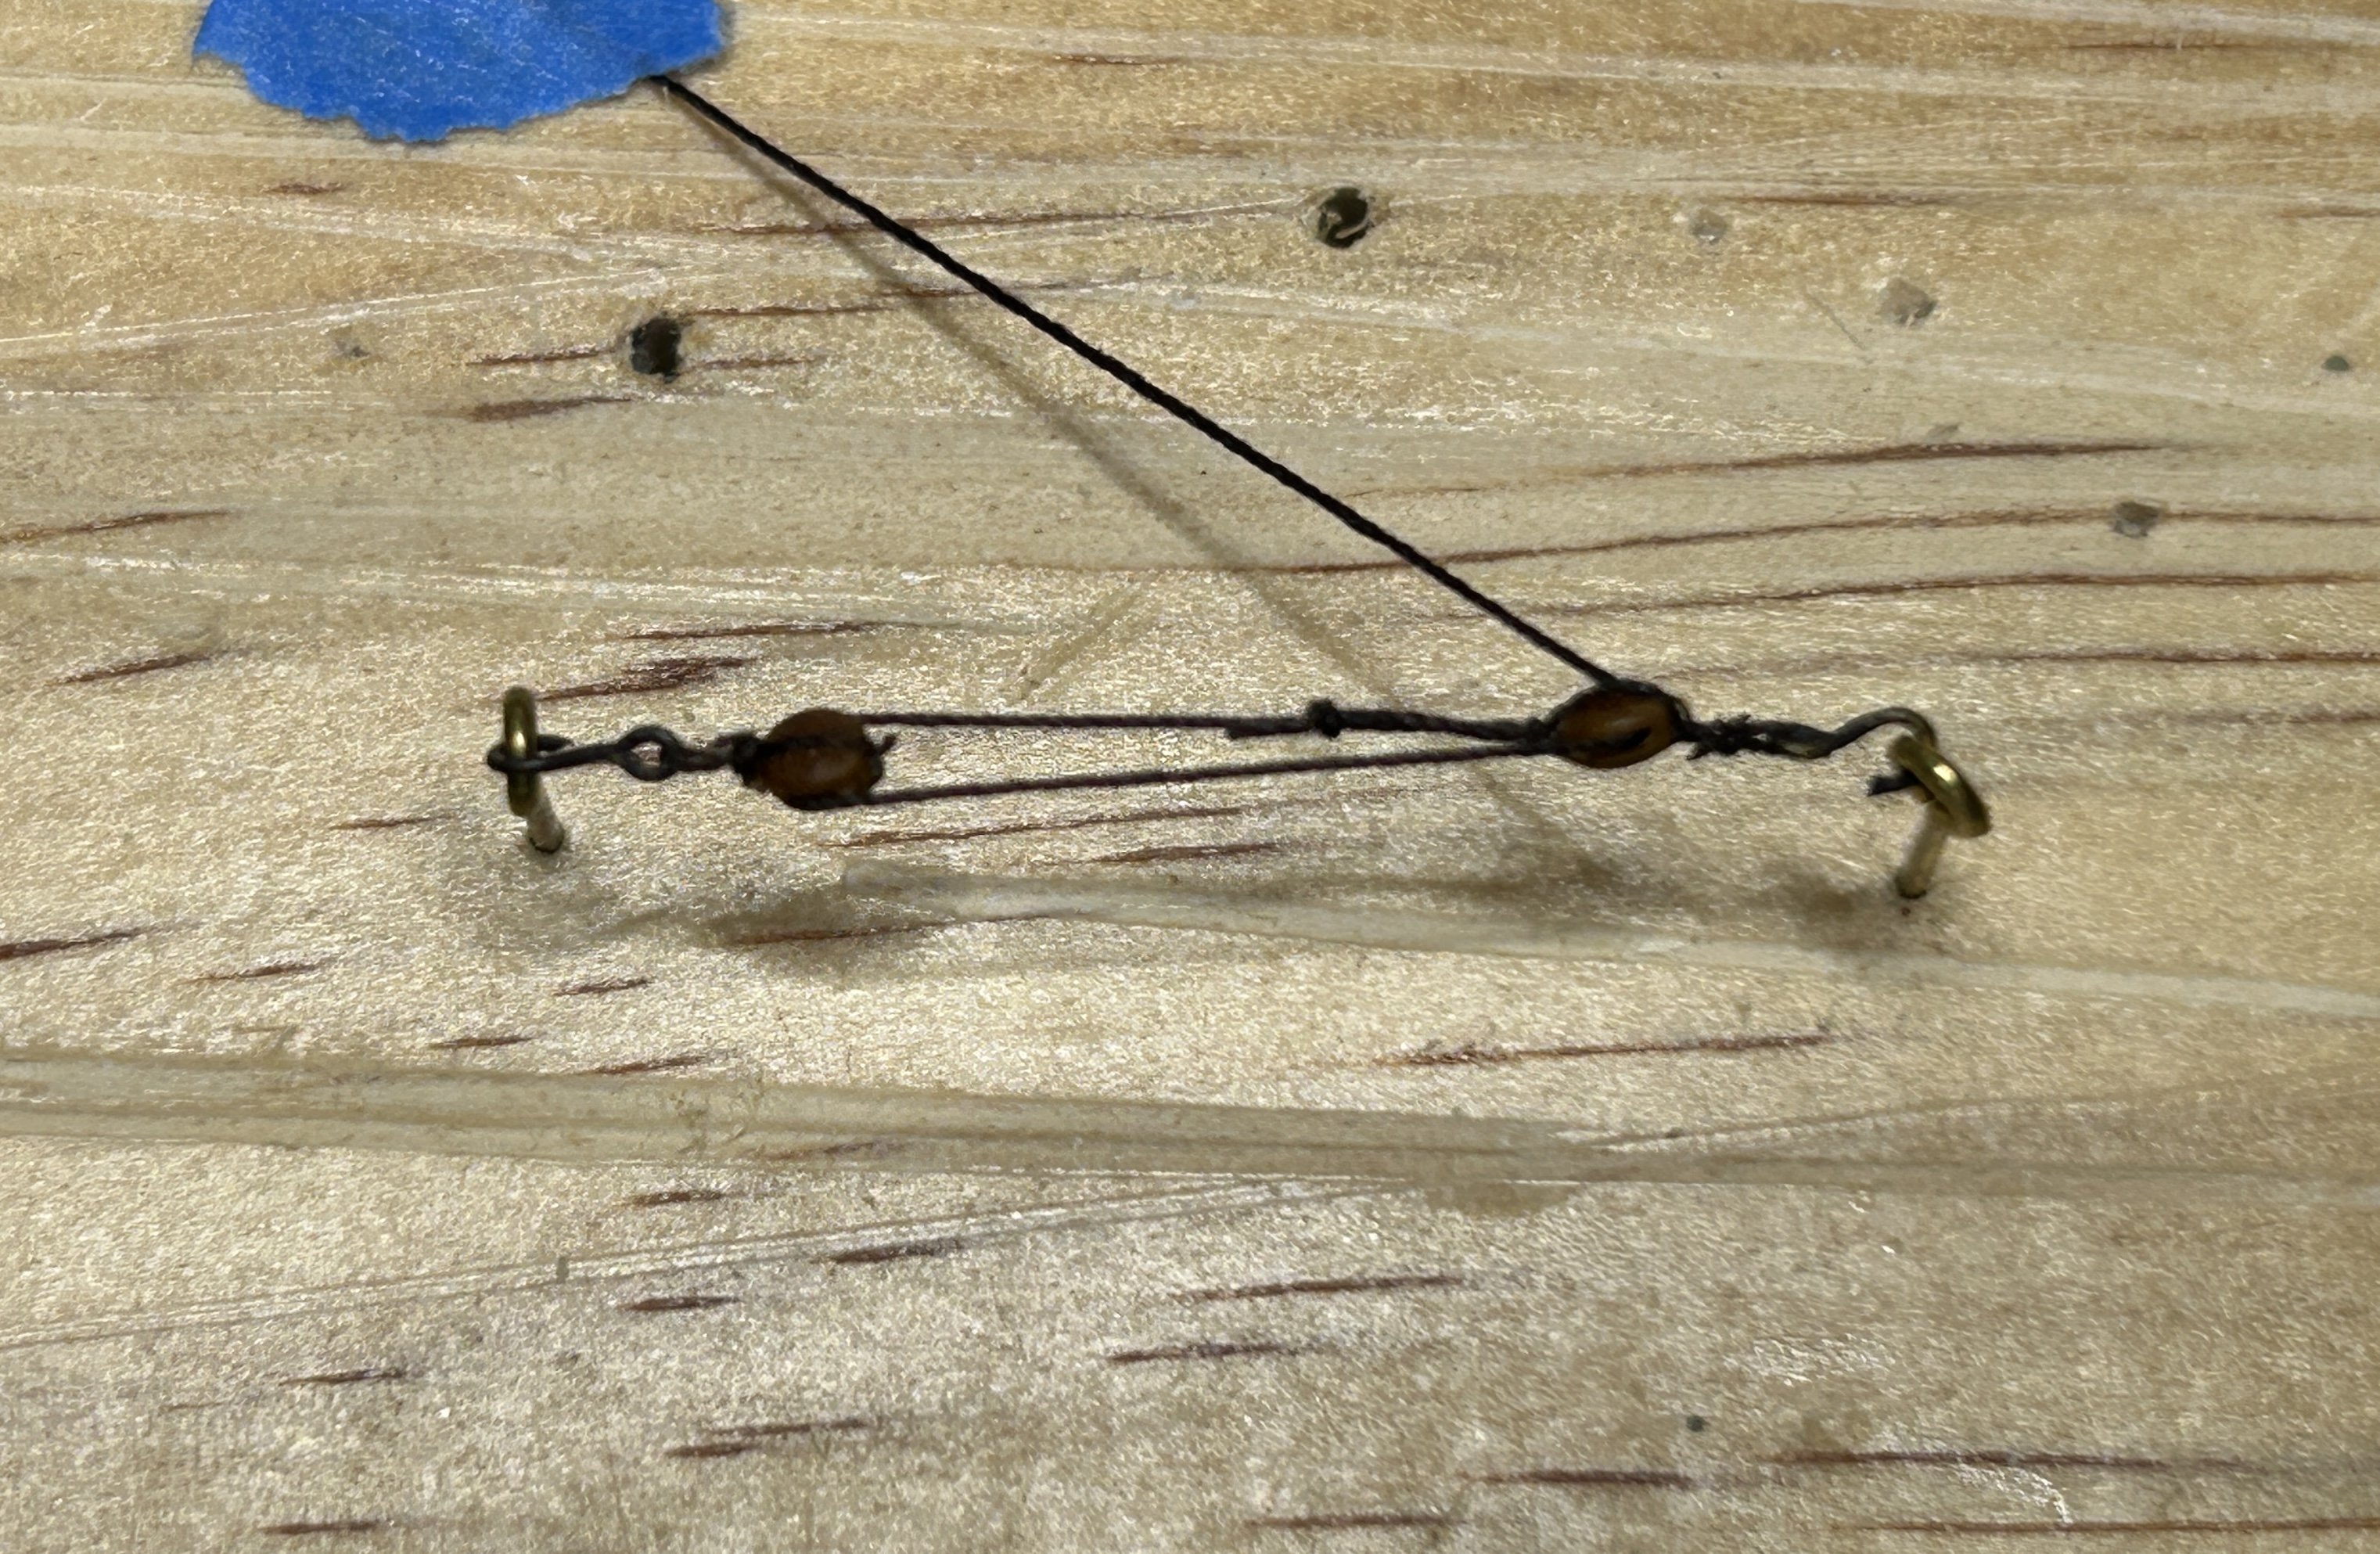
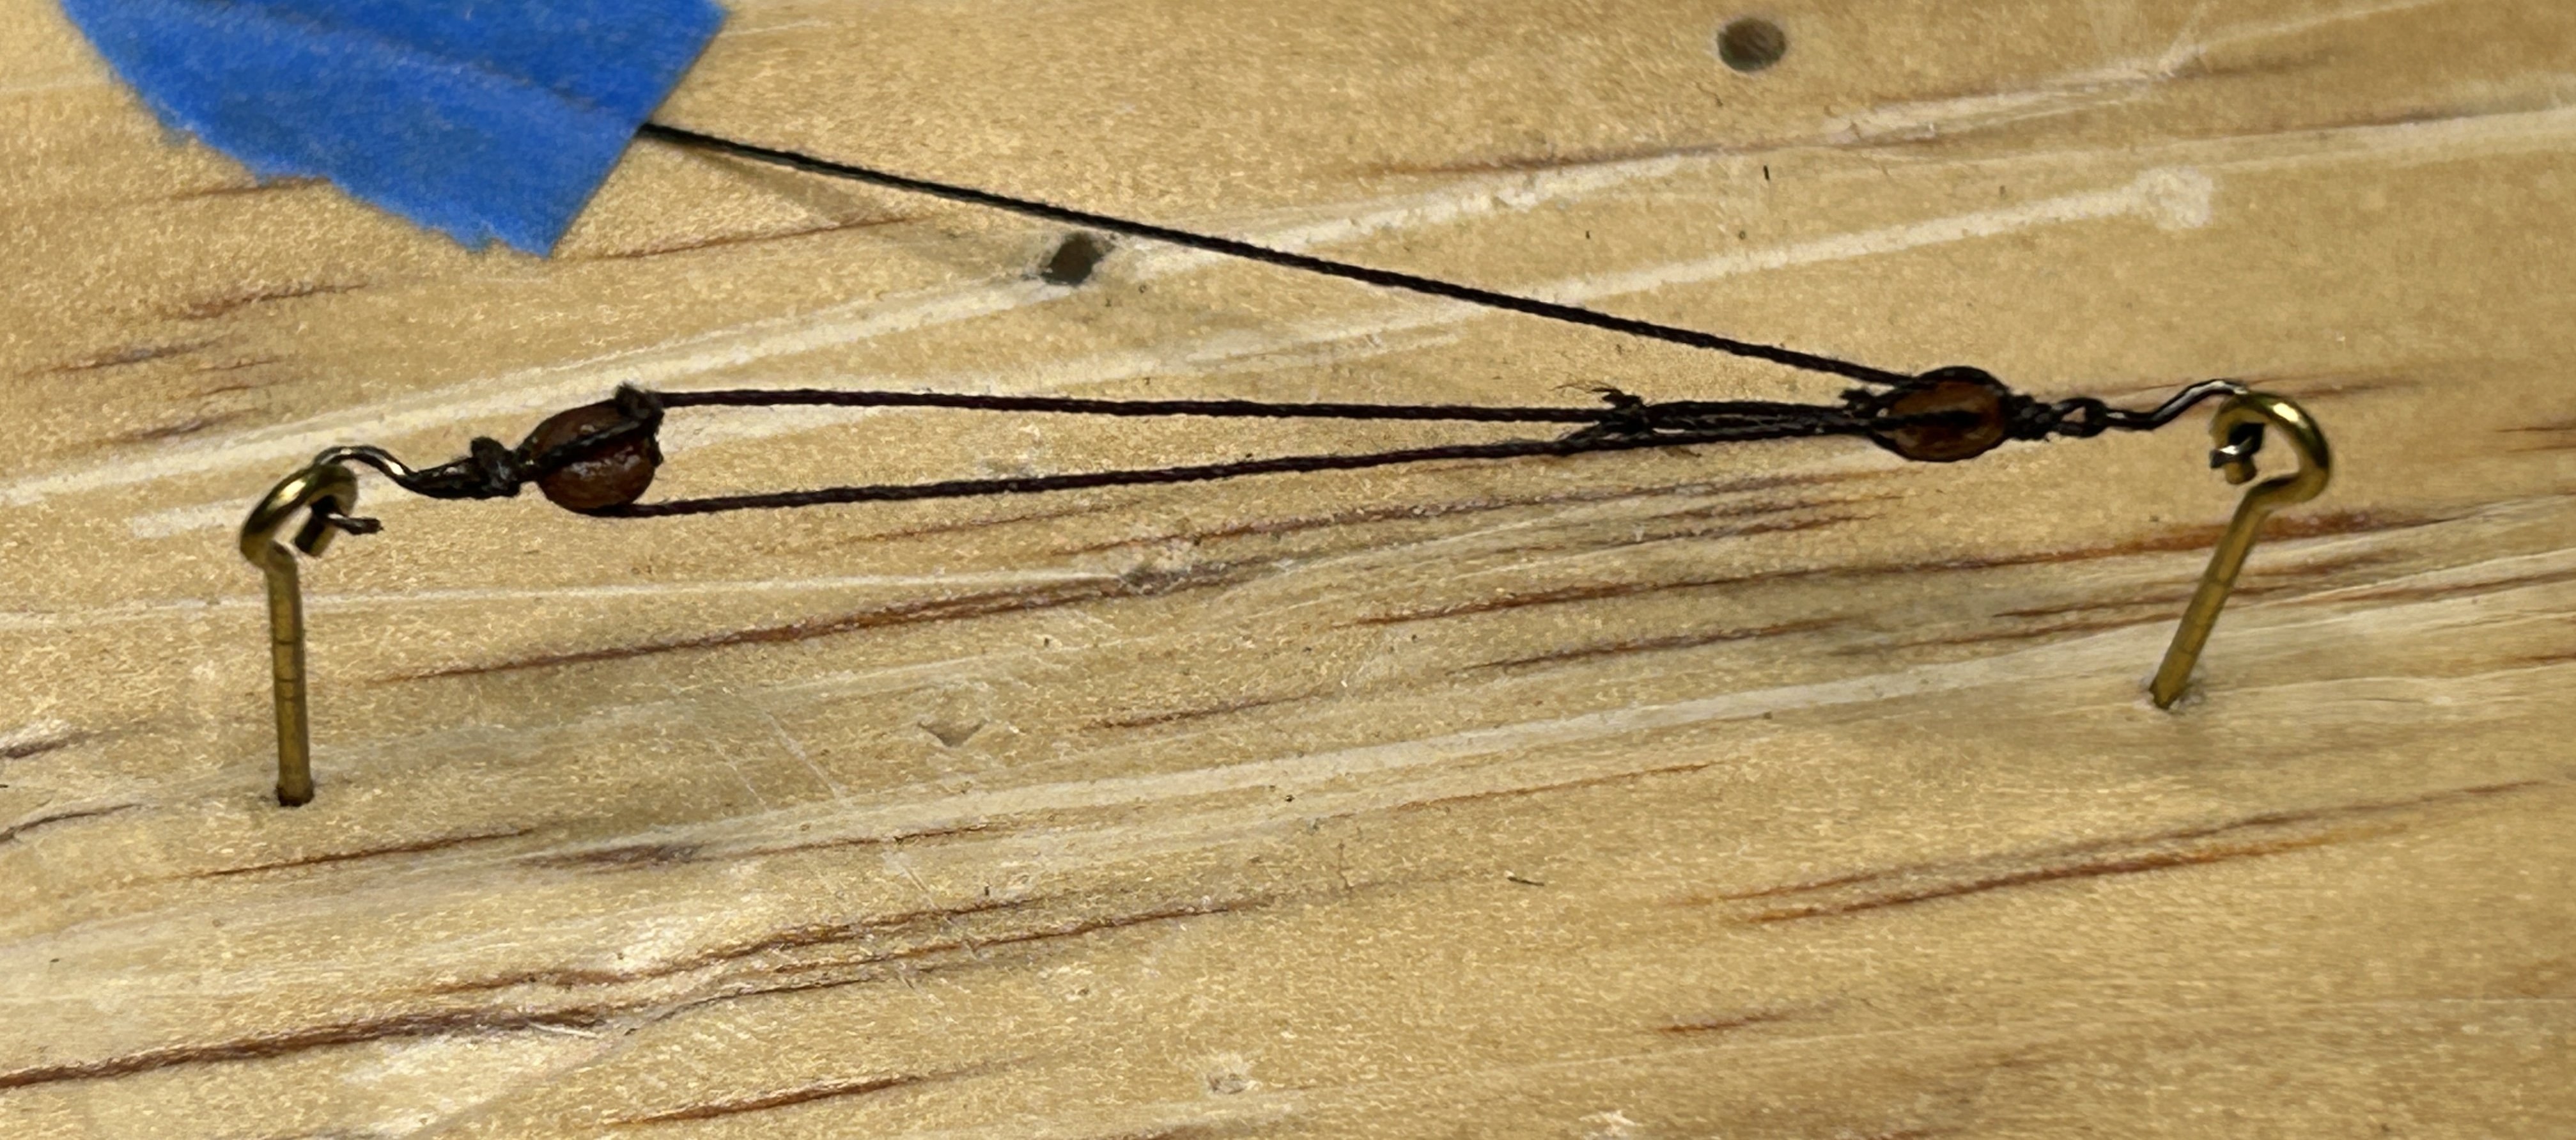
.thumb.jpeg.ffac2f8a24d212961a83eab4efb06a6c.jpeg) Fairing the interior of the bulwarks is going slow, but I am starting to make some progress. I have been practicing working with Syren's 3/32 blocks that I hope to use for the rigging on the guns. These are incredibly small and after many attempts that failed I am starting to get some better results. This is one of the first almost passable attempts I made. The rope is .008 inch diameter. I am struggling to get the rope through the holes on the blocks, so I have been drilling the holes out. I am trying to use the techniques Chuck has shared using CA to help secure the block. This attempt is a little shinier than I would like from the CA used. I am using 150 weight Gutterman Mara thread for the sizing. I was hoping to use some that was even thinner, but I am struggling to find any in the US. Chuck shared a reseller in the UK that sells it, but I am a little nervous about navigating the tariff mess we now all have to live with right now. This is another attempt that I am a little happier with. I made the hooks from small Brass eyepins. They measure about 1/8 inch long. I would like them to be a little smaller, but I don't think I can make them any smaller. I have ordered some 1/8 inch blocks from Syren. If the .008 inch rope with fit through the holes on those without being drilled out, and they don't look too big I might use them instead of the 3/32 to avoid having to do all the drilling. I suspect in the end I will drill out the 3/32 inch blocks to keep things in the proper scale.
Fairing the interior of the bulwarks is going slow, but I am starting to make some progress. I have been practicing working with Syren's 3/32 blocks that I hope to use for the rigging on the guns. These are incredibly small and after many attempts that failed I am starting to get some better results. This is one of the first almost passable attempts I made. The rope is .008 inch diameter. I am struggling to get the rope through the holes on the blocks, so I have been drilling the holes out. I am trying to use the techniques Chuck has shared using CA to help secure the block. This attempt is a little shinier than I would like from the CA used. I am using 150 weight Gutterman Mara thread for the sizing. I was hoping to use some that was even thinner, but I am struggling to find any in the US. Chuck shared a reseller in the UK that sells it, but I am a little nervous about navigating the tariff mess we now all have to live with right now. This is another attempt that I am a little happier with. I made the hooks from small Brass eyepins. They measure about 1/8 inch long. I would like them to be a little smaller, but I don't think I can make them any smaller. I have ordered some 1/8 inch blocks from Syren. If the .008 inch rope with fit through the holes on those without being drilled out, and they don't look too big I might use them instead of the 3/32 to avoid having to do all the drilling. I suspect in the end I will drill out the 3/32 inch blocks to keep things in the proper scale.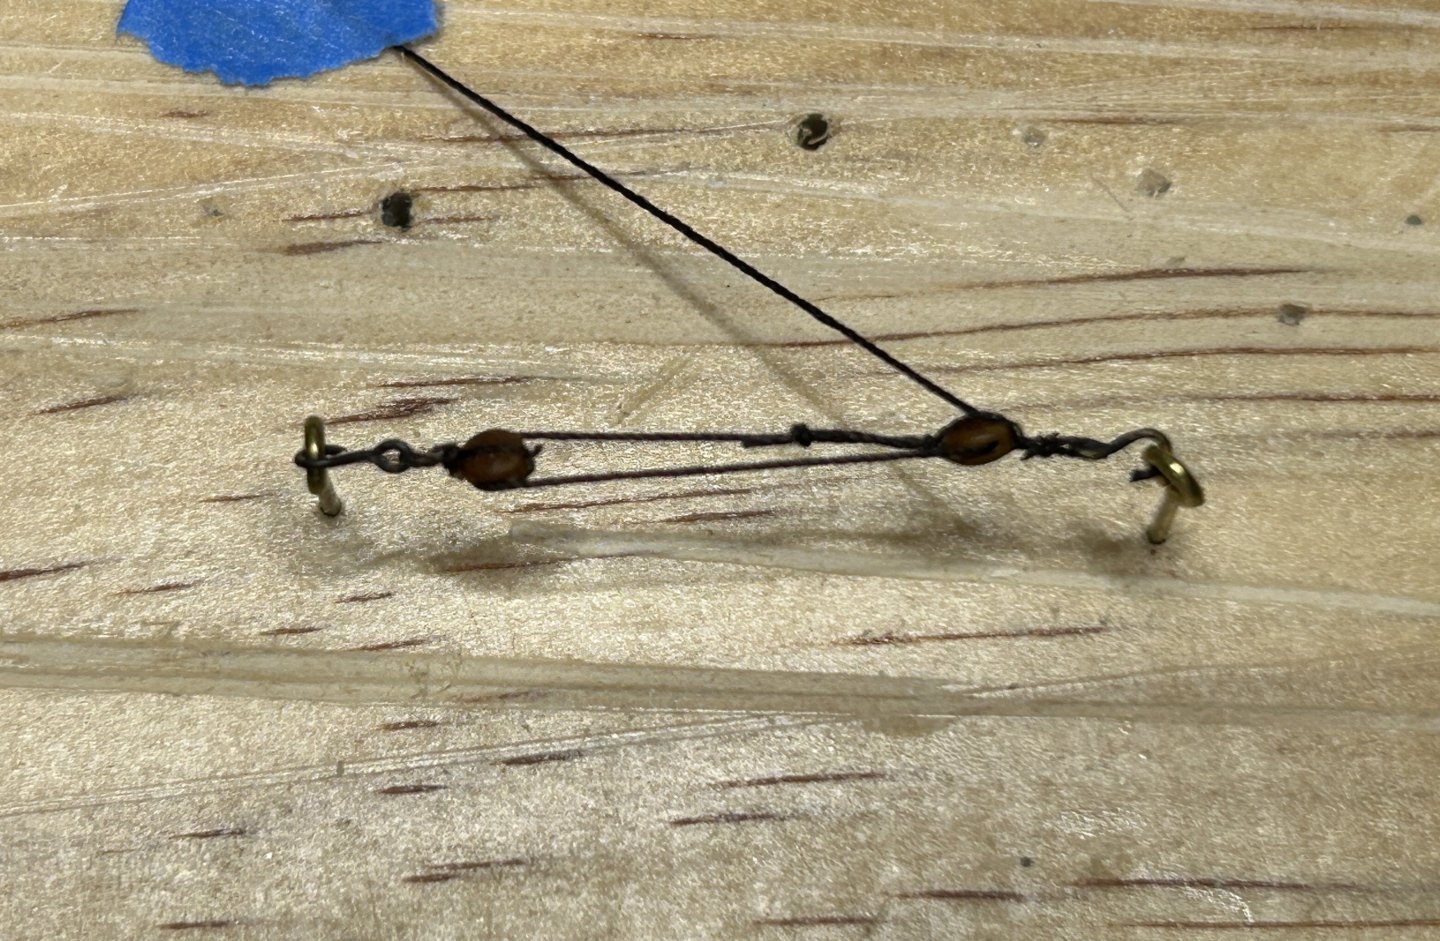

-
I have been practicing with 3/32 inch (2.5mm) for my USF Essex and I can attest to how difficult it is working with blocks this small. Practicing is helping. I have some time before I am ready to rig the guns.
-
I think they look pretty good. Keep it up.
-
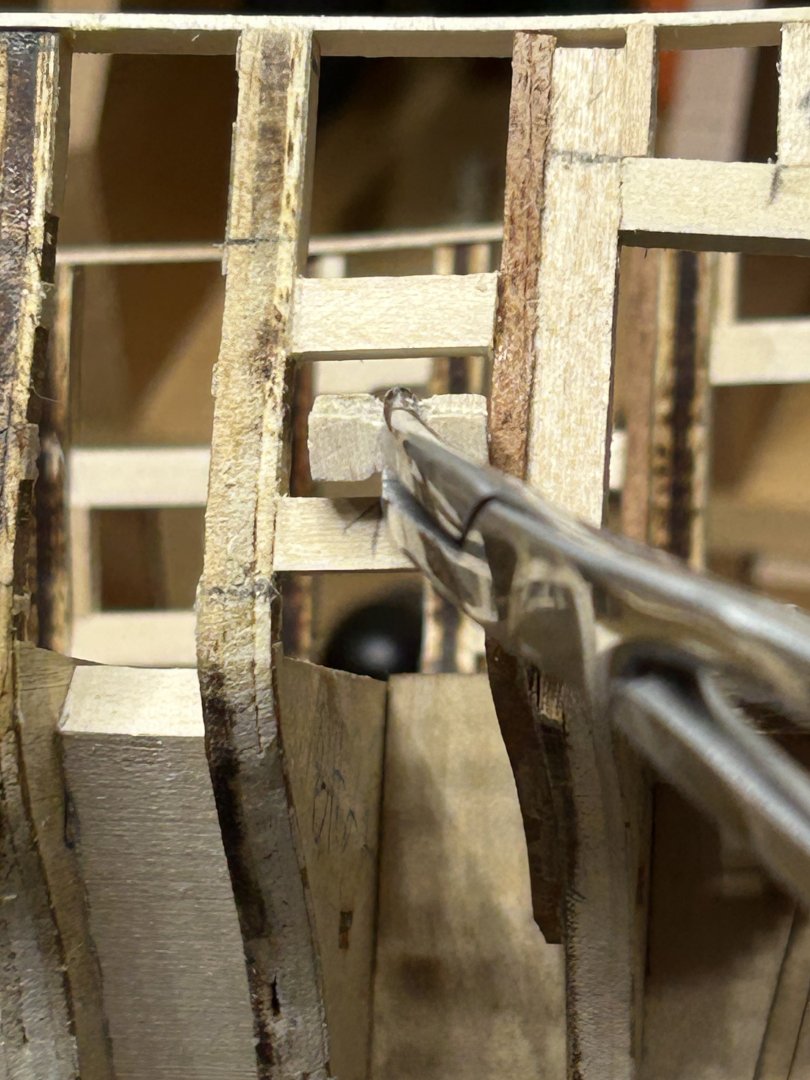
I have made repairs to the gun port frames that ended up a little concave due to my aggressive sanding. Here is a picture showing what I am talking about. After adding a piece of 1/32 inch or in a couple cases 1/16 inch material I sanded them flush using a finer grit wheel on my Dremel. 120 and 240 were used. Now on to the interior work on the gun port frames.


-
deck planking options
RossR replied to manning16's topic in Building, Framing, Planking and plating a ships hull and deck
I haven’t had the pleasure of working with most of the woods you are listing, but with those options I would leave basswood off the list. -
Thanks I appreciate the tip. In my post about the outsides I said I started with 60 grit disks. After further inspection of my work, that was a little aggressive. Some of my lintels and sills have a concave surface that I will be addressing this weekend. I will include pictures of the issue and the fix on my next post.
-
Blocks, cannons and ships boats
RossR replied to stevenba21's topic in REVIEWS: Model Shipwrighting Tools, Parts and fittings
Thanks for sharing this. Considering upgrading the cannons on my current build. I will check this KTL model shop a look. -
I have made some progress on sanding the gun port frames on the outside of the hull. I used a disk sander on my Dremel. I used a 60 grit disk for parts were a lot of material needed to be removed and then 120 grit for the finer work. I still need to do a little fine sanding. A the bow I needed to add extra material to get the curve of the bow right. I still need to sand the extra material down. I also need to start the interior. This will be a challenge as my Dremel, even with the flex tool will not reach into the interior with the disk sander. I am looking at purchasing the right angle attachment. getting into the bow and under the interior section that slopes toward the interior of the ship will be difficult. If anyone has any other suggestions for how to get in there to sand I would love to hear it. I can't wait to get this part done and start the planking.


-
Mara thread - what colors do you use for fabricating ropes
RossR replied to Sterling59's topic in Masting, rigging and sails
Thanks. Unfortunately that now means tariffs. I have been practicing your technique with 3/32 blocks. Need the smaller thread. -
Mara thread - what colors do you use for fabricating ropes
RossR replied to Sterling59's topic in Masting, rigging and sails
Does anyone have a source for a tan colored Gutermann Mara 220 thread. I looked at Wawak where I have purchase Gutermann thread before and they only offer the 220 in 5 colors and in very large spools. -
Good luck. I would encourage you to start a build log. Great way to get feedback and advice.
-
HMS Victory by ECK - OcCre - 1/87
RossR replied to ECK's topic in - Kit build logs for subjects built from 1751 - 1800
As usual, your work looks fantastic. The gun ports look great. -
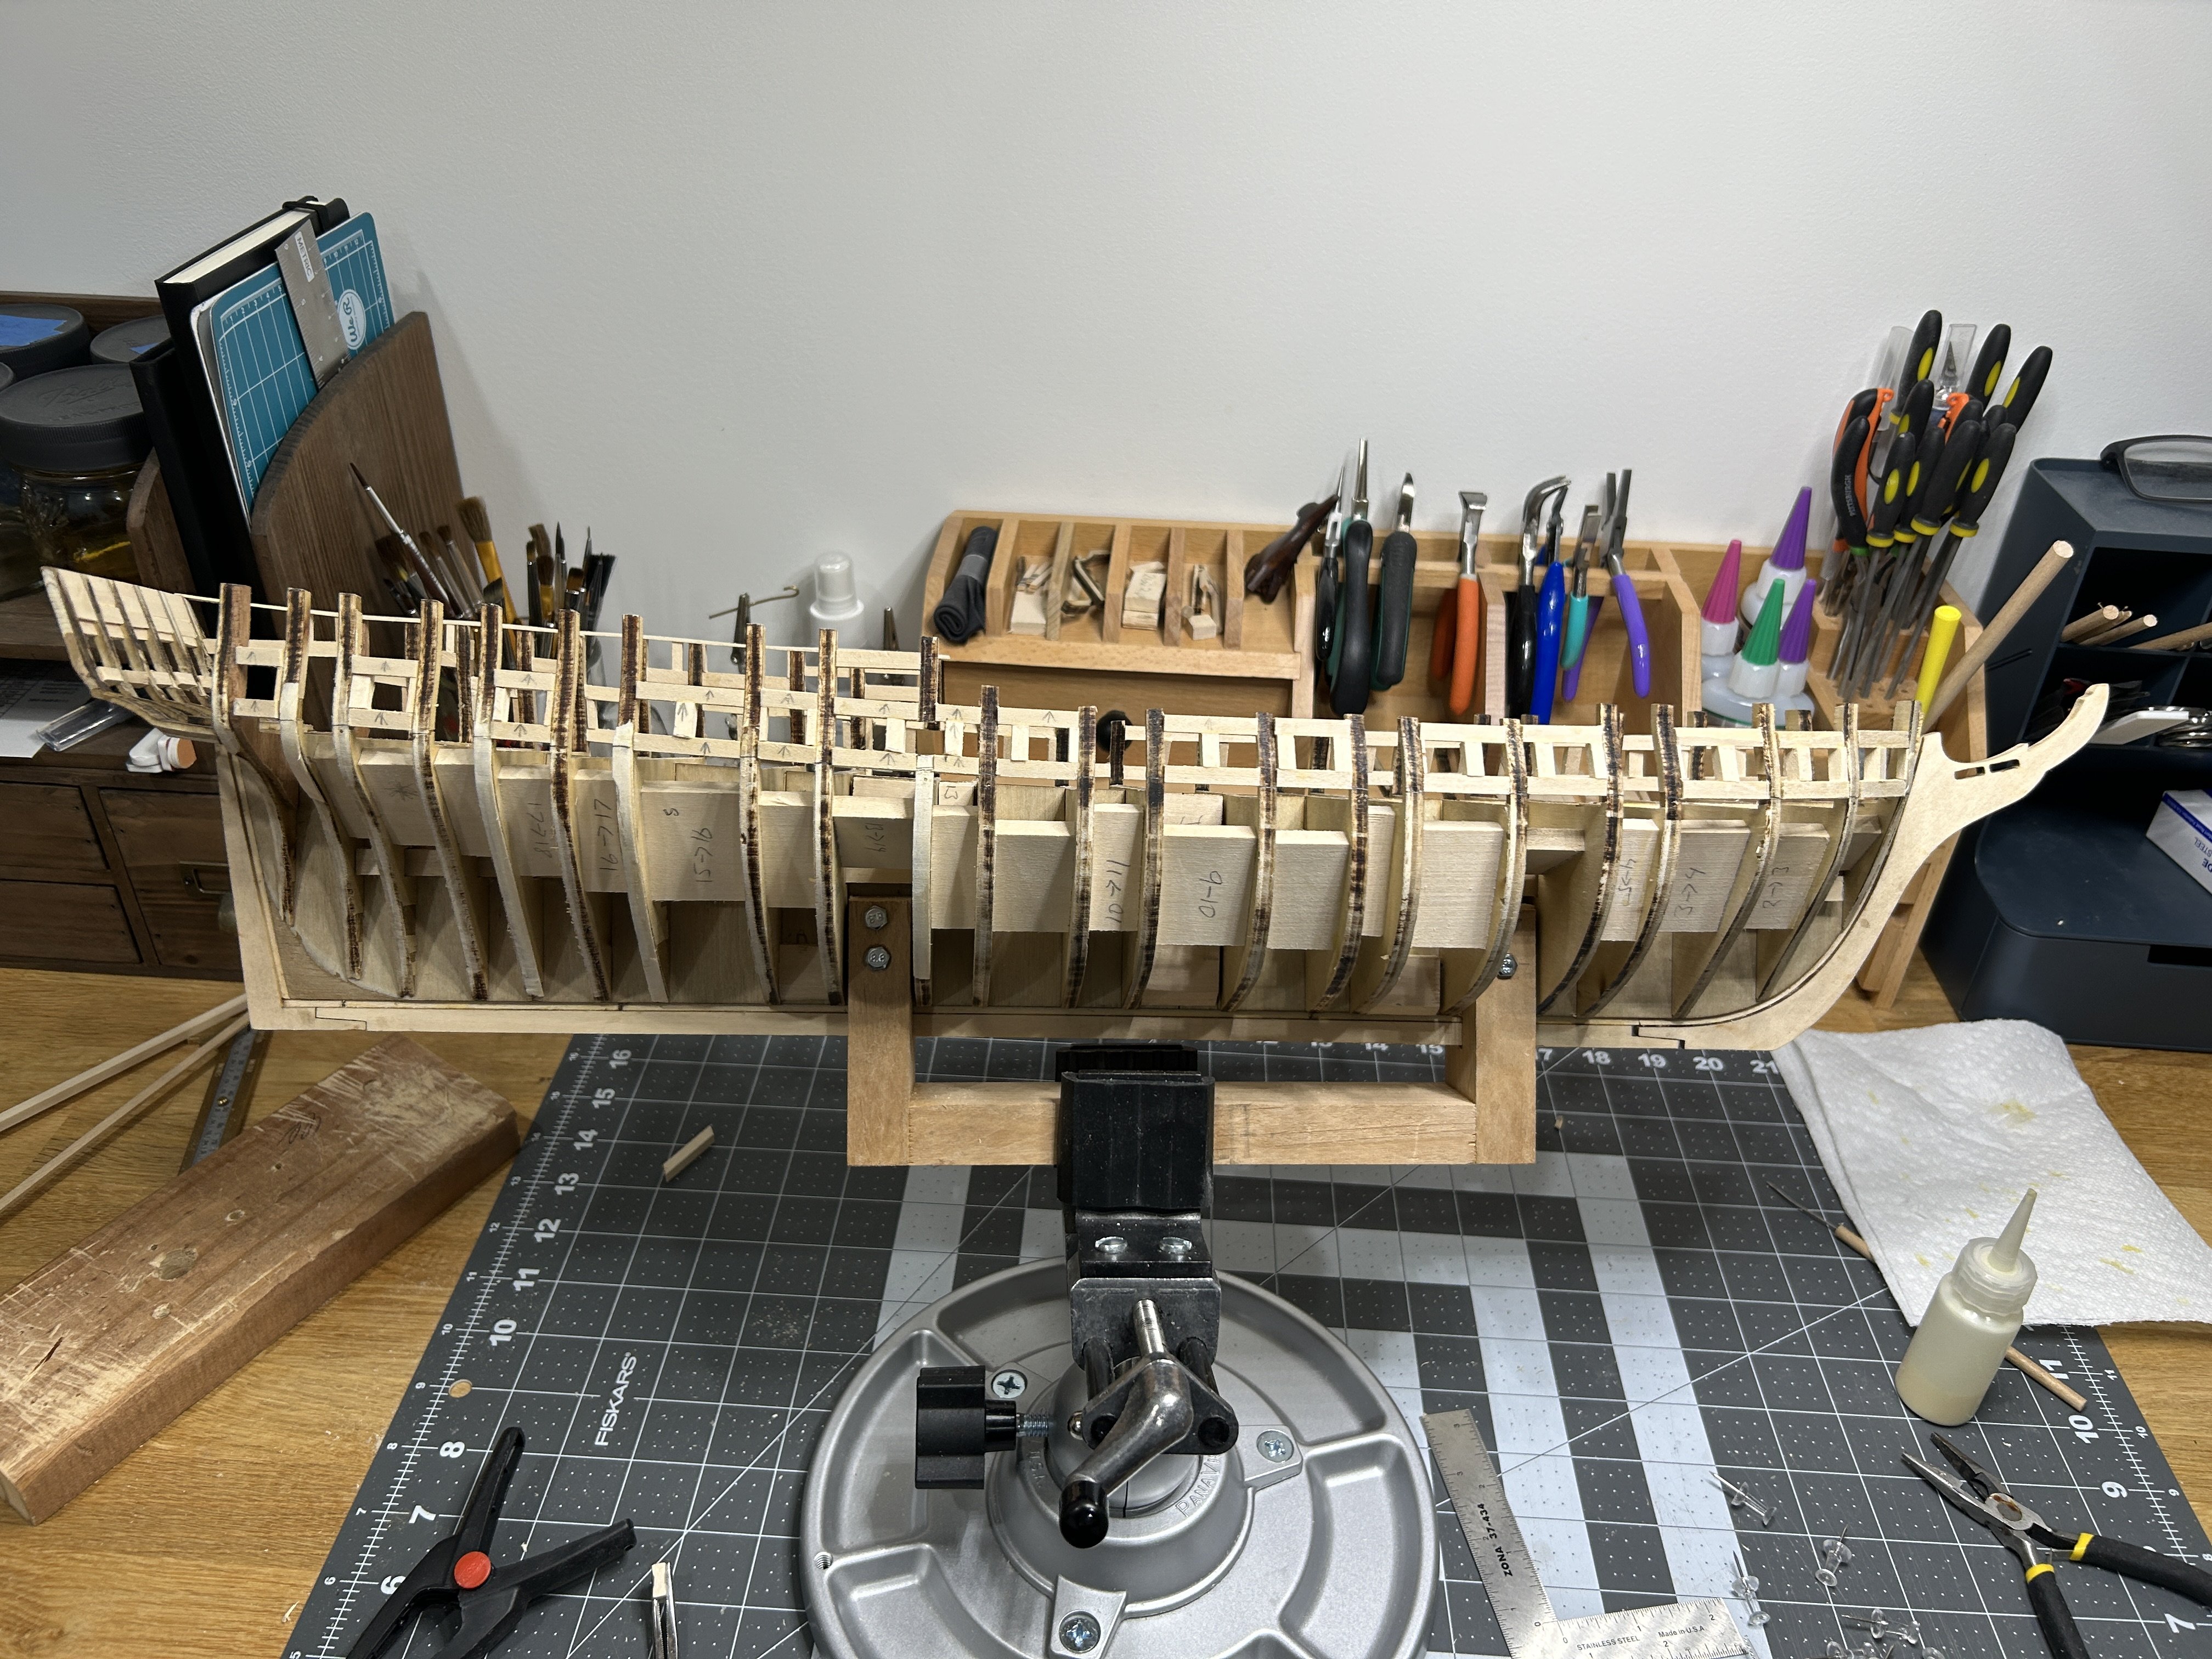
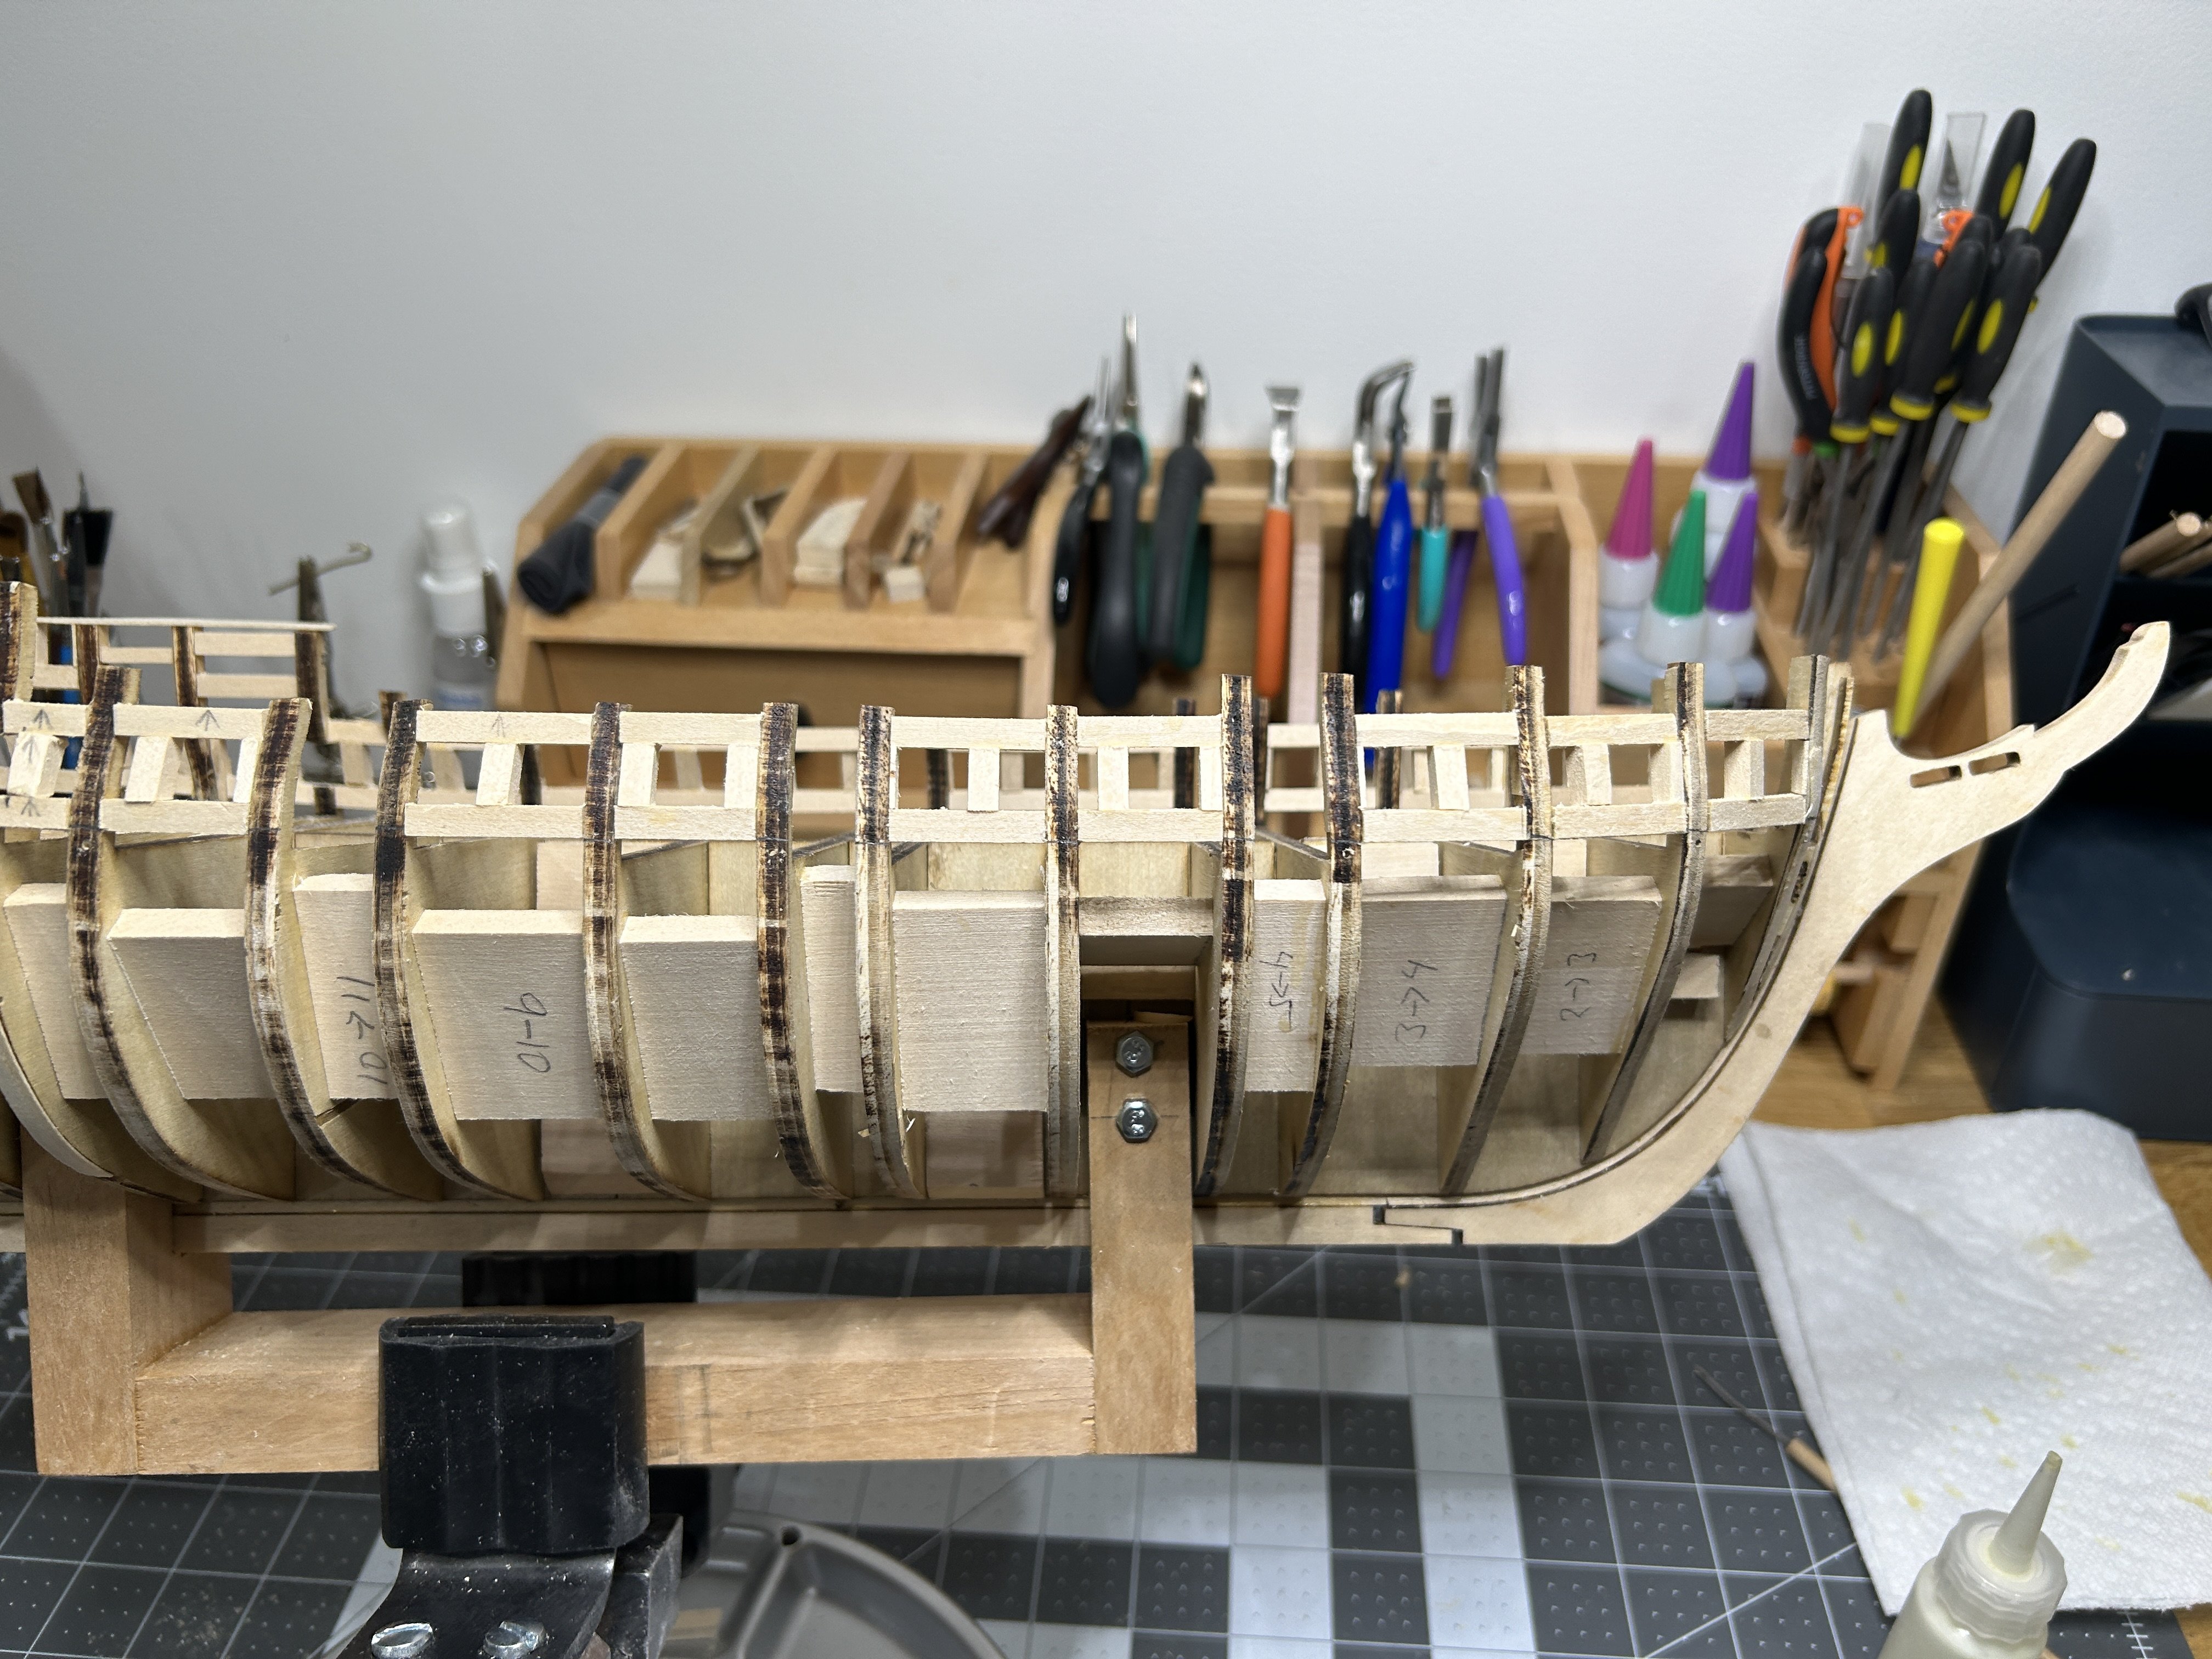
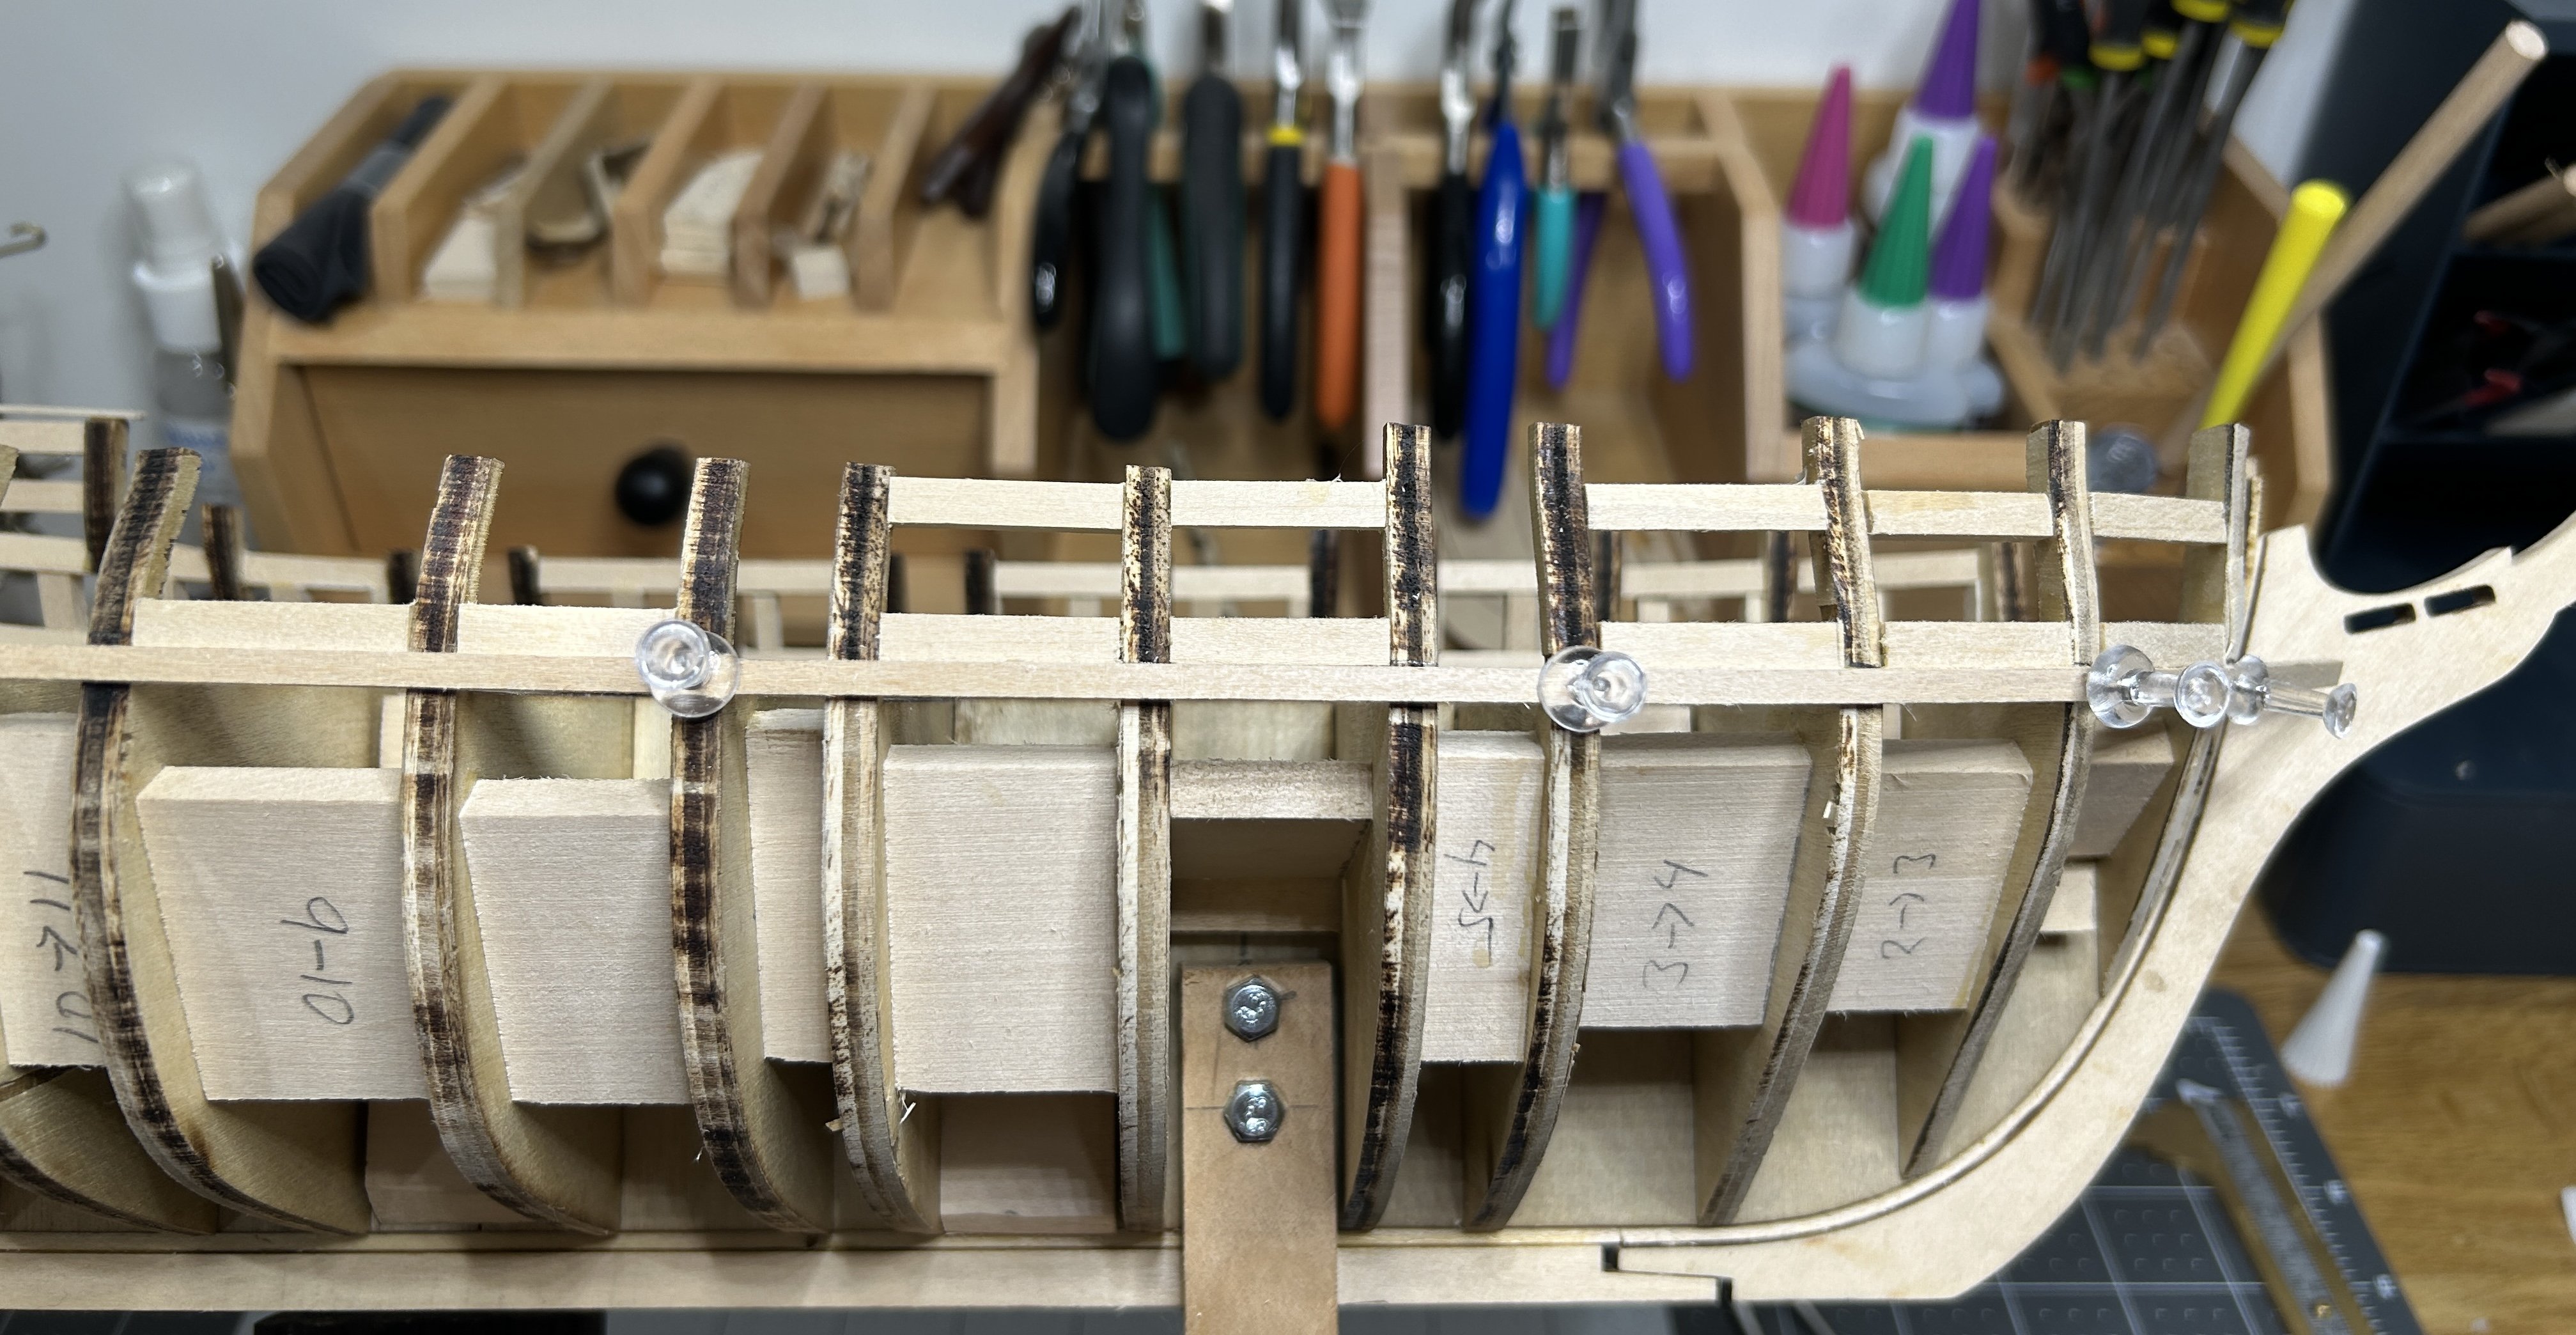
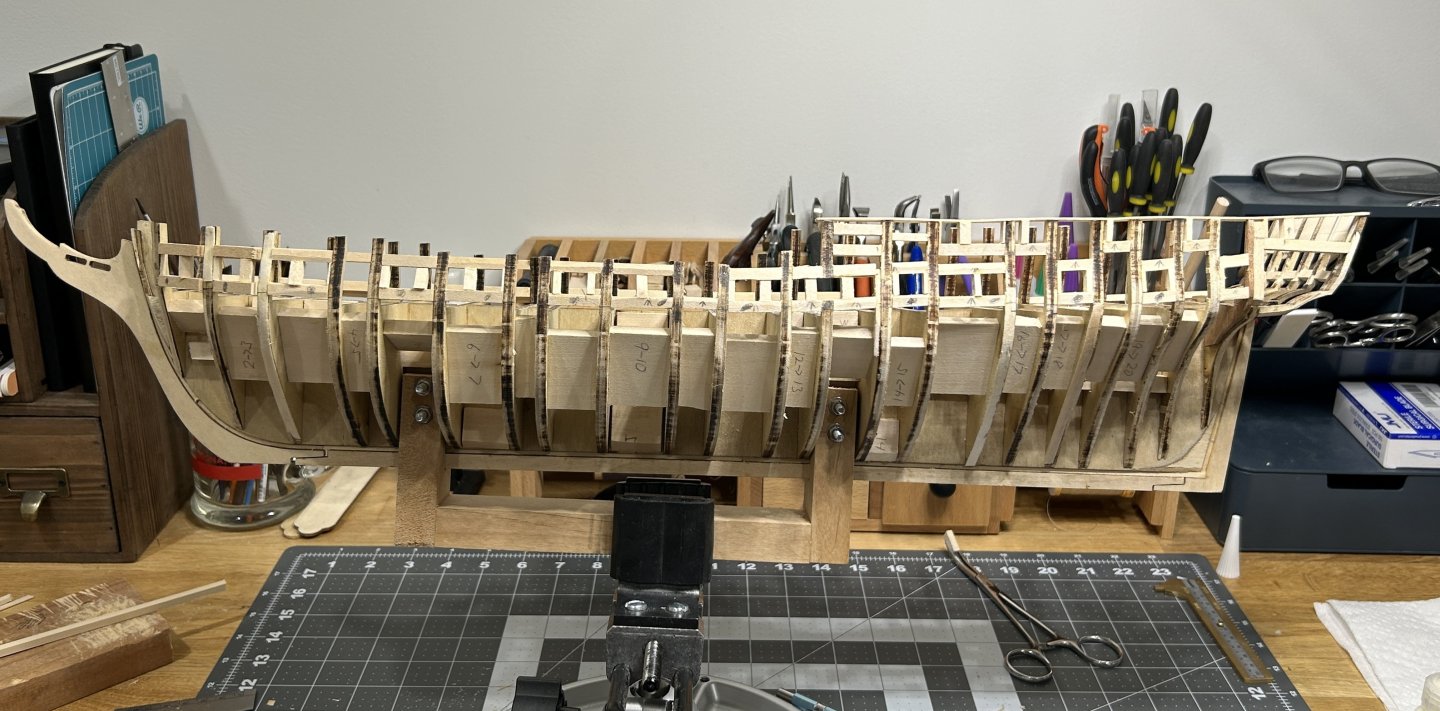
I have all the Gun Port frames added now. I still need to do quite a bit of sanding and then there will be some gaps that need to filled in with wood filler and then more sanding before the blanking begins. I did decide to go with some upgraded wood for the planing around the gun ports on the gun deck. I recieved some Alaskan Yellow Cedar this week and I am looking for ward to working with it. As I have mentioned, one of the challenges in framing these is that the are all rectangles. The sills follow the upward curve of the deck and the sides are straight up and down leading a non-rectangular shape to most of the gun ports. In order to get the size of the ports currect I did make a plug that represented the shape of any gun ports that happens to be a rectangle. I them used a hemostat to hold the plug and used it to determine the proper height and width of the ports. I will be working on the sanding in my garage as soon as the weather cools a little bit. In the meantime I will get started on assembling the gun carriages and I bought a bag of 3/32 blocks from Syren. They are so tiny. I am going to practice with them a little to see if I can use them for the gun rigging. I don't know If I can pull off working with blocks that small.


-
Great work.
-
Work area pictures only
RossR replied to Johnny Mike's topic in Modeling tools and Workshop Equipment
I love the big windows. -
I already have the sills and lintels replaced on the port side. I am so happy that I removed all the framing on that side and started over. On previous builds I would have accepted the poor result and kept going. I will be adding the sides of the gun ports next and then add the gun ports on the quarter deck. I did get the Alaskan Yellow Cedar to use for the section of the hull that isn't painted. Really excited for that.


-
I would be painting the hull at the gun deck level, not the deck itself. Leaning towards the Alaskan Yellow Cedar depending on the lead time to get it.
-
I have a planking decision to make. The prototype of the model has a band of about 5 strakes along the gun deck that are not painted, but are stained with Minwax Golden Oak stain. The instructions say that on the actual ship this section of the hull would have been painted yellow occre. If you followed my build log of my NRG Half Hull, you may remember that I was disappointed in how the basswood looked after staining. My previous 3 models were from Occre and they supplied Lime Wood that I thought stained very nicely. I have since acquired some MInwax Pre-Stain and the results with Basswood are much better using the pre-stain before the stain is applied, but I am still not sure if the look of the stained Basswood is what I want. Tonight I reached out to Modelers Sawmill about the lead time on some Alaskan Yellow Cedar. I can get enough material for the 5 strakes that I would leave unpainted for about $25 - $30. I am seriously considering going this route. I would still use the kit provide Basswood for the parts of the hull that are painted or covered in copper. I think I would forgo any stain and just add a coat of shellac to the AYC. I would love to hear if you guys like the idea of the Alaska Yellow Cedar or the yellow occre paint for the planking of the hull at the gun deck.
-
I am jealous of your 3d printing skills. I have no CAD experience, so I am pretty intimidated to even try any 3d printing. These look really good.
-
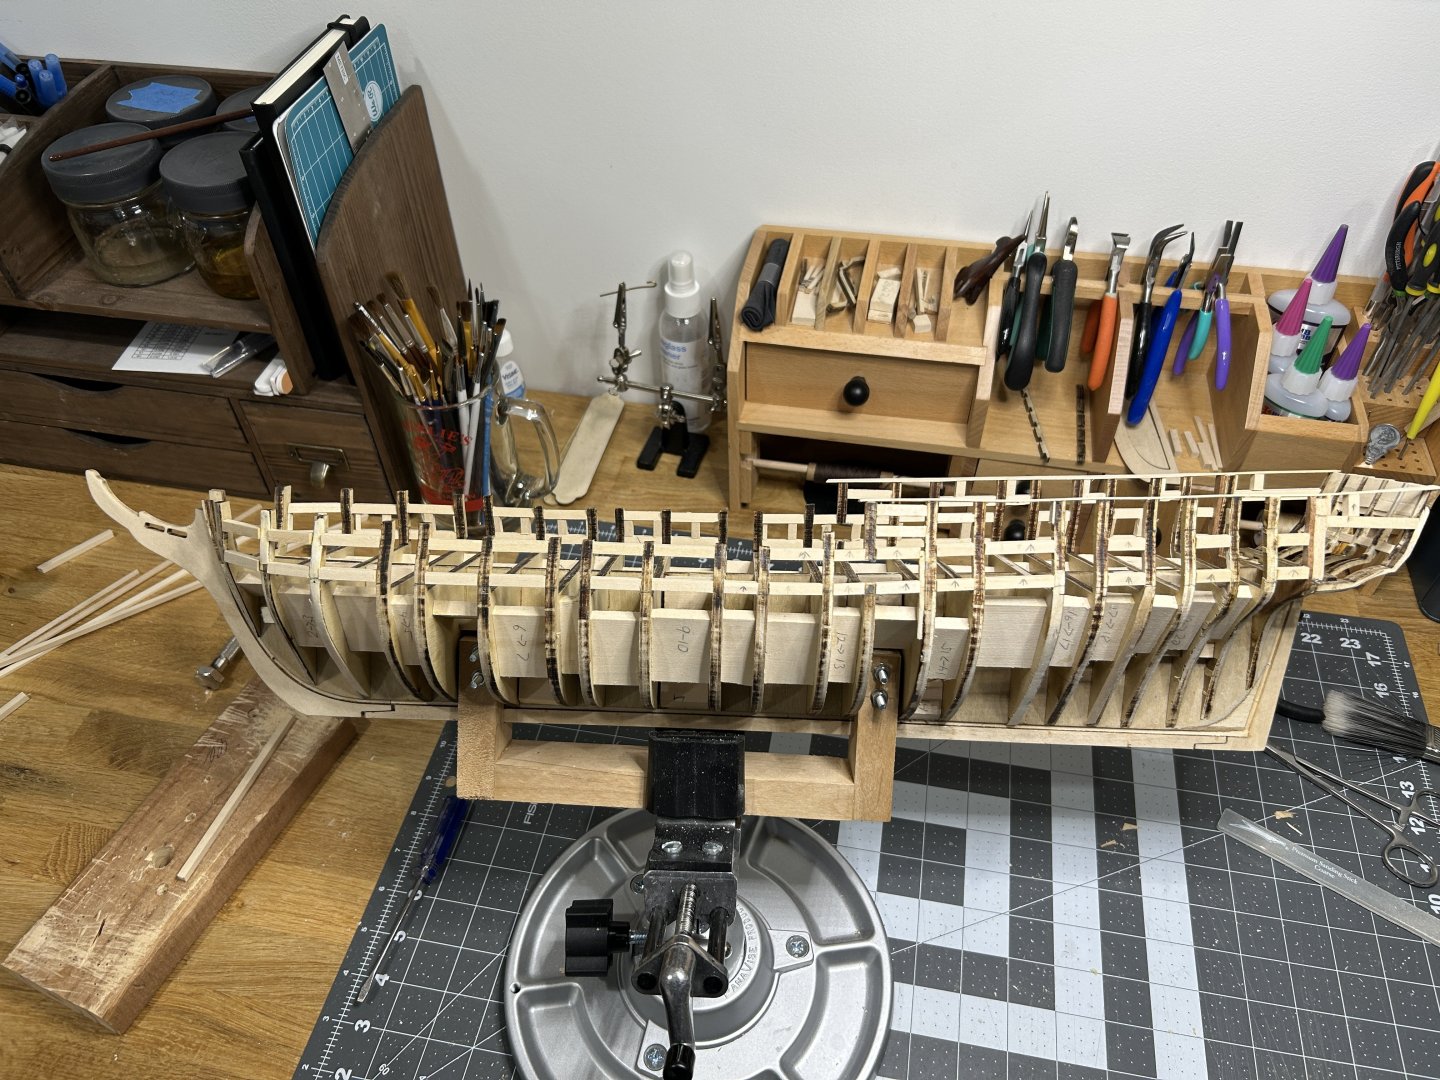
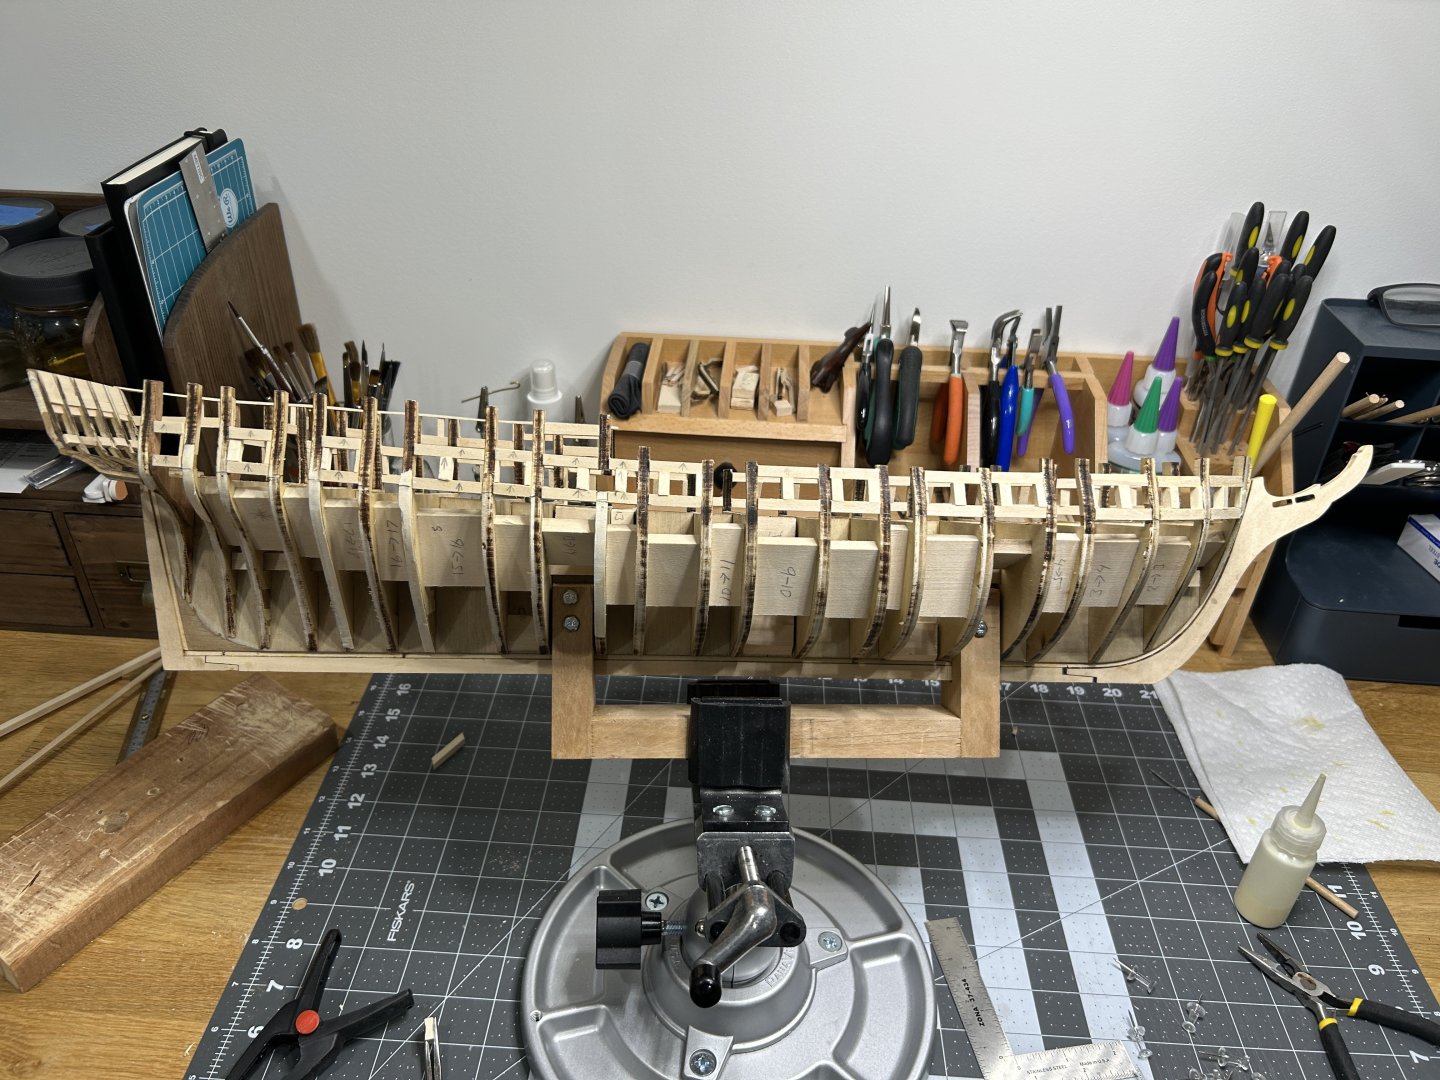
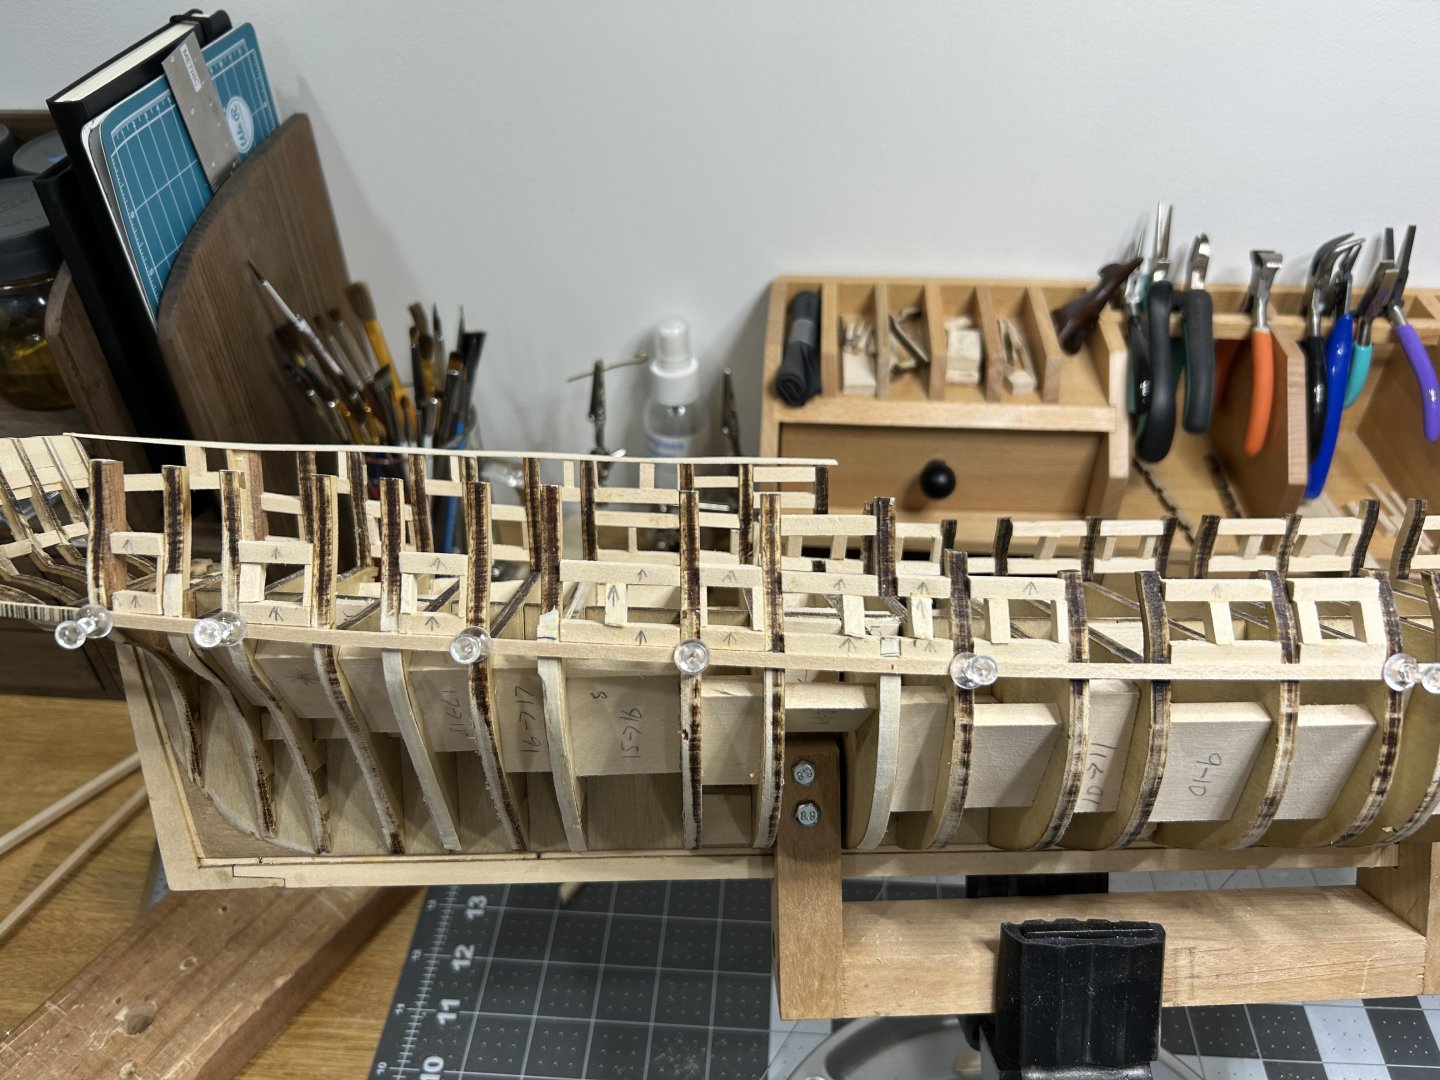
A quick update on my progress. I added the quarterdeck gun port framing to the starboard side. There isn’t a lot of information in the instructions about the placement of the queter deck gunposts and the plans show the sills and lintels as 1/8 inch and the instructions call for 3/16 inch material. I how I have them placed properly. I also removed all of the framing on the port side and will be redoing it.

-
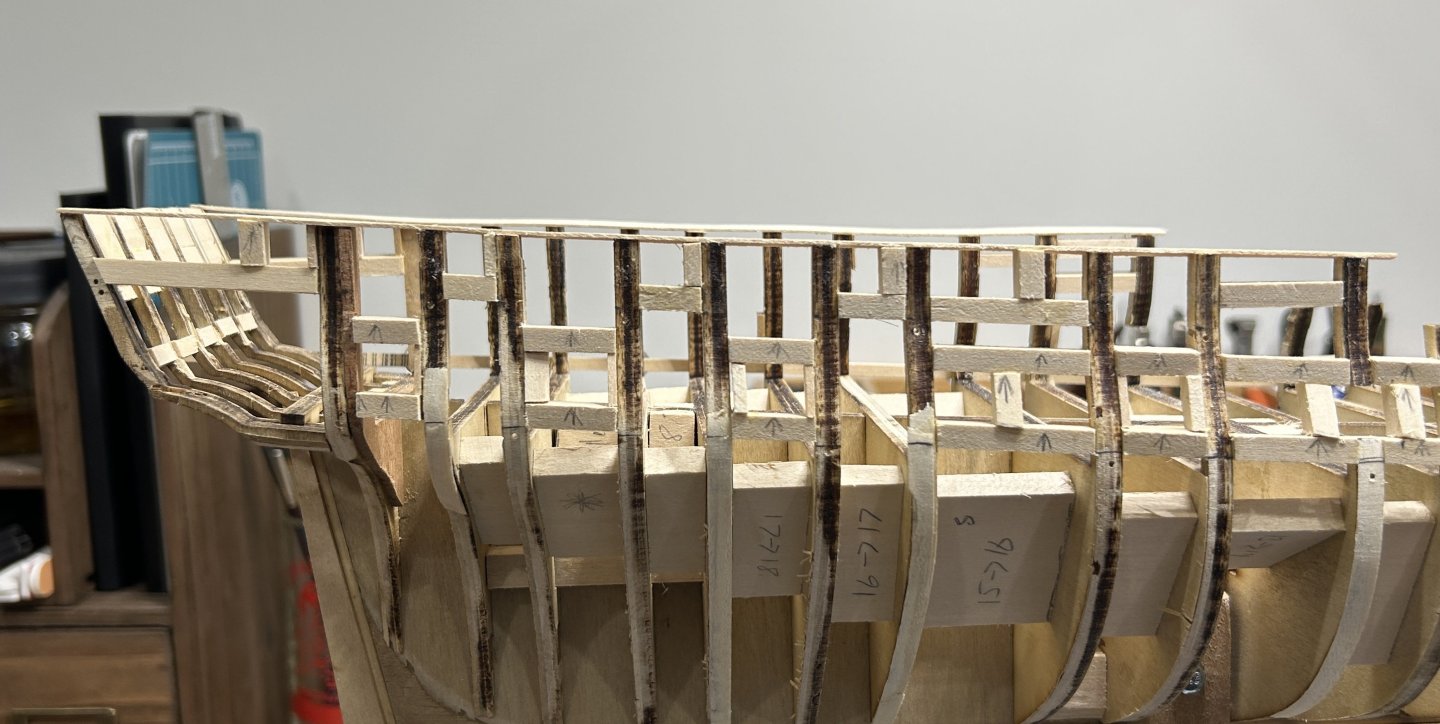
I have completed the gun deck gun port framing on the starboard side. It turned out much better than the port side. When I did the port side I attached a batten and then used it to mark the bulkheads. I then attached the sills. I didn't end up with a very smooth flow especially as the deck curves upward at towards the stern. When I did the starboard side, I left the batten in place and use it to line up the sills. This produced a much smoother flow of the gun port sills. I am currently adding the gun port framing to the quarter deck. Then the big decision is what to do with the disappointing port side. I know there right answer is the remove the sub-standard work and redo the port side. I am not looking forward to redoing the work, but I know I will always regret it if I do not redo it.

-
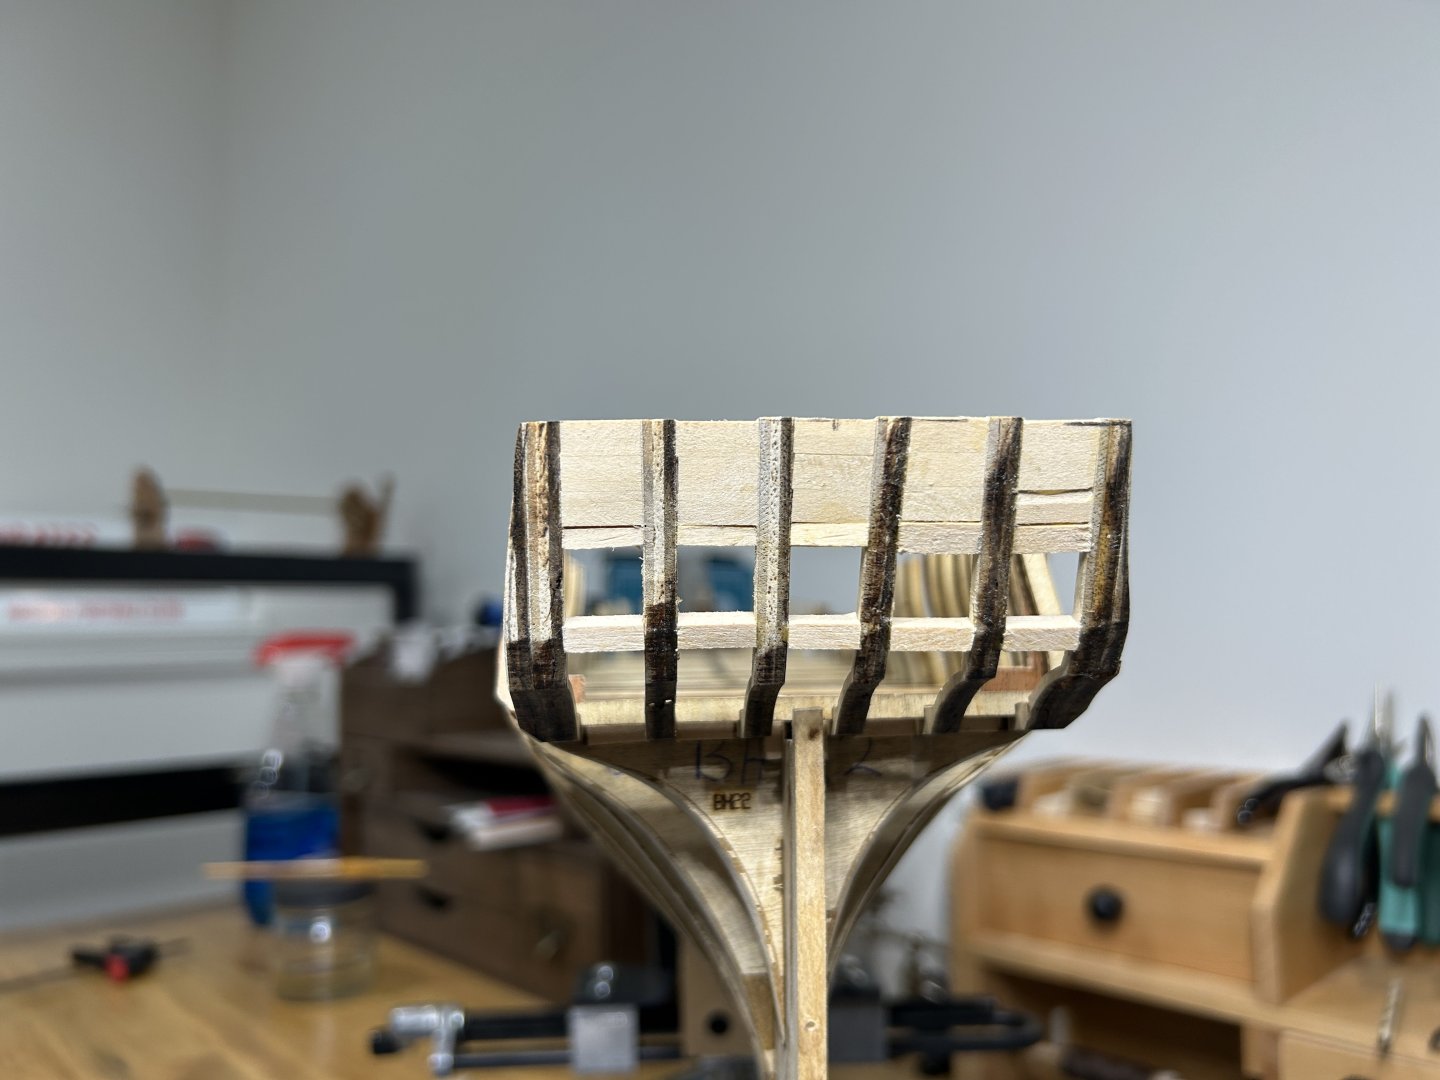
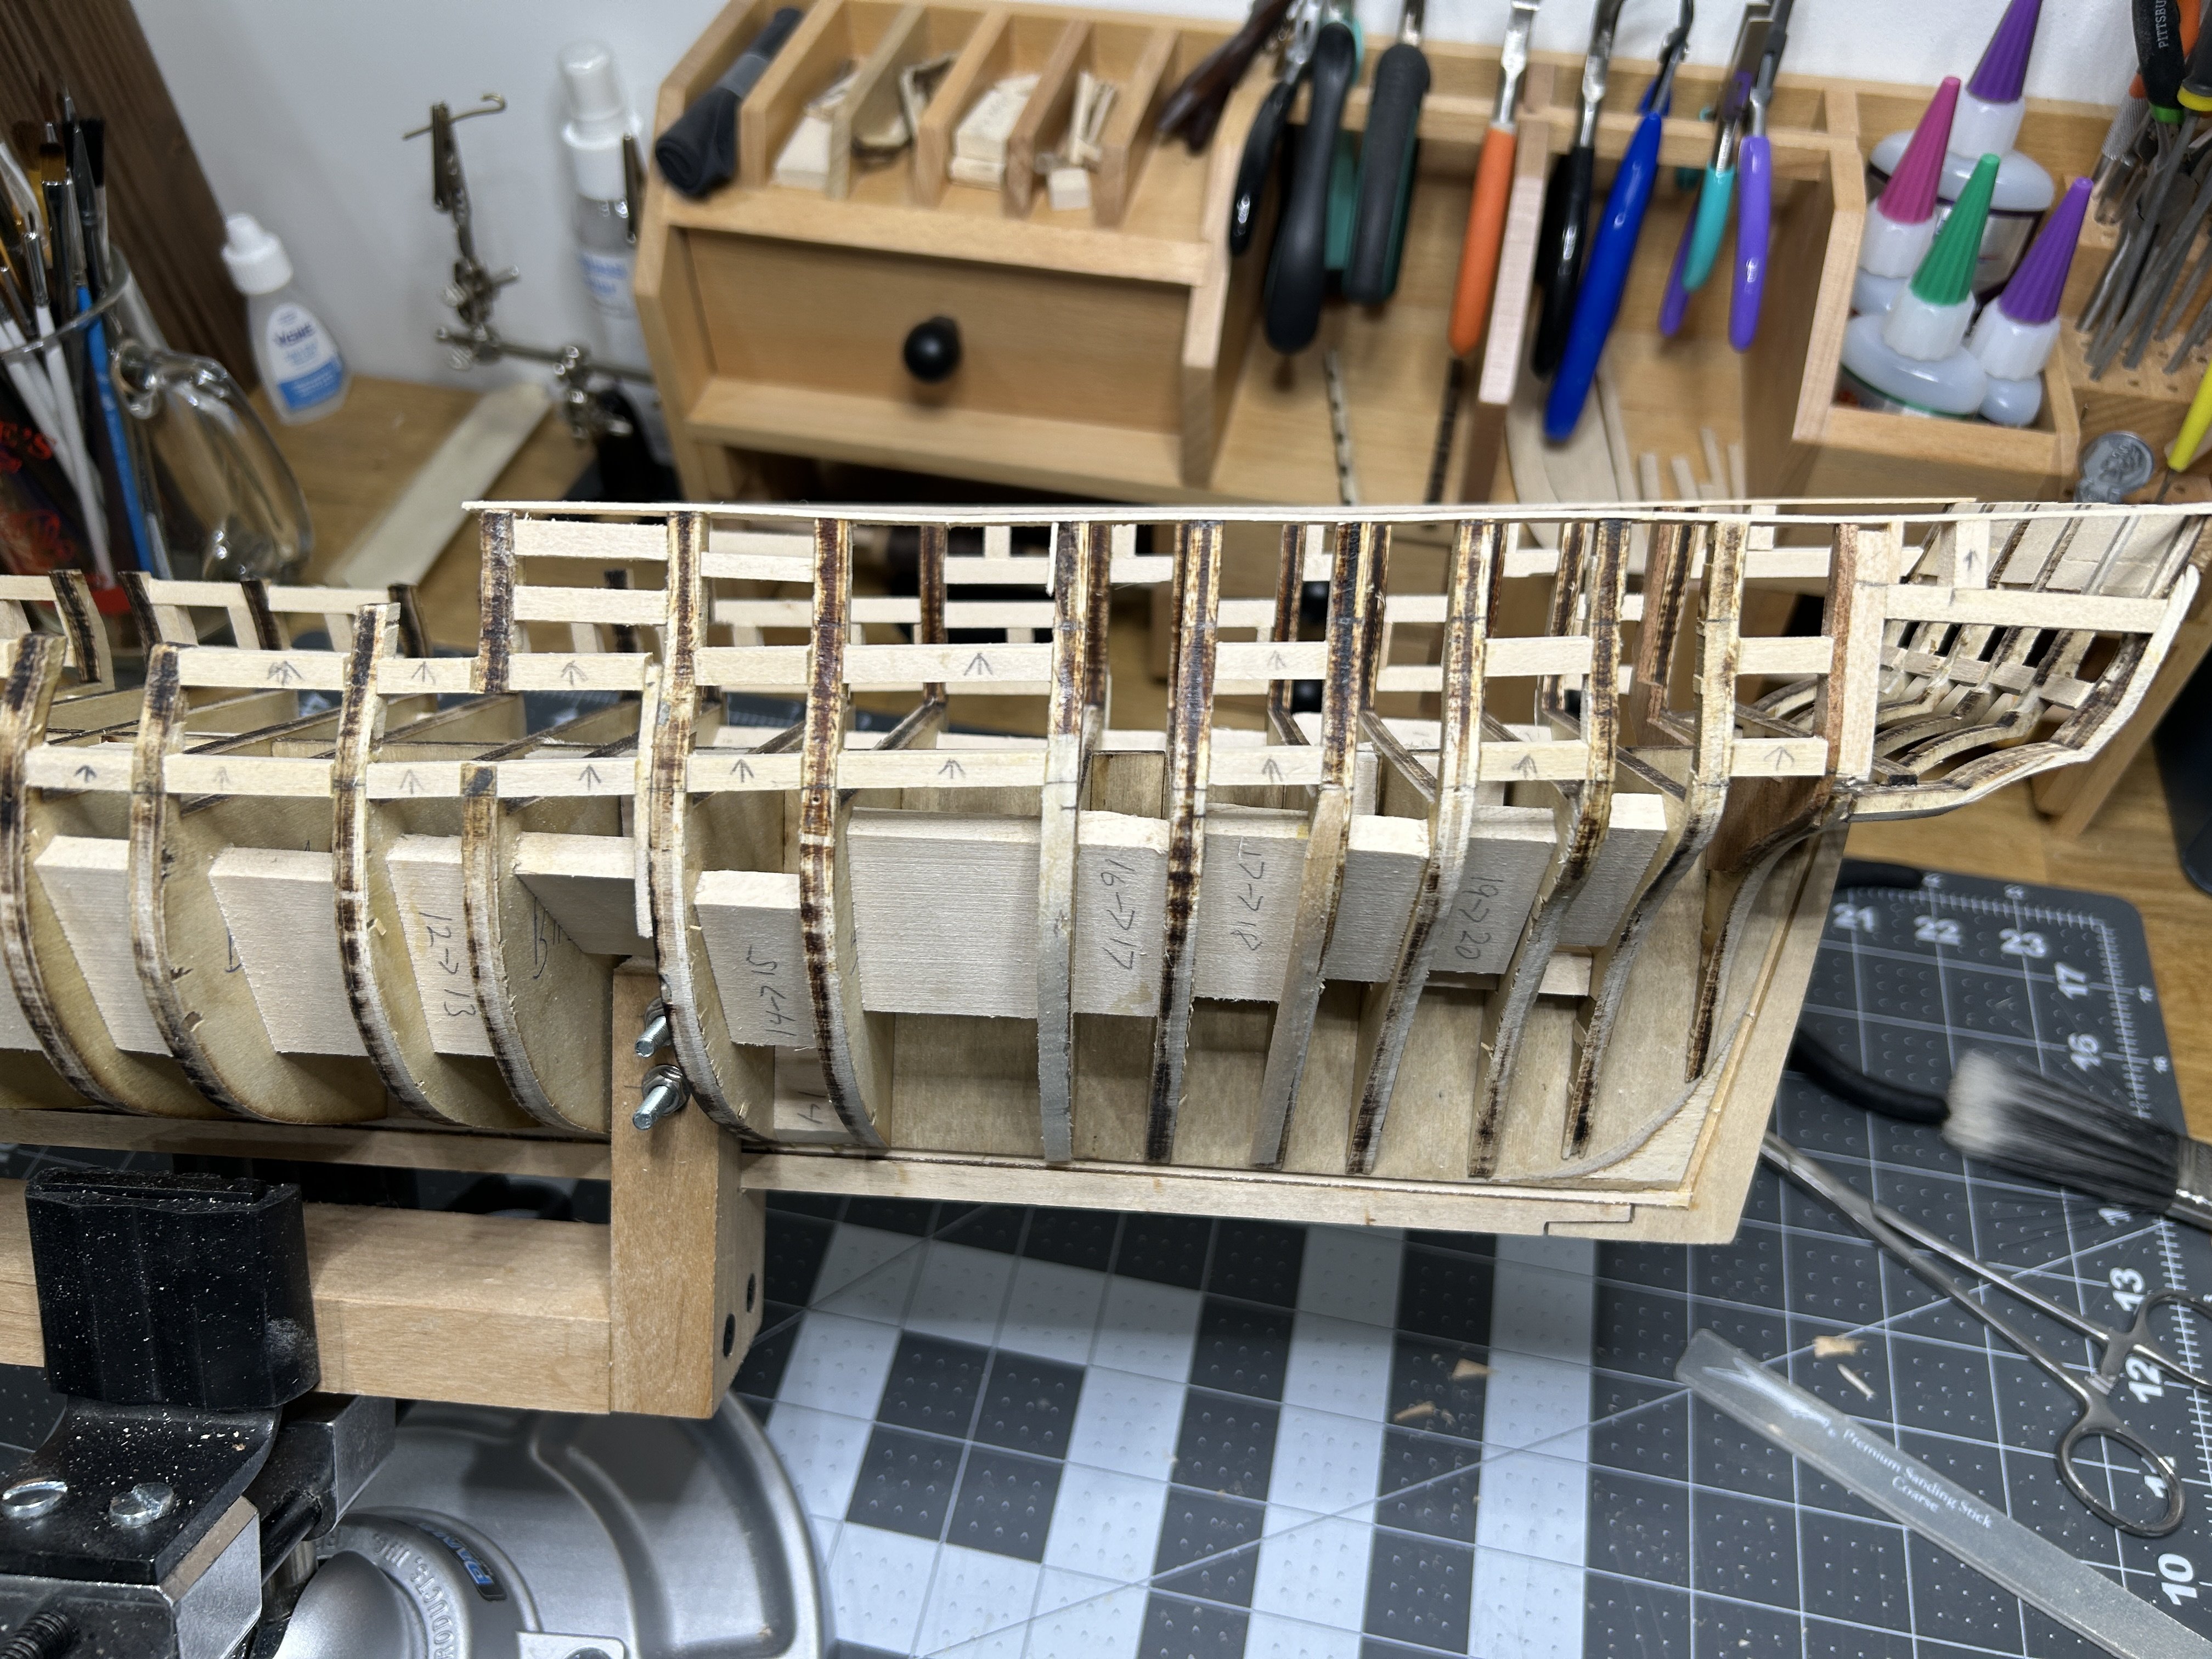
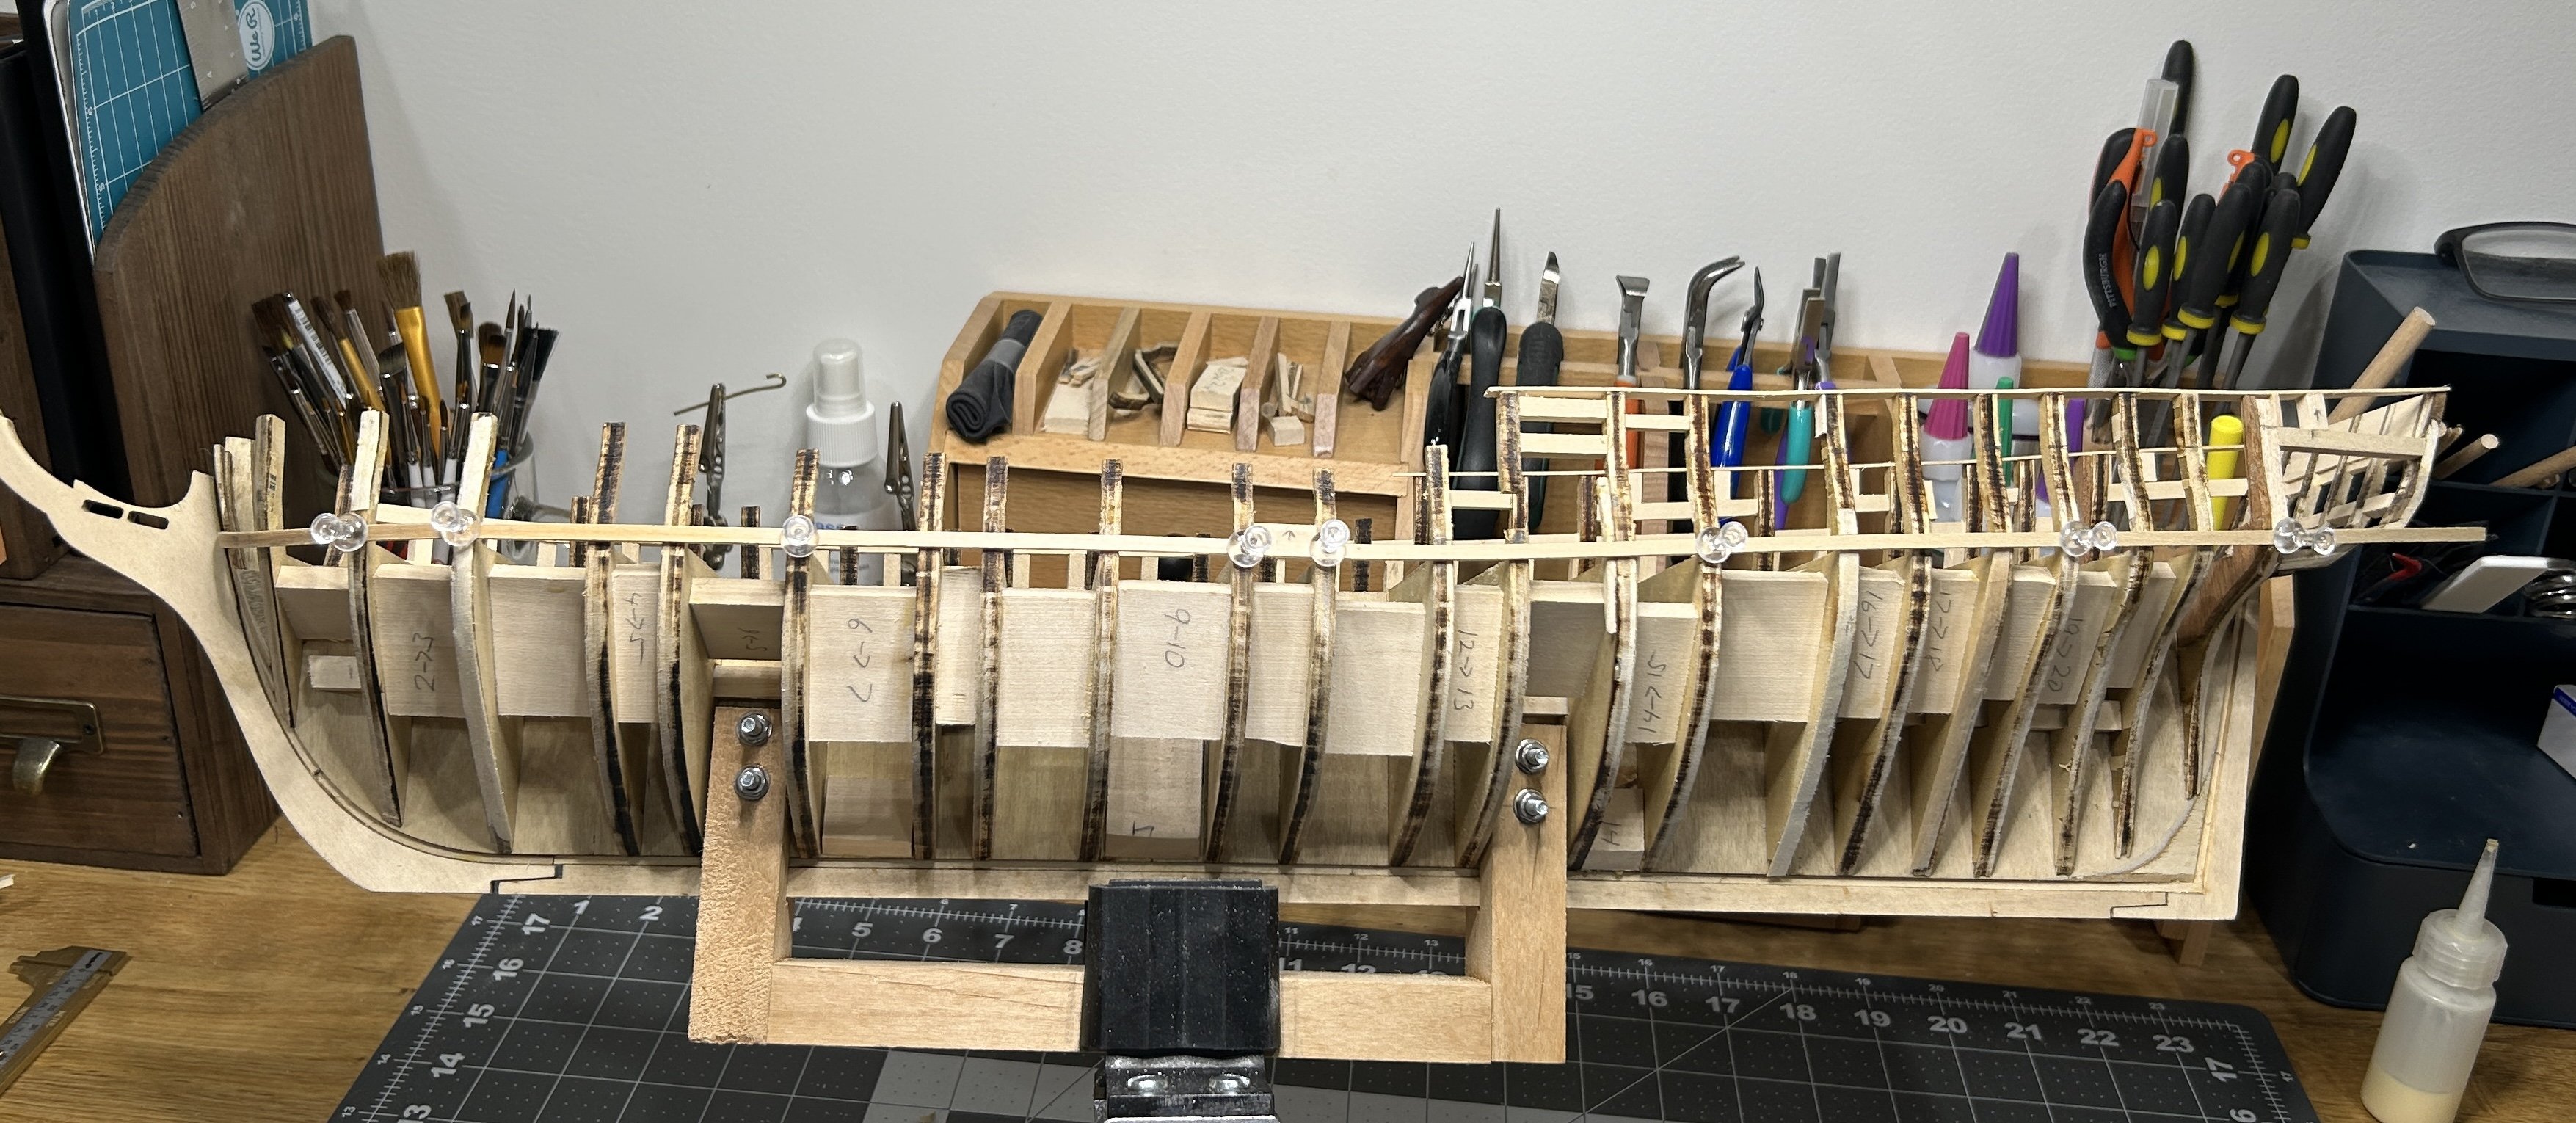
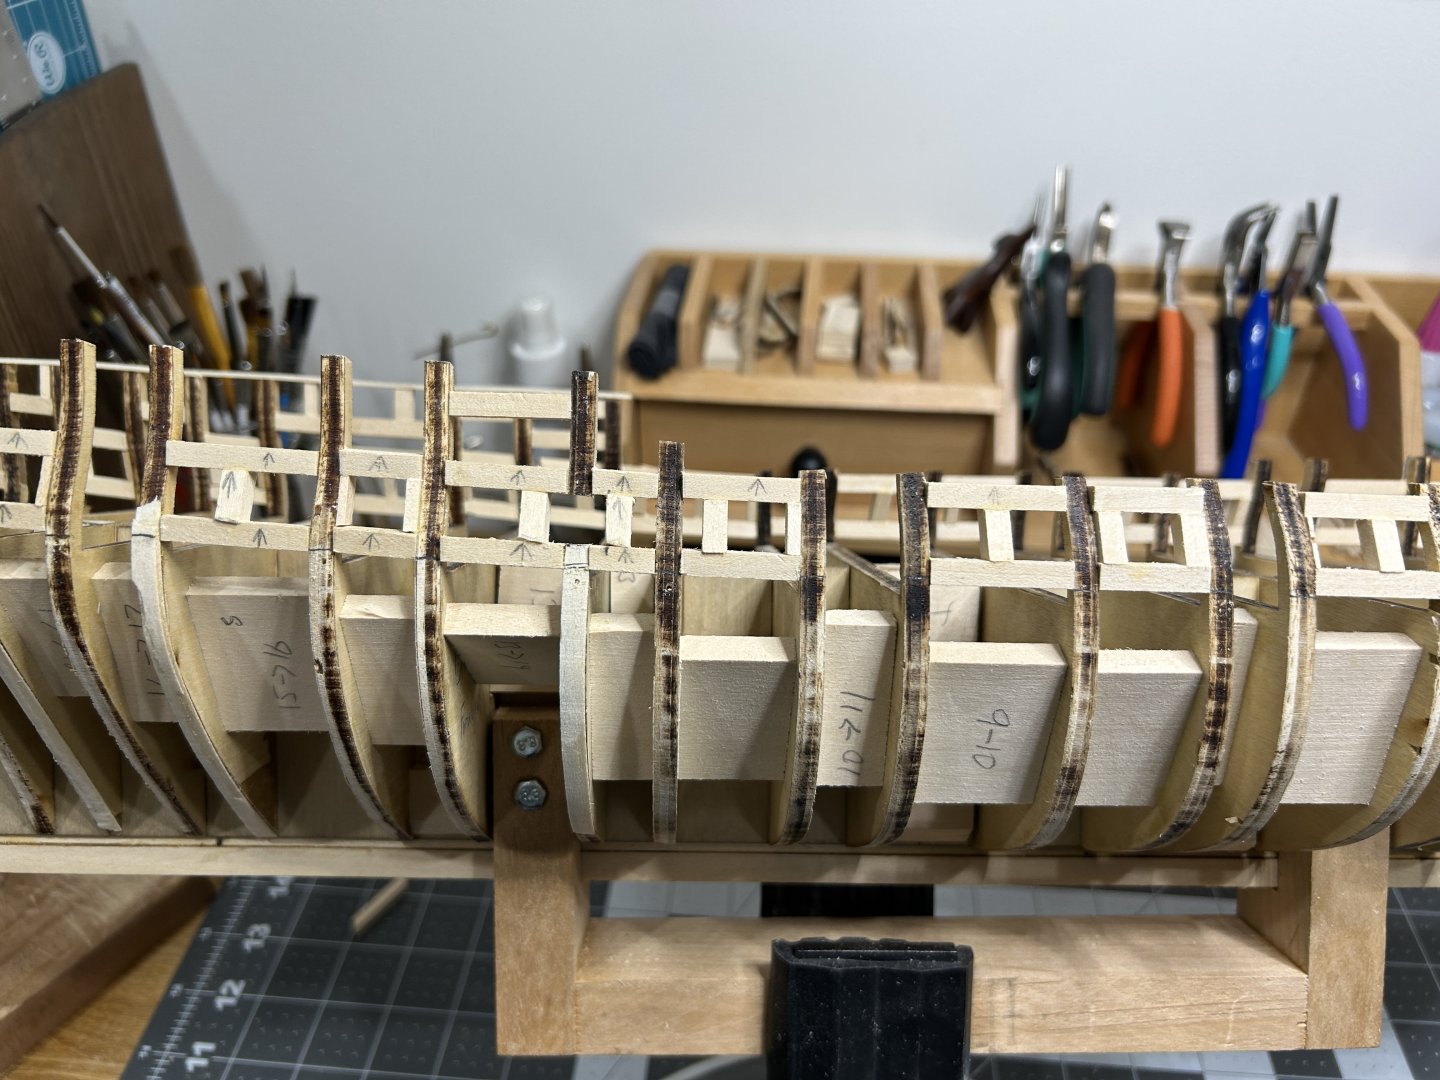
It has been awhile since I posted and progress has been slow. Summer got in the way a little bit. The framing of the gun ports has proven to be challenging. The deck is curved, so the gunport sills and lintels need need to follow that curve. I am not thrilled with the first side that I completed, but things are going better on the other side. I maybe remove the first side and redo it if things keep going well on the second side. I have become an expert at using alcohol to get PVA to dissolve. Here is a picture of the side I am not thrilled with and the start of the other side.

-
HMS Victory by ECK - OcCre - 1/87
RossR replied to ECK's topic in - Kit build logs for subjects built from 1751 - 1800
I have been away from the forum for a few weeks, and your progress is amazing. The gun port linings look fantastic. -
Thanks. I thought about sanding, but the planking material on this model is only 1/32 of an inch think, so I was worried I might sand though some parts if I sanded much at all. As it hangs on my wall and I am used to it, it bothers me less. Good luck on your planking.
-
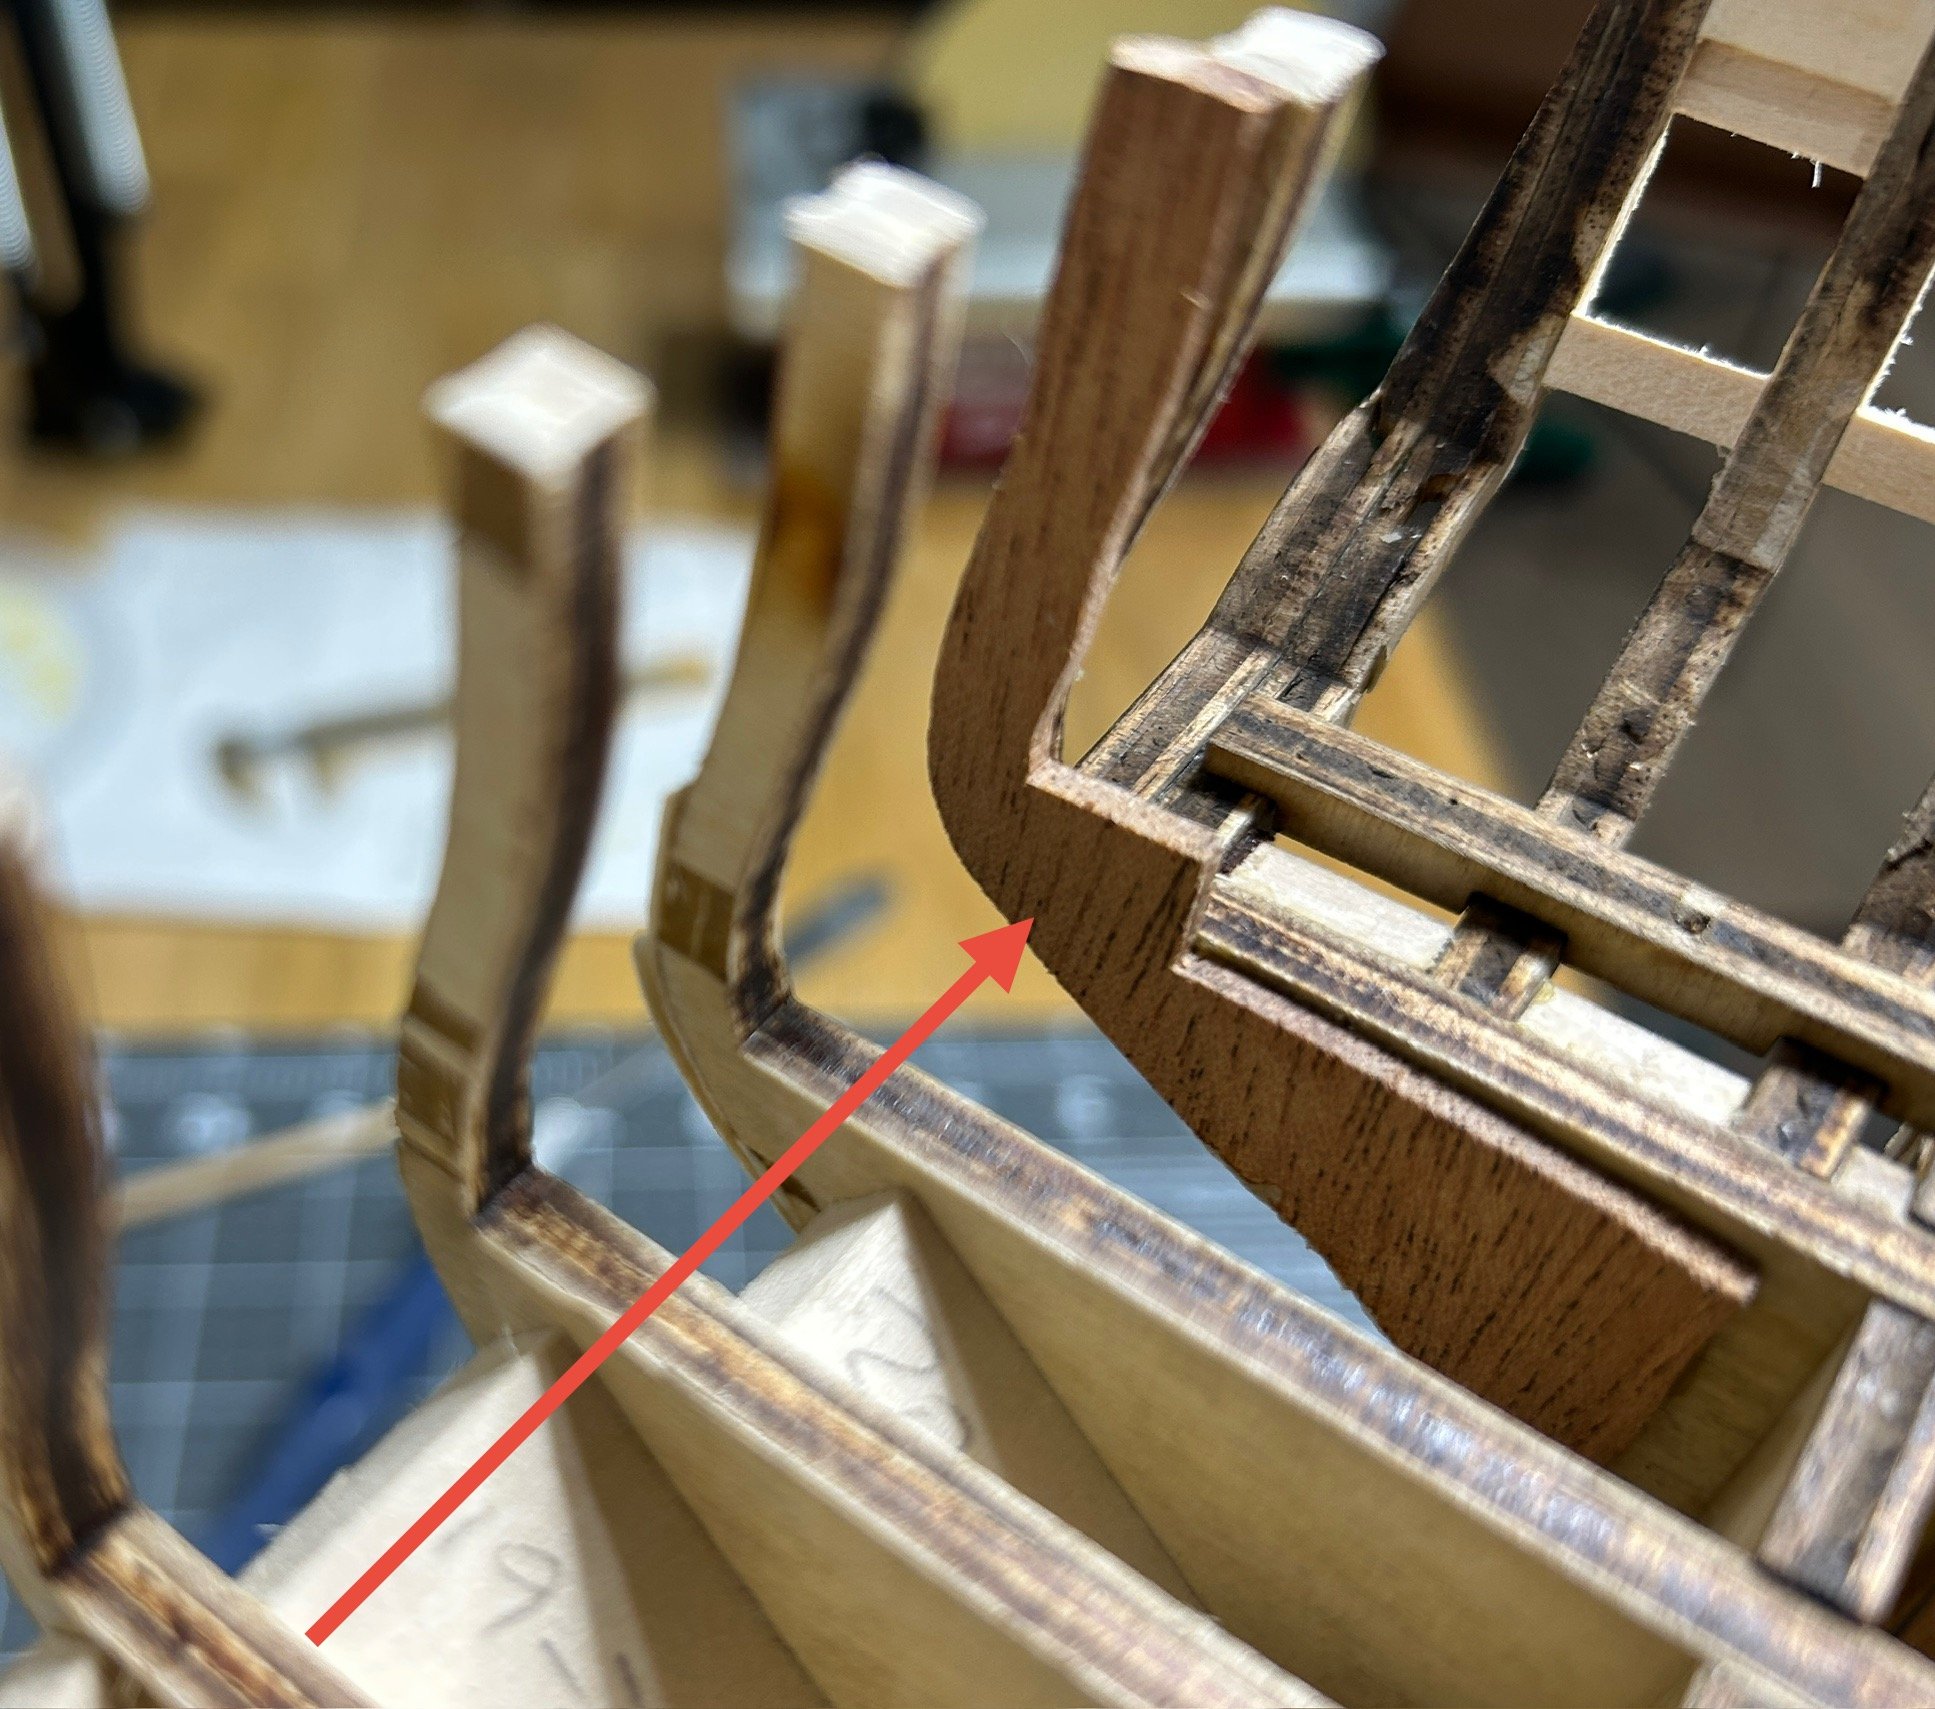
I have made some progress on the stern. I have managed to repair and reattach the frame pieces that broke. I also figured out that the problem I was anticipating with the arched frame for the windows on the stern. As I described in a previous post it appeared that the top of the arch would end up above the cap rail which would not be correct. It turns out that I misunderstood where the the sills were to be placed on the stern. I used alcohol to free the sills and then place them correctly. I also created some parts that will help re-enforce the bulkheads above the deck on the last bulkhead. I left some extra material at the deck level to help add some strength until the outer planking is complete. I will need to remove that material before the decking in installed. I use some 3/16 inch thick walnut. I am hoping the walnut is a little stronger than basswood. This part will also create the side of one of the gun ports. the 3/16 thickness was what I needed to have the side of the gunport in the right position. I still need to do a little more sanding and on the stern, but I have started to work on the placement of the gun port sills also. I will post an update on the sills soon.