


Rustyj
-
Posts
2,448 -
Joined
-
Last visited
Content Type
Profiles
Forums
Gallery
Events
Posts posted by Rustyj
-
-
-
Well done Glenn. I find the stern can be even more challenging then the coppering of the hull. You did a
great job of adjusting to make it look really fantastic and the pictures will help tremendously when I
eventually crack the box open and start on her.

I look forward to seeing the hull completed whenever you finally succumb.

-
-
I wish I could say I’m stunned at the realism but you’ve spoiled us and now we expect, and receive,
such fine work it would be more stunning if you did not produce your awe inspiring work.
Verrrryyyyy well done!
-
Hi Bob, That’s a unique way of doing the copper. It looks really good and if you find it easier
then all is good. Now if we got 13” of rain up here everything on the hills would wash into the
valleys and the water wouldn’t recede for months! I hope all is well with you and extra model
time was the only “issue”.
-
Hello all, Thank for the Birthday wishes and the likes. That was very nice. Had a good
day and a nice dinner. No work either! So far doesn’t seem any worse than any other.
Hey Joe when you get there let me know how it is. I may have to stop counting.
Hi Michael, Yes with your projects I would see it not being an eye opener.
Hi Grant and thanks for the info.
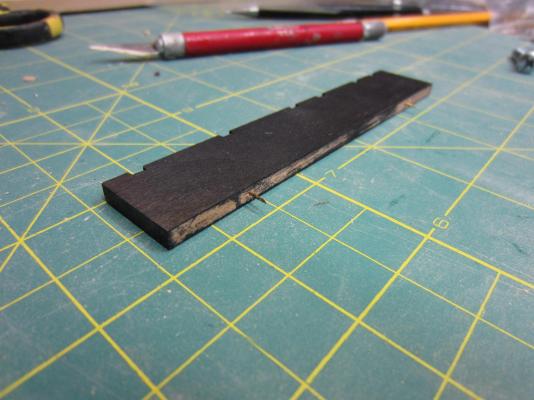
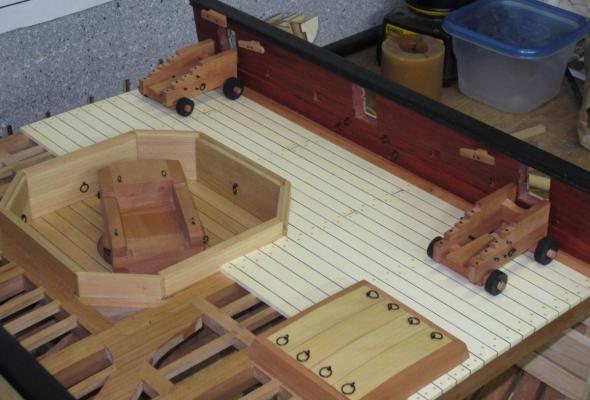
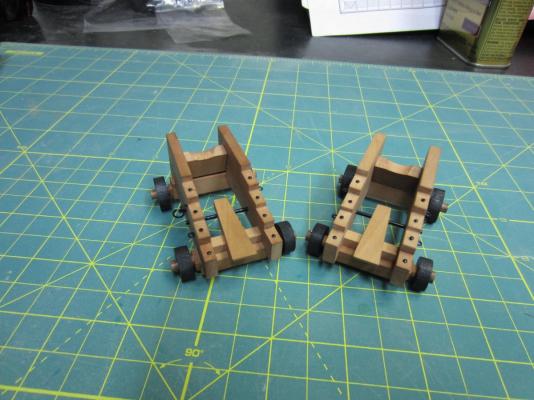
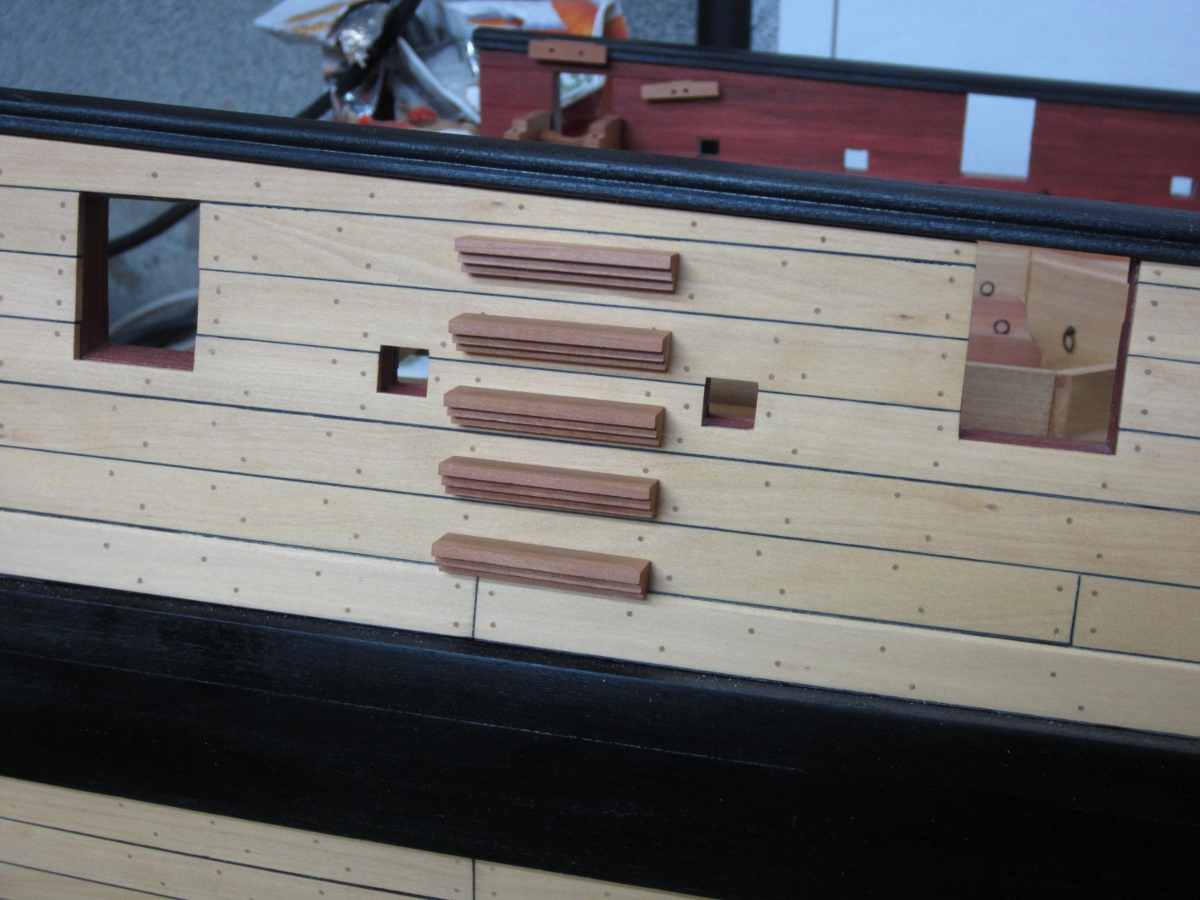
Well I have cut the pedestals for the swivel guns and then notched the channels to
fit around the pedestals. Glued them in place and took the pictures………..
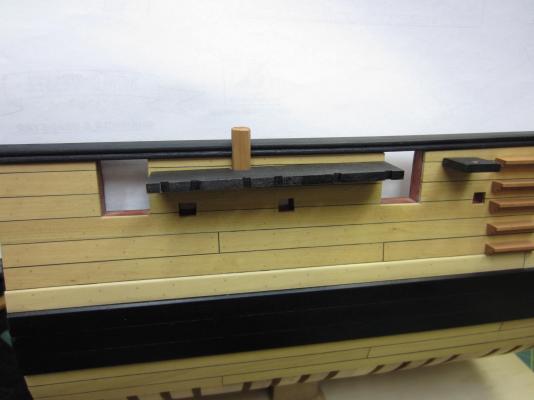
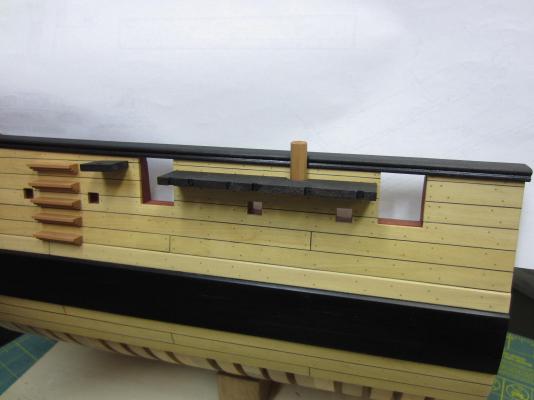
Crap the port channel (1st pic) is *$#@ backwards! The notches for the chain plates are
reversed! Oh well I guess I needed some more practice making them. Just another head
slapping duh moment.

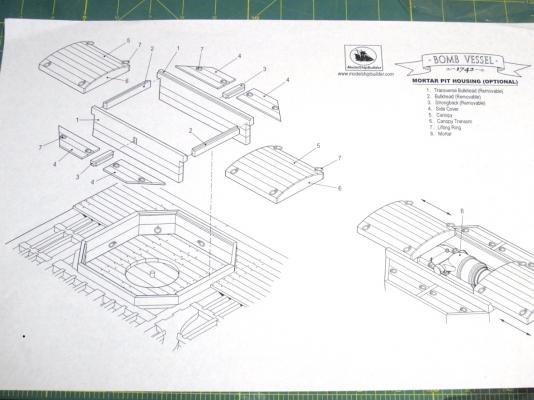
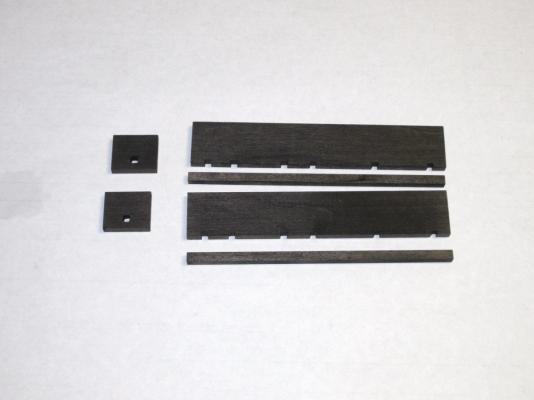
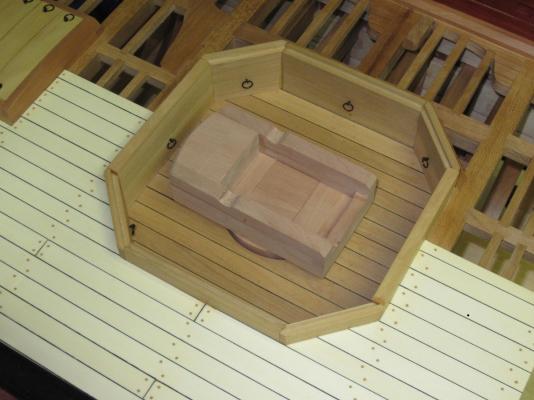
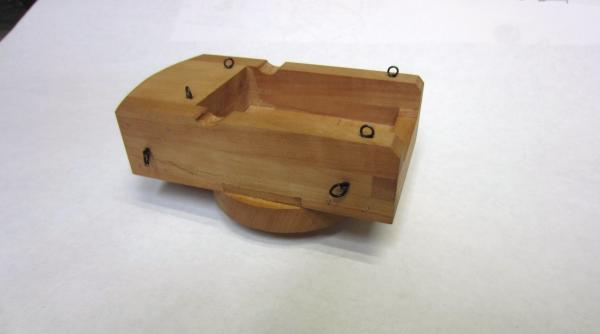
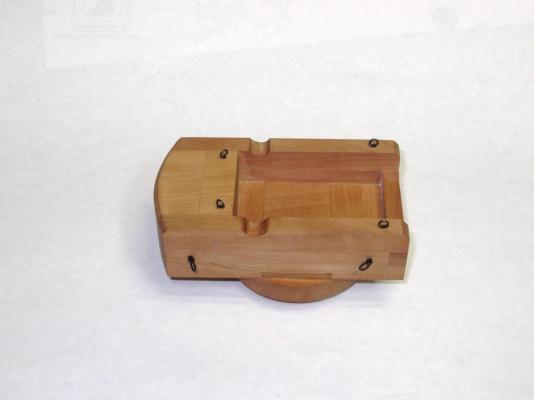
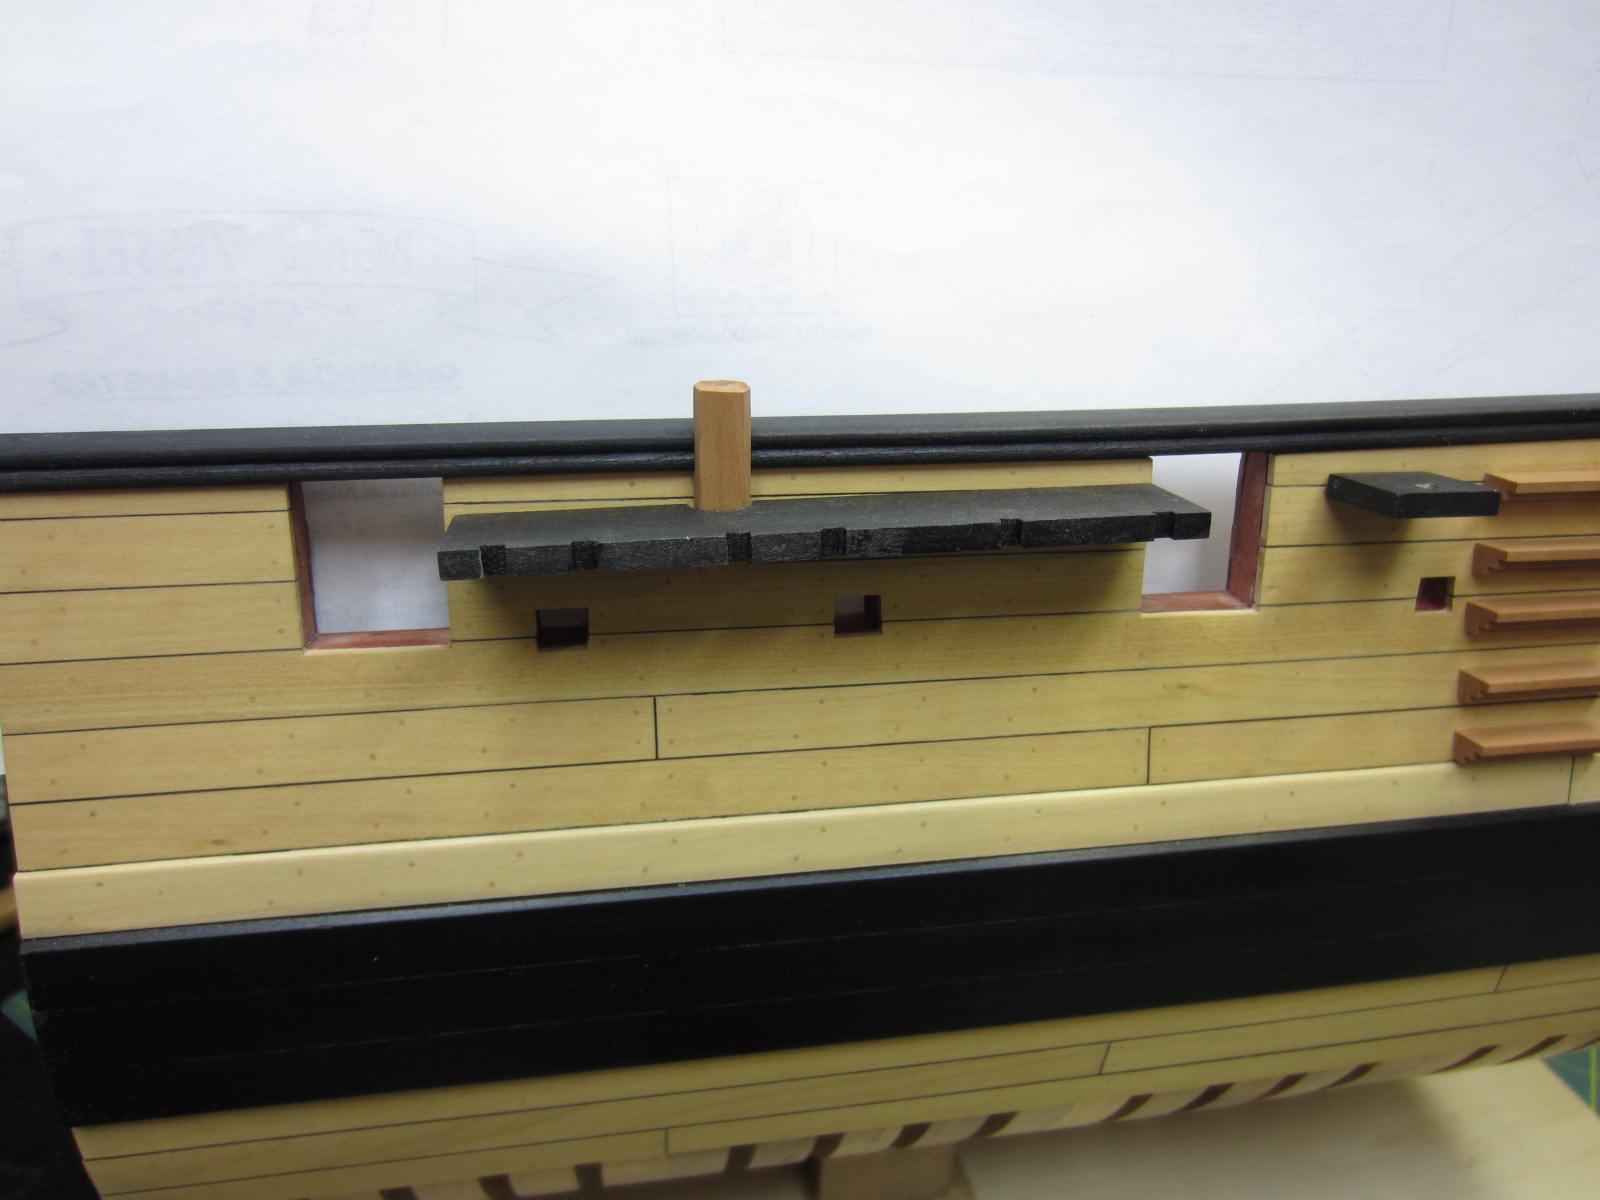
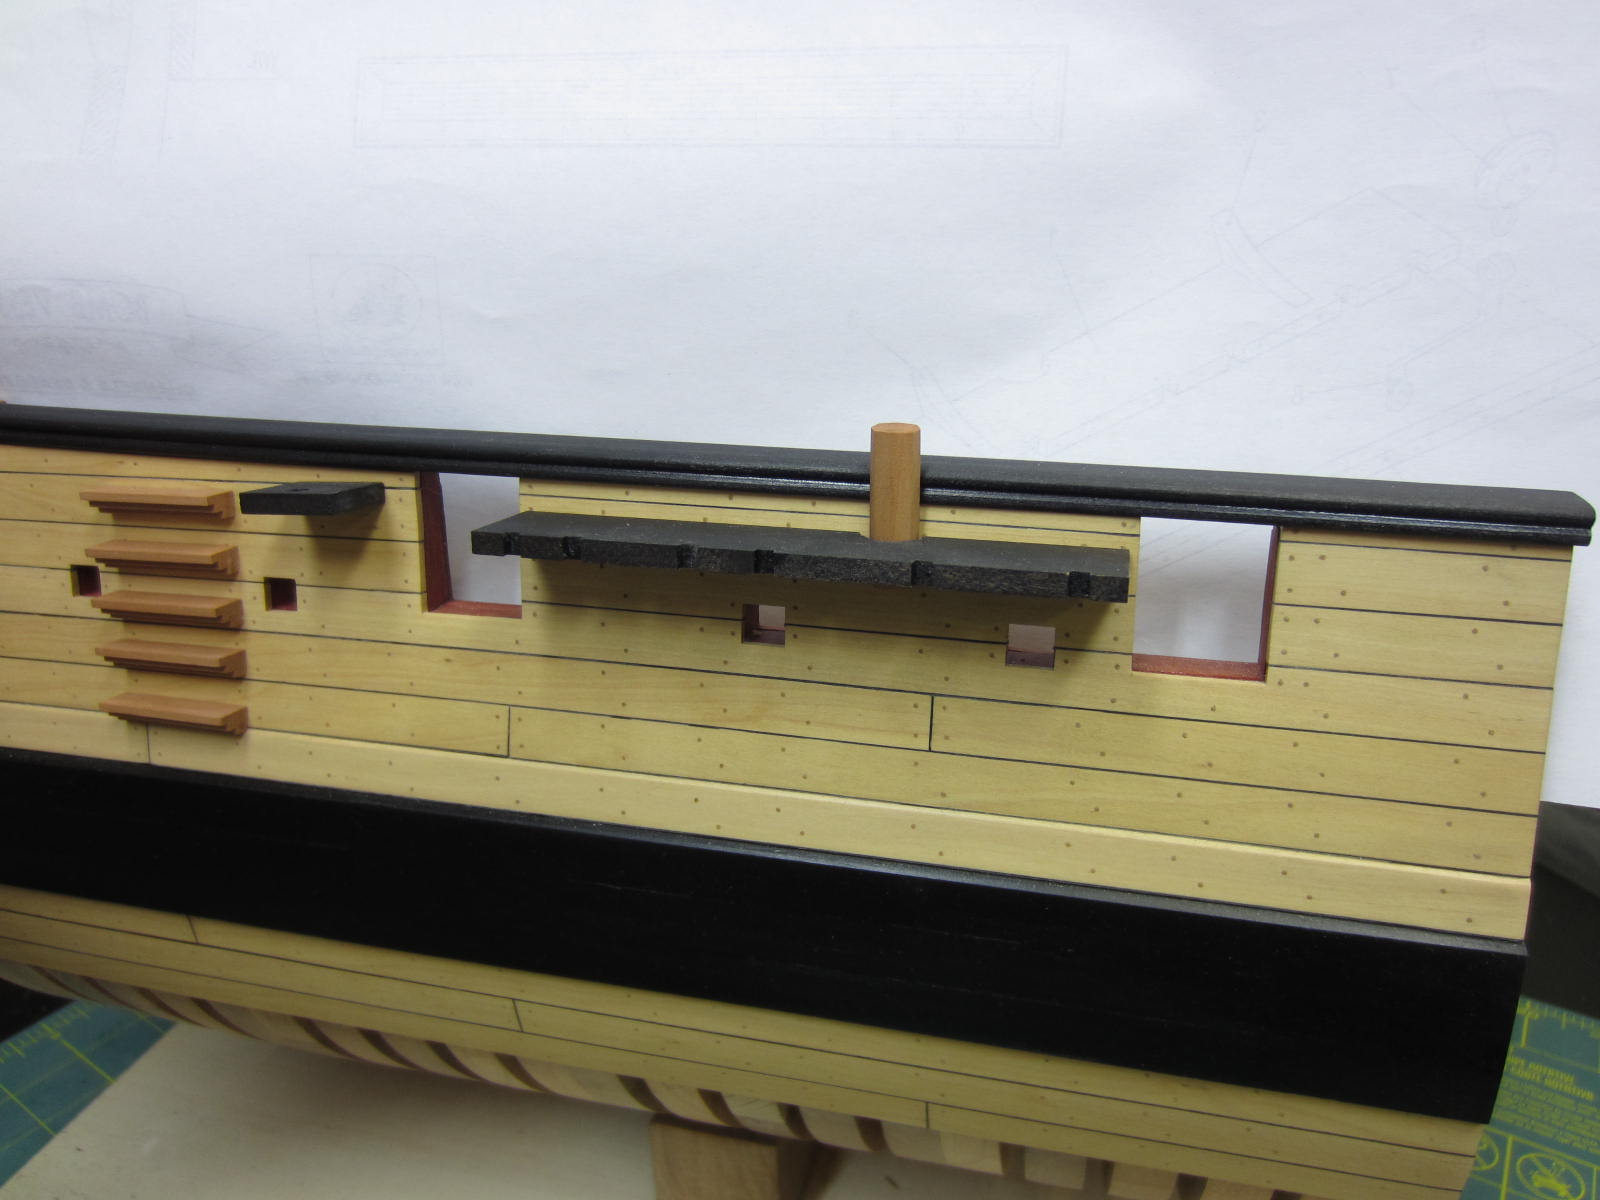
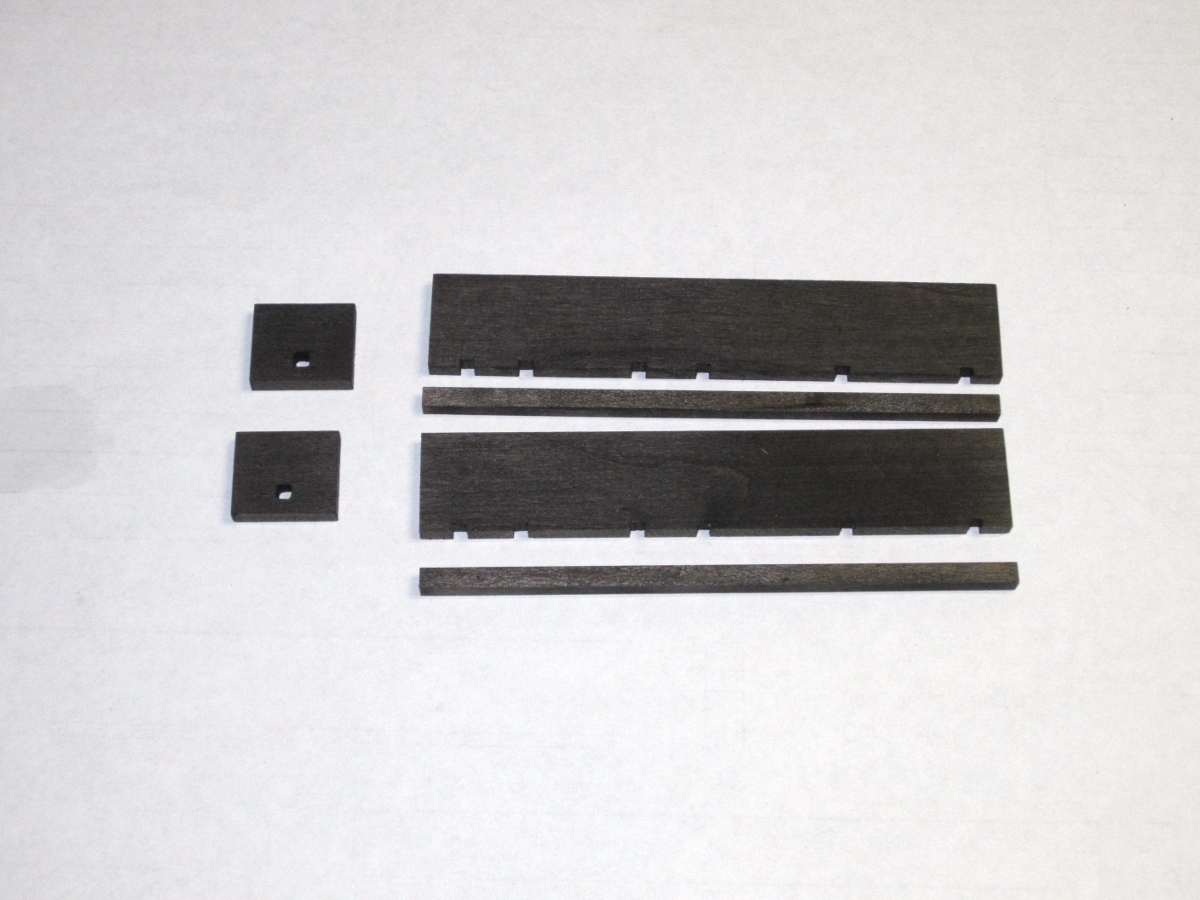
Next up while I wait for my brass for the channels to arrive I will be playing around
making the optional storage cover for the mortar. It has to be removable so I can
show it in either state. Should be fun.
- augie, fnkershner, WackoWolf and 7 others
-
 10
10
-
Beautiful work Maury. Well done.
-
Thank you all for you stopping by and the likes.
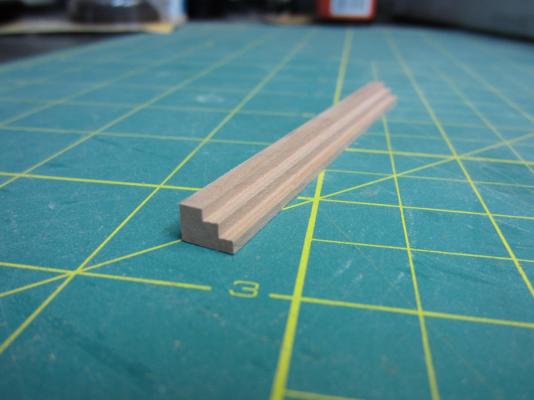
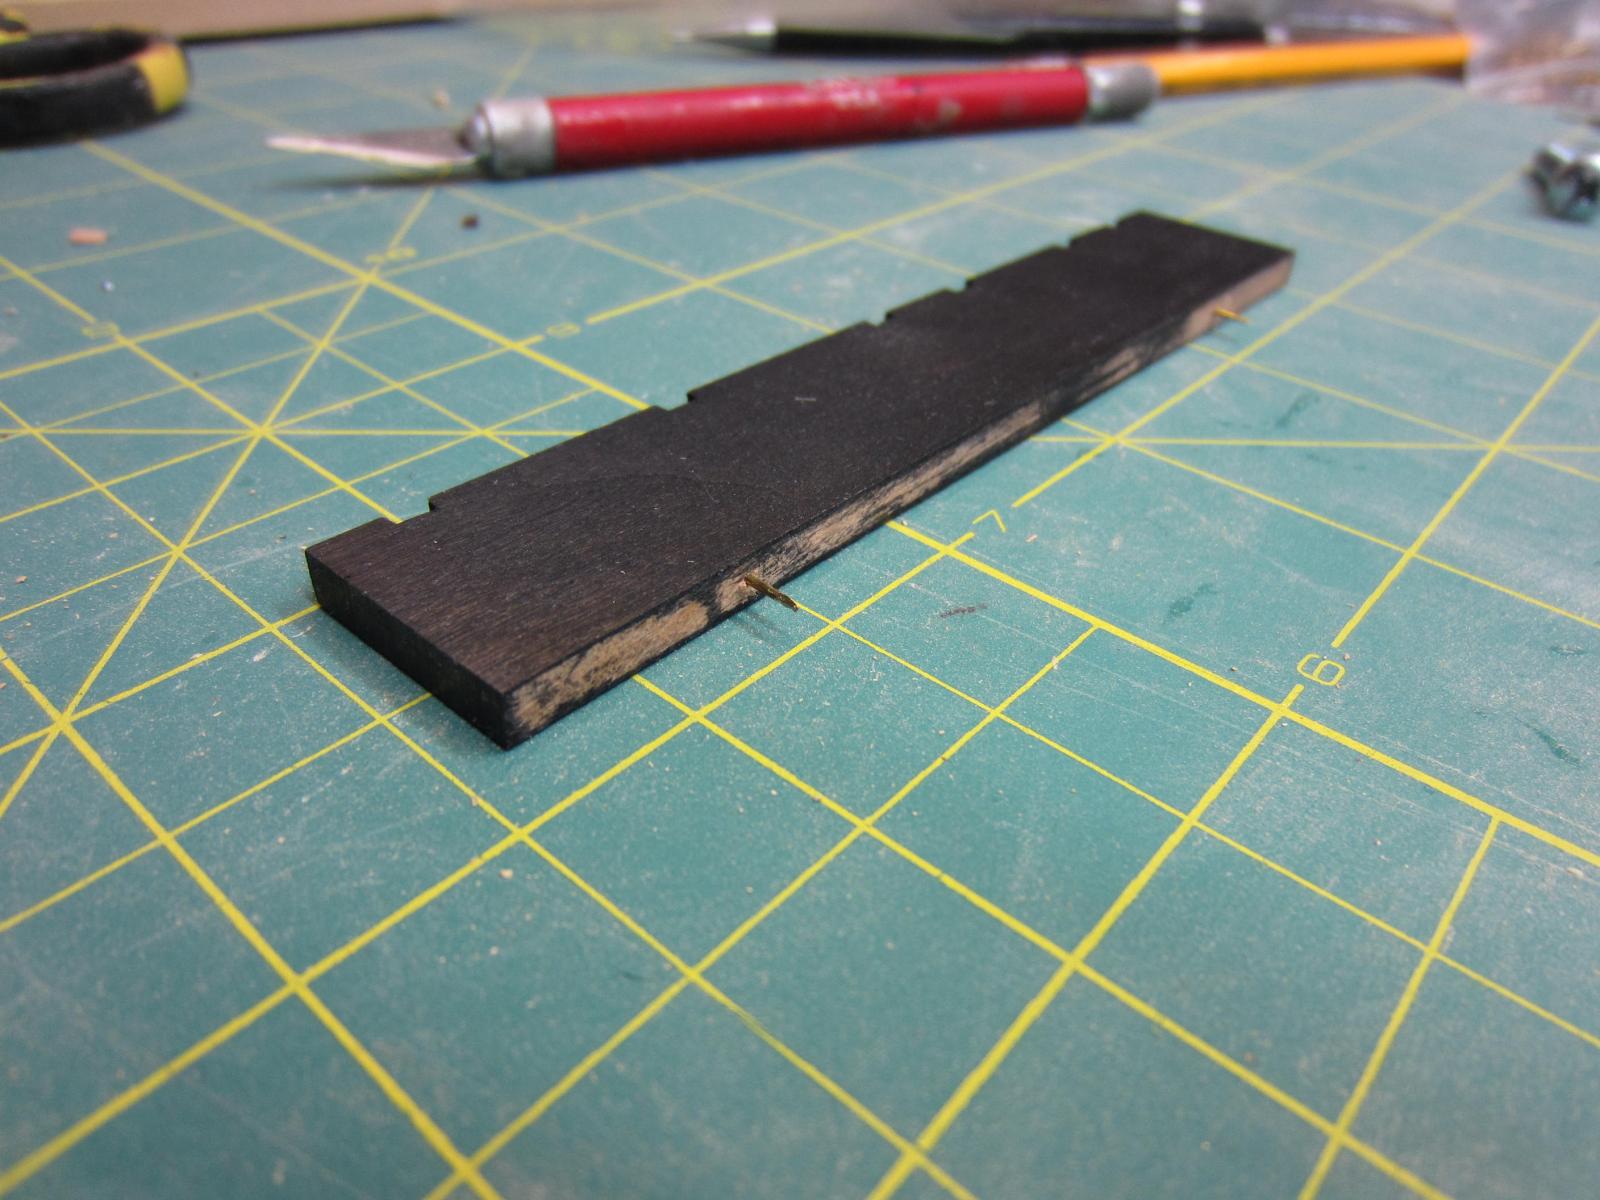
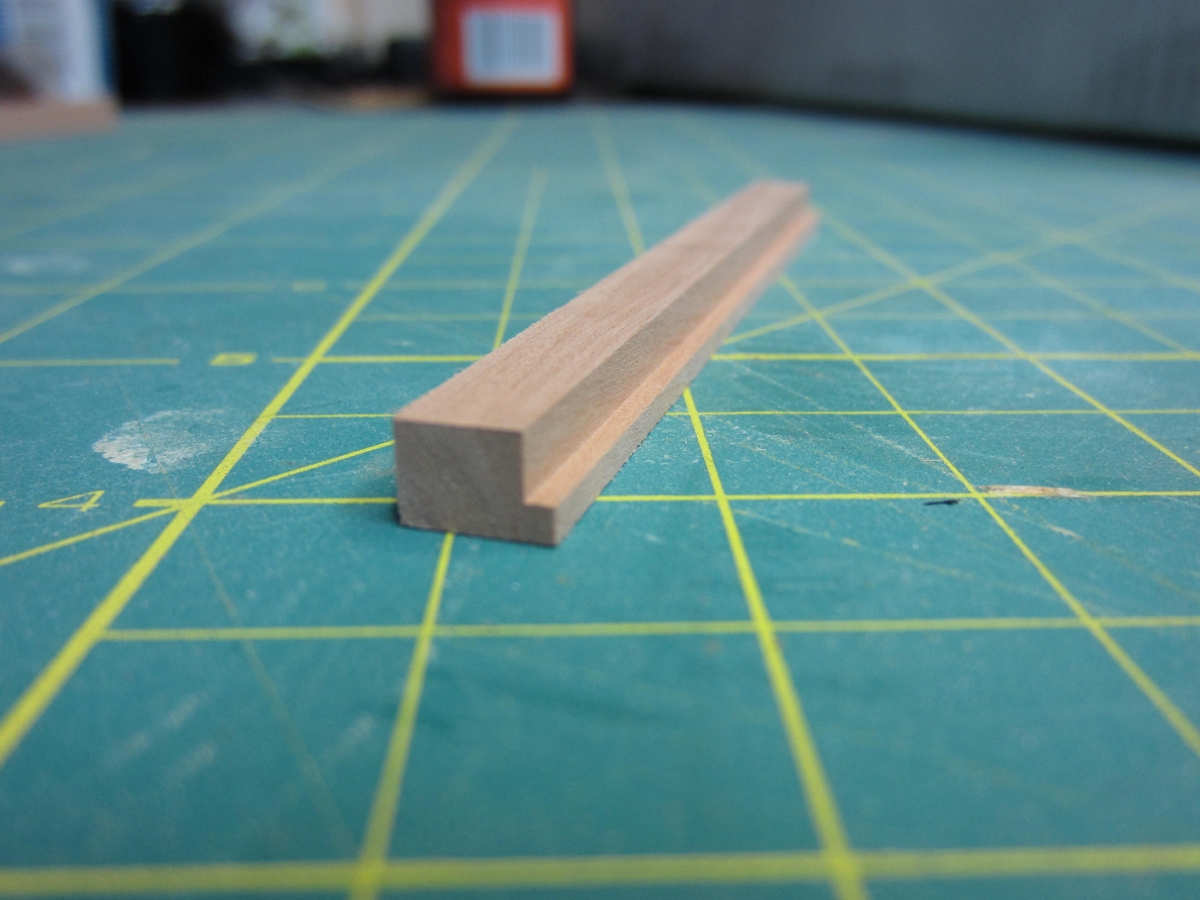
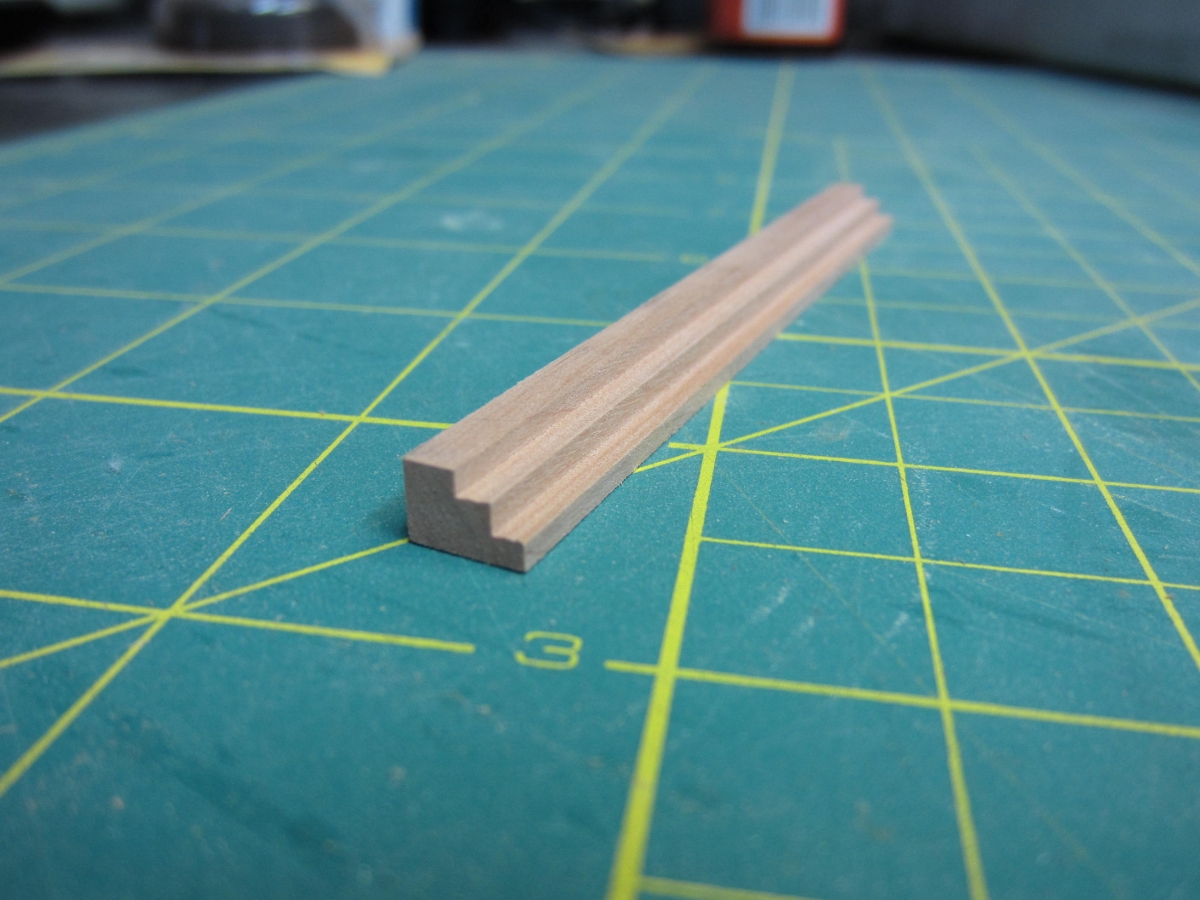
Nothing much to report. I took some cherry and make the channels for the
dead eyes. They are also colored using the Fiebings dye.
Though there is no tension on these I did insert a pin in them so when
tacked and glued to the hull they will be stronger.
Heavens knows they will need it as I bump into things a lot!

-
Nice job on the scuppers and sheaves. I think they really add to the look. If you hadn’t fessed
up on the scuppers no one would have known!
-
Hi Sam,
Fantastic work and modification on an already great project. I have her on the shelf to build with my
grandson sometime and I really want to try to duplicate the sails. Wonderful!
-
-
Hi Floyd, List sent to Chuck. Also you can direct people to me for the list too.
-
Very crisp!
Thanks Augie, That’s one of the pleasures of a Jim Saw. It allows me to do things I could never do before!
-
Hi Bob, Very well done on the model, stand and display case. I love them all.
-
Hi Floyd, The material list in the kit calls for the following;
Strip wood
6 @ 1/32” x 1/32” x 12”
10 @ 1/32” x 3/16” x 12”
1 @ 1/32”x 3/32” x 12”
40 @ 1/32” x 1/8” x 12”
10 @ 1/32” x 5/32” x 12”
3 @ 1/16” x 1/16” x 12”
1 @ 1/16” x 3/16” x 12”
1 @ 5/32” x 5/32” x 12”
The keel, false keel, stem and rudder are cut from 3/32” sheet.
The transom is cut from 1/16” sheet.
I hope this helps.
- maddog33, fnkershner and 42rocker
-
3
-
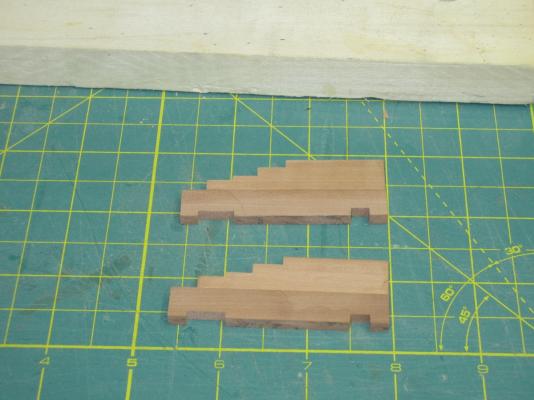
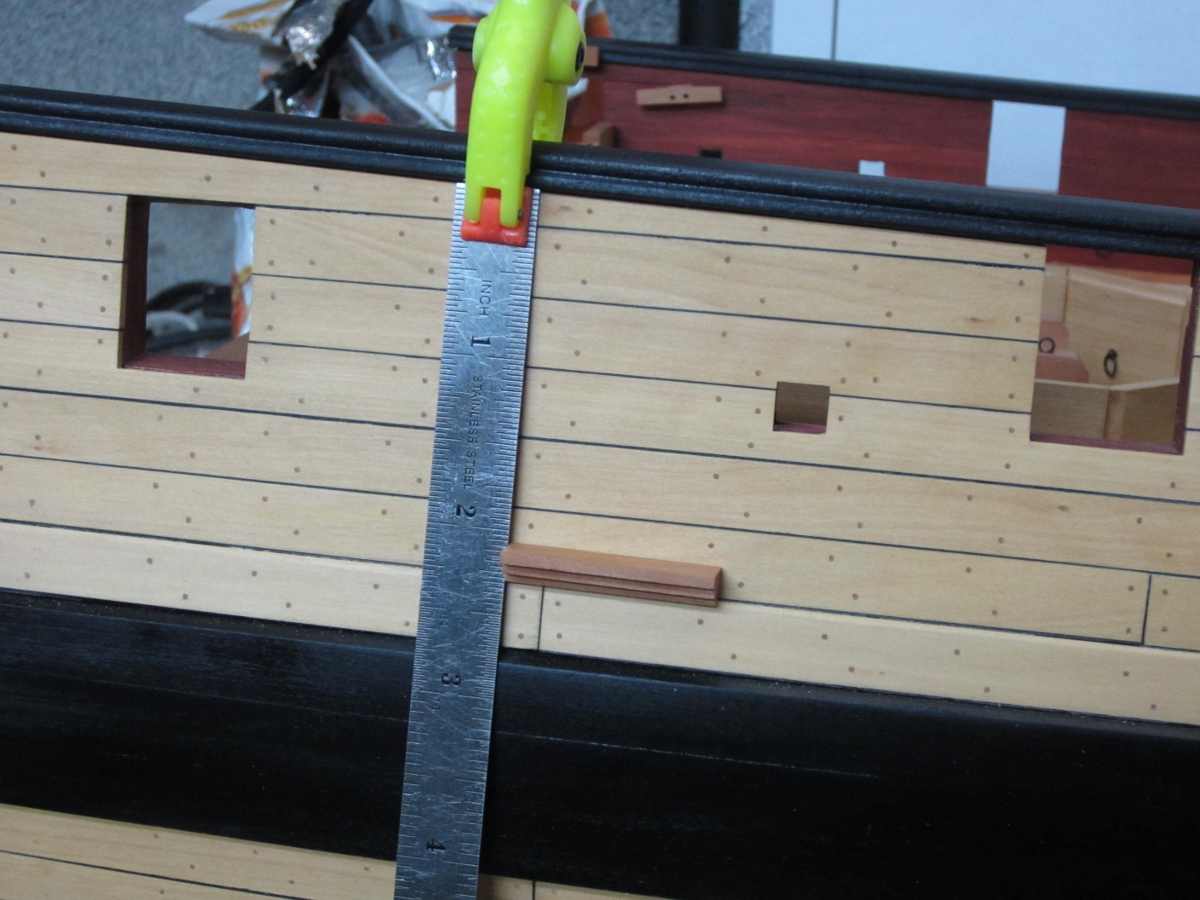
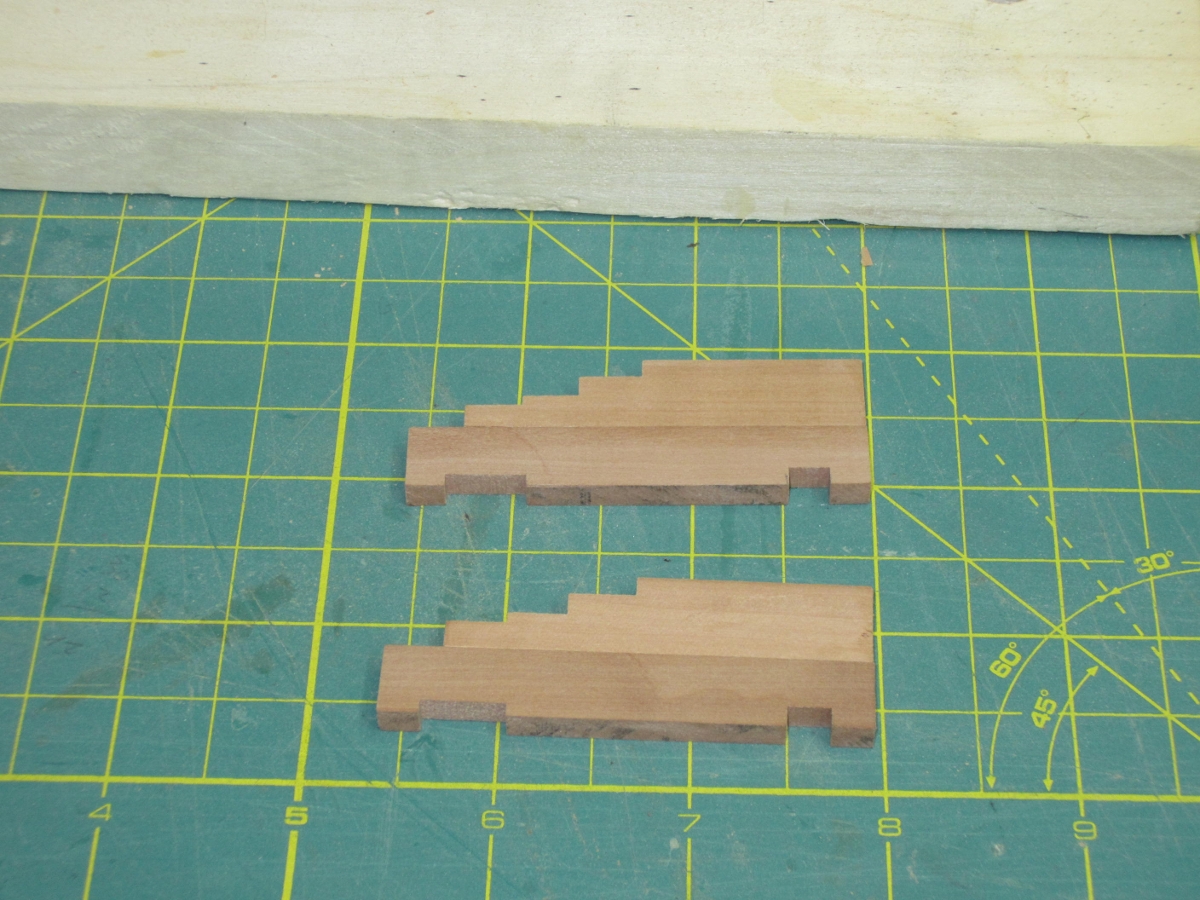
I kinda shifted gears and decided to make the entry steps. They are cut from
swiss pear using the Byrne’s table saw.

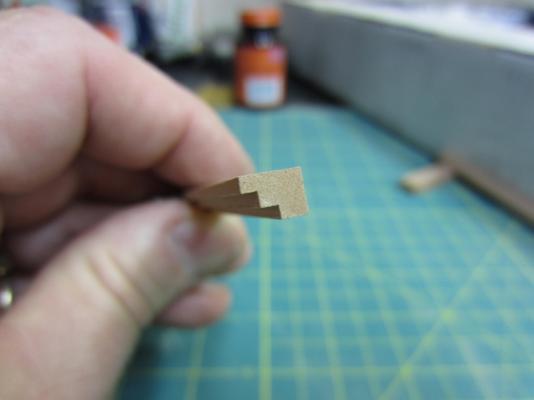
I clamped a ruler to the hull where they were located to keep a straight line
and assist with the spacing.


- Elia, Dubz, sonicmcdude and 12 others
-
15
-
Thank you so much Christian.
-
Hi Antony, Thanks and a Happy New Year to you!
Gary, thank you so much for that information and your kind words.
-
Hi all, Thanks for stopping by and all the likes!
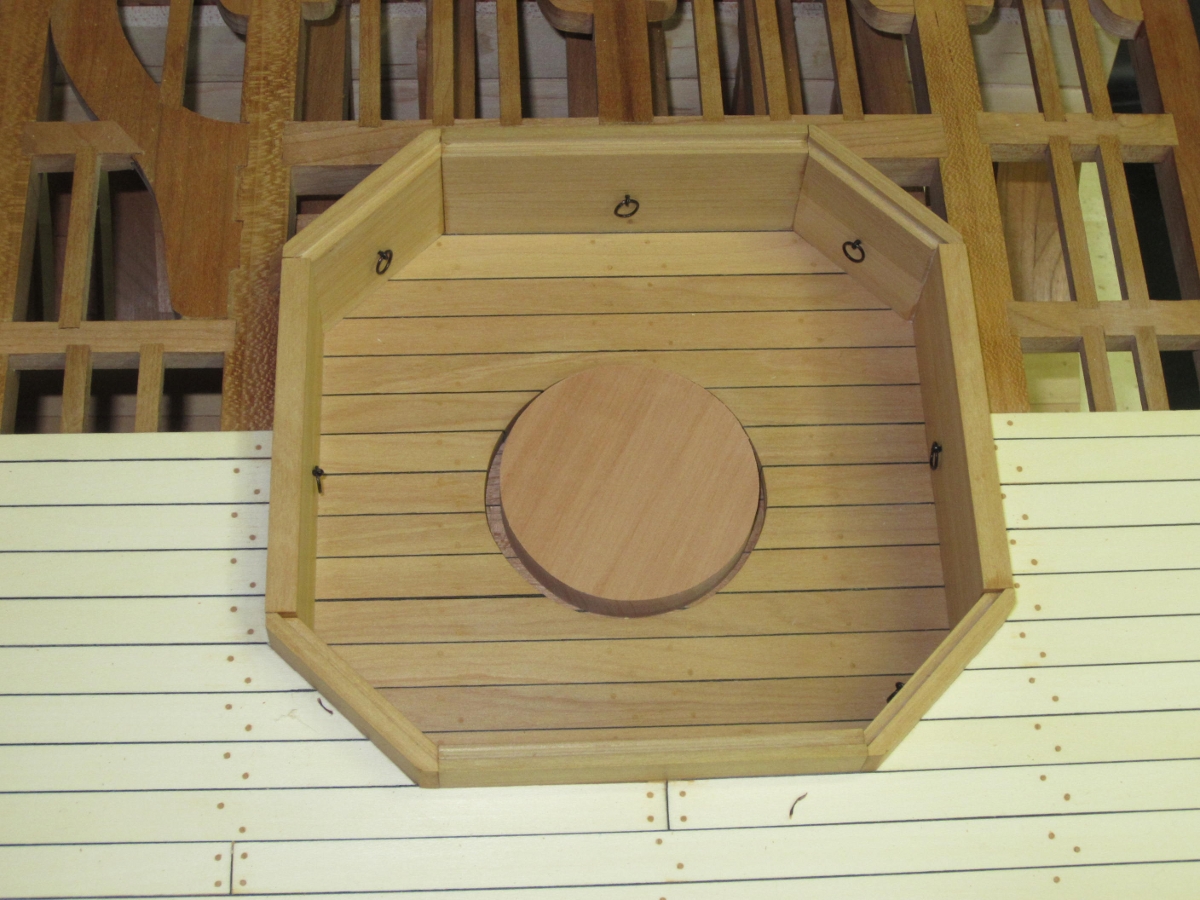
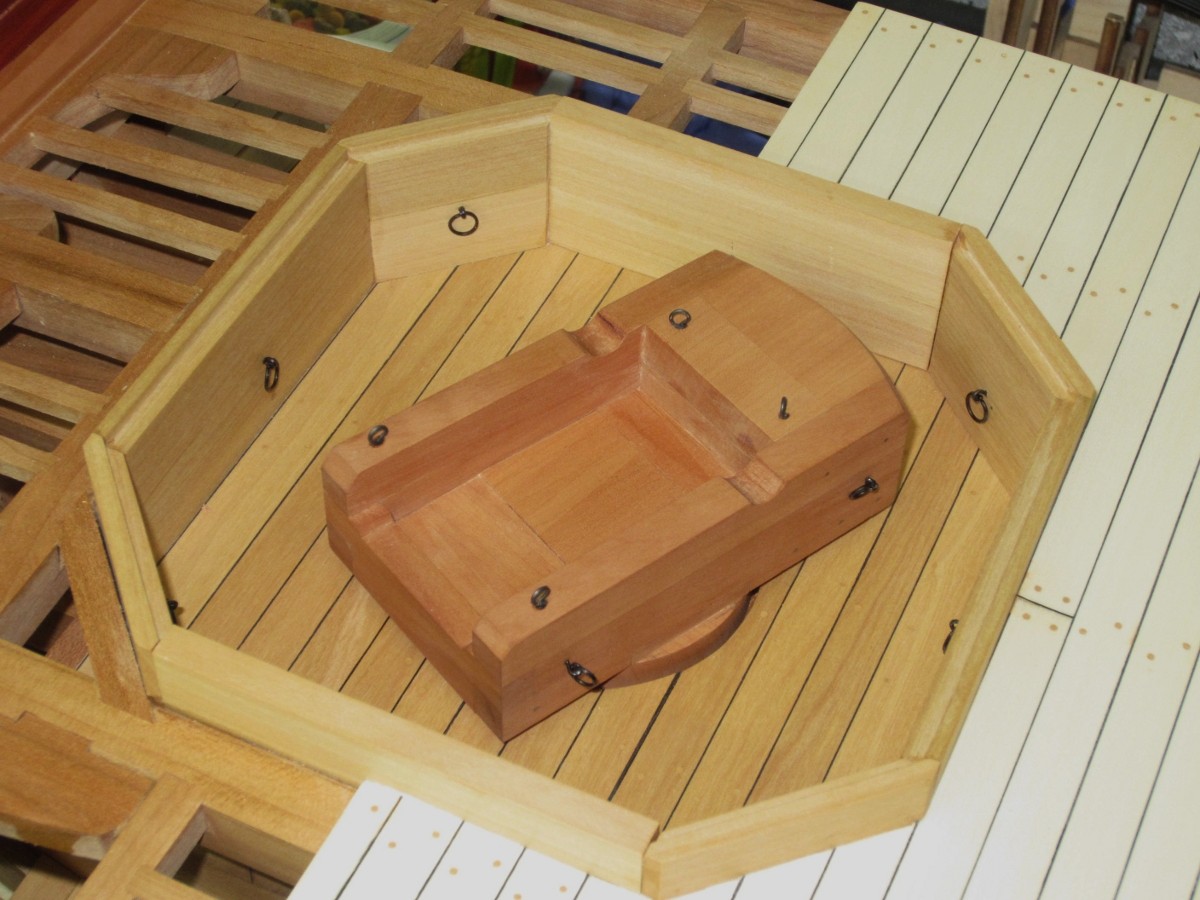
It’s really nice having a couple of days off with no obligations. You can really get some fun
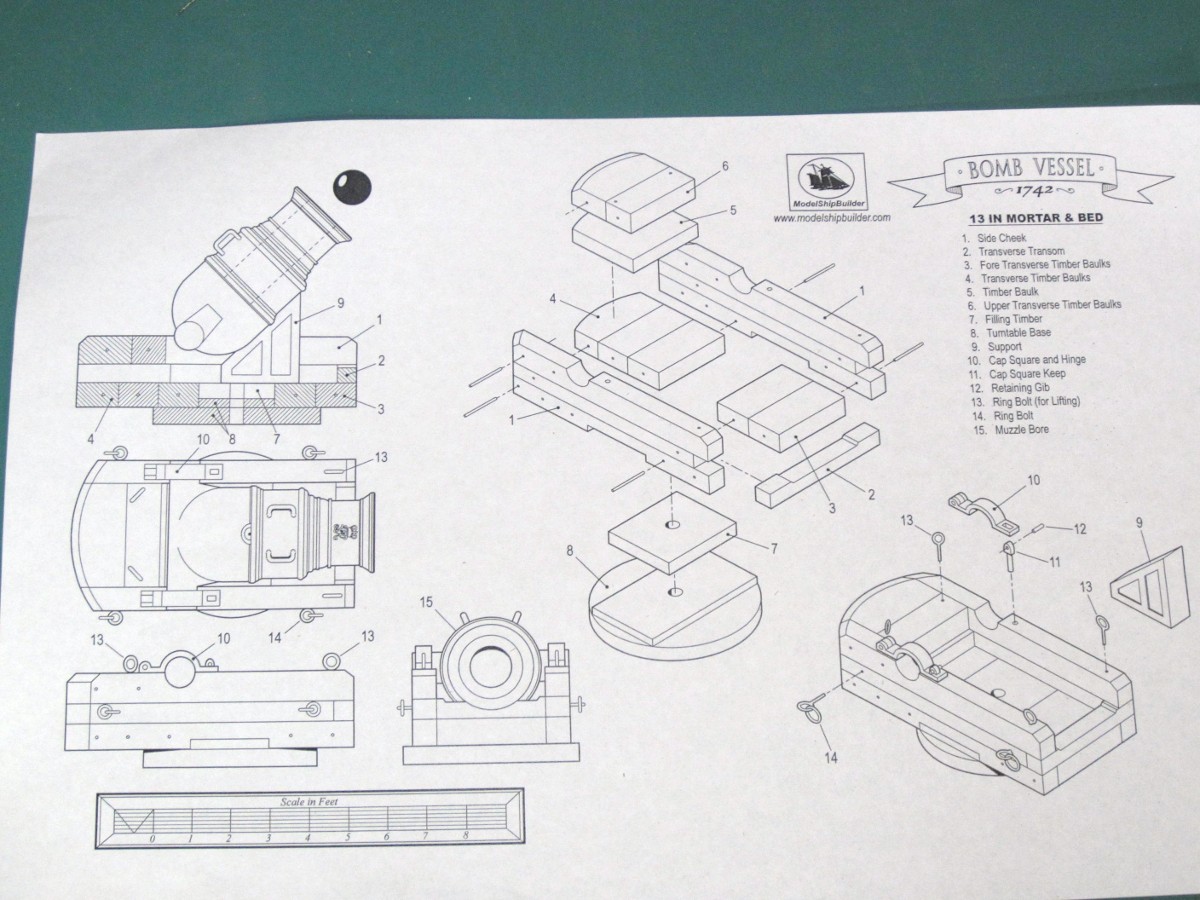
stuff done. I assembled the main mortar carriage. It was pretty straight forward and like
the deck and beams below, very thick and rugged.

I have held off on the cap square and hinge until I have a cannon to match it to.
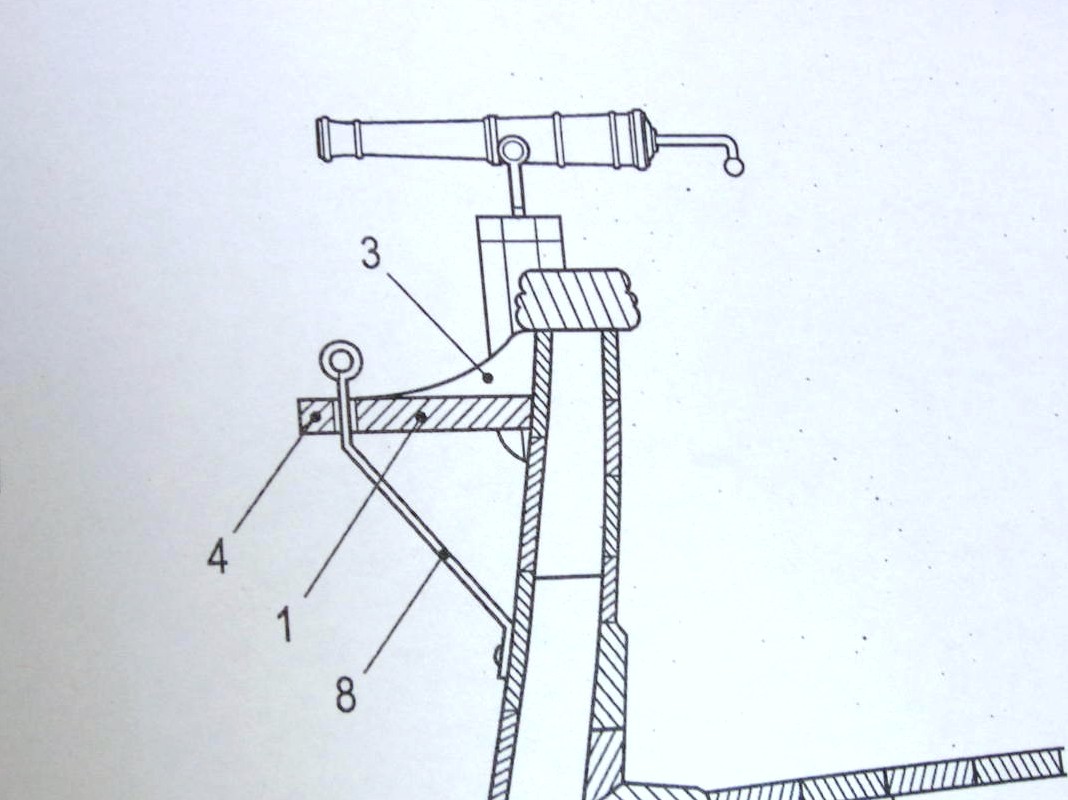
Now looking ahead to the chain plates here are two pictures showing how the plans depict them.

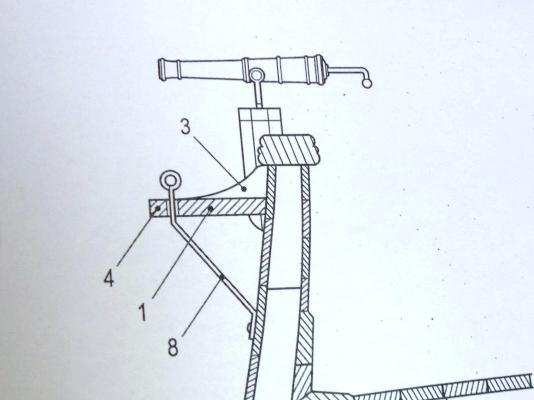
My question to you is would they be like that or would they be “links” like I did on the Confederacy?

Thanks
-
Nice Ben you'll be treated with hours of fun.
Remco
Hi Ben,
Remco’s “hours of fun” will be joyfully measured in thousands not hundreds.

This is a great model and I know you will do a wondeful job on it.
-
Hi Bob, She’s coming along very nicely. I understand what you are saying about switching
to something a little more “fun” once in a while but then there are good points for just
diving in and getting those pesky treenails done.
-
Thanks for all your visits, likes and comments.
Thanks Augie. Yeah I constantly go huh when I measure the plans and it calls for a piece to be ¼” thick x ½” wide!
Thank you Paddy and the same to you and yours!
Grant and Joe, I’m only on chucks and already its self centering or not, 2” or 3”, get a combination of both, man talk
about sensory overload. And this is only the start. I haven’t even looked at the other 100 options!
Thanks Bob, Yeah if all goes well once I make the barrels I’m sure I’ll use both of them. I also noticed that they
don’t show the blocks or line. Gotta figure out what sizes they should be!
Thanks Chris. I can speak to the disk sander and for scratch work I wouldn’t be without it. I’m just glad to see you
can get some time to spend on the Confederacy with those cute kids of yours.
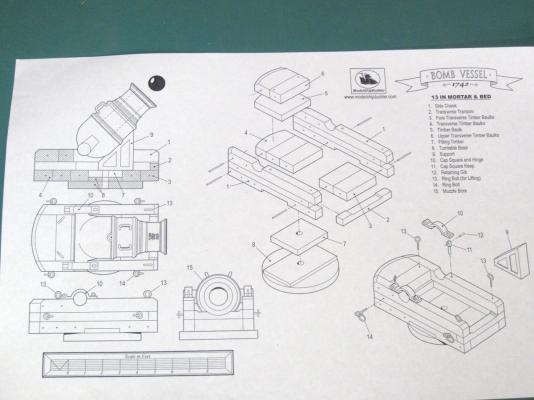
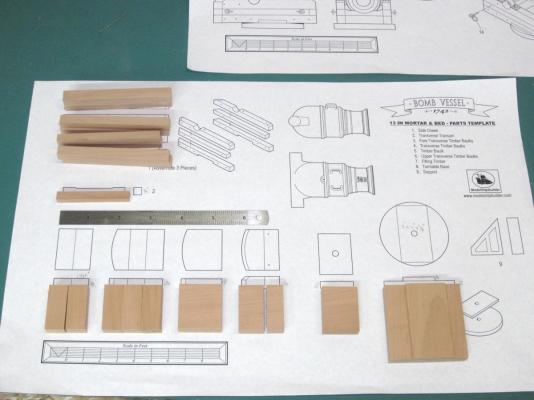
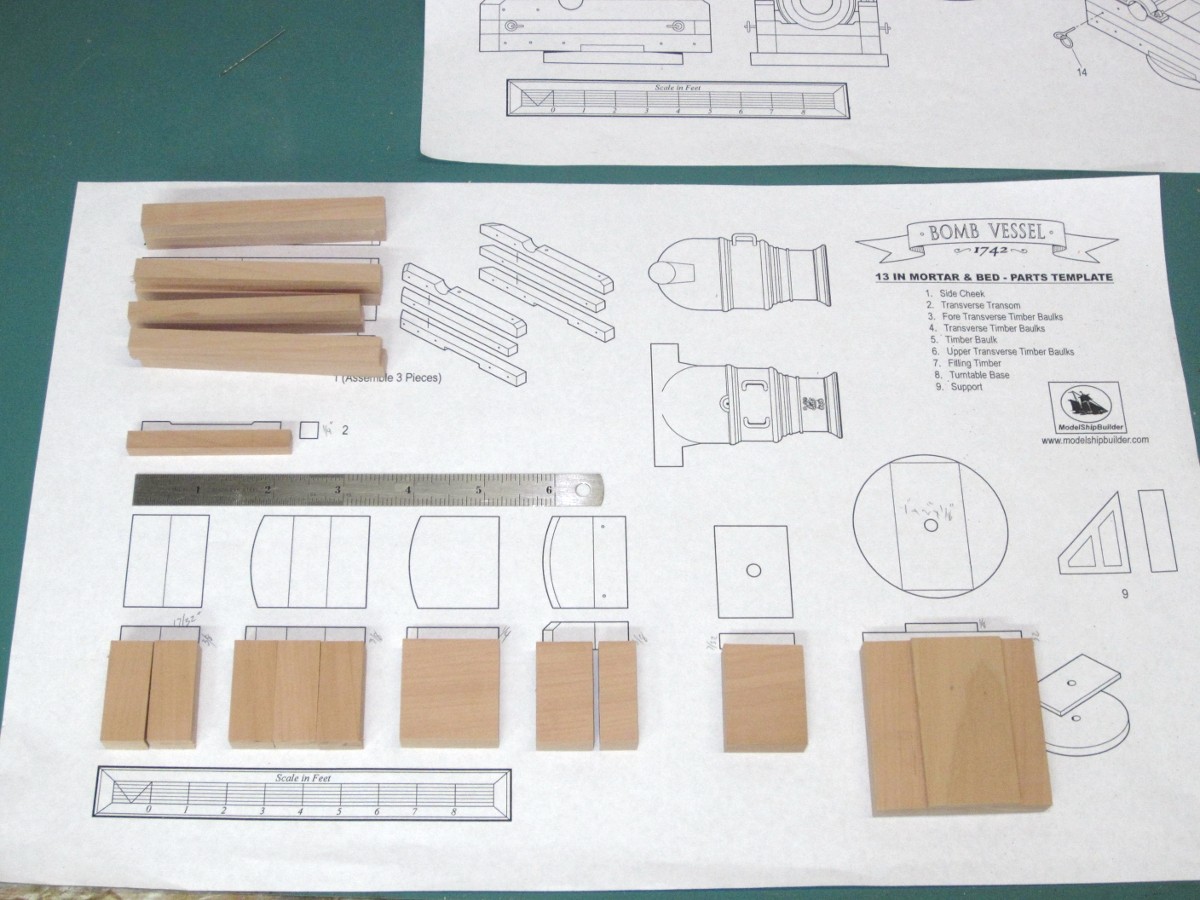
Here are the plans for the mortar carriage and the pieces cut from swiss pear and ready for shaping.
- aykutansin, dnputnam, gjdale and 10 others
-
13
-
Hi Augie, You’re still doing some fine work I see. Everything looks spot on and couldn’t be better. You
know the best thing is you’re only about half way done with the planking. So much more fun yet to go!
Really though your approach of slow and steady is working great. Some of us
 who tend to move at too
 quick a pace suffer for it. Well done as usual! Happy New Year!
-
Happy New Year to all of you!
Hi Grant, Like I’ll have any issues wanting to get more accessories! OK I’ve been looking at the
three and four jaw chucks and I realize that I will eventually need both types. The one thing I am
unsure about is if the self centering chucks are better than the regular jaws chucks. From what
I’ve read self centering is nice and handy but the independent jaws allow for more “accuracy”.
What types do you use?
Hi Ben, Thanks for stopping by. As I said above I will get a 4 jaw chuck just not sure which type
yet. You know you don’t have to wait. We can take that plunge together!

OK onto the fun stuff.
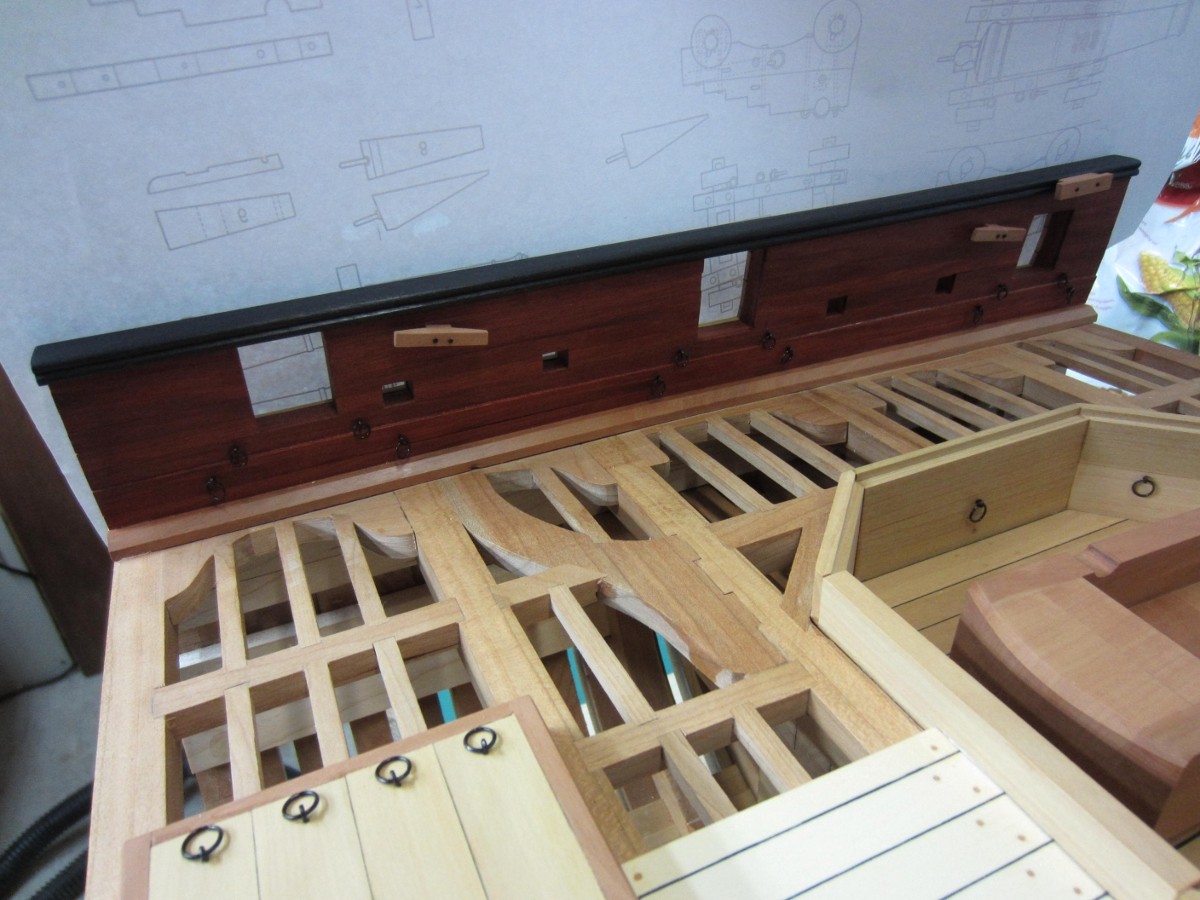
Here is the starboard side with all the assorted ring bolts in place. I made them from some 20 gauge
wire I had on hand.

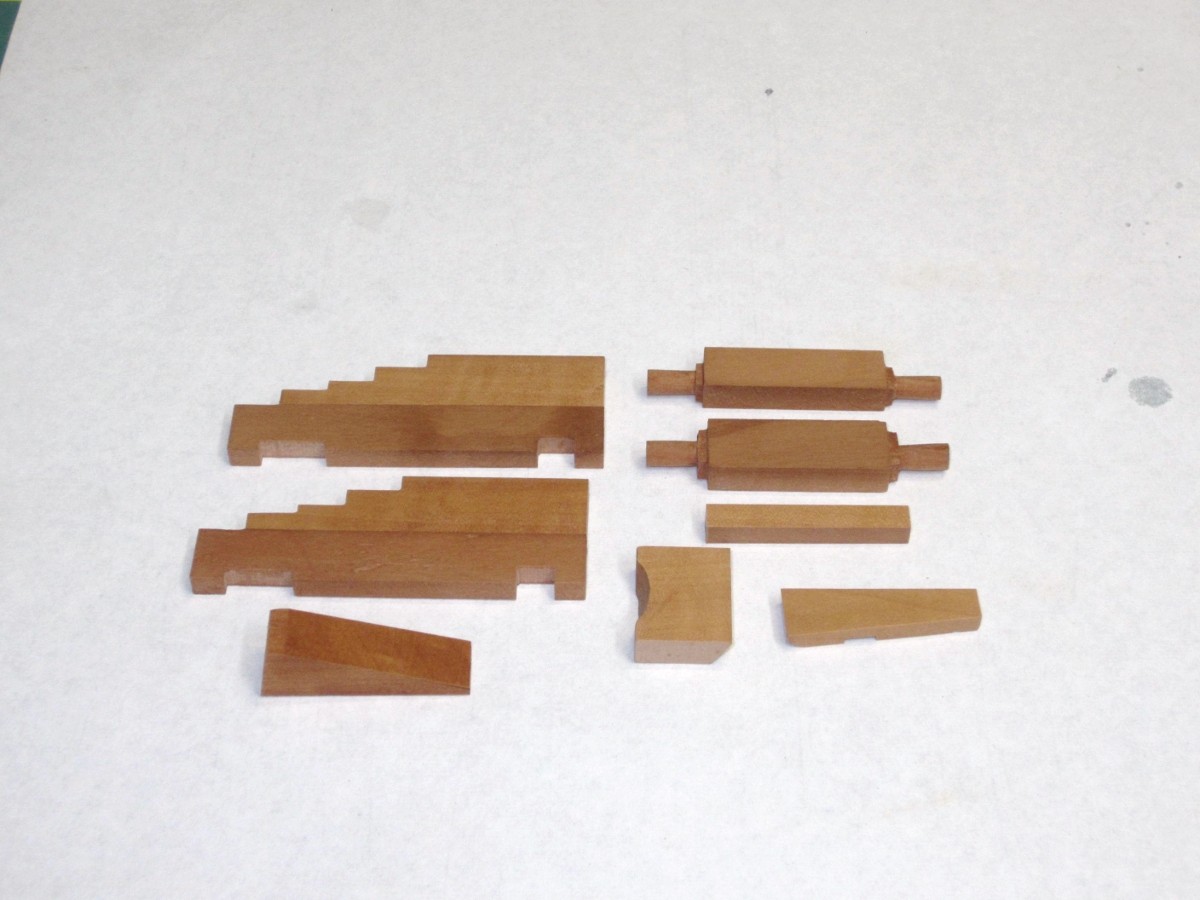
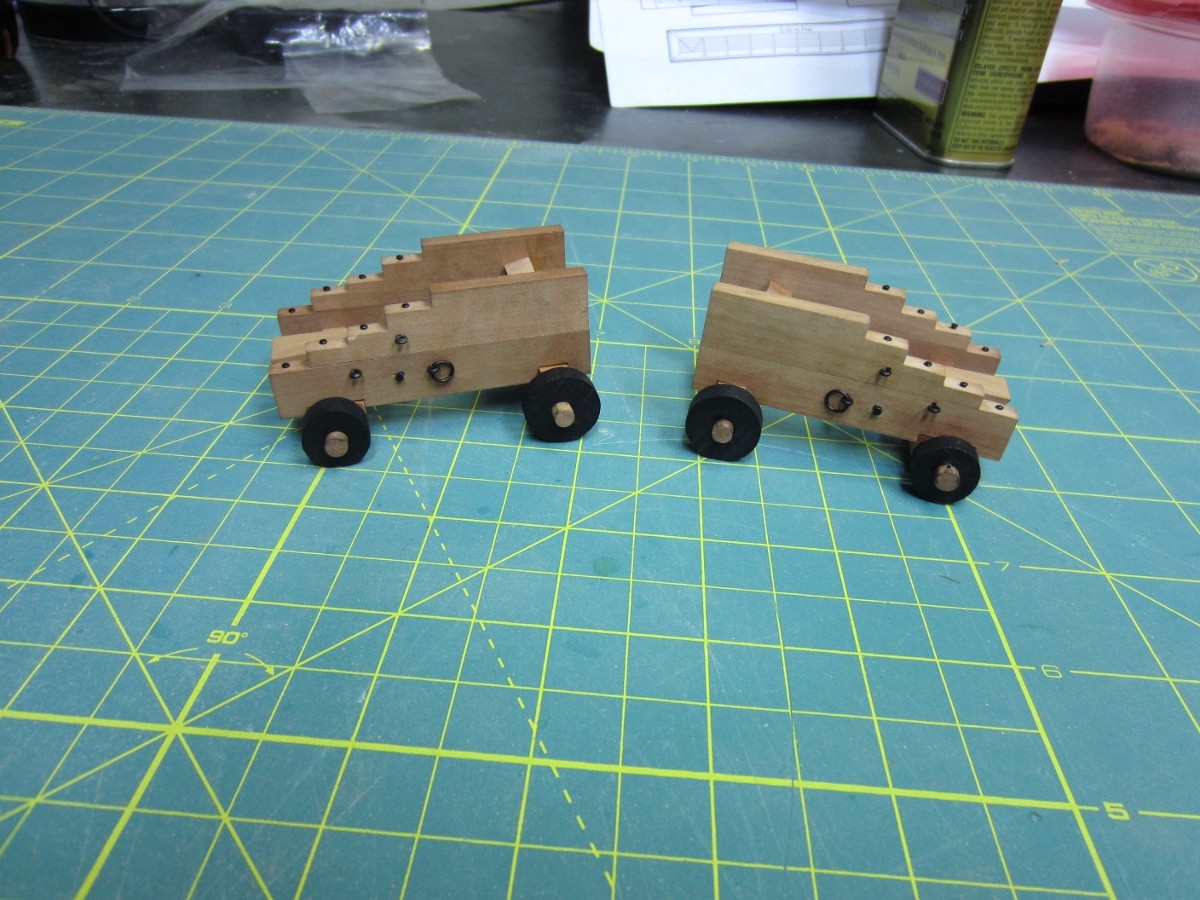
I also figured I don’t need cannon barrels to make the carriages so I started on them. They are
made from swiss pear. I made two just in case I decided to add a second cannon. I figured it was
easier to make them together instead of having to go back and make a second one.


Bomb Vessel Granado by Rustyj - FINISHED - 1:24 - cross-section
in - Build logs for subjects built 1501 - 1750
Posted · Edited by Rustyj
I’ve been working on the chain plates. I used a brass sheet and old 90 TPI blade on the Byrnes
table saw and cut strips for the chain plates. I roughly bent them to shape and will fit them to
each individual location as each one will be unique. I chose to paint the assemblies too.
For the deadeyes I cut some correct sized dowel to and then using files and sandpaper shaped them.