


Rustyj
-
Posts
2,449 -
Joined
-
Last visited
Content Type
Profiles
Forums
Gallery
Events
Posts posted by Rustyj
-
-
Hi Bob. Great work as always!

-
Hi All,
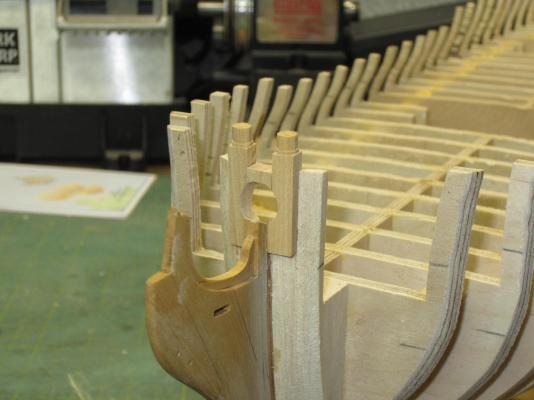
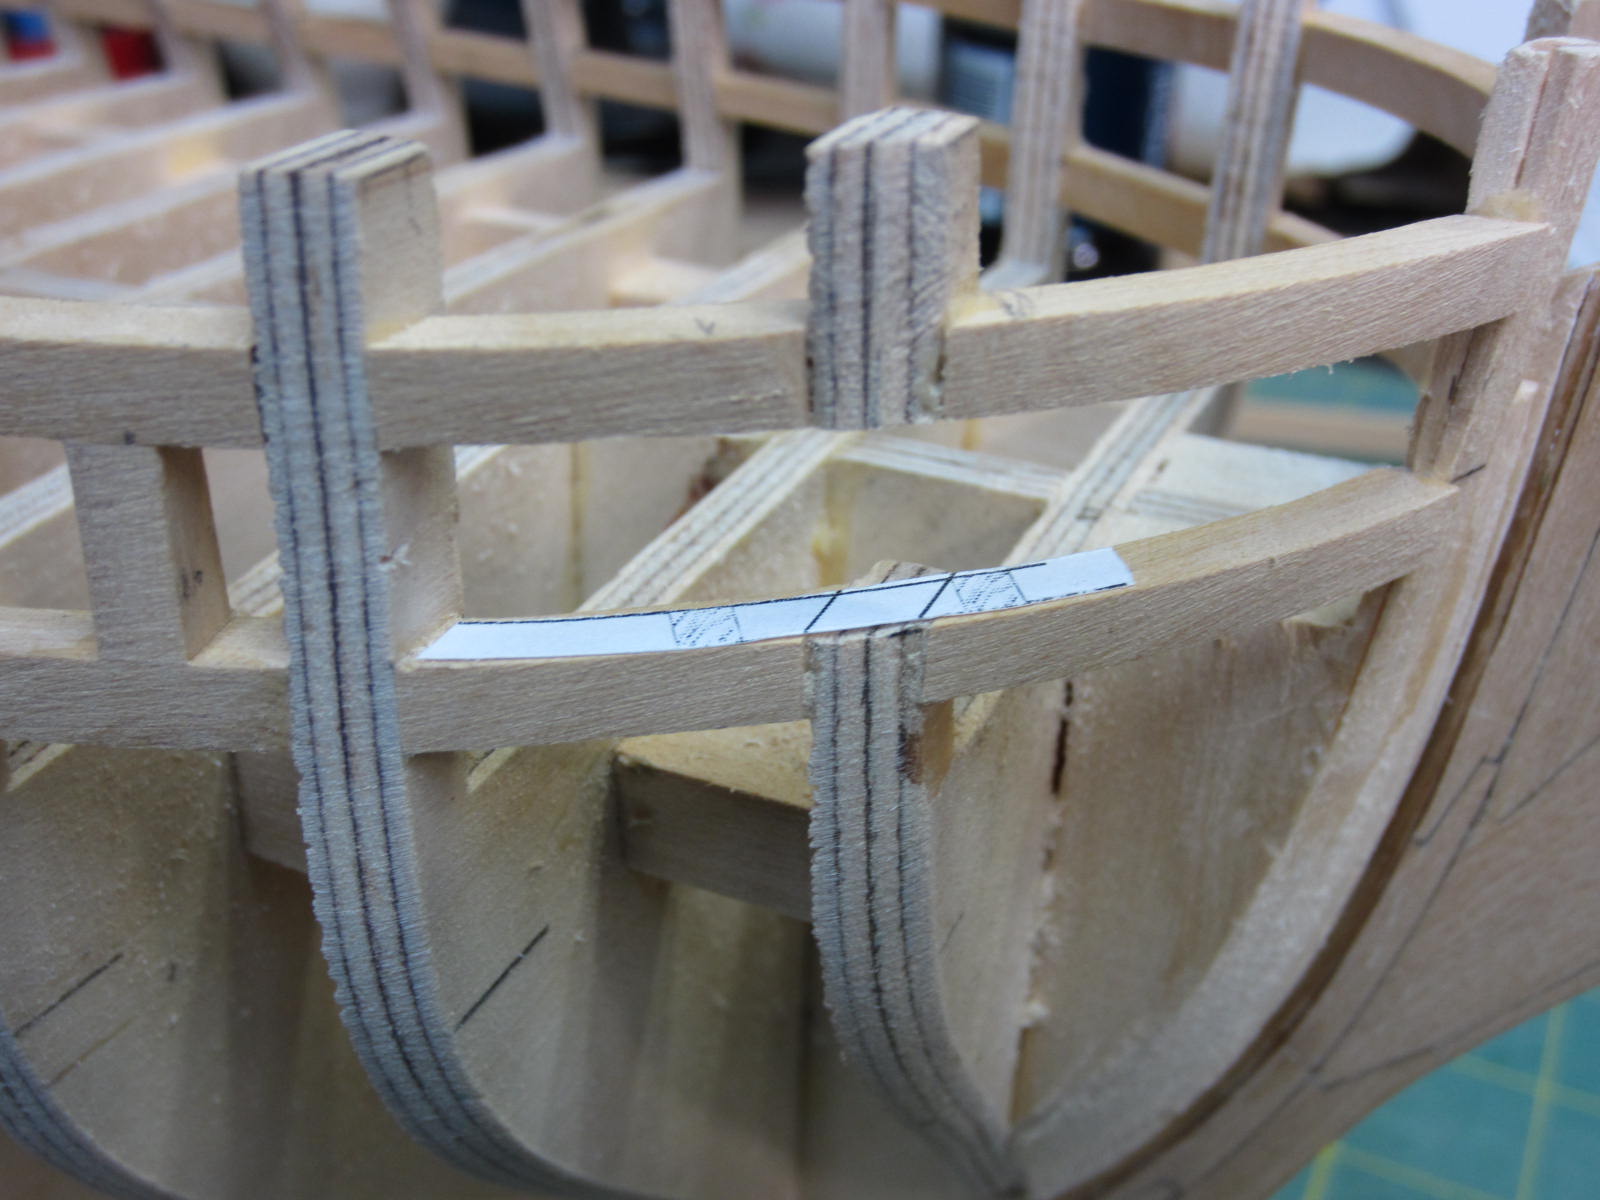
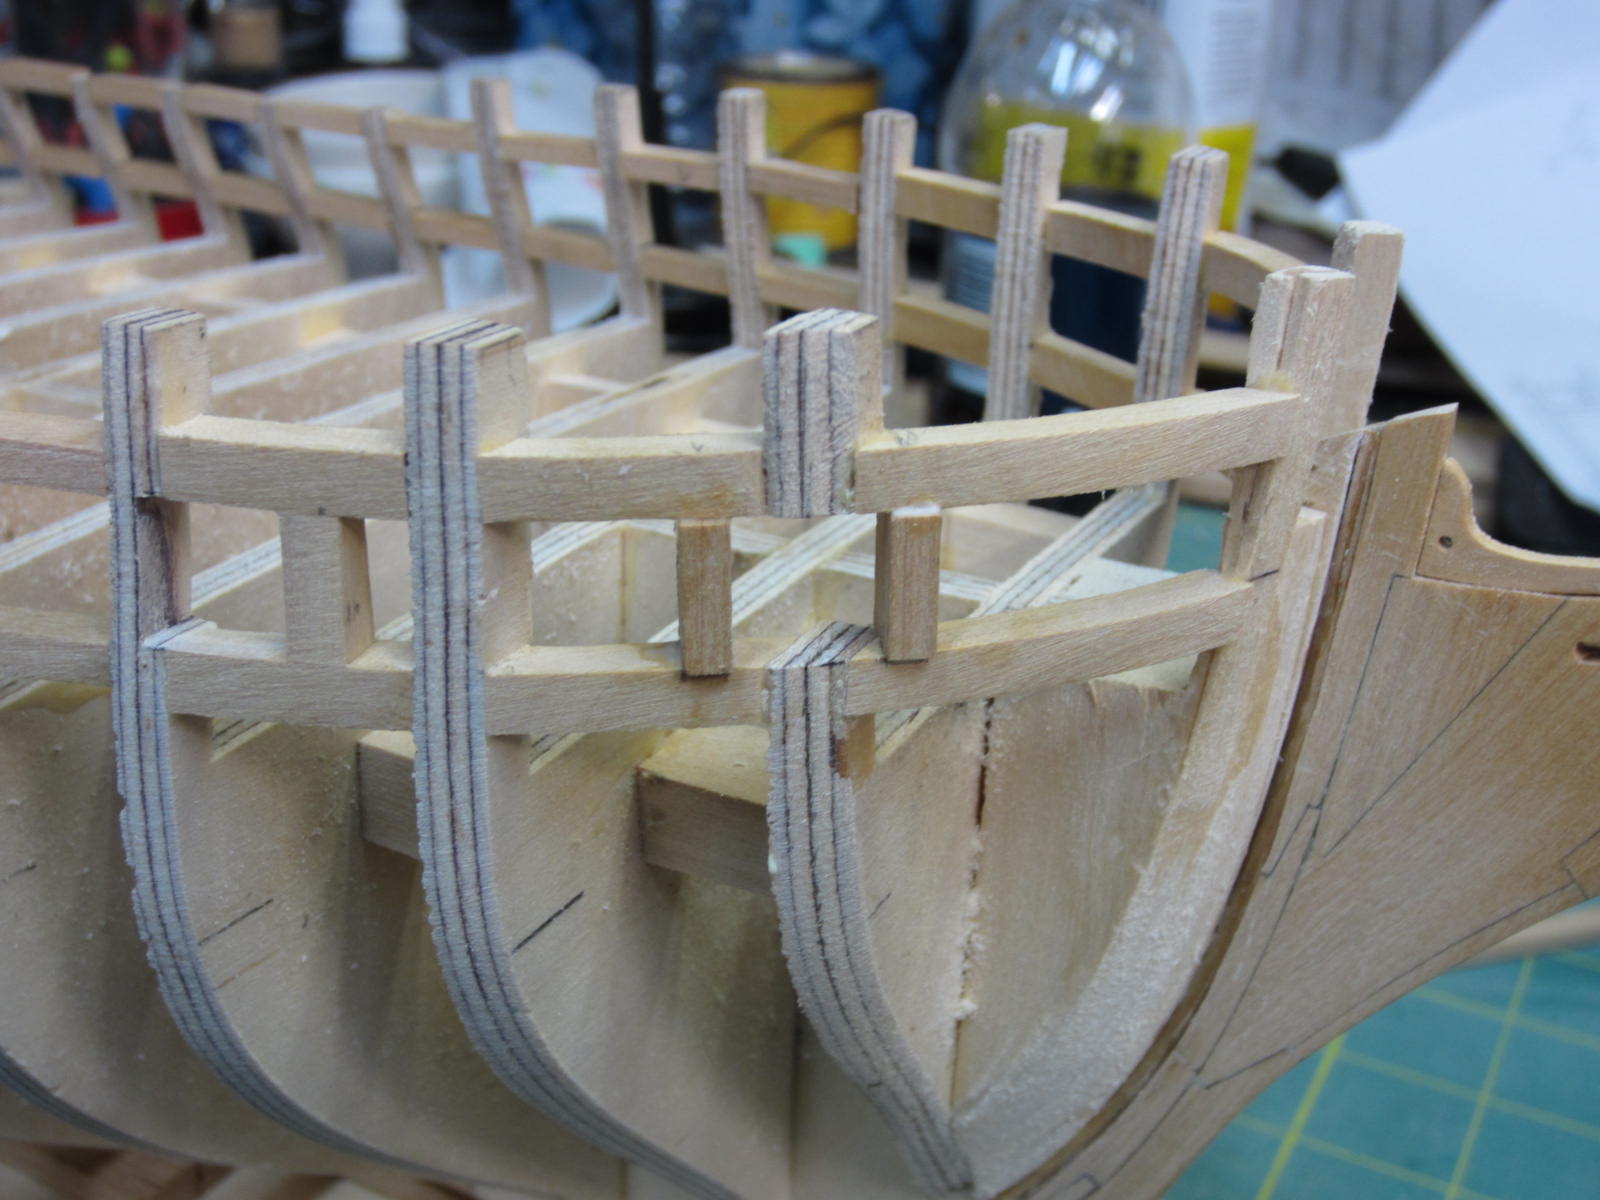
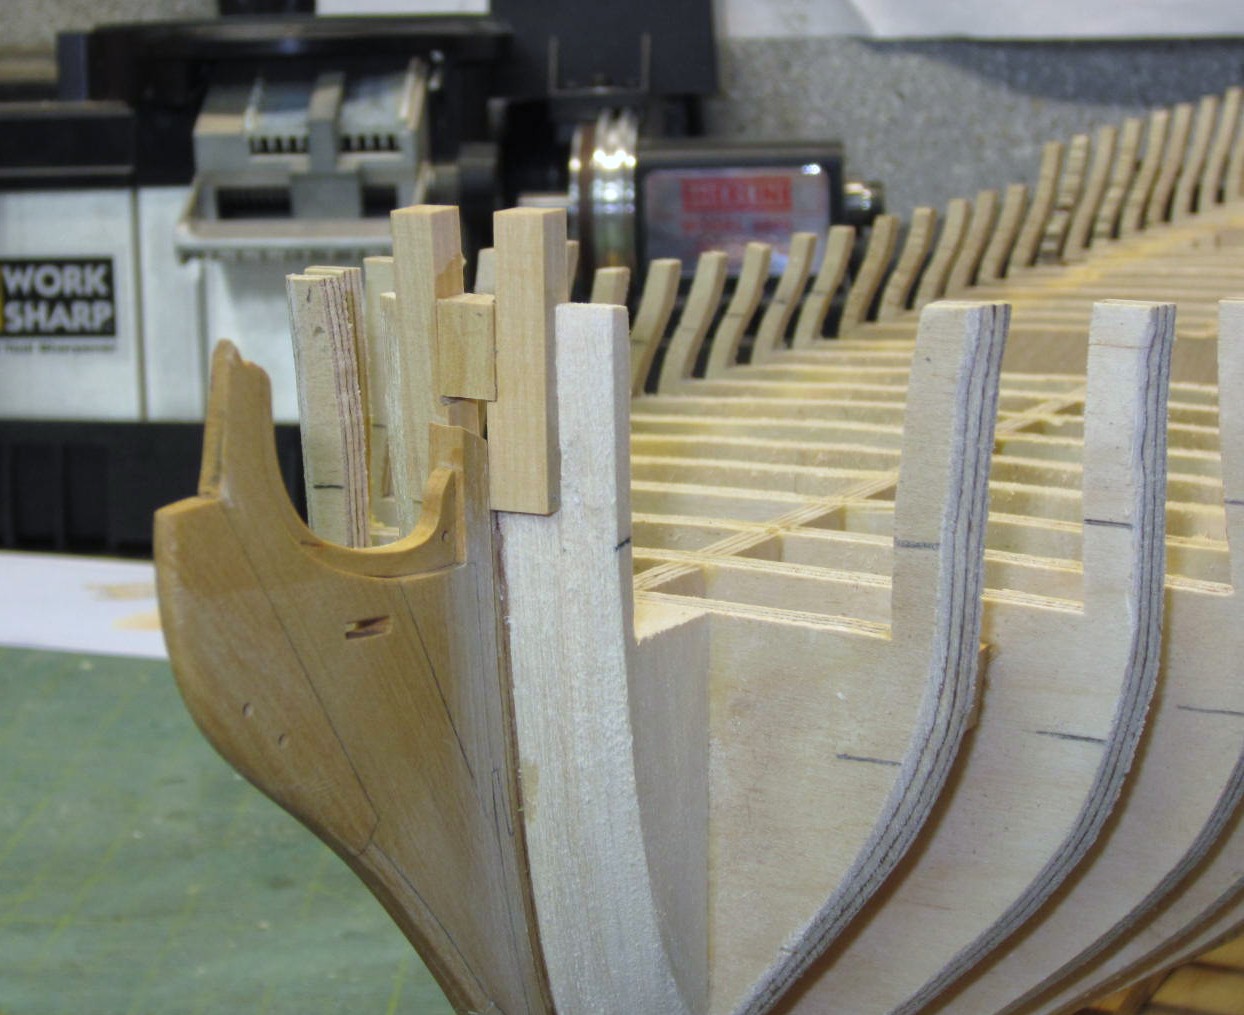
The framing of the gun ports is moving along nicely and one pleasant thing I learned was that
there are no sweep ports to worry about.
A batten strip was pinned to the bulwarks at the previously marked reference lines and a smooth
run was established. I then marked the bulkheads for the final placement of the sills. The sill and
lintels were cut from boxwood.
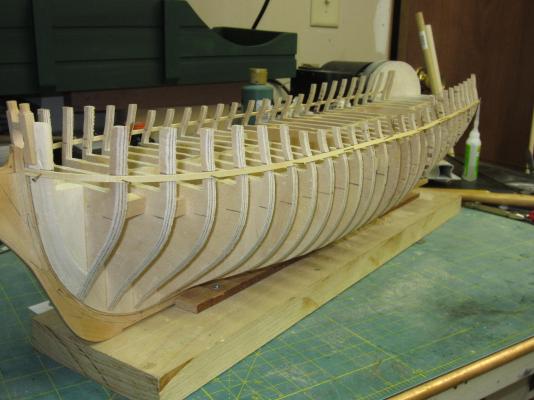
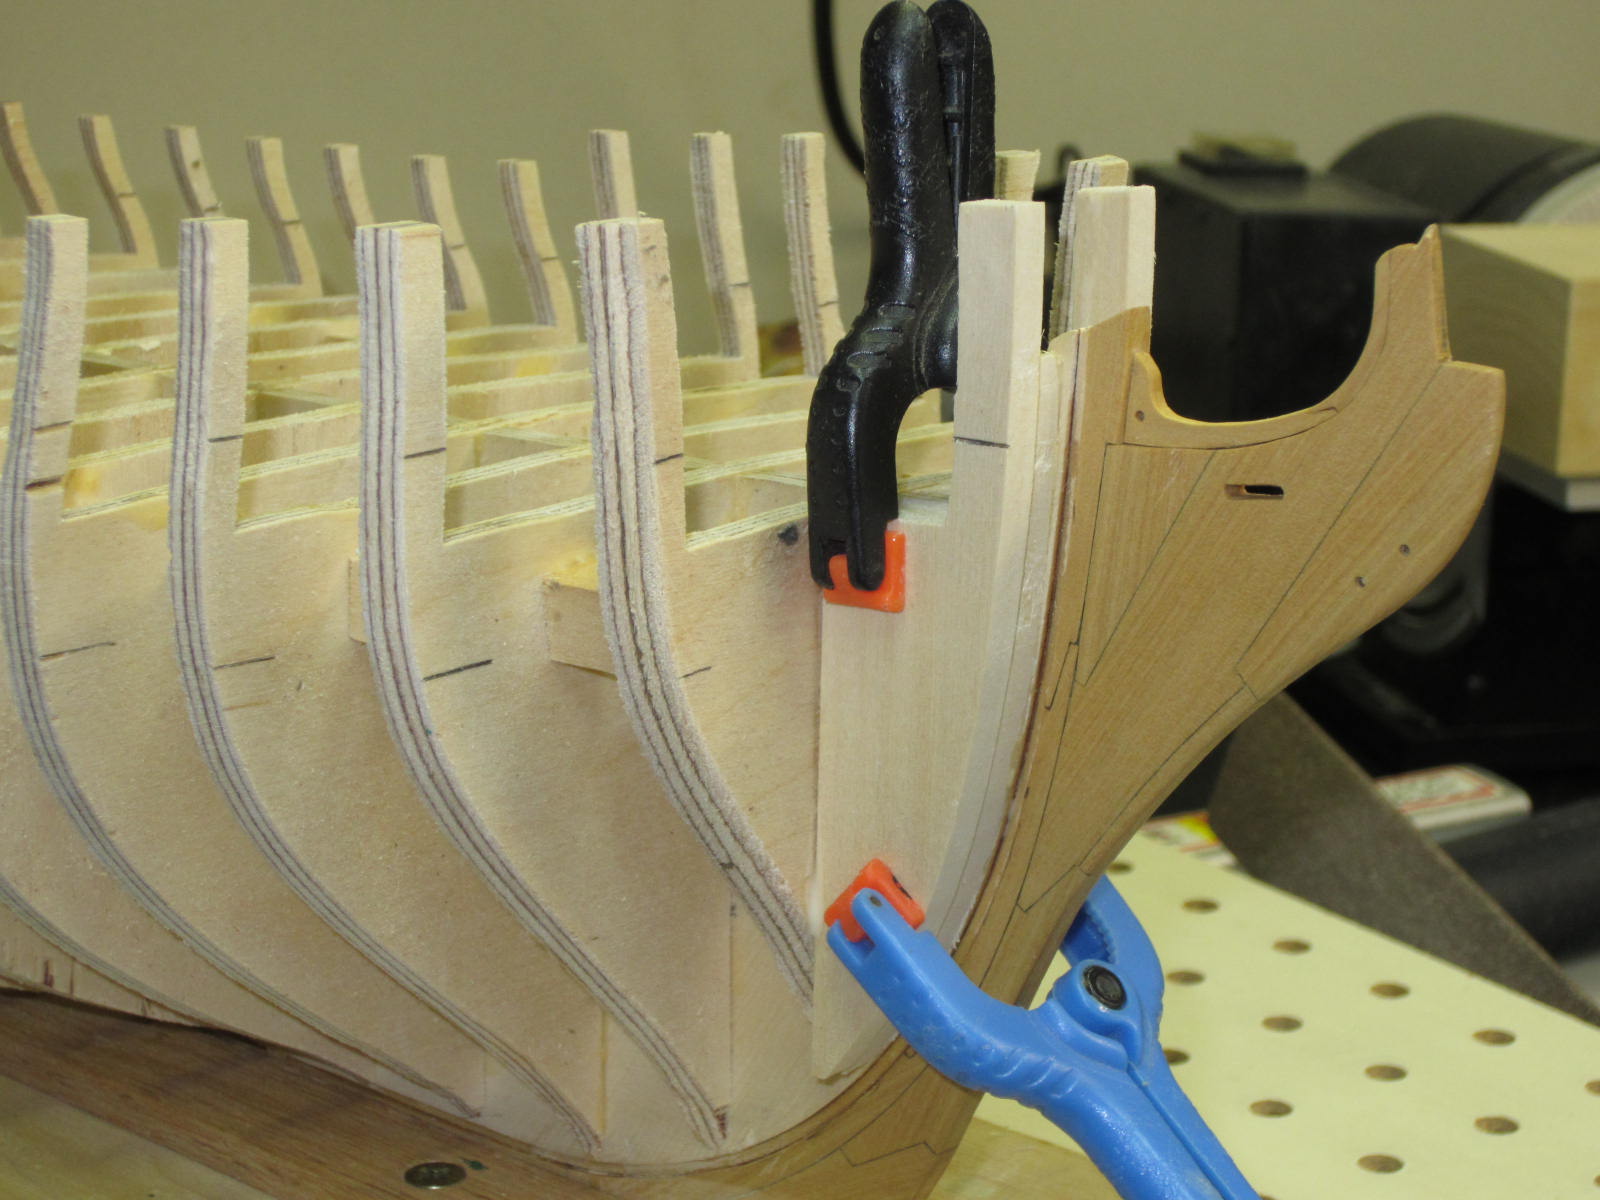
At the bow the bridle port fell over a bulkhead and the bulkhead had to be cut away prior to framing it.

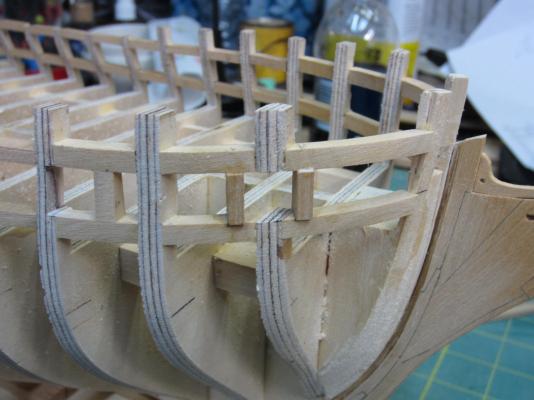
To add the lintels a piece was cut at the correct height and long enough to sit on both sills this
gave a consistent height and eliminated the need to measure each one.

I have done the preliminary sanding to the out board side.

On to the transom soon!
-
Thanks Bob and Mark and everyone for all the likes!
-
Thanks Pat. Following Chucks instructions makes it much easier!
-
Hi Ben, Unfortunately it's a long haul for me and I won't be able to attend.
Sorry it should be a great time. I hope you get to go.
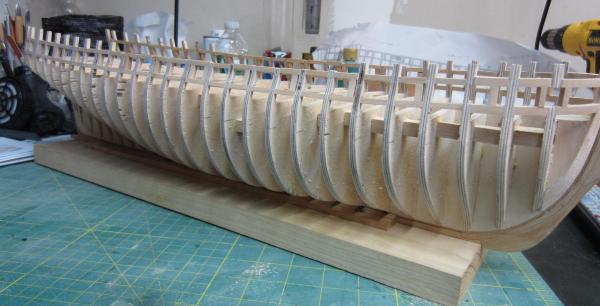
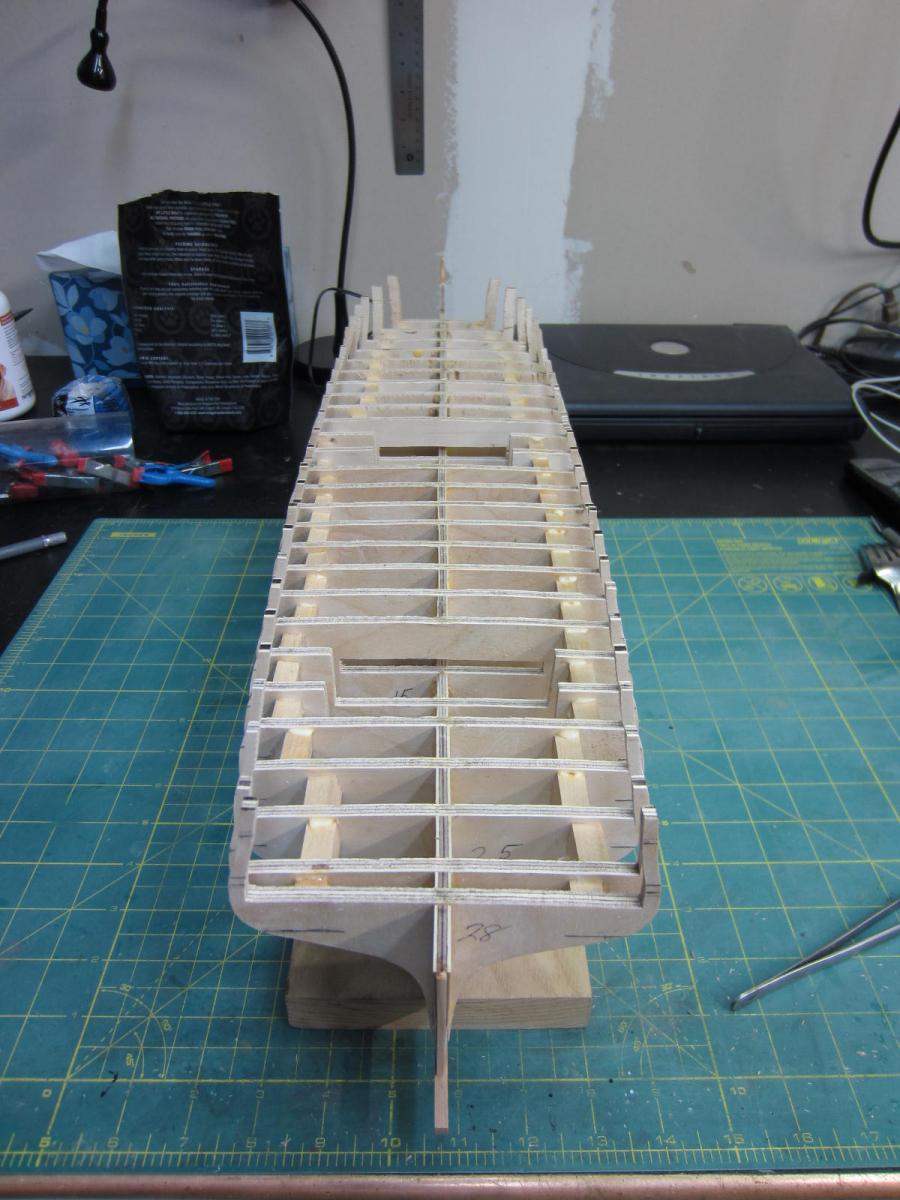
Ok I've been moving along just haven't been able to find time to post.
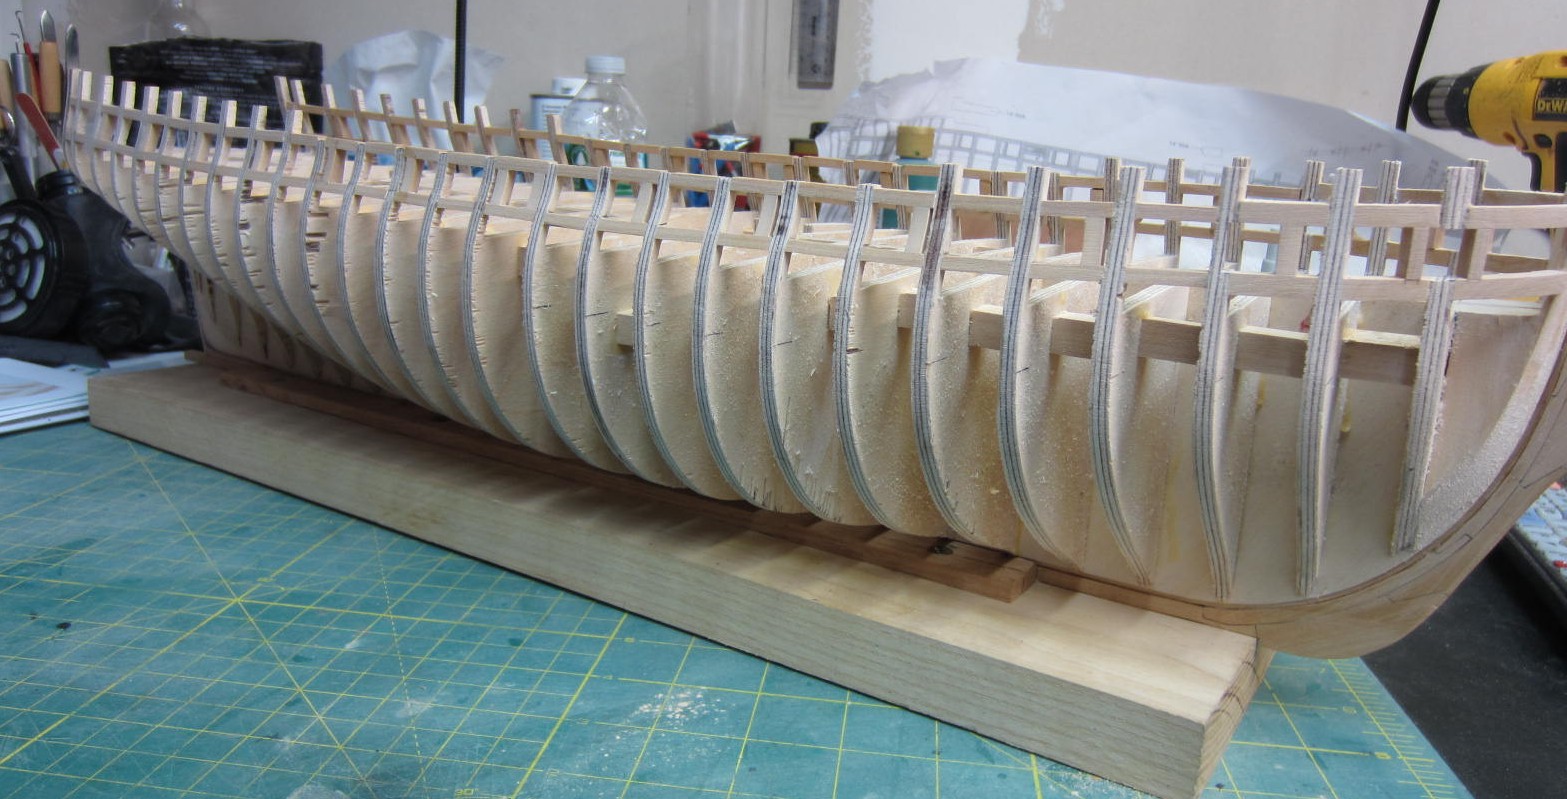
The hull is faired fairly close to its final shape. I still have a little work to do on
the tops of the bulkheads but I'll wait until I frame the gun ports to finish it up.
I didn't need to use any cross bracing either. The plywood was good and solid
and I was careful too.
I next planked the two platforms of the lower deck with pau marfim.
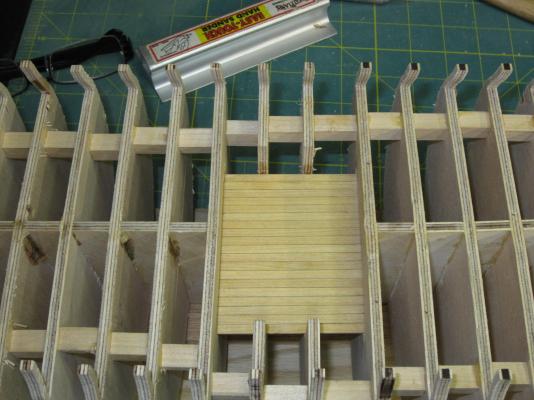
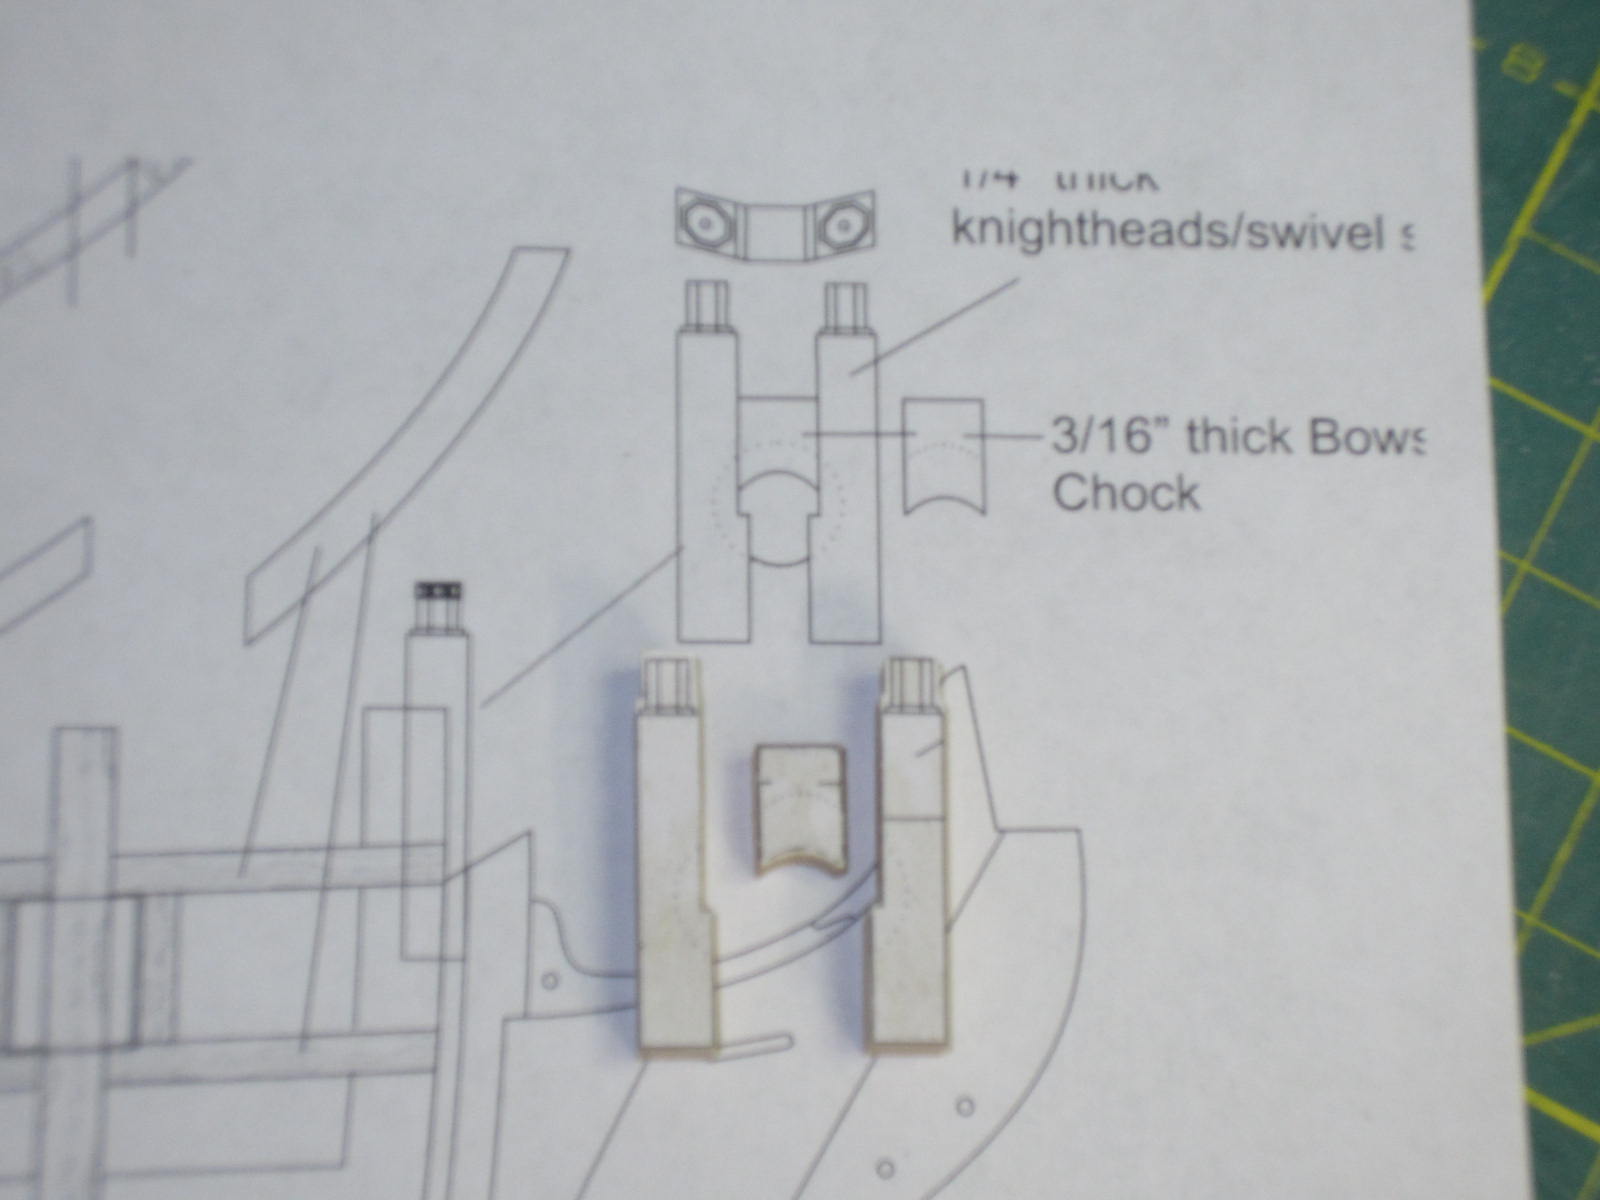
After that it was time to add the bow fillers and bollard timbers. Two of the fillers
needed to be a total of 7/32" thick. While the third timber needed to be 3/16" thick.
Chuck used two pieces to obtain the 7/32" thickness, (1 x 3/16" & 1 x 1/32"), I used
my thickness sander to thin down a piece of 1/4" wood I had to the 7/16". Same result
I just used one piece.

After that it was time to make the bollard timbers. these are not the traditional way to
make them but seeing there are bulkheads and not frames only the tops will be seen.
As you can see from the plans there are different angles, thicknesses and a hole it was
a bit of a challenge. At least every piece was made twice and some three time before
an acceptable one was obtained.
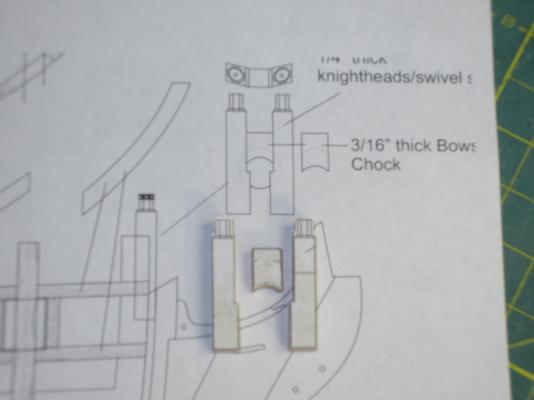

The bollard timbers are just set in place for now. Next up it is time to start framing in the gun ports.
- sonicmcdude, dvm27, Remcohe and 19 others
-
 22
22
-
Hi Ben,
Very well thought out an executed! Looking really nice too.
-
-
Thanks Ben!
Mark, Keeping the admiral happy is why I made it all those years ago.
Thanks Grant. I mainly use it for big dirty jobs like fairing and sanding the hull planking.
Then it gets tucked away for long periods of time until needed again.
-
Hi All,
Not much to report on. I have started sanding/fairing the lower portion of the hull. When I do that
I set the hull upside down on a small homemade down draft table to help contain the dust. I place
some wood blocks on the table that are thick enough to keep the tops of the bulwarks from hitting
the table and hopefully protecting them. Then it's just a matter of sanding, checking with some
planking strips, sand some more, etc etc etc.
- Ryland Craze, harvey1847, augie and 11 others
-
14
-
Wonderful workmanship Bob. I'm so impressed with how you can build the deck off the model and make it fit so nicely.
-
-
-
Hi Len, First and foremost my best wishes to you and hope you get it all sorted out for the better. If we get to see you again this year great, if not there is always next year. I also understand you wanting to move on for a new project. She looks great as is and if you decide to come back and do the rigging when you feel like it I'm sure it will be outstanding too. Well done my friend!
-
Thanks Augie. She came out as straight as I'll ever get it. At least she's not looking like a crescent moon.
Hi Chuck S. Yeah rubber cement it is. I have contact cement in the cupboard and have to make sure I
never mix them up! That wouldn't be pretty.

-
Hi Chuck S.
I'm no chemist but I don't believe the stuff I use is water based. It's Elmer's Craft Bond
Rubber Cement . It also has a warning that it is flammable and has a smell like contact
cement. Like any liquid that you put on paper it could cause distortion. When I place
the paper on the wood I try to lay it as gently as possible and not to pull or stretch it.
If I have doubts I'll closely compare it to the plans. So far no issues for me doing it this way.
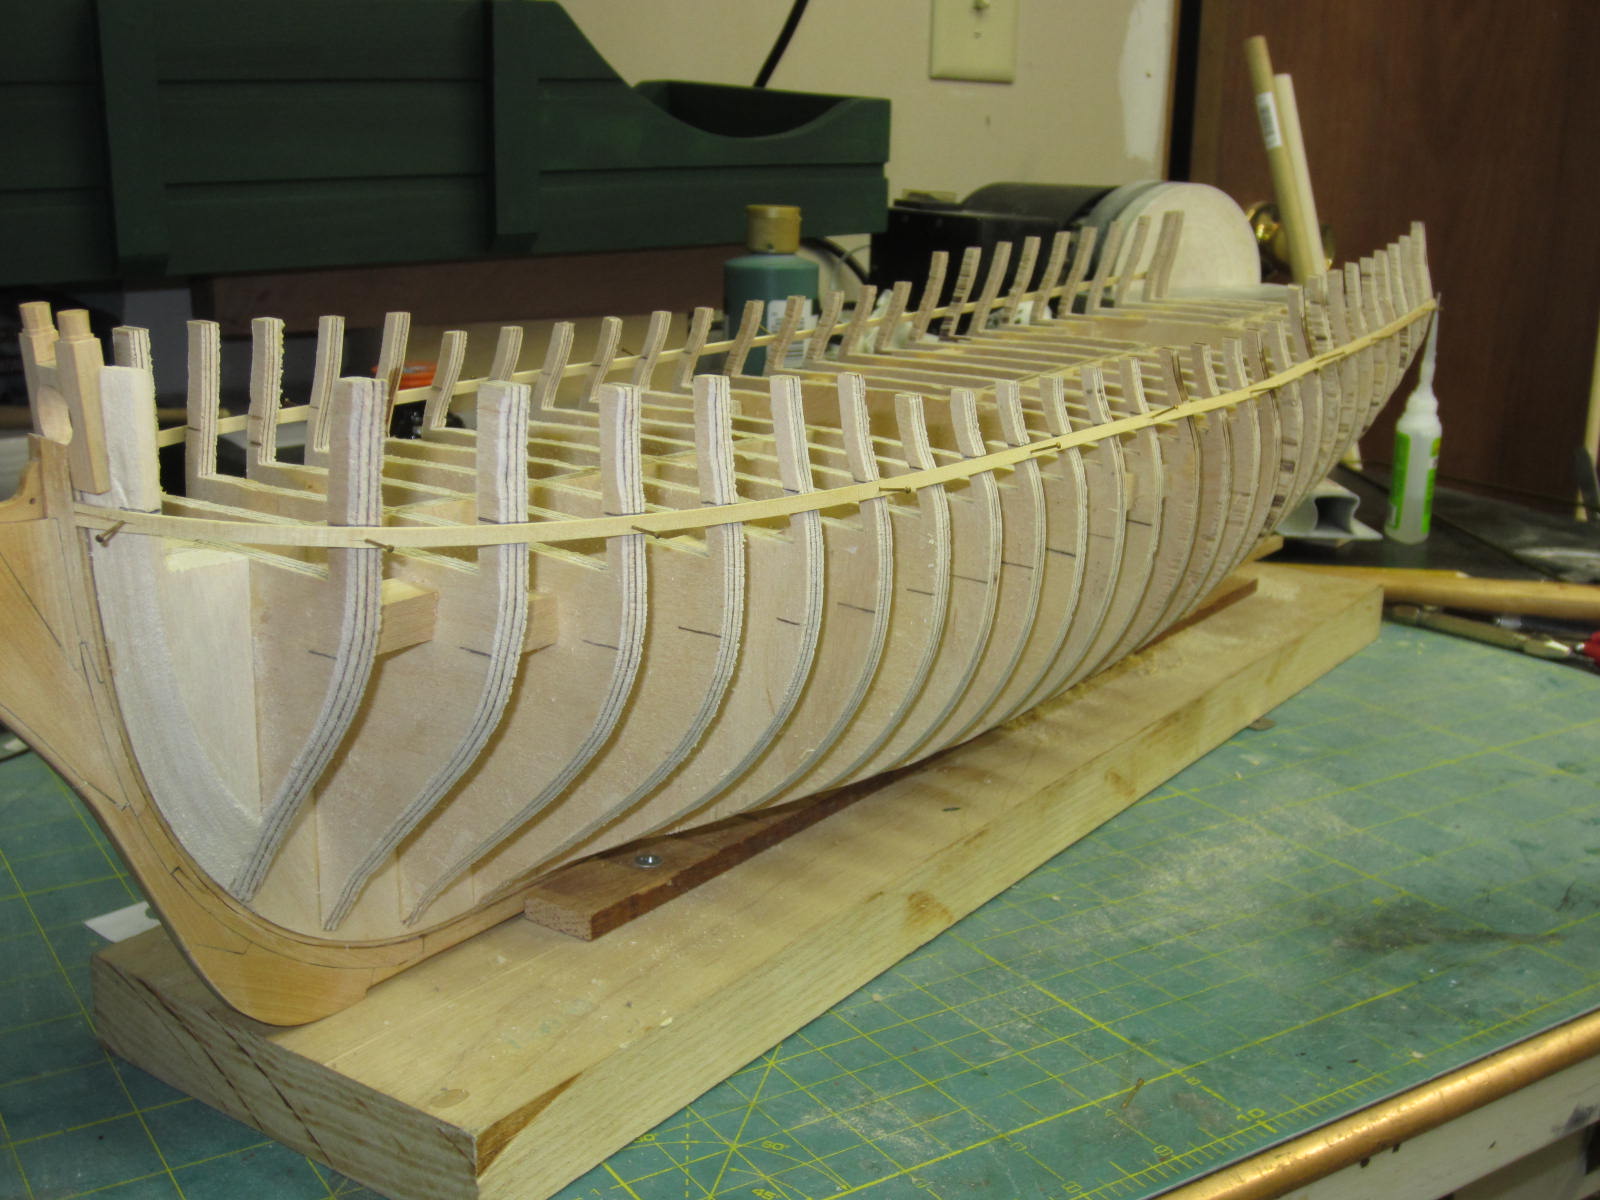
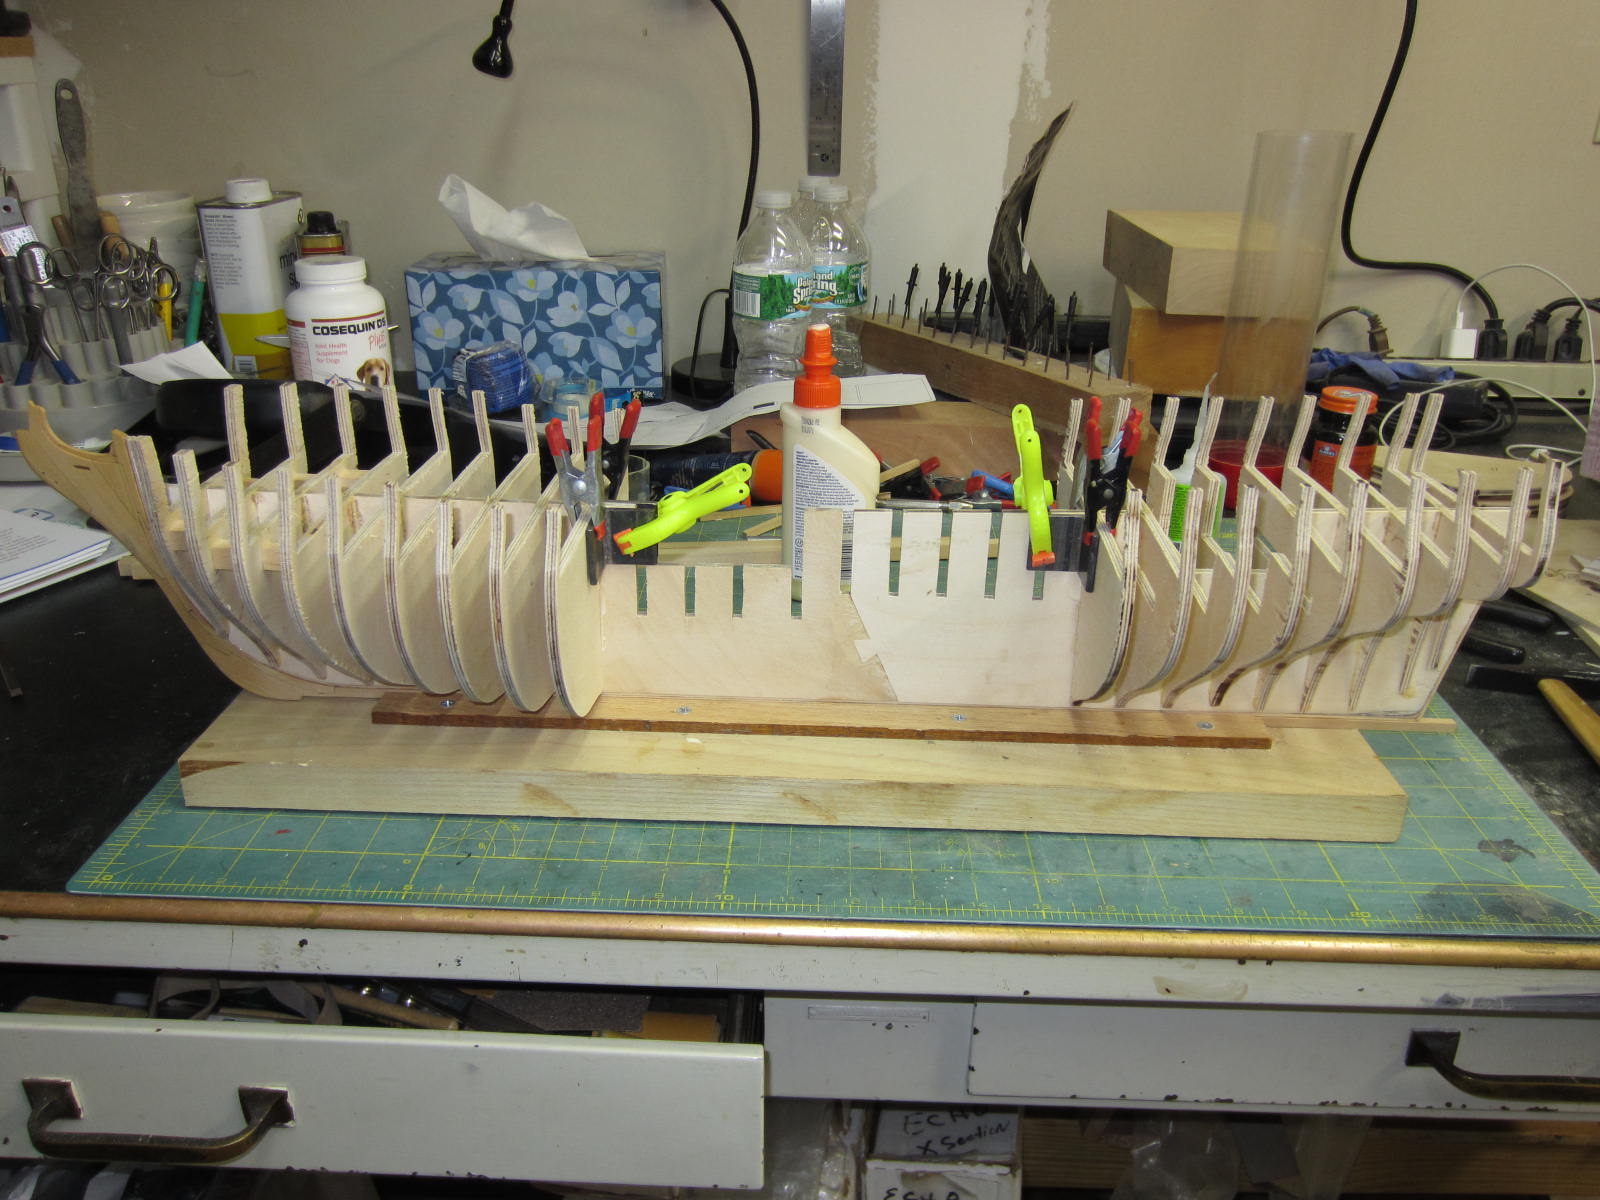
Well all of the bulkheads and braces have been glued in place, and it is very solid. I won't
have to worry while fairing the main part of the hull. As I move up to the tops of the
bulkheads especially the longer ones I may use some bracing on them. I'll have to see
what's what when I get there.

-
Hi Ben, I don't know how the bulkheads relate to the plans stations but there are 27 bulkheads
on a 24" former. On the Confederacy there were 15 bulkheads on a former that was approximately
29" long. A lot more bulkheads in a shorter span.
As far as building her, when you are done with your 5 year project,
 I know you would love her!
Prior to seeing the plans and starting work on her I had thought about adding balsa between the bulkheads
at the bow and stern as the twist and curve can be a bugger to maintain for us mere mortals.
Don't think I'll need to do that now. Time will tell.
-
-
Hi Ben, I am thinking along those lines. I didn't have to do it with the Confederacy because
the extensions were thicker and the plywood was strong. With the Winnie the extensions are
thinner so there is a possibility of breakage. So if I had to guess right now I'd say I'd do them.
Thanks for the reminder.
- Trussben and fnkershner
-
2
-
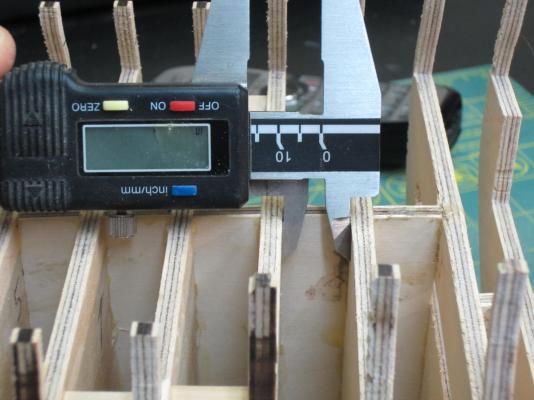
Hi druxey, I'm hoping that by measuring at the former where there is no movement and by paying
close attention to the fit I should be able to keep a creeping error out of it. Fingers are crossed here.
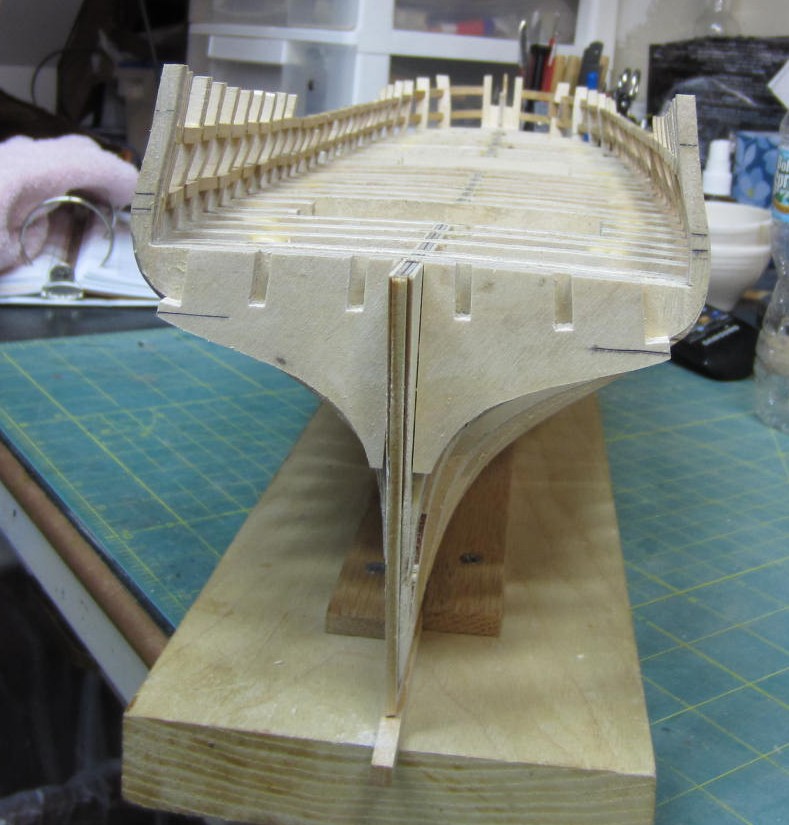
Hi Daniel, Oops I got talking about the bulkheads and filler blocks I forgot all about adding the stem
and keel. Chuck uses a cleaver way to create the rabbet. He has you glue a 3/32" x 1/16" stripe on
the edge of the bulkhead former. It extends down the stem and continues along the bottom edge of
the bulkhead former. Once the keel and stem are added, this strip will form the rabbet. At the stern
I had to trim the former to form the bearding line. Once this was completed the stem is test fitted
against the rabbet strip and adjusted until a good snug fit is obtained. The stem is them glued to the
rabbet strip. After that the keel and false keel were glued in place too. I did not need to pin or bolt any
of this assembly in place as it was a snug fit and glued good and tight.
- mtaylor, harvey1847, fnkershner and 5 others
-
8
-
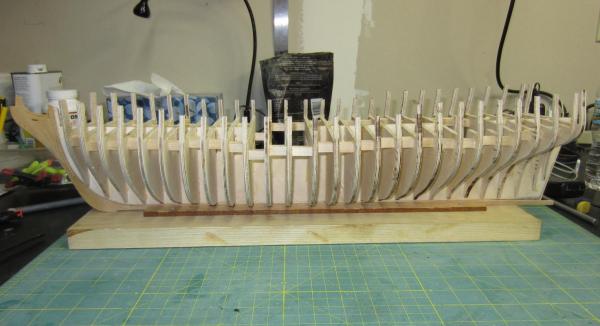
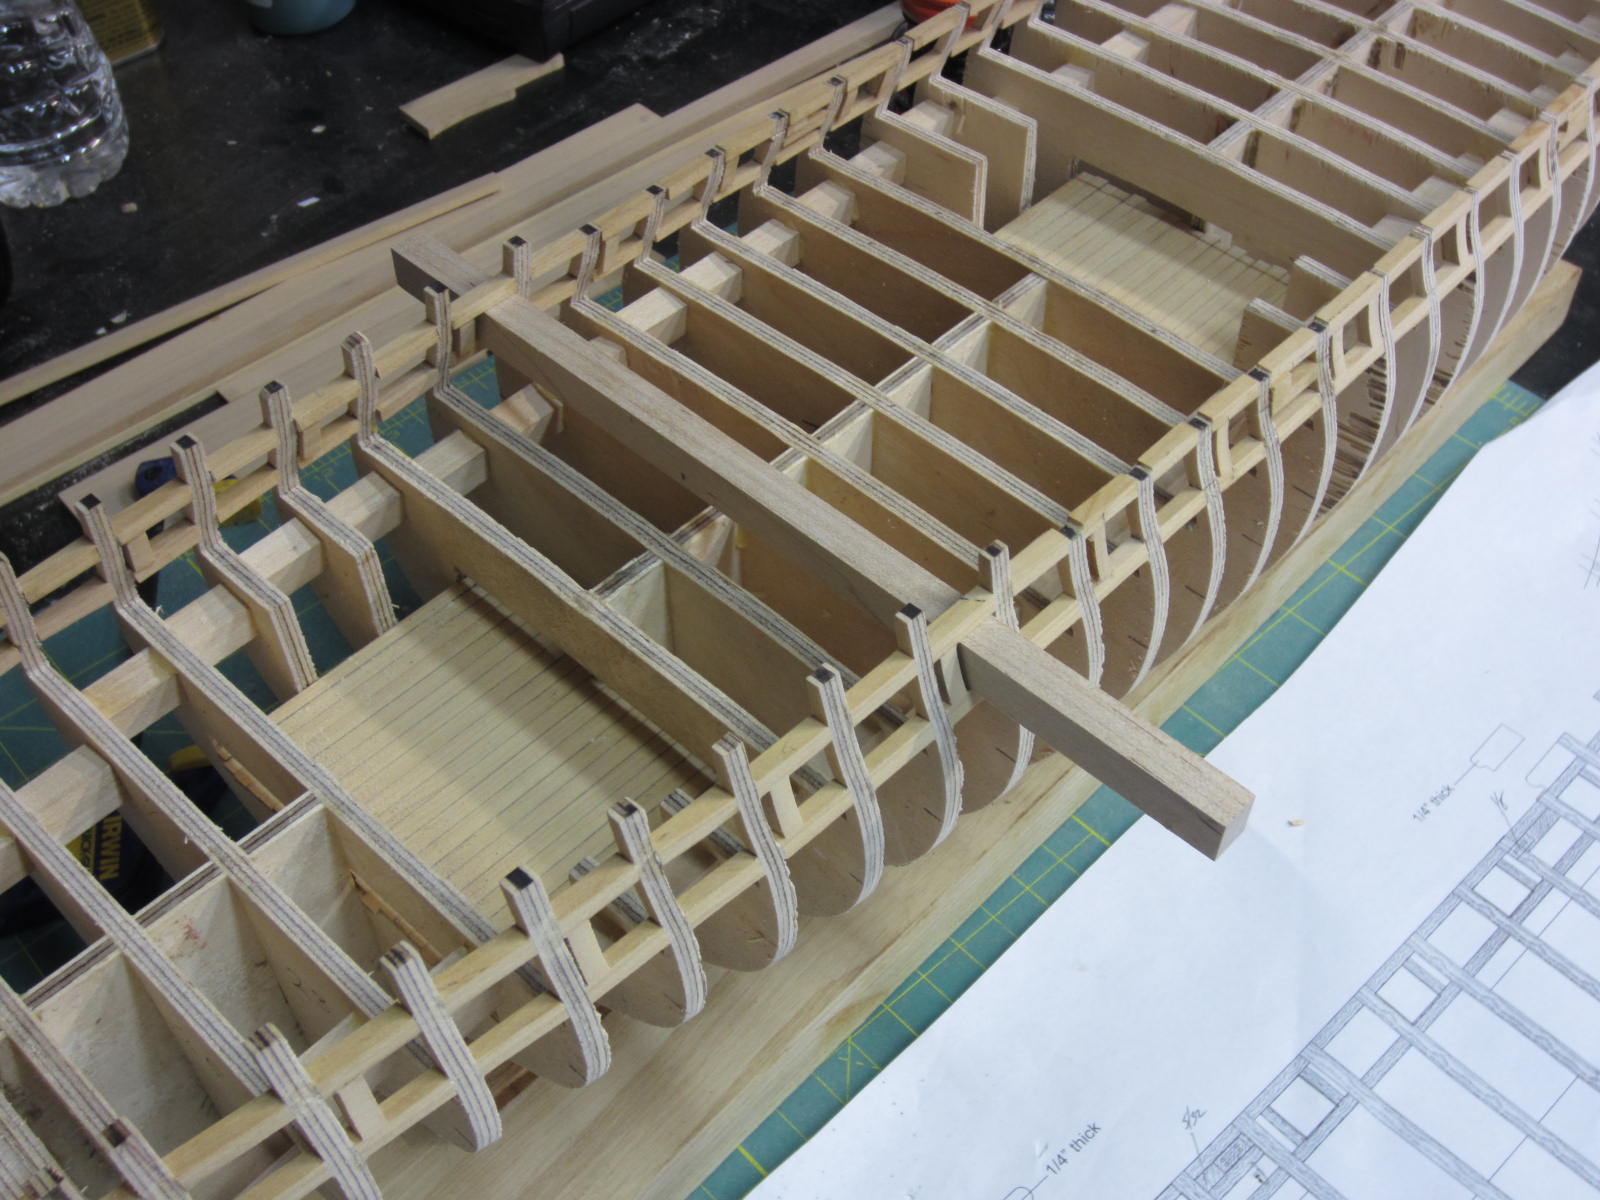
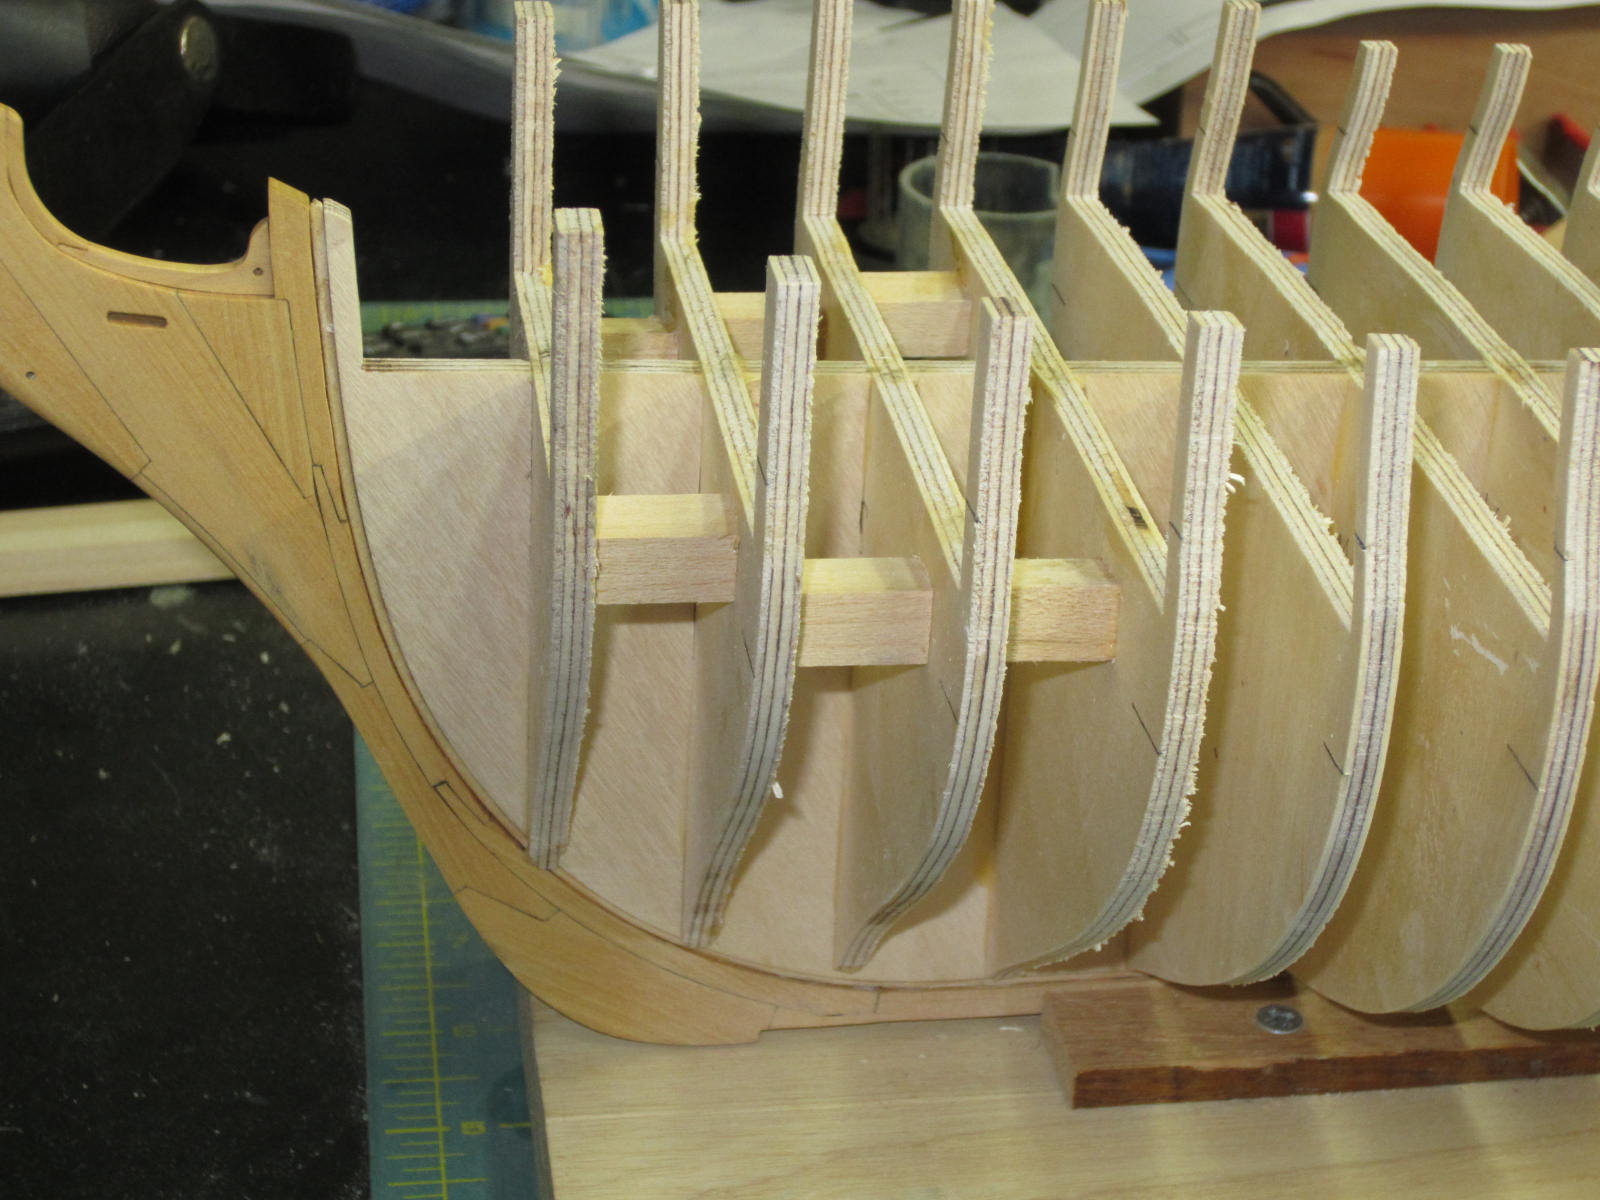
I've been working my way towards the center and this is how far I've gotten.

While gluing them up I had a thought about putting some bracing between the bulkheads to
help stiffen them some more for when I have to fair them. I also thought it may help eliminate
any change of the hull twisting. I took and measured the distance between the bulkheads at
the former and cut a piece of bracing and glued it towards the outer edge making sure not to
displace the bulkheads.

It seems to be working. I'll let you know when I finish with all of them.
- WackoWolf, mtaylor, sonicmcdude and 14 others
-
17
-
Oh yeah Ben. I can mess things up on my own. I don't need a twist to make it worse!

-
Thank you for the kind words Antony.
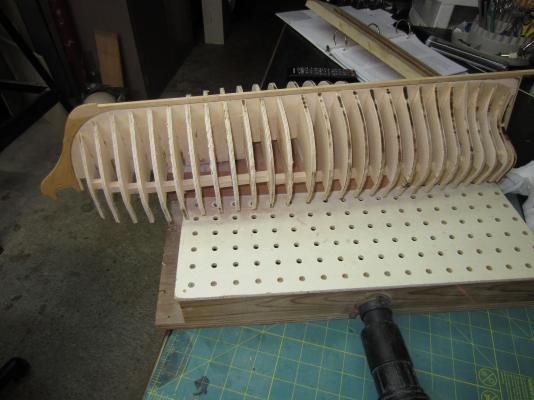
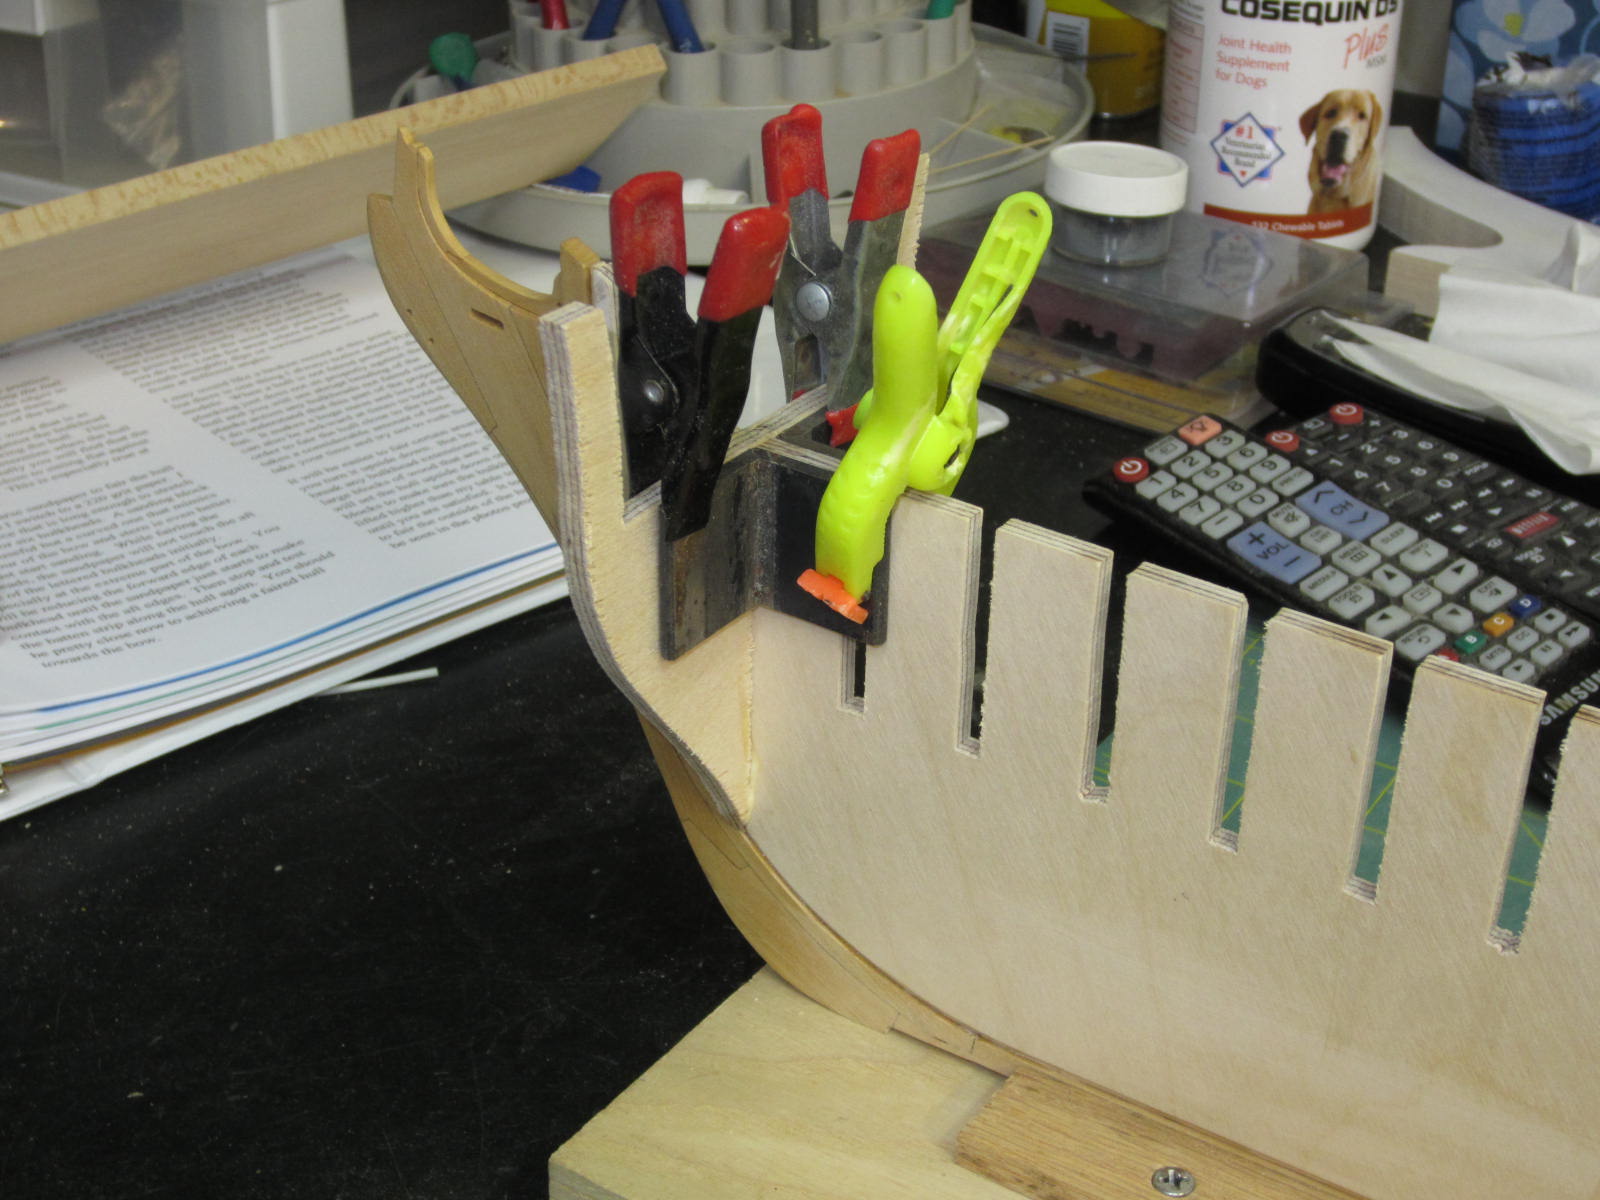
Well I've pre fit all the bulkheads. Just some minor sanding of the slots was needed so it didn't
take as long as anticipated. Here is the first bulkhead in place. I clamp the angle piece in place
to hold the bulkhead square until the glue sets up. I do one bulkhead fore and one bulkhead
aft at a time and work my way to the center.

- fatih79, Erebus and Terror, Chuck and 13 others
-
16
-
-
Hi Augie, Yeah there a lot of bulkheads and hopefully the former remains flat!
Thanks Michael.
Hi Remco. Yeah at 1/64 she is smaller but I guess my magnifier will get a workout! Plus if I
need help on producing small details I know I can count on your help.
Thanks Bob, Always a pleasure.
Sounds great Jim.


HMS Pegasus 1776 by Trussben - 1:48 - Swan-class sloop based on TFFM
in - Build logs for subjects built 1751 - 1800
Posted
Very nice Ben. You obviously have a great touch for this. You make it look too easy!