


Rustyj
-
Posts
2,516 -
Joined
-
Last visited
Content Type
Profiles
Forums
Gallery
Events
Posts posted by Rustyj
-
-
I have the distinct honor of being able to work with Chuck again on my next project,
the HMS Winchelsea. This is the same ship that Chuck is designing and currently
building. I cannot put into words my gratitude to Chuck for allowing me to participate
in his project. I will make every effort to build her as described in the plans and
practicum although I will never be able to reach the outstanding level of craftsmanship
Chuck has set.
The HMS Winchelsea was launched in 1764 and is a Niger class 32 gun frigate. This
build will show how she appeared during the American Revolution. The model will be
fully rigged at 3/16" scale. I will be using various woods throughout the build but the
primary wood used will be Boxwood, Holly and Swiss Pear. All of these woods are
from Jeff at Hobby Mill.
As Chuck has very eloquently detailed his log and I could never reproduce that either.
I will just show how I worked my way through the build.
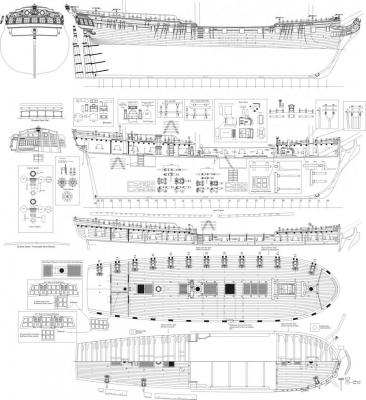
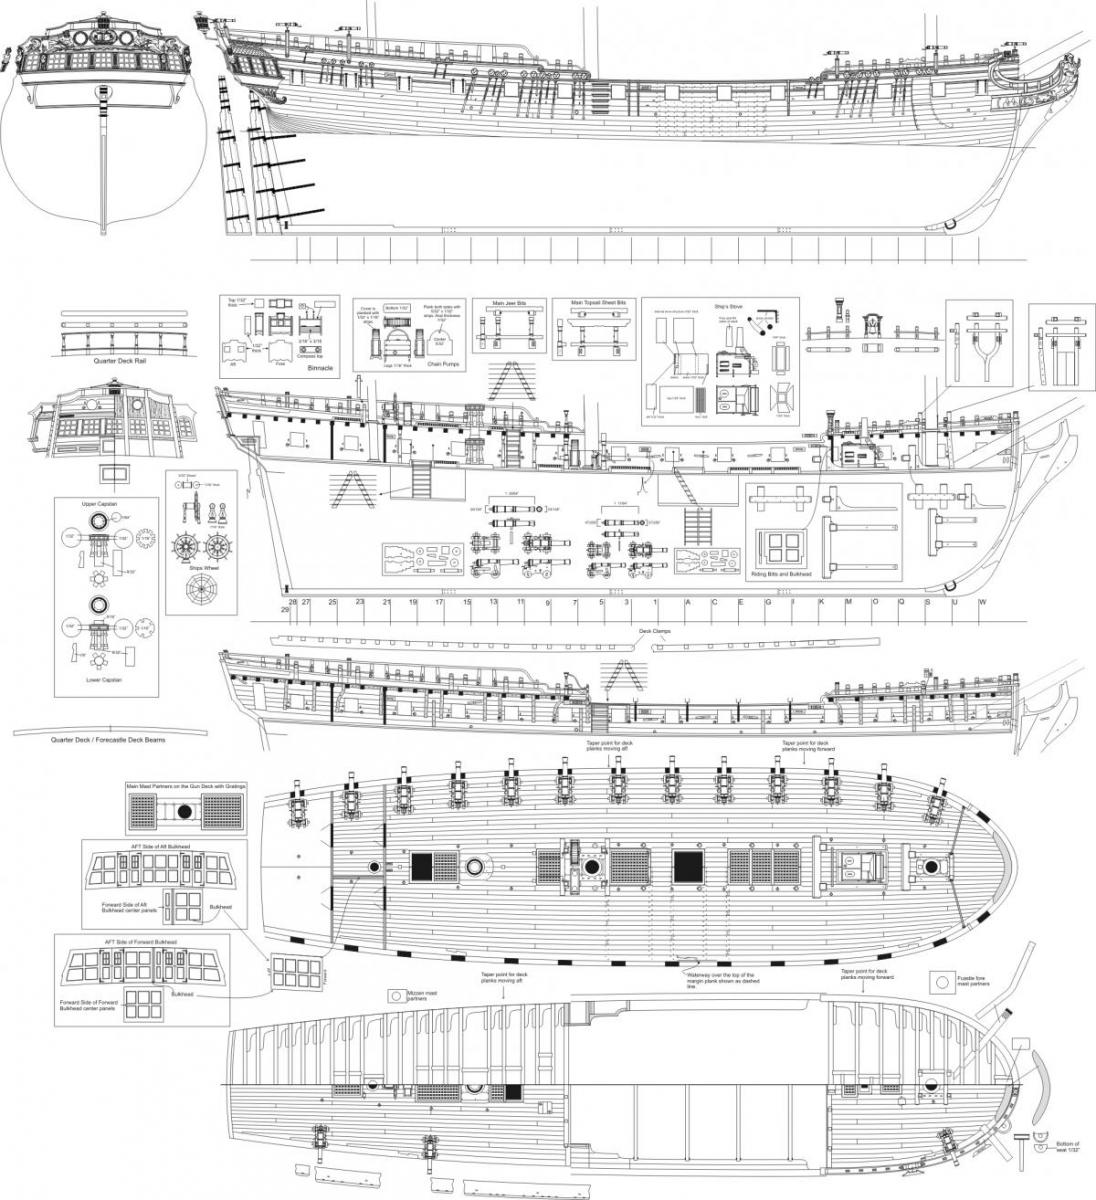
Here is a sample of some the plans that I will be using to build the Winchelsea.
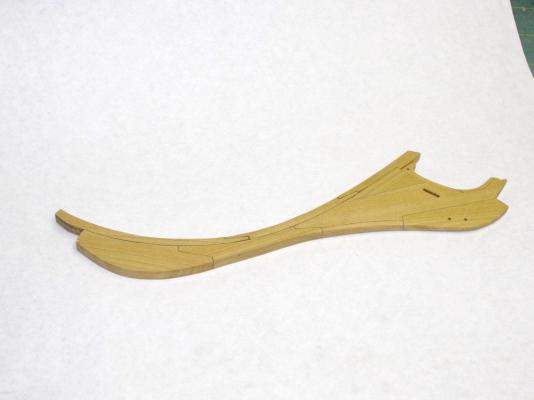
The first step in the build will be to cut out and assemble the knee of the head. There are
eleven parts to the head knee assembly and they will all be cut from 3/16" Boxwood. The
pieces were rough cut with the scroll saw and finished with files, sandpaper and chisels.
To simulate the caulked joints.
Once assembled Chuck states " The entire assembly must be tapered. This taper extends
from the upper stem piece towards the bobstay piece. The aft edge of the upper stem
should remain 3/16” thick. It should gradually be reduced to 3/32” thick along the
forward edge of the bobstay piece. The taper is 3/32” at the top of the bobstay piece
but it also gradually widens back to 3/16” as it works its way down towards the cutwater. "
Hopefully you can see this taper in the photograph.
Next it will be time to cut out the bulkheads and the bulkhead former. These will all cut
from Birch 3/16" aircraft 4 ply plywood. As there are so many bulkheads, a total of 27,
I anticipate it taking a least a week to cut them out and fit them prior to gluing.
That is if my mind doesn't wander!

-
Thank you E&T.
Ok Ben.... you should have excused yourself.
 You had insider information!
Yes Chuck has graciously allowed me access to the Winnie and I will be starting her shortly.
As this will be a long slow build while he continues to design her I will try to complete the Fly
at the same time. Gotta keep the Grand kids happy you know!
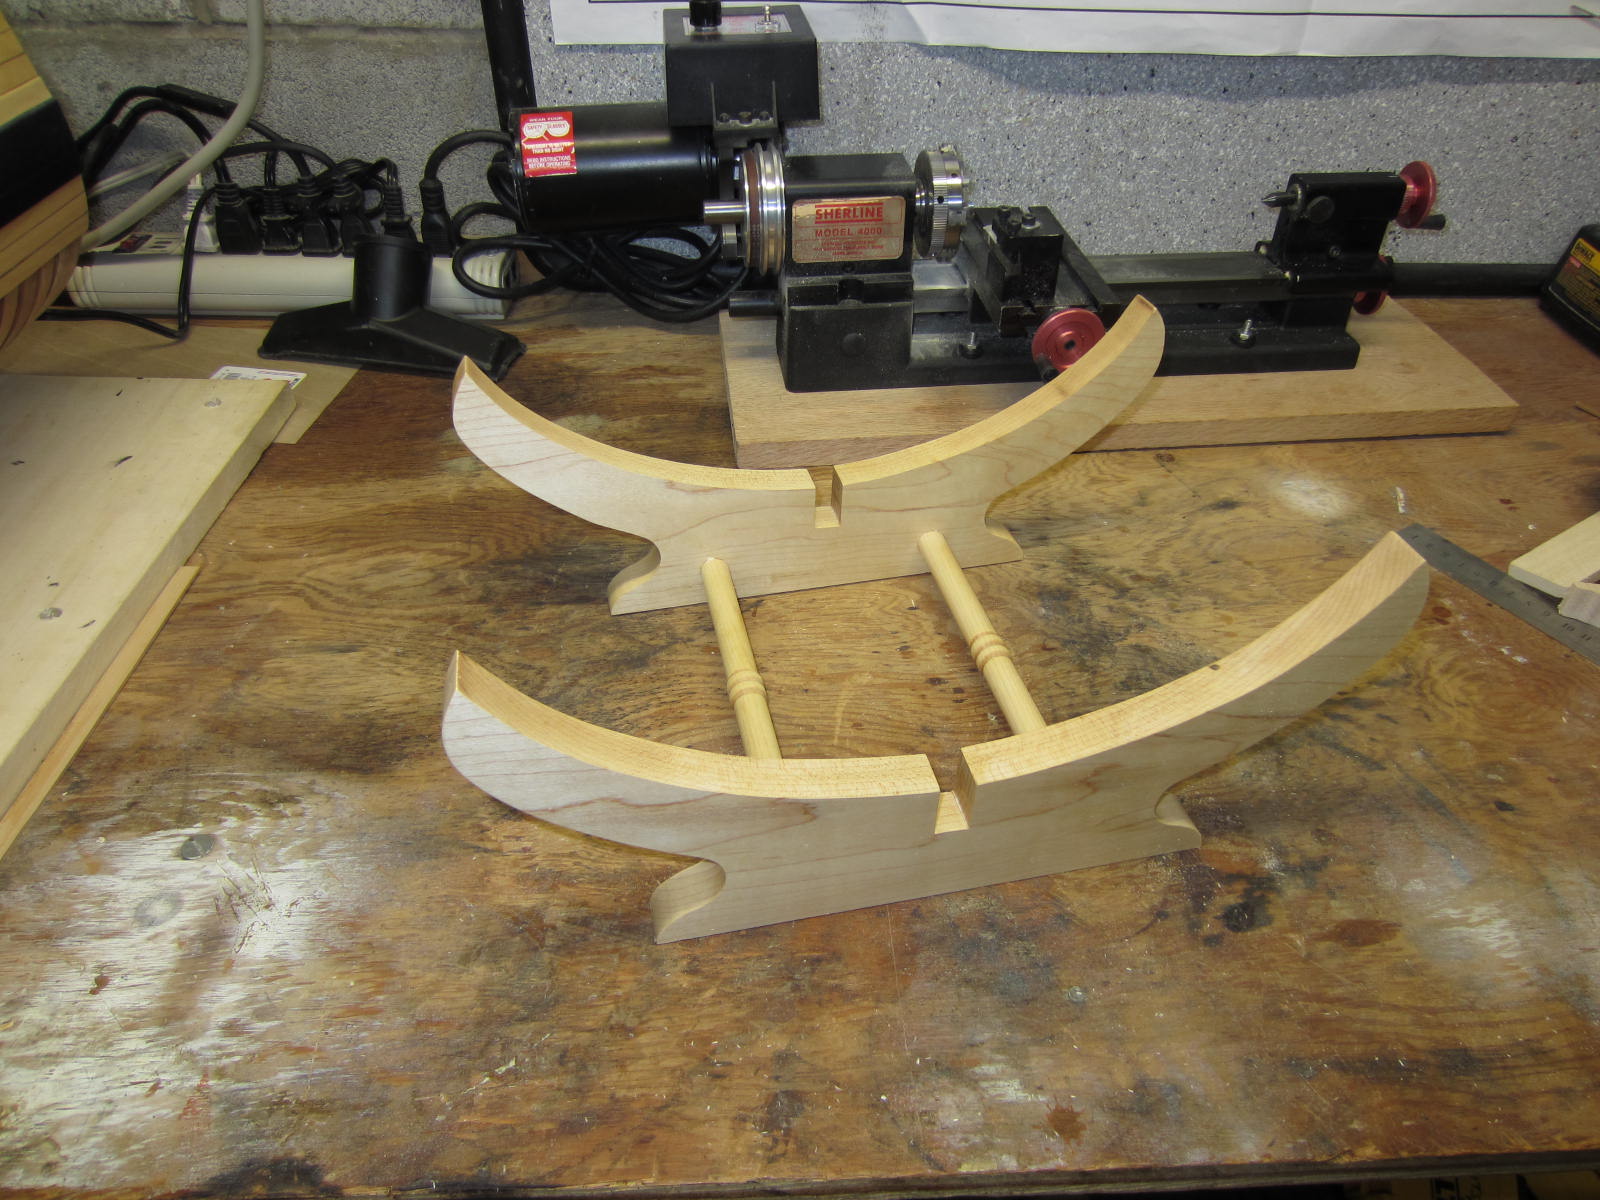
I have completed the stand. I made it out of some Maple I had available.
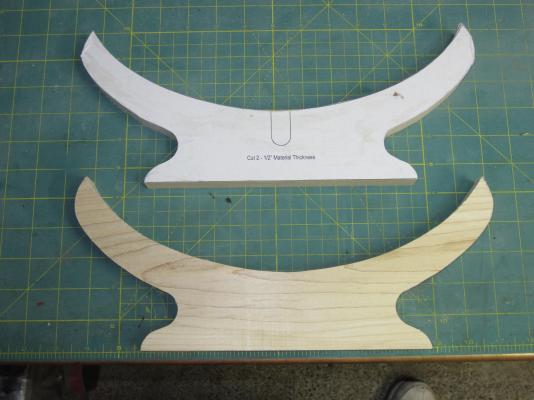
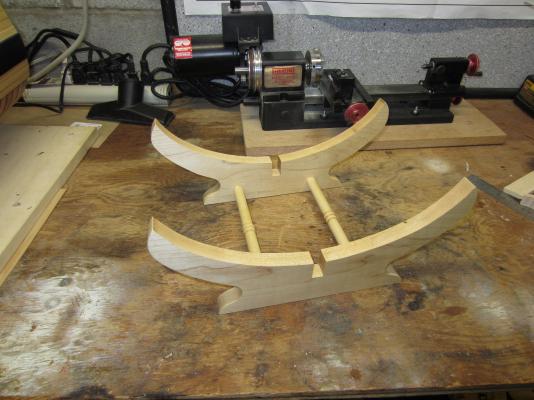
I kept the dowels low on the stand so they wouldn't cover the frame work. Now I just have to put
on a couple of coats of sealer and I can set the cross section in it.
- fatih79, Elmer Cornish, Dubz and 11 others
-
 14
14
-
Very Nice Ben! Nice clean work. And yes it is a piece of cake from here on out.
Hopefully it's a kind of cake you like though!
-
-
Thanks Mark, Grant and Joe.
It would be my luck to get stuck in a groundhogs day that was really horrid and have to live it over and over and over again!
Now I have to get that accountant to figure out how to get all the cool accessories like a duplicator!
No new news from the shop. I have to still mount the barrels and rig them and make the base. That and a good cleaning
should just about finish her up.
I also had started doing the base work on what was going to be my next build. I was going back to the light for a bit and build the
FLY for my grandson. He saw it on the shelf and really liked it. So I have been doing a bit of work on that for him when I
was presented with a Dark Side opportunity I just couldn't pass up.
So now that I have been cruel and thrown out that teaser I am preparing to post the new build log here in the scratch build
section by this weekend.
Sorry gotta head of to work now.
-
Thanks Augie and Ben!
Hi Mark,
Yes toys I mean tools are great! I can see where a duplicator would be a god send!
Edit...Though it's not a Sherline the Unimat link was very informative.
Re-edit: Sherline version is great too.
Re-re-edit: Vanda-lay link will save me a bunch of searching.
Re-re-re edit: Do-over's. It seems everyday has to many do-overs!
Thanks Joe.
druxey, the design and execution is a bit over my head at this point but maybe in the future.

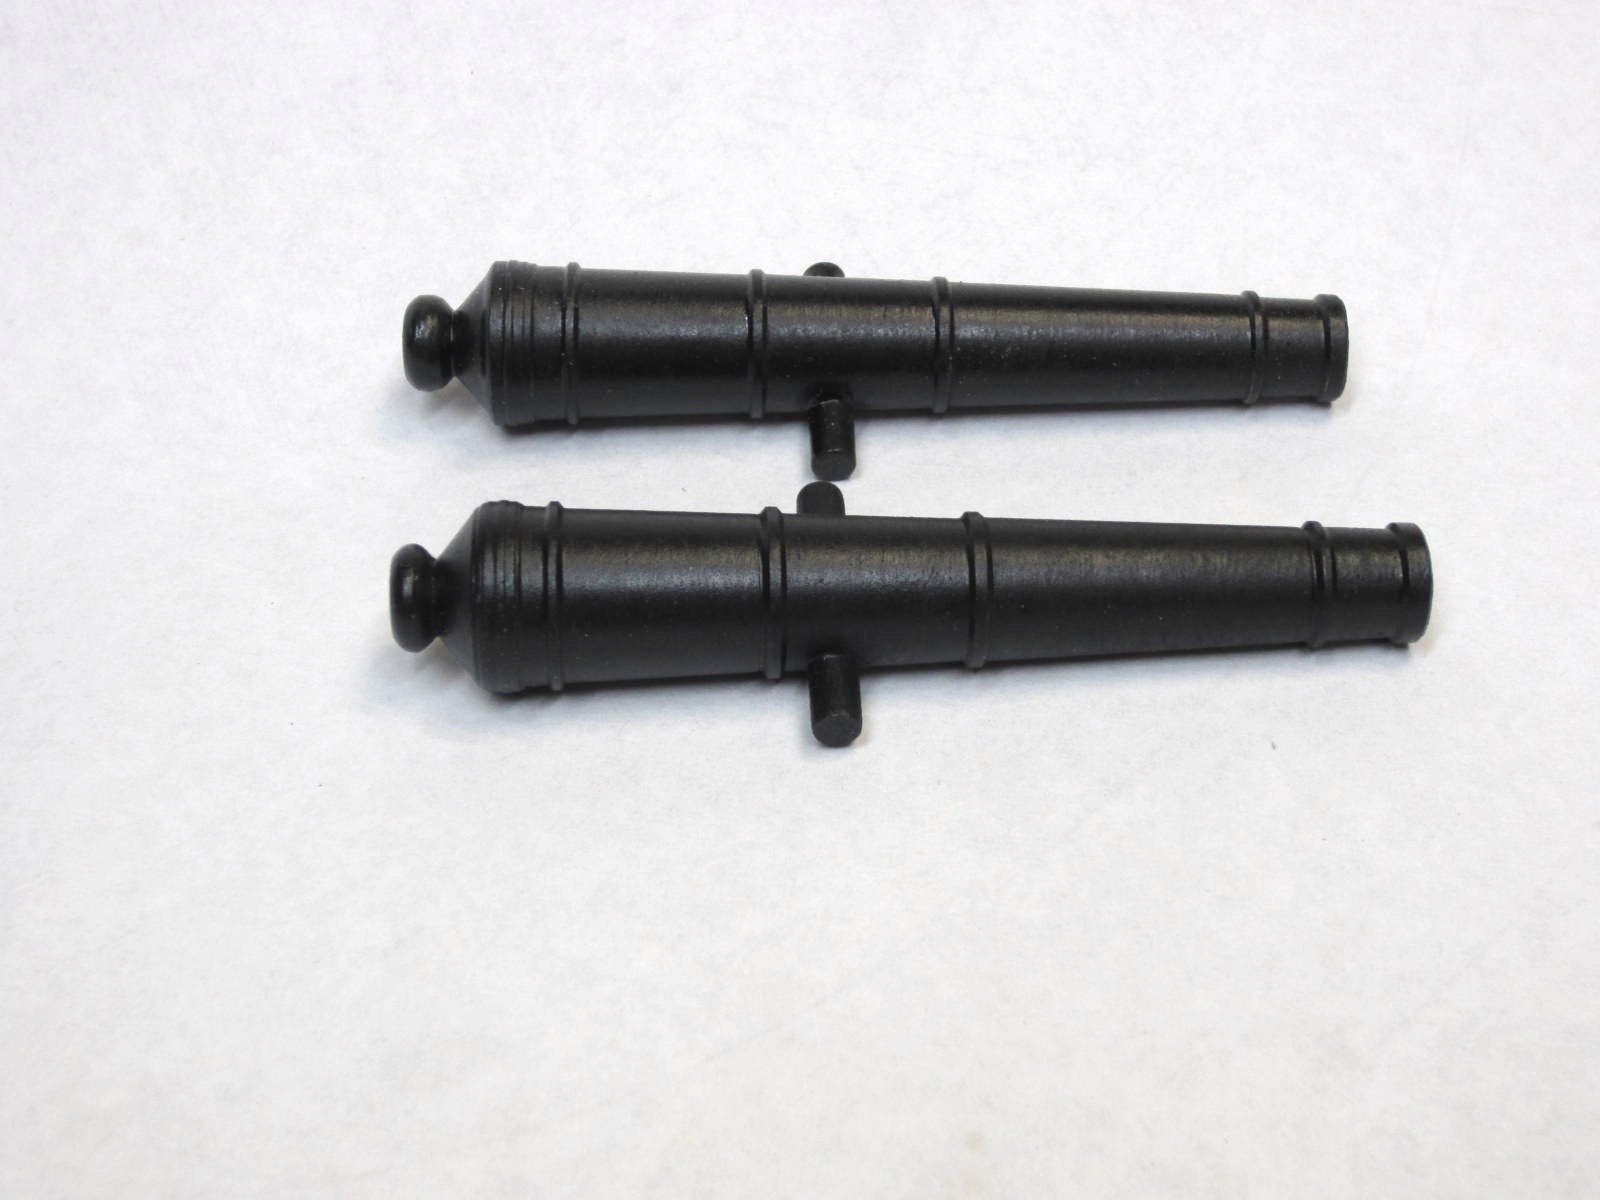
Ok here is the result of the duplication. An acceptable job. Not perfect but they won't be
right next to each other so all should be good.


- captainbob, fatih79, mtaylor and 6 others
-
9
-
-
Hi Mark, I guess I'm very productive then cause I've surely made a mess.
No thumb twiddling going on here although work has gotten in the way a bit. As
suggested I cut as deep as I could and the used a jewelers blade to finish the cut.
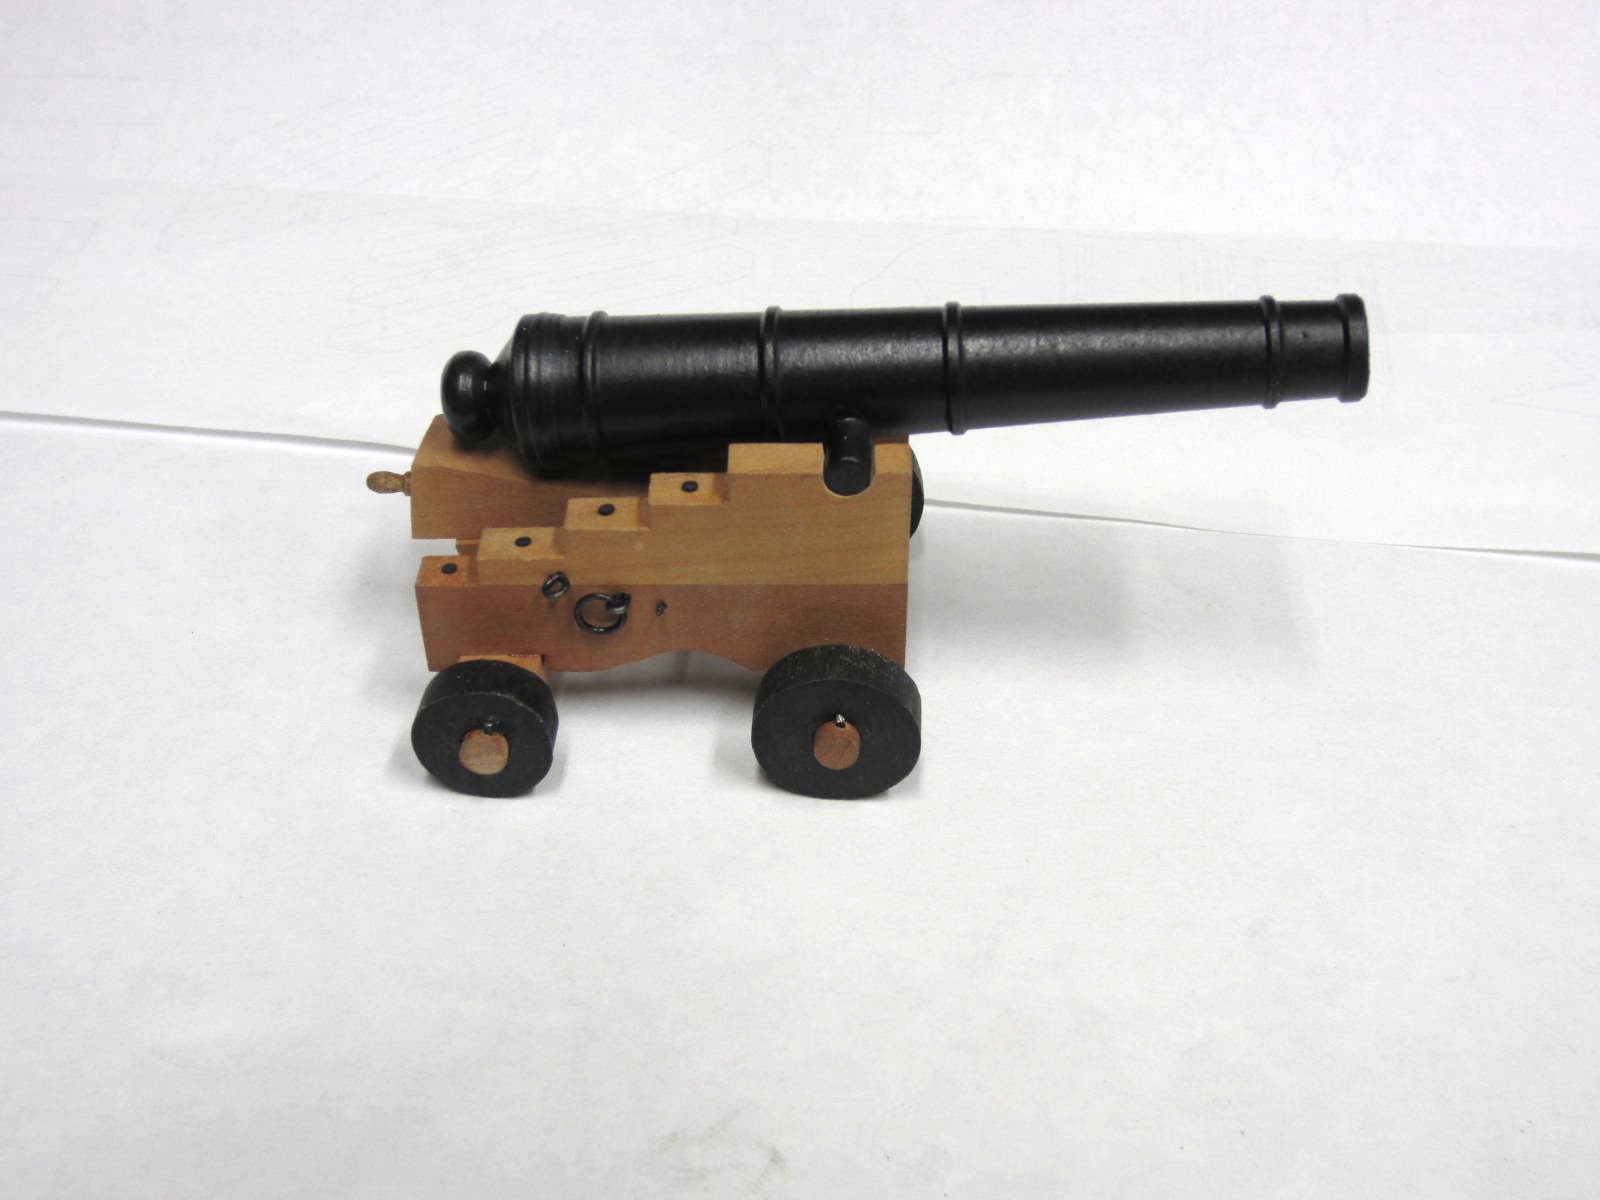
Here is the first barrel painted and just set in the carriage.

Now comes the fun part! Trying to duplicate a second barrel that comes close to the first.

-
-
Thank you all for stopping by and the likes.
Thanks Dubz.
Mark I wouldn't want to be standing next to when it was fired let alone be down range
when she let loose!
Thanks Bob I am really happy with how she looks.
Hi Grant. Sorry to disappoint but I played with one 1/2" dowel while waiting for the rod to arrive.
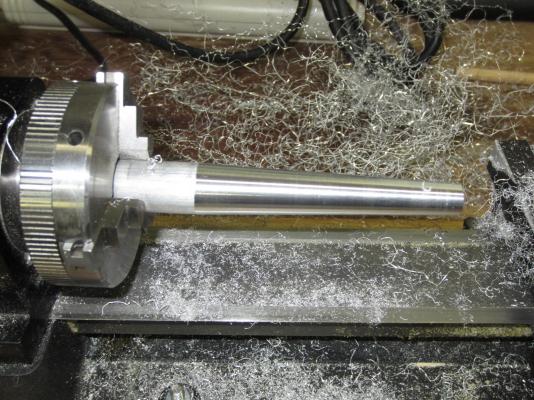
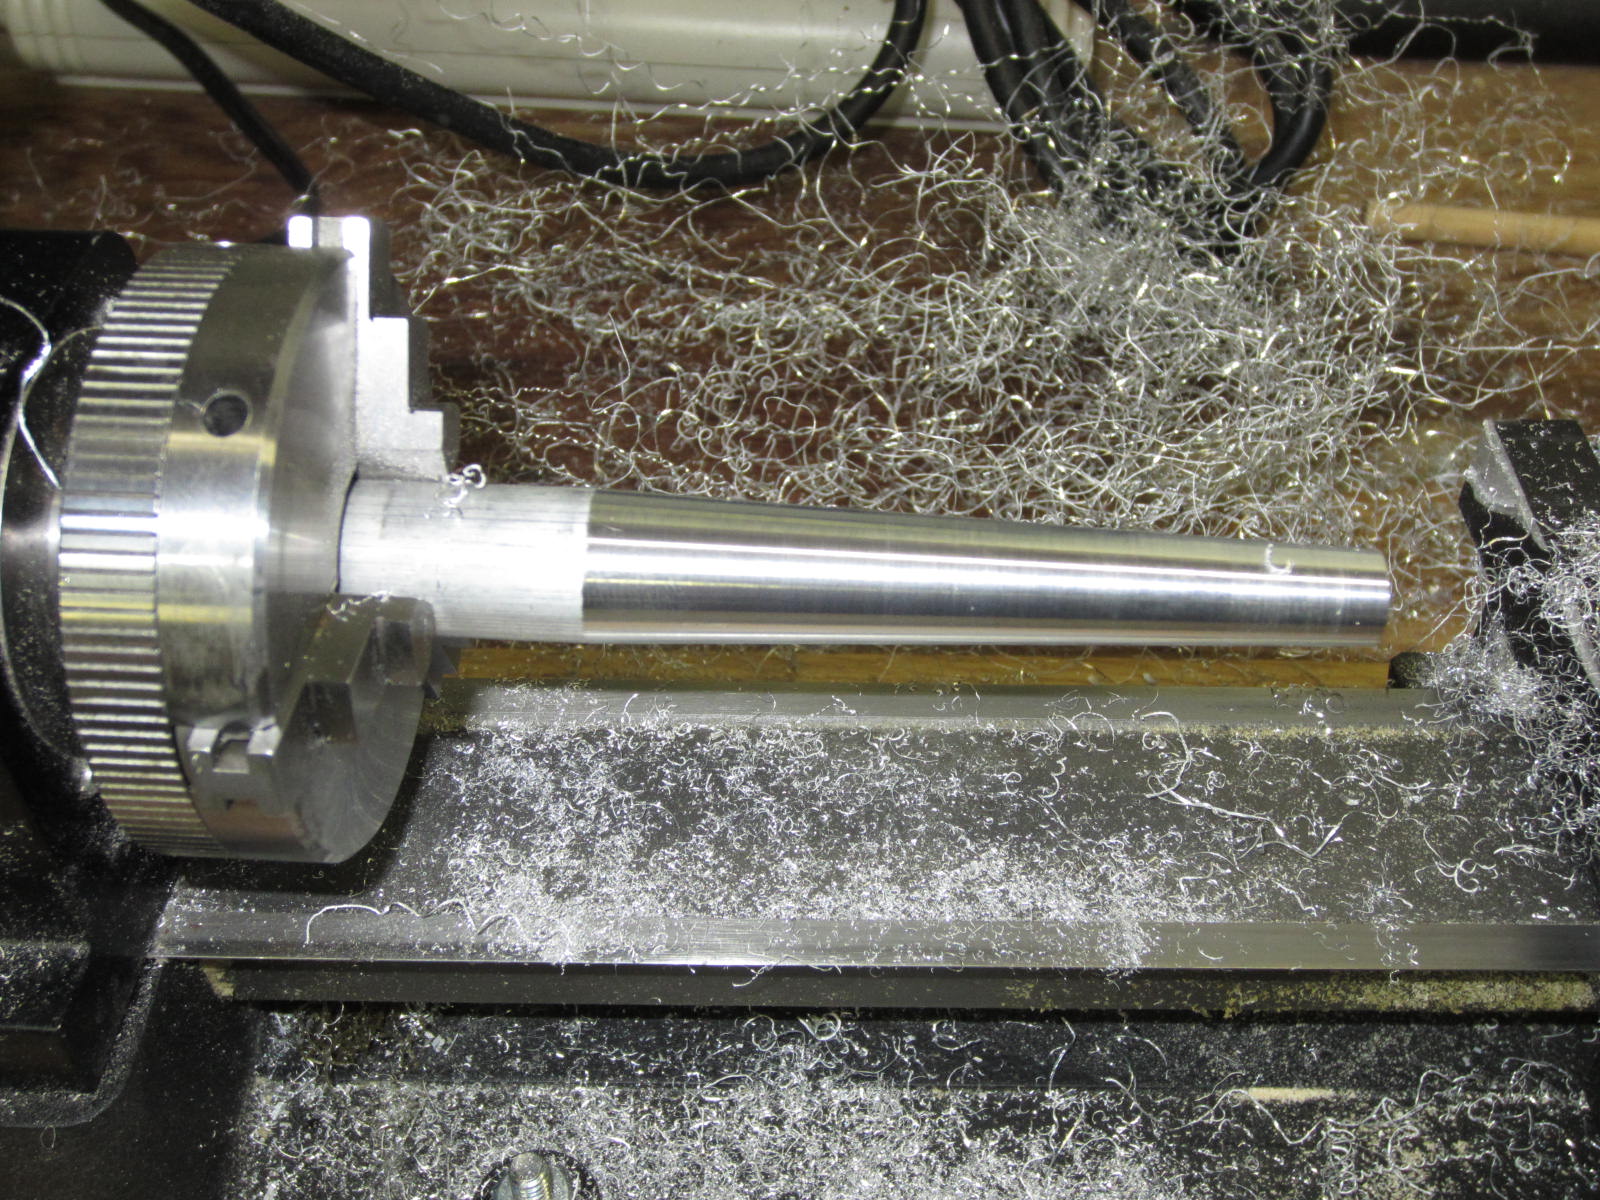
Now I will make a confession. Machine equipment is no stranger to me. When I was a
young'in I had training in machining engines. I could bore an engine block, hone a cylinder
or machine a head to a couple of thousandths. I just never played with a lathe. Also it's
been 37 plus years since I used any of that equipment so I wasn't sure if any feel was left.
Now all you lathe users I have a bit of a bone to pick with you! No one ever mentioned how
messy these things are. Now I'm no neat freak by any means but man it makes a mess.

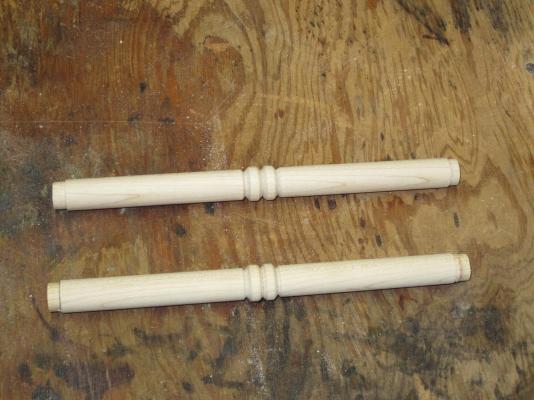
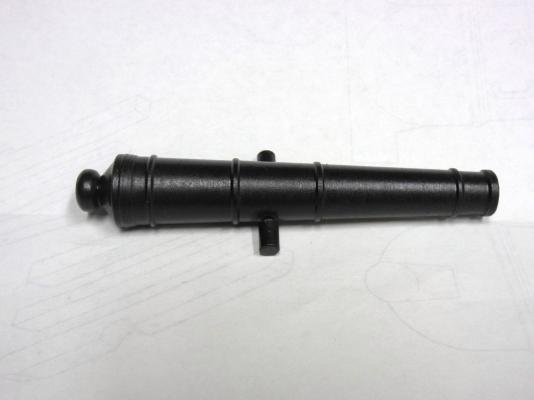
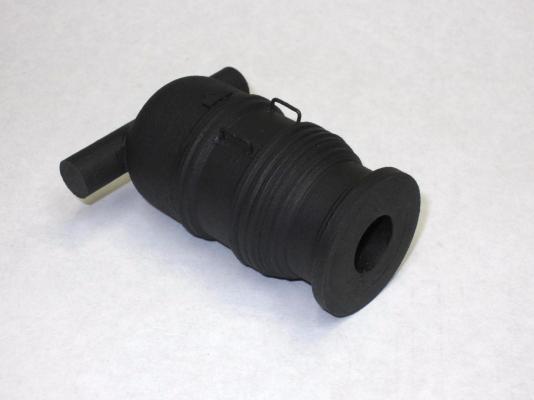
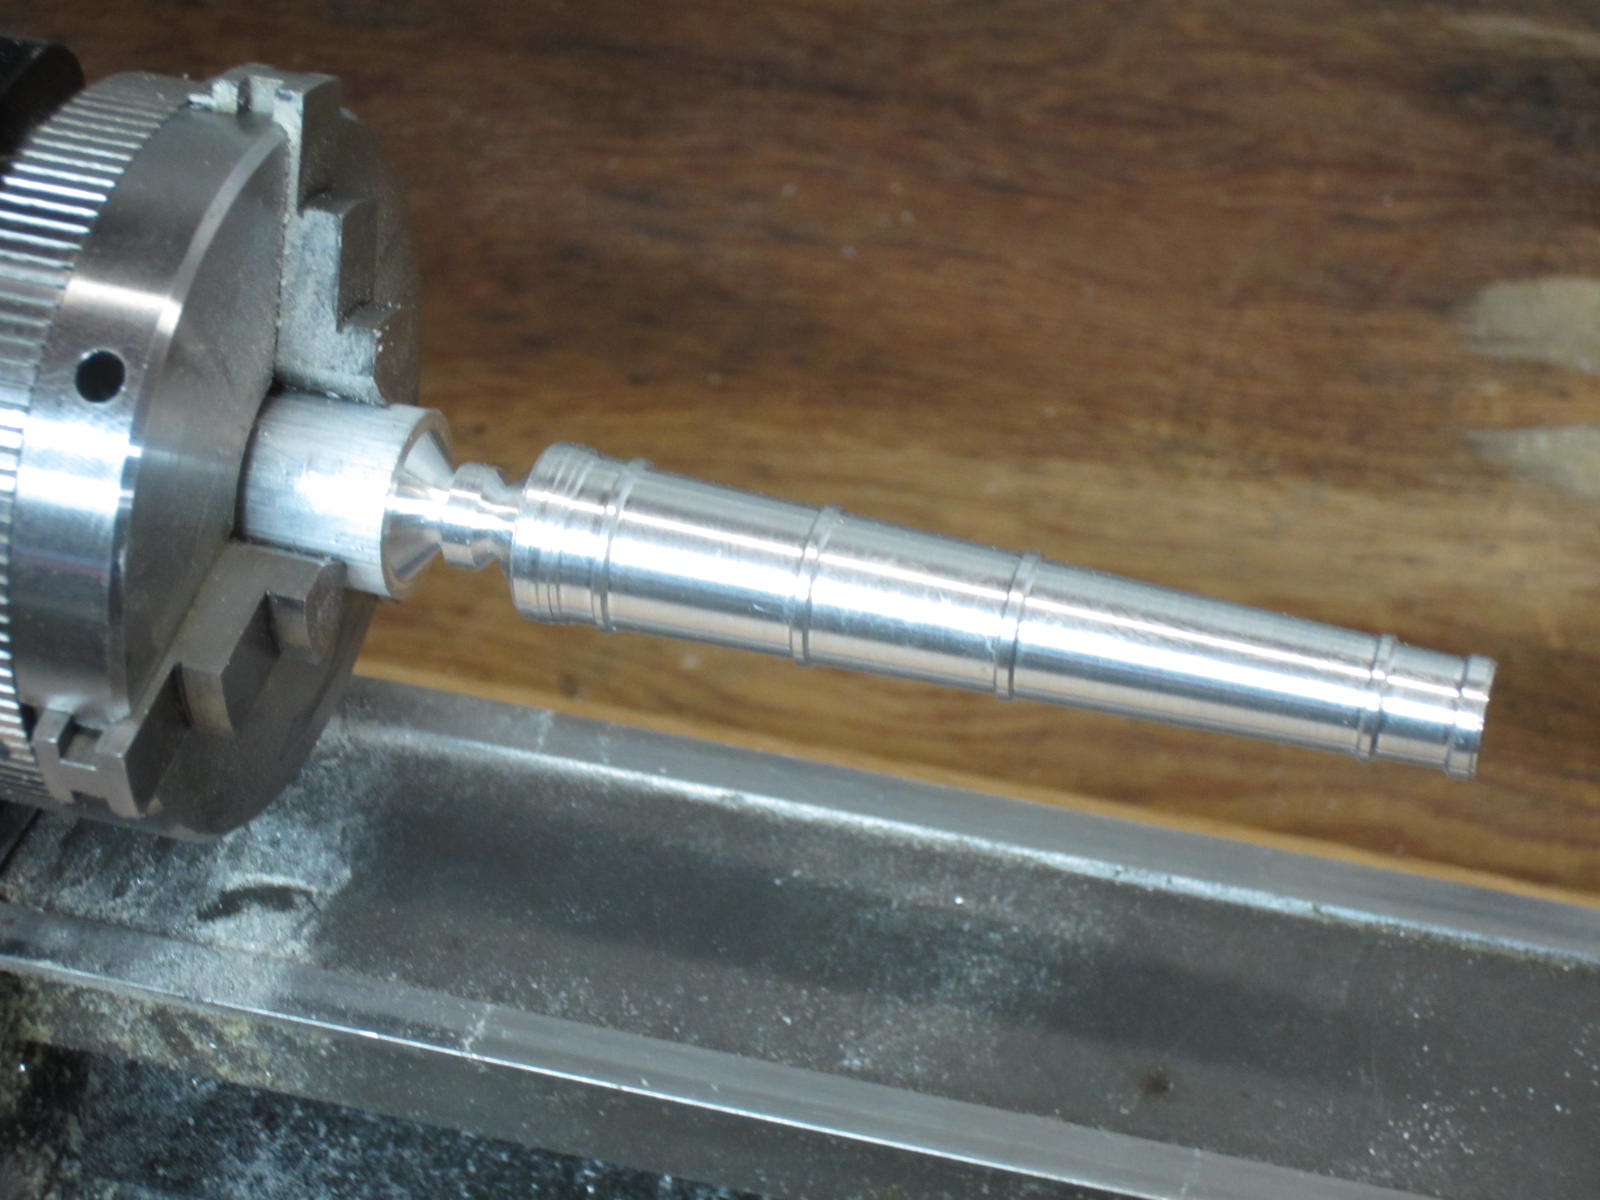
Here is a the cannon barrel turned to the correct taper .
And here it is completed except I have now realized that I don't have a cut off tool!
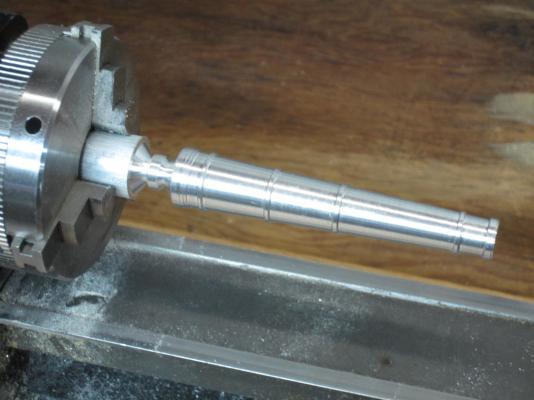
Oh goody something new to get! I can see where this can be very addictive.
-
Very nice Bob! I'm loving it.
-
Thanks Ben and Floyd!
Putting aside the temptation to stick every piece of wood, plastic and metal in
the lathe and "turn it" I've placed the mortar in it's carriage.
Here she is set to be stowed.
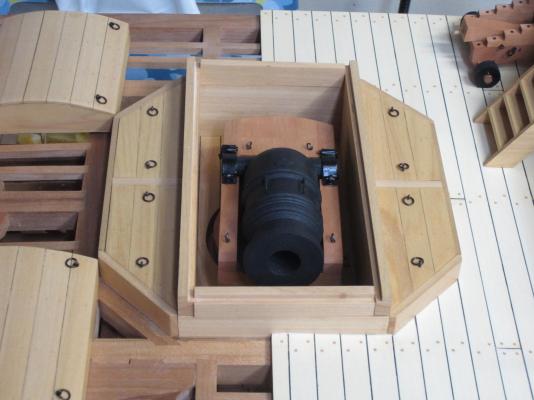
And here it is set in firing position.
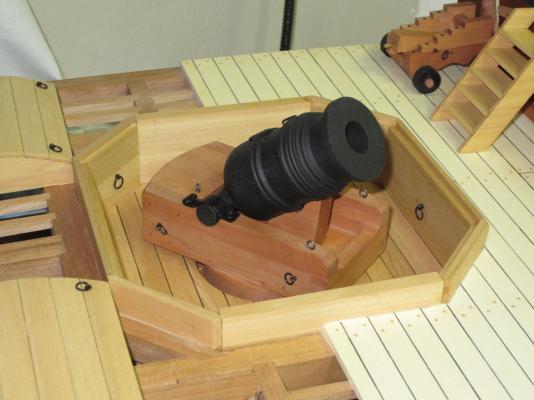
Now I can move on and attempt to turn some cannon barrels!!!!!!!
-
-
-
Thank you all.

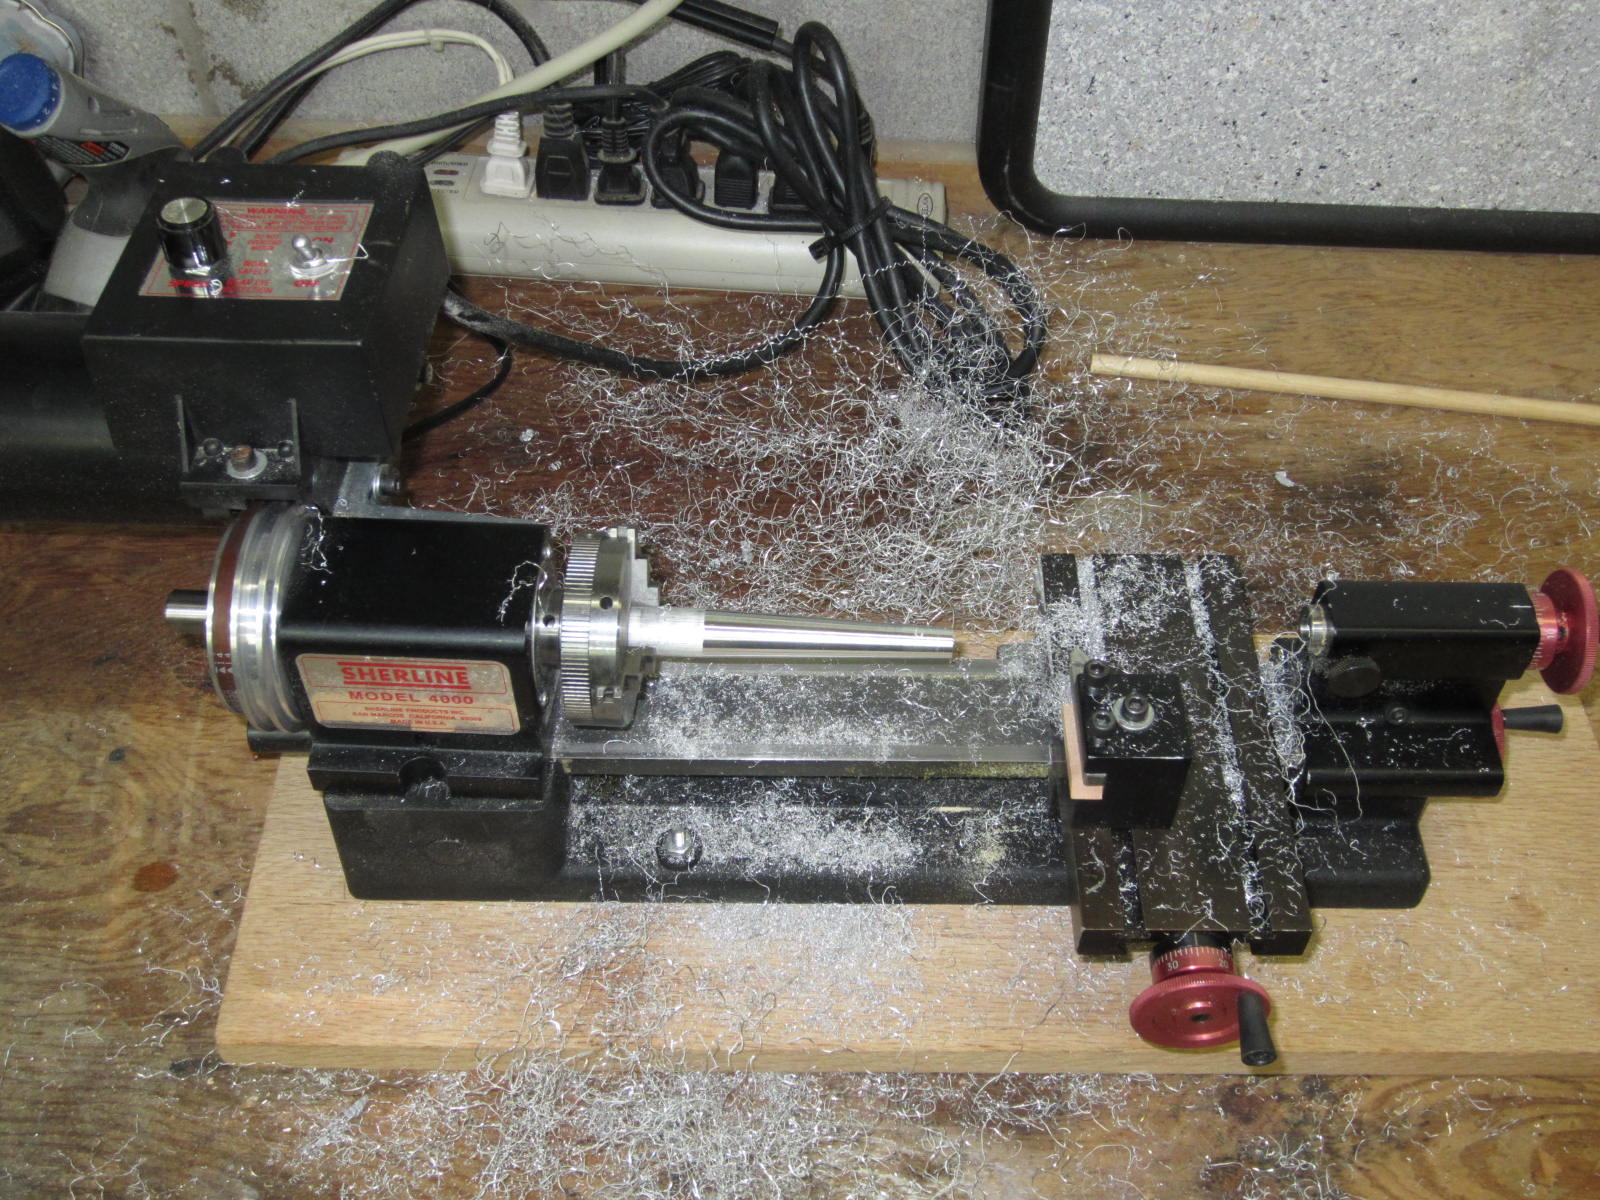
Hi Bob, The lathe arrived last Wednesday and I played with some scrap wood until the rod arrived Friday
afternoon. I sent several hours in the shop Saturday getting used to it. I must say the quality of the chucks,
cutters and lathe make it much easier.
Antony. Calipers, rulers pencils and any other items I think I may need are on hand. Unfortunately no digital
readout on the slides.
LOL Mark, beginners luck! Not wood or brass. It's 1 1/2" nylon rod. I was going to use that for practice but it
worked so nice I kept it. The cannon barrels will be aluminum rod. The nylon rod is too flexible at 5/8" diameter.
Thanks druxey and Augie, As I said beginners luck and good tools.
-
-
Hi All, It's been a bit since my last post. Life, sub zero temperatures and feet of snow
have all conspired to slow me down. Well the lathe has arrived and the learning curve
is steep but the Sherline is a truly fine lathe. Thanks all for talking me into it.
I tinkered around turning some scraps trying to figure out what I was doing and one
mortar has been made. More coats of paint are needed and then it will be mounted
to the carriage.

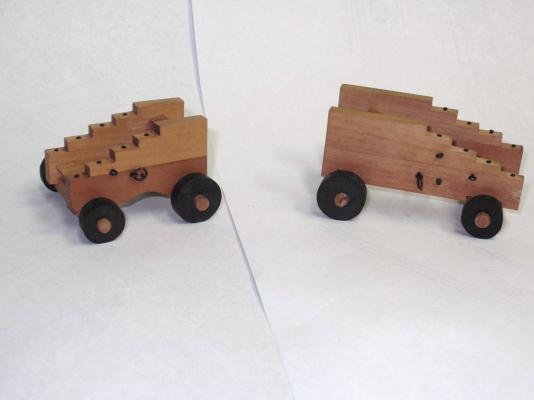
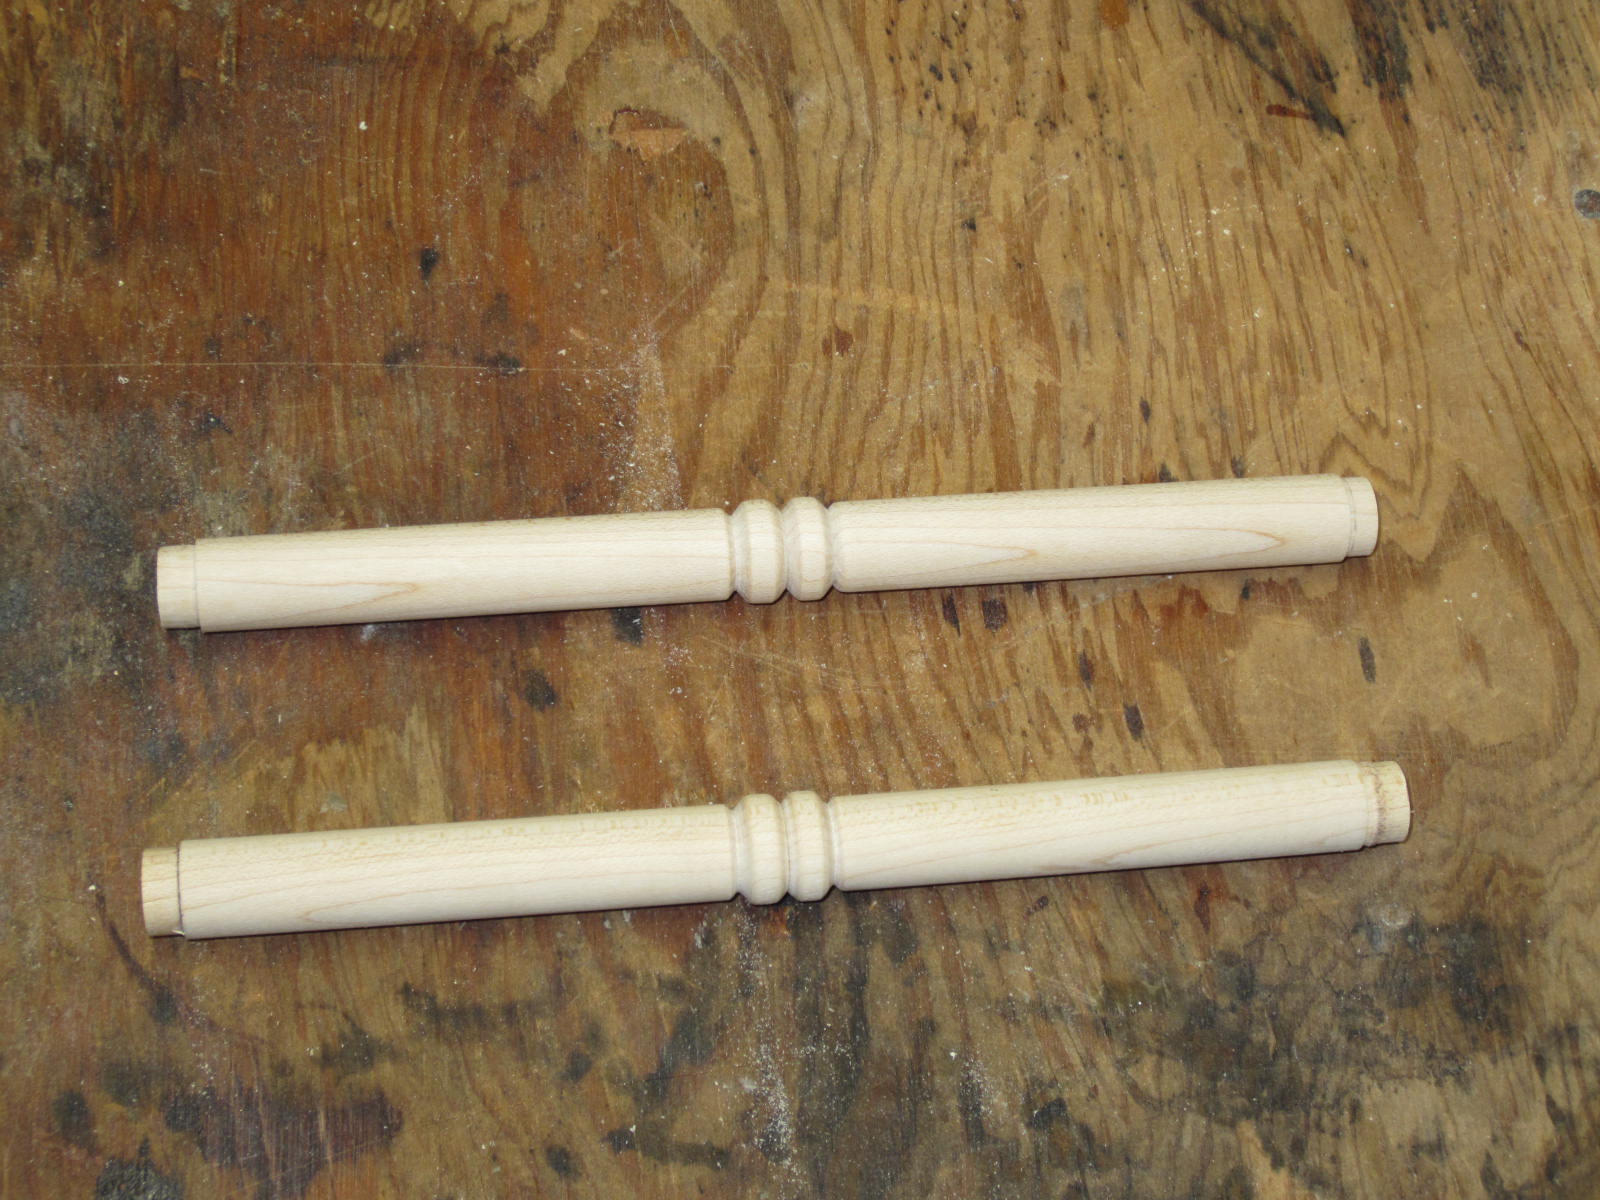
The new carriages have also been made. Here is a comparison between the two.
After that the fun continues when I have to try and figure out how to turn two
cannon barrels. Well not only do I have to make two but for some reason they
have to match. Hmmmmm...........
- mtaylor, ChrisLBren, sonicmcdude and 18 others
-
21
-
Hi Alan, It' so great to have you back and your Syren log too!

-
Very nice Bob and I'n sure there will be a mirror image of the starboard side!
No pressure
-
Hi Raymond and welcome to the Triton Club. Good choice on building in the 1:24 scale.
You will find it a whole new enjoyable experience. Best of luck!
-
-
-
-
Thank you all for stopping by for a look and all the likes!
Grant, "Creative Accounting" here usually comes with free room and board for 5 to 10 years.

Not to worry the lathe will be here eventually.
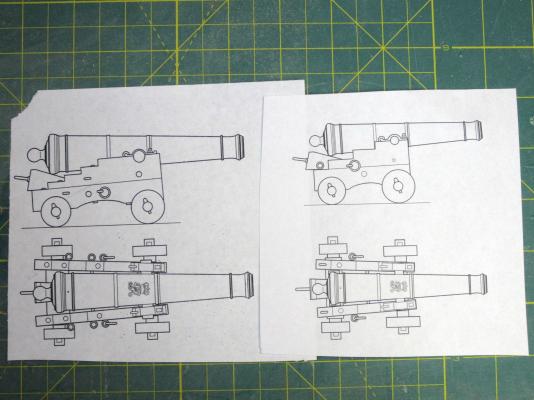
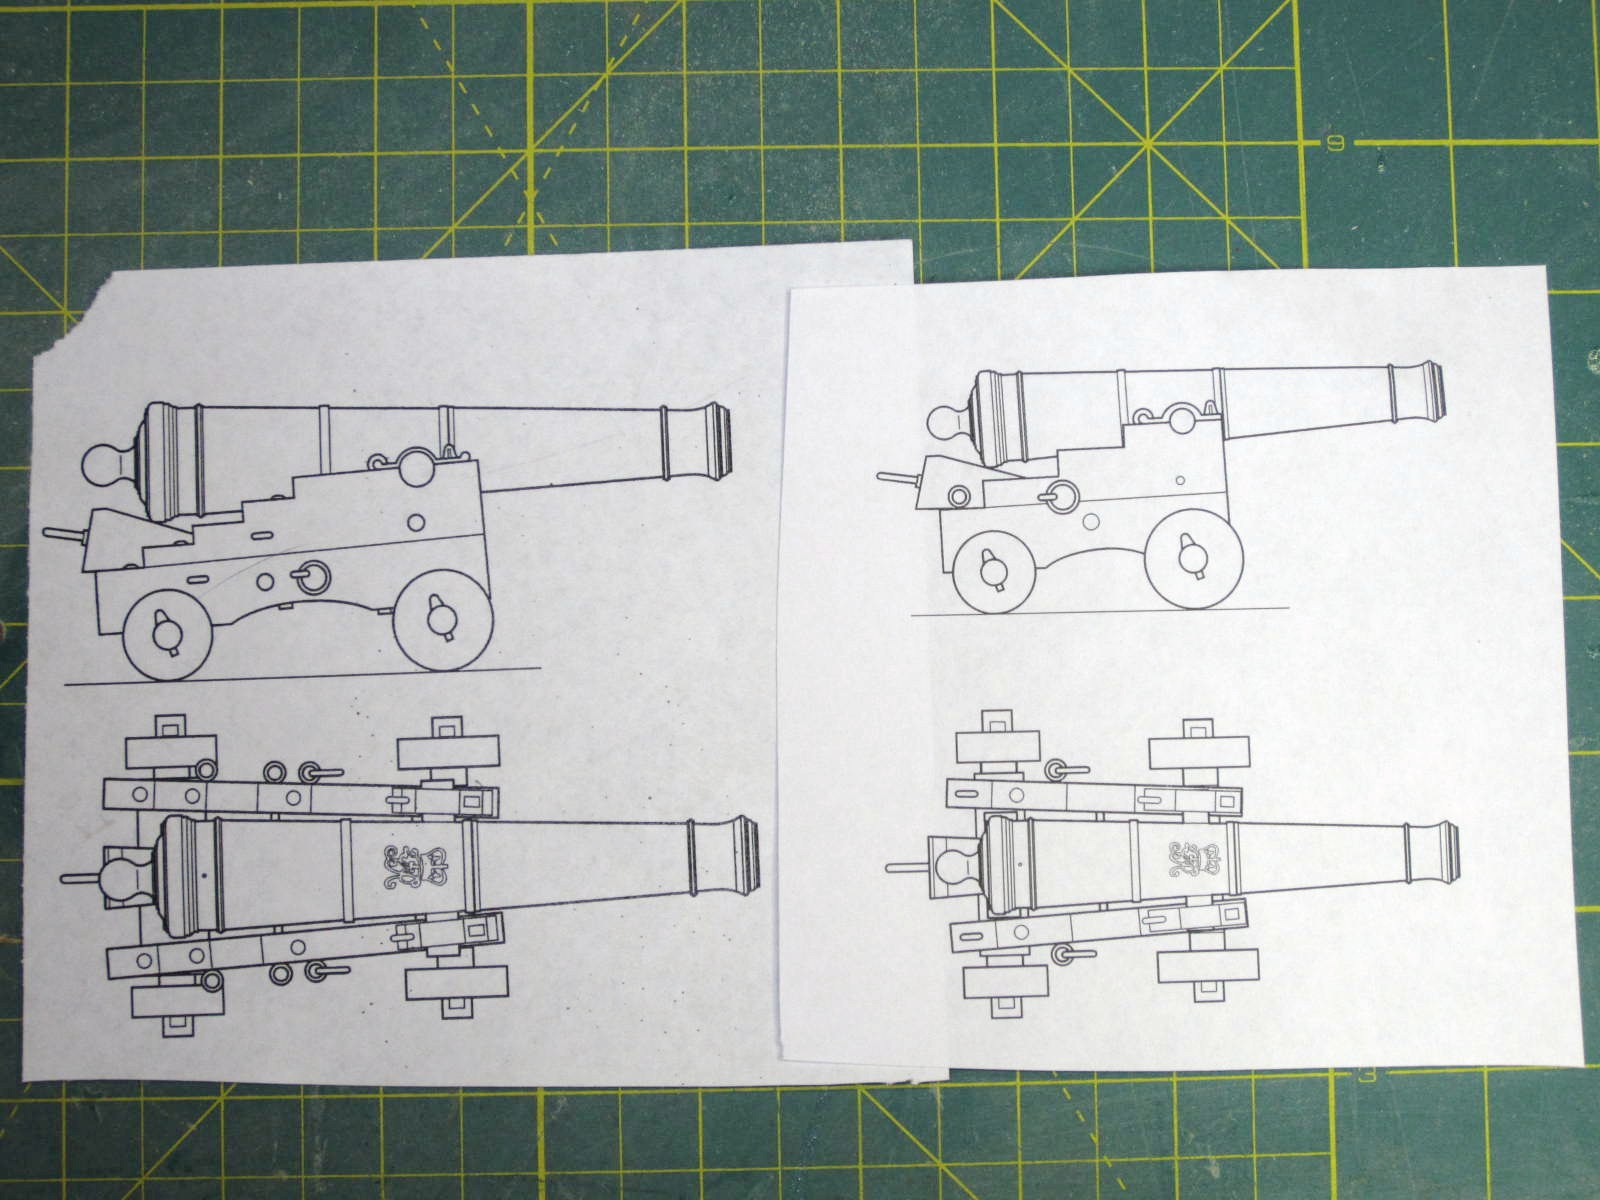
I have received a notification from the author of the plans that there was a slight error. The
cannon were drawn at the wrong size. The new sheet of plans was received and you can see
the difference below. Good news is that I haven't made the barrels so nothing lost there and
I will get some more practice making the carriages today.
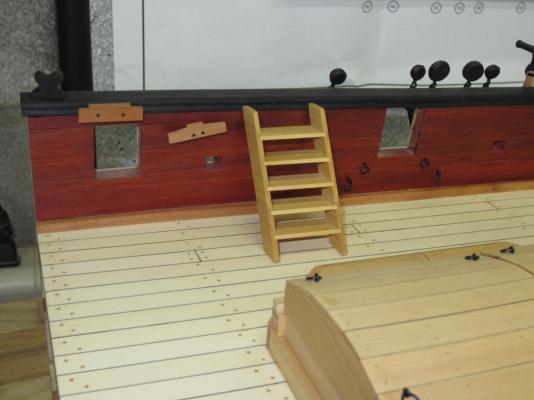
Also I have made the ladder but it is just set in place for now. I want to be able to remove it
for when I rig the cannon.
- garyshipwright, mtaylor, AntonyUK and 12 others
-
15


HMS Winchelsea 1764 by Rustyj - 1/64 - POB - 32-Gun Frigate
in - Build logs for subjects built 1751 - 1800
Posted
Thanks Bob, The good news is that it will eventually be available through Seawatch Books!