Rustyj
-
Posts
2,540 -
Joined
-
Last visited
Content Type
Profiles
Forums
Gallery
Events
Everything posted by Rustyj
-
Hi Jim B, I have the same as Jim L and agree100% I also would buy your's, when you finish making it, tomorrow!
-
 Hi Chris, Very nice work on those rails. It is a fun area especially when you did such good work setting it up. It's important to remember that work very early in a build can have a major impact later on. I should know! Well done.
 -
Very nice job on the planking Augie. You are doing great and bringing back some fine memories. Thanks
- 2,191 replies
-
- 1
-

-
- confederacy
- Model Shipways
- (and 1 more)
-
Hi Sjors, Looks like you will be doing another great build.
- 1,616 replies
-
- 2
-
-
- caldercraft
- agamemnon
- (and 1 more)
-
Me too!
-
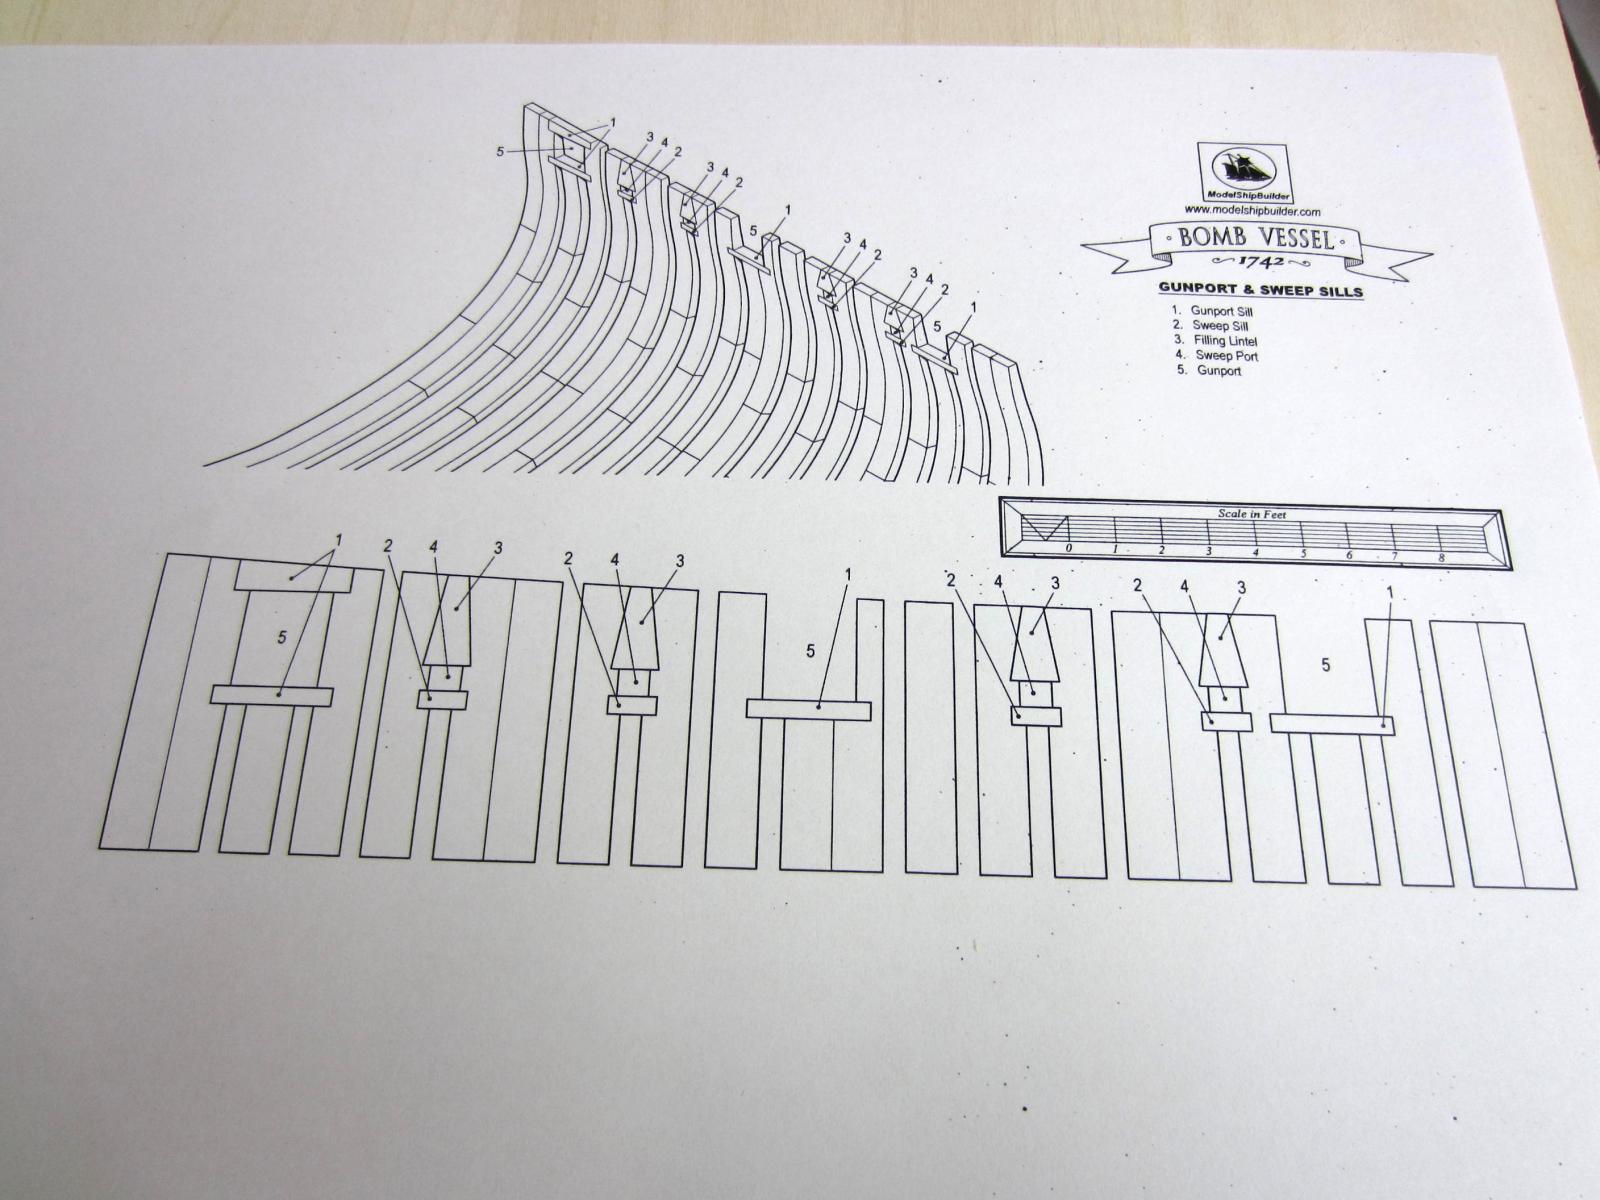
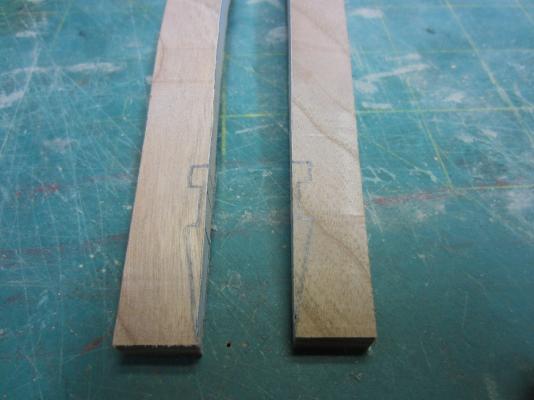
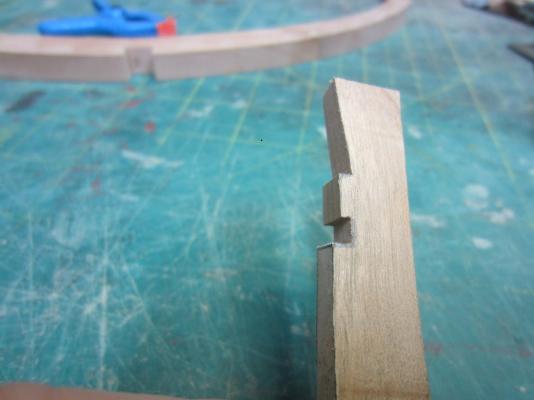
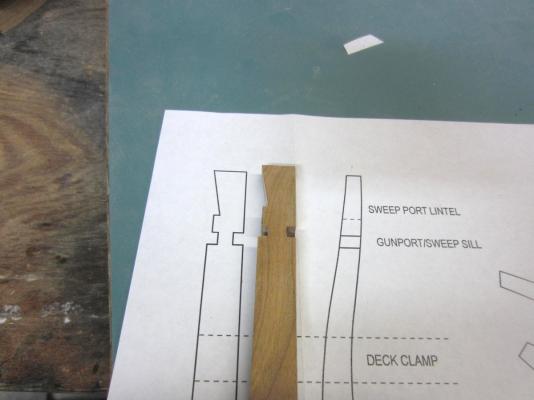
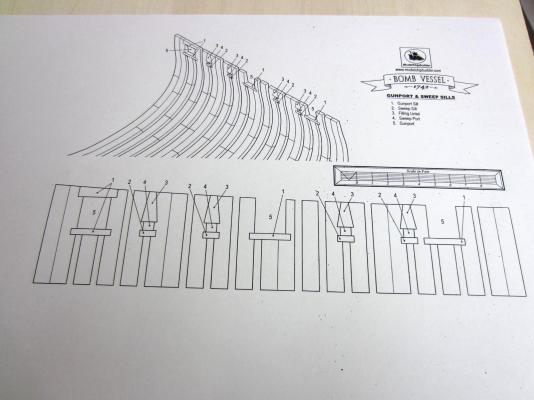
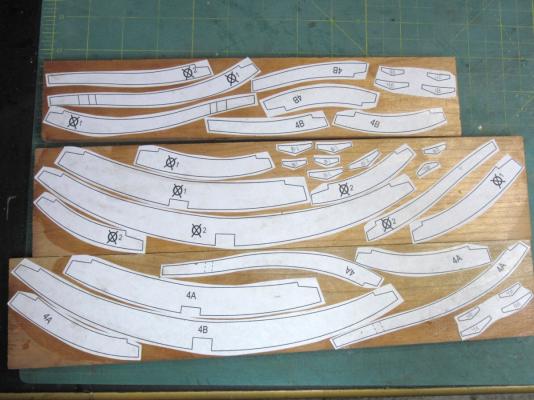
Working on the frames here and there is an interesting way they designed the sweep and gun port openings. As you can see from the plans they are all cut out prior to installing the frames. I used the Byrnes table saw and disk sander to make the cuts. The nice thing is that if they are off a bit I can adjust them as the upper hull is planked inside and out.
- 421 replies
-
- 9
-
-
- granado
- bomb ketch
- (and 2 more)
-
Thanks Paddy, You know you can always have the plans reduced to the Triton scale. It would save a lot on the wood costs and completed size. If I had to purchase the wood in 1/2" billets I don't think I would have done it at this scale either.
-
Thanks Grant.
-
Thank you Pete, Bob and E&T for your interest!
-
Hi Bob, Slow or not she's looking good!
-
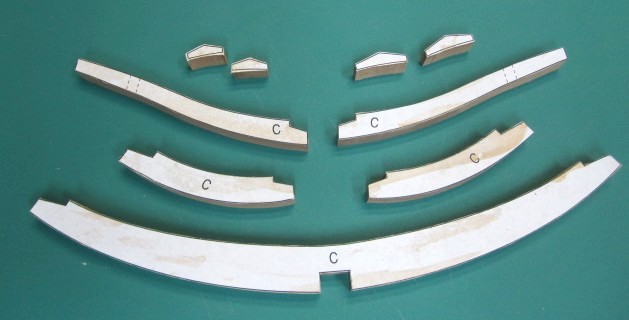
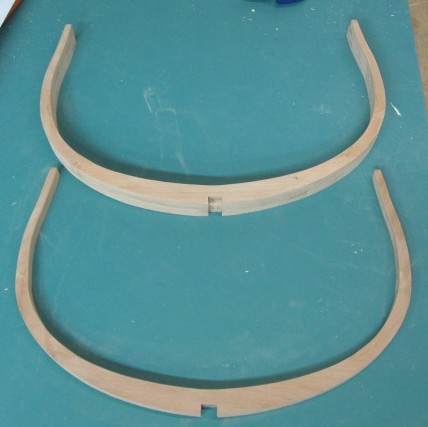
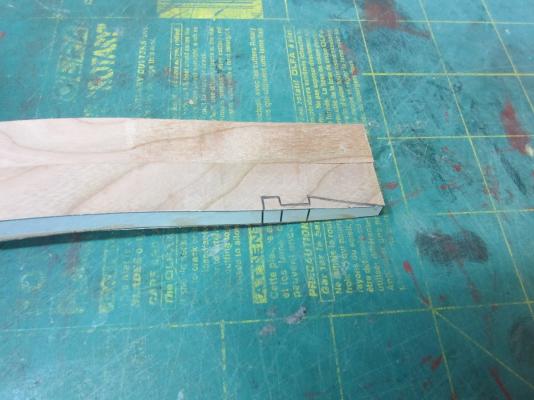
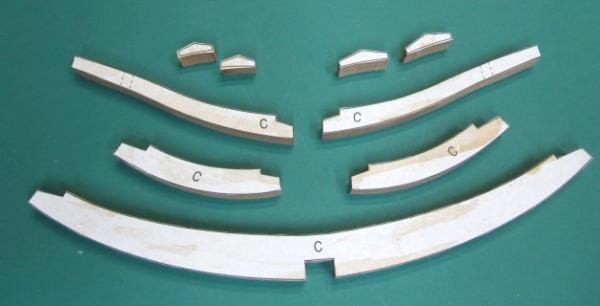
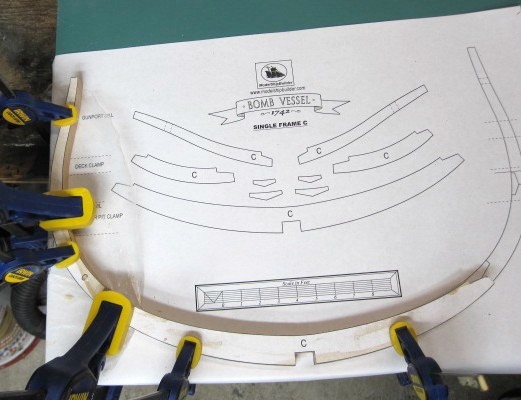
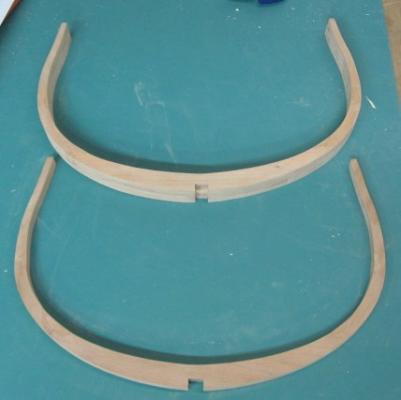
Hi David and E&T, Thanks for looking in. Sorry for the delay but I missed your posts. Well I’ve finished the Triton cross section and she’s safely tucked away in her case. Now it’s time to get back to the “set up”. Now where was I had left off? Oh yes I had completed the keel and now it is time to cut out the pieces for the frames. There are a total 17 frames 5 of which are doubles so that’s 22 frames to make. I will take and cut up the frame plans and use temporary paper glue to adhere them to the cherry billets. Then I will use the scroll saw to cut them out, over lay them on the plans and then glue them up using wood glue. It doesn't show but remember the wood for the frames is 1/2" (12.7mm) thick. And here is a single and double frame all glue together and the chocks added. Two down and a whole bunch more to go.

- 421 replies
-
- 6
-
-

-
- granado
- bomb ketch
- (and 2 more)
-
Great start Bob. I look forward to your improvements and modifications. Should be fun for us all.
-
Hi Glenn, I'm glad to see you are back and off to a great start. I'm also glad you are doing a build log of the Vanguard as I have her "on the shelf" and will use your fine work as a reference. Welcome back my friend.
- 101 replies
-
- 1
-
-
- victory models
- amati
- (and 2 more)
-
Echo by Rustyj - 1:48 - cross-section
Rustyj replied to Rustyj's topic in - Build logs for subjects built 1751 - 1800
Hi Glenn, Good to hear from you again. I devoted the bulk of my time recently to finishing the Triton Cross section. Now it’s time to start things back up again. -
Echo by jml1083 - cross-section
Rustyj replied to jml1083's topic in - Build logs for subjects built 1751 - 1800
Hi Jim, I’ve used the foam center sanding sticks but never tried a paint stirrer before. Great idea. -
Hi Bob, Happy Birthday and congratulations on finishing up your build. Very well done. It was a joy watching along and I’m really looking forward to your Essex. I know seeing your work will tempt me to build her too but I must remain strong! Enjoy.
-
Great work on the entire build Grant. That happy/sad moment of completing her is approaching fast.
-
Hi Daniel, Sorry for the delay getting back to you but that four letter word "work" has kept me away but I'm back now. I'm glad you enjoyed following along. It was a lot of fun. The bomb vessel and Echo cross sections need some serious attention next.
- 332 replies
-
- 1
-
-
- Triton
- cross-section
- (and 1 more)
-
Thank you Antony, I’ve the two other cross sections (Echo and Bomb) to finish up and then who knows from there. Thank you very much David and Ron.
- 332 replies
-
- 1
-
-
- Triton
- cross-section
- (and 1 more)
-
That's a very nice fit. Very good Paddy.
-
Hi Grant, I too would like to echo the very nice job on the brackets.
-
Thank you Kevin, Grant and Christian. Hi Paddy. No documentation. I saw it done that way in Chad’s build log, liked it so I did it that way too
-
Thanks Pete. Glad to help when I can. Thanks Russ. Hi Augie. Thanks and I look forward to your new build. Thanks Grant. Just a 3 weeks then it's back to the workshop. Thanks Mark. No pressure needed with 2 projects still under way.
-
Thanks Paddy. It's been fun.
-
Only one? Seriously you are doing a great job and well done on fairing the frames. They look great.